Tag Archives: Wool

I made matching shoes and bag

I’ve finished the next coupla components in my 1 year 1 outfit project!
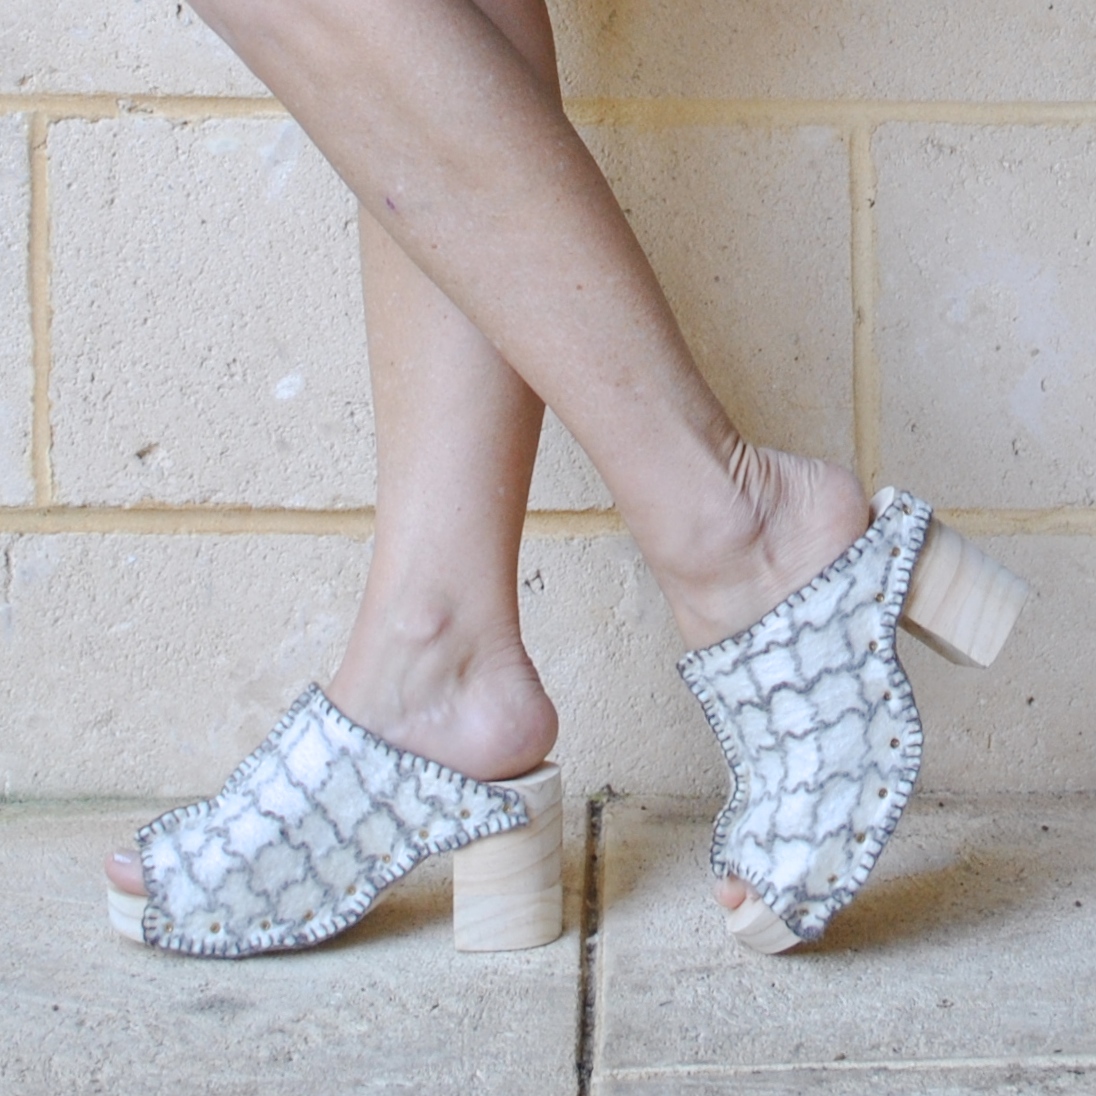
First up; shoes!
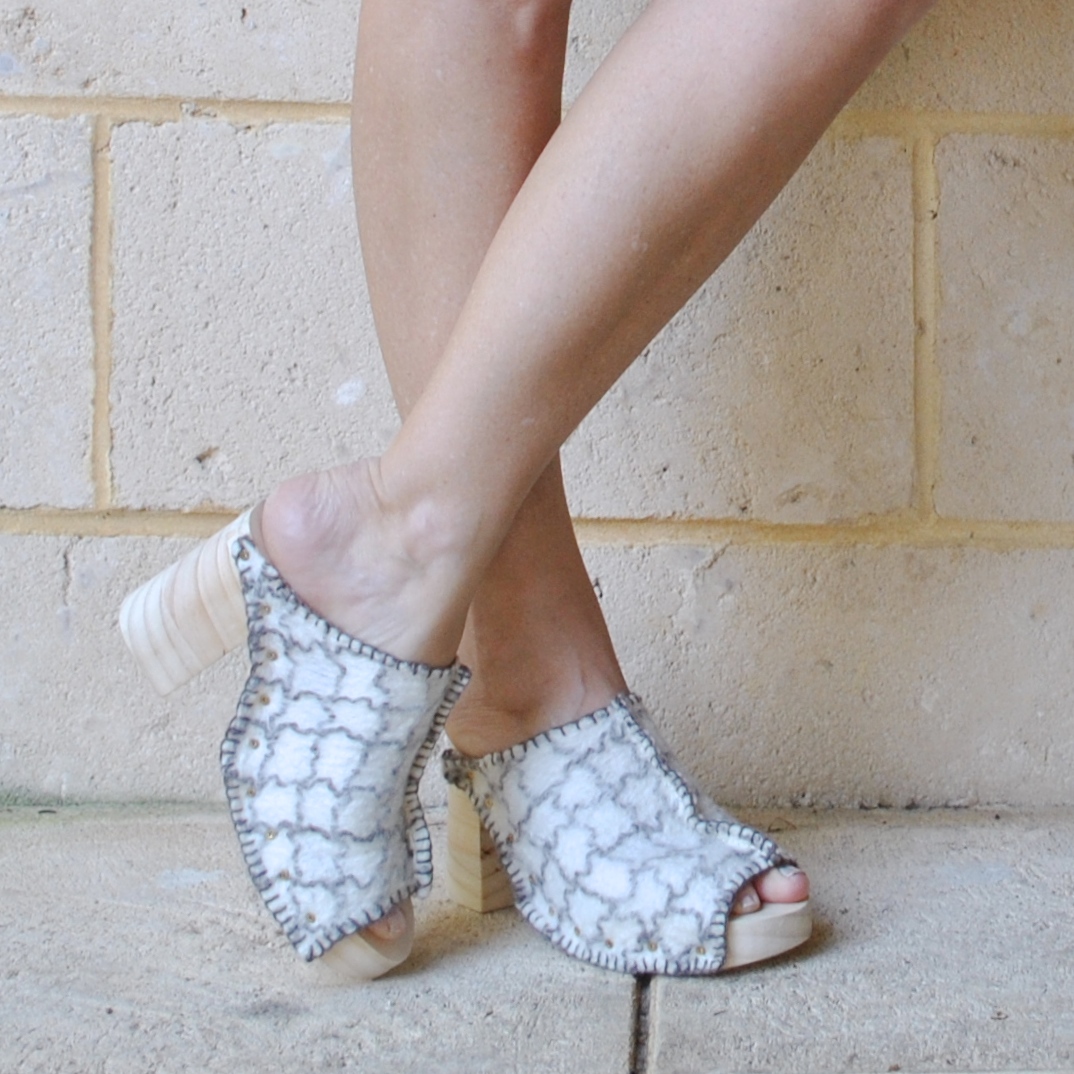
Following the same formula that I used for my previous two pairs of shoes; these have a carved wooden base and a fabric top.  For the soles I used Western Australian pine from Bunnings.
I actually had several pieces of wood from which to choose for this project; my Dad had given me some marri from their block; and I also, albeit briefly, considered jarrah as another truly Western Australian product.   Also, my brother had given me some jacaranda logs from when he had to lop a branch from the tree in their back yard.  But I eventually decided to go with pine … why?  Well it’s the softest, lightest and easiest to work with! and our ancient old bandsaw has finally given out, meaning it was going to be a ginormous struggle to cut the marri or jacaranda or jarrah either on any of our other equipment. These are all pretty rock hard woods, also both marri and jarrah weigh a tonne and you’d only want very thin soles of it for a shoe.  Pine was the path of least resistance.  I have definitely not ruled out using the other wood that I have for future pairs of shoes though.  I just need to get better at woodworking first  🙂

personalised soles  🙂

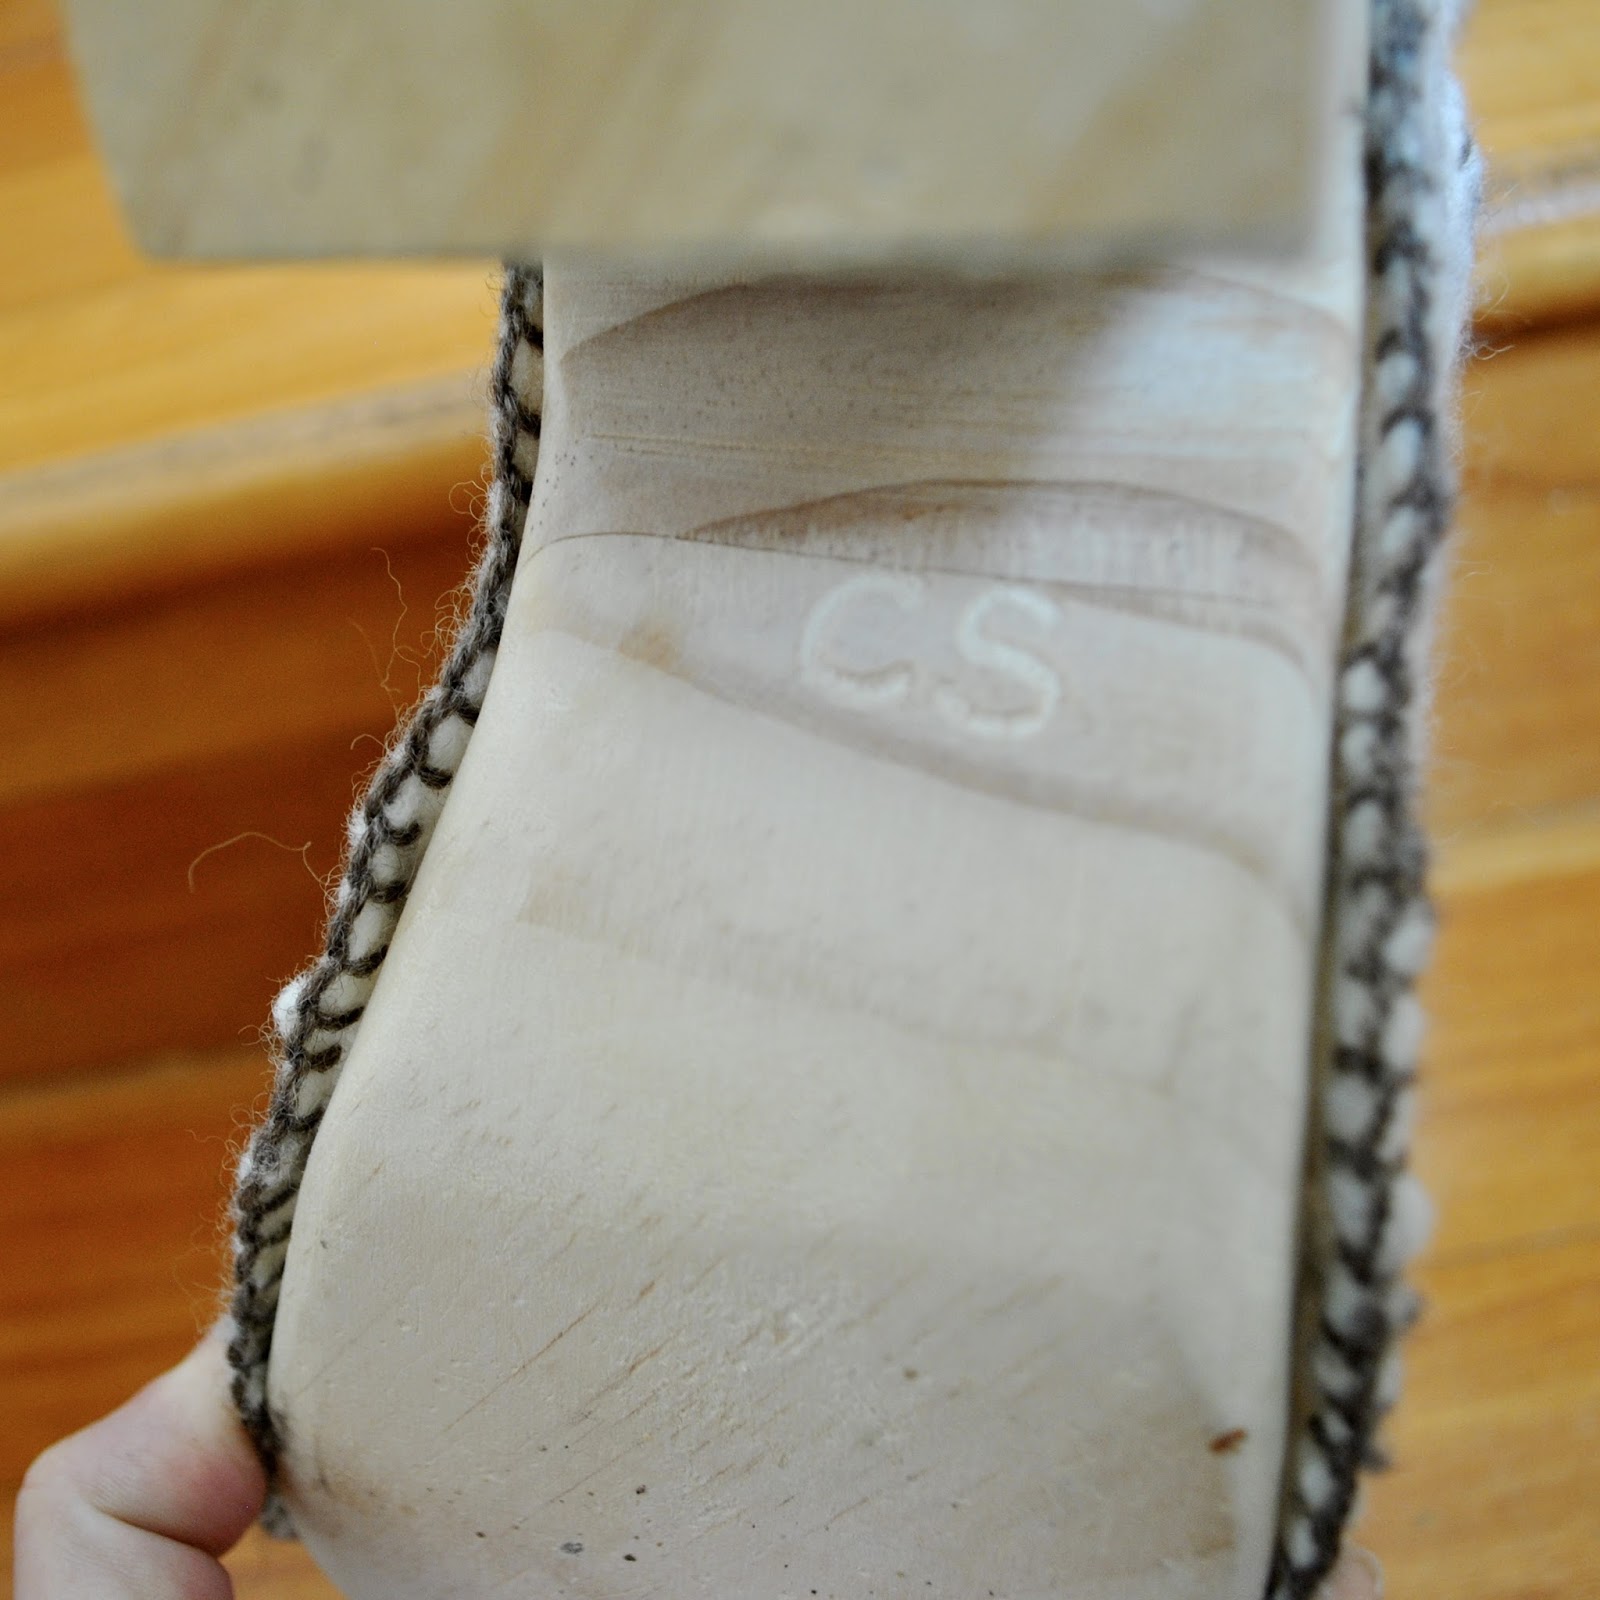
Craig helped me with the big cutting and I did the finer shaping using the belt sander, and hand-sanding out the heel groove and some grooves for the ball of my feet.  I also carved my initials, just for fun  🙂
The upper is 100% Western Australian Merino wool felt; made from natural, undyed, white fleece and natural, undyed, handspun black sheep’s wool as outlined in this post.  By the way; I incorrectly stated in my previous post on my dress that the wool I used for the felt was Corriedale, and I have since discovered that it was pure Merino wool, sorry!  I’ve corrected the error in that post now.  And am actually rather thrilled to be wrong, to be honest!
Anyway my black and white “plaid” was the thickest and strongest of the felts that I made, so I kept it for these more demanding of my outfit components.  Sadly, I realised that it’s still not particularly sturdy and is probably going to stretch out pretty quickly  :((  But I’ve devised a devious plan to cope with the inevitability of The Stretch, mwahahahaha… see that central seam running right down the top/middle? well as it stretches out I can just unpick it, cinch in the top seam a bit, trim and re-stitch.  Simple!  And when it has stretched out past the point of saving, which it will; then I can easily unscrew the screws from the sides, remove the whole felt top and substitute something sturdier like leather.  Hopefully I can somehow find a nice piece of thick WA leather, so that my shoes will still be eligible as a 1 year 1 outfit piece!

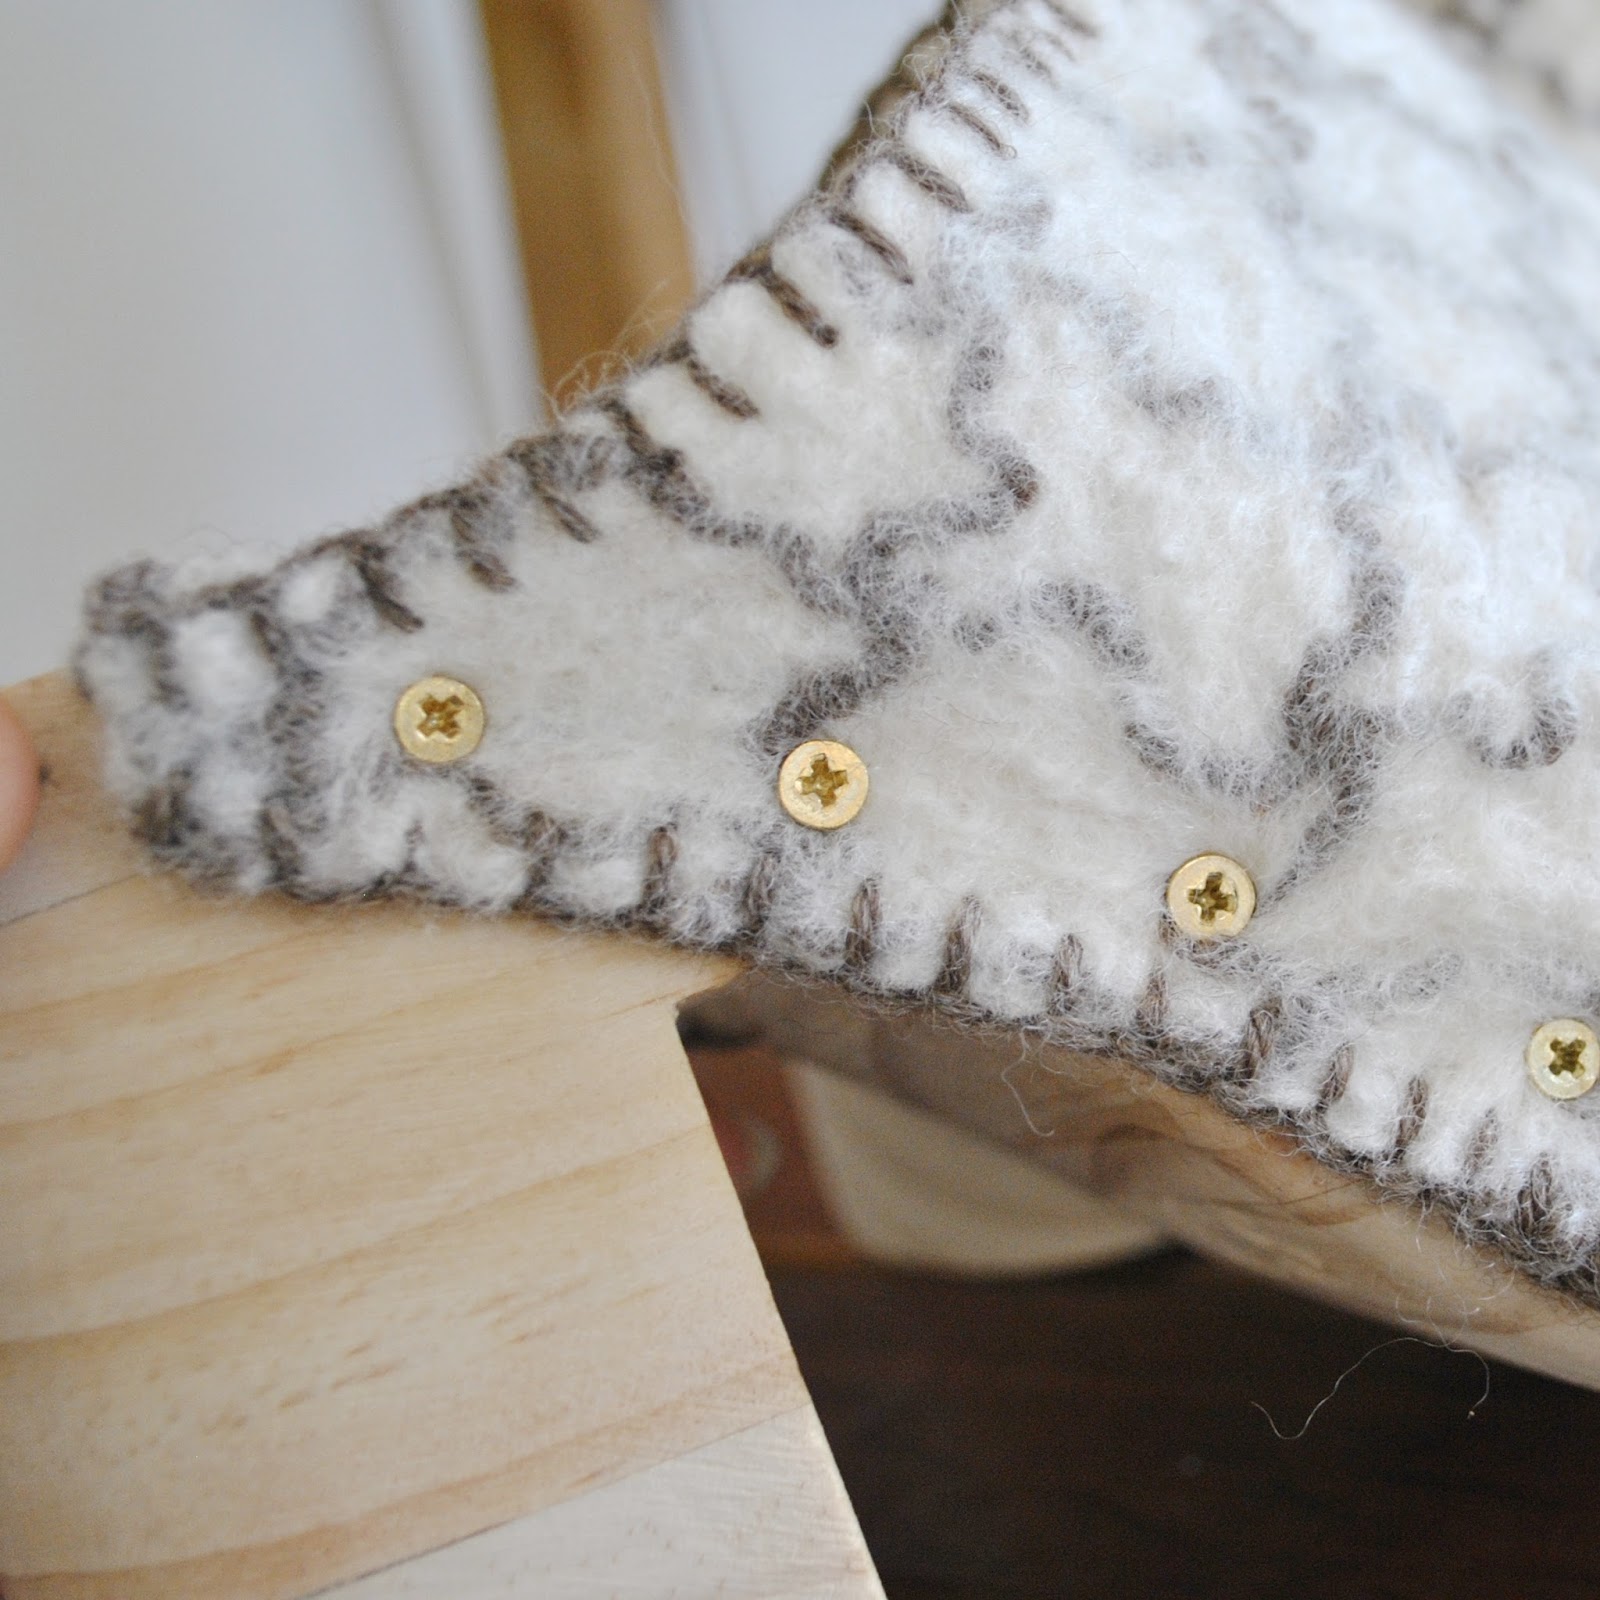
OK: confession time… I did have to cheat on a few minor parts of this project; the glue holding the pine layers together is made in NSW, and the screws holding the felt upper to the wooden soles are made in *embarrassed whisper* China.  I did investigate making these; and concluded that to make my own local glue and “nails” is both possible and achievable.  You can make your own glue using boiled animal bones, sap, or milk and vinegar; and I could have made wooden “nails” using jarrah or pine dowel.  And originally I was seriously gung-ho about doing just that; until my Dad and my husband advised me to get real.

You see, the wooden soles are honestly such a hugely time-consuming and difficult component for me to make that I really really wanted them to hold together firm and fast and be perfectly secure; and NOT EVER fall apart.  A rank woodworking beginner like me could all-too-easily destroy my carefully hand carved soles trying to ram wooden dowel “nails”, with hot homemade glue dripping everywhere; and even then if I was miraculously successful; they could later on just fall out or snap at a moment’s notice.  Which, according to my experienced father and my husband; is pretty darn likely.
And I would, um, yeah; be sad.  Understatement of the year, right there.
Anyway, I went the route of properly manufactured wood glue and steel screws…  but I just want to say, for the record, that I did investigate the 100% hardcore approach, and gave it serious and careful thought.
And I do not regret not going there either, not one little bit, sorry!  You can only do so much!
What is more! I will also be gluing some thick rubber to the soles to protect them from damage.  I haven’t done that yet, I plan to “show” them first in this virginal state.  But I will.
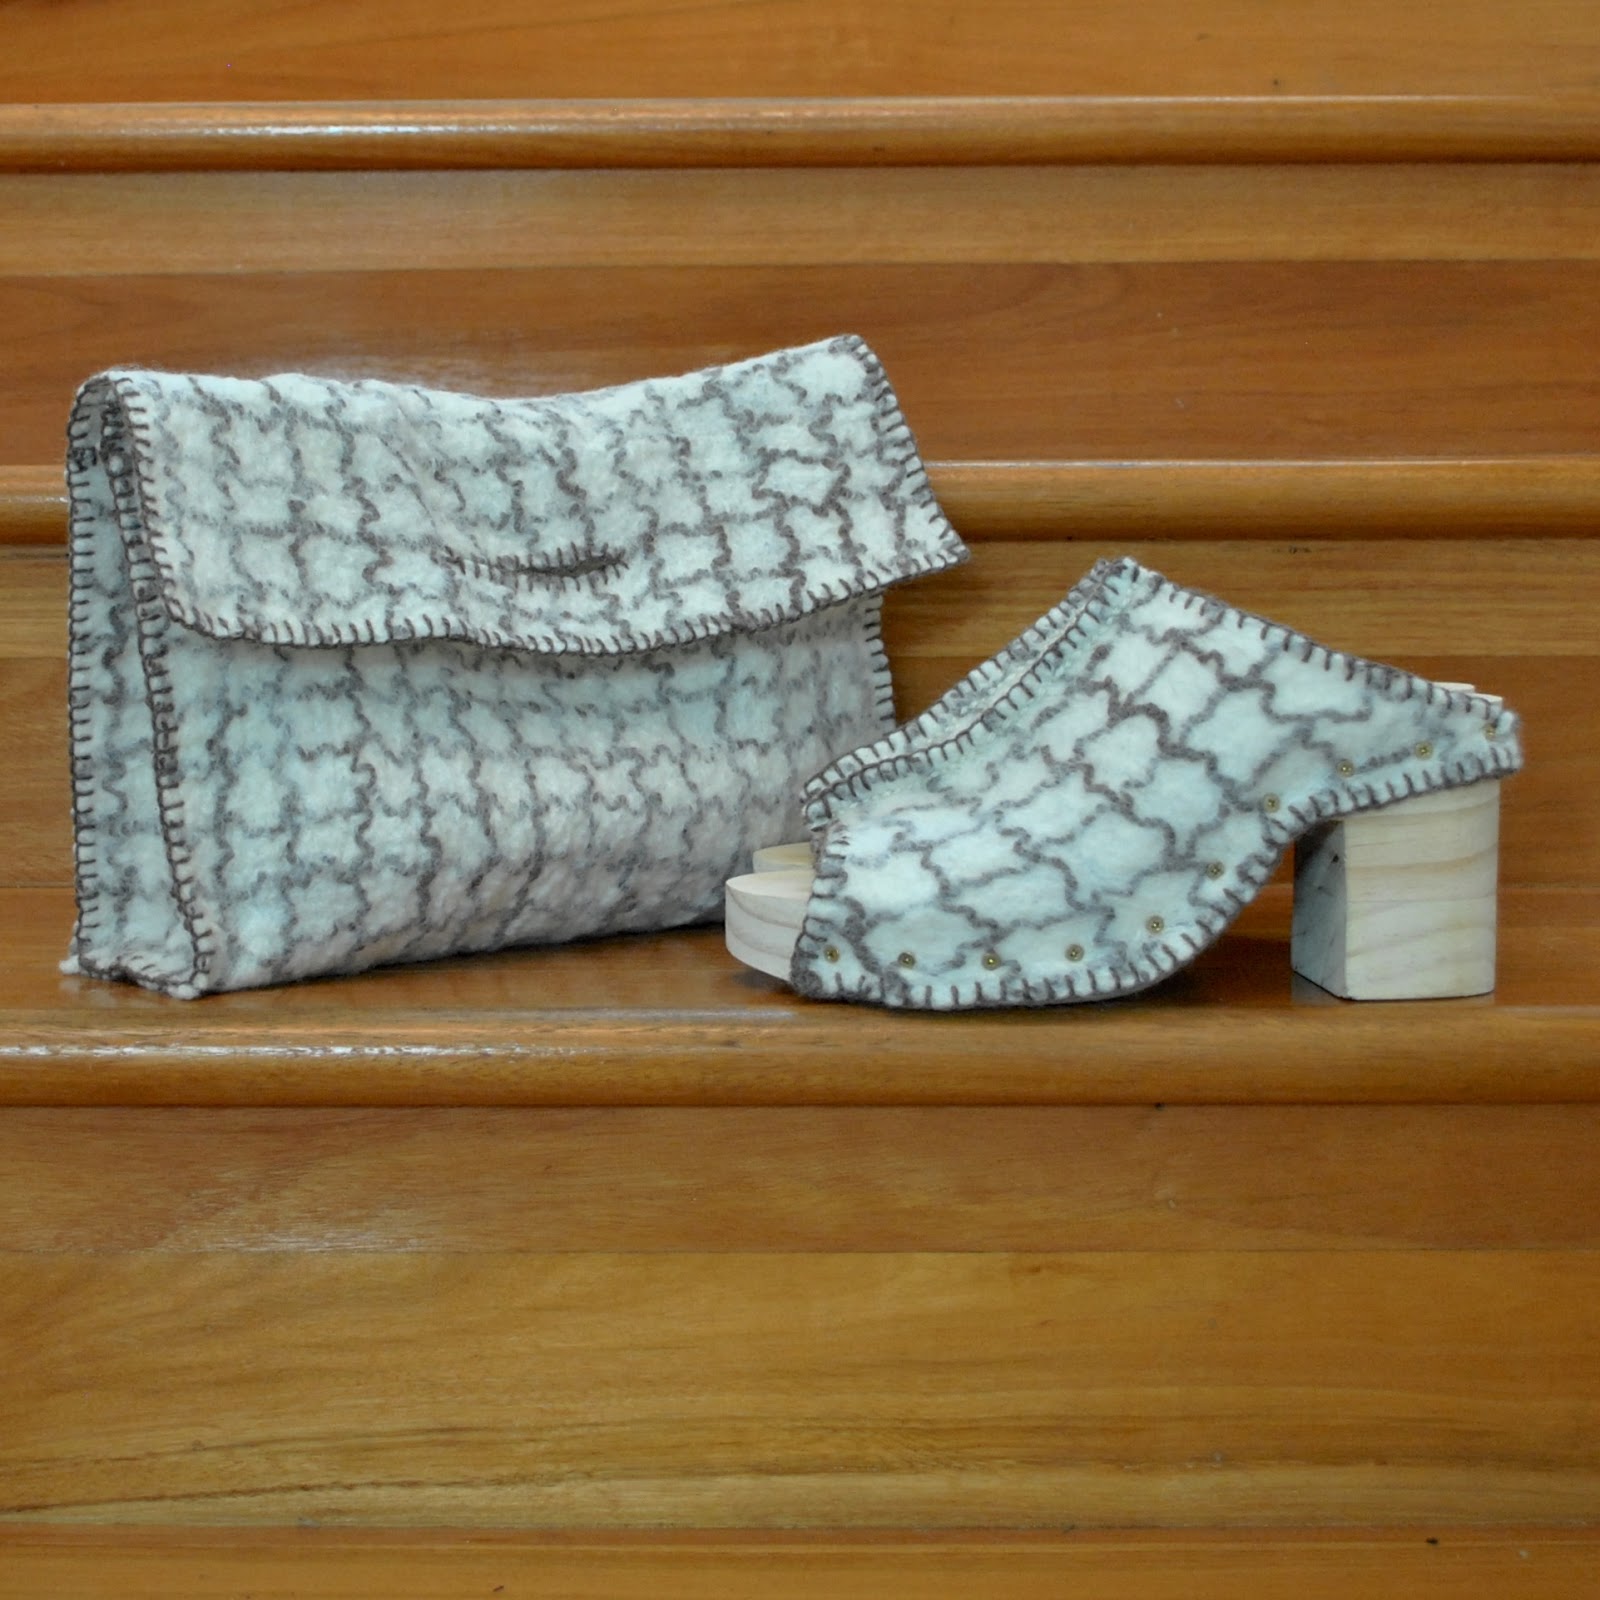
Exhibit two; a bag!

And it perfectly matches my shoes, hehe.  Isn’t that the old fashion must-do advice for a lady from the 50’s or something? I seem to remember reading somewhere that a lady would never dream of sashaying out with non-matching shoes and bag.  Ancient stuff, I know; we definitely do not adhere to such a strict dress code anymore!  But I had enough felt for it so here I am, totally regressing to the standards of a previous era.
ooo yea.
It’s just a simple, um, something-bag?   A sort of rustic briefcase?  I don’t know the correct term to describe this kind of bag.  A fold-over, almost-envelope, with rectangular side gusset thingies to make it box-like.  It’s all held together and decorated with blanket stitch.  For the handhold; I cut and blanket-stitch edged three slits that line up with each other through all layers.  Ta da!  Simple, but it does the trick.

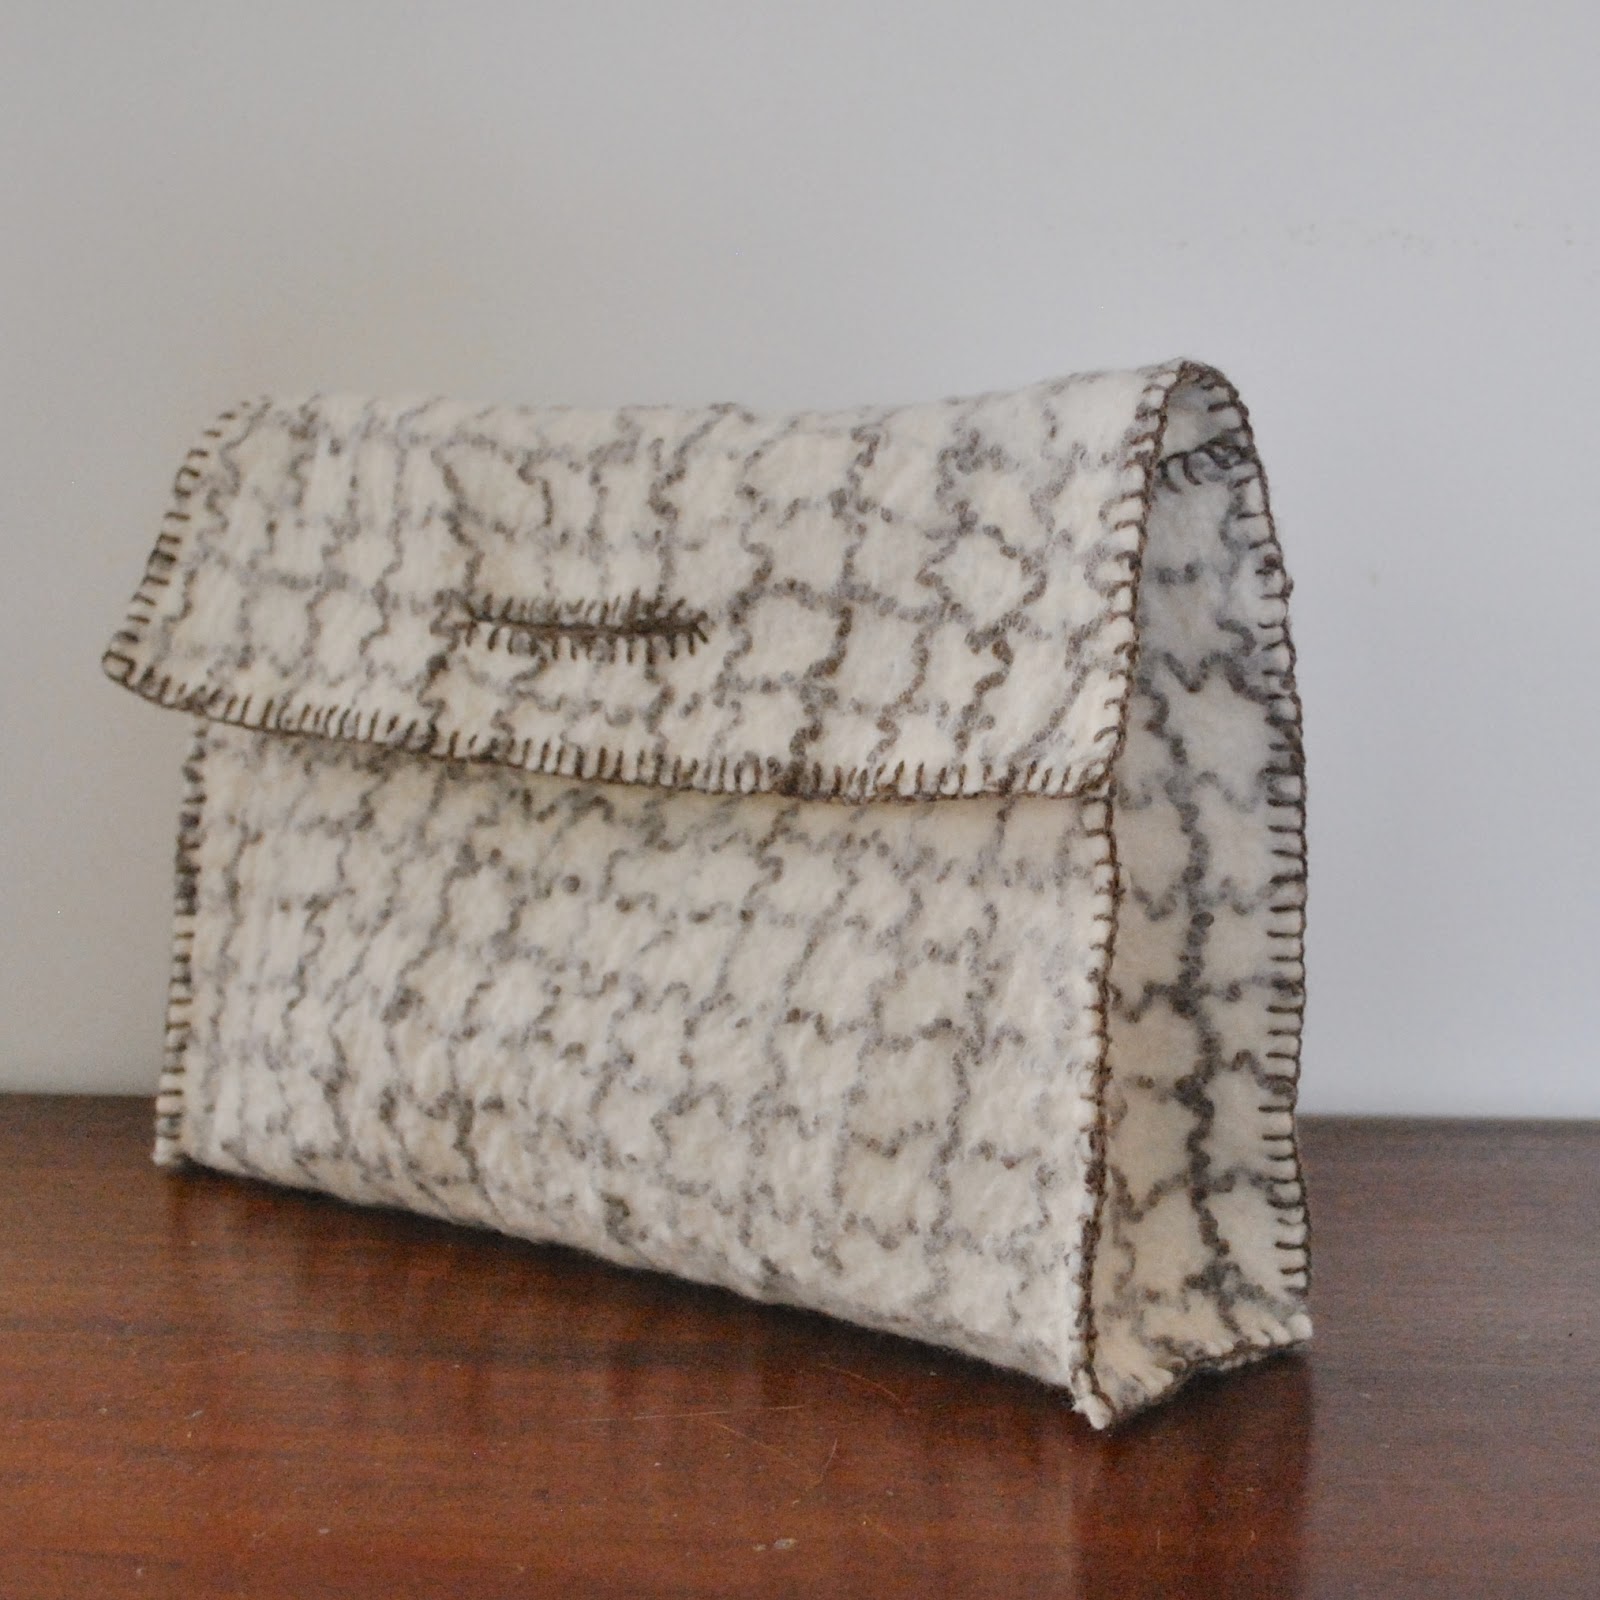
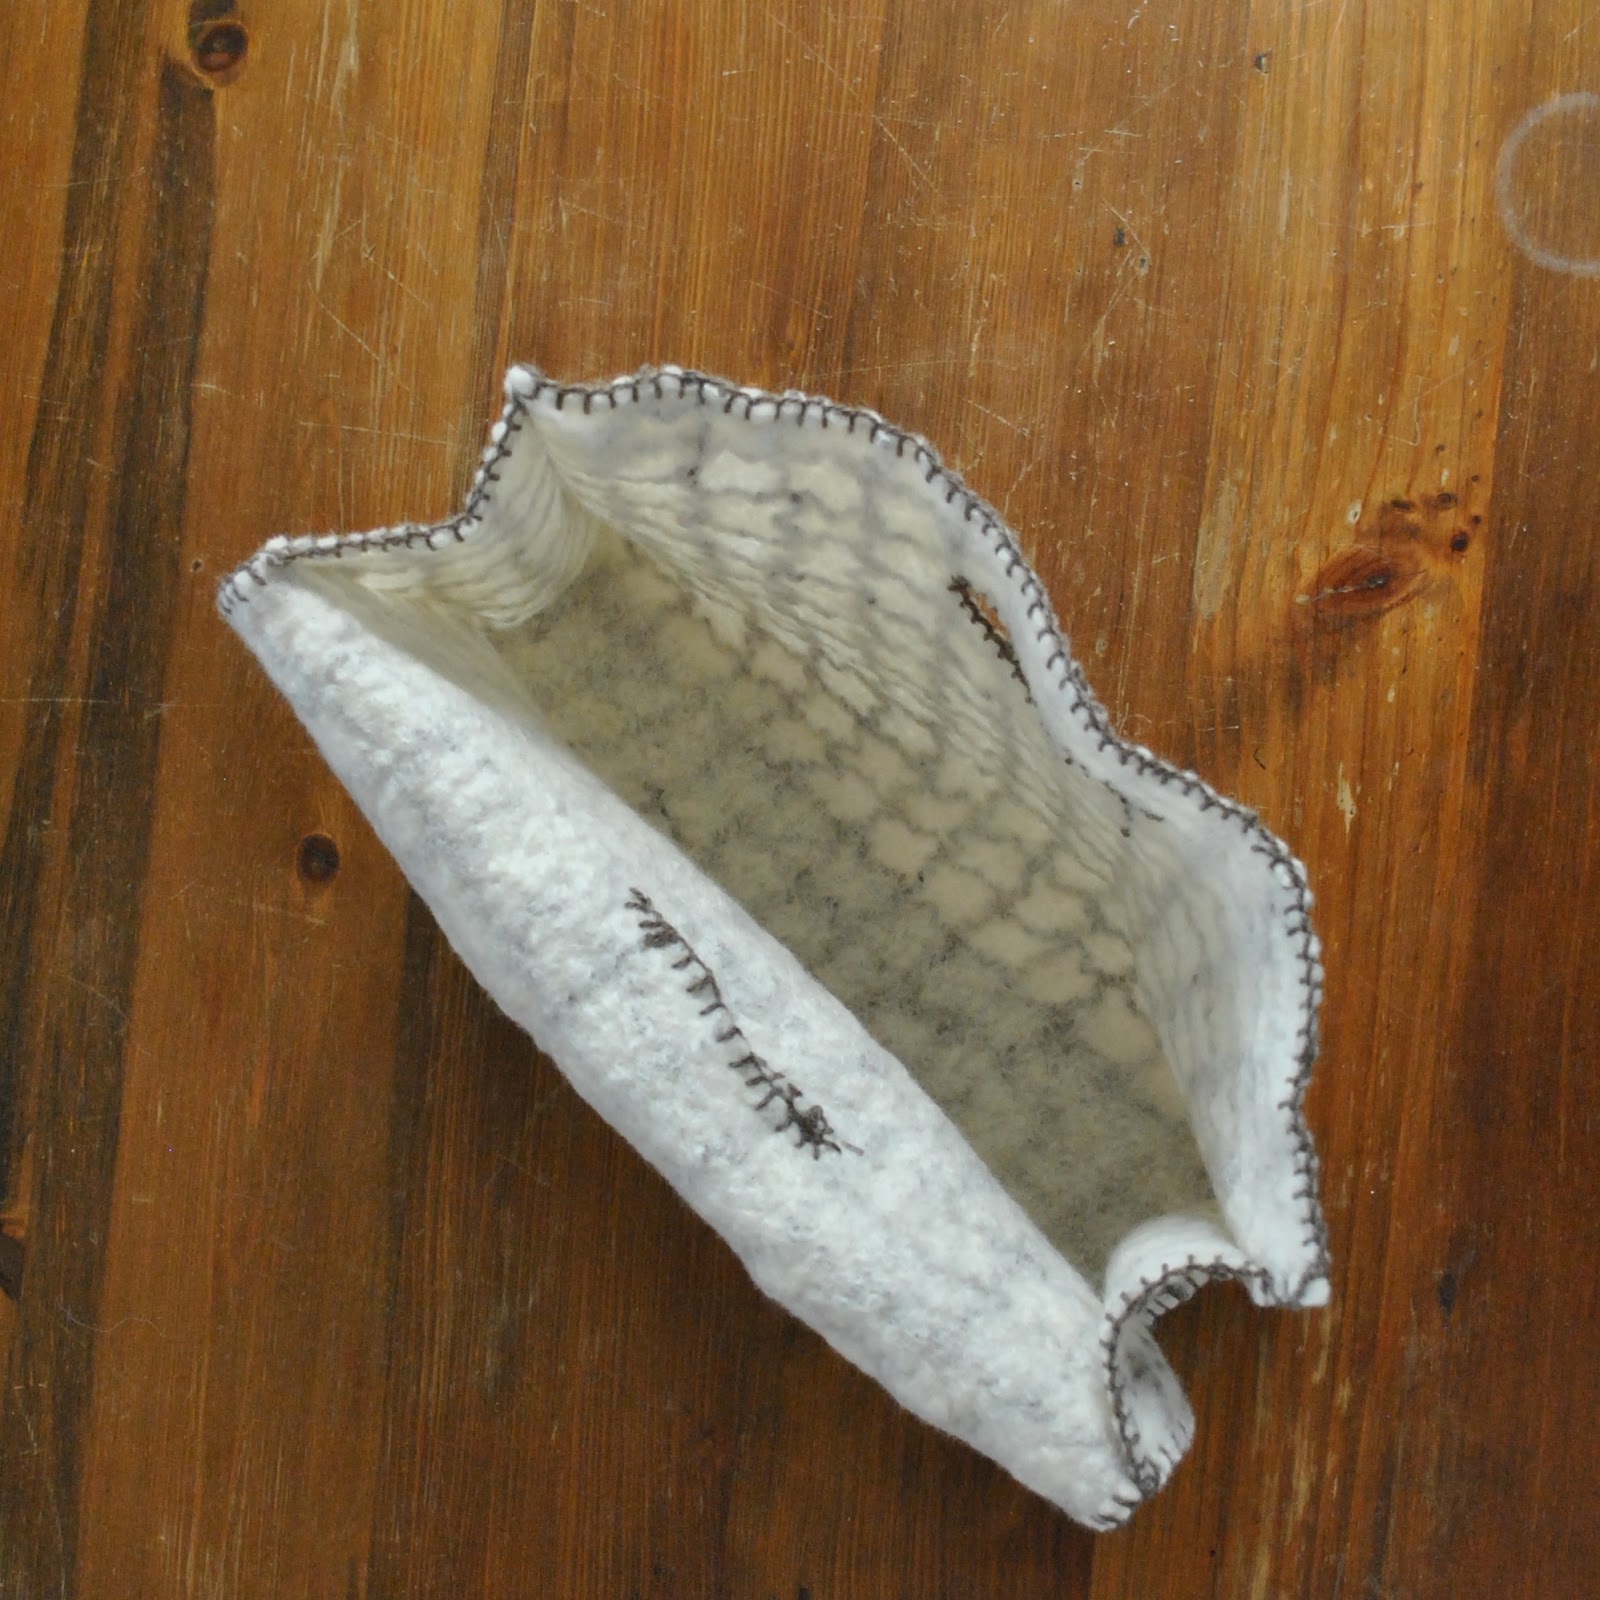
I like the way the felt is thick enough that it can stand up by itself… just.
I am toying with a few extra components for my 1year1outfit project, but minor things that may or may not come to anything.  However, they may; fingers crossed.  If all else fails, at least I do have a complete outfit now!

pinterestmail

Crocheted Granny-squares skirt

I crocheted a skirt!  Yup, a whole skirt…. almost can’t believe it myself, since crochet is not my forte.
Now I was initially inspired by Jo Sharp’s Hexagon skirt, but have discovered this new-wave trend was set by Australian designers Romance was Born in their whimsical Spring/Summer 2009 collection, itself inspired by the crocheted granny-square rugs of the 1960’s and 1970’s.
I really love it! it’s so warm and cosy, and I love the unexpected jolt of seeing so-unhip-it’s-actually-kinda-hip granny-squares in a wearable item.  I think it is fun and funky; when I first posted my plans for this skirt I did get a comment that “these are everywhere right now” but I haven’t seen a single one out and about around where I live, so I guess the trend hasn’t caught on in Perth yet.  I feel happily unique so far.
Viva les granny-square!


Details:
Skirt; crocheted to my own design using Jo Sharp yarns, my pattern below
Top; Sexy Woman, found second hand
Tights; Voodoo
Shoes; Misano from Labels boutique

(at left, Jo Sharp’s Hexagon skirt; at right from Romance was Born Spring/Summer 2009)

I wrote down the pattern I used to make my own skirt if anyone is interested in making one too.  There are multiple small variations on the crocheted granny-square.  I trialled several different variations before settling on this one, but a granny-square is a granny-square is a granny-square really…

Crocheted Granny-Squares Skirt:

6 balls of coloured 8ply yarn
I used Jo Sharp  Classic DK Wool; 3 “greenish” shades (Glade, Lichen and Orchard), and 3 “reddish” shades (Brocade, Scarlet and Nasturtium)
3 balls of Black 8ply yarn
3.5mm crochet hook  *
3.5mm round needle  *
(*warning, I am an extremely loose knitter and crocheter, and a “normal” person would probably use a needle/hook 3 sizes bigger…)

Abbreviations:
ch; chain
tr; treble stitch (US double)
sl st; slip stitch

Using colour 1, ch 6, join with a slip stitch in the 1st chain to make a ring.
ch3, tr x2 into ring, (ch 3, tr x3 into ring) 3 times; ch 3.  Sl st into top of 3 ch at beginning, end wool.
Join 2nd colour into corner:
ch3, tr x2, ch 2, tr x3; (ch 2, tr x3 into next corner, ch2 tr x3 into same corner) 3 times,  ch 2, sl st into top of first ch 3 in this colour, end wool.
Using black, join into corner:
ch 3, tr x2 into corner , ch 2, tr x3 into same corner, ch 2; ( tr x3 into side, ch2, tr x3, ch 2, tr x 3 into next corner, ch 2, tr x3 into same corner, ch2) 3 times; ch 2, tr x3 into next side, ch 2, join with a sl st into top of first black ch 3, end wool.

Voila! you have a little granny square!

How many you need to make depends on the size of your granny-squares, your own hip measurement and how long you want your skirt to be; this is an individual requirement.
I made 78, having one “green” and one “red” shade in each one, and alternating to have equal-ish numbers of each variation. Then overstitched them together to make a tube of 6 x 13 squares.
Then using a 3.5mm round needle, I picked up 92 stitches around the top (as a guide, 7 in each square and then 1 extra in the last),
K 15 rows in the round in black.
Row 16; (K4, K 2 tog) rep until you get to the last 2 st, K2  (78 st)
K 15 rows.
Cast off, veeeeery loosely (otherwise you won’t be able to fit the skirt over your hips!)
Take a piece of 2mm black elastic cut to fit your waist, and weave it in and out through the stitches in the second to top row, then machine zig-zag the ends together firmly.

The beauty of this is that it has no front or back, so there is less chance of developing a “seat” by sitting in the skirt the same way every time.  It can just be swivelled around any which way.  And since it is all wool and crocheted, it can be reshaped after laundering, if necessary.

SaveSave

SaveSave

pinterestmail

Crocheted granny squares

I know there is a phrase to describe occurrences like this but I can’t think what it is…
This morning I dug out this crochet scarf and put it on, thinking again how much I like it and its beautifully swampy, underwater-y, murky combinations of colours! but especially it got me thinking about crochet granny squares.  This scarf is simply a sewn-together row of large-scale mohair crochet granny squares, and I was thinking idly about how much I would like to make a scarf or something out of the original type of crochet granny squares; those ones that were all kinds of colourful but always black-edged.
So I took the above photo this morning  (I’ve still been taking photos occasionally but not always putting them here), and afterwards, Cassie and I were going along to meet with my mother in the Jo Sharp knit shop, which is a tiny little shop but like a wonderful Aladdin’s Cave stuffed full of divinely colourful balls of woolly goodness…  Of course you guessed it, we walked in and what should I see but straight away!, and that is this rather funky little skirt below, made entirely out of exactly the crochet granny squares I had been daydreaming about.  Bizarre coincidence; magical thinking? that I should select this vaguely granny-squarish scarf and be thinking about granny squares, and then immediately find this rather cool new-age take on granny-scarf couture??  (cue Twilight Zone music)
(image of the Hexagon skirt below from Jo Sharp)

Don’t you just love it?  Old fashioned, unusual, quaint, reminiscent of those awful old op shop blankets like you always saw flung over Rosanne’s couch on the 80’s sitcom?  Goodness, that thing was so daggy as to eventually become quite cool, yes?  No?  Am I on my own on this one?  Well, I guess to my 80’s-addled consciousness the ol’ granny square blanket did assume an aura of grungy chicness anyway….!

So Mum and Cassie did a bit of enabling, and I did not walk out of the knit shop empty handed…   I just bought a few colours to get going along with some blacks for the edging, but I can always go back for more if I need to…  I’m still undecided as to whether to just go for a scarf as per my original thoughts, or to go for the full-on skirt… what do you think?

Details:
Skirt; Vogue 7303 with modifications, green cotton velveteen, details here
Scarf; crocheted by me, details here
Tights; my own design, denim print jersey, details and a tutorial on drafting your own tights here
Top and cardi; Metalicus
Shoes; Francesco Morichetti, from Zomp shoes

pinterestmail
Switch to mobile version
↓