Category Archives: Uncategorized

the paper-doll project

I’ve been thinking about things for the year ahead.  Apart from continuing to make all my own clothes, I mean… that’s a given  ๐Ÿ˜‰
It’s fun to set little goals to think about and complete.  I like list-making and box-ticking, if that explains anything.

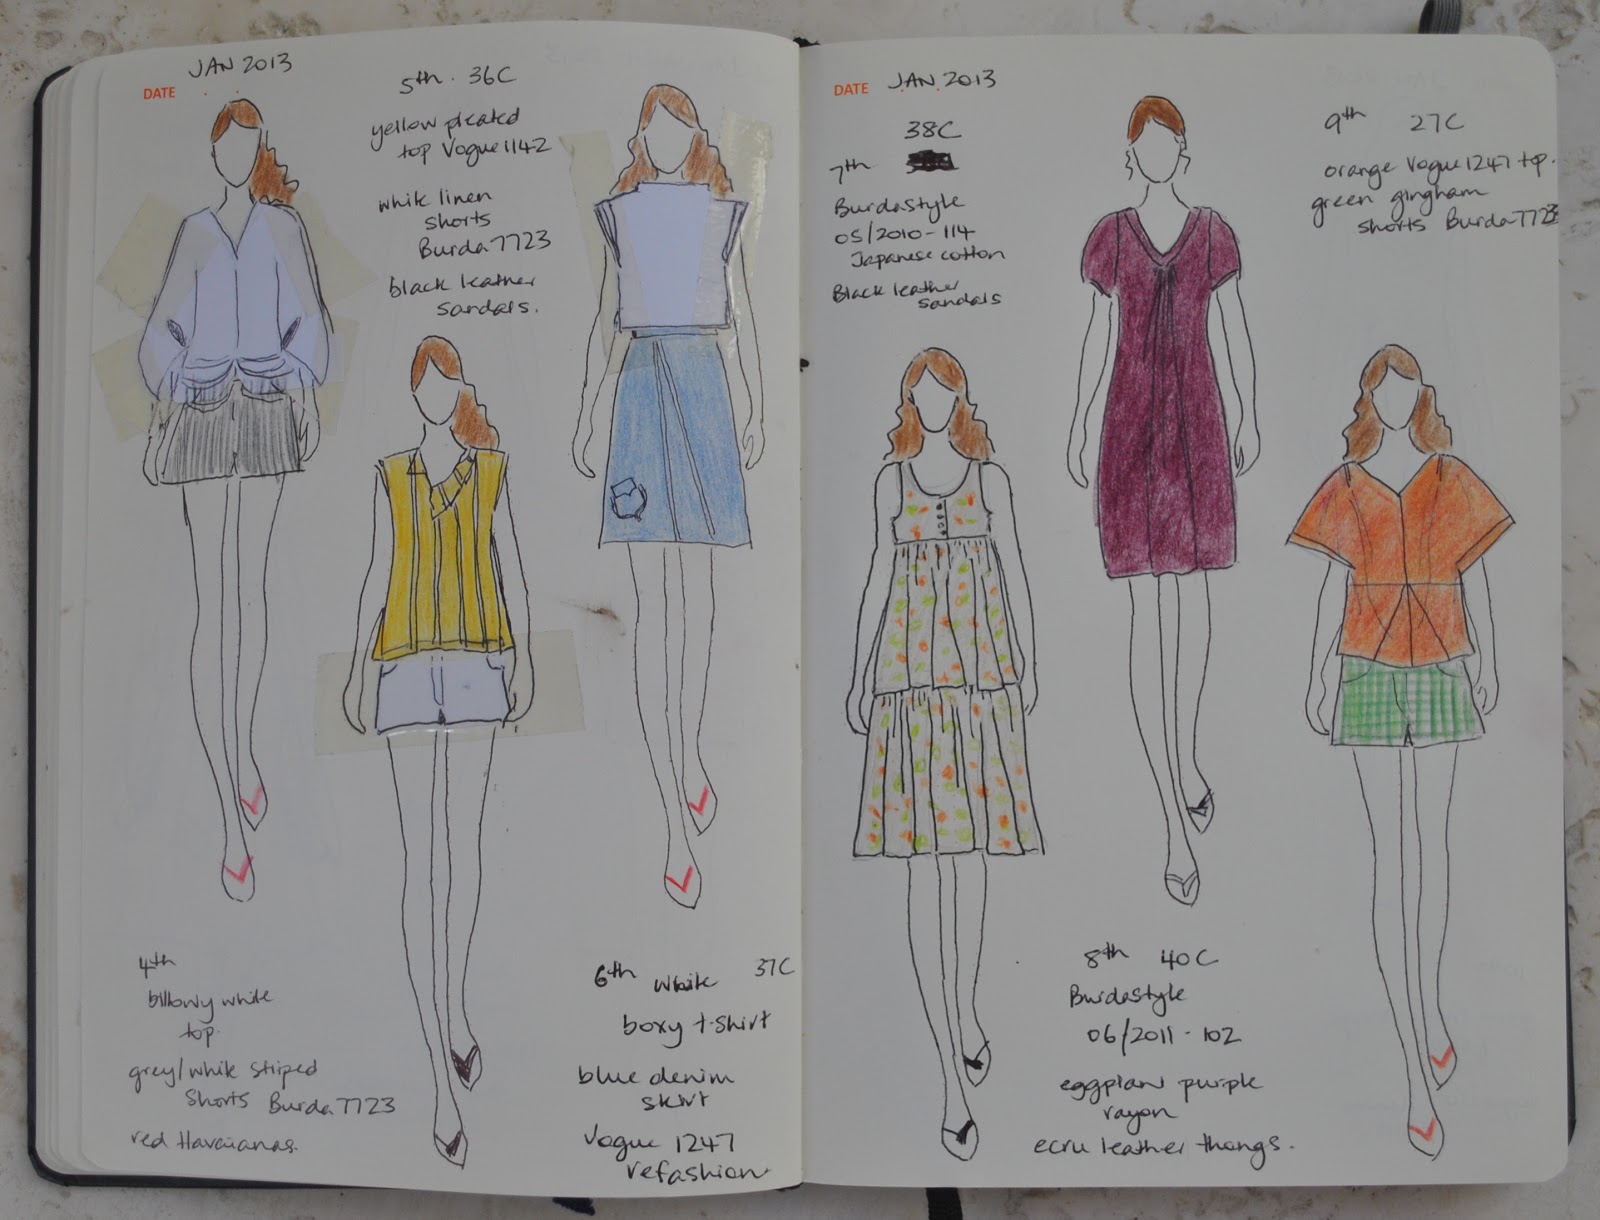
So, this year I am going to wear only my own self-made clothes, and sketch the outfit I am wearing each day in my Fashionary.  I’ve written before how much I enjoyed and was thoroughly inspired by Natalie Purschwitz’s journey, and this is kind of a homage to her Makeshift project.  Although Natalie made her own shoes as well as her clothes; which blows my tiny mind!!   So needless to say, making my own shoes is way beyond me.  Actually it’s probably impossible in Perth.  
However I can do the clothes! and document them.
I’m calling this the paper-doll project.

1-9 January
The outfit on the right was drawn on white paper separately and then stuck on with stickytape afterwards… this is because my first attempt at drawing that skirt underneath looked horrendously weird.  Awful.  Since I completely suck at drawing.  I’m hoping this project will change that.
However, I did like the way the white paper stuck on top made my outfit look just like it is; an all-white outfit, and not just like I had forgotten to colour it in.  So I started drawing all the other white garments on white paper, and sticking them in for other days.  
So practice makes perfect and hopefully my drawing skills will improve and…  oh, who am I kidding; I just like fiddling about with paper and scissors and coloured pencils and sticky-tape, doodling fashion-y type stuff.   Playing fashion designer!  I loooooved paper dolls as a child.  This is fun!

The hairstyle on each paper-doll is the hairstyle I had for that day too.  Since I basically rotate between three hairstyles; ponytail, “out” and messy bun (day 8) then this shouldn’t be too challenging to draw  ๐Ÿ™‚
The other reason I am doing this:  well, apart from fun, and does there need to be any other reason, really?? of course no.  But I started out using my Fashionary as a brain-storming and planning tool for my future creations.  But it didn’t take long for me to notice something of a downer; only about half the things I’d drawn as a firm “yes” for a future project, actually end up looking like I initially planned.  I’ve found that by the time I finally get the fabric and the patterns out and get going I’ve often mentally moved on and incorporate a whole host of little changes!!  There is no point in showing examples here, suffice to say they are many!

It’s cheering to see the creations that did get made but the drawings of things that might have been but are not and never will be; are a bit sad, like wasted space and wasted effort.  This year my Fashionary is going to reflect the clothes I actually am making, and choosing to wear.  ๐Ÿ™‚
(I didn’t put in any links to the construction posts with photos, but I can do that if it is useful to anyone ๐Ÿ™‚  )
pinterestmail

Bra sew-along….

… woops, better late than never!
With all my crazy pre-Christmas sewing, followed by the stiflingly hot post-Christmas coma period, I totes forgot to post that I am taking part in Amy’s Bra Sew-along, over at cloth habit….
Join us!
Now, I have made a few bras for myself already but I’m ashamed to say that the most perfunctory of measuring sessions was employed before I decided on same size I’ve been buying for years and years and years and years (“and years”, recurring) since I’ve always felt perfectly comfortable in them…. yes, I know, lame excuse and how lazy, right?  So I have a selection of nice and comfy 12A’s (34A) in my drawer….   Well, in the spirit of “gettin’ serious” about mastering the perfect bra I did three separate measuring sessions in each of the following 85b International bra size calculator, the Berlei bra size calculator, and the Victoria’s Secret How to Measure page… that’s nine measuring sessions; and in each case came up with 10A (32A).  Hmmm.  No wonder my bras were lovely and comfy if they’re all a tad too big!
So for the sew-along, I am going to be brave, and try out the smaller size…
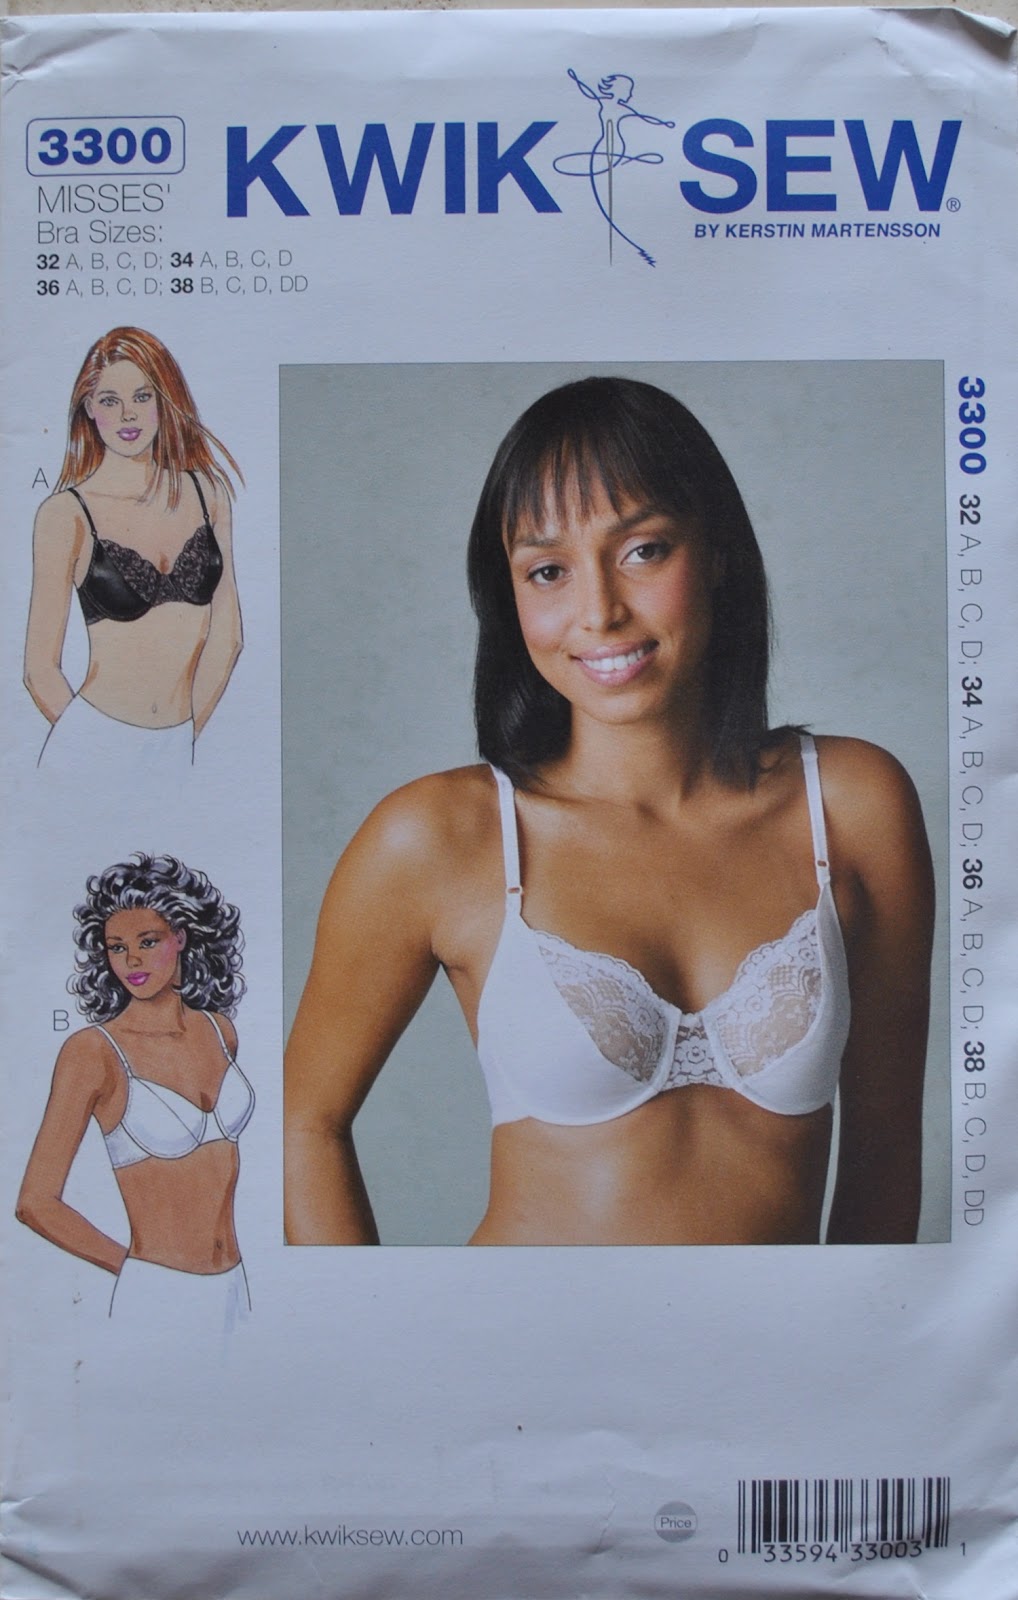
I will be using KwikSew 3300

pinterestmail

Denimen. Ineminem.


First garment for the year!

The credit for the cute pocket and the funky piecing and top-stitching goes to Mum of course  ๐Ÿ˜‰  Yes, remember this Vogue 8561 skirt that she made, and
passed on to me because she didnโ€™t like it?  Unfortunately that particular combo of pattern and fabric was kinda unforgivably frumpy.  I think the older you get, the far less
you can get away with anything remotely frumpy.  When she saw it on me even Mum said โ€œoh just toss it out Carolyn,
it does nothing for you eitherโ€
But it was of lovely, new fabric; slightly stretchy denim from
KnitWit? I think? and waaaaay too nice to ditch so hastily; and I liked the idea
of a little blue denim skirt in my wardrobe.  Key word there: โ€œlittleโ€.  And blue denim; always a favourite!
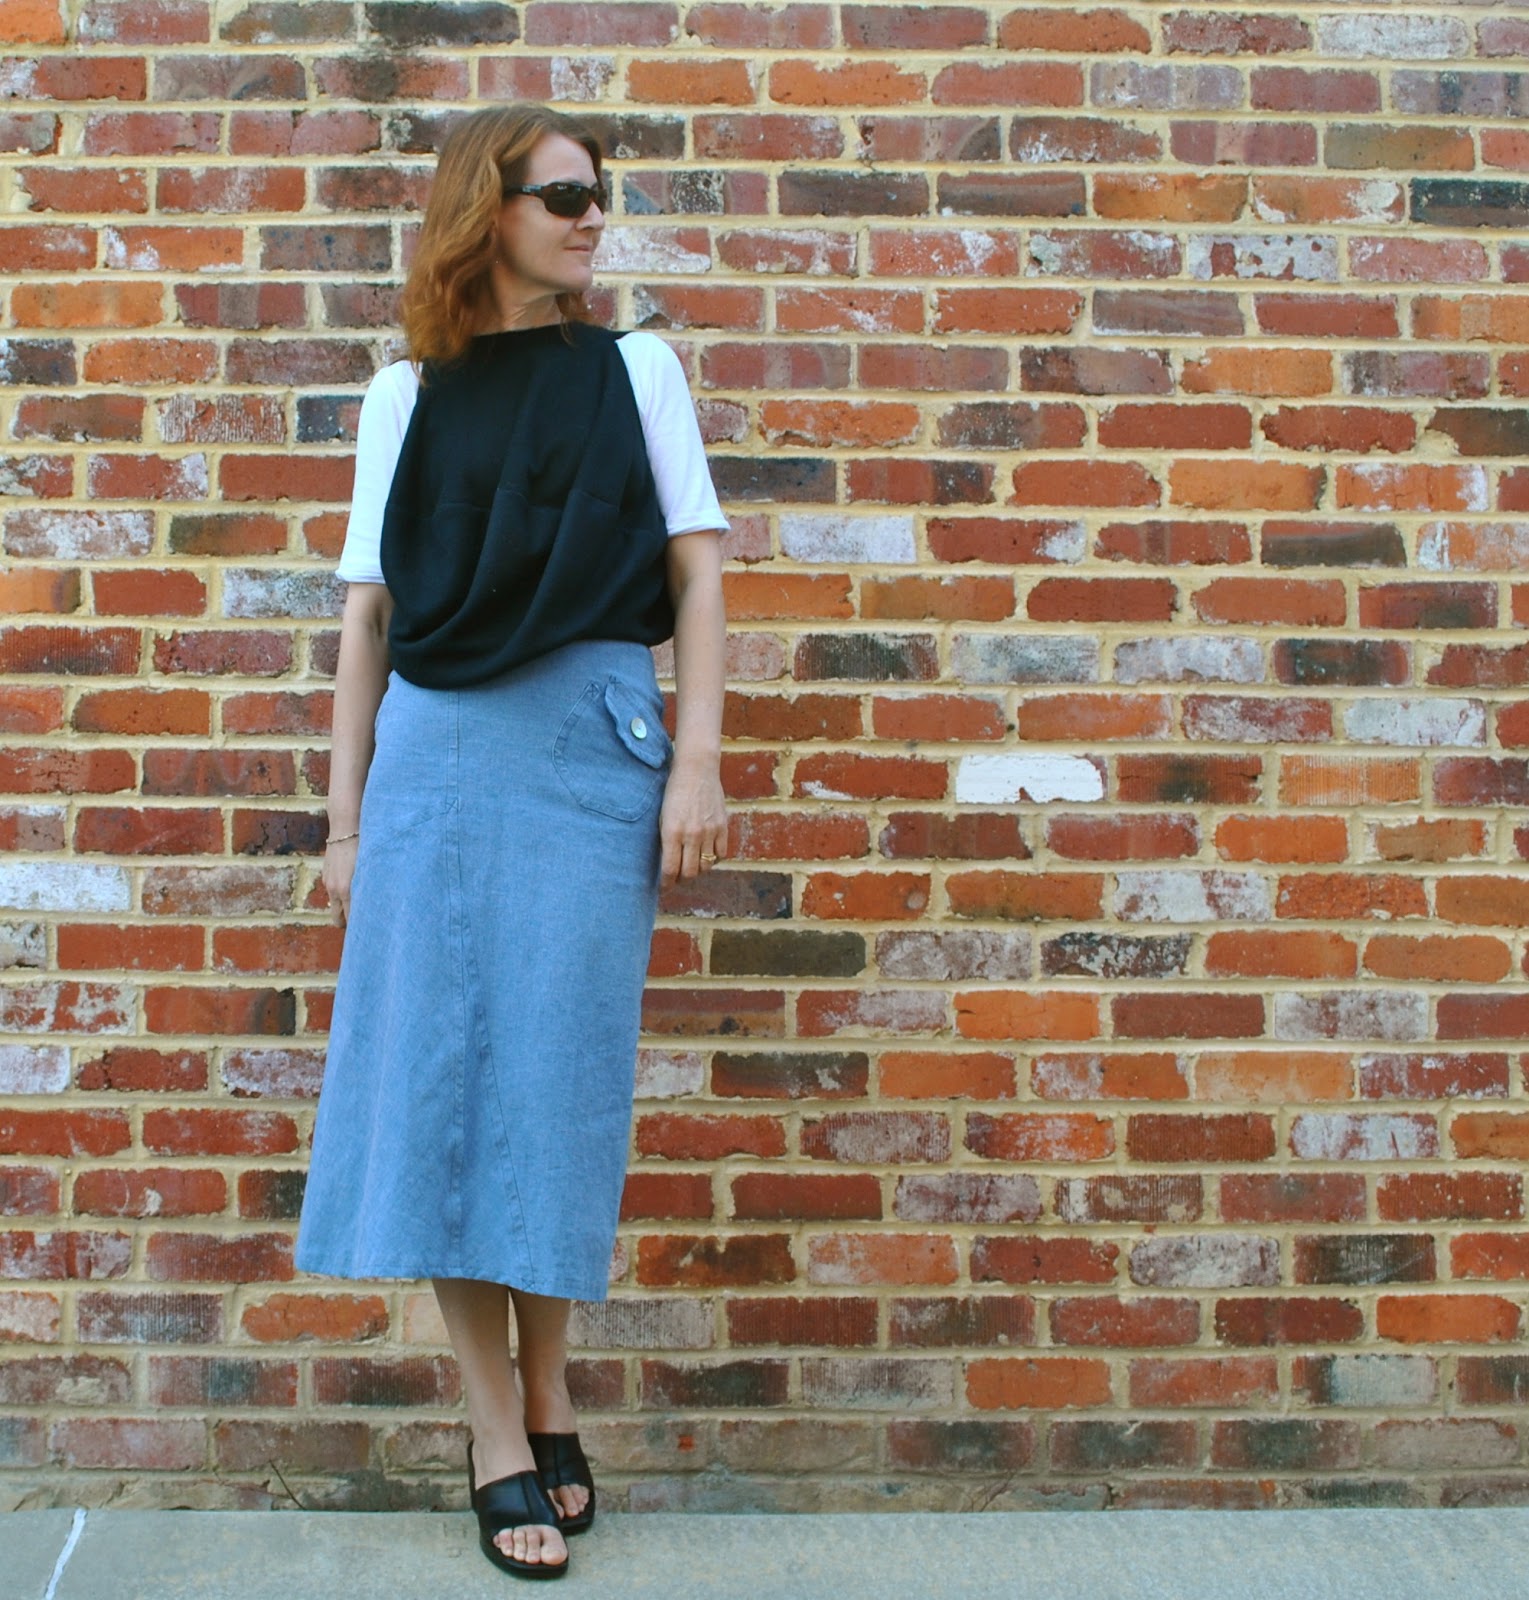
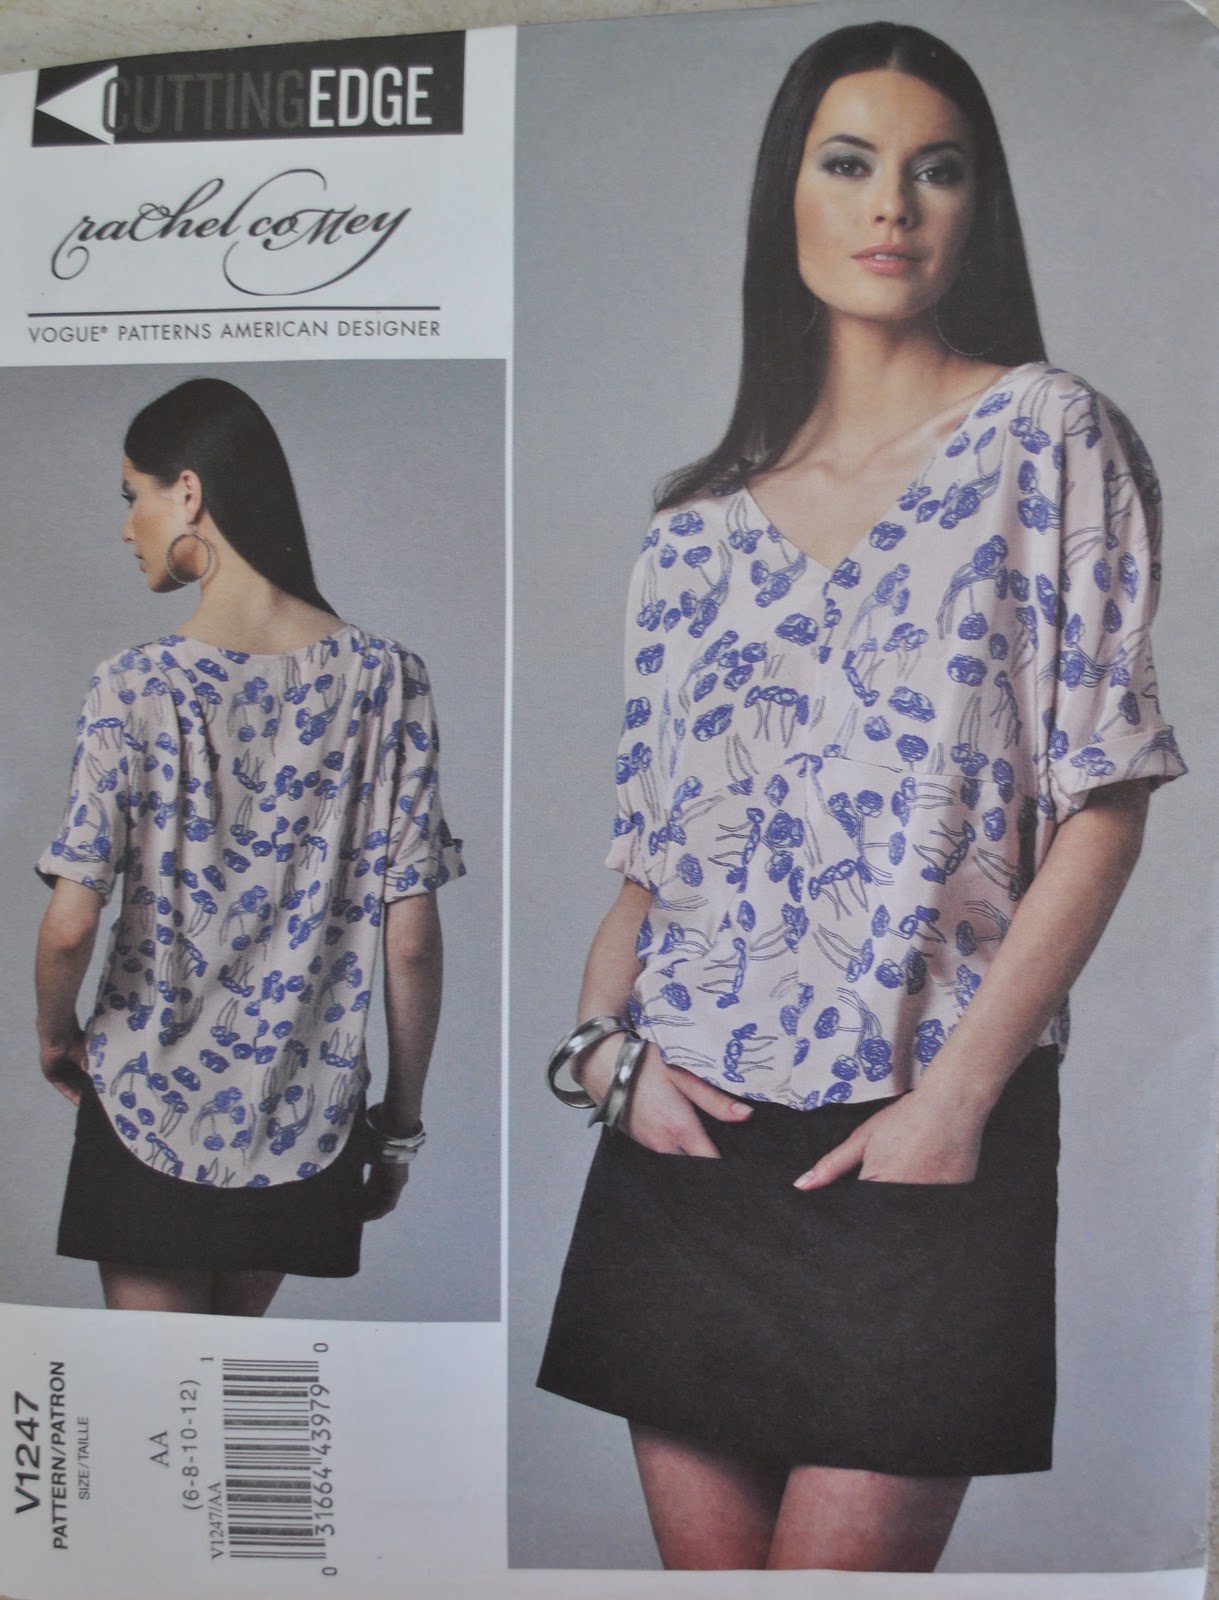
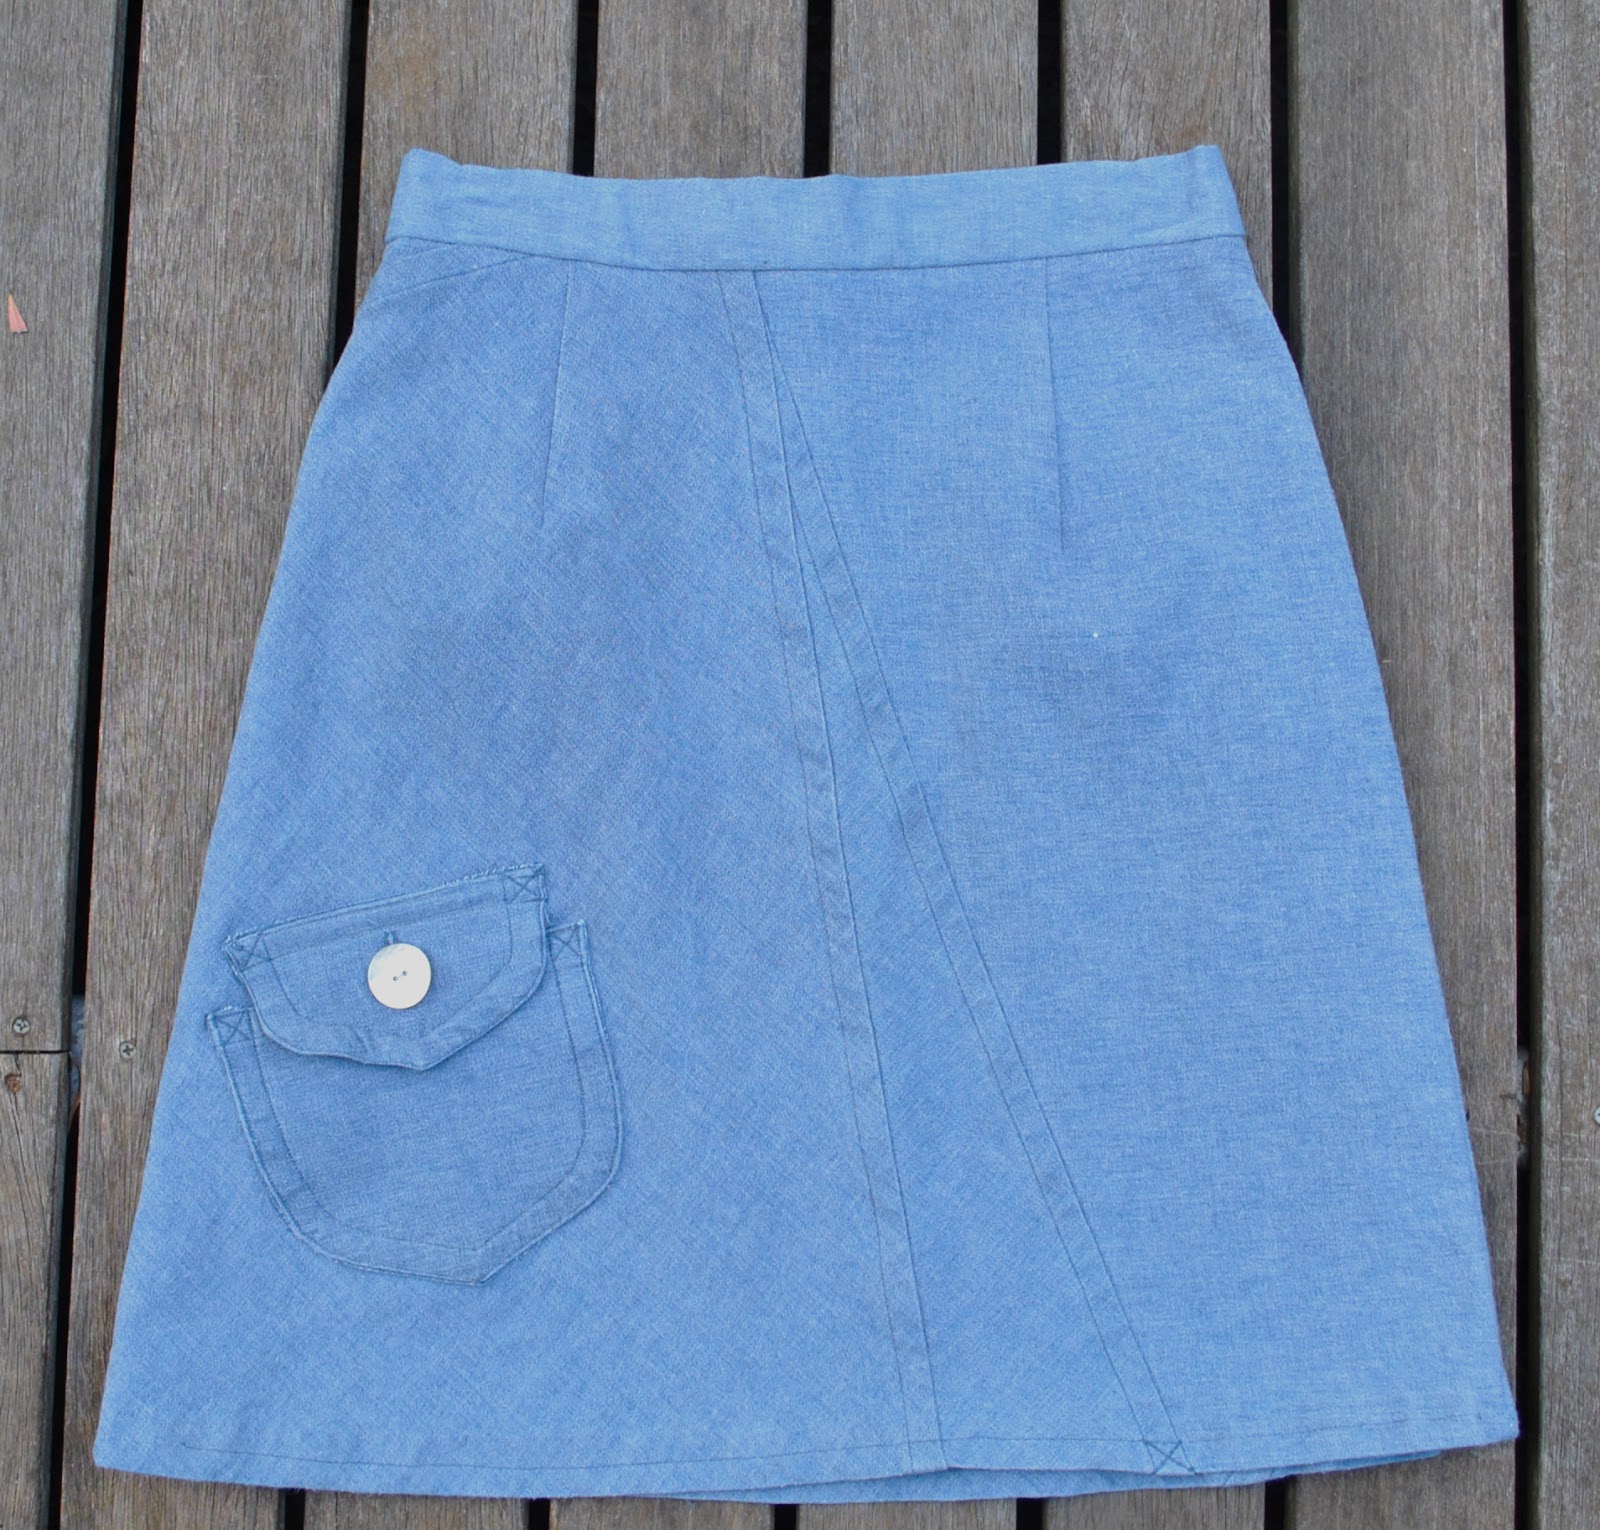
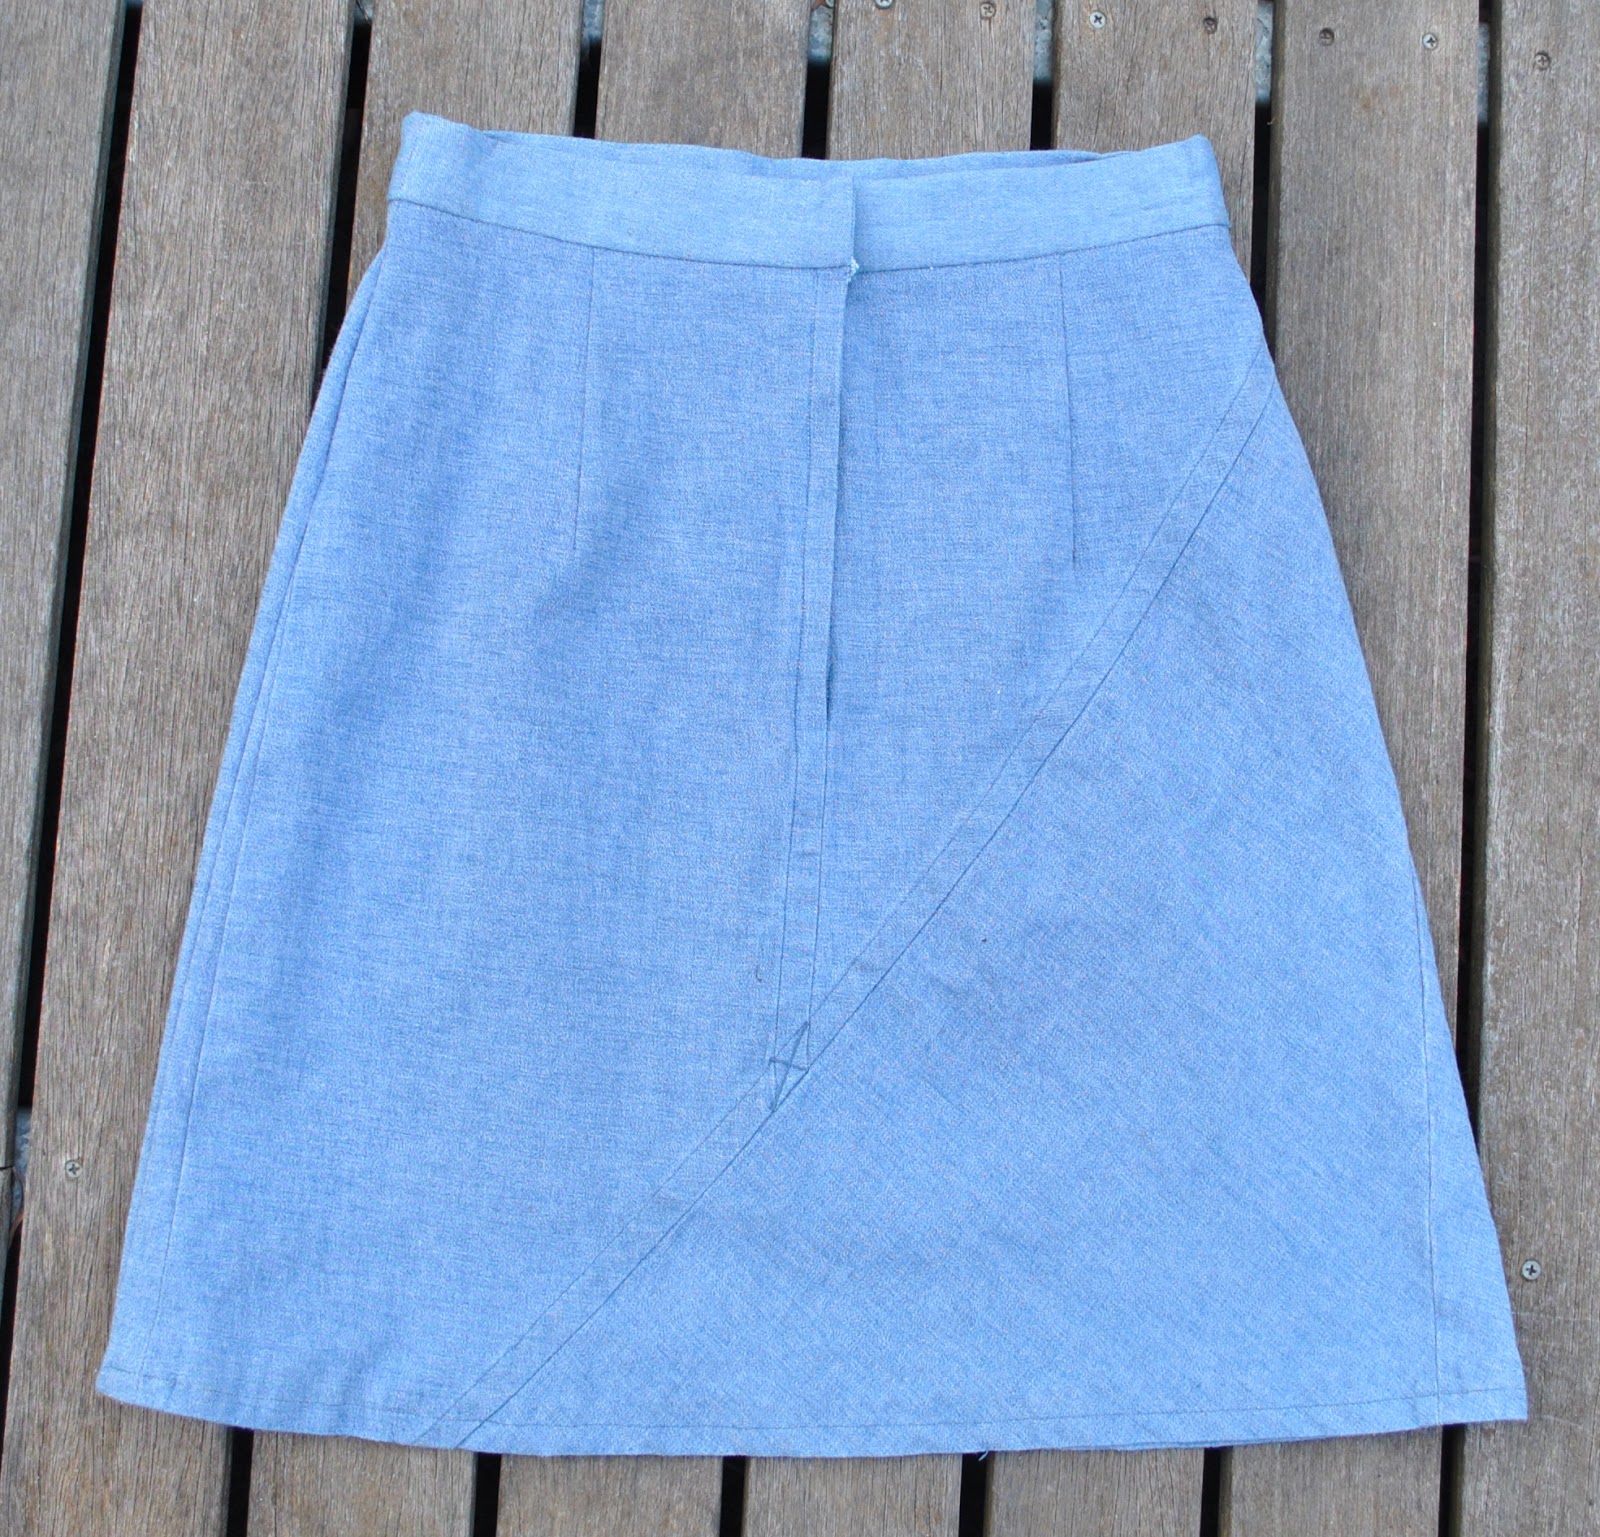
So the unfrumpy Vogue 1247 came to the rescueโ€ฆ I
spliced the upper and lower skirt pattern pieces together and managed to cut a
front and back from the very lowest portion of the skirt, keeping most of the
original hemline intact.  
Interesting, huh? that the hemline circumference of that long long original is almost exactly the same as it is in this much much shorter skirt.  Explains a lot, in retrospect it was pretty constrictive and difficult to stride briskly along in….  and I’m a strider.
I cut out
that adorable little pocket from the top and re-attached it to the skirt;
because imo it was the hands-down highlight of the original skirt and I just had to keep it!  The original dress zip was unpicked and
re-used in the CB seam, and I found a piece of non-stretchy denim in my stash
with a wrong side having an excellent colour match, leftover from a skirt
Cassie had made for herself.  From this, I cut
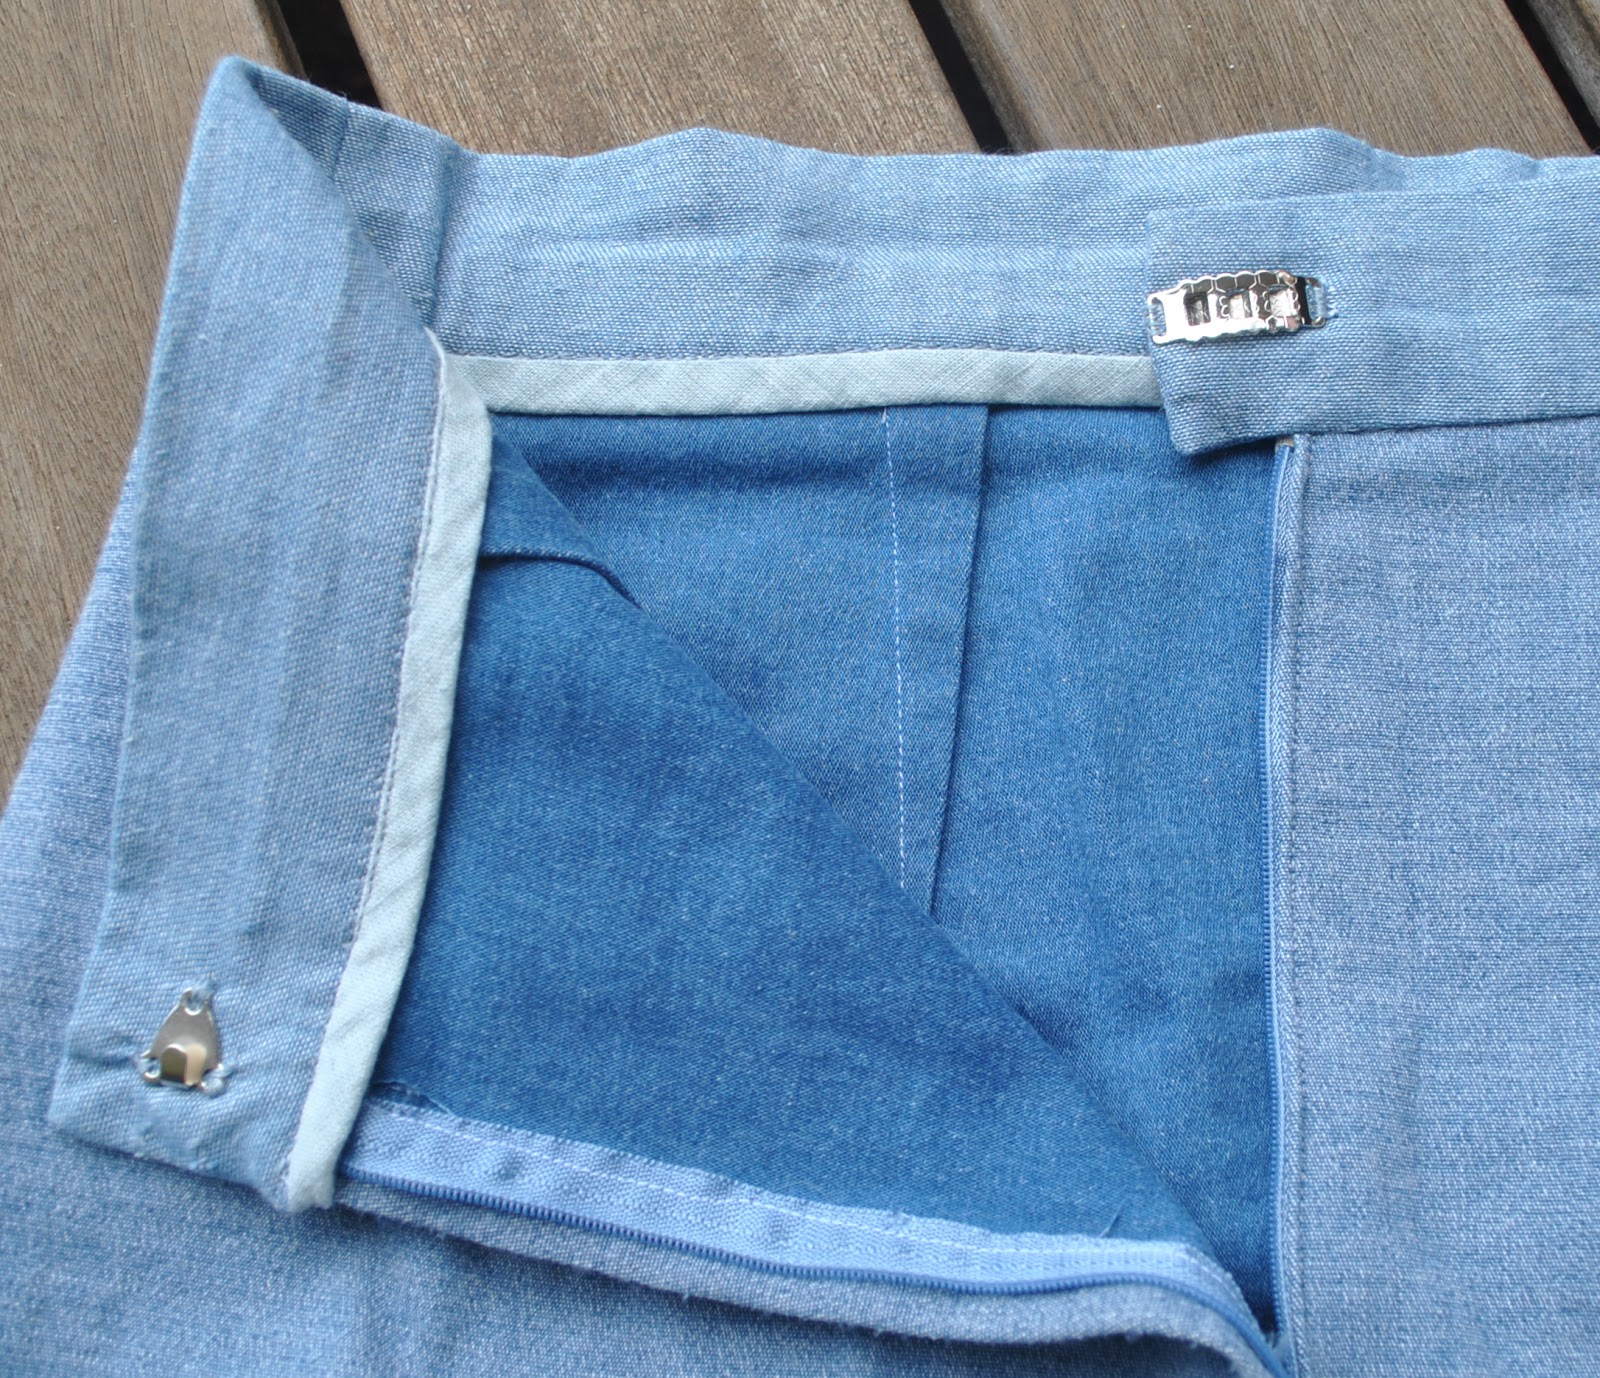
a new waistband, and to reduce bulk and avoid that quintuple layer of fabric
you get in the joining seam of a traditional waistband, I edged the inside raw facing
edge with pale blue bias binding (leftovers from this shirt) and stitched them
together in-the-ditch.  I re-used
the same heavy-duty hook and eye closure.
Voila!  I think
this is a far more flattering and usable skirt in our climate, and there is no
doubt it is going to get a heck of a lot more wear now!
Details:
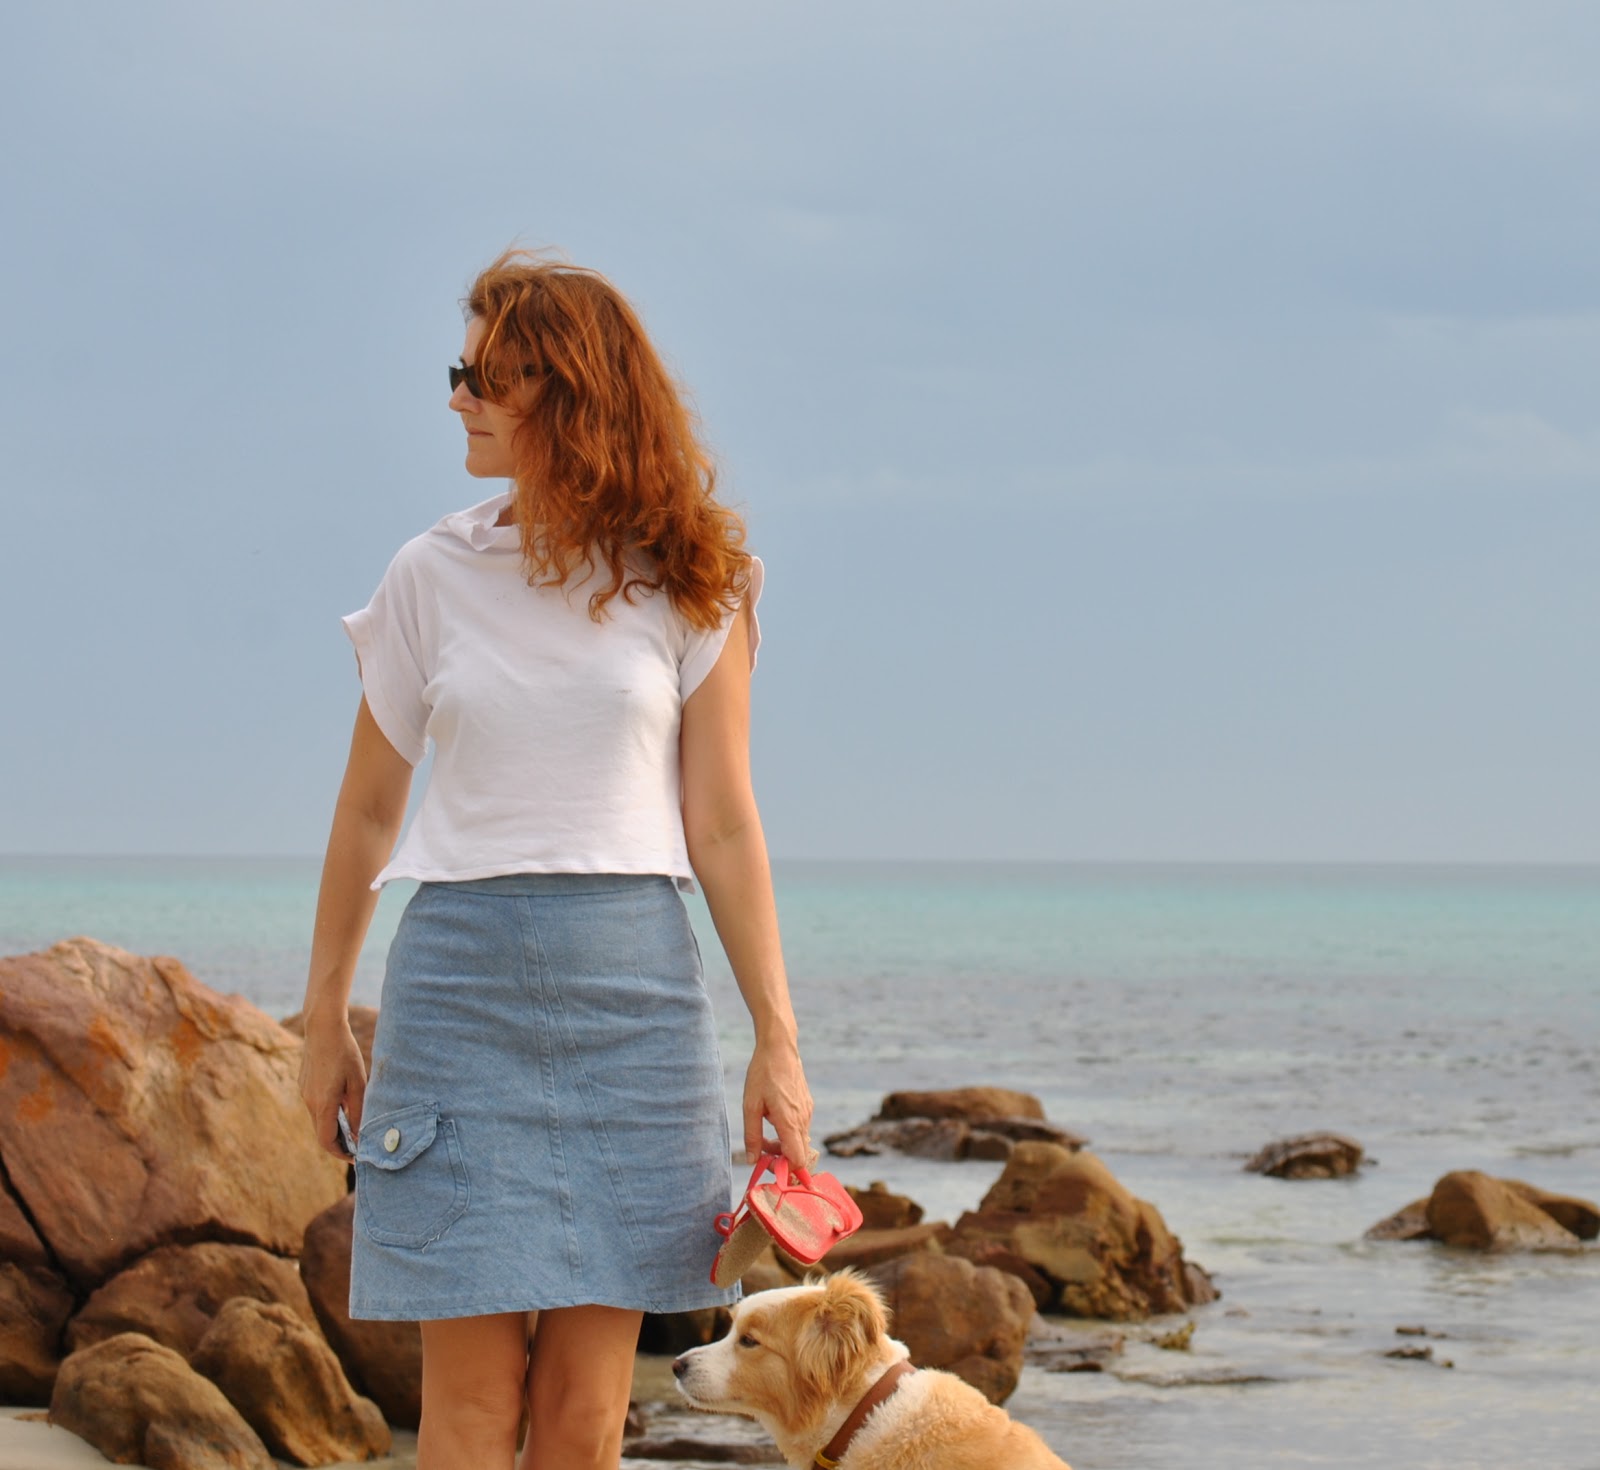
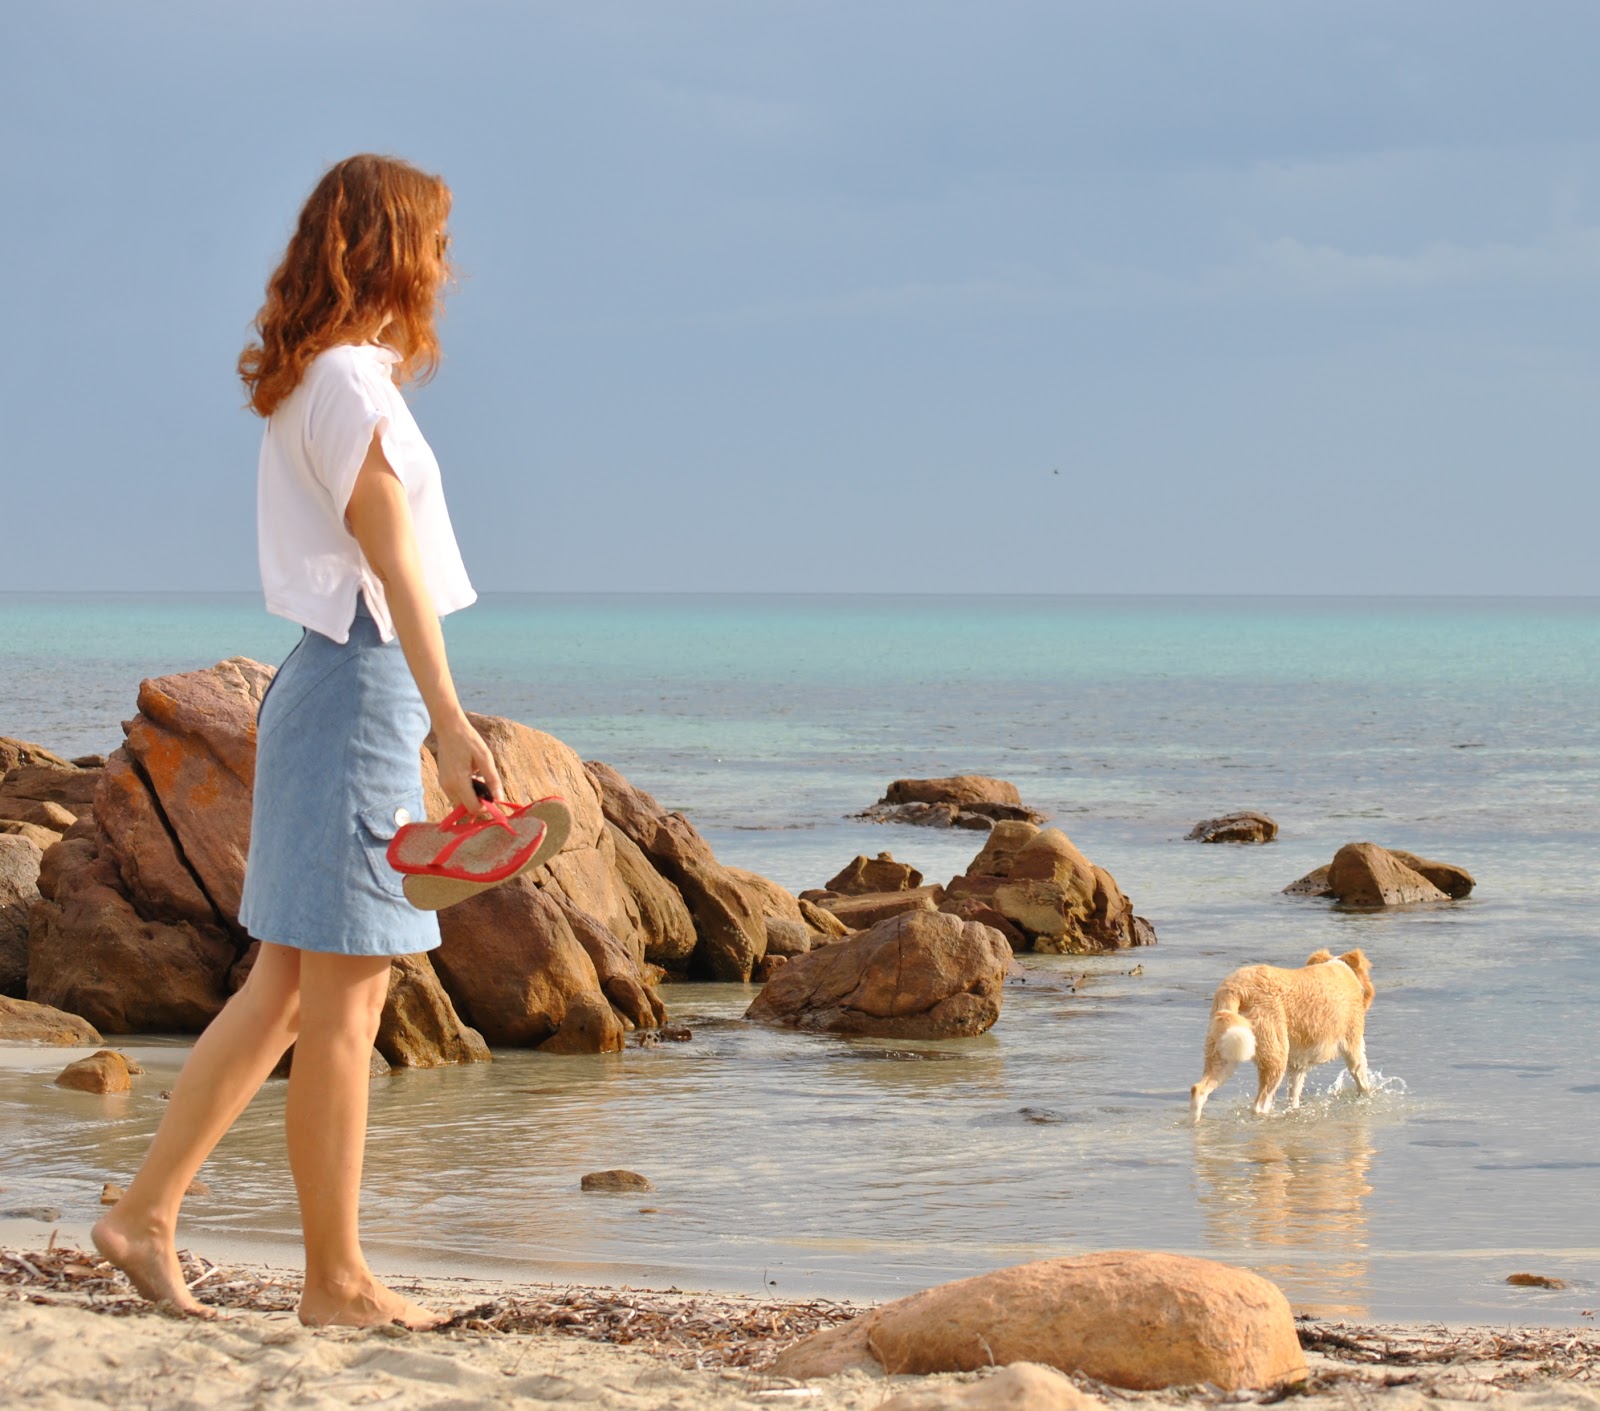
Skirt; a refashion of a Vogue 8561 denim skirt, using a
modified version of Vogue 1247, my review of this pattern here
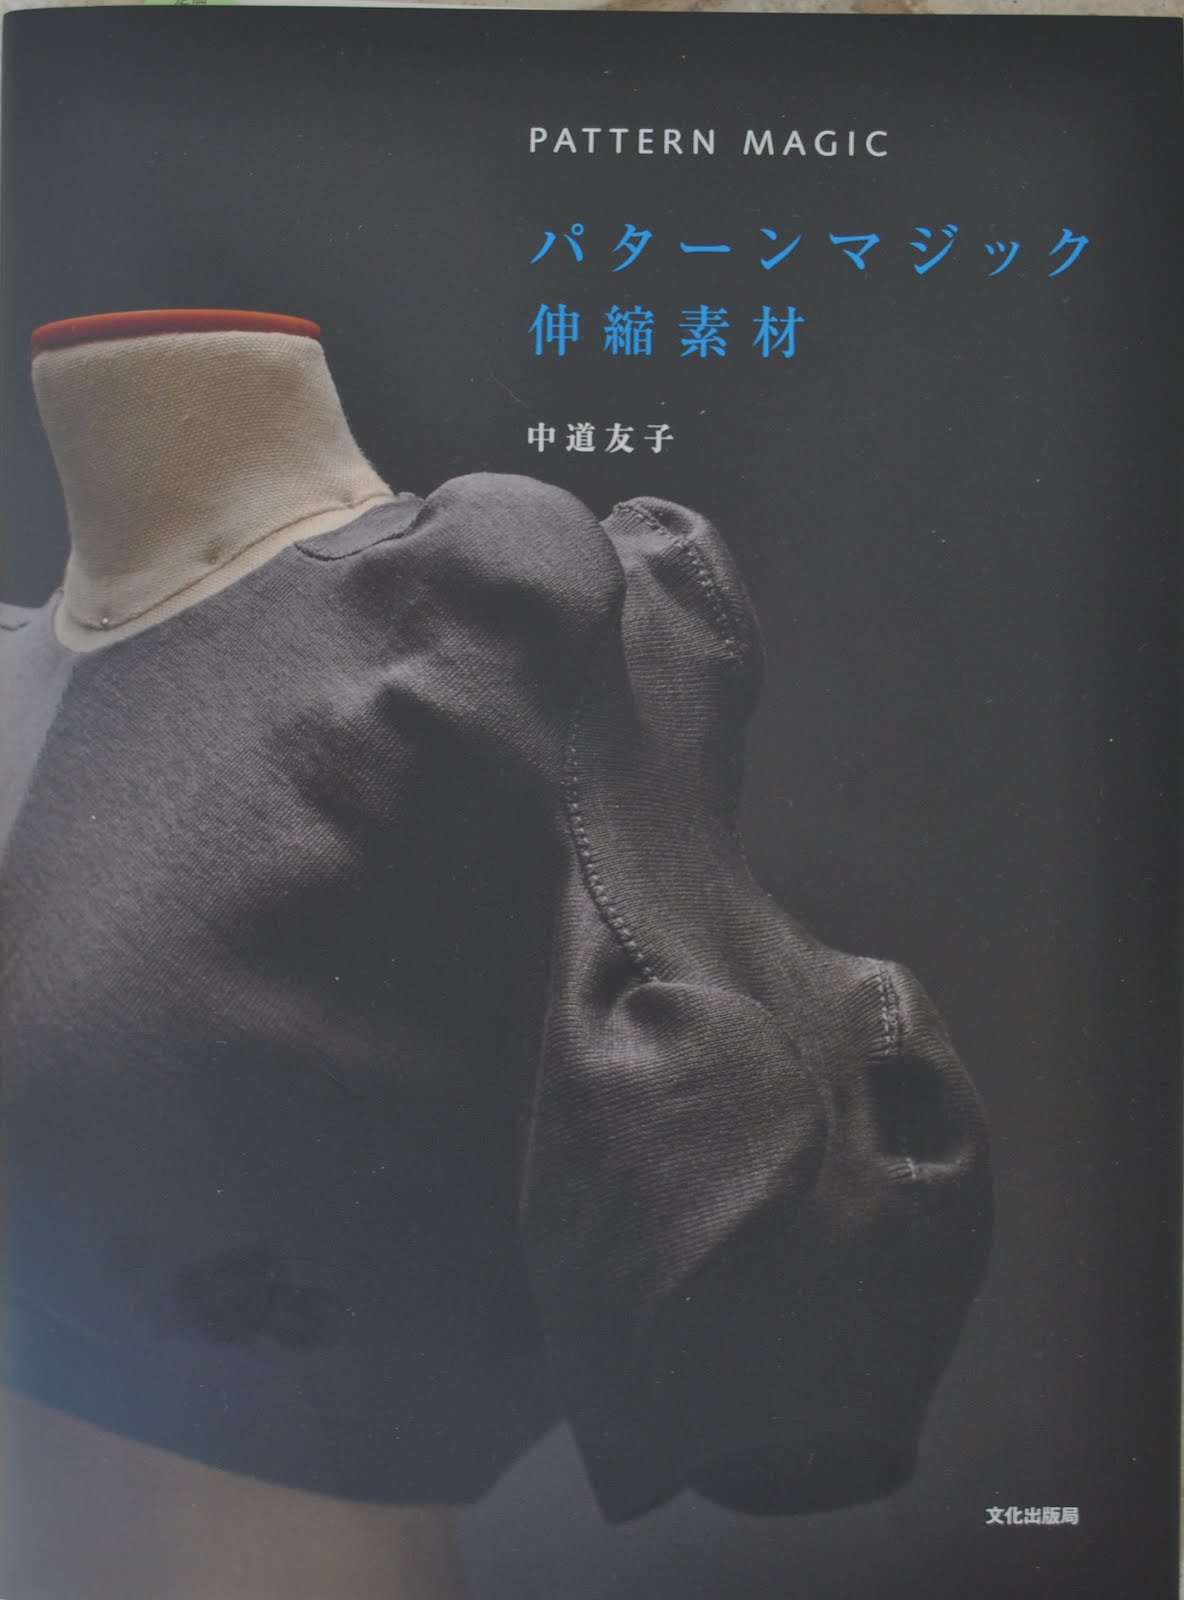
Top; the top portion of a dress from Pattern Magic 3 by
Tomoko Nakamichi, of white cotton jersey, details here
Thongs; Havaiana
pinterestmail

A self-rolling edge finish for knits

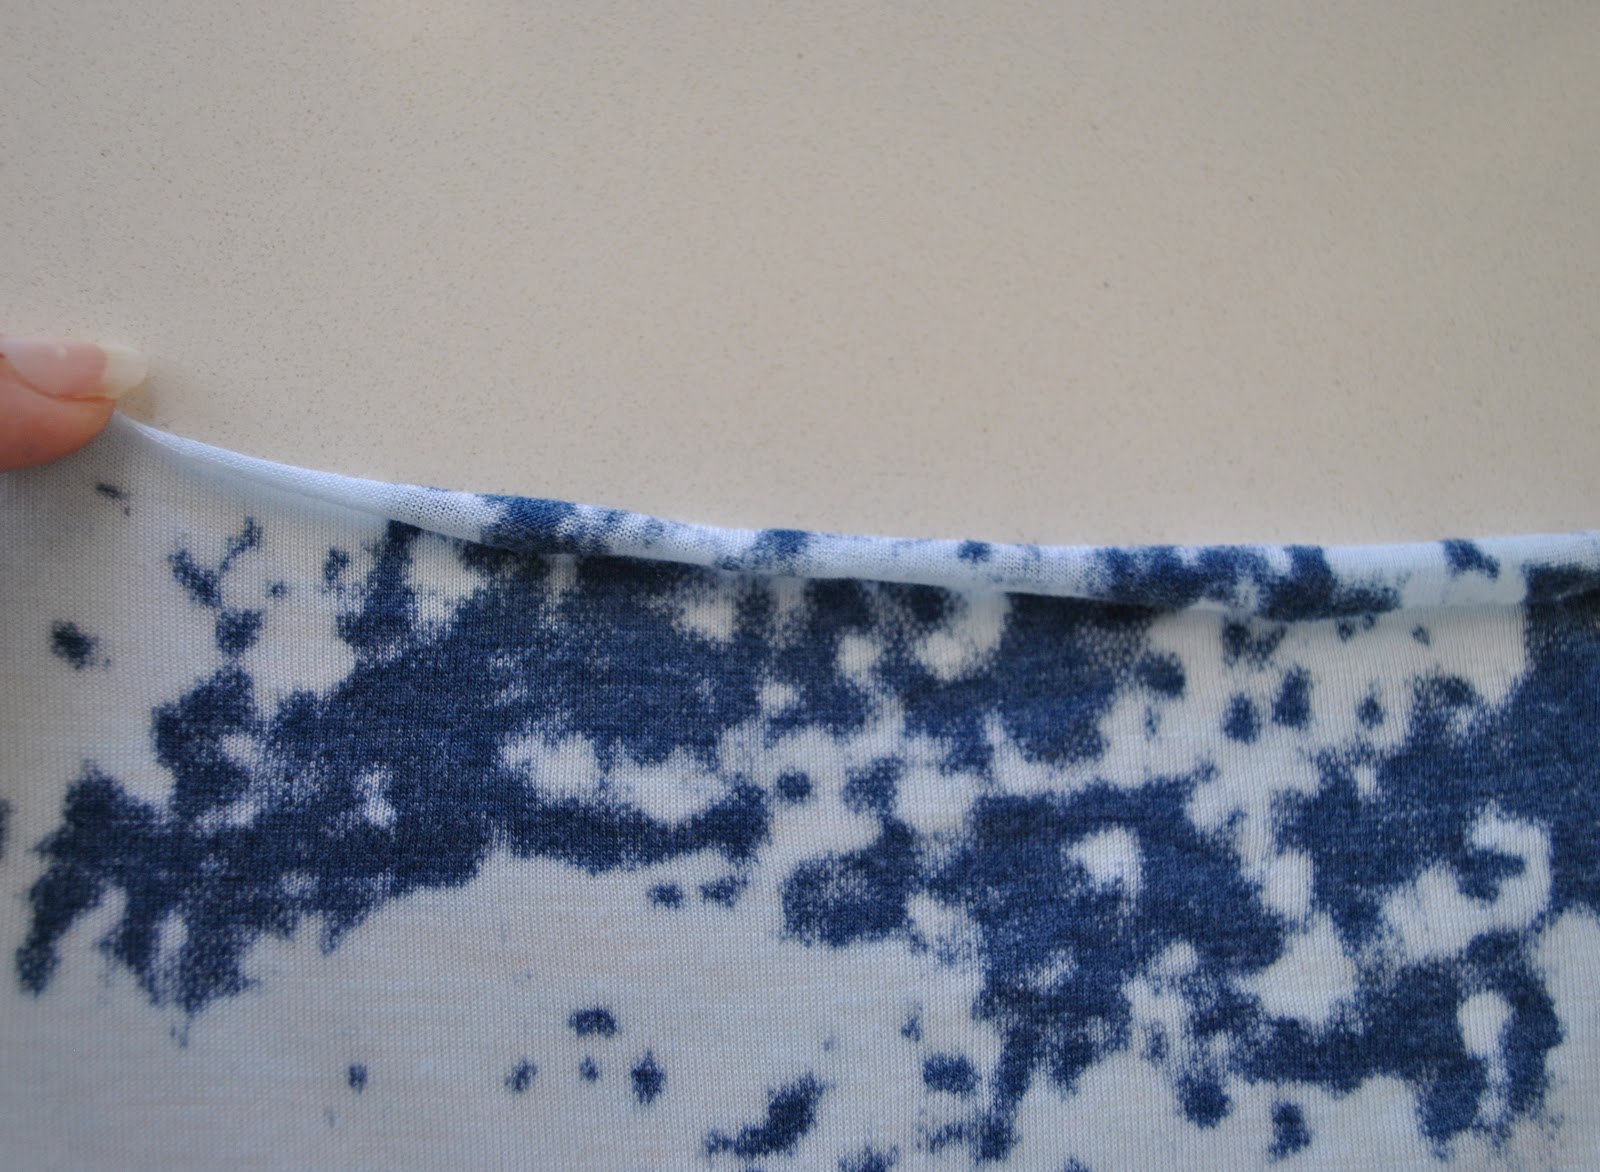
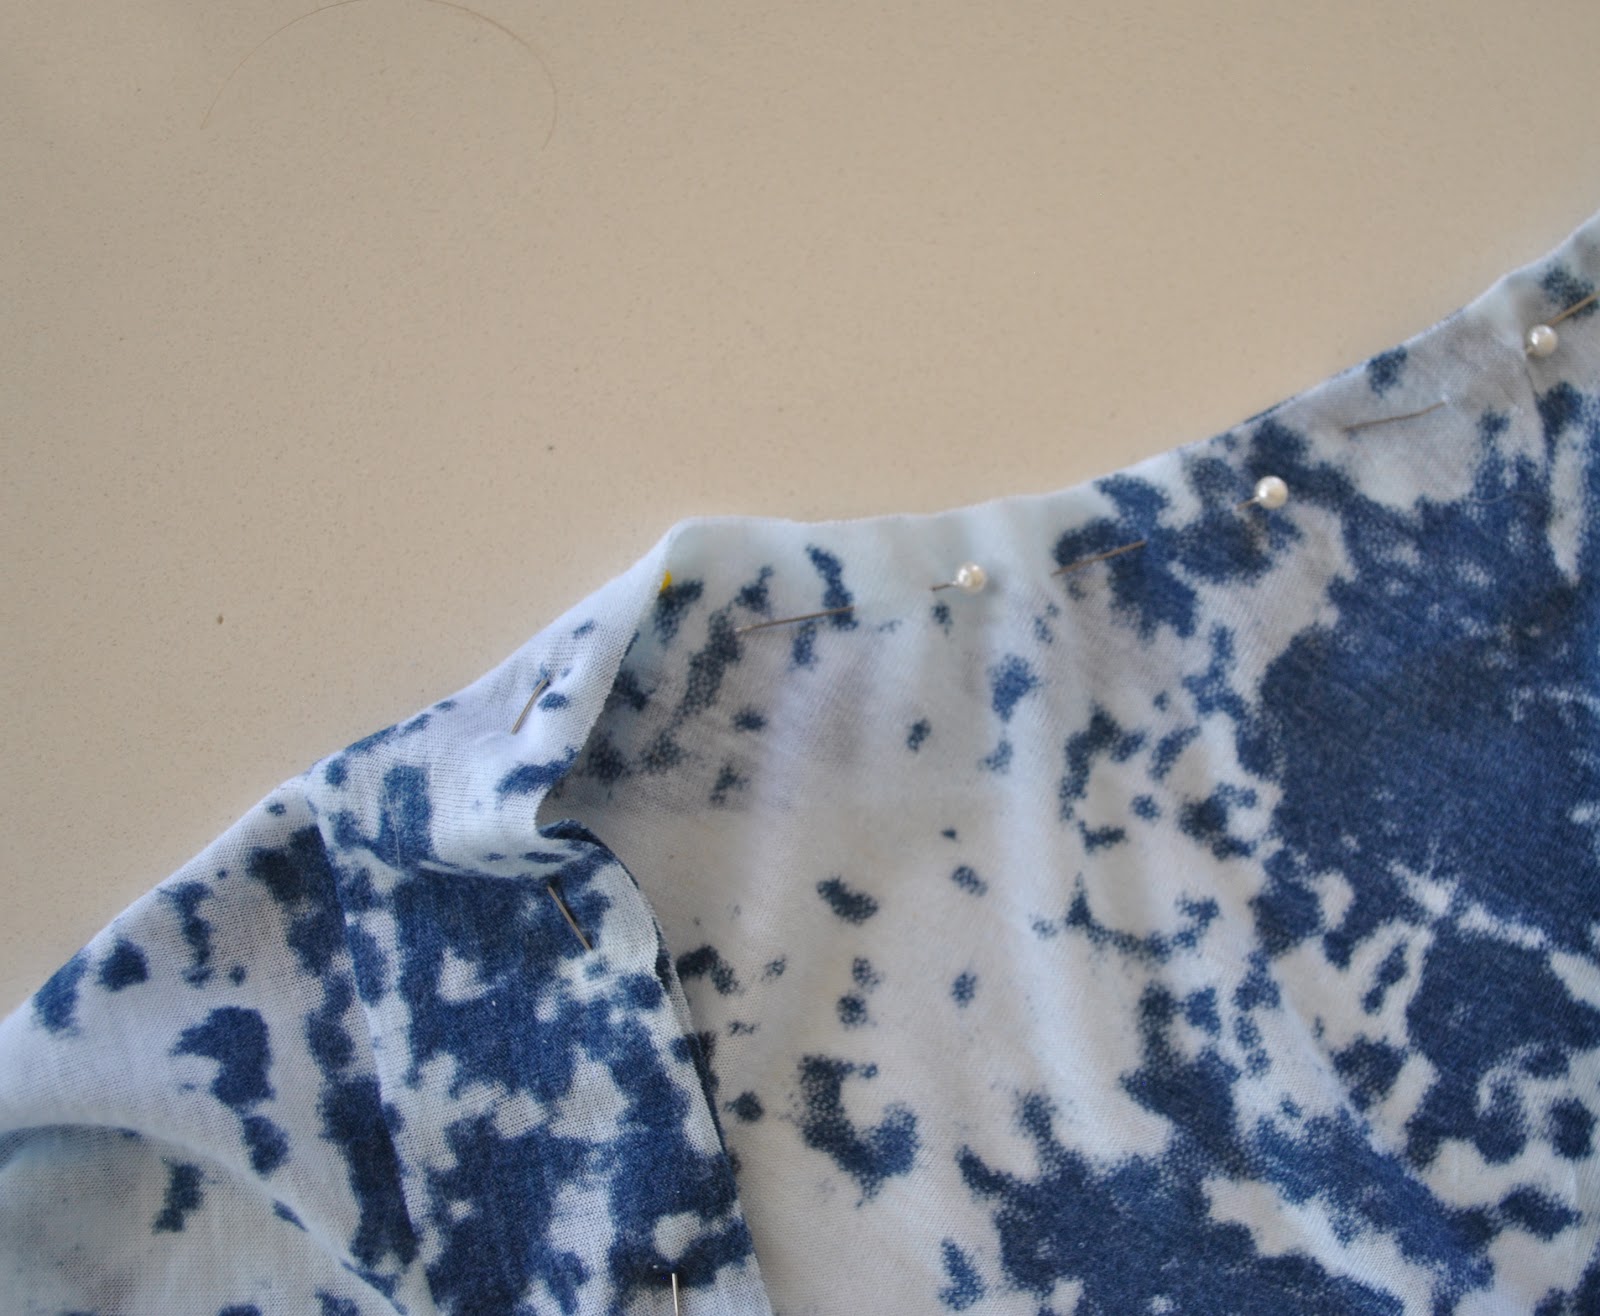
This is a sweet and pretty finish to apply to the edges of casual knit garments… and a more neatly-finished-on-the-inside edging, if slightly more involved, than a similar one I wrote previously.  This is the edging technique used for this dress.
Firstly; the fabric has to be that sort that when left alone; rolls up at the edges all by itself.  Generally, this will only be a reasonably lightweight, single knitted jersey.

Cut a cross-grain strip (that is, with the stretch running along the long edge of the strip) that is as long as the aperture being edged, minus 10% and rounded to the nearest full or half centimetre, for ease of working.  
So, for example, if your neckline is 32cm, cut a strip that is 32cm – 3.2cm = 30cm.  Or if your armhole is 125cm, cut a strip to be 125cm – 12.5cm = 113cm
The width of my strip here is 4cm (or 1 1/2″)

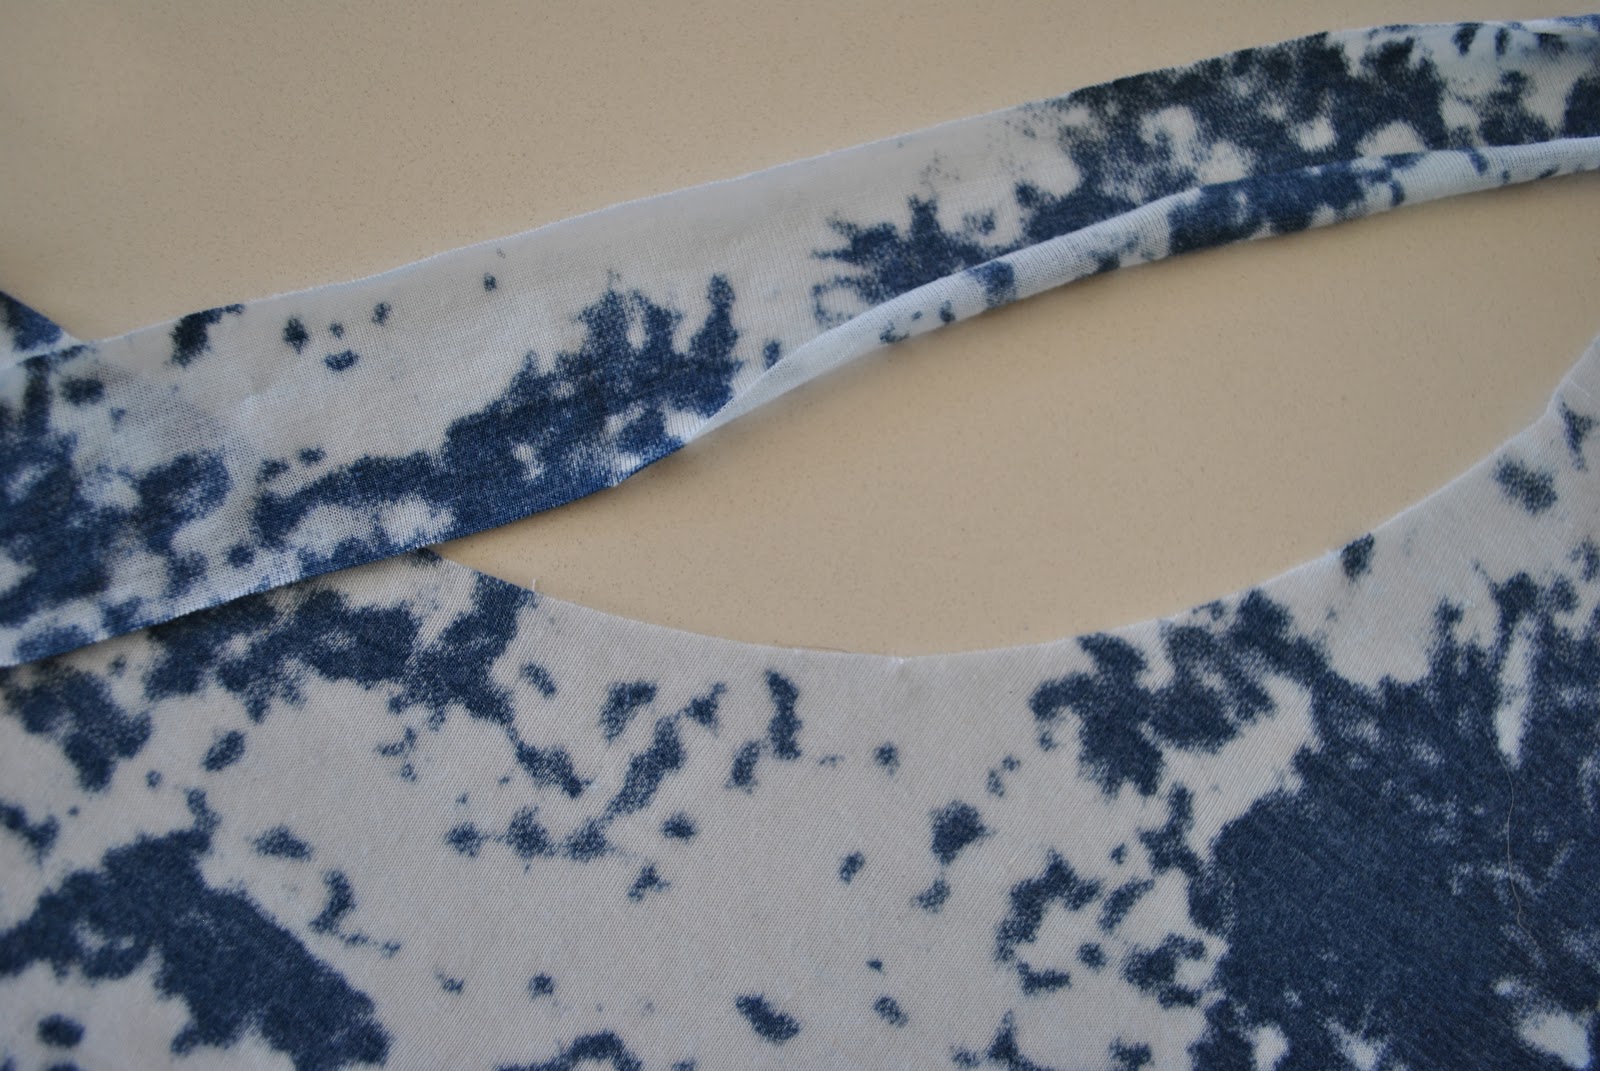
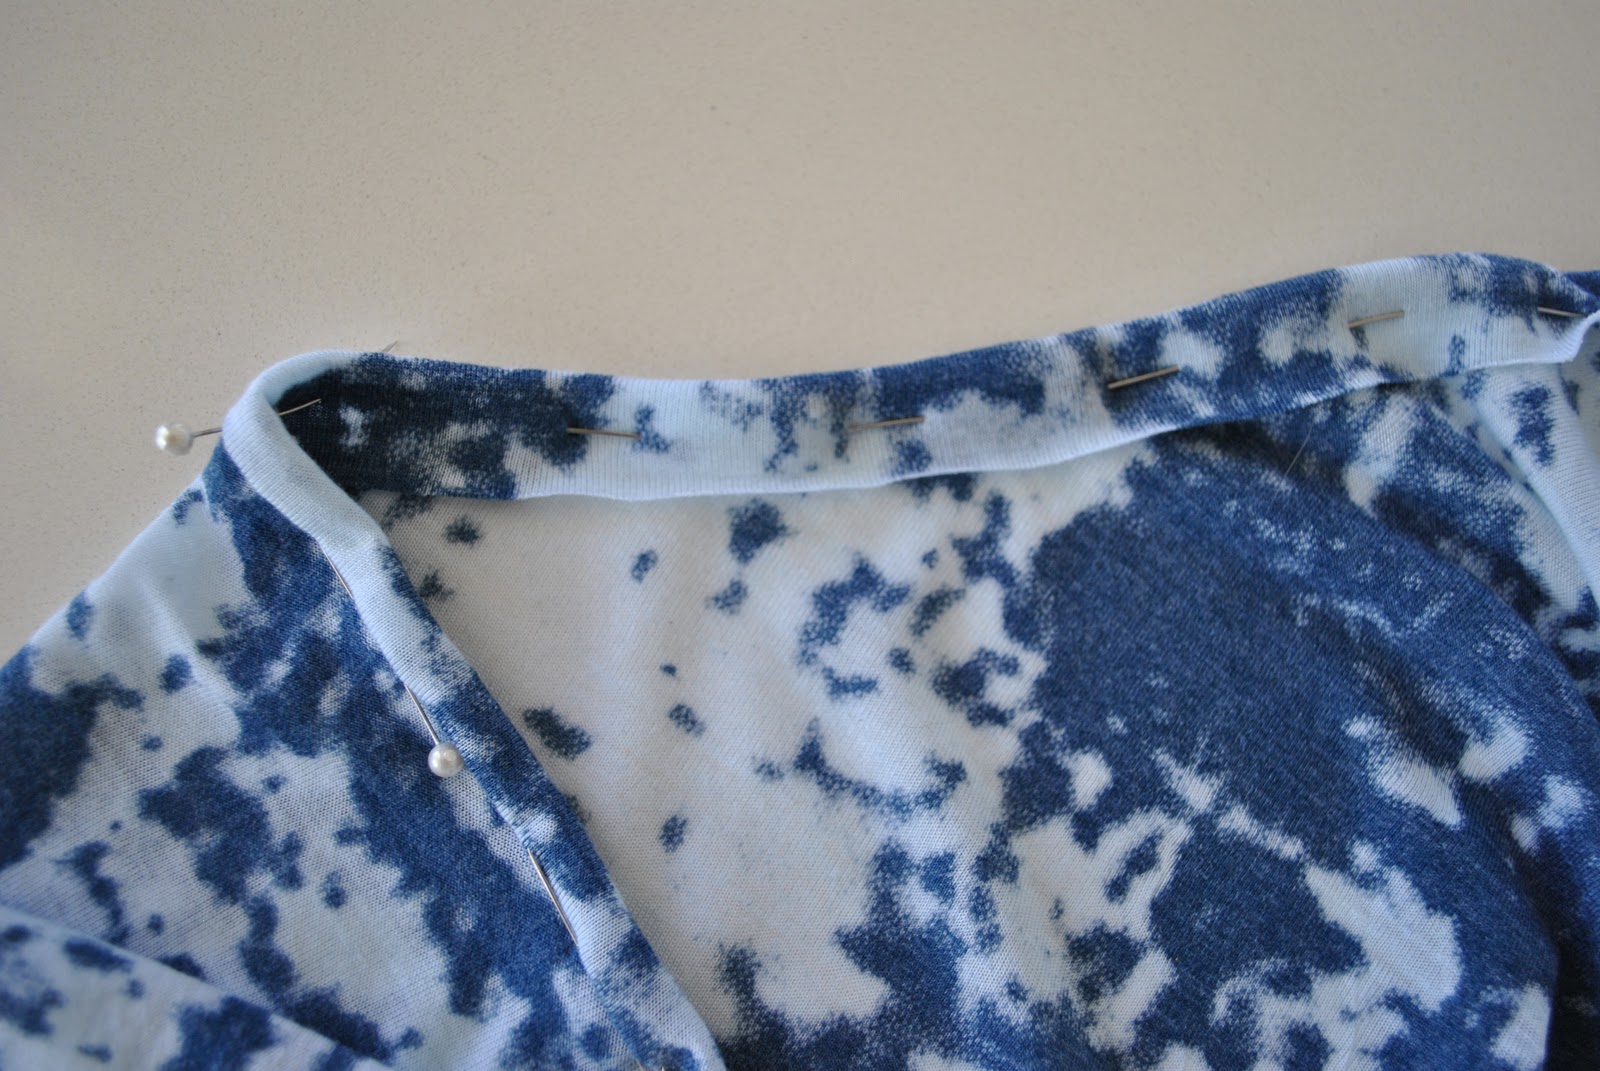
Stitch together the short sides of the strip right sides together, in a 1cm seam.  Then pin the right side of the strip to the wrong side of the garment.  Your strip is now a bit more than 10% shorter than the armhole/neckline; apply the most stretch when attaching it to the most curved sections of the garment edge, such as the sharpest points of the underarm curve, and the centre front of the neckline.

Stitch in a 1cm (3/8″) seam.  If the area is not expected to cope with any stretch during wear then a straight stitch is fine; otherwise use a shallow zig-zag, a stretch stitch, or double-stitch with a twin needle.

Trim the seam allowances just a bit, by about 3mm.  
Why do we do this, and not just stitch the seam with a narrower seam allowance in the first place? because stitching a narrow seam allowance on a fine flimsy knit is not easy even on the best of sewing machines.  Most domestic sewing machines will tend to chew up the edges of a lightweight fabric if you try sewing very close to the edge, meaning you’ll end up with an uneven ugly line of stitching.  Stitching in a wider seam allowance just means the fabric glides through machine more easily, and stitches up far more smoothly, and then you can trim away the excess width afterwards.

Turn the strip up, and press up…

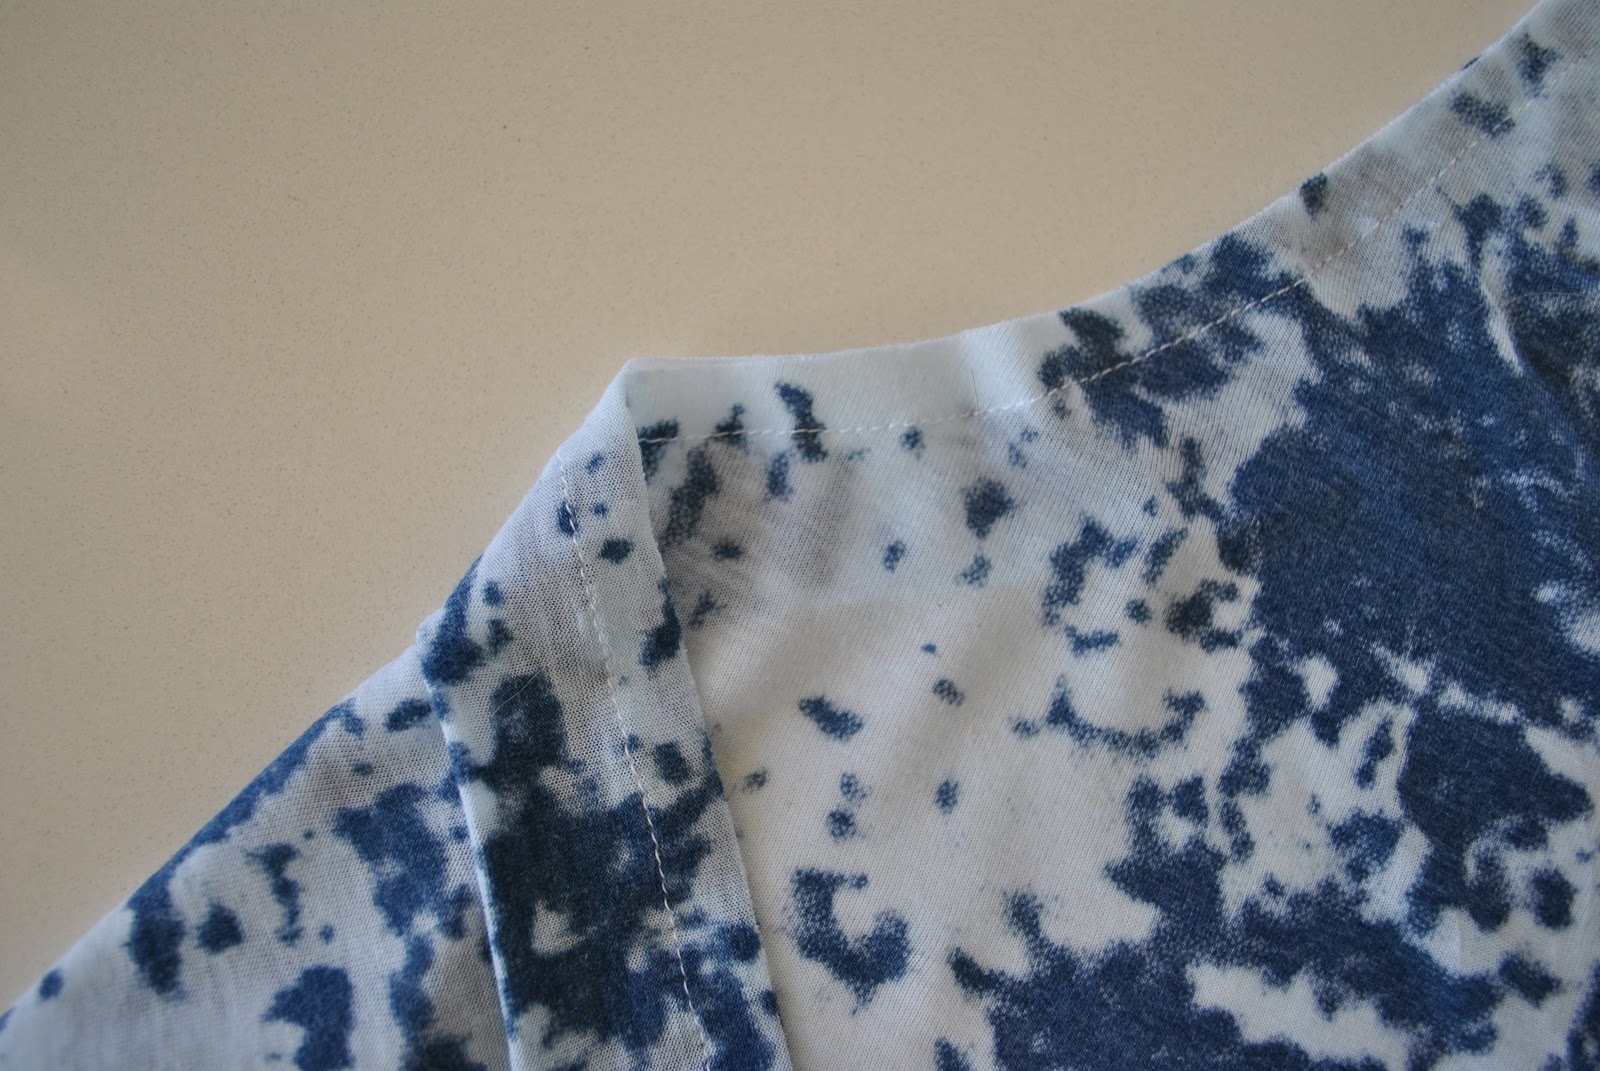
… then flip the strip over and onto the right side of the garment, encasing the seam allowances and press it in place.  Don’t worry if you are pressing some of the curl out of the fabric at this point, it will come back!
From the wrong side, pin the strip in place.

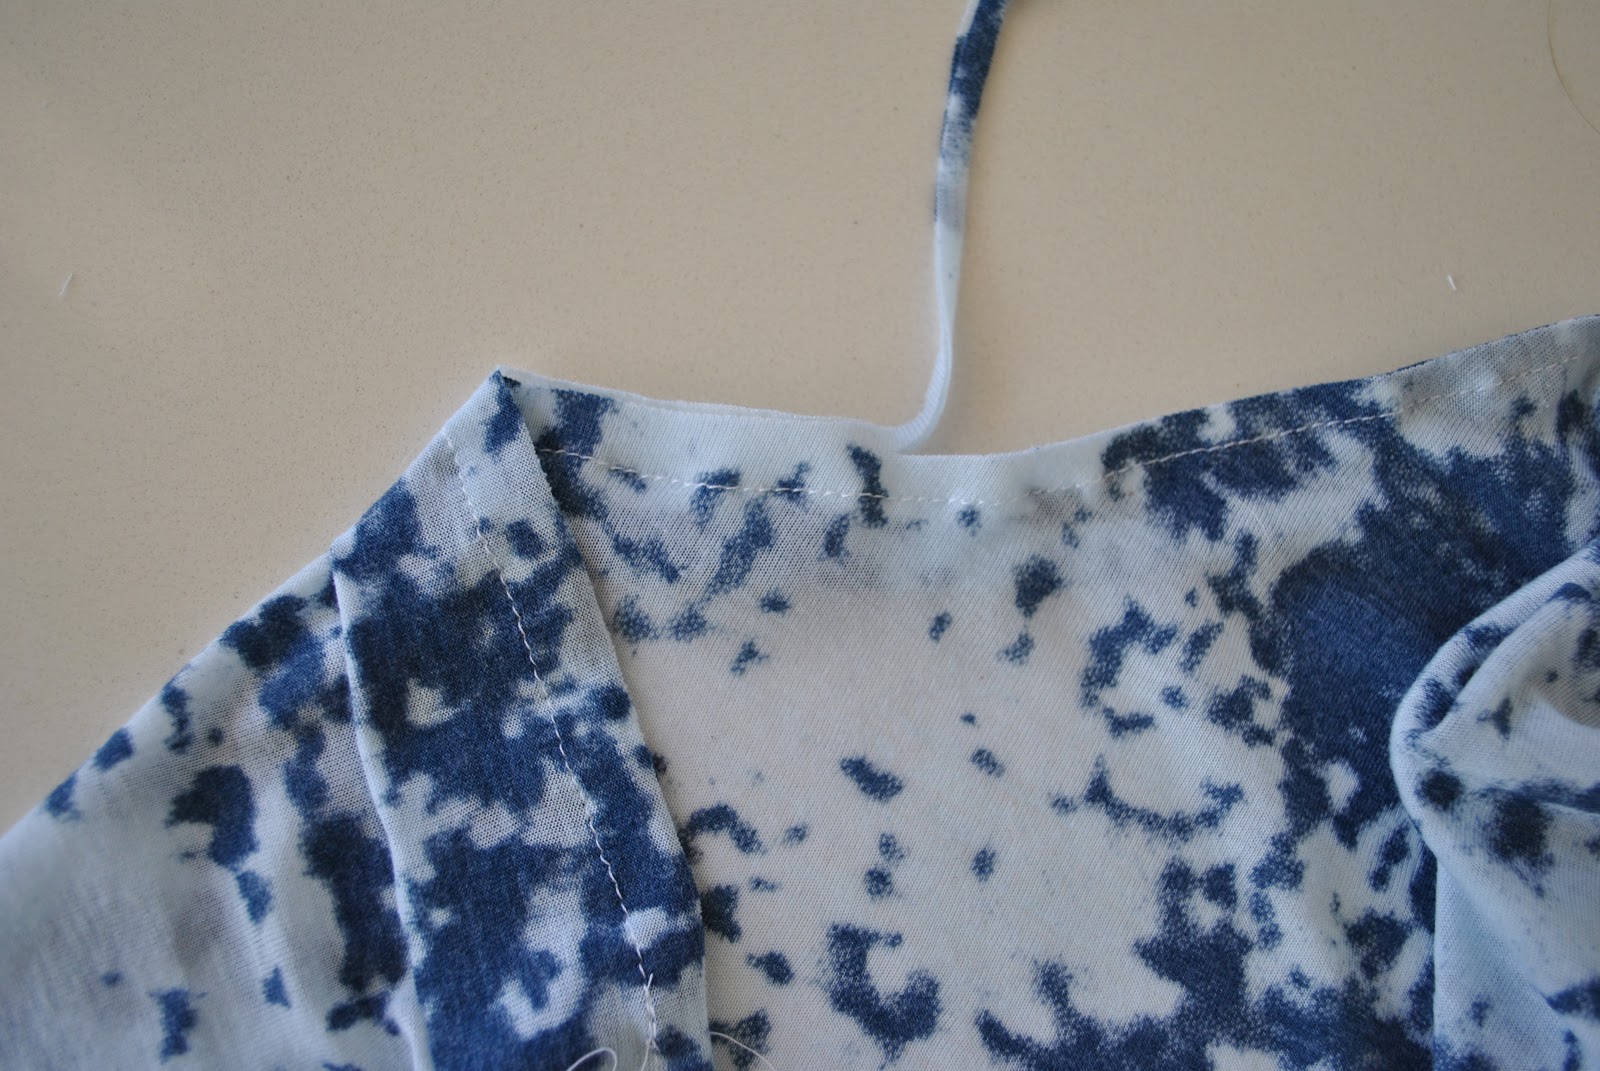
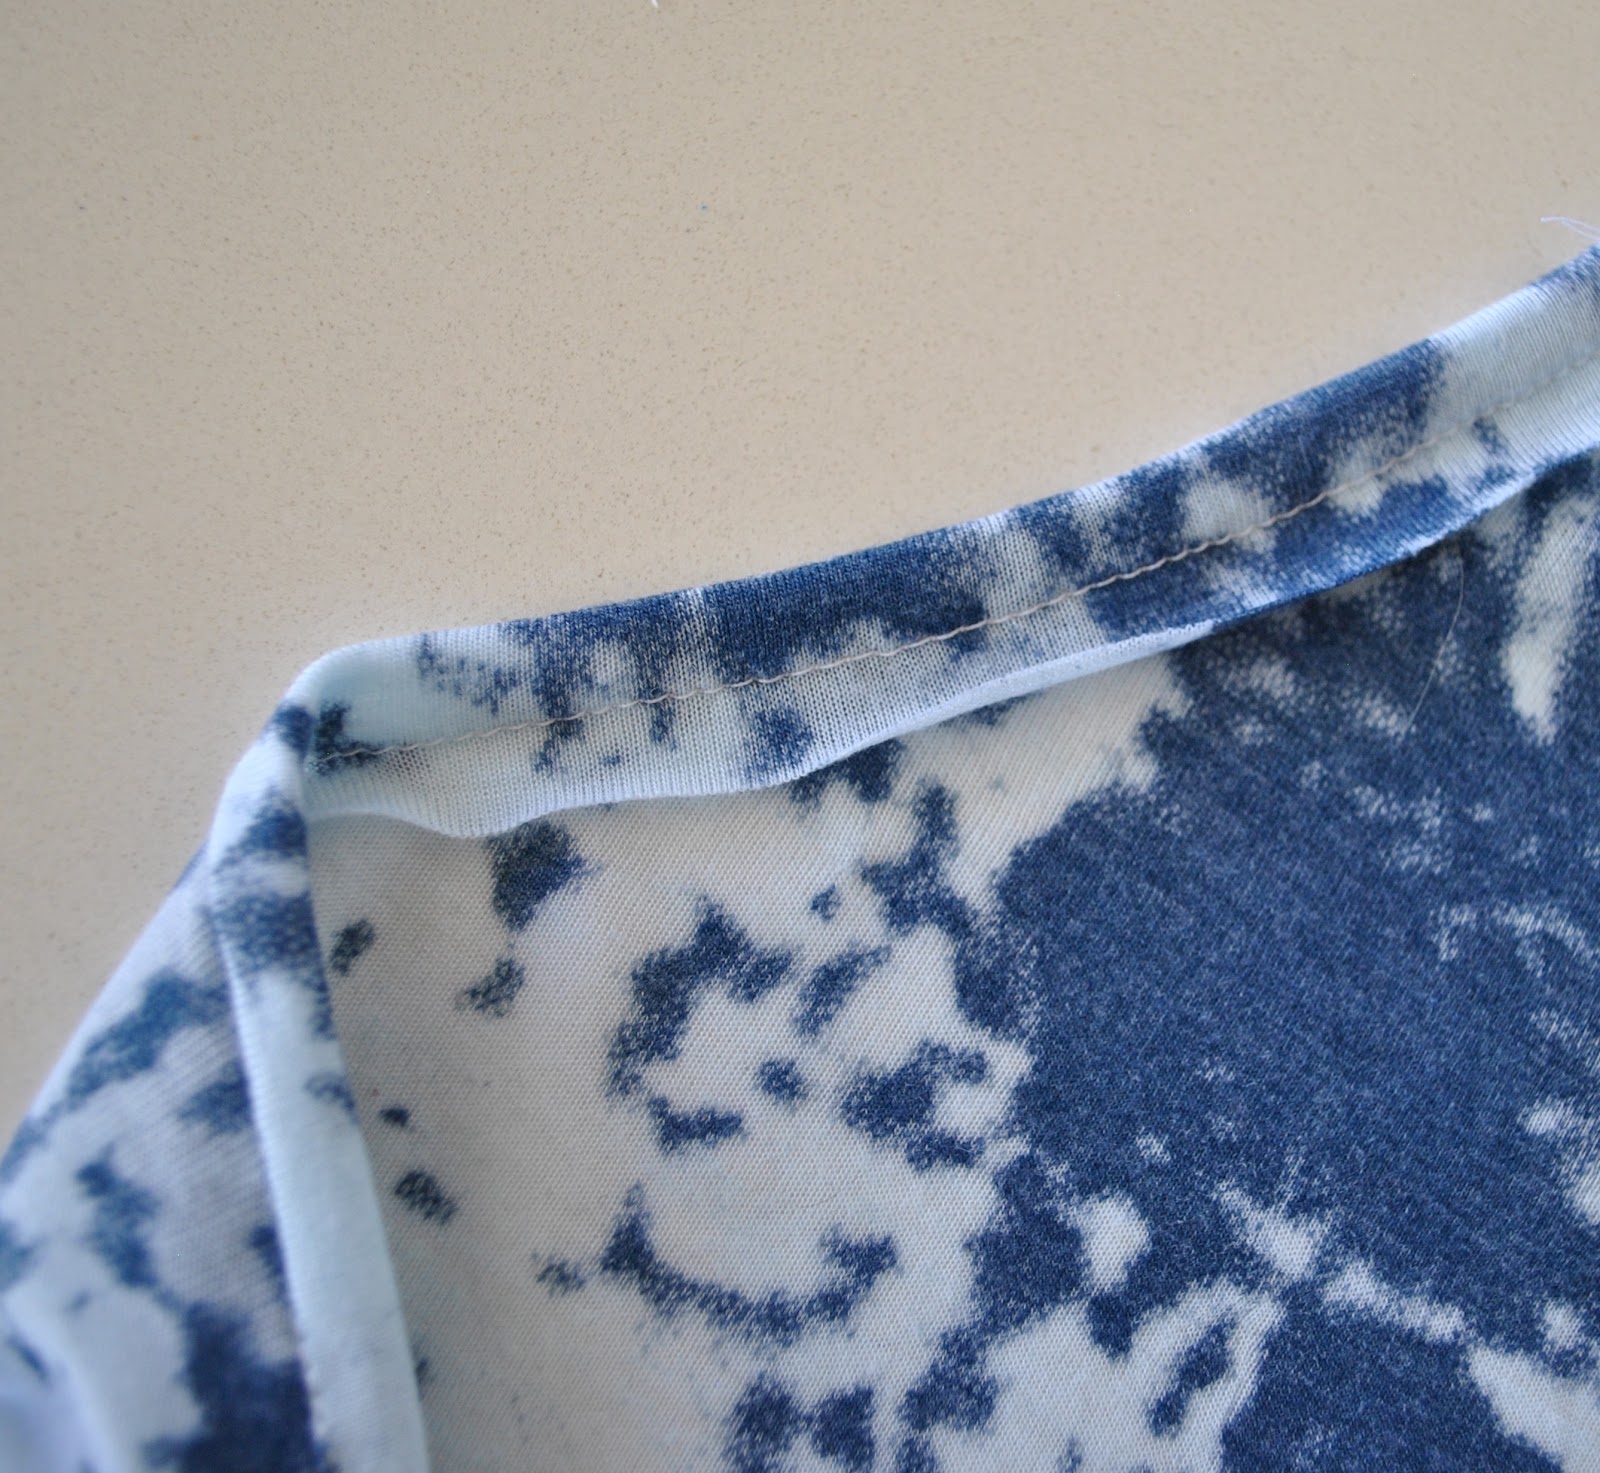
With the wrong side of the garment facing up, stitch in the ditch of the seamline between garment and strip.  Again, if you are stitching a garment in which has to cope with a bit of stretching then it is probably wise to use a stretch stitch, or a double stitch with a twin needle here….

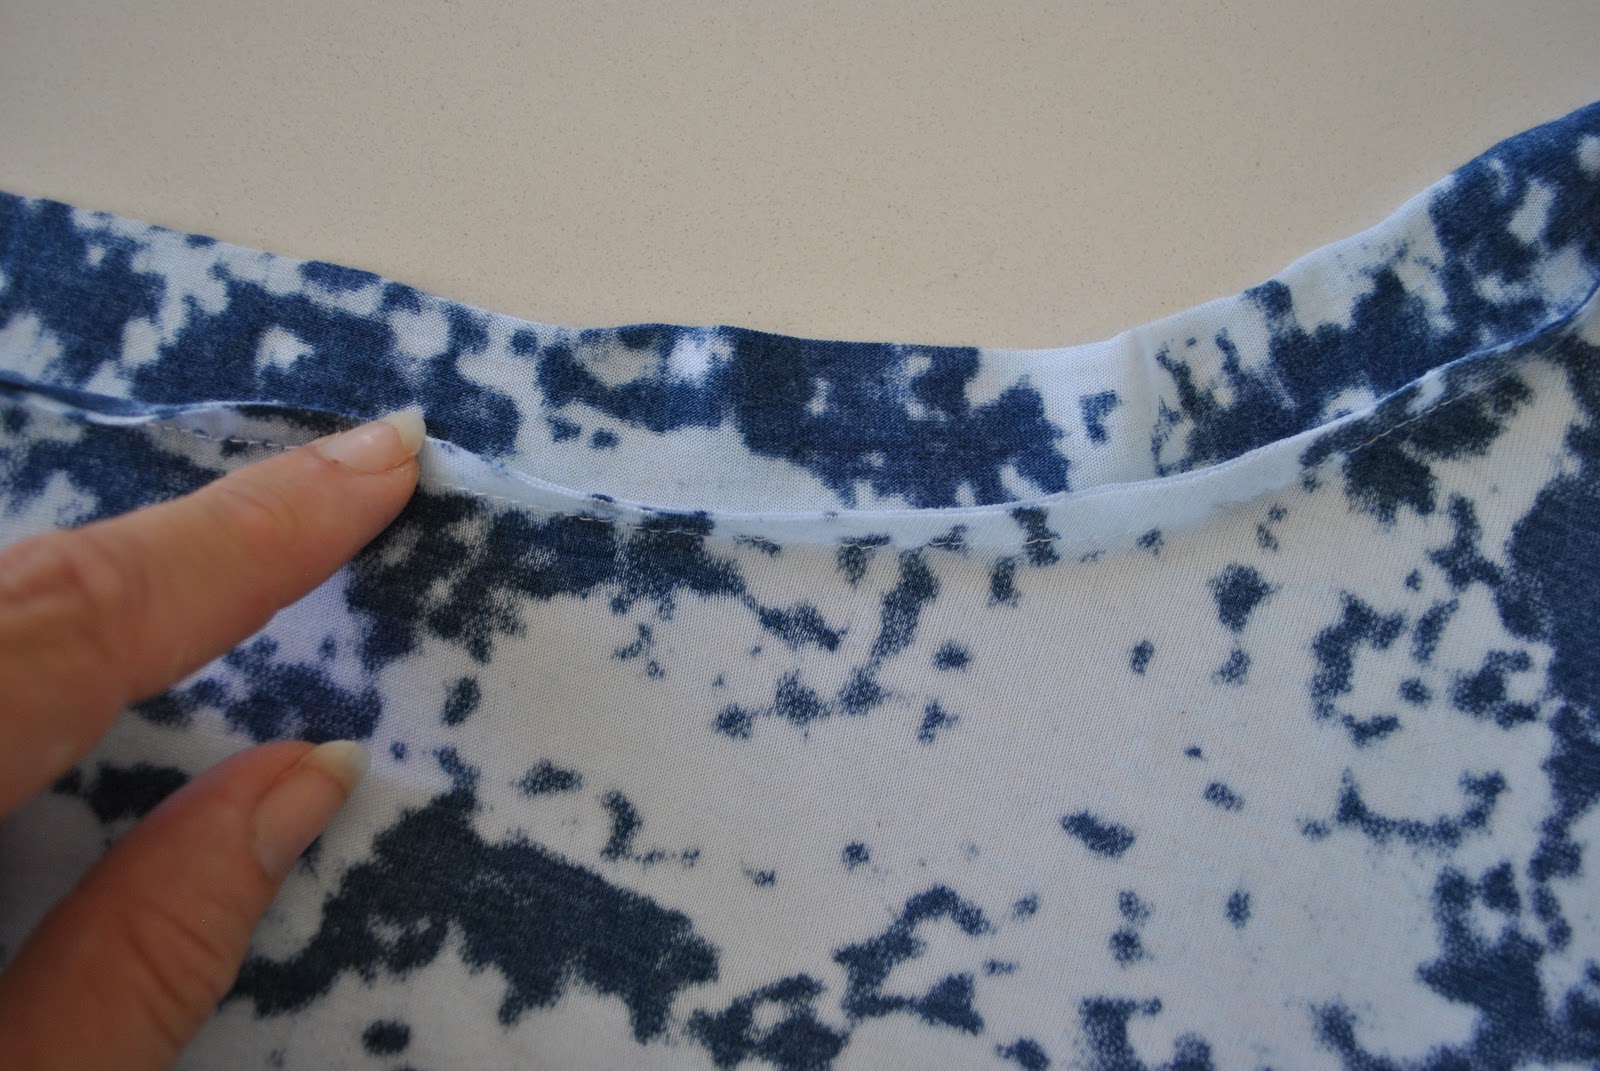
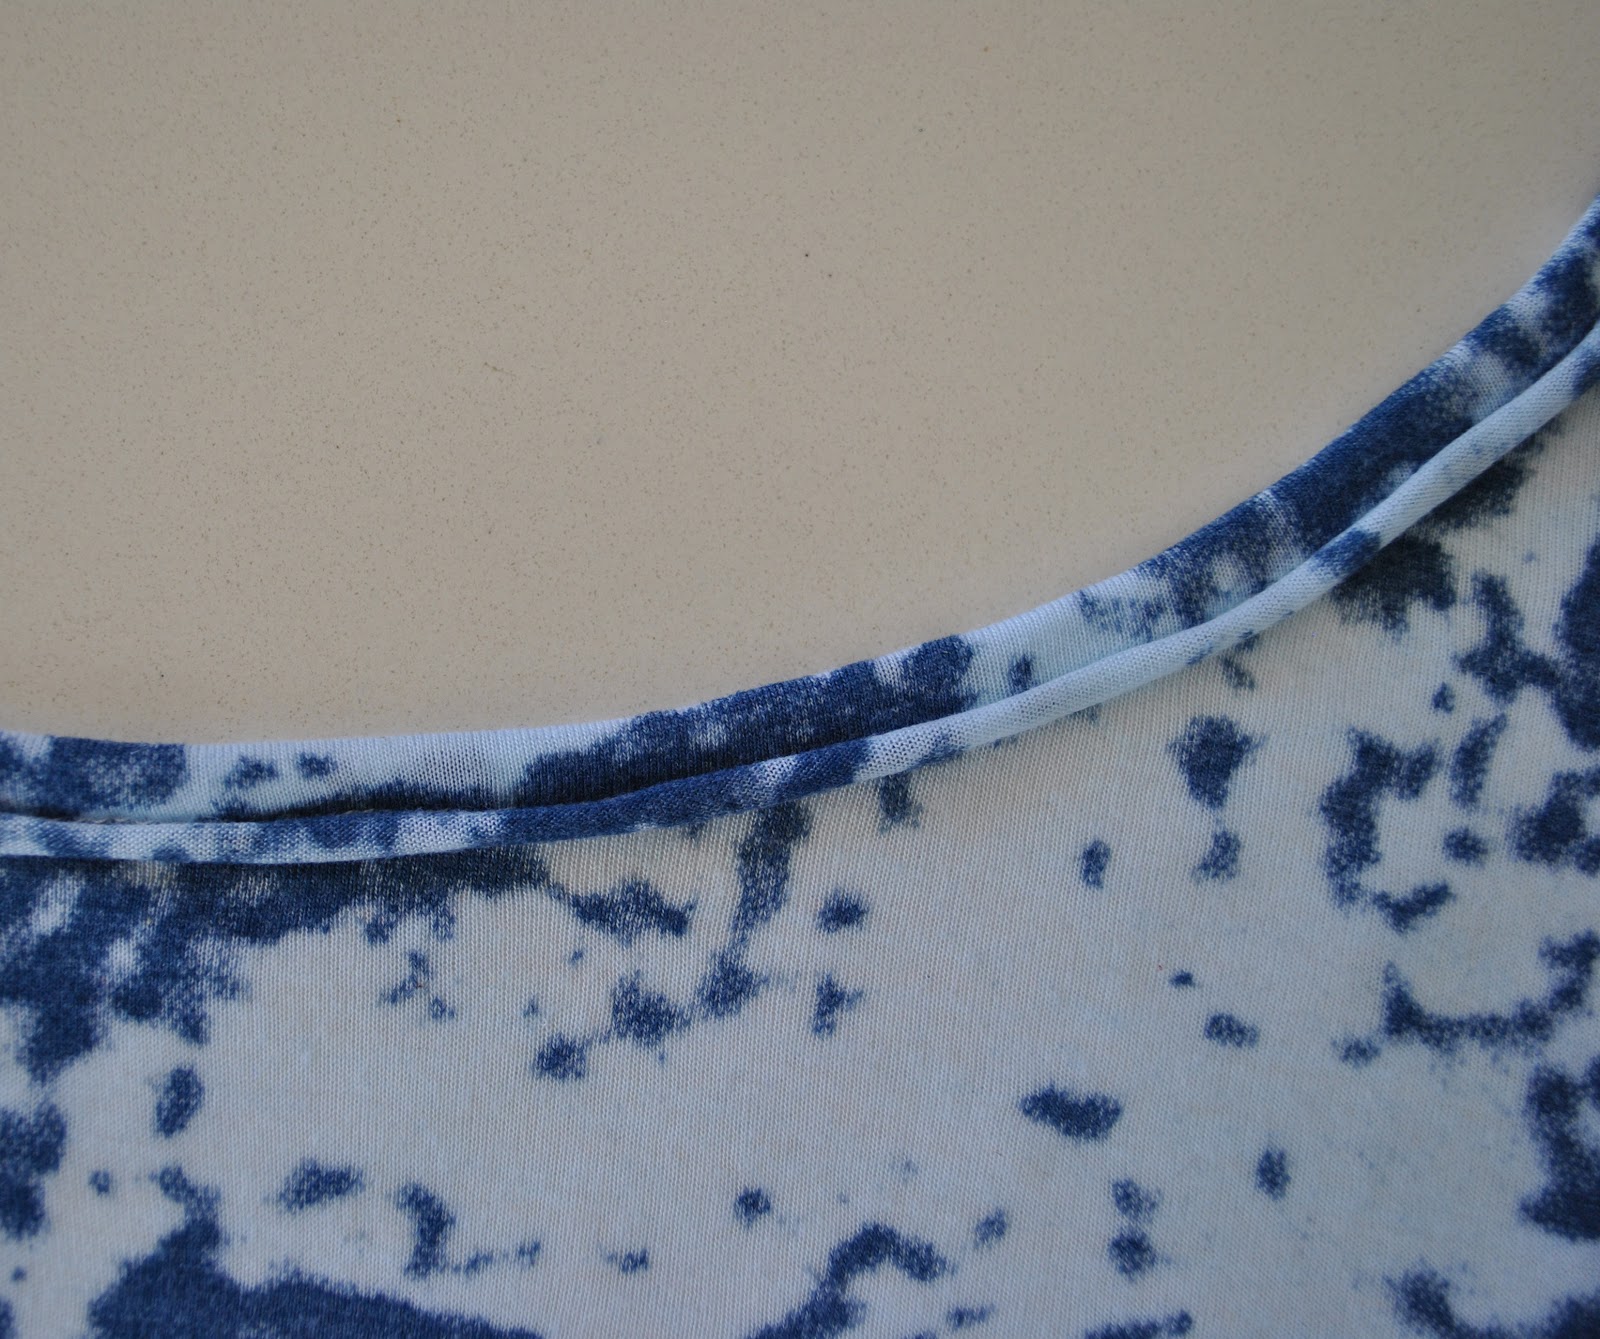
Give your garment a dunk in a bucket of water and if necessary, if it isn’t curling up on its own; ease that curl back into place… it will stay there as it dries, and forever after that.  Just don’t iron it down!

Voila! cute curly seam, that looks a bit like piping  ๐Ÿ™‚

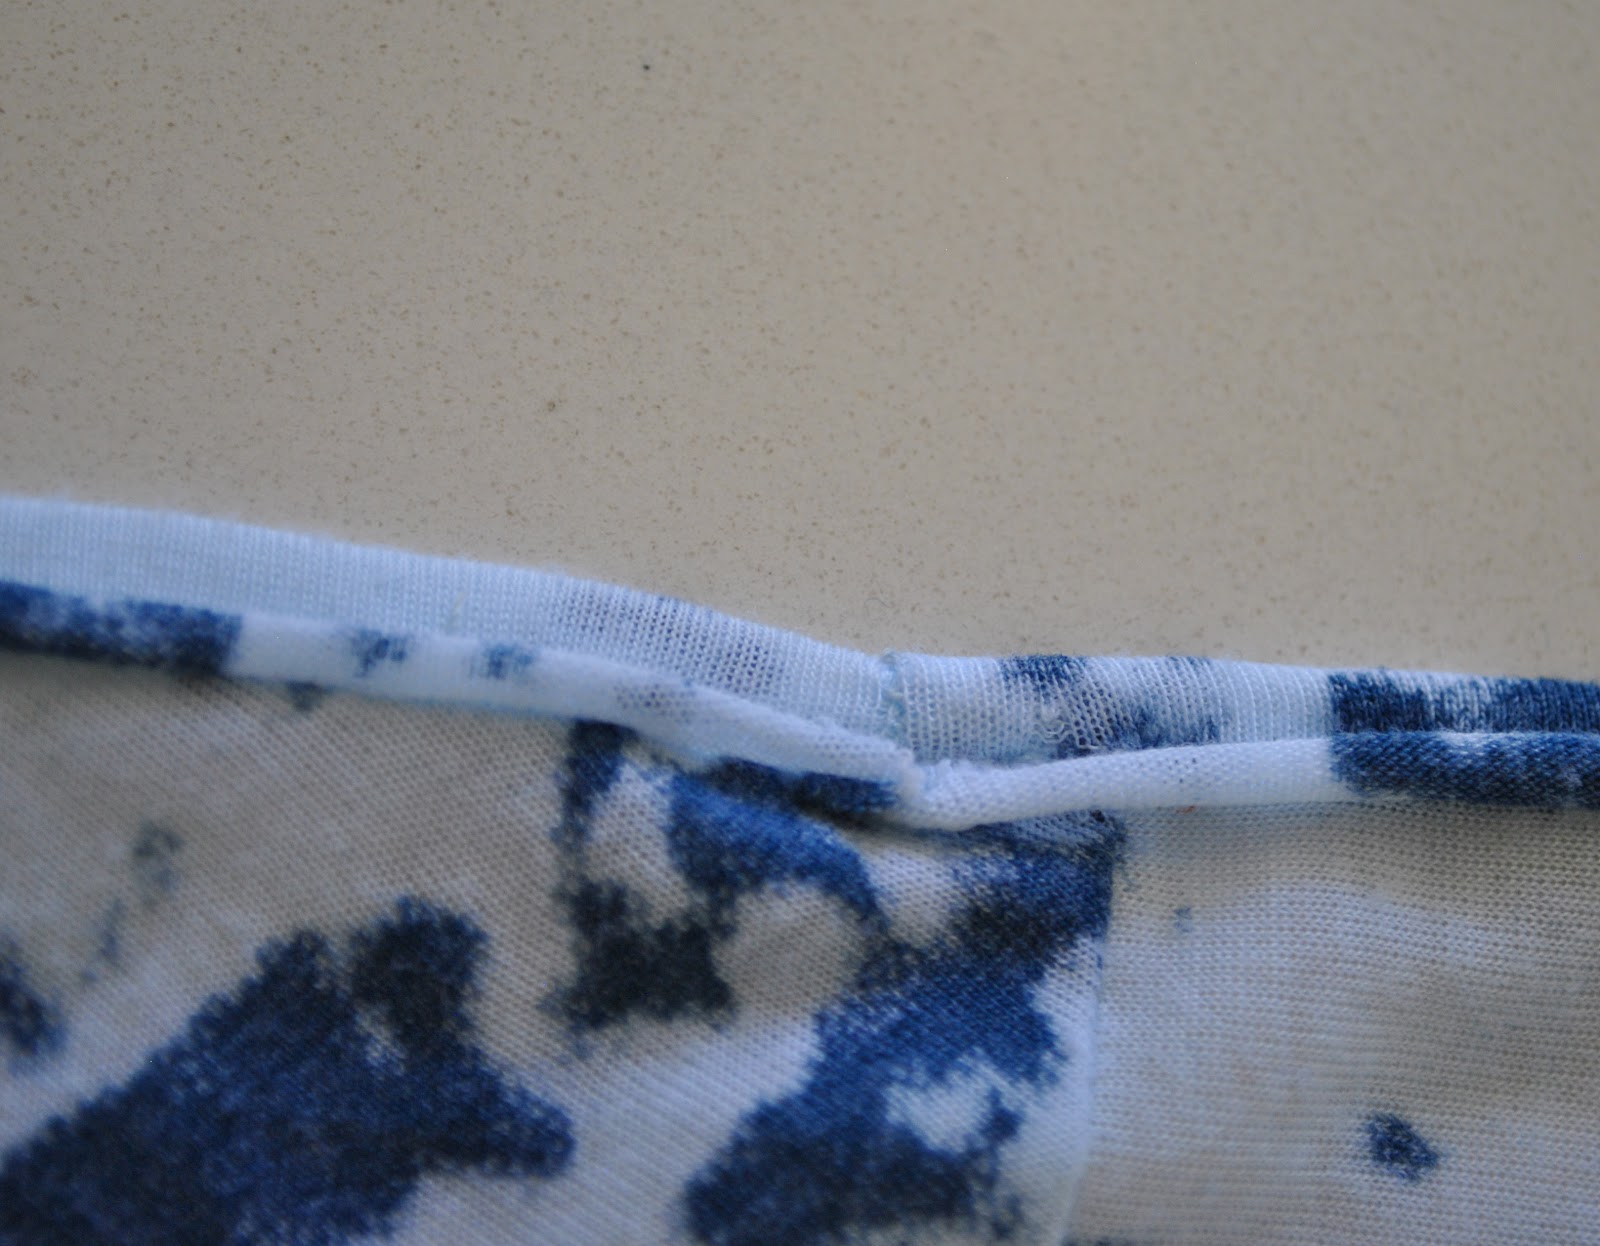
Oh, and that strip joint…? (hehe, strip joint, (smirk)) …. be sure to situate that in an unobtrusive place, like the underarm seam, or just behind the underarm seam if bulk is an issue.  (sorry; I forgot to take a picture of this “during”)  Here the strip seam is about 1cm to the left of the side seam, with the strip seam allowances both pressed to the left and trimmed on the diagonal close to the stitching just prior to the final stitching-in-the-ditch step.

pinterestmail

2012; a retrospective

Here we are, the very last day of the year! and a good time to reflect… was the year fabulous? was it awful? was it so humdrum we now cannot remember a single thing?
Of course, the beauty of having the blog is that a whole bunch of stuff is documented in black and whiteย buff yellow and there is just no escaping the truths within; good or bad, wrought by my own fair hand.
A favourite picture from each month of the year… June has two because I just had to have one each from Italy and Paris!
January

Italy!
Paris!
Thoughts on the year?
I am quite comfortable now in making my own entire wardrobe. ย It’s been years (3? 4?) since I bought any RTW clothes. ย I’m kinda happy with just about everything that I’ve made, only a handful of things per year getย chopped up or passed on to others who liked them more than I did. ย I’m getting better at letting go of things that are tatty or past their best, and allowing myself to wear the newer and exciting things I’ve made, with less fear of “mucking them up”.
The big big big thing of the year for me….?
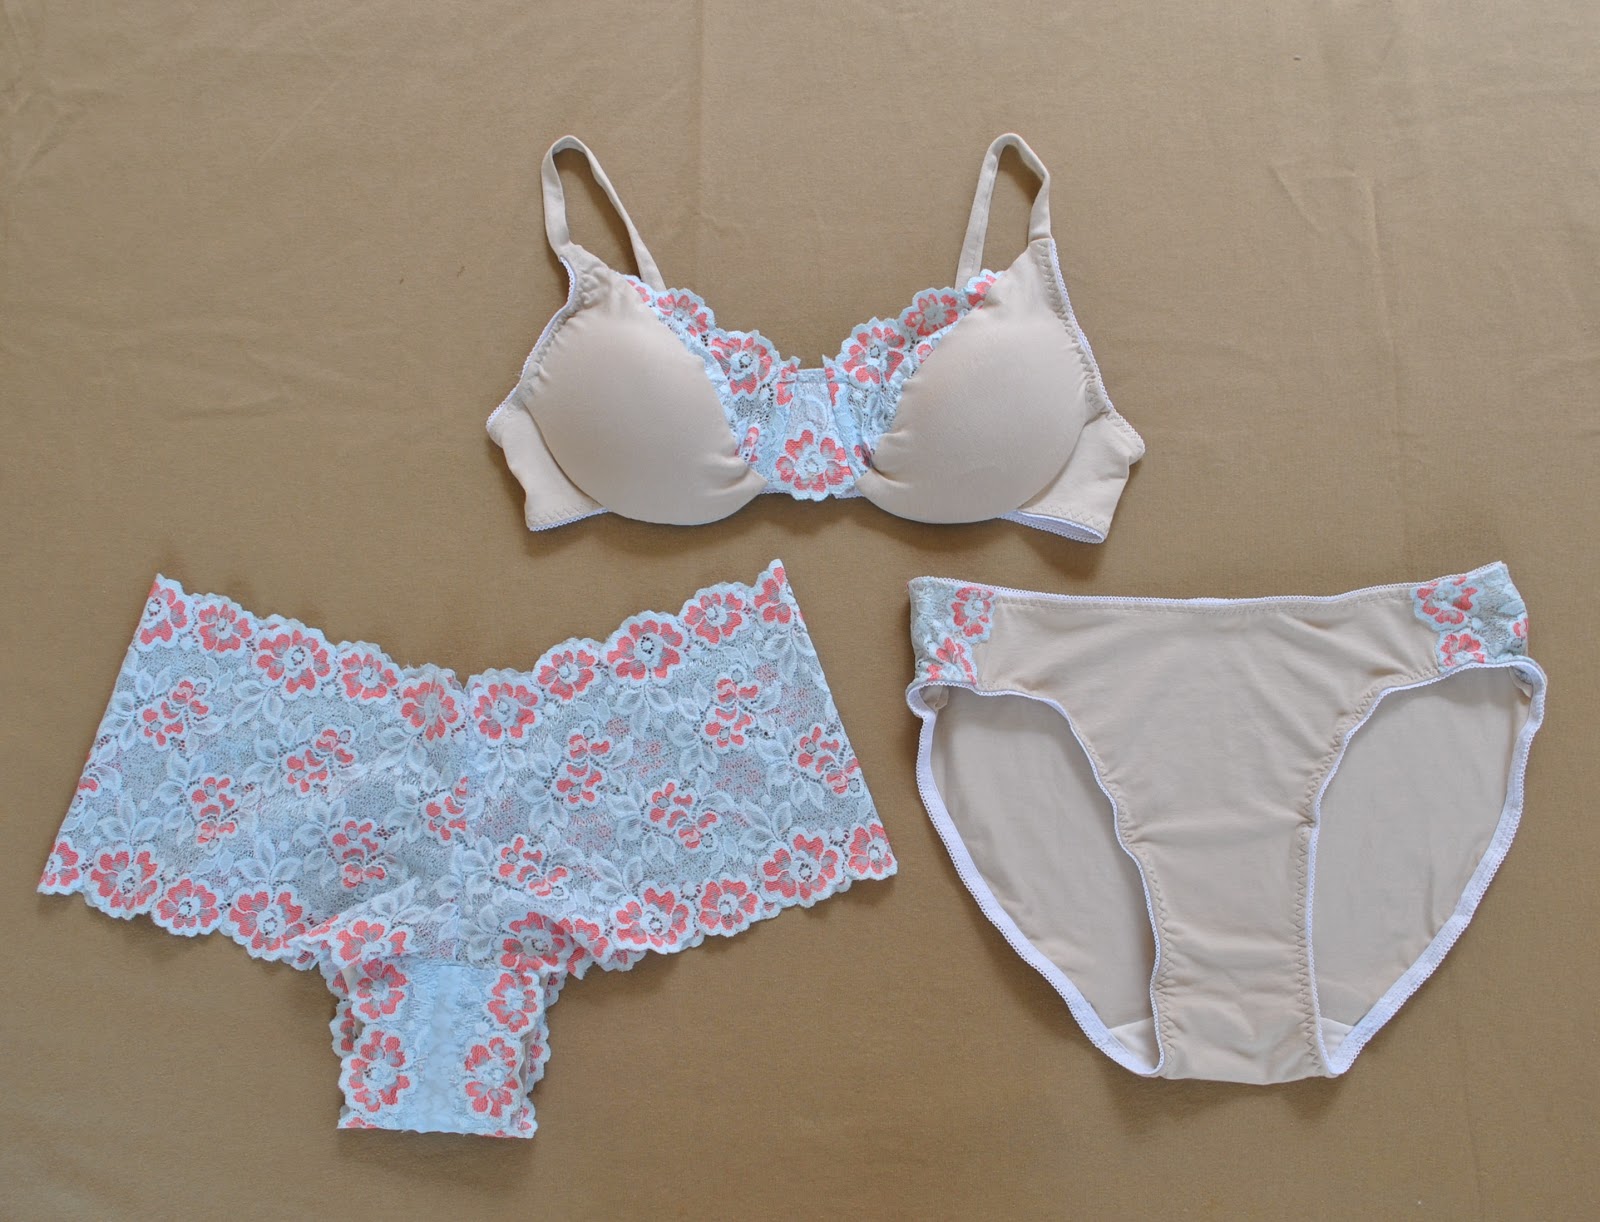
ย I’m sewing my own lingerie now!!ย ย This is something I always thought would be beyond me, so I am so glad I got brave and gave it a whirl. ย My own self-made bras are so soft and comfy and well-fitting compared to any RTW thing I have worn in the past. ย 
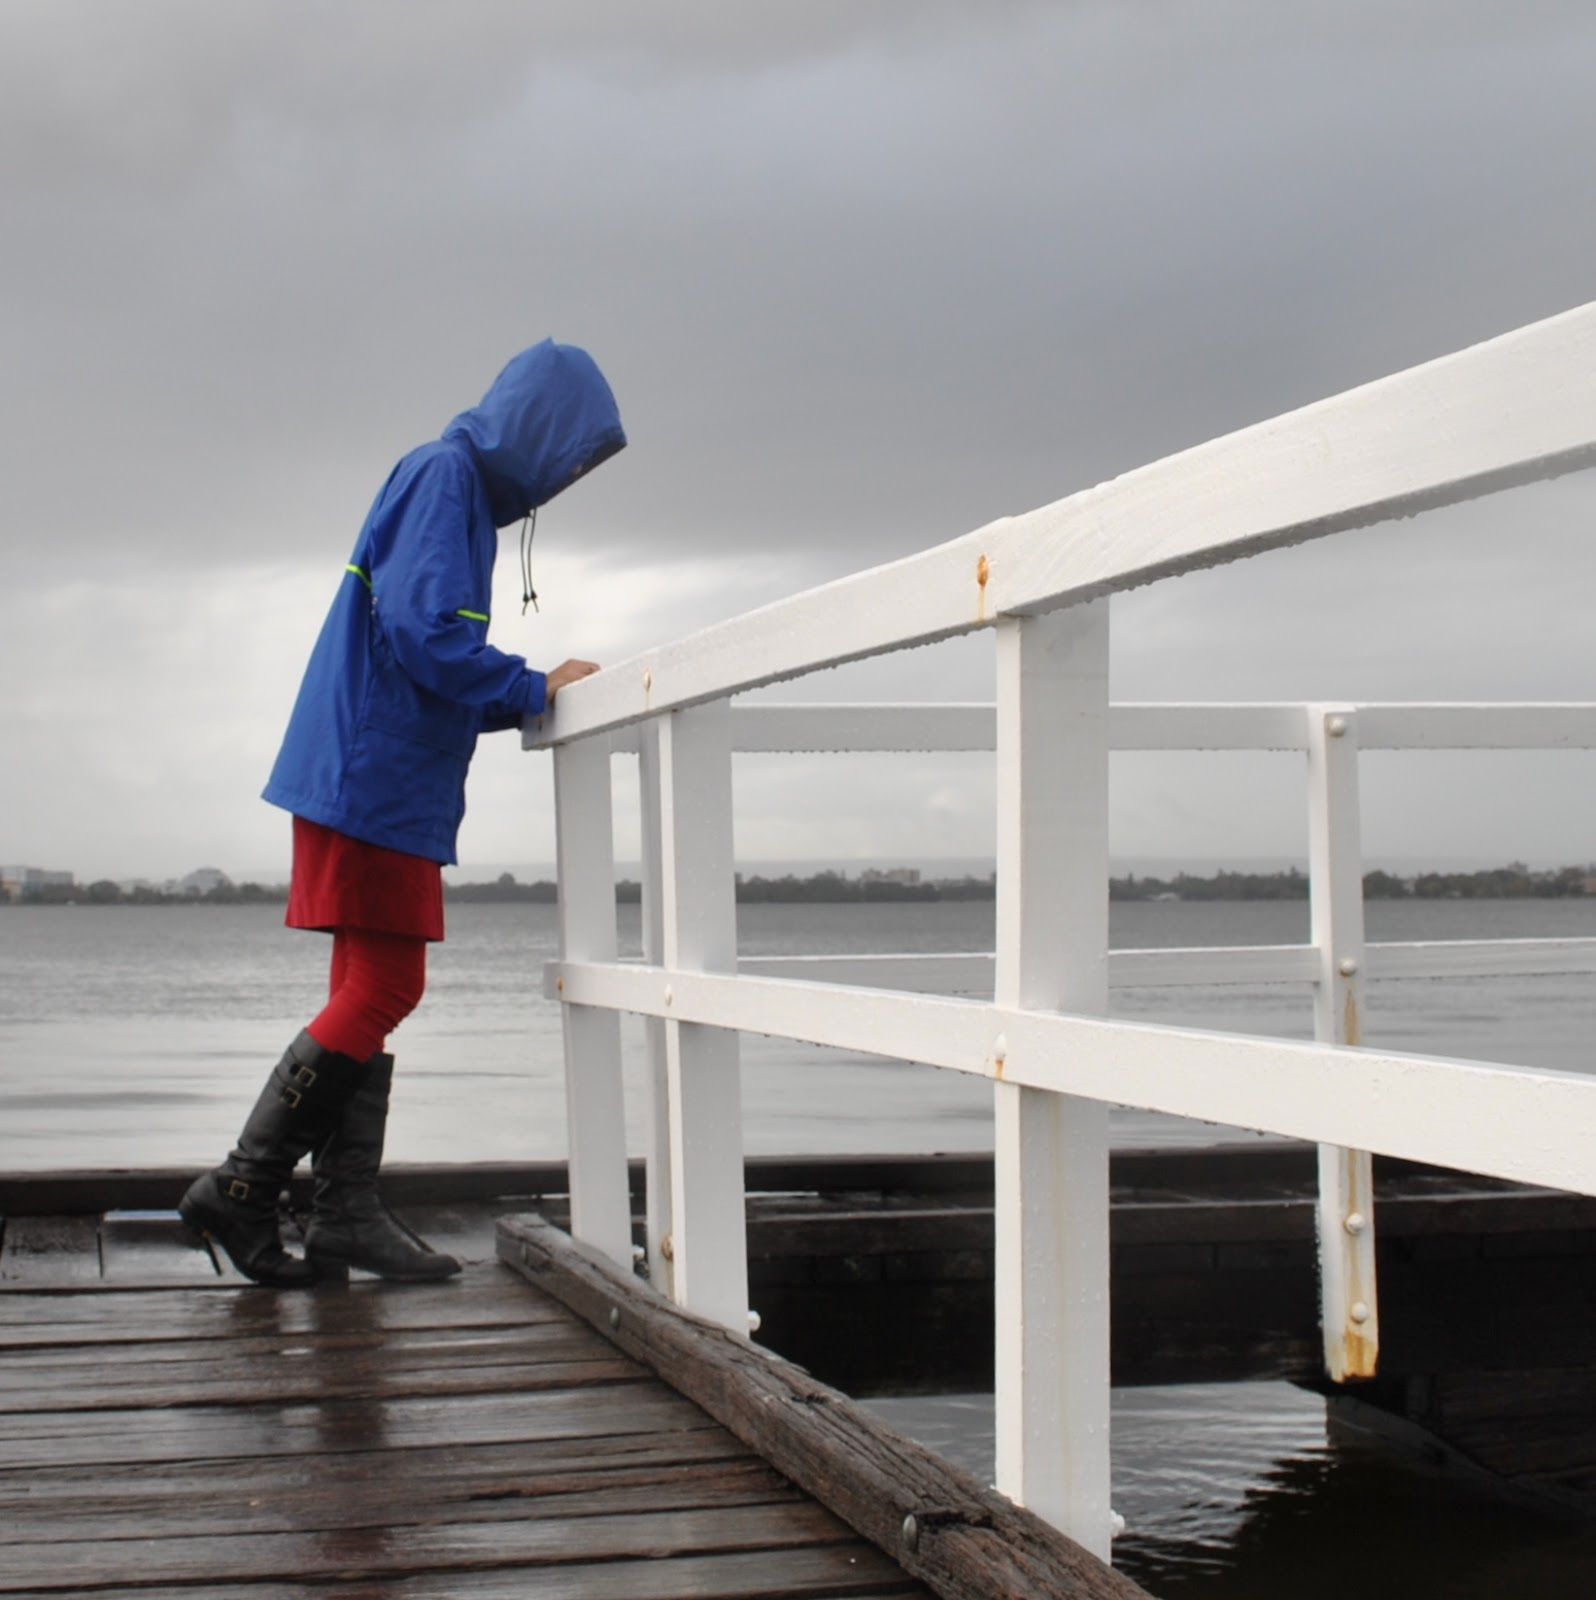
Another personal best for the year was sewing my own raincoat… ย I did it! ย I cannotย tellย you how proud I am of that thing (smug self-pat on the back)
ย ย 
You can skip this next bit if you found it dull… ย The Finances. ย So this year I set out to account for my sewing habit. ย Like Ebenezer Scrooge I obsessively totted up every last cent, forย every single thingย sewing related that I used this year. ย And I know I said I would disclose all the sewing I did for my family, including gifts, but I have decided not to. ย I’m OK with that. ย I mean, I know what I spent, but the secret will die with me. ย The following is only just the sewing for ME!
ย 
Total expenditure:ย $1330.73.
Number of garments made, counting each set of 1 bra+ 2 undies as one garment: 65
(plus 15 items for family)
Average cost per garment: $20.47
Favourite garment: Ivory trench coat
Any fails?: my double sleeved shirt got worn only a few times before I decided that bright-ish shade of sky-blue was awfully unflattering on me… fortunately Cassie likes it and took it. ย It is a dressย on her, and she looks adorable in it!
Garments made from old fabric: 29
Garments made from new fabric: 38 (yes, these numbers add up to more than 65, but two garments were made from both old and new fabric, and I counted these in both categories)
Refashioned garments: 12
Most expensive garment made: Peppercorn cardigan $108.70
Number of times worn: ย ohmigosh, countless. ย Probsย at least 40 times during the winter and early spring.
Least expensive garment made:ย 18!ย garments wereย free!
ย 
So. ย This is more than I thought I would spend, I had actually estimated about $1200 for me-sewing, but overall I don’t think this is too bad. ย Of course,ย I am very fortunate thatย a lot of my fabric is given to me; however that is actually a normal state of affairs. ย Since everyone in my life knows how much I love to sew, Iย doย receive a lot of fabric; both cast offs from other people’s stashes, as well as in the form of gifts for my birthday and for Christmas.
There were some items that bumped up the total more than I expected, particularly lingerie. ย Just the findings, elastic and the moulded bra cups that I like cost $25 per set of bra plus 2 undies, and that isย beforeย buying any fabric or lace… ย and considering I made five sets this year… well lingerie turned out to be a more costly habit than I anticipated!
But so what; I’m making my own lingerie!!!ย  Wooo hooo!ย  Plus, each set is still far less expensive than anything I would buy, so I’m satisfied. ย There will be more.
ย 
I also discovered that knitting is kinda an expensive hobby relative to sewing. ย Yarns are quite dear compared to fabric. ย But am I going to give up knitting? heck no. ย I will take better care of my knitted items from now on though!
ย 
So, I am looking forward to the New Year already!
Please let me say, Thank You to all those who read my blog, and who take the time to comment; your presence and your support is very much appreciated. ย Big hugs to all of you!
Also my very best wishes to all for a wonderful 2013, and I hope it brings to you all that you’ve been hoping for!
See you next year!

SaveSave

pinterestmail

Extras…

Hmmm, I’m going to have to squeeze a few lobbed-in-together Christmas-make posts, or I am not going to finish this biz before the end of the year!
Firstly; as I am sure everyone is aware ๐Ÿ˜‰ Christmases here are HOT!  Here in Perth; we delighted in temperatures of 40C on the day, and joy of joys; the entire following week has, and will be, also over 40C.  Monday promises a cool change of 38C, lol.
Literally, I’ve been in my bathers almost all day  :S
Anyhoo, Christmas Day is generally synonymous with cold seafood, chilled bubbly, cold ham, and refrigerated fruit platters, since the very thought of firing up the oven to cook a traditional hot roast anything, that is going to heat up the kitchen and the house even more than it is already, is just too awful for words….  however, some traditional European dishes have snuck their way into our hearts and been adopted, and one of my favourites is Siena cake.
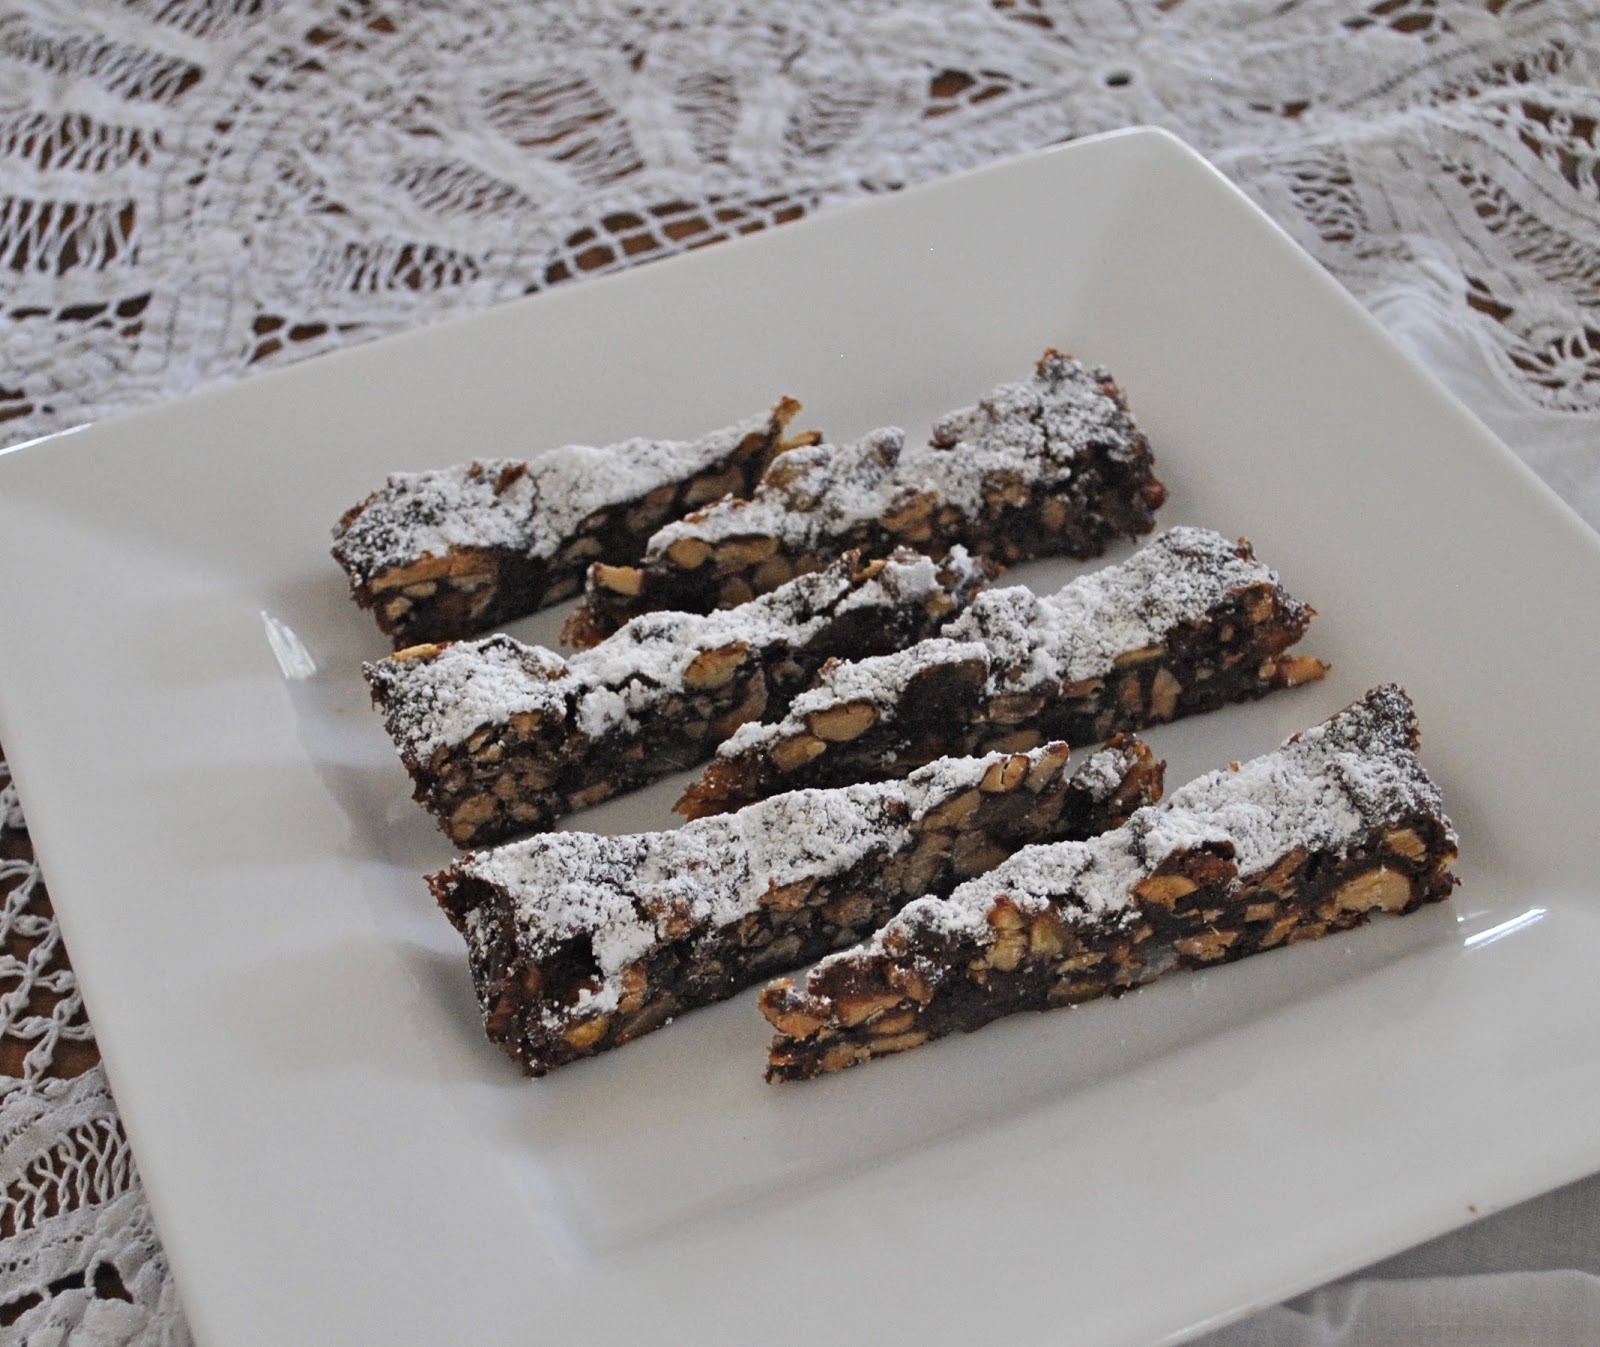
It is a deliciously rich, flavoursome and chewy concoction and makes a terrific gift; it lasts happily in the fridge for weeks, that’s if it remains uneaten for that long.  This year I multiplied the recipe by 4 to make a ginormous batch, enough for a cake for everyone else in the family, so everyone got a Siena cake as well as the owls.  
I use a simplified version of the recipe from the Italian cookbook published in the 90’s by the Australian Women’s Weekly, the original is reproduced here

Siena cake

125g (4oz) slivered almonds
125g (4oz) hazelnuts
60g (2oz) glace apricots
60g (2oz) glace pineapple
60g (2oz) mixed peel
2/3 cup plain flour
2 tablespoons cocoa
1 teaspoon cinnamon
60g (2oz) dark chocolate
1/3 cup sugar
1/2 cup honey
icing sugar

Spread almonds and hazelnuts on oven tray, put into moderate oven 5 to 7 minutes, until lightly golden. Chop hazelnuts roughly, combine in bowl with almonds, chopped apricots, chopped pineapple, chopped mixed peel, sifted flour, sifted cocoa and cinnamon, mix well.

Put sugar and honey in separate saucepan, stir over low heat until sugar has dissolved, brushing down sides of saucepan with brush dipped in hot water to dissolve any sugar crystals. Bring to boil, reduce heat, simmer uncovered approximately 5 minutes or until syrup forms a soft ball when a few drops are dropped into a glass of cold water. Drop chocolate in and stir well to melt then add to fruit and nut mixture, mix them well.

Spread mixture quickly and evenly into 20cm round cake tin lined with baking paper. Bake in moderately slow oven 35 minutes, remove from oven, cool in tin. Turn out, remove paper. Wrap in aluminium foil. 

Leave at least one day before cutting. Before serving, sift icing sugar thickly over top.

Nice to have on hand for if friends spontaneously pop over for celebratory drinkies during the Christmas-New Year’s break unexpectedly….  I cut mine into very slender 1cm slices and serve them as pictured at the top, for a decadent morning tea or an after dinner treat. 

Random trivia: actually our dog was supposed to be named Siena too; but an extra “n” snuck in there somehow when all her papers were filled out and registered.  I blame Sienna Miller entirely.
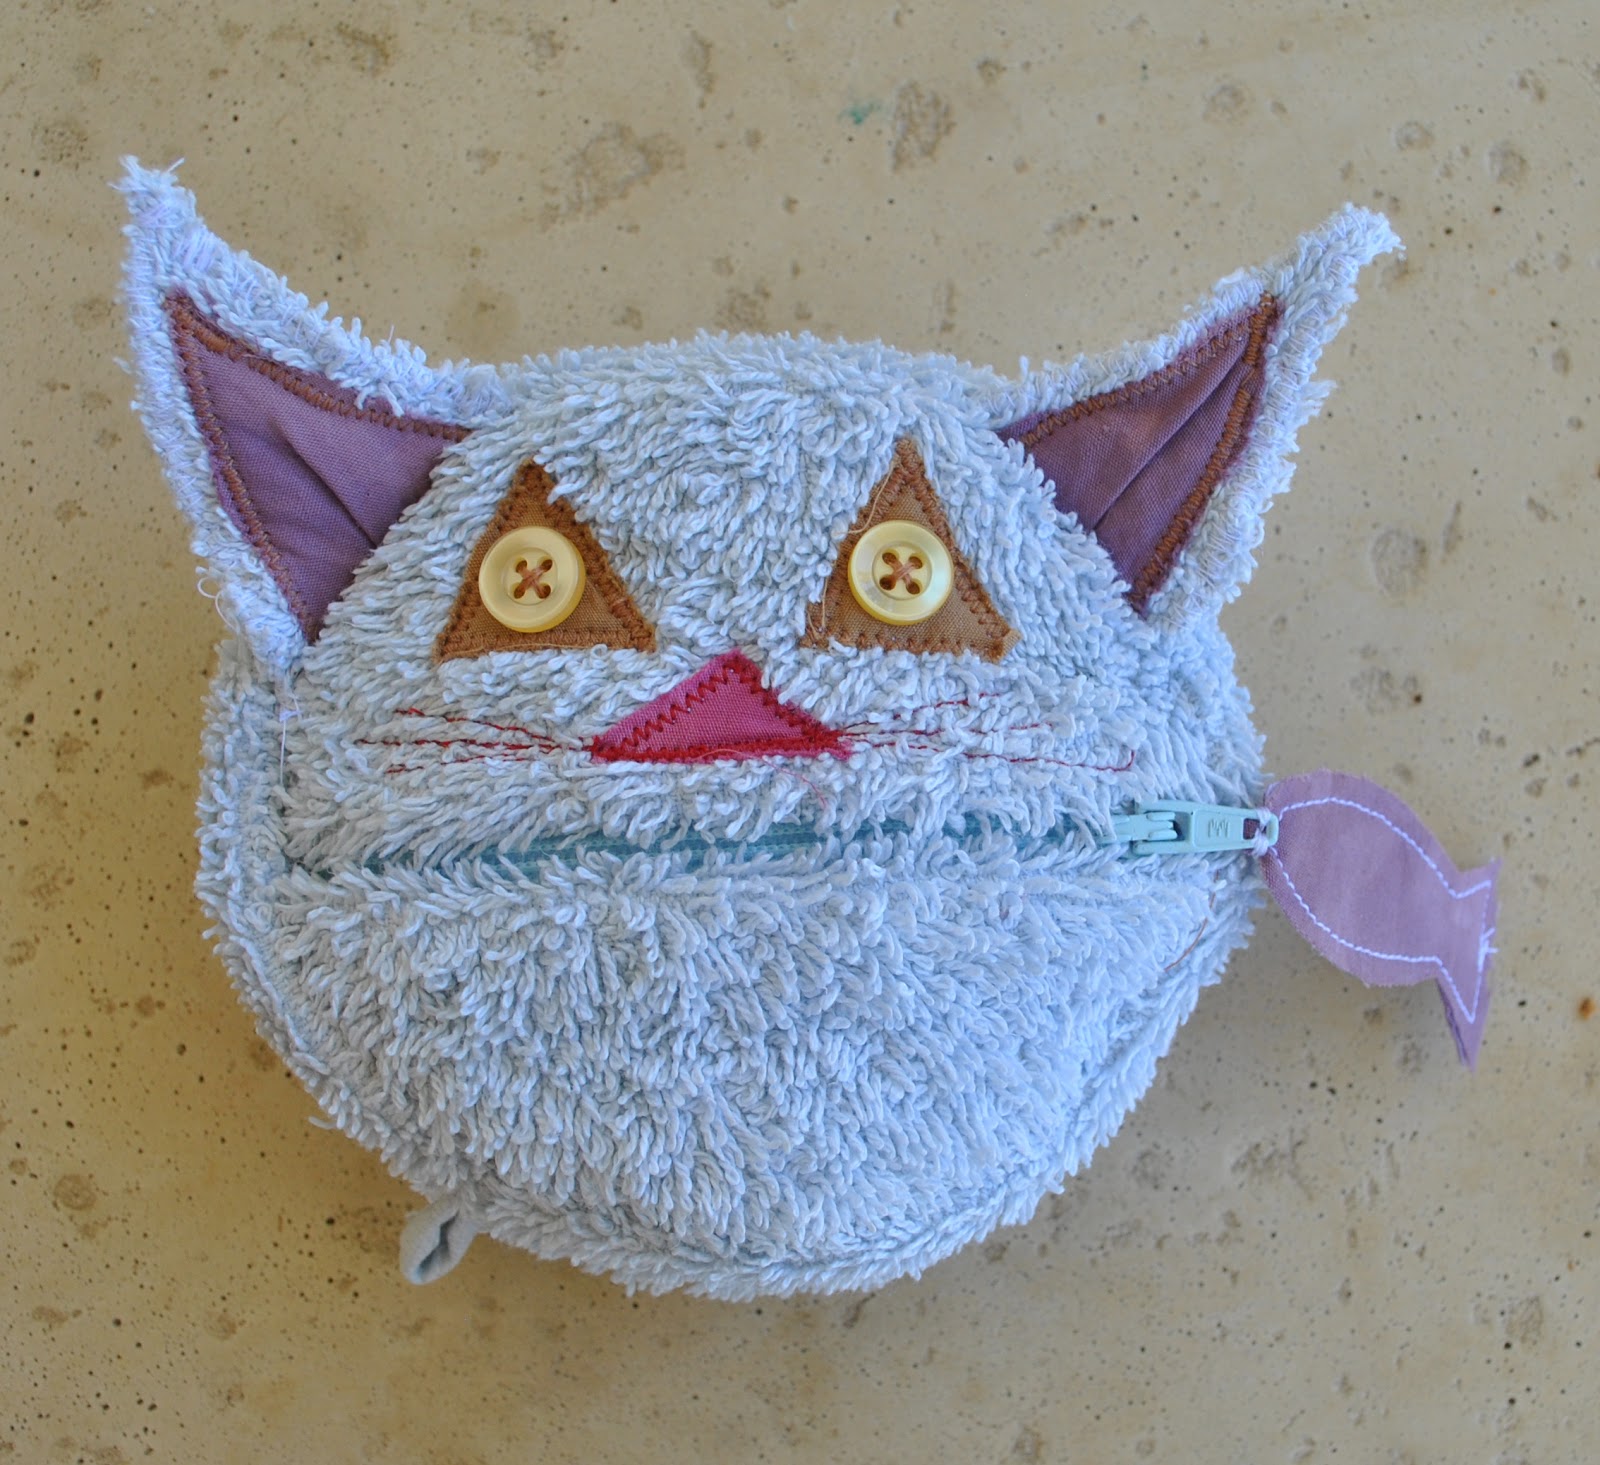
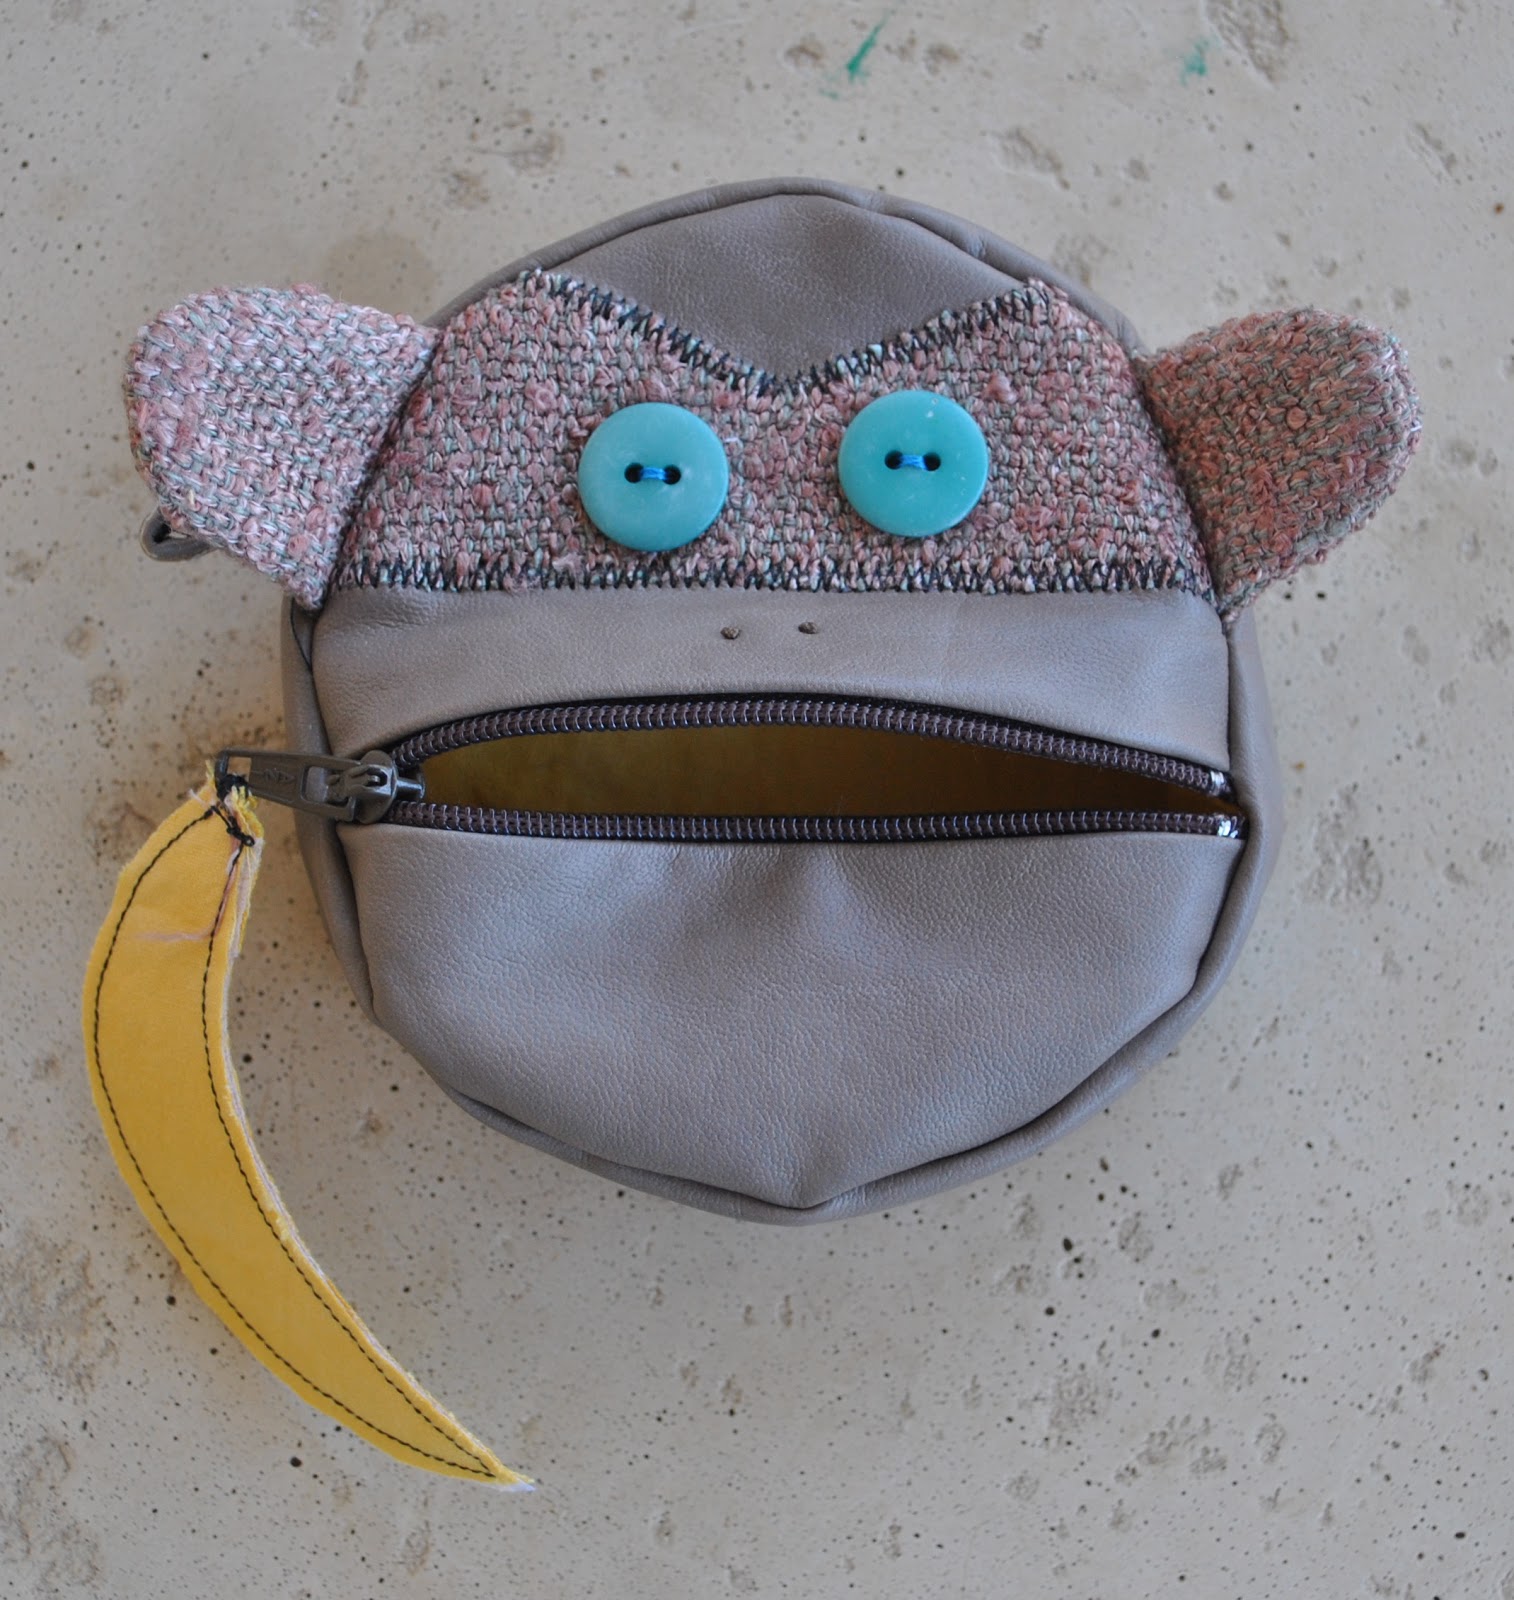
Another coupla makes; inspired by Novita, I made some cute little novelty coin purses for my littlest nieces and nephew.  These are the Feed the Animals coin purses, from the Straight Stitch Society.
They are fully lined with the same cotton used for the “food” zip pull, and were made all from scraps and small odds and bobs in my fabric and button stash, and I bought one short zip, from Spotlight.
Following tradition, I slipped a coin into each purse before wrapping them  ๐Ÿ™‚
pinterestmail

As blue as; Cassie’s Christmas dress

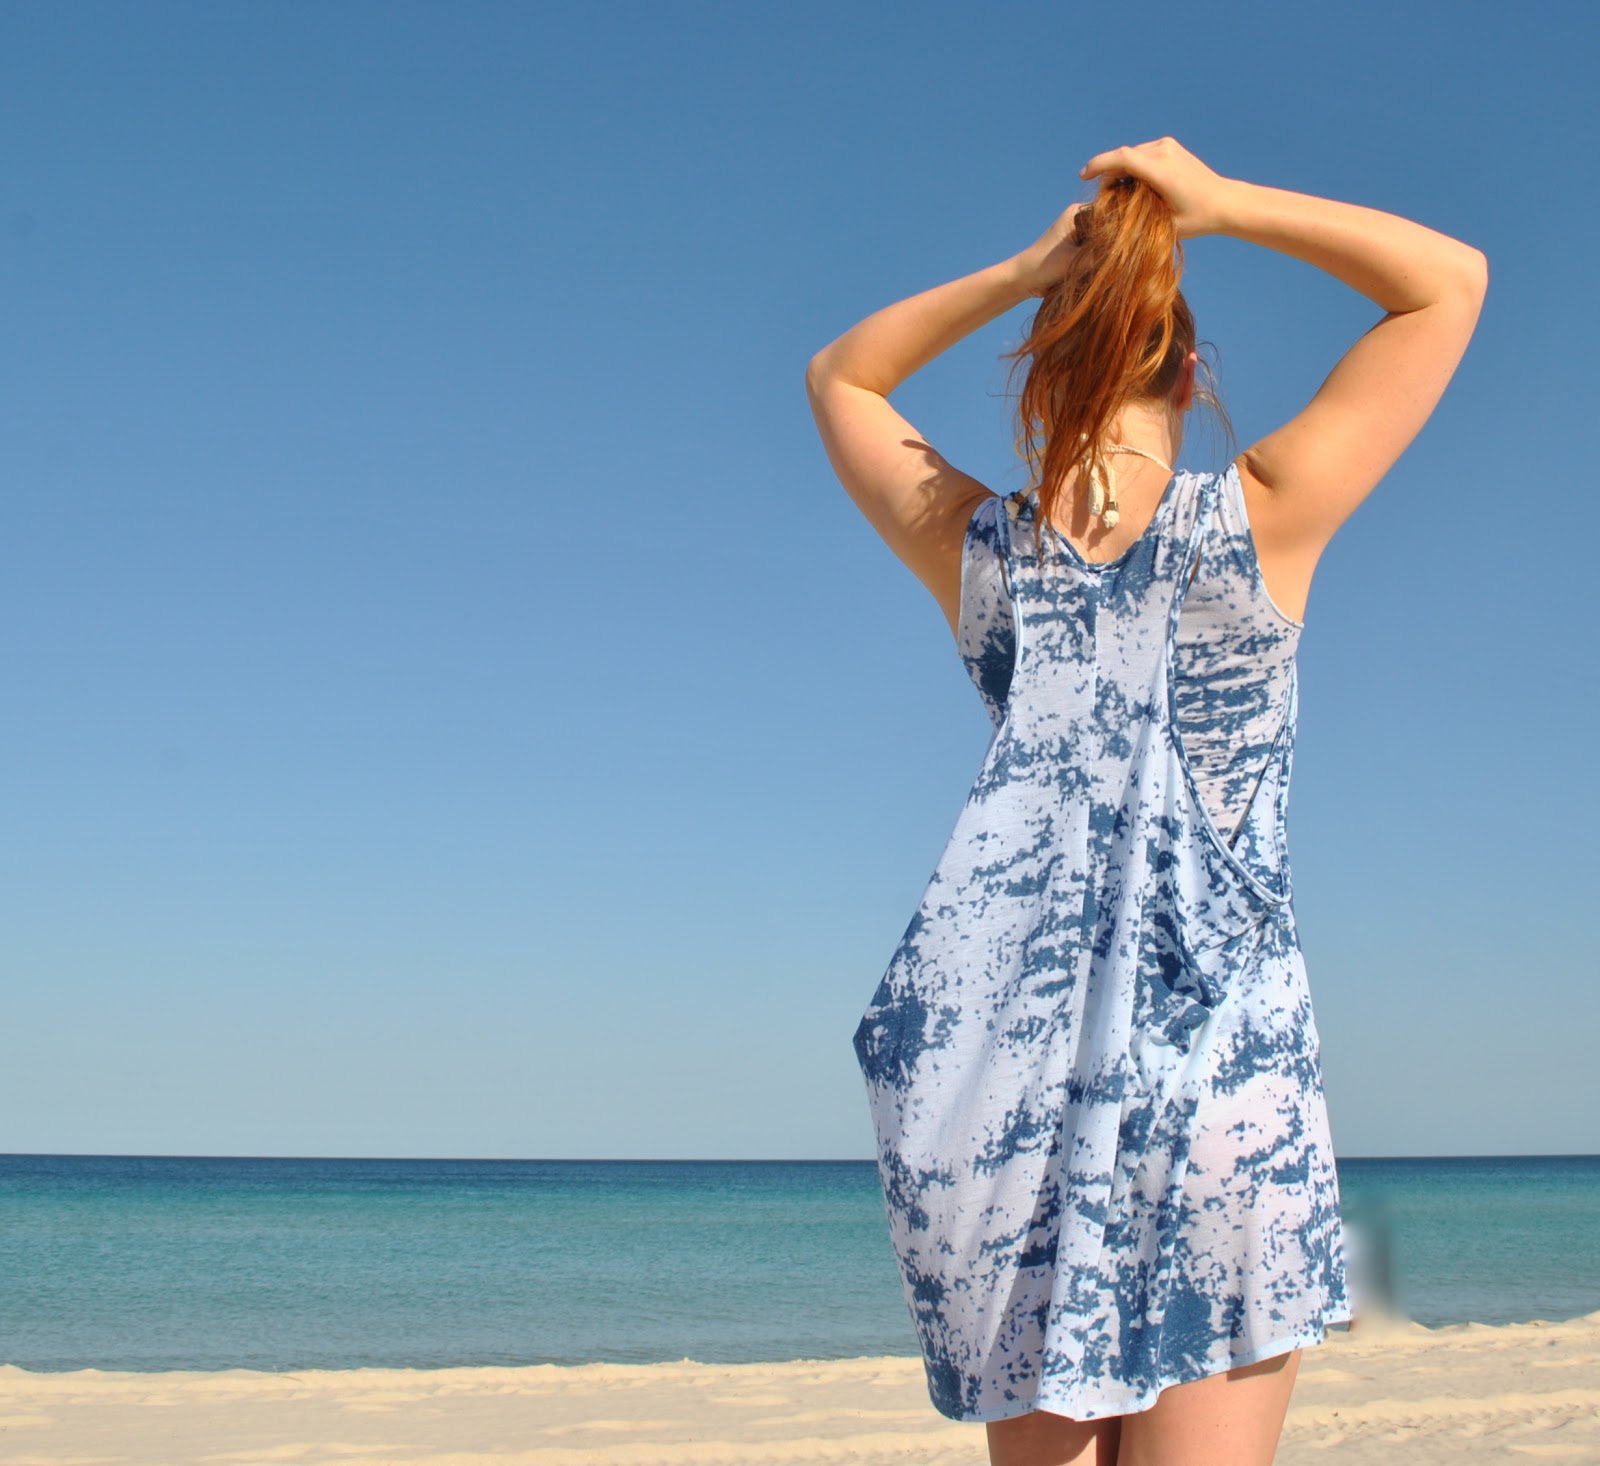
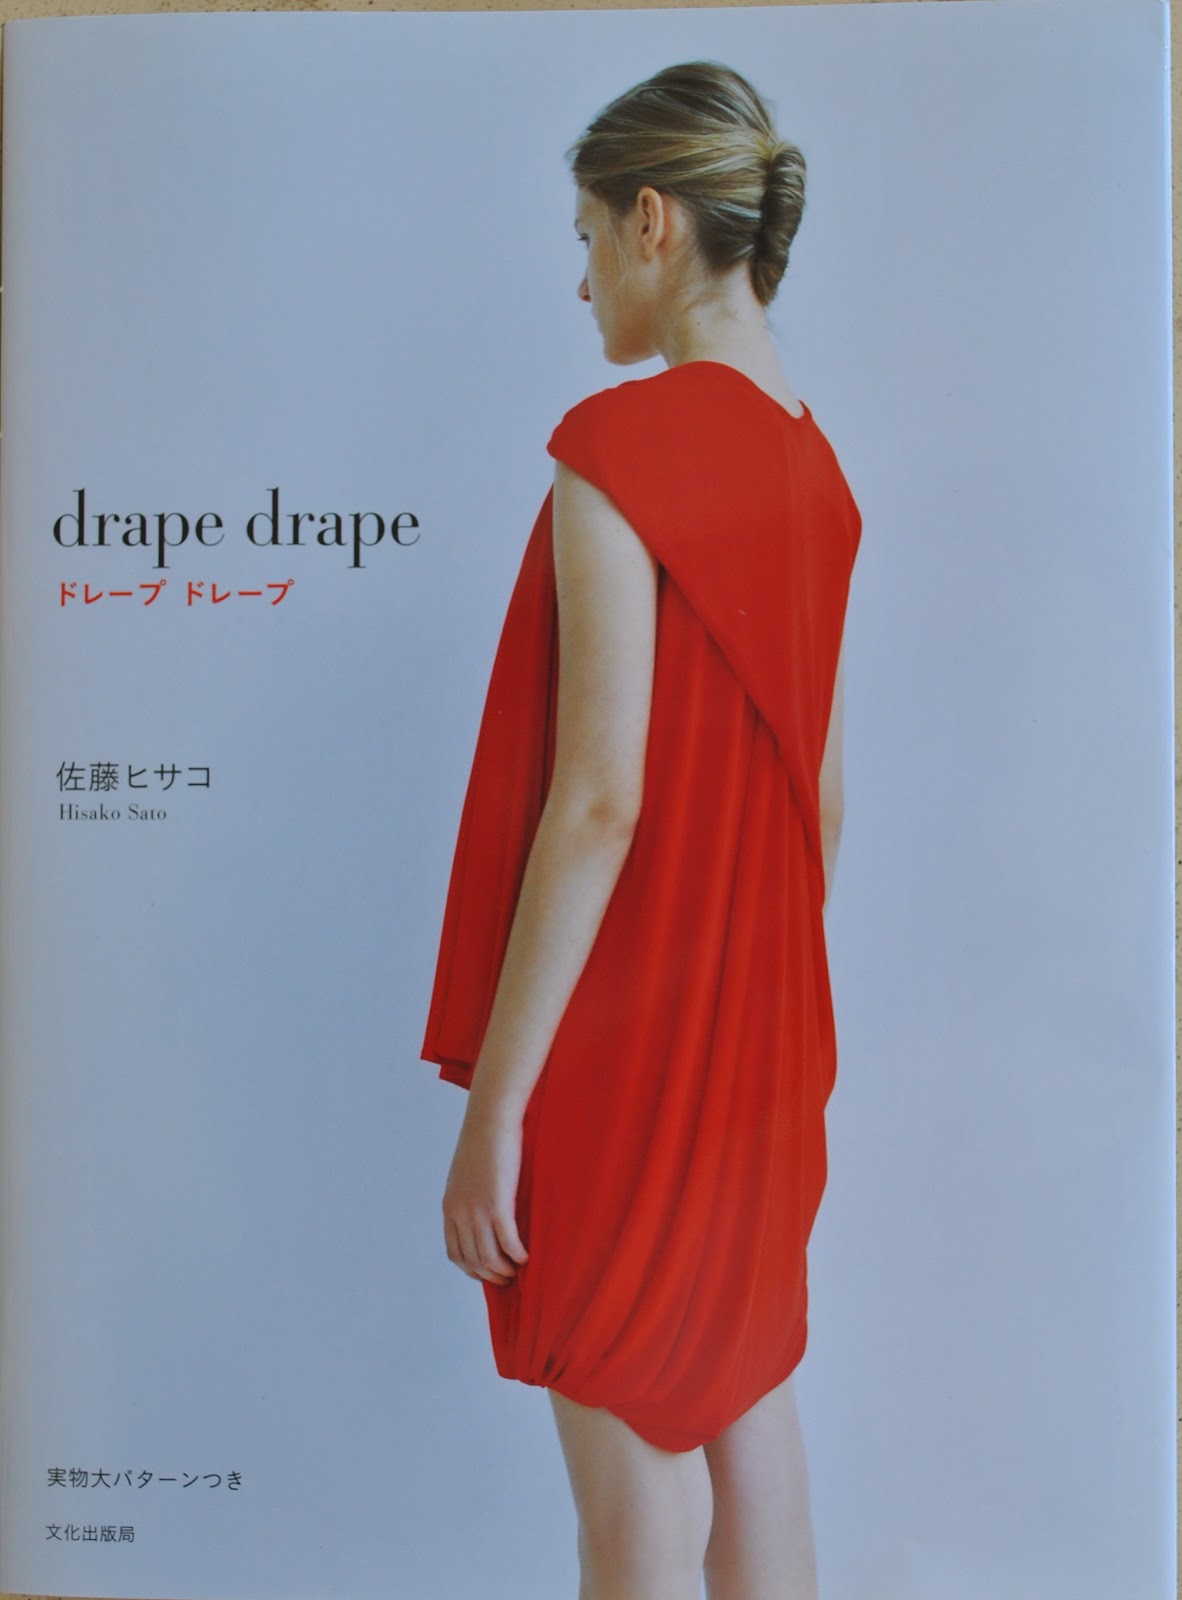
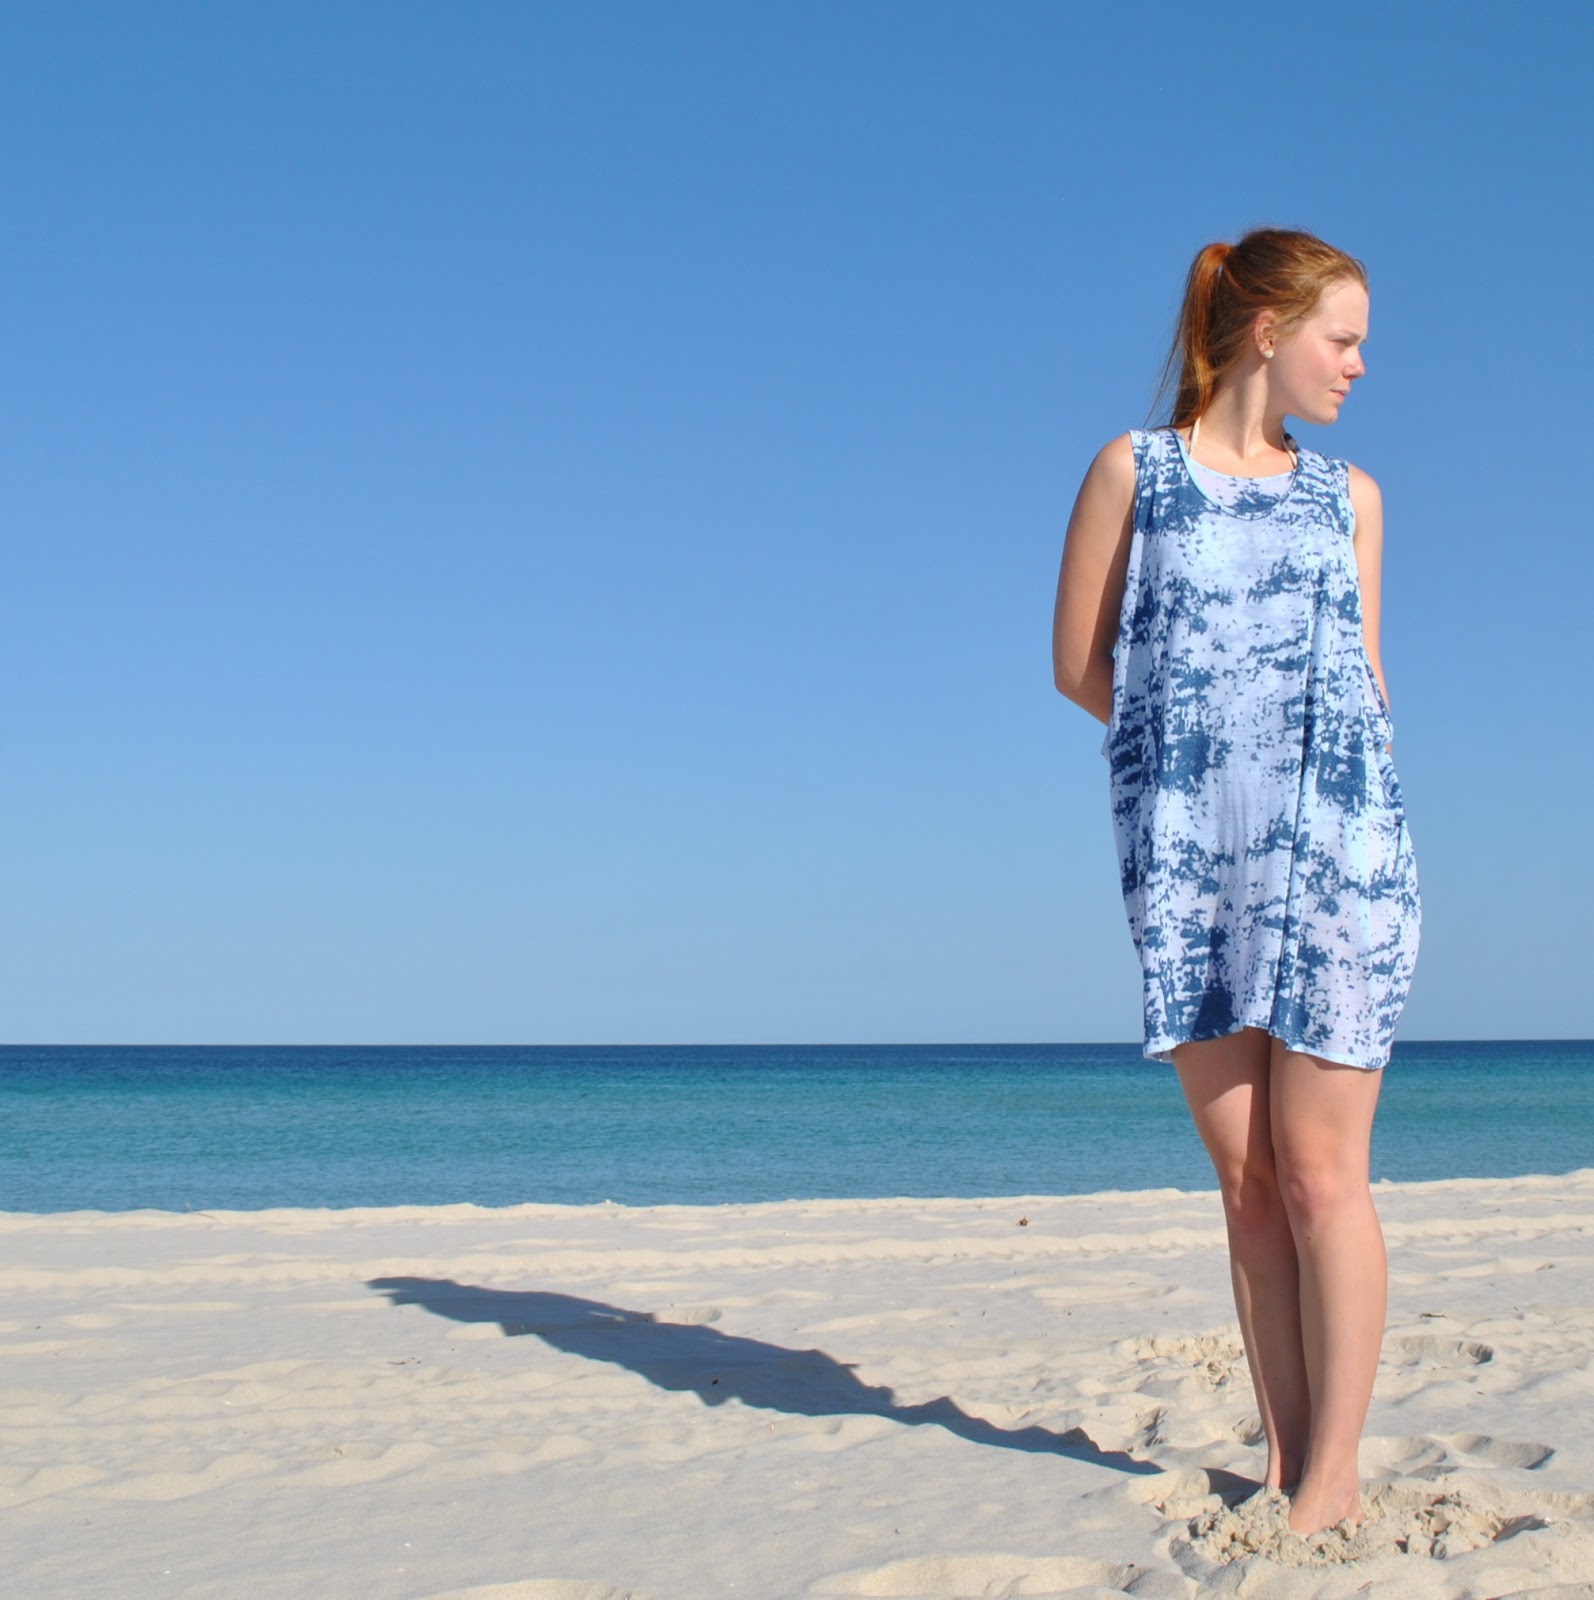
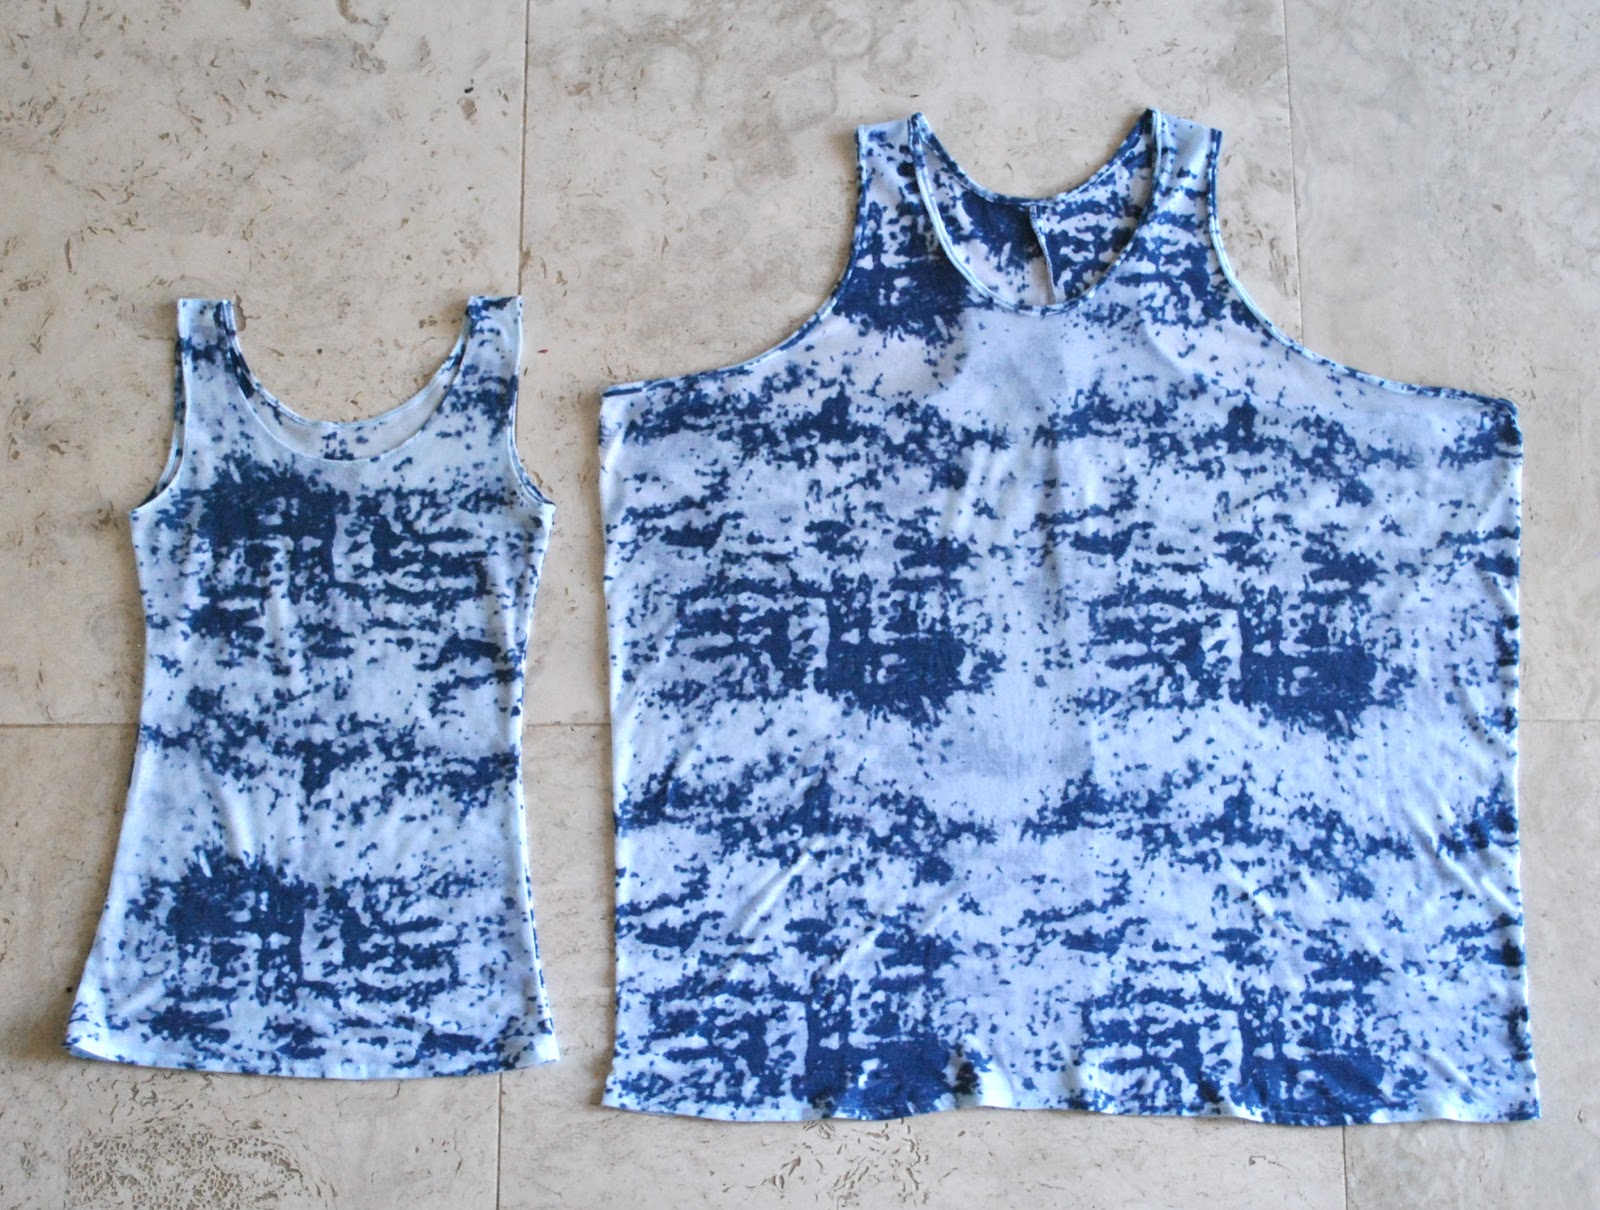
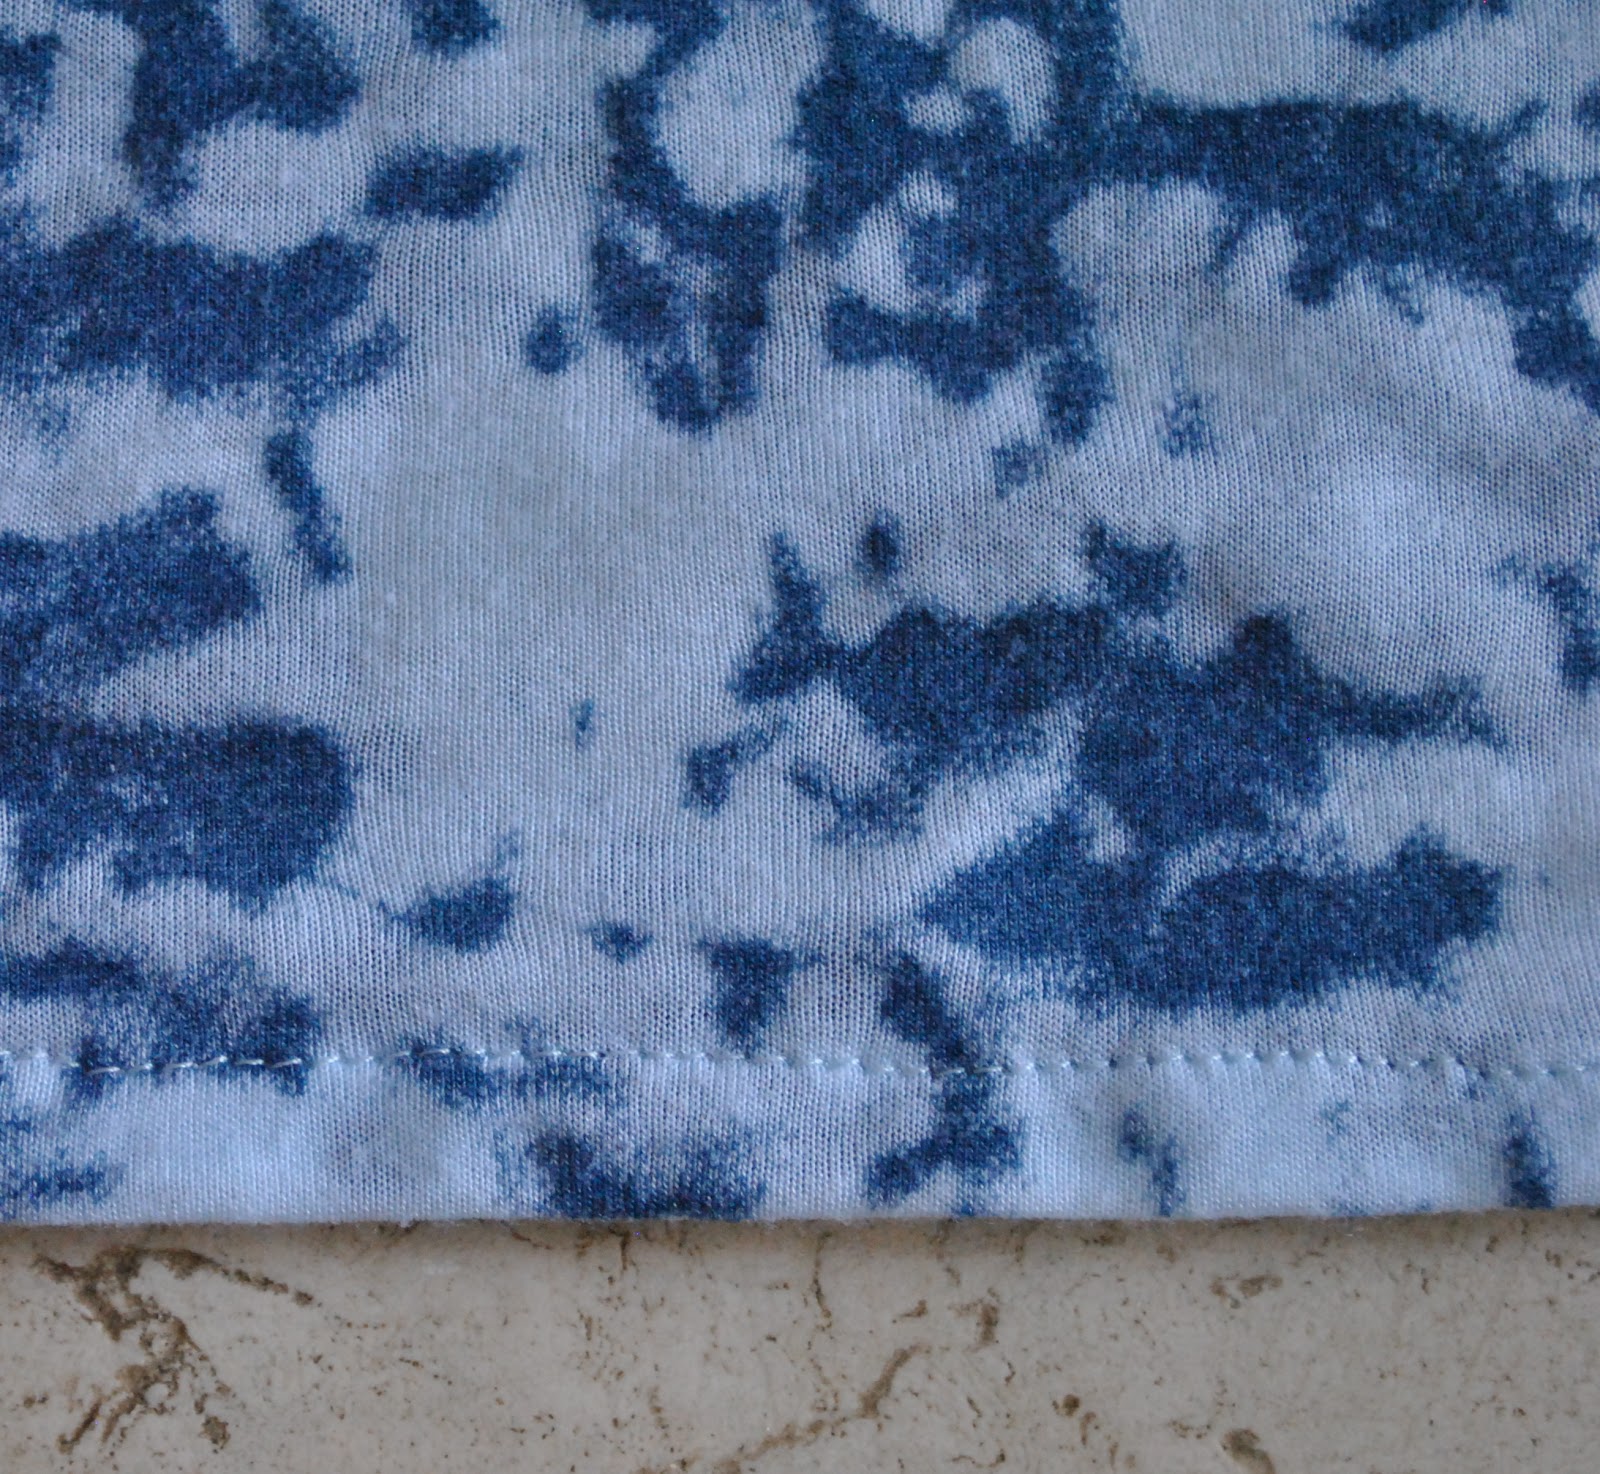
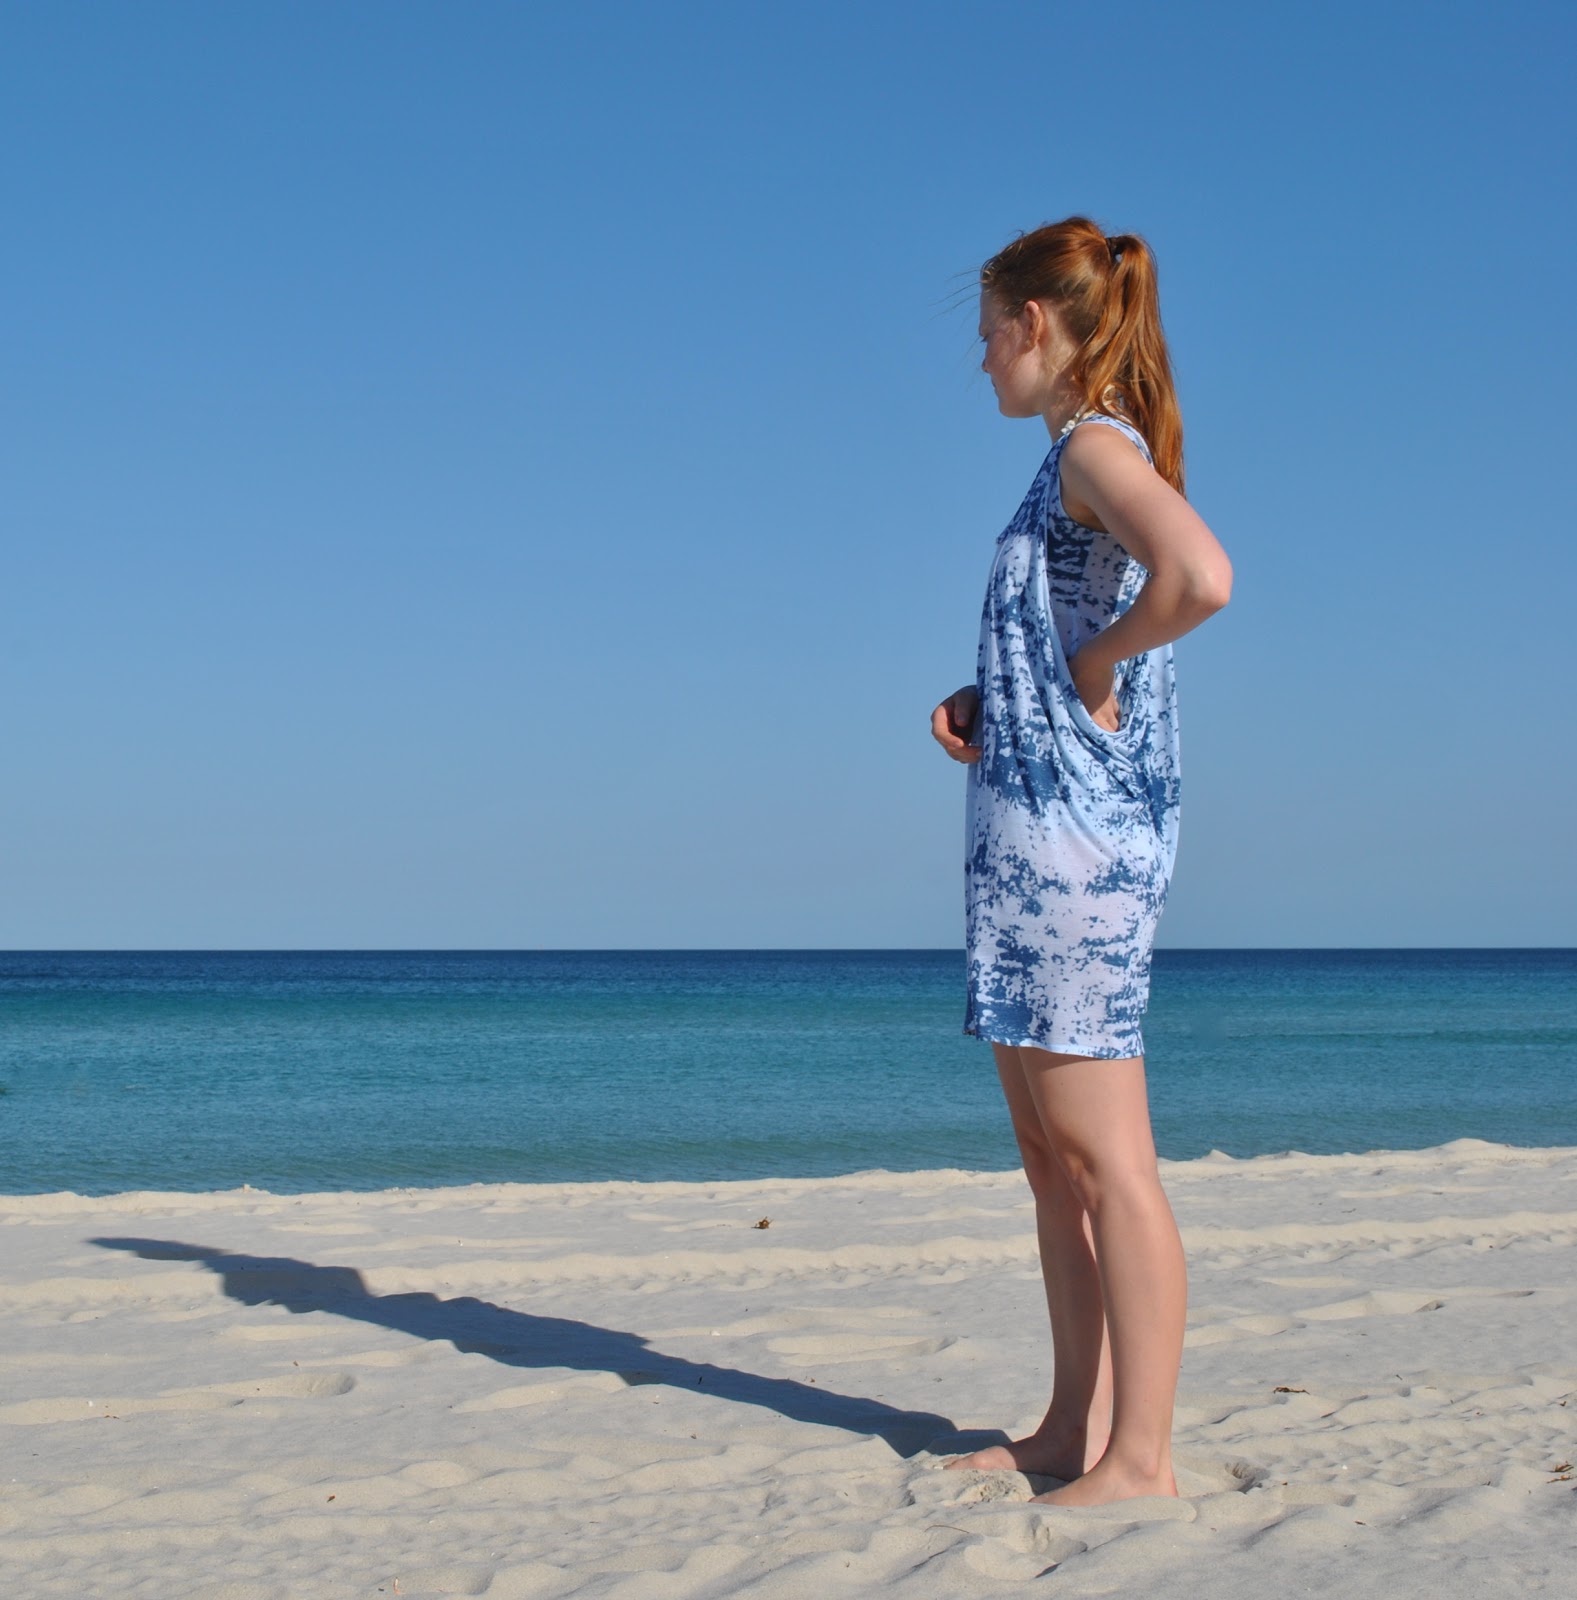
Last up: Cassie! and I made a dress for Cassie for Christmas this year; this is the loose drape tank-top from drape drape by Hisako Sato.  I used a thin cotton jersey, printed in an interesting fractured pixels design of ocean blue upon powder blue.  I bought the fabric from the Fabric Store in Melbourne during our trip there in September.
I think the tank-top is designed to just be a summer cover-up, the only explanation for its skimpiness and bra-revealing nature; so I also made a matching little tank top; that is, the regular kind of tank top! to go under it, just in case Cassie decided she wanted to wear it anywhere other than the beach.  I based the shape of the tank top on a well-fitting Tshirt that she owns already.

For the drape drape tank-top; I edged the neckline and both of those big big armholes with a cross-cut strip of the jersey, attached right-side to wrong side on the inside, and then flipped out to the right side of the dress and stitched down on the outside; so the raw edge rolls up on itself and over the stitching.  I can go into more details of this finish with a pictorial tute, if anyone is interested… ?  Looks quite nice and kinda cute, and is appropriate for a casual little summery thing, I think.
The regular tank-top neckline and armhole edges are just finished by turning under a narrow hem twice and top-stitching on the inside face.

The lower edge of both pieces are finished with a hem, turned under twice and top-stitched.

pinterestmail

White Christmas; Craig’s Christmas shirt


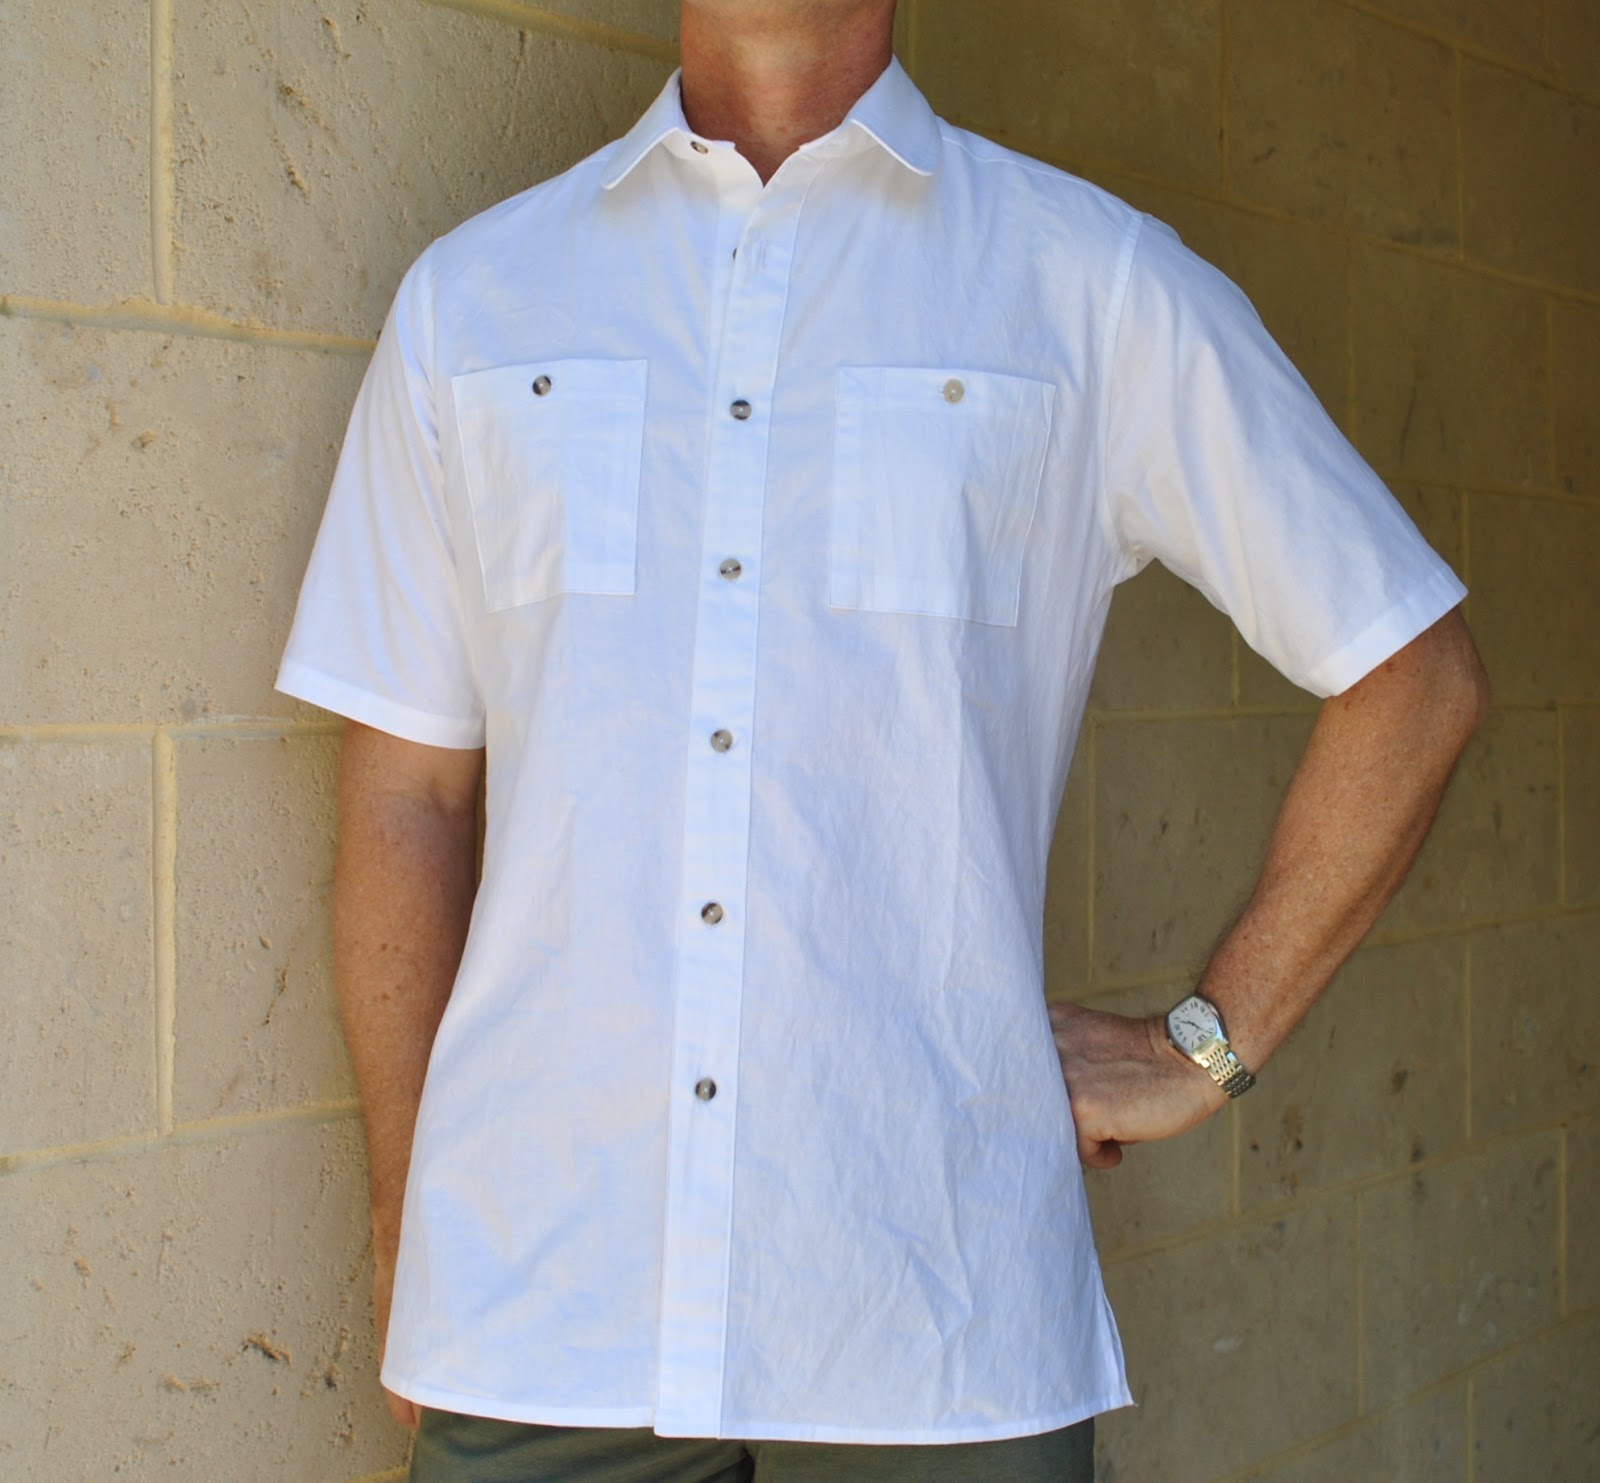
I made a shirt for Craig for Christmas too; and used er, hehehe; Burda 7767 again!  I bought some very nice white cotton broadcloth from Spotlight; and the buttons are also from Spotlight.
Actually, this shirt is a response to a rarity; a request.   Rumblings and murmurings about a nice, smart-casual, short-sleeved white shirt have been increasing in frequency and volume for a few weeks, at least.
I tuned in.  I took action.
Most satisfyingly, he was very very pleased when he opened up his pressie on Christmas morning! and he put it on straight away.  Actually, all my boys put their new shirts on straight away.  Cassie put on her new outfit too (hers to appear here tomorrow!!  ๐Ÿ™‚  )  Most gratifying.  I have to confess; Christmas lunch I looked around, and Dad was wearing this shirt, my two boys and my husband wearing their shirts, and my daughter, as well as (duh) myself; was wearing an outfit made by me. .  My heart just … well, swelled.  Real warm fuzzy moment   (sigh) 
This is a fairly simple version of the pattern.  Simple was just about all I could cope with by this time, since as you can imagine I was fast approaching men’s-shirt saturation point …. And after the hard and heavy duty this pattern has endured over the past few months I think it deserves a nice little rest now  ๐Ÿ™‚  Time to go bye-byes, good and faithful well-thumbed pattern, wishing you sweet pattern-y dreams and I’ll see you in… oh, sometime in the future, I’m sure ….  if when I can muster a skerrick of enthusiasm.
and (whispers) you can be sure I will be leaping with joy upon some new patterns in the New Year.  Yup.  NEW.  Patterns!  Whoo hooooo!!!
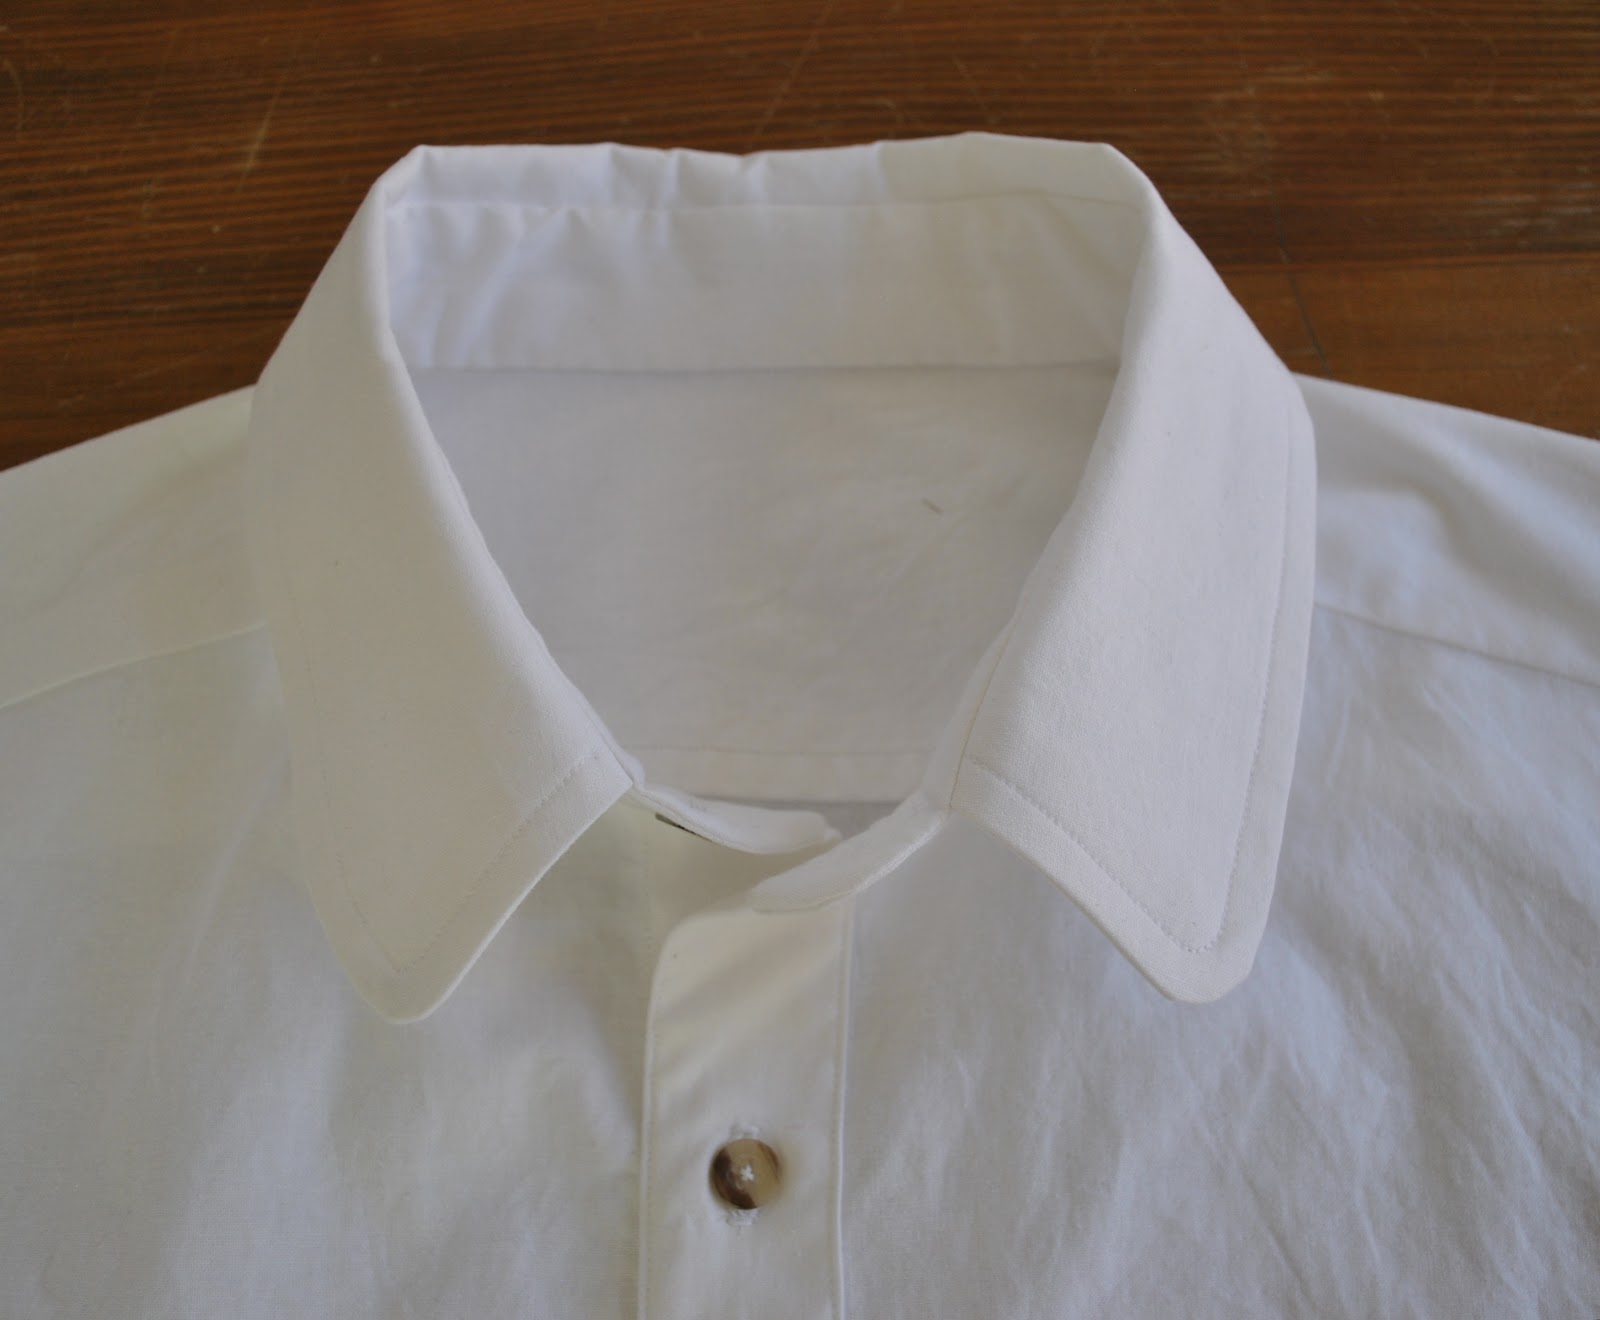
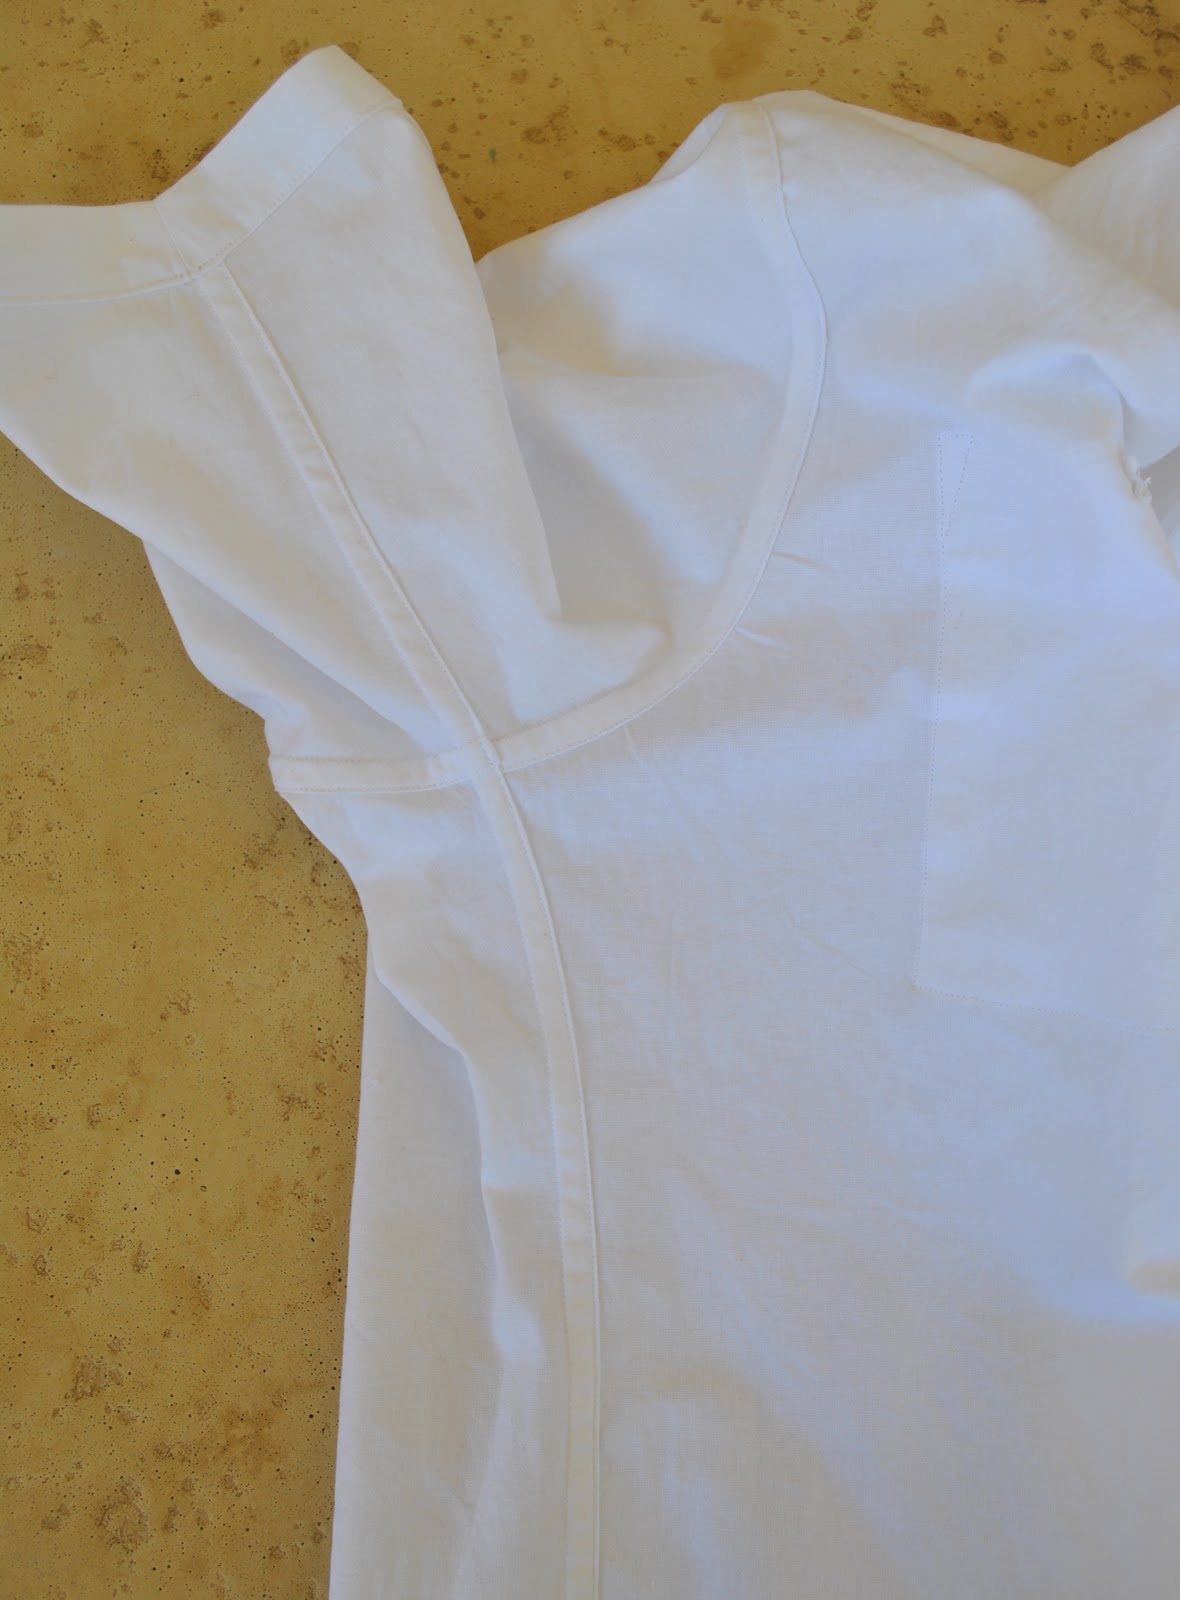
This latest version of Burda 7767 has short sleeves, and two very simple squared patch breast pockets, the left one has been partitioned to have a pen compartment.
For the first time I gave the shirt a club collar by curving the collar points off.

The armscye seam allowances are flat felled; utilising a gathering stitch along the curved sleeve cap to achieve this neatly.  The side and sleeve seams are flat-felled also.

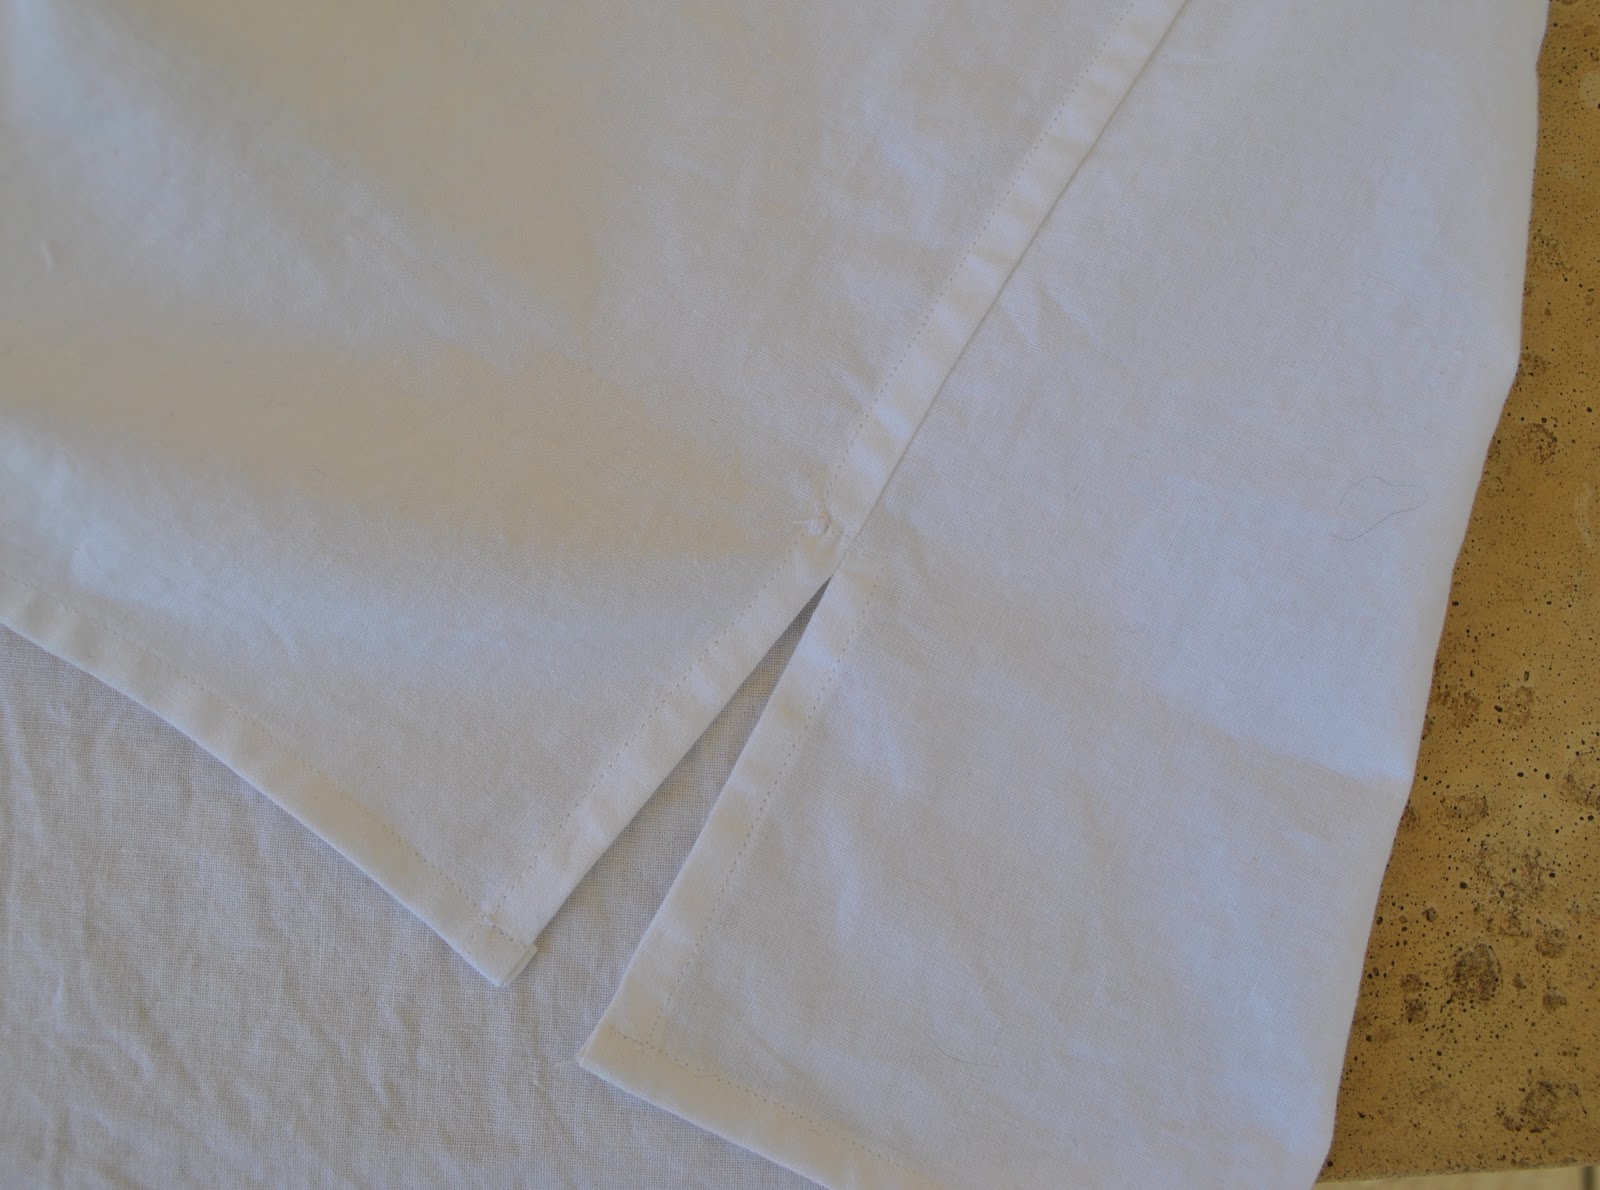
I usually like to add a traditionally curved lower hem to my mens’ shirts; but this time I went with a split side seam.  It is hard to see with the white-on-white stitching; but I stitched horizontally along the top of the split with a tight, closely spaced bar of zip-zag stitching.

Going by the worn worn state of Craig’s current white short-sleeved shirt collection; I am completely confident this one will be getting tonnnnnes of wear!

Details:
Burda 7767 modified, white cotton, my review of this pattern here

pinterestmail
Switch to mobile version
↓