Category Archives: Uncategorized

On mittens, and making time for sewing

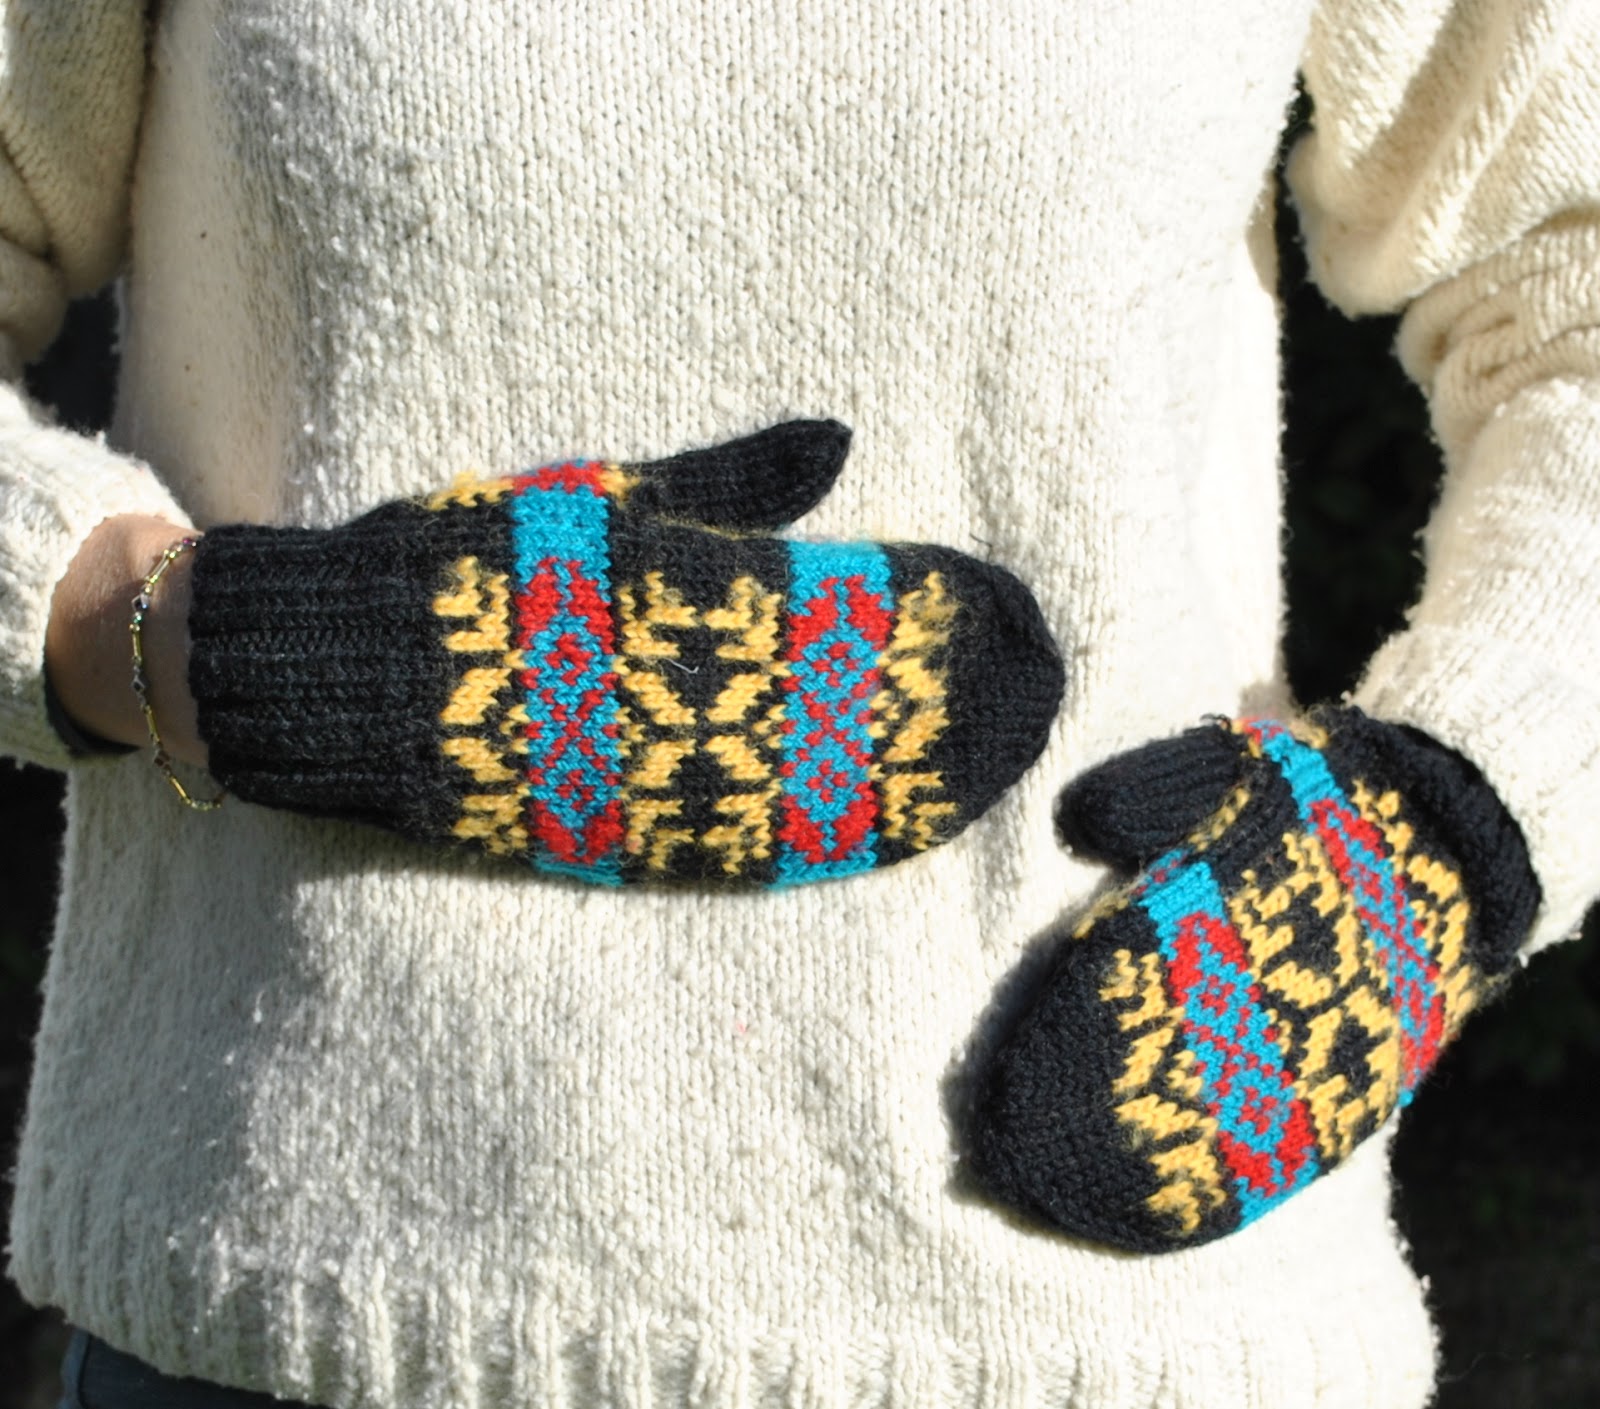
Rootling around in my winter woollies; I realised that I had never devoted a post before now to these mittens.
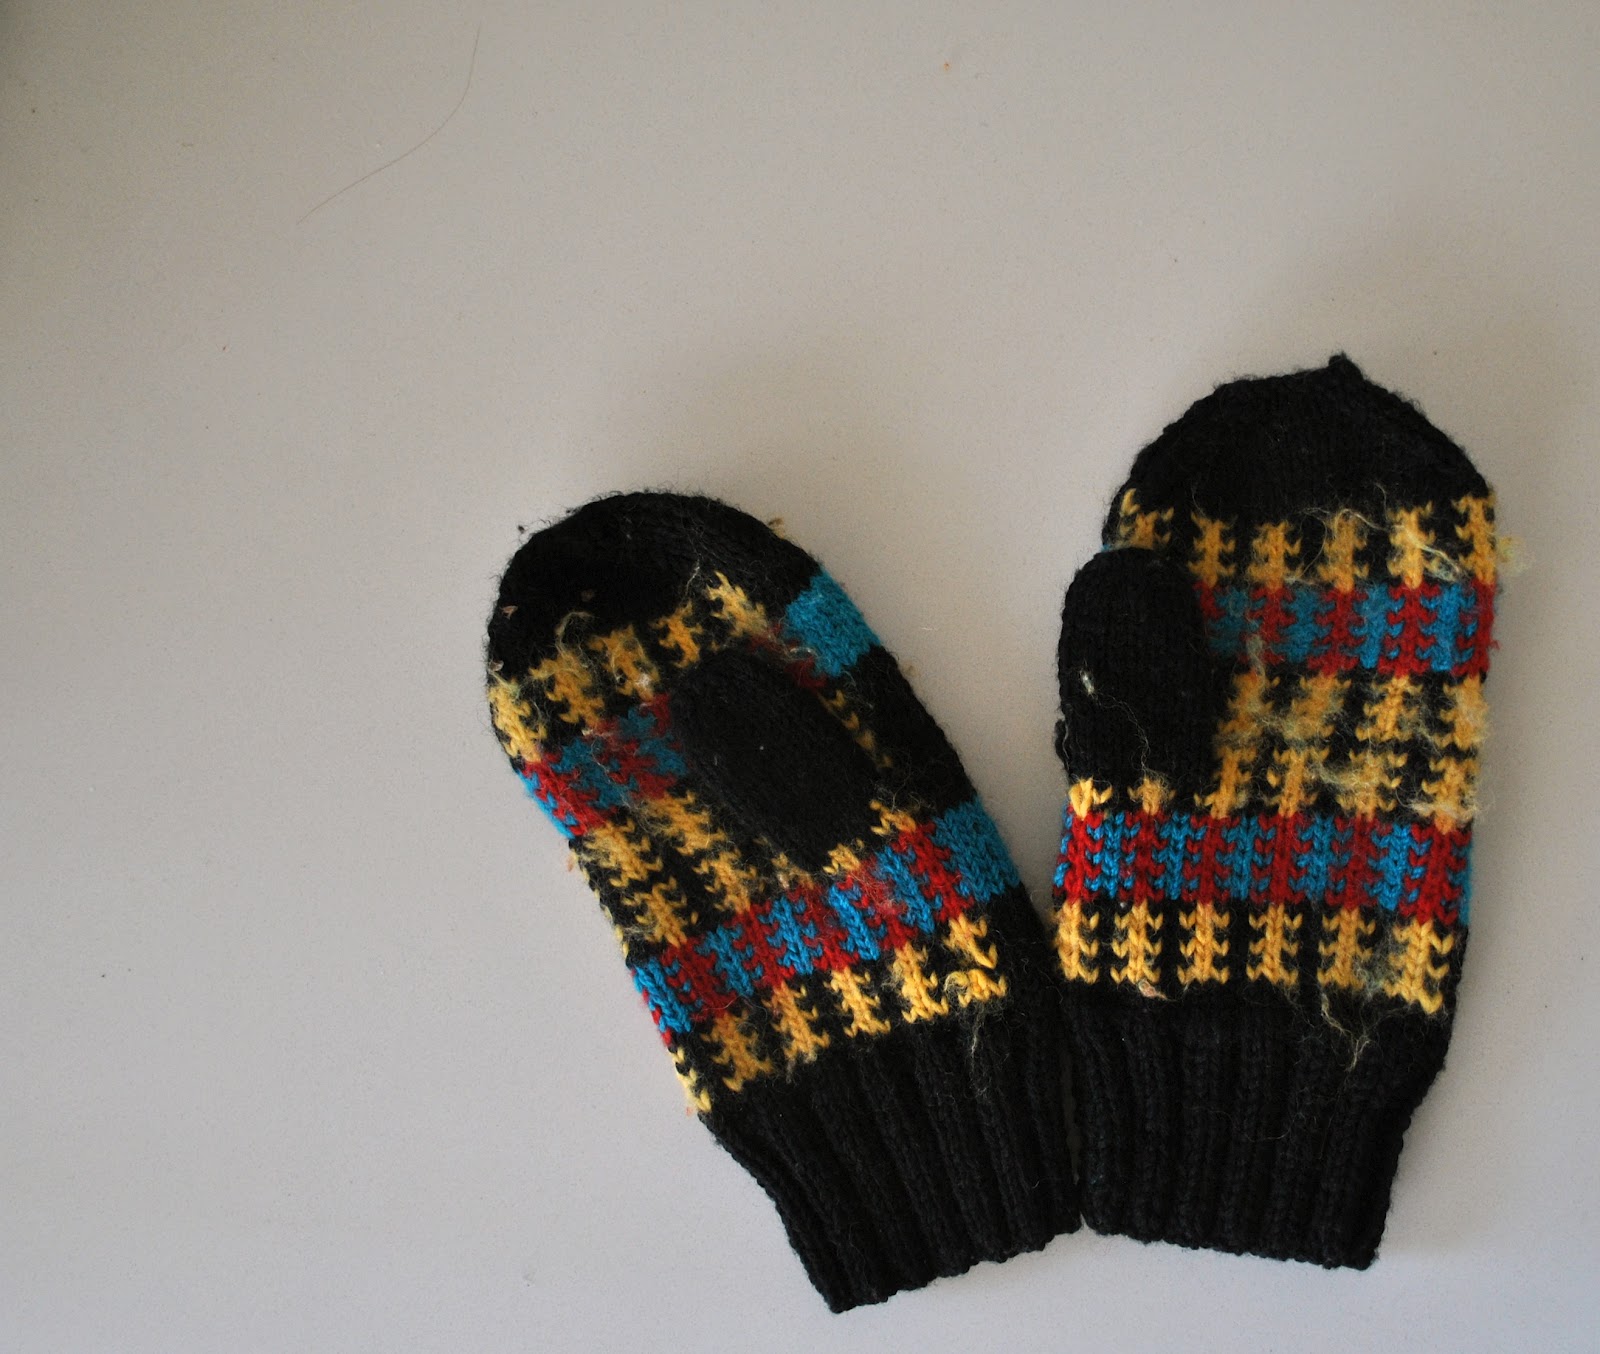
I knitted them yonks ago: probably when the children were really tiny, and probably using leftovers from one or another of my hand-knitted fair isle cardigans and jumpers that I was very keen on making at the time, and which have mostly appeared on this blog already.  The yarn is Patons 8ply, my yarn of choice for years and years and years because it came in a gloriously huge range of colours, tailor-made for lovers of fair isle knitting, and which sadly seems to be no more.
I have no memory of the pattern I used, but it is obviously a Scandinavian design, no?  (Later edit; Lydert advised that it is likely a true Fair Isle design from Scotland… thank you Lydert!)
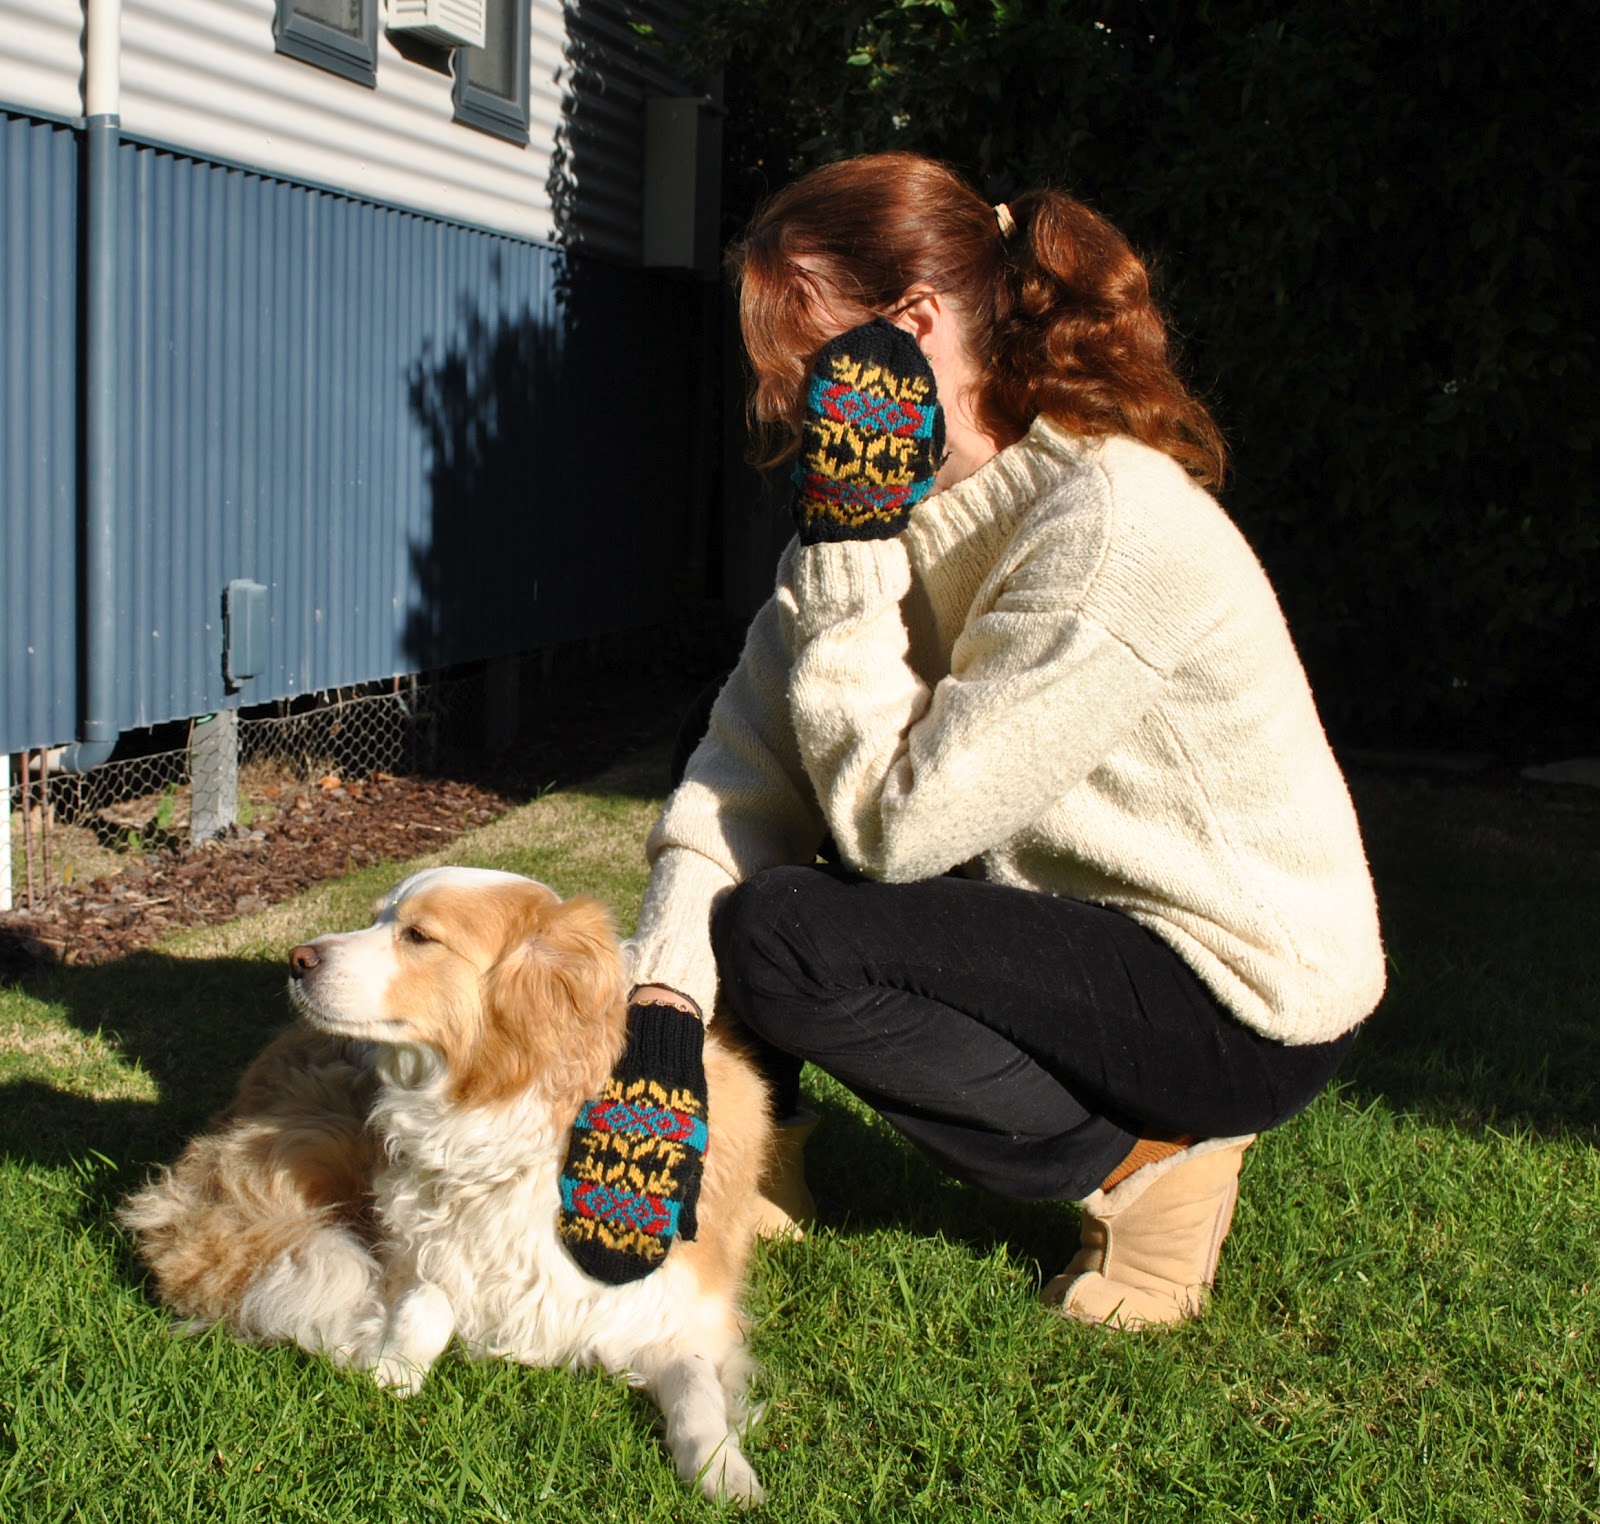
I still love to wear them on really frosty mornings, that is; as long as the finer motor skills are not required   🙂
Each row has two strands of yarn, one carried behind the other, to form the colourful fair isle pattern.  The backs of the hands are still looking quite presentable, but unfortunately the palms are a bit fluffy now through wear.  But I think they still have a good many years left in them!  I think I will try to make for myself a new adapted pattern based on these, because just now I have noticed that the area around the base of the thumb is just a tad too tight across my hand.  I think the tightness is a minor detail that never bothered me before.  When I was a wee young strapping thing I was very accepting of minor discomforts in my handmade clothing and it is only as I have got more, er, mature (haha) that I have become more picky and fussy about The Perfect Fit.
Will keep you posted on the progress of that pattern…

Details:
Mittens; knitted by me, using Patons 8ply merino
Jumper; knitted by me to my own design, using Jo Sharp’s Aran Tweed, details here
Jeans; Burda 7863 modified, black stretch corduroy, details here
Socks; handknit by me, details here 
Ugg boots

I was highly flattered when Carole and Gilly both asked how I manage my sewing time, and even what was my schedule for weekly sewing…  thank you so much for the interest ladies!  
My “schedule” is a very NON-scheduled kind of a schedule, really.  A Clayton’s schedule.  The schedule you have when you’re not having a schedule, y’know  ðŸ˜€    That’s another antipodean-ism there btw…
Lately I am trying a new tack; to limit myself to just one project a week, and no more.  I figure; forcing myself to slow down means naturally paying plenty of attention to the finer details and finishing things off properly.  I’m not doing toooo bad about sticking to that one  ðŸ™‚  but (blush) I do still have three more finished things to show here, just awaiting me taking some photographs and sitting down to write something coherent about them.  Often this bit takes me longer than the sewing bit  ðŸ™‚
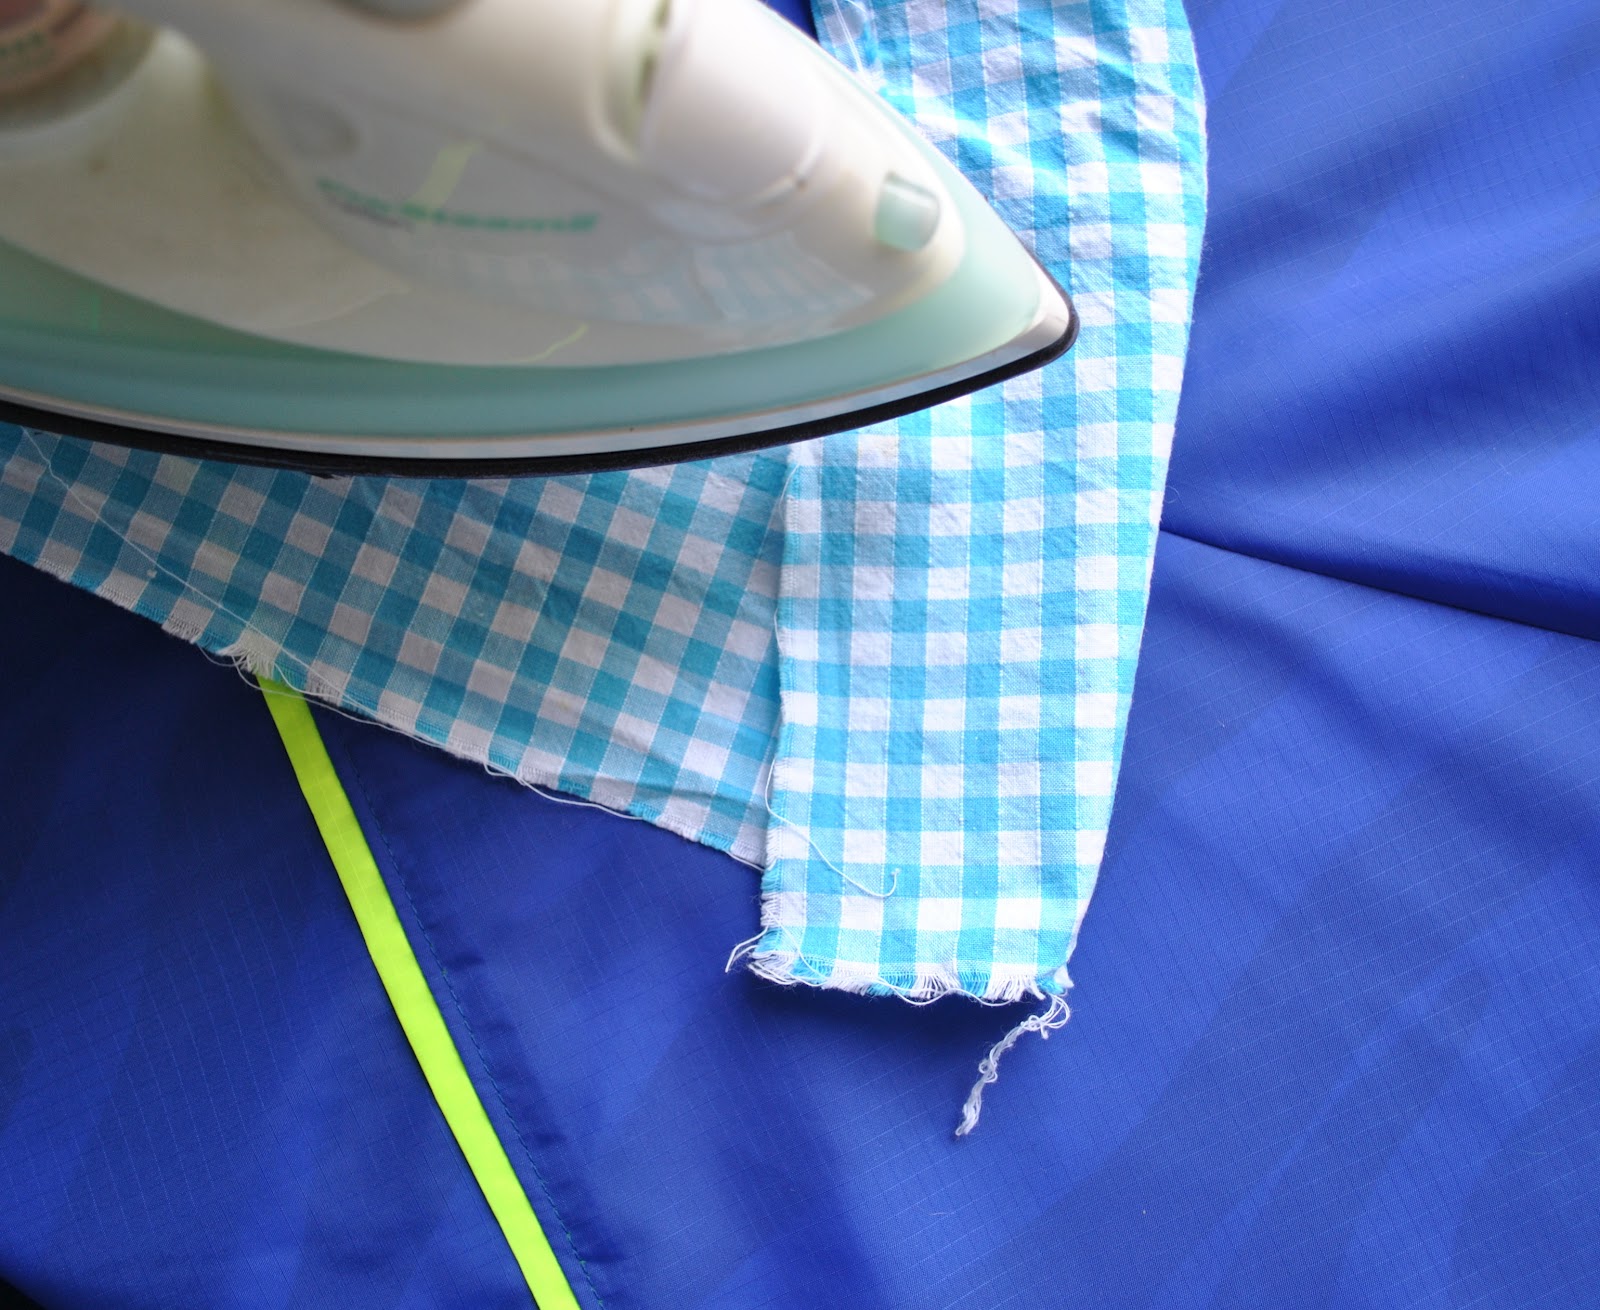
I don’t sew every day, but often if I am idly passing my laundry door I’m suddenly possessed and propelled by some mad demonic force beyond my control, over to the sewing machine, picking up whatever is on the go and doing a little bit.  Sometimes that little bit turns into a lot, as the sewing demon evilly tempts me to put off whatever it is I should be doing, just to do a little bit more sewing.  Oh, I’ll just put in this zip, or oh, I’ll just finish off this pocket, or whatever.  Oh, I really should walk away right now and NOT apply that iron-on interfacing to the collar… oh woops, look I just did.  Now I really just have to sew it together now, darnit…
Other times I might have just put on a load of washing and suddenly woosh!  I awake from a trance to find myself sitting at my sewing machine, doing just some little thing more.   The sewing demon is powerful, I tell you.  Cunning too.
It gets particularly malevolent  when I am all enthused and excited about a new project.  I will be super-restless about getting on with it, and obsessively think about it every moment I am not right there with it, working on it.  My raincoat was one of those projects; I worked on it solidly for several days. feverishly plotting over the minutiae of the construction details and the best possible order it should all go together.  
Until it was finished.  Then I am at peace and the demon is appeased.  
This house is clean.
well, momentarily anyway…. mwahahaha 😉

pinterestmail

Raincoat the Second

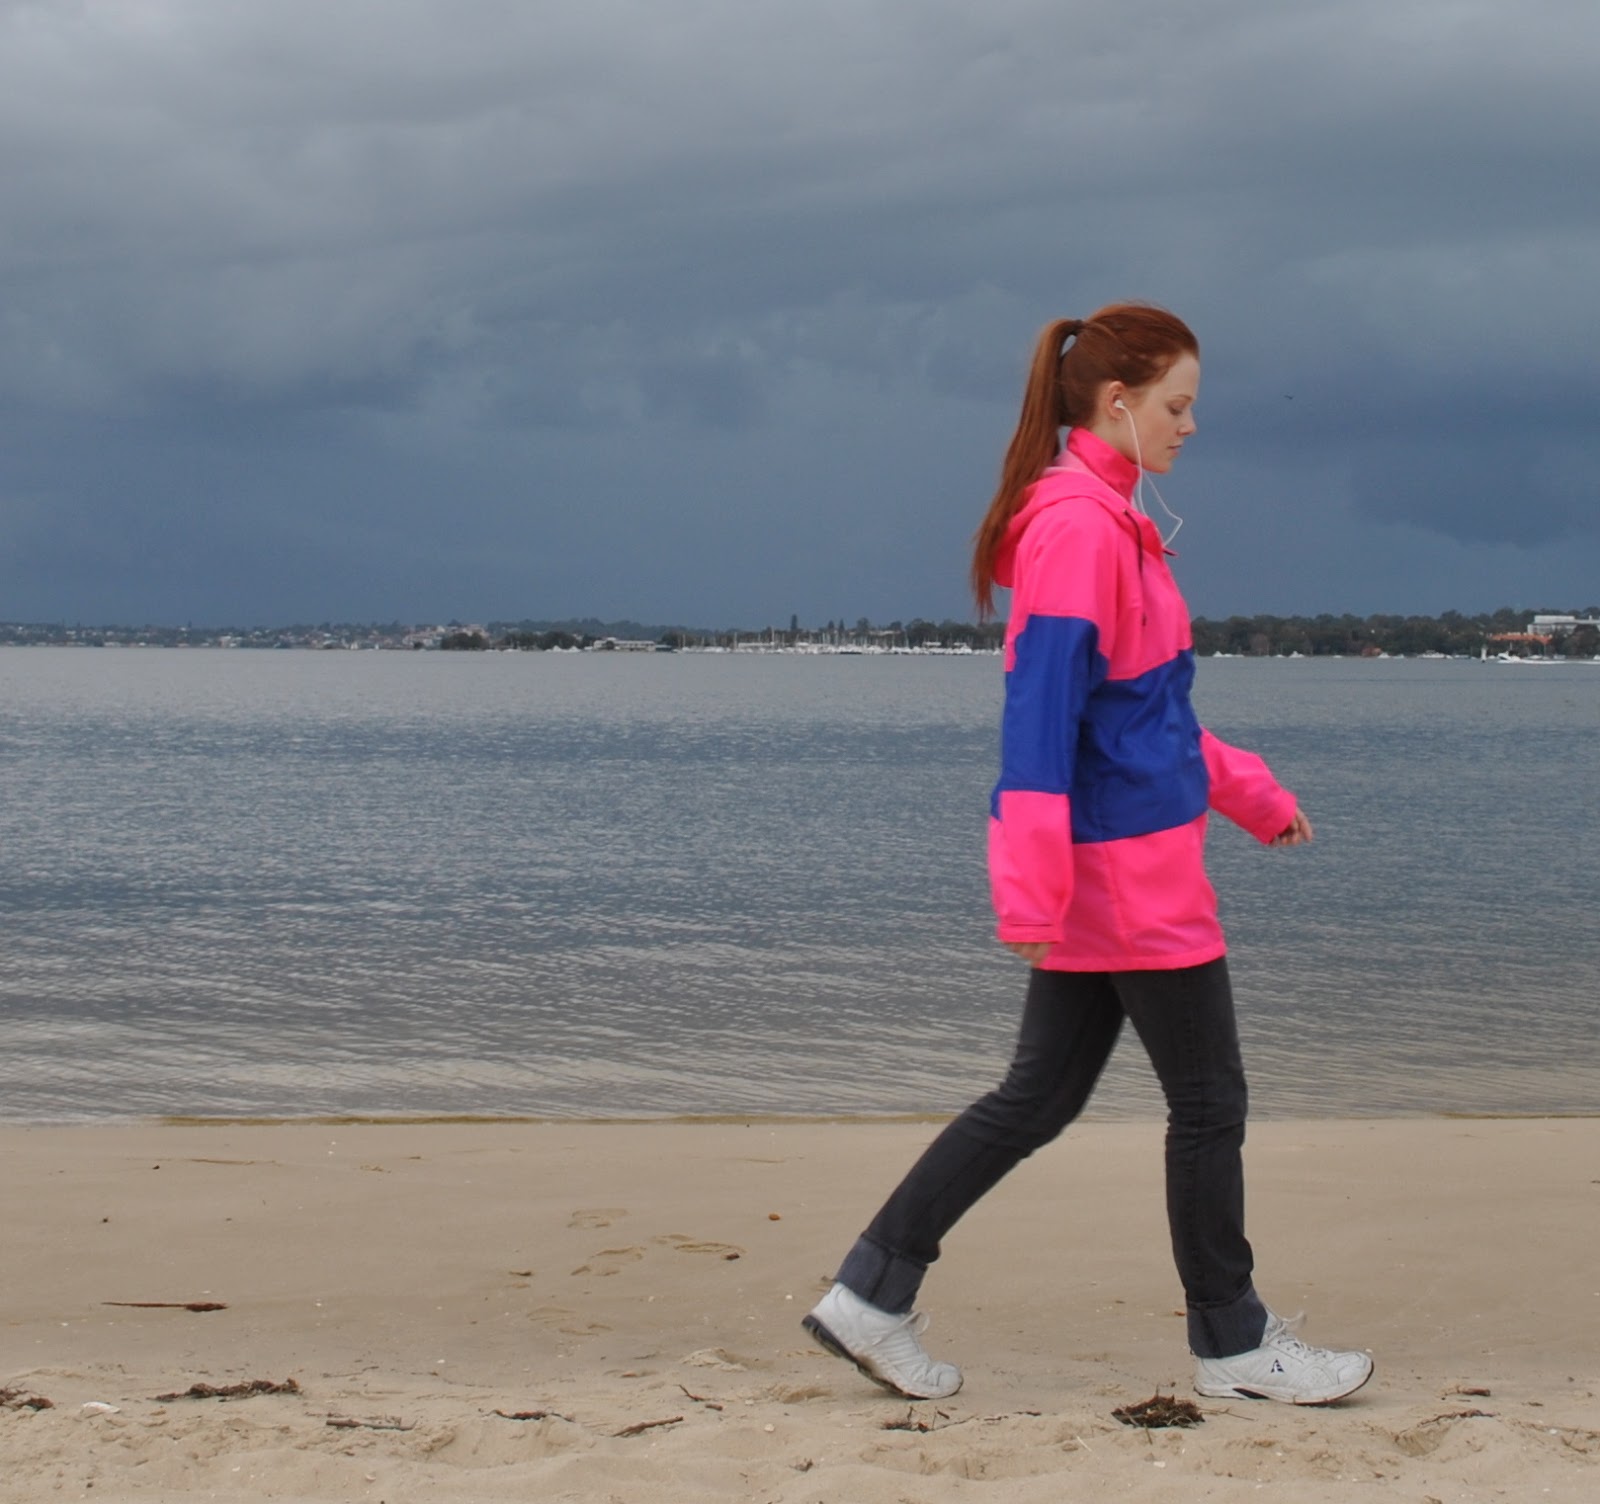
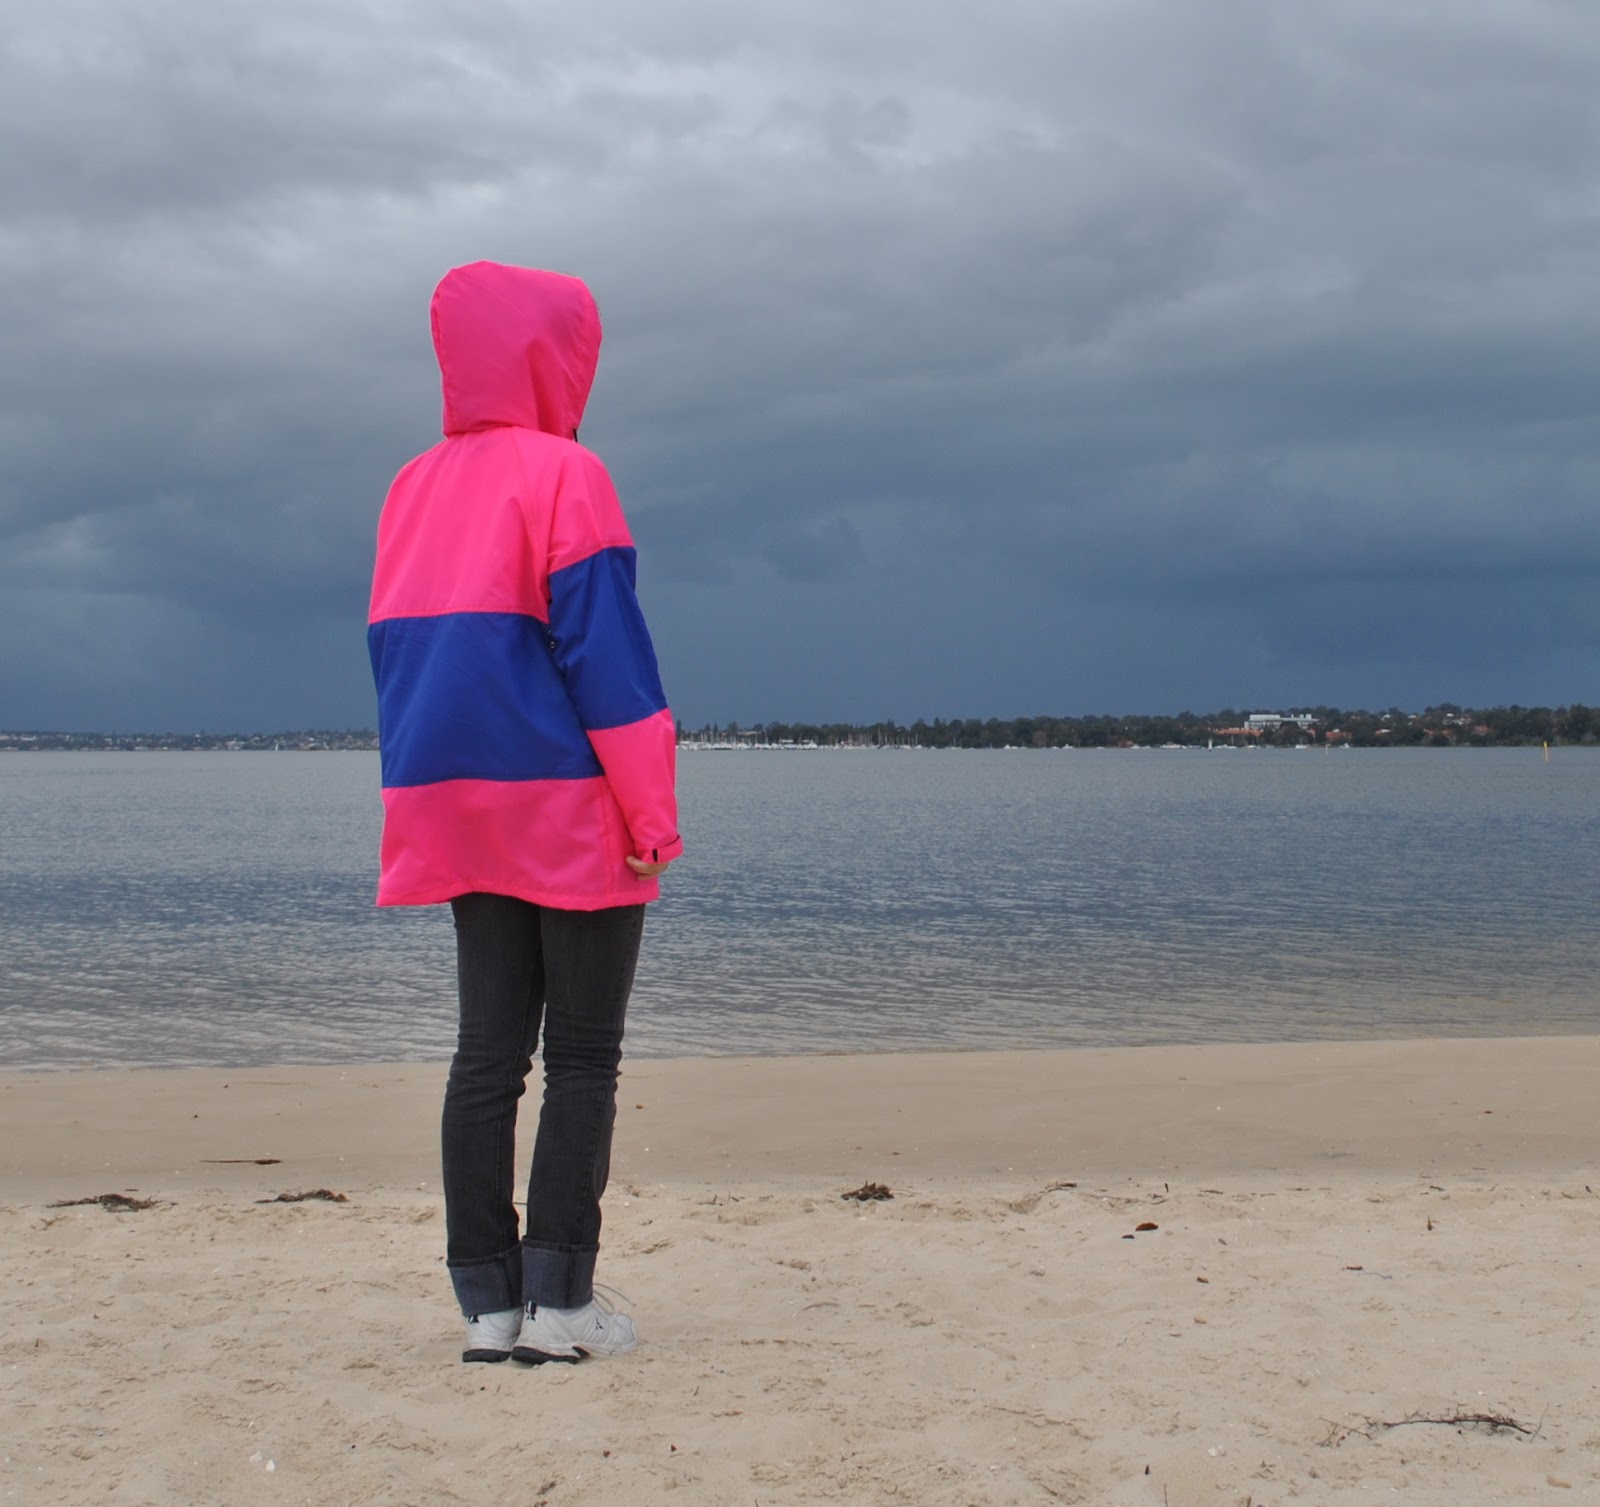
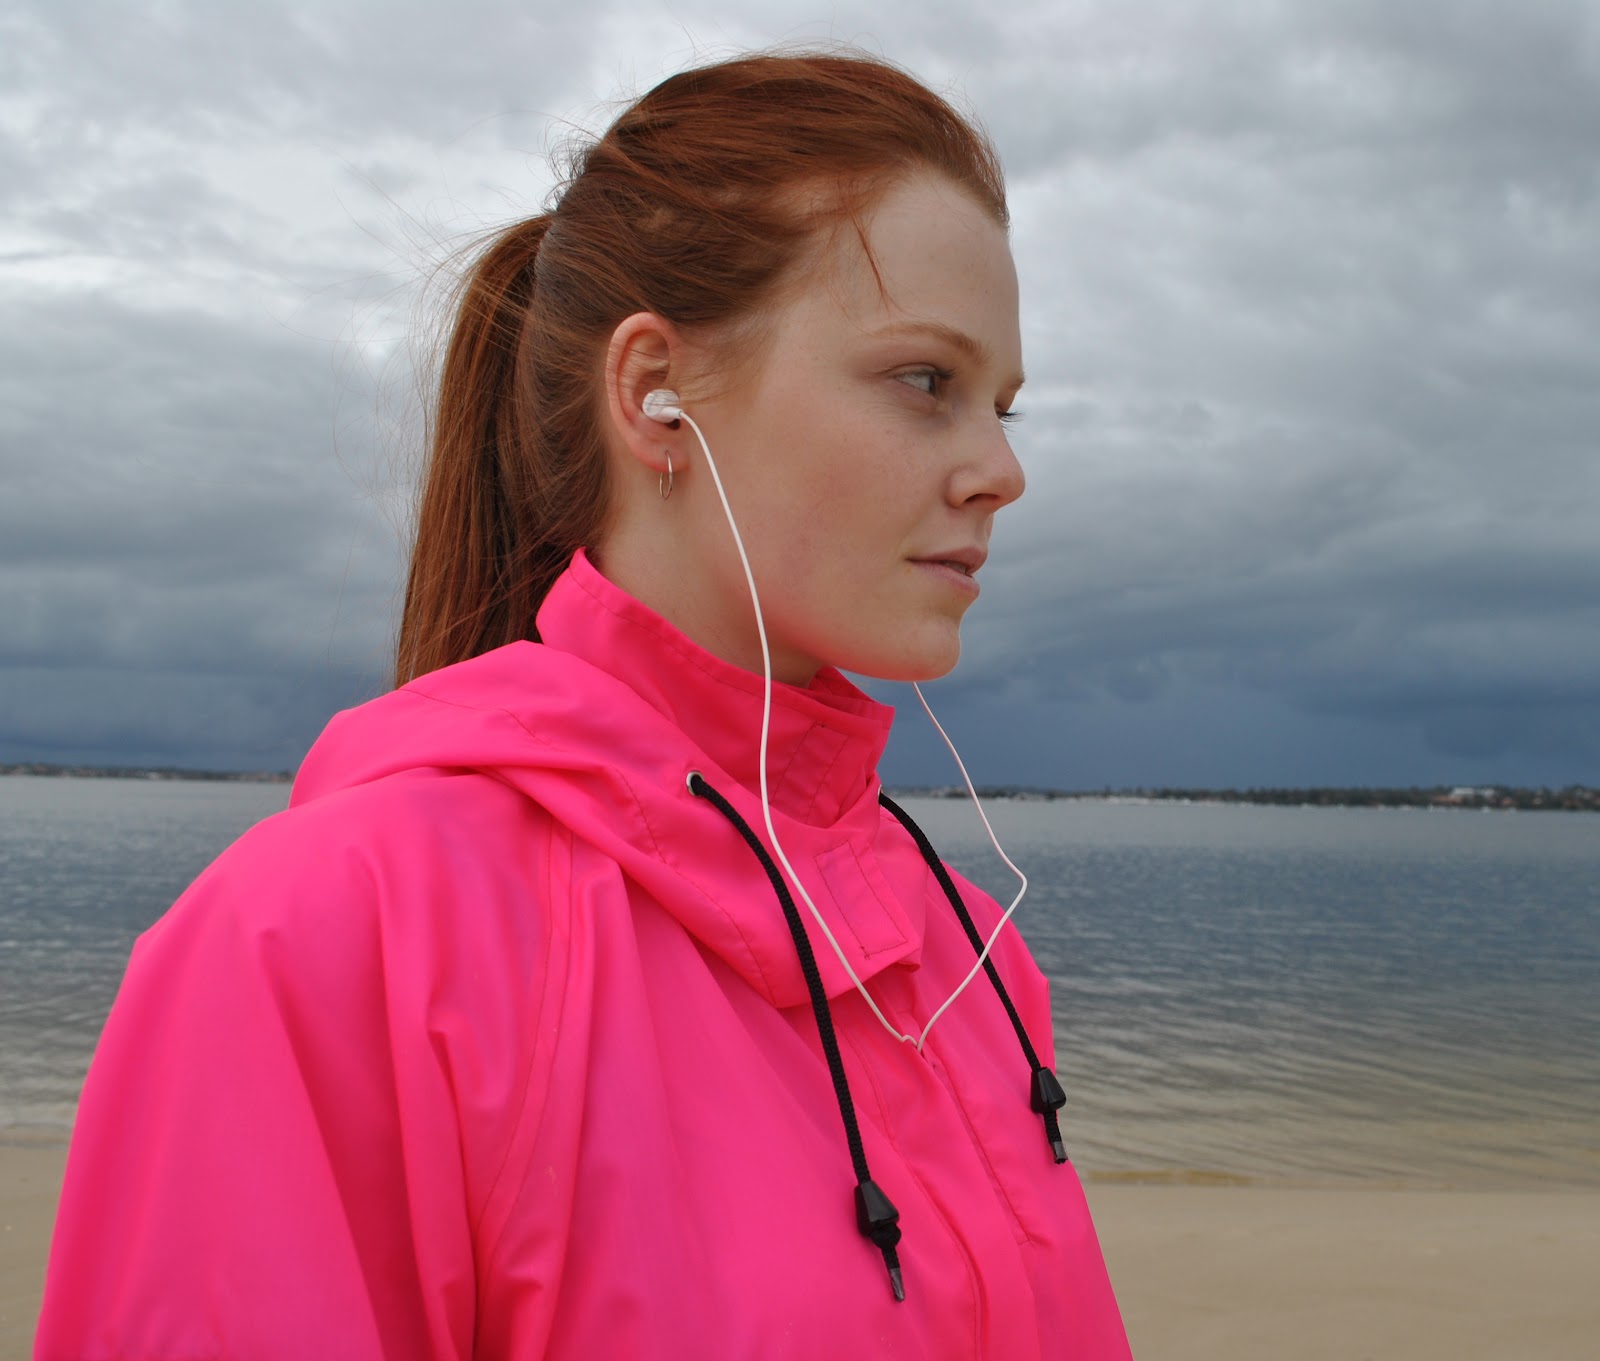
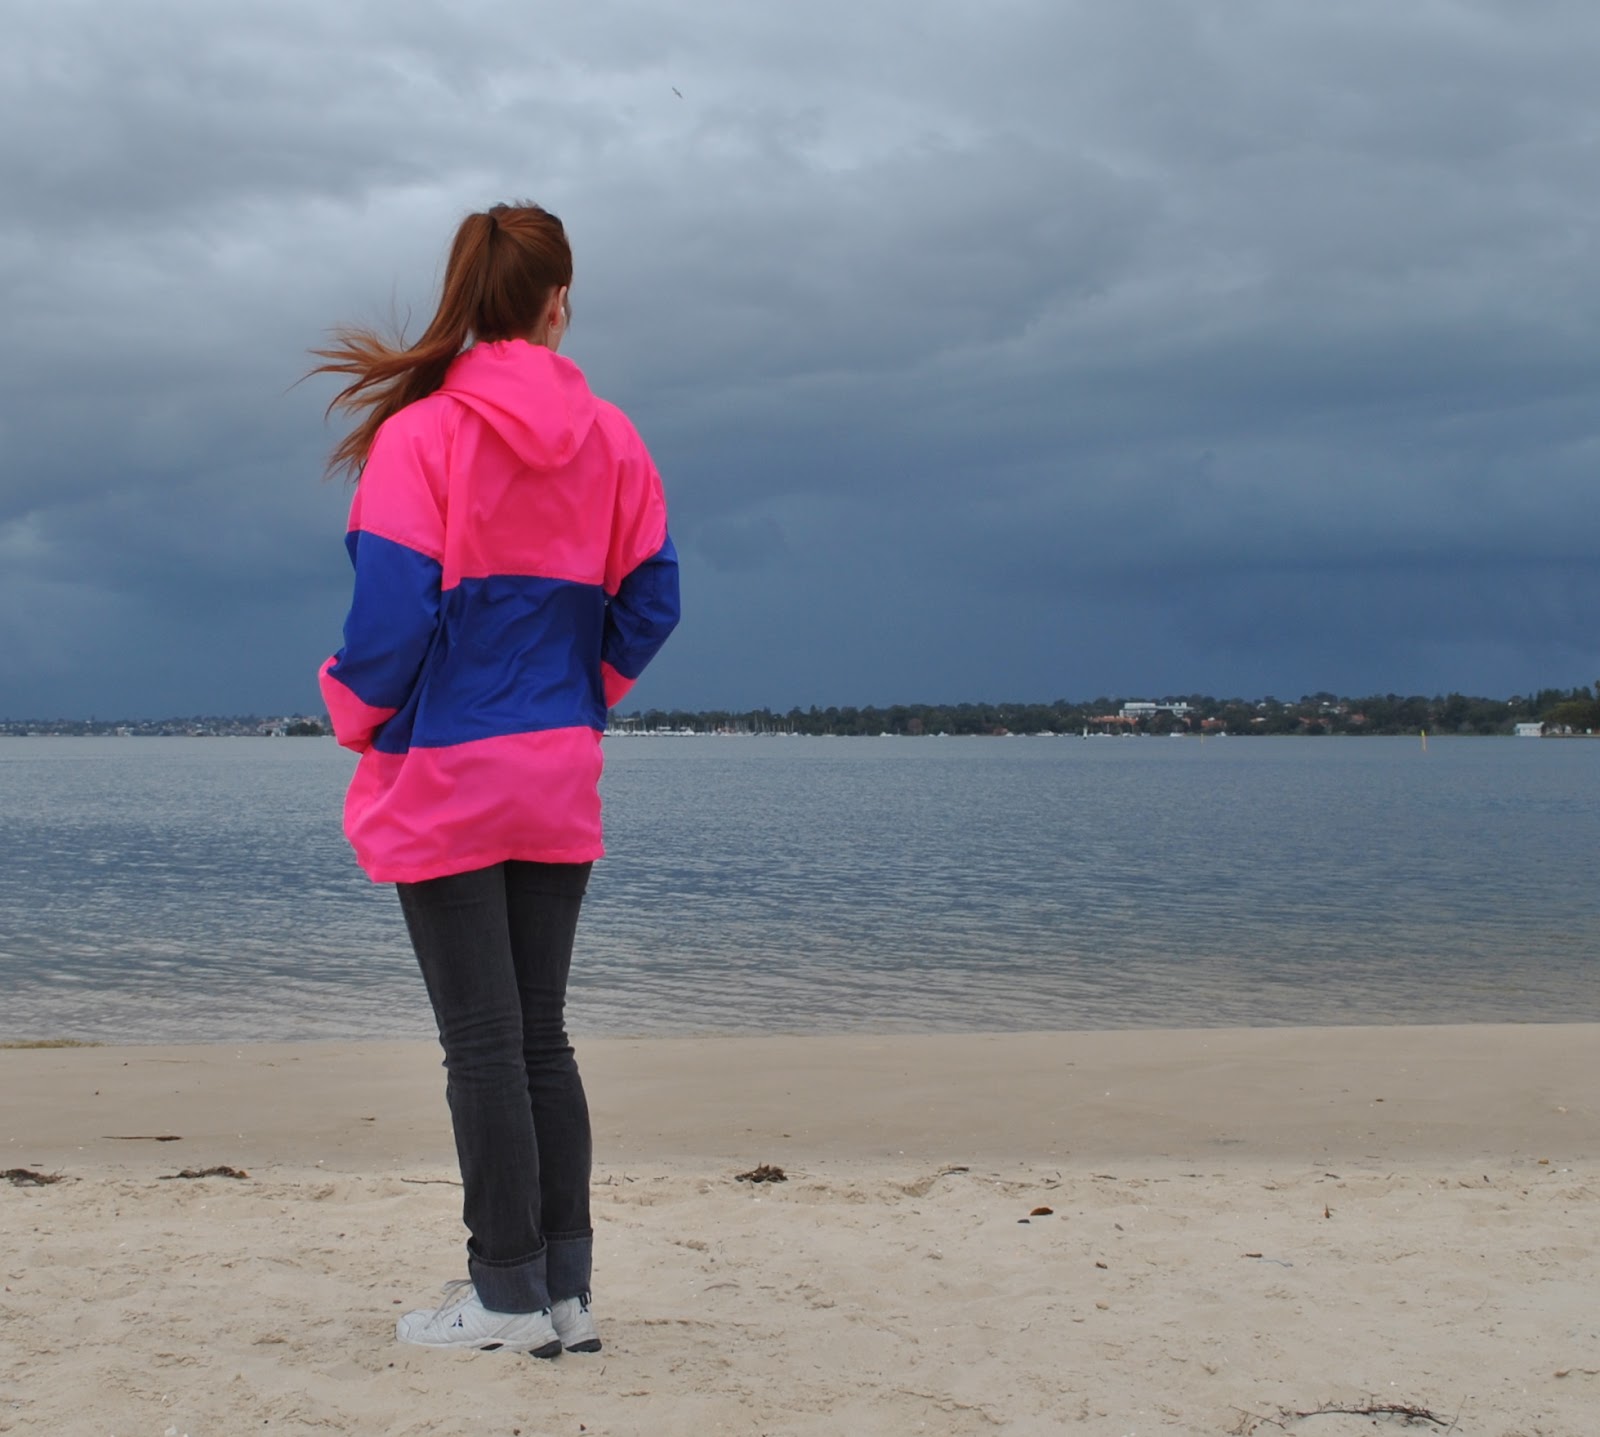
Ta da!  please allow me to present the raincoat that I have made for Cassie.
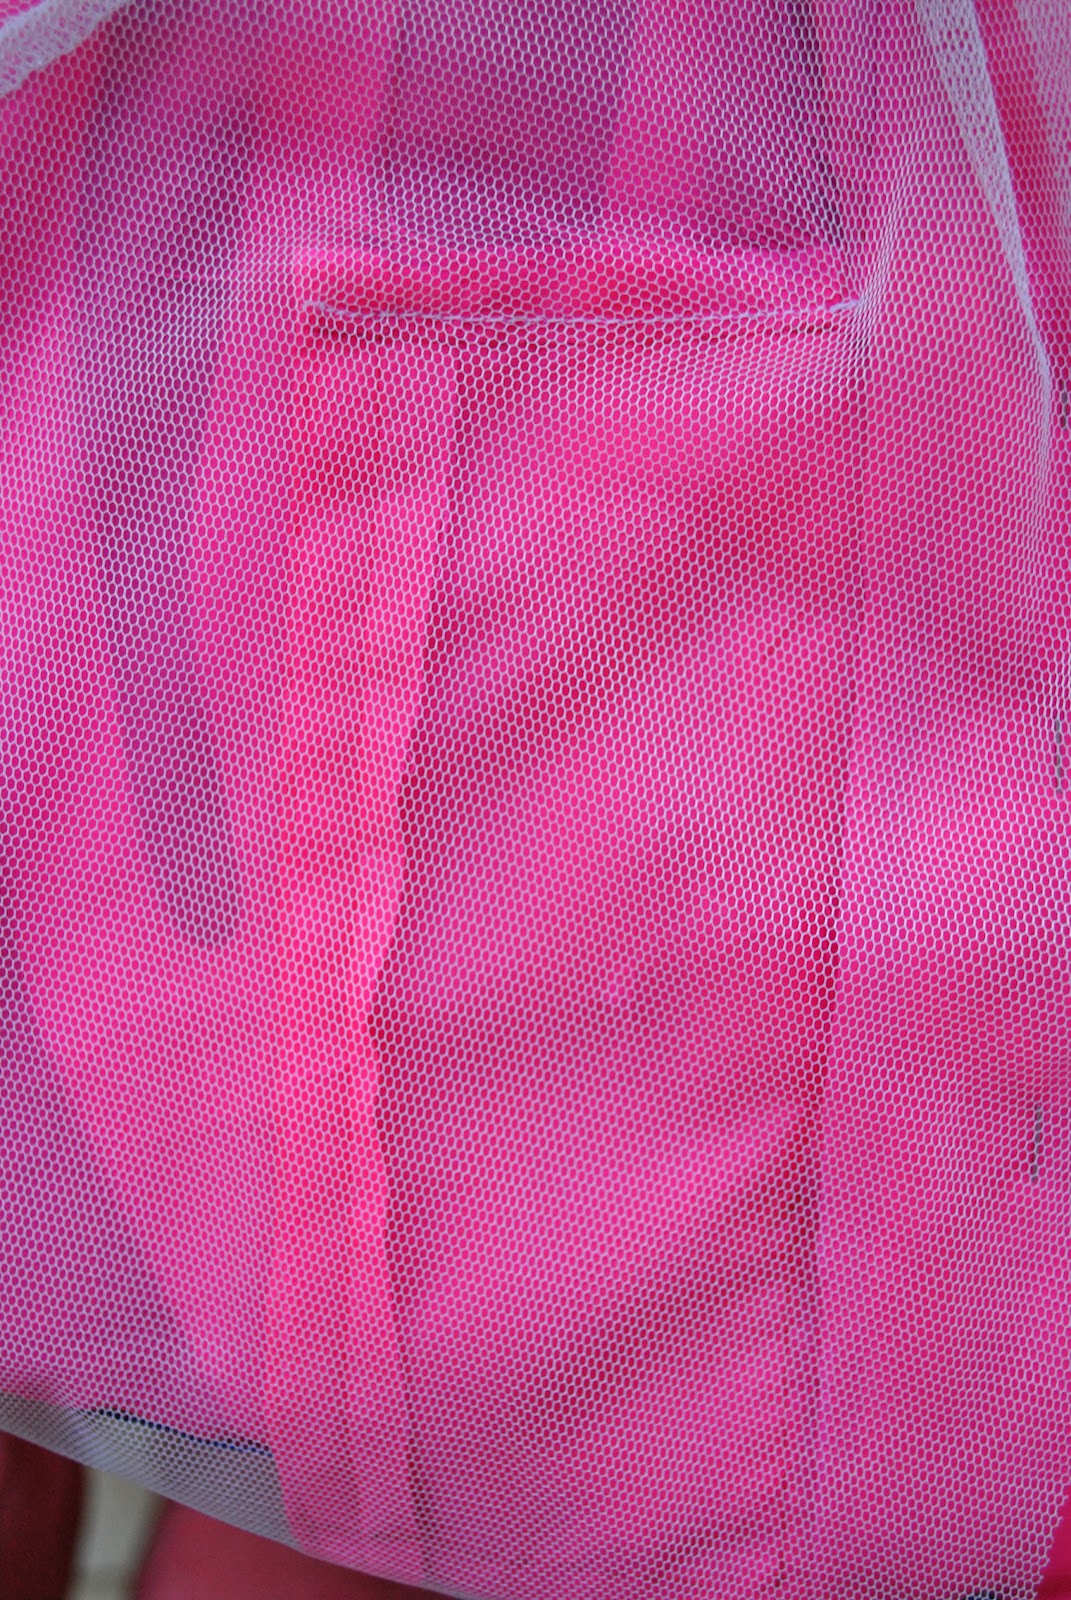
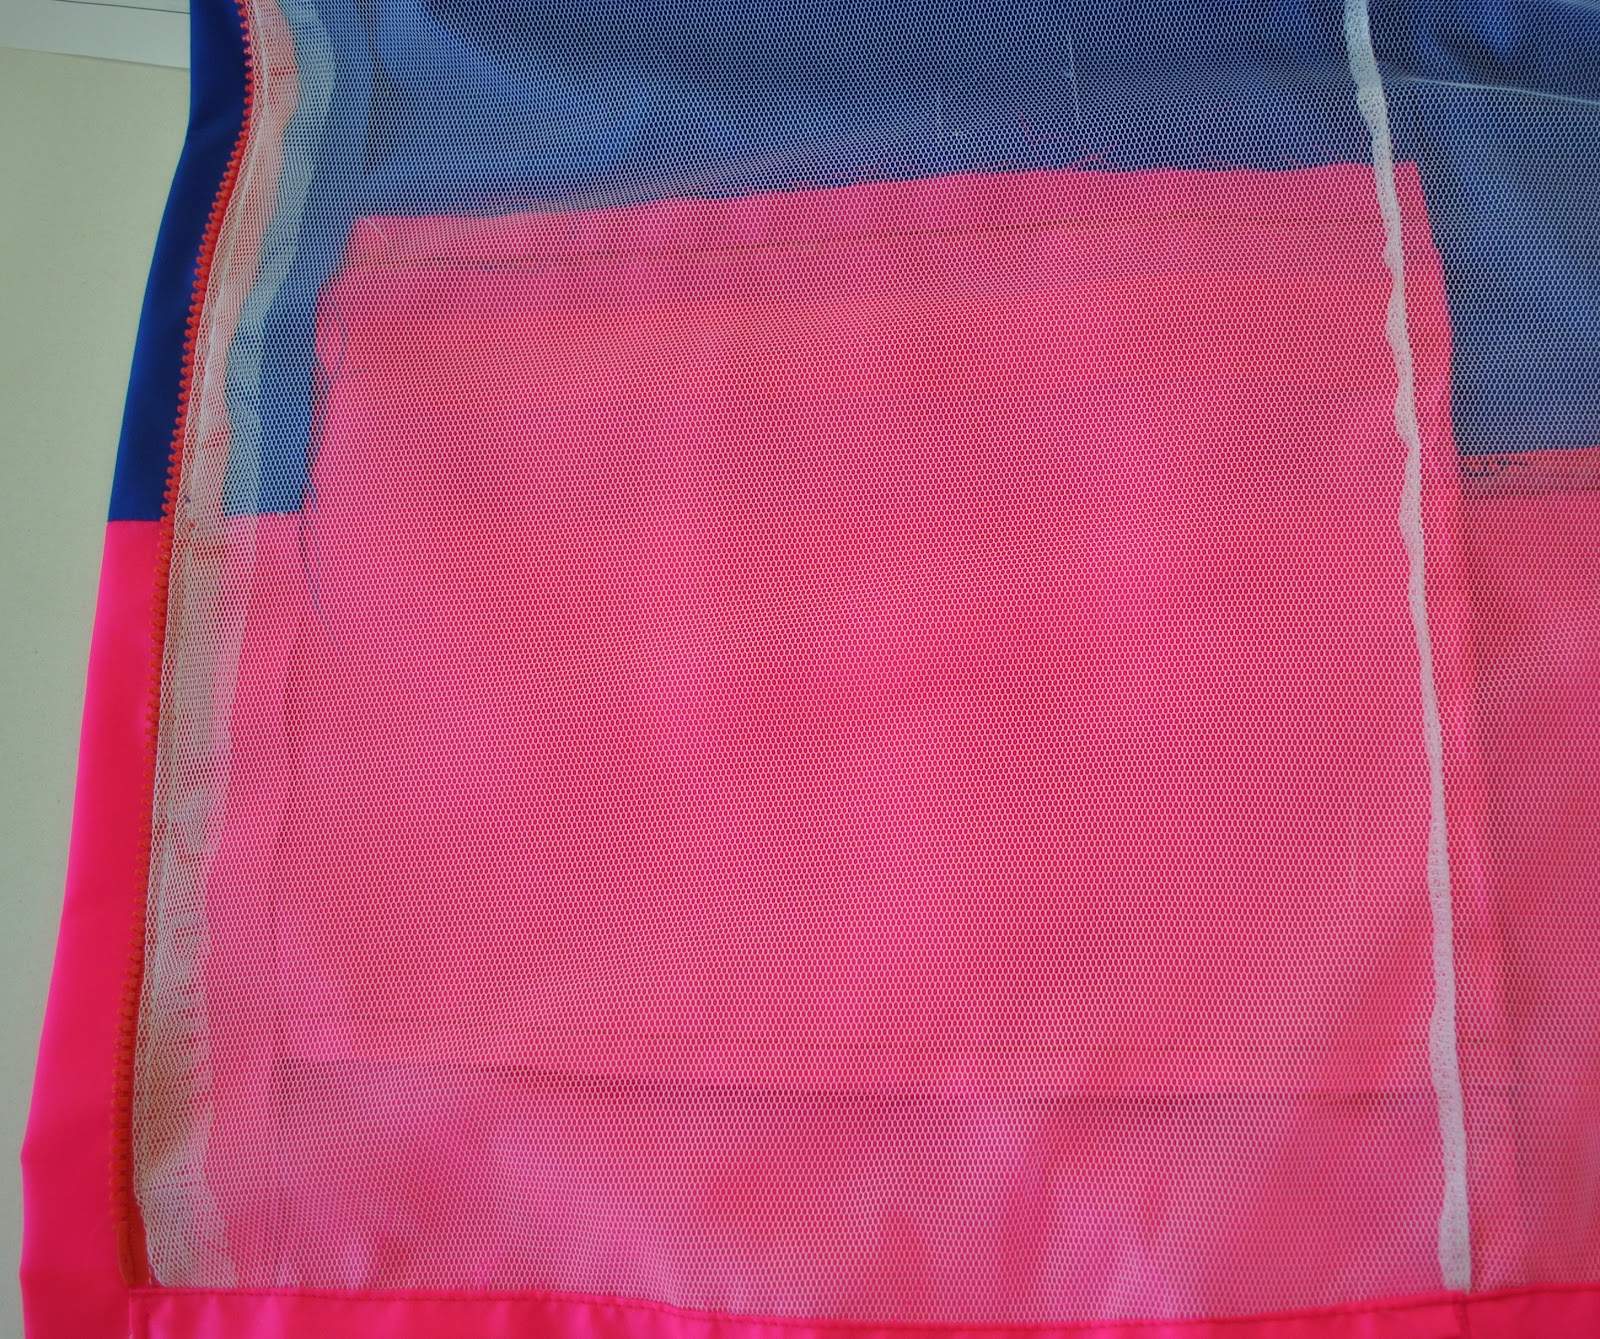
It is made using the same self-drafted pattern I used for my own raincoat, with just a few minor fitting adjustments.  All the details are identical to my own coat; the seams in the shell are French seams, waterproofed with Seam Grip, and the coat is fully lined with soft and lightweight white polyester net.
Cassie chose the colour herself and I am happy with the knowledge that she is unlikely to get run over crossing the road whilst wearing this  ðŸ˜‰

I ran into a snag buying the pink fabric, that fortuitously turned into a stroke of brilliant good fortune: previously when buying the royal blue fabric for my own raincoat I had bought 3m to ensure I had plenty to play with, since there is nothing worse than running out of fabric halfway through a project, no?  It turned out 3m was plenty, in fact it was way more than plenty and I ended up with an annoyingly large leftover piece.  This is a pain, because I am really trying to rid my life of leftovers.  Especially icky nylon leftovers which have a very small desirability in my wardrobe.  So when I went in to buy the nylon for Cassie’s raincoat I asked for 2m of pink, and was mildly horrified when the roll only had 1.4m left on it.  But the cunning stash-busting part of my brain instantly saw a beautiful possibility….  a quick consultation with Cassie, who cheerfully agreed that yes, a wide blue stripe did indeed sound very nice (phew!) and I went home with the 1.4m of pink, joyful that I was going to be gainfully using up the rest of that blue nylon after all… and so quickly after it had joined the stash too!  (air fist punch) Yeeah!

Of course it was not all beer and skittles from then on; I did have to conjure up a bit of pattern placement magic, and do various mental calculations for various stripe scenarios, and there is one short extra piecing seam in the blue under one sleeve, but I did manage to squeak the raincoat out of my pieces of royal blue and pink successfully.  I’m pleased to report that the final scrap count is almost non-existent too (‘nother air fist punch).

There was a hiccup; the making of this second raincoat did not go as smoothly as the first.  You know how the second time you do a thing everything is supposed to go much much quicker and easier?
Well, no.

Halfway through, my ironing cloth slipped a bit and I managed to iron a hole in one almost-completed front.  It was a very small hole, but it was.  An.  Unmistakeable.  HOLE!  When I saw this; steam started to emit from the ol’ ears and I had to walk away to calm down for a few hours.
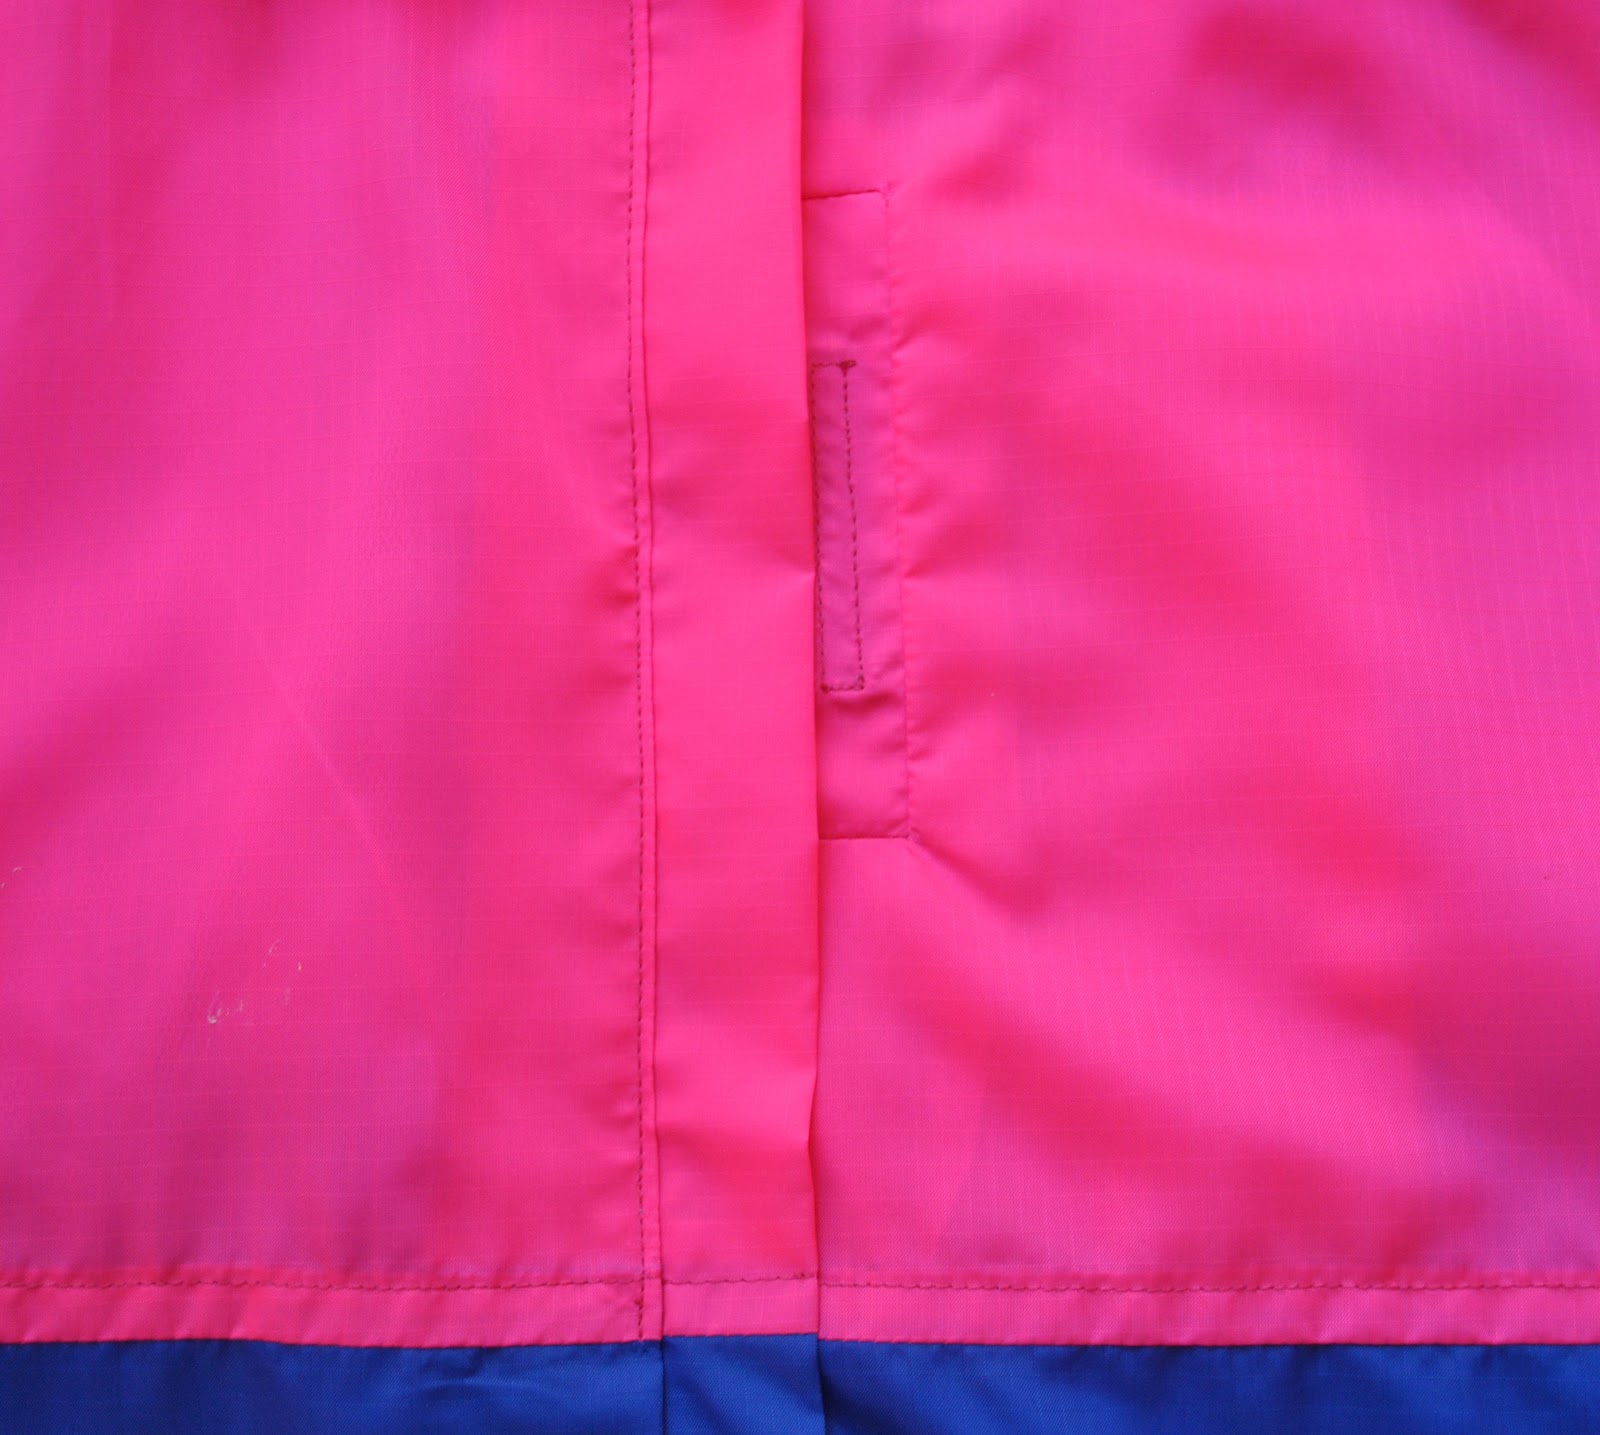
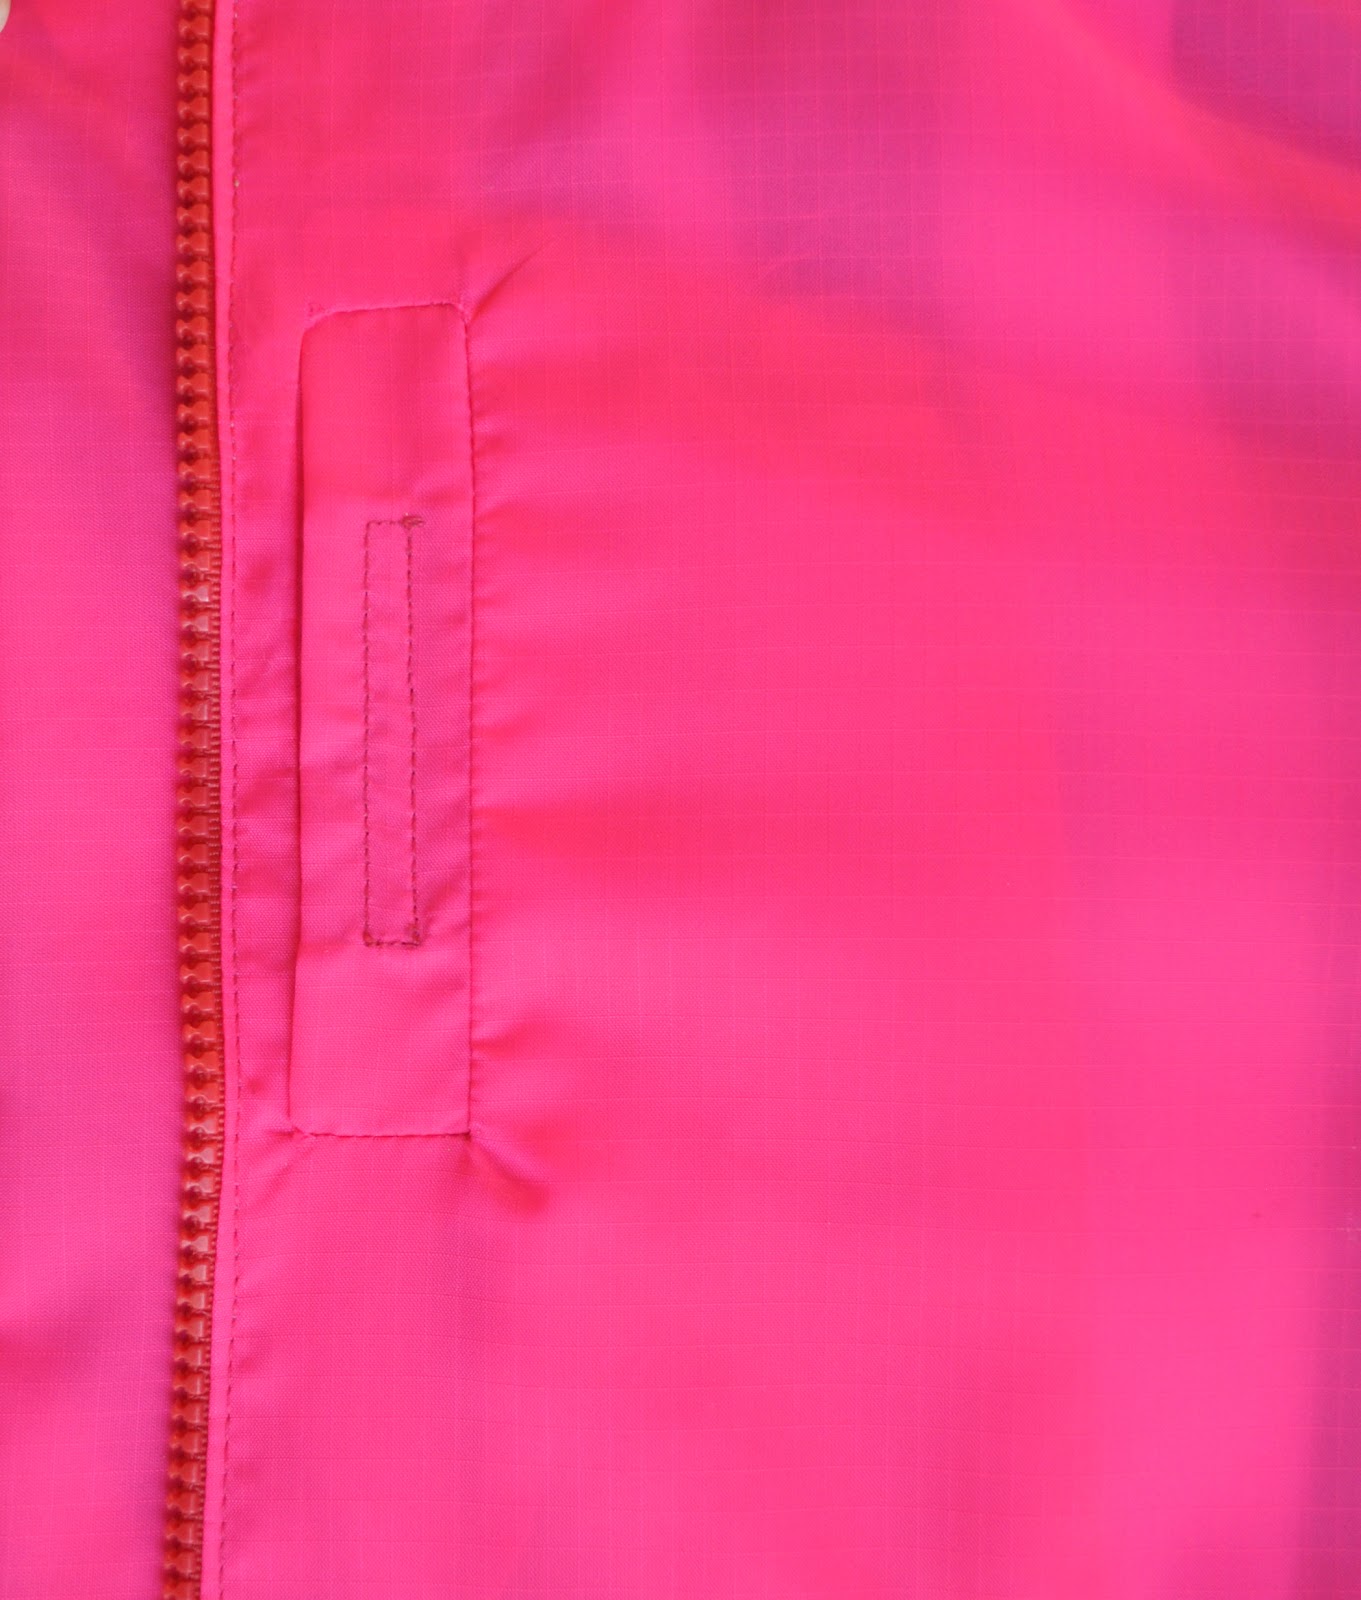
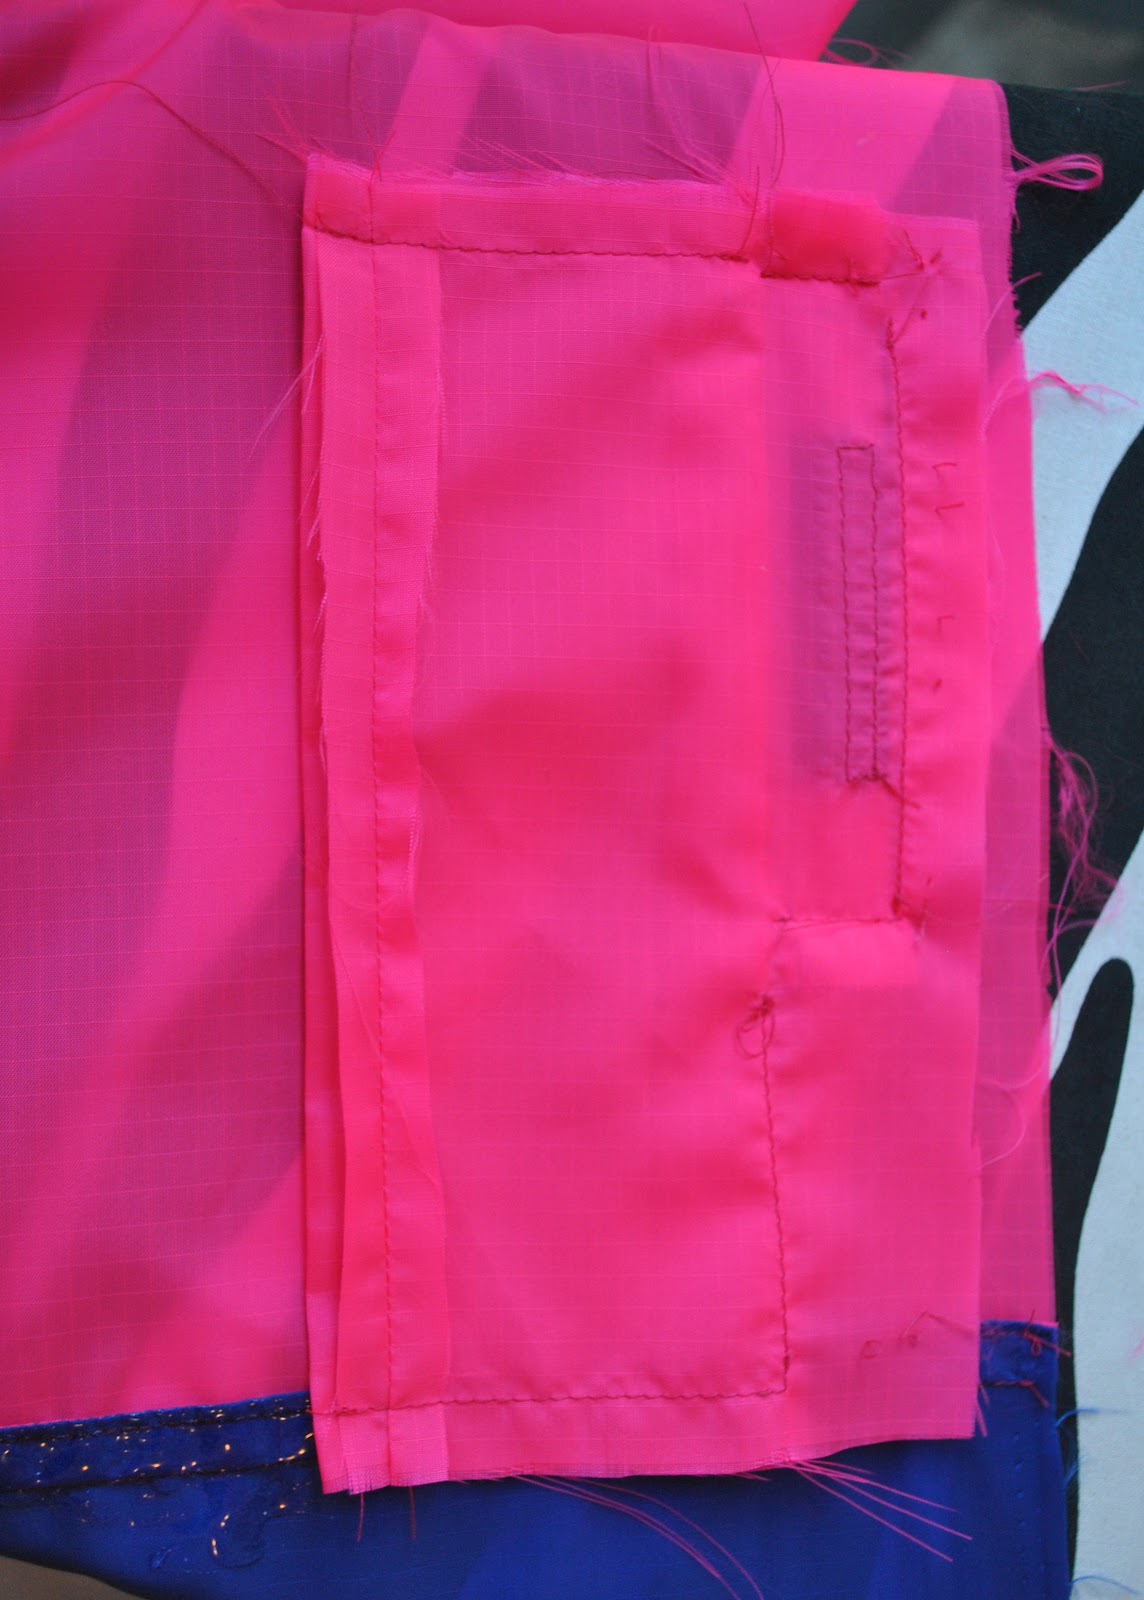
Once I had regained some composure, I returned to the coat and thought about possibilities.  Y’know when life gives you lemons there is always a silver lining, or something or another, yeah?  And I surprised myself with my own ingenuity by coming up with the idea of a little pocket for her iPod.  Where the offending hole was, there is now a welt, covering a little internal pocket.  It closes with a little mini-strip of velcro, with enough room at the top for the headphone cord to come out.  And fortuitously, the welt is in the perfect position where its vertical opening is covered by the zip placket when the zip is closed, improving waterproof-ability.  Yowza!  It’s like I planned it all along!!

Below left; I made the welt as small as I could that could still fit the iPod sliding in sideways, the pocket bag hangs below and to the side… Below right; I stitched the top of the pocket bag to the lining to help reduce the drag effect of having the pocket bag off to the side of its opening.  Fortunately, iPods are very lightweight!

I am happy now.
And y’know what?  I am even more ecstatically happy that none of my boys wants or needs a raincoat, and that this is the end of raincoats.  At least for now.  I’m raincoat-ed out.  I want to make something fun and easy and selfishly frivolous now!
Later, fellow self-fashionistas!

pinterestmail

Smalls

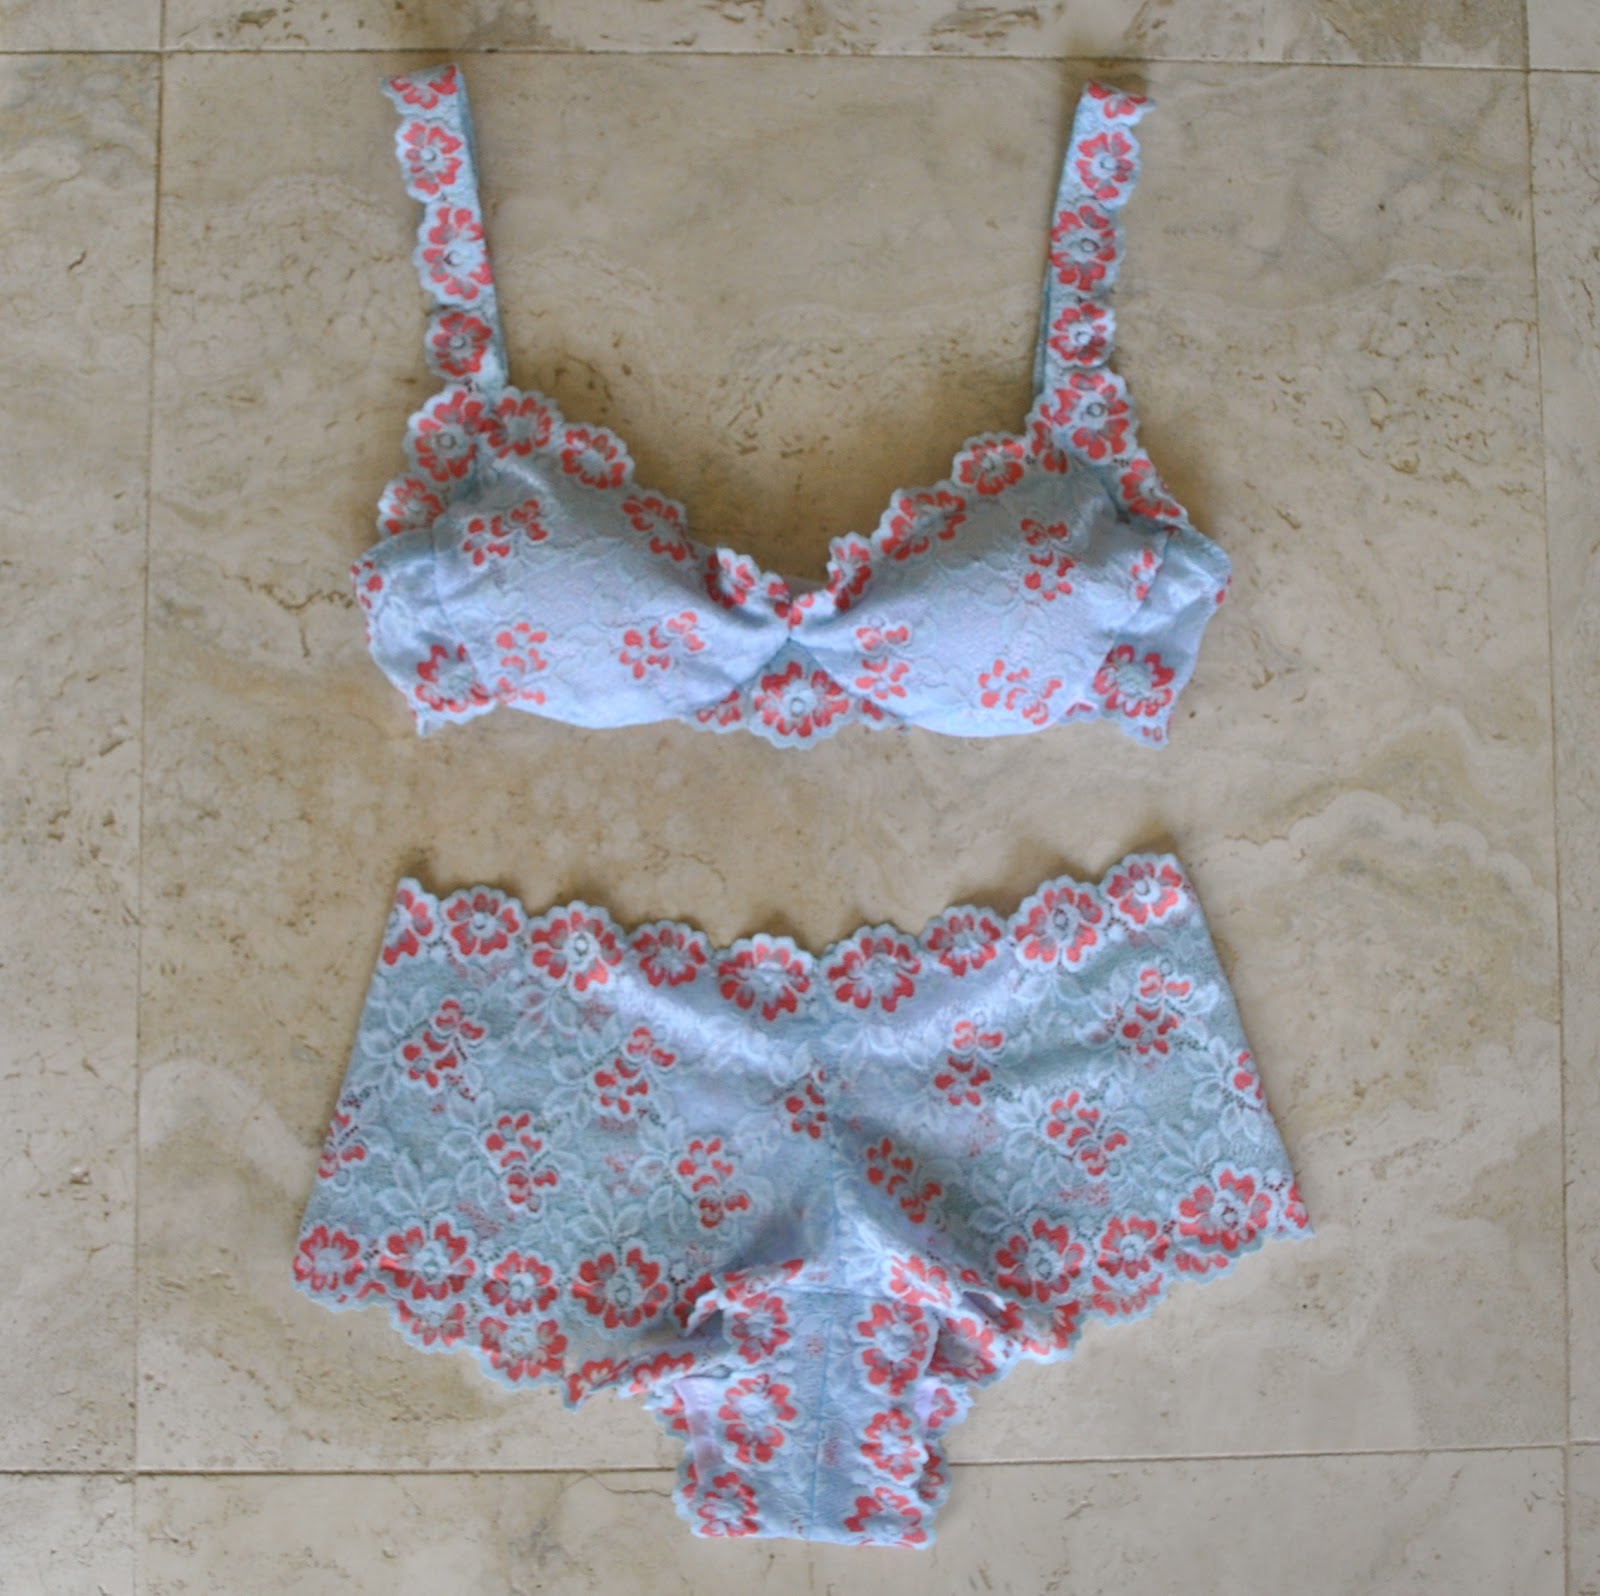
Hehe, I was thinking of calling this post “My First Bra”, but apart from making it sound like the breathless diary entry of a sweet young teen  (ahem) I have actually made two bras before; both years and years (and years) ago, neither of which are around any more for me to post about.  But this is the first in my blogging life; so , er, yeah…
I’ve kept to my Wardrobe Refashion pledge of 3? years ago to make all my own clothes, but always exempted myself from underwear; reasoning that I was doing enough in the handmade department already and that I could allow myself a small break here and there.  Also, up until a few years ago Bonds were still manufacturing undies in Australia, and I was OK with supporting a local business by buying them.  But then they went to the dark side, and started moving all their manufacturing to China.  When the last Bonds factory in Australia closed down a few years ago I knew my days as a Bond girl were numbered (wipes a sentimental tear from the old eye)  I liked being able to say I was a Bond girl!  And now my current smalls collection is… well, lets just say it is an absolute wonder my husband still finds me attractive.
One of my favourite bloggers Novita makes the most exquisite lingerie sets you have ever seen, each more lovely than the last; and her latest Red Lace Set finally tipped me over the edge and I decided that I just had to start making my own too.  I rushed out to Fabulous Fabrics for some pretty lace and bra bits…
The knickers pattern is Tanga, a free downloadable pattern from Burdastyle.  I had seen this on their site before, but the wonky mis-matched lace scallops in the blue sample pictured with the pattern were so distressing I never took it any further.  Novita’s set is beautifully constructed and so perfectly pretty, I woke up to the fact that this is actually a darn cute little pattern after all!
They are super-easy, and take all of about ten minutes to make from go to whoa; even if you do take an extra few seconds to match all the lace motifs…  ðŸ˜‰  which of course I did.
Because I am a woman of a certain age and my lace is partially see through; I extended the panty liner piece up to make more of a full lining at the front of the knickers.
My bra pattern is self-drafted, with the help of an old bra.  This was, ahem, not super-easy  ðŸ˜€  I looked at a commercial pattern but decided in my usual foolishly gung-ho, can-do manner; how hard could it be?  Well, it turns out, it is quite hard to put together a self-drafted, well-fitting bra after all!
My bra looks pretty from the outside, but the insides are far from perfect.  It would not bear up to close inspection!  Unlike the first two bras I made years ago which were fairly basic, I tried to get all fancy with this one, lining and underlining it, with moulded cups and underwires in their own separate channels.  Putting it all together was a jigsaw puzzle!  So I have decided to buy a pattern for any future efforts, if anything just for the instructions on the correct and proper assembly!!
One “easy” feature I incorporated: it doesn’t have adjustable straps, because honestly; I feel like that feature is only on RTW bras because they have to fit the different over-the-shoulder lengths of many different sized women.  Since the bra has to fit only me, I decided that to have self-lace covered elastic straps would be fine.  And it is.  I did this for my first two bras too, and they were always perfectly fine.  When the elastic does eventually stretch out a bit through wear, I just unpicked the straps at the back, shortened them a tad, and re-sewed them back into position, easy peasy.
The bra also has a purchased hook and eye closure at the back.
So; after struggling through fitting and assembling this thing and half expecting it to turn out hideous; I was pleasantly surprised when I had the final try-on and discovered it to be beautifully easy to wear, soft and yet still supportive, fits perfectly; the most comfortable bra I own.  A very unexpected win!
Seriously; I have no idea how that happened.
So I will definitely be getting a proper pattern for next time.

pinterestmail

Waterproof pockets for a raincoat

I put these pockets in the two raincoats made recently, and they’re pretty well perfectly waterproof.  Yay!  See, while we have only had mobile phones, iPods and electronic keyless entry thingys on our car keys for a few years, they are now ubiquitous.  And they need to be kept dry.  So, when I was thinking about my new raincoat and its pockets, I gave them a lot of thought re waterproofing.  Firstly I eliminated as many seams as possible.  Water can seep in through any and all unsealed stitching holes in a raincoat; so pocket designs with lots of exposed stitching, like patch pockets, and stitched-on pocket flaps, require tonnes of sealing, which is a messy, smelly and generally horrible job.  So it’s a good idea to plan to eliminate them, if possible.  Likewise, exposed zips are not good in the rain.  
There is only one line of exposed stitching in these pockets, so it’s not too painful to waterproof with a commercial sealer.  
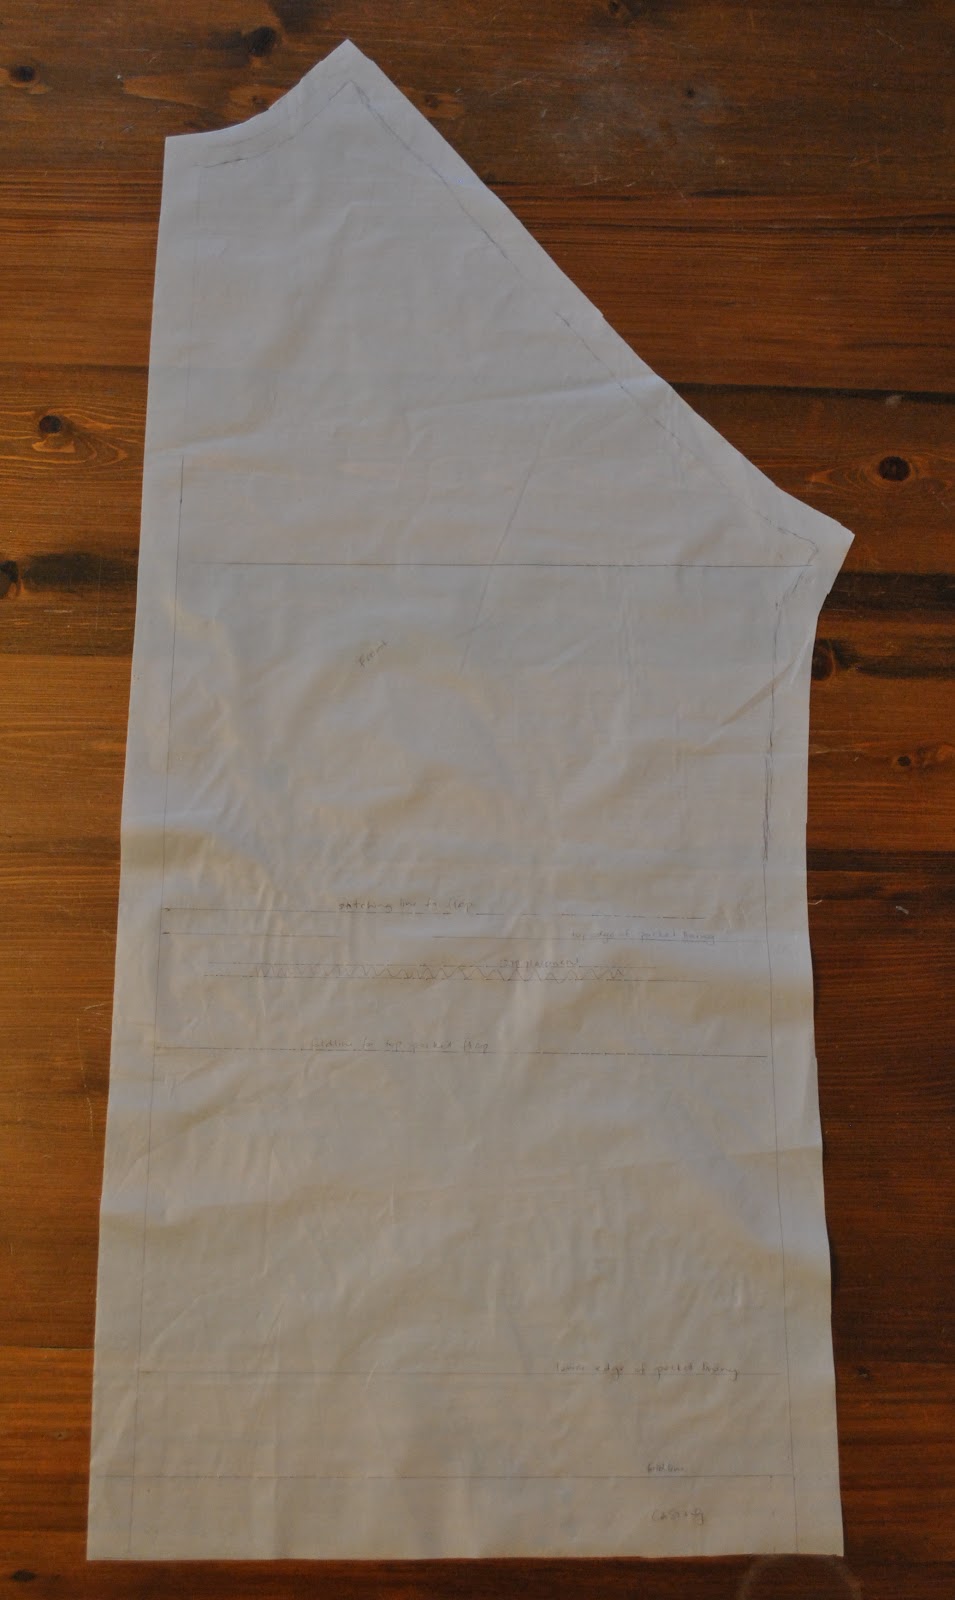
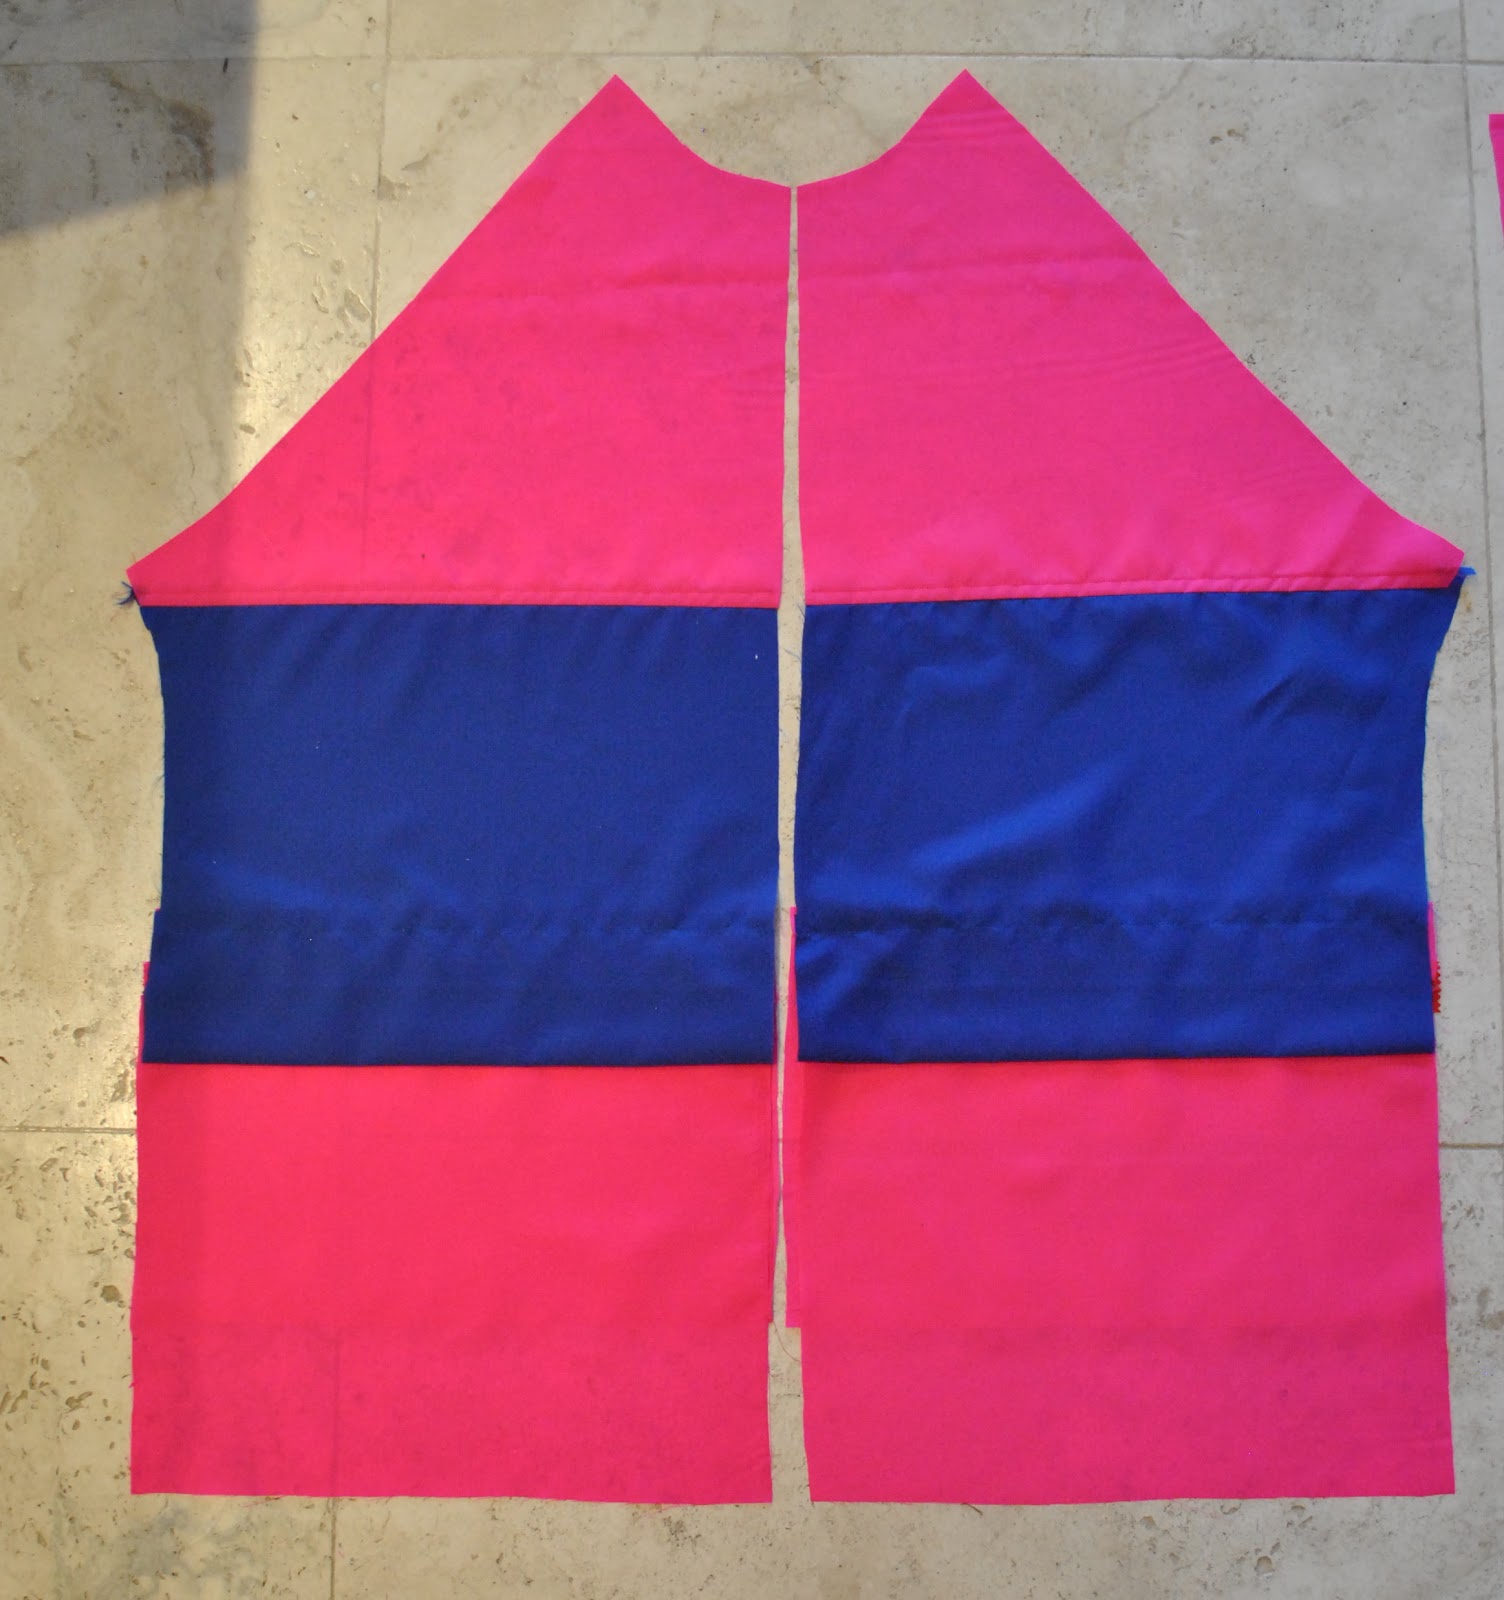
This pocket eliminates some seams by extending out to the side seams at one side, and into the placket, at the centre front.  So all of the pocket pieces are cut the full width of each front of the jacket.

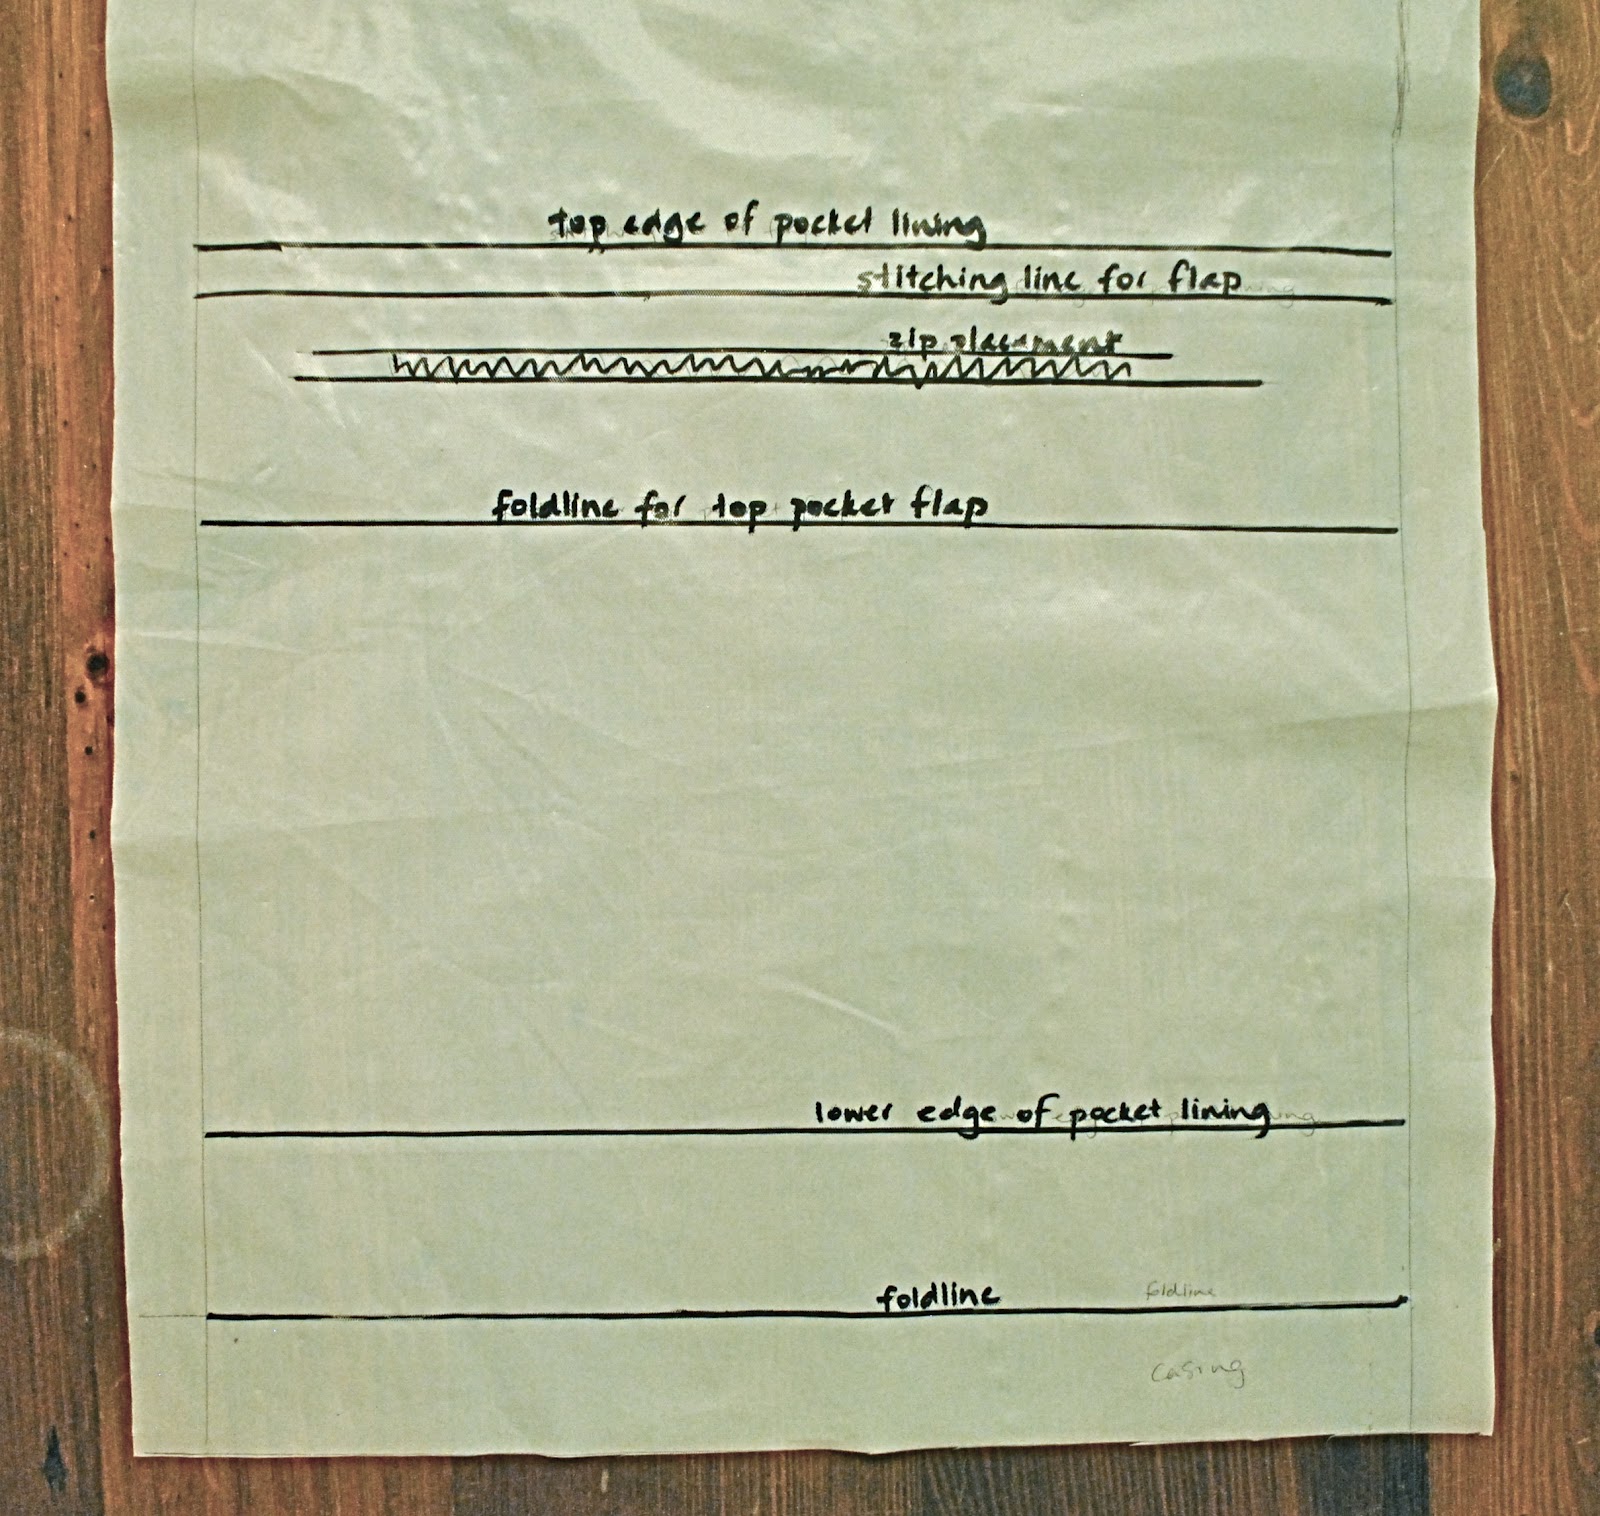
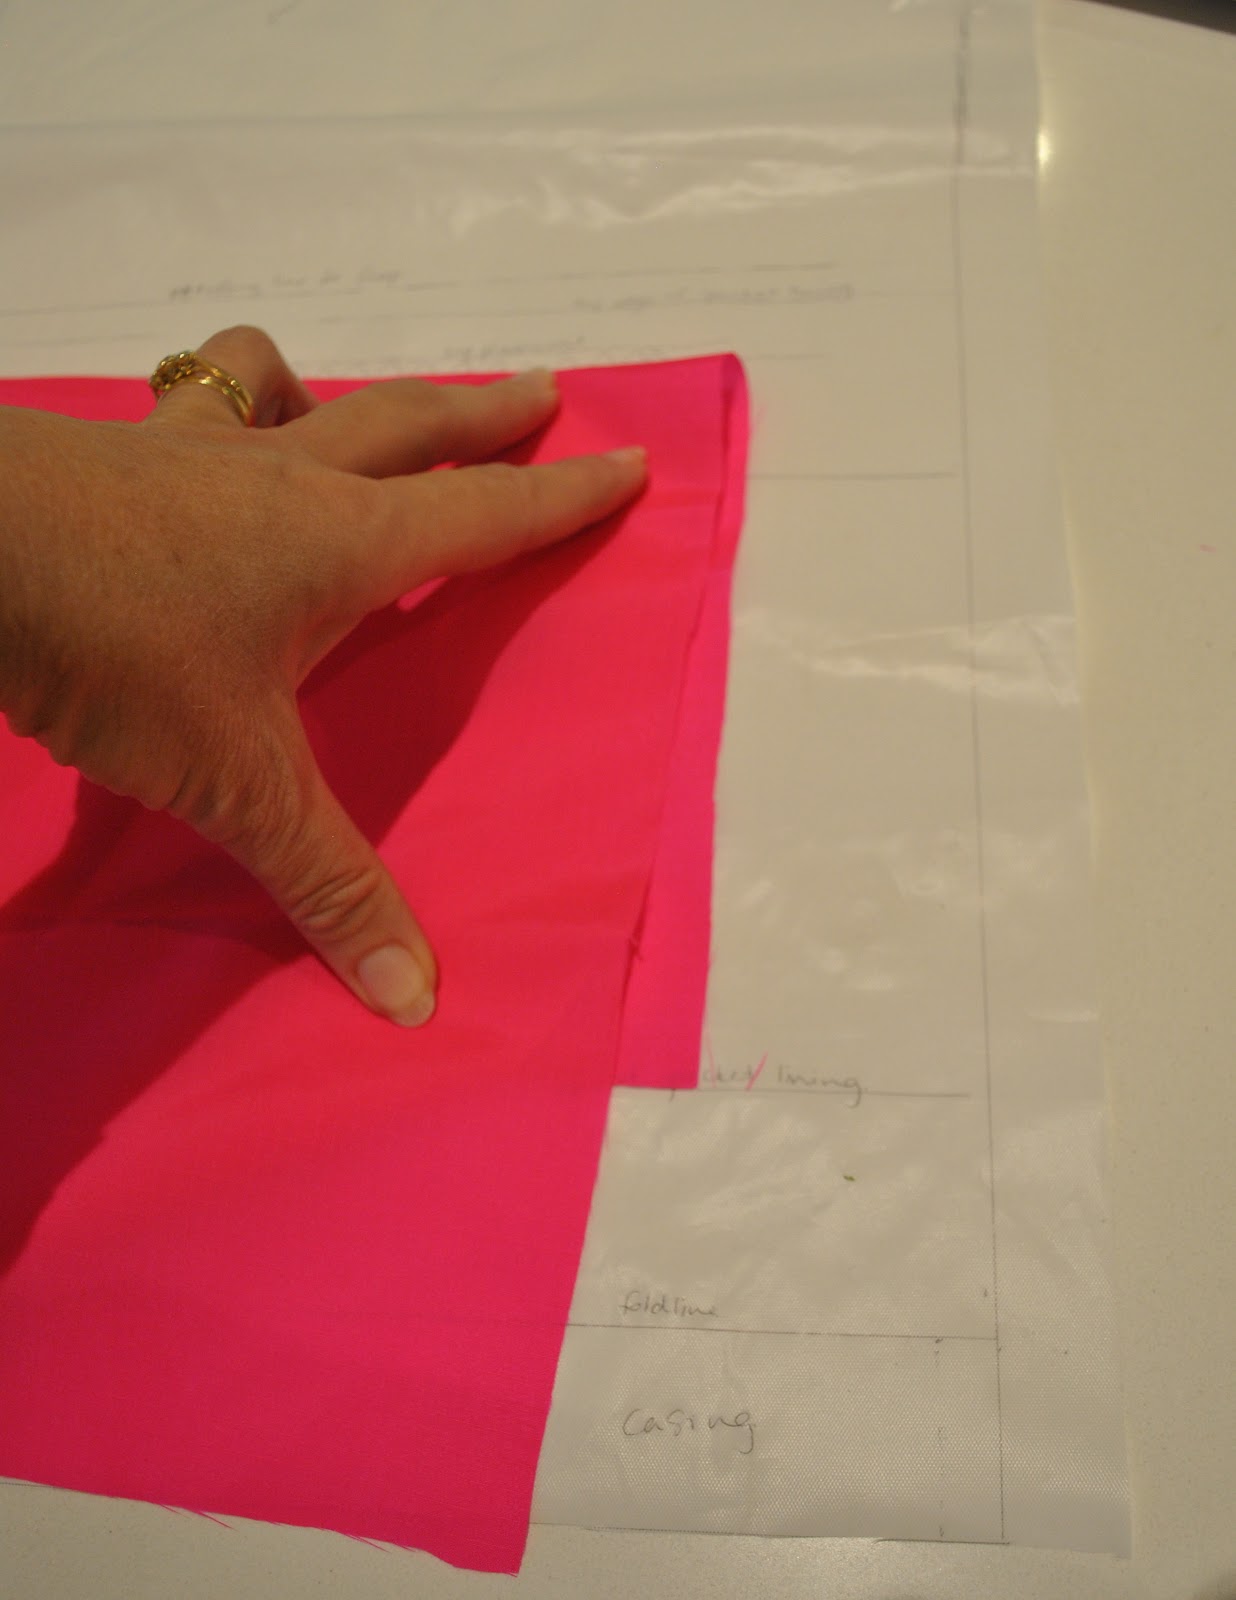
The front jacket piece looks like above, and the close-up below shows the relevant markings for the front pockets.   I’ve re-marked them but I apologise that it is still difficult to read them; they read, from the top:

  • top edge of pocket lining
  • stitching line for flap
  • (two lines with a zig-zag between them) zip placement
  • foldline for top pocket flap

(and much lower) 

  • lower edge of pocket lining
  • foldline (indicates the lower edge of the finished jacket, below this is the hem allowance)

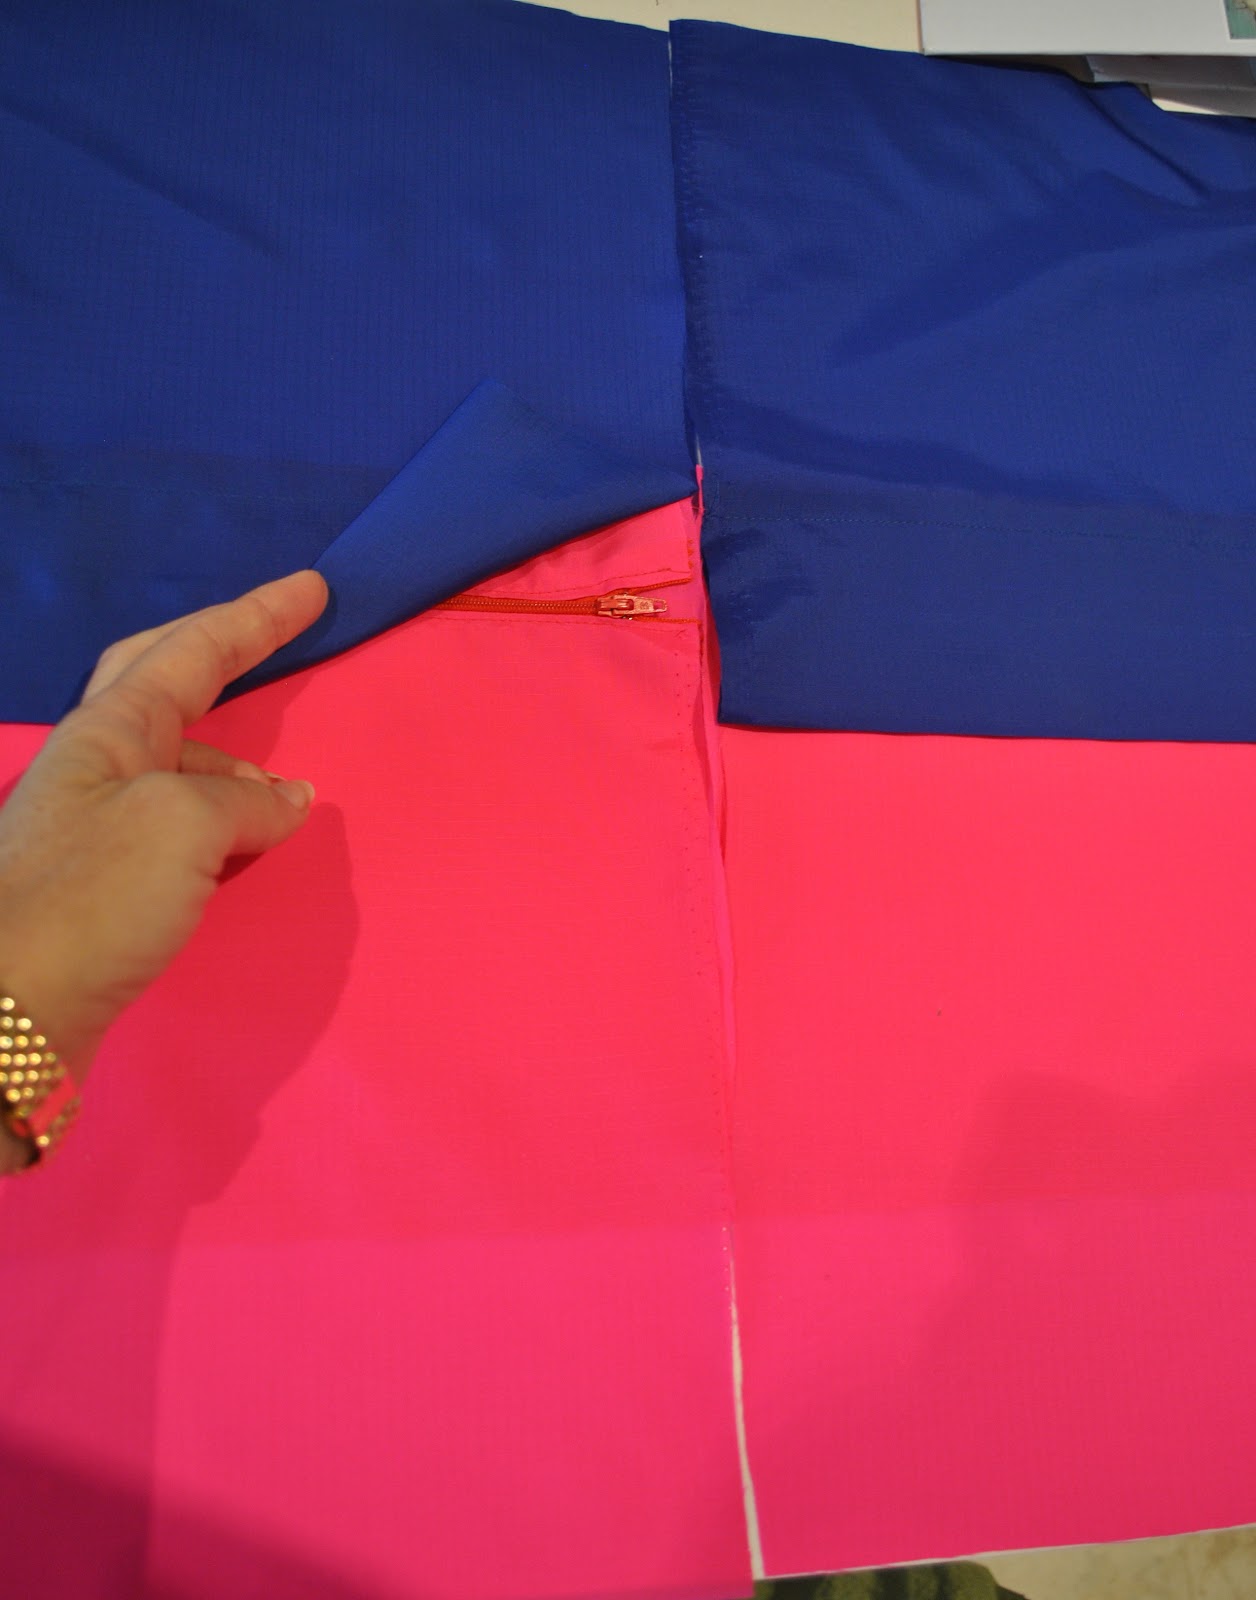
First, cut the two lower front pieces… these should be long enough to extend from the lower edge of the pattern piece above; up to the lower edge of the “zip placement”, and then fold here to finish at the “lower edge of the pocket lining”.  I’ve pictured it splayed out here to show the length and how it folds at the zip placement line…

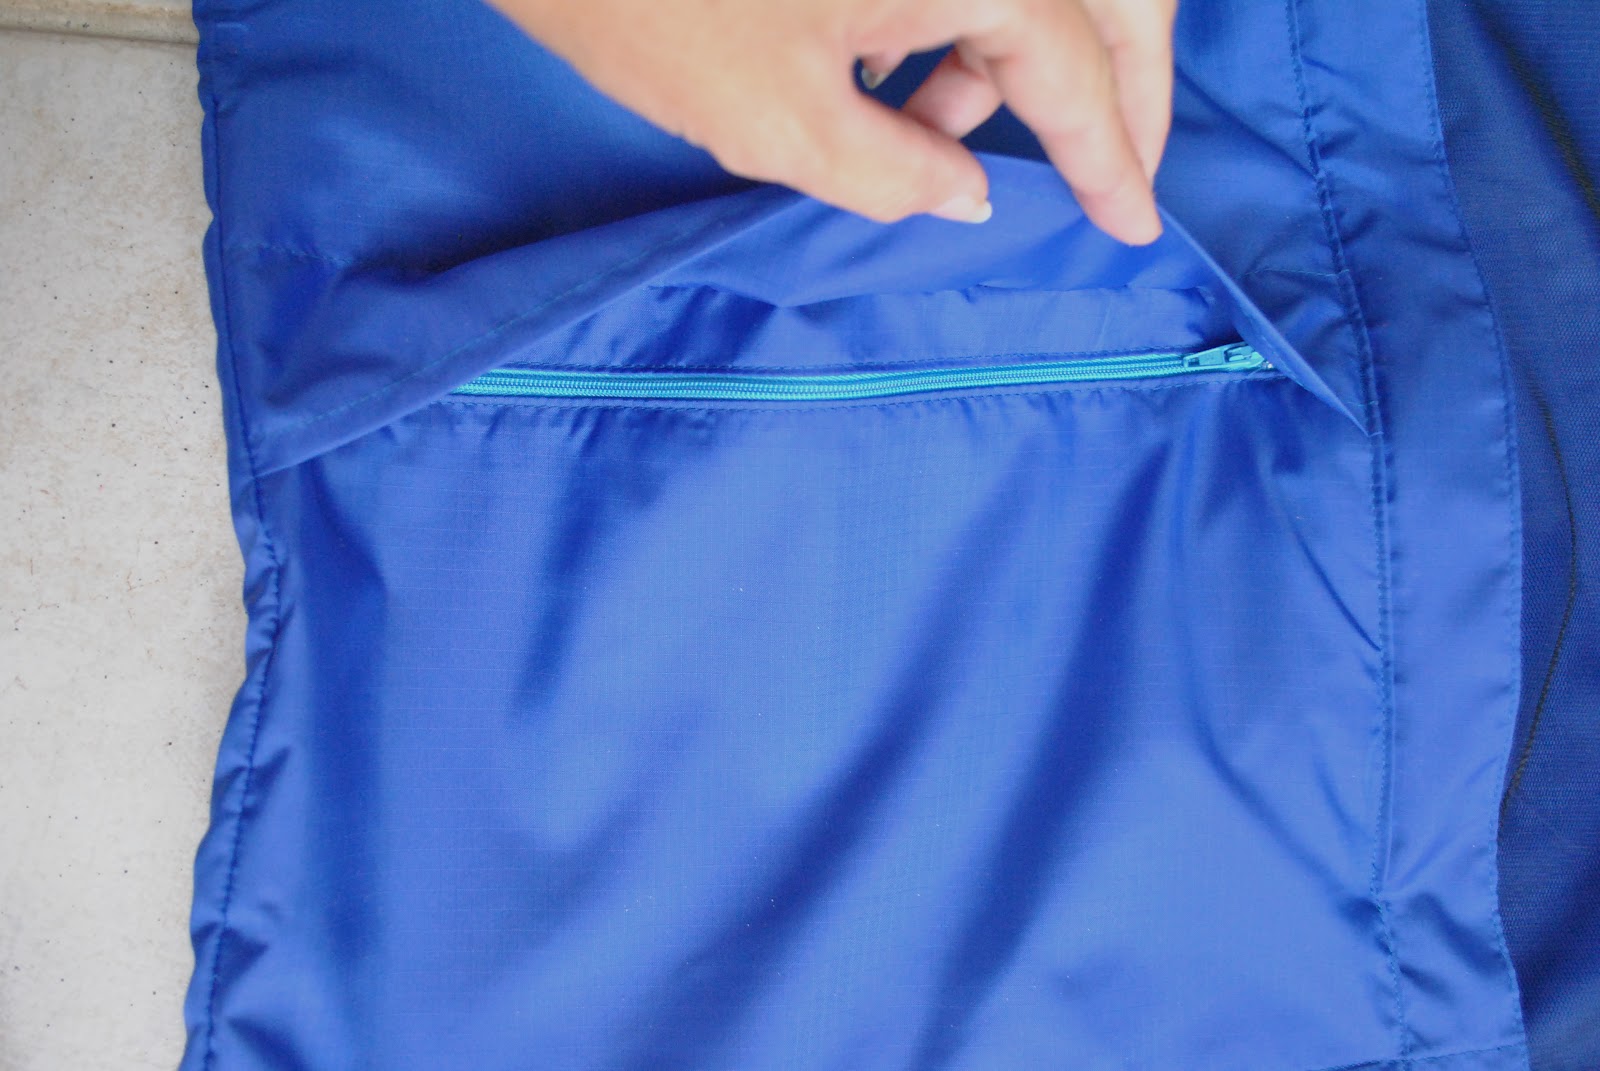
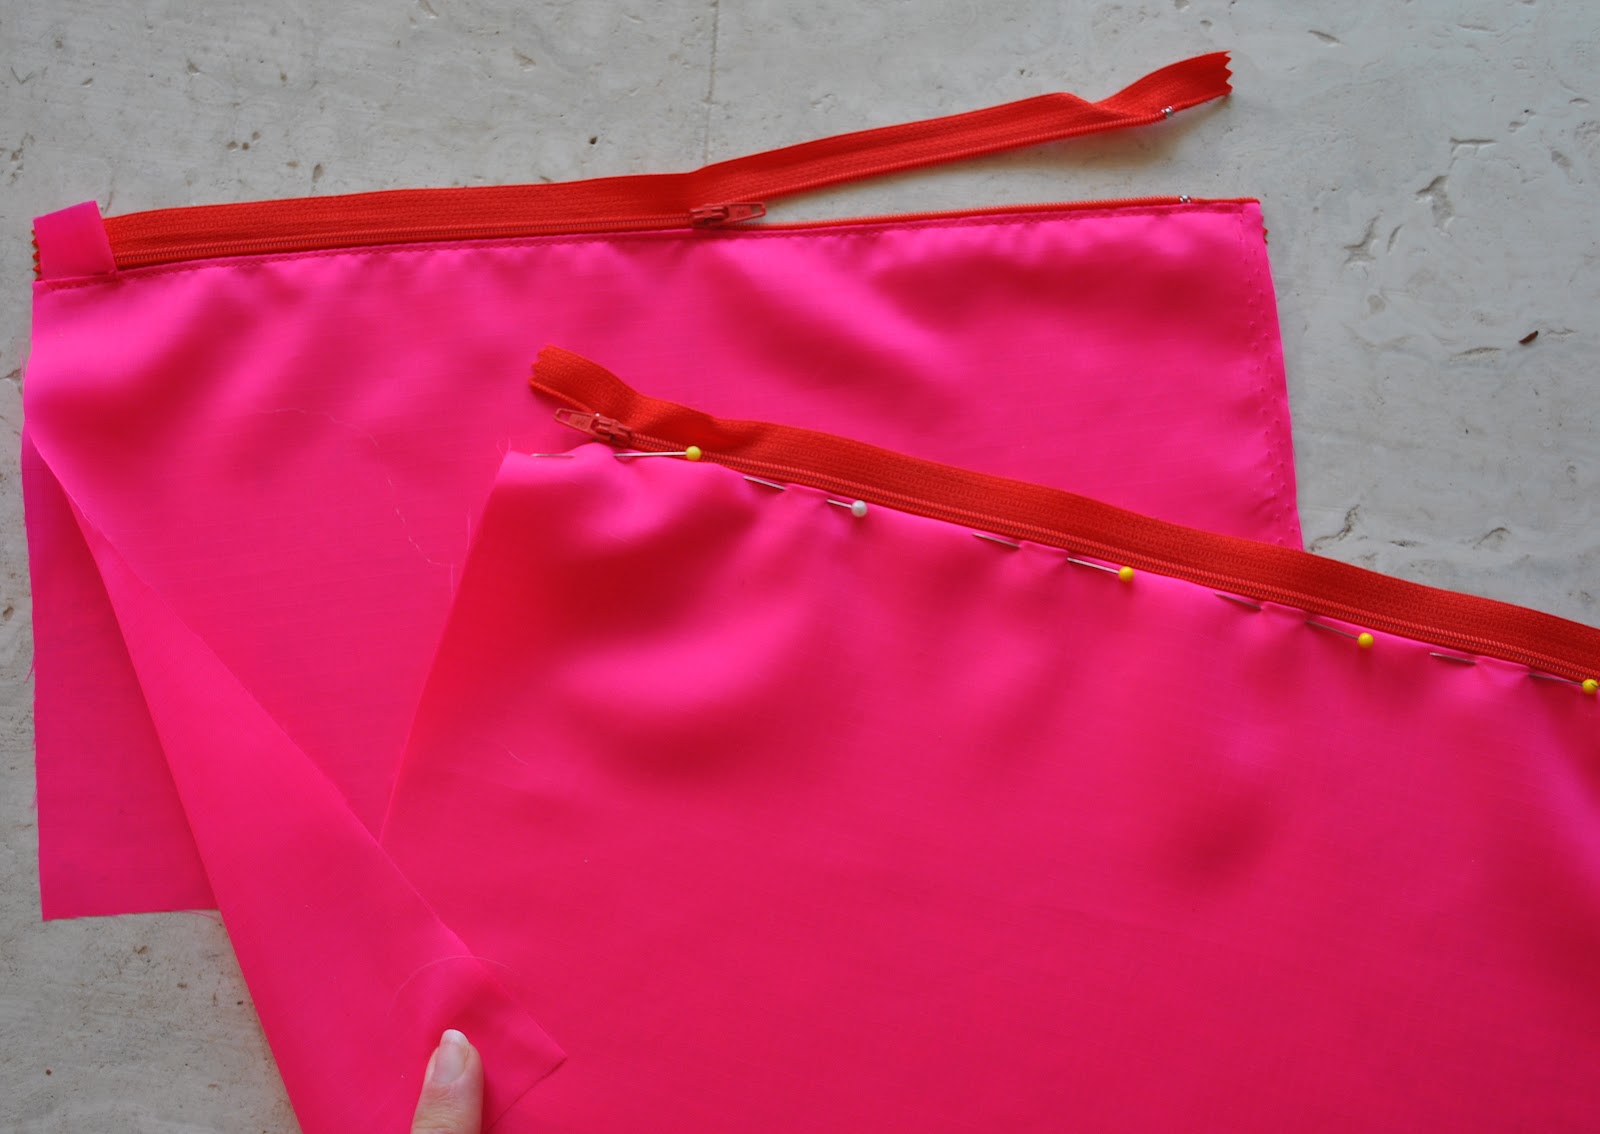
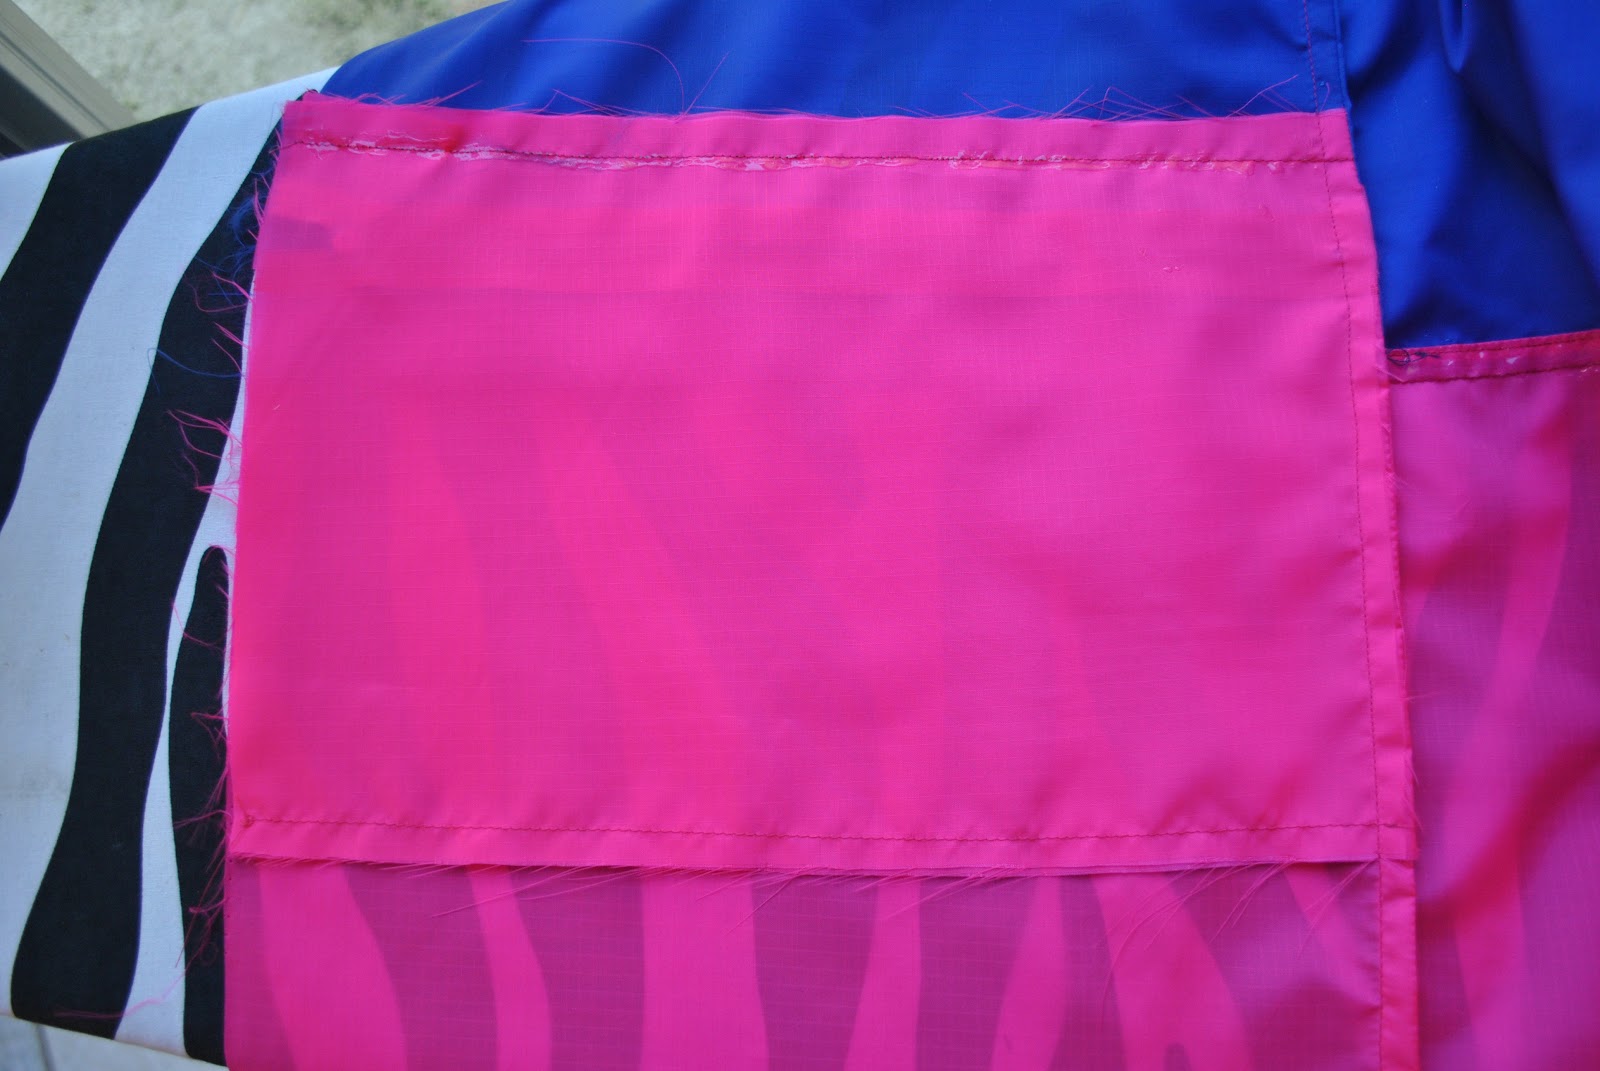
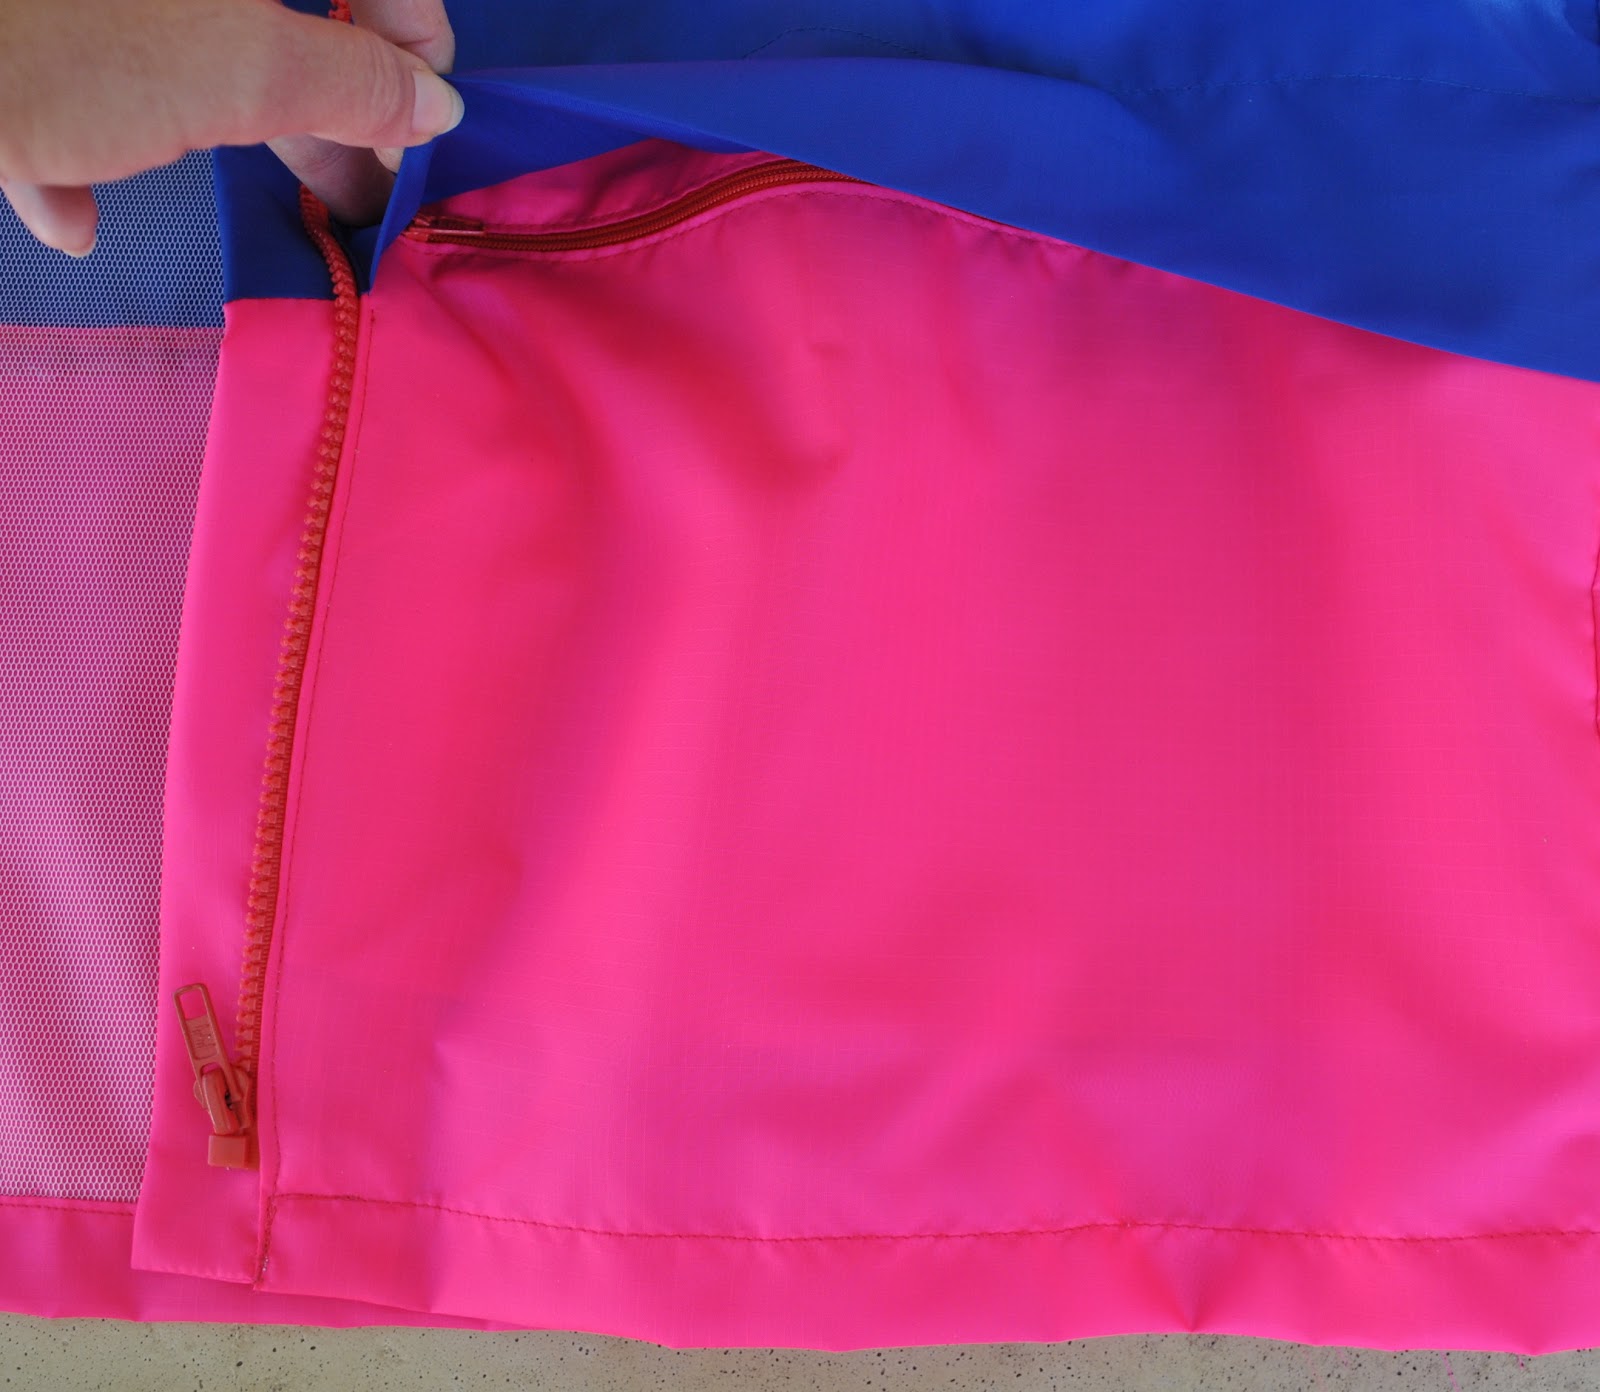
Press the fold in place.  Pin and topstitch in place the two zips at the pressed foldline, remembering to place them to open at opposite ends to each other.  At the upper left edge of the top pocket piece can be seen a small piece of folded fabric, stitched inside the seam to cover the metal zip stop and the bottom of the zip…  even though you won’t be able to see this in the final pocket I still like to have this covered like so…

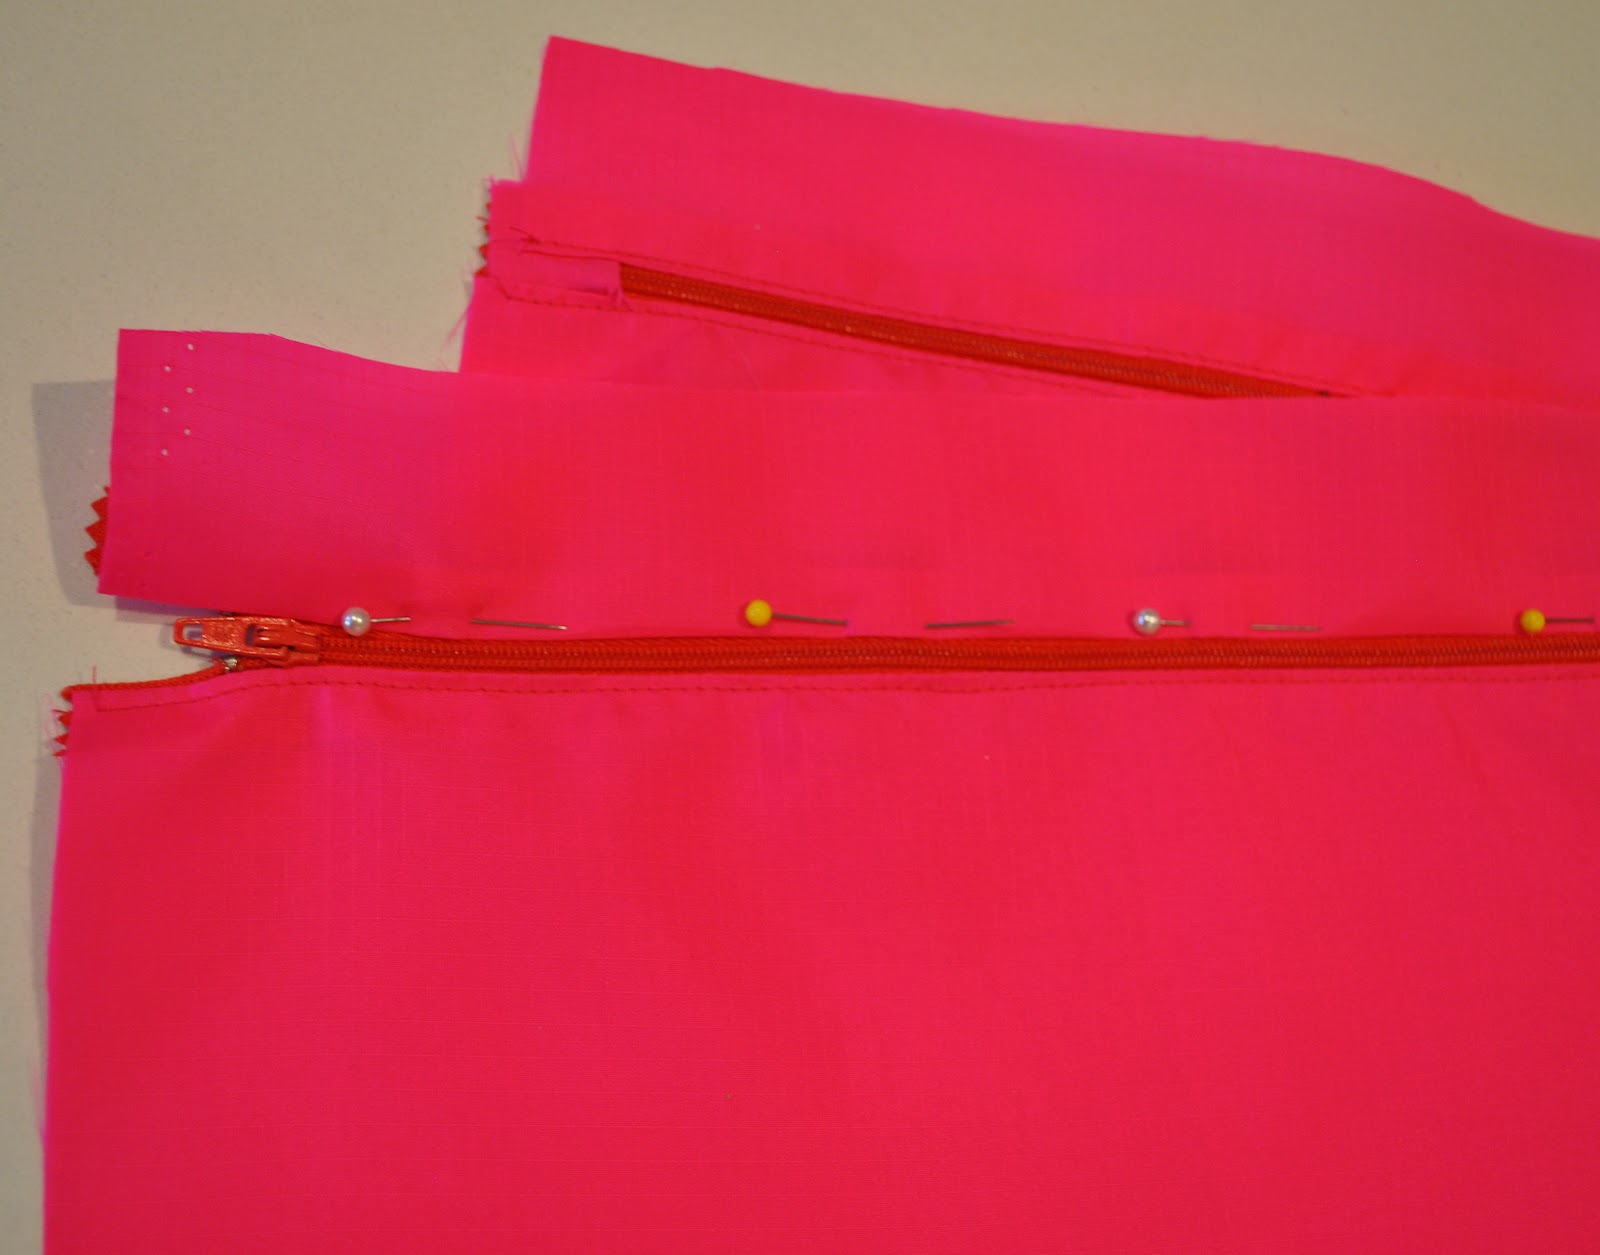
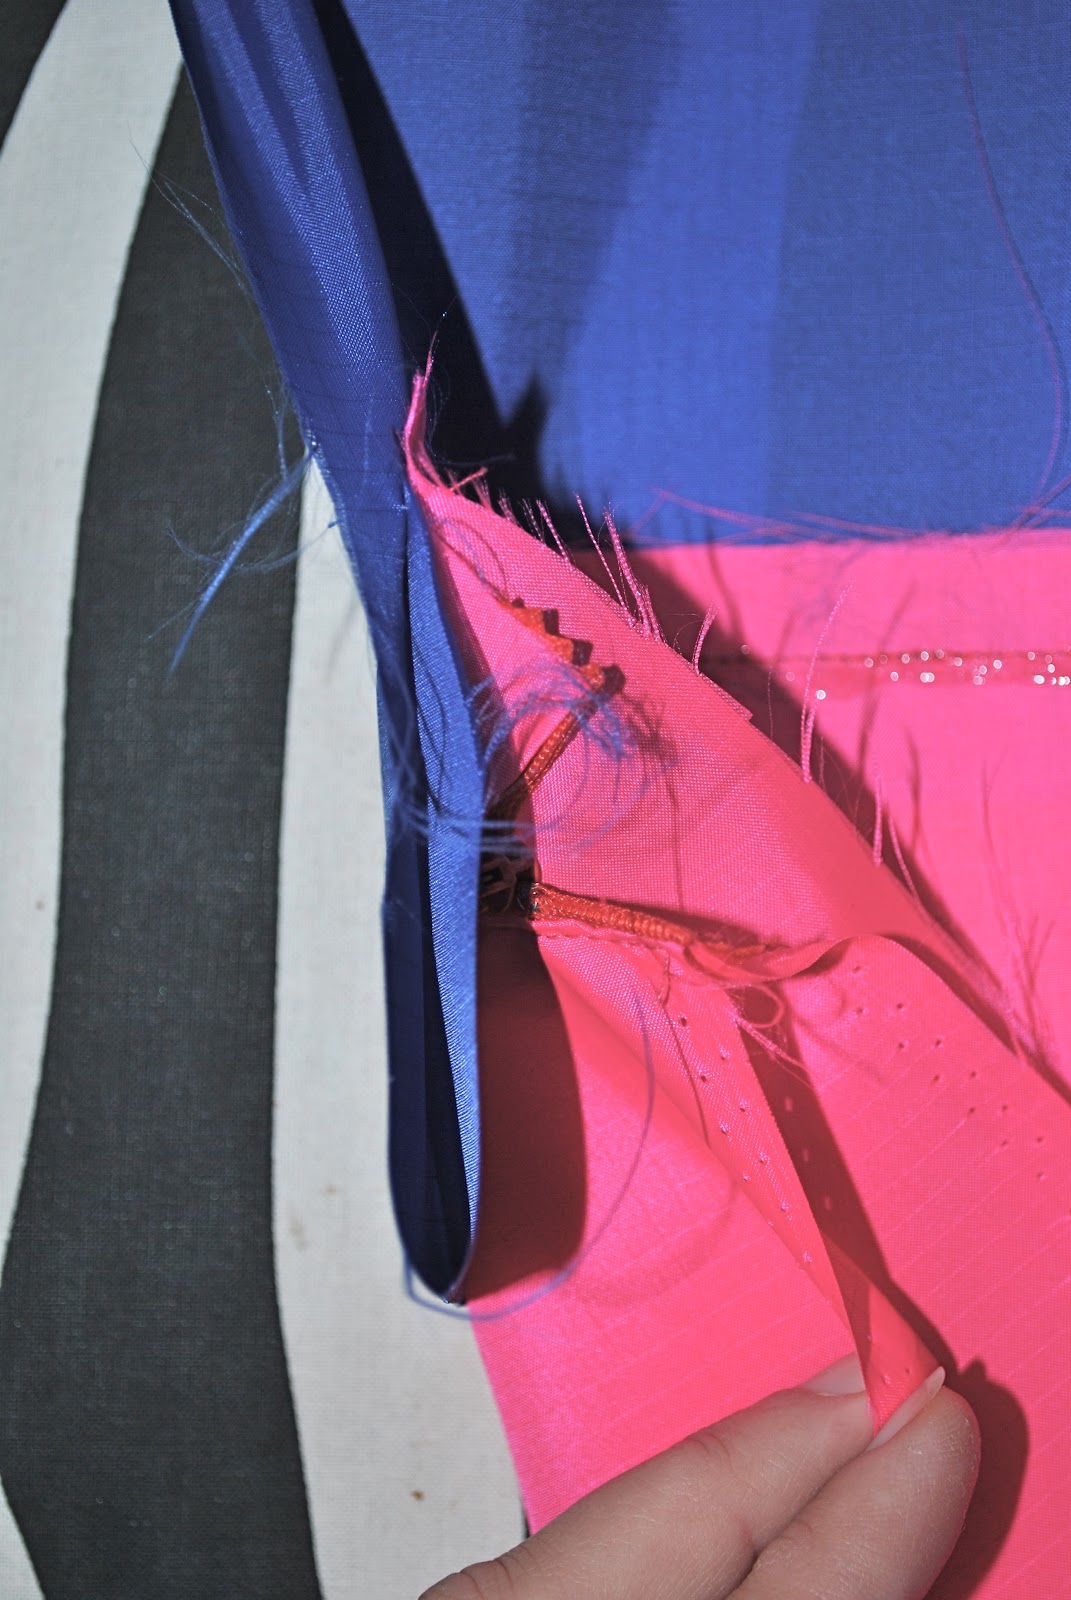
Cut a full-width piece of fabric, to sew along the top edge of the zip, to form the top outer edge of the pocket itself.   This has to be long enough to extend from the “top edge of the pocket lining”, down to the upper edge of the zip placement, where the fabric is folded lengthwise and then to have a seam allowance to enable it to be stitched to the top edge of the zip here… Sounds complicated, but hopefully the picture illustrates what I mean OK…  Press along the foldline and stitch to the upper edge of the zip. (In the top pocket can be seen that small piece of folded fabric stitched in to completely hide the bottom of the zip  (My stitching is a wee bit wonky just there, but I didn’t want to un-pick and sew over again because of the permanency of holes in this fabric.  And actually, nylon ripstop is a ^&%$#* to press and topstitch neatly.  Just saying  ðŸ™‚  )

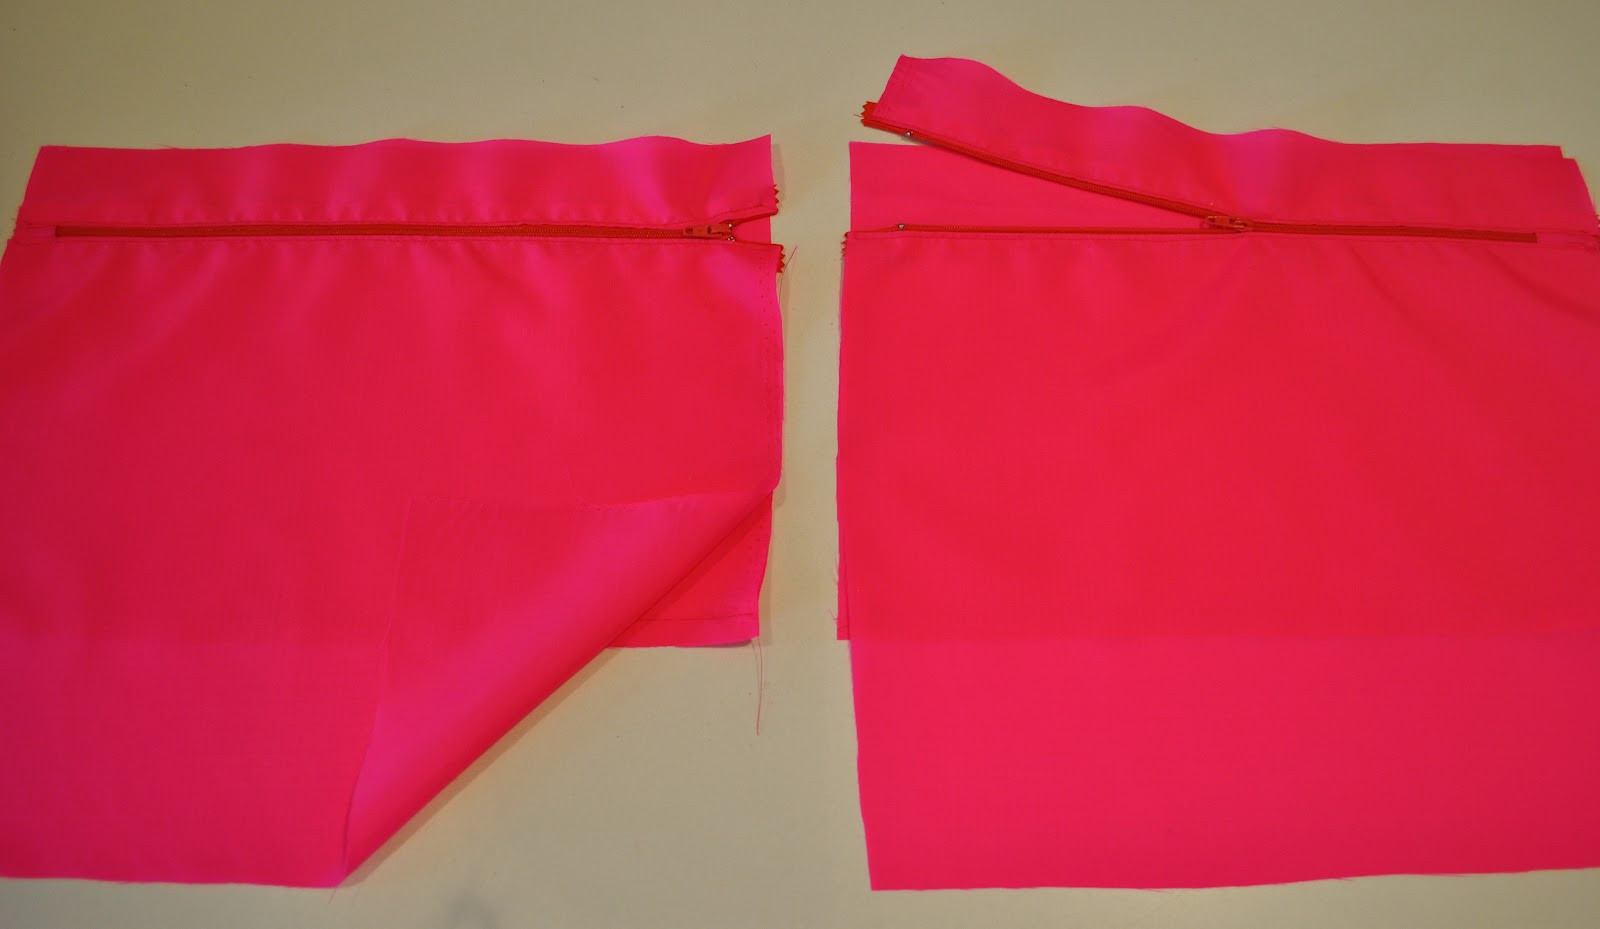
Now cut a full width piece to form the back lining of the pocket… these should be long enough to extend from the “top edge of the pocket lining” mark to the “lower edge of the pocket lining” mark.  Stitch the upper edge of this to the upper edge of the piece on the zip, and the lower edge to the lower shorter edge behind that long front piece, as pictured below…

In the picture above, the lower edge of the left jacket front is folded back to reveal the pocket underneath, and the zip of the right pocket is partly open to reveal the pocket lining underneath.  it can be seen that the top edge of the pocket is still unstitched at this stage.
Now for the upper edge of the jacket front; cut a piece to be long enough to come down to the “foldline for top pocket flap” mark , and fold back at this point and extend back up to the “top edge of pocket lining” mark (which is the top edge of the pocket so far).   Press along the foldline.

Pin and topstitch along the “stitching line for flap”, catching also the upper two edges of the pocket underneath in the same line of stitching.  The below picture is a side view of the layers and folds in the pocket. 

and below; a view of the completed fronts of the jacket.  It can be seen that the pocket flaps, and the pockets underneath, extend the full width of the jacket fronts…
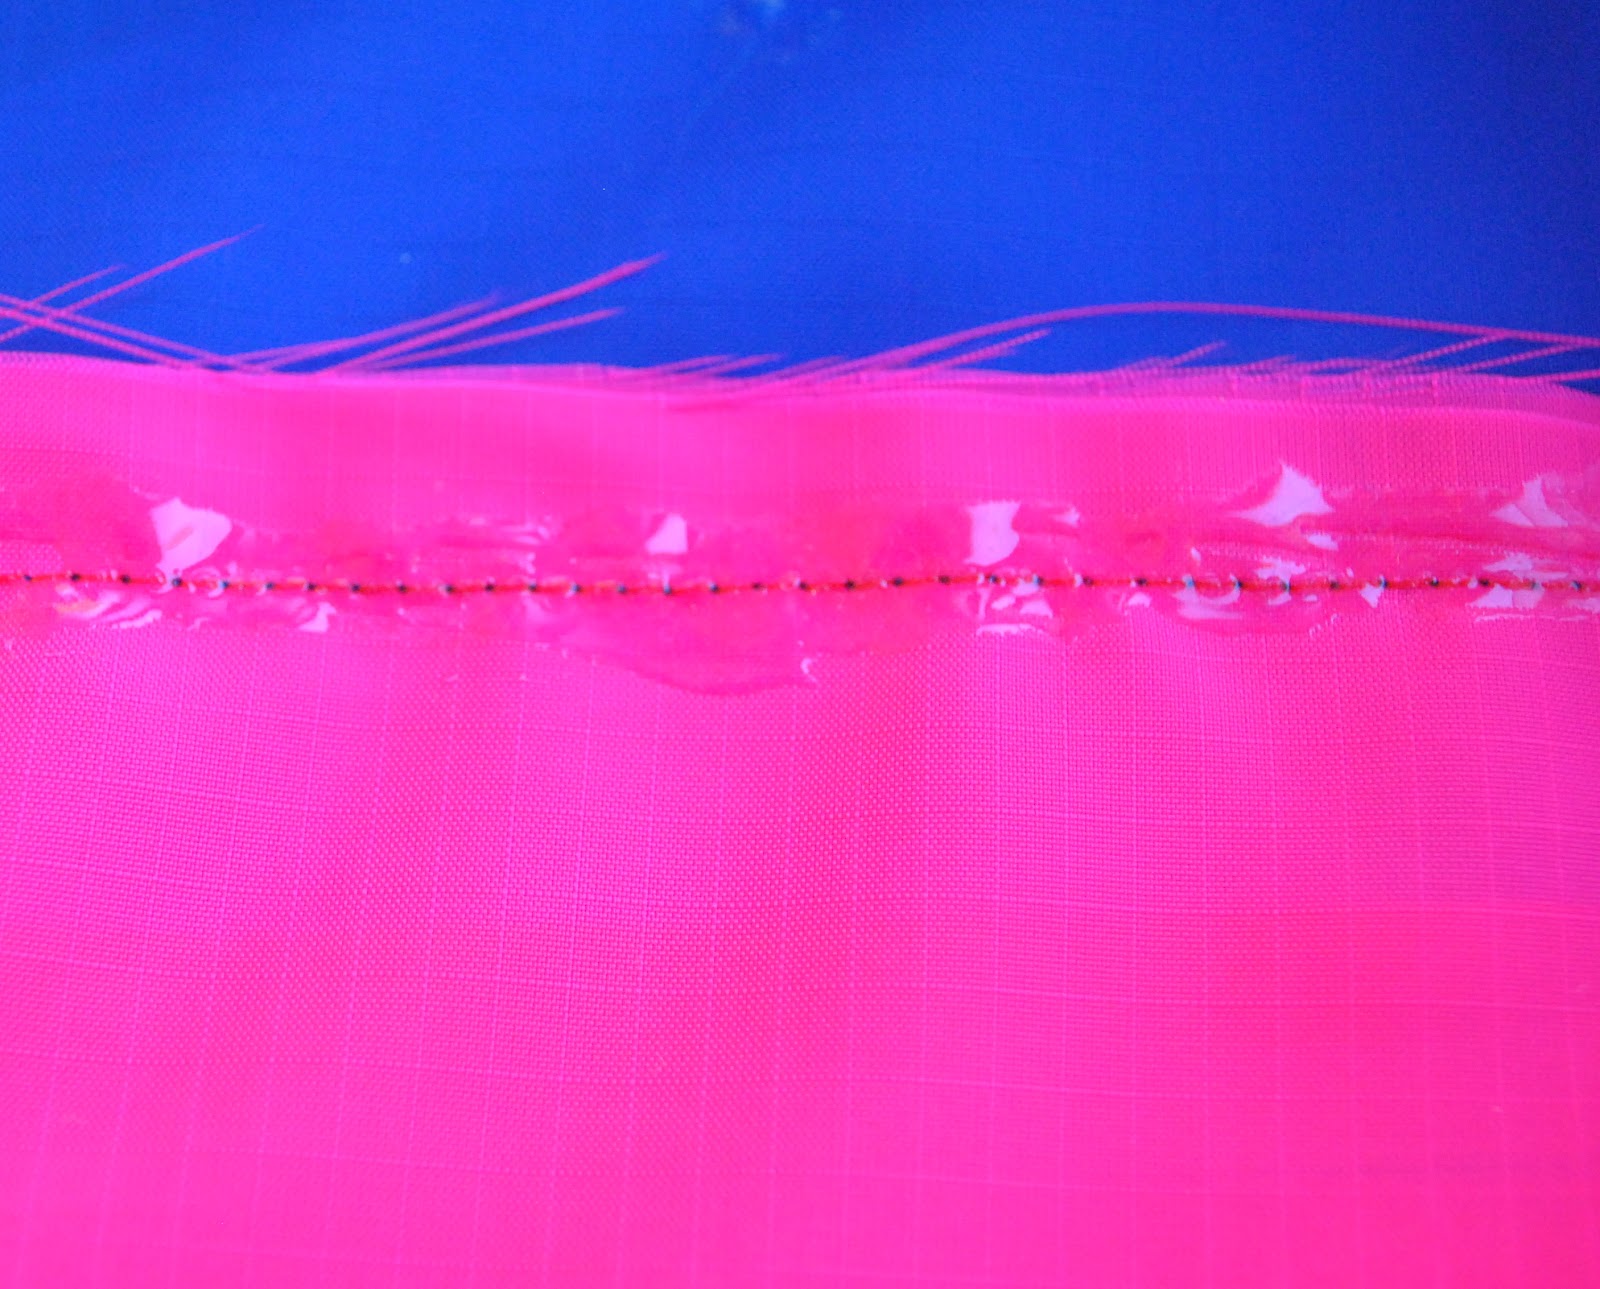
…and also that one single line of stitching appears on the right side of the jacket front.  Waterproof this seam by applying seam sealer along the back.  I used Seam Grip.  Let it cure completely.
When sewing the side seams, include all the layers of the pocket inside the side seam allowances (at right in the photo below).  I sewed them as French seams, to improve waterproofing of the jacket, and also later applied  Seam Grip to the second stitching.
Keeping the other side edge  of the pocket aligned with the front centre edge, stitch the front placket, zip and lining together in one row of stitching.  Turn up, press and stitch the lower hem.
Ta da!  Waterproof pocket!
pinterestmail

Operation Raincoat

Warning: distinctly un-humble and boastful post to follow…
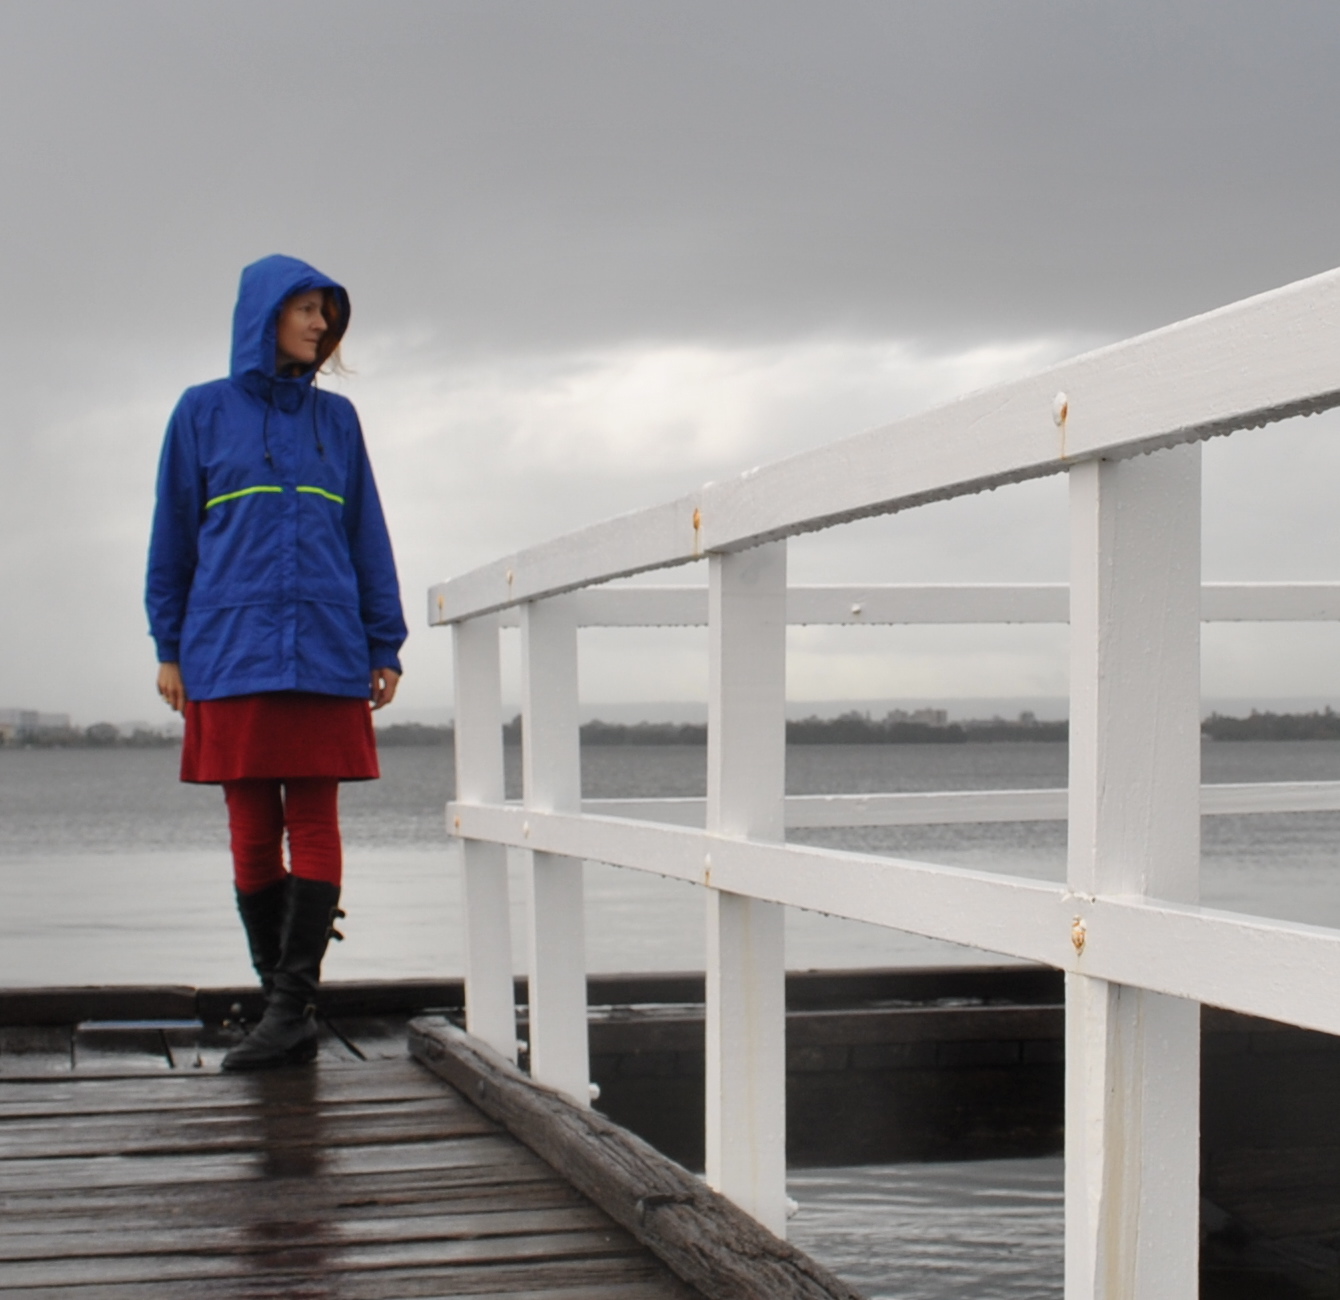
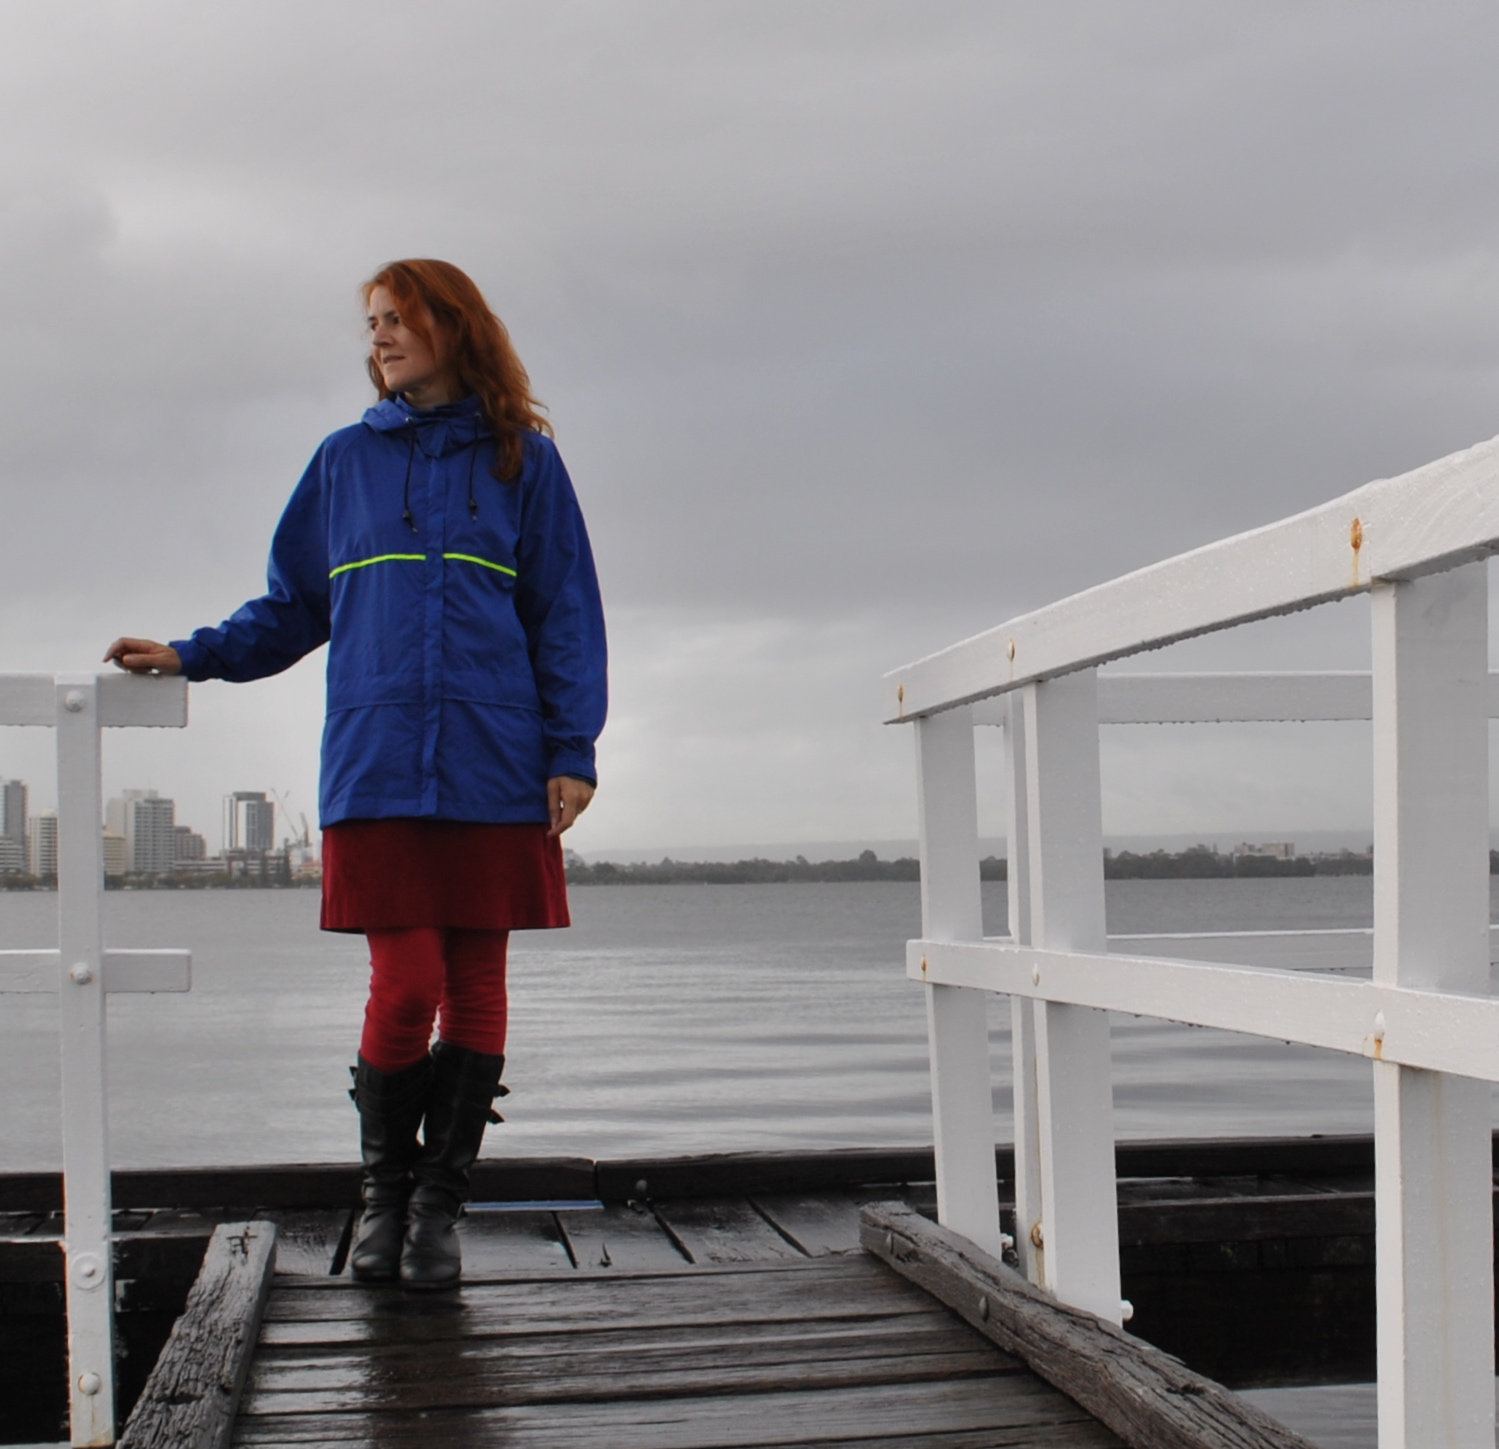
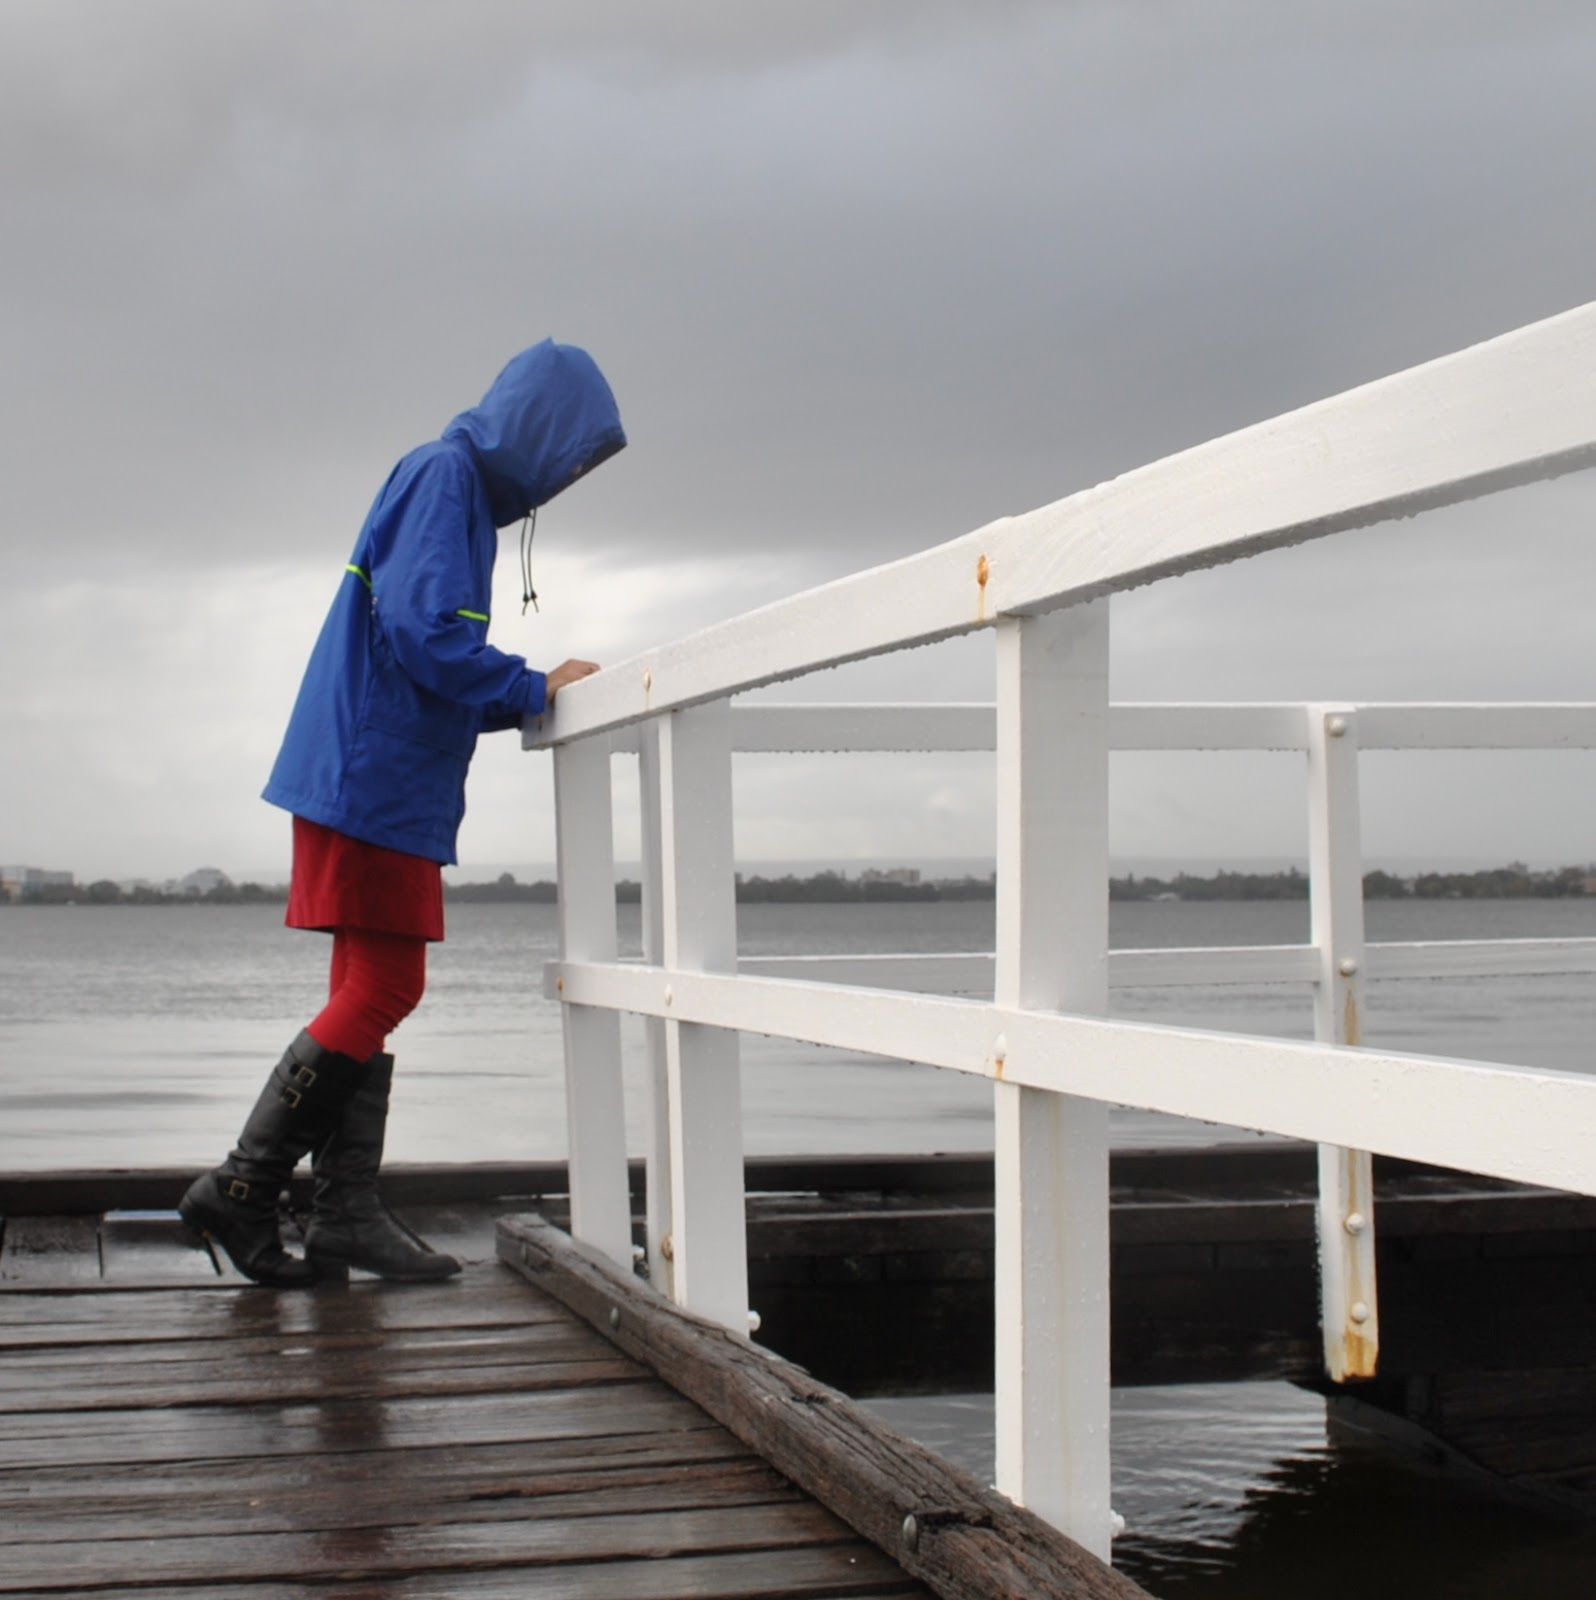
I have made this; my first ever raincoat…  :0 and I am thrilled!!!!! with how it turned out!
Making a raincoat is one of the scary things I have always wondered was too hard for me, whether the technicalities were beyond me.  Now I have successfully made one I feel like I have achieved another small step toward having an entirely me-made wardrobe.

Thank you so much to all who left a comment regarding good quality raincoat fabric sources  ðŸ™‚
I checked each and every one of your recommendations.
I found extremely helpful this article written by Caroline, the link sent to me by bloodsweatshoptears.  Caroline wrote about making a waterproof cycling jacket and included bundles of relevant and very interesting information for the outdoor-gear sewing newbie like myself.  And the jacket she made is so awesomely fantastic and inspiring…  
Caroline’s article included a link to another very very informative article on how to choose rainwear, which I read and reread.  This article really helped me to honestly assess what I actually wanted from my raincoat… which was: another raincoat almost exactly like my old one!

I had bought my previous old raincoat at Kmart for our eldest son Tim when he was about ten years old.  After he had worn it for a coupla years I had to buy him a new official school uniform one, so his old navy blue one became mine.  I have worn it and worn it pretty solidly every rainy winter’s day since … and Tim is now 22 years old, so you can see the old raincoat has done very good service!  The only reason I am replacing it is because it is finally starting to fall apart….  so, I did a close inspection of the old one to work out what to copy and what I could improve.  And this is what I did, and have learnt…

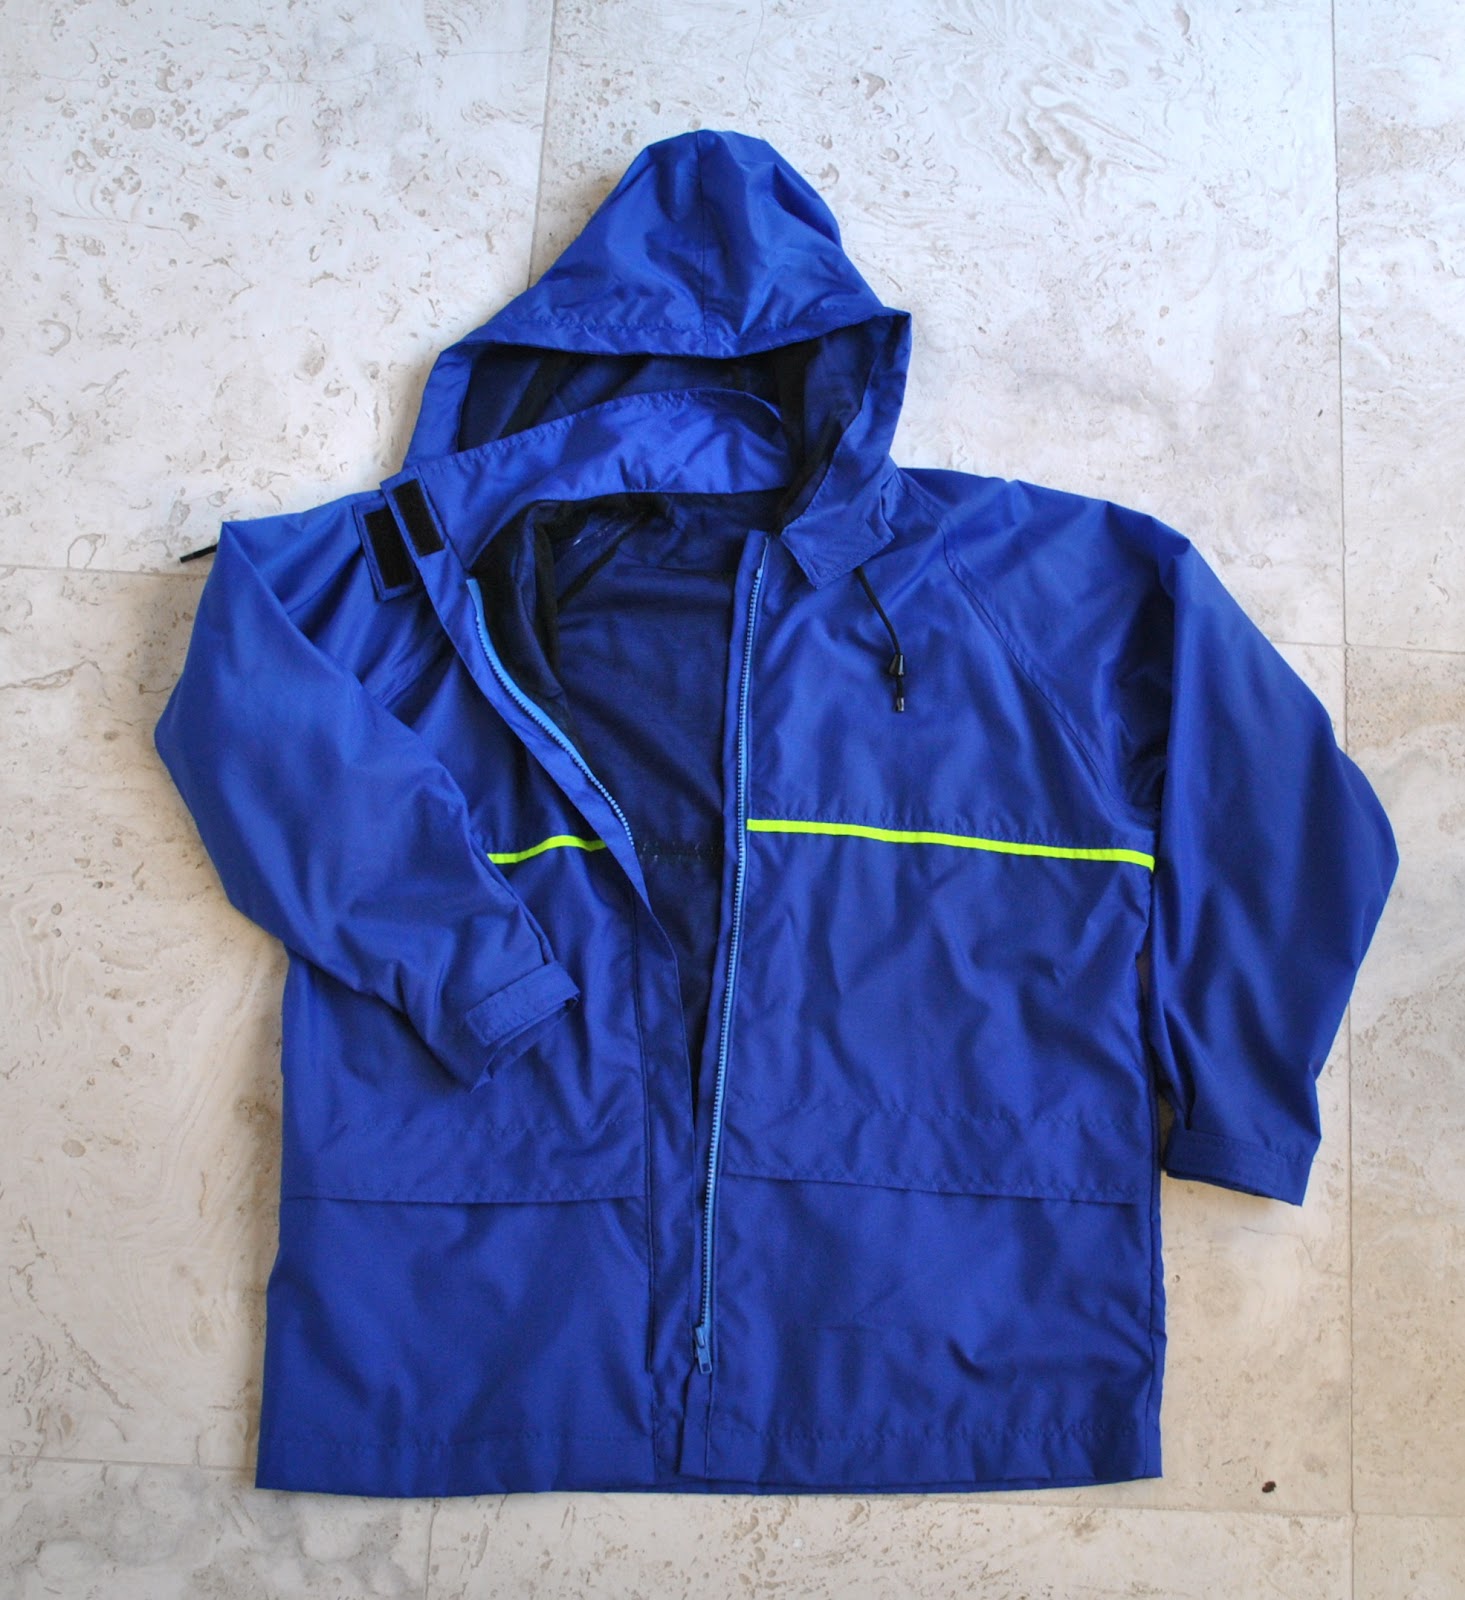
I used my old raincoat to help me draft a new pattern: I didn’t have to chop it up to do this, but this would be an excellent plan for someone who hasn’t done much self-drafting.  It has raglan sleeves, a hood and a high, inner collar.  I incorporated a few, very minor, fitting alterations and small design improvements at this stage.
I decided my raincoat doesn’t need to keep me warm, just dry; so: waterproof, non-breathable fabric, something like nylon ripstop would be the best.  I knew from my old one that this kind of fabric does keep one plenty warm enough in our climate already.
I wanted a full lining in my new raincoat.  My husband’s raincoat has a polyester net lining; something akin to the fabric school sports shirts are made of; that is smooth and comfortable and very nice against the skin.  I added this to my shopping list.

Now, I am sure everyone is dying to know where I bought this awesomely gorgeous fabric (hehe, kidding!
Well: I browsed the online fabric stores, and had even bookmarked a few and was pretty much all set to BUY, when, like, the next day, I happened to be passing Spotlight and thought it would be worth going in to check out the separating zips.  Well, you never know whether the ones you are buying online are dearer than Spotlight, and I’ve always found their zips, while not plentifully stocked, to be very reasonably priced.  And while I was there, I idly checked out the fabrics; and hey, whaddyaknow? Nylon ripstop!  The colour selection was not huge, but it was definitely cheaper than any I had seen online, so I picked up some royal blue plus a glow-in-the-dark green for trim, just for fun.  Polyester net?  They didn’t have exactly the same sort that was in my husband’s raincoat, but they did have some that seemed pretty good, so I picked that up too…  Velcro? check!  Zips? check!  Cording and cord-stops? check and check!  Spotlight is a much maligned store, and frequently by me, too  ðŸ™‚ but I have to eat my words now since they had almost everything I needed!  The only thing they did not have was some of that marvellous Seam Grip I have read about to waterproof my seams… but I recalled reading that its primary use is in tents and camping stuff, and barely 50m away from the front door of my Spotlight is a BCF store (Boating Camping and Fishing); practically next door.  So I popped in, and yes of course they had Seam Grip.  I promptly bought some.  I was all set!!
The nylon ripstop can be cut just with ordinary household scissors, so I did not blunt my good dressmaking shears on it… bonus!

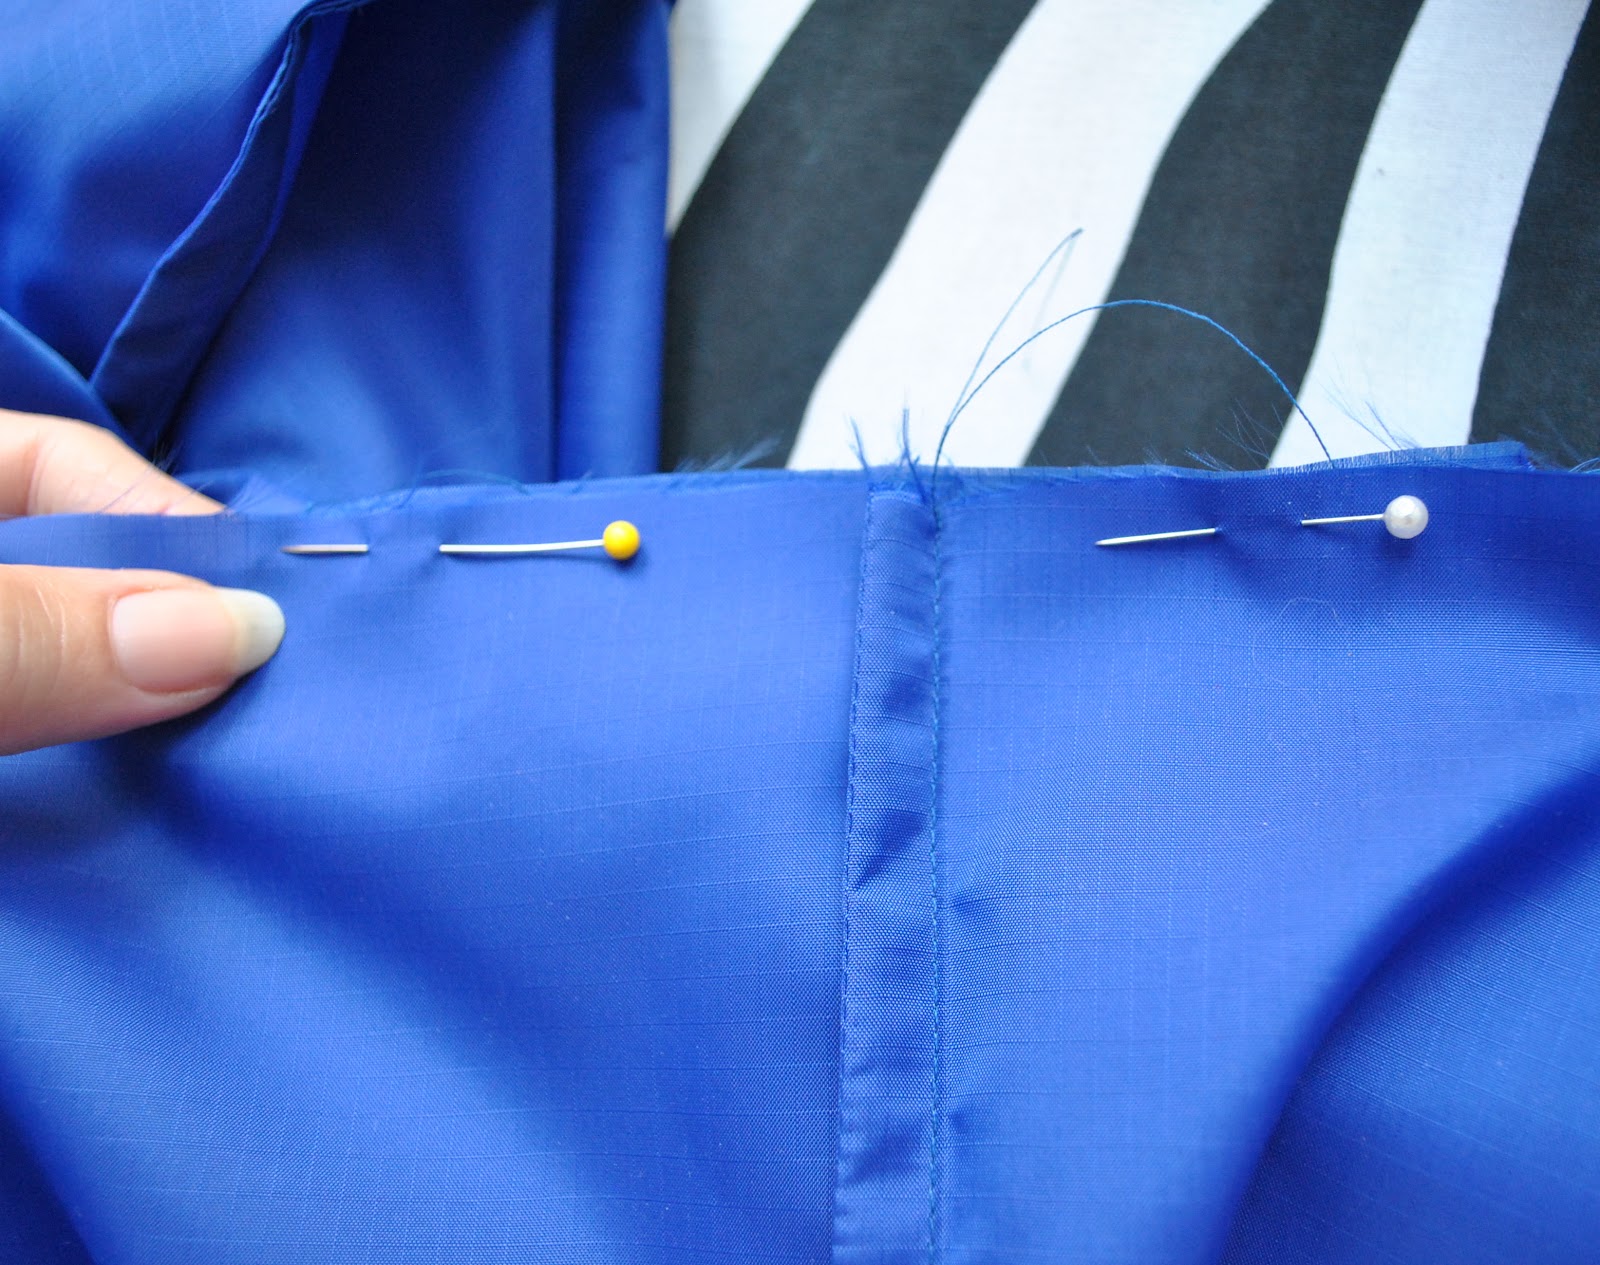
One can’t use pins willynilly since it has to be waterproof!  But when necessary I pinned within the seam allowances.
Not for looks (since the raincoat is fully lined) but for extra waterproofing, I sewed all the seams as French seams; bar some of the internal pocket seams which are inside the coat and so are not a waterproofing issue.  

I ironed the seam allowances “up”, against gravity (another waterproofing tip) before topstitching in place.

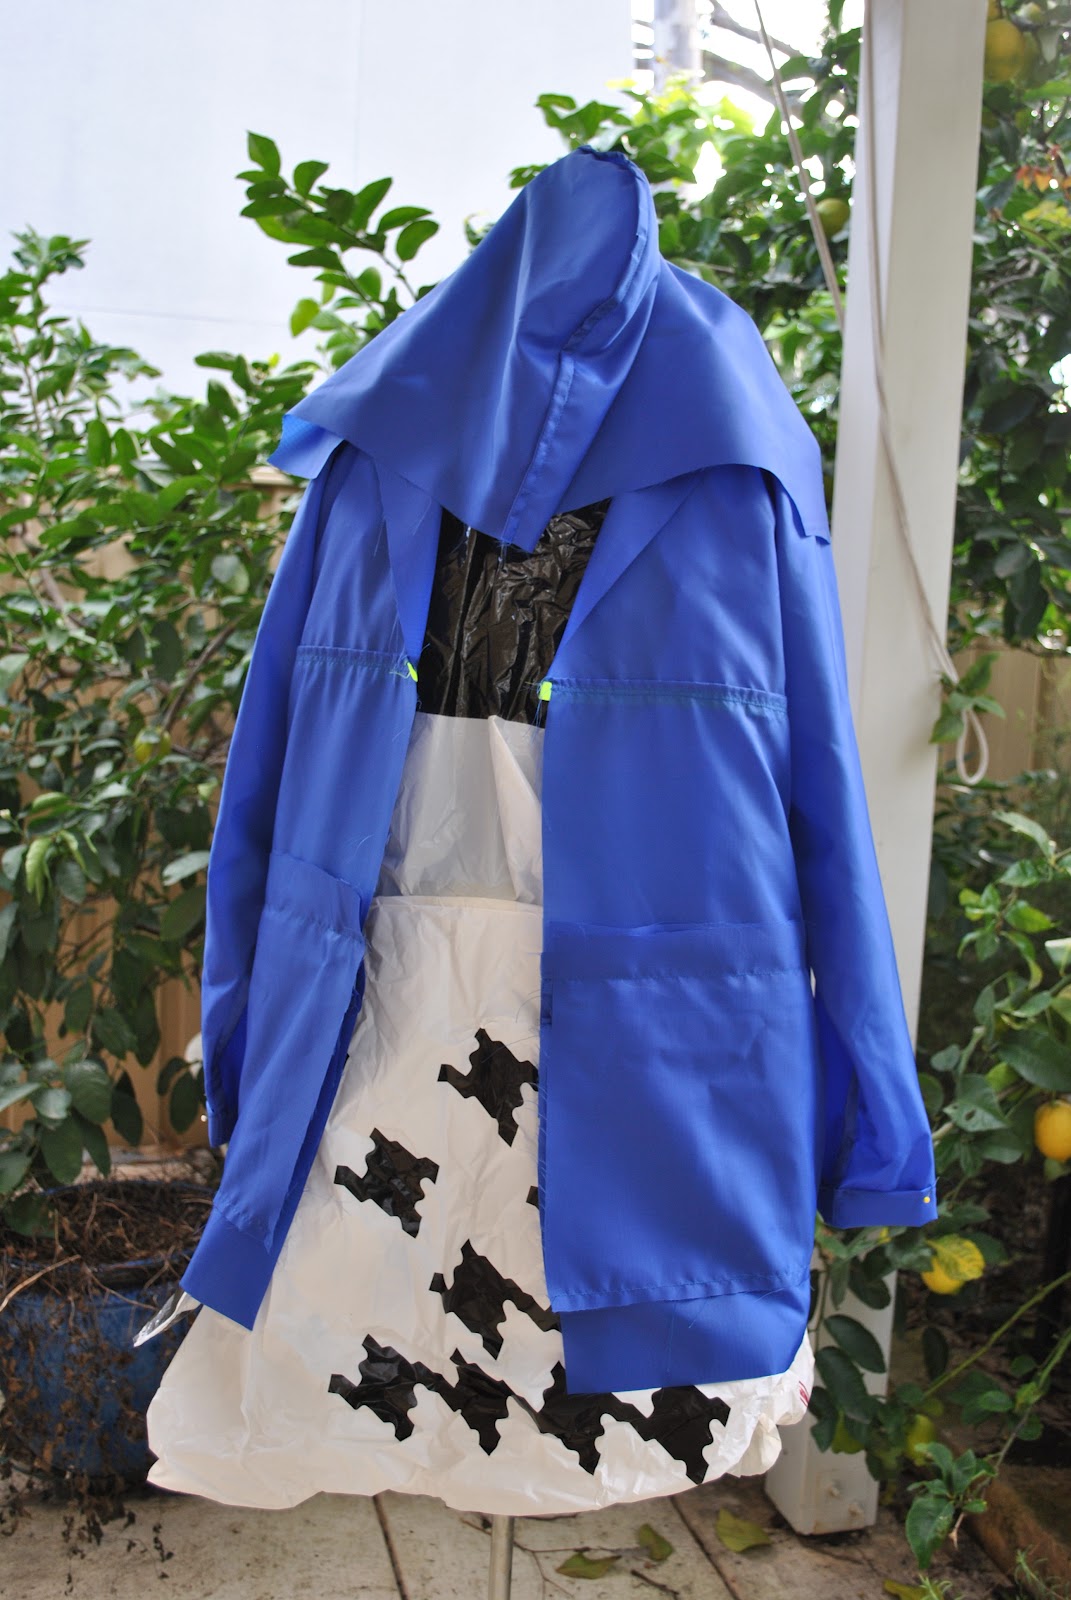
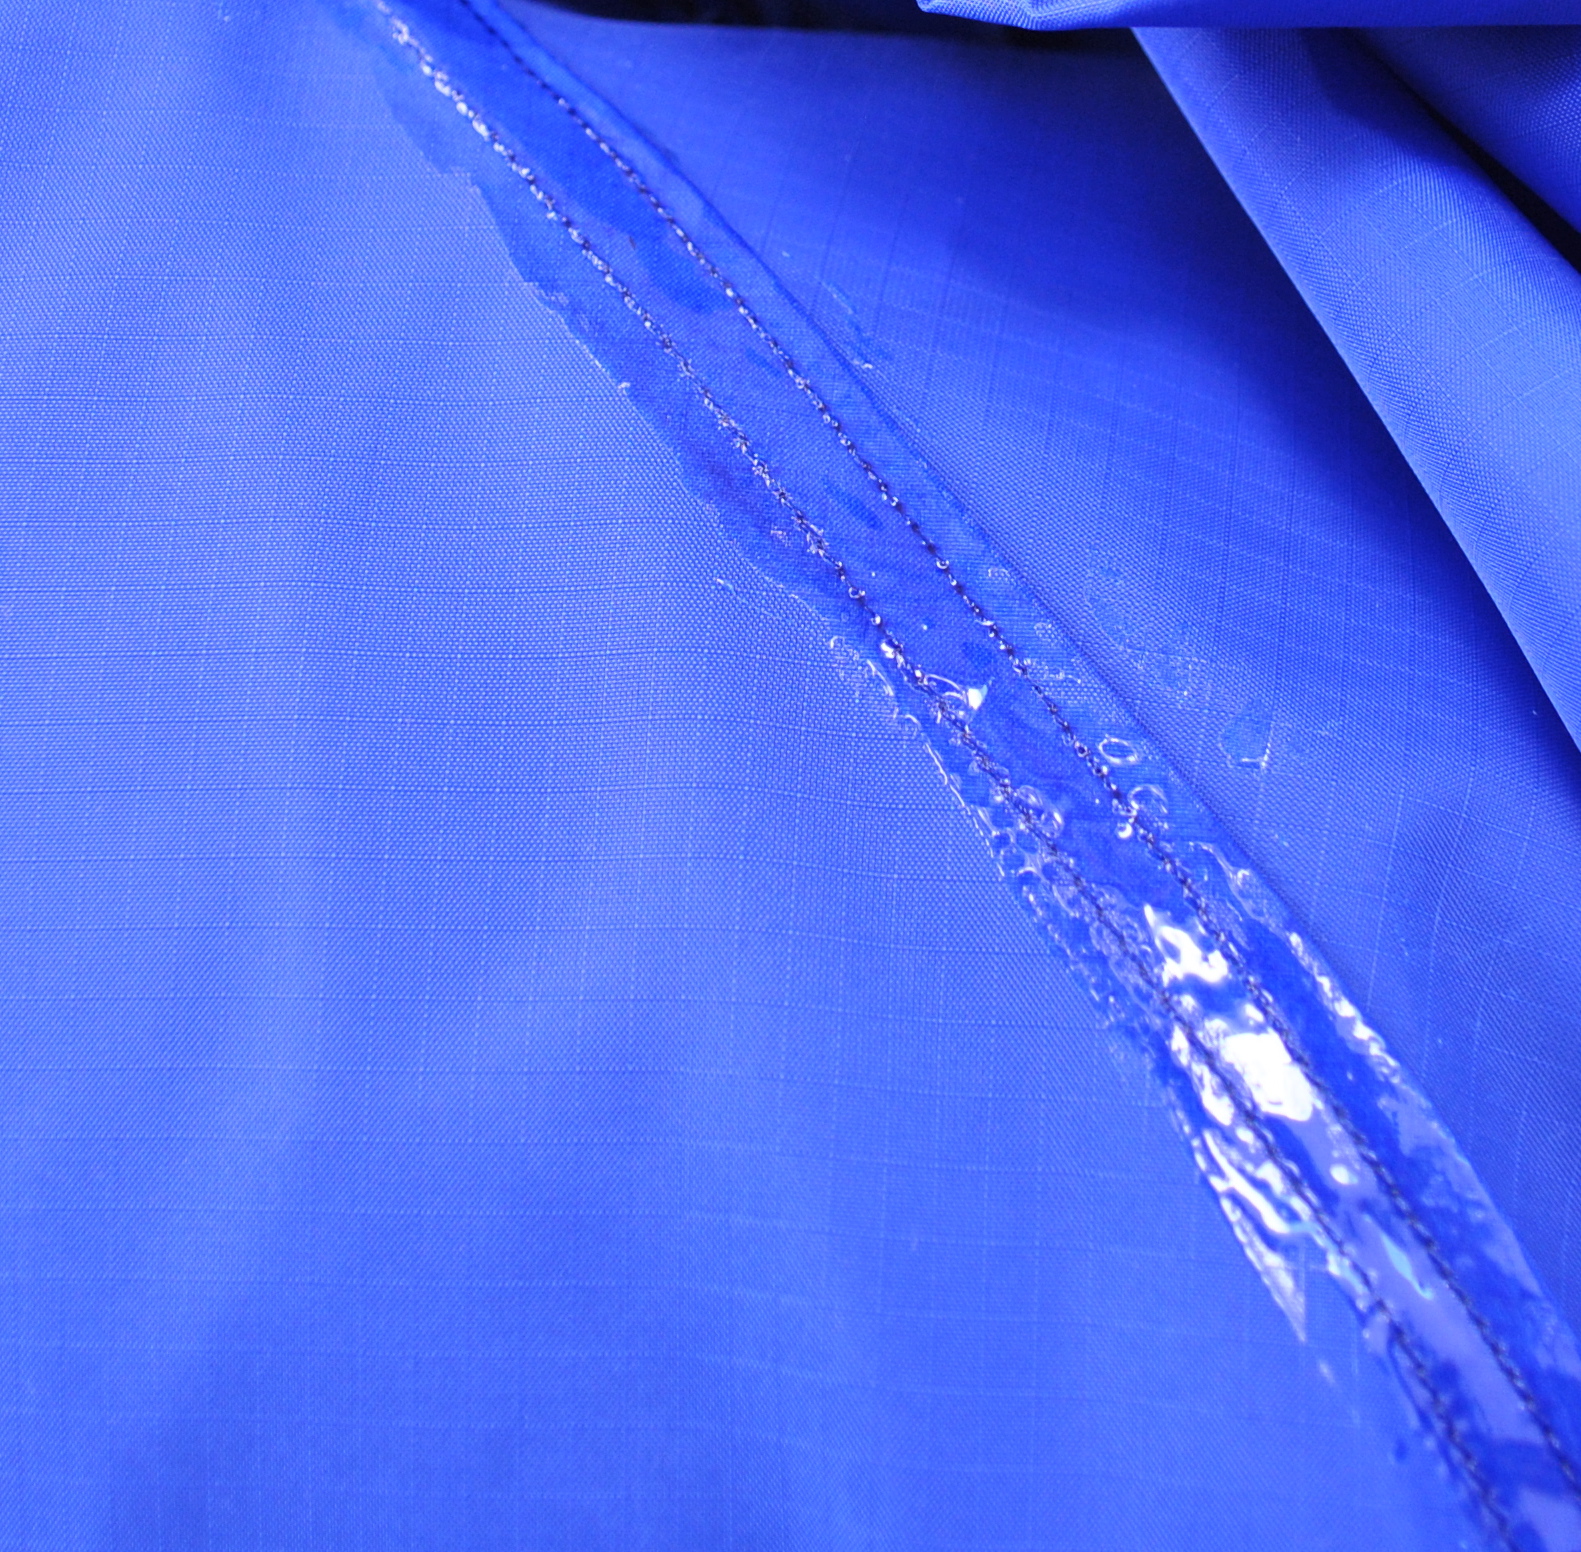
Seam Grip is messy stuff.  Apparently it is the best product around for this job, but check out the fine print; it contains toluene.  This is nasty… back in the dark ages when I was an analytical chemist I would have only opened a bottle of this substance in a fume-cupoboard.  Not having access to a fume cupboard anymore, I worked outside and used disposable rubber gloves.  I cloaked Bessie in plastic bags to protect her (not that she is susceptible to carcinogens….) and draped and pegged my half-finished coat inside out to do the seam sealing.  

I left it to cure for 12 hours, and kept on going out regularly to pull apart the bits like the underarms, that were sticking to themselves; to ensure nothing became permanently glued together.  Even when fully set I have found the Seam Grip has a tendency to stick to itself.  Having the lining in has alleviated the problem somewhat, but not completely.  I sure hope it de-stickifies eventually  :S

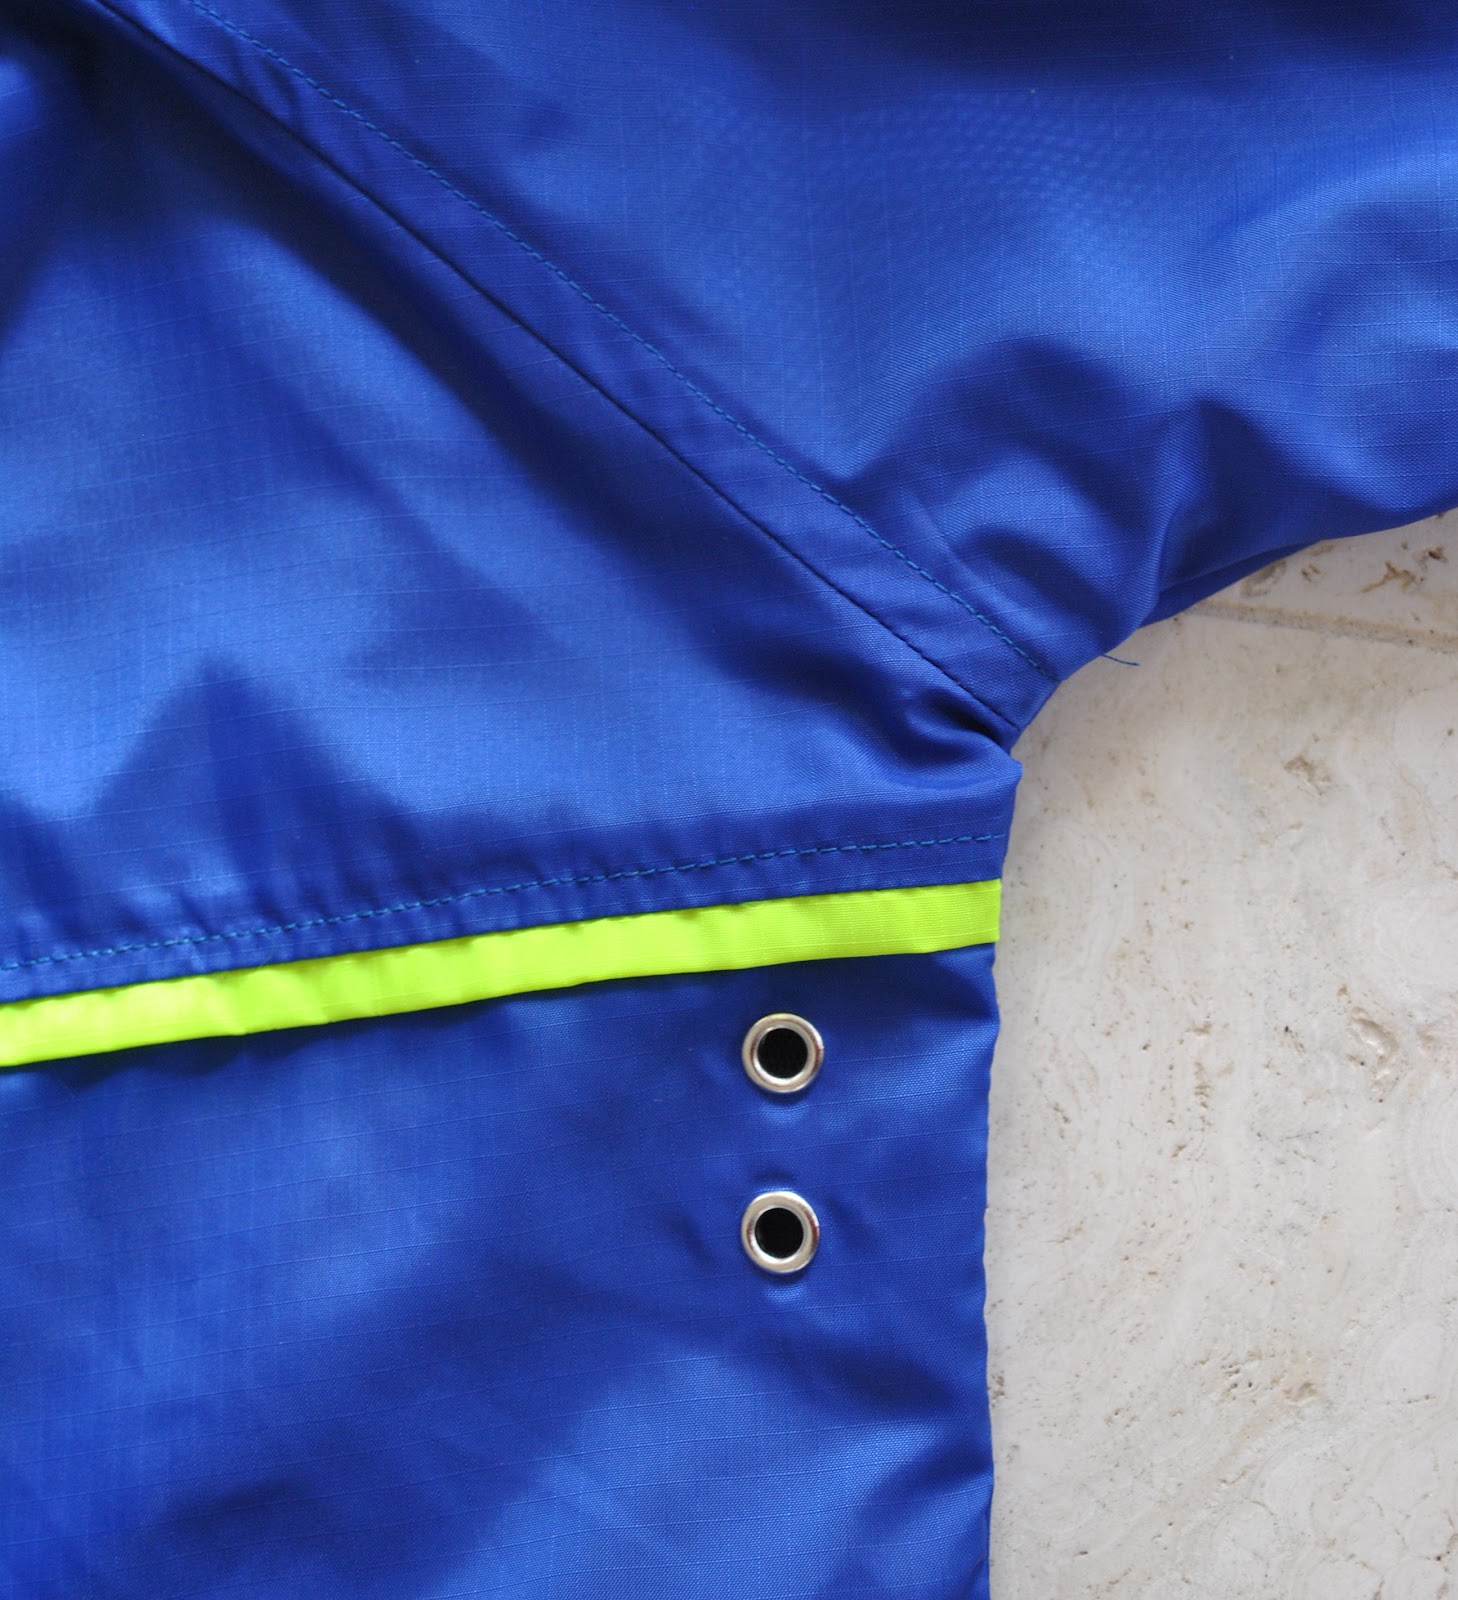
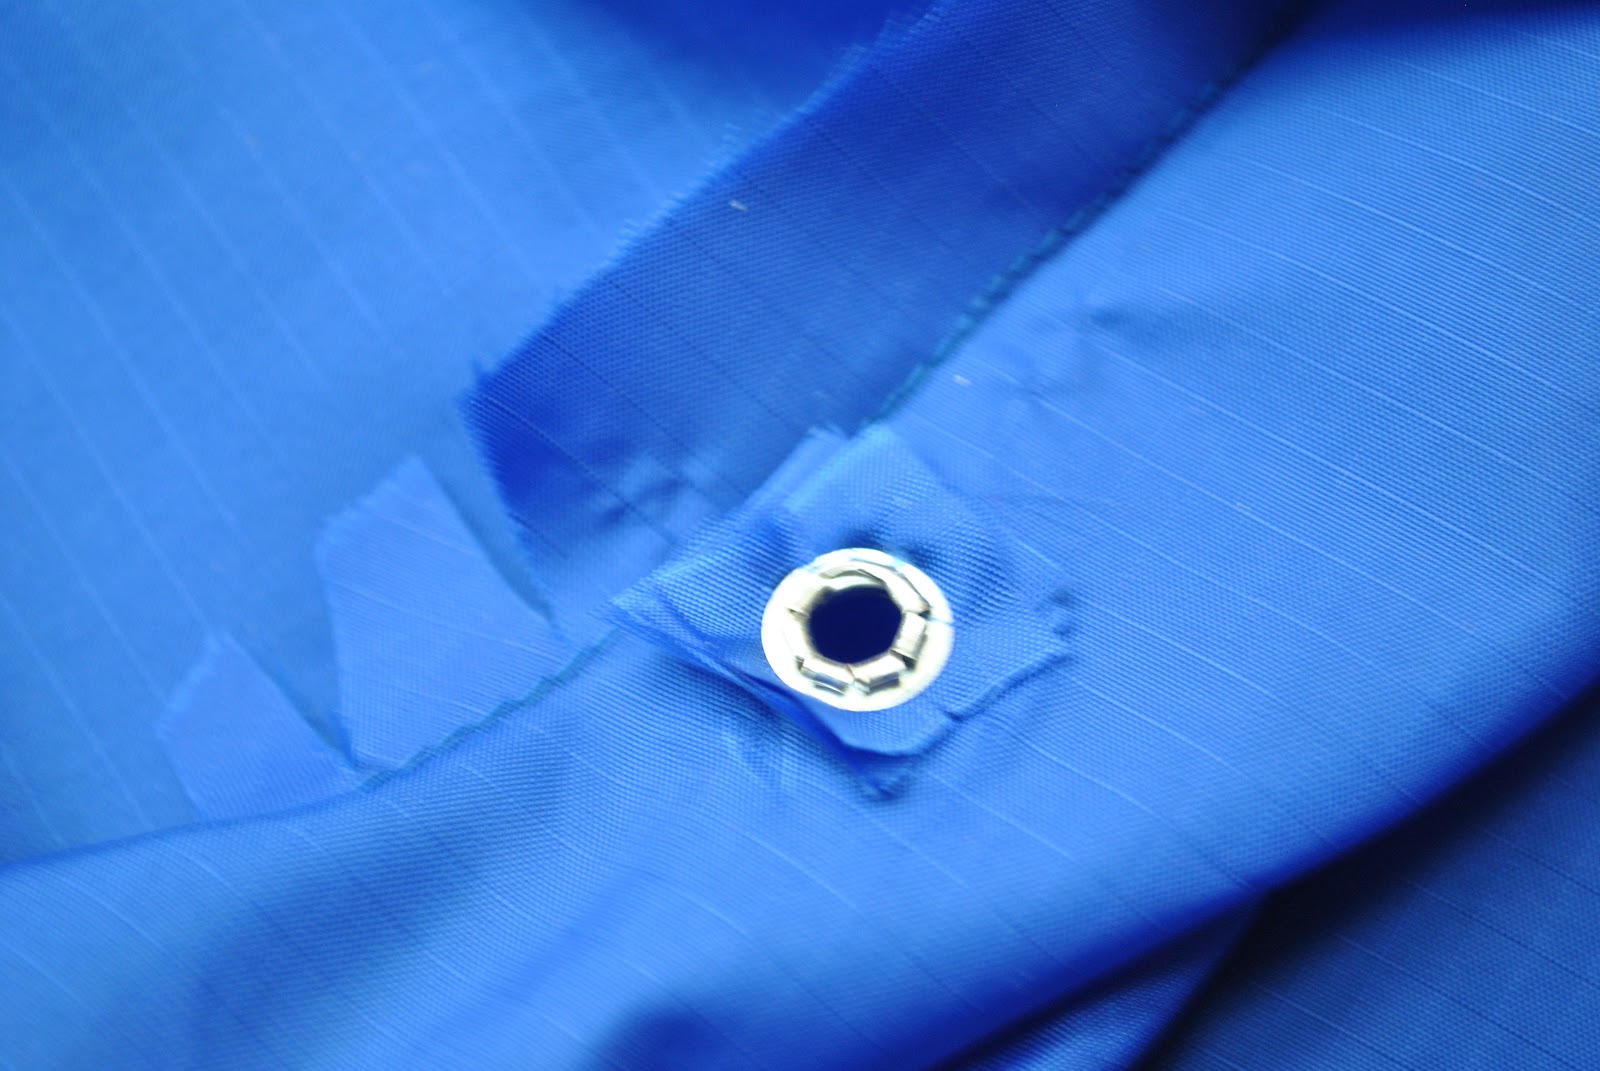
Ventilation: meaning, an aperture for one’s body heat to escape outside; is a must in waterproof non-breathable garments.  So I copied a feature from my old raincoat and hammered in two eyelets under each of the arms, at the back.  These, as well as the eyelets in the hood for the cording (pictured below), are each re-inforced on the inside with an extra four layers of self-fabric, for strength.

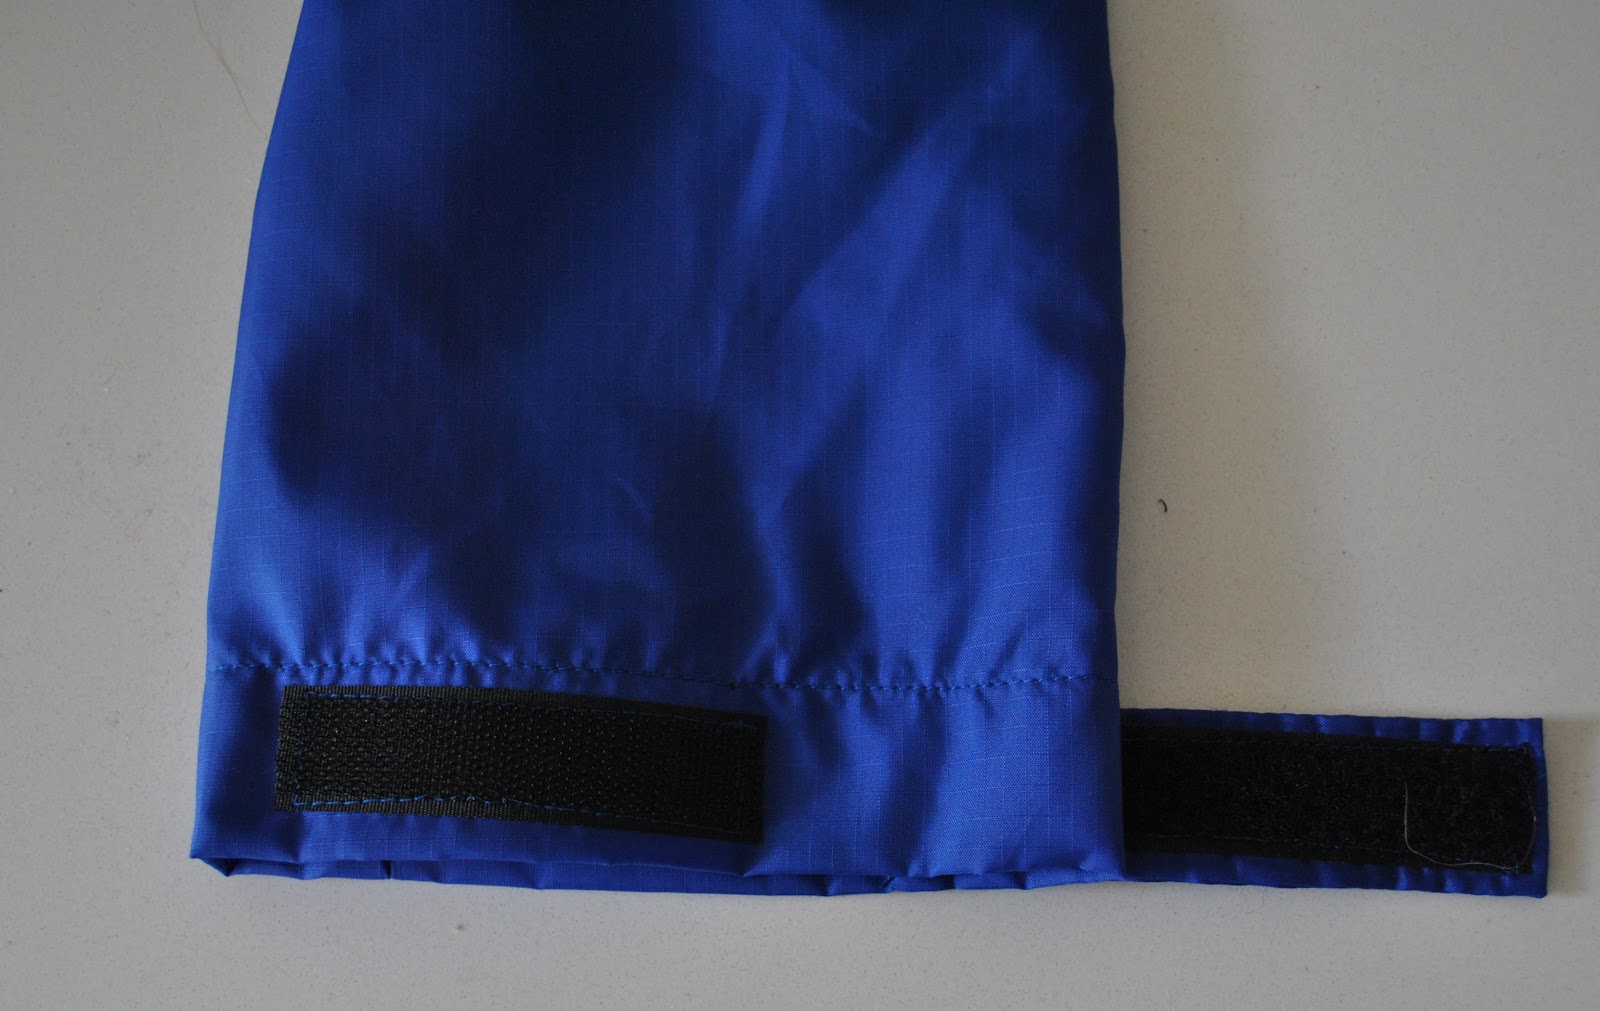
Quick and simple velcro-lined tabs to tighten the wrists.  I’ve used something like these on my old raincoat for the last dozen or so years: so they’re second nature to me and I am accustomed to them, so I copied them exactly for my new one.  No need to re-invent the wheel, right?

Waterproof pockets; an essential.  These have a full-width flap that is an extension of the upper front, covering a zippable pouch that is an extension of the lower front.  These are similar in design to the ones on my old raincoat; I simply extended them so they are much wider, thus eliminating seams.  In fact, at the sides they extend out to and in to, the side seams and the front placket.  Less stitching therefore simpler to construct and finish off, and you get wider pockets!  What’s not to love about that?  (I can do a tute on these pockets, if anyone is interested.  I’m frankly a bit terrified of doing tutes now, but I am pretty chuffed with how they turned out, so please let me know, ok?   🙂  )

This has been a fun learning curve.
Of course, eagle-eyed Perth readers will instantly see that I could not possibly have taken these photos during the last 4 days, since it has been unrelentingly sunny.  Truth: I raced out to take these during some early morning showers last Wednesday, but have been too apathetic to even look at my photos since then, let alone write up this post.  But anyway, here we are.  And I am sure we will get more rain soon.  Hopefully.
And yes, flushed with my own sewing success, another raincoat is already in the pipeline, this one for Cassie….  ðŸ˜‰  stay tuned!

Details:
Raincoat; self-drafted, with the help of an old one, nylon ripstop with polyester net lining
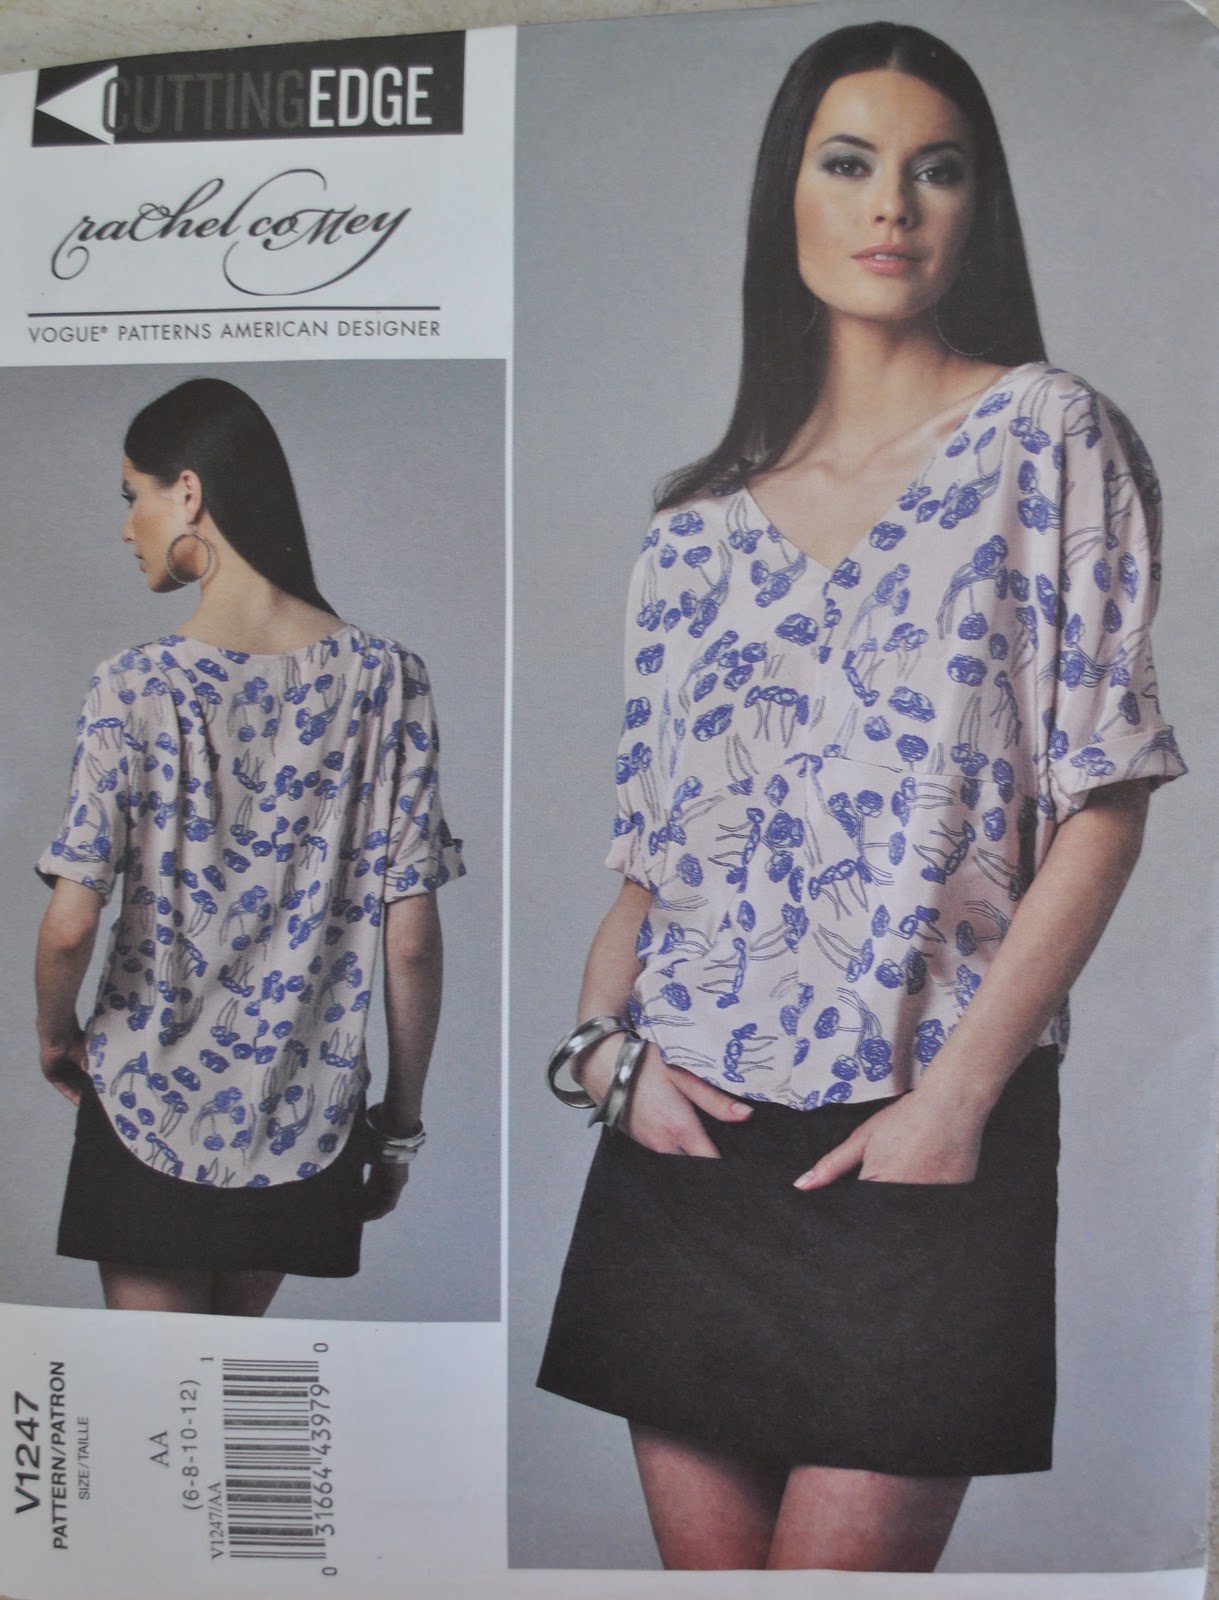
Skirt; Vogue 1247 lengthened and lined, red cotton velveteen ombre dyed brown, details here and my review of this pattern here
Leggings; self-drafted, red cotton jersey, details here
Boots; Andrea and Joen, from Uggies in Dunsborough (now renamed Eco-boutique)

pinterestmail

On lemons, cats and hearts in the grass…

Fabio contemplates boughs laden with lemons, and dreams of a summer awash with limoncello…

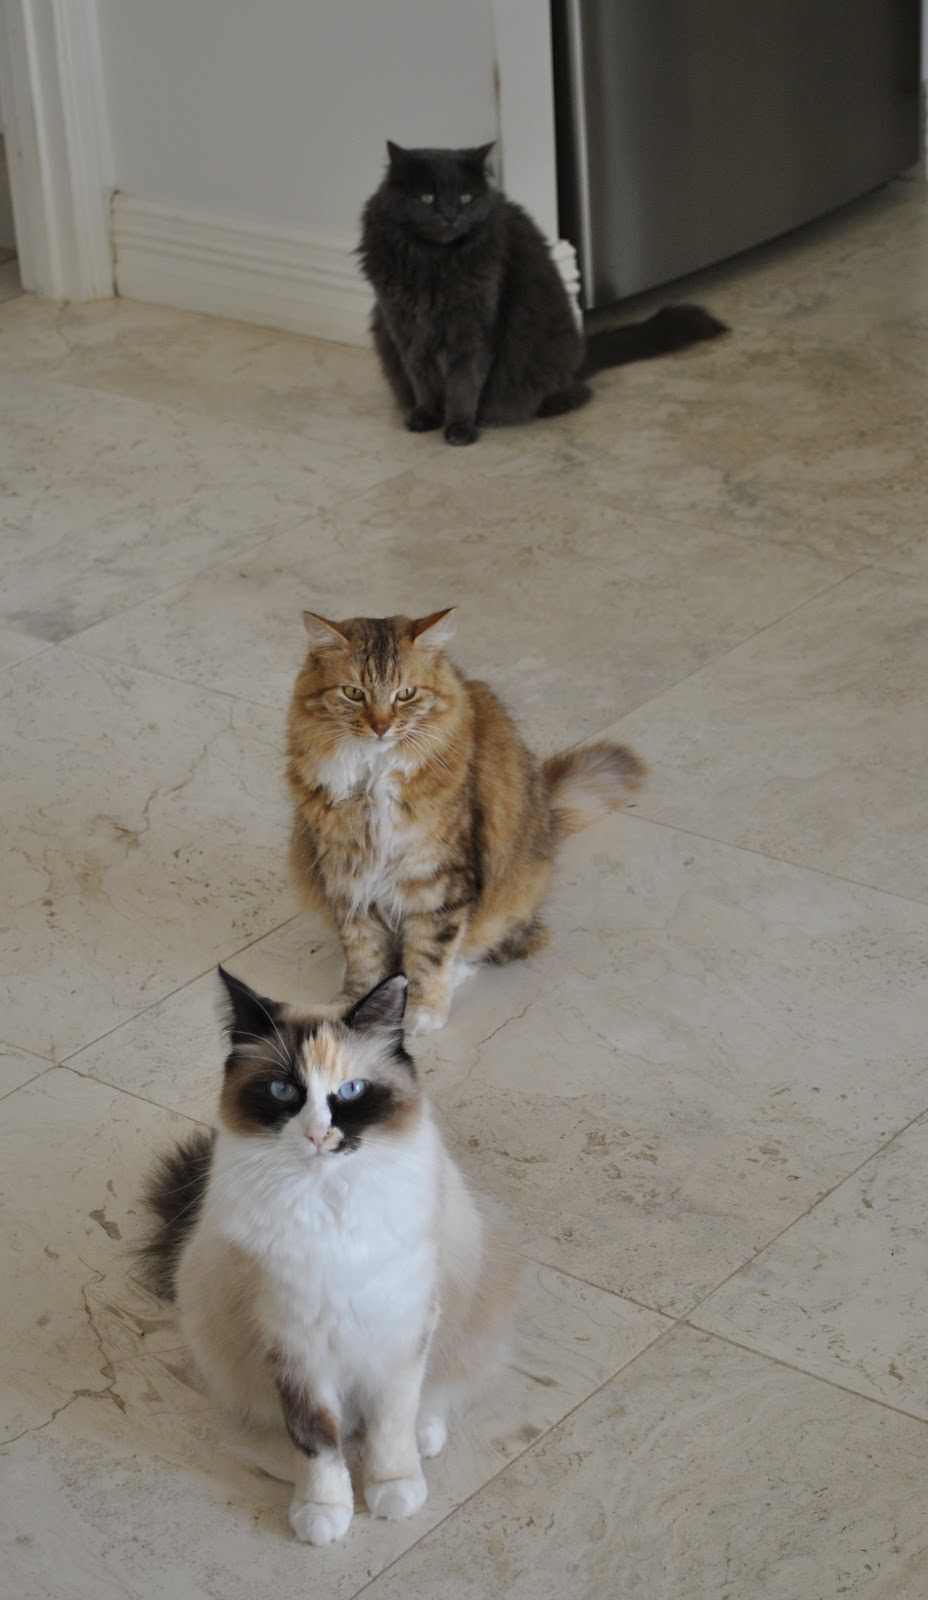
a furry feline line…

and verdant love in unexpected places…

May and June were lean in handmaded-ness… but soft! all is now beyond sweet memory since riches beyond measure were contain’d within.

Fret not dear reader, I have not yet gone mad.  
Shakespeare, y’know.  
Watched Romeo and Juliet last night…  :D)

Ombre Dyed Velveteen Skirt here
Fabric; $17.94
Zip; $2.29
Dye; previously accounted for
Hook and Eye; previously accounted for
Lining; leftover from my Red Emperor ball gown
Total cost; $20.23
An Unusual Dress here
Pattern; Vogue 1281, first time used, $8.75
Fabric; old Tshirts, free
Total cost; $8.75
Mustard Cable Knit Scarf here
Yarn (I still have two and a half balls leftover); $80.50 
Pattern; my own design
Total cost; $80.50

pinterestmail

Mustard cable-knit cowl

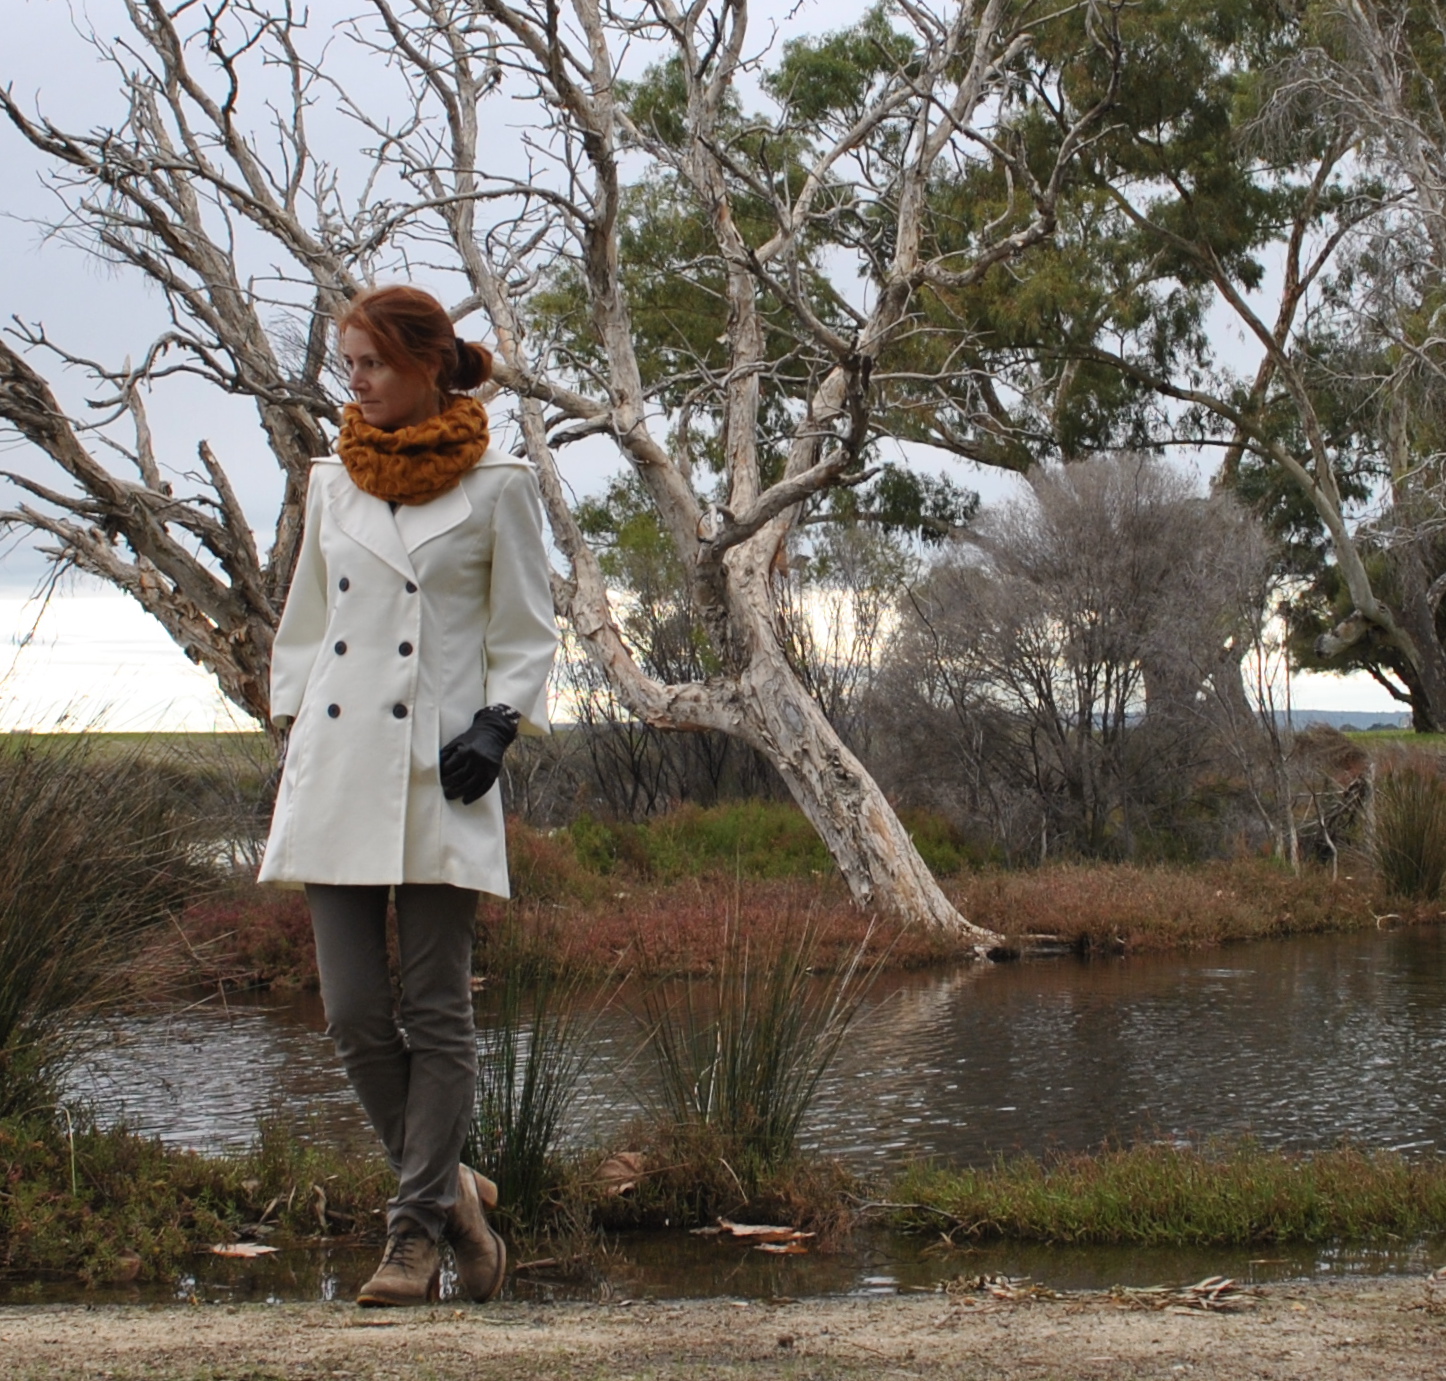
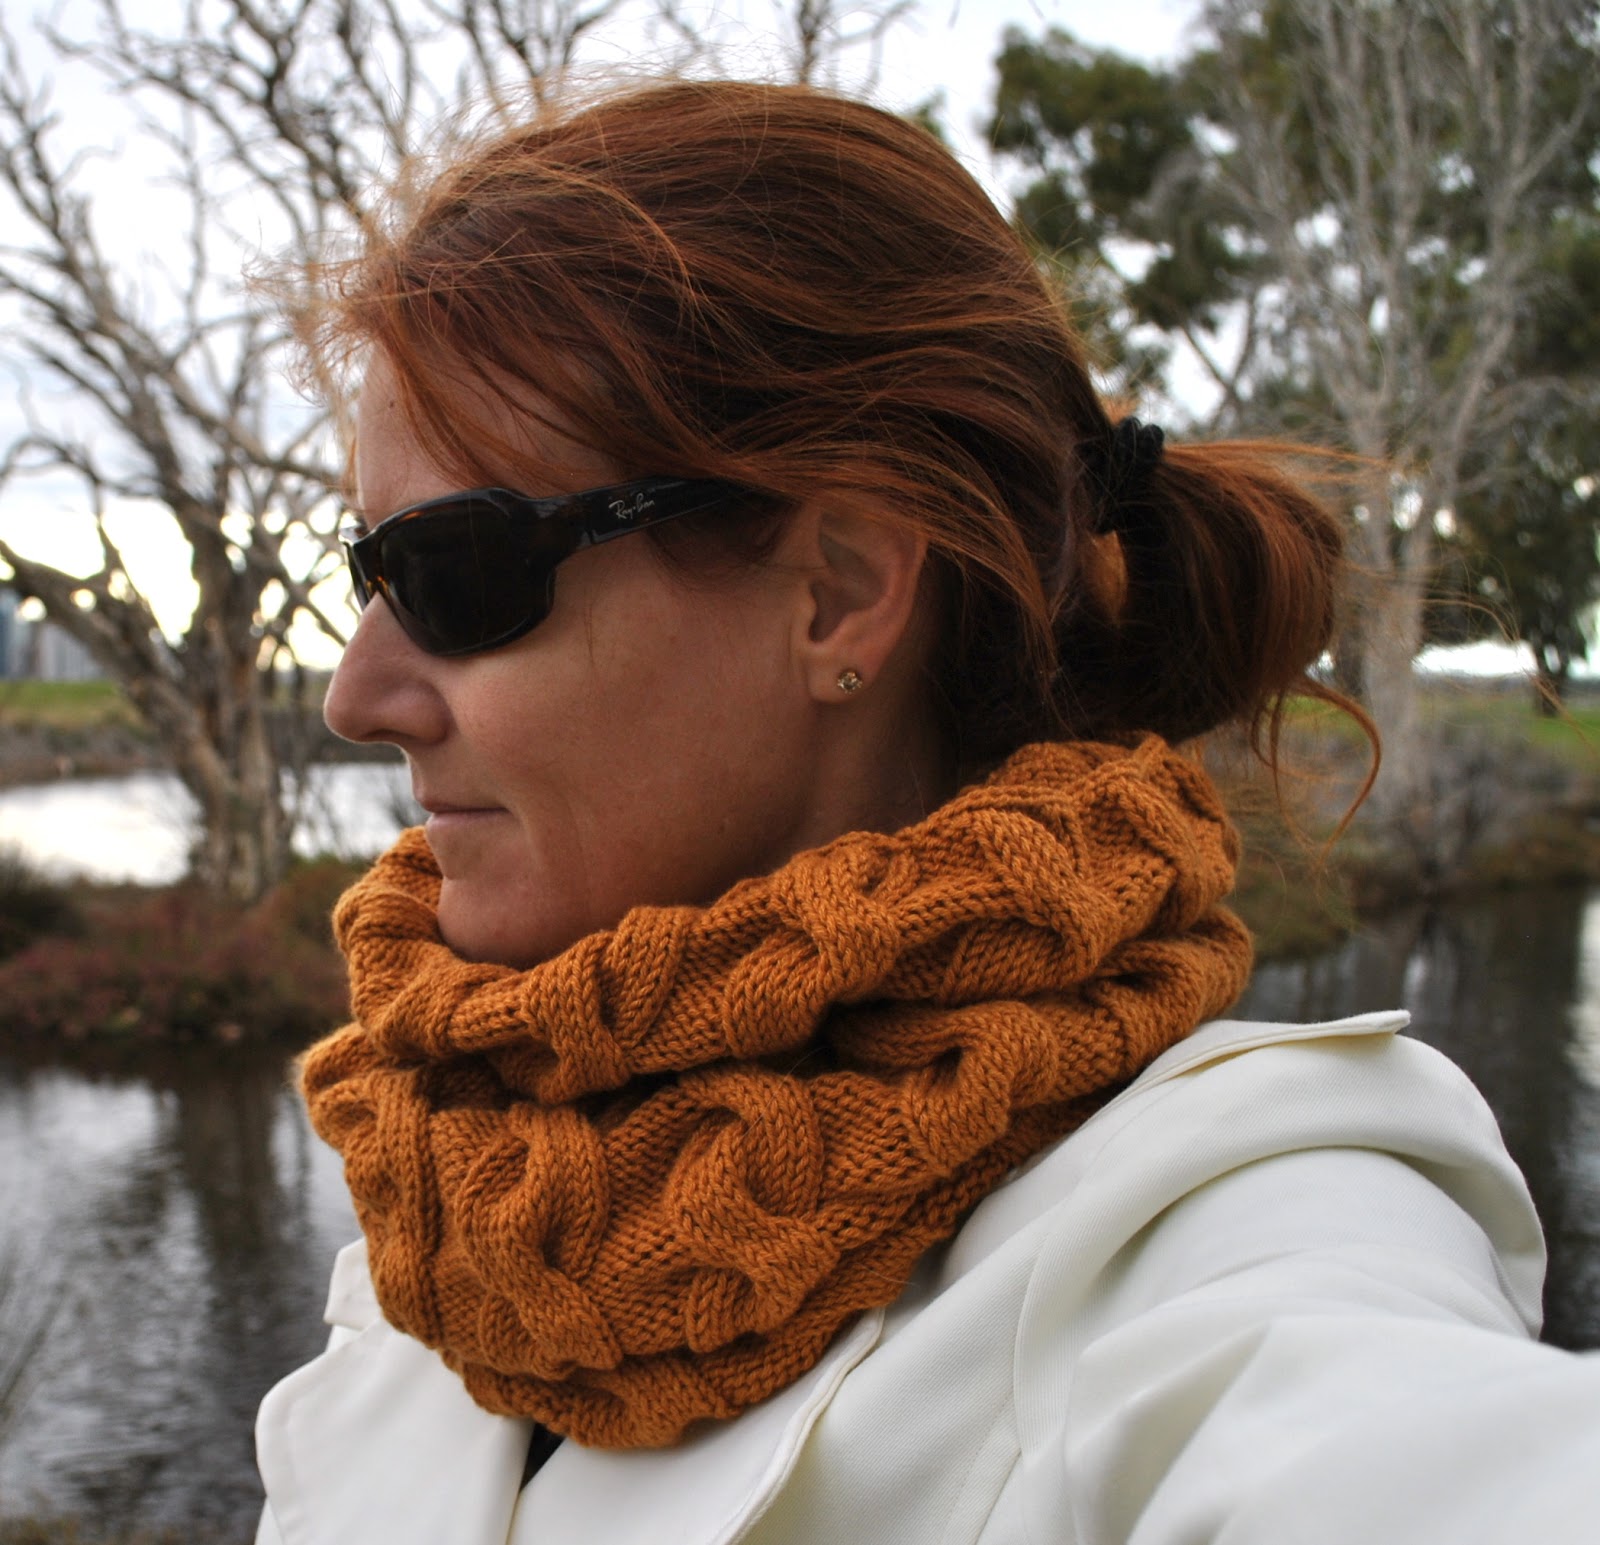
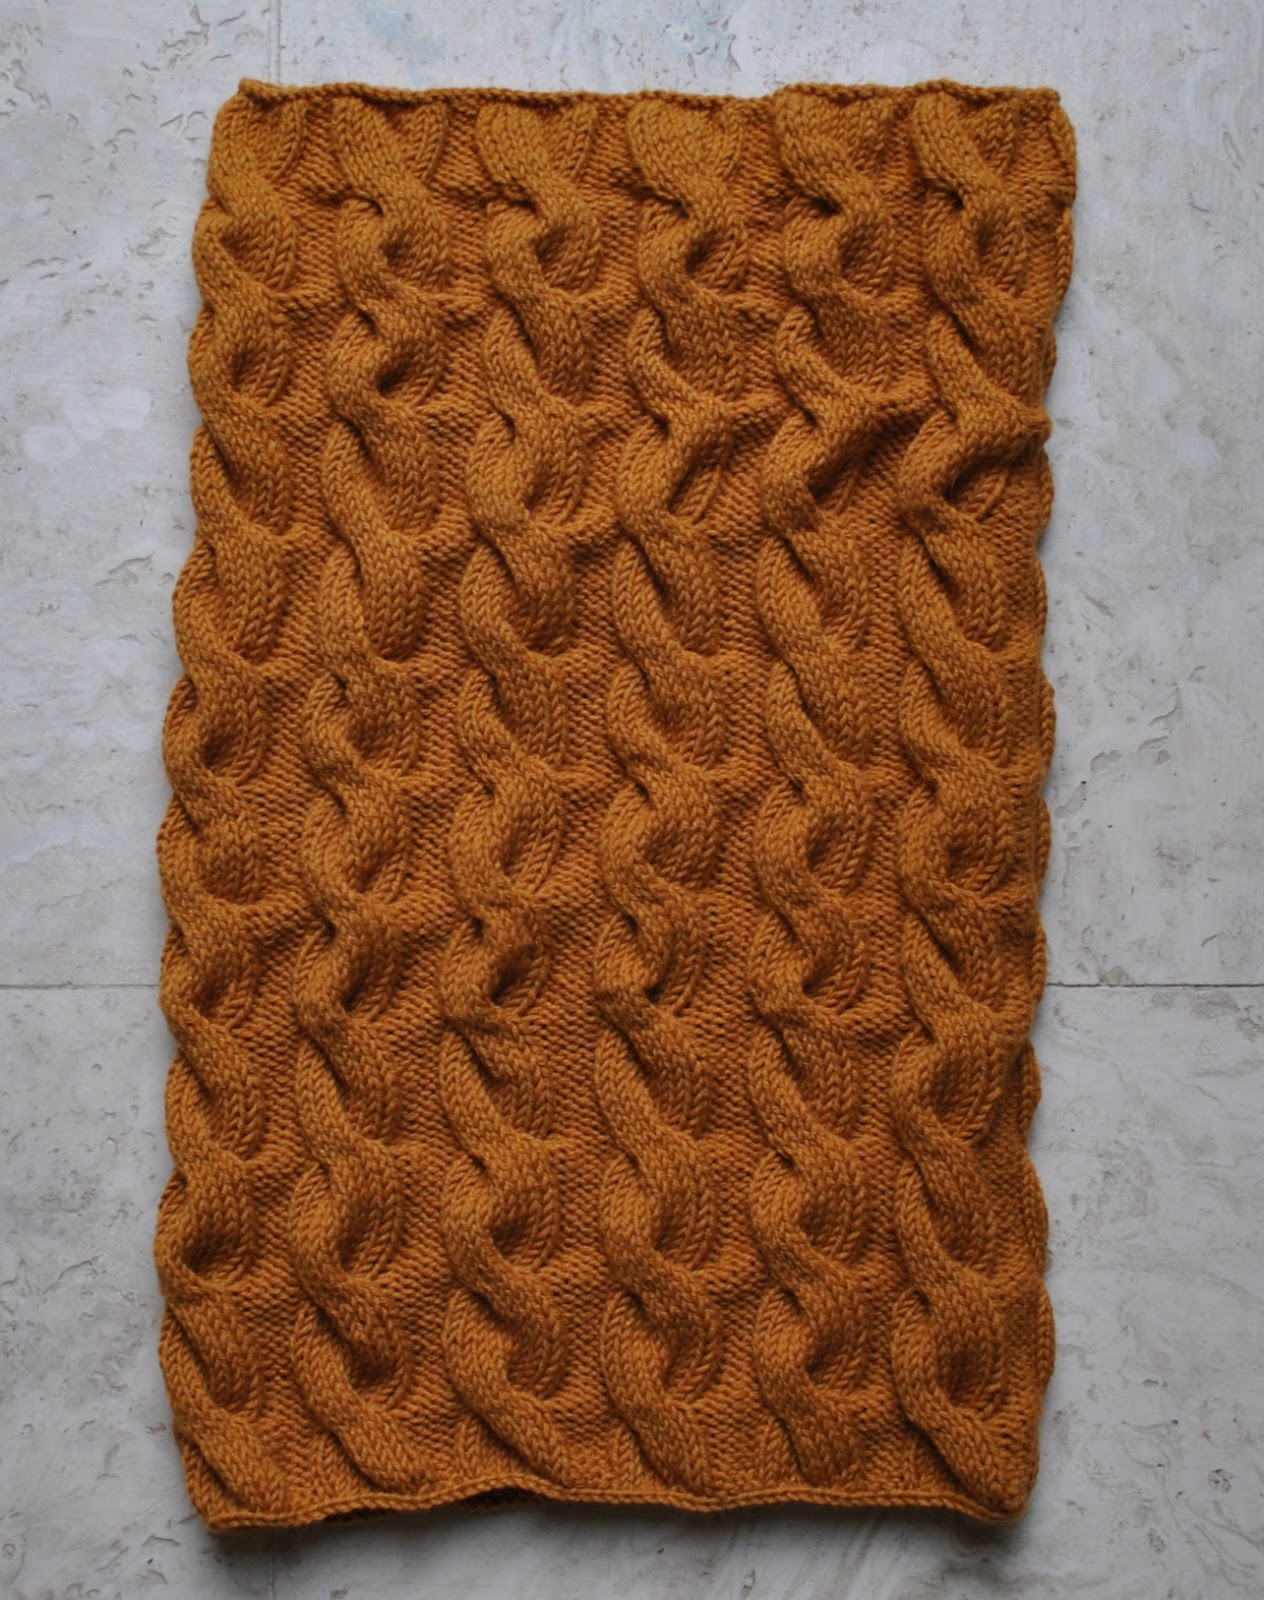
As those clear and cold as crystal winter mornings descend upon us, and the desire to swathe oneself in warm and cosy woolies; I have finished knitting a neck-warmer thingamy-bob.
I used Rowan belle organic dk, in shade 00010.  This is a 50% organic wool 50% organic cotton yarn, made in Italy; which is serendipitously appropriate given that most of the knitting was done in Italy.  The rich and cosy mustard shade is one I’ve had on my fashion radar for a while now.  I have been hunting for mustard-y goodness in either fabric or yarn, on and off in a desultory and increasingly despondent way for yonks, losing hope of ever seeing anything vaguely mustard-y.  Then; when I spied this yarn in Calico and Ivy, I pounced!
Rather embarrassingly to admit, but this started out as my holiday project, that I took away with me on our recent trip.  I started out with high flown fanciful ideas of a tall cowl with lots of sections with contrasting patterns, sorta to be like a knitting sampler.  There were to be ribs, moss stitches, a few sections of squares, and alternating bands of plain and purl… all of which I started and all of which got unpicked and done over.  Countless times!  The final result I am wearing here which looks like, and is; a simple dimple little cable-knit cowl scarf is actually the product of a several weeks of knitting.  And un-knitting.  But let’s not dwell on that…  🙂
Here it is: finished, and I am satisfied.
Sometimes, simple is best, yes?

If anyone is interested, here is my “pattern”; if you can even call it that  😀

Using a 3mm circular needle, cast on 135 stitches.
(commence by inserting the needle into the first stitch cast-on, so that you are knitting in the round)
1st row; K2, K2 into the next stitch; repeat for the first round  (180 stitches)
2nd row; K10, P5; repeat until the end of the round.
Repeat 2nd row 7 times.
10th row; slip next 5 stitches onto a cable needle, K the following 5 st, slip the 5 stitches from the cable needle back onto left needle and knit, P5; repeat 11 times (until the end of the round)
This is the cable row.
*Repeat 2nd row 12 times.
Repeat cable row*
Repeat from * to * until the cowl is a satisfactory length (I did another 13 repeats)
Repeat 2nd row 8 times.
K2, K2 tog, repeat until end of the round (135 stitches).
Cast off.
(this uses up about 4 and a half balls)

Details:
Scarf; handknit by me, using Rowan belle organic dk, in shade 00010 from Calico and Ivy
Jeans; Burda 7863 in khaki stretch gabardine, details and my review of this pattern here, and see these jeans styled in 6 different ways here
Tshirt; leopard print jersey knit, details here
Coat; McCalls 5525, ivory gabardine, details here and my review of this pattern here
Gloves; David Jones
Shoes; Francesco Morichetti, from Zomp shoes

pinterestmail

The Shopping and the Spoils…

…the lowdown on the fabric and yarn shops I visited whilst in Italy and Paris.

First stop, Rome; and before we had headed off on our trip I had read about Fratelli Bassetti Tessuti in a really excellent review which is also on the store website, and from which I also borrowed the below photo of the store exterior since I neglected to take my own.

Fratelli Bassetti Tessuti
Corso Vittorio Emanuele II, n. 73 00186 Roma
map

Well, well.  Oh my.  It’s rare for a fabric store to leave me speechless and incapable of waxing lyrical about the multitude of lusciousness contained within, but this one is pretty mind-blowing!
Just read Elaine’s review to which I have linked above instead.  It’s a goodie.
Rather lamely, I ended up buying only one piece of fabric.  Confronted with all that fabric; my brain started out exploding with possibilities and then went numb.  In fact, it was not until a few days later than my brain managed to process, and then belatedly began to kick myself.
But: and there is a but.  Along with all that fabric wonderfulness, went sky high price tags.  So I am not beating myself up too badly over not having bought more.
My recommendation; if you are ever lucky enough to be in Rome and have time to visit this store; do.  Despite the high prices, it is nice to get a little piece of fabric for a souvenir, just because.

I bought this citrus-y pinstriped linen.  It wants to be a summer-y dress, when the time comes  🙂  Or something summer-y.  I haven’t decided exactly.  I was thinking of limoncello and lemon gelati when I bought it.

Now, to Milan.
I had googled fabric stores in Milan prior to getting here but came up with zilch.  Then one afternoon, sitting in a cafe watching all the beautiful people strolling by, I happened to catch sight of a girl holding a carrybag printed with the unmistakeable motifs of a fabric store; roll of fabric, scissors, measure rule.  Could barely contain my excitement.  Fortunately could make out the name of the store, and immediately looked it up and headed out there… pronto

(this photo by me)
Tessuti Scampoli
Via Lario, 14  20159 Milan, Italy02 6886493
map
 

Another treasure trove. Not as large, therefore not as fabulously and overwhelmingly stocked as FBT, but still pretty fantastic. Here the fabrics were heaps more reasonably priced yet still very high quality; and plentiful enough while not so much as to overwhelm. There is the ground floor section which is not very prepossessing; but if you wander into the back corner of the store you find an unobtrusive staircase, leading one down to the basement which is where most of the action is.  Here were leathers, pure Italian wool suitings, silk velvets, linens and shirting cottons, tonnes of other silks, metallics, cotton denims for jeans, some cashmere knits, a whole wall of jerseys, some synthetic offerings … lots of stuff.

I got more excited in this store, buying two pieces.
Pure Italian woven wool, for which I paid the paltry sum of E15.49/m (A$19.38/m)  Only my fellow Australians will know what you would pay for this fabric over here in Australia.  It’s OK, I will understand if you hate me.  I would too  🙂
I also bought a piece of silk velvet.  It is hard to see from the picture, but it is black pile, on an intensely neon orange background, giving it a sort of chocolate-y glow in the light.  Pure gorgeousness, no?
The downsides to this store: they do not accept credit cards and are a cash-only business.  Plus; the cashier, perhaps not realising that I could understand Italian since I had only spoken with a girl downstairs, made a vaguely rude remark about “Americans” on our way out.  I couldn’t be bothered going back and sorting him out.

My recommendation: definitely still worth trekking out there.

Now, to Paris.  Aah, Paris.  The day I popped out to Montmartre to meet Donna I allowed way too much time to get there and turned up at our rendezvous about three quarters of an hour too early, haha.  Easy tourist mistake.  So to kill a bit of time I wandered up and down the fabric store street and checked out this one, where I could not resist starting my fabric buying spree a little early.  I knew Donna wouldn’t mind…  🙂
Sacre Coupons
4 bis, rue d’Orsel 75018 Paris
closest metro stop: Anvers
 

Doesn’t look very enticing from the outside, huh?  Appearances can be deceiving; this is a small store it is true, but stuffed to the gills with gorgeous fabric.  Prices, mediocre.  Not as cheap as Milan, not as dear as Rome.  I found here another piece of silk velvet; green pile on a pink background, giving it a mossy appearance.  This is one of “my” colours, so I grabbed it, thank you.

Donna and I went into a neighbouring store, the name of which I cannot remember, which had a mind-boggling range of buttons, and I bought: some charmingly wonky pewter ones, and some delicately carved copper-y brown ones… (it’s OK, I did buy more than 3 each, this is just a representative sample)
I re-visited Sacre Coupons a few days later when Craig was at the conference, and bought a length of soft ivory, finely woven, pure wool; and which needs almost no input from me to make it into a perfectly gorgeous light and floaty scarf.  Cassie really really really wanted this one, but… so do I!  I might let her borrow it every once in a while.  If she’s good  🙂
Finally, Donna took me to visit L’Oisive The, a perfectly lovely tea-shop and knitting cafe.
L’Oisive The
10, rue de la Butte aux Cailles ou 1, rue Jean Marie Jego
75013 Paris
closest Metro stop; Place d’Italie
Here I bought 4 skeins of hand-dyed French wool, in a shade of French blue, no less!
I’m envisioning a little nipped-in waisted cardigan.  One day.  Soon.  🙂  I have a few other little things that really should be finished off first.  But I will get ’round to it.  All of it.
I will not suffer from thisfabricistoogoodtocutup-itis, I promise!


pinterestmail
Switch to mobile version
↓