I’ve got a version of Photoshop with which to experiment, and I found a really fantastic ombre tutorial here. This photo has a single gradient layer added; (33.3% (Gradient Fill 1, RGB/8*)* … er, I don’t really know what that actually means, but hey…fyi) and I fiddled with it to have white at the bottom at 10% opacity, through violet, and khaki at the top at 70% opacity.
Soooo, tres moody and sorta apocalyptic, oui?
As we were…
Fun with Photoshop
Dusky pink ‘bustle” skirt; 6 different ways
This dusky pink skirt of a very simple and yet at the same time very unusual shape has been one of my favourites since I made it and it has appeared multiple times here on the blog already. It is made using the pattern for skirt “m” from the Japanese pattern book Unique Clothes Any Way You Like (also sometimes referred to variously as Clever Co-Ordinates to Wear, Shape shape, and also Sewing Clothing Patterns to Wear Multiple Ways) by Natsuno Hiraiwa. The lack of structure and form in the design has been the key to its versatility, enabling the wearer to flip the skirt around any which way on the body without being limited to the one-way-only nature of most conventional western-style skirt designs; and its style embraces both the minimalist and the heavily draped, depending on the angle from which it is viewed.
I made it from a lovely linen/cotton mix from Tessuti’s in Melbourne, and it is lined with a soft, thin almost fluffy beige cotton from Fabulous Fabrics. The outer fabric is a greyish pink that is so subtle as to be almost a neutral. So accordingly, I tend to wear it mostly with some sort of little white shirt, to show off that pretty colour to its best, or with a blue chambray shirt. Otherwise, I do like it best mixed up with quietly subtle beige or ivory neutrals which do not overpower that soft soft colour.
When I first made it, I wore it mostly like it is pictured at the left, with that modernist bustle situated over the hip. Probably because this how it was styled for the book. And obviously, you can wear it over either hip, take your pick… and colourwise, I must say I do like the pink and turquoise together, too… 🙂
Then at right; I discovered one day that you could push the bustle in on itself, creating a kind of big pocket at the side of the skirt. This is also became a favourite “way” for a while for me! Incidentally, the little necklace I am wearing here is a souvenir from our trip to Japan, a miniature leather-bound book on a leather thong. It is pretty cute, no…?

Then I tried wearing it with the whole bustle swivelled to the back, and this might be my currently preferred way of wearing it now… although I do still tend to flip it around any which way on random whim…. staves off boredom y’know.
At left; worn with a longer shirt belted over the top, the bustle is covered up and it looks pretty much like a conventional Aline skirt; and at right, paired with more winter-y accessories; long boots and a dip-dyed stole that is short enough to put that bustle on display at the back. Incidentally, this asymmetric stole is also from the same book, posted here.

Below; at left; a cool and chic-ly featureless front is presented when worn with a summery little beige sleeveless top tucked in, and with black summer sandals to provide a foil to those pretty colours.
And at right; well I’m always partial to the flattering longline layers of a little dress worn over a longer skirt, as in this last ensemble. And these sugared almond colours are particularly nice I think, too!

Which of these “looks” here do you like the best?
And would you like to know which one am I wearing today? well, it is still pretty warm around these parts so I am wearing the summeriest of these outfits just above, with the little sleeveless top the colour of milky latte. I just love these soft coffee and pink shades together!
More finishing details for jersey knits
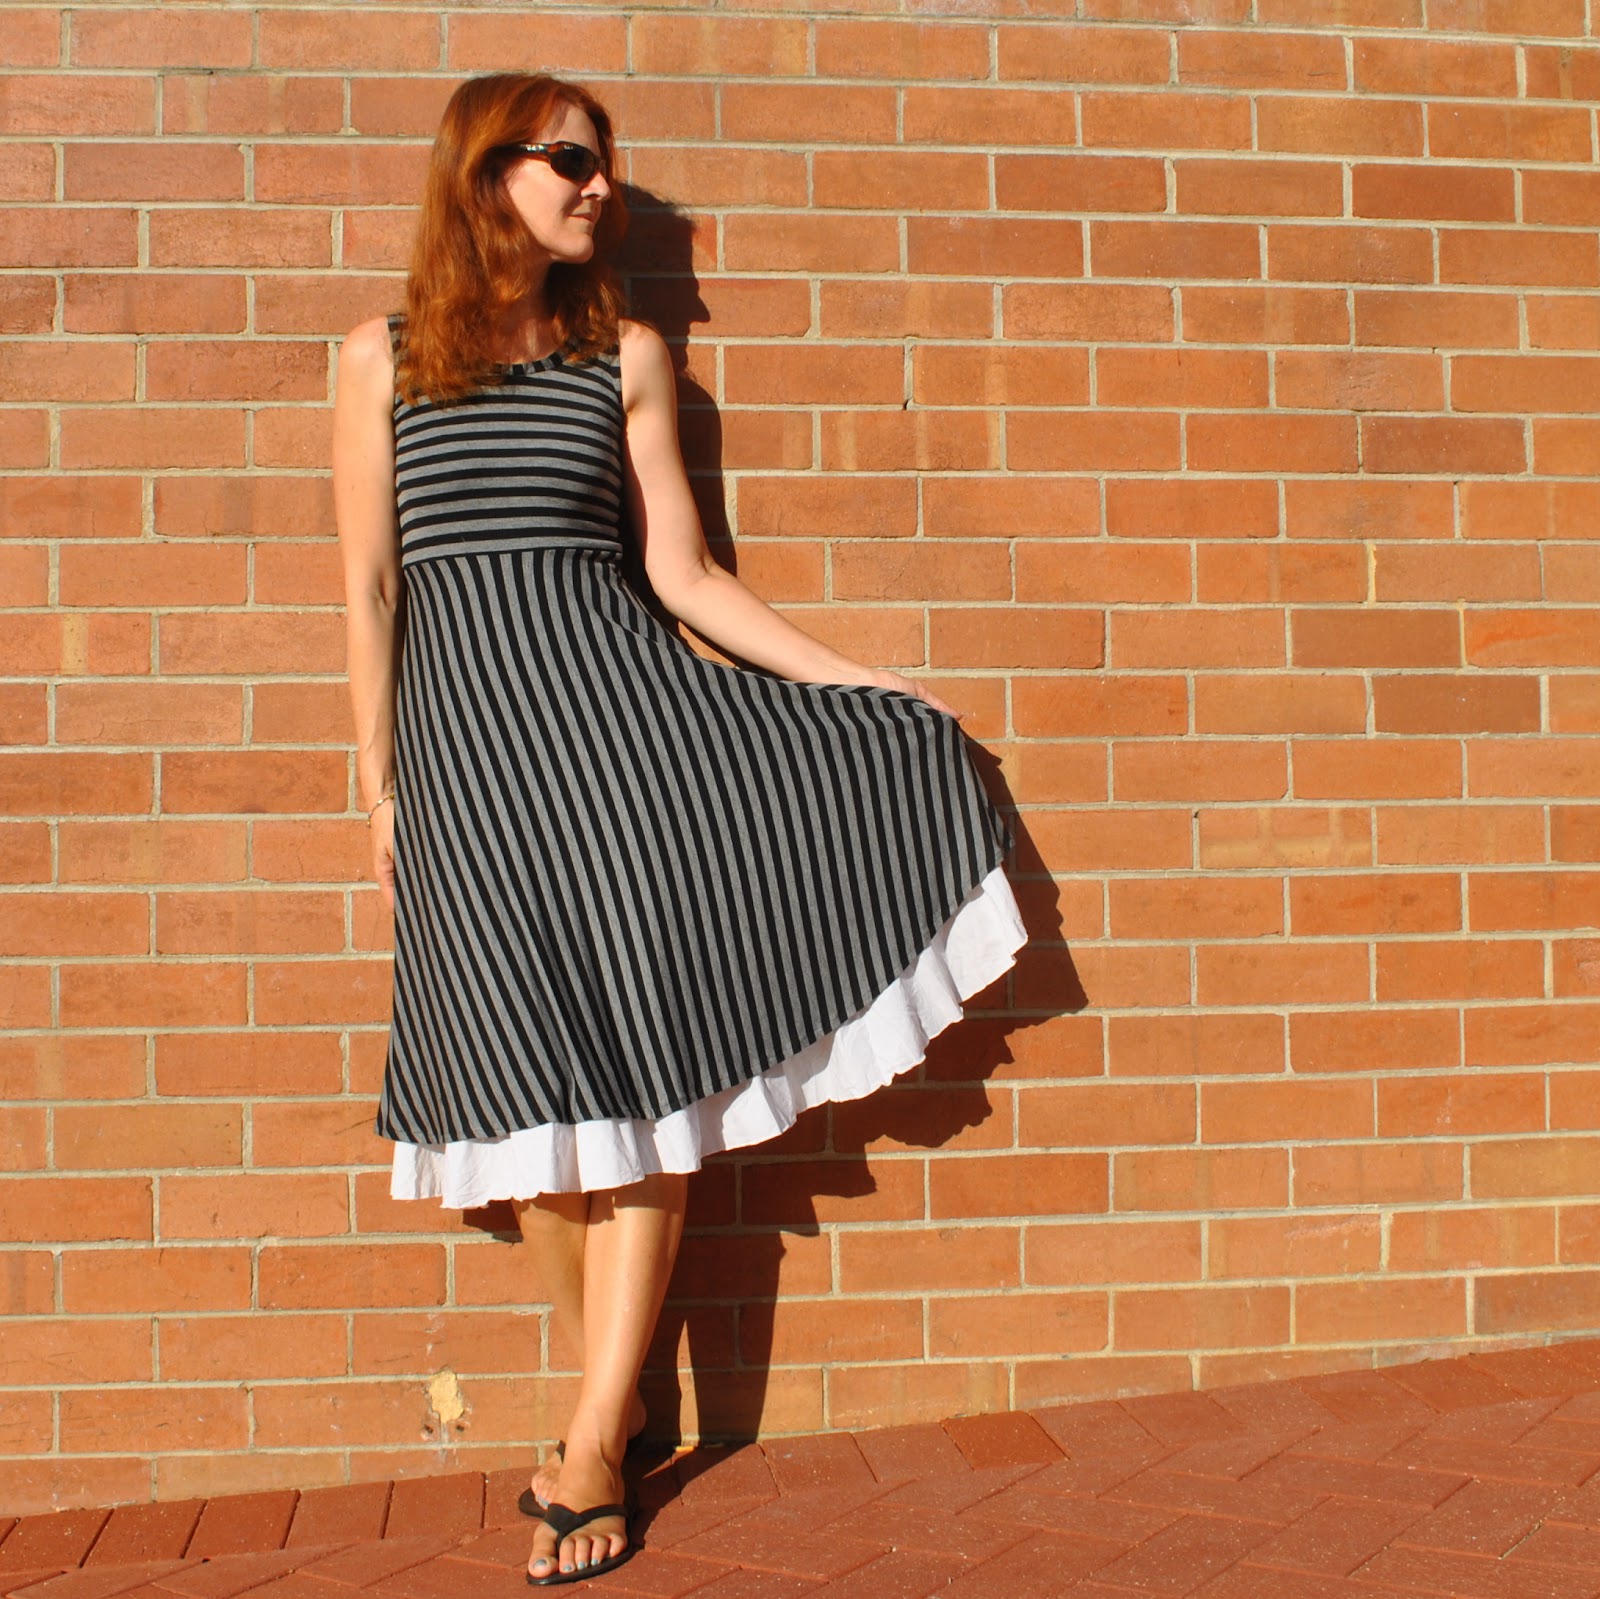
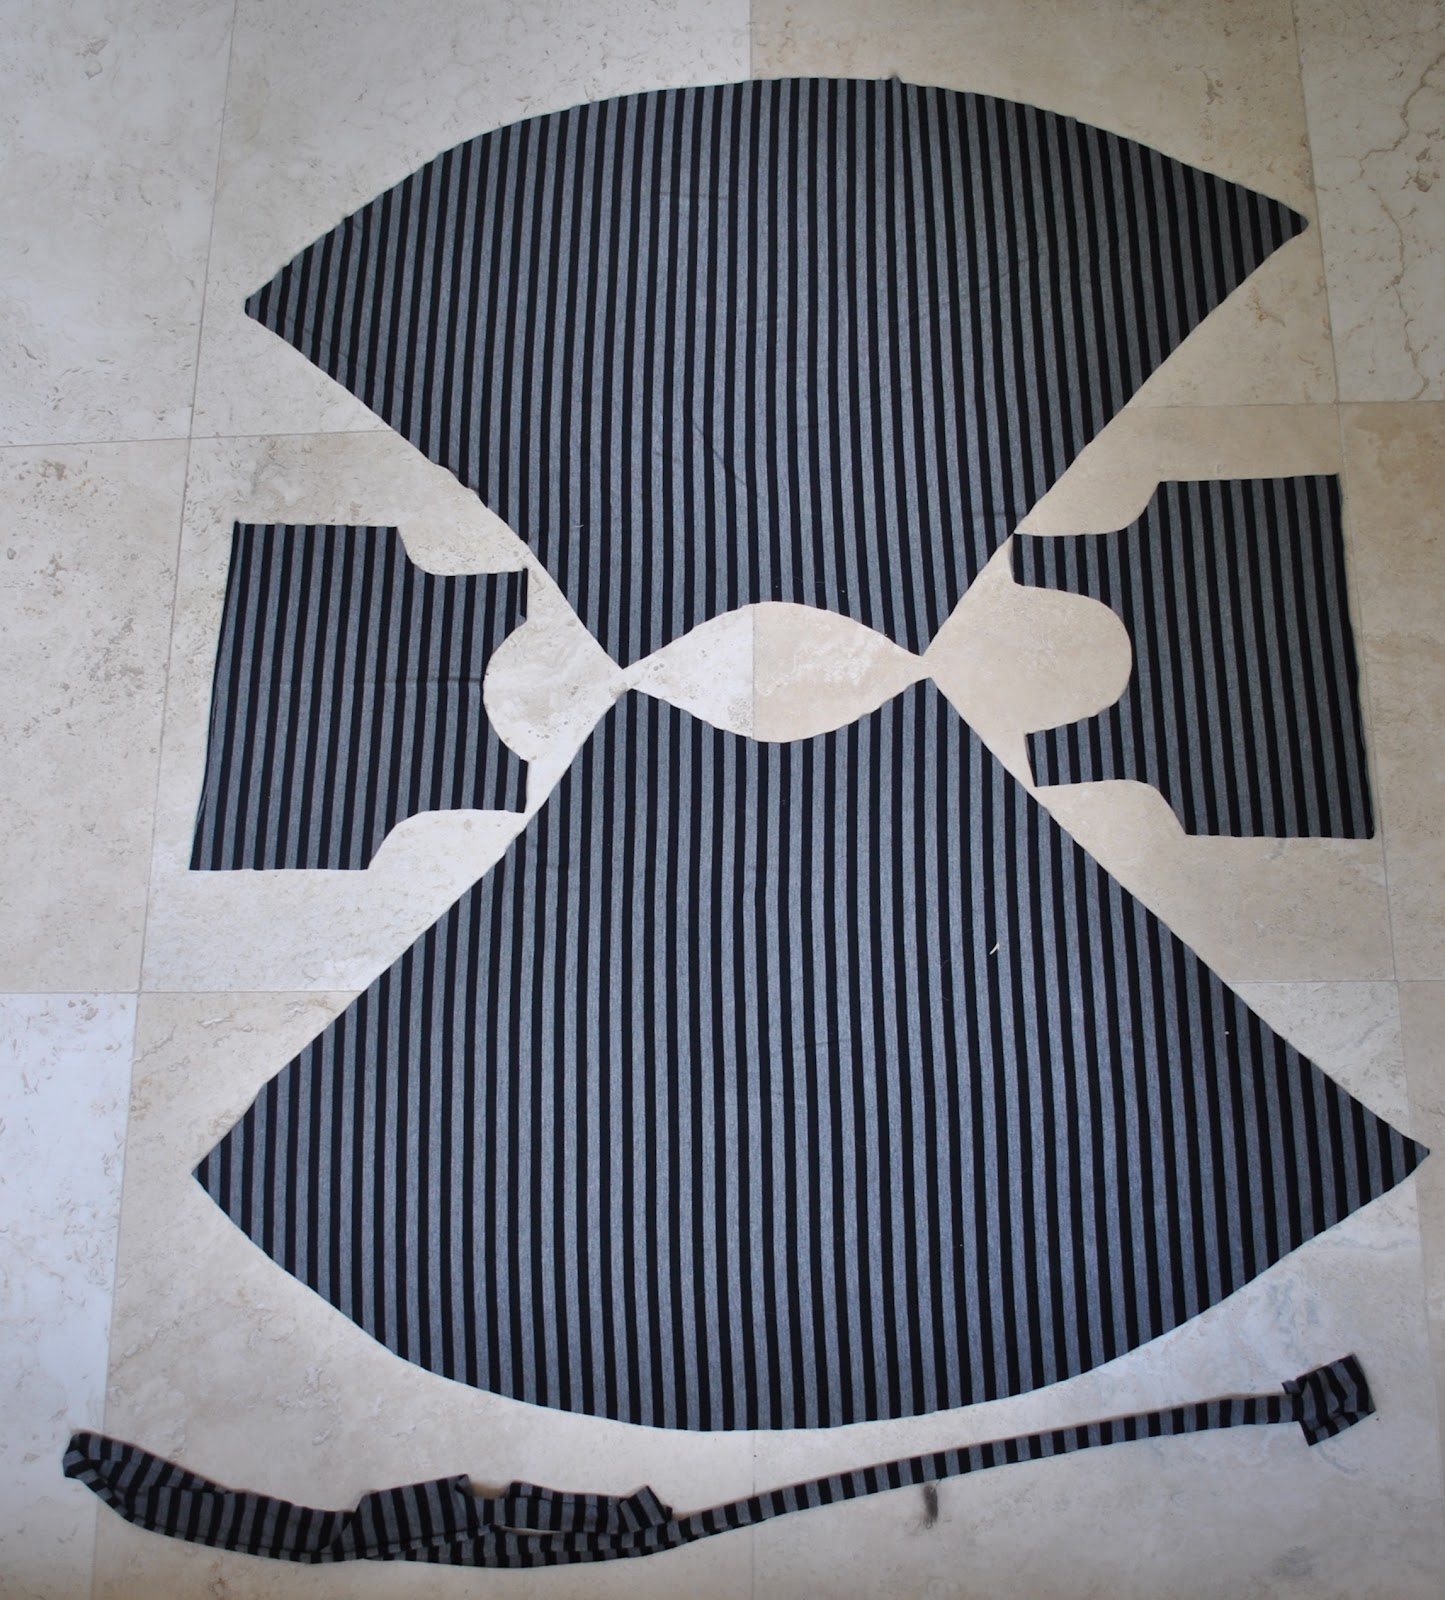
In making my grey striped jersey dress here, I opted to re-inforce the shoulder seams. I do not re-inforce the shoulder seams in all my knit garments, but in this case; a long tank dress in a stretchy fabric, where the weight of an entire dress is hanging off those two meagre teensy little shoulder seams, then it is a very good idea to build in a little extra strength in this vulnerable area.
And this is how:
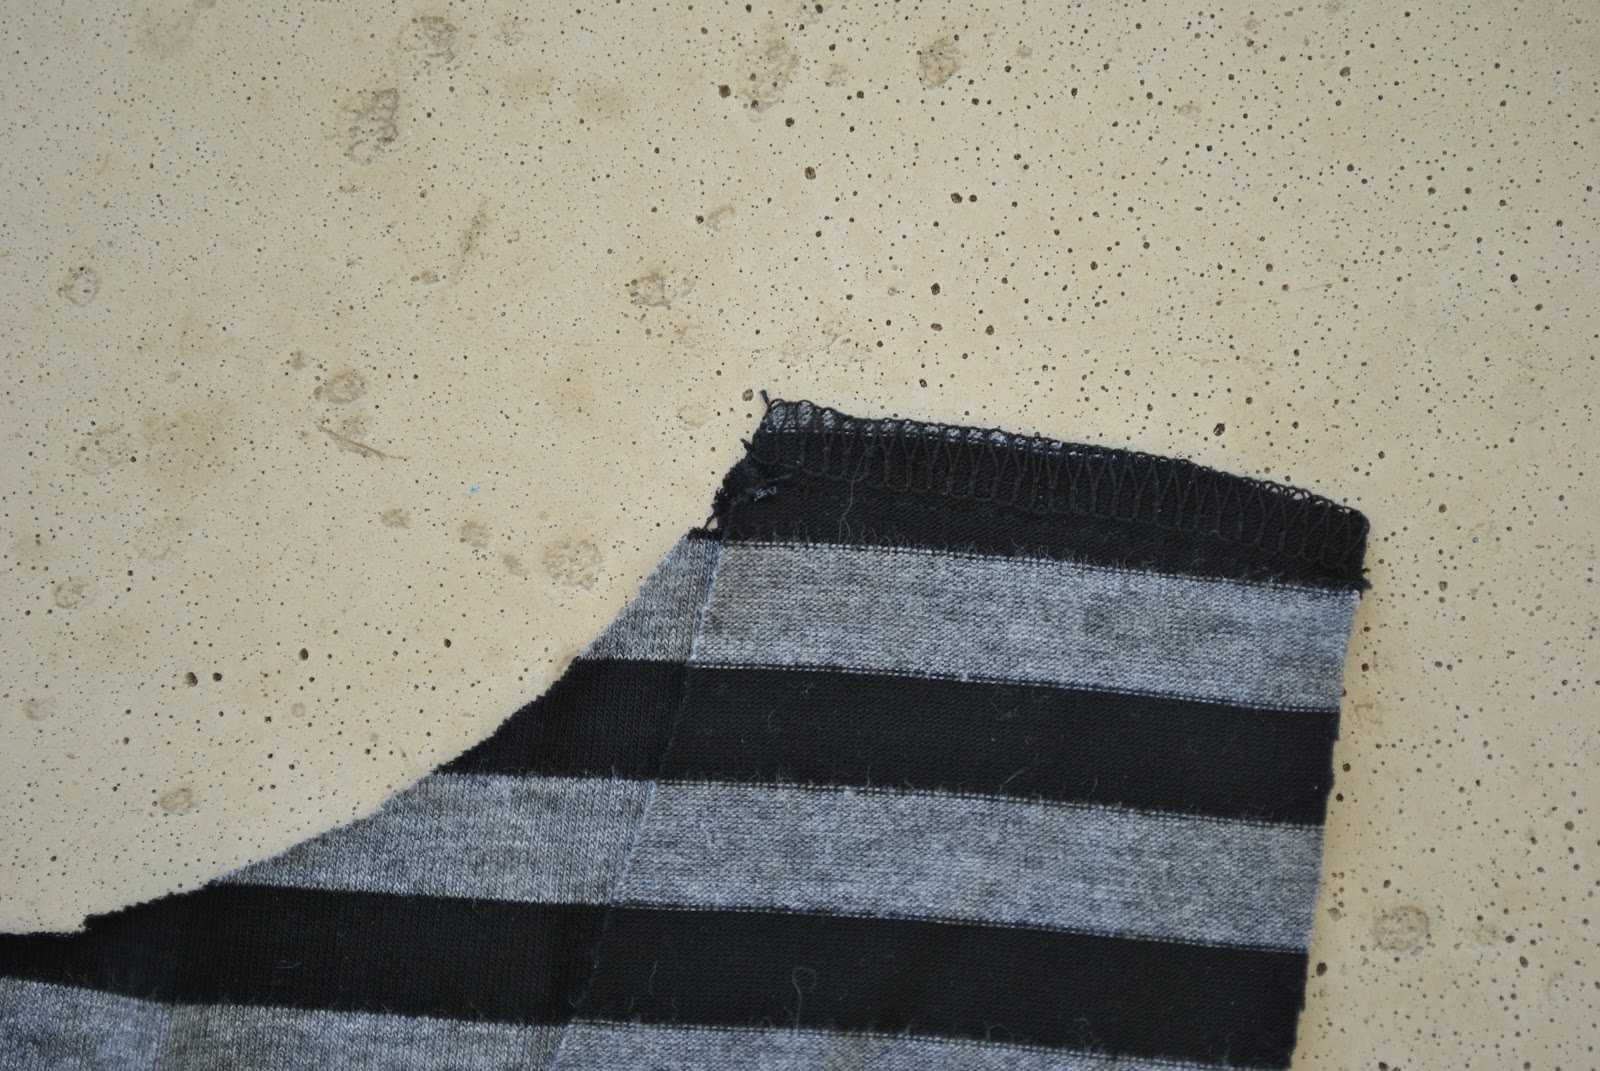
Sew the shoulder seams, and then overlock the raw edges (optional, since you won’t see this when it is finished..).
I then cut a short strip on the bias, in a thin but strong, woven cotton. Quilting cotton is fine for this purpose.
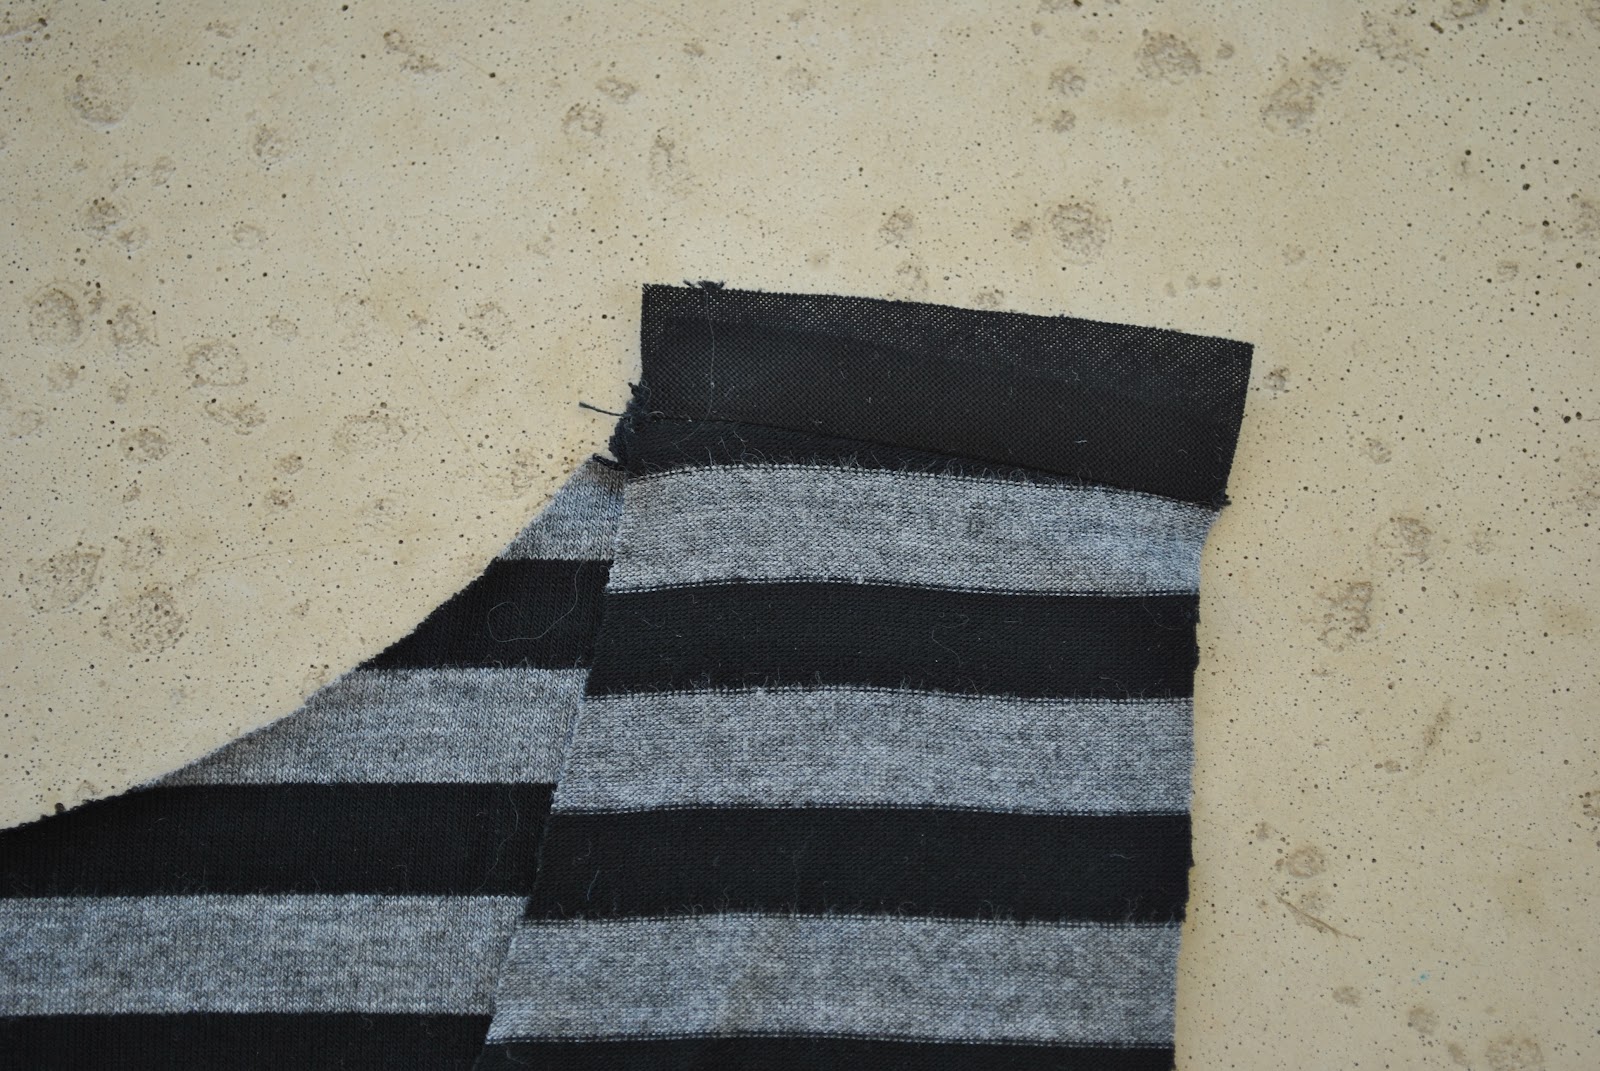
Stitch the bias strip to the dress shoulder seam; directly over the previous dress/shoulder-seam stitching. The bias strip should be laying over the dress front, as pictured at right.
Fold the bias strip up over the overlocked seam allowance and press.
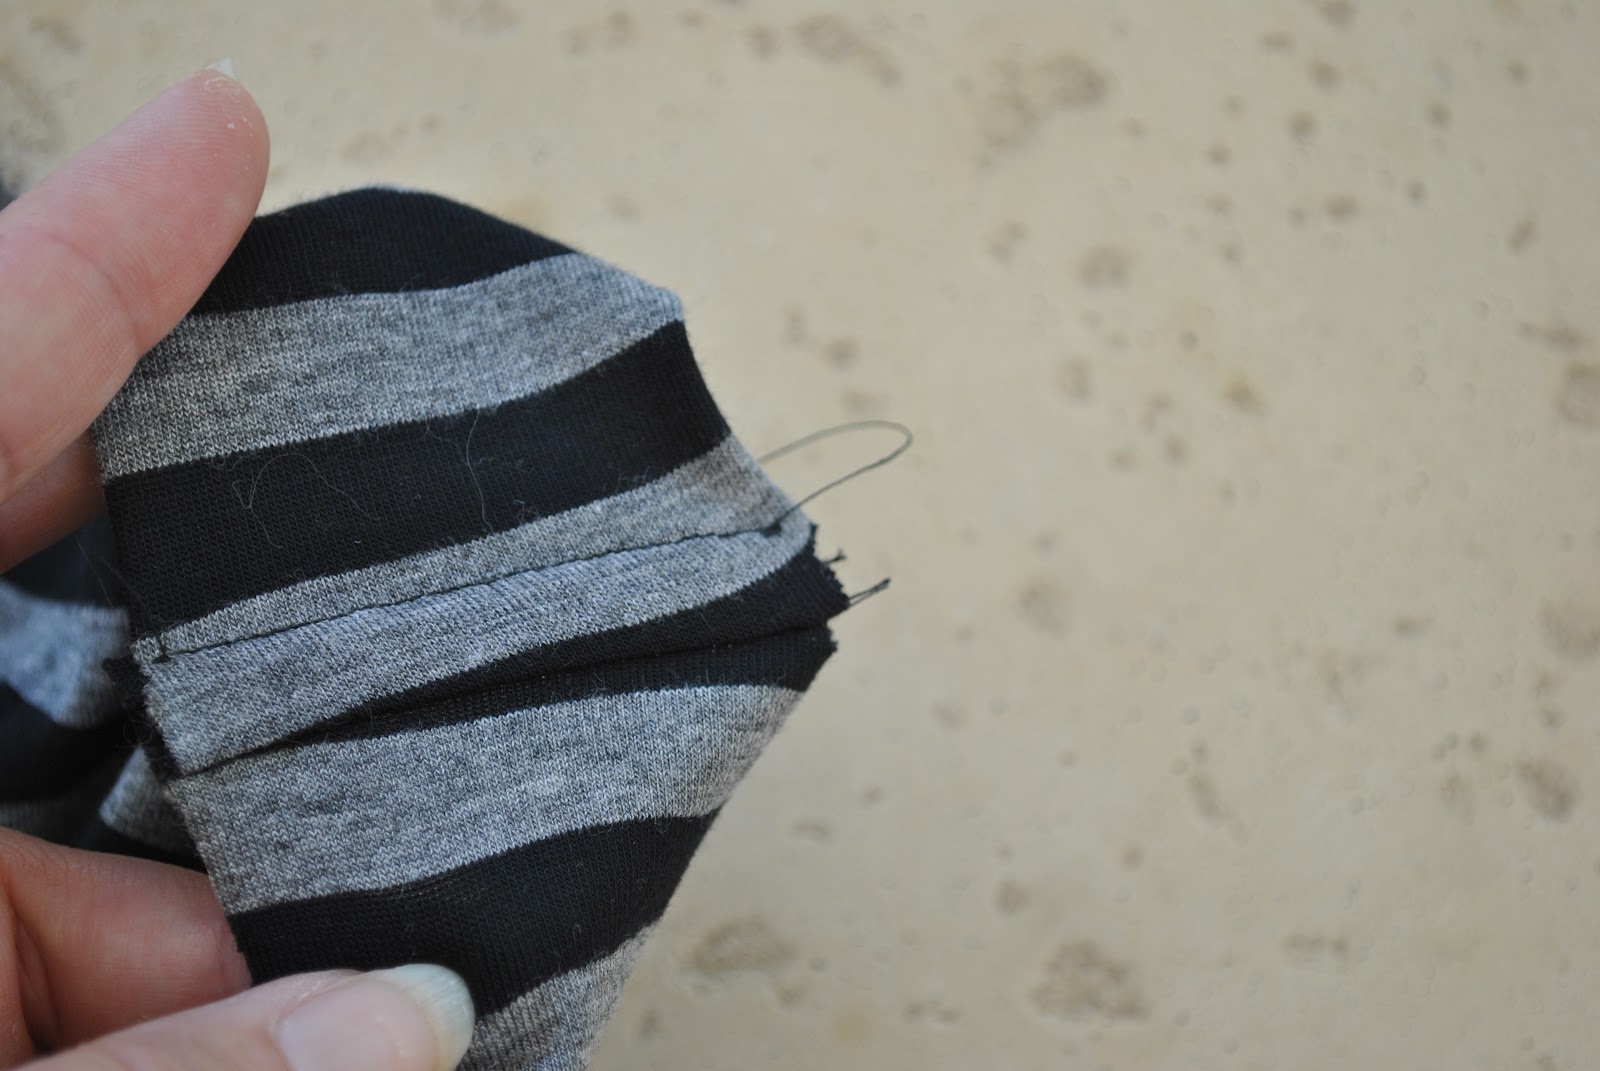
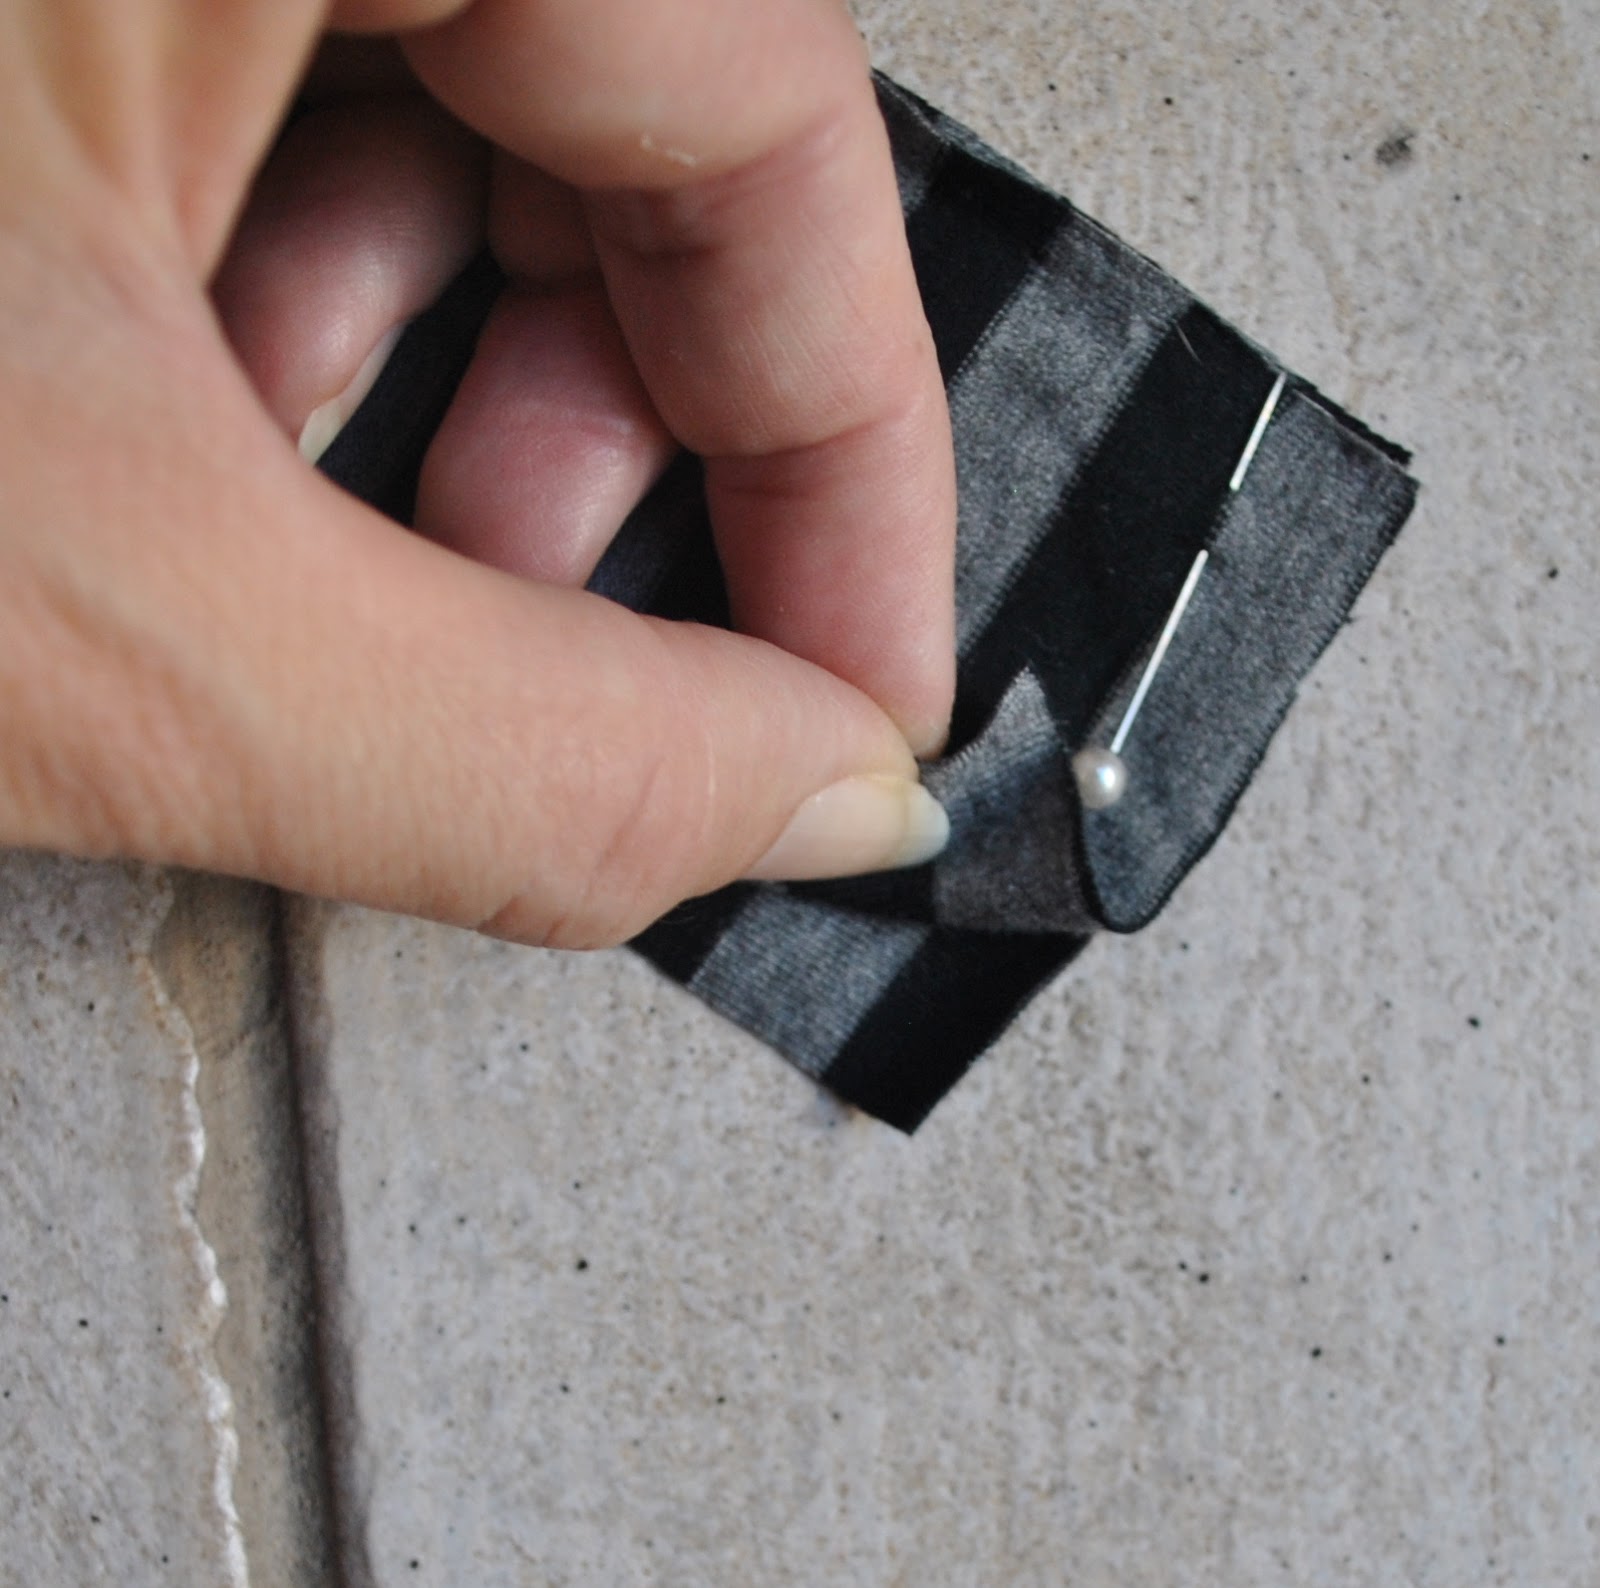
Fold the bias strip and the shoulder seam allowance back to lie flat over the dress back, and press. Fold under the bias raw edge to an even width, encasing the shoulder seam allowance, and pin in place.
Top stitch the folded edge down onto the dress.
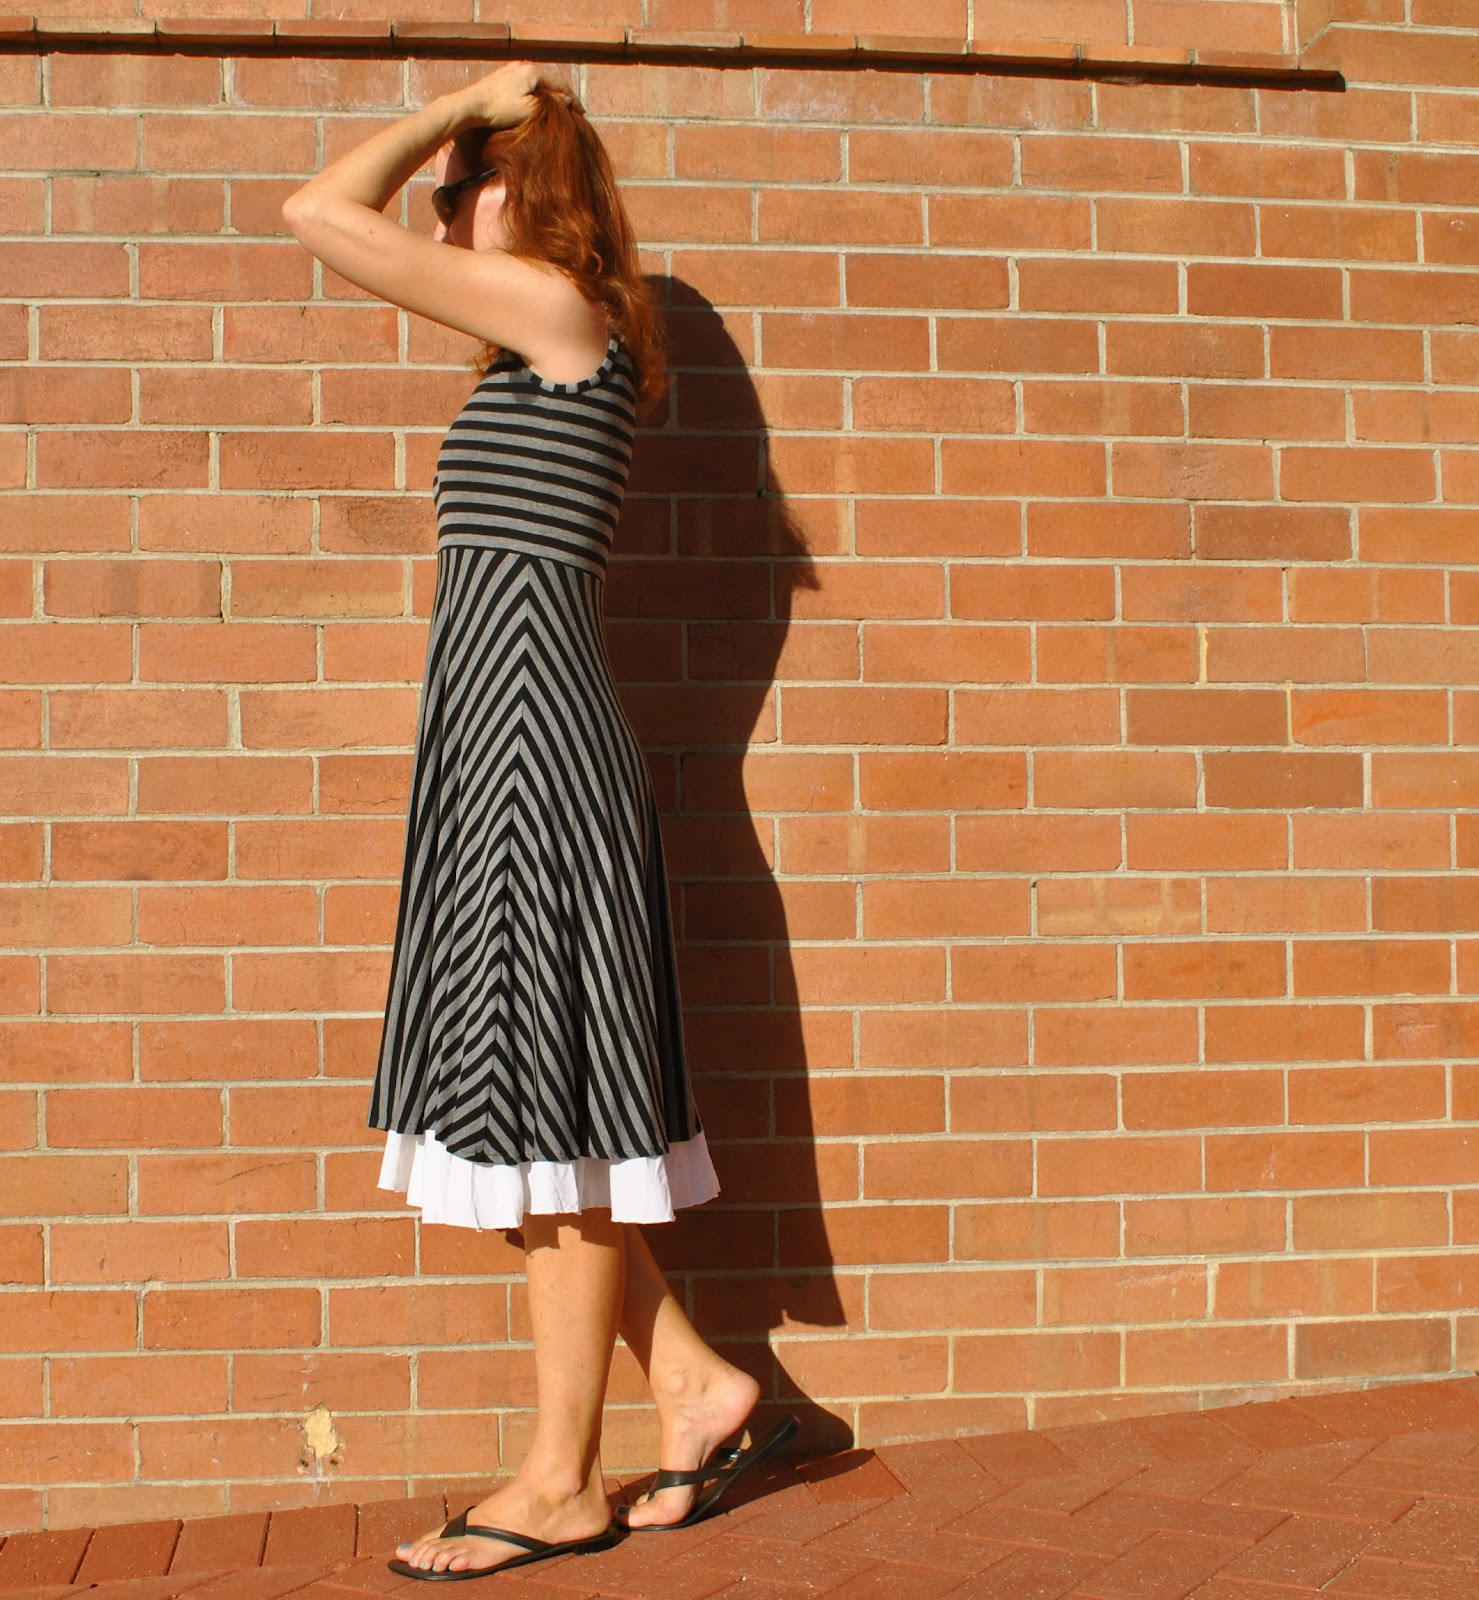
There! Now your shoulder seams will be perfectly rigid and strong enough to hold up the weight of the dress without stretching or ever becoming mis-shapen over time….
Now for the armhole and neckline bands…
I’ve mentioned before how I call this the Metalicus finish, this is merely because I learnt it by studying my Metalicus pieces where I first observed this technique and started trying it out on my own garments. It probably goes by some other proper name really, but meh, that is my name for it. It is a very nice neat finish, uses the same fabric, and requires no hand-stitching, expensive twin needles or special machines like overlocking or cover-stitch machines. And still looks really professional.
It can be used on any raw edge; armholes, necklines, sleeve edges, cardigan edges, Tshirt hems, I’ve even used it on firm stretch fabric waistbands, dress hems; anything.
(Later edit) I’m adding this to address some comments: if you follow this method the seam allowances will not flip out to the outside and will not need topstitching down!
Start out by trimming the armholes/neckline/sleeve length/Tshirt length; whatever, to the finished desired length.
The dimensions of your band strips are calculated as follows:
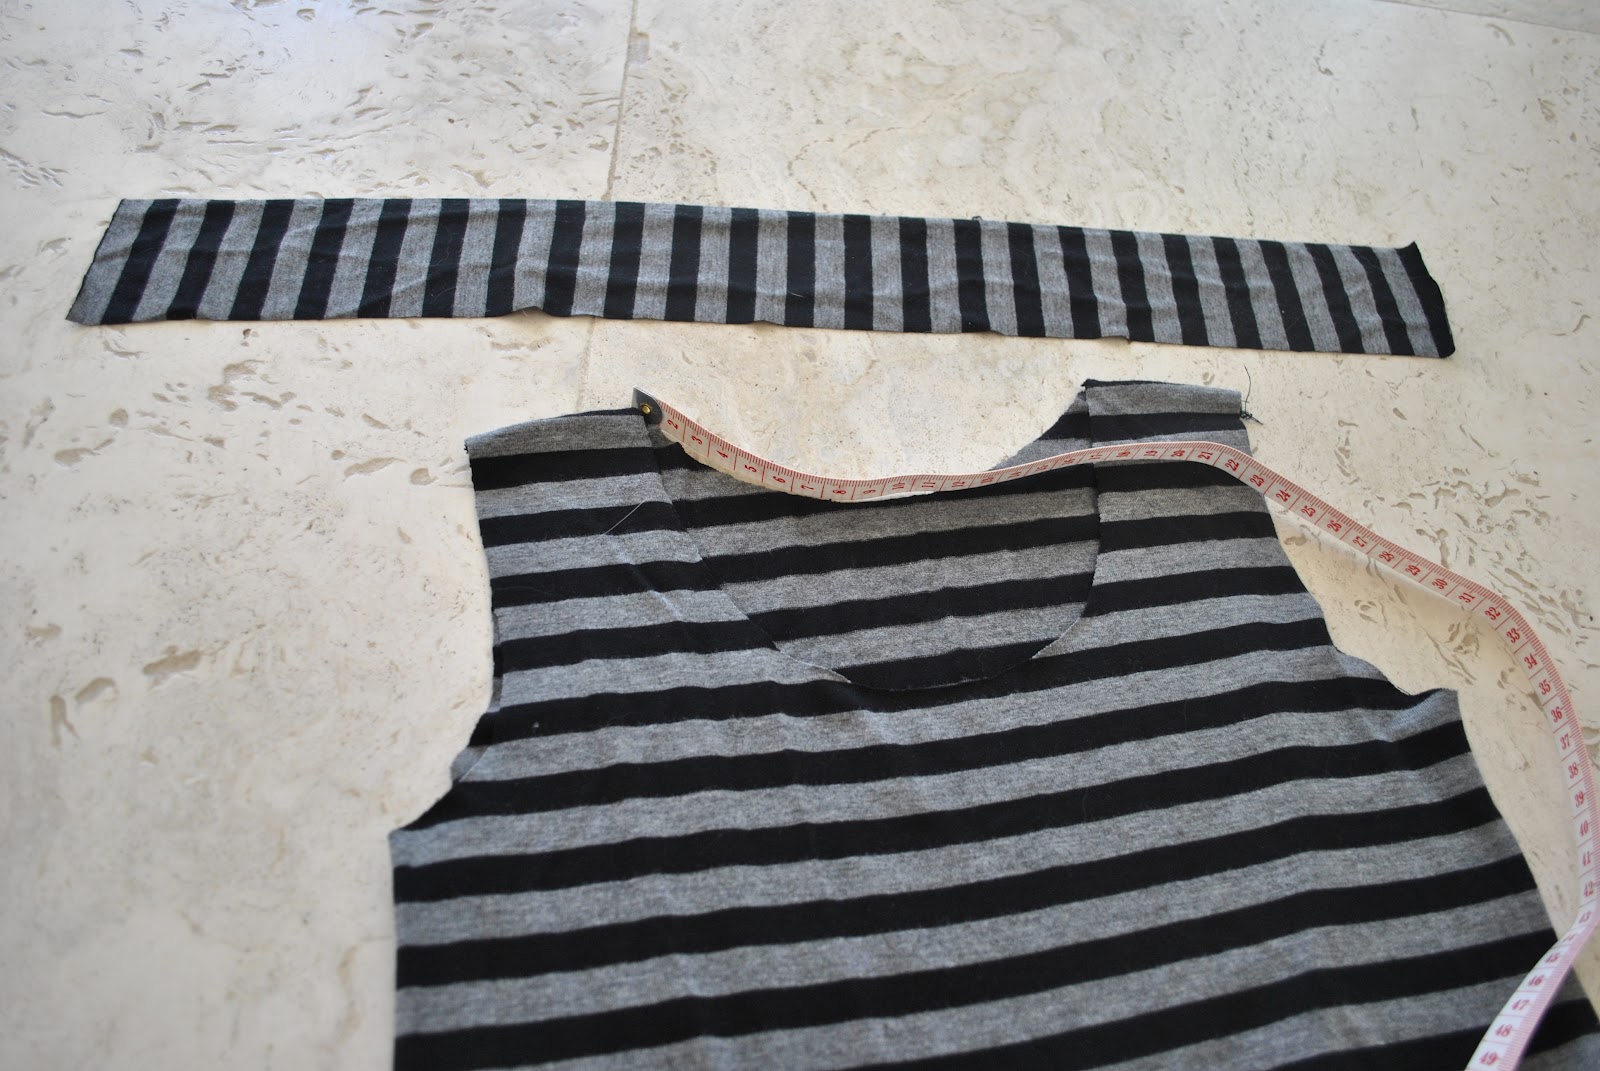
Measure the raw edge and cut a strip to exactly this length plus 2cm for hemming.
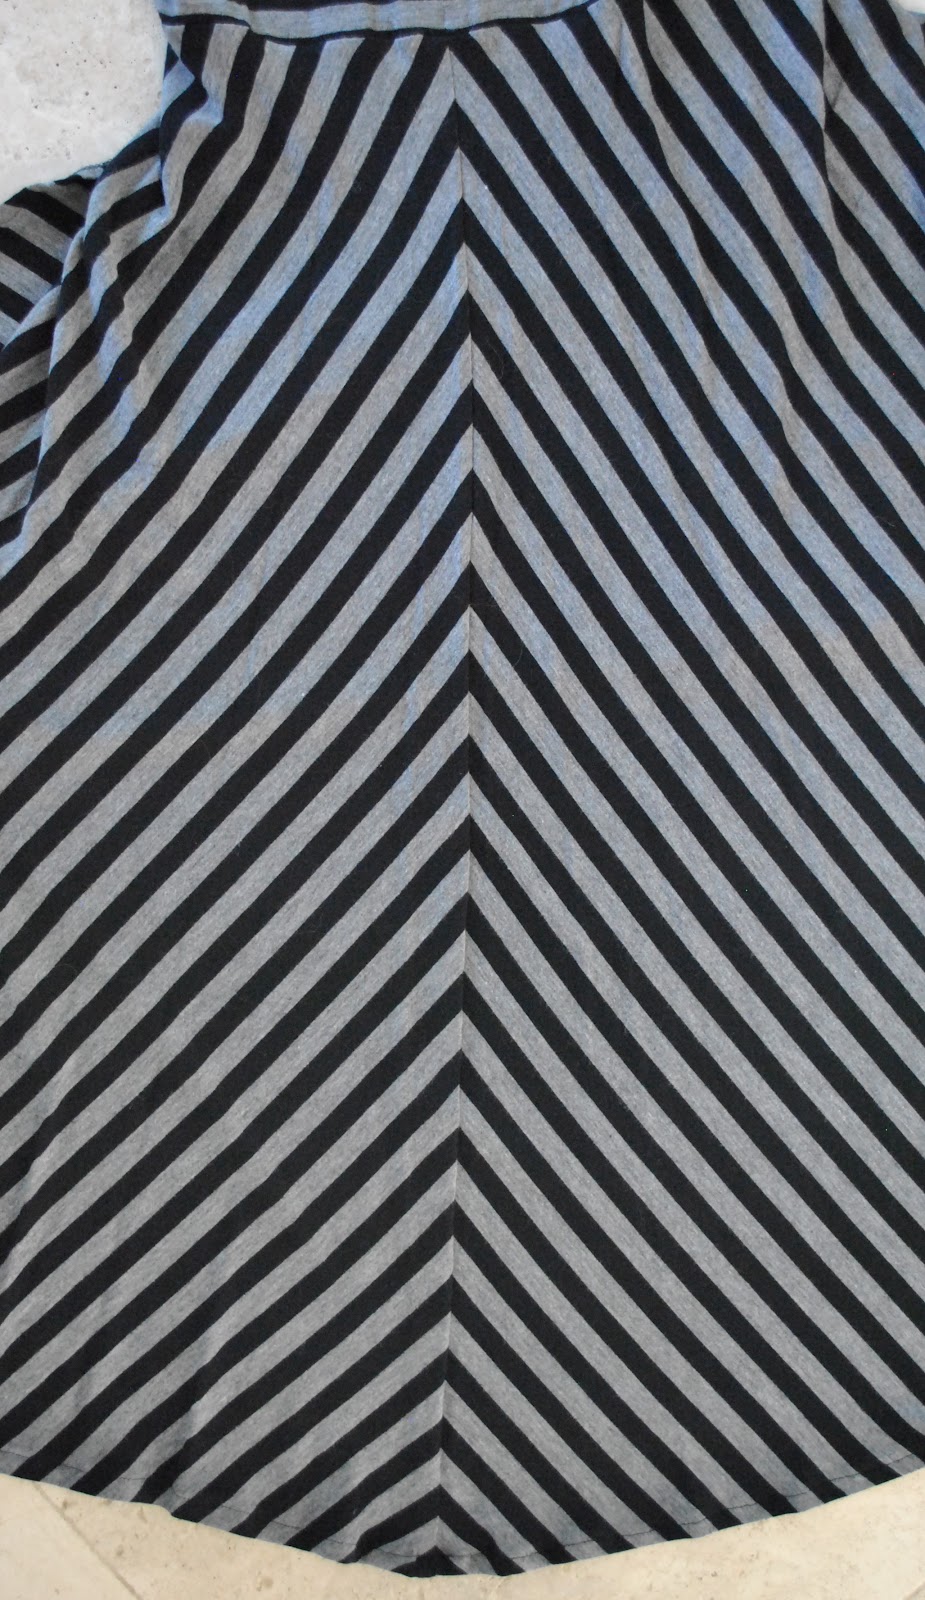
Now, since my fabric in this example here is a stripe, I wanted to get the stripes matching with the joining seam invisibly between two stripes. This meant cutting the band to a different, very slightly shorter length that was ideal compared to my measurements. In the case of pattern matching like this, it is OK to cut the strip a tiny tad shorter, but NOT longer, than required, but you do not want for the difference in length to be any more than 5%. If you are trying to match up wide stripes and your measurement looks like it is going to be more than 5%, then it would be best to not bother with pattern matching. Any differences bigger than 5% will mean that your garment will look bunched up, or “gathered”, into the finishing band.
AND, since your stitching line is a longer length than the raw edge, (being a concentric circle of a wider diameter) your band is a slightly shorter length than the stitching length around your neckline/armhole, meaning the band will be stretched slightly during stitching and WILL sit up nicely on the outside of the garment when finished.
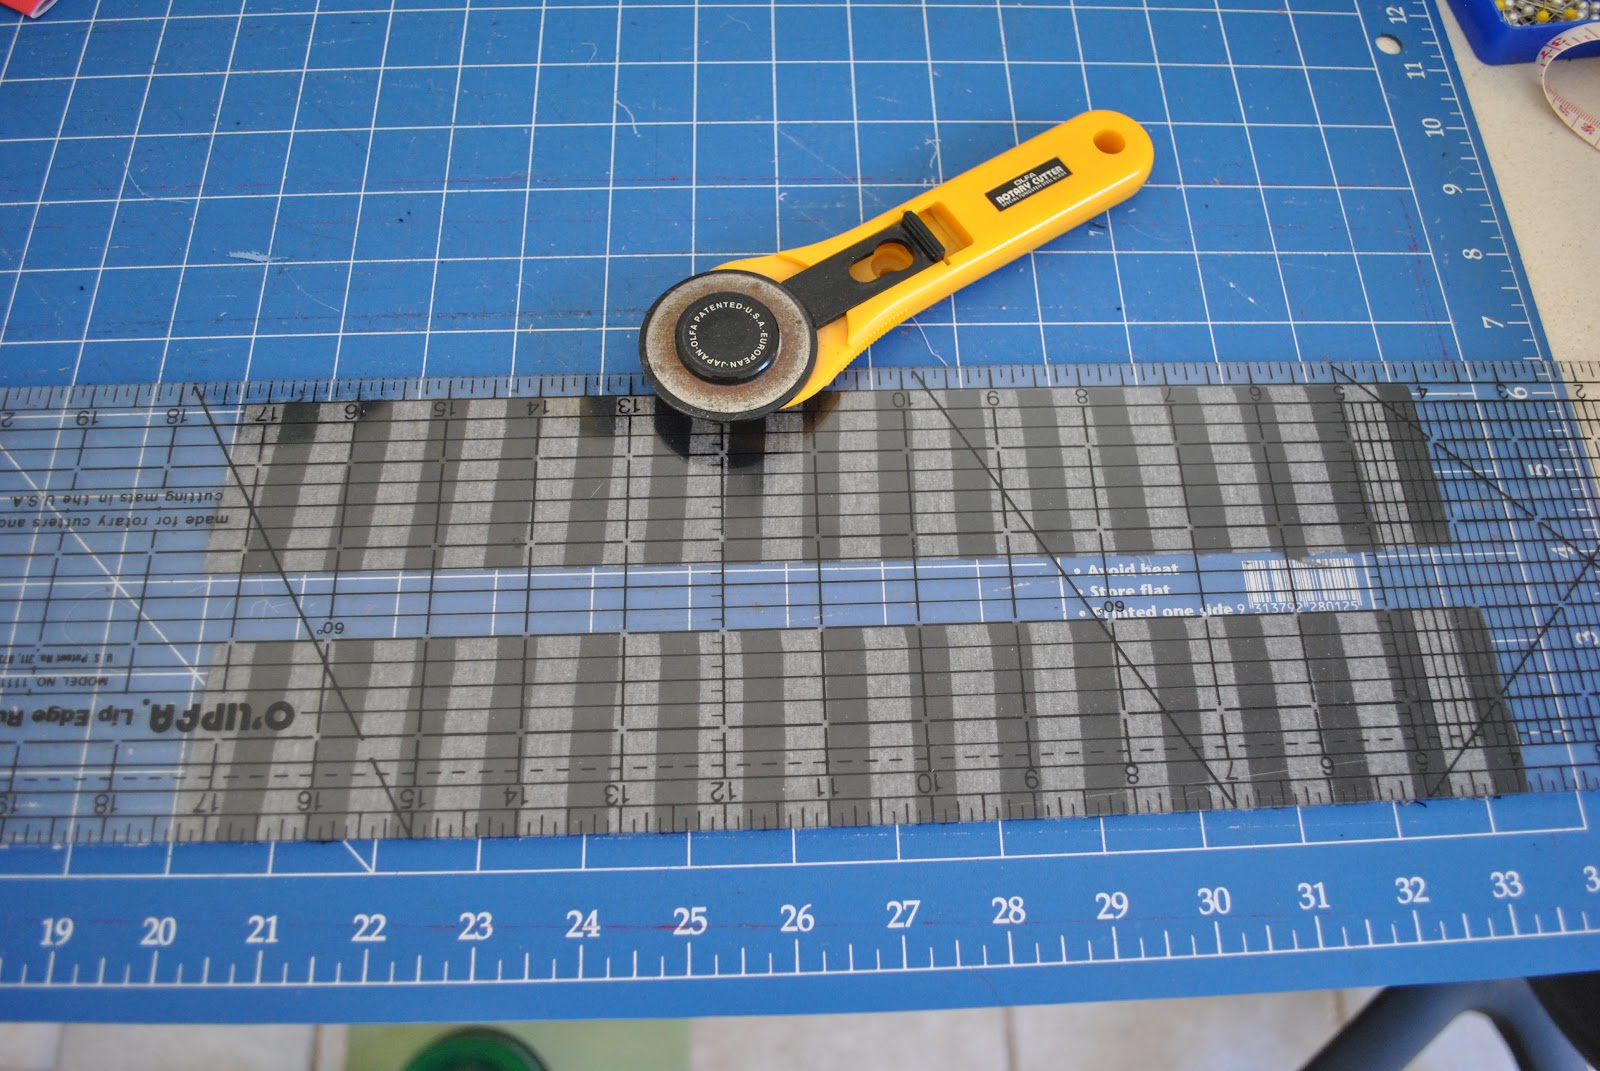
The width of your strip should be double the desired finished strip width plus seam allowances… So for example; say I wish for my neckline band to be a finished width of around 1.5cm, and I am allowing a seam allowance of 1cm. I should cut my bands to a width of (1.5cm + 1cm) x2 = 5cm; and then add a tad to allow for losing some in the fold-over process, so round it up to 5.2cm.
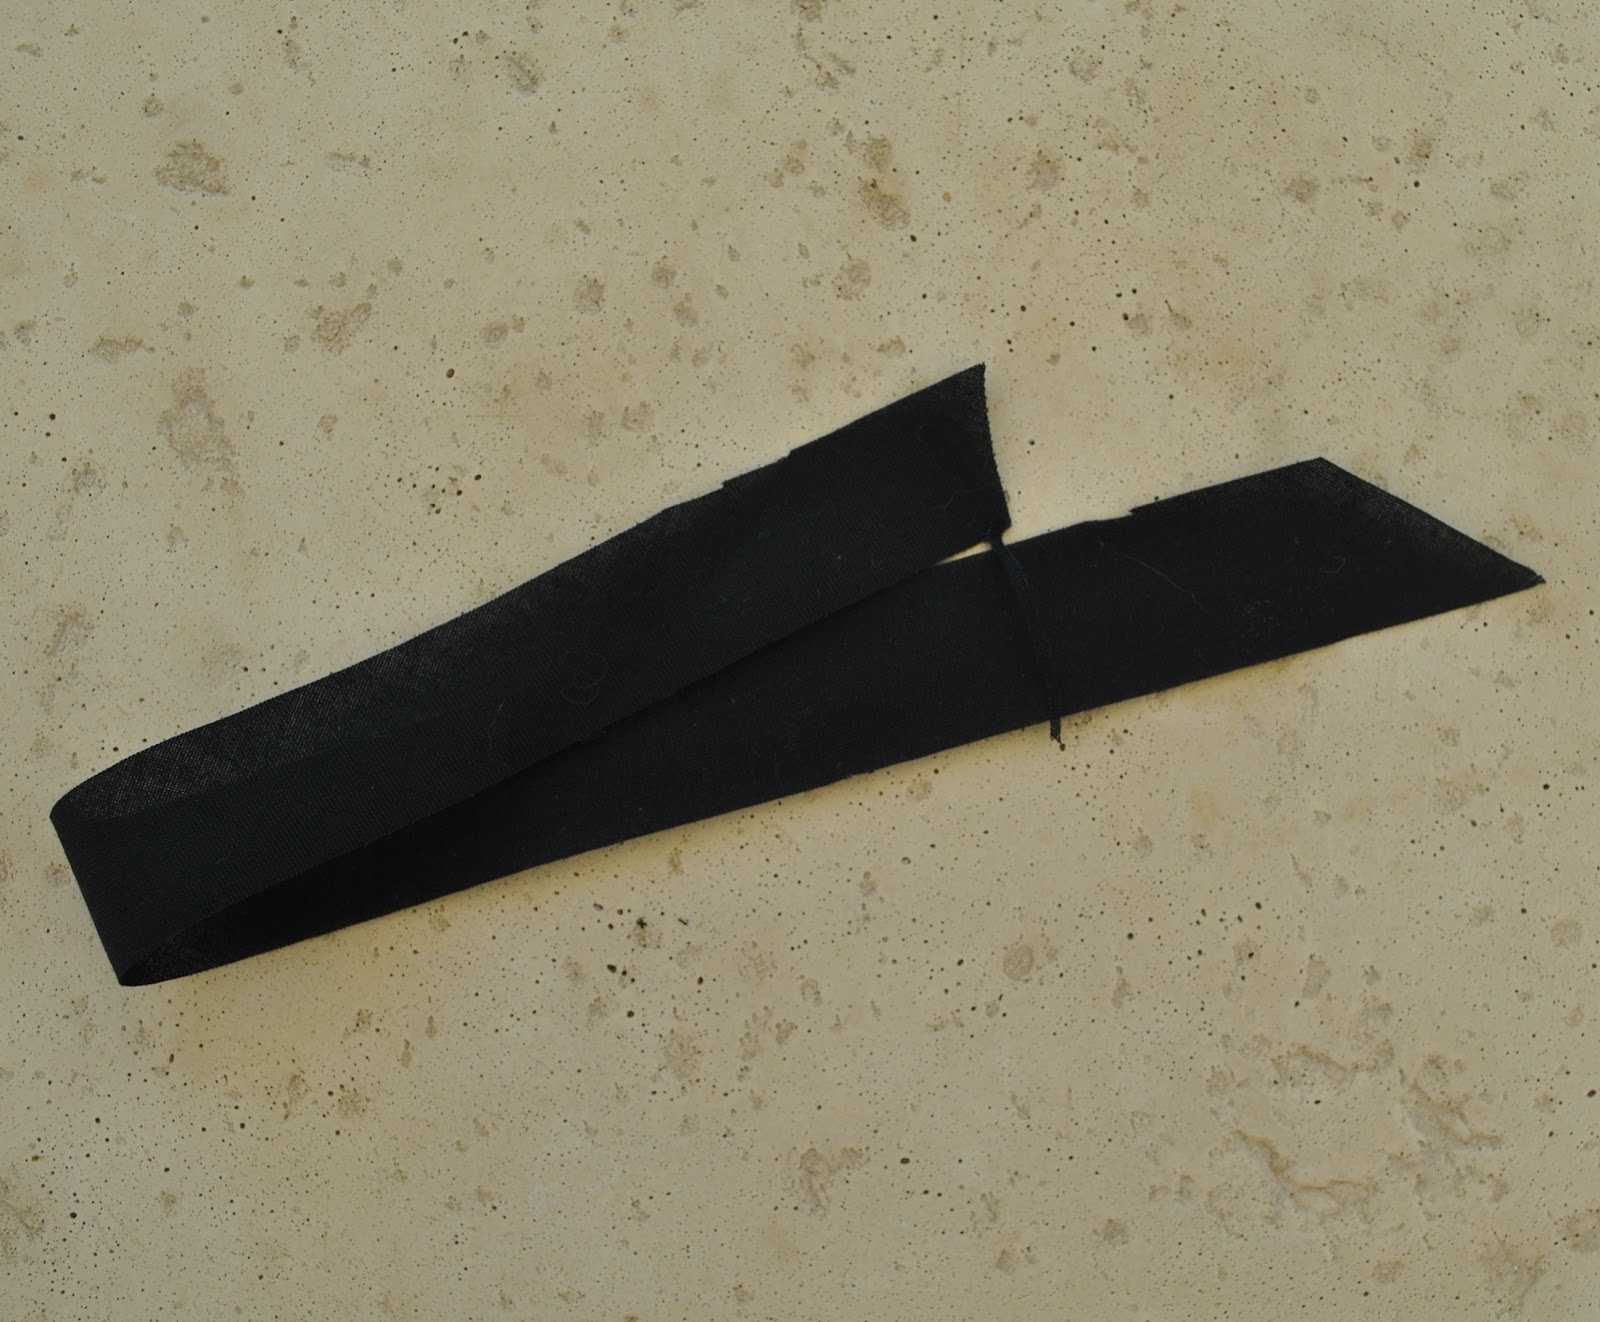
These are my two armhole bands….
Lay the strip right sides together and sew the short edges together in a 1cm seam to form a ring.
Fold the band in half along its length, wrong sides together.
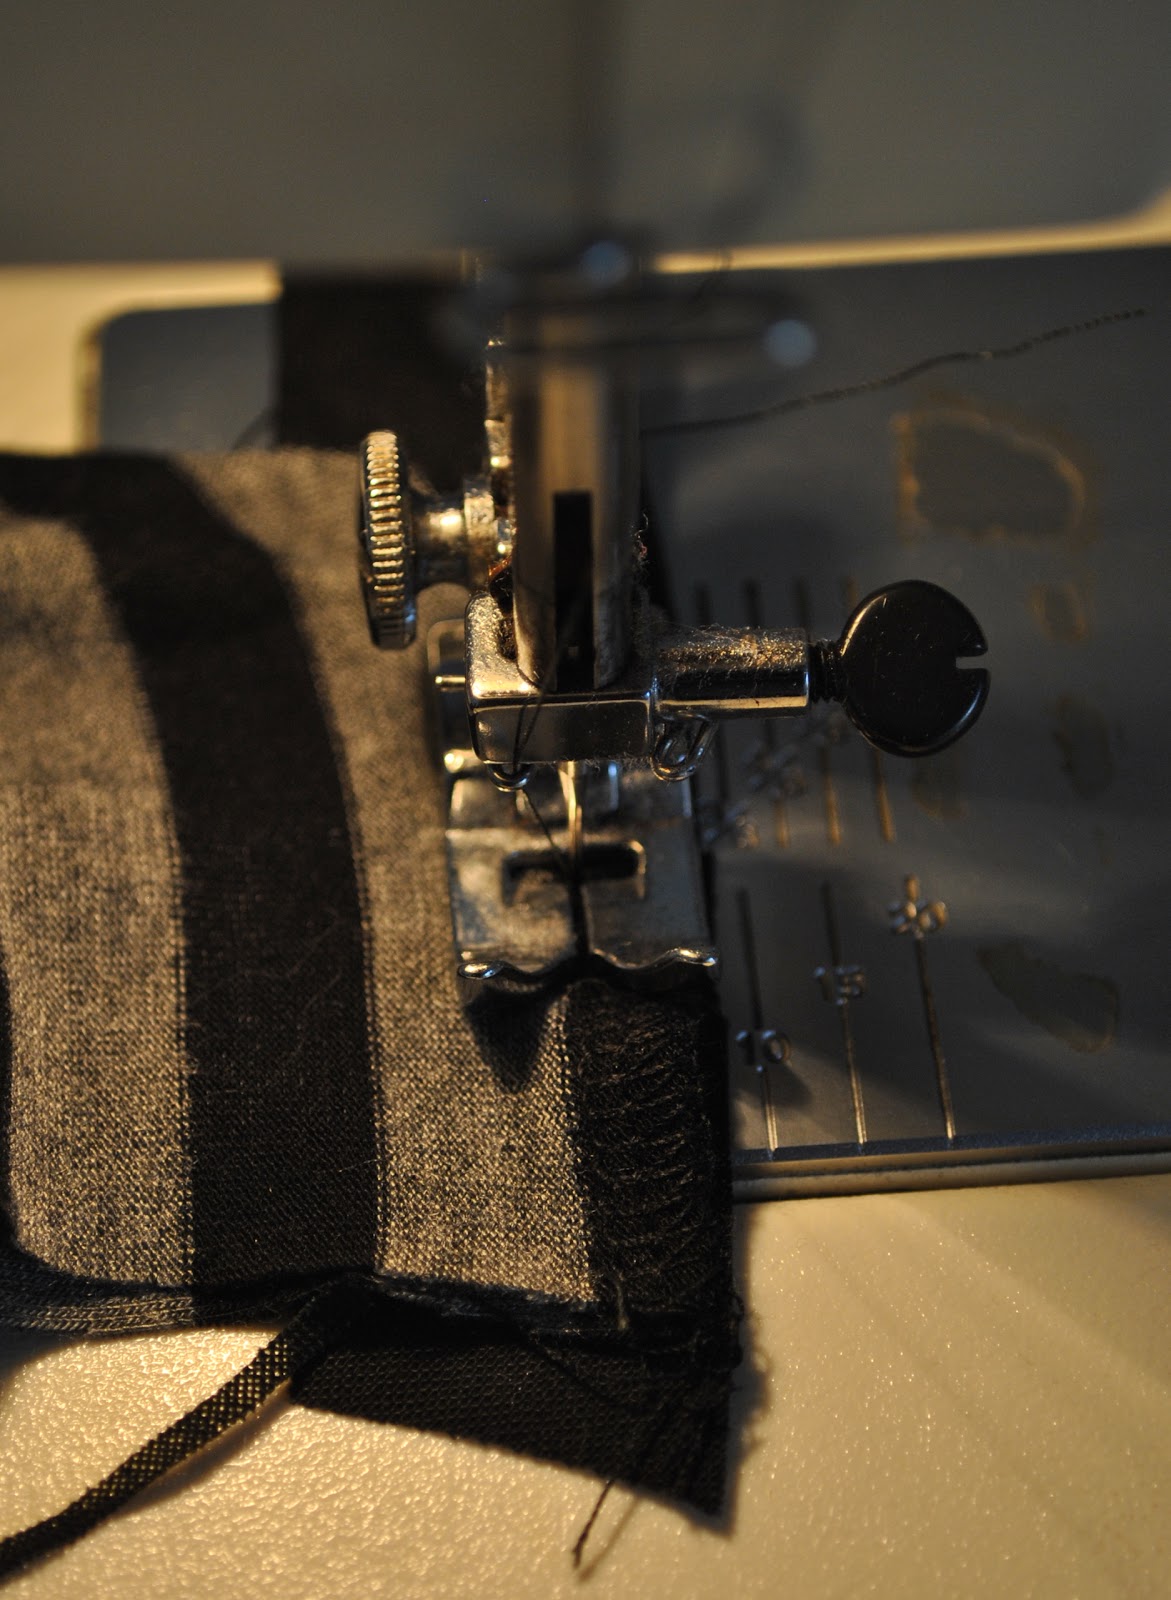
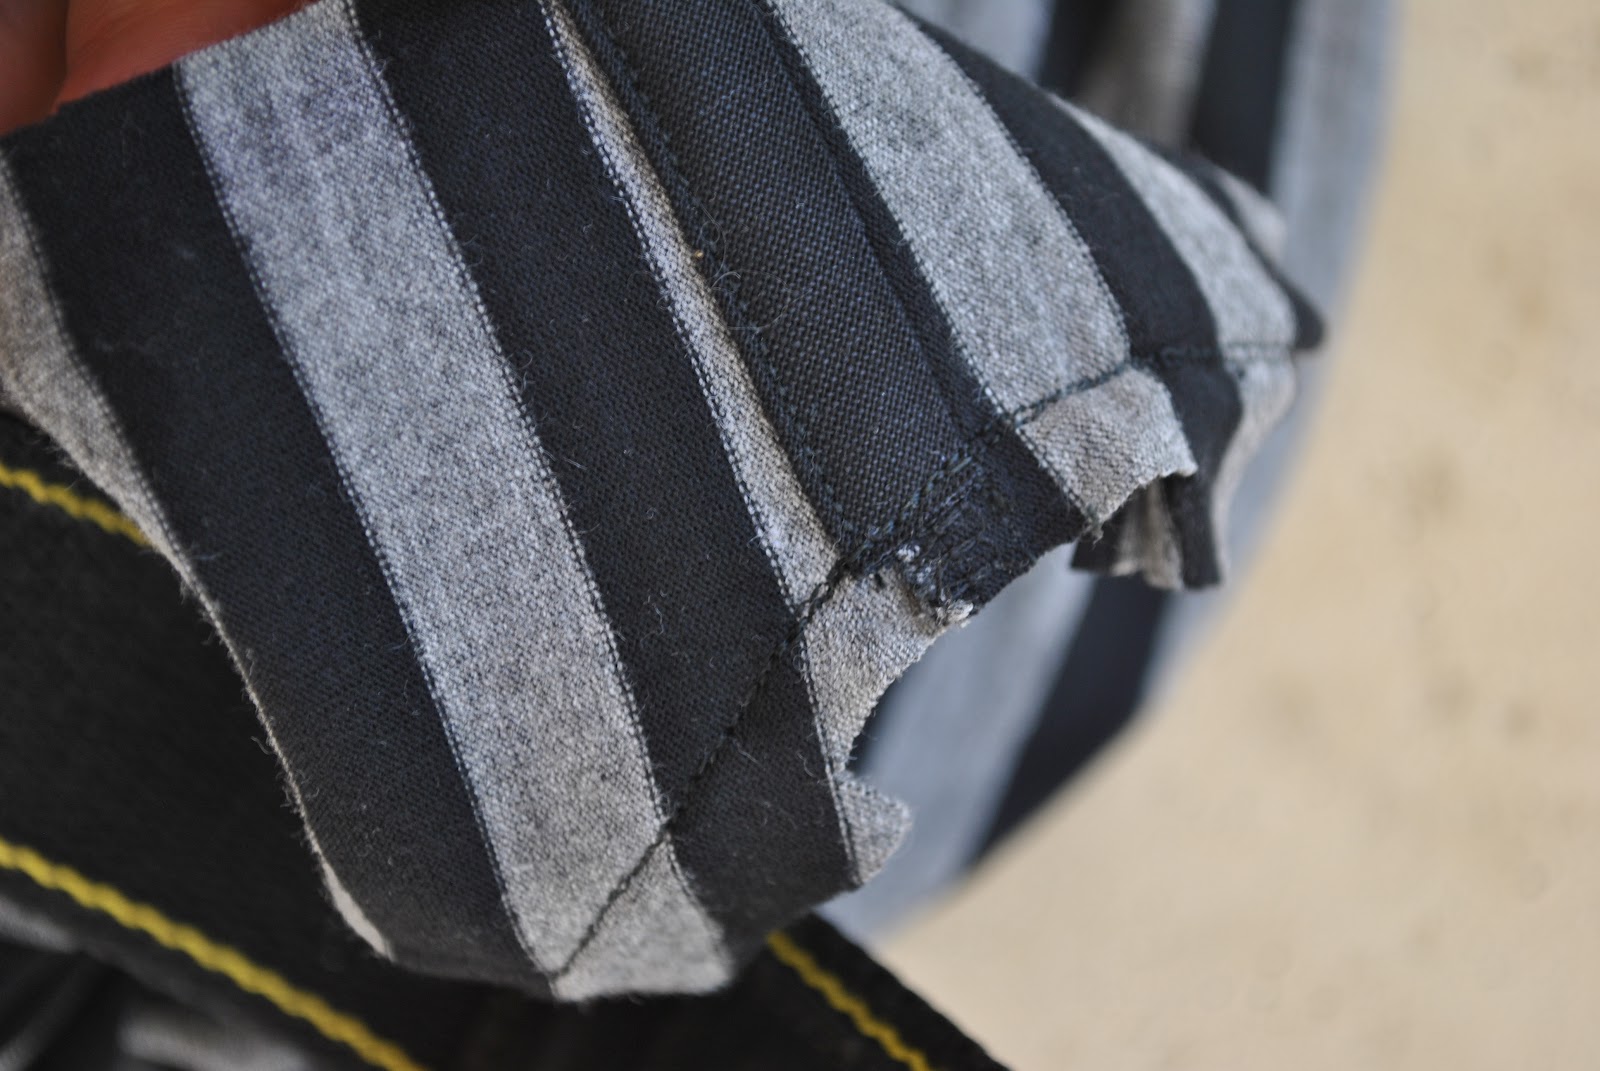
Pin this ring to the raw edge that you are finishing, right sides together, aligning all three raw edges, and stitch along the seam allowance.
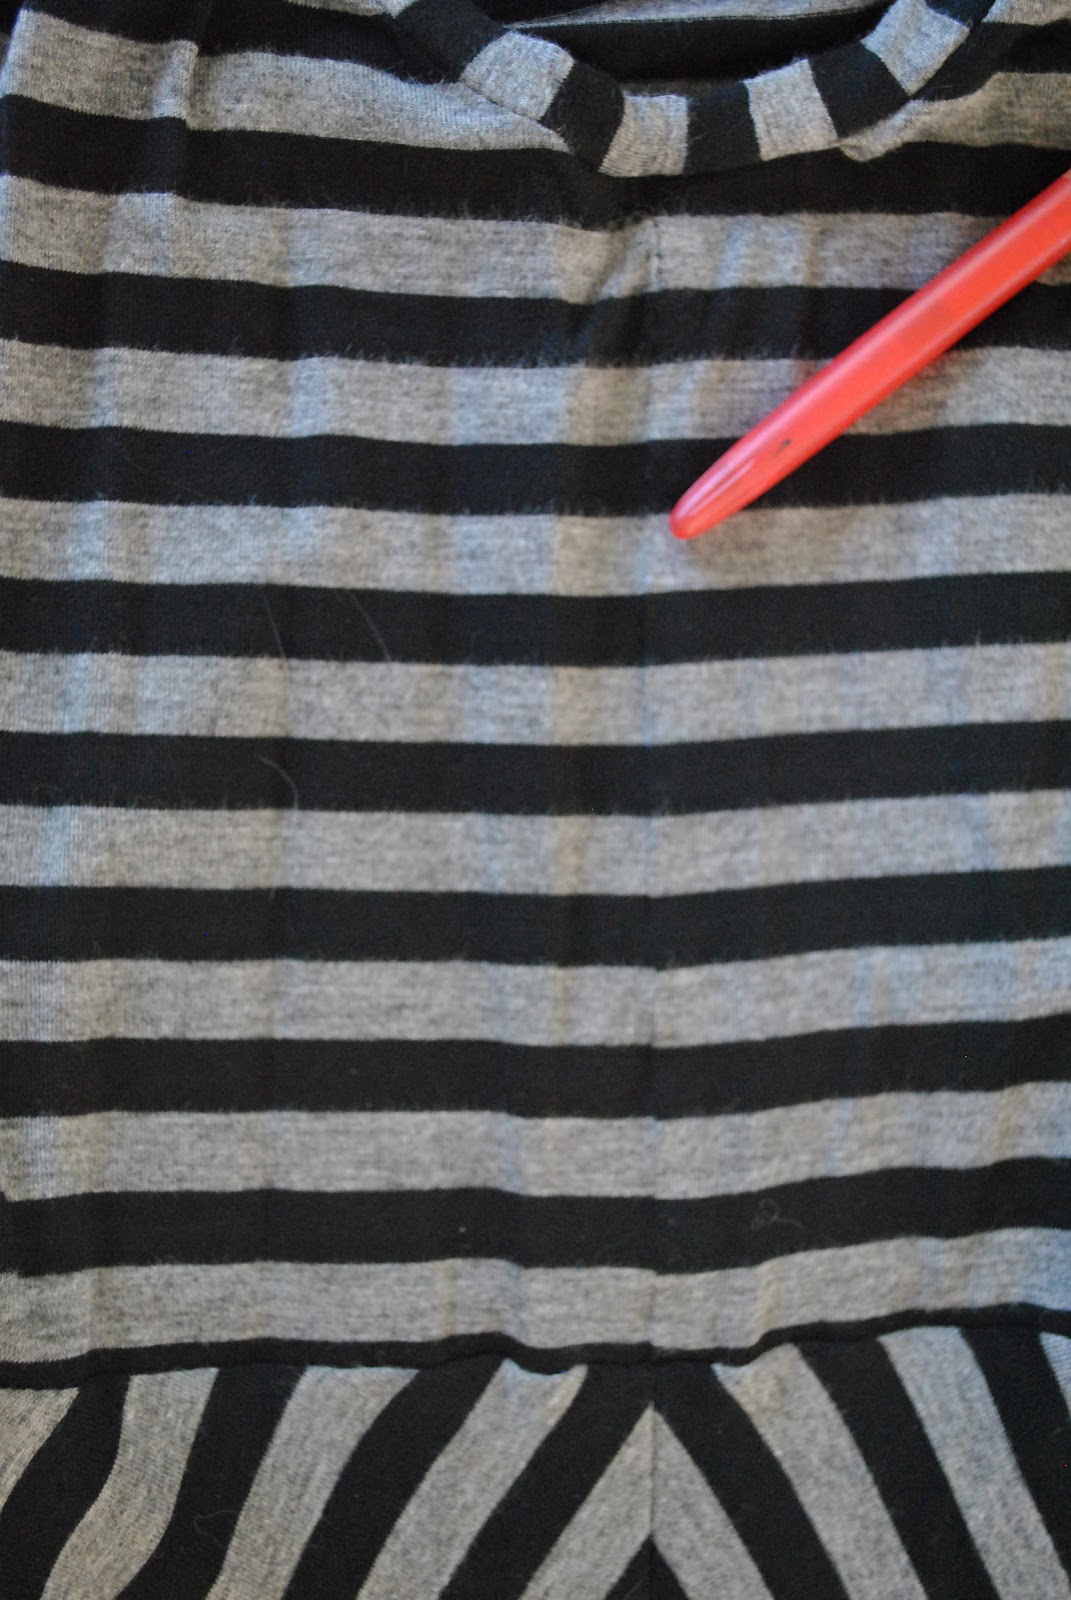
And sorry, I did not take a picture during this stage… but this picture below might give you some idea, with the three raw edges aligned in the seam allowance at the right there. This is an easy sew; since there is only a slight difference in the measurements of the ring and the raw edge, then there is only a little stretching or easing happening.
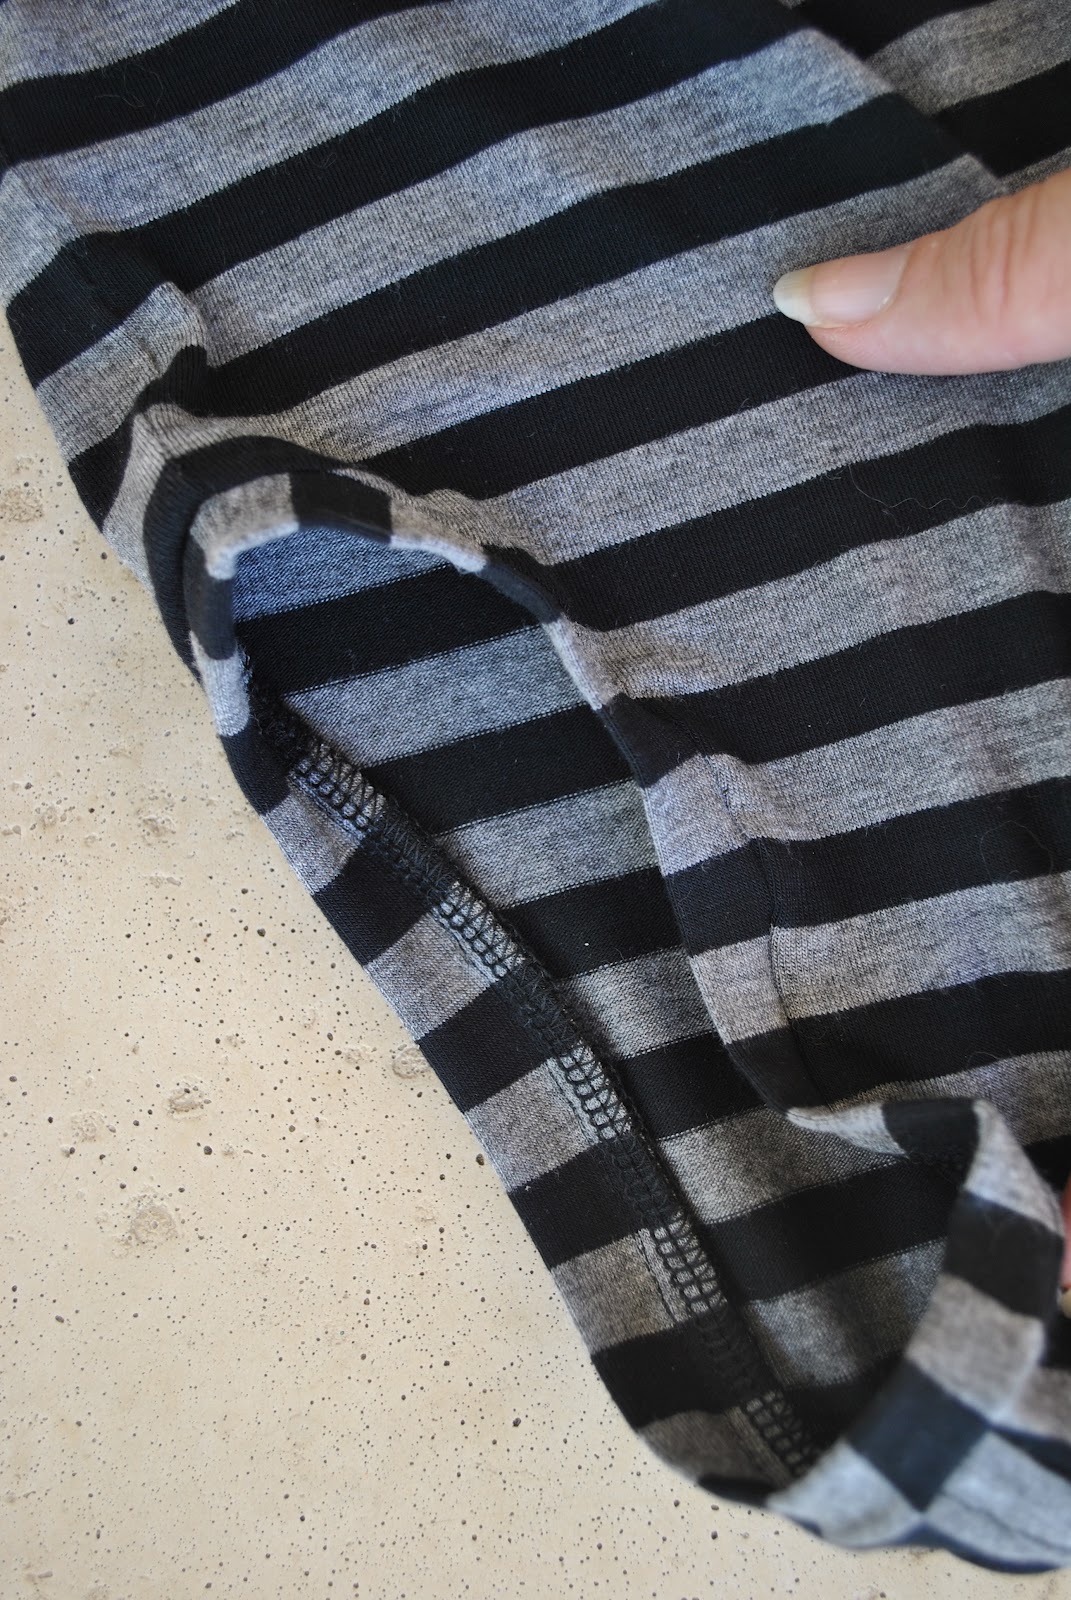
At this point, turn out the strip and check to see that the band is sitting in a perfectly even width all the way around, with no dips or lumps or bumps marring the evenness. If there are any, un pick and re-stitch these bits.
And essentially, you are pretty much finished!
Unless you have an overlocker… but that is OK if you don’t 🙂
Since I do have an overlocker I always go over and finish off the raw edges on the inside, but if you don’t have one you can pink with the pinking shears, or just trim neatly.
If I have reinforced the shoulder seams with a bias strip as outlined above, then BEFORE OVERLOCKING I trim away that bias strip from the seam allowance, as close to the armhole/neckline stitching as possible to remove some of that fabric bulk that is going to end up inside my band finish (as pictured above)
A little bit of Sunshine…
Recently Donna gave me the Sunshine award, thank you so much Donna! I thought at first that I already had this one… but I noticed that this Sunshine award is a New-and-Improved Sunshine award that now comes with a cool little list of questions… yay! questions can be fun, can’t they?
Sooo, here we go…. and just for fun, some random sunshine-y photos too (unless otherwise stated all photos are taken by me)
Favourite Colour: ok, that’s easy! er… hang on, wait. Let me think now. Hmmm. OK, how’s about this, I saw a divine mustard scarf recently. Mustard. Done! Actually, wait; I’m lately also rather thrilled about that wonderful shade of ox-blood red I achieved here… And then of course there’s my best neutral, olive. And my perennial allegiance to ivory remains unabated. Oh, and then there is charcoal, and pinky-beige, and muddy chocolate, and pure white, and burnt orange, and duck-egg blue, and raspberry … and … and …
Favourite Animal: I am ridiculously soft and soppy about all animals. Except for mosquitoes. Mosquitoes, I squish. Mosquitoes bringeth no good to the world. Apart from being frog food. That one sole good deed on the part of mosquitoes.
Favourite Number: What…? Do other people really have favourite numbers? I don’t know if I could pick just one. The infinite others would feel left out 🙂
Favourite Non-Alcoholic Drink: Aha! at last, one for which I can give a straight answer… tea! English Breakfast. In a proper tea cup, please. Strong, and with a little bit of milk. No, no sugar, but thanks for offering.
Facebook or Twitter: I’ve recently discovered a whole host of old school friends on Facebook. It was so awesome!
My Passion: no prizes for guessing that one… 😀
Getting or Giving Presents: er… both?? Y’know what; I’ve been thinking about that one, and I’ve decided that it is one of those posers to which 99% of people will give exactly the same answer, the one I just gave. Think about it. Answering the former would be a no-no, except to garner laughs, and answering the latter is raaather priggish, so is equally a no-go… it’s a non question, really. What do you think?
Favourite Pattern: Well, it changes all the time. Virtually with each new project. Right now I am in raptures all over again with McCalls 5525, since I have just completed a new coat that I am insanely pleased with.
Favourite Day of the Week: Well. Any day that the whole family’s schedules serendipitously dovetail so we all happen to be all home for dinner, together, at once. This happens rarely. But when it does, it is my favourite day of that week.
Favourite Flower: In first place; my daughter, the most beautiful blossom in my life. In second place; big old-fashioned roses in shades of pink, apricot and old-gold. The sort that get blousy and overblown and scatter their petals in gorgeous profusion. Which then dry into sweet-smelling colour-distilled scraps. Which then becomes divine pot-pourri.
Favourite celebrity role model: Now why would I idolise a stranger when I have such amazing women in my real life? Srsly 🙂
So now, to pass the sunshine-y love along….
Beth; of SunnyGal Sewing Studio
Liza Jane; of Liza Jane Sews
Karin; of Sew Here We Go Again!
ElleC; of ElleC Sews
Alexandra; of Alexandra Mason Crafts and Stuff
Lynne; of Sewing Cafe
Adithi’s Amma; of Adithi’s Amma Sews
Details:
Top; Vogue 1247, of orange cotton, details and my review of this pattern here
Shorts; Burda 7723 modified, of yellow embroidered cotton, details here, and my review of this pattern here
Nail varnish (above); BYS Bright Light, with daisy decal. I know, decals are so last year, yes? Well maybe I am a last year kind of a gal 🙂
Grey stripes
I’ve made a new dress for autumn! (sneaky peeked in my Fashionary here) More accurately, I made this about a month ago and have been awaiting a day I can actually wear it without unladylike perspiration marring the photograph. (ew)
It is a Metalicus sort of a dress.
Oh, OK; it is pretty much an almost exact copy of one from their summer range. (pictured at right)
Well, I saw, and I was helpless to resist. I just had to have. (shrug)
I used a cotton knit jersey with a charcoal and black stripe from Fabulous Fabrics, and drafted my own pattern with the help of a tank top. The skirt is just a slightly shaped to-the-waist and then flared A-line design. I bought 2m of 150cm width fabric, but found that 1.2m was plenty to cut out this dress shape using the layout pictured below.
Don’t worry, the leftover 80cm has been put to good use already, undergoing a rapid transformation into a three-quarter sleeved, scoop-necked Tshirt. This using my now go-to Tshirt pattern, the one formerly known as Burdastyle 06/2011, 120 (altered completely until beyond recognition, but still one must give credit, non?)
I edged the neckline and armhole/sleeve edges of both the dress and the Tshirt with a folded band, the type that you see on just about all Metalicus pieces,which is why I have it stuck in my head as The Metalicus Finish, lol.
Please note; the Absolute Perfection in Stripe-Matching. I pinned the junction of each and every stripe to achieve this. No, I am not exaggerating.
The red pen below is pointing to a bodice side seam. Can you even see it? (said with an unseemly lack of humility)
This is the kind of thing not noticeable to a, er, normal person (read: someone who does not sew), but is the ultimate in self-satisfaction for those of us who have ever sewn stripes together. Stretchy jersey stripes, I might add. (insert deep and disgracefully un-humble sigh)
The lower hem is overlocked, folded under once, and finished with a straight stitch. I hemmed my dress exactly the right length to work perfectly over one of my favourite actual Metalicus pieces, this frill-edged white petticoat.
Now OK; do I feel bad about outright copying a dress like this? I do, a bit. You see while I like to make my own clothes nowadays, I have a lot of respect for Metalicus. I used to buy their clothes. And actually I will own up now that in a small transgression of my pledge I did indeed buy a few pairs of Metalicus winter tights at their New Year’s sale, eep! But they were such fantabulous colours!! (the colours made me do it, your Honour…) and anyhow, tights can be classed as underwear, right??
I am OK with supporting Metalicus, since it is an Australian company, with the clothing traditionally made here in Australia. I am of course a big supporter of ethical fashion which includes buying locally made stuff wherever possible. So I wish to see Metalicus successfully continuing on this path and not succumb to the evil lure of the profits that come with overseas manufacturing.
It was during this visit to Metalicus I noticed that a few “made in China” pieces were making an insidious and very unwelcome appearance in the range. I did feel sad about this and wondered briefly (and probably foolishly) if my boycotting of RTW had contributed in even some minuscule part. And copying a dress from the store, even just one, for me, is also part and parcel of taking away business from what is a legitimate Australian business. So I did feel a bit guilty. But if Metalicus is going to go to the dark side and send their manufacturing overseas, taking away Australian jobs, then while I am very sad about that it does at least make it a heck of a lot easier for me to stay away from RTW.
btw I did check my tights before I bought them, and they are indeedy of the Made in Australia variety.
So I’m resting easy on that purchase.
Sort of.
Ex-ci-ted!
Miniature “denim jacket” purse
I’ve been making some funny little purses; as silly birthday gifts for my crafty friends. I got the idea for these from a miniature leather jacket coin-purse that we have from goodness-knows-where, I think it was given to Cassie sometime yonks ago. I used the shortest zips I could find and orange top-stitching thread to replicate the design aesthetic of the purses’ parent garment; a beat-up hole-y old pair of Wranglers jeans from the children’s younger days.
These are quite sturdy; and could be used as a coin-purse, as a repository for receipts, as a keyring, for, er, feminine hygiene bizzoes, whatever.
I think they are kind of cute, and I’m hoping my friends will like them!


