
Thank you so much to all those who entered the giveaway and left such nice comments about my L(ong)BD. Your kind words never fail to put a smile on my face and make my day!!
Thank you so much to all those who entered the giveaway and left such nice comments about my L(ong)BD. Your kind words never fail to put a smile on my face and make my day!!
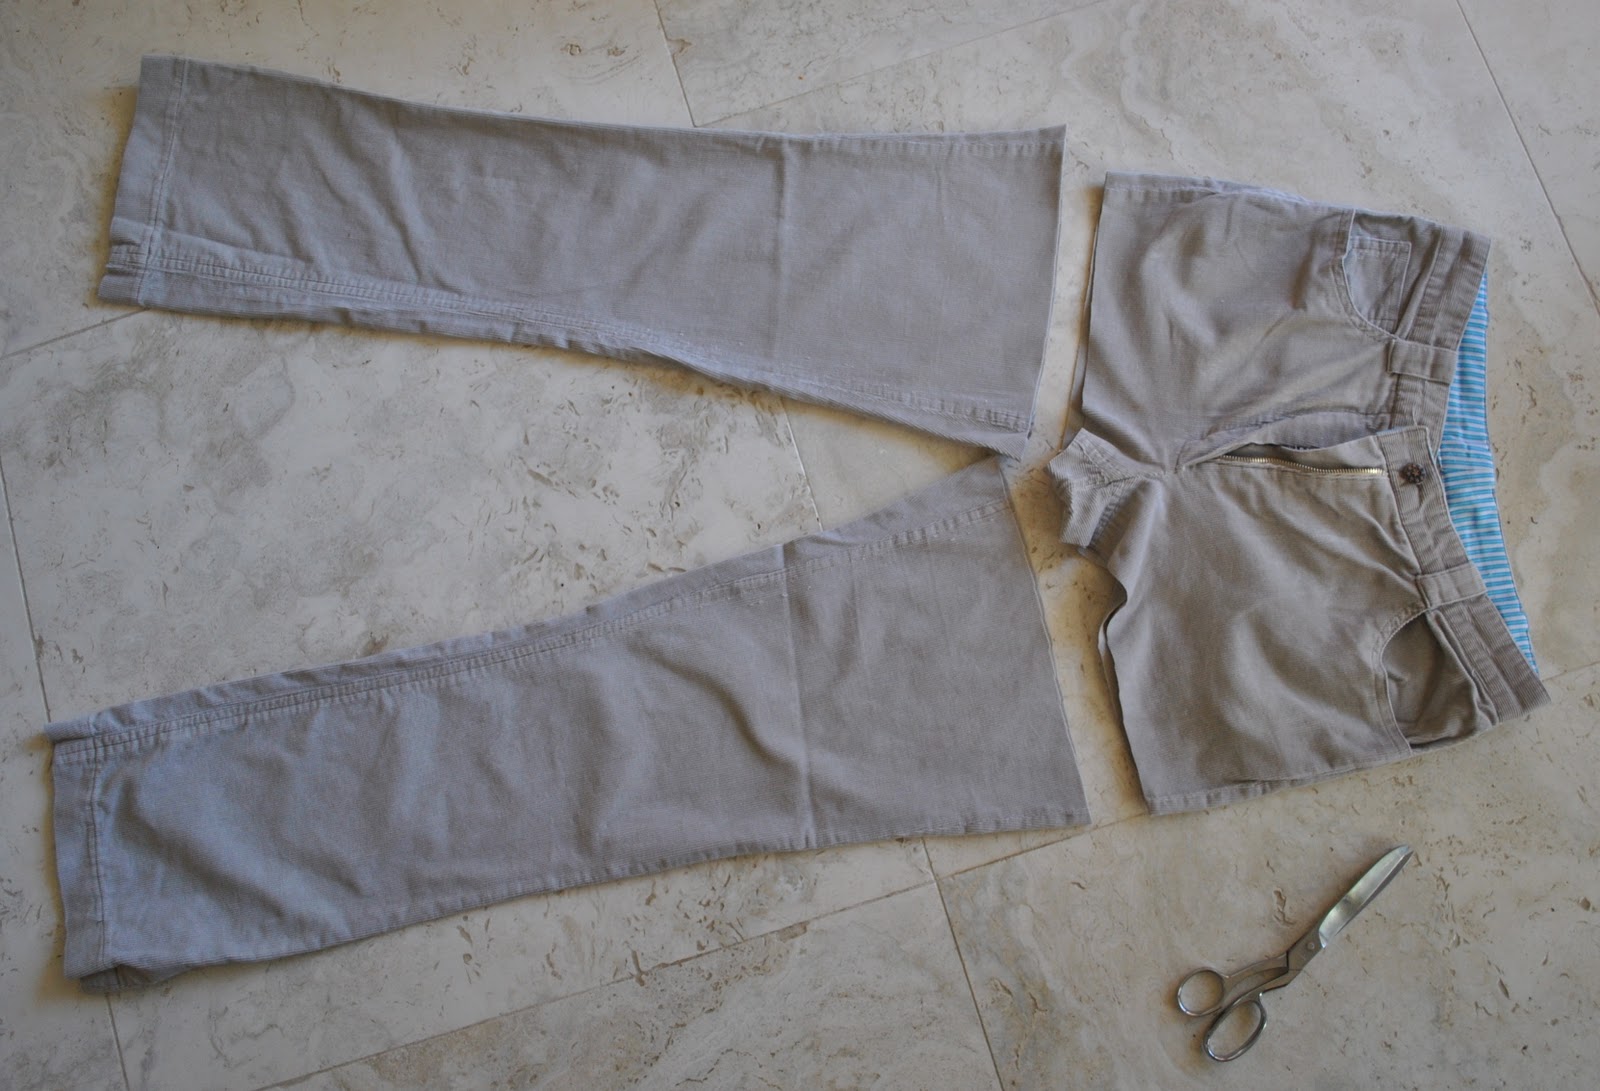
 … I decided it was high time for another refashion since I still have a small mountain of perfectly good fabric in the form of old clothing sitting in my stash. eep! Do you remember these jeans? They had got a bit saggy and baggy about the crotch and seat area, thanks to me using almost-stretchless fabric. Thus I learnt jeans really are so much better with a bit of stretch in them… anyhoo so I could barely stand to see myself in them as jeans anymore but the corduroy was still in pretty good knick overall, and I still absolutely looooove the colour. It’s the perfect “white” for me, a sort of warm shade of grey-white that I love. Oyster white, to get all referentially descriptive, if you like that sort of thing. Yeah, I do too 🙂
So. I’ve seen dozens of jeans-to-skirt refashions on the net but none of them have ever ever appealed to me. Why? People can’t get past dealing with that big curved crotch seam, and will just leave it there, sew it down boom onto the front of their new skirt as is, and I just can’t bear that look. When I do a refashion I want it to actually look like a skirt, thanks, and not for people to look at it and go, “oh, she obviously converted her old jeans into a skirt, yeah. Hmmm. Okaaaaay… No attempt to do anything at all about that crotch seam…. And what about the rest of the fabric from the legs? Why not make use of that somehow?”
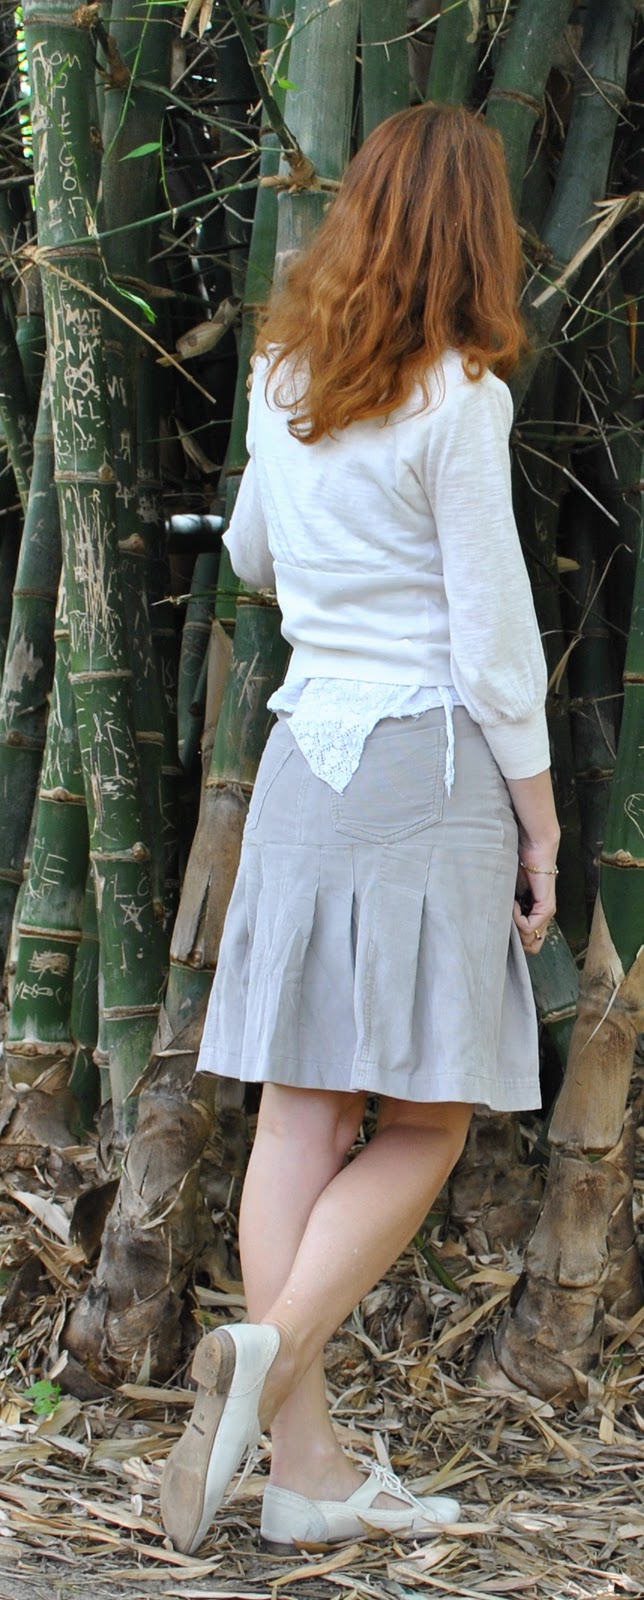
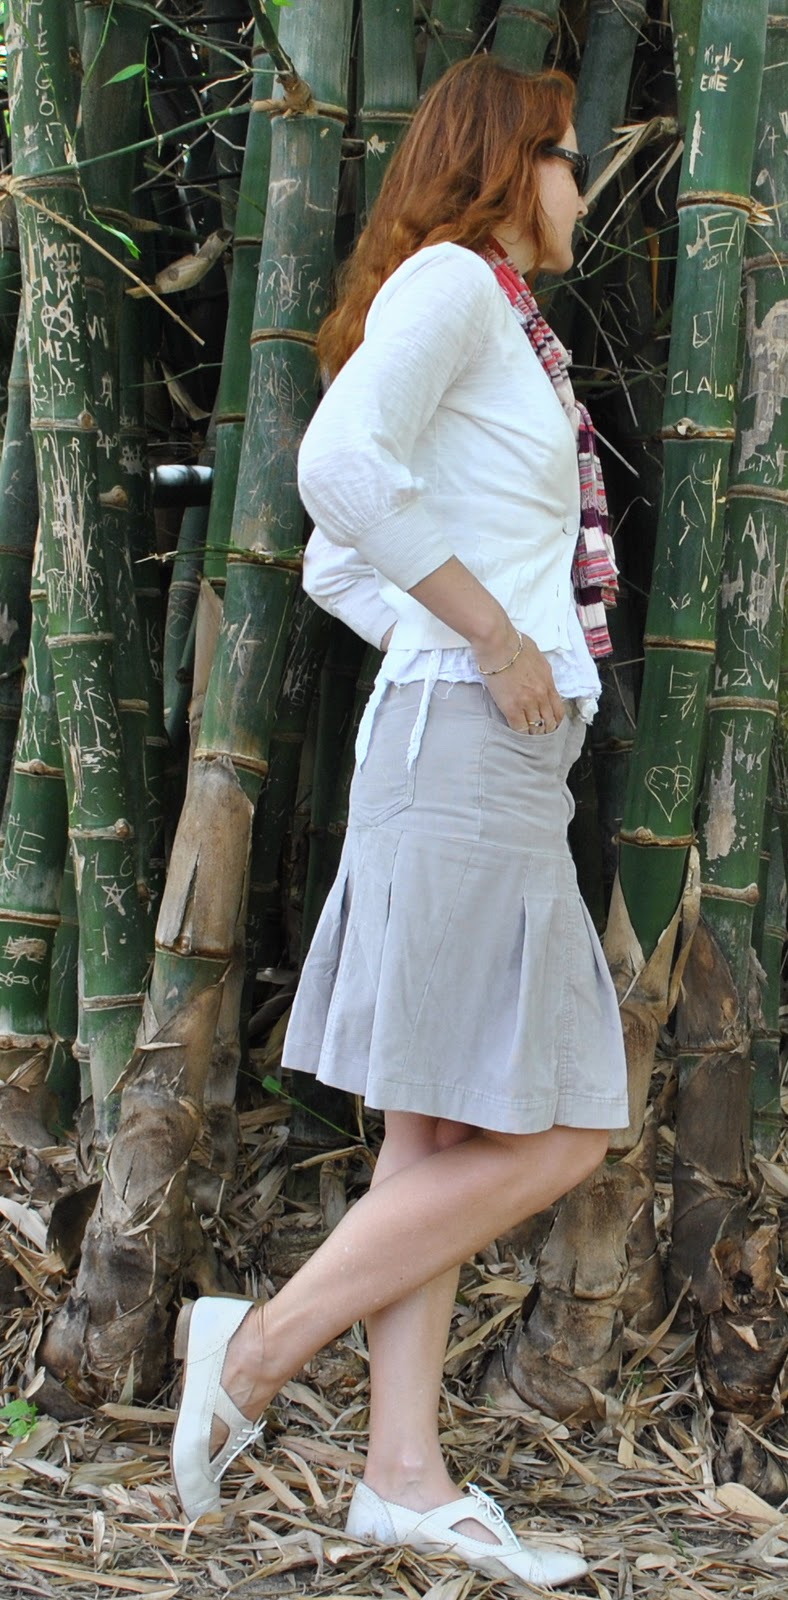
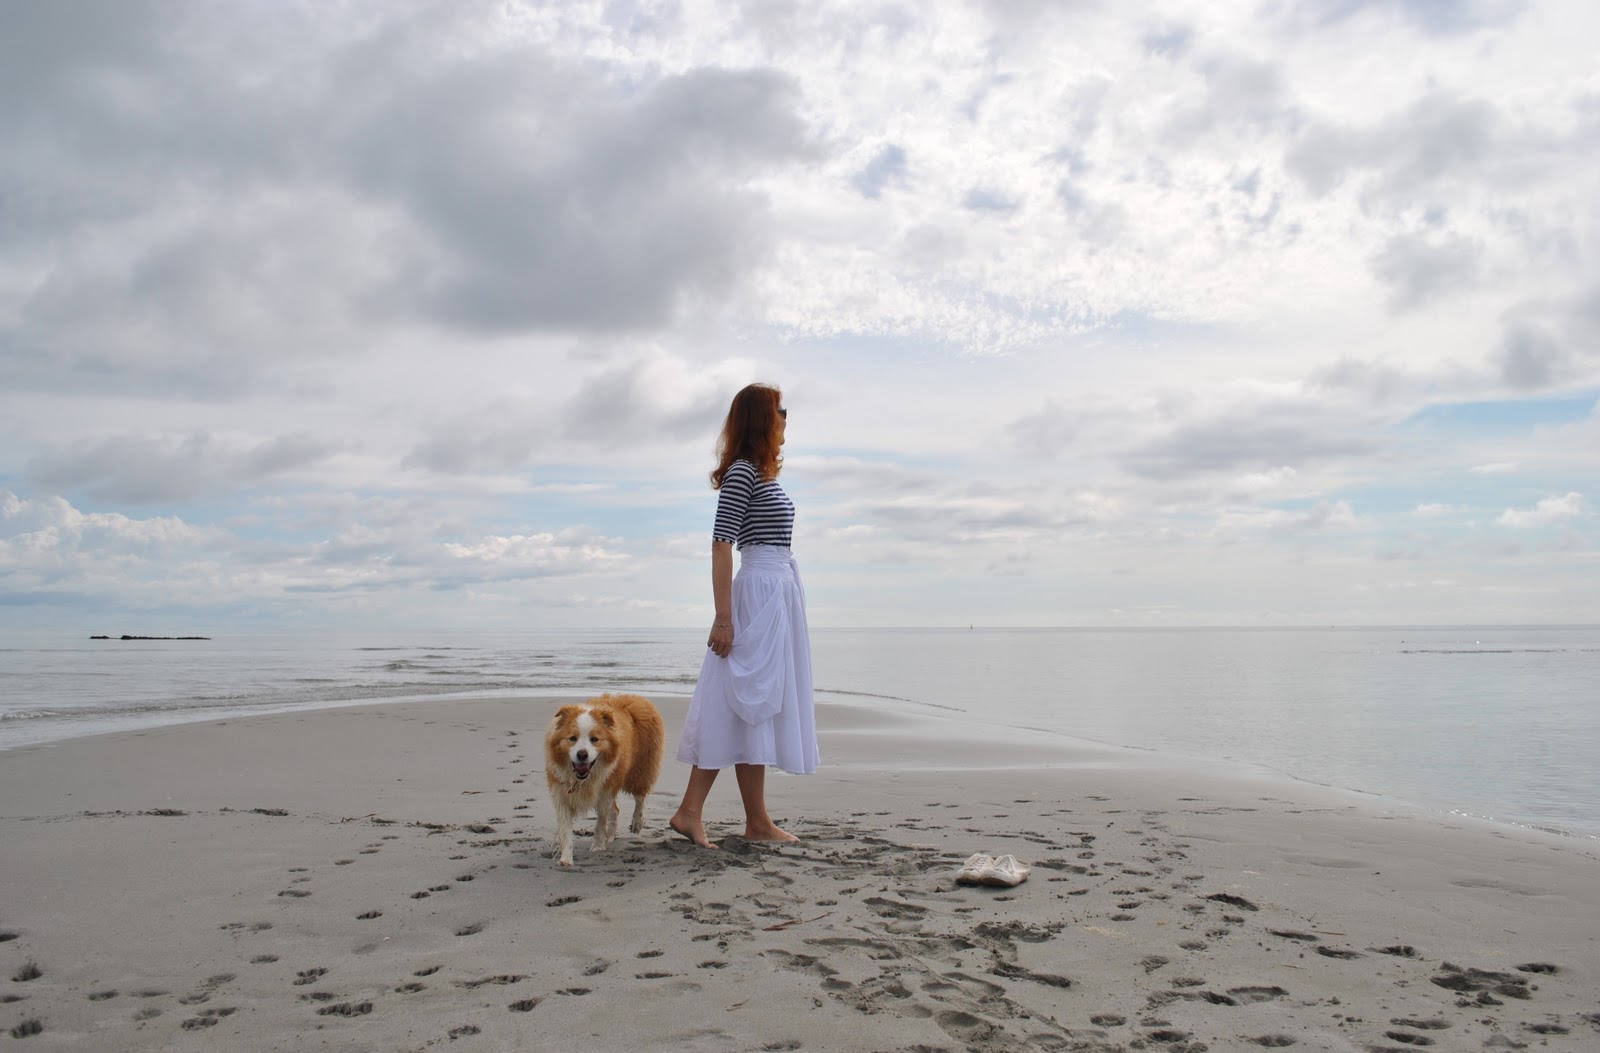
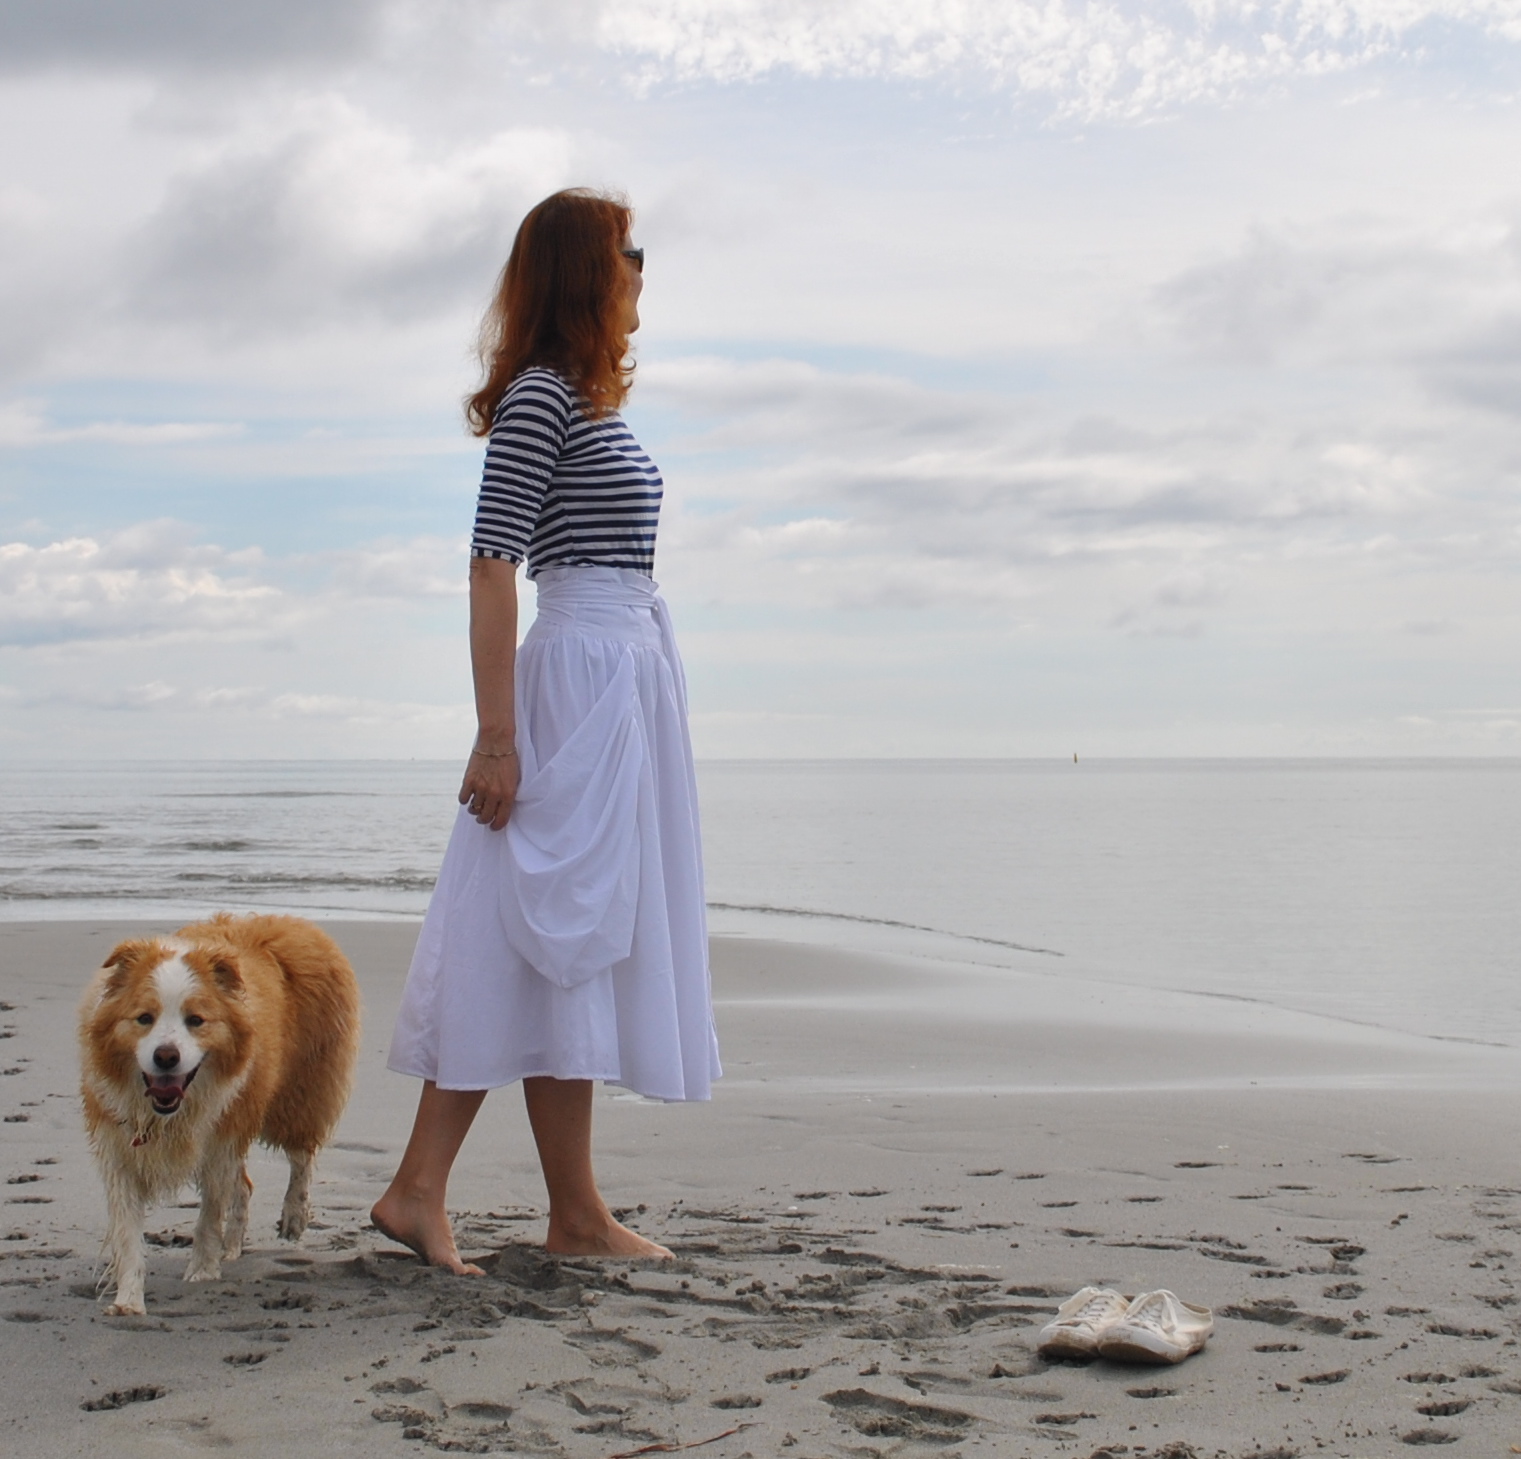
So I gave it some thought and came up with this refashion (details below), that actually used up nearly all of the fabric from my old jeans. The whole top bit, with the waistband, fly, side pockets, coin pocket and rear patch pockets is still there completely intact too. I think it ended up looking quite fun and flippy, and almost sporty too, don’t you?
Details:
Skirt; my own design, a refashion of an old pair of off-white corduroy jeans (originally made by me too, using Burda 7863 here)
Blouse; Butterick 4985, ivory eyelet cheesecloth with lace trim
Cardigan; Country Road
Scarf; Missoni
Shoes; Bronx, from Zomp shoes


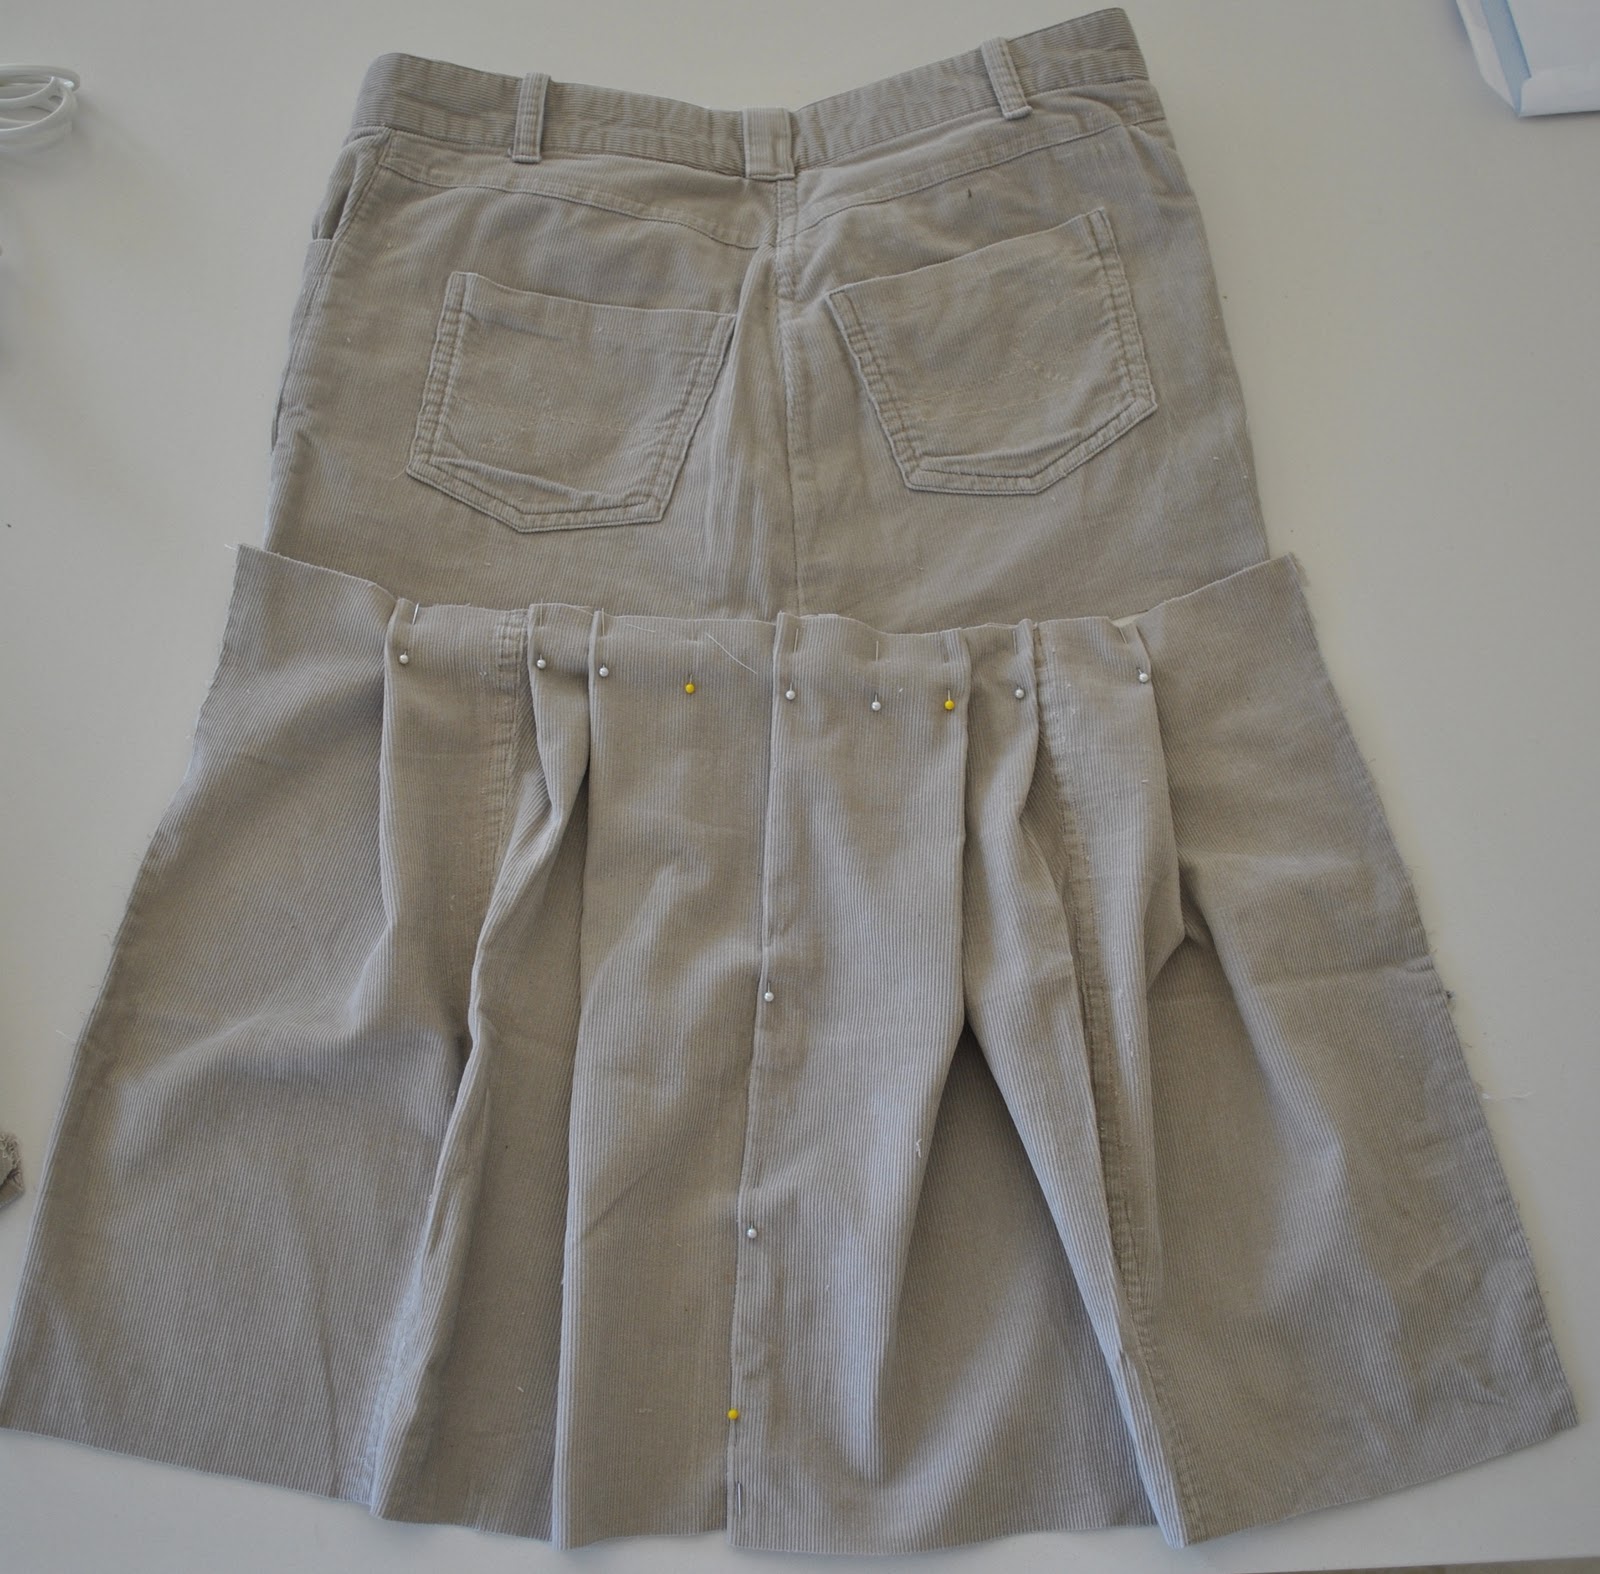
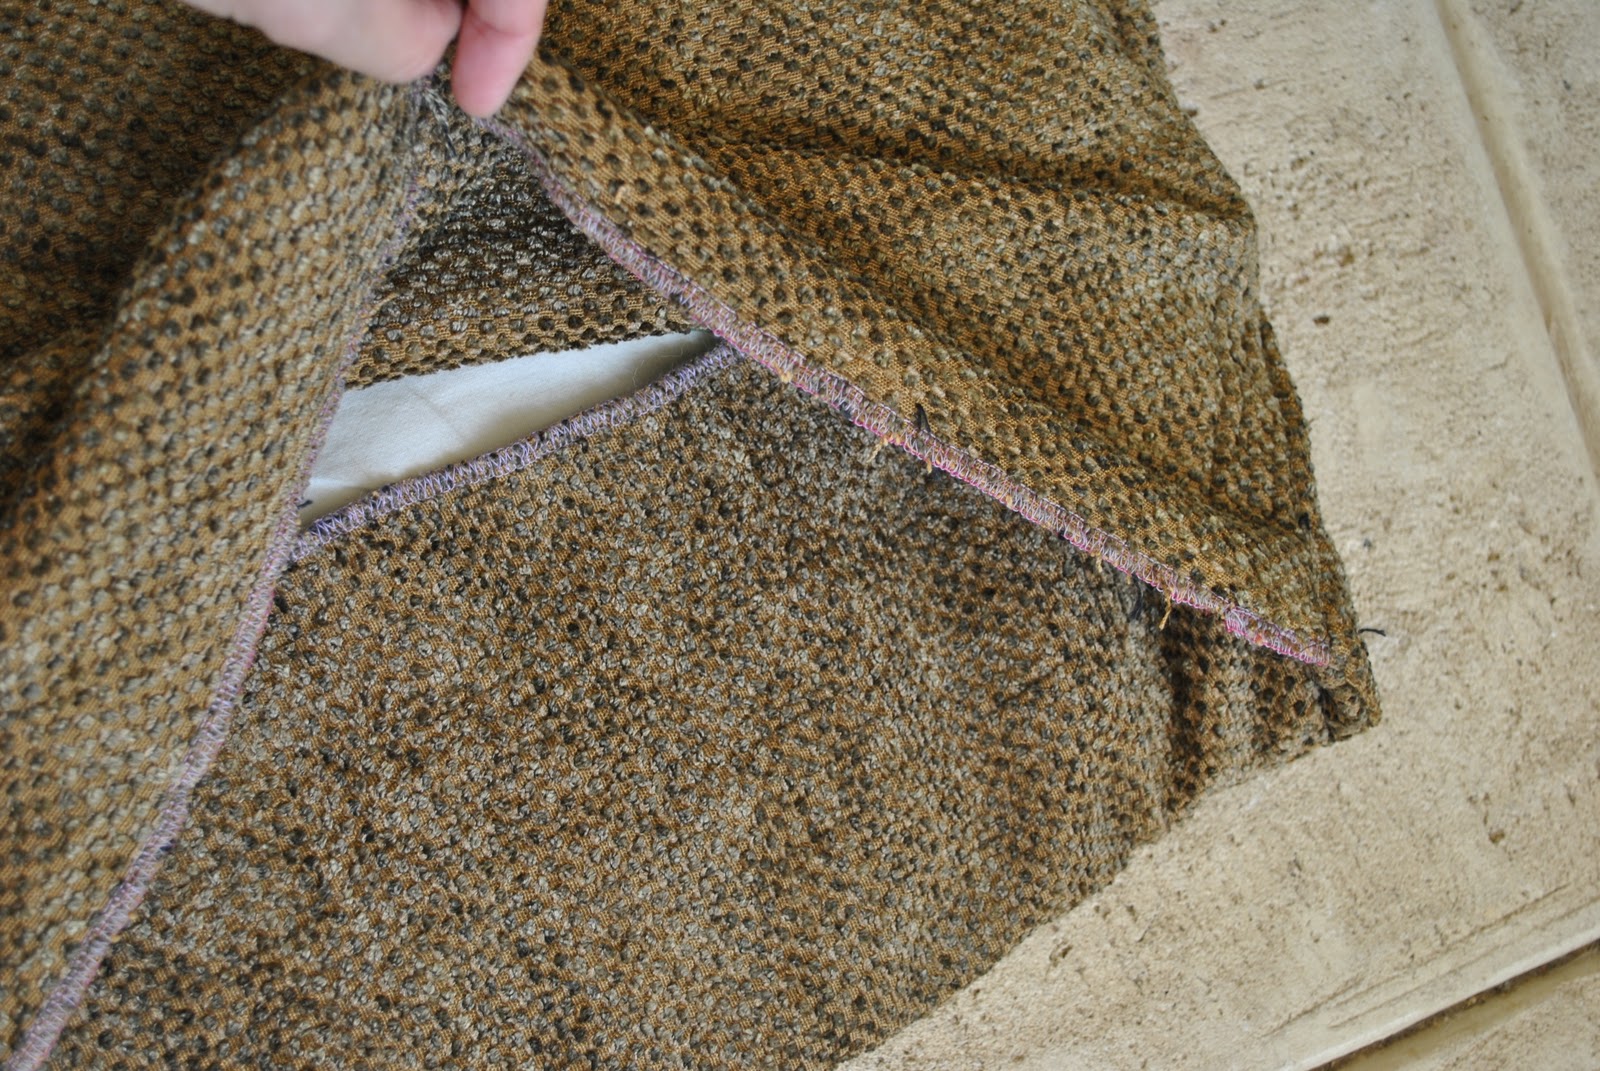
It was a pretty simple refashion…. firstly I cut off the top bit, and unpicked the curved part of that offending crotch seam.

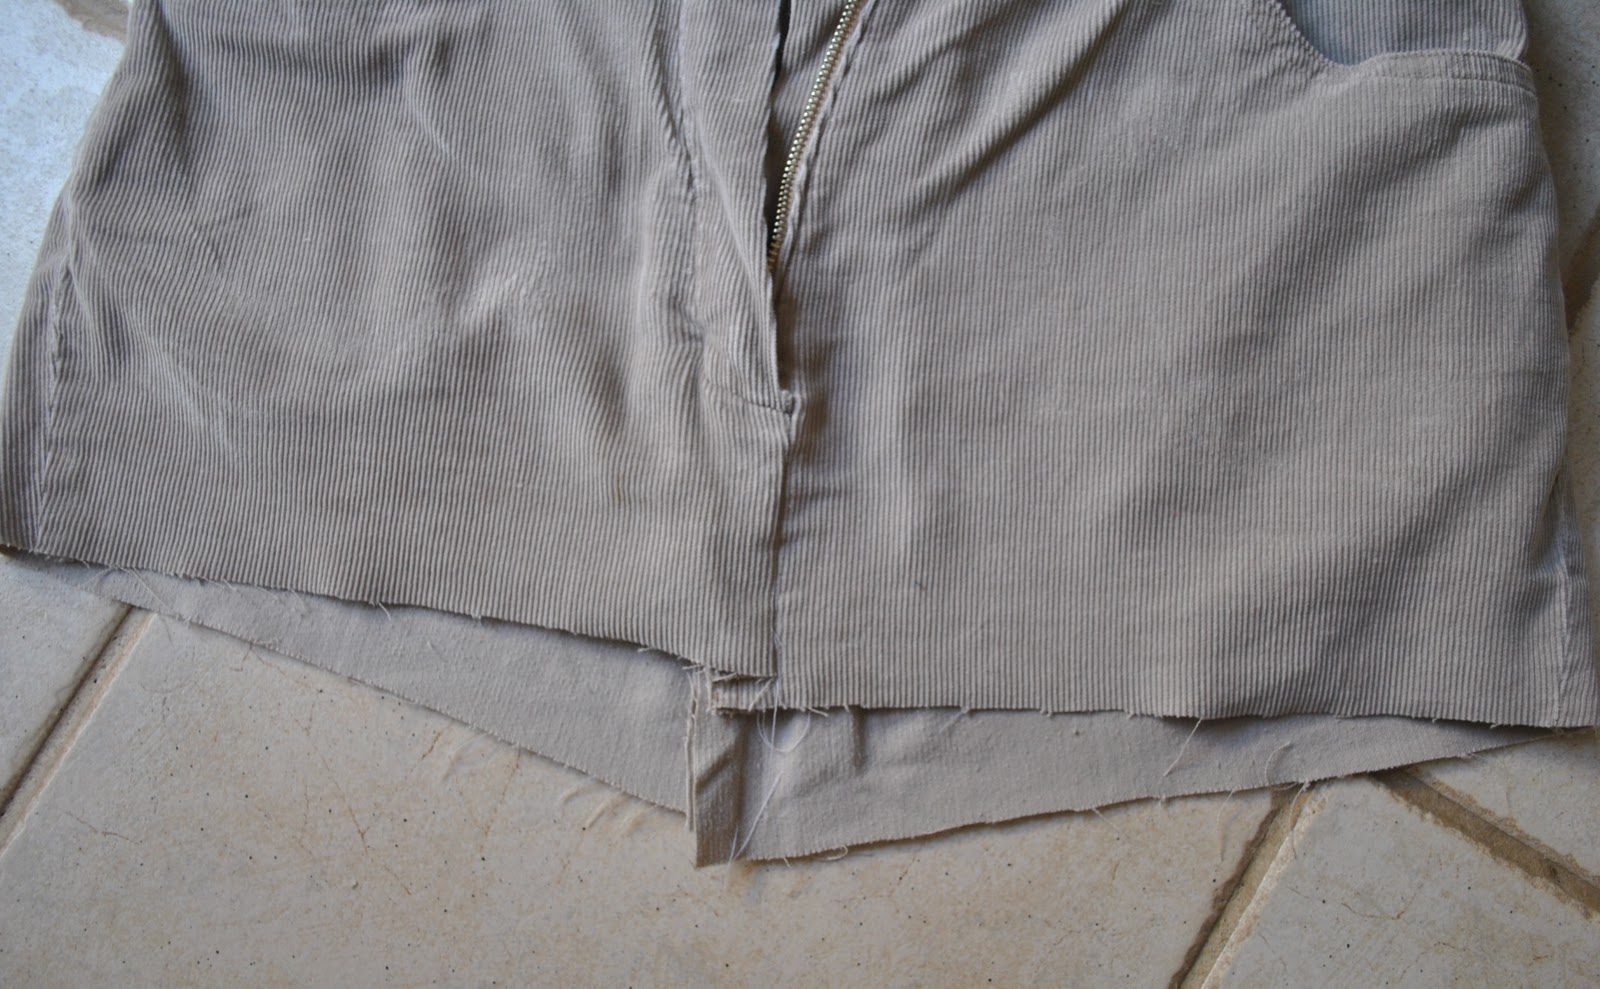
Pinned and resewed centre front and centre back respectively into a straight front and back seam… aaah; already, things are looking a lot more skirt-like here, right? I also re-double-topstitched that centre back seam down again to match how it was originally…

Now for the legs bit…
Measuring and allowing for an equal depth hem cut each two leg pieces in almost-half horizontally.
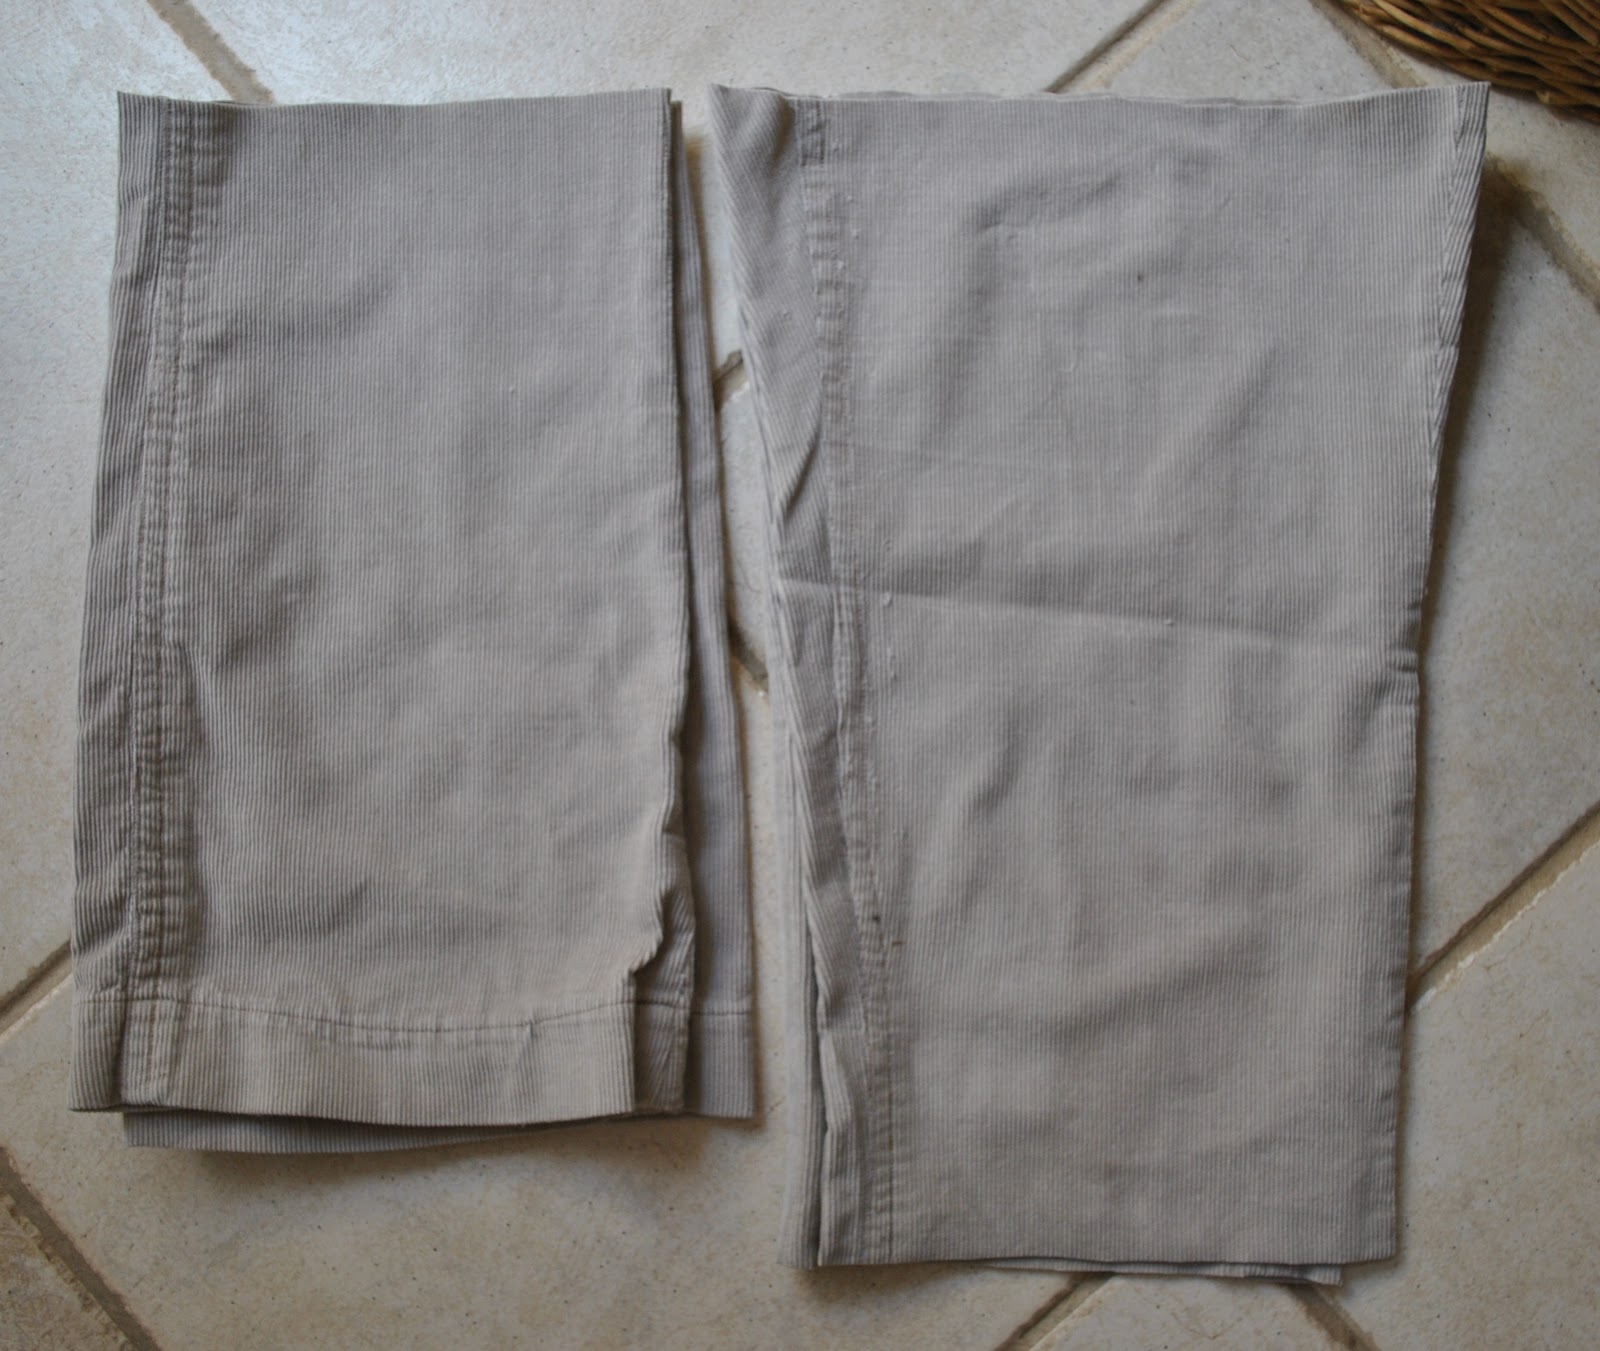
I wanted to keep the original hem down at the bottom of the legs intact, and so just unpicked a small area of hem near the outside leg seam… so I could unpick that long outside leg seam. I chose the outside leg seam for unpicking like this since I had originally double-topstitched the inside leg seam down, and so the outer leg seam was a far easier option here…!! And those double topstitched seams makes a nice random feature on the final skirt too.This gave me four largish pieces of leg, in pairs of two mirror images. I used the lower leg pieces (with the hem mostly intact) for the skirt front and the upper leg pieces (which as yet have no hem) for the skirt back, and checking to make sure the nap of the corduroy is all the same way as each other and the top of the skirt, sewed up the side seams, and centre front and back seams.
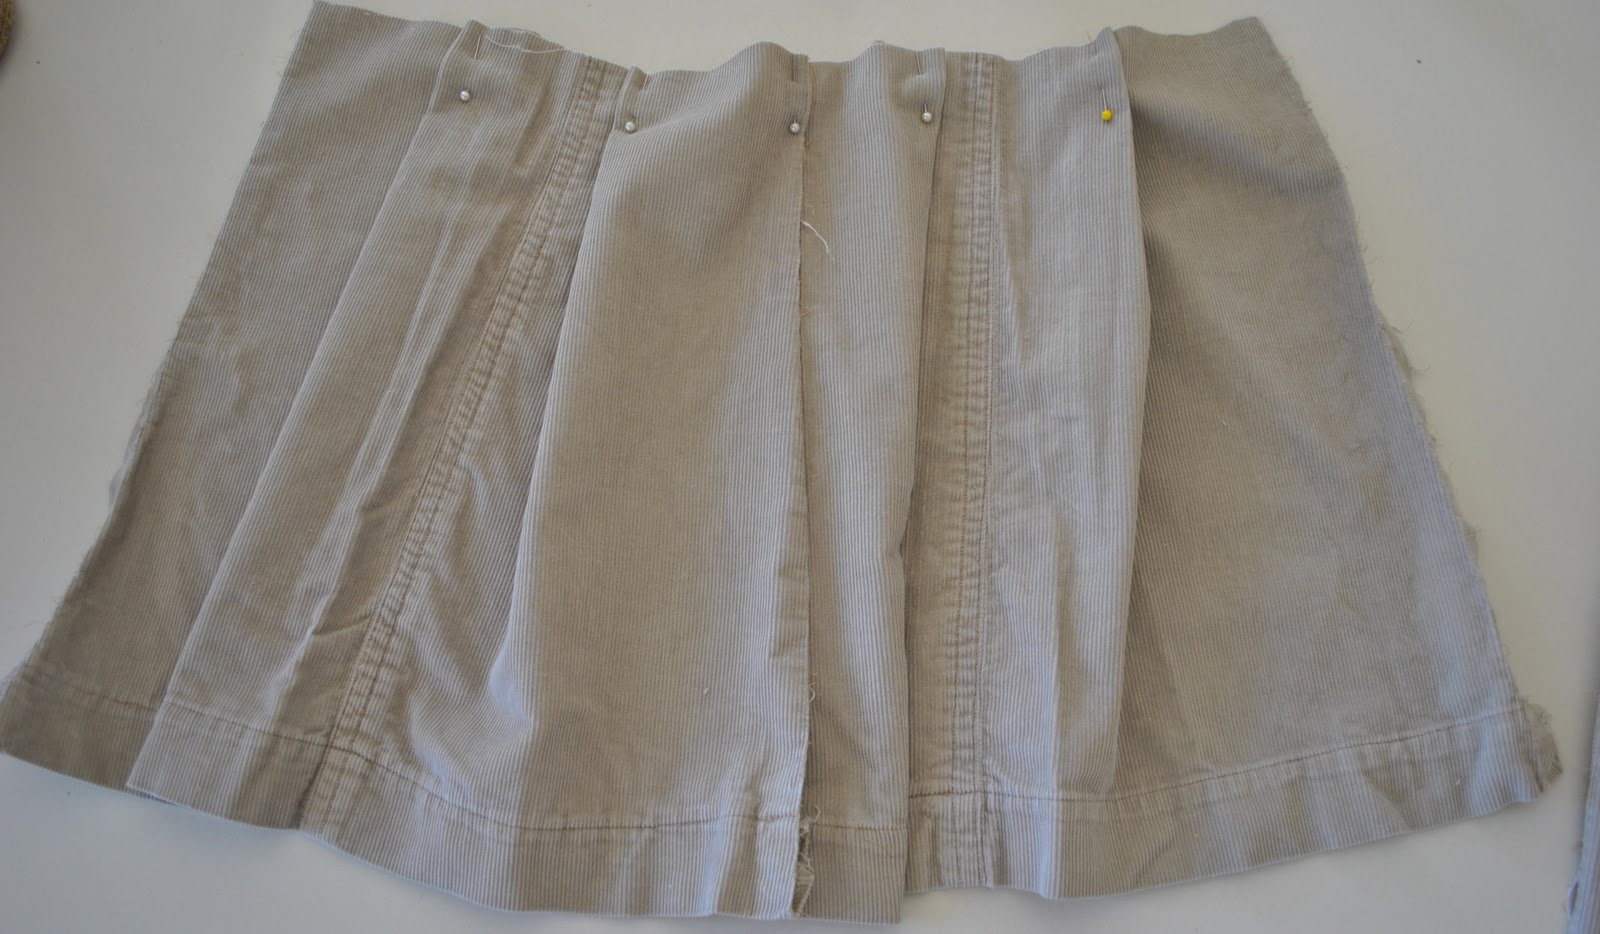
The next step was to arrange the excess fabric in the lower skirt piece into folds so that it fitted the upper skirt piece. This was just a matter of measuring and arranging the folds to be as near as perfect mirror images of each other, front and back, and checking every now and again to see that it was fitting into the top section.
Once the folds were all evenly in place I basted them all and then sewed the skirt top and skirt bottom together. I top-stitched each fold down in place by about 5cm vertically, some single- and some of them double-topstitching. Then hemmed the skirt back, to match the hem of the skirt front (which is already in place, and only required the centre front bit of the hem to be sewn into place…)
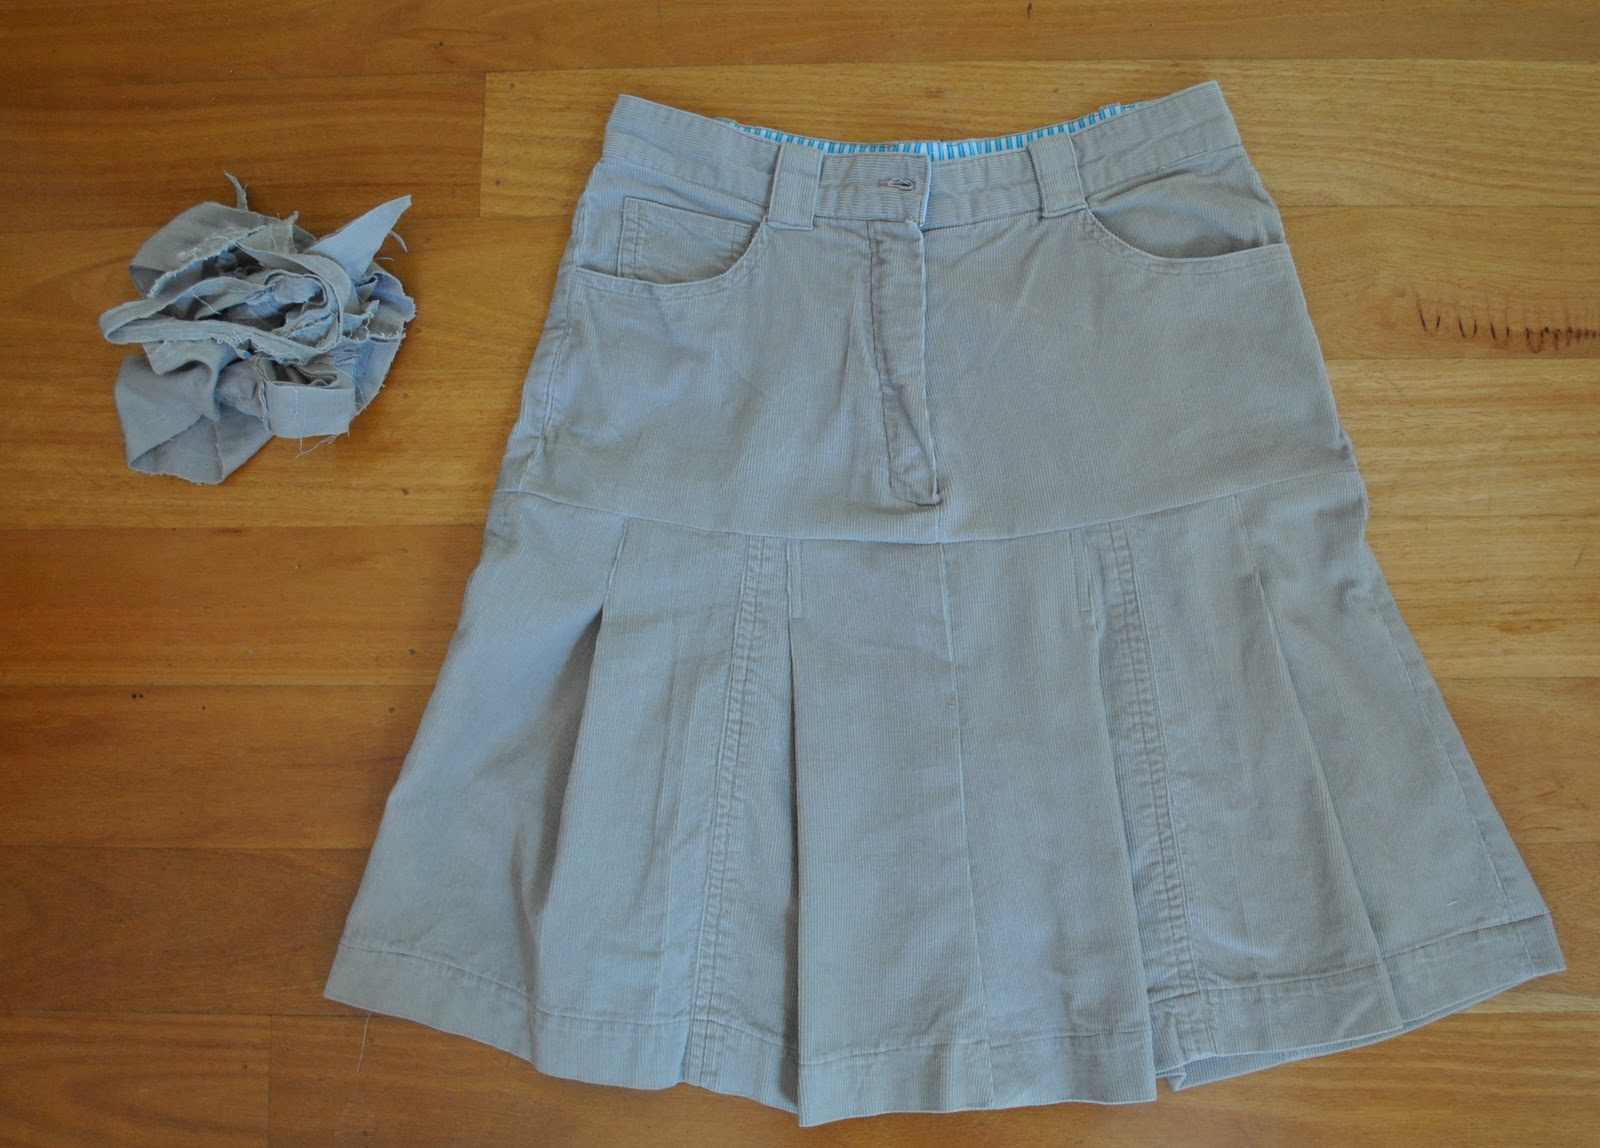
Voila! A new skirt, and with very little waste! The only waste fabric was from the crotch area, plus I ended up shaving a few inches off the top of the lower skirt section also to get a length that pleased me. Note, I took length off the top of the skirt, not the bottom, since I was keeping that existing lower hem in place. When re-fashioning a garment it is well worth incorporating those existing hems into your new garment somehow, since years of washing and wearing creates a permanent and very visible line of wear into the fabric, and a fold that will never ever iron out … thus removing length from that top area (that will just be disappearing into the joining seam anyway) is definitely the way to go here.
I’ve made an interesting little top…
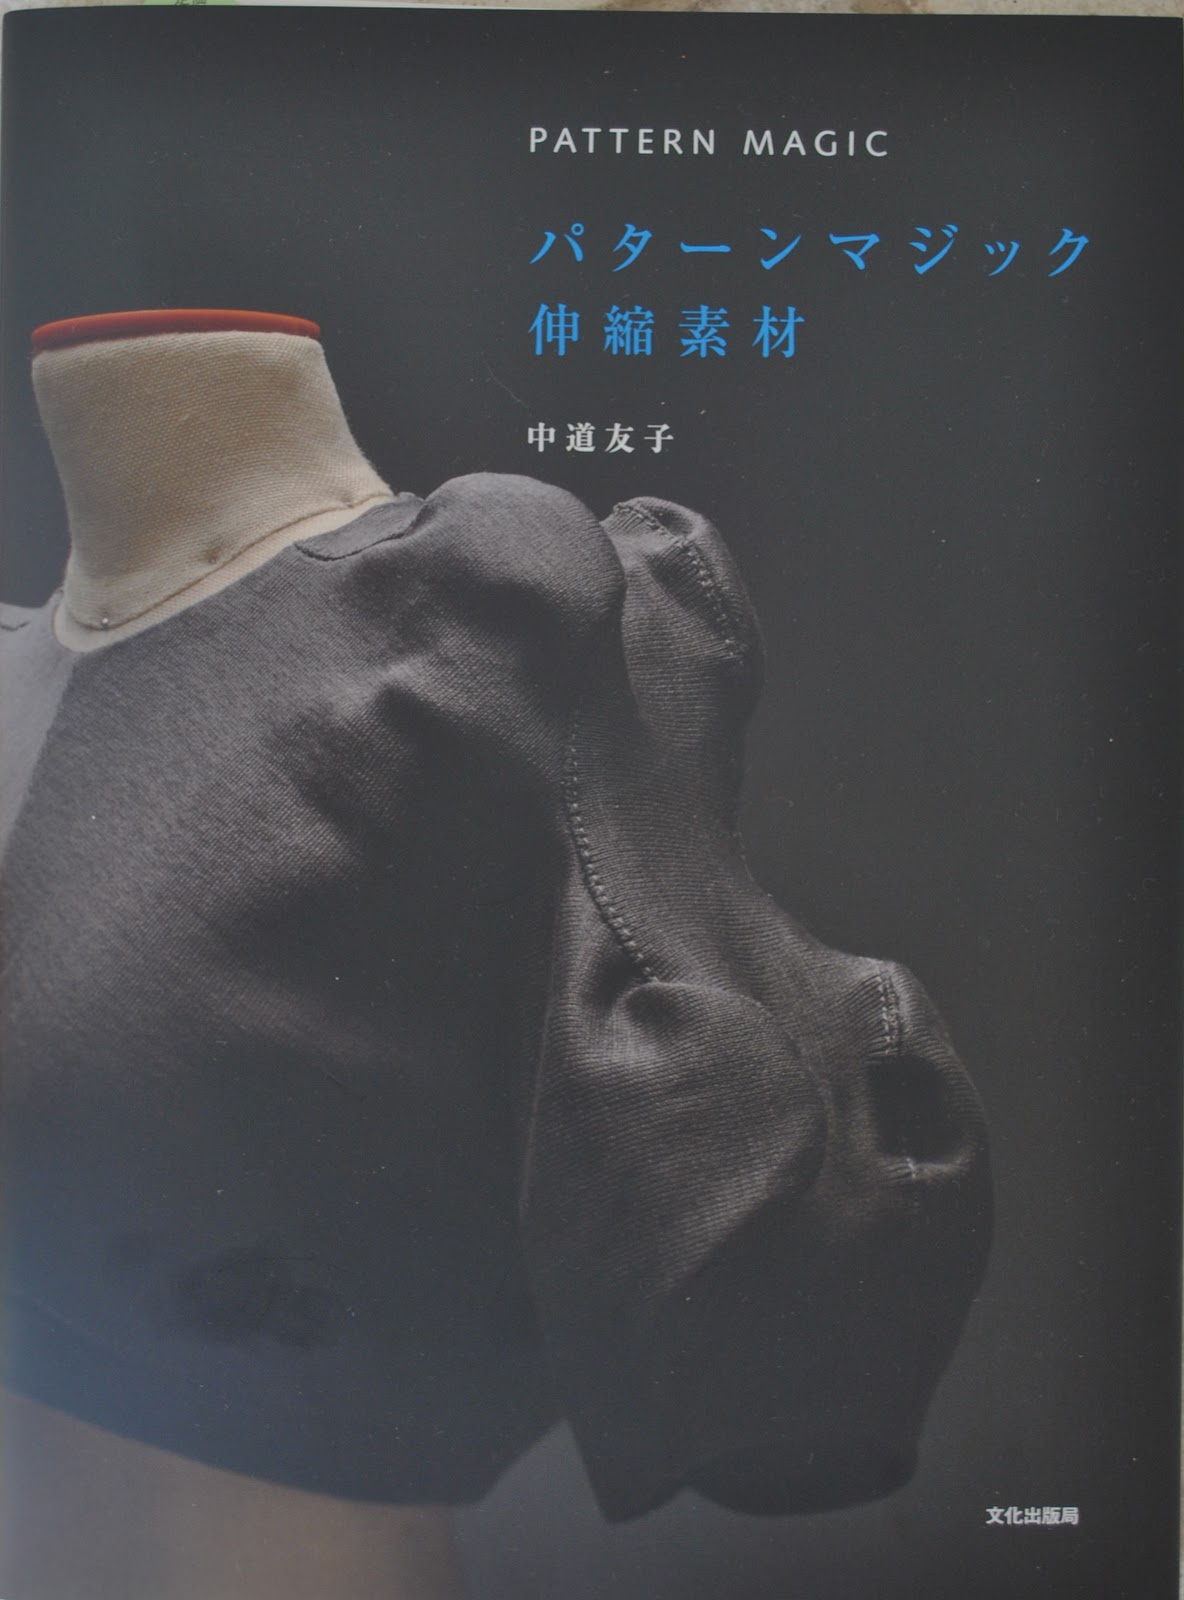
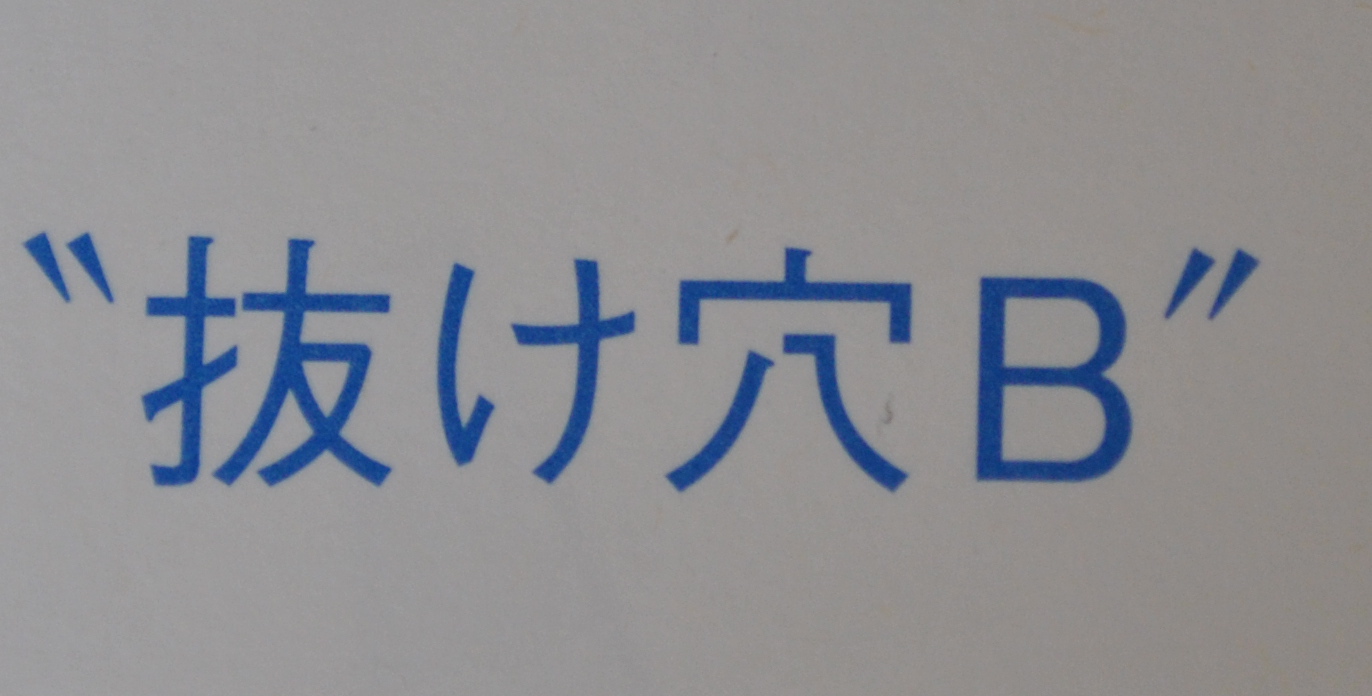
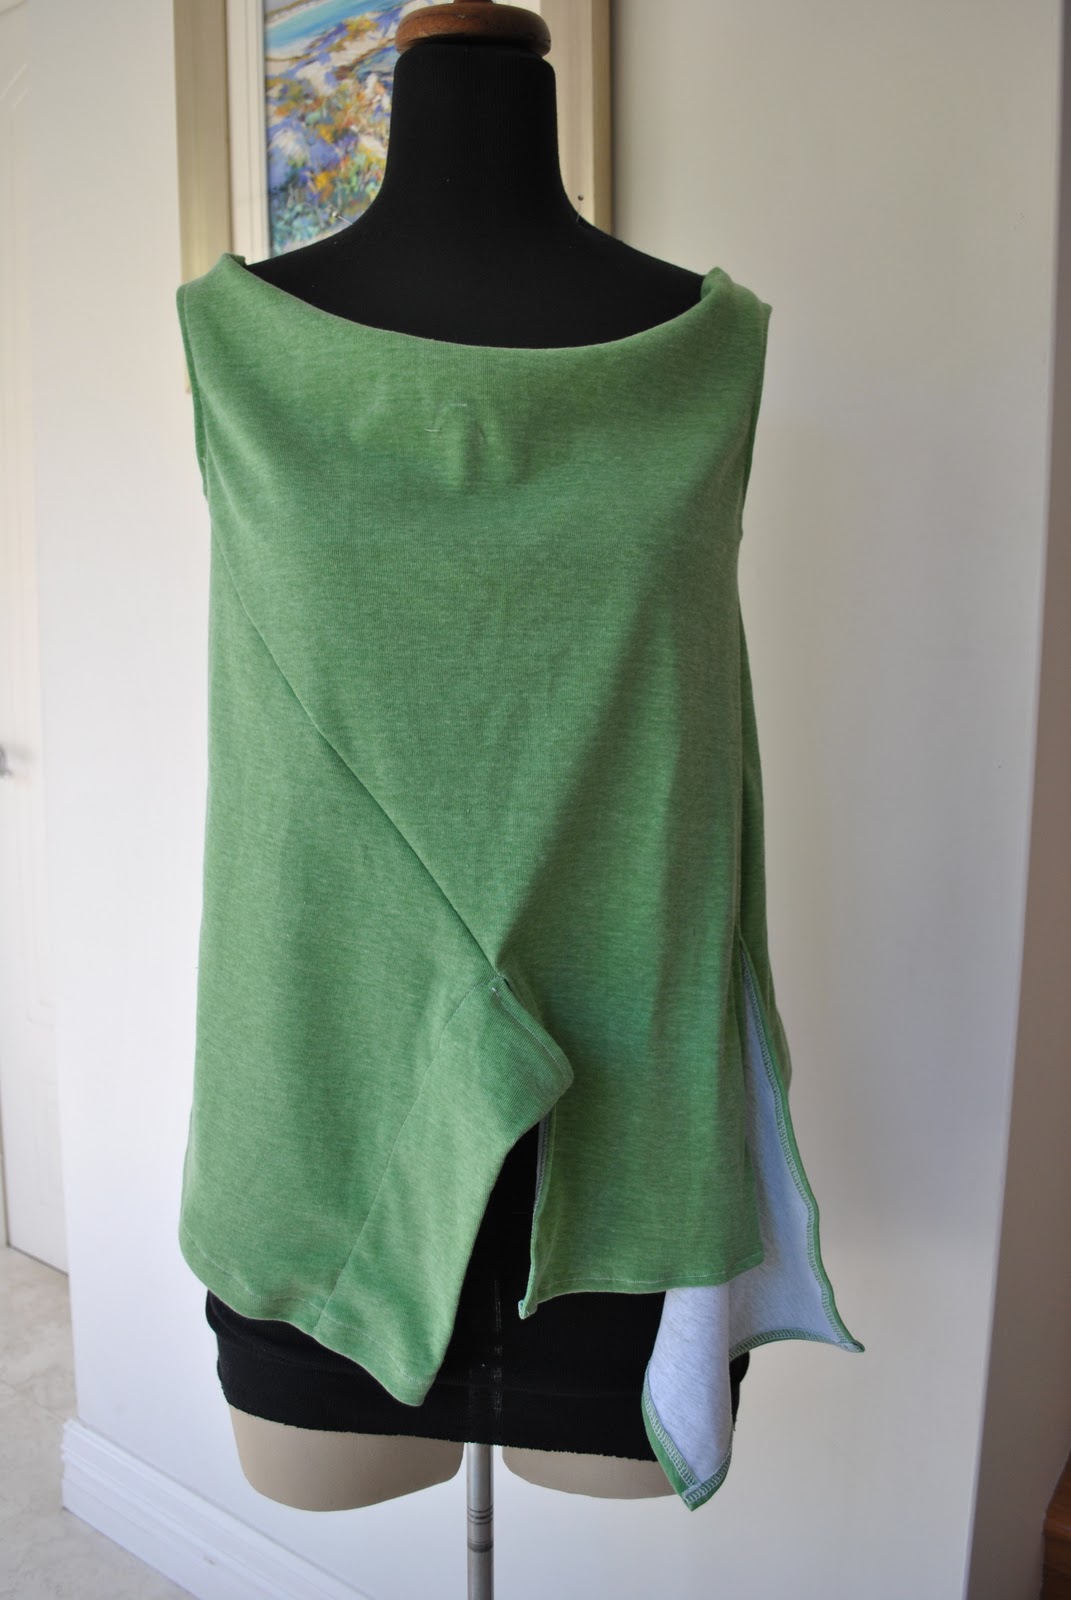
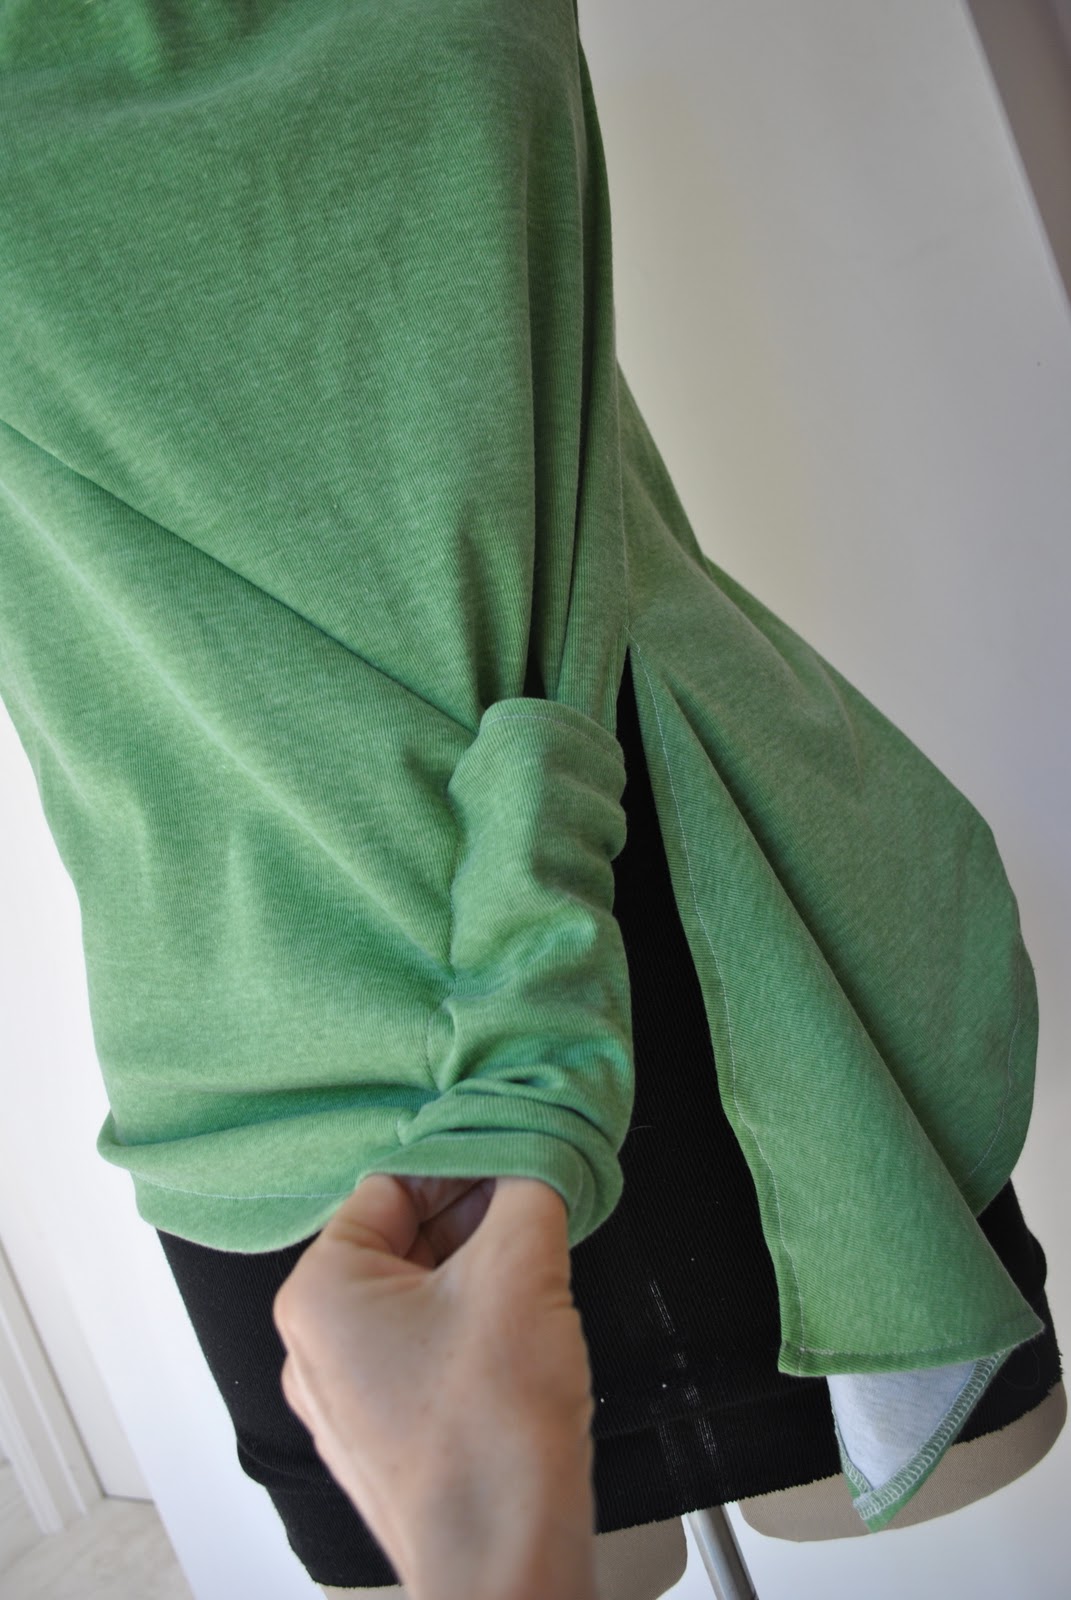
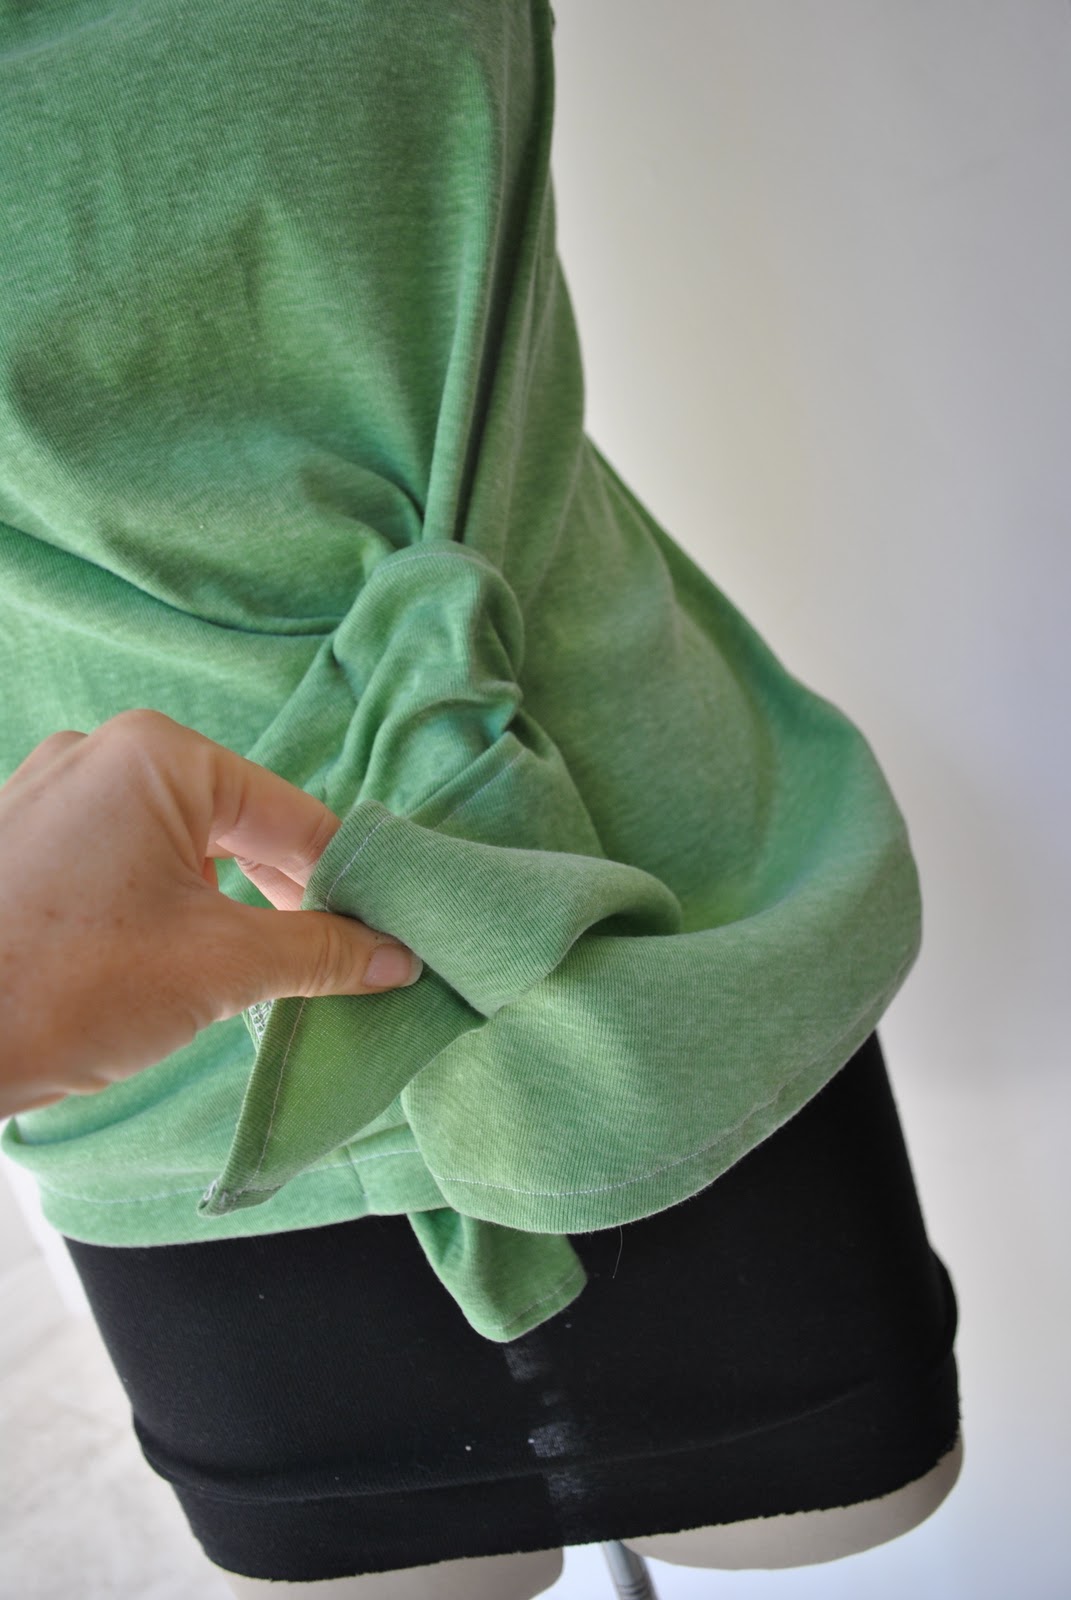
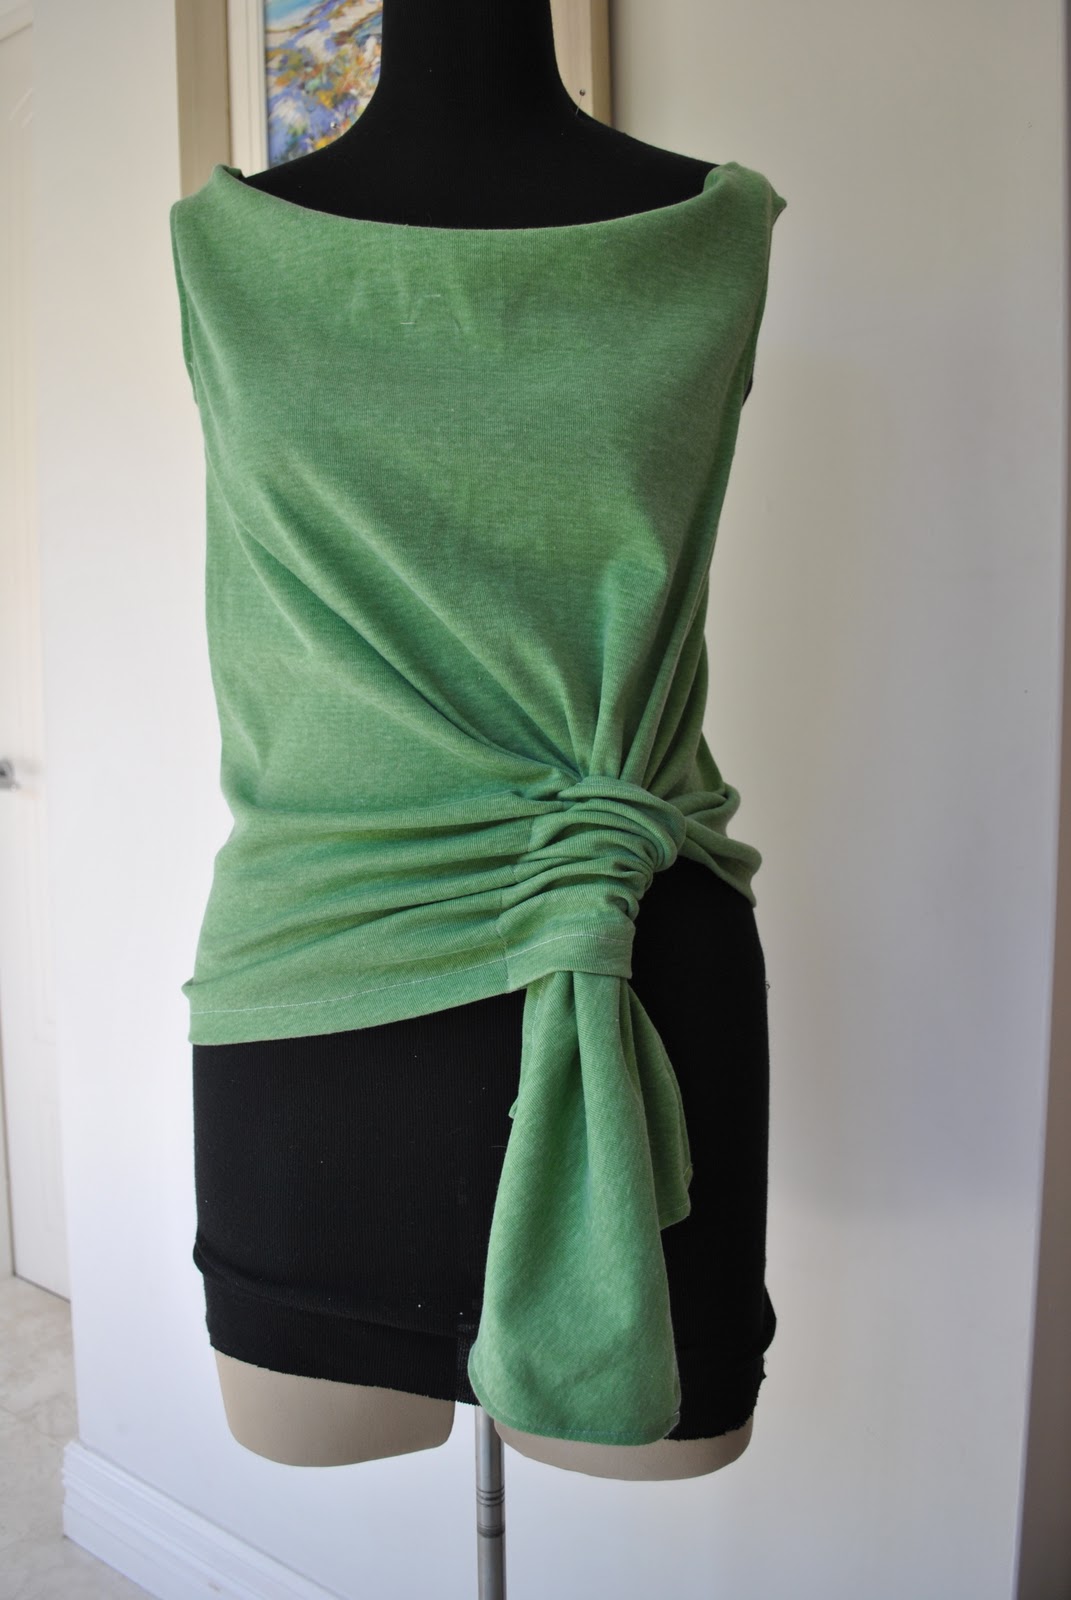
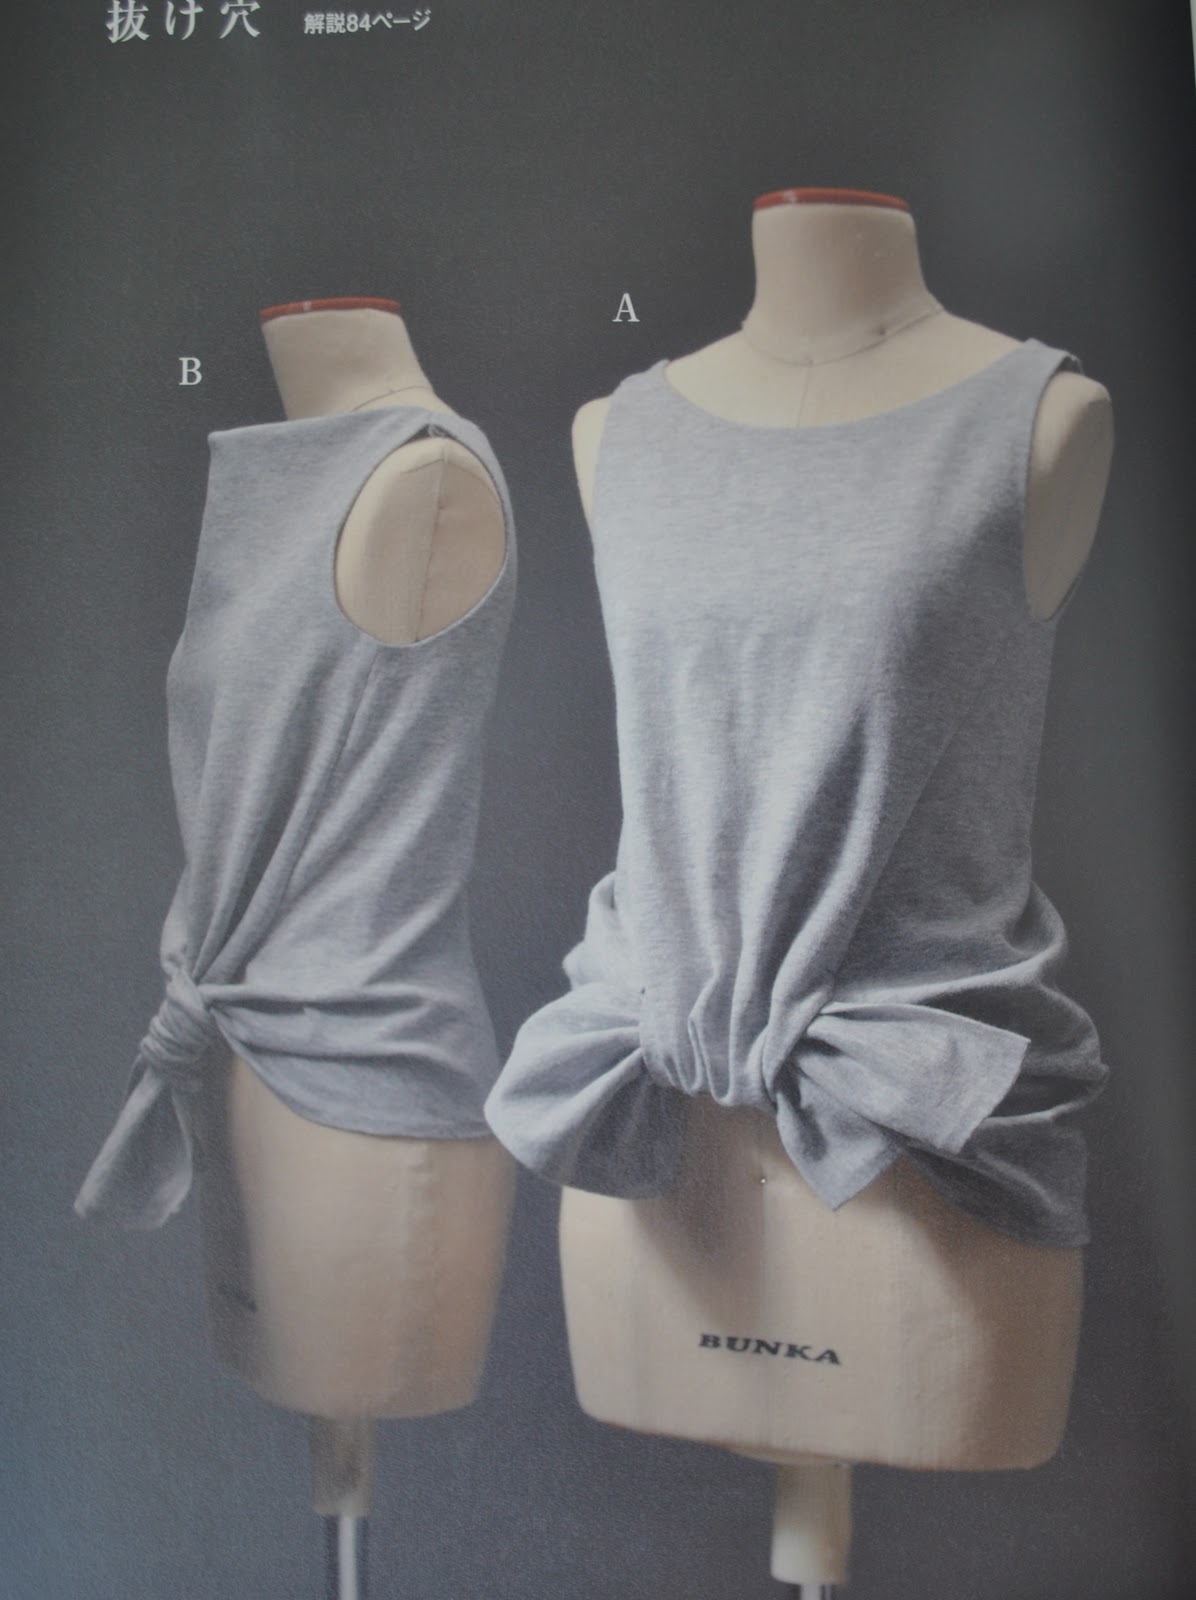 This from the marvellous book Pattern Magic 3 by Tomoko Nakamichi. I’ve nicknamed it my “ponytail” top (version B), because of the way the pieces are pulled together, bunched up and held together with a sort of self-scrunchie and flow out of the other end like a girl’s ponytail. As for its real name… well my husband and I have seriously spent the last Half. An. Hour; pouring over Japanese character translations and come up with “pulling hair through a hole”. Could be completely wrong, but just maaaybe my nickname might be vaguely related to its true name bestowed by its Japanese designer? If somebody actually knows and could correct my bad translation then that would be super wonderful, hehe.
So, on the down side I think I am a failure at Japanese :(((
But on the bright side I don’t think my new top is a failure 🙂
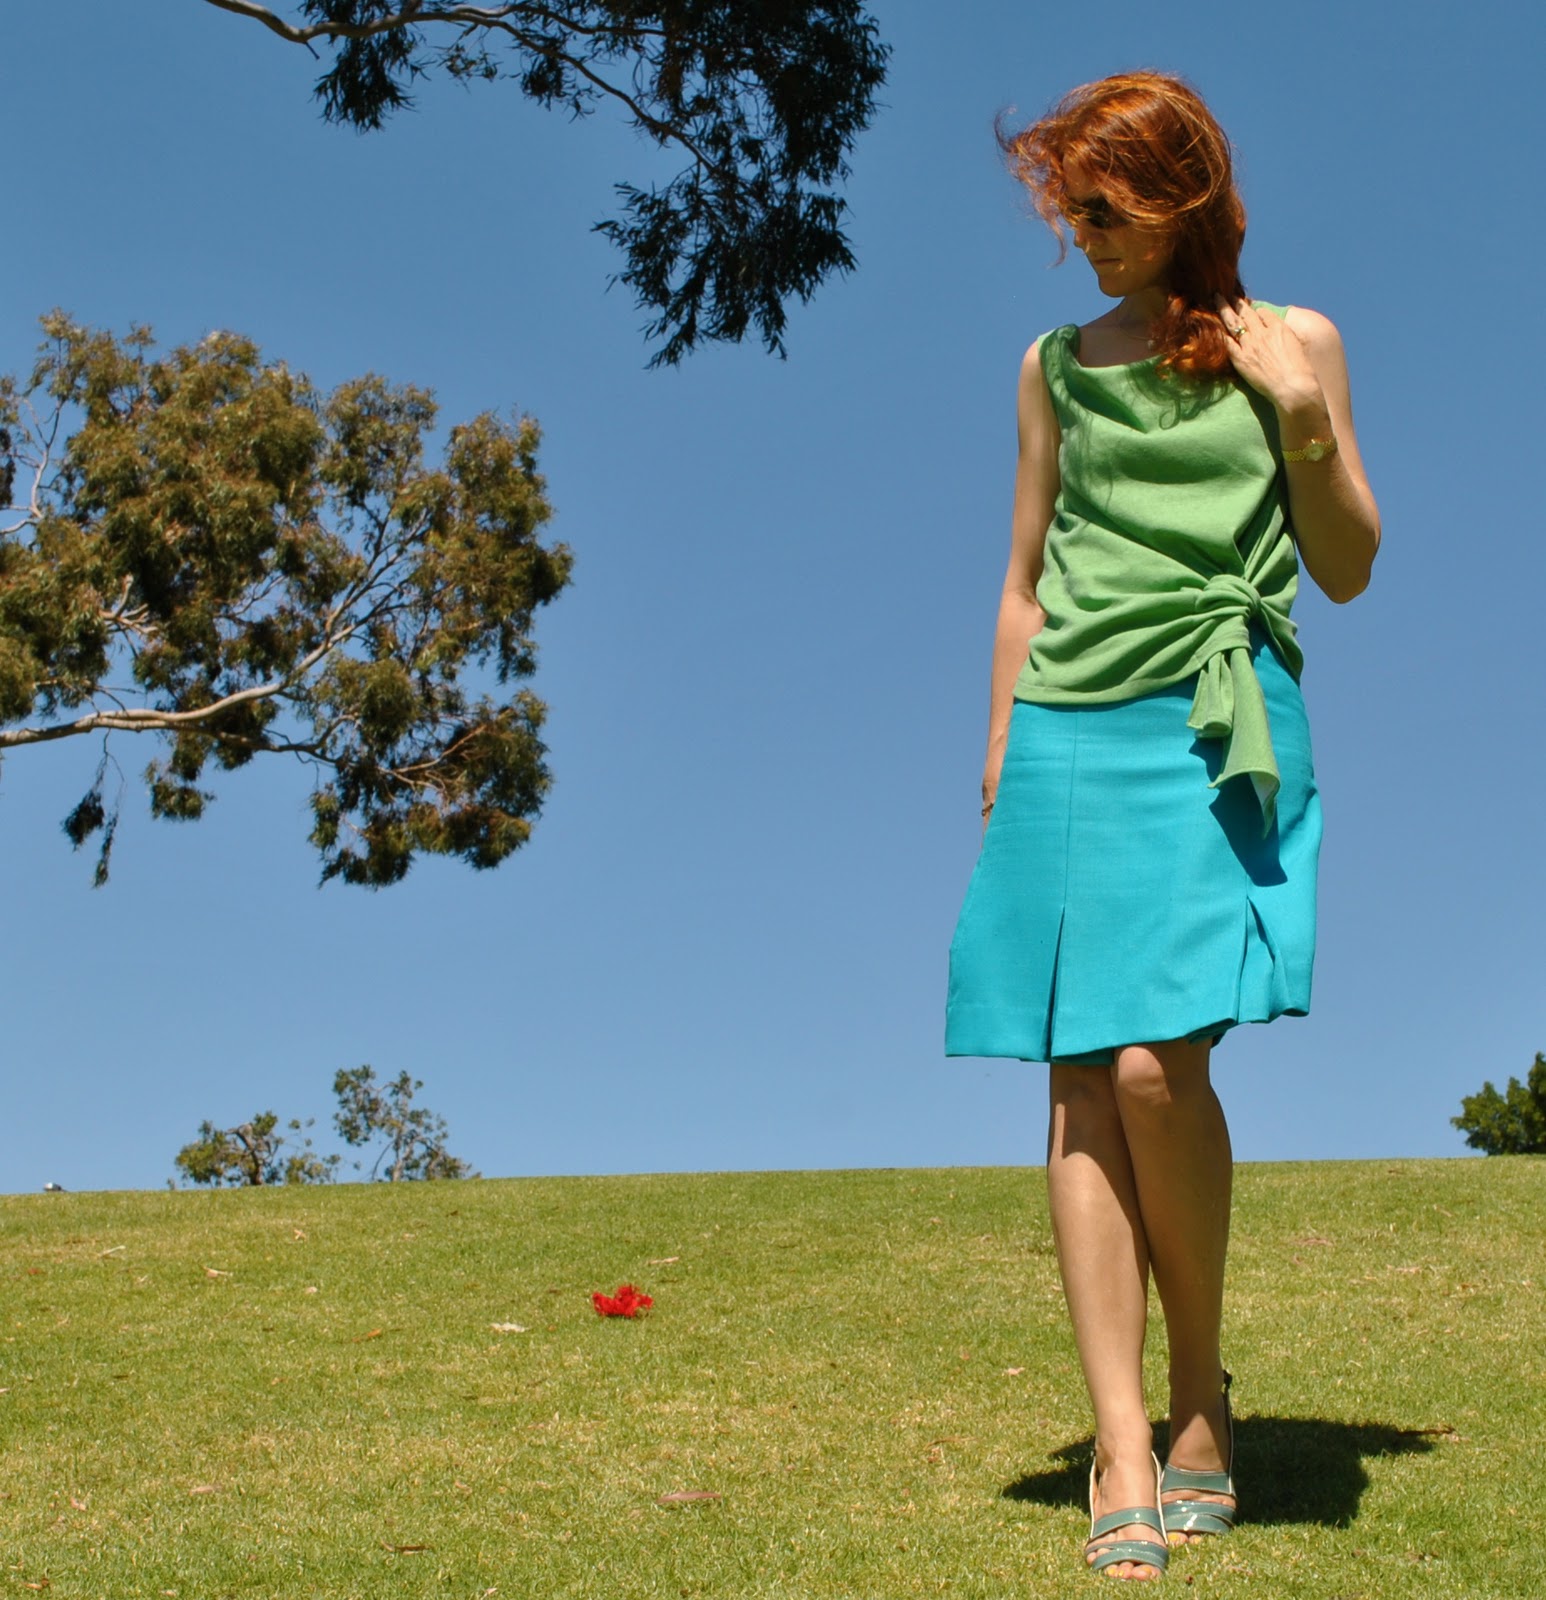
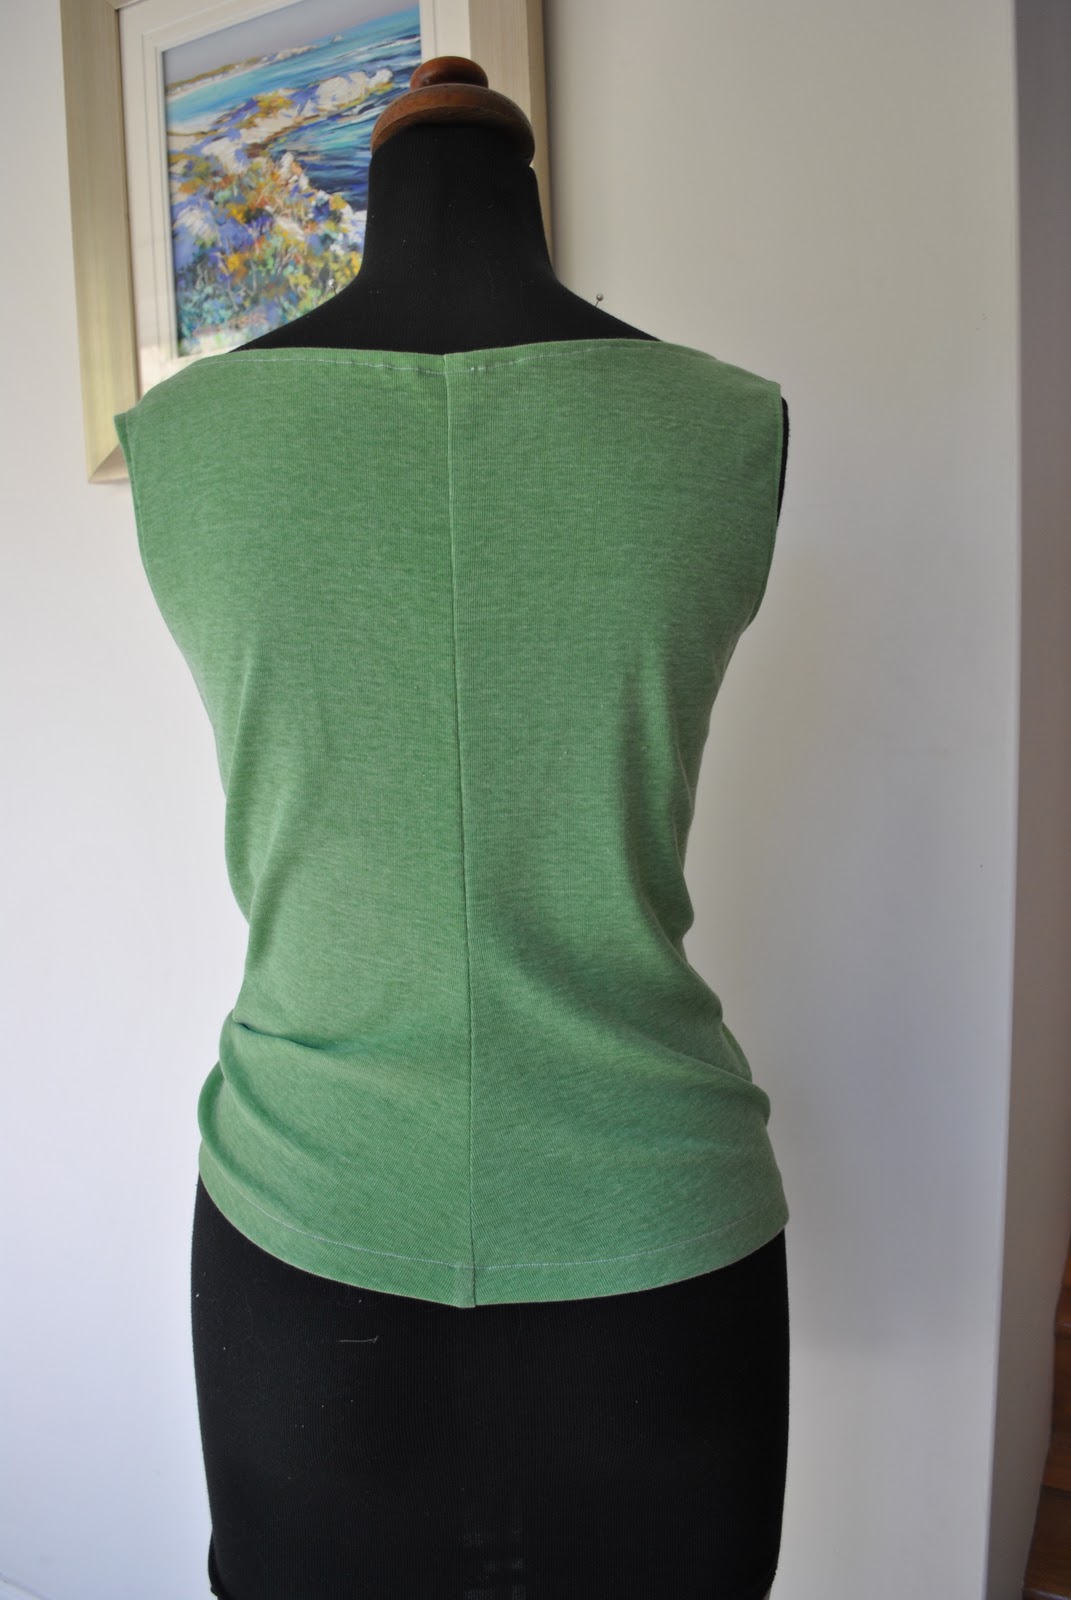
Pretty cool, no? It has a wide, slightly cowled neckline which is quiiiite nice, but which is a wee bit flappy on my figure, so I just fold that down into the inside and it looks pretty good like that. I considered stitching it down to the inside, but decided that isn’t really necessary as it sits down nicely all by itself.
All the seams are stitched, then the raw edges overlocked together to finish. The raw edges of the hems, armholes and neckline were overlocked, then the allowances turned under once and topstitched in place. Simple dimple!
I used some green cotton jersey that has been in my stash for yonks, initially intended for some St Patrick’s Day thing which never got made. And I still have a bit left over which I am in the process of transforming into a little cardi…
 Top; this is one of the designs on p58 of Pattern Magic 3, by Tomoko Nakamichi, made of green cotton jersey
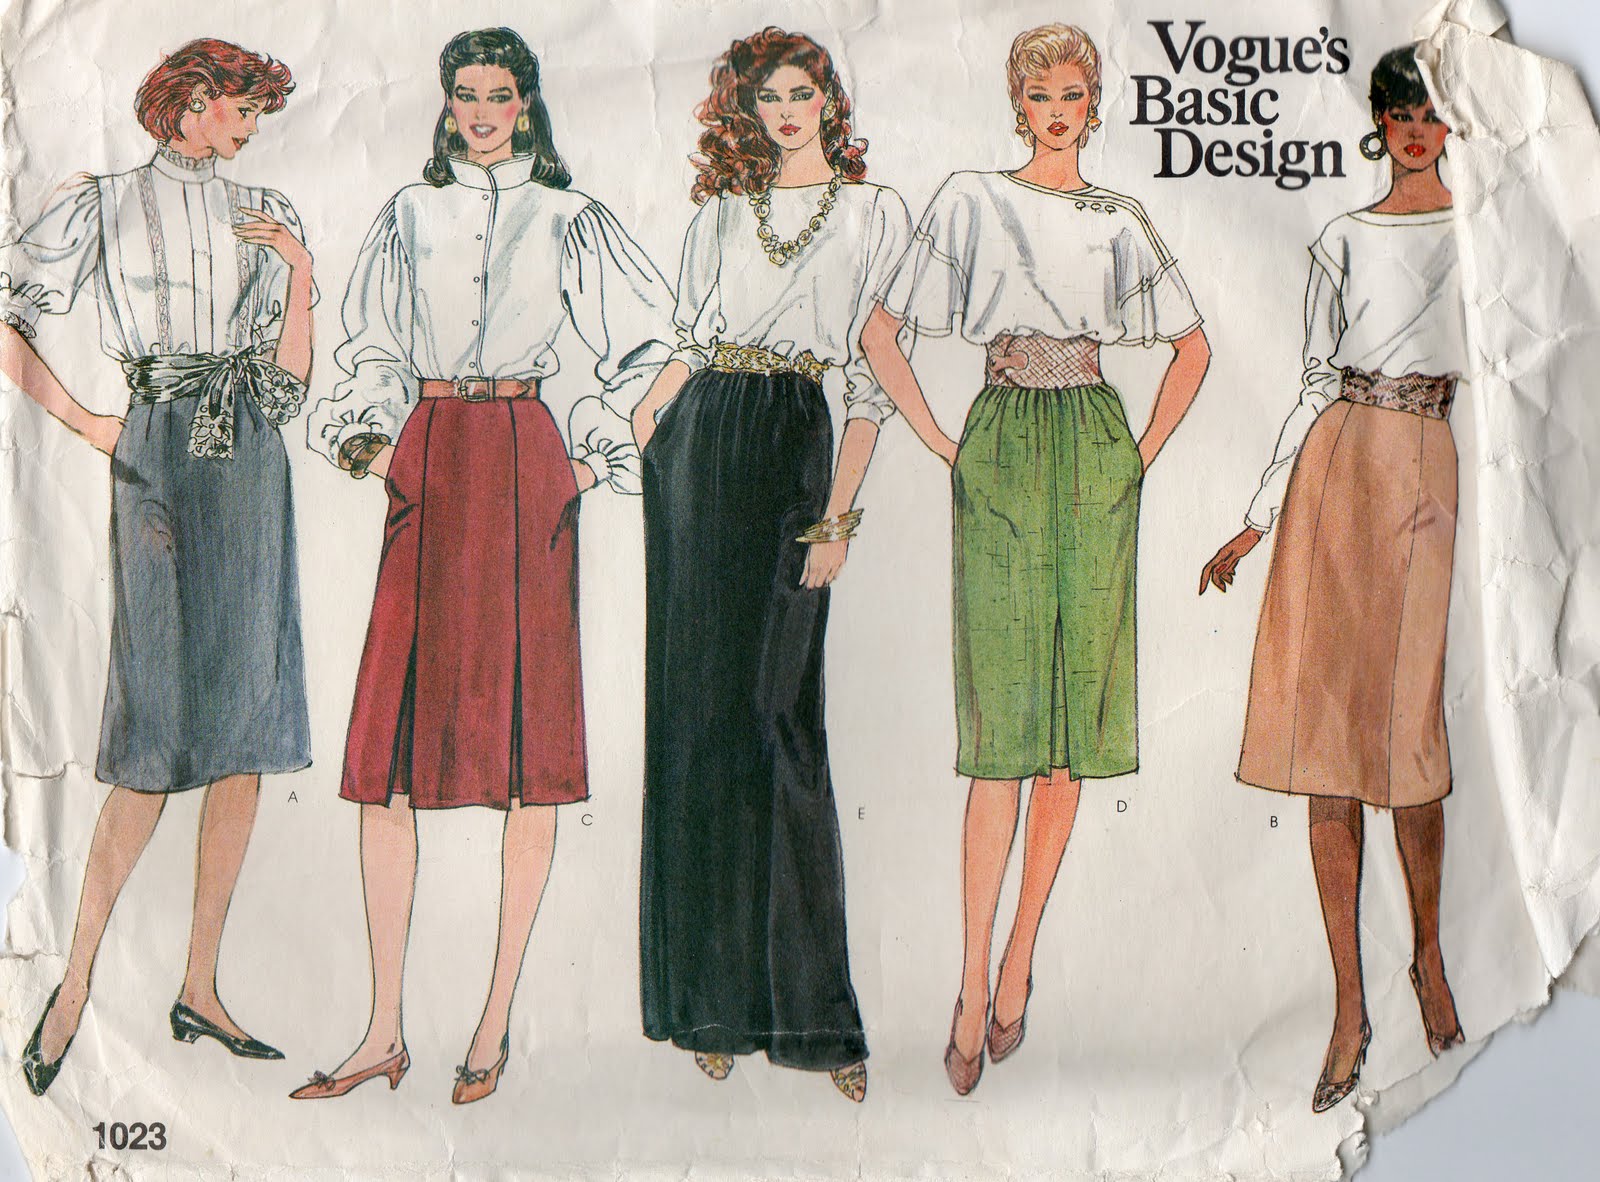
Skirt; Vogue 1023, turquoise synthetic stuff, details here, and this skirt styled in 6 different ways here
Sandals; lasoffitada Gilde, from Zomp shoes
I would just like to point out that it wasn’t my intention to offend anyone yesterday with my reference to the “typical” blogger’s stance. So some people like to pose and smile like this, well that’s great!! and please don’t blush or feel like you have to defend yourself just because I say that this isn’t my own thing… That was just how my thoughts have developed about how I like to present my creations and myself in my own photos.
And cropping…
I would also like to assure everyone that I am not always swanning about in paradise; and cropping fabulously beautiful scenery from my photos either. A lot of my locations are very very prosaic and ordinary, and usually I am just chopping out boring stuff that contributes absolutely nothing to showing off my sewing… to give a few more examples:
The gardener’s storage shed in a local park
The catamaran-hire kiosk down at the river
Camera perched in the back of my car in a carpark on a busy day full of errands (I’ve used this as a tripod substitute several times… even one of my “natural bushland” shots was taken like this)
Basically I just grab a photo opportunity that presents itself; a location that just happens to have nobody around when I am passing by. (yawn) pretty boring and not very exotic, actually…
My point is; there is no such thing as a necessarily “ugly” location it all comes down to how your outfit shows up against it; and taking into account the available lighting and colours, and framing and perspective…
My clothes-line area… (I’m really giving away my secrets here, aren’t I?!)
See how in each case the background might not appear very promising, but the garments still show up well, and the picture is much improved by judicious cropping?
And patterns!
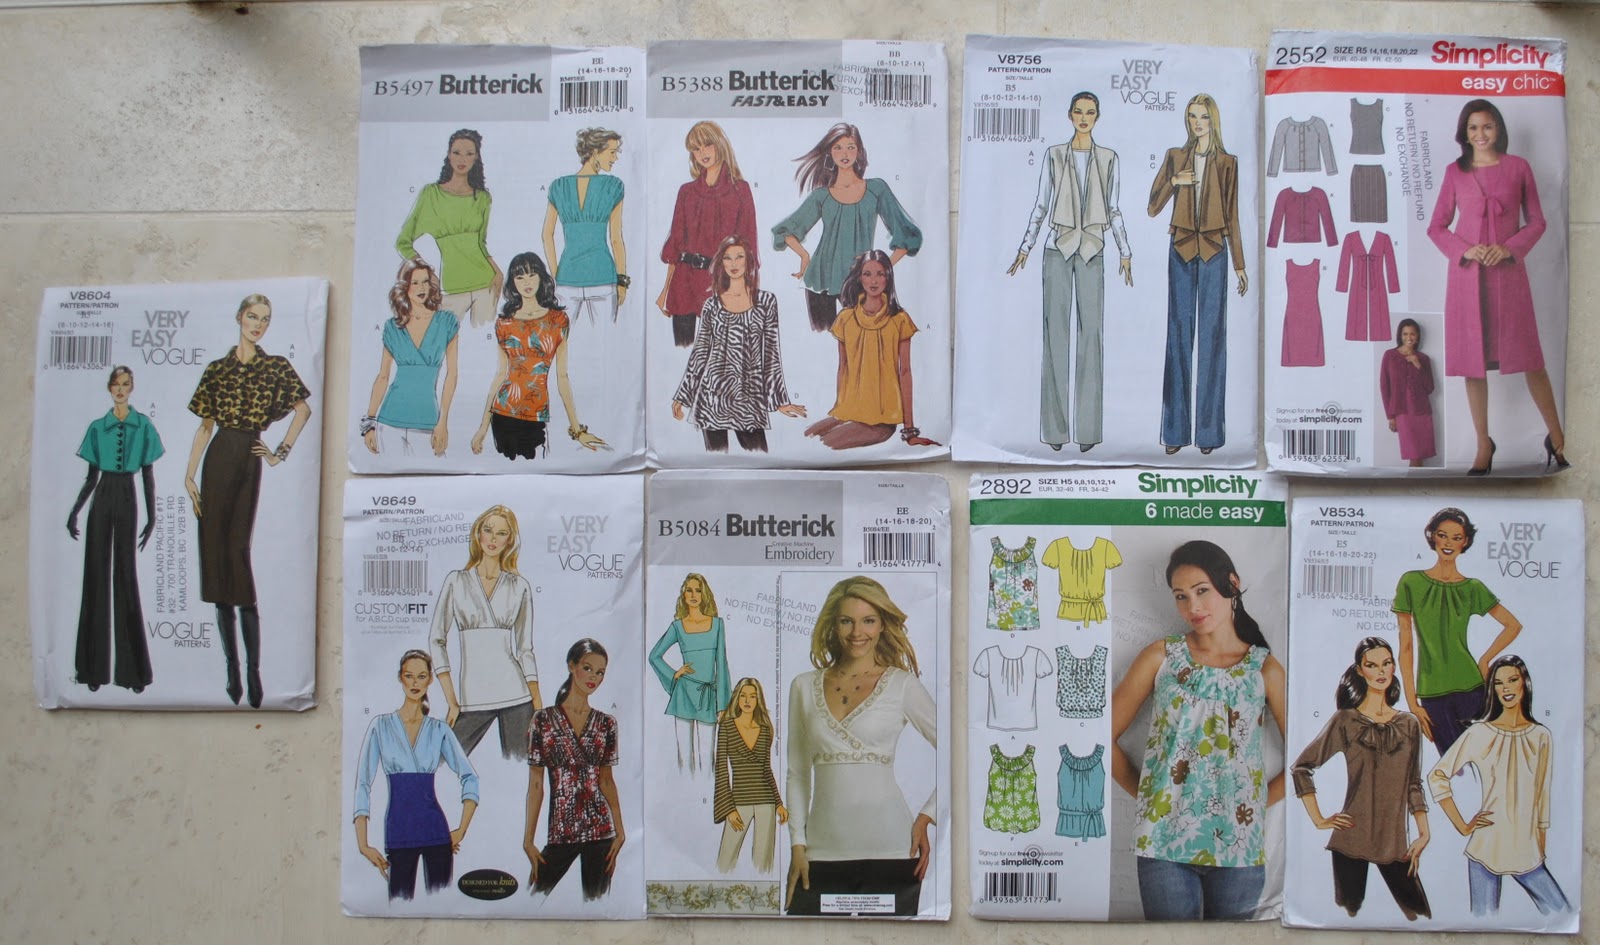
Myrna contacted me about sending me a Vogue pattern that she had mistakenly double ordered, and I gratefully accepted. Vogue patterns are actually pretty expensive to us Aussies… so imagine my delight when a parcel arrived with not one, but nine patterns in it! So generous!! Thank you sooo much Myrna! I will enjoy exploring and trying out these so very much…
Of course, now I feel pretty stingy that I am giving away but one (admittedly special) pattern in my blogiversary give-away, so I have decided there shall be more give-aways around here. Soon. Zere vill be noooo more stinginess!

During September, I was give the Versatile blogger award by Adithi’s Amma Sews; and also from SewingCafe with Lynne thank you so much to both Adithi’s Amma and Lynne!
Now the rules are as follows, you have to write seven things about yourself… well, I’ve done a few of those before (in the sidebar at right) and truthfully I have nothing further of any interest about myself to add. Yup, I am a pretty boring person… and what is more this is not supposed to be about me, although if I do feel like sharing any little titbits of what is going on in my life I will blurt it out at there and then, but pretty much this blog is all about my sewing, knitting or general fashion-related stuff as it inspires me.
So.
The last time I did one of these I wrote 7 things about couture sewing I had picked up from reading the excellent and highly enlightening instructions in Vogue 8333, and I decided that was a far more fun and interesting thing for people to read about than boring old me, so I decided to go down that path again… this is supposed to be a versatile blogger award, right?
So to be a bit versatile; today I shall touch on a completely different subject of interest to me and probably all bloggers like me documenting their handmade creations… photography. People have left me lovely comments saying nice things about my photography, so while I am no expert and what I know about the actual technical side of photography could be written on a pinhead with room to spare, and a real photographer might read this and laugh at my naivety; I do still like dabbling in fashion photography in my own silly small-scale way and take some pride in my photos. So thought I would just jot down a few little things about taking photos of myself and my work that I have learnt along the way.
1. Background
It might seem obvious and therefore not worth mentioning, but this is a biggie. The background of your photographs is really important and there is a big difference between a background that will highlight your creations to advantage, or alternatively swamp them into insignificance.
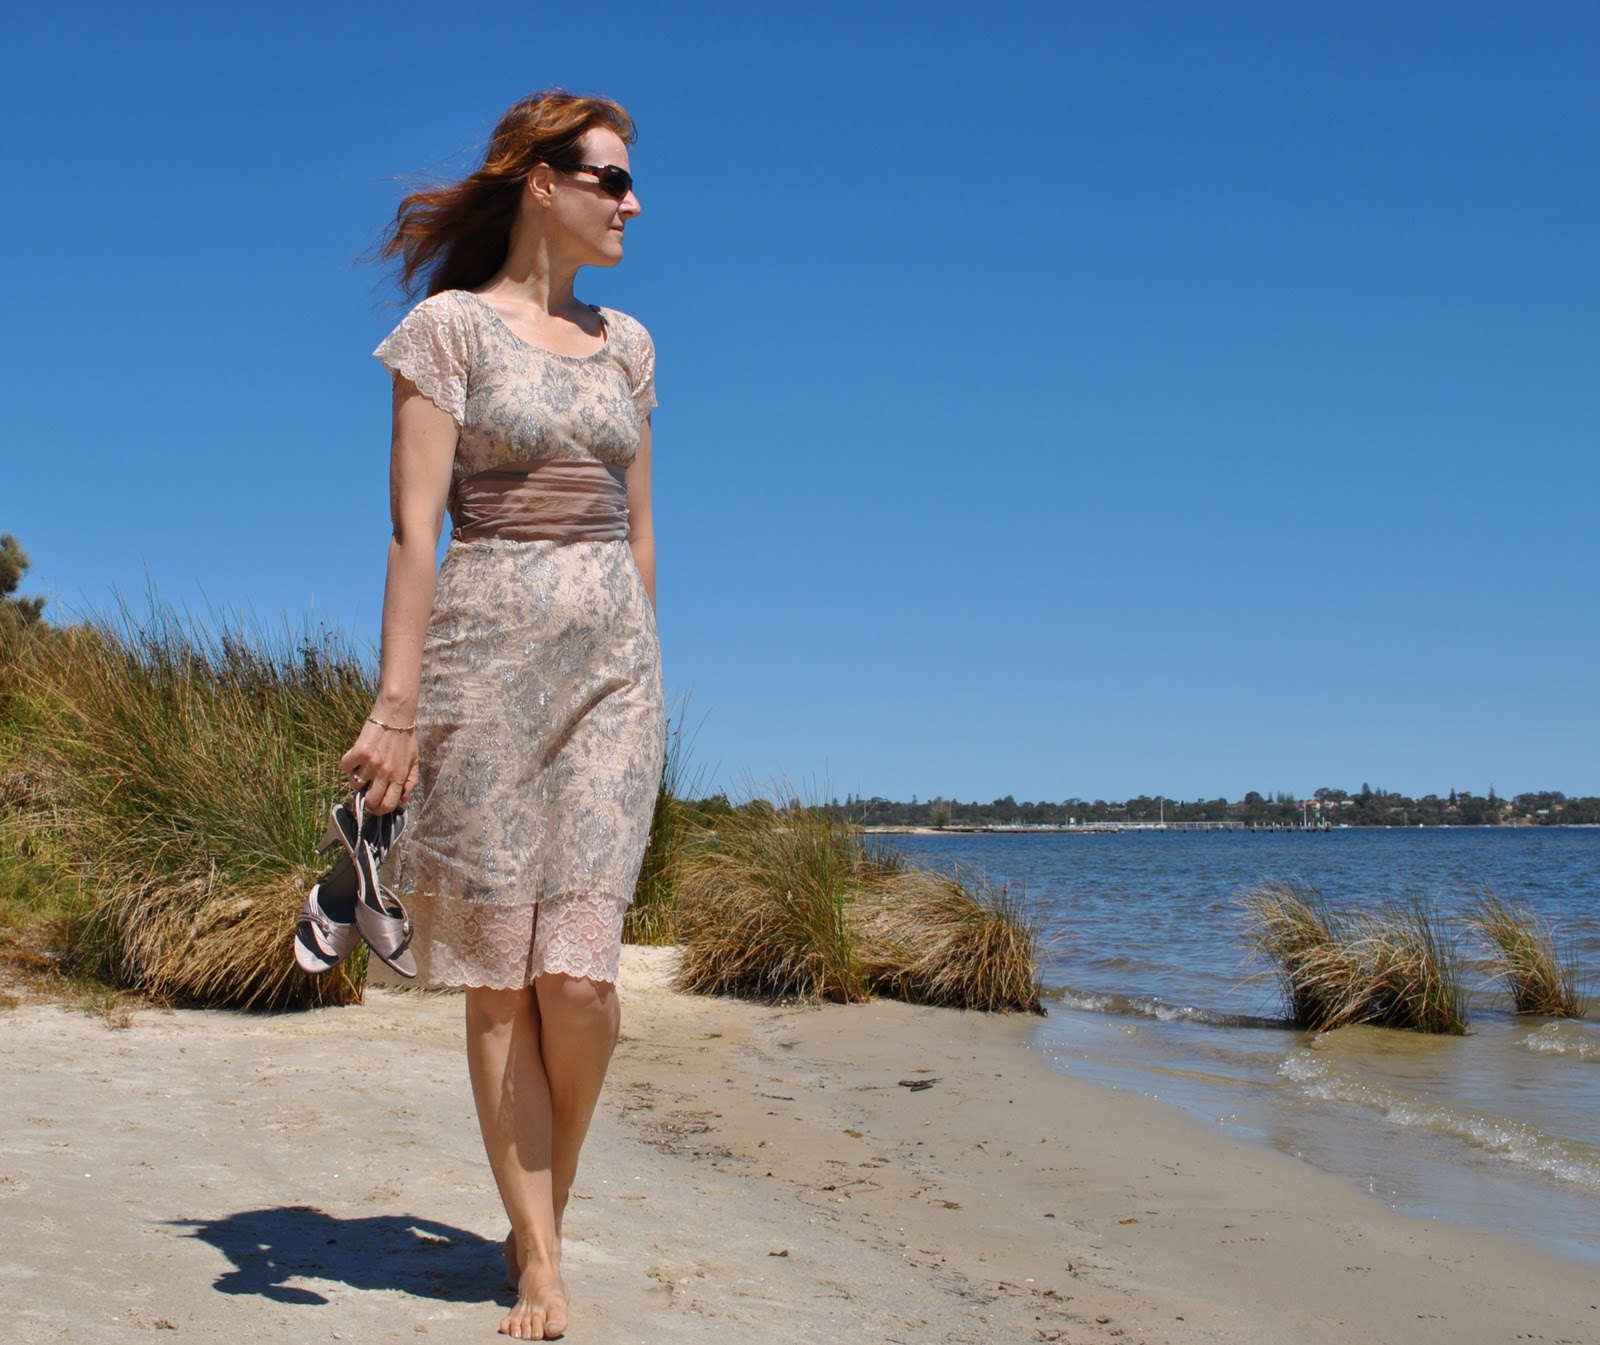
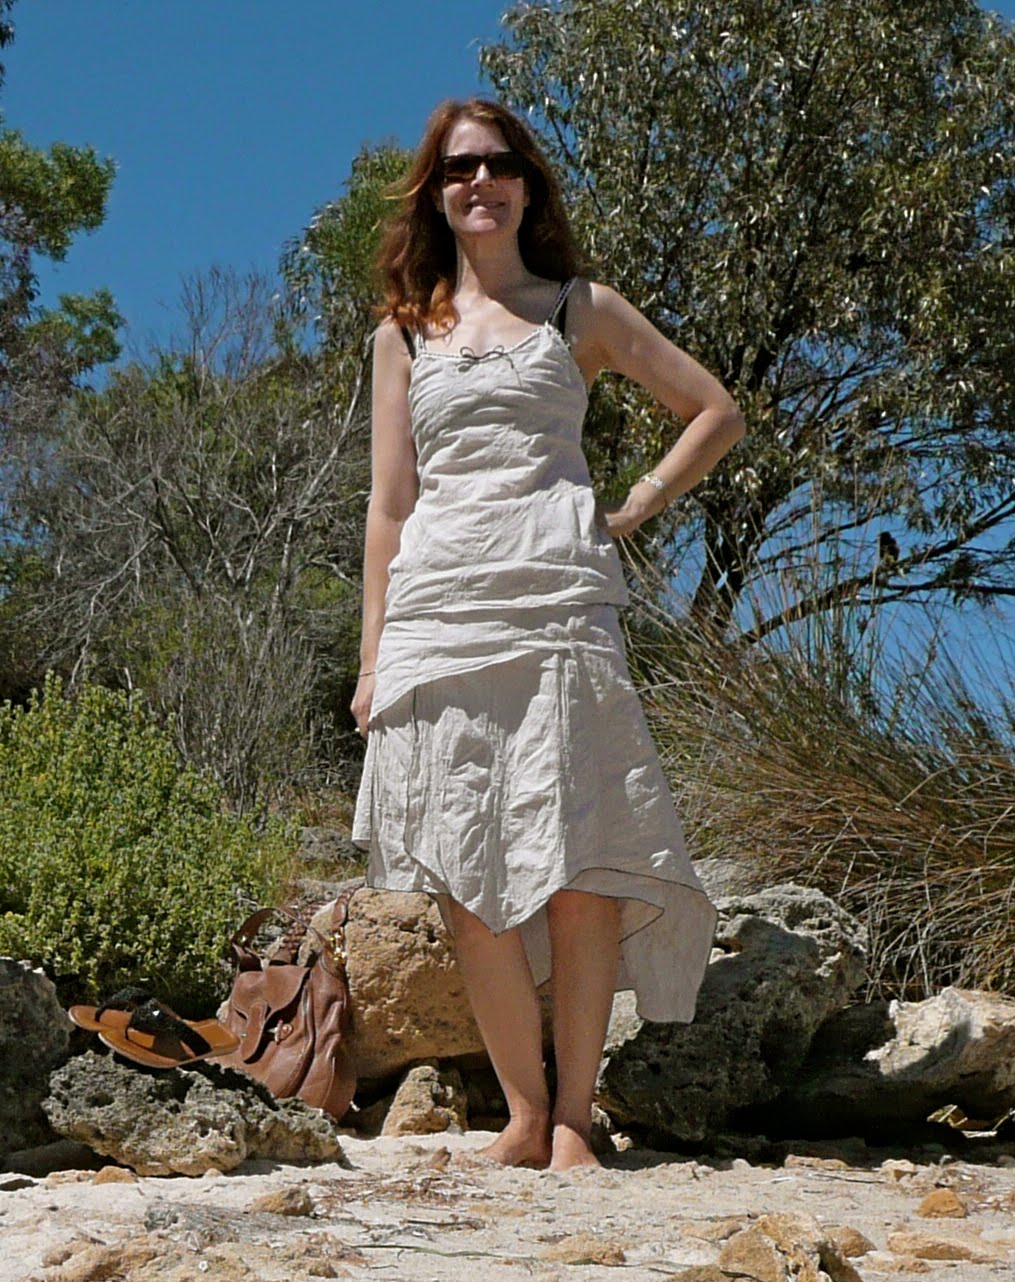
Aaaand; not particularly vital and not something I obsess about, but I do find myself semi-consciously seeking out photo spots that will enhance my creations. I certainly don’t let it get in the way of my life, but if I see a good spot around about I will often tuck it away mentally for future reference. Also, there are suitable spots, and there are unsuitable spots. Let’s just say, if I have made some new bathers then I will pick a day I am going to the beach to bring along my camera. And if I am photographing say, a beige dress, then it’s probably best not to sabotage my creation by standing in front of a beige background.
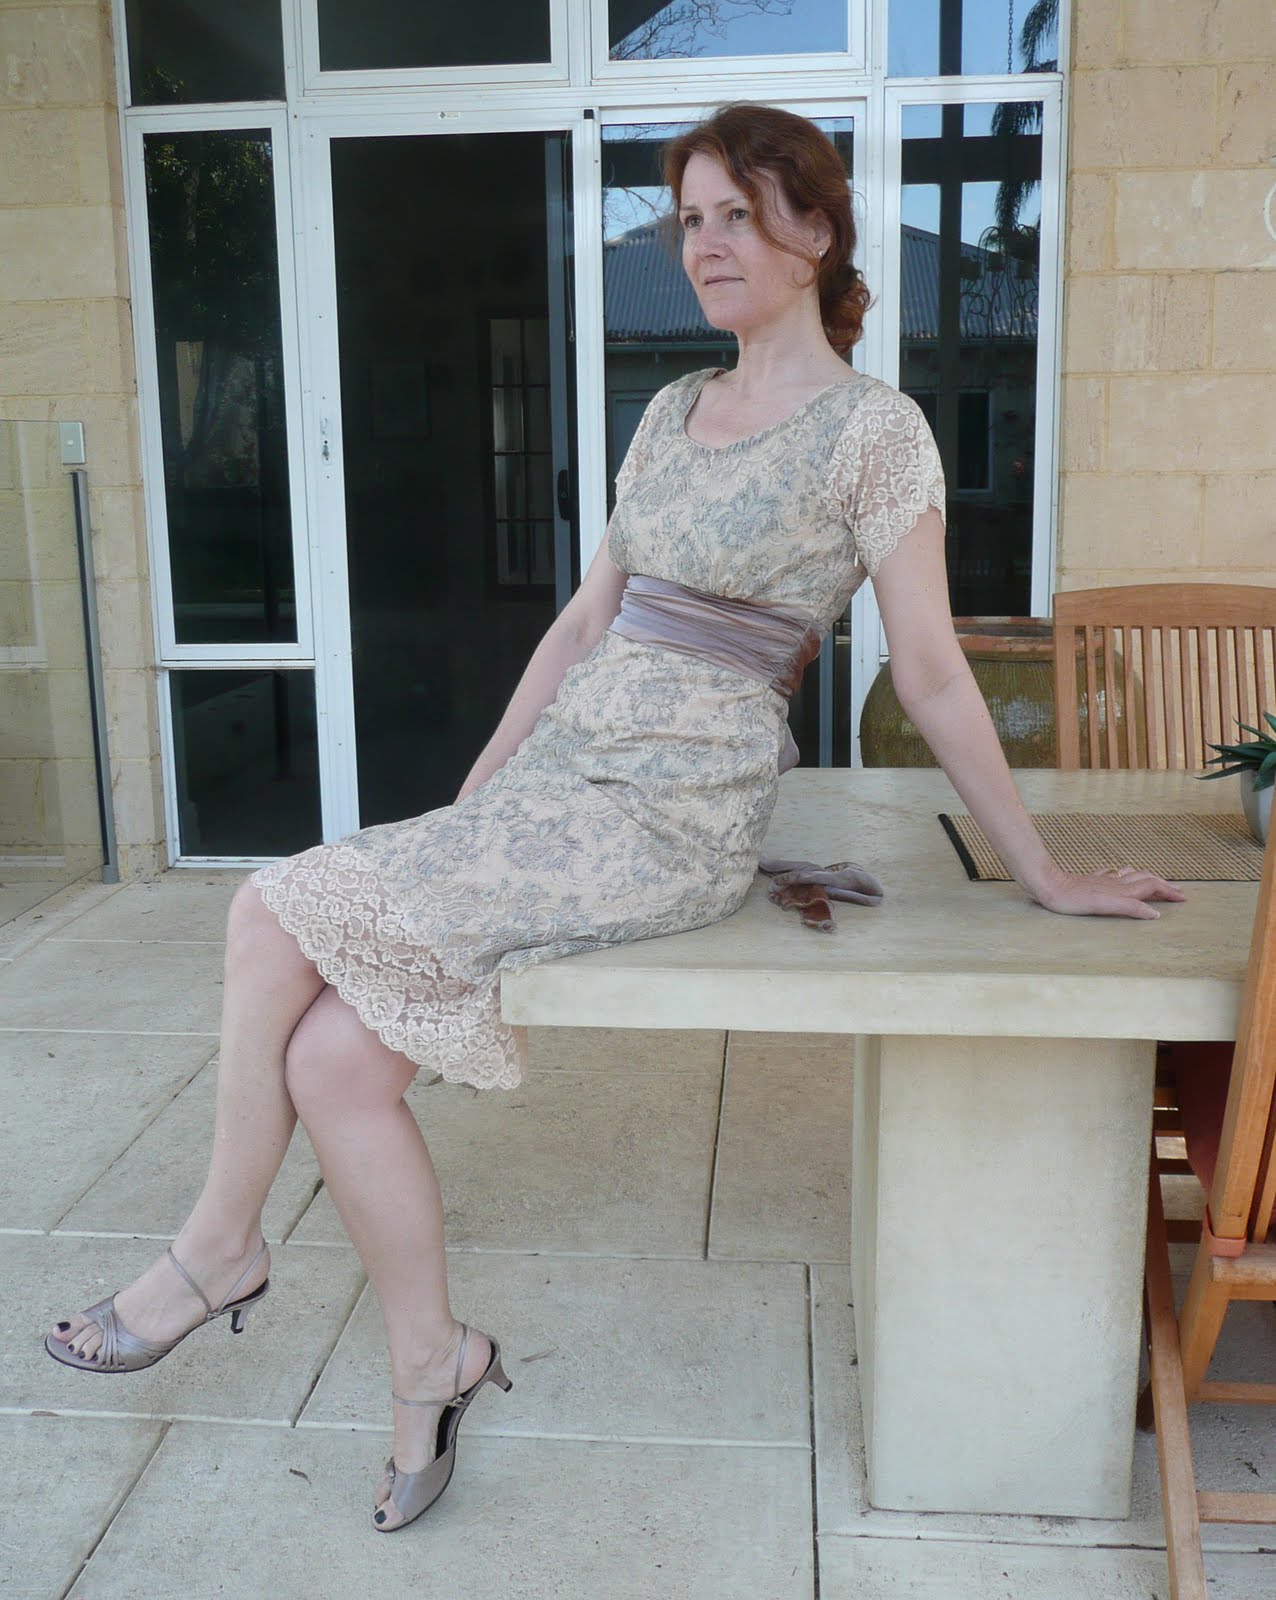
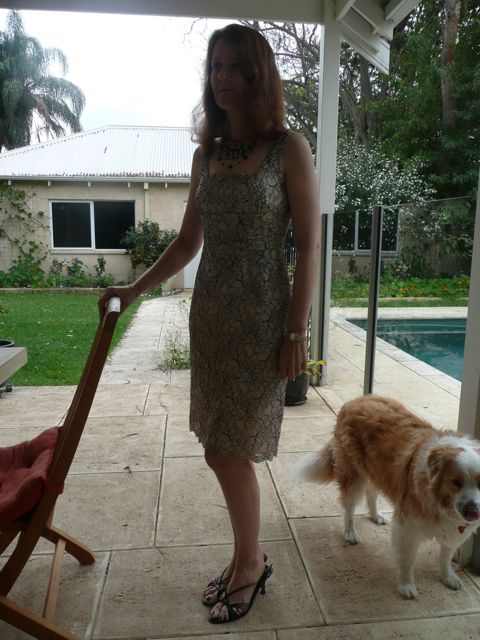
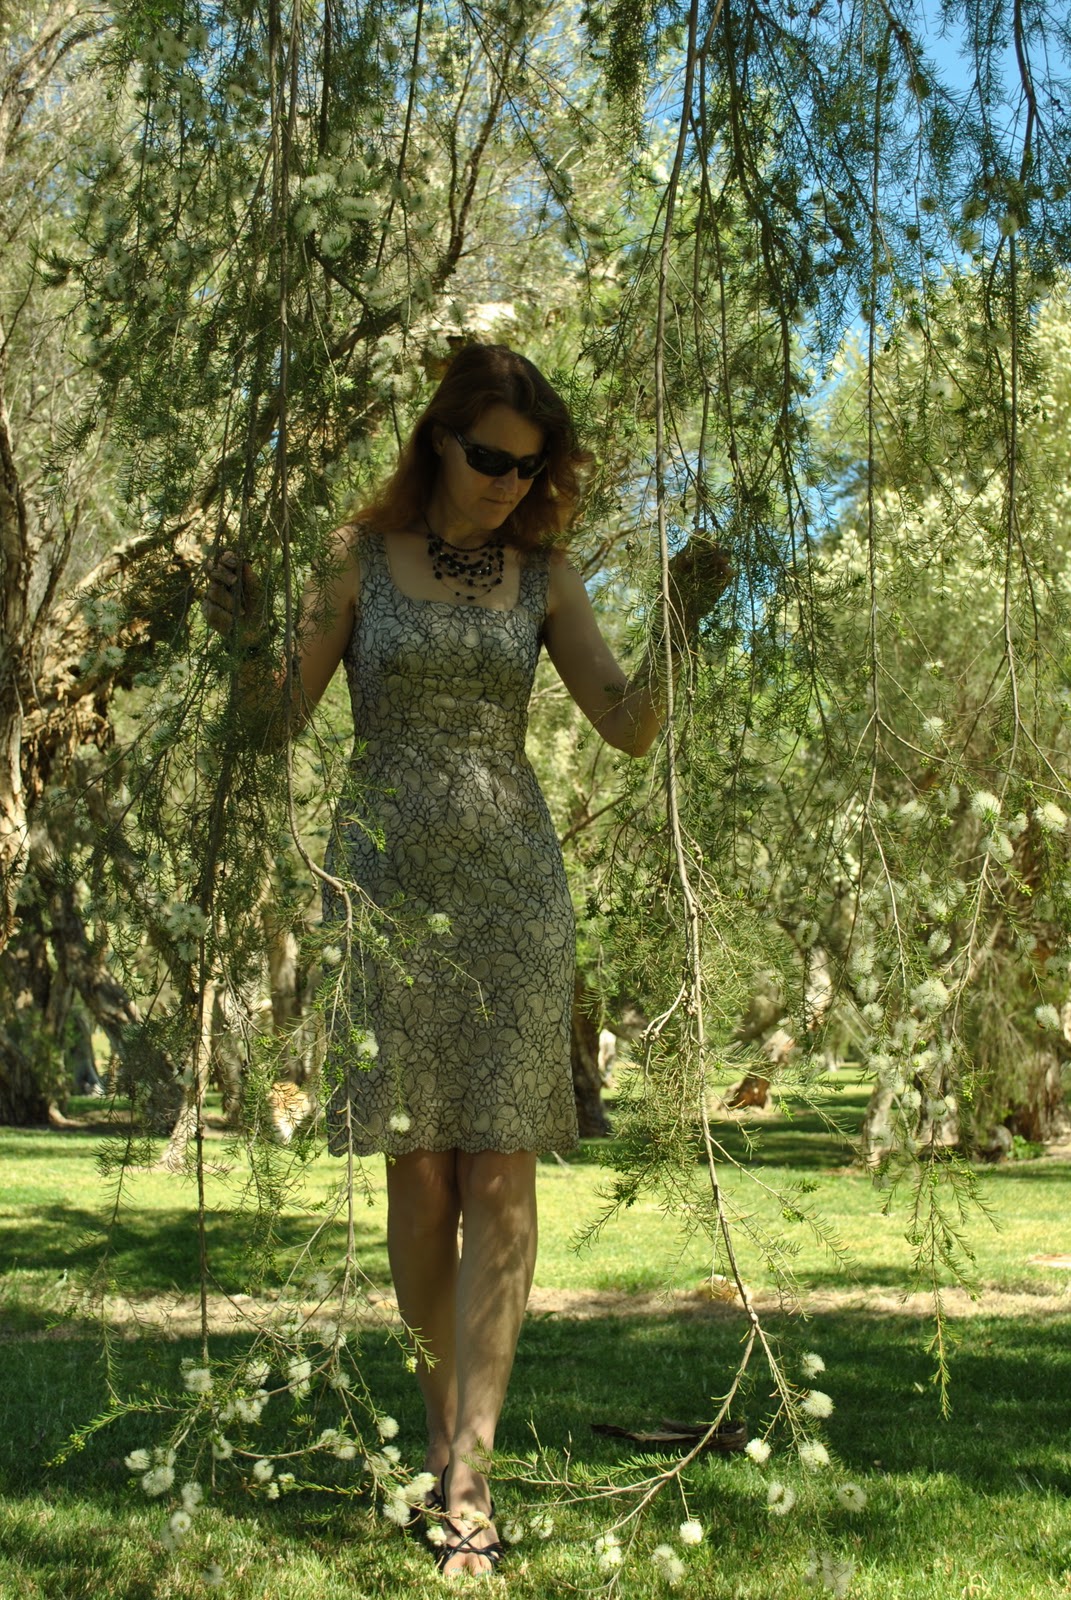
Take these two examples, two pictures of the same dress. Below is one taken before I had grasped that a contrasting background would show up my dress better. Below that, I had started to twig that an attractive setting might make a difference. Which do you think is the better picture?
2. Natural light vs. Flash
A tricky one. I reckon natural light is far superior if you can get it. I haven’t yet taken a photo of myself with a flash in which I didn’t look terribly ill; on death’s door even. Or at least ten years older than I am… so I nearly always “force flash off”. But I’ve heard that professional photographers can do wonderful things with a flash, and I really should take the time to work out what those things are….
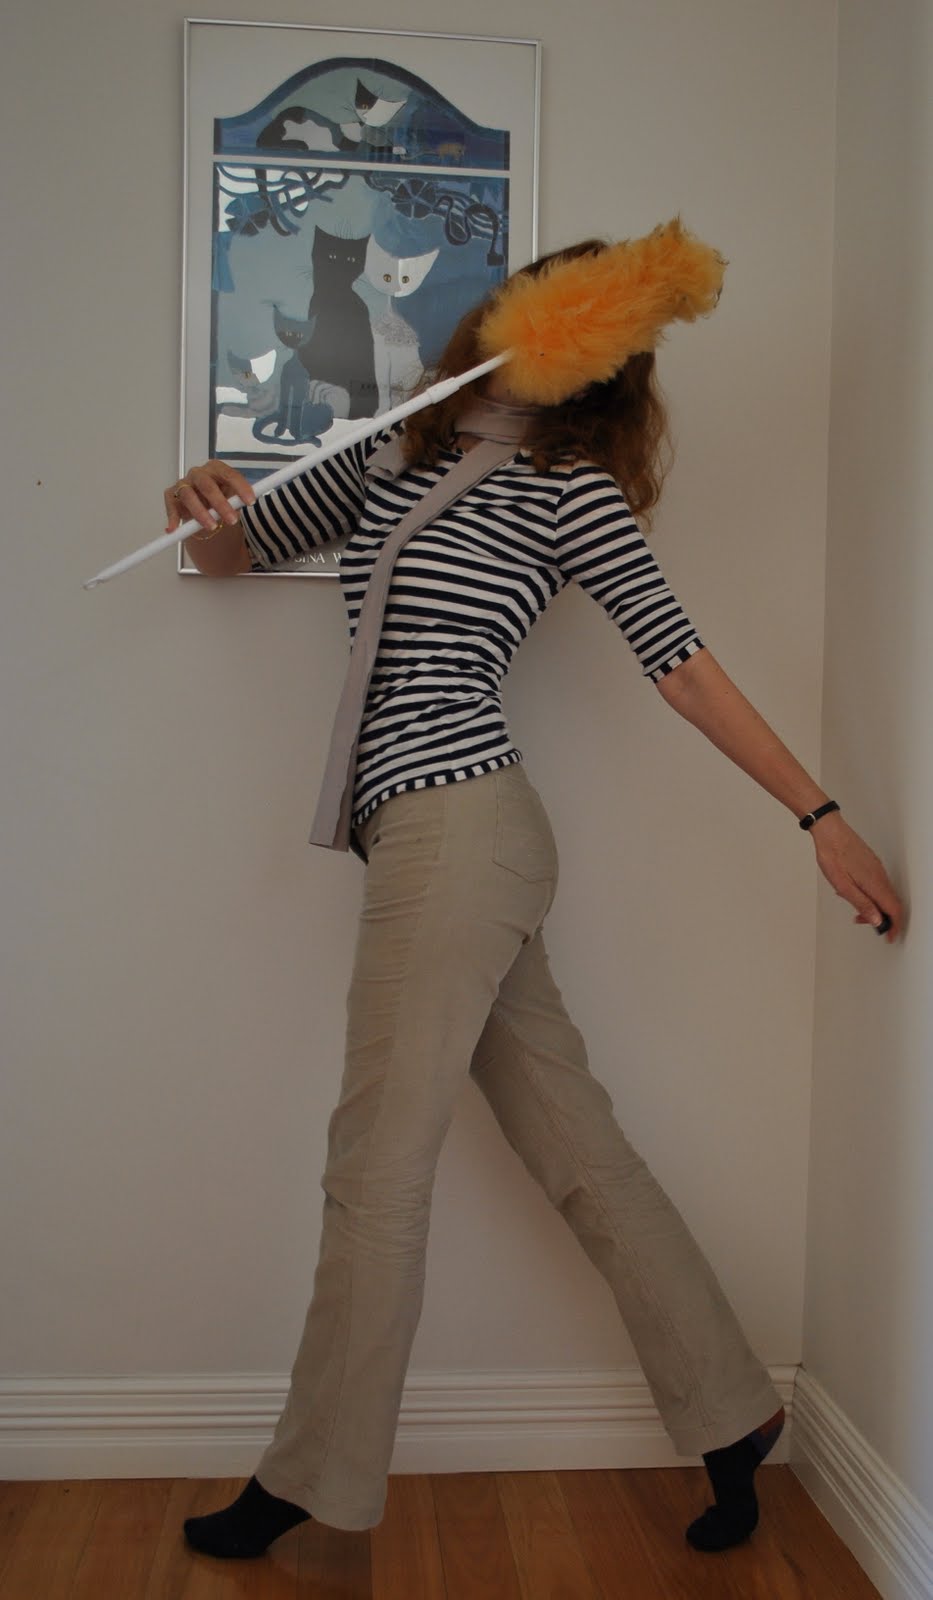
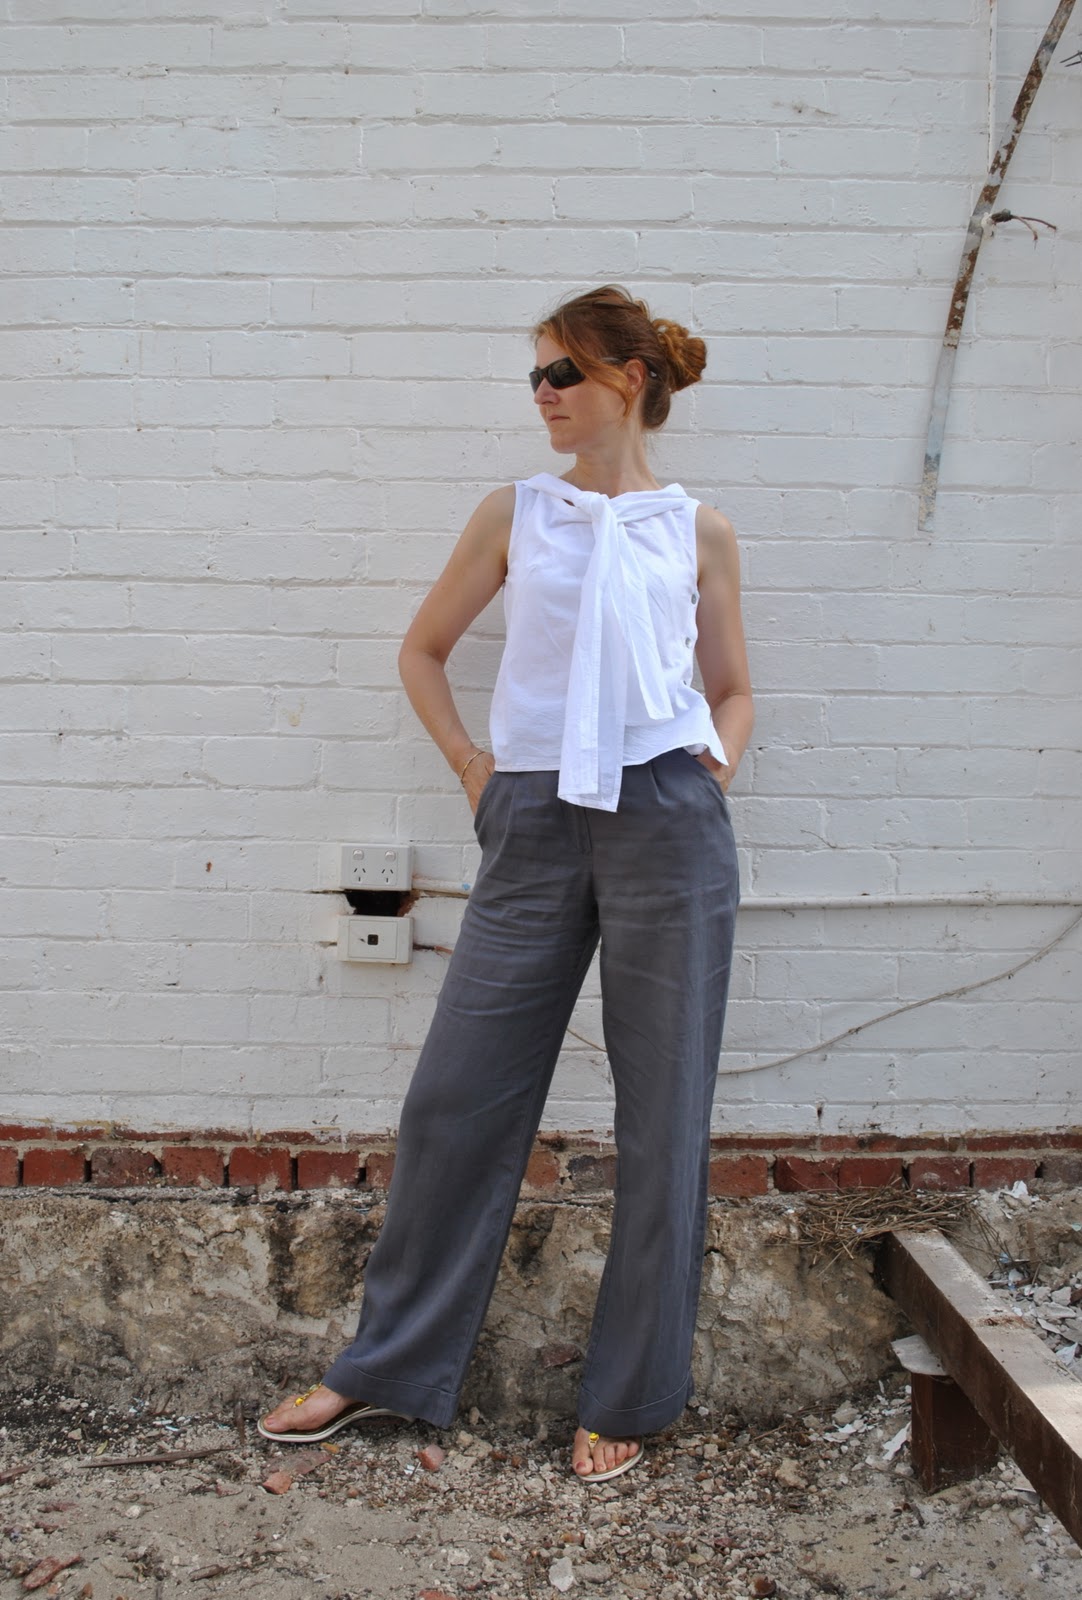
In the meantime, take these two examples, below is a photo taken at nighttime, with a flash. Horrible, no? Below that, the same trousers in the daylight and sans flash. Which do you think is the better picture?

3. the Direction of your light
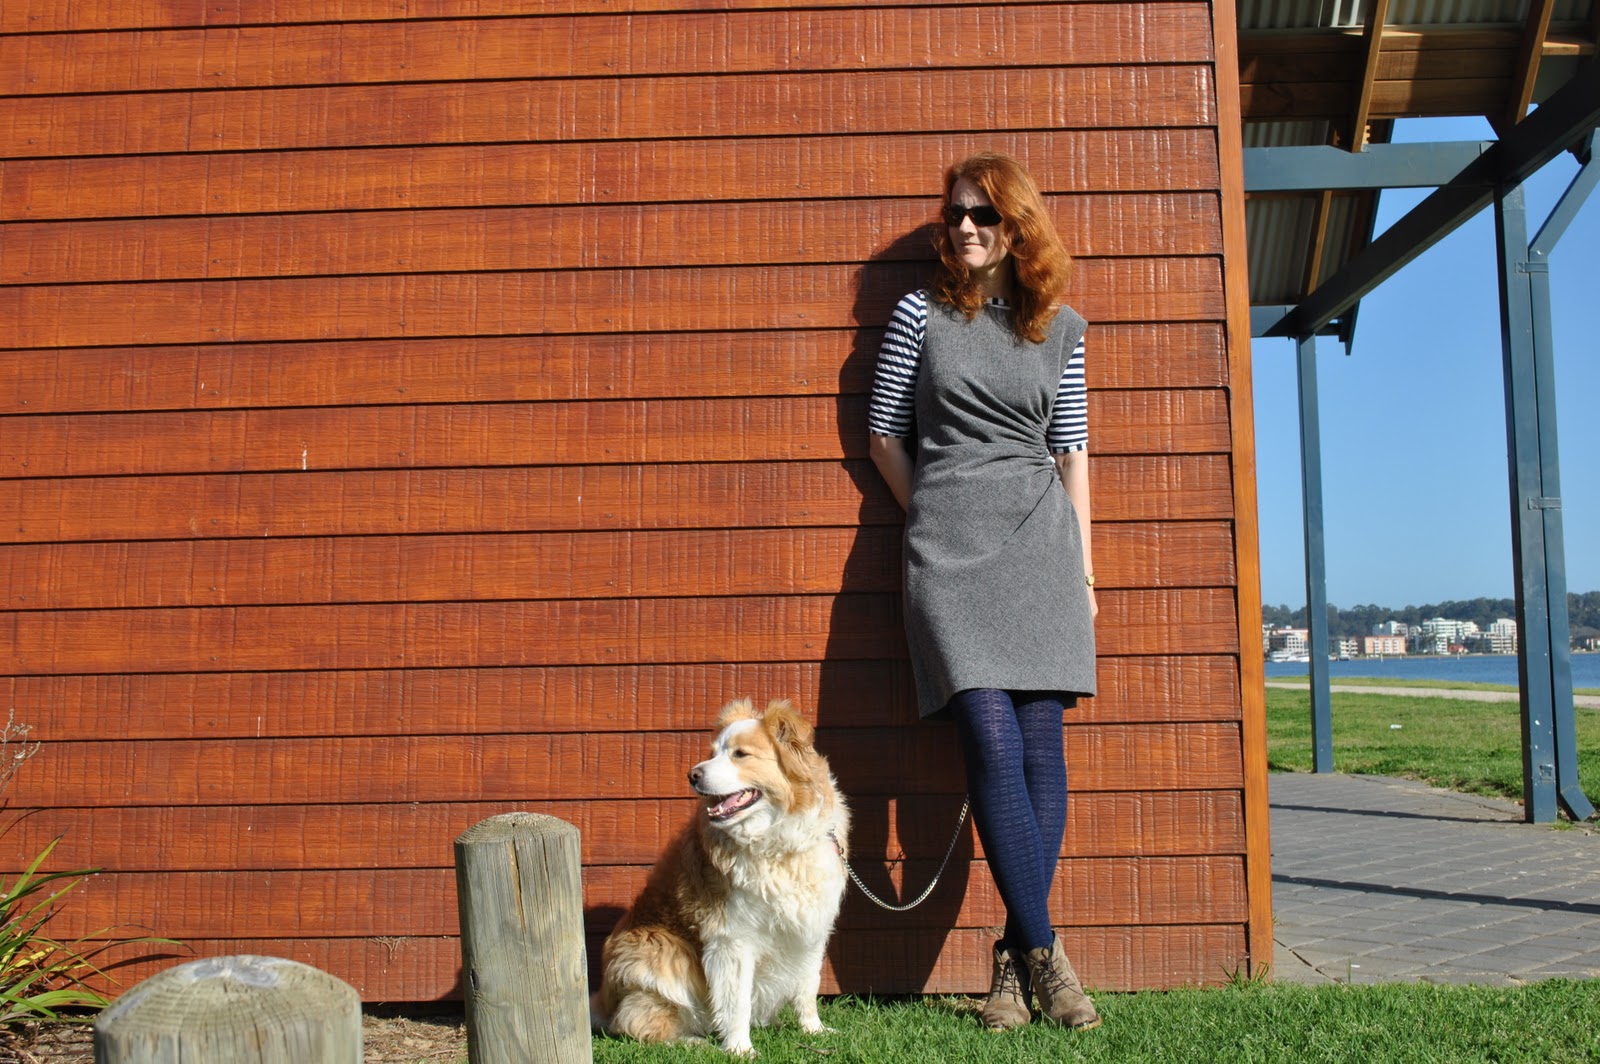
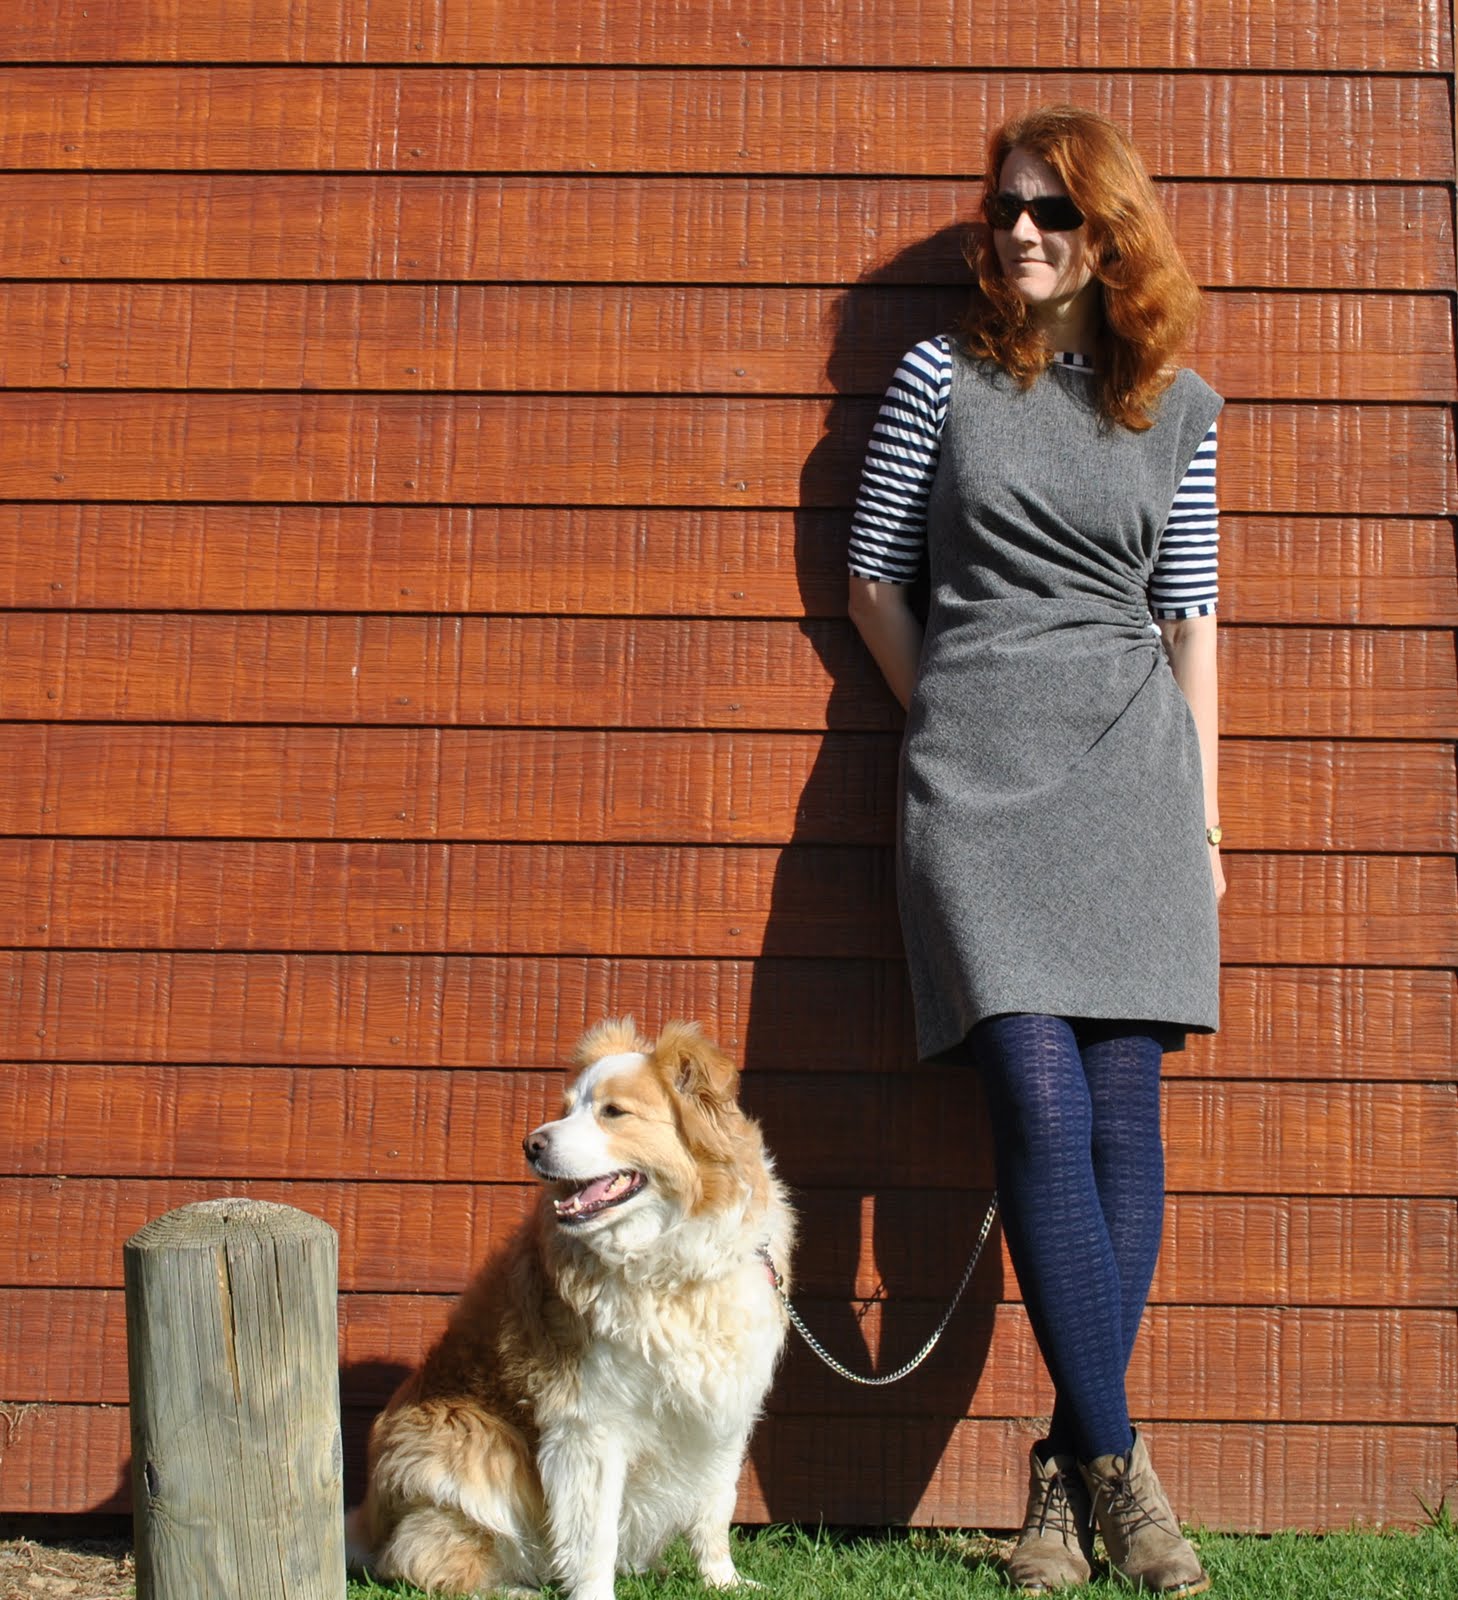
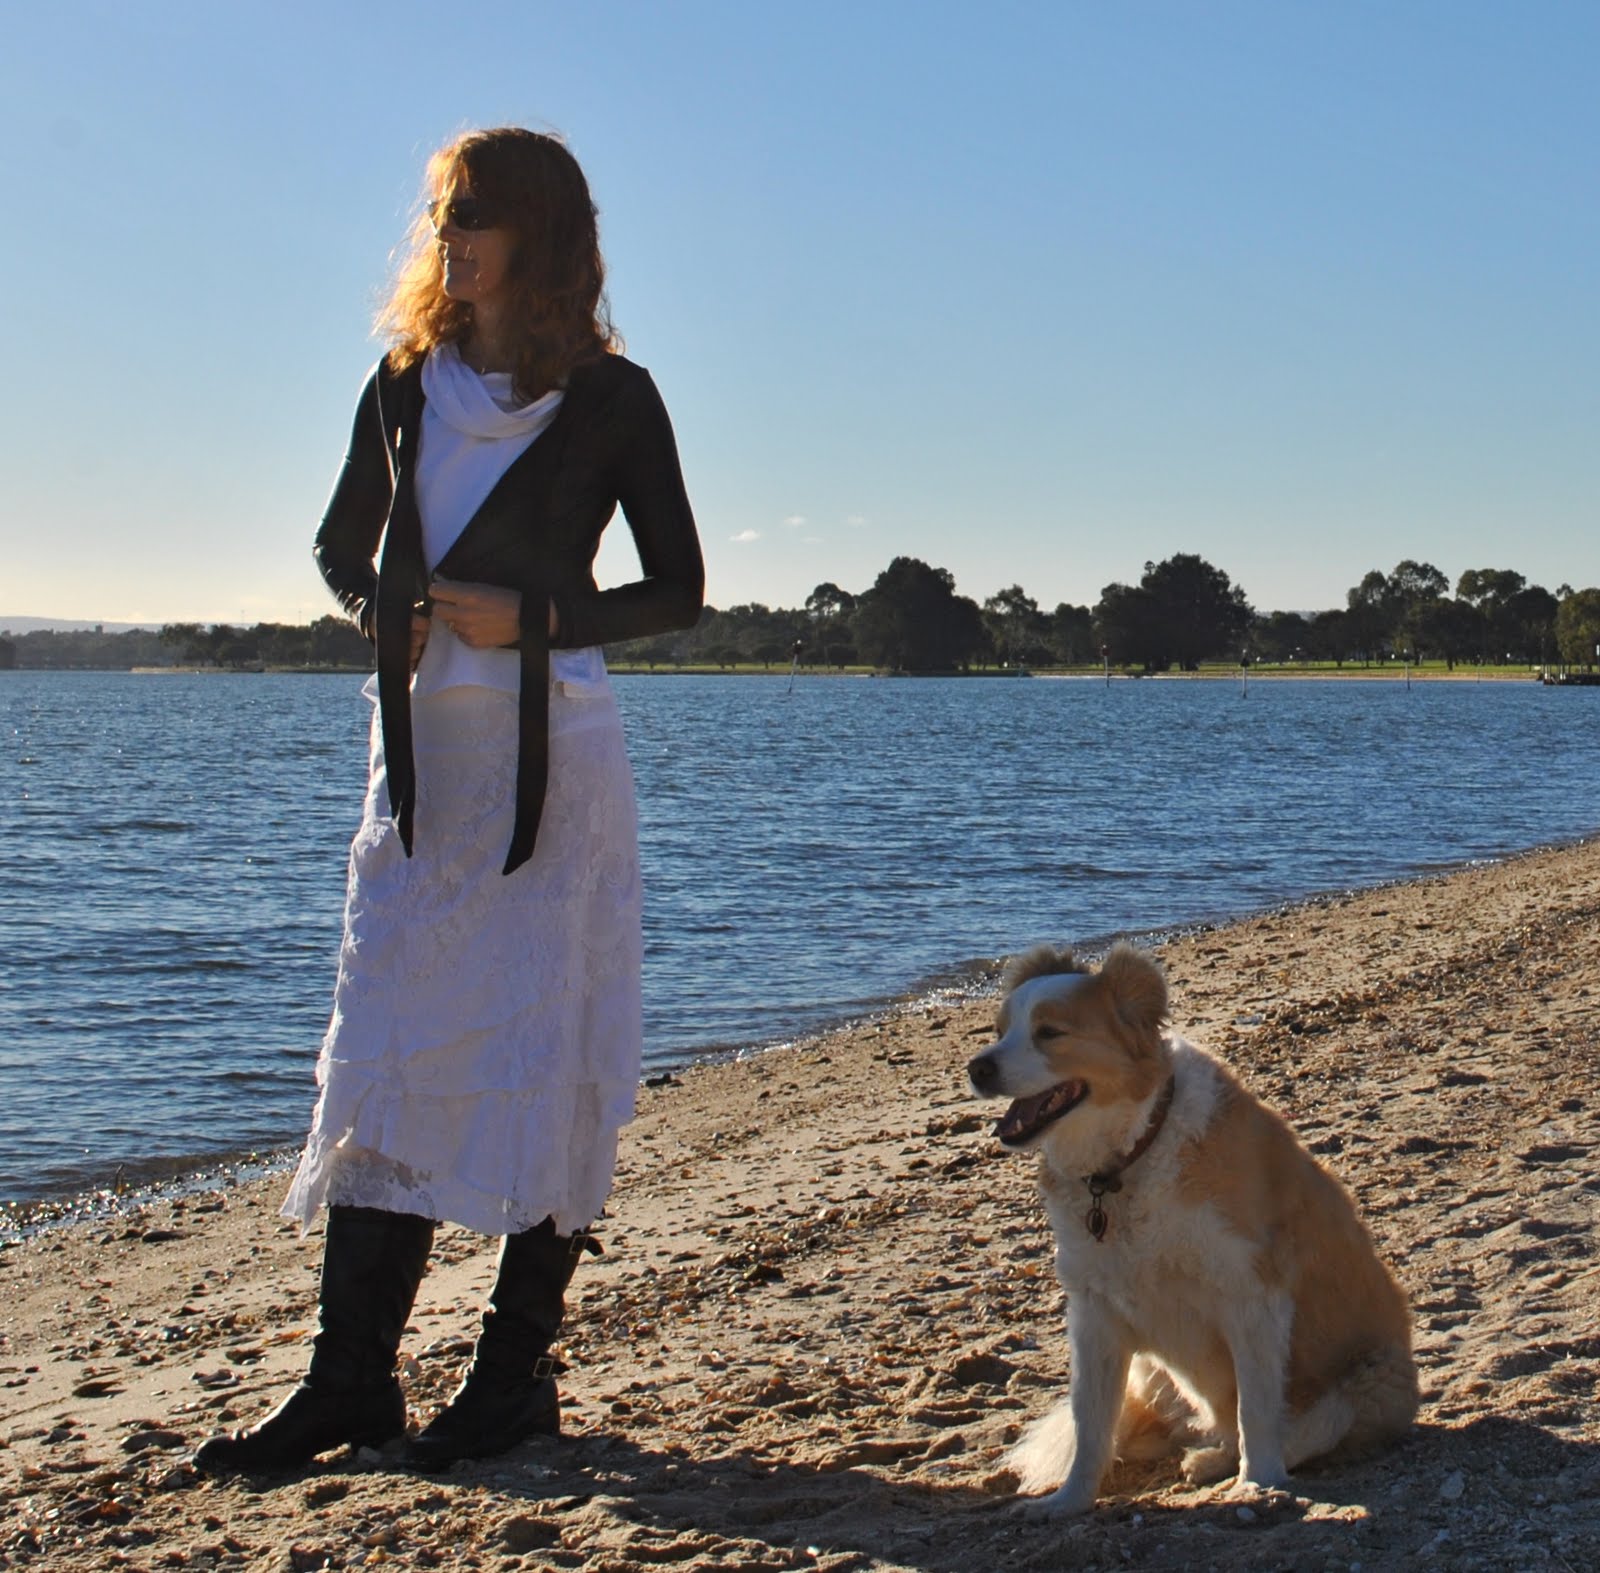
In general, shaded outdoor light is the best for giving naturalness to your clothes, and providing a true indication of colours, textures and details. And if the light source is behind you, you will just be a featureless silhouette in front of a bright beautiful background, and no one will be able to see any details of your creation at all. Take these two examples… below I took this photo without thinking enough about direction of the light. Below that is a similar outfit, taken in the shade. In which can you see the details of the outfit better?
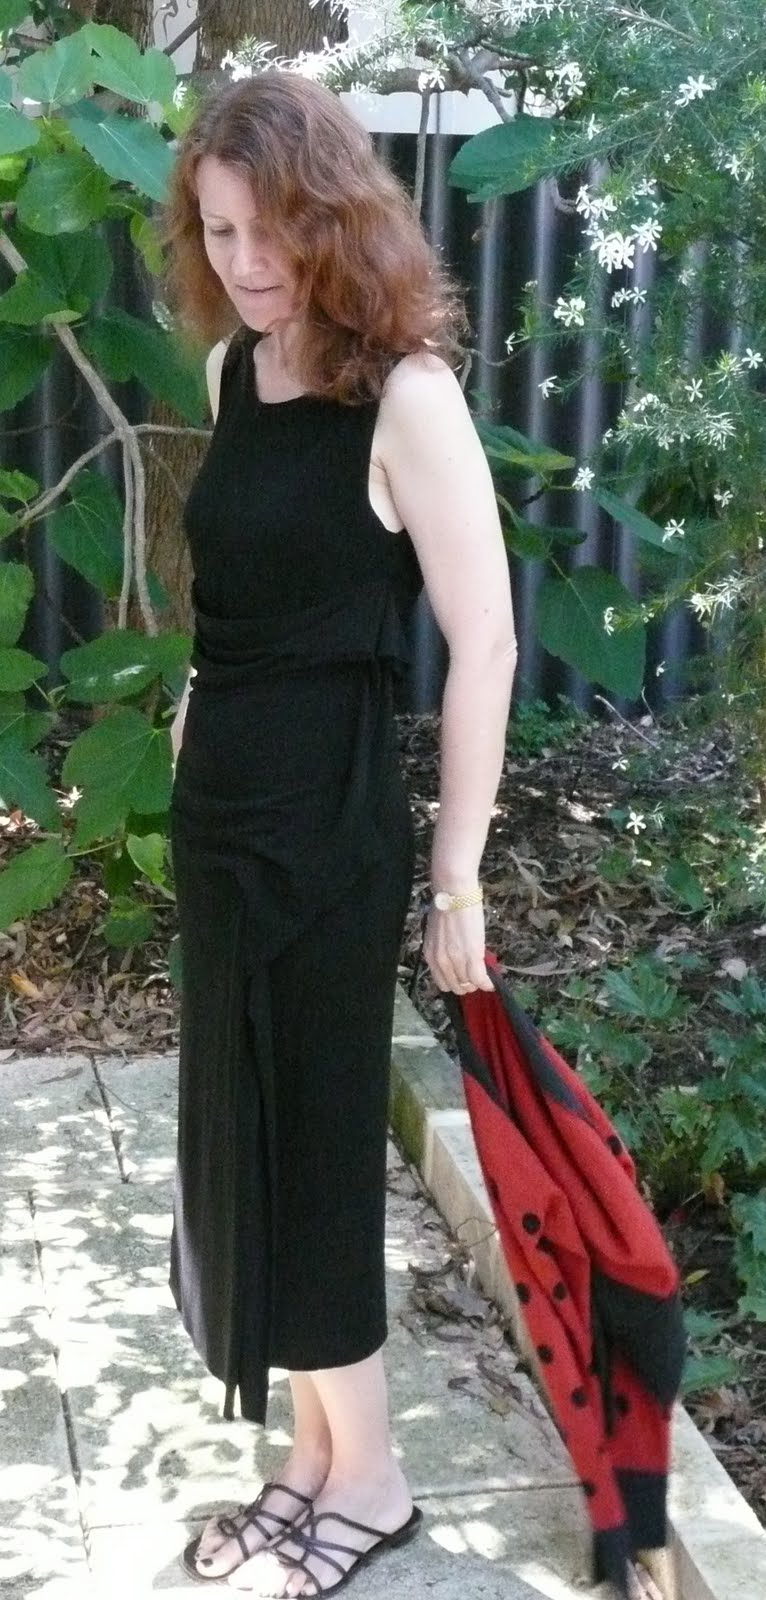
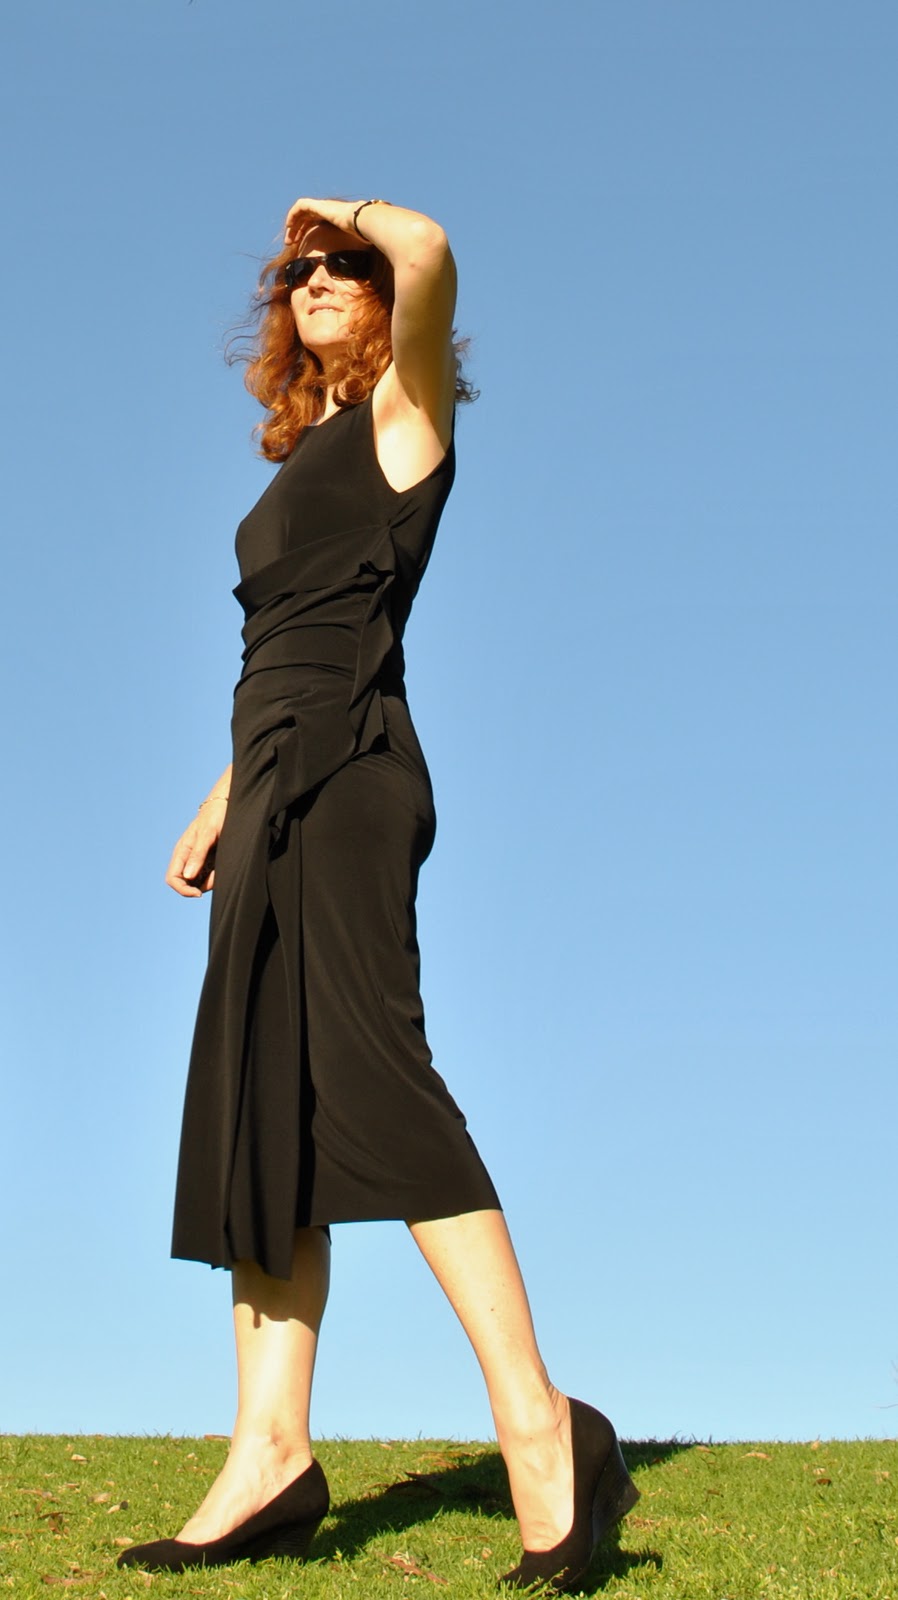
4. Black
Black is “special”. Generally speaking (without access to a studio set-up), bright or strong light is necessary to show any details at all of a black ensemble… Take these two examples, two pictures of the same dress. On the left is one taken when I thought that shaded natural light was the best option for all my photographs regardless of the colour of my garments, on the right is one taken when I had realised that black might be an exception to this rule. In which picture do the details of the dress stand out better?
5. Posing
I believe that a natural stance suits my personality. For me personally, the typical blogger’s stance with one hand on the hip and smiling straight into the lens, is not very natural and sorta too aggressive for my own style. I did this a few times in my early days of blogging and now those photos make me cringe, because in real life I am quite shy and that sort of stance is not me at all. Now I just aim to be as relaxed and hopefully the least dorky that I can. A big cheesy grin is just not very me, although I try to smile at least a little bit in some of my photos since my husband told me I am always looking too serious. Incidentally, my posture has improved outasight since I started taking photos of myself. I am not super tall, but I am certainly taller than most of my friends, and I think that was making me slouch. I could see that in my earlier photos and I’ve stamped that out. That is one area I can definitely say where blogging has really improved my life!
Take these two photos; below is early blogging days. A dreadful and cheesy pose, right? Below that, a similar outfit but I think my posing and my posture has improved enormously and is a lot more natural.
6. Perspective
well, again a biggie. I’ve found that the most flattering angle for a photo is when the camera is situated quite low, say at low hip height, and certainly no higher than waist height. The worst angle is if somebody taller than you is taking your photo, from their full height, and one ends up looking munchkin-like up into the camera… with a big head and tiny weeny little feet down below. This isn’t because you actually have a big head and teensie weensy little feet, but is just how it looks from the perspective of the camera. Do yourself a favour (as Molly would say), and if a tall person is taking your photo get them to crouch down to squatting height. Or get yourself a tripod and open for yourself a whole new world no longer to subject to the whims of your family’s photo-taking willingness nor availability…
Take these two examples, two pictures of the same dress. On the left is a picture taken by my son at his full height in the days before I had worked out how to take my own photos, on the right is one I took myself with my camera on a tripod at hip height. Which has the better perspective? (the two photos of my black dress above have exactly the same issue!)
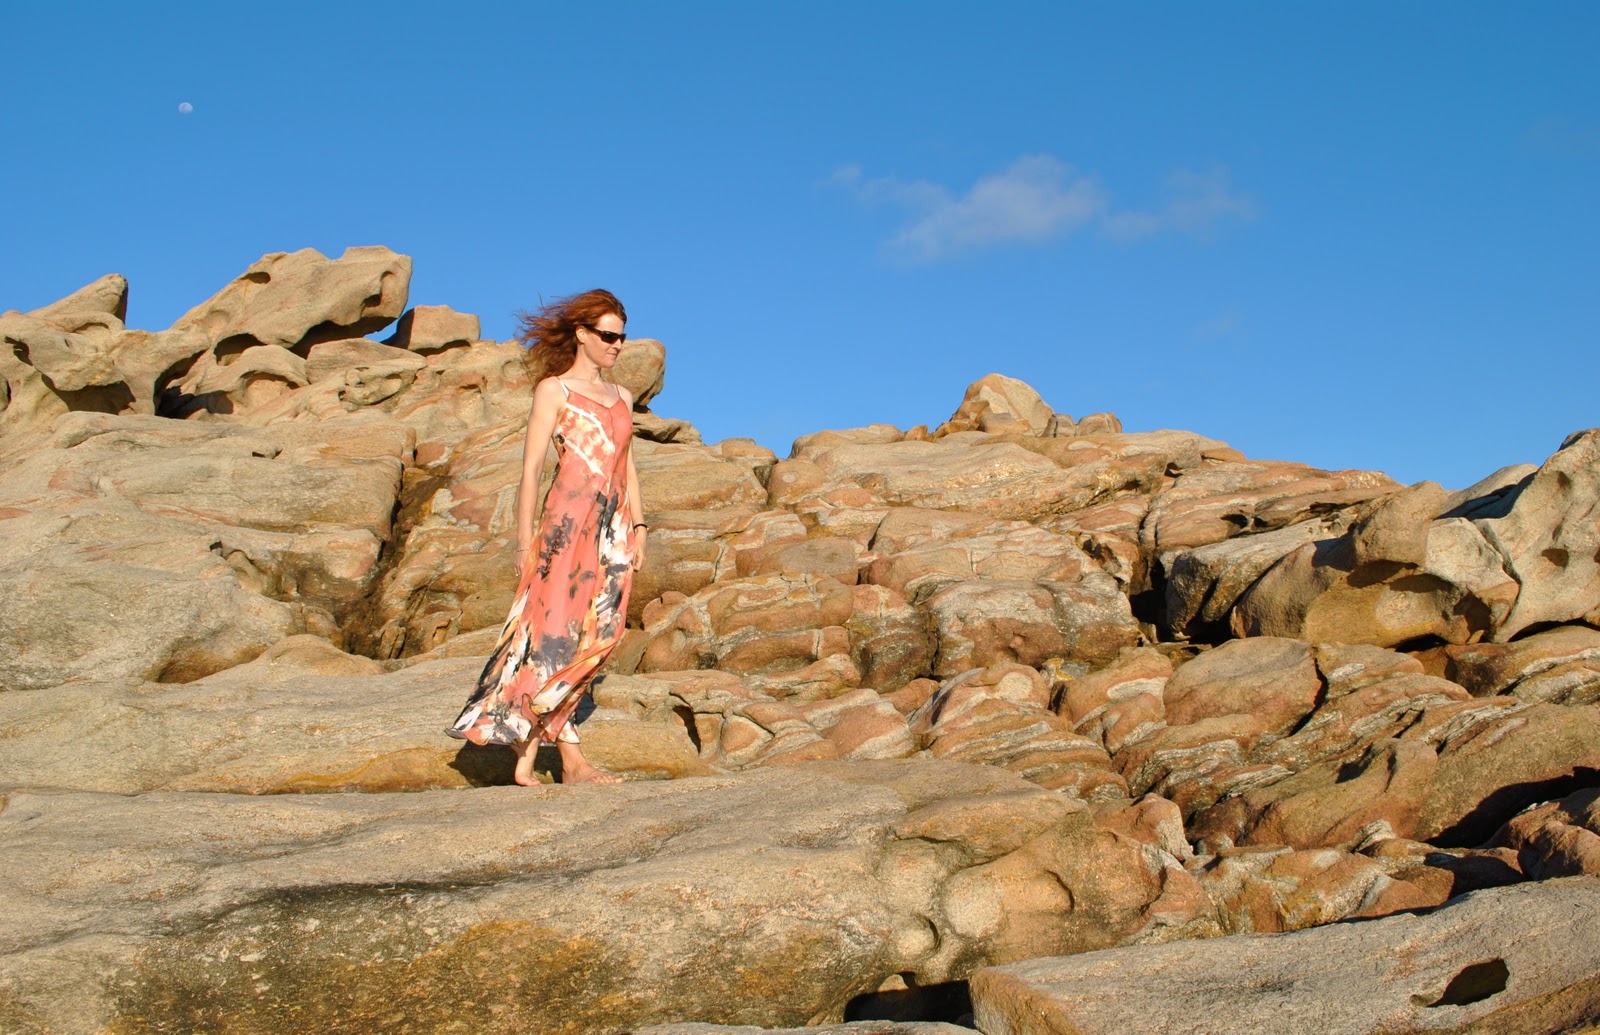
7. Crop
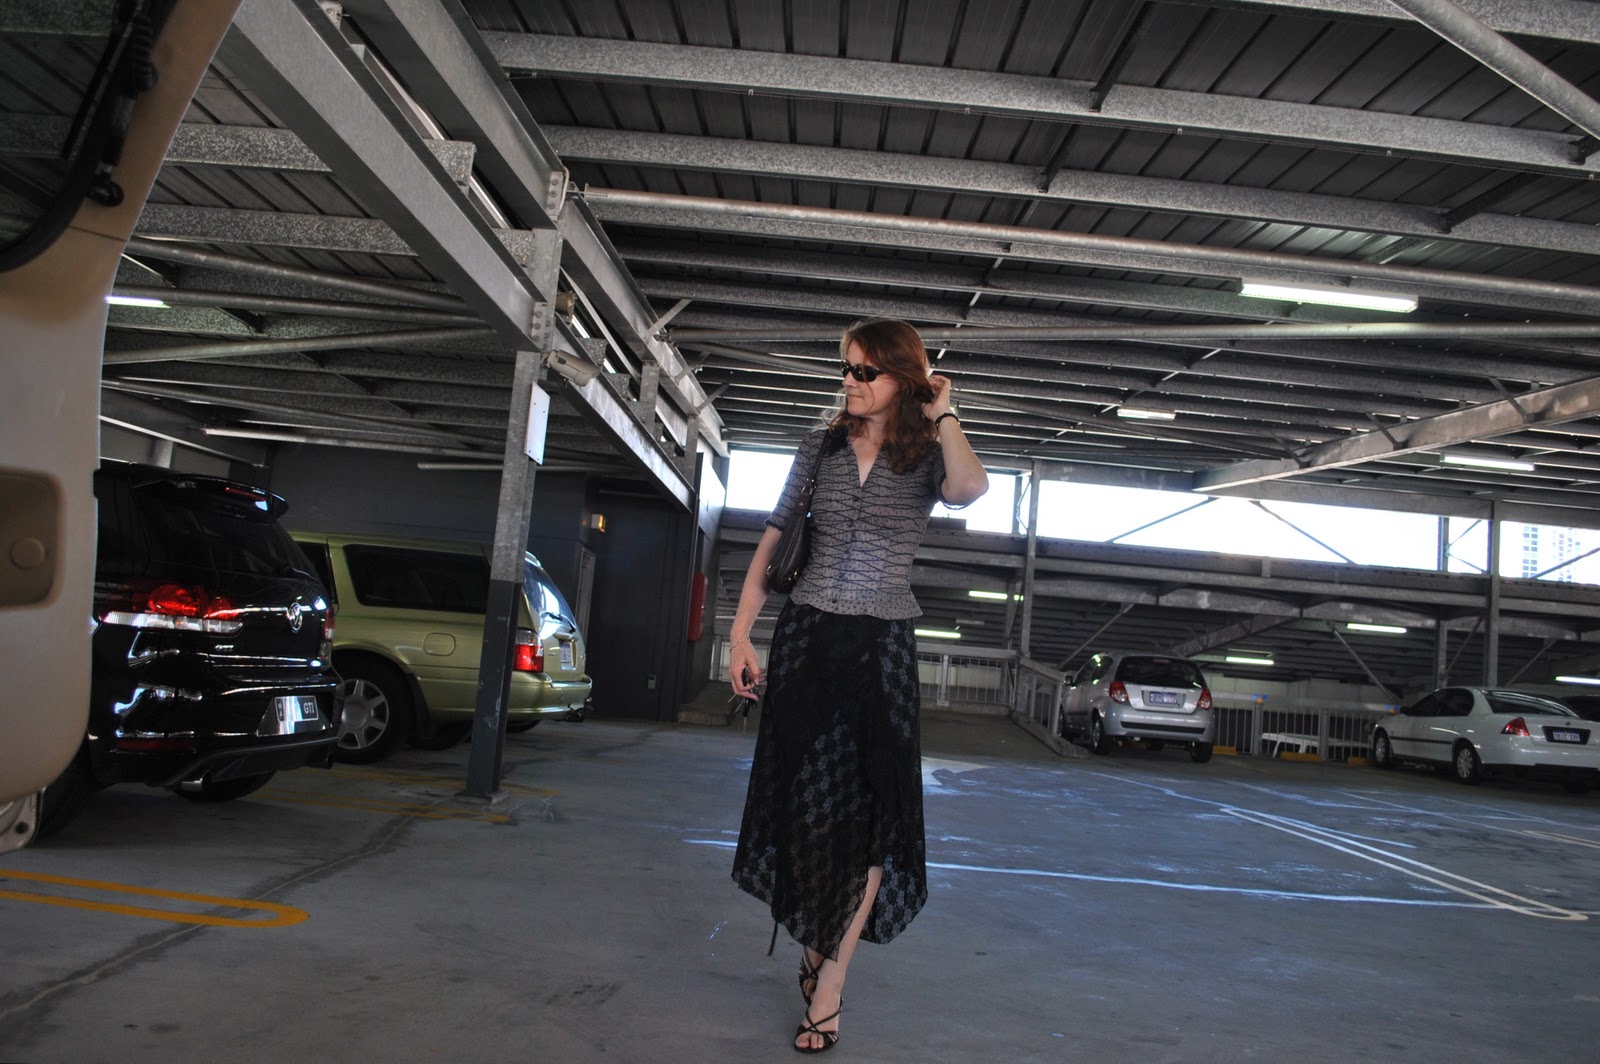
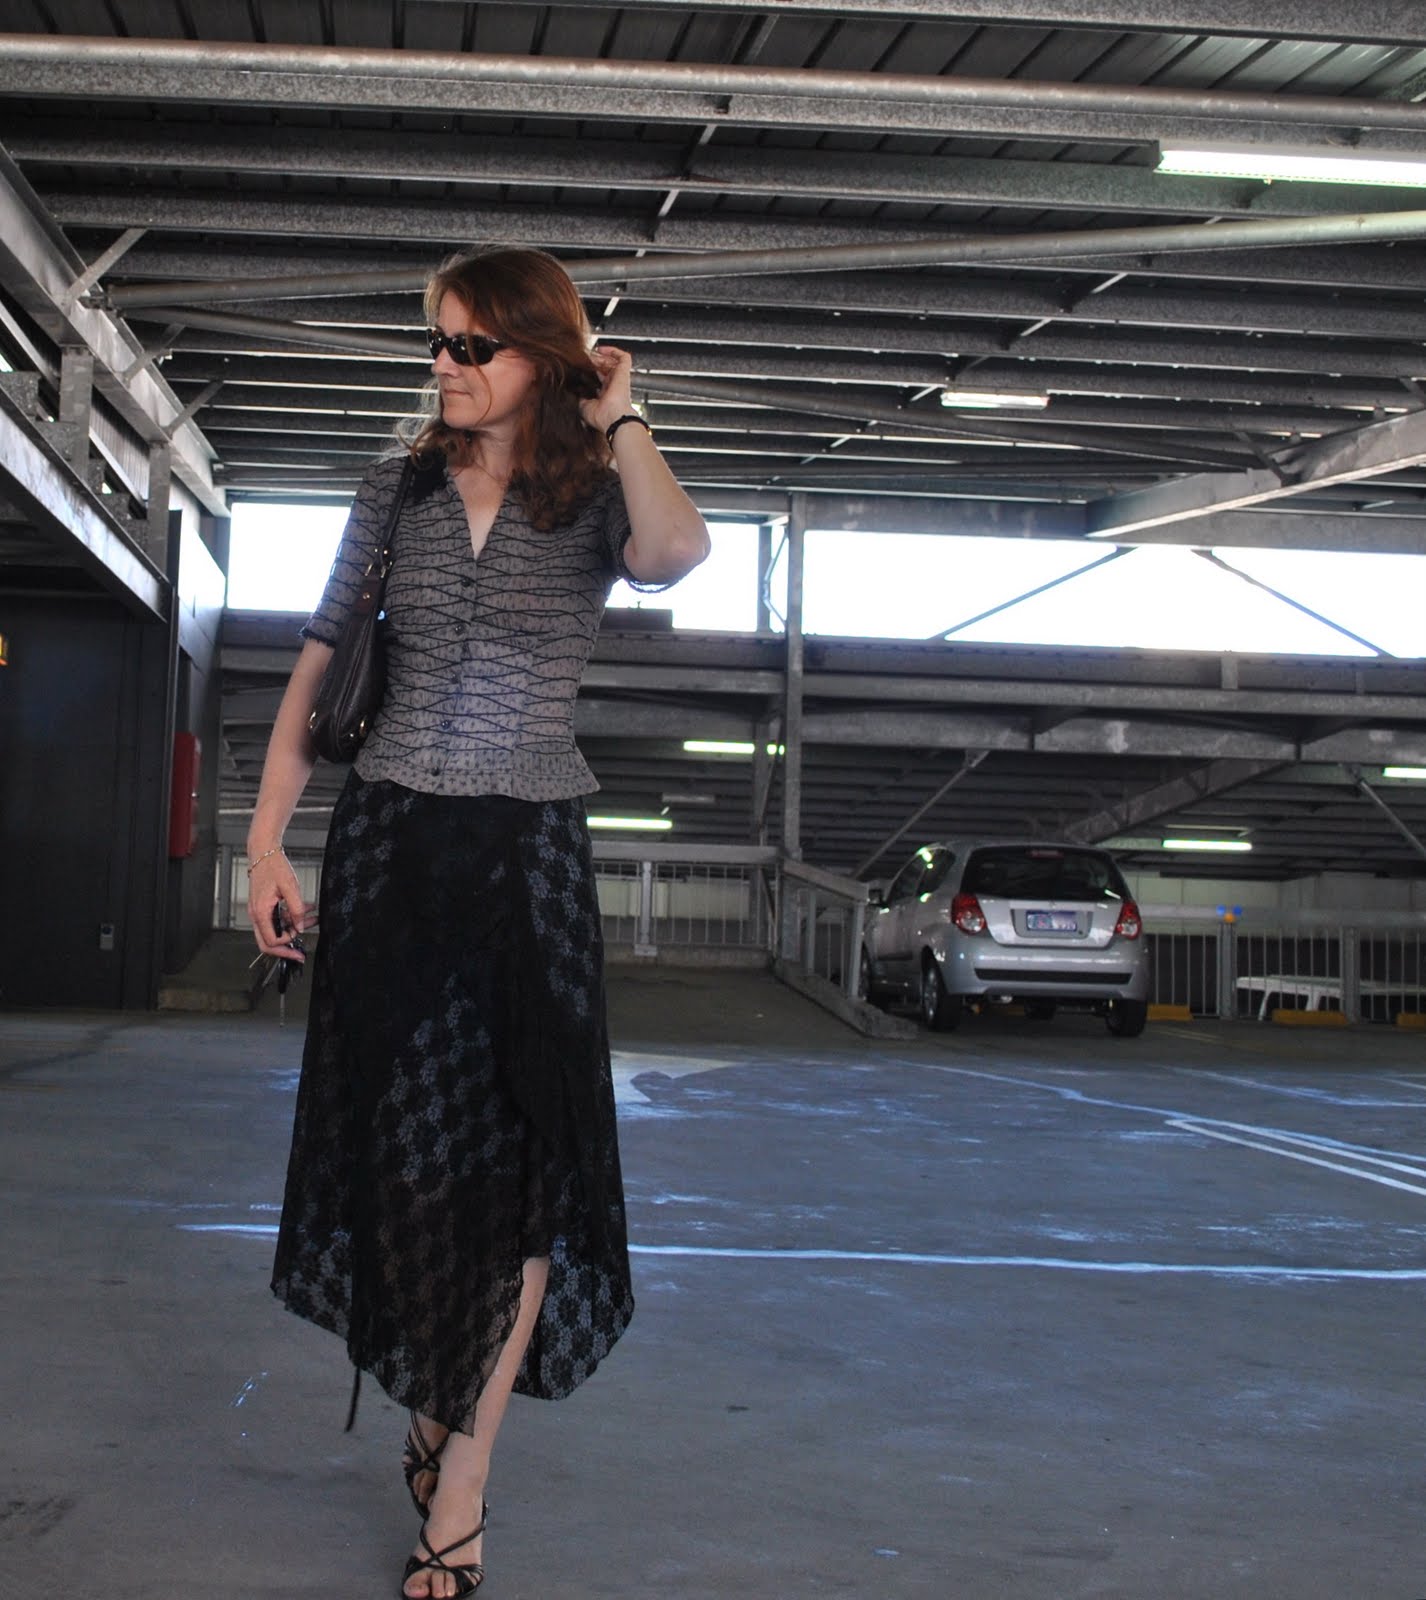
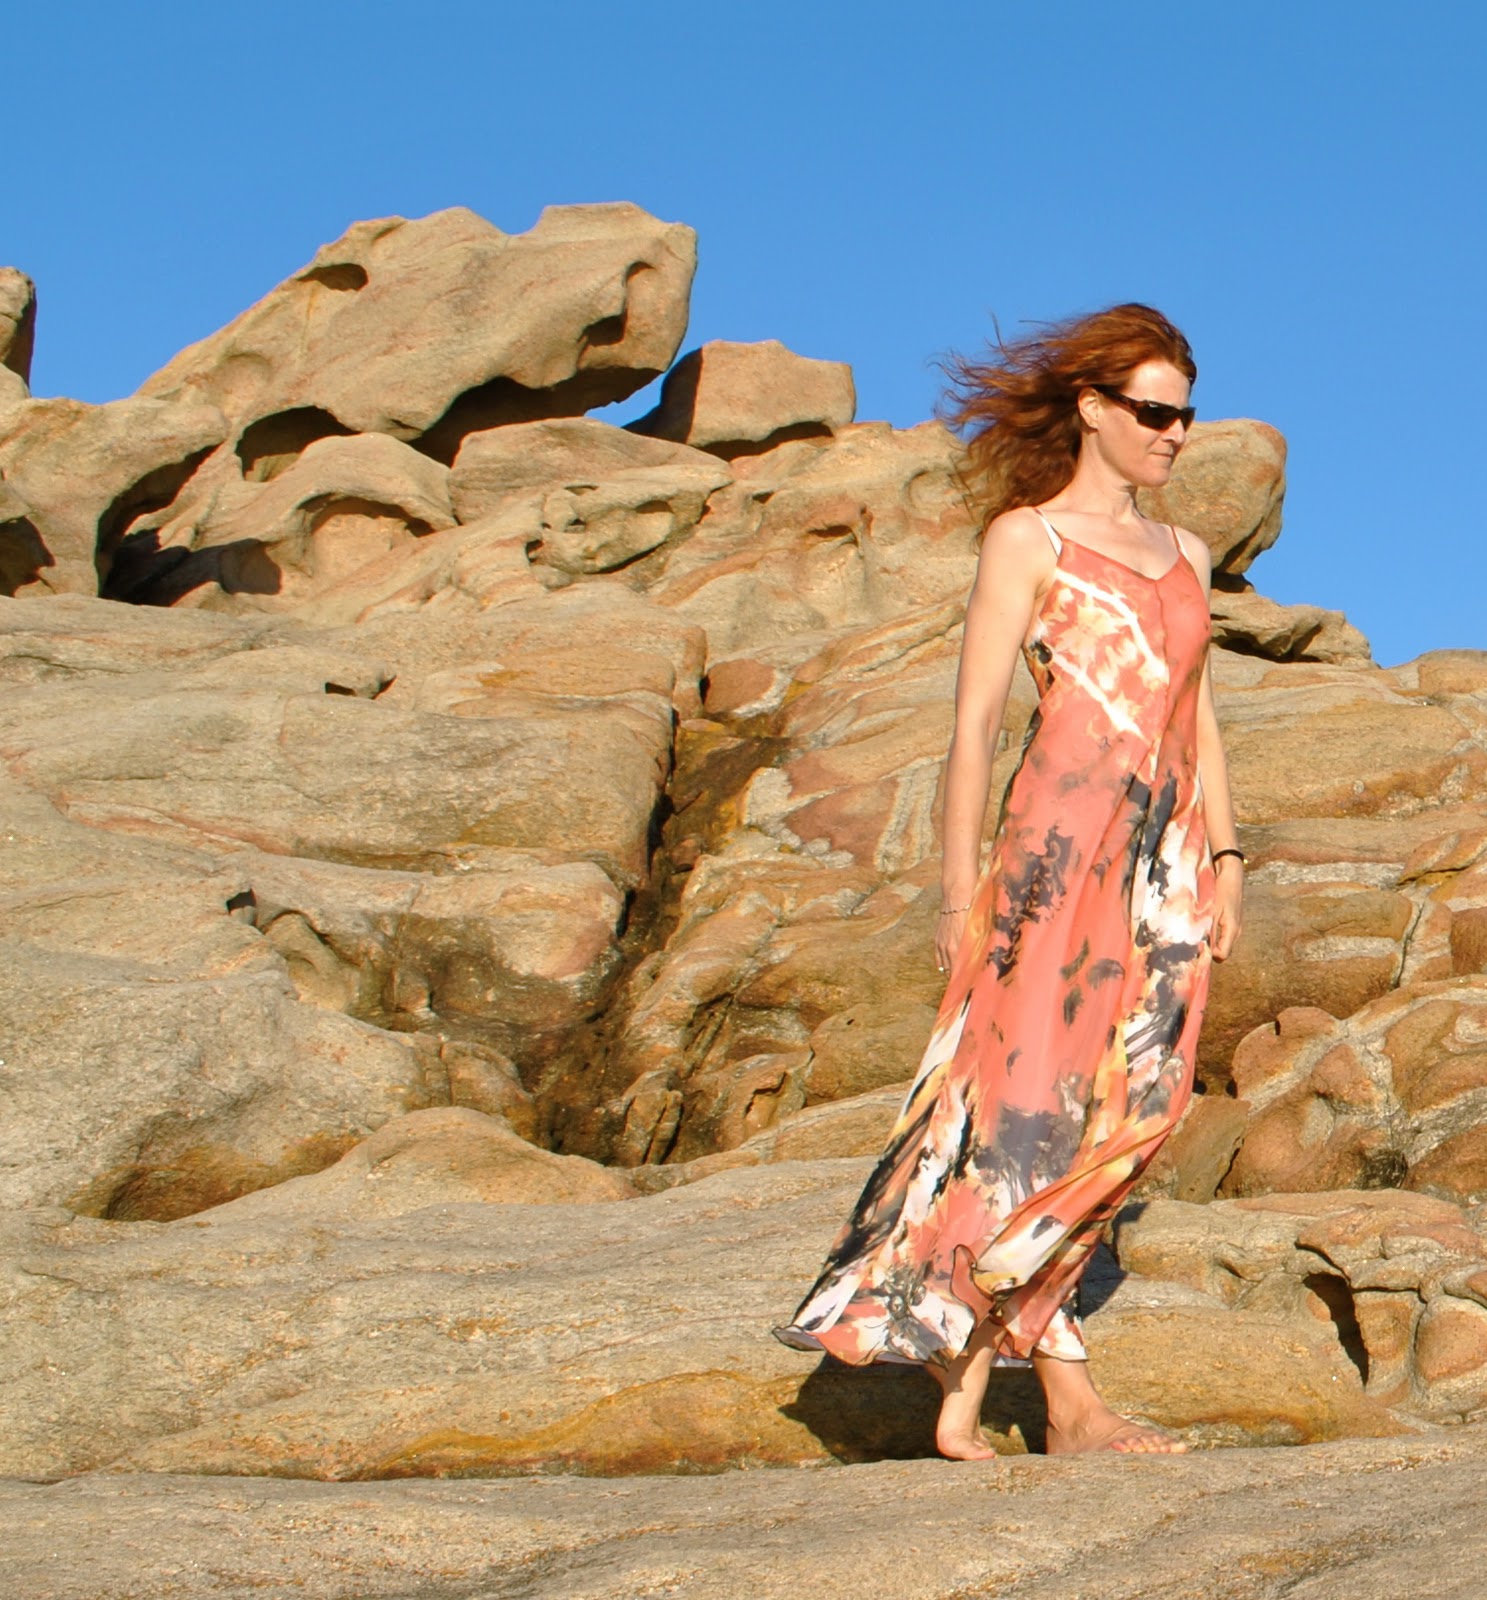
I usually zoom out as far as possible when taking my pictures, reasoning that I can always crop later if necessary. This is a better option to the alternative, ie taking a few pictures only to later see that your head has been chopped off. Take these two pictures, below is the unadulterated photo. Of course you can see only rock and sky (I agree, this might be preferable…), but the dress is a tiny no-detailed speck in the midst of rocks. Below that is the one I used in this blog. It is exactly the same photo but cropped to show off the details of the dress.
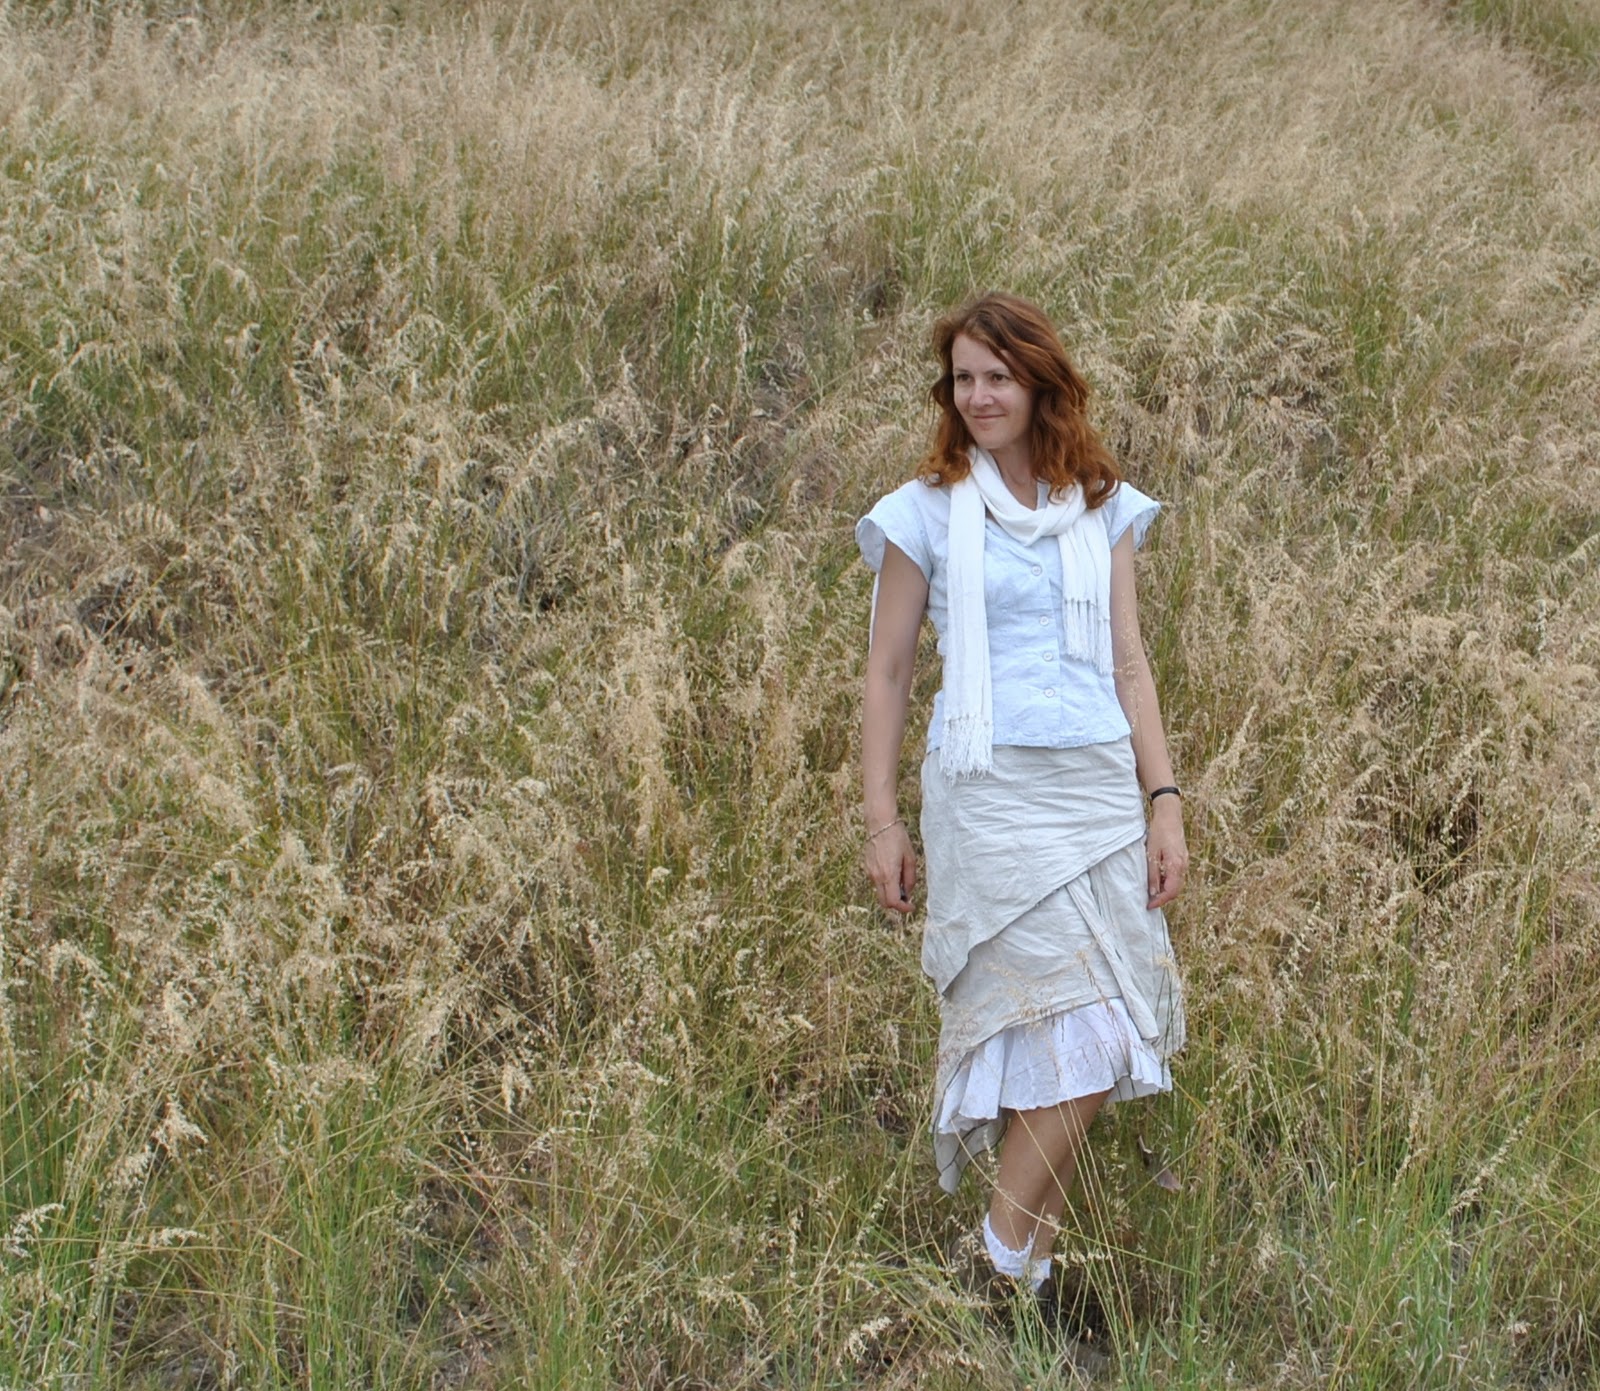
Don’t let the beauty of your background overwhelm you!
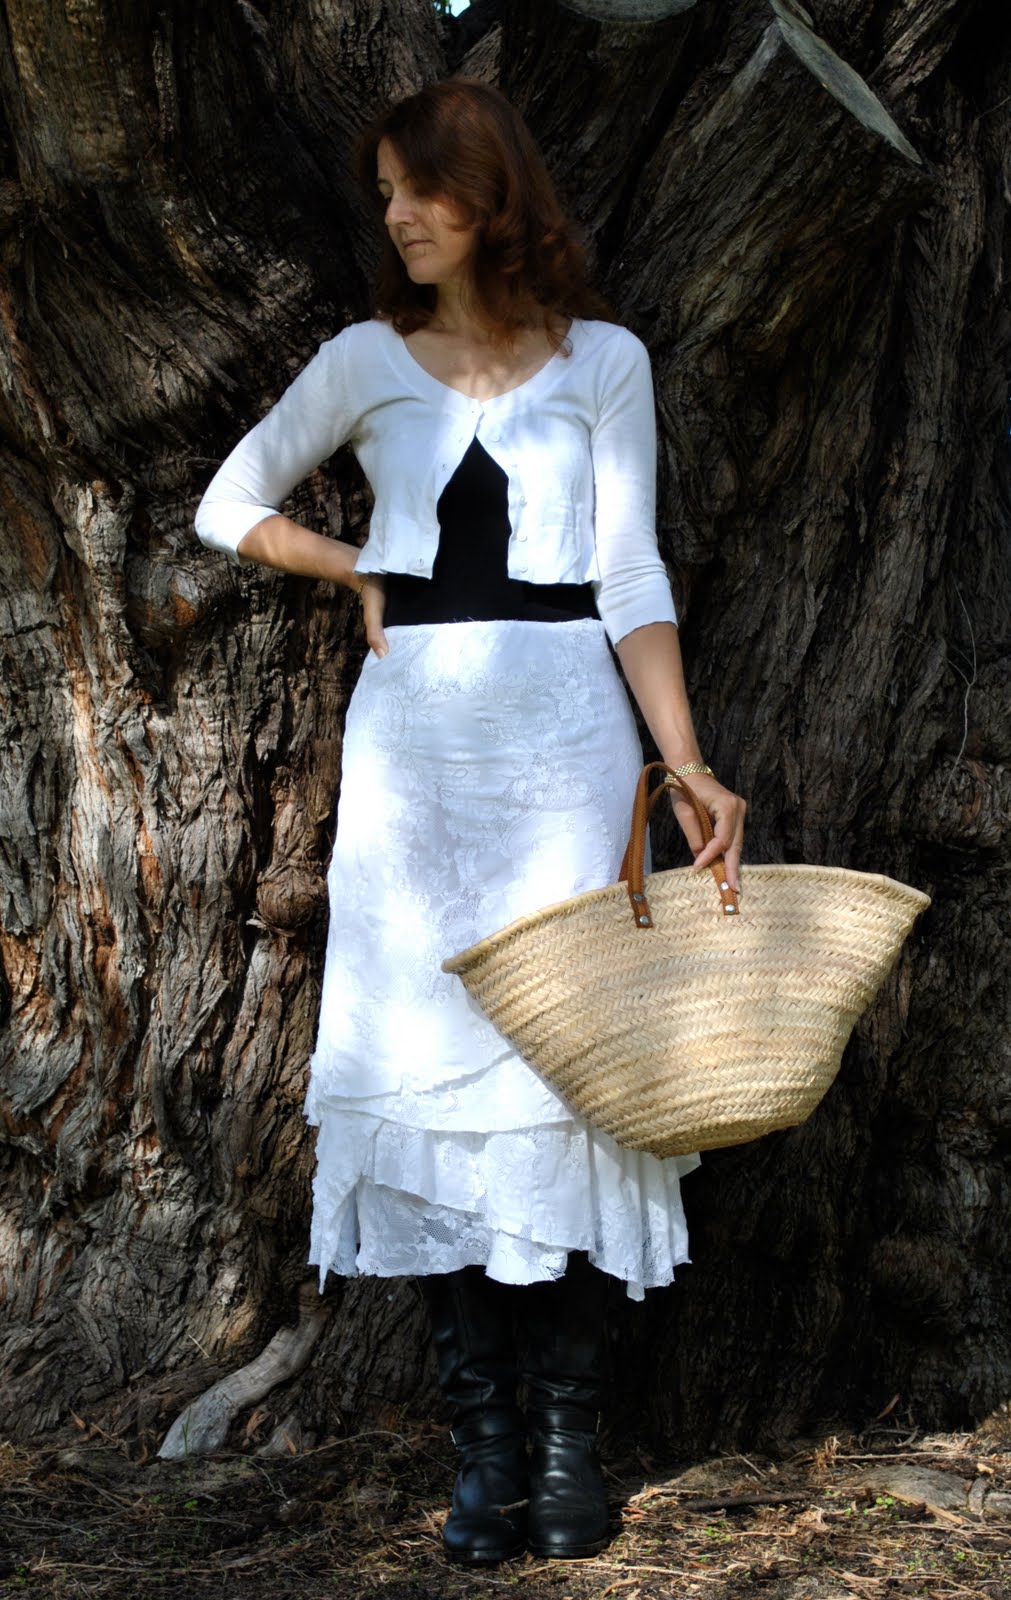
This is the biggest for me. Often I am so smitten by the beautiful locations I take my photos in I don’t want to crop anything out. But it is better to be ruthless since I am trying to show off the details of my creations and not just a lovely location… below is the uncropped photo. Then the cropped version; well, now you can actually see some details of the skirt!
Now, I am passing this award on to some other blogs that I like reading… your mission should you choose to accept it:
Ana, of Stepalica
Andrea, of Fabric Epiphanies
Caroline, of Church Sexy
Shannon, of Mushywear
Tanit-Isis, of Tanit-Isis Sews
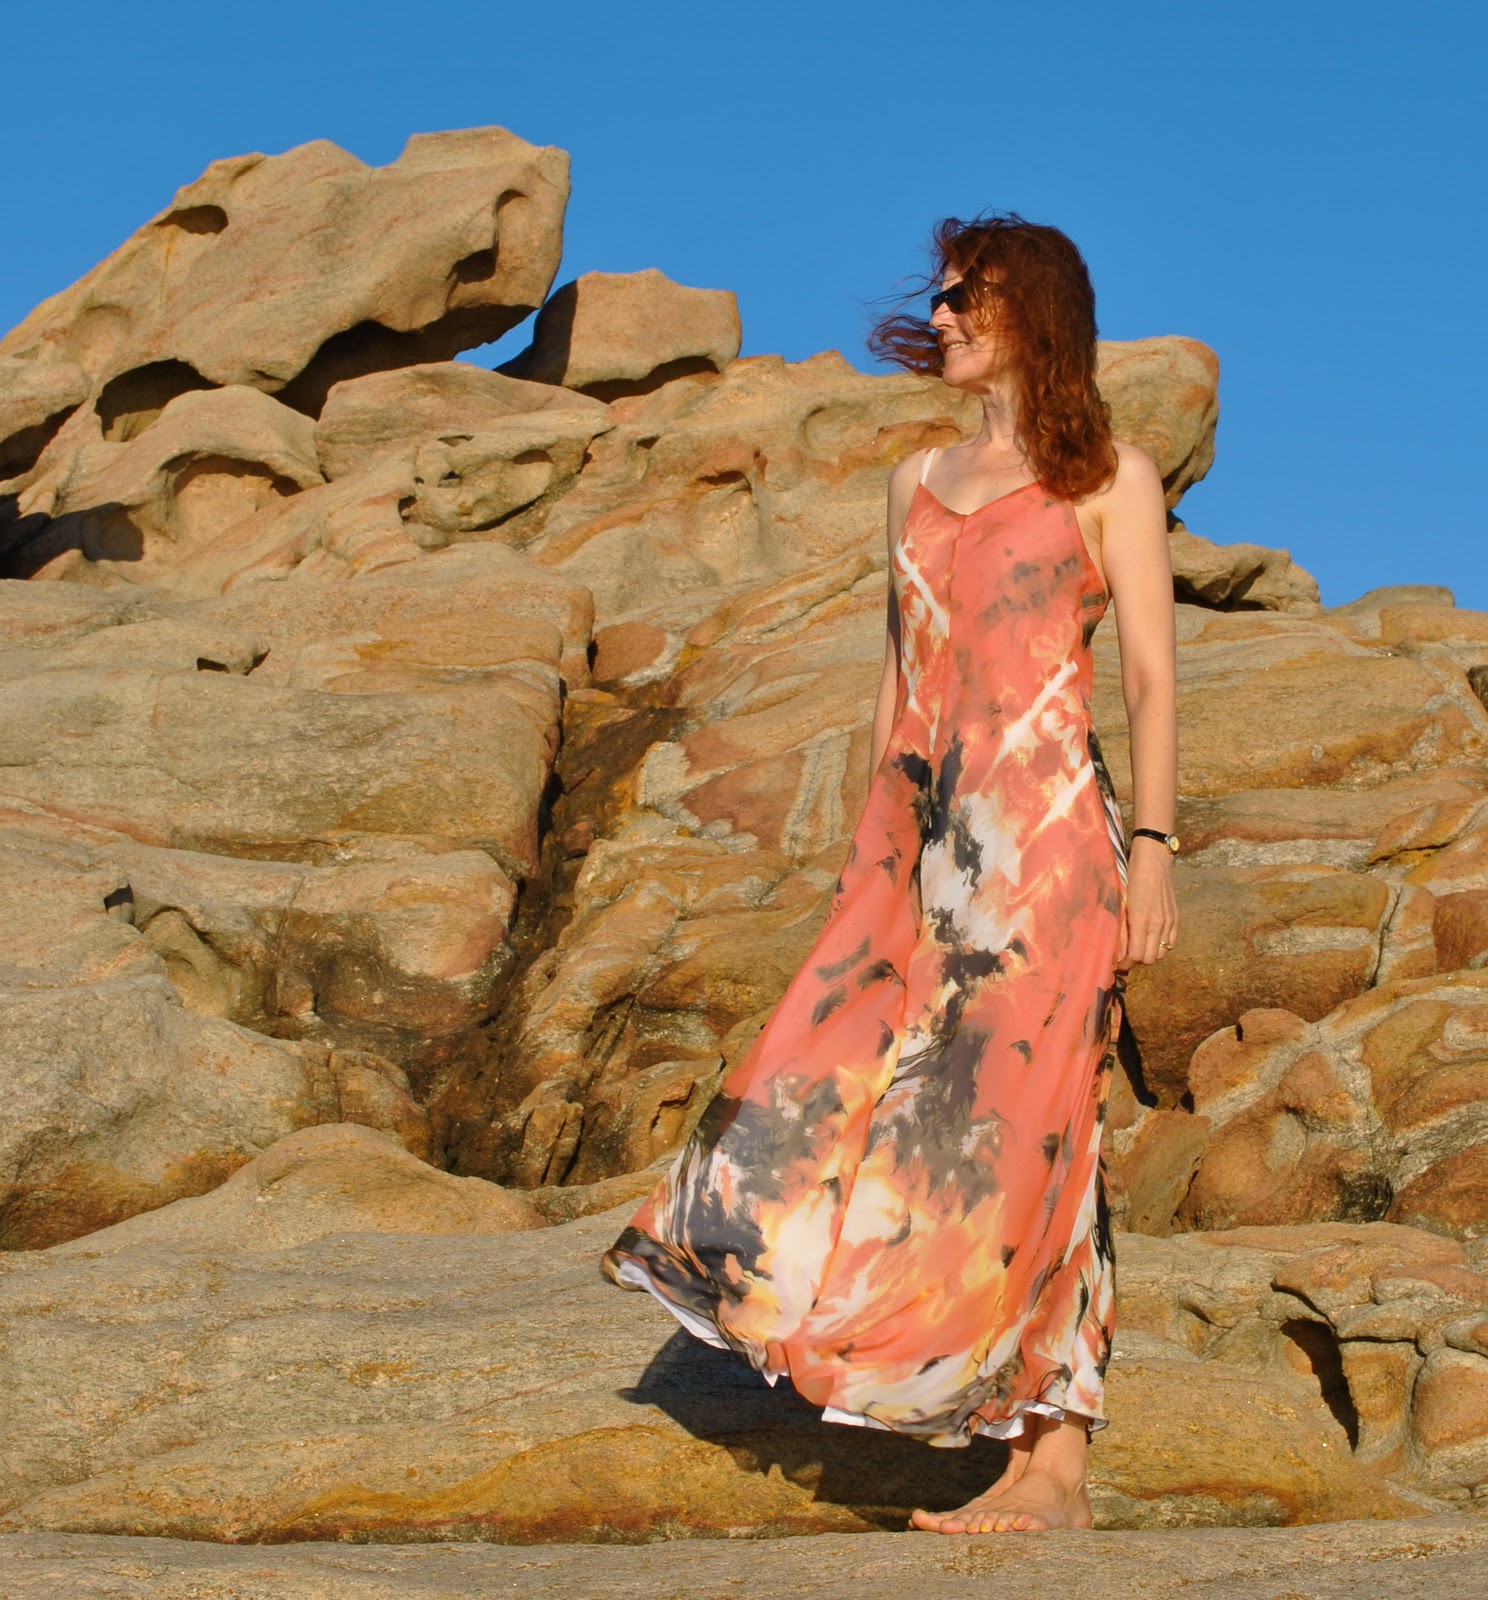
 I have been seeing stacks of floaty-to-the-max, hippy-dippy maxi-dresses in totally gloriously over-the-top colours and patterns in catalogues and magazines as a staple for yet another summer. So decided I just had to make myself one. It was a bit of a business, but I am super happy with how it turned out! It flows and ripples beautifully around my ankles, and I feel delightfully bohemian in it. Just hand me my poolside cocktail, will you? I’m so ready for summer now!
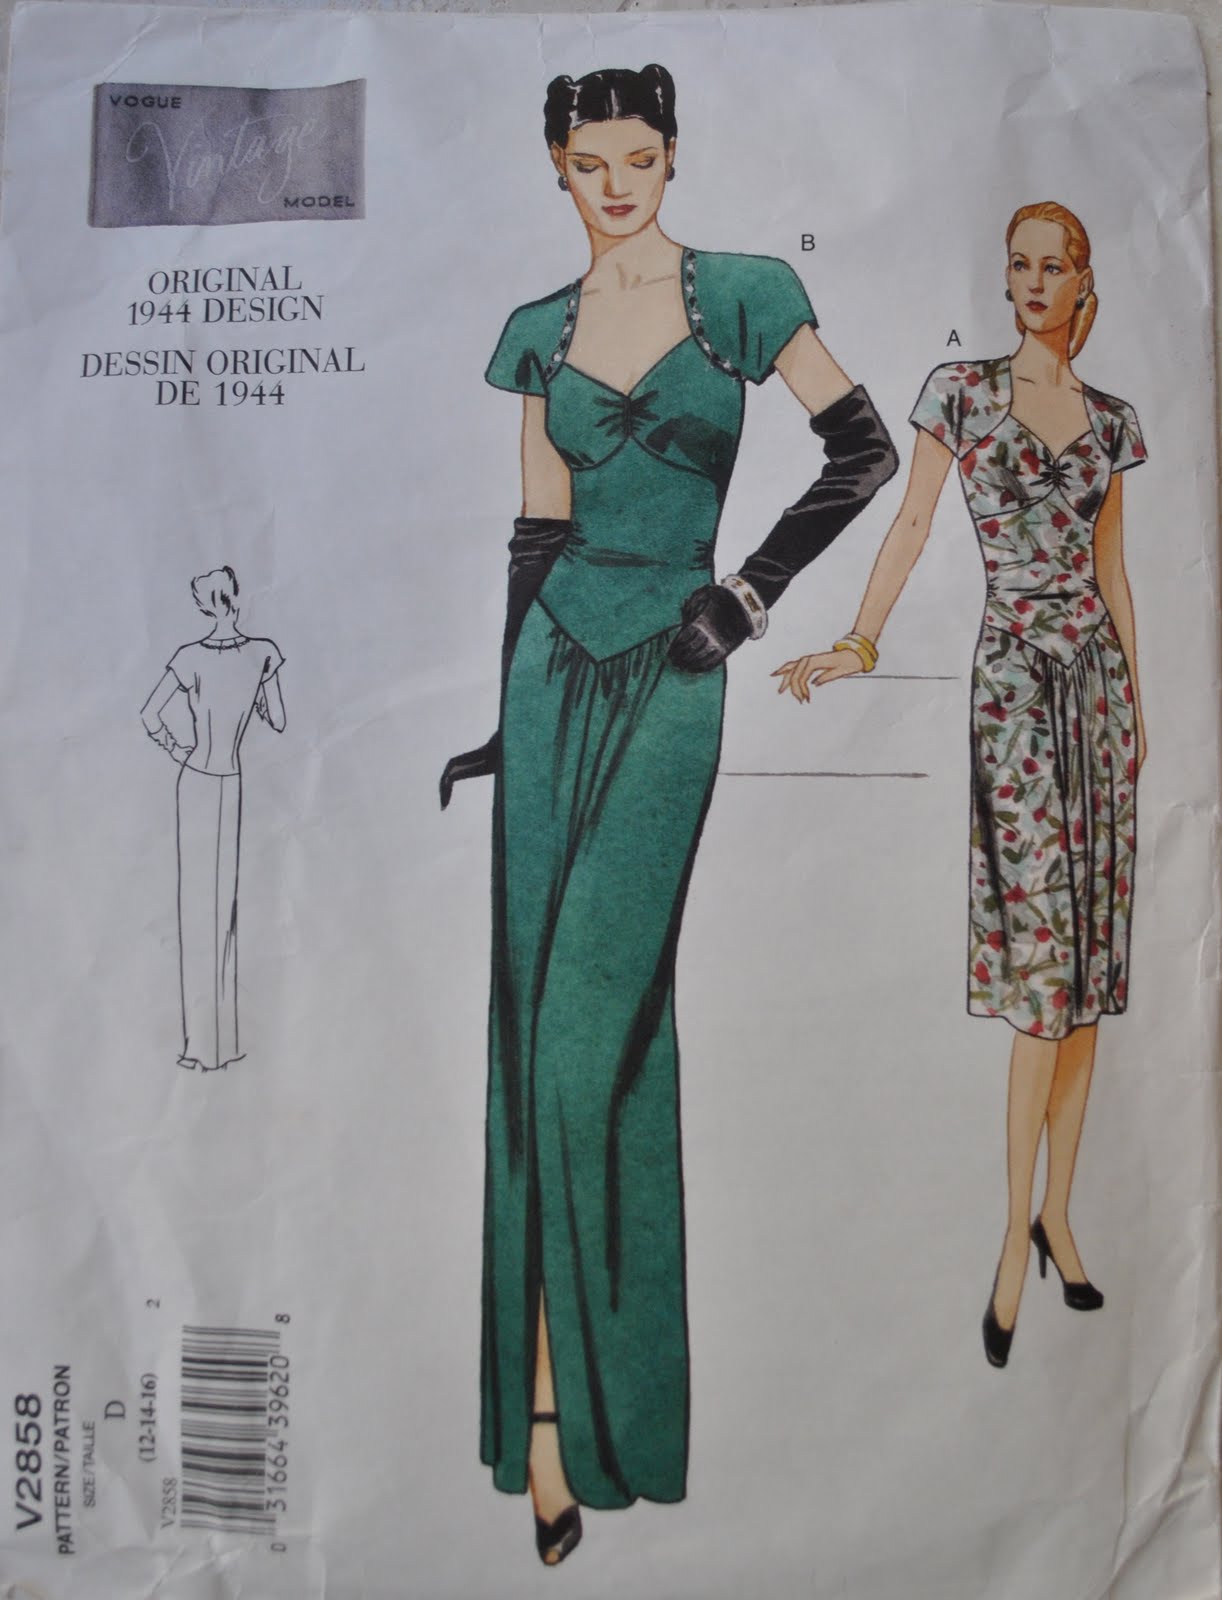
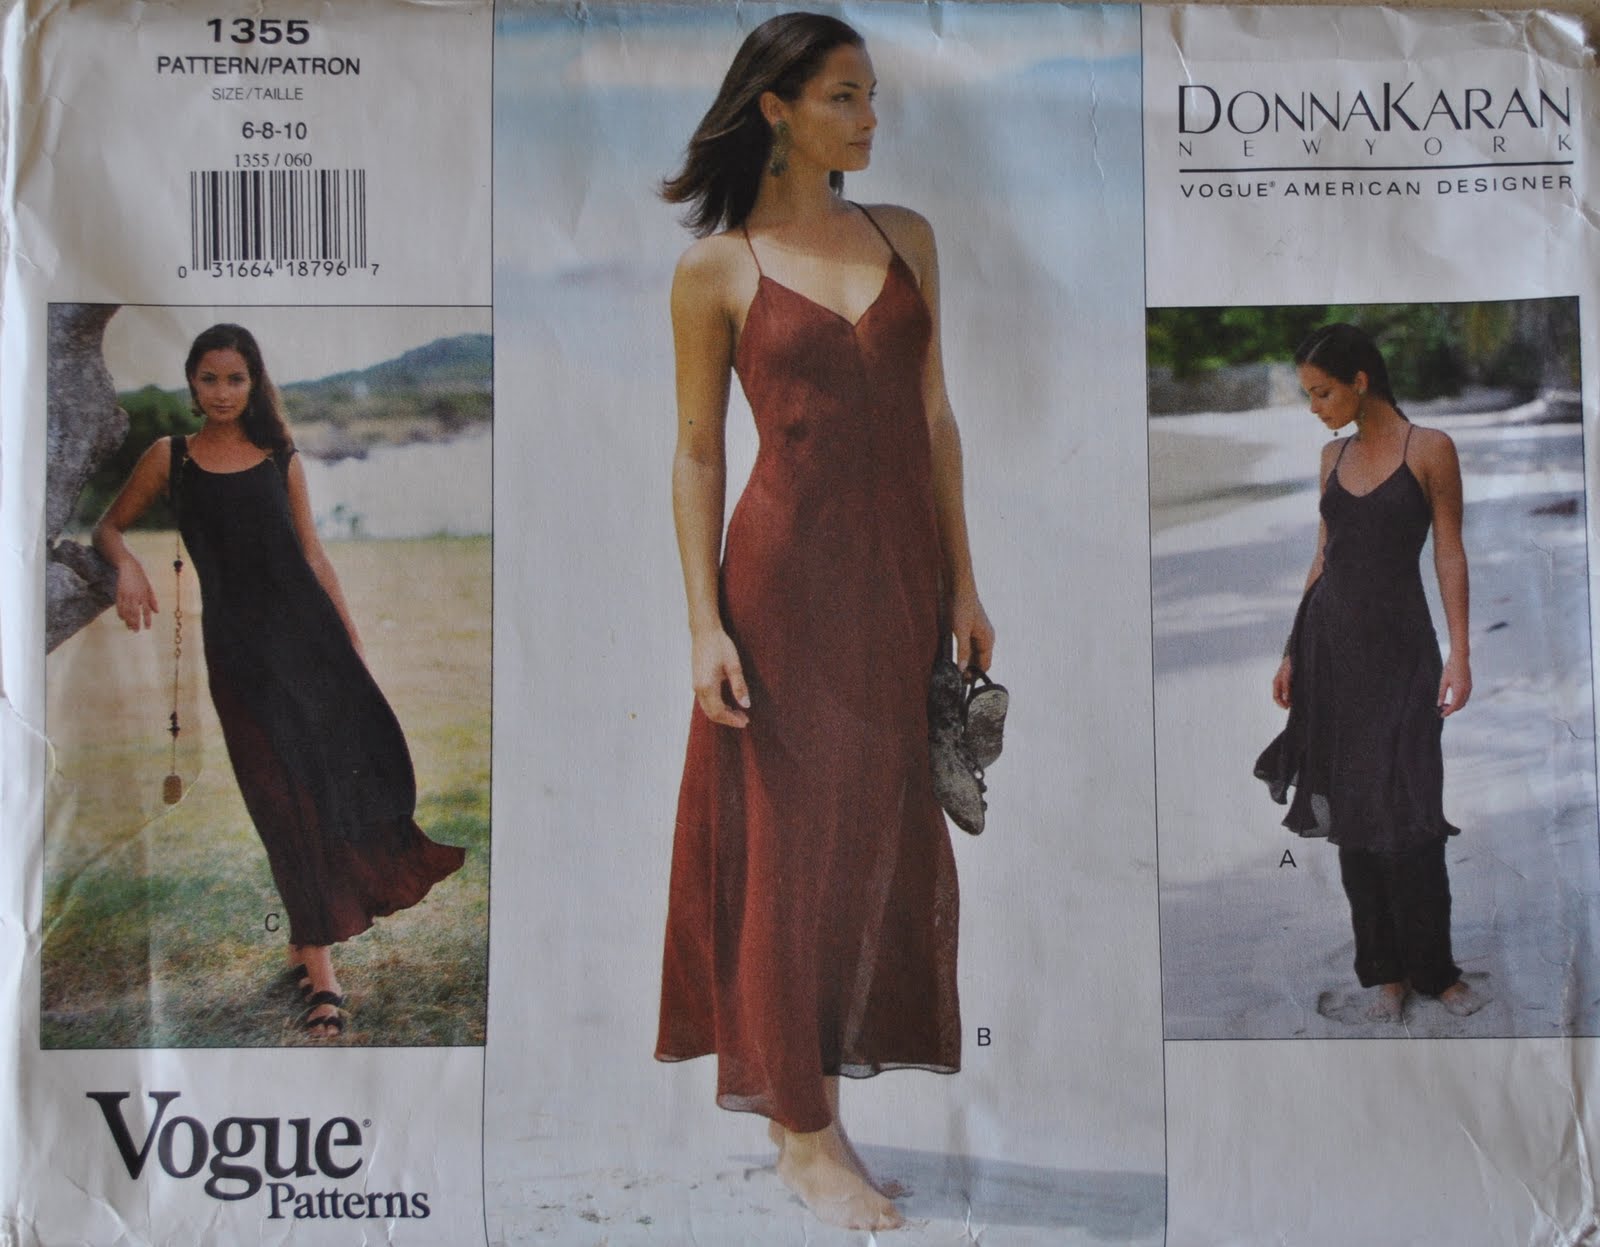
I have to say in the end this is inspired by or based upon, but certainly not true to Vogue 1355, an old, possibly 90’s?? pattern that I bought on ebay… a pattern with a midi dress of lovely simplicity pictured on the cover. My dress turned out kinda like how I thought that one looked but not really how it is…
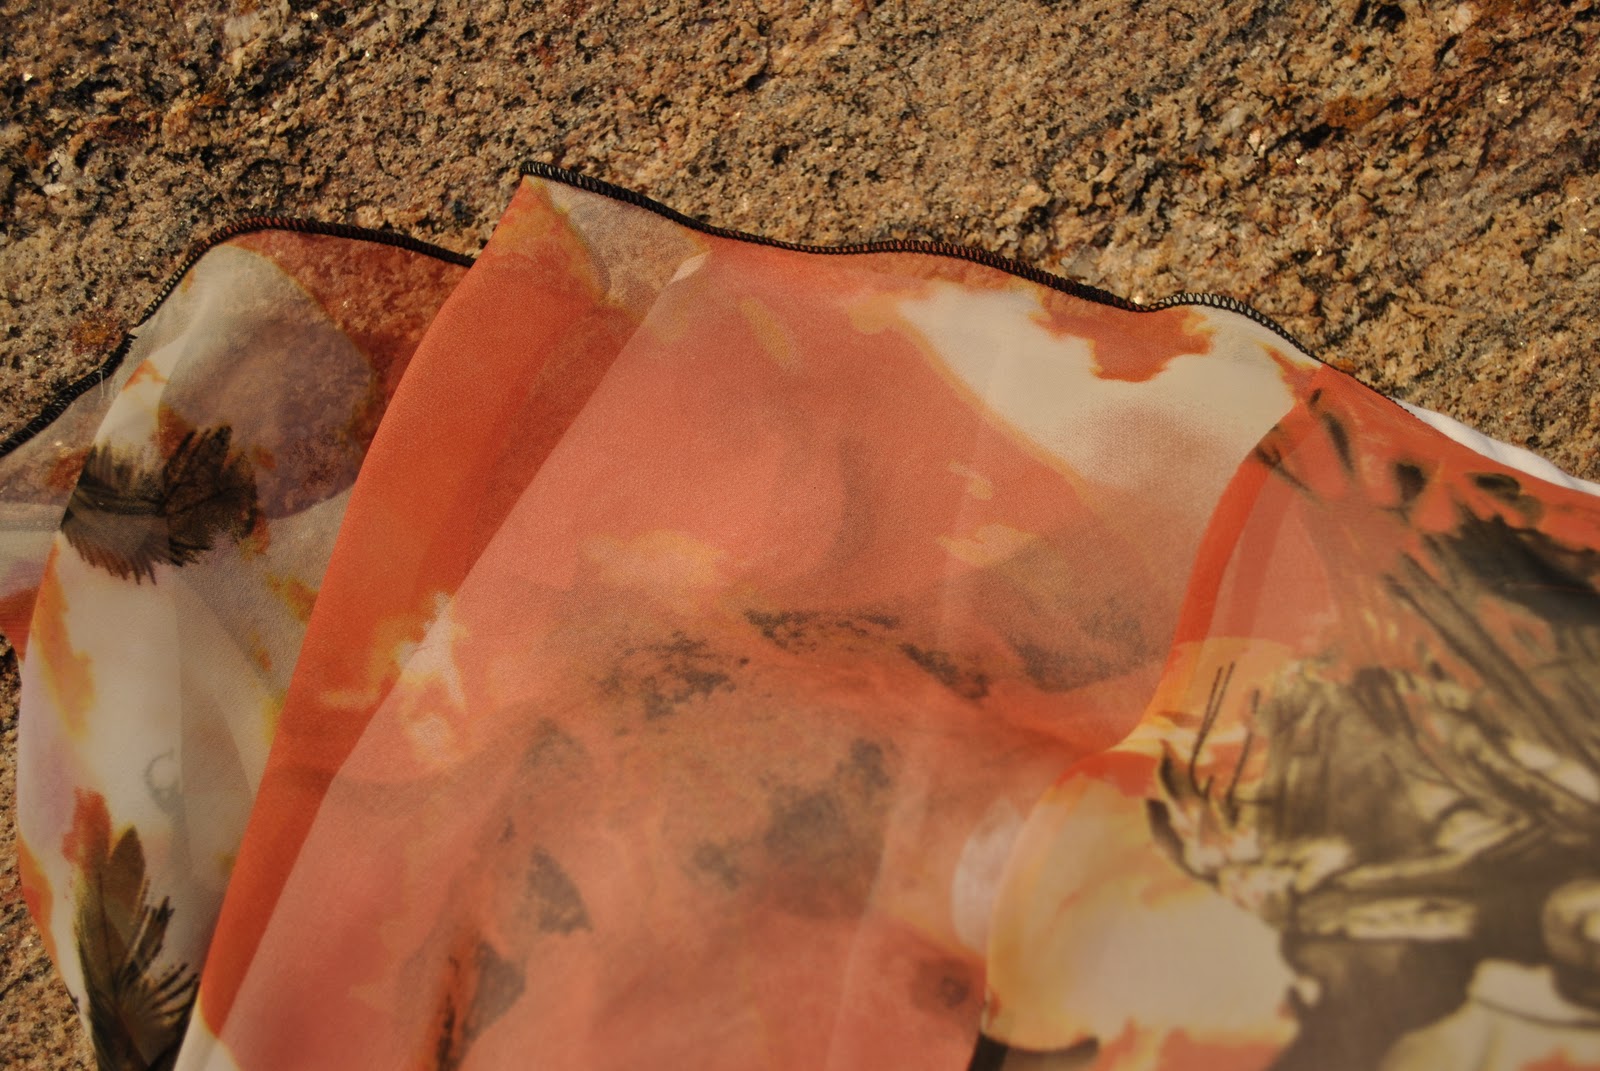
I chose a beautifully coloured and patterned polyester chiffon with a lovely design that is almost post-apocalyptic in its colours and images; fiery swirls of ivory, gold and orange, and with wispy furls of black smoke and black downy feathers floating randomly across. Surprisingly a cheapie from Spotlight.
This is a delightfully simple pattern, on first glance. Nothing to it. Just three pattern pieces, a front, a back and a shoulder strap piece. No closure; the pieces are to be cut on the bias so the dress simply slips over your head. Couldn’t be simpler, hmm? Well, the truth is; this dress is that deceptive brand of simplicity. But maybe that was mostly due to the difficulty factor inherent in working with chiffon. The instructions with this pattern are fabulous, like gold, for working with bias cut delicates.
Hilarious random fact for the day; did you know the word “chiffon” comes from an old French word for “rag”? Lol!
Dress; based on Vogue 1355, printed polyester chiffon, with a lining of white cotton voile

Making the dress; skip this saga if you want.
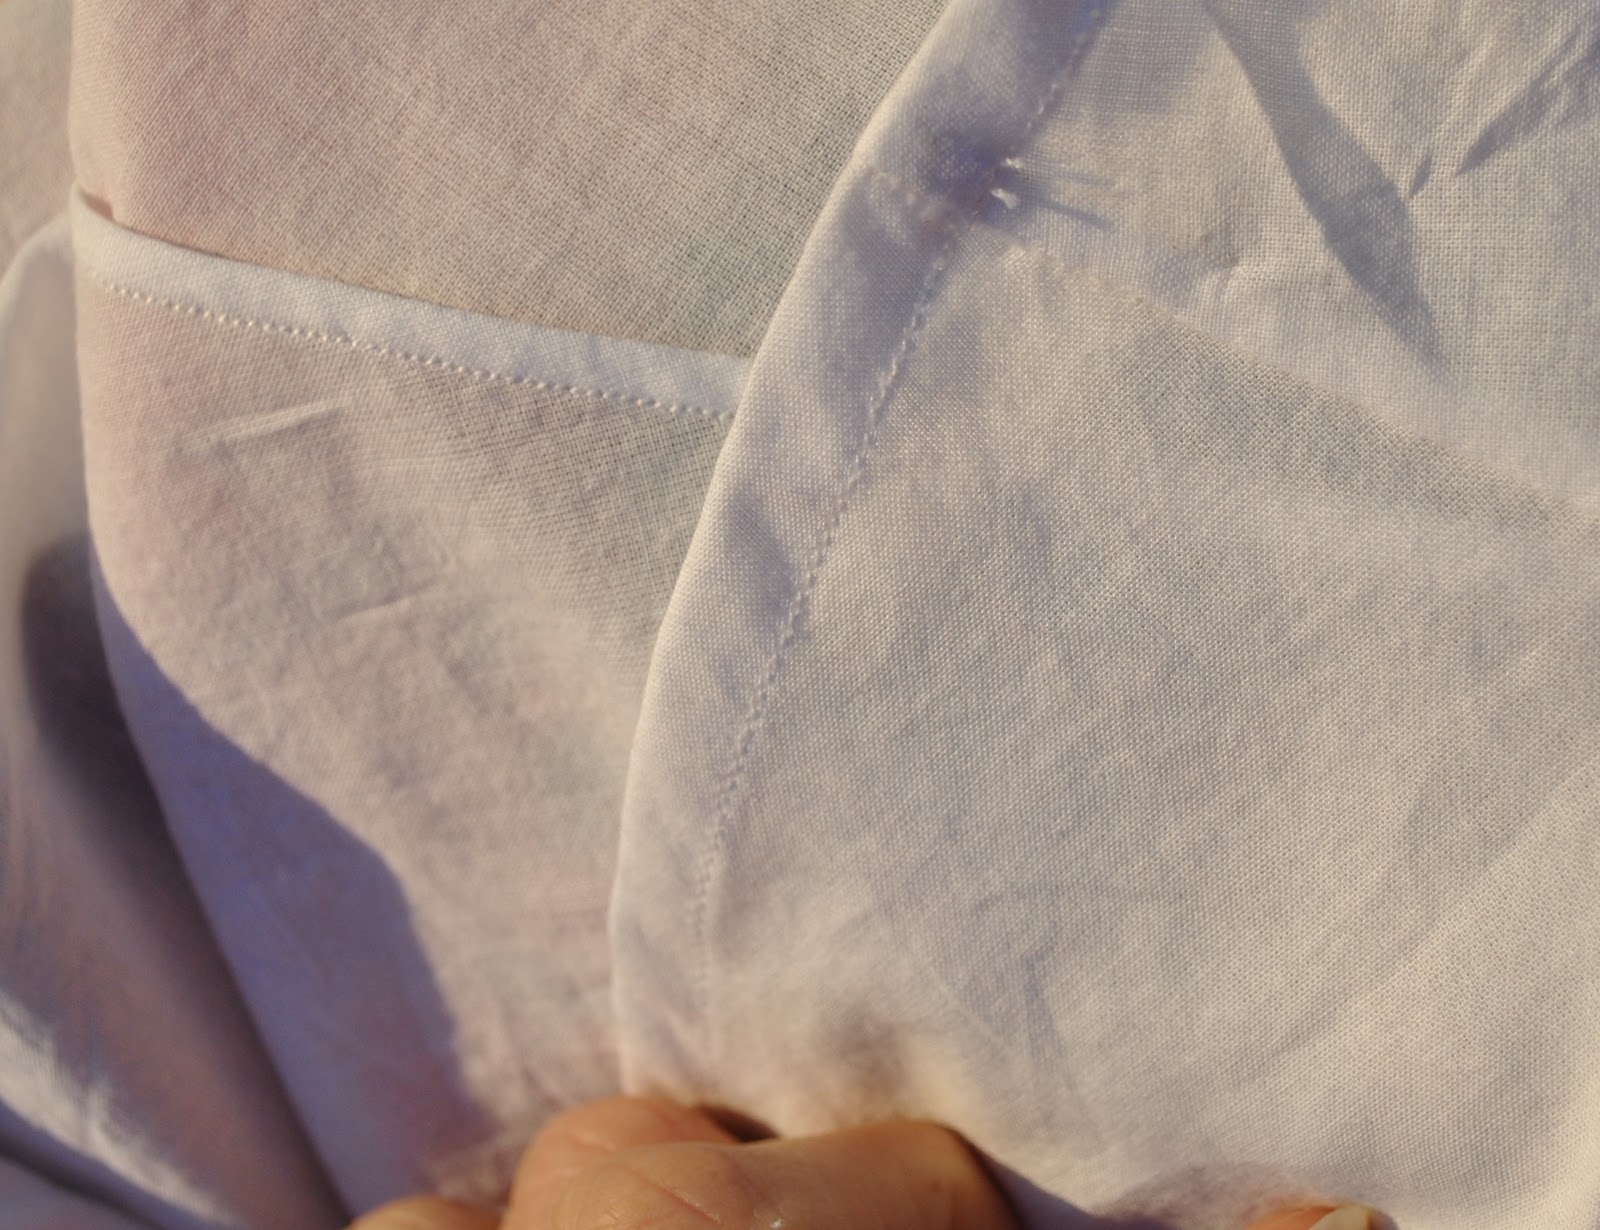
For a start, the pattern pieces come with a 3.8cm seam allowance, to allow for bias “drops” after hanging… I hadn’t seen this before but I shrugged and went with it. Later on this turned out to be a wonderful thing… More on this later… but first things first.
Have you ever cut out polyester chiffon on the bias? Yah, it’s a %$^#, right? Moves and slides about with but the slightest breath of wind… truthfully even breathing on the fabric as you are cutting out and it will ripple slightly off the true bias so so so easily. I’m a bit of a perfectionist when it comes to cutting out so this stage was leeeengthy. And in hindsight I probably spent way too much unnecessary time getting this bit perfect since my final dress is unrelated to those seamlines anyway. But I eventually got it cut out… now on to those seams. Firstly, one has to pin it along the seam lines and hang it up for a while to allow the fabric to drop through the bias. To be absolutely sure I left mine hanging for a week. Then basted and tried it on. Wait wait, I’m getting ahead of myself! First I cut miles and miles of tissue paper strips and basted over these, then to rip the paper strips away; the ideal method for sewing delicates on the bias… then tried it on. Straight away saw that the shape of the dress wasn’t particularly flattering. The pattern as it is has the skirt very slightly tulip-shaped, which just serves to emphasise the figure flaws of a narrow torso-ed but slightly hippy person such as myself imo…. So, no. Thanked the heavens for that 3.8cm seam allowance, which allowed me to alter the bodice to be smaller, and to taper the skirt out lots lots more, from a narrower waist in a straight line to the ankles, ending in the teensy weensiest seam allowance at the ankles… a far more flattering silhouette. Re-did the seams; hung for a few more days. Ditto for the lining. Oh, yeah, I made a bias-cut lining dress too, identical to the dress in every way except of white cotton voile. There is no lining stipulated in the pattern but I deemed it necessary. Hey, that polyester chiffon is completely see-through, people!! This was also pinned, hung, basted, tried on, re-sewn, hung for a second time; also. Finally, when I decided all was perfect, I sewed the seams in French seams (again, with the strips of tissue paper twice, for the double lot of sewing that is the French seam), attached the shoulder straps, and joined the dress and lining dress together at the top. Hung up for just a bit longer, just to gather mental strength for the next scary bit… the hem. By this time, the dress just had to work out perfect or I would have been inconsolable… my overlocker is temperamental and sometimes spiteful when it comes to rolled hemming. On this occasion I was grateful that it behaved itself. Hemmed with a rolled hem in black on my overlocker, and a narrow double folded hem on my sewing machine for the lining. Tried it on and was immensely relieved to see it hung at just the perfect length, and what’s more has a perfectly even hem. Yay!! Breathed easily for the first time.
And can now appreciate why the pattern was rated Average, in spite of just three very basic pattern pieces. Pared back simplicity can be quite tough to get just right!
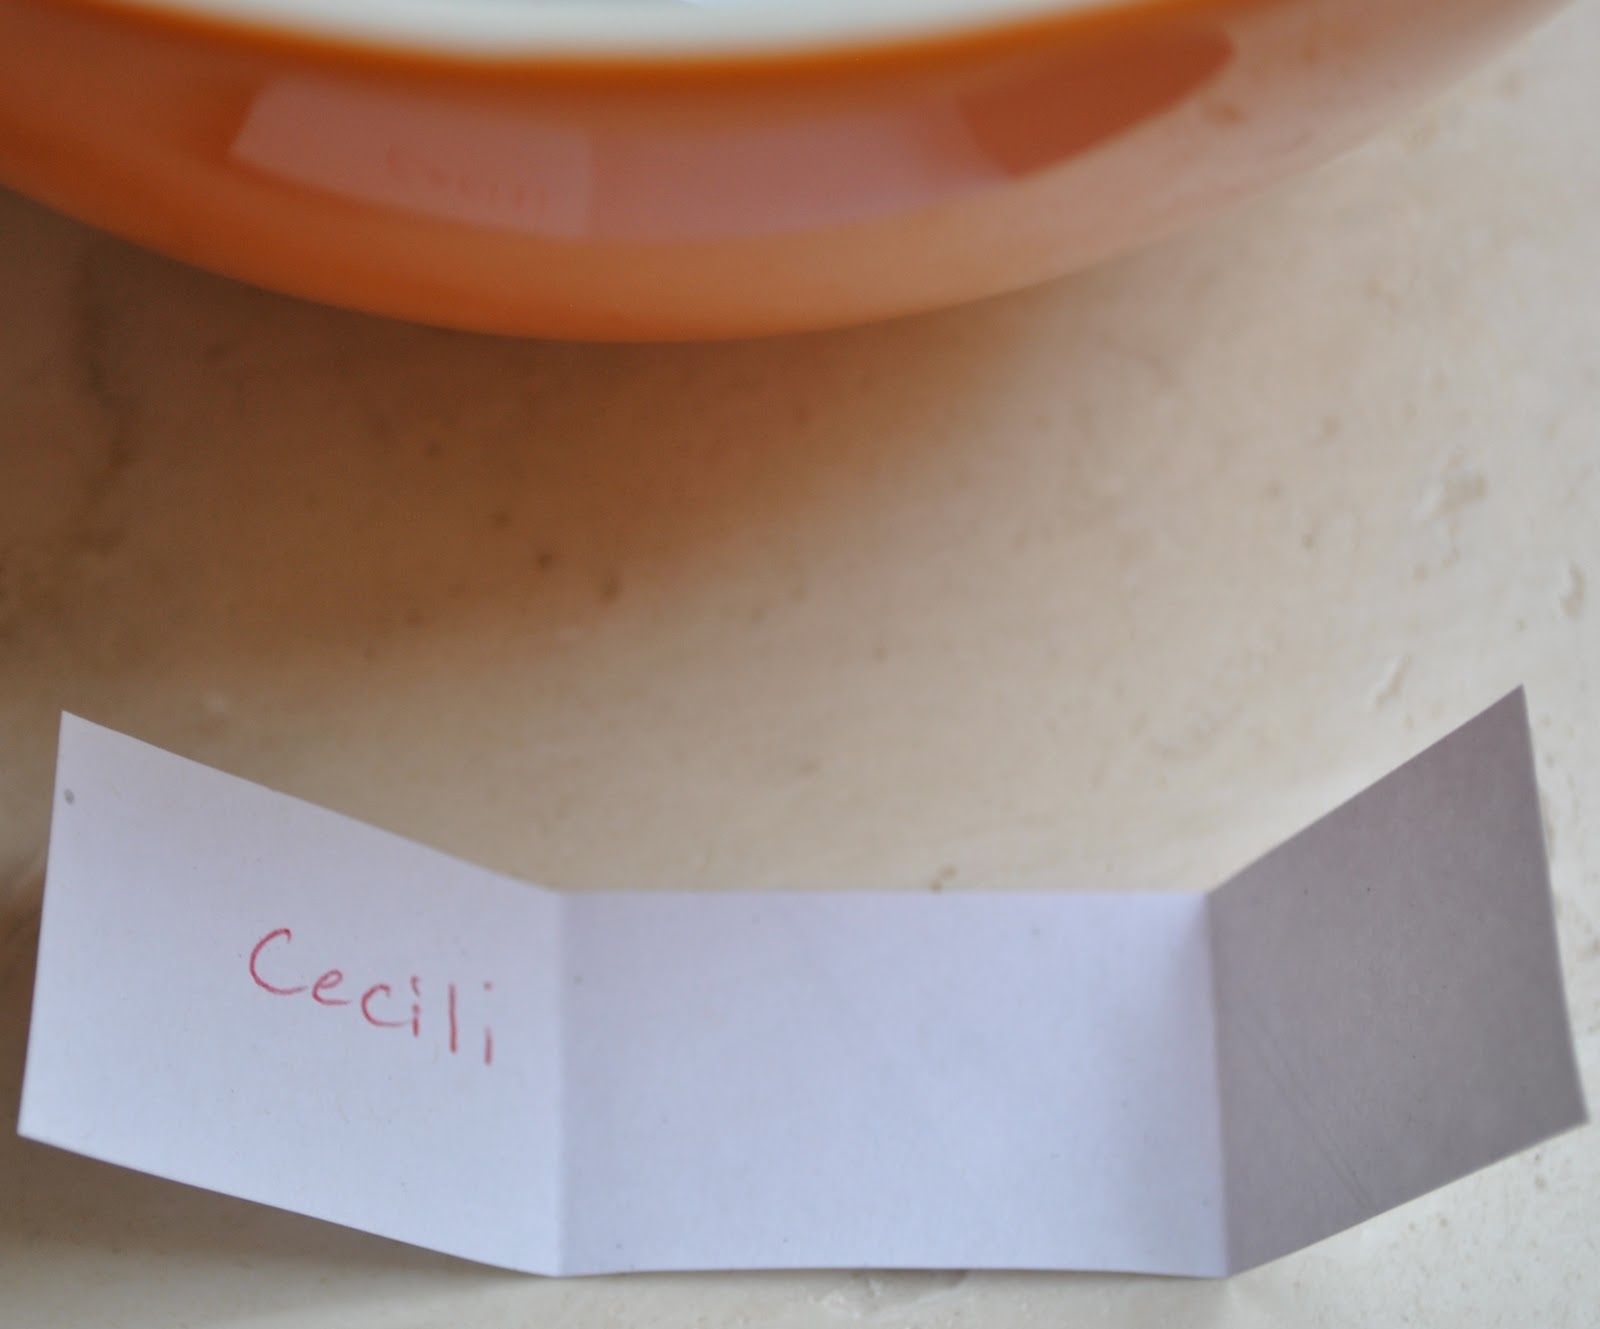
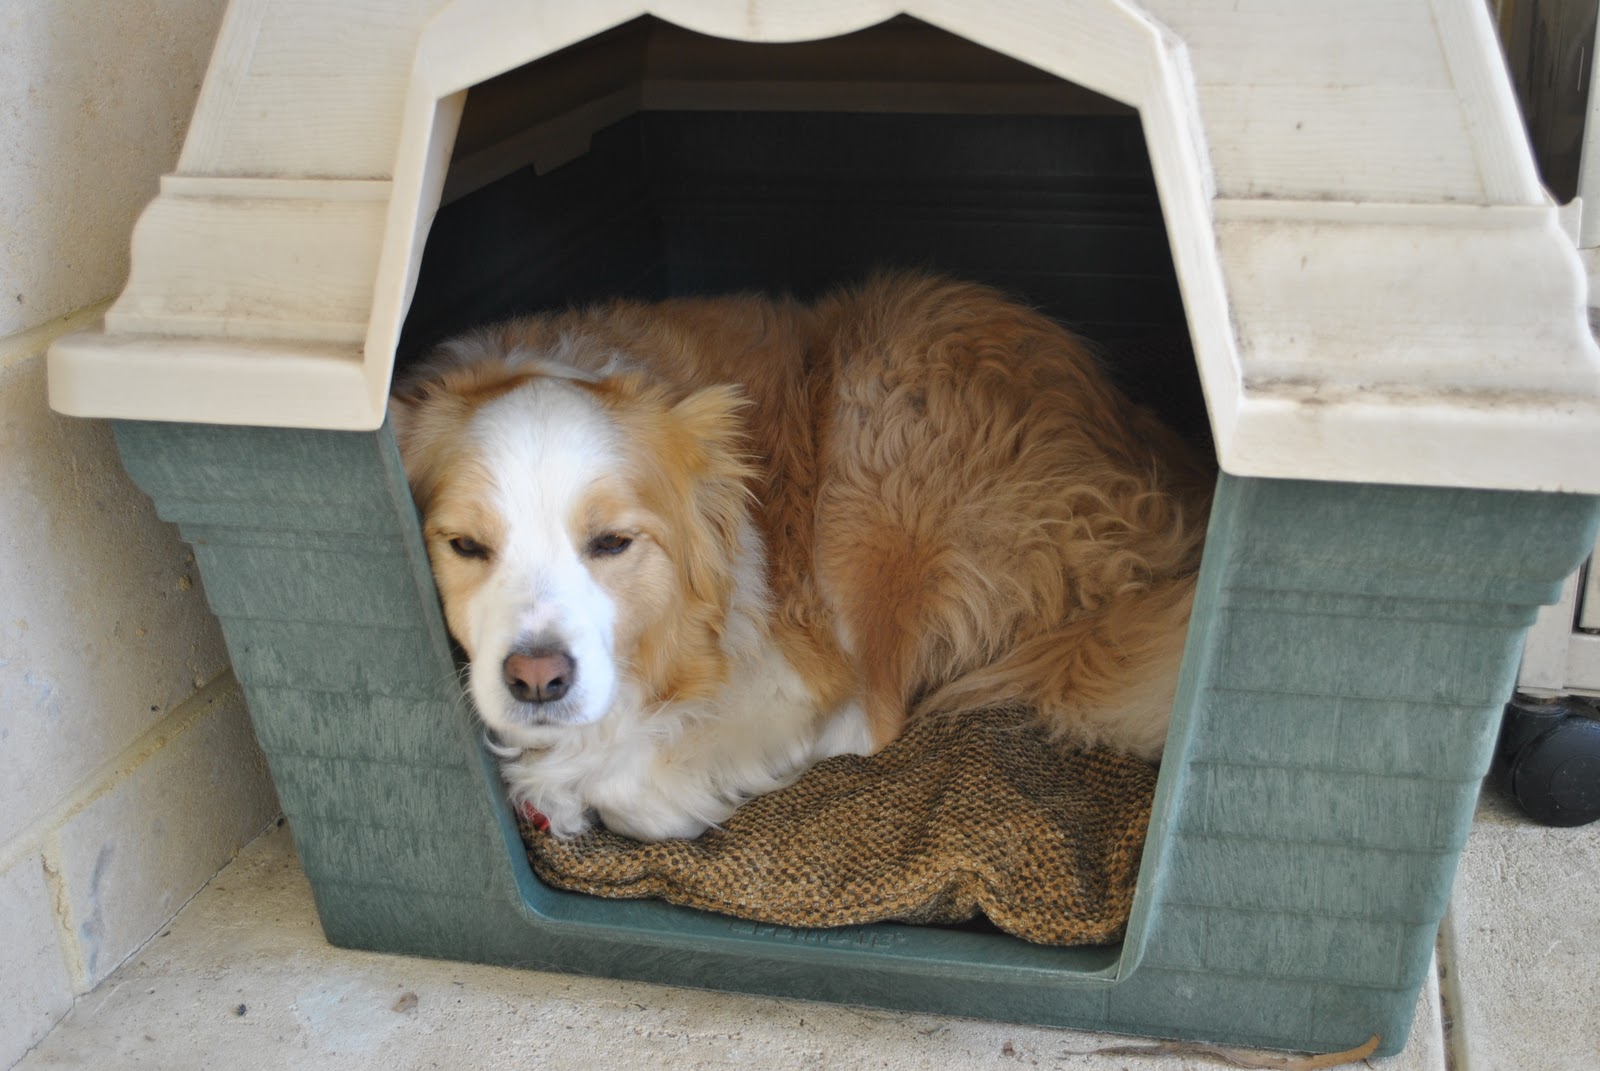
… hehe, just kidding. Just proving that I actually followed through on my promise. Sienna now has cast-off old sofa fabric no, wait; brand new (to her), freshly washed and fluffy, specially custom fit covers on her two beds.
Lucky girl!!!
the inside bed…
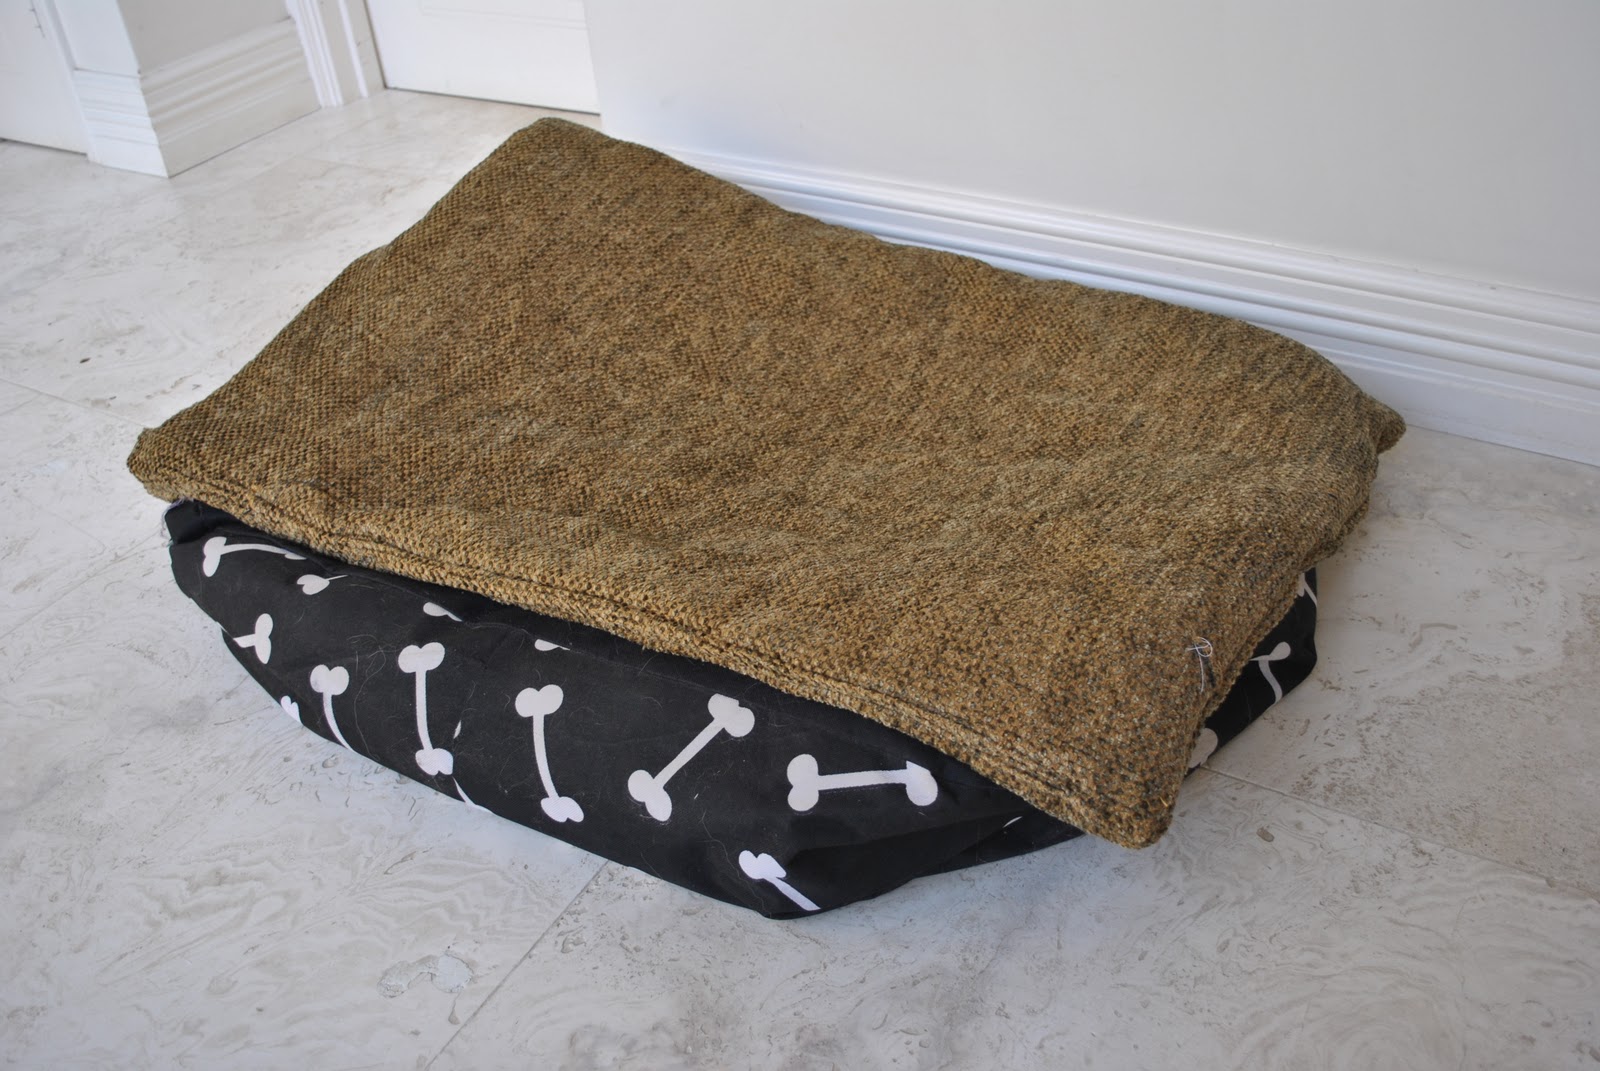
the outside bed…
details…. whoa, blowing your mind much? Precision high fashion sewing on show here today… NOT!
Sorry. Well, sewing for practicality and not for fabulousness is sometimes required of me too. You might be able to see that at least I used pink and purple overlocker thread. Sienna appreciated that little girly touch. Really.
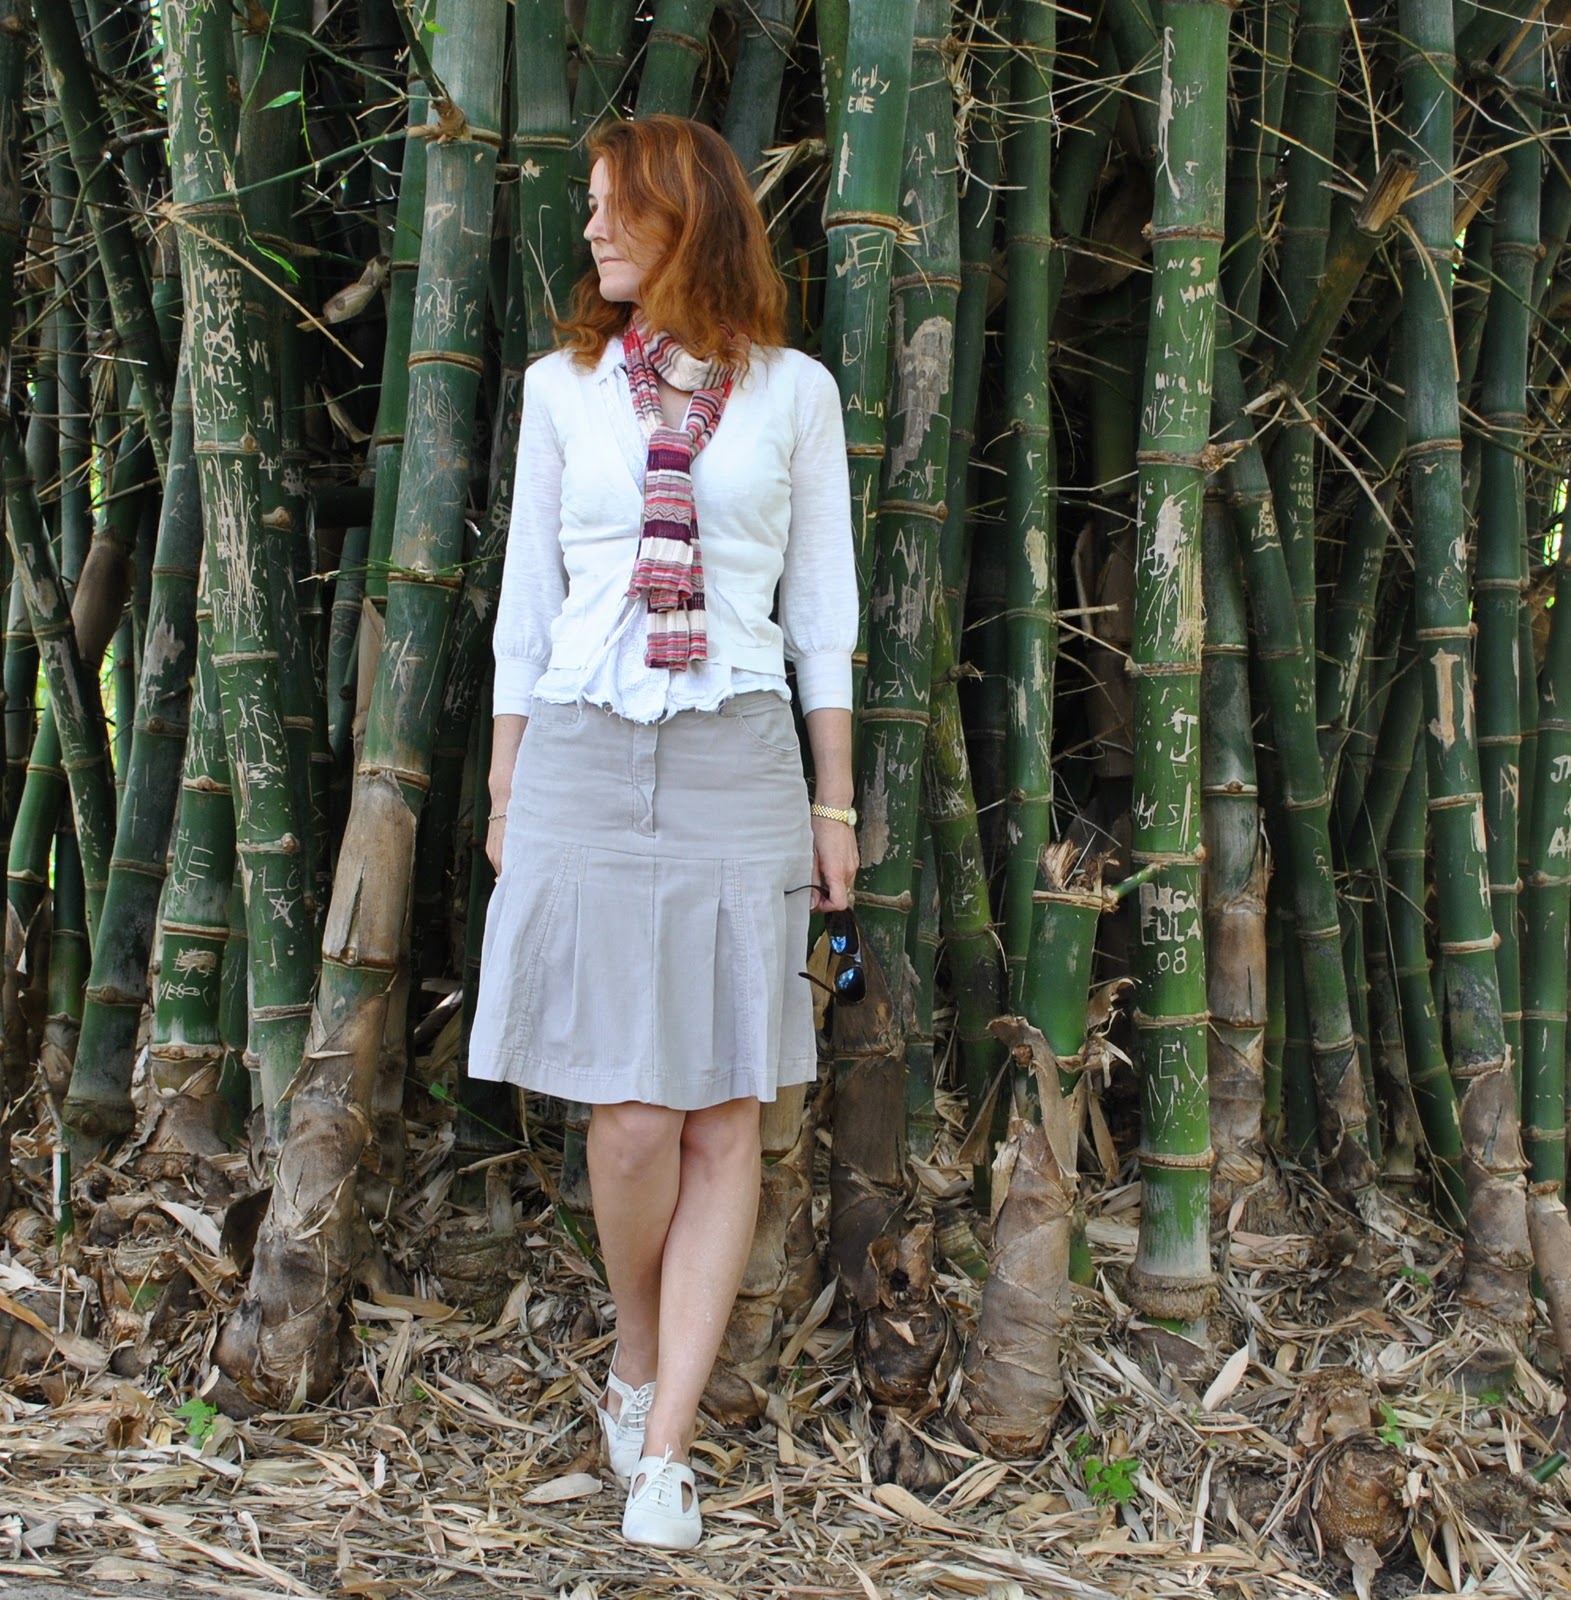
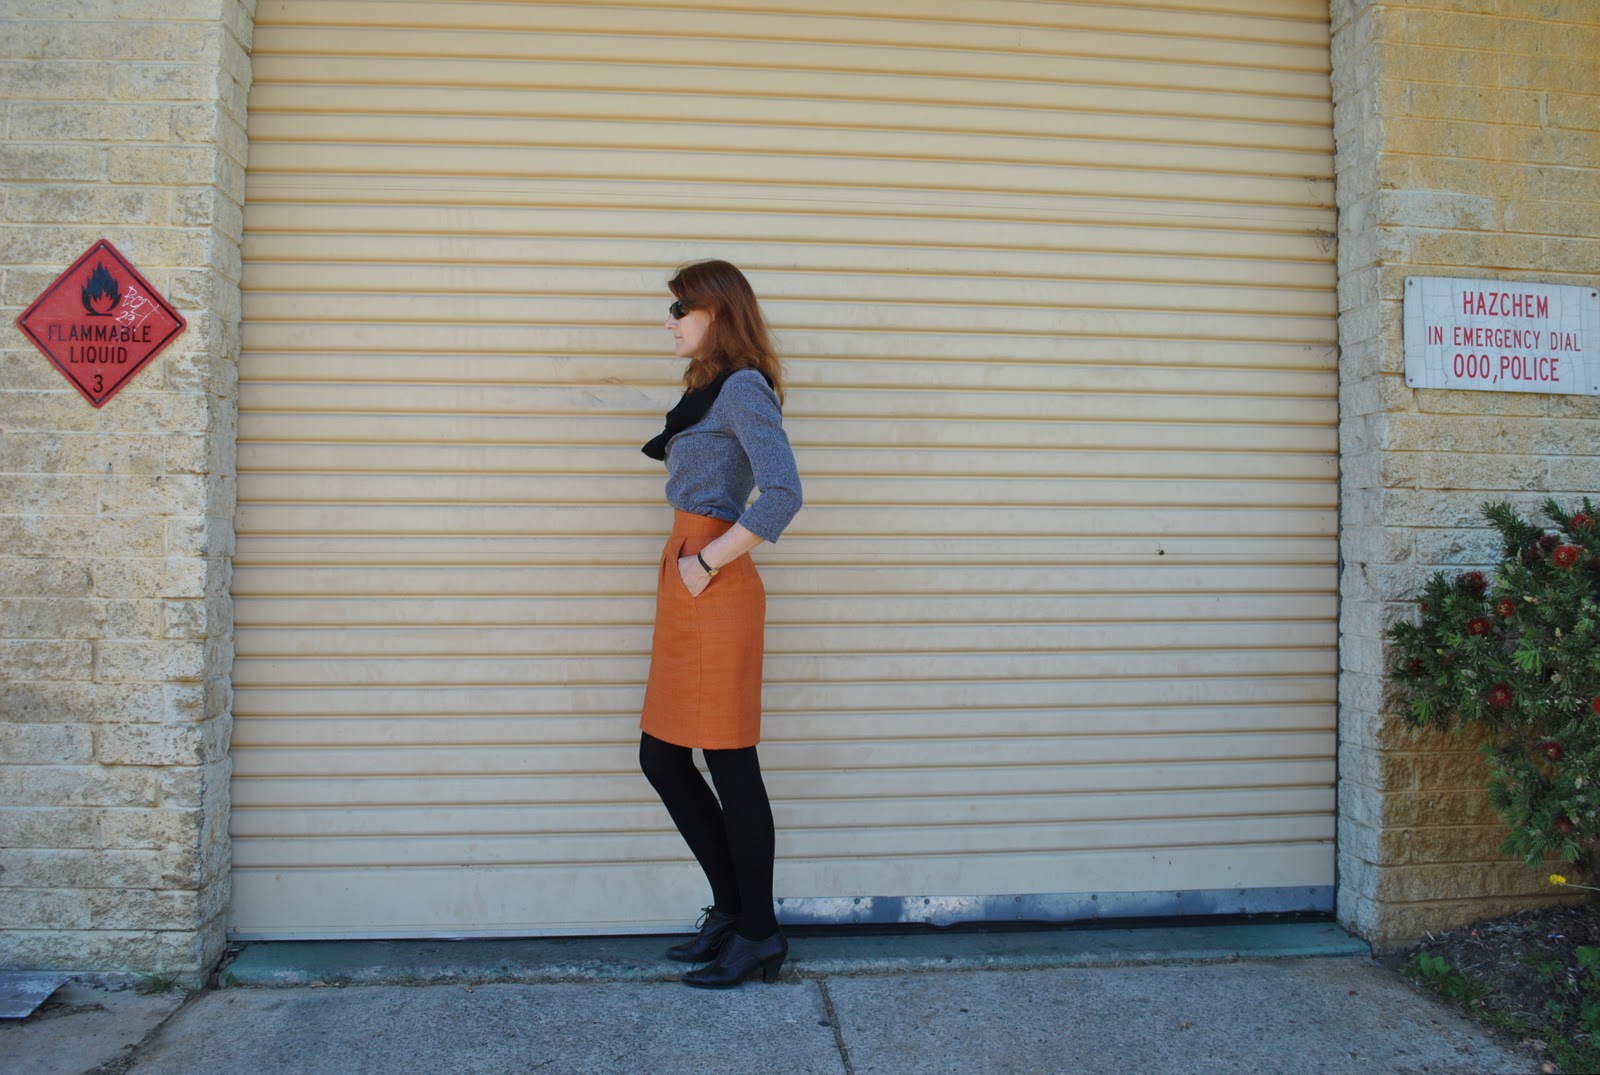
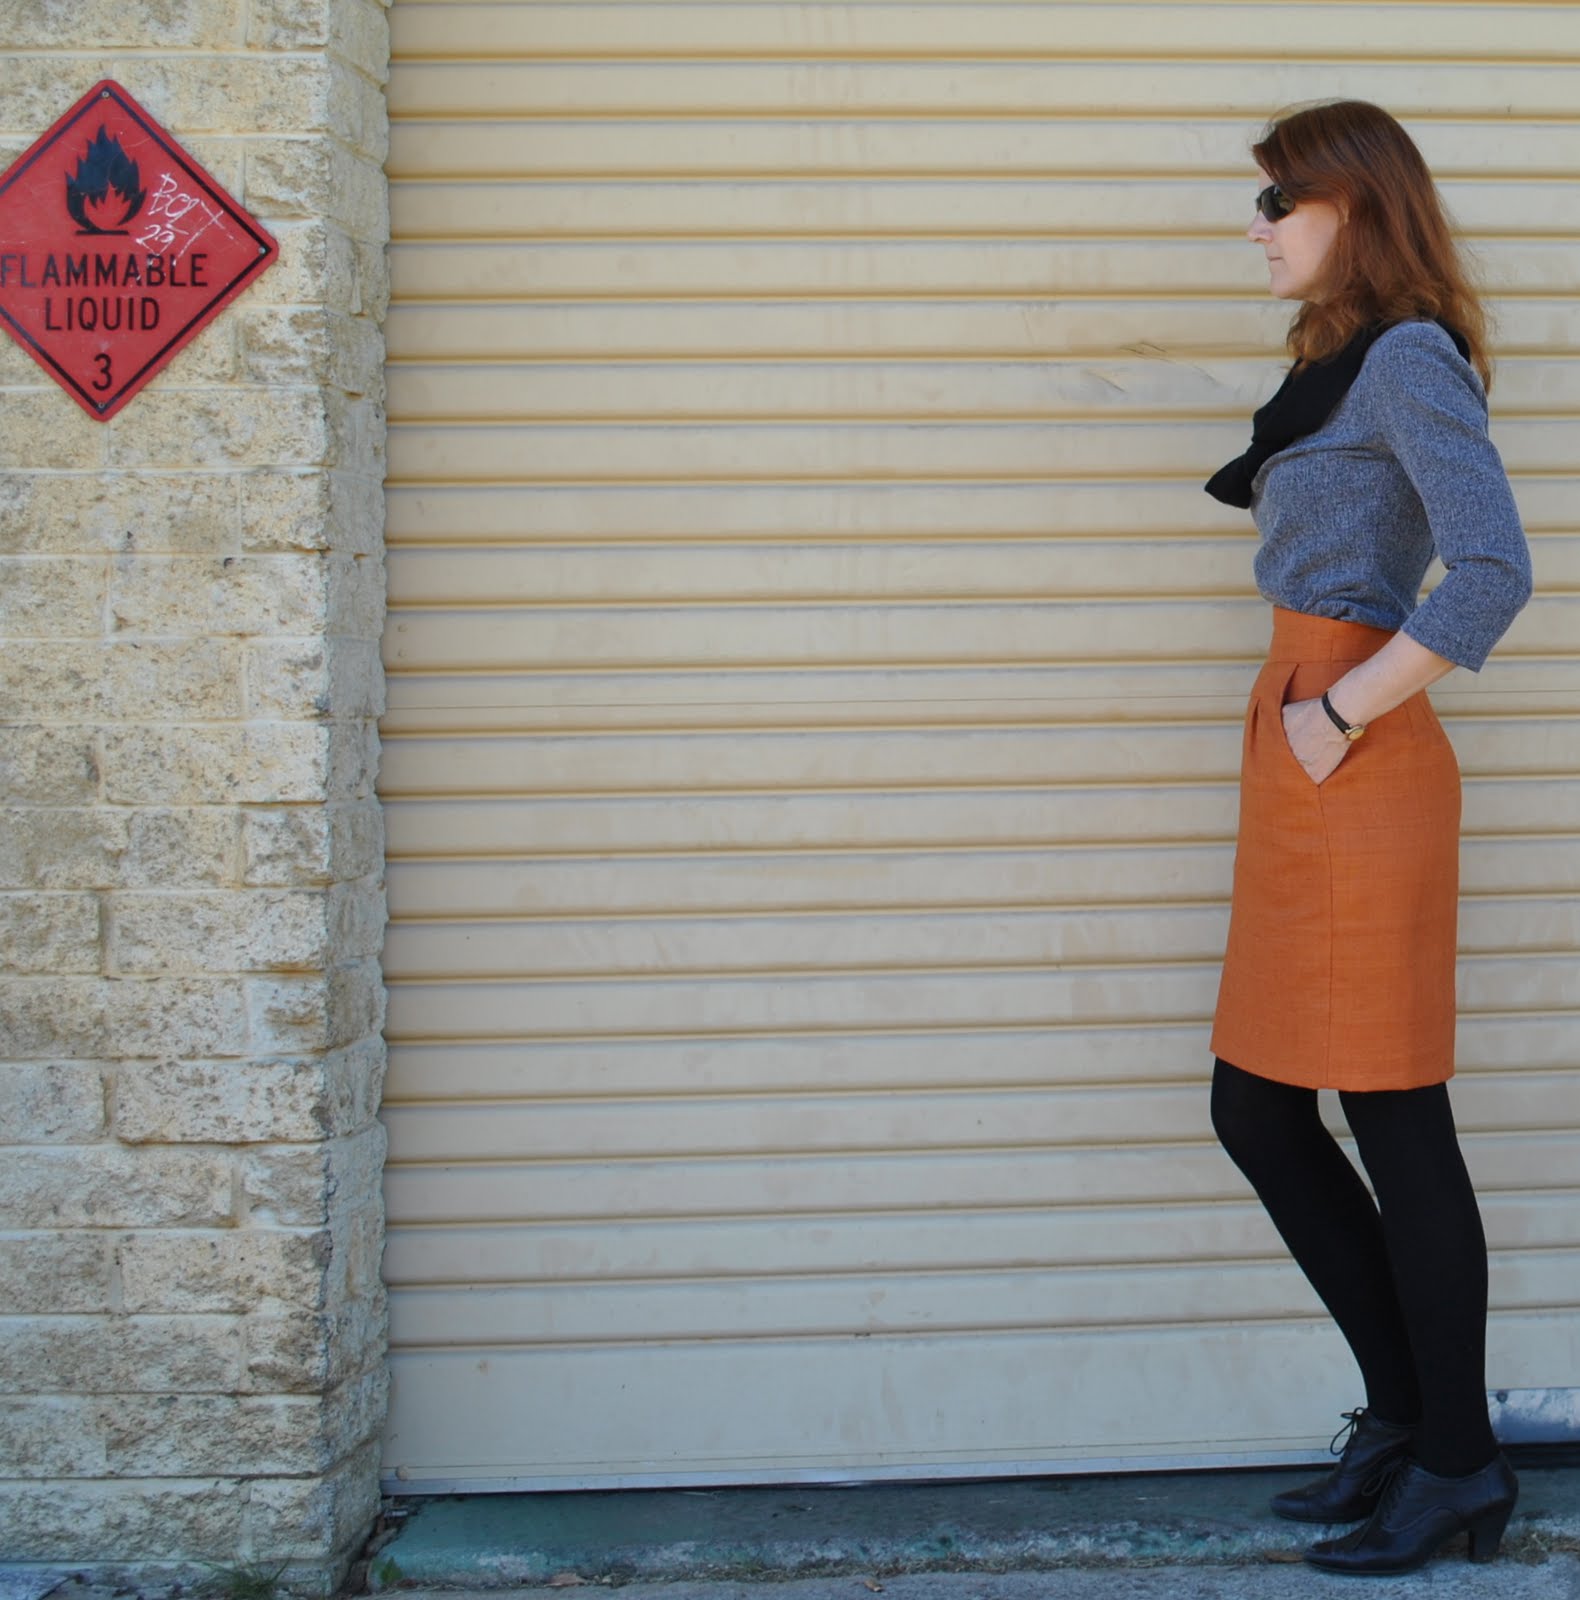
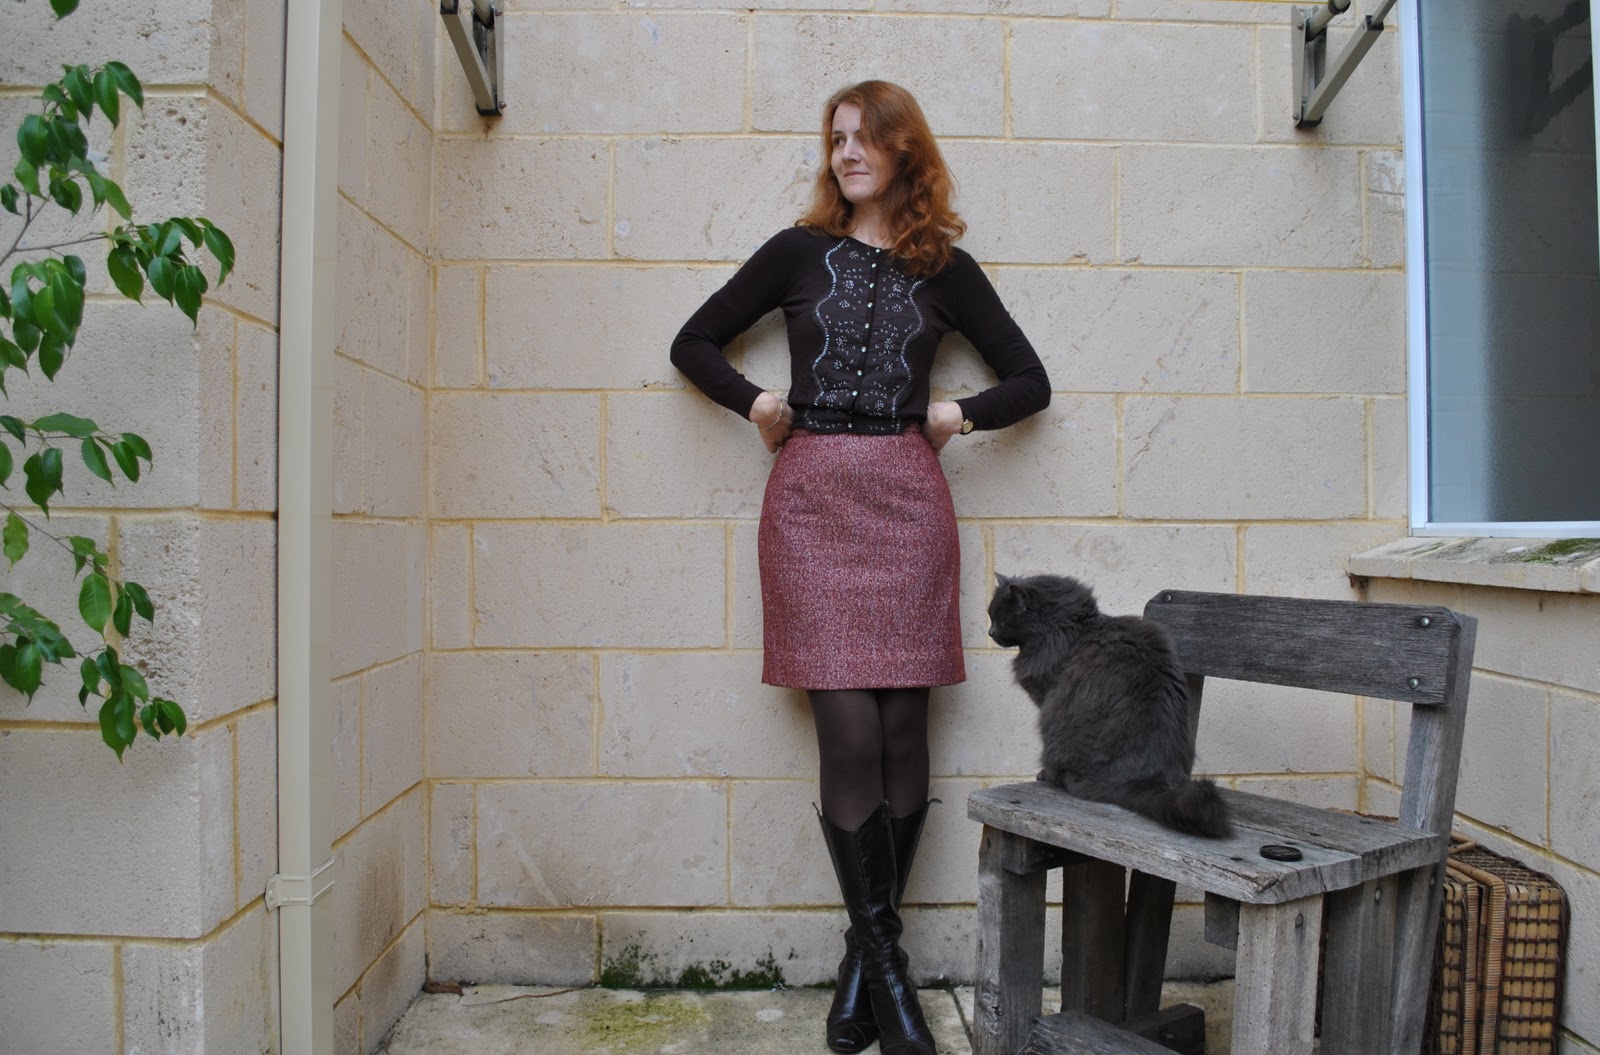
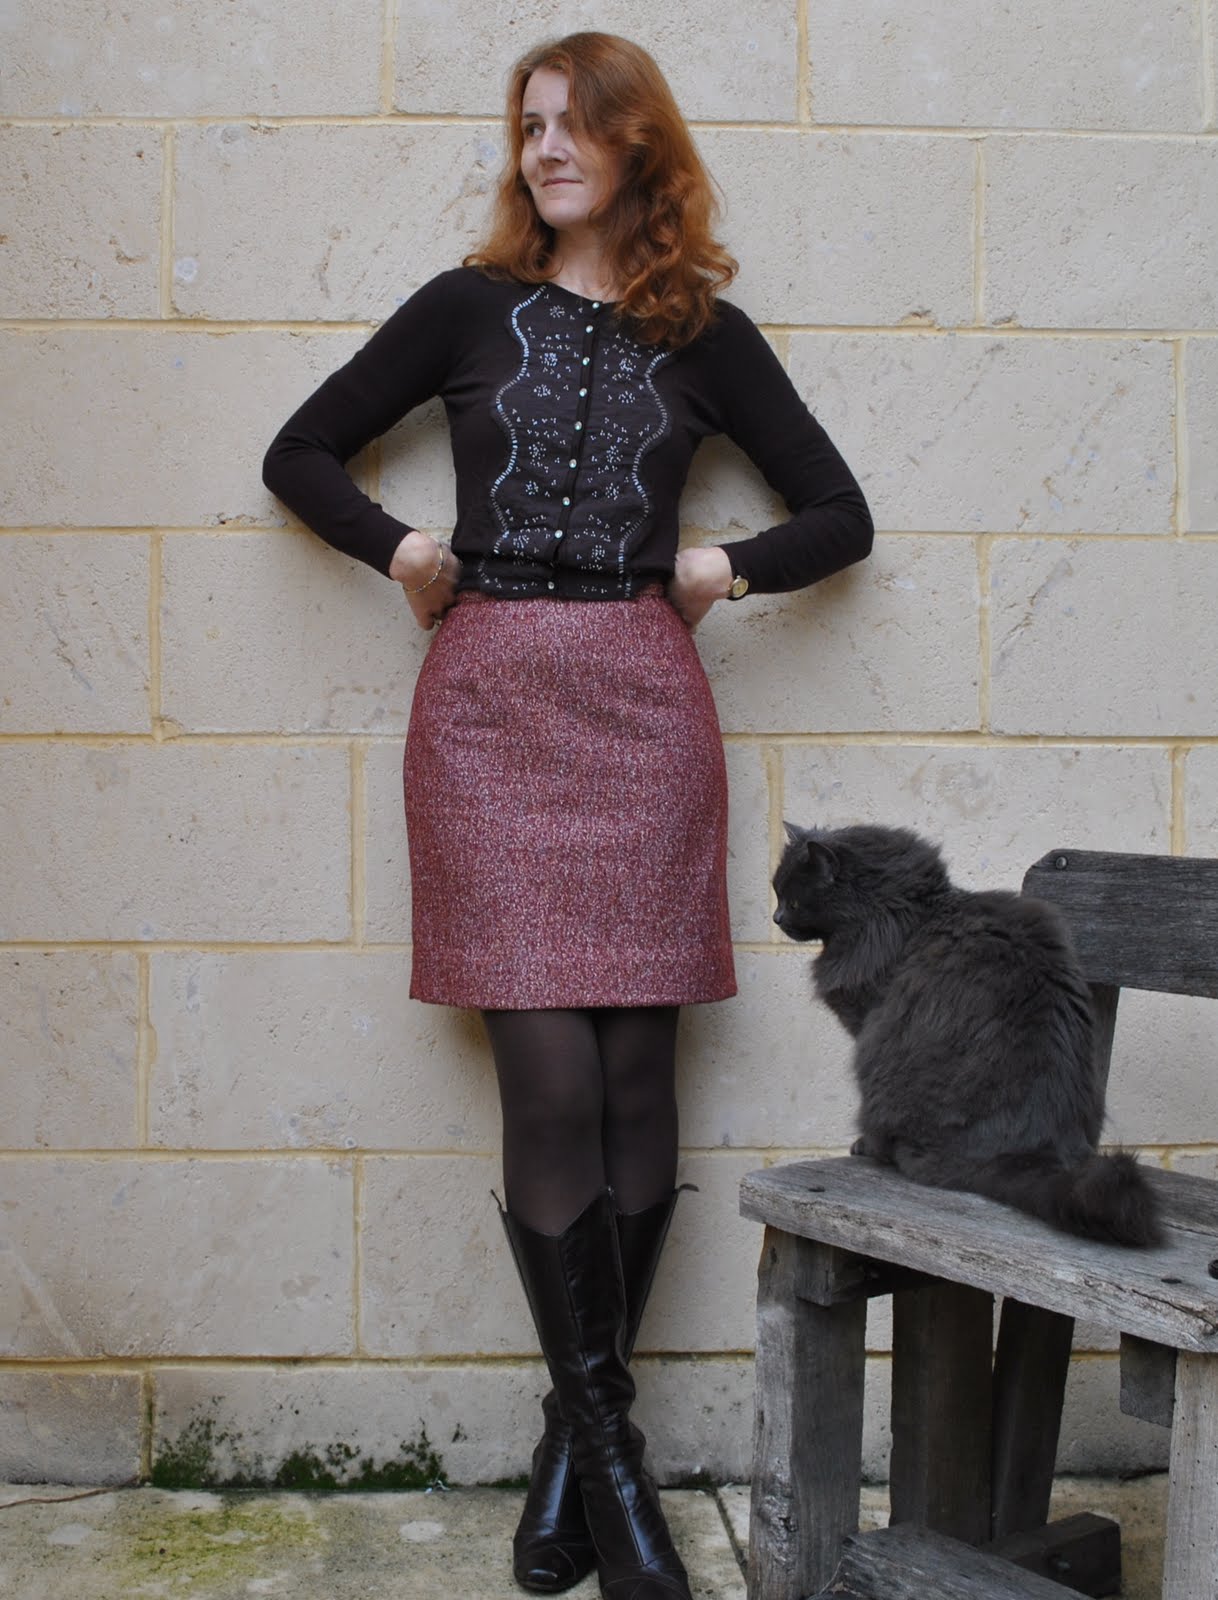
 I’ve been playing with my recently finished burnt-orange skirt, styling it up for a variety of seasons and the different degrees of formality that my lifestyle requires. When I bought this silk hessian I knew its autumnal shades would go with a lot in my wardrobe. But I had such fun putting together outfits based on this skirt… OK, sure I always have a lot of fun playing in my wardrobe, but this time was an easy breezy spoilt-for-choice kind of a fun; because this skirt really goes with just about everything I own! I could have had twice as many outfits as I have pictured here… either a sign that I have far too many clothes (a distinct possibility), or that I am getting a lot better at colour matching my fabric purchases to each other, and to myself and my own colouring. The latter can only be a good thing; the former… hmmm, well we won’t go there…
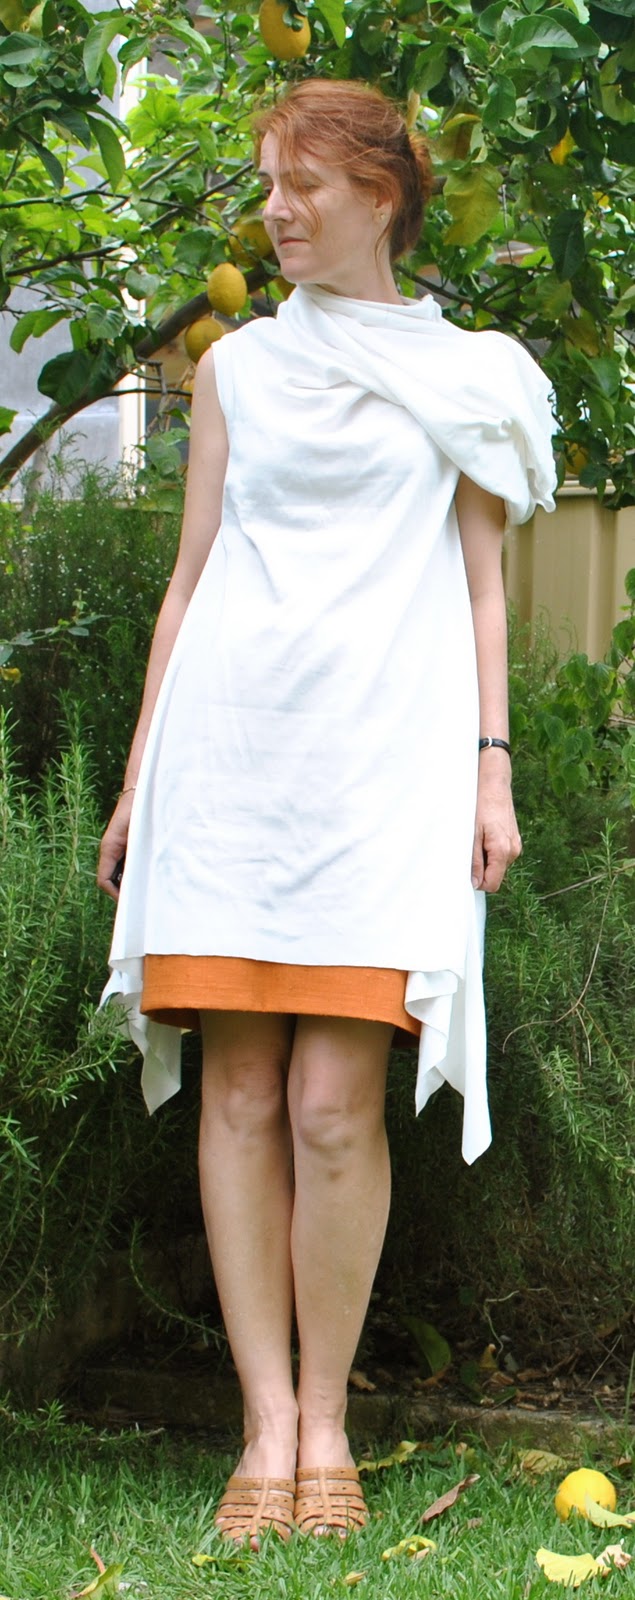
I made this little skirt during the tail end of winter and styled it then with charcoal grey and black here, and I thought the colour of the skirt added a nicely rich yet still citrus-y zing to those sombre winter-y shades. Naturally the orange will also look fresh and tangy with a pure white top during the warmer months, so I avoided that obvious choice here, with just one exception which I’m guessing will be a much harder item to mix-and-match in my wardrobe…
namely this avant garde white dress, at left. It’s quite short on its own so really needs at least a little skirt underneath. To be honest, I’m already re-thinking this white dress (it’s pretty ….er, voluminous) and have a few new plans… watch this space. But in the meantime, wouldn’t this be a good choice for a half-way glamorous, semi-formal summer do? Just imagine the champagne glass in my hand… yes?
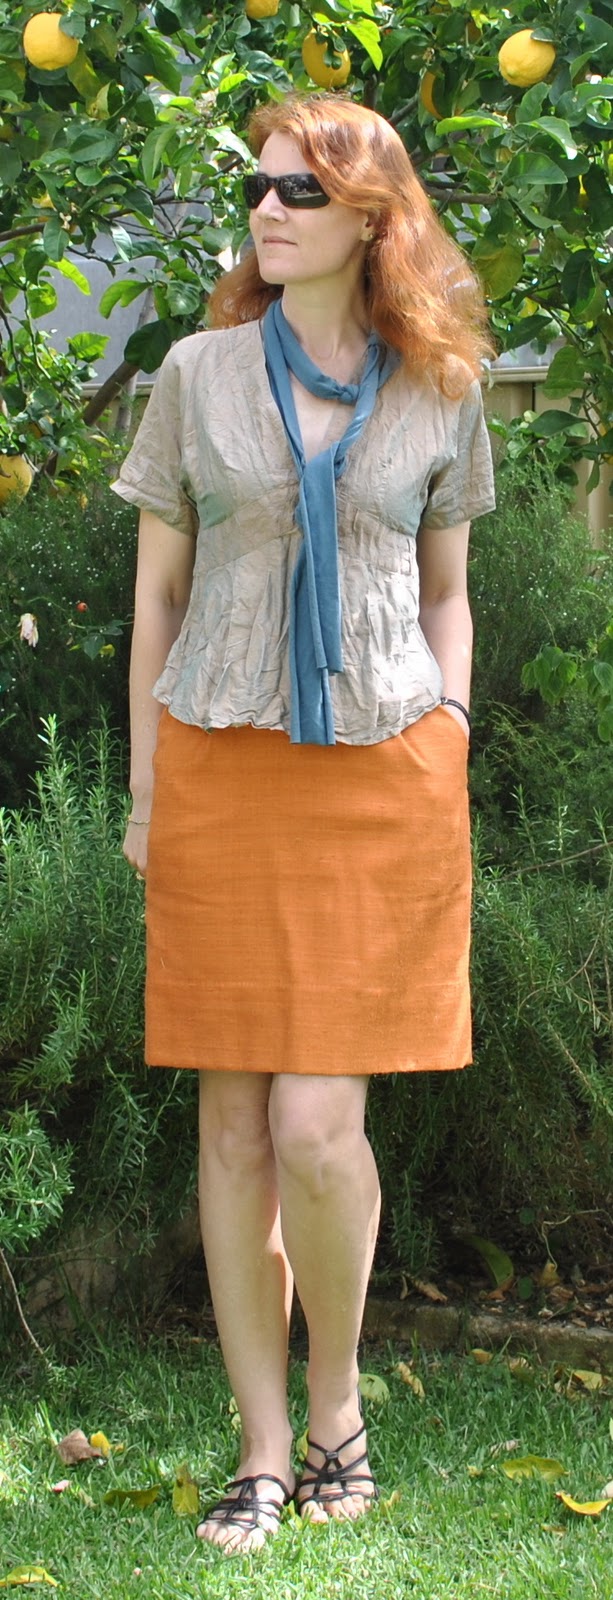
At right; for a more casual kind of a summer’s day, well my top here is of shot silk, with an orange warp and a blue weft, so its resultant drab pink colour is actually a mixture of the other two colours in the skirt and scarf of this outfit… how’s that for painterly colour analysis of an outfit? Sorta impressive…huh?
For days of middling temperature:
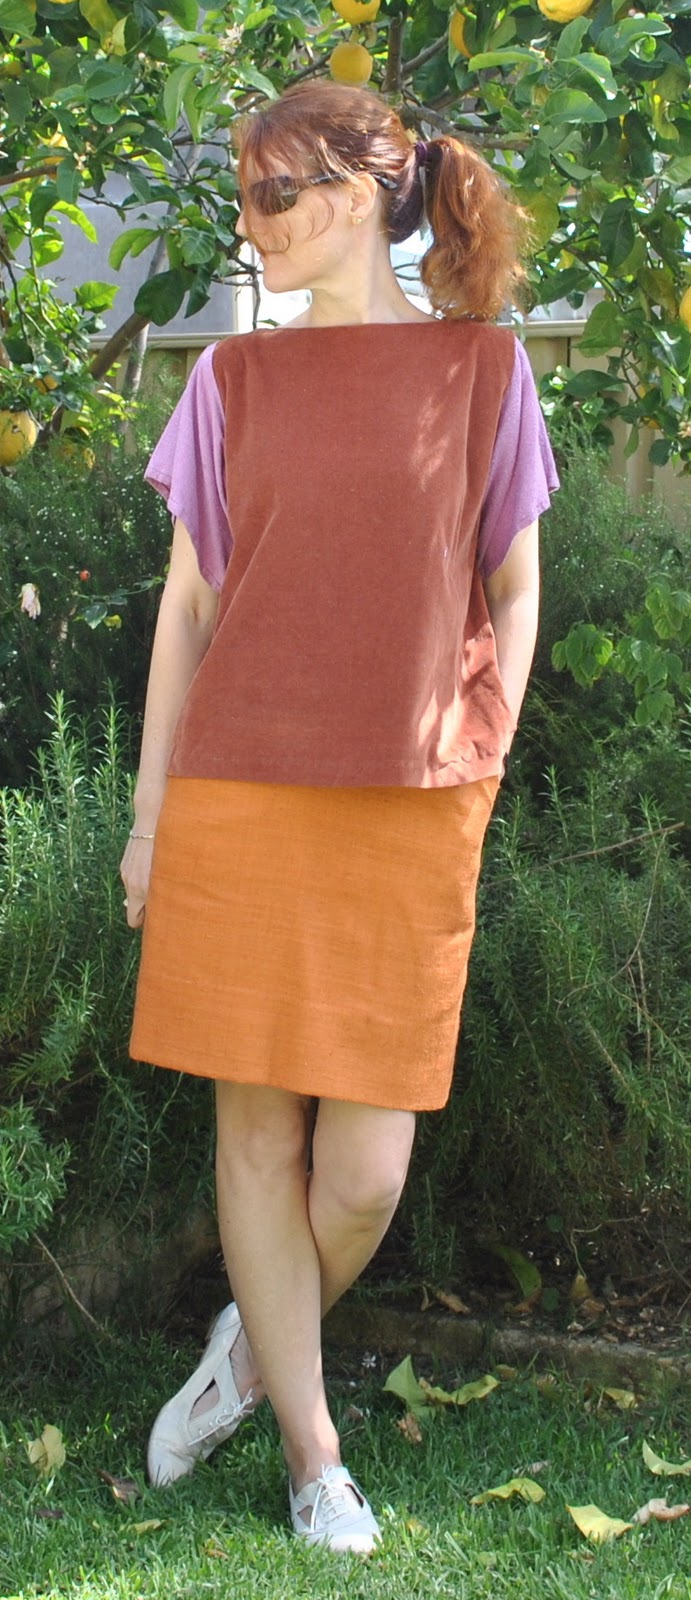
At left; Casual required? I would wear this outfit, and thus serendipitously be sorta colour-blocked. The current fashion buzz-word.
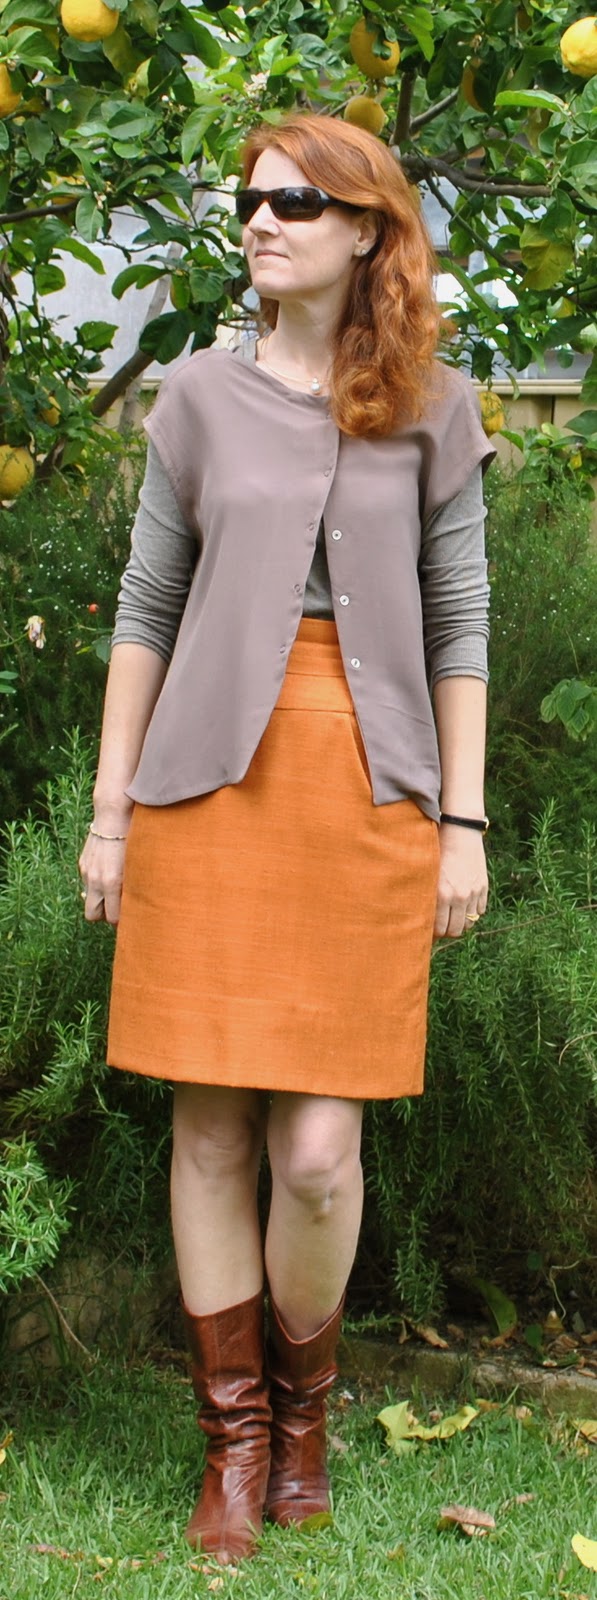
At right; going somewhere nice? Mixing the burnt orange with milk chocolate brown, khaki and rich brown leather; and getting into those toasty autumnal sorts of shades here.
Going winter-y:
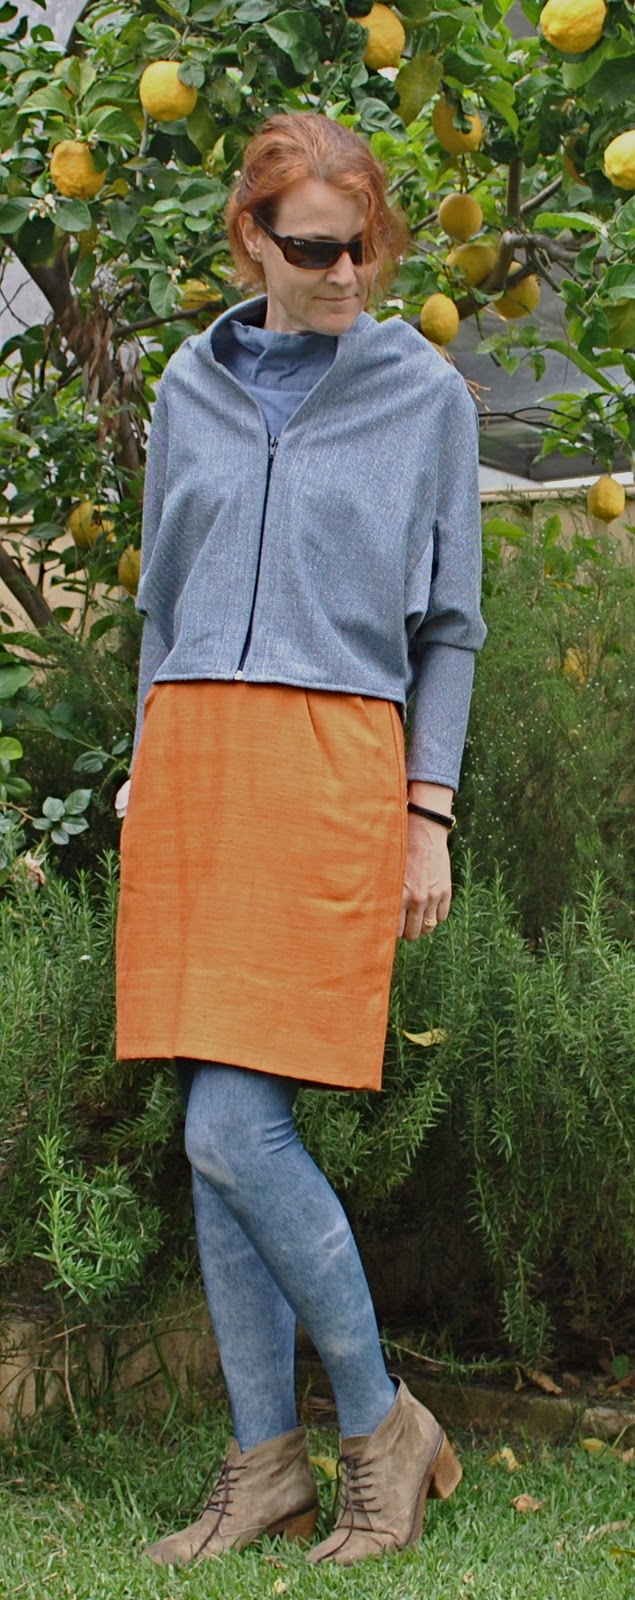
At left; I wore these denim-y blue garments with my rusty red skirt during SSS11, and I really like them with the burnt orange skirt too. Will definitely wear this on a cold and casual day next year… hopefully these tights will hold out that long, fingers crossed :S
And lastly at right; for a semi-smart winter’s occasion, the burnt orange colour works beautifully with the rich jewel shades of ruby red, purple-y red and with the chocolate brown in my tights, boots and bag… well rugged up, and these colours are psychologically half warming me up already!

What am I wearing today? well I met with a friend for her birthday lunch, and I wore the “brown” outfit with my slouchy boots. It was perfect for visiting a cafe, and for these pleasantly warm but not hot days that we are getting now.
Which outfit here do you like the best?


