Kryptonite lingerie

As soon was I saw this kryptonite-ish print I was just like, o gawd! must have….  And, naturally, lingerie was the very first thing that popped into my brain.  Well, of course.  It was only logical.
Mixing up my sci-fi sources there, but y’know wot I mean, right?
Haha! I’ve gotta be honest, this set gave me such a giggle to make.  I’ve been humming the Superman movie theme in my head the entire time I was making it.  Really.
Da dadadaaaaaaa! Da da dada dadaaaaaa!
I’m pretty rapt with them!  I think they’re super cute.  Super cute, gettit?   Haha.  I think even Superman might approve.  Or at the very least, Sheldon.
Sorry.  I just can’t help it!  The thought of superhuman underthingies just cracks me up  ðŸ™‚

Technical blahdy-blah…
Well, aside from the loud print the set itself is quite plain and featureless, really.
I used MakeBra 2610, and McCalls 2772 for the two pairs of matching undies.  All black findings and elastics.  The kryptonite print stretch fabric is from Fabulous Fabrics, the lingerie elastic I used for the undies is from Spotlight, and all the other bra elastics and findings are from MakeBra.
And I followed the absolutely fabulous MakeBra Youtube tutorial when making my bra.  Honestly, MakeBra is fair dinkum the best resource for bra-making I’ve come across, not that I’m an expert or anything, but just in my experience in making 16 of my own bras; that is my honest opinion.  They have a very nice range of findings and the.youtube tutorial is the most brilliant little tute, well worth taking the quarter of an hour or whatever to watch, if you have ever been tempted to have a go.  It demystifies bra-making and takes the difficulty out of it, but totally.  If you’ve been intimidated by the thought of making a bra, please do not be; it’s really not actually that hard!
My original review of the MakeBra pattern is here

squeezing detail close-ups into one jumbled-up shot
pinterestmail

Black moto jacket

Finally! A wintery day!
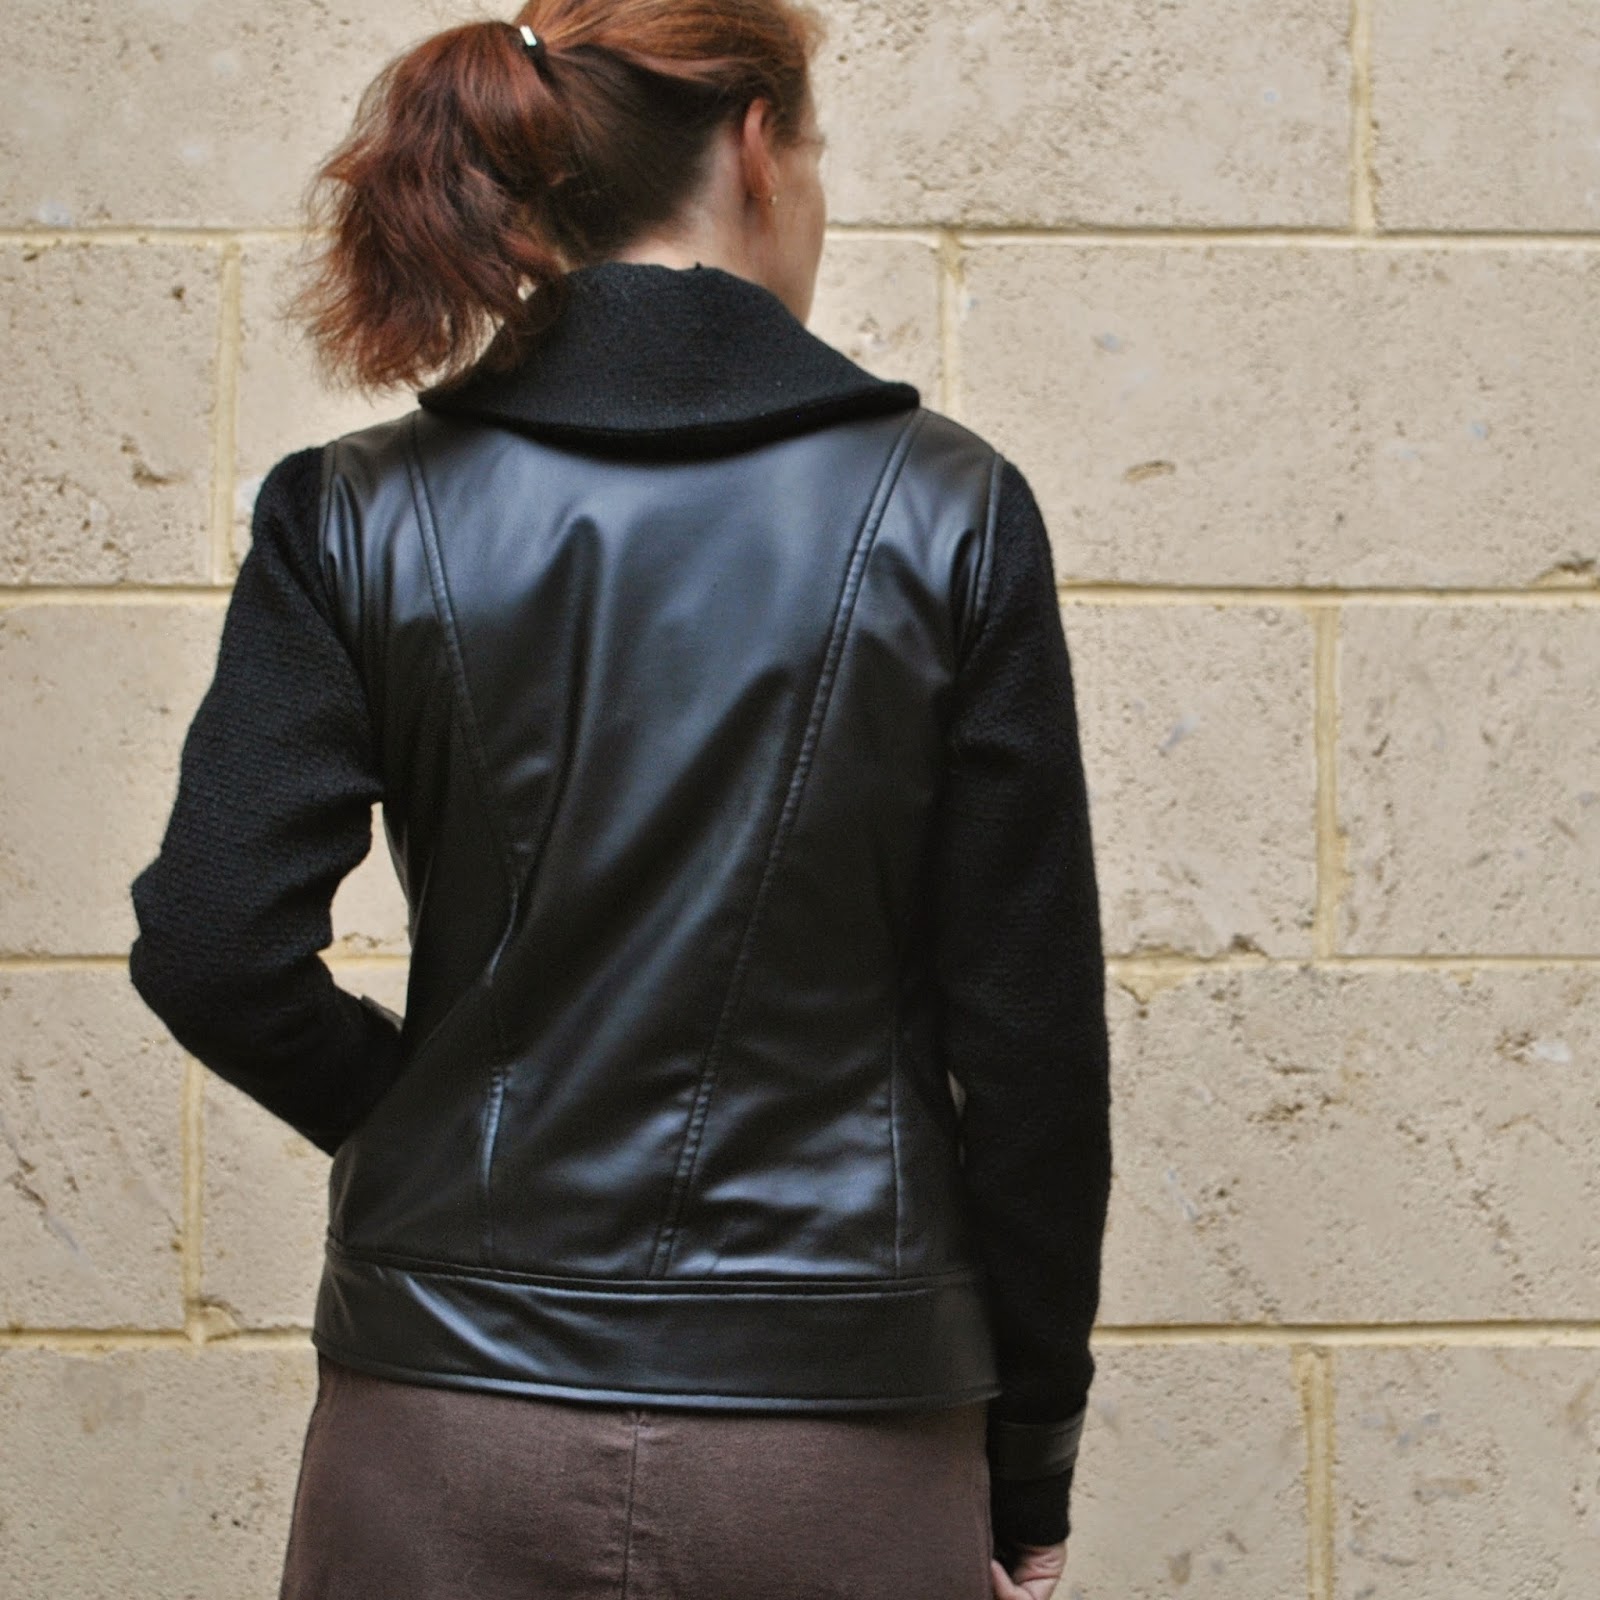
It’s pretty unusual for me to get excited about a wintery day, haha.  Believe me, winter is my very least favourite season… but I have my reason, see; I’m happy for an excuse to wear and show off my newest thing.  My moto jacket!
*sings* the leader of the pack…  brrrrm brrrrm brrmrrrrrrm!
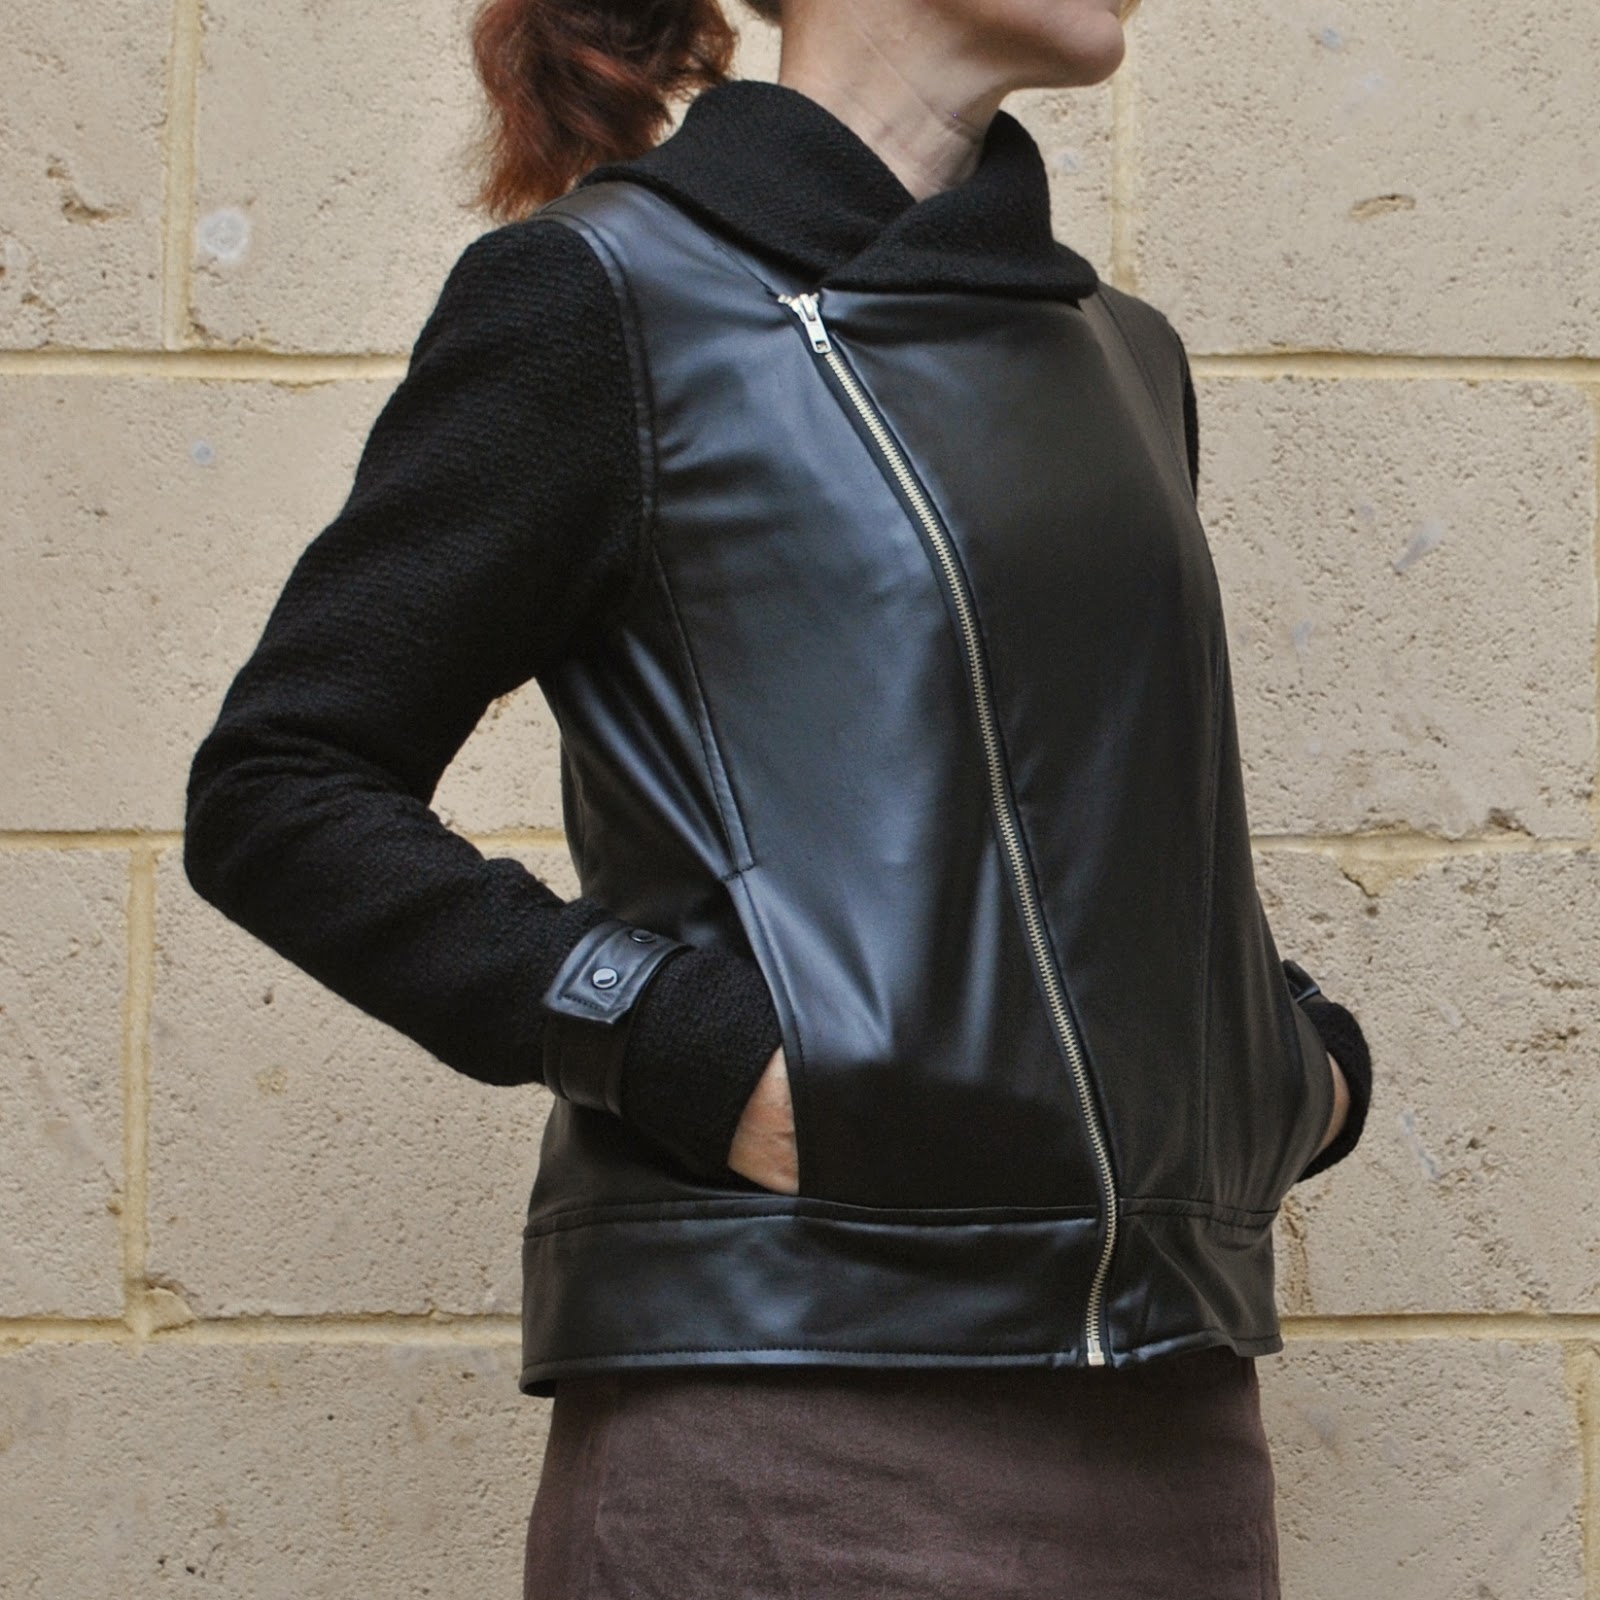
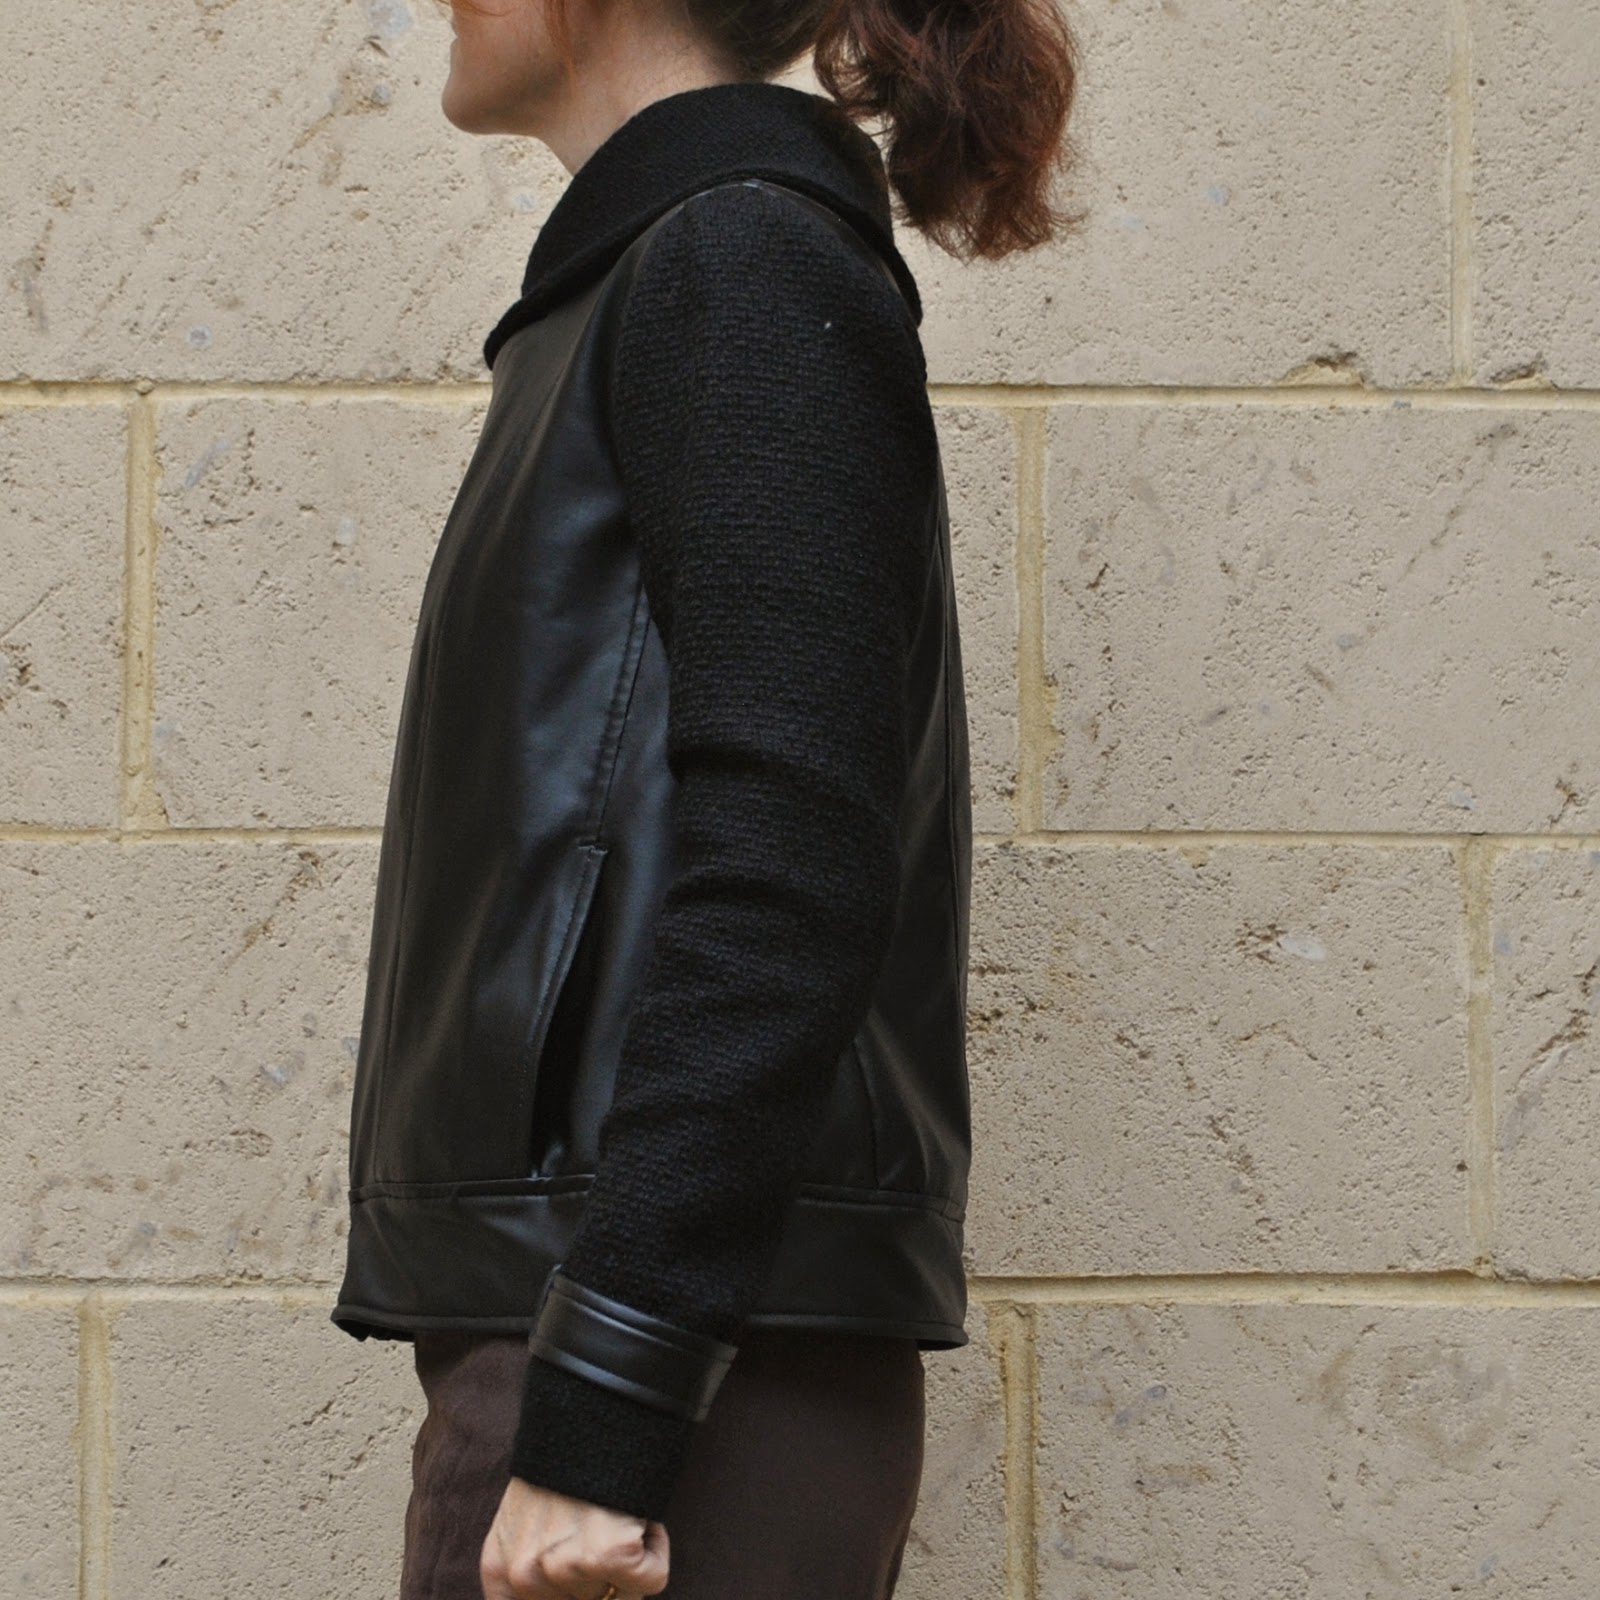
Silke, the designer behind schnittchen patterns contacted me asking if I would like to road test one of her patterns and I chose the Tina jacket; a blouson style with an asymmetric front closure by exposed zip, and a wrap-around collar.  
Danke, Silke!
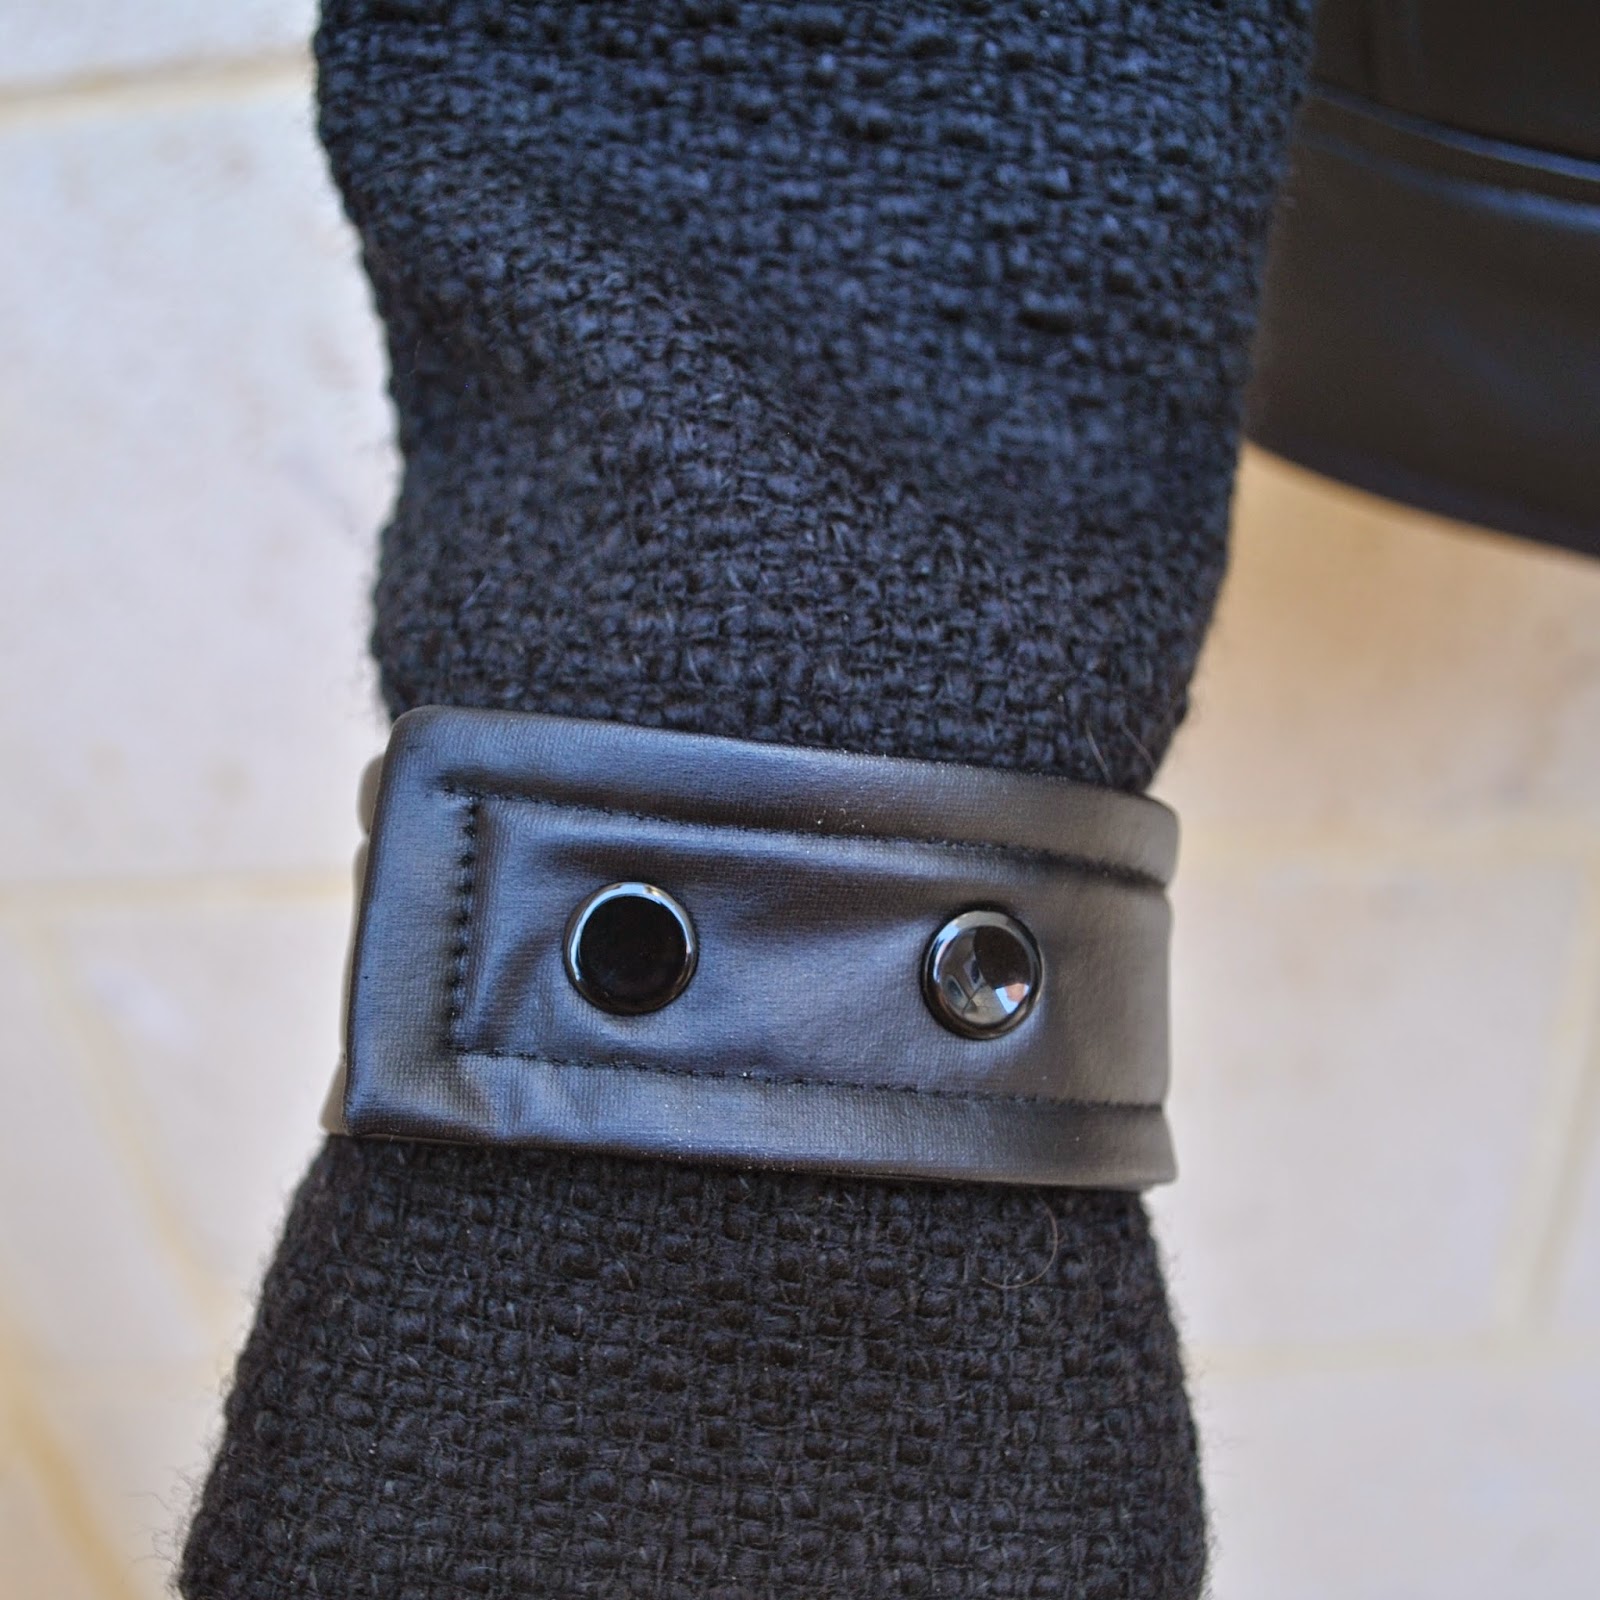
I immediately envisioned making something in a combination of leather/wool… well; making this, wot I’m wearing here, essentially.  My jacket here is made up pretty much exactly to the pattern… except I made my sleeve cuffs a little wider, because I have quite long arms apparently, and I added leather sleeve tabs, sewn into the sleeve seams and wrapped around to close with two hammer-in press studs.  I also fully lined my jacket using black polyacetate lining fabric.

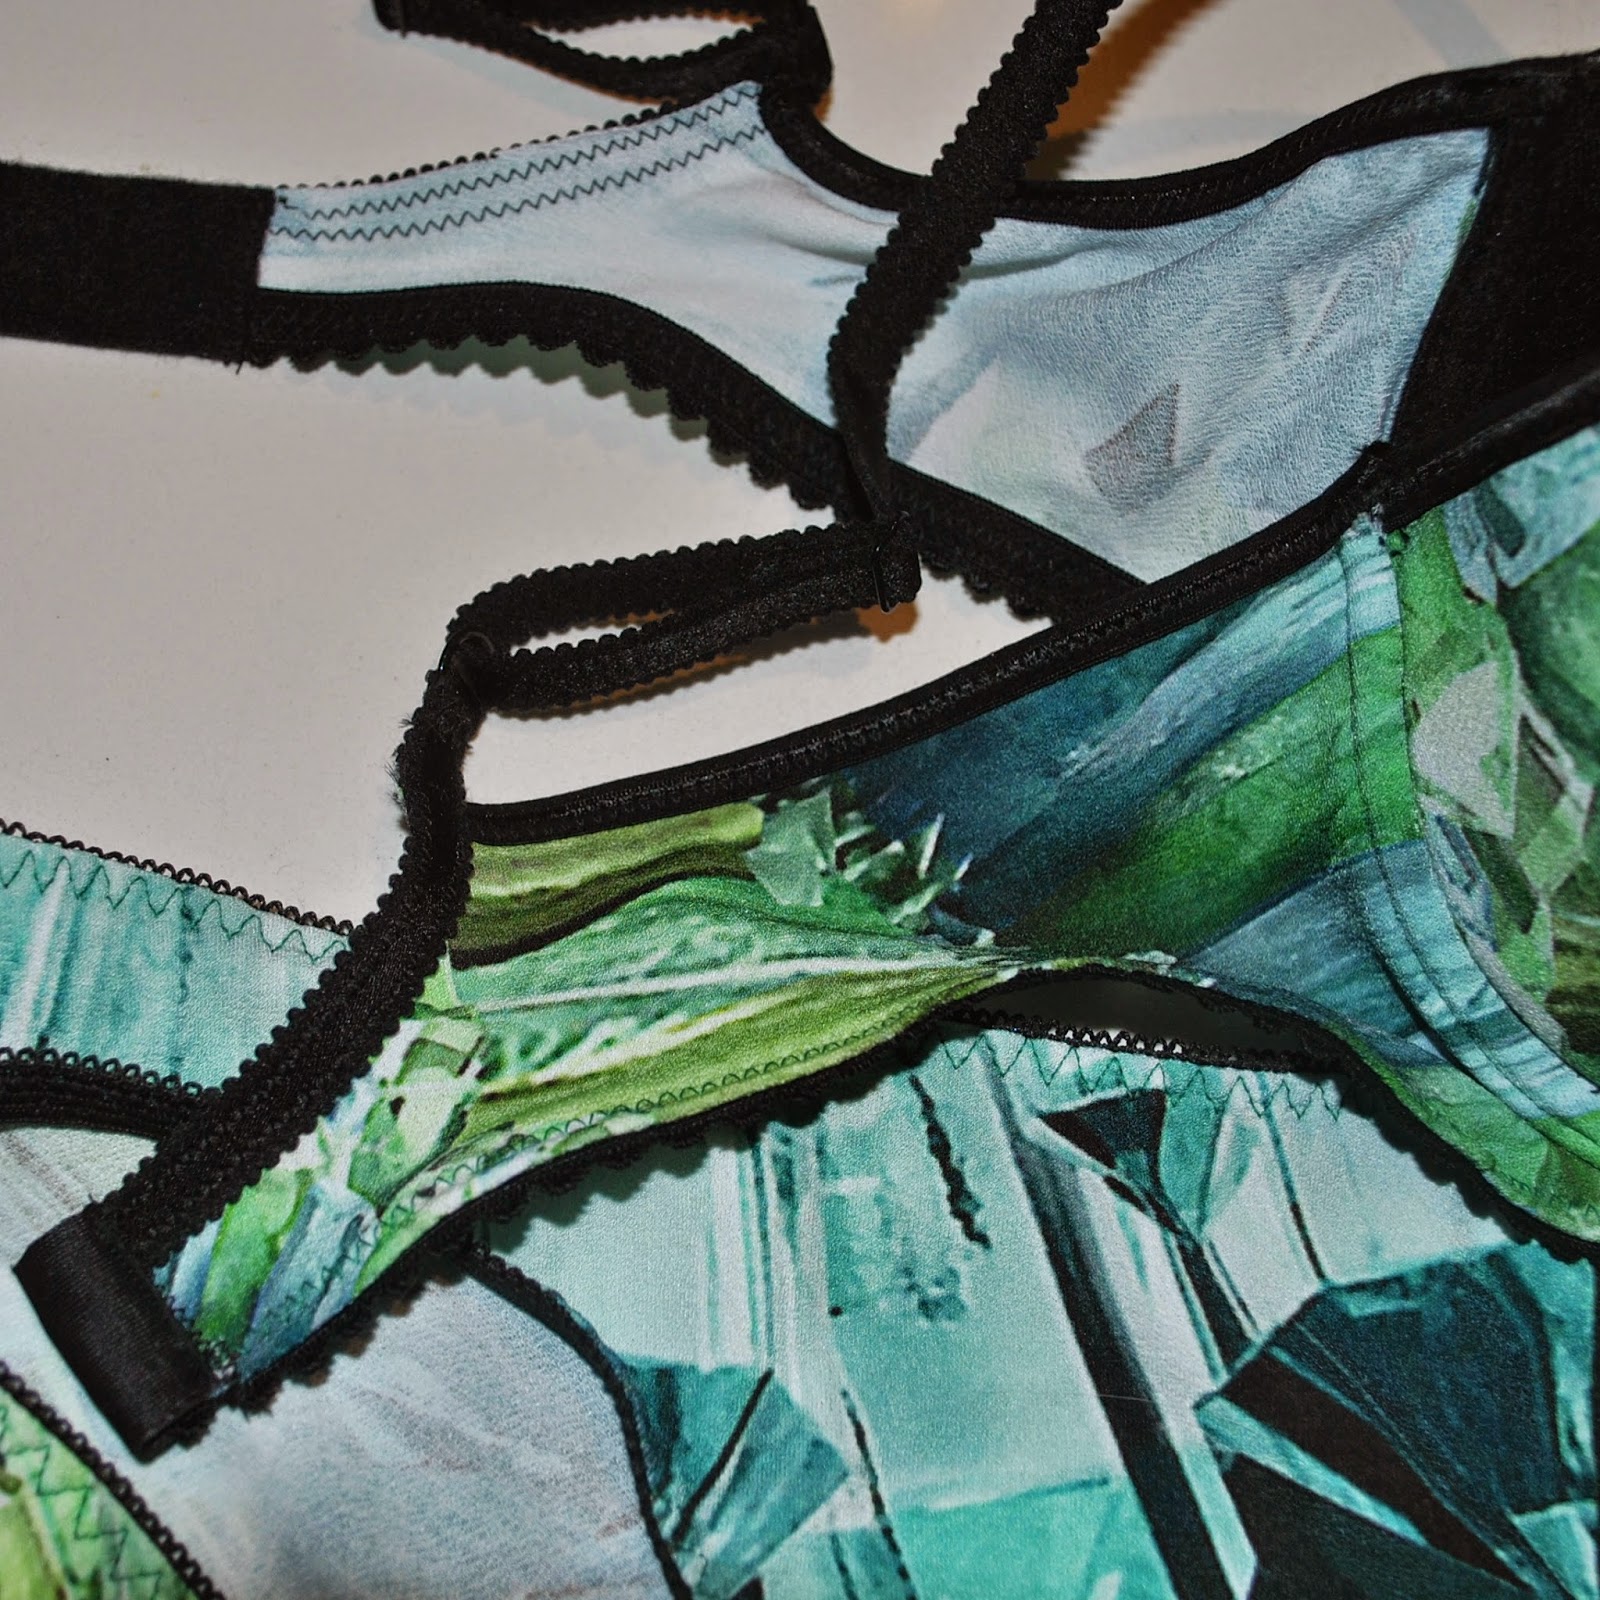
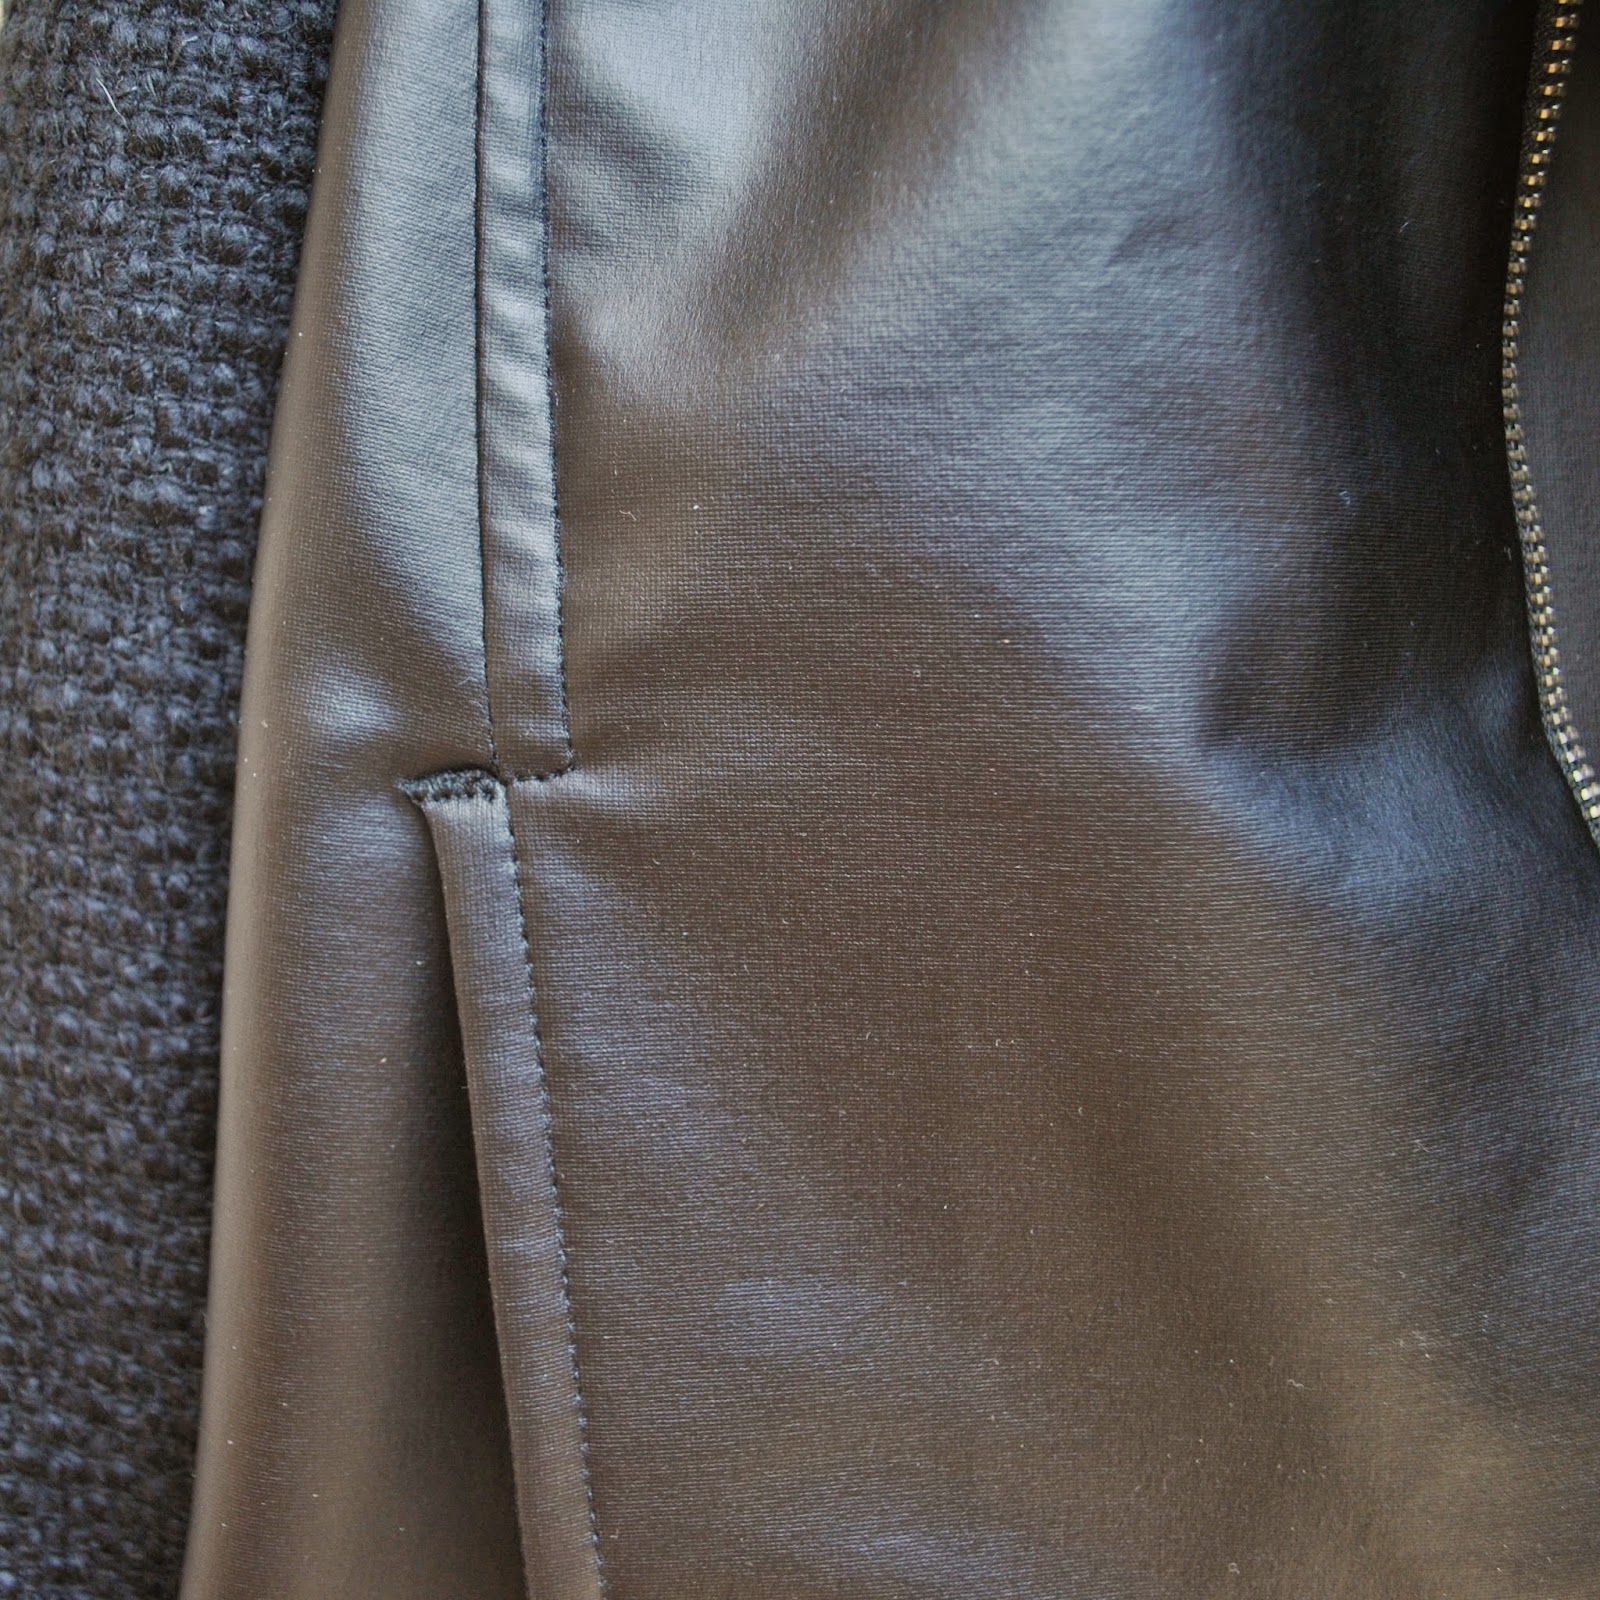
Also I top-stitched the body and armscye seams, stitching the seam allowances down inside. And a little bit of narrow zig-zagging along the top of the pocket openings, to strengthen that bit.
And I also made the pockets about 2cm deeper.  So, just a few teeny alterations here and there, after all  ðŸ™‚

All of my materials are from Spotlight.  The “leather” is obviously vinyl, very thin, soft and pliable and a little stretchy.  I found I could use my regular sewing machine needle on it just fine.
The “wool” is a wool/acrylic mix tweed.  It felt quite stiff when I bought it, but a pre-wash in my machine on the gentle/wool cycle brought it up beautifully soft and fluffy, and the collar feels heavenly snuggly against my neck skin.

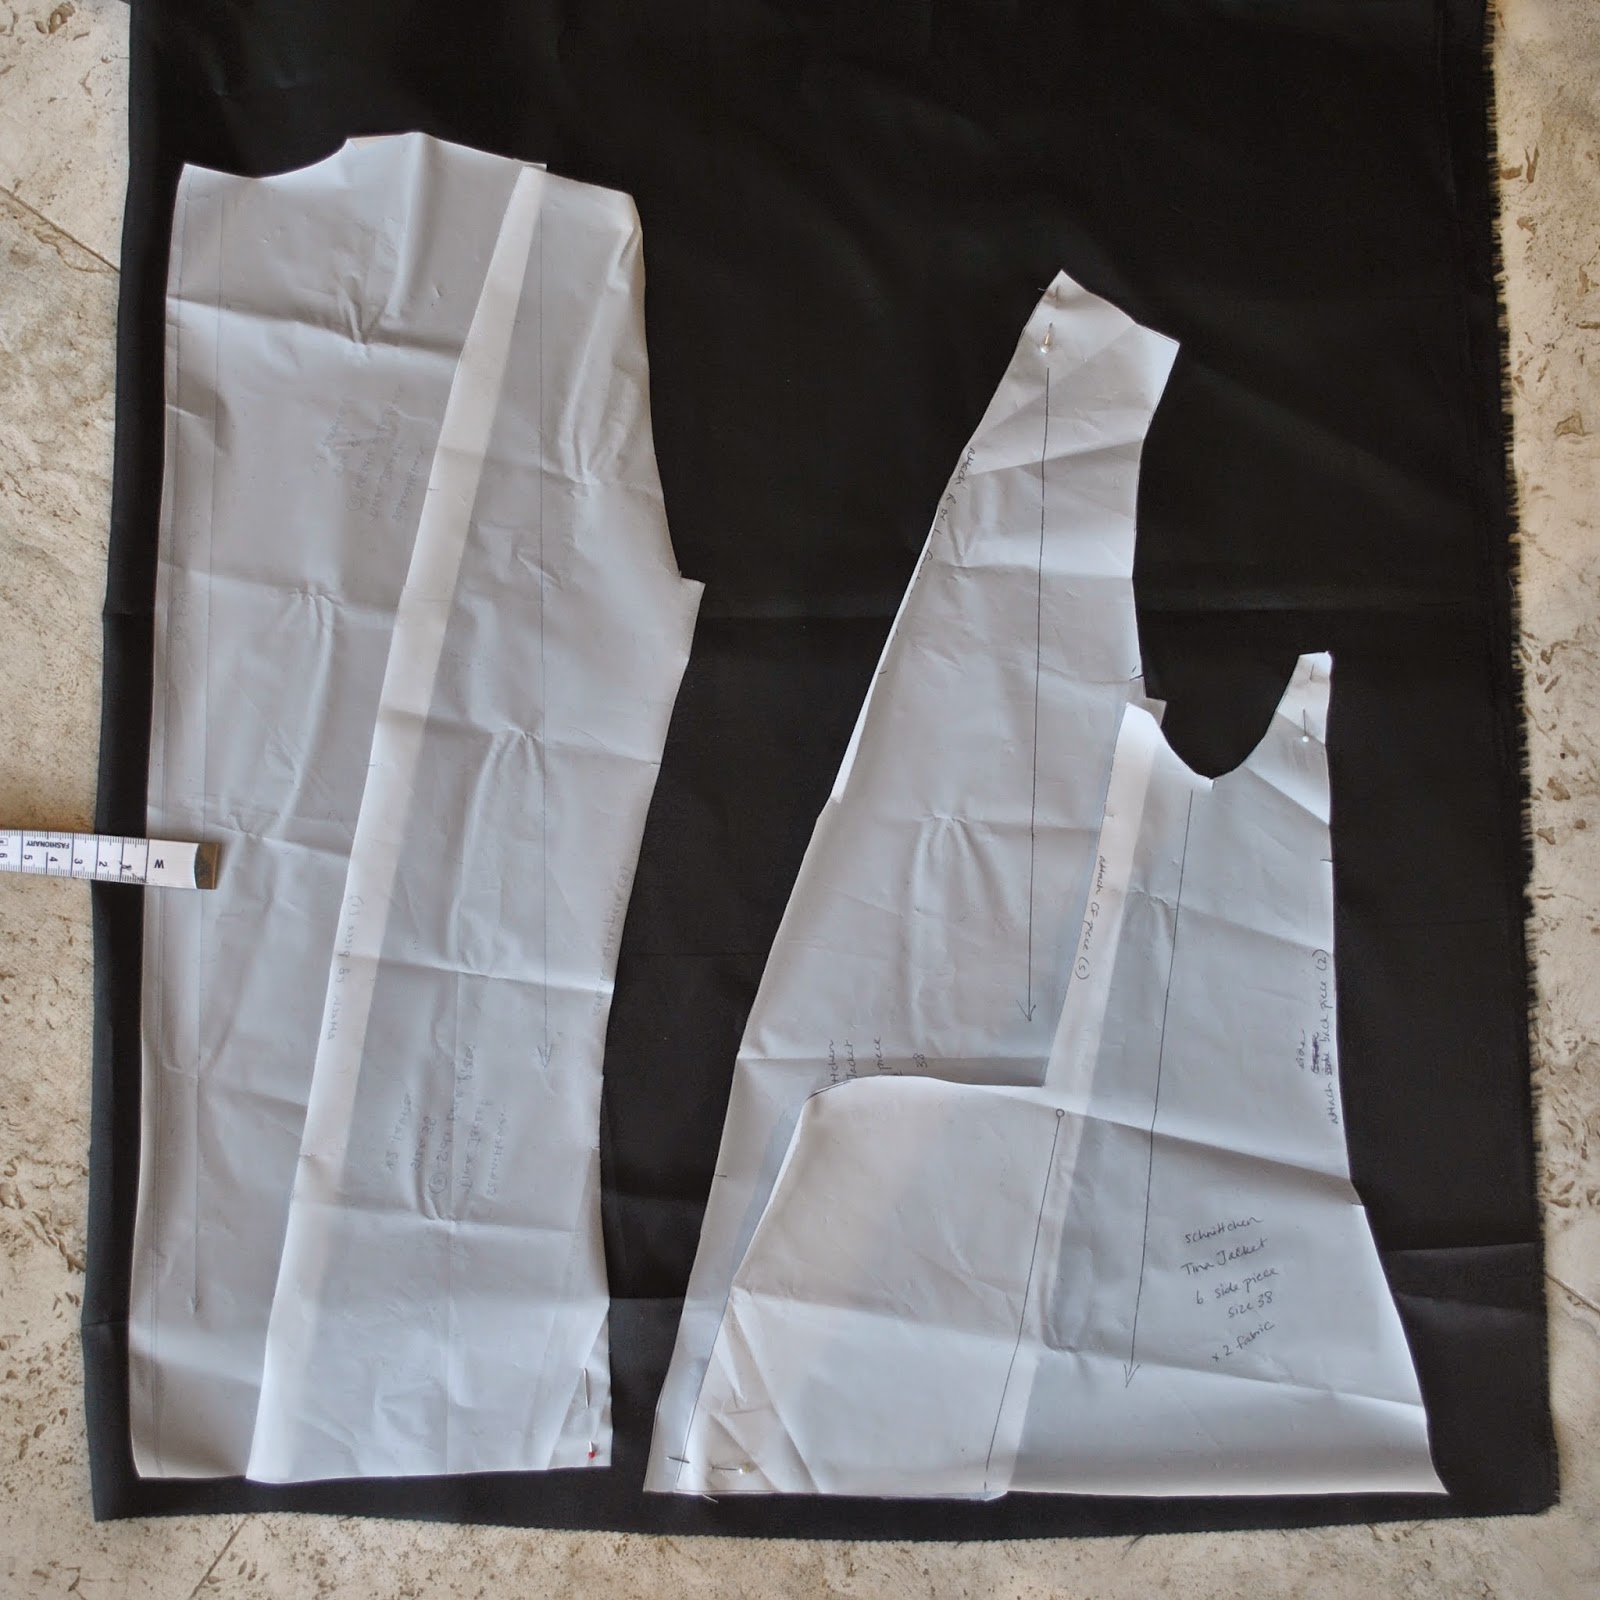
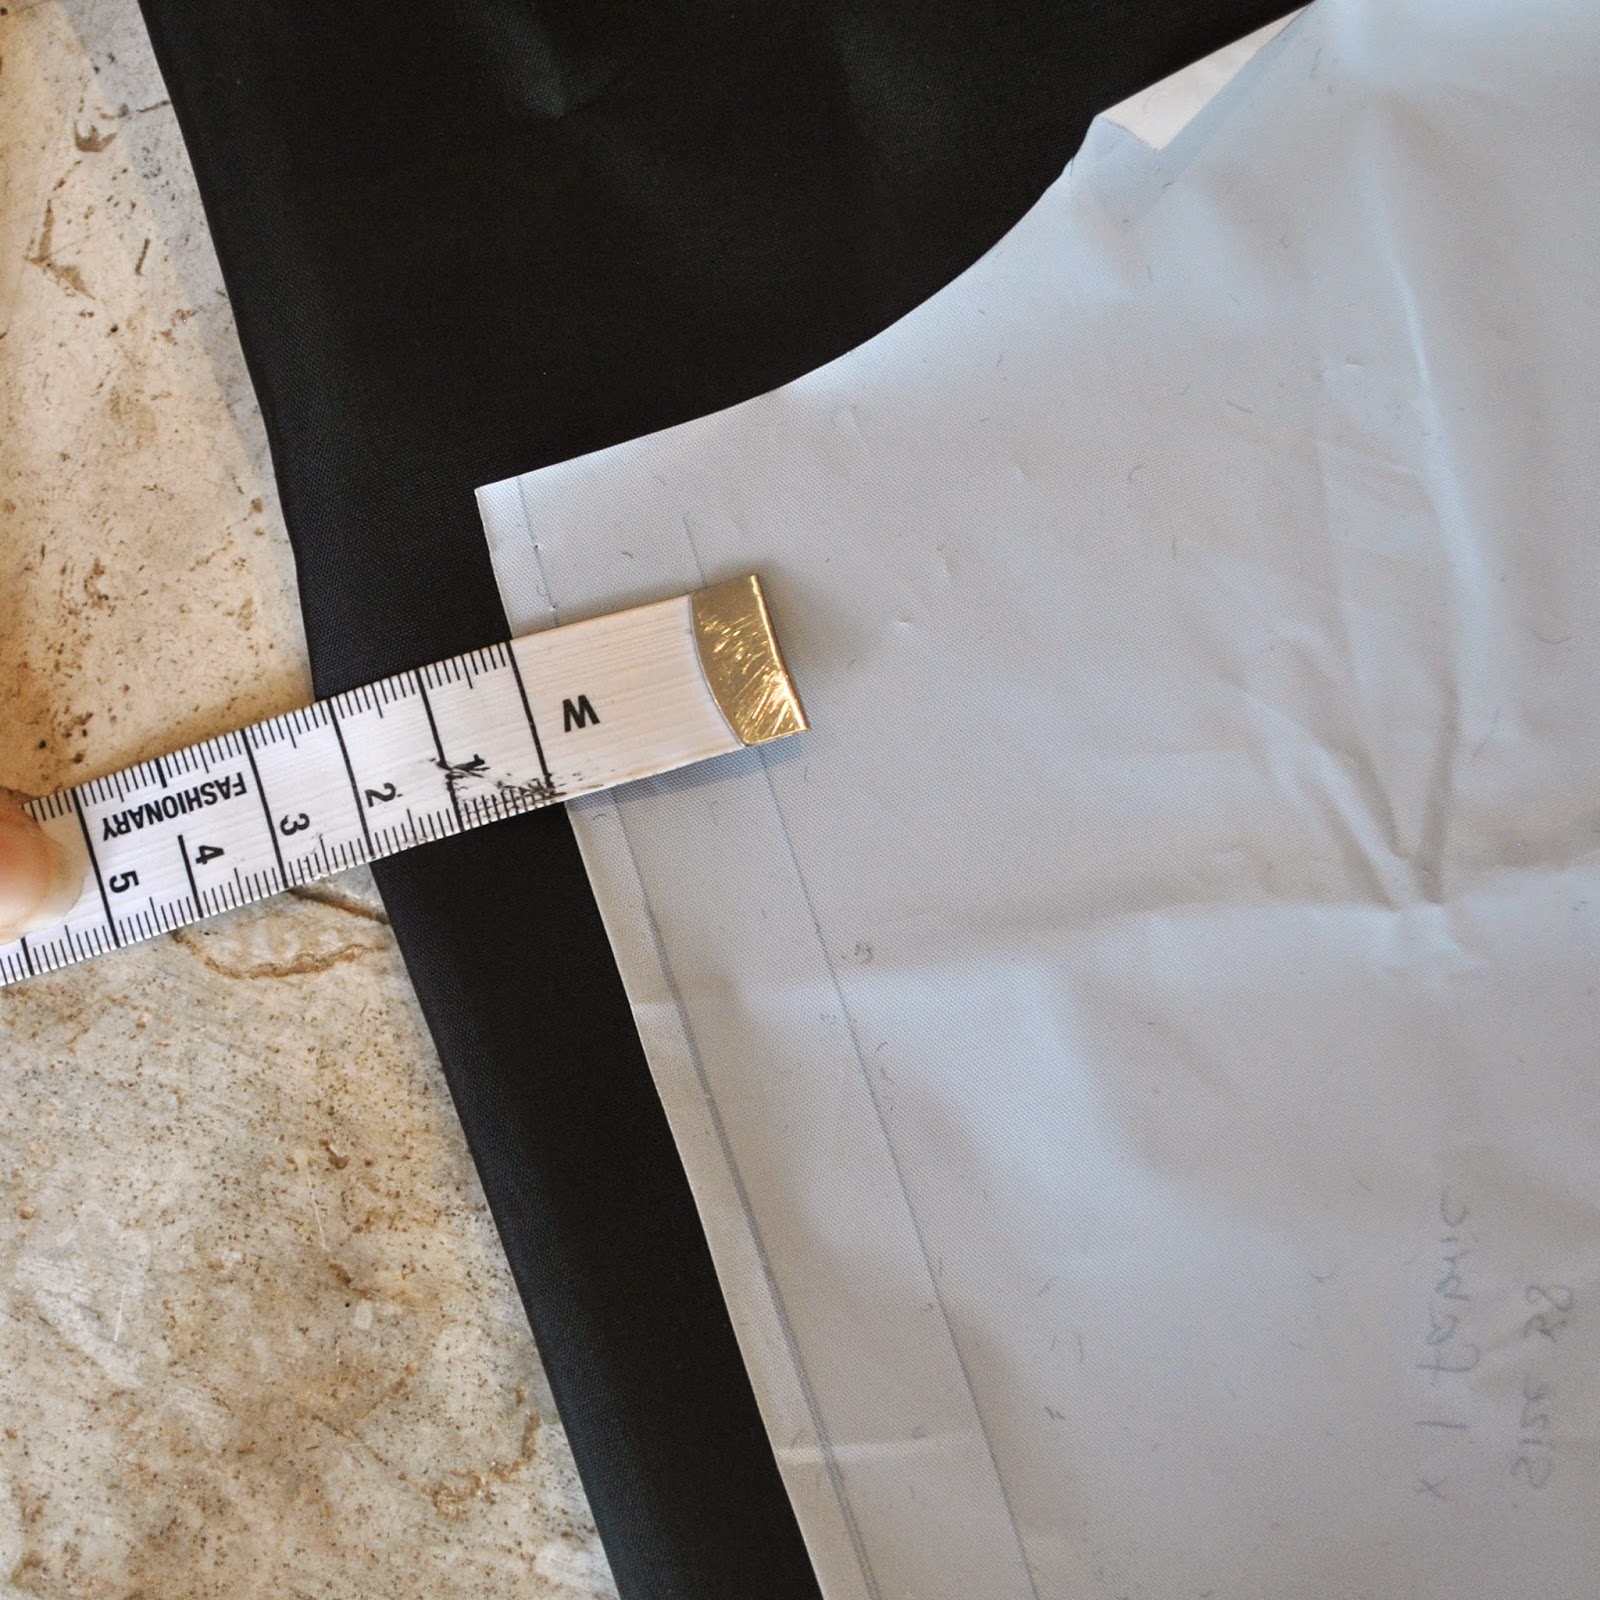
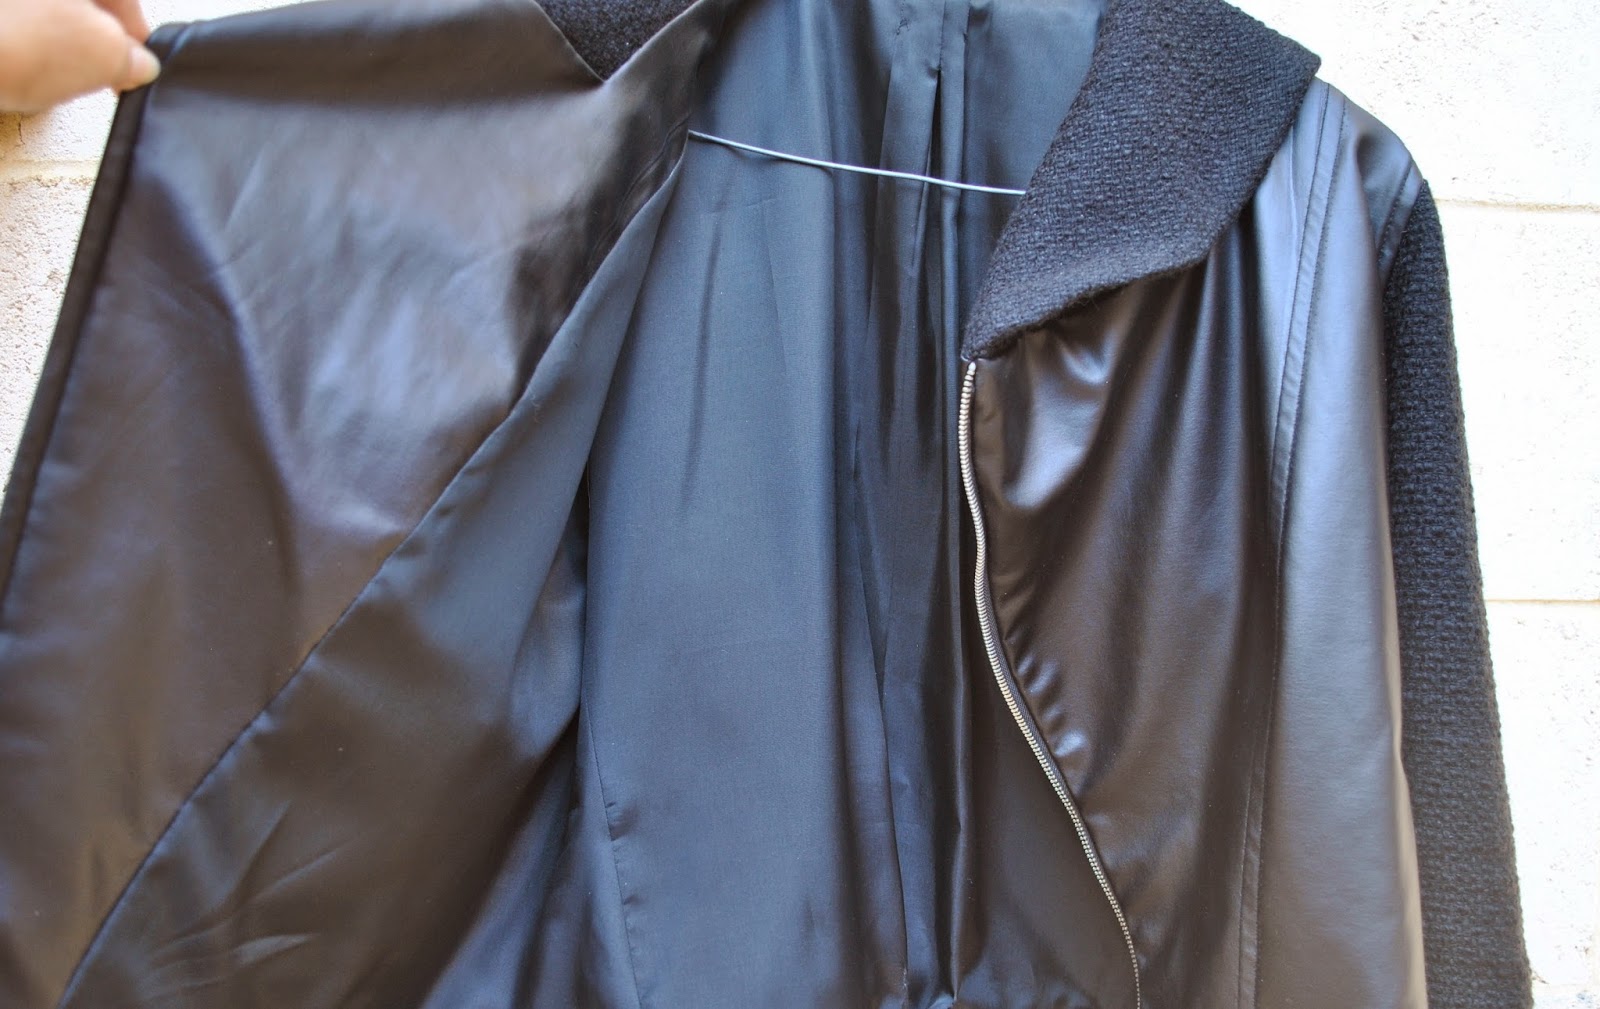
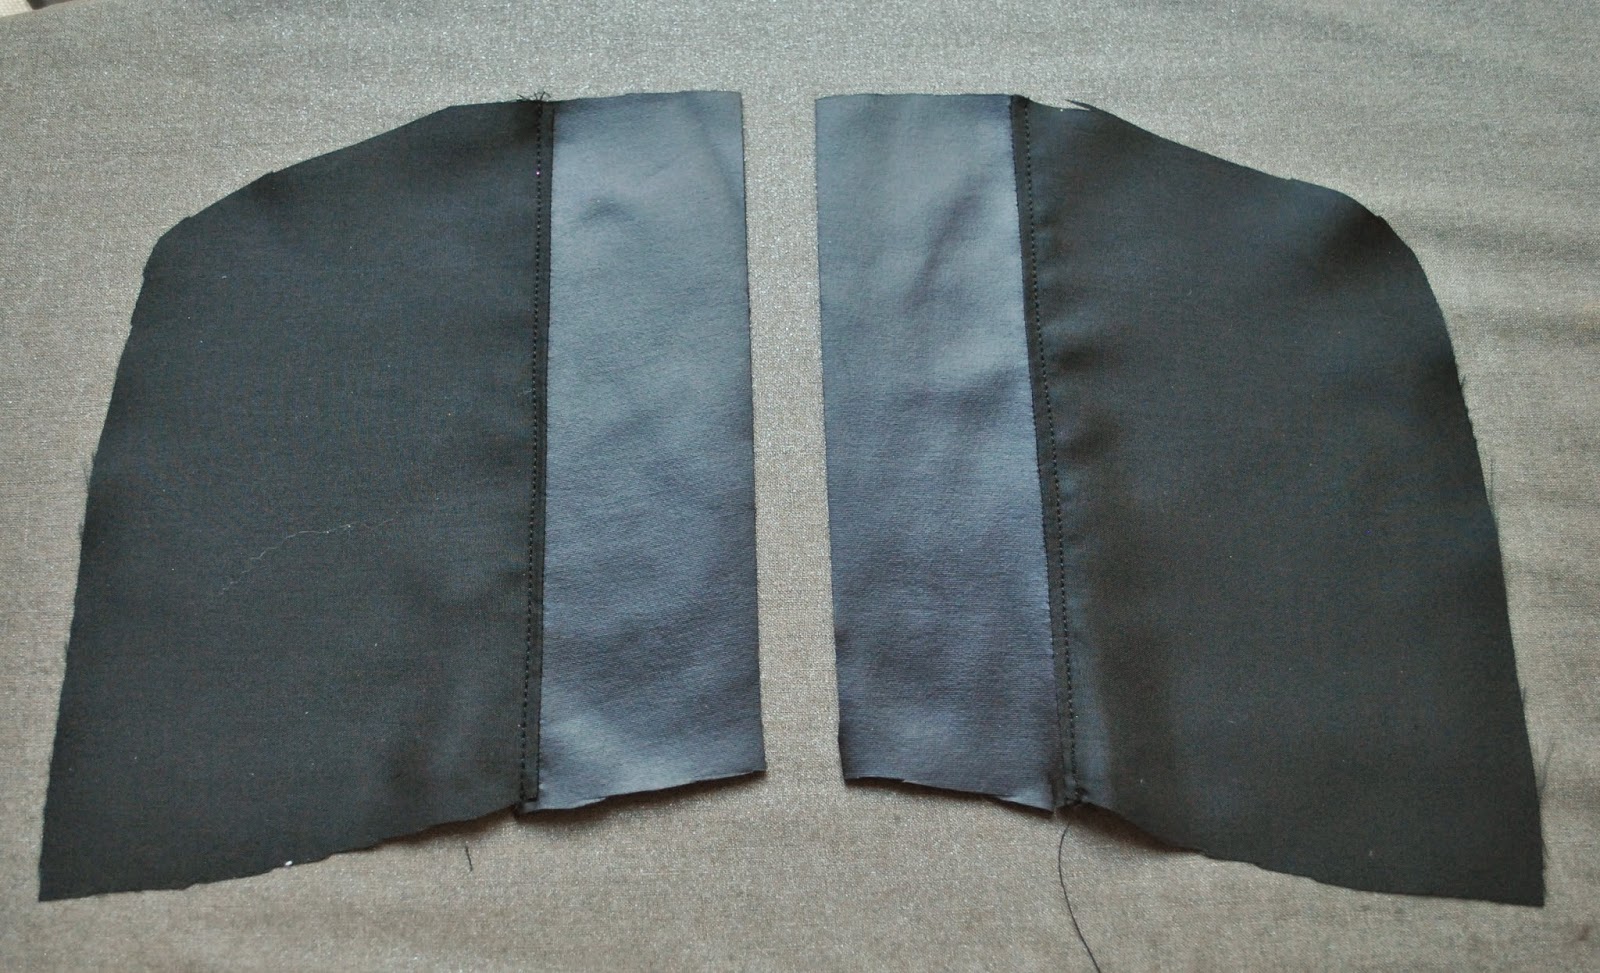
I chose to fully line my jacket.  The pattern doesn’t stipulate lining but that’s no biggie.  I used the pattern pieces, and to save myself the trouble of tonnes of piecing the multiple body pieces, I spliced the side front/side pieces together to cut them as one piece in the lining fabric, and also the centre back/side back pieces I spliced together in the same way.  When laying down the centre back piece; I laid it down with the centre fold line 2cm away from the fabric fold, giving myself an extra 4cm in width at the centre back. 

Note: re-enactment shots, when I realised I hadn’t taken any pictures, doh!

This extra width at the CB I folded into a box pleat and basted it in place for the first 5cm in from each edge.  Doing this gives me a nice bit of wearing ease in the lining, which is always a good idea in a jacket.  I learnt this little tip from my standby McCalls 5525 coat pattern.

When cutting the pocket pouches, I cut them of half lining fabric with a leather facing at the opening edge, so there’s no danger of any lining fabric peeking out unattractively.
Also, when cutting the sleeve linings; I tapered out by about 1cm down each long edge, again to give the lining a bit of elbow-bending ease inside the sleeves.

Thoughts?  Well, the pattern is a lovely classic style and the pattern works beautifully, all going together and fitting in place like a dream.  I really love the style, and how my jacket worked out.
However this might be a challenging project for the non-German speaking, beginner seamster.  This is a German pattern with German instructions and an English translation, with no illustrations or pictures.   Occasionally there were some innovative words and phrasing, reminding me of that time I typed a set of Patrones instructions into Google translate.  Memories.
The schnittchen website does however have an excellent step by step photo tutorial which clearly illustrates all steps and is very helpful.  I think if you had made a jacket before you would be absolutely fine with the English instructions.  They gave a good construction order and they worked perfectly well. 
Finally and most importantly, I’m super stoked and excited with my new jacket.  According to the fashion report on the news the other night, leather and leather details are IN this winter.  How fortunate!
Whatevs the fashion, I’m going to LOVE wearing it.  It’s very cosy, comfy and super warm.   Its edgy vibe is a nice bonus  ðŸ™‚

Details:
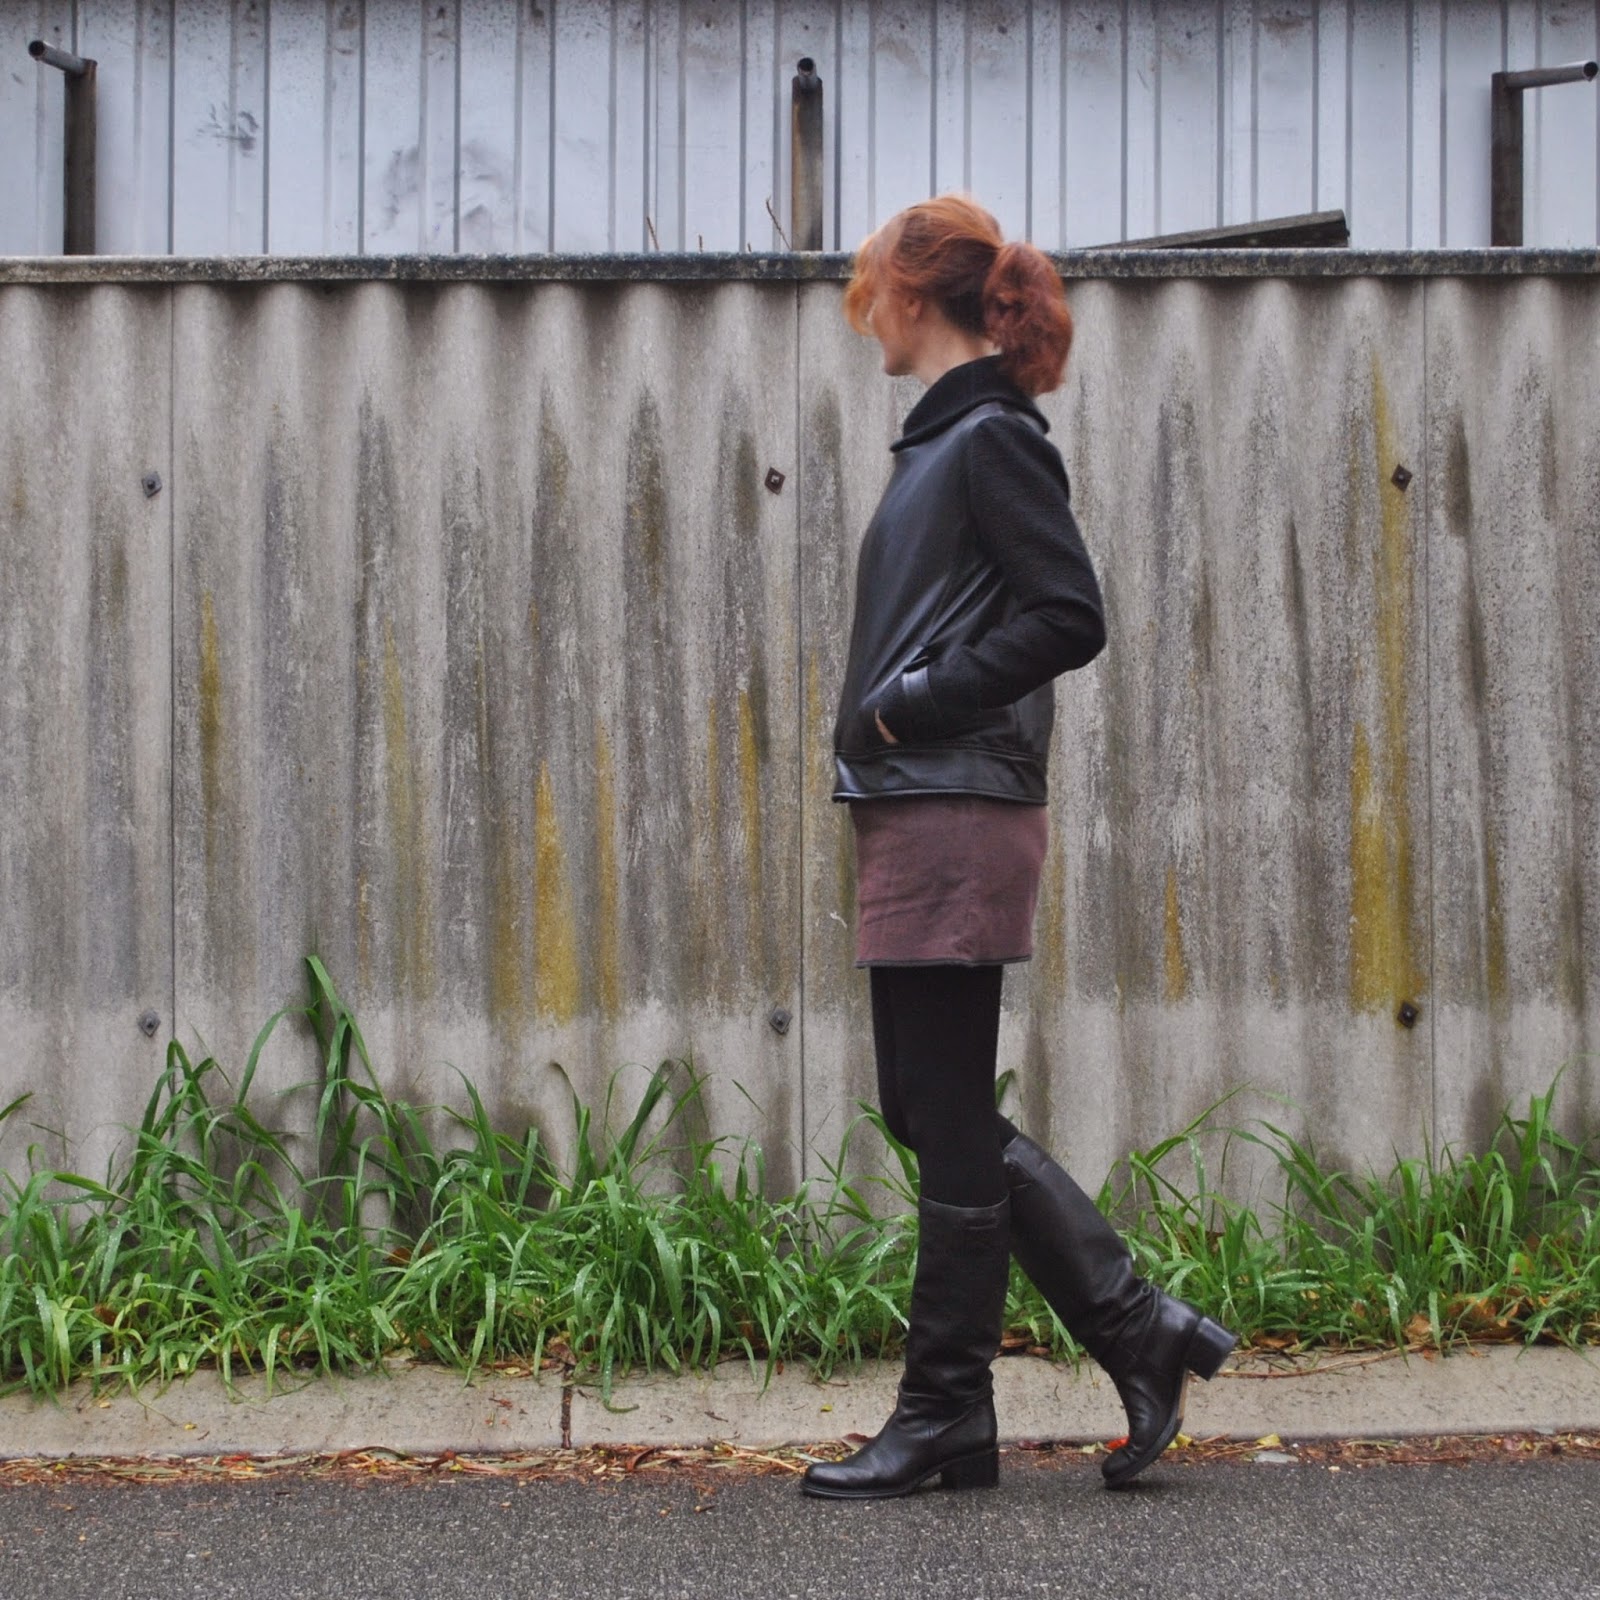
Jacket; the Tina jacket by schnittchen patterns, faux leather and wool mix
Tshirt (under); white cotton, using my own custom fit pattern, details here
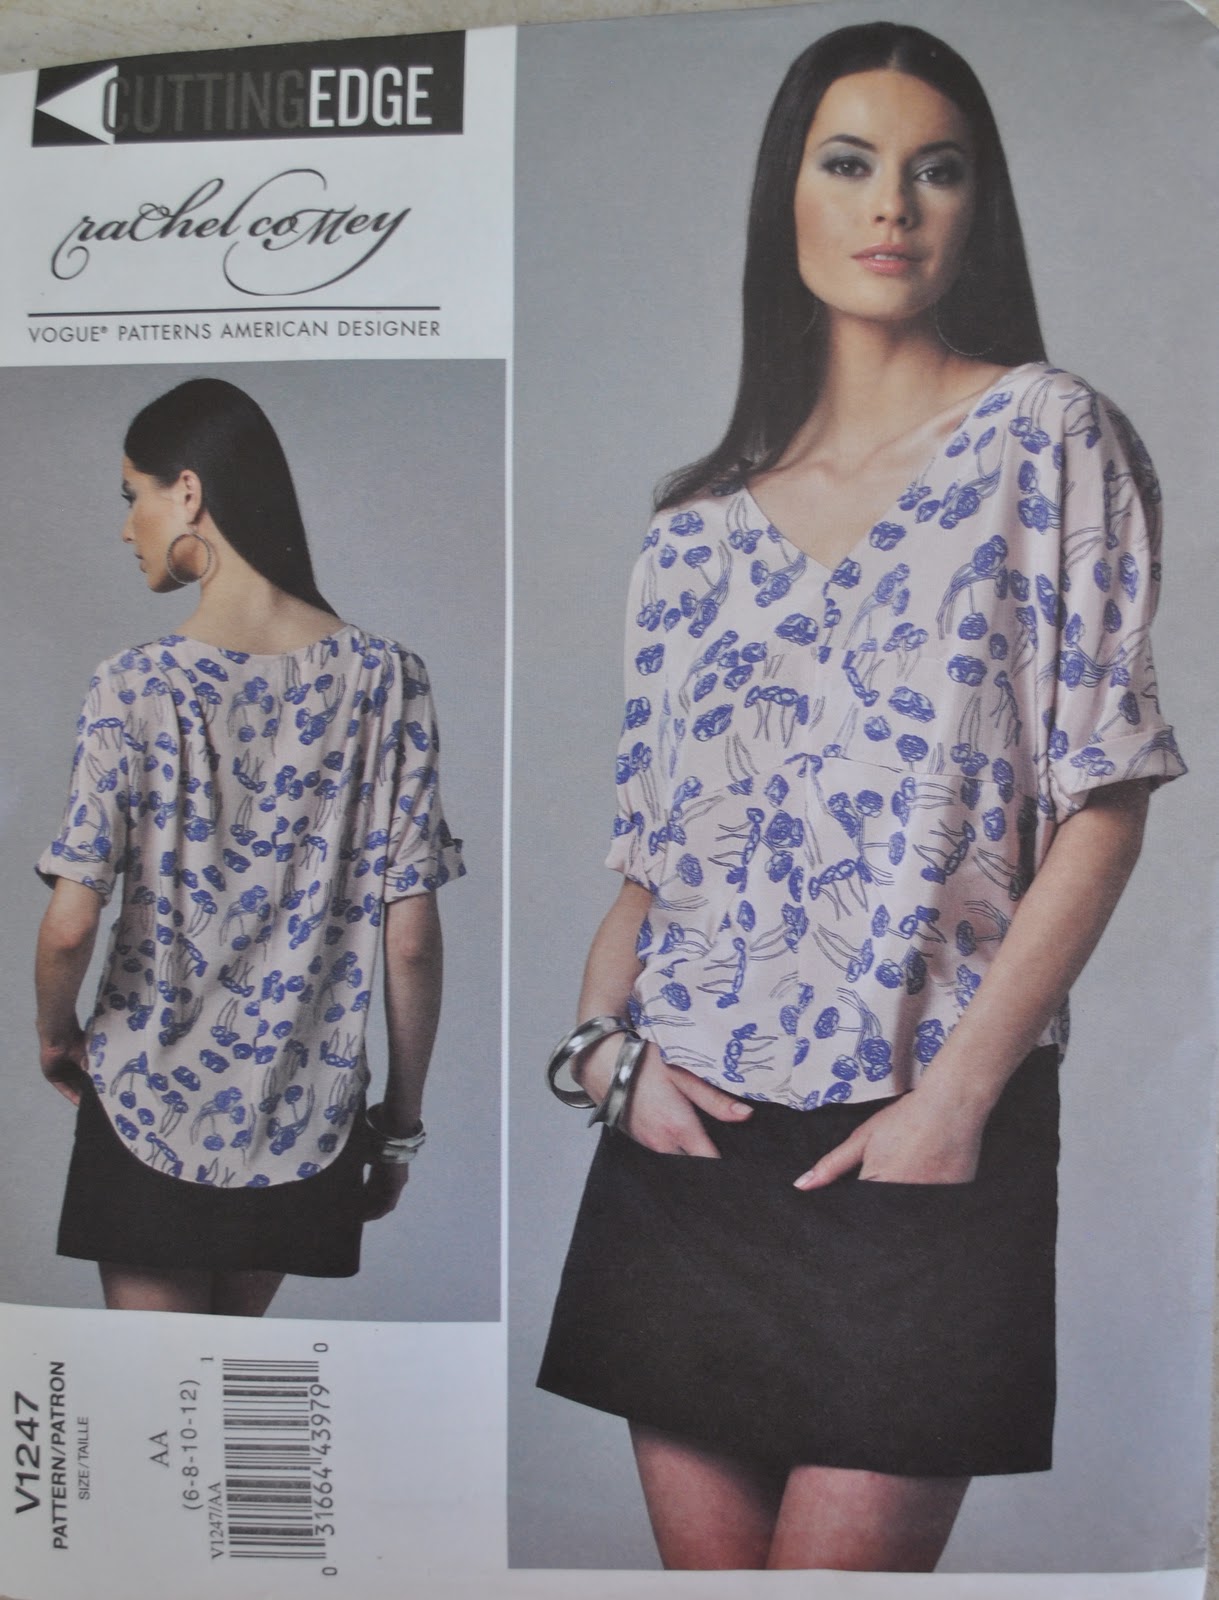
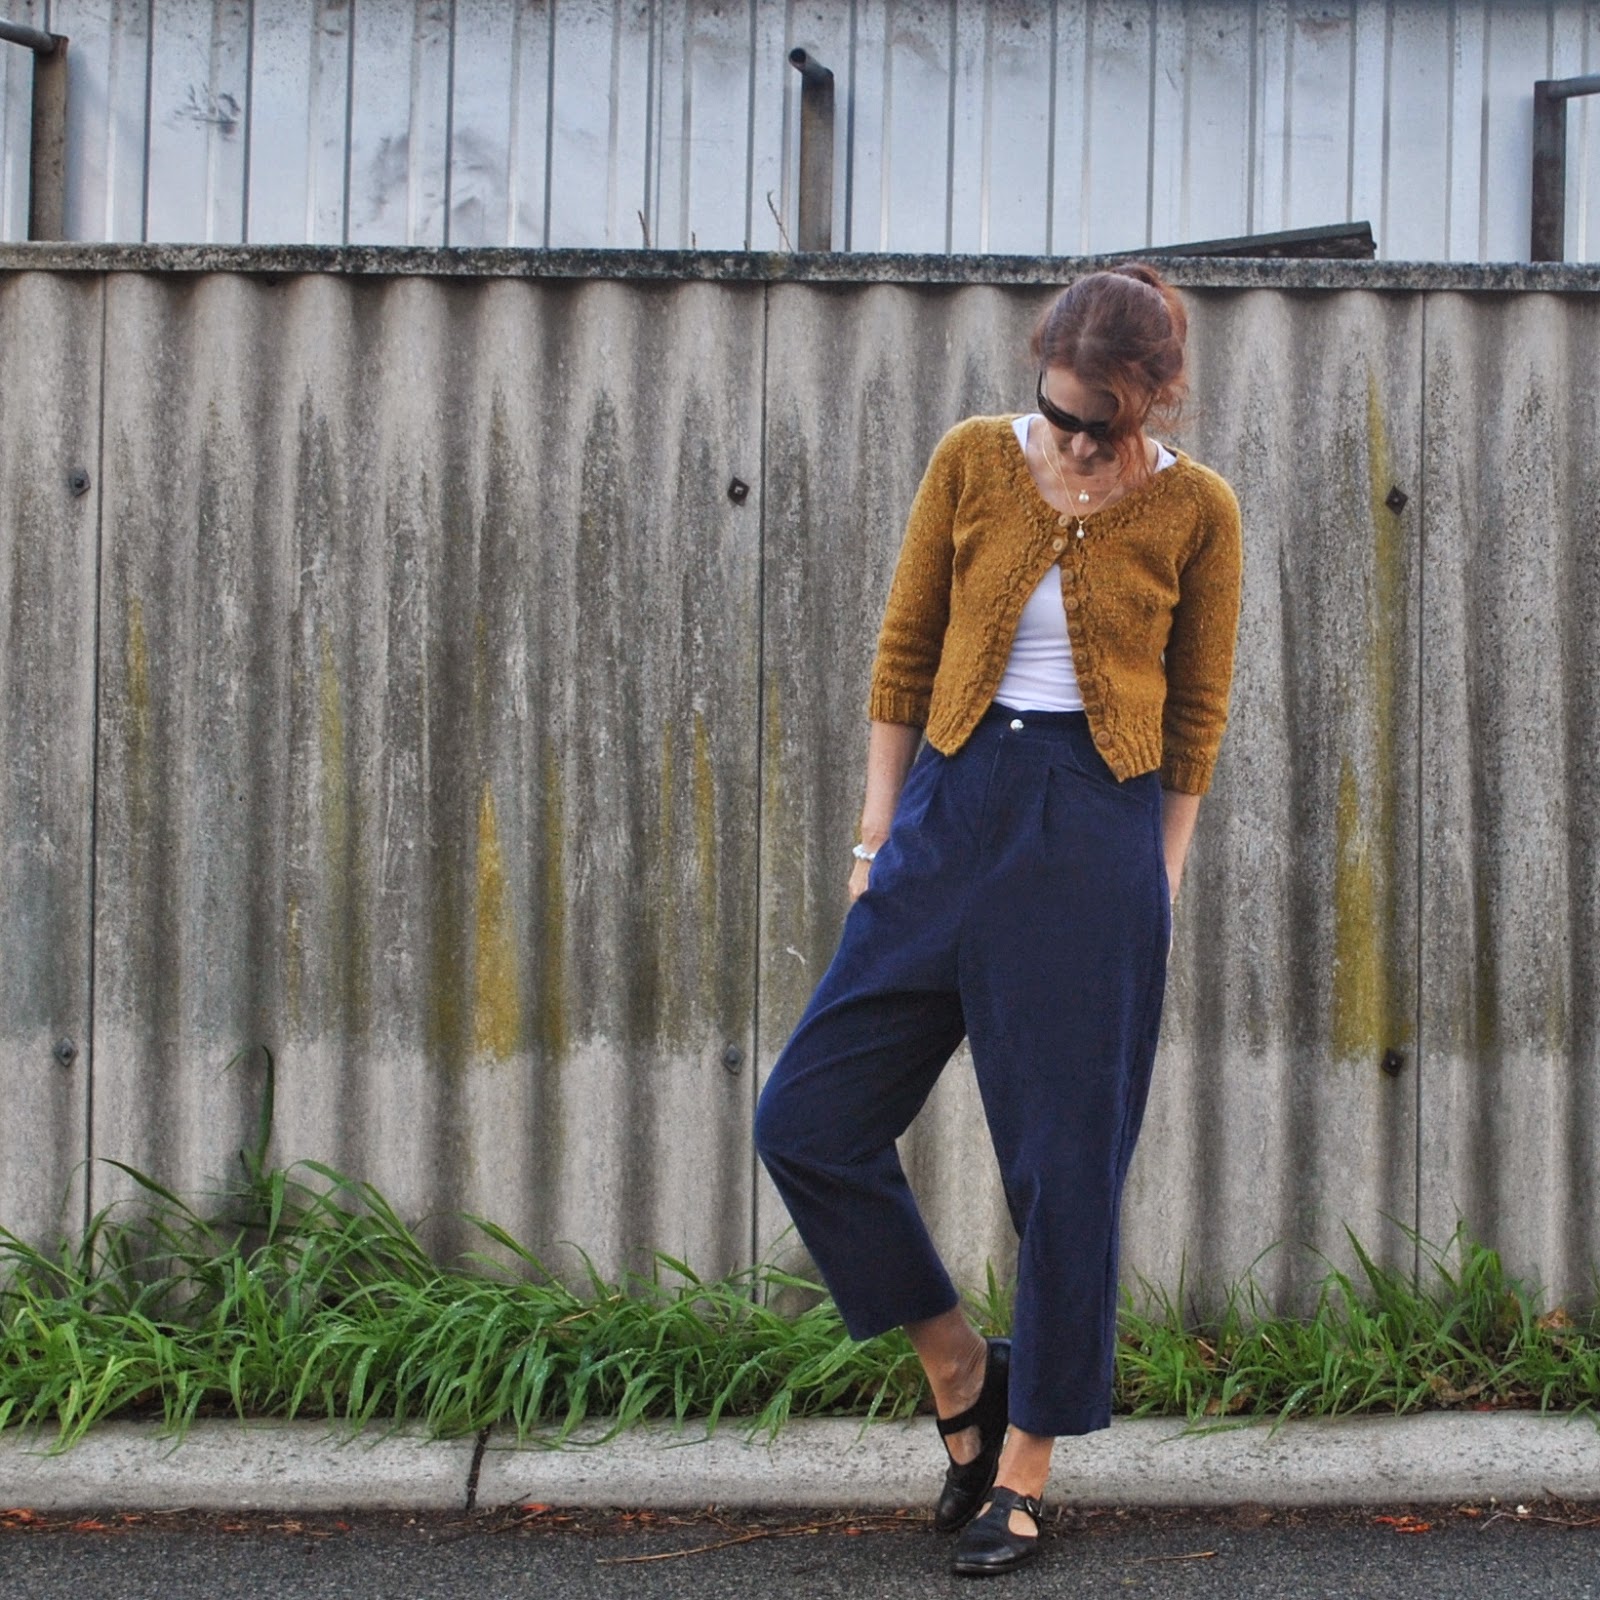
Skirt; Vogue 1247, overdyed purple cotton denim, details and my review of this pattern here
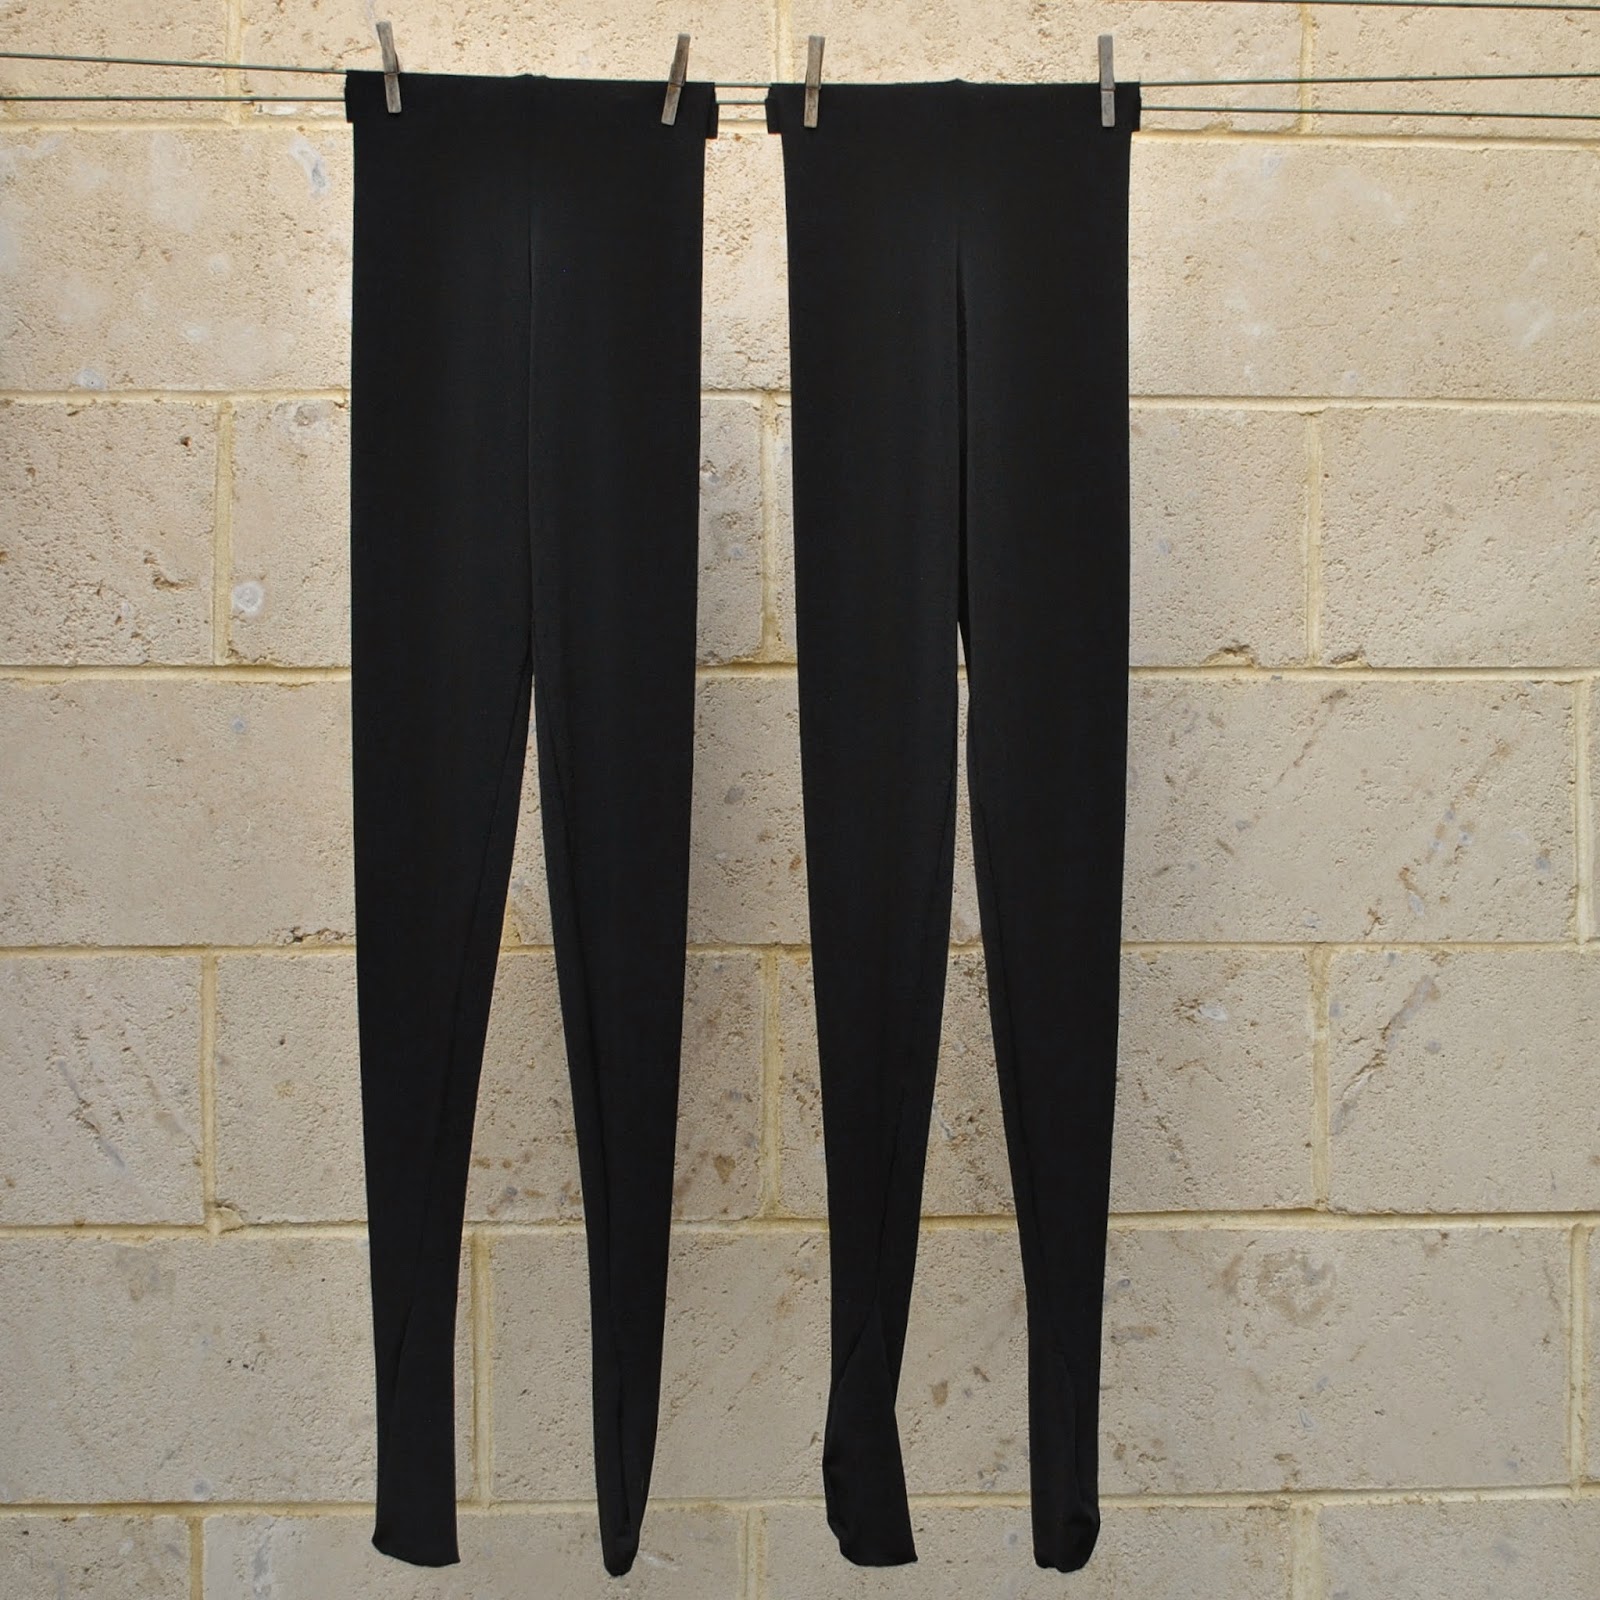
Tights; black polyester stretch, using my own custom-fit pattern, details here
Boots; Roberto del Carlo, from Zomp shoe boutique

In other making news, I ran up two new pairs of black tights for myself, in stretchy polyester knit.  I know I had this whole thing about how I wasn’t going to make my own tights any more, just buy them… but I’m taking part in me-made May again and going ALL me-made, as is my “thing”.  And I just decided that to cop out on the tights when it’s so laughably easy to make the darn things, well it was just that; a cop out.  I bit the bullet.  2m of fabric, half an hour of cutting/sewing, whack in an elastic waistband; BOOM yah.
Two pairs of new, super warm tights.

Also I *cough cough* um, “made” a scarf….  as in five minutes of zig-zagging the cut edges of a nice piece of fluffy brushed cotton plaid and fraying with a fine-toothed comb.  I found this plaid in Homecraft Textiles.
Like most of the world, probably, I fell in love with the Zara blanket scarf that was all the rage last Northern winter.  And though we do actually have a brand new Zara store here in Perth now, I don’t think we’re going to get the scarves here.  However I still kind of fancied one for myself.  So I have my diy version now.  Yay!  And if I get tired of it I can always cut it up and make a top or something with it still!  Double yay!
pinterestmail

baggy blue trousers

My new trousers are kinda weird.  They are seriously baggy and they have a seriously dropped crotch.  But they feel sooo luvverly on! I think I’m going to like them, in their weirdness, even though I know I look a bit kooky in them.   *shrug*
See, every now and again I’m seduced by an unusual but super-cool Japanese pattern, the kind of cool thing that looks awesomely cool on cool people.  And then am brought back to earth with a bit of a bump when I look at myself in the mirror and am reminded: I am not very cool.
Ah, well I can but try, haha.  The thing is, these are the comfiest trousers evah, as in incredibly awesomely comfortable, as in like wearing an old pair of trackydacks or pj bottoms, kind of comfortable.  Cool people know a thing or two about comfort, it seems.  Well, apart from the ones that wear skinny jeans, obviously.
My trousers are pattern No. 13, the Tapered Trousers from “she has a mannish style” a Japanese pattern book by Yuko Takada, and  I could see from the picture that they had a seriously dropped crotch,  which is just what you would expect in a “woman wearing a man’s pants” style.  So I did something very unusual for me and made a rough muslin.  My husband was a little bemused but Cassie gave them a big thumbs up, assuring me that lots of cool arty kids wear this kind of thing at uni.  This was both encouraging and, um, at my age; also a bit not, ahem!

Whatever, I ploughed ahead regardless; and ta da!
Technical blah-dy blah:
I made them in a deep navy-blue cotton corduroy from Spotlight, and cut the pocket linings and waistband facing from a pair of Sam’s old pj’s from the refashioning bag; nice soft and well-washed, navy-and-white plaid cotton flannelette.  I used a navy jeans zip, and a jeans-style, hammer-in stud for the button.  The pattern had patch pockets on the back, but since precisely zero of my husband’s trousers, not jeans, have patch pockets, I put in double welt pockets instead.  This gives a far more authentic “menswear” look, imo.

My measurements put me at size ML to L, however I found the waist/waistband in this size to be seriously oversized, by 10cm at the very least!! even taking into account that you make a tie with D-rings to cinch in the back of the waist, paper-bag style.  So I removed a tonne of extra width in the waist, while still trying to retain the boofy, oversized pants vibe of them.
I drastically enlarged the front pockets, by about double.  Seriously, the originals were so tiny you would not be able to fit barely anything in them, let alone hands.  I’m used to having to enlarge my pockets on patterns but these were teeny.  I very much liked the way they were constructed, with self-fabric facings and with a French seam to finish.  I think the finished pockets look really nice, both inside and out.

I’m not keen on the way the fly front was constructed, with the fly pieces cut separately only to be sewn back on immediately, leaving you with an unnecessary and bulky seam in the centre front.  I really cannot see any advantage in this, and prefer for the fly pieces to be cut-on.  And will do it in that way in the future.
btw, I have read reviews for this book saying that not all the instructions are given for a pattern; well they actually are but not always on the same page as your pattern.  The book only gives the instructions for doing a thing, like a fly front, once and once only in the book.  For example, the instructions for doing a fly front are given on p71, with the Semi-flare Culotte instructions.  It does mention this in the Tapered Trousers instructions, but since they are in rather small print in amongst the Japanese characters then it’s understandable why people might have missed that.  All the actual sewing instructions are illustrations, very clear and quite easy to follow.
So; in conclusion? I like my new trousers although, well to be honest I am a wee bit nervous of them, being so cool and all.   But I think my street cred will survive wearing them.  Actually, they remind me a bit of pants we used to wear in the early 80’s… omigod, did I just admit to that?!  Eeeeeek!  Street cred in tatters!

I think when you read a lot of sewing blogs and online forums and what-have-you, like I do, you can get swayed by the very popular notion that Fit and Figure-Flattery are the King and Queen of Sewing.  As in, everything has to skim your body just to the perfect degree, not too tight, not too loose, and be perfectly right for your figure type.  Hey, there’s absolutely nothing wrong with that at all; I buy into those rules all the time myself too.  Just that, sometimes it is fun and nice to stretch yourself beyond those rules, to make and wear something that is not particularly fitted, is not particularly figure flattering, and is just stylistically interesting and cool and fun and kinda weird.  And comfy.  Fashion should be fun, after all.  I think it’s ok to try out new and unusual stuff once in a while.

And they are so warm and comfy, I’m going to love every minute that I have them on.  Well, every minute that I’m not worried what people might be thinking.  
Did I mention they are comfortable?

Details:
Trousers; the tapered trousers 13 from “she has a mannish style” by Yuko Takada, navy blue cotton corduroy
Tshirt; Closet Case patterns Nettie, with short sleeves and a breast pocket, in thin white jersey, details here
Cardigan; Miette, hand-knitted by me in Debbie Bliss Donegal Luxury Tweed Aran, in Gold, details here
Shoes; Enrico Antinori, from Zomp shoes

pinterestmail

lurid green skirt

A delightful morning tea with Sue and Megan this morning seemed like a good opportunity to crack out my new skirt for its maiden voyage.  And we were meeting in Kings Park which is one of Perth’s most beautiful parks, so naturally I snuck along early avec camera et tripod to have a quicksticks photo session in a blissfully empty park, prior to our morning tea! haha, doesn’t everyone do weird stuff like that?!  hmmm, don’t answer that!
This is skirt “d” from the Japanese pattern book shape shape, originally called Unique Clothes Any Way You Like, by Natsuno Hiraiwa.  To be honest, I’m a little bit sad the book was renamed to be something cool and catchy in English.  I liked its first title; I thought it quite charming and I expect it was also likely a more accurate portrayal of the original Japanese title’s intention.  Much in the same way that I prefer the title “she has a mannish style” over the new English title “she wears the pants” and speaking of that I have a bit of a grumble about that very misleading new title since there are VERY FEW pants patterns in that book! and almost all of those gorgeous pants pictured are NOT available as patterns!! but more on that another day…  I’m still quite glad I bought that book while it still had that original title too!
Back to my skirt, ahem.
I’ve made this pattern once before in silver grey, here.  Oooh, I loved that skirt, and have been wanting to replace it in my wardrobe for years now.  Now I have! although the colour is a little less, um, shall we say easy on the eye, haha!

This skirt is such a very simple and yet quite unique and clever design, cut in one piece with part on the straight grain and part on the bias.  I think it can be seen from the different angles how the drape of the skirt changes quite distinctively around the skirt from the seam around to the seam again.
The bias dropped a bit before hemming, as it is wont to do, and I really liked how that looked, so hemmed the skirt without evening it off. 

I like wearing it with the buttons situated just slightly asymmetrically to the left like here, putting the bias drape to the left/back, although the skirt can be swivelled around to wear it with the bias to the back or the right, or even the front although the longer length at the front looks a wee bit odd.  You can wear it any way you like, in fact.  Thus the original title of the book!
Please excuse the multiple pictures, but I think the skirt looks at its absolute very best when in motion, the bias part really comes to glorious, rippling, swishy life.  Really, there’s few feelings more lovely that that of soft slithery fabric swirling around and against your legs as you walk.  Bliss.

All my materials; fabric, lining and buttons, are from Fabulous Fabrics.  My fabric is a rather eye-searingly intense chartreuse poly crepe, the same fabric I used for the armbands on my second Sea Change top, here, so the two should go nicely together.  A two piece set-tacular!  It’s a little nippy for that top here today, so I hauled out a warmer thing.  Winter’s coming, yay.  Please note the use of extreme sarcasm font there.  We get very mild winters here, but I’m still that wuss that barely tolerates the slightest hint of cold in the air.

The crepe is on the sheer side so it needed a layer underneath, either a lining or a petticoat.  I decided to line, and bought some poly knit of some sort or another, chosen merely for its excellent colour match.  It’s quite stable stuff, so I merely cut it nice straight and even line at the bottom edge and left the lining unhemmed, it sits nice and flat and smooth and doesn’t show on the outside at all.  I attached the lining to the skirt at the lower edge of the waist facing, and it does its job fine.  However, the knit seems a little heavy, and I’m worried it actually drags the skirt down just a touch.  I’m toying with the idea of detaching it, adding some elastic to the top edge and wearing it as a completely separate petticoat.  Or maybe not, depends whether I can be bothered.  We’ll see how it goes.  Probably I’ll plan to alter, while wearing the skirt to the end of its natural life, unaltered.  Story of my life, pretty much!

Details:
Skirt; skirt “d”, from Shape Shape by Natsuno Hiraiwa, chartreuse poly crepe, lined with knit
Shirt; Burda 8497 with added cuffs, white cotton, details here
Sandals; Zomp, from Zomp shoe boutique

pinterestmail

Inside Out

Today is Fashion Revolution Day; where we are supposed to reflect upon the question; who made my clothes?  And yes, I am wearing everything inside out too even though I have no labels.
You can find out more about how to get involved here 

Details:
Dress and petticoat; Vogue 1160, brown chiffon and silk charmeuse, details here and petticoat here.  It was a little difficult to get the zip on the dress done up inside out!! so it’s only partway up  😉 but the evidence is covered up with my cardigan so that’s ok
Cardigan; Audrey in Unst, knitted by me from wool I bought in Paris (Renaissance dyeing 4 ply poll dorset), details here
Sandals; la soffitada Gilde, from Zomp shoes

Now, on another note; I have been updating my daily outfit blog for the last year and a third and although I will continue to do so I have decided to make that blog private, for the time being at least.  There’s no sudden or dramatic reason for this decision, just call it a dawning self-awareness, if you like.  I guess I’m starting to feel a little self conscious about it, like publicising it is a bit silly.  And that maybe I prefer to maintain a higher standard for the material I am dumping out there, for public perusal, on the poor ol’ world wide web, since few my daily outfits are particularly exciting.
Except um, haha, *blush* I’ve just remembered that I’ve signed up for me-made May 2015! But I’ll be posting those on the Flickr group, just like everyone else  🙂
Thank you so very much to everyone who “liked” my posts  *mwah* and probably I’ll still do a 6-different ways post here periodically, to round up some of my favourites.  I’ll see how it goes  🙂

pinterestmail

fractal

I’ve made a weird patched dress using twelve old Tshirts of my boys’.  I know it’s bizarre and crazy and probably a little bit ugly but I totally love it!
I’m constantly pinning patchwork-y and randomly asymmetric things.  I’m actually very inspired by and crave to wear stuff like this A LOT in reality, even though I also make and wear a lot of plain things.  I think I have a very non-cohesive brain, wardrobe-wise.  It plods along all plain and quiet and unobtrusive for a while, “fitting in” with the norm *yawn* and then will suddenly have the urge to zoom off into arty, thrown-together-land.  Making something kinda weird and wild like this makes me feel quite exhilarated; sorta free and unconstrained and satisfied and happy.  I don’t think I act upon this often enough.  Clearly, I need a little more such craziness in my life!
Anyway, the new dress.  I was inspired by this dress credited to Jurgen Lehl.    
I used one of my oldies, Vogue 7795 with some adjustments; namely with the front bodice tucks and back bodice darts removed and the waterfall skirt drape transformed into an asymmetric box pleat.  Also I made the back bodice and back skirt as one piece each, with the CB seam removed from both.  In my memory this is a very drop waisted design, so I also shortened the bodice pieces by about 4cm.

I’ve made this pattern up a couple of times before; both many years ago, my first version in white swiss dotted voile is pictured here looking tres touristy with a gelato and at the Fontana di Trevi in Rome, and my second version was pink, although I can’t find any pictures of that one.

When you’re making a large scale, randomly patchworked design like this one, I’ve found it’s a good idea to draw out the adjusted pieces full scale and lay them out as a guide for the patchworking.  That way, you can see how the design is looking on the scale of the dress as the piecing progresses.

I selected twelve Tshirts, all old, some very old, cast-offs from my boys.  This is one of the things I love the most about it actually, in that I am so familiar with each and every one of these shirts, having watched my boys run around playing in them a zillion times, also of course I’ve washed them all, hung them on the line, folded them and tucked them away into their dressers about a zillion times each also.  
A sentimental dress then, in a way  ðŸ™‚

There’s also one “new” fabric, harvested from a recent Absolute Fail… *sad face* IG’ed here.  
I cut all the fabric into varied width strips and then just got creative.  

In a super random design like this one it’s good to install some order to the thing somewhere, and in this case I stuck to the same order in the colour arrangement.   I finished the neckline and armscyes as simply as possible with strips of black Tshirt, stitched on right sides together, then folded to the inside and topstitched.

So, my dress is fulfilling several intentions; firstly to satisfy that creative urge, and my desire for a bit more crazy in my life as outlined above.  Tick!
Secondly, I made it as a kind of a muslin for another project that I’m planning right now.  Then I had the patching idea, was distracted and got  a bit carried away.  I may or may not go ahead with that original plan, but I’m very happy with this particular result! I’m pleased to say  ðŸ™‚

And lastly, I recently received an email from Charlotte regarding the sew solidarity challenge run by the charity TRAID.  Essentially it’s this: to commemorate the Rana Plaza garment factory collapse you select an old, not new! mass-produced garment, possibly from Bangladesh although I didn’t restrict my options country-of-origin-wise, re-fashion it fit for a new life and then you’re supposed to wear it on 24th April.  Last year I joined in the same-aimed Fashion Revolution movement by wearing my self-made clothes inside out.  Theoretically this year I could do either of these commemorative activities… option 1, wear this dress as per the Sew Solidarity challenge; option 2, like last year wear something else I’ve made inside out as per the Fashion revolution challenge; OR option 3, combine the two challenges and wear this dress inside out.  The only problem with option 3 is that I’m pretty sure my insides might be kinda too ugly for me to get away with this in my very conservative suburb!  The insides are a gridlock of overlocked seams, and because I used some fabric pieces wrong side out, the prints are then on the inside of the dress; so it’s a bit of an unholy mess in there.  But I guess the option is there, should I choose to look irredeemably ridiculous.

Details:
Dress; modified Vogue 7795, made from old Tshirts
Shoes; Zomp, from Zomp shoe boutique

pinterestmail

two sea change tops and a little blue skirt

I absolutely adored the new Lily Sage & Co Sea Change top when Debbie debuted it on instagram and rushed with unseemly haste to sign up when she called for testers.  My love has not diminished upon making up a few either.

The top can be made in either a stretch or a woven, and I elected to make up one in each.
Exhibit A is in a deep blue stretch panne velvet, from the leftovers from Sam’s Magicka robe here.  Basically, it’s a big, roomy, cropped, oversized velvet Tshirt.  Ha! I know that sounds weird and like the kind of thing that has potential to be hideous, but I think it turned out absolutely not.  I love it, unequivocally.

The Sea Change is a gorgeous design; modern and stylish, comfortably roomy, chicly oversized and tres elegant.  It is also a super easy, quick and simple project; a “can be started the night before to wear the next day”, kind of a project.  My measurements fell on the upper side of Small, lower side of Medium, so I elected to go Medium.  This feels fine, but the top is quite unfitted and intentionally roomy so I would have been equally comfortable in the Small too, I think.

So, that’s top numero uno.
And theeeeeeeen…
Having done a little cleanout recently I realised that I had very few skirts that matched my lovely new top… the horror!  I raced to rectify this terrible situation.
I unearthed from le stash a few smallish pieces of bright blue cotton corduroy, the leftovers from my dyed blue ray dress here.  I had just exactly enough to eke out the pieces of Vogue 1247… o joy!  It’s bordering on embarrassing how many of these skirts I have made by now.  It’s such a fantabulous little pattern; a. on its own merits, nothing else considered; and also b. for using up a pile of awkwardly too-big-to-throw-away leftover scraps, and also c. it’s hard to have too many of these classic little A-line skirts in winter.

The brightness of the blue is borderline OK/not-OK for me.  I’m humming and haa-ing about it a bit.  I’ve been entertaining very tempting thoughts of dyeing it a deeper darker dirtier blue; a colour which I think will blend in a lot better with my current colours hanging in the wardrobe.  But for now I’m just going to live with it for a while and see how it goes…
I bound the inner seam allowances of the skirt with some pretty pink and white polycotton gingham, itself the leftovers from a lemon-butter bottling project, and also used for this nightie.  I have now used up every.  Single.  Last.  Weeny.  Scrap, of this stuff.  Hurrah!
The only thing I had to buy new for this entire outfit was the invisible zip for the skirt… and then this is a whole new outfit ALL from leftovers! So it feels kinda free, in a way.  Double hurrah!

But wait, there’s more…
Exhibit B.

My second Sea Change top is made from a very lightweight and drapey crepe from Fabulous Fabrics.  All new fabric for this baby!  It is a rather divine and heavenly pale pink in colour, and sheer enough that I decided to underline totally in a slightly deeper pink, poly chiffon.  By “underline” I actually sewed all shoulder and side seams, the sewed the two different tops together around the neckline, right sides together, turned the chiffon top to the inside and under stitched and top stitched around the neckline… then, from then on, treated the two layers as one.  So, that’s not really the same as underlining, but I have no other, more accurate word for that process.  All seams are concealed away within the layers of the top and bands.

I embroidered a tiny “x” to mark the back…

The armbands are the same stuff, in a garish lime-y greeny yellow that I was drawn to immediately.  While I was petting it another lady in the store remarked, “that is your colour!”
*cue immediate purchase*
I bought enough for a matching skirt too.  I’m rather excited about the skirt; which I have to confess is already made, finished and hanging in the wardrobe but not yet worn or documented, whoops!! anyway I’m excited about wearing it because I think it will go very nicely with both of these tops, and a whole lot of my current existing tops too.  In fact, I’m quite looking forward to mixing and matching all these things in with my new and existing winter wardrobe.


Details:
Tops; the Sea Change top by Lily Sage & Co, (1) dark blue stretch velvet, and  (2) pink and green poly crepe lined with pink chiffon
Skirts; Vogue 1247 lengthened, (1) blue cotton corduroy, and (2) yellow cotton corduroy, details here and my review of this pattern here

Update: it’s been great, but nearly two years of use later and I got a bit bored with the vivid bright blue-ness of that little blue skirt, so I’ve over dyed it with some brown dye.  Now it’s a lovely deep navy/teal colour.  Like having a new skirt!
Wearing it with my paprika Nettie bodysuit and my suedette MN Dove blouse that’s a pretty good colour match, yay!

SaveSave

pinterestmail

jumper of triangles

I’ve knitted a jumper  ðŸ™‚
I’ve knitted jumpers before but this one felt different because I didn’t feel like I was knitting an actual real entire jumper, a process that can sometimes feel a bit never-ending while you’re so engaged… this rather unusual and innovative design is essentially a patchwork comprised entirely of plain and identical triangles.   So all you’re doing is knitting is a whole bunch of very quick and simple triangles, separately, one by one… you knit a triangle, toss it on the pile, knit another, whenever.  The triangle itself is a super quick n’ easy pattern that you’ve memorised after the first couple.  Making it a fairly mindless and terrifically painless project.  Once you have enough you stitch them together into a jumper shape.  So really it’s like, the jumper to knit when you don’t want to knit a jumper!
I bought the pattern pamphlet from Spotlight, thinking about the awkward quantity of fiddly diddly leftovers in my collection that were not enough to do anything with on their own but that were too much to throw away.  Mission: Use Up Leftovers; and I think I’ve accomplished that quite successfully, ahem *smug self back pat*  I used several different shades of grey, chocolate, beige, black, navy blue, mustard, natural and white; various Patons 8 ply and Rowan tweeds and several others too, basically a small collection of disparate leftovers I’ve held on to for forever.  I also had to buy some new, don’t you always?! I bought some of the recommended Cleckheaton Country Naturals 8 ply from Spotlight.   Which is where I bought the pattern pamphlet too 🙂
The pattern can quite easily look like a, er, regular jumper too if you aren’t keen on the multi-coloured harlequin look; you can always just use one colour for all your triangles.  In the pamphlet there’s also pictured another, rather chic and stylish version made up in deep flecked charcoal which looks quite classic and mainstream and normal, and not patchwork-y at all! 
But, as an interesting way to make good use of little bits and bobs I reckon this is a pretty good design idea, and is a nice and easy project for beginners too  ðŸ™‚
Details:
Jumper; knitted by me from various 8ply yarns, a Nikki Gabriel design for Cleckheaton
Shorts; Burda 7723, made from an old charcoal gabardine skirt, details here
pinterestmail
Switch to mobile version
↓