Tag Archives: Daily Outfit

#hoodie

I love hoodies.  And I love dark browns, crinkly linen and loose relaxed-fit comfy loungewear.  Despite all those loves, it’s taken me a ridiculously long time to finish this hoodie.  I started it before I left for Melbourne last year! woops!
I used Burda 09/2014-115, a tunic/hoodie pattern; and this lovely deep, deep, burnt chocolate linen, that I bought from Tessuti’s in Melbourne on our previous, 2013 trip there… extra woops!  Sometimes I hoard lovely fabrics for forever and feel guilty about it, but really it’s only because I can’t think of the Perfect Project which it would like to become.  Some fabrics tell you straight away, whilst others sit there and taunt you with their loveliness while never giving any hint of what they want to be.

Anyway, finally I made something.
To be honest, this is version two.  
The pattern is actually for a tunic a good 6″ longer than this, and that is how I made it.  I had visions of those lovely chic European lagenlook-y ladies wearing long and loose flowing clothes in earthy neutral shades.  I started out with high hopes, made the hoodie/tunic.  Felt really good about it, all went together smoothly, happy with my decision, almost finished it; perfectly hand narrow-hemmed shirt-hem and all.  It was easily long enough to be a dress.
Tried it on, and was immediately struck by the fact that I had made myself a Friar Tuck robe.  Yes, in its long version I looked exactly like Friar Tuck. Do I want to look like Friar Tuck?  Emphatically, no.  Disastrous.  Dejectedly shoved it aside for, um; a few months.  Hmmm, how time flies!  
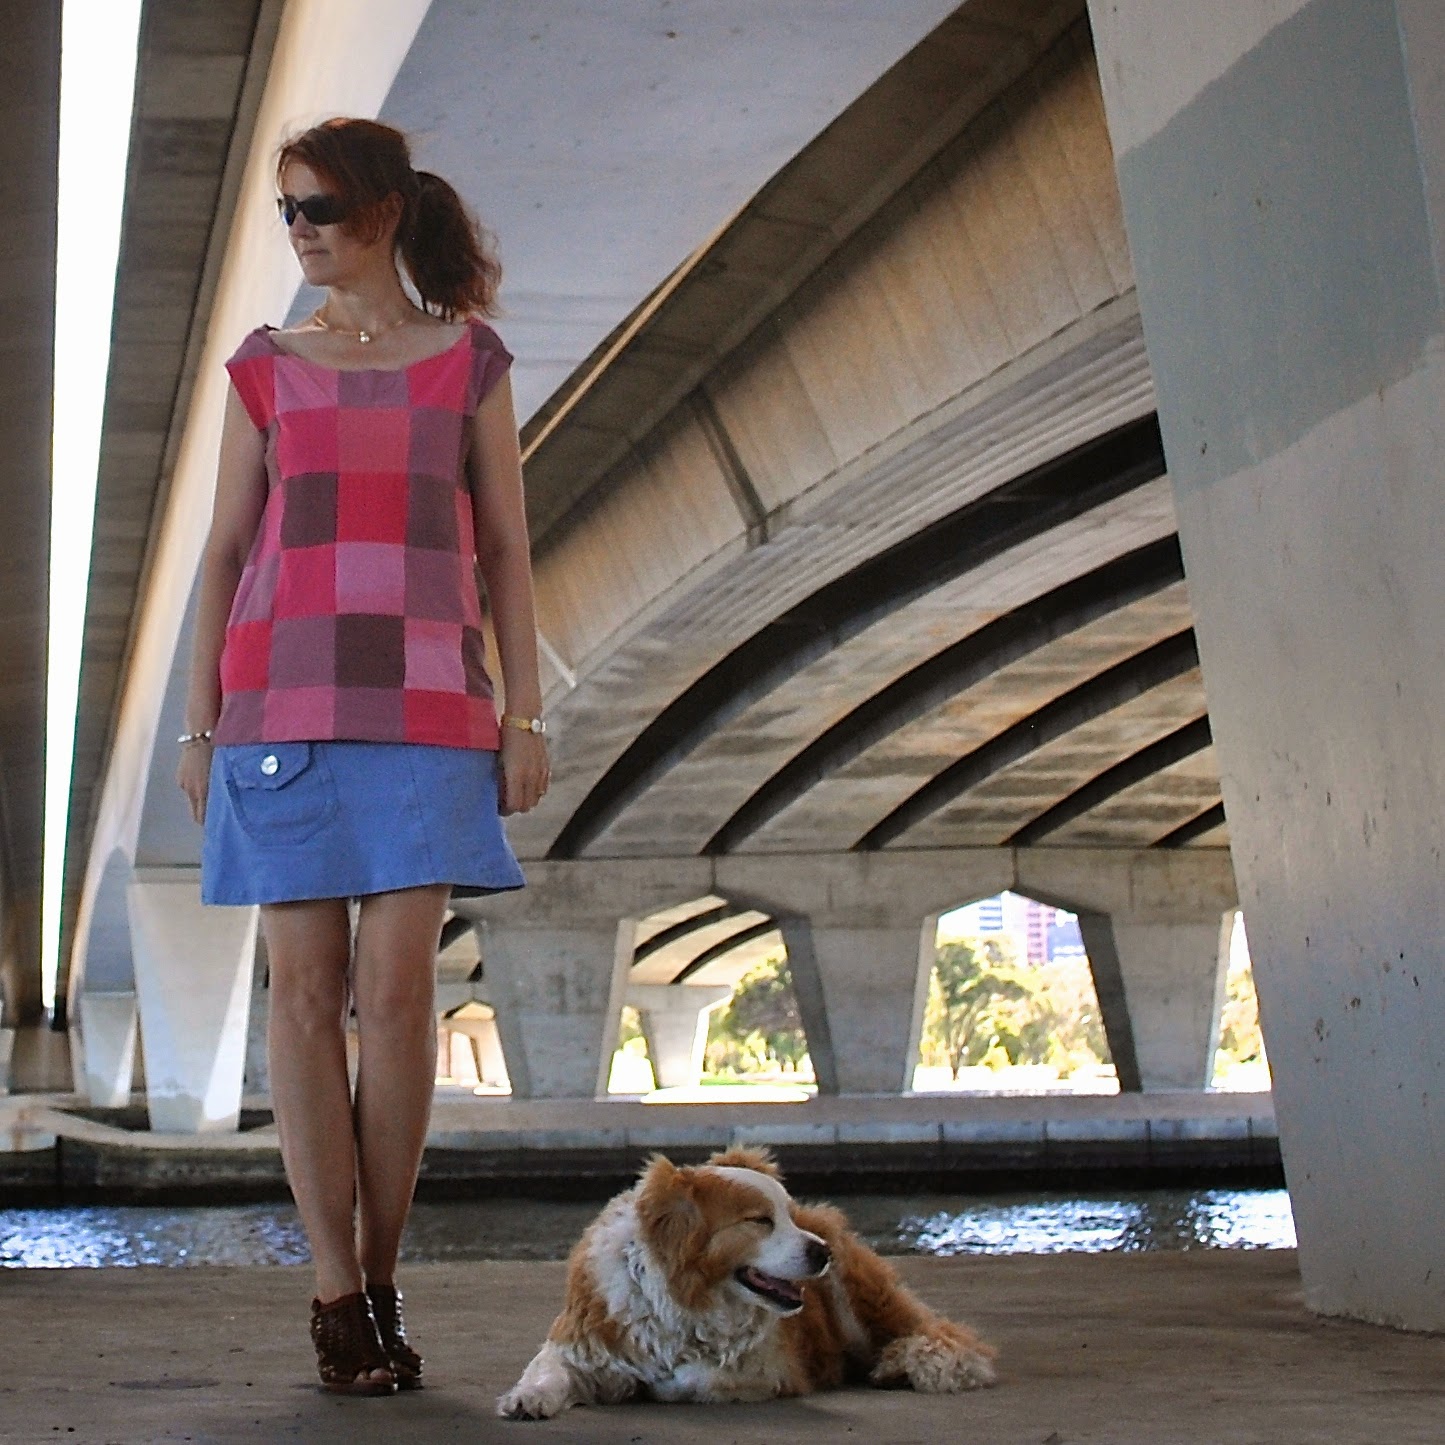
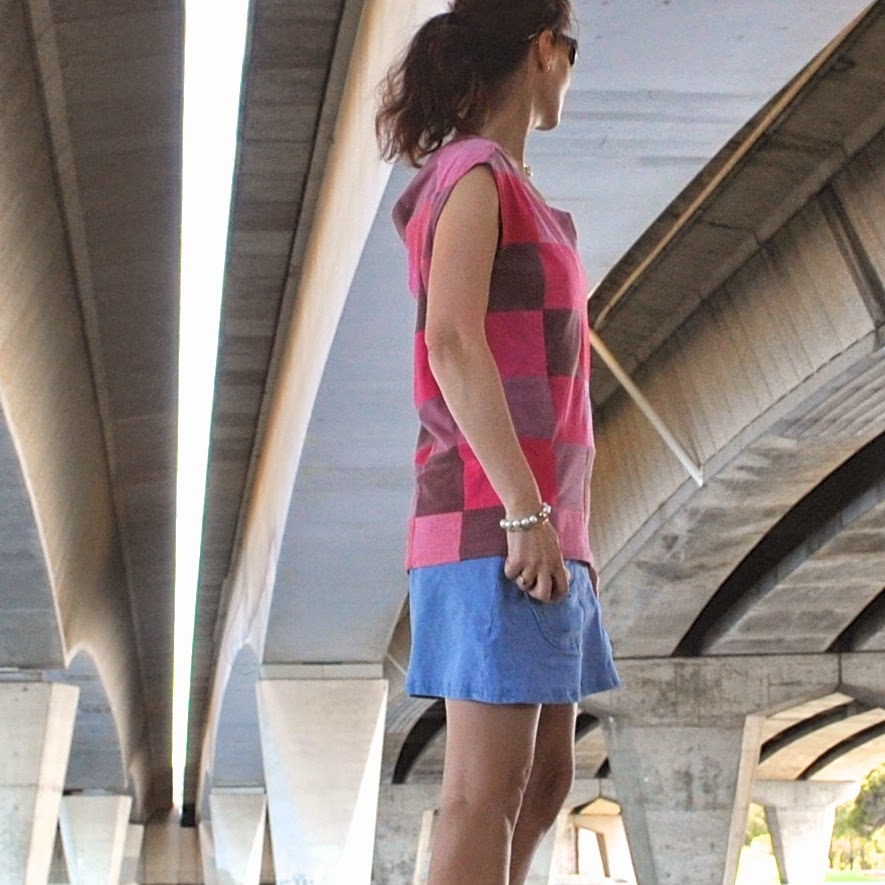
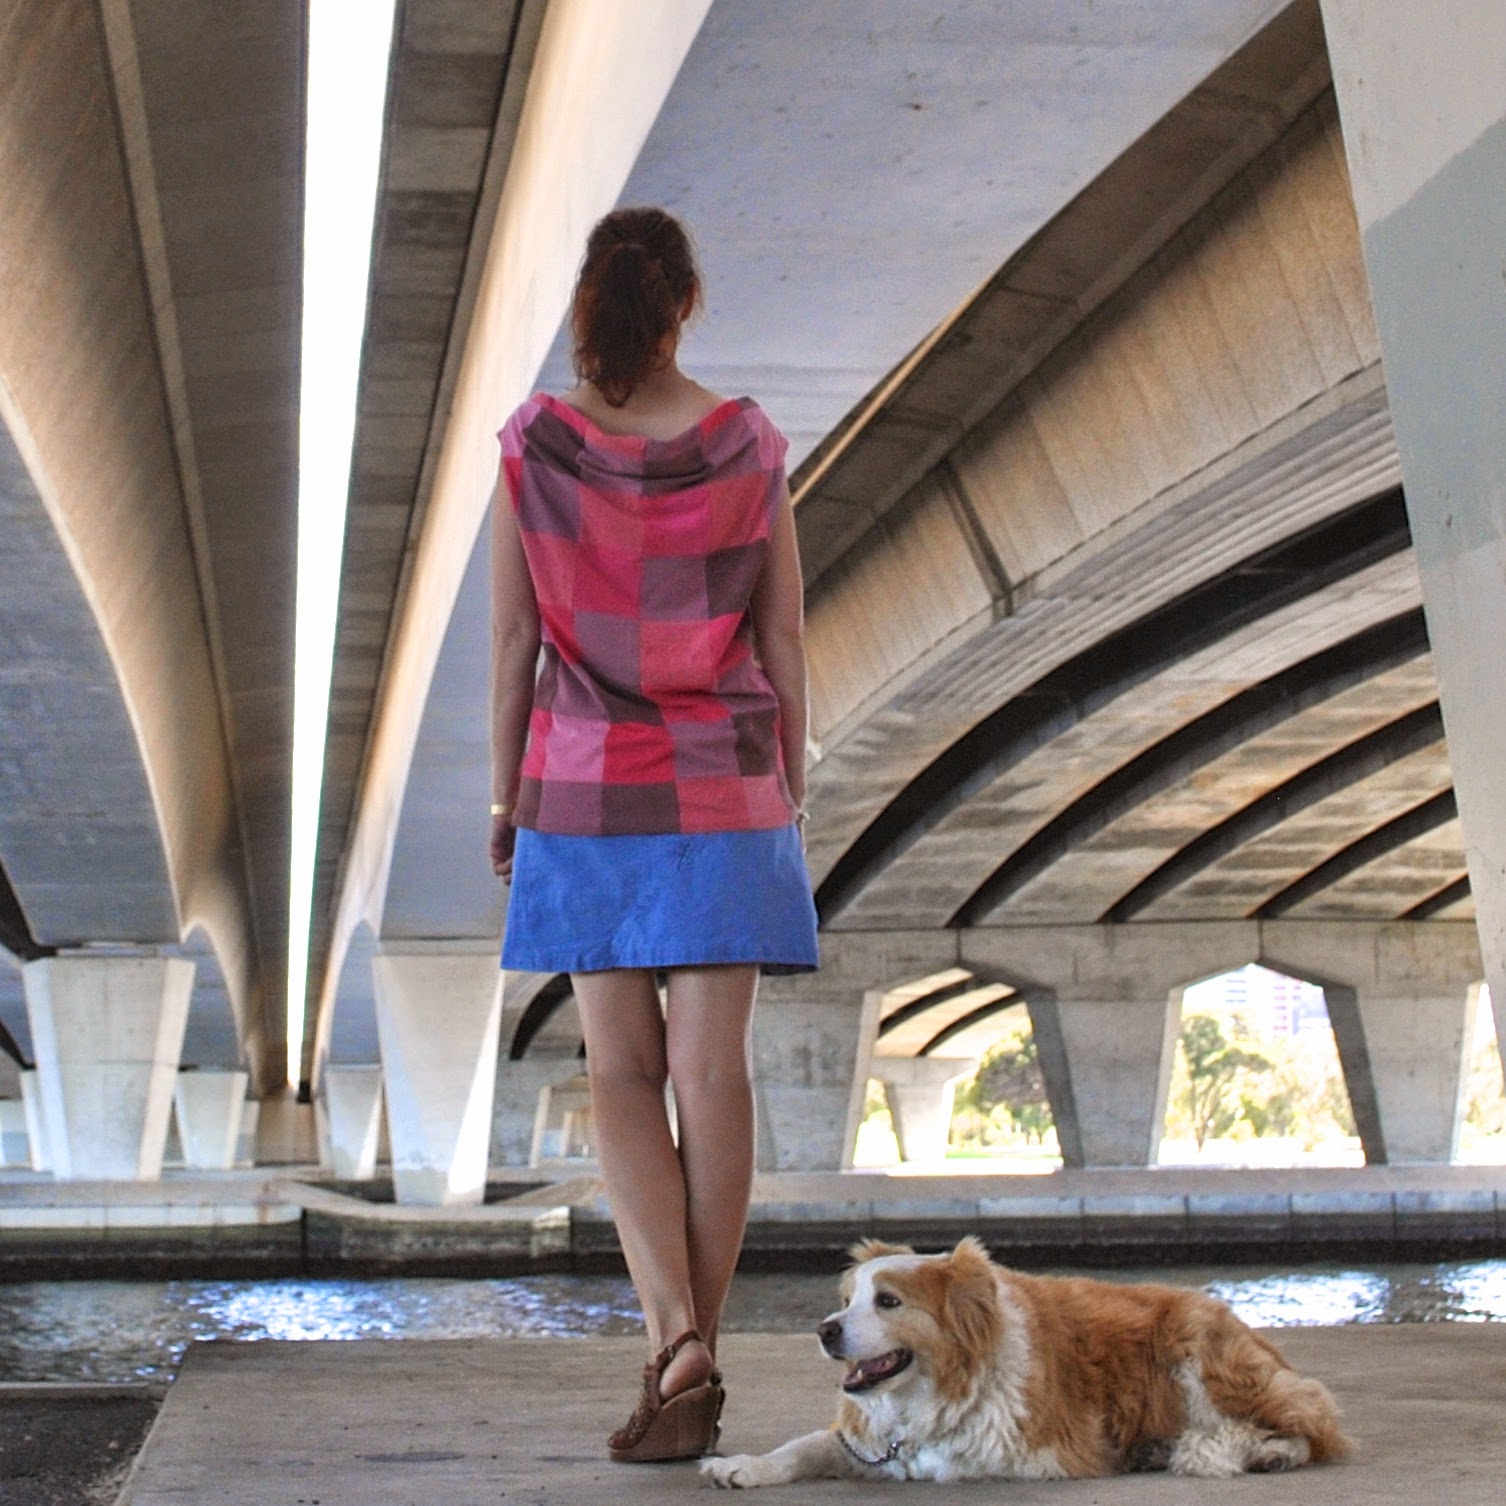
Anyway, I really did want it to work, and so just recently I drastically shortened that hem and rolled the sleeves up.  Massive improvement.  I left off the waist tie channel and tie.  I reckon that as a boxy, shorter tunic, with rolled up sleeves, it still had that relaxed, fairly oversized, comfy vibe that I was after… stylishly chic, I hope!
The dress has pockets and so I kept those, cutting and re-hemming it to just below that level.  The button placket is invisibly sewn closed, because all buttons just seemed either the wrong size or colour, or just plain wrong against the fabric.

For some reason that now escapes me, I felt allergic to the idea of self-fabric bands to hold up the rolled sleeves.  At the time I felt they would look unutterably boring and/or too match-y.  So I made some sleeve holder-up thingies from skinny metallic belts.  It felt like a good idea at the time, and luckily I’m still quite pleased with them, feel like they bring something interesting to the table, on what is otherwise a quite plain and featureless hoodie.  I’ve tried wearing the hoodie with a few other of my clothes and it’s interesting that that little bit of silver-y, pewter-y metallic on the sleeves really helps the hoodie to “go” with a lot of my other clothes far better than it would without.

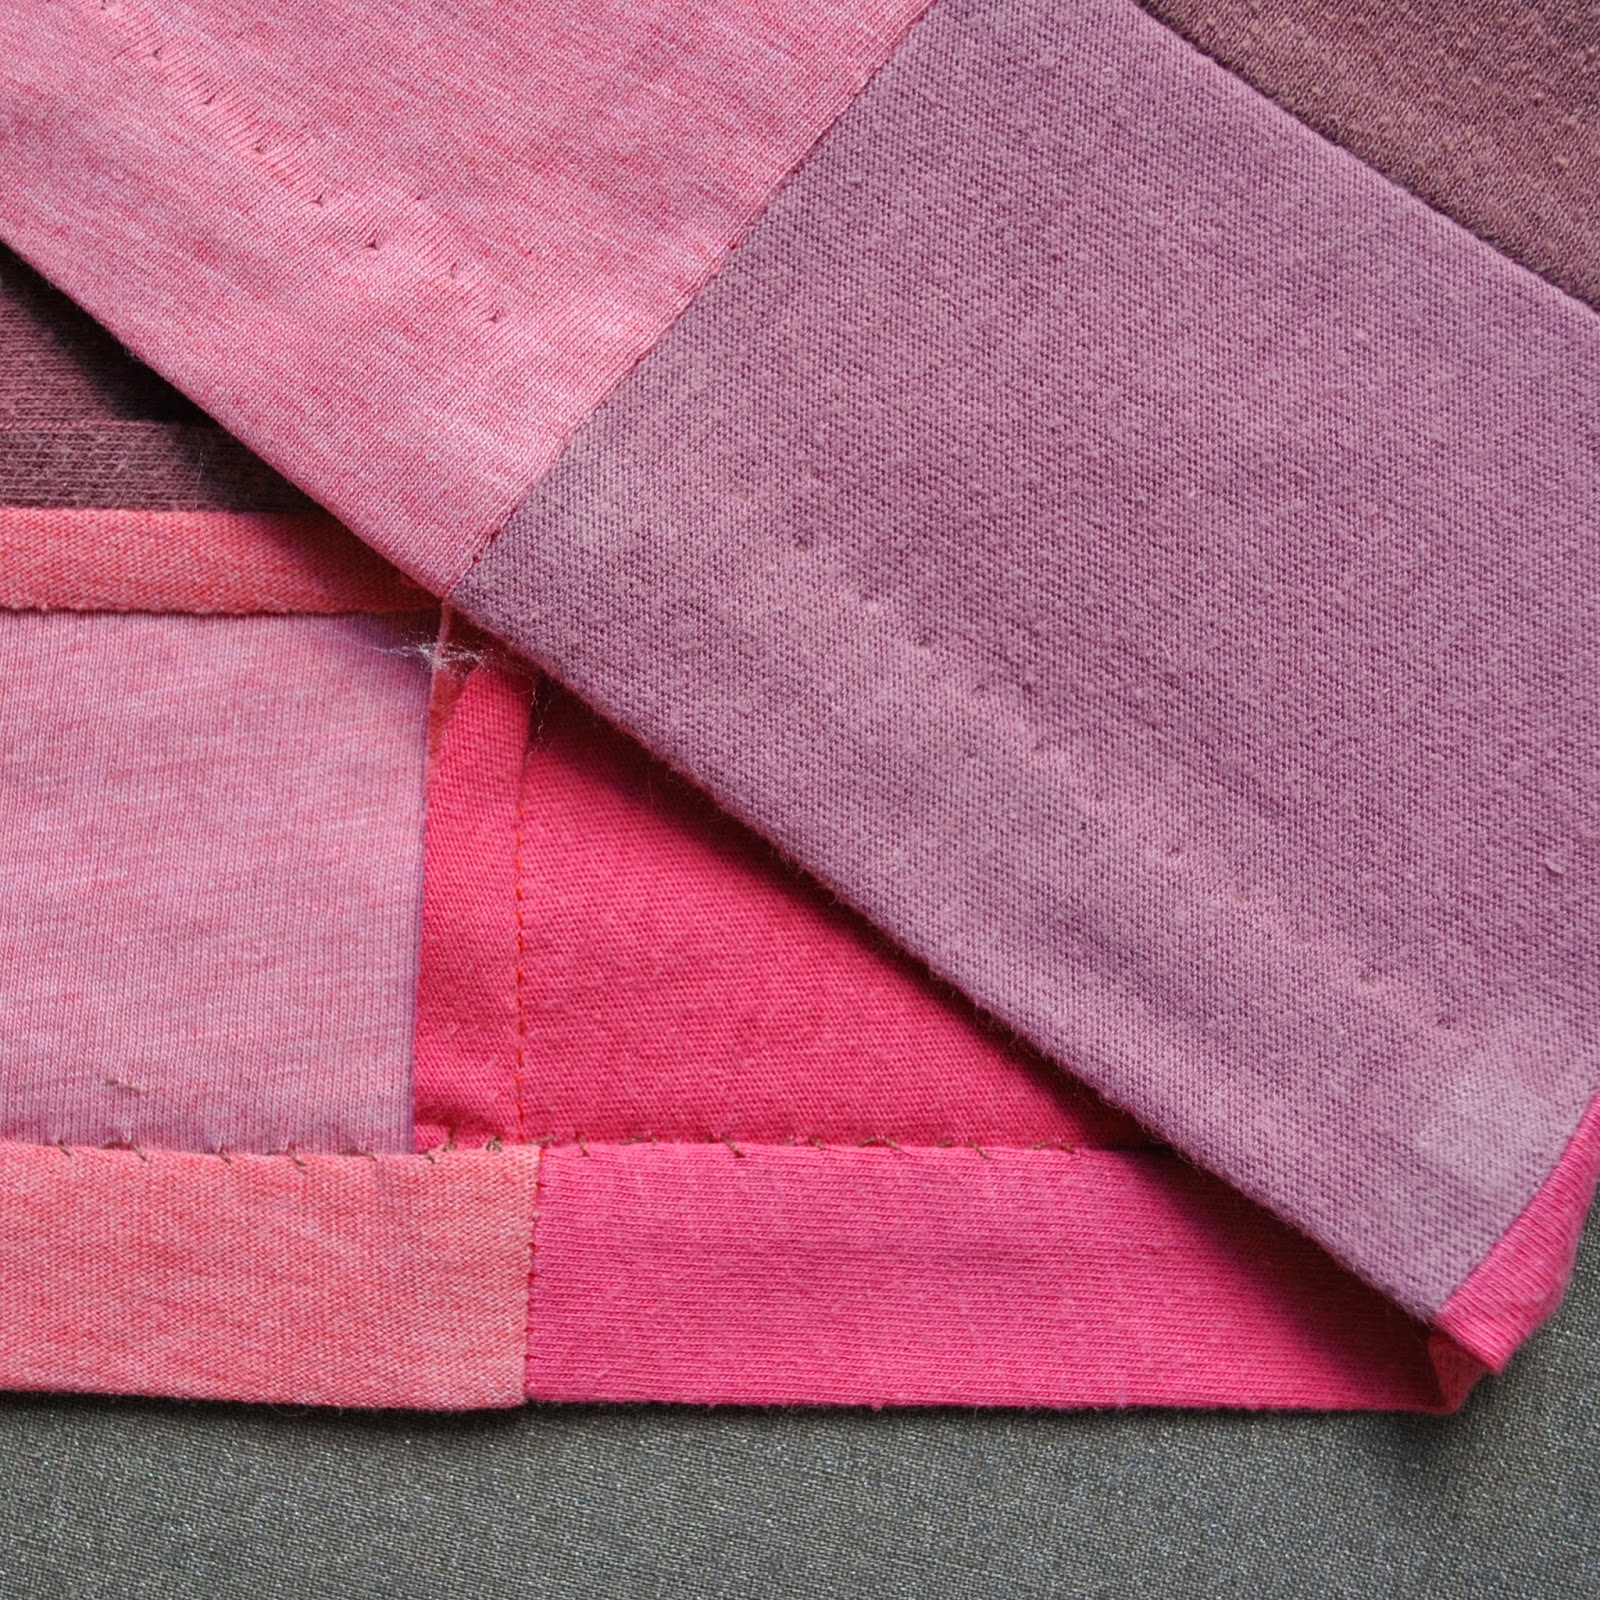
The neckline/hood seam is hidden underneath a band, cut from the leftovers from this dress.  It felt quite fortuitous that the brown stripes were wide enough that I could do this, with barely a hint of cream pin-stripe to be seen!

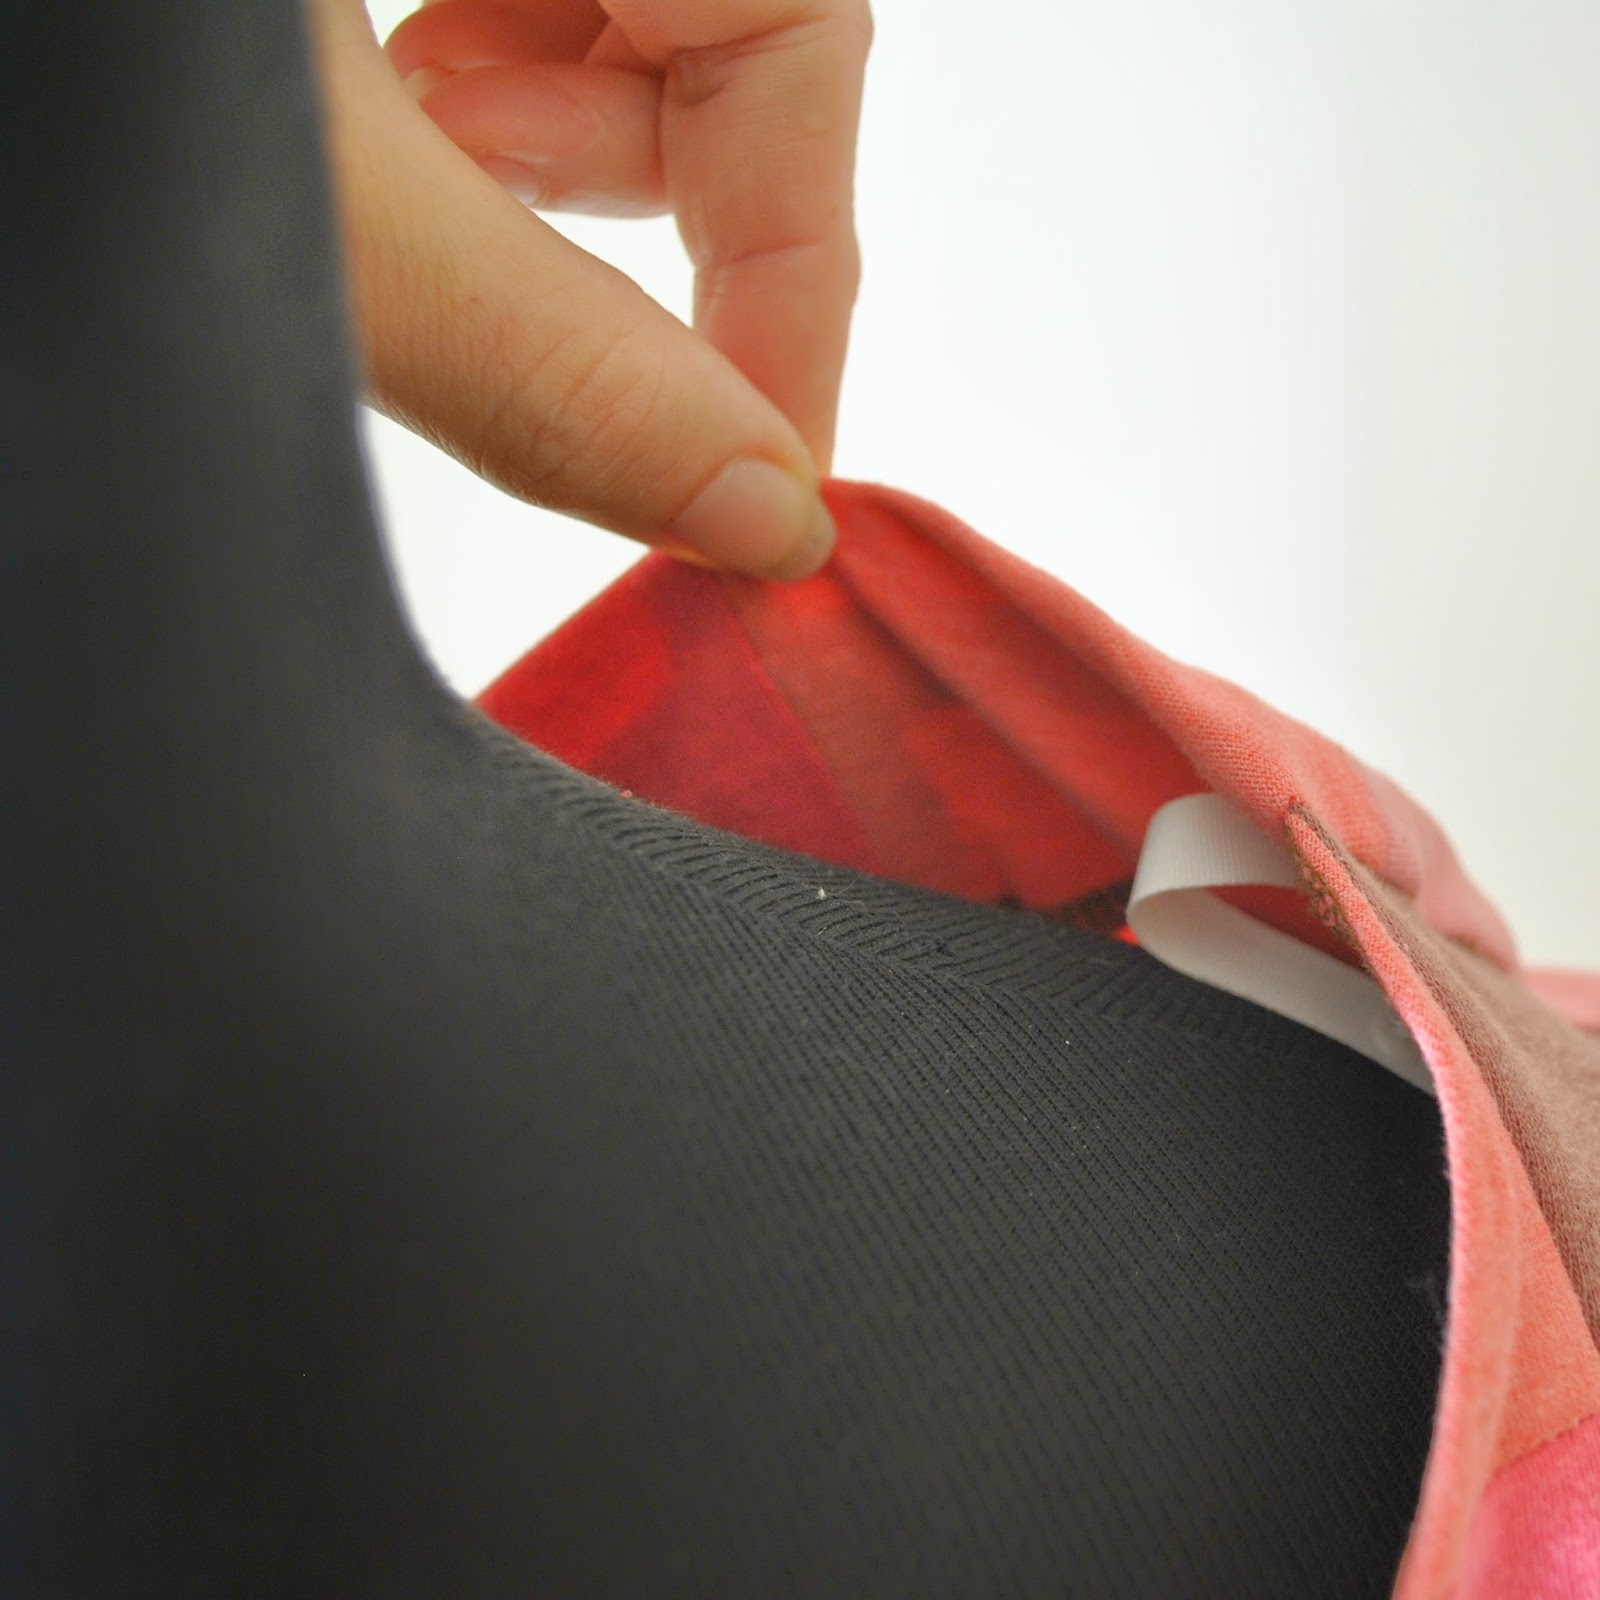
Later edit: Inside the sleeve tabs, and thank you Jenna-Lynn for asking  🙂
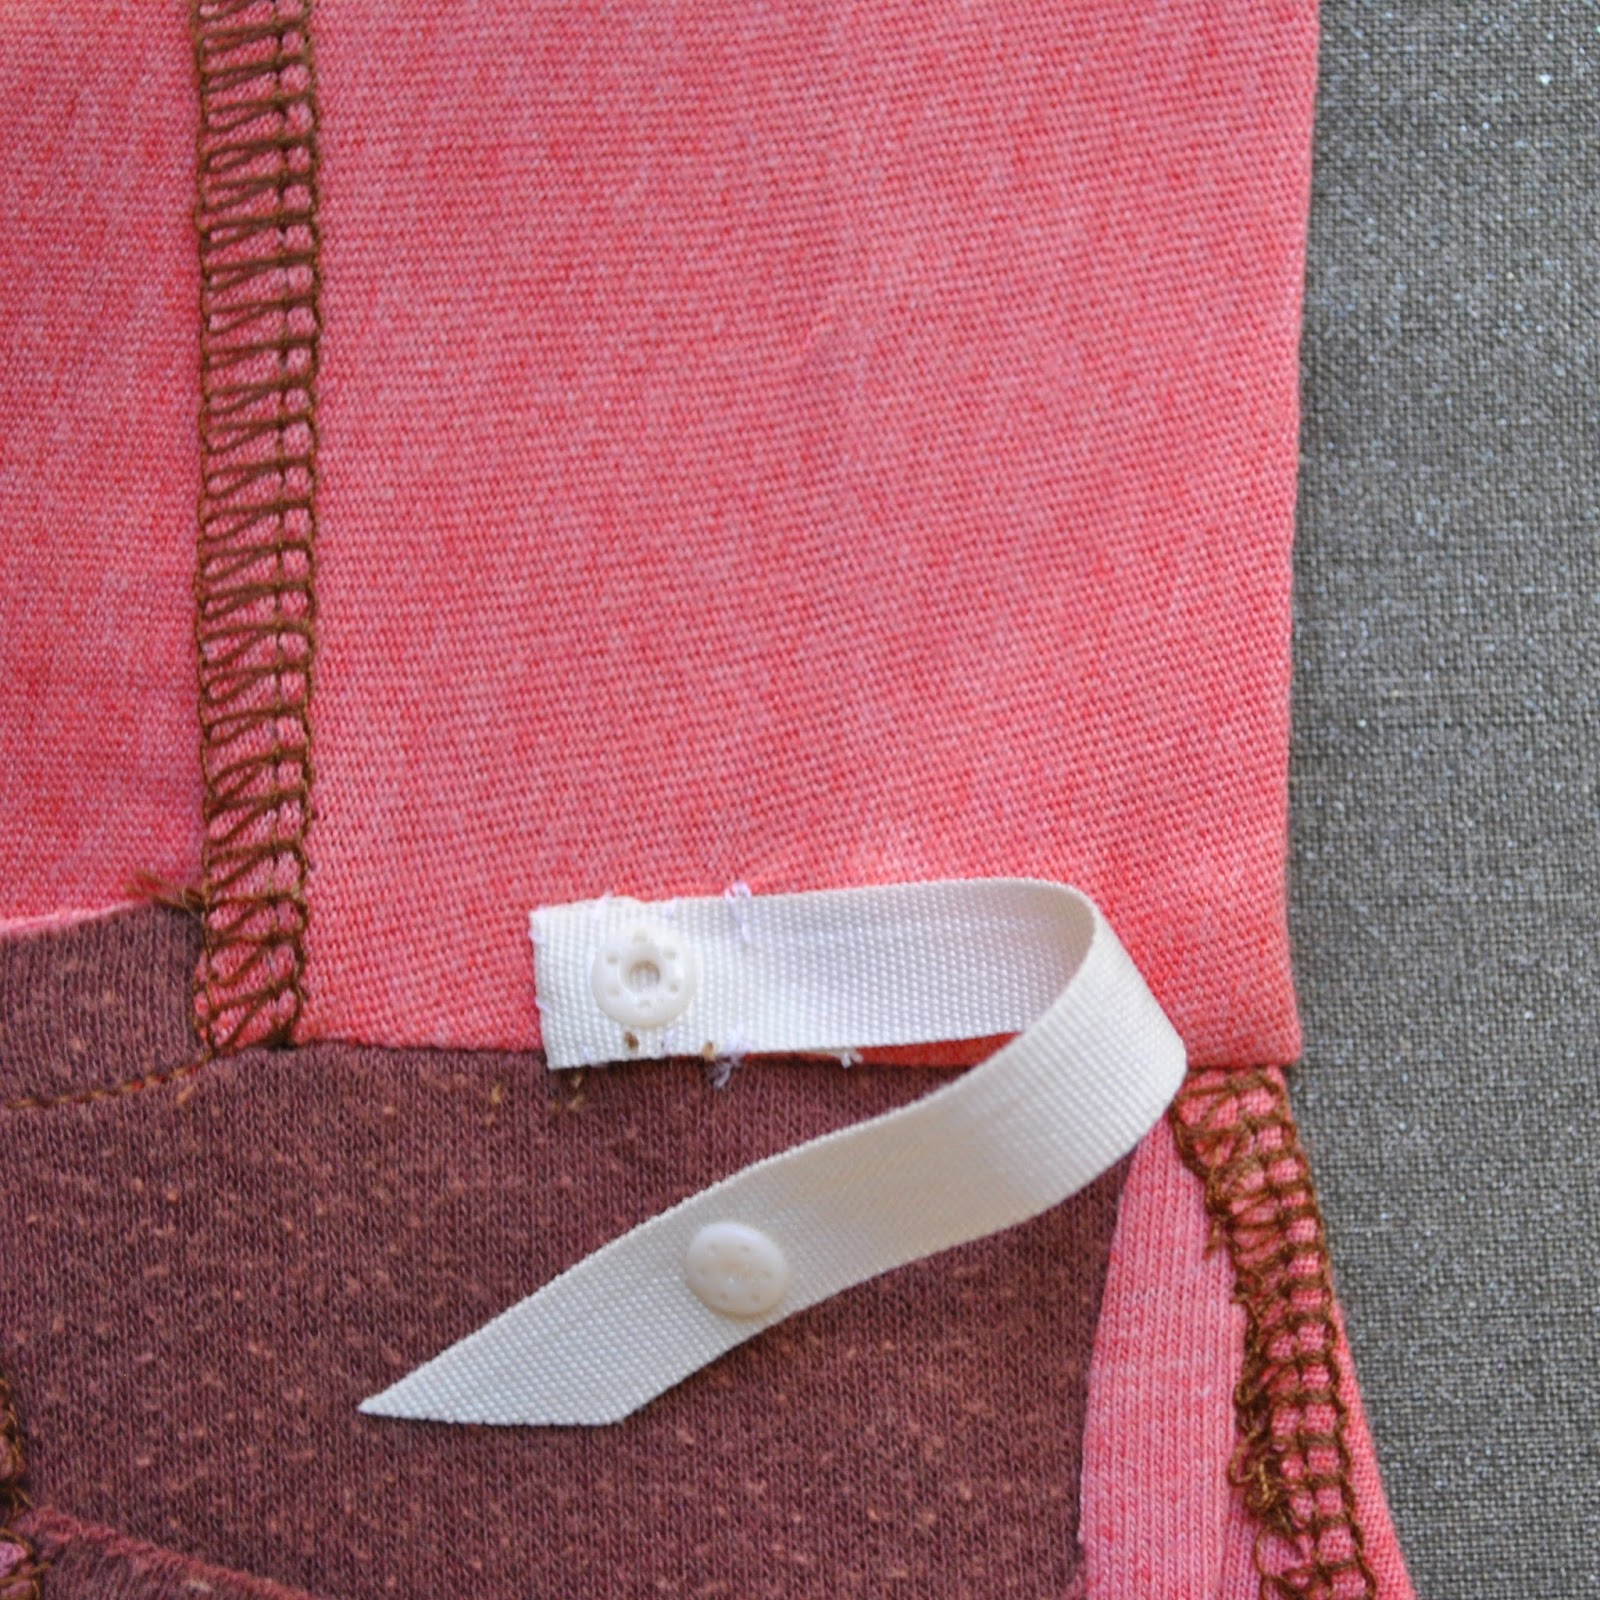
I made the belt sleeve tabs by buckling the belts and cutting down to size keeping the buckle area intact.  Using a nail, I hand-drilled four little holes for stitching, two at each end. The outside holes are hidden underneath the belt overhang.  I put a little wad of folded fabric inside the sleeve between the belts to stabilise and strengthen the stitching area, and stitched through my drilled holes firmly and securely using thick upholstery cotton.

Details:
Hoodie; Burdastyle 09/2014, 115 shortened, of burnt chocolate-brown crinkly linen
Shorts; Burda 7723, grey/cream pinstripe linen, details here and my review of this pattern here

Disclaimer; this pattern was given to me by Burdastyle; however I chose it myself from the large range of patterns on offer because I liked it.  All opinions are most definitely my own.  There are no affiliate links on my blog and never will be…  I’m in it because I love sewing  🙂 

pinterestmail

Oriental Bird

I was tempted to call this my other Swedish dress, since I bought this fabric in Stockholm as one of my wearable souvenirs from our Scandinavian holiday, but actually the fabric is English!  I bought it in Svenkst Tenn but “Oriental Bird” is a linen upholstery fabric by GP&J Baker, printed in England.
Yes, upholstery.  I am wearing a couch.  *womp womp*
😉
Y’know those upholstery adverts in magazines that showcase upholstery fabrics and even carpets by making “garments” from them and photographing them on a model, like a fashion spread?  Well, I love that kind of thing.  Fabric is fabric and honestly, I cannot see any reason why upholstery fabric cannot be worn just like any other fabric.  I reckon if you like it then just go for it.
And the print is just beautiful.  Just look at these colours!  There are twenty three colours.  Twenty flipping three…  Meaning, twenty three separate screens were required to make the design.  Having done some printing myself, I find that number of colours to be, quite simply, staggering.  Think of the placement!  Honestly, I cannot even comprehend.  Consider my mind officially blown.

I used Burda 8511.  I wanted a dress with minimum joins, seams and darts or any other fussy shaping details that would visually interfere with the large-scale print; and this fulfils all criteria.  It’s a terrific little basic shift dress pattern.  I’ve had mine for years and it is still in print and available today.
Speaking of the pattern…  I’m gunning for Burda’s envelope pose here.  

powning it

I shortened it slightly and, because I wanted a nice fit, went to the effort of a minor sway back adjustment.  I also did my semi-regular FHA.  Haven’t heard of the Full Hip Adjustment? well that’s probably because I just made it up, hehe.  The FHA is enormously complicated, requiring one to grade out from the waist to a larger size at the hips.

Inner workings: my fabric has three main characteristics; A. it is quite thick and stiff, B. it frays  and C. it was very expensive.  Taking these into consideration, I decided to HongKong finish all the raw edges inside.  This can be a time consuming finish, only visible to and appreciated by one person; you, the wearer.   However imo it is a really beautiful inner finish, and I’m always secretly thrilled with the sight of it, even thought it’s only for my own private benefit.  I used pale yellow cotton voile for the HongKong bias strips and raw silk for the neckline/armhole facings.

Details:
Dress; Burda 8511, upholstery linen
Sandals; Zomp, from Zomp shoes

pinterestmail

nani IRO blouse

I’ve made a new top.  It is a plain little top, but to my eyes the lovely thing about it is the fabric; a beautifully soft cotton gauze, and the charming hand-painted look to its print.
A short story…
About
a month ago I was meeting with some friends, and one friend was a little late.  When she arrived, she explained that on the
way she had spotted a cute top in the window of a shop, and just had to screech to a stop and check it
out.  She tried it on and then bought it,
totally on the spur of the moment.  We
all duly admired the top and chatted about the pros and cons of spontaneous vs
carefully planned purchases.  Important, life
altering stuff, I know!
Anyway,
after our get-together, which happened to be in Glyde Street where Calico and
Ivy is situated, I popped in to check out the offerings.  Saw the range of nani IRO double gauze, fell hopelessly
in love all over again, as I always do when I go in and see it there.  It occurred to me that maybe I could buy
myself a little top too.  Except of
course that my version of buying a little top is buying a piece of fabric.  Inspired by my friend I just decided to
spontaneously go for it. 
And bammo, new top!   Woot!
I wanted the print to be the star so wanted for a very plain, simple and relaxed silhouette.  I used New Look 6483, one of my really old old old tried and trues that I’ve had for many years.  Not exciting, but a real goodie nonetheless.  There are probably tonnes of patterns identical to this one.
This
print is called Painting Check.  My very favourite
thing of all about it is the way the print fades away towards the selvedge and
I wanted to use this feature as a sort of “border print”,
although obviously it isn’t actually a border print but the complete opposite.  It’s a reverse border print!
But
I like ideas that are turned on their head so it’s definitely my kind of border
print.  To keep this feature firmly in
focus I left the selvedges unhemmed.  It’s an uncommon choice but I think it works really well for this particular fabric, and I really like how it looks!
The
two body pieces are cut from one selvedge edge and the two sleeves were cut
from the other.  The sleeves still have
the fabric ID on them, which I find quite charming.
There was only 1m left on the roll, which wasn’t quite enough for the hip width required for my pattern pieces.  So I cut them as wide as possible and just left the side seams open in a slit from the lower waist down.  
Side,
sleeve and shoulder seams are flat-felled, the armscye seam is overlocked and
the neckline is finished with a narrow strip of bias cut cotton voile,
stitched, understitched and then topstitched.
Details:
Top;
New Look 6483, nani IRO double gauze “painting check”
Shorts;
Burda 7723, white linen, details and my review of this pattern here
Thongs;
Havaianas
pinterestmail

patchwork Sandpoint top

I’ve made a new top.  Well, kinda new from old actually, since it’s made from 4 old Tshirts cut up and patched together.  My refashioning bag yielded; a light purply-brown from Craig, two pinks from Tim, and a chocolate-y one which is one of my old self-made Tshirts.  They were all old and a tad tatty here and there but still had some good bits left in them.  And I liked these yummy Cherry Ripe colours together.   mm-mmmmm  🙂

The pattern is the Sandpoint top designed by Helena of GreyDay patterns.  Mel of the curious kiwi contacted me to ask me to make up the pattern and review it and well, I love trying out new patterns; so ta da!

The Sandpoint is described as “a loose fitting T-shirt
with a surprise cowl in the back”.  It is a nice little top pattern suitable for a beginner, having separate front pattern pieces for the two neckline options, V-neck and round neck.  I think it’s biggest point of difference from other similar designs is a “shoulder band”, essentially a strip which is supposed to be worn behind the neck.  I think its purpose is probably to keep the top actually up on your shoulders and not fall off, which is pretty much a given with these necklines.  However I wasn’t keen on the shoulder band and decided to leave it off, and sewed lingerie holders inside on the shoulder seams.  I have previously used lingerie holders to keep up the shoulders of my other oversized cowl, drape-y tops, here and here, and have found them to work just fine for the job.  Fortunately they do for this one too  🙂

Because I wanted my rather bold patchworked fabric to speak for itself I decided that arm and neckline bands would be a visually distraction, fighting for attention.  So I left these off also and finished these edges by simply overlocking, turning under once and hand slip-stitching a hem in place.  My lower hem is likewise, invisibly hand stitched, and actually my top is 6.5cm longer than the pattern… for no real reason other than my patched-together fabric had the extra length, and who was I to ruthlessly cut it off? after all that careful cutting and patching it together!?  Plus, I just happen to like tops to be a little bit long.

Because I was leaving off the shoulder band, I put my top together quite differently from the instructions… namely: the instructions say to fold the back cowl allowance inside and then stitch the front and back together at the shoulders.  However this would result in a visible end-of-seam at the neck, which in the design is to be covered up by that shoulder band.  So, instead I pinned the front and the back together at the shoulders right sides together, then folded the back cowl facing allowance out to wrap around the front; then stitched the shoulder seam.  This way, when the shoulder seam is turned right side out the shoulder seam is nicely encased and hidden away within the facing, which gives a neat, more polished finish.

Details:
Top; Sandpoint by GreyDay patterns, made using 4 old cotton jersey Tshirts
Skirt; an adaption of Vogue 1247 and Vogue 8561, blue, slightly stretch denim, details here
Shoes; c/o Misano

pinterestmail

a creamy little double-fronted top

My new top will come as a very un-surprise to anyone who has been following me in the Sewvember instagram challenge, haha!…
This pattern is Burdastyle 04/2014-115, with modified sleeves  and my fabric is a silk hessian from Spotlight.  It has a very loose weave, a rather pleasing slightly rough and rustic texture.  The rich, almost buttery cream colour apparently suits me.
Now, I have received a handful of patterns of my choice from Burda… however this is NOT one of them.   I had bought this magazine myself already!  and I’ve already made the asymmetrical turtleneck top from the same collection in the mag.  Ok, honesty here; I actually totally love just about this entire collection.  It’s embarrassing to admit how easily I am swayed by colour choices.  Those peacefully harmonious shades of soothing cool non-colours; *sigh* heavenly!
So style-wise, this is a plain design.  And my choice of fabric; quite plain.  But that’s ok, a bit of plain is a good thing to have in the wardrobe to set off the more eye-catching elements within.  But as I was doing the sleeves, which are likewise as plain a style as could be, I worried that they were going to tip my blouse over into the territory of Irretrievably Bland.  So I added a little feature; a faced split that has a little button closure on the corners.  I’m very pleased with how this looks; quite primitive, like a vague sort of a nod towards a tailored shirtsleeve button placket.

Construction-wise, this is a nice, quick and simple little pattern and utterly foolproof… . oh, I put the wrong front lapping over.   Haha.  We’ll just pretend that I did that on purpose, ok?  Ahem.

Insider biz; the side and shoulder seams are flat-felled, the sleeve seams overlocked.  The neckline is faced with a bias-cut strip of pale yellow/cream cotton voile.

Finally, my usual criteria; if I saw this in a shop would I be tempted to buy?  Heck, yeah!  Plain is my middle name.  Along with all the other middle names I adopt when the mood strikes.  This is going to be worn a tonne  🙂


Details:
Top; Burdastyle 04/2014-115 with modified sleeves, cream silk hessian
Skirt; adaption of Vogue 1247, coffee lace with silk charmeuse lining, details here
Thongs; Mountain Designs
Sienna wears her own custom-fit coat

Later edit: 4 yrs later, and I gave this little top a rejuvenating dye-bath!  it’s now a pretty shade of cherry-blossom pink…
Other outfit details:
and then again, to an exciting new shade of hot pink!  I love it like this!
pinterestmail

a ladylike skirt

I have lots of “little” skirts, but it’s nice to have some longer, looser, wider skirts too.  To be more refined, relaxed, ladylike and elegant, and less, er, whatever I was before.  This pattern is Burdastyle 02/2014, 106, and delivers the required dose of elegance quite nicely, I think.
Even in an annoyingly brisk breeze that turned up, just at the right time to buffet it about in my pictures here!  The wind tried, but never once did I come anywhere near doing a Marilyn in any of my shots.  Thank goodness for that!  Ladylike personified.  Or, should I say, skirtified?  Yeah, I think maybe I should  😉
So, yes, it is looking a bit windblasted here, but that’s “real” or whatever.   My fabric is a mid-heavyweight, richly creamy-coloured satin remnant from Fabulous Fabrics; I suspect from the bridal section.  Probably if I’d made it up in the suggested brocade it would hang properly smart with the big box pleats standing out nice and stiffly-straight and looking just like the one on the magazine cover, at right, but I think that the luxurious feel of the satin rippling and swishing against my legs is a happy bonus.

The skirt is pretty simple; wide, deeply pleated skirt sections attached to a fitted, curved yoke.  The pattern is super straightforward, all going together very easily and quickly.  I would describe this as fast gratification; a nicely stress-free project.
There are two views to the pattern; the other, illustrated in the line drawing, is a more complex version with a bigger rectangular piece of fabric pleated over the yoke as an over layer.  This feature you can just make out on the magazine cover, above, at right.  I made the simplified version with plain yoke because hello, remnant.

I lined the yoke in ivory polycetate lining fabric, also from Fabulous Fabrics, and used an off-white invisible zip in the CB seam.  I wanted the skirt to be as long as long as I possibly could make it, and managed to cut the skirt pieces to be about 10cm longer than the pattern.  Then hemmed as stingily and as meanly as humanly possibly, by stitching to the lower edge a bias cut strip of pale ivory/yellow cotton voile in a very narrow 2/8″ seam.   This enabled me to only turn up a mere 2/8″ of my satin but still to have a nice deep hem.  The hem is slip-stitched by hand.

the least windy of the pictures…
Details:
Skirt; Burdastyle 02/2014-106, ivory/cream satin
Cardigan;  Audrey in Unst knitted by me, in 4ply poll dorset bought in Paris while shopping with Donna, details here
um, I’m not sure if or how I’m supposed to do this, but just in case…
Disclaimer; this pattern was given to me by Burdastyle; however I chose it myself from the large range of patterns on offer because I liked it.  All opinions are most definitely my own.  There are no affiliate links on my blog and never will be…  I’m in it because I love sewing  🙂 
pinterestmail

studio faro pocket dress

New dress, with interesting pockets.
While browsing Pinterest, as you do, I came across a line drawing of a very elegant dress on and I immediately knew I wanted to have a go at drafting it for myself.  It is the pocket drape dress designed by Anita, of studio faro.  Subsequently I discovered her absolutely fantastic blog well-suited, where she very generously shares her considerable expertise in understanding how designs actually work.    If you’re interested in exploring and understanding pattern making then Anita’s blog is totally brilliant; sure to inspire and motivate.
I’d previously measured and made a custom-fit darted sheath dress sloper for myself during my early explorations of Pattern Magic and I used this to draft my pattern, following Anita’s guidelines pretty closely.  I made a first test version using an old sheet.  It worked, but well, ahem.  I have to admit I looked less than chic in that thing.  I think my drape was a bit of an epic fail.
However I decided I really did love the pocket, so I went with having the pocket on both sides.  Also I fiddled about with the crossover neckline, put in a few random folds and made it asymmetrical.

The deep side pockets have flap openings that are an extension of the bodice side panels.  They are fully functional pockets, but their positioning with the opening sitting up high at the waist makes them not really conducive to shoving your hands in.  So, not as practical as they are decorative.  Well, I could put a few small things in there that I don’t need to get out in a hurry.  The pockets are perfectly useable pockets, but just for things, and not hands.  But still…  a very cool design, and I reckon they look really interesting  🙂

The pockets are kinda hard to explain… they are inset into the side of the dress and have an extra piece which is part of but also sitting over the pocket, that extends into a flap hanging loose and free past the bottom of the pocket.  
Working out how to construct the pockets was quite an enjoyable puzzle, and I really enjoyed the process of nutting out a way to put it together neatly!  I don’t know if my way is the way Anita intended for it to be made, but it worked out OK for me.  I think  🙂
I’ve written my instructions at the end of this post, mostly for myself, if I ever want to make these pockets up again.  Please be warned that they will probably not make sense to anyone not making up the pockets…

the pocket detail; underneath is a fully functional, 2-layer inset pocket

In the muslining stage I found that the pocket sagged down on the inside, pulling down on the pocket flap; and so decided it would be better to add a lining to the front and back side panels above the pocket, and to “tether” the top edge of the pocket to the side panel lining, by sewing the panel lining lower SA to the upper SA of the pocket bags.  Having a lining added some much needed hidden support and keeps it all holding up and together, nice and stable.
Subsequently I decided to go the whole hog and properly line the whole dress in the same creamy polyacetate.  I used the same pattern for the lining pieces.

inside view; lining of side panel and inset pocket

The fabric is a rich cream, silk dupion, slightly slubby yet still with a subtly glossy sheen, and a decadently crinkly texture.  I bought it at Fabulous Fabrics forever ago and it’s been living quietly in my stash, patiently awaiting its turn.  It had gone slightly yellow but I gave it a good wash and it came up lovely and fresh, seemingly as good as new.
So I like my dress.  Well, it’s OK.  It was not easy, ahem! and I’ve decided my self-drafting skills are kinda rubbish.  And even though I thought my muslin looked dreadful I have a sinking suspicion that maybe it was more interesting that way.  I think maybe I could’ve stuck with the drape, hmmm.   *sigh*
But I do love how the pockets look and I very much love that I have a nice fresh off-white dress to pop on for summer.  So I will wear it very happily.
And now all I want to do is just leap onto some commercial pattern, already drafted up for me, ready to go, easy peasy, no thought required, neat and tidy like.  Yeah.

The Pocket: feel free to skip this bit if you want.
So, you have the pocket detail, the pocket bag, the pocket bag lining and the pocket flap facing.  Also the back side panel, front side panel and their lining pieces, which have the pocket flap facing allowance  removed …
Sew pocket detail and pocket bag R sides tog at top edge, turn, understitch.
Sew pocket bag lining  to pocket bag, R sides tog at bottom edge.
Sew pocket flap facing to pocket bag lining R sides tog, press pocket flap facing up.
Sew back side panel and front side panel R sides tog at side seam, press open, repeat for panel lining pieces.
Sew lower edge of joined panels to pocket flap facing R sides tog, trim, clip side panel pieces into corners, turn pocket flap out, press.
Align and layer 3 pocket pieces together and baste tog at sides, clip into the SA of pocket detail at junction with pocket bag lower edge.

For the side panel lining; and this is where it gets a little more complicated…
the dress pieces need to be assembled except for the shoulder seams and keeping the lower part of the pocket detail free, and the dress lining assembled likewise, leaving out the pocket lining which is attached to the dress already, meaning there is a “hole” in the dress lining where the pocket lining should be.
 Sew the dress to its lining pieces together at the underarm and neckline seams, understitch the lining as far as possible, turn; then the side panel lining pieces can be sewn to the upper pocket bag seam allowances on the inside, W side to R side.  Clip into the corners, then the SA around the three remaining sides of the dress lining “hole” can then be stitched to the pocket lining seam allowances inside, R side to W side, between the dress and its lining.
The lower pocket detail edges are turned under and invisibly hemmed by hand.

All that might seem a bit convoluted, but trust me, if you are putting together the pocket it does work!

pinterestmail

Ginger jeans

Hello!  I’ve made some new jeans  🙂
These are the Ginger jeans designed by Heather of Closet Case Patterns, and named after Sonya of Ginger makes, and I was so happy that Heather asked me to test the pattern.  Thanks so much for asking me, Heather!  I LOVE trying out new patterns!  
The pattern has two views, I have made view A, a mid-rise bootleg design.  View B is a high-rise skinny leg.
I used a stretchy cotton denim from KnitWit in a very deep blue-black wash, and the topstitching is in ivory/cream-coloured Gutermann’s upholstery thread.  The jeans zip, the copper coloured snaps for closure, and the copper coloured rivets are all from KnitWit too.

The pattern is a classic five pocket jeans pattern; and I know Heather has worked very hard to perfect a really good starting-point fit.  Although obviously; everyone, everywhere has completely different bodies, meaning fit is a very personal and individual thing that cannot be easily standardised; so it’s terrific that Heather has included in the pattern instructions some very helpful suggestions for trouble-shooting the fitting process.  I learnt several new things!  I did make some adjustments to custom-fit mine to myself, taking in the crotch, the side seams at the waist, a pinch-in adjustment of the CB seam for a slight swayback.
Just as a comparison, these are pretty much the same adjustments that I generally make for my old tried-and-true jeans pattern, Burda 7863.   
Also, at the cutting out stage I added 7.5cm (3″) to the leg length, just in case.  Lengthening the legs is another always adjustment for me; partly a shrinkage insurance policy, and partly in case I fancy wearing a high heel with my jeans and partly because when I’m crouching down or sitting with my knees crossed I prefer for my ankles to stay covered and warm and out of the wind.    I’m of the school of thought that you can always cut off but you can not add on afterwards!  And I was glad I did add that little bit of length since I think the legs would have been just a smudge short otherwise.  

During my early fitting trials I realised the rise of view A is quite low, so I decided to sew the upper and lower seams of the waistband with skinny 2/8″ seam allowance, instead of the standard 5/8″.  Meaning my waistband ended up 6/8″ or 2cm wider and thus my jeans have a that-much higher rise than intended.  This higher rise feels a tonne more comfortable for me.

I also like my waistbands to be firm and stable and secure, holding everything in ie. not stretchy!  so instead of on grain I cut the waistband on the cross, where the fabric had zero stretch.  My waistband is interfaced, and the waistband lining and pocket bags are cut from a charcoal/white pinstriped fine-grade linen, the leftovers from Tim’s business shirt that I made for him last year

Speaking of learning things… I’ve put in loads of fly fronts in my time, so sometimes I’m tempted to ignore pattern instructions and just potter along blithely in my own merry way.  But when I’m testing a pattern I follow the instructions given.  Because you’re testing and later reviewing the pattern and its instructions, duh.  And hey, you might learn new stuff.  I sure did… the Ginger jeans fly front method is, dare I say it? …foolproof.  Detailed to a fault, meticulously outlined, and it works like an absolute charm!!  I think my new jeans have the best damn fly front I’ve ever done, ever.  And it went together so easily.
I’m so impressed with those fly front instructions I’ve printed that bit out and stuck them to the wall behind my sewing machine.  Have I ever done that with a technique before…? Precisely never.  
These instructions are that good.
Thank you so much for another excellent pattern, Heather!

Details:
Jeans; Ginger jeans by Closet Case patterns, navy/black stretch cotton denim
Top; Burda magazine 04/2014, 111, creamy bobbly stretch stuff, details here
Sandals; c/o Misano

pinterestmail
Switch to mobile version
↓