Tag Archives: Embroidery

Kitchen witch

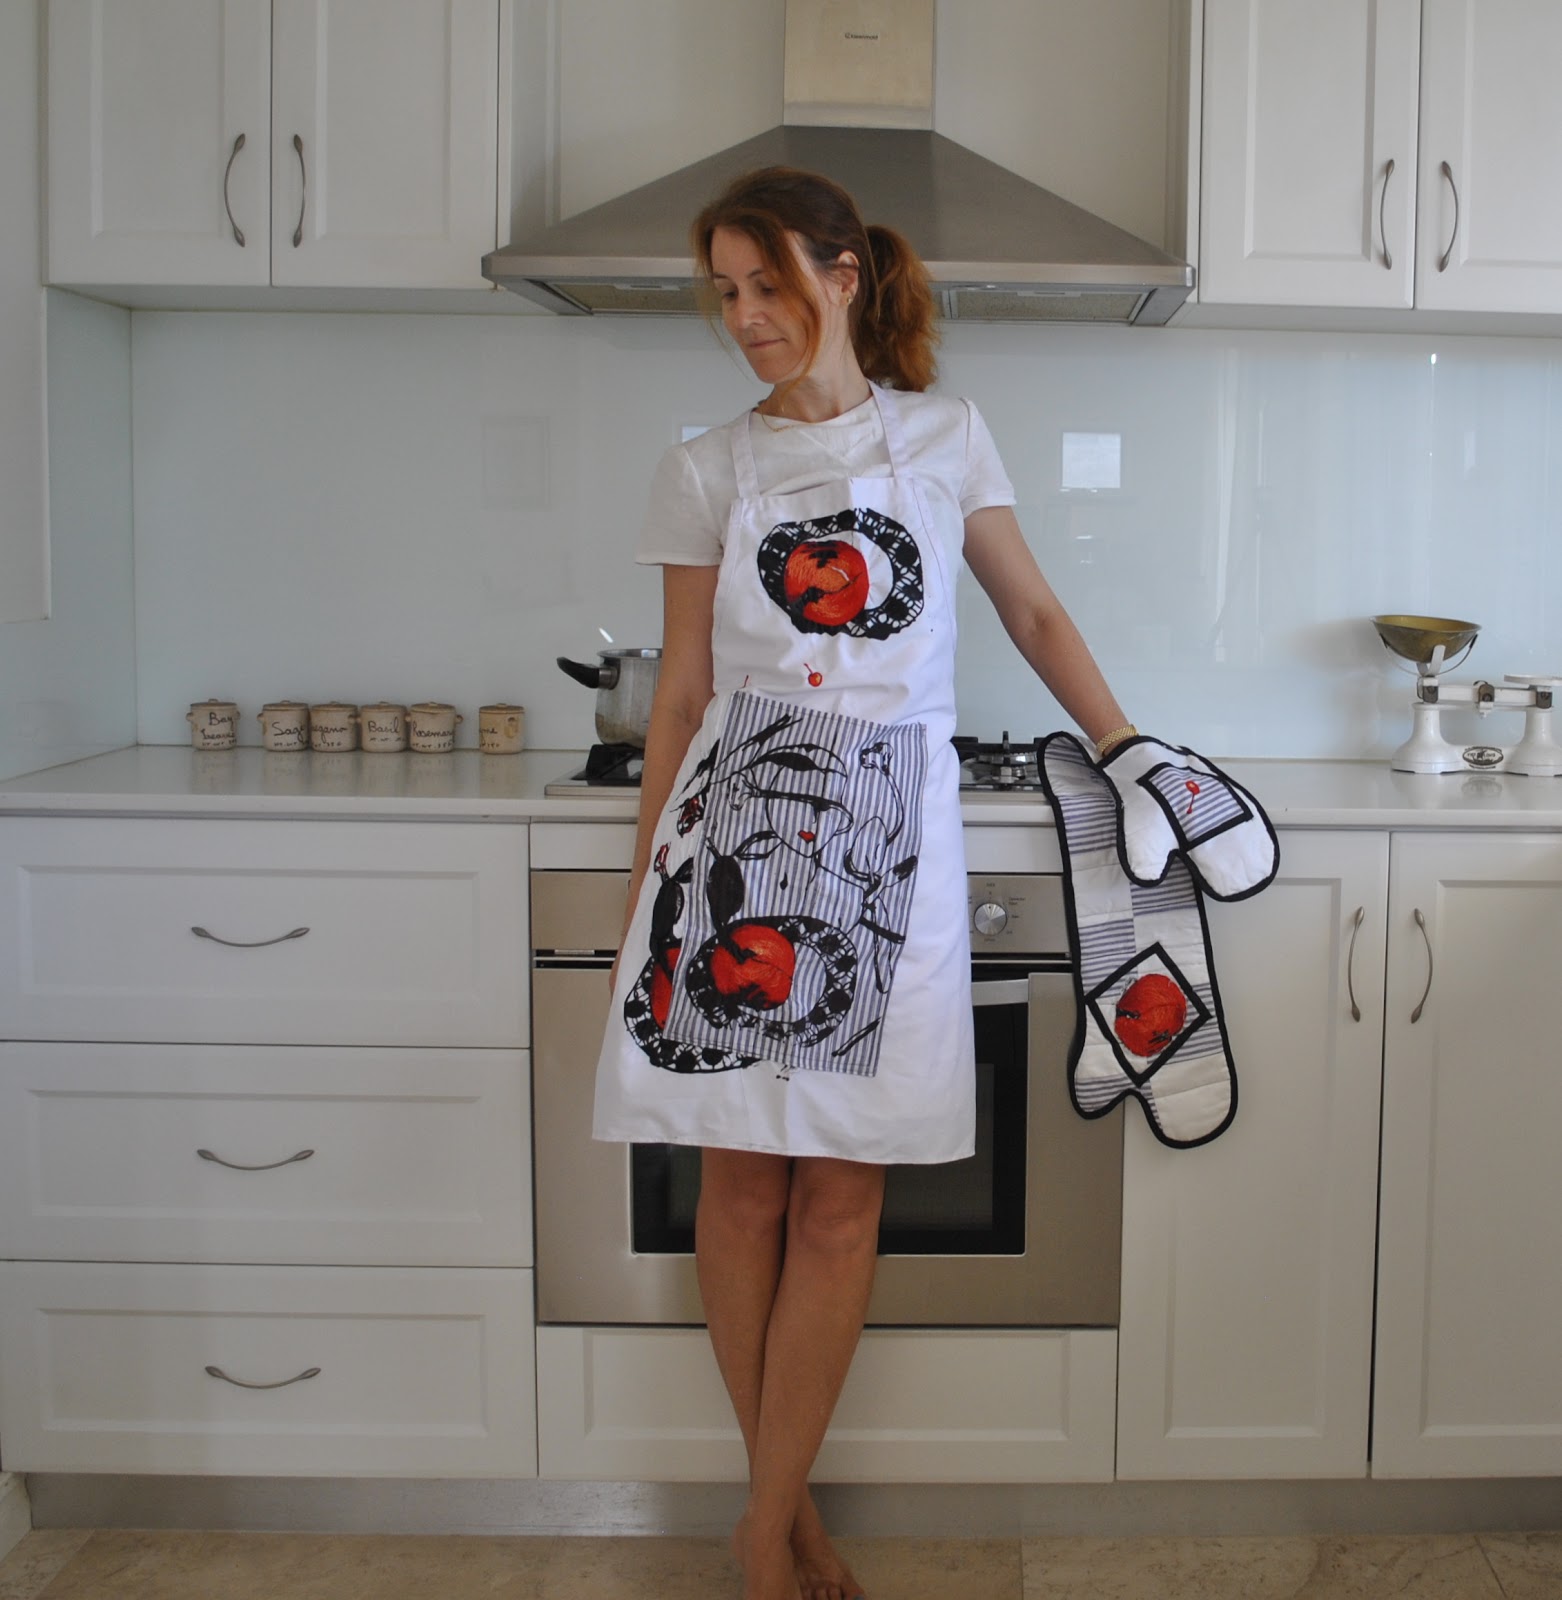
Some kitchen couture!!
With all the gorgeous aprons popping up in the sewing blogging world at the mo’ I thought I should show why I did not take part in the big sew-along this time… you see; I have a very nice little selection of perfectly lovely handmade goodnesses to choose from when it comes to cooking-related apparel; already!
All of which are of quite high sentimental value to me since they were hand-crafted by my two favourite ladies in my life; my Mum and my daughter Cassie.
I own two aprons and one pair of oven mitts.  Actually I have one other pair of oven mitts too, cruddy old ones which I actually use.  The ones Cassie made are too good to muck up  ðŸ™‚  But I do wear the aprons.
They are both quite simple in line and style BUT the divinity is in the details.
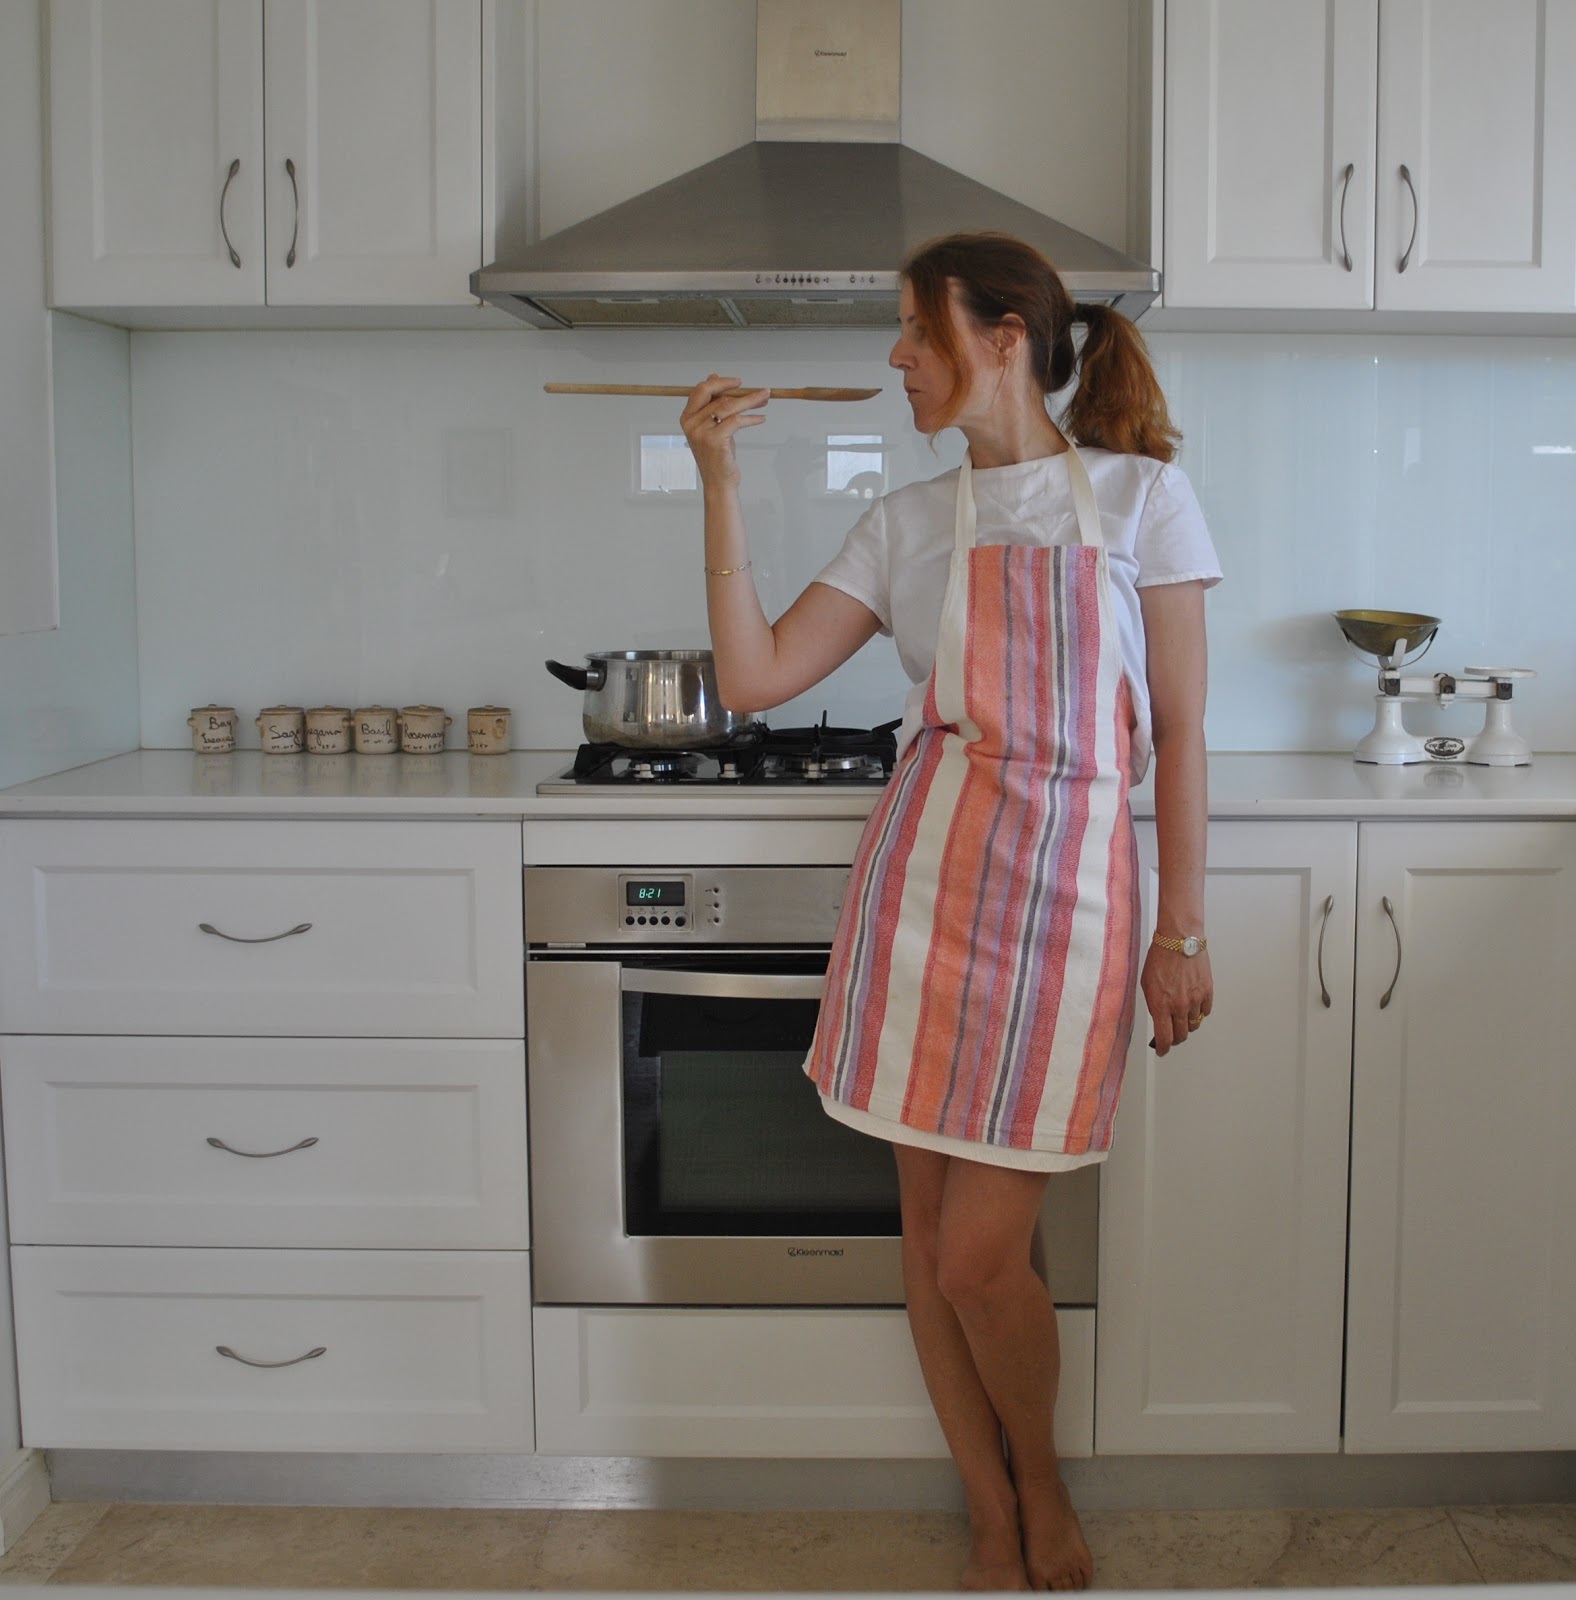
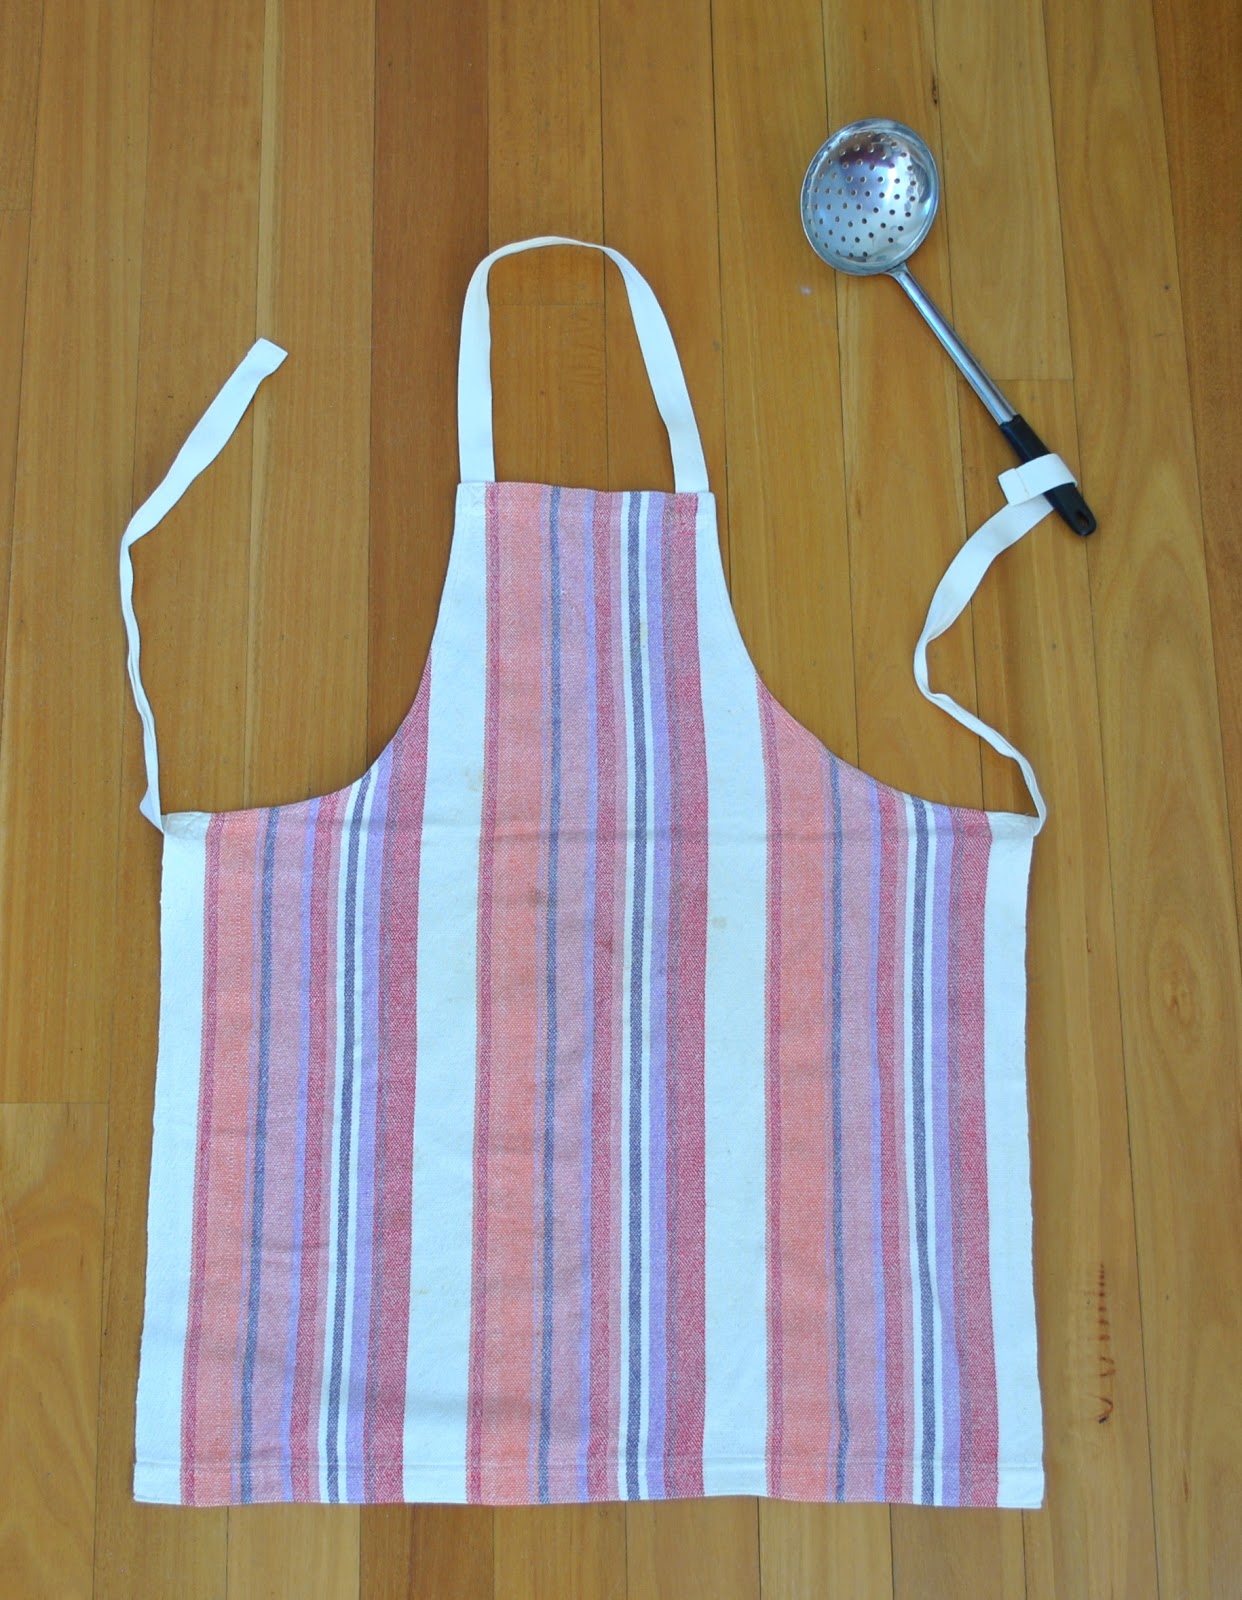
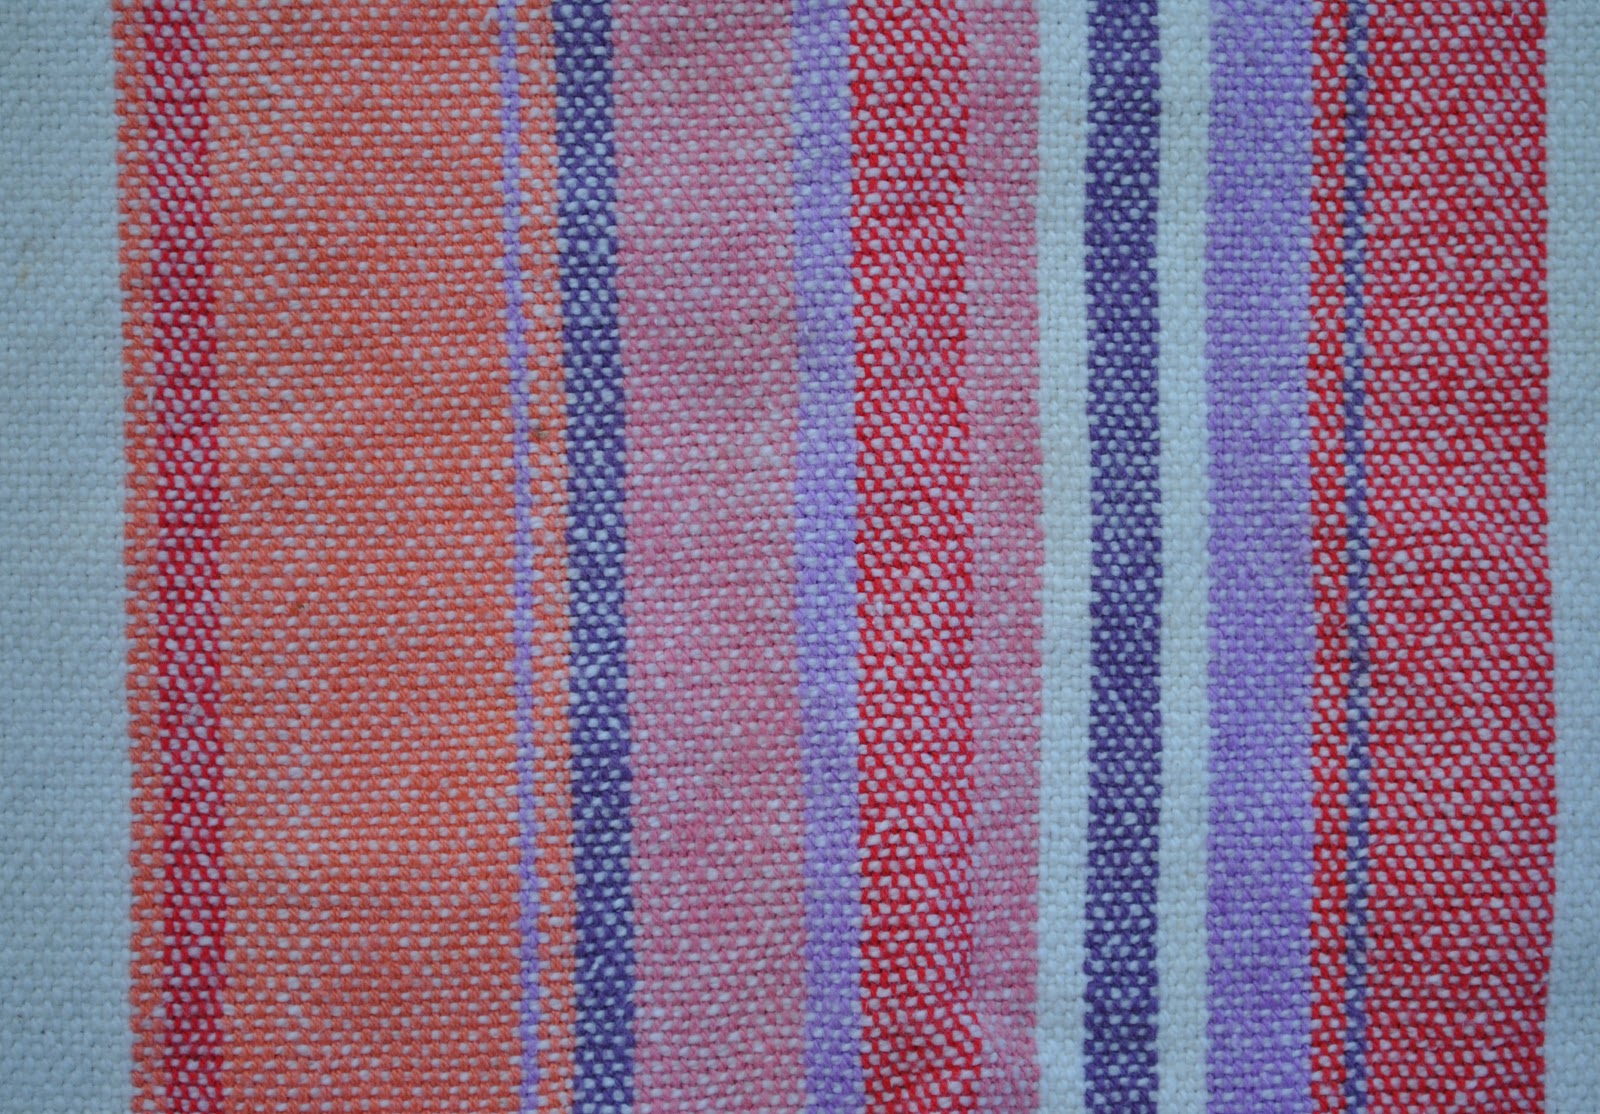
Firstly; the striped apron above was handwoven and made by my mother, and I have been using it all my adult married life.
It is all cotton; the fabric handwoven by Mum on a big floor loom in a plain weave; and has twill tape attached for the neck bizzo and the waist ties.

I just love the colours Mum chose  ðŸ™‚

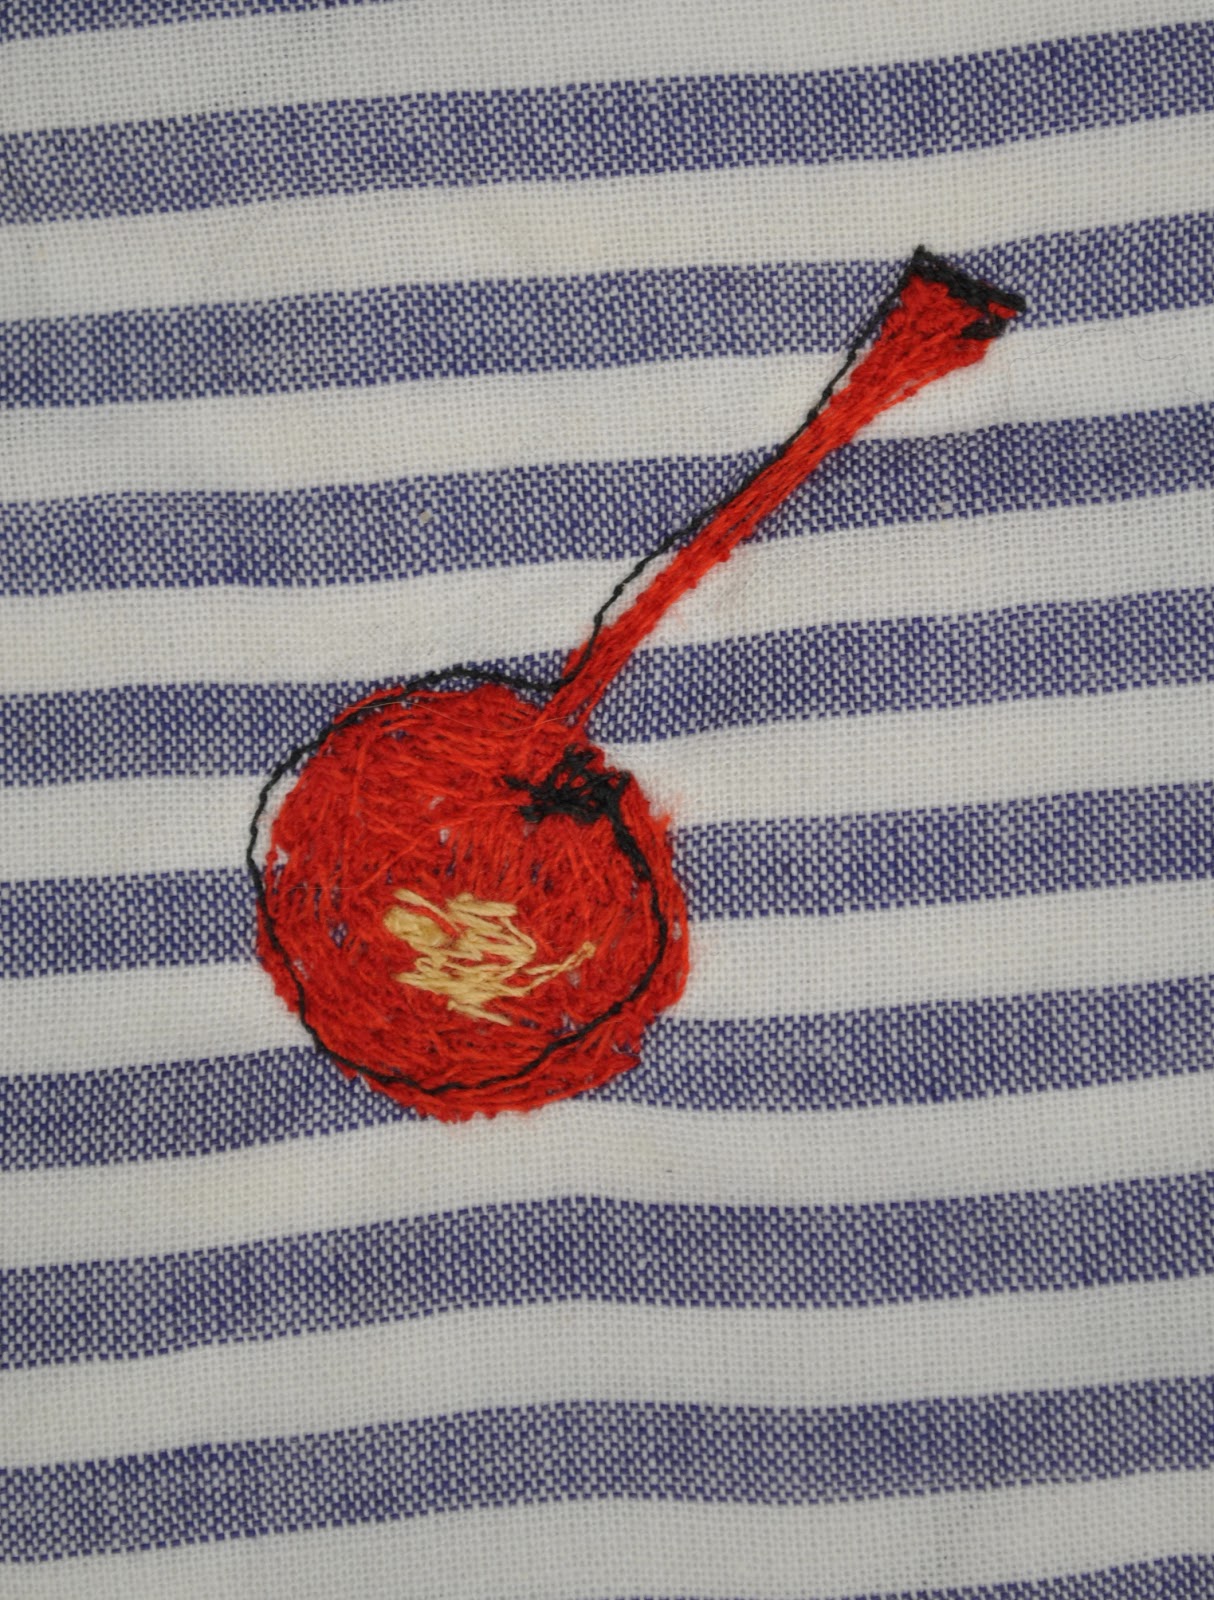
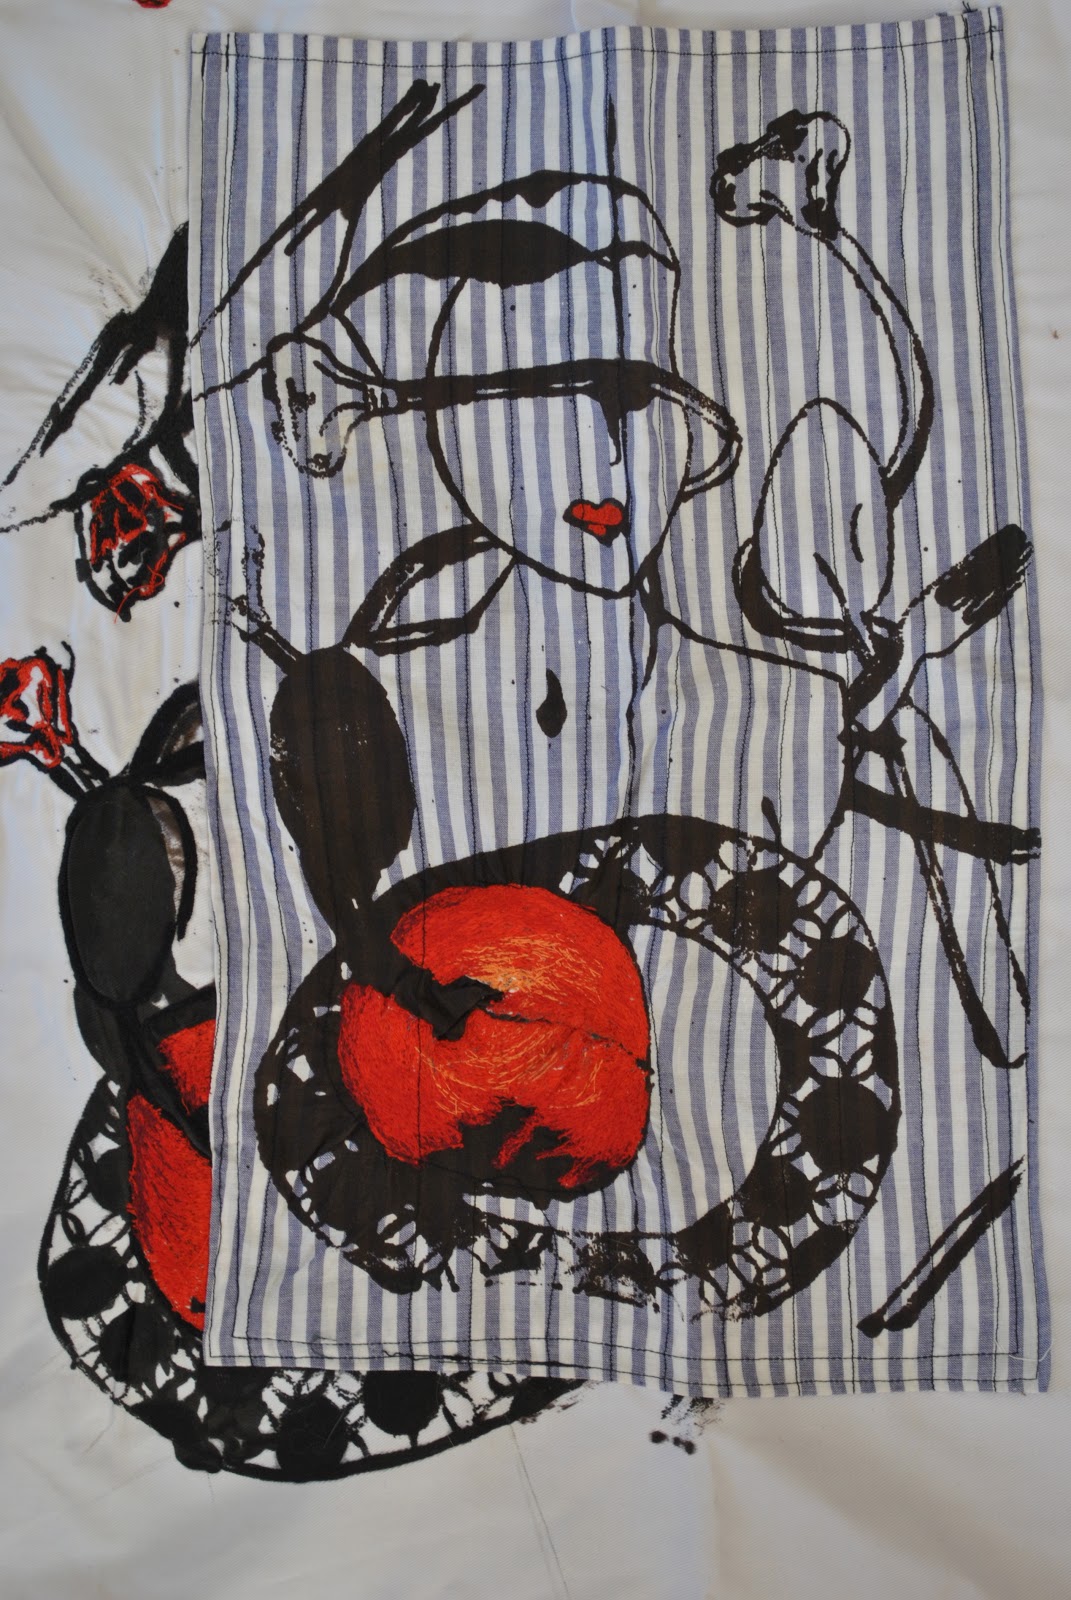
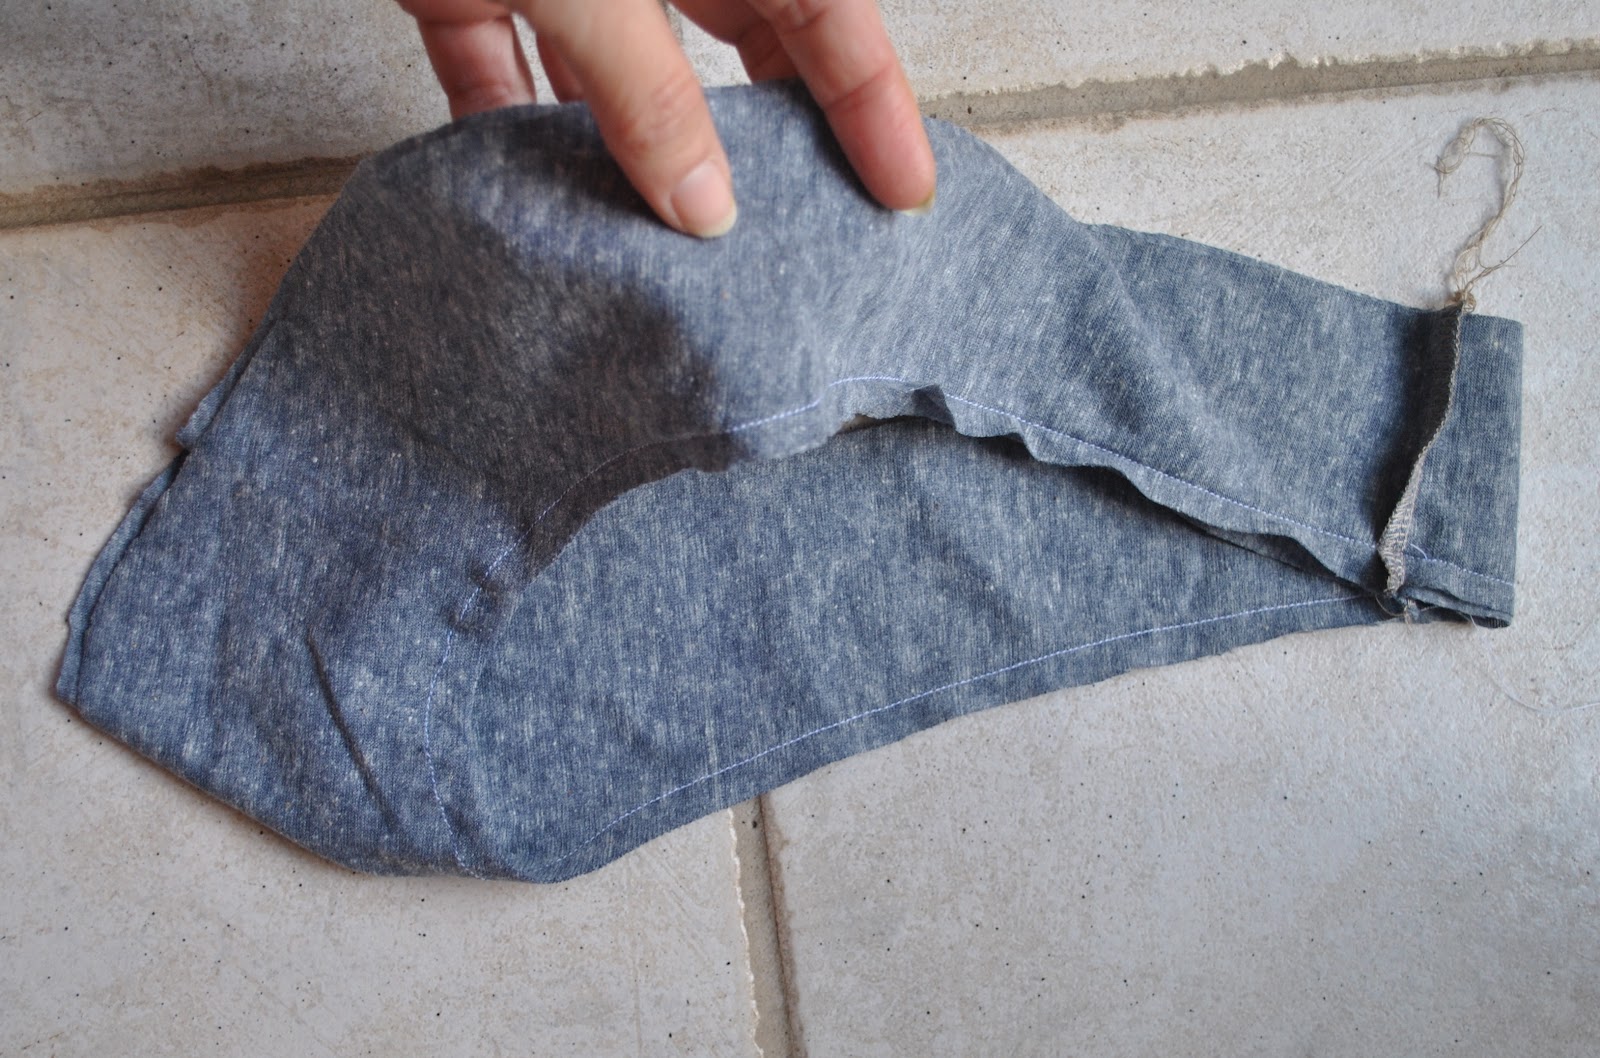
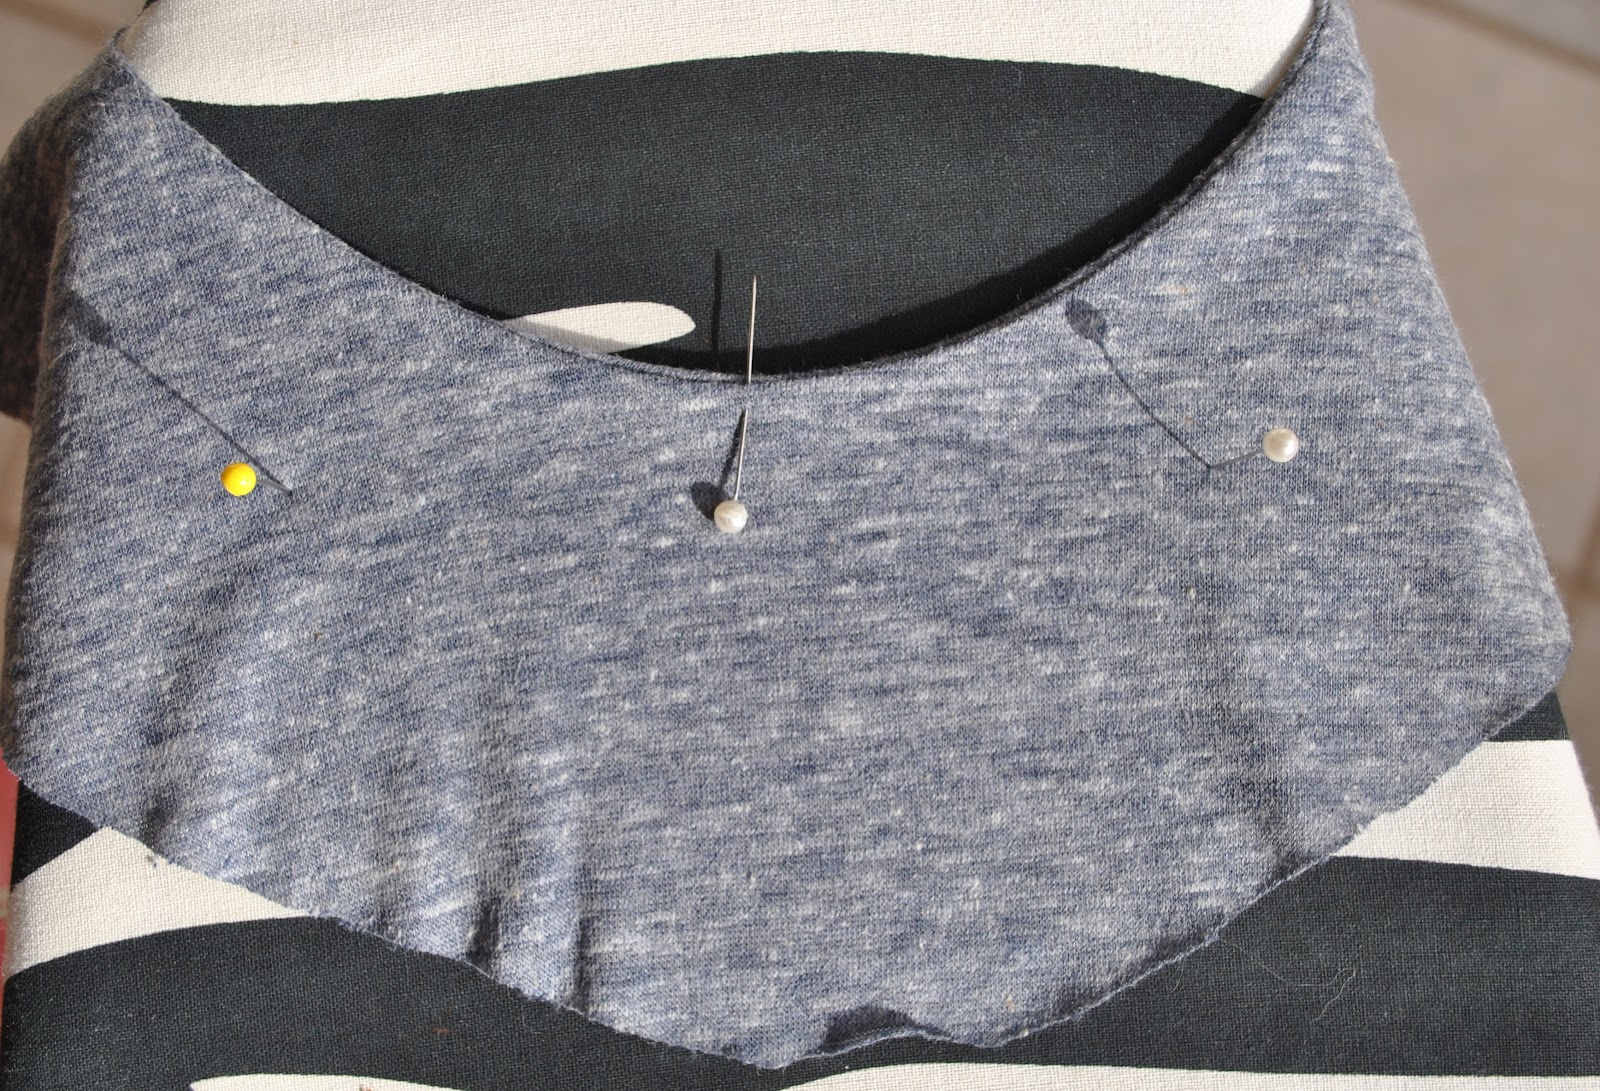
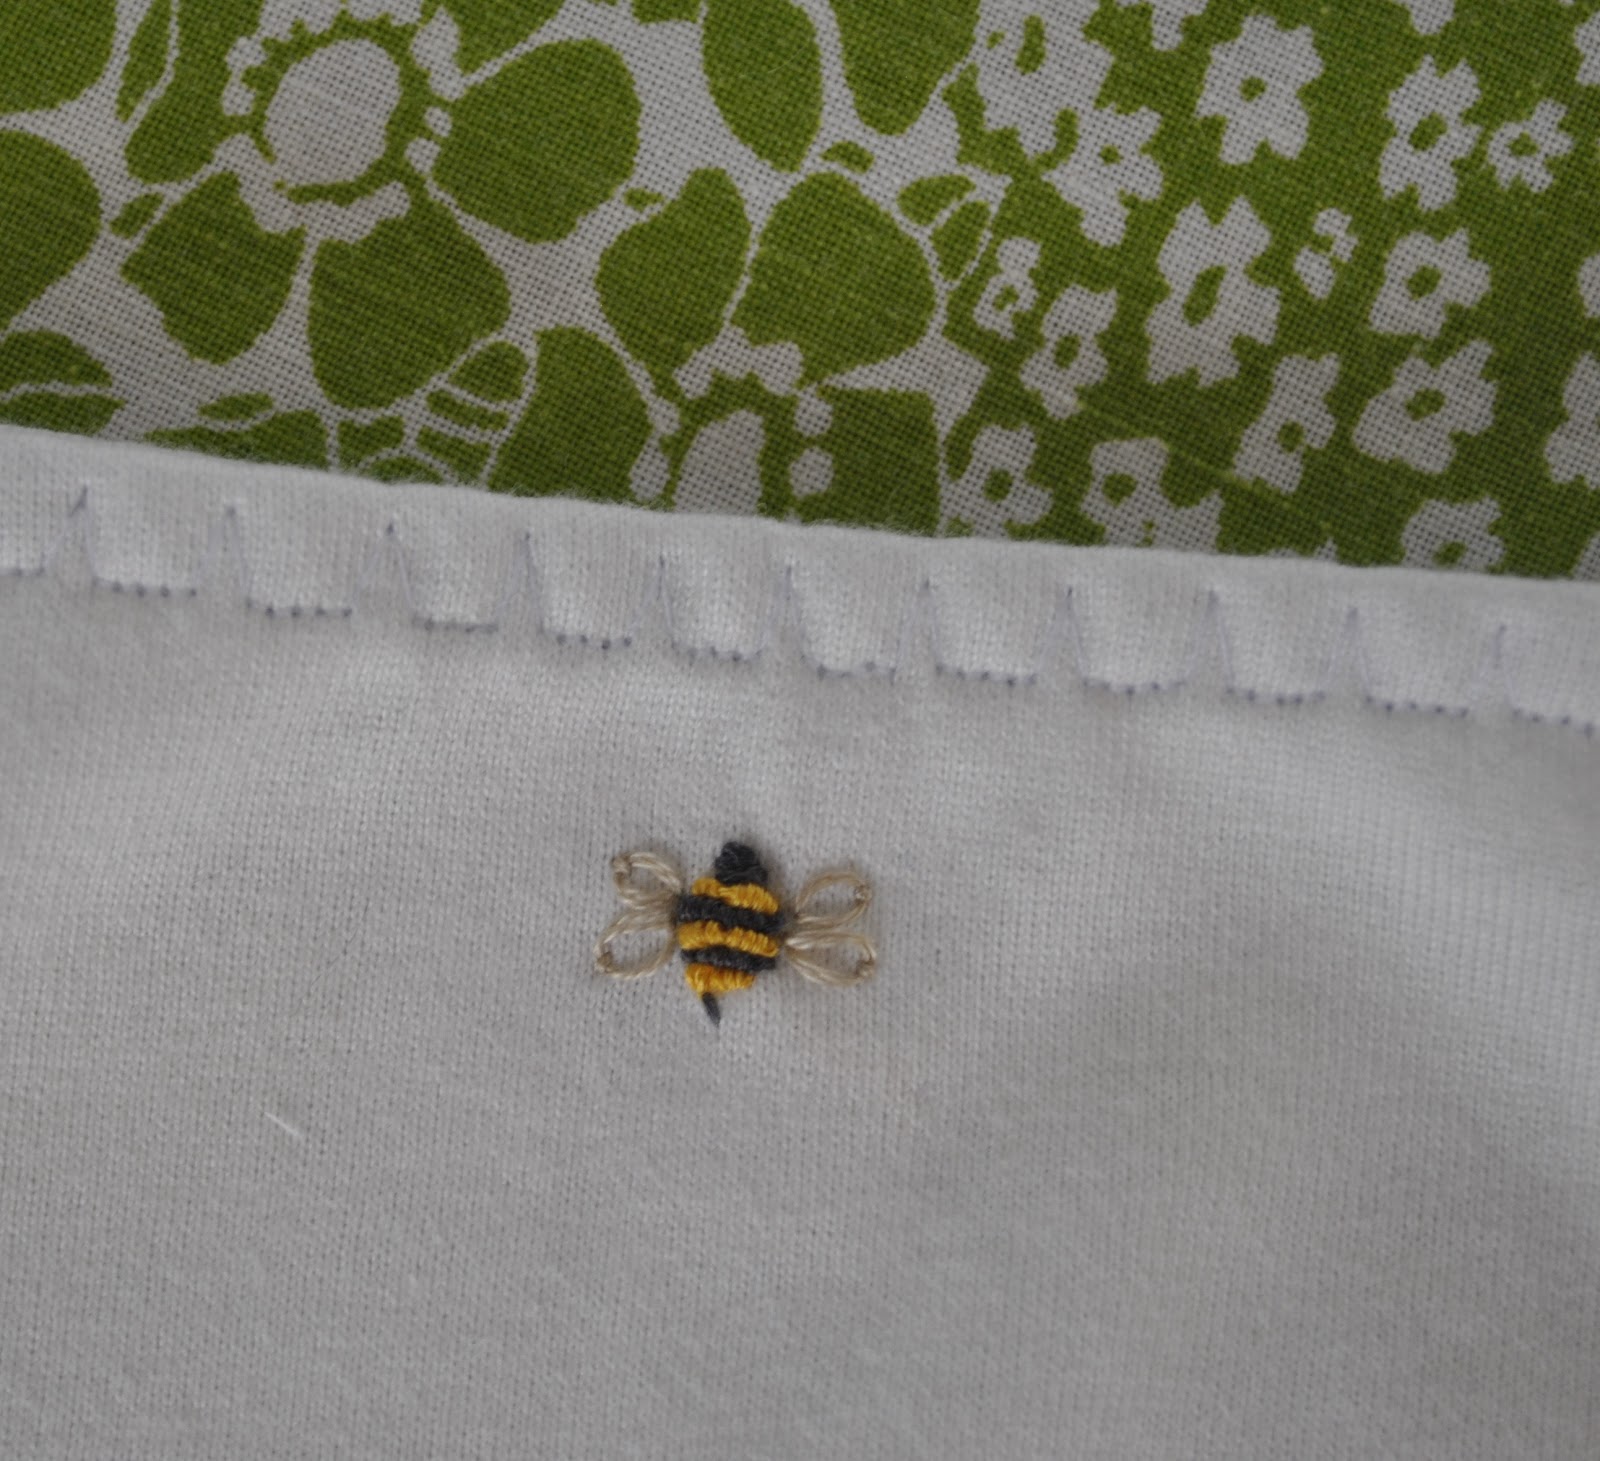
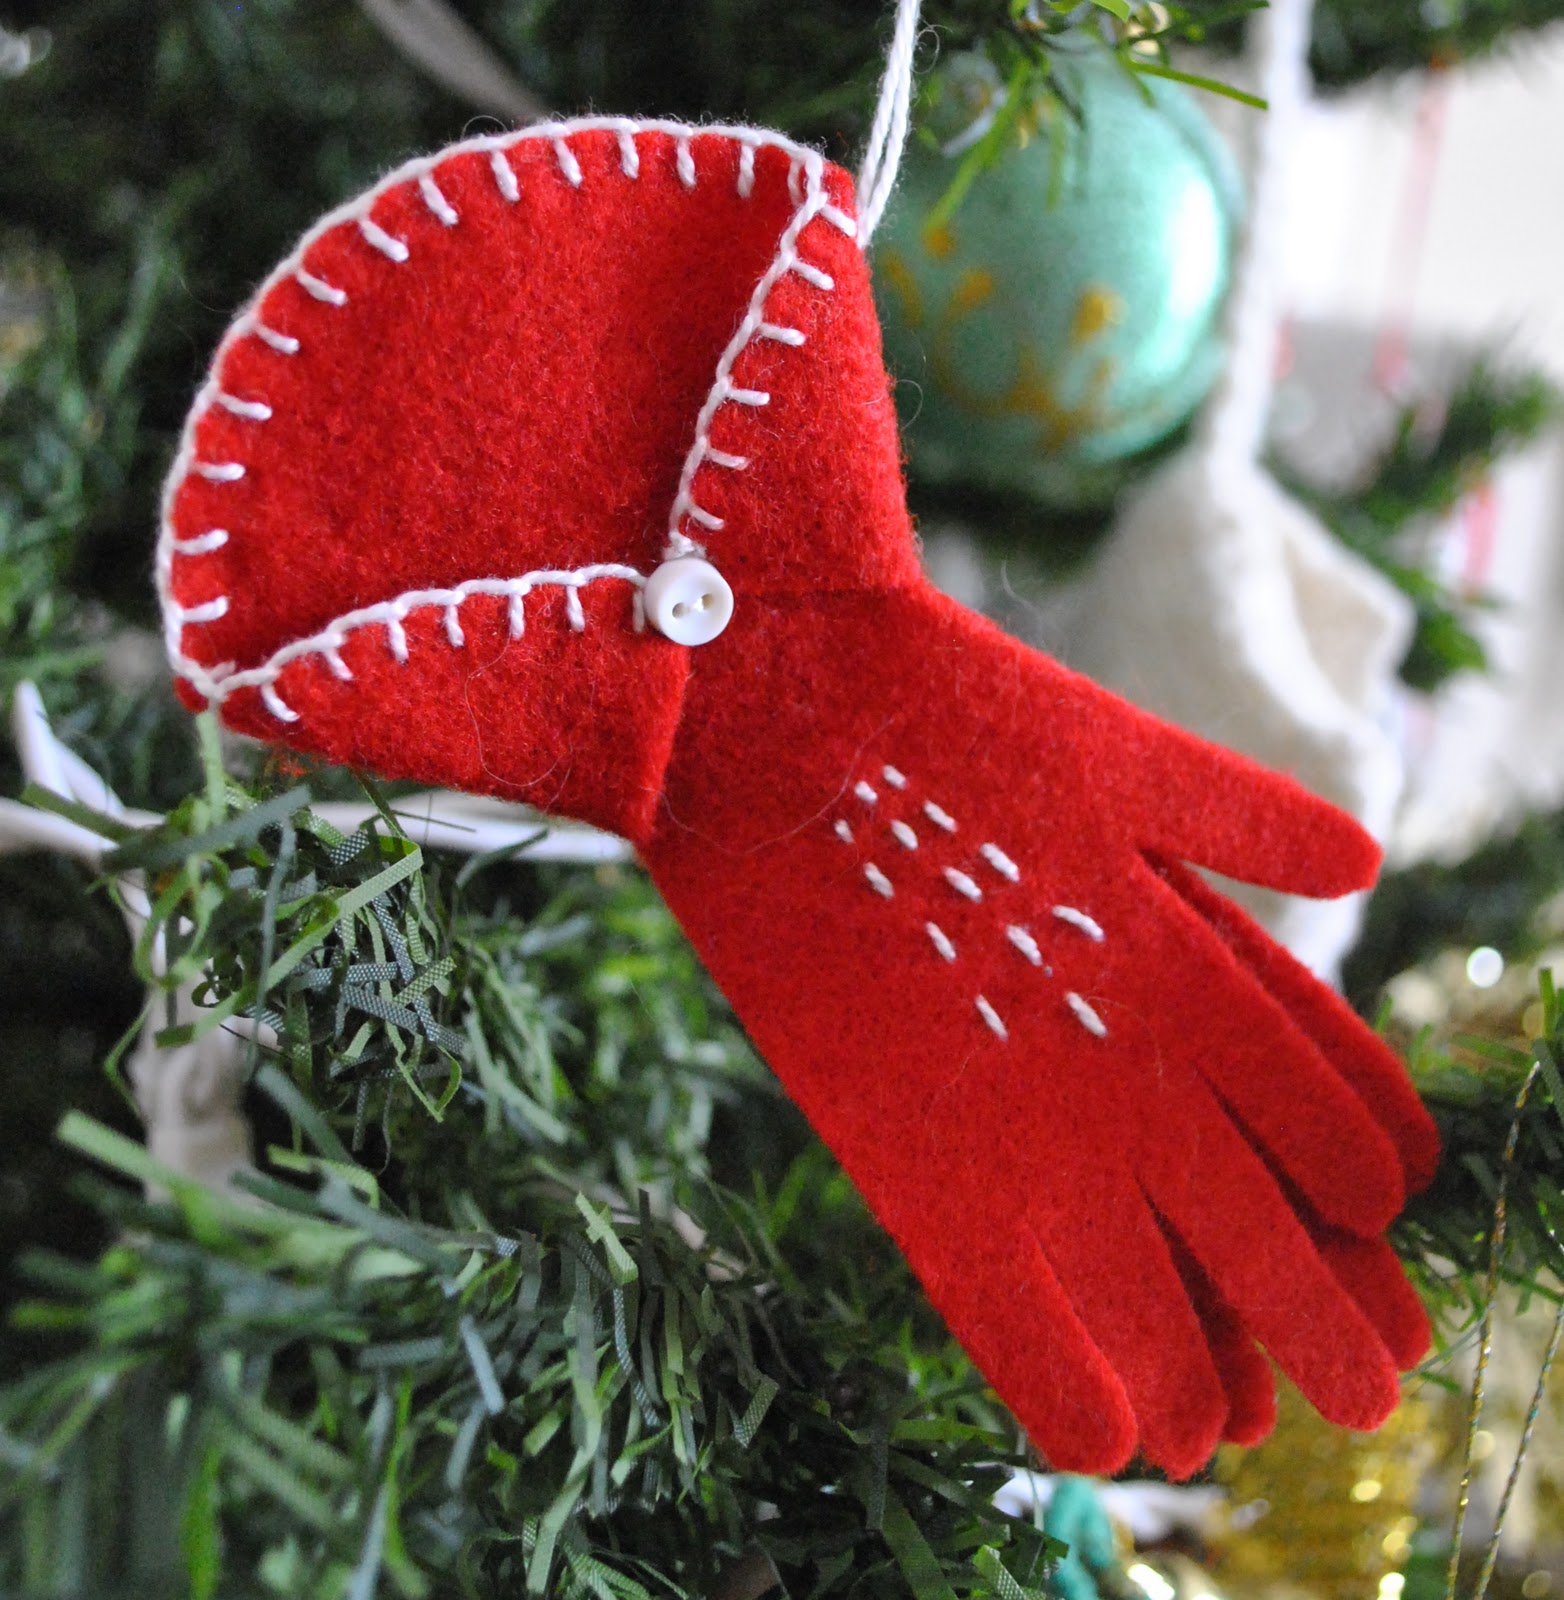
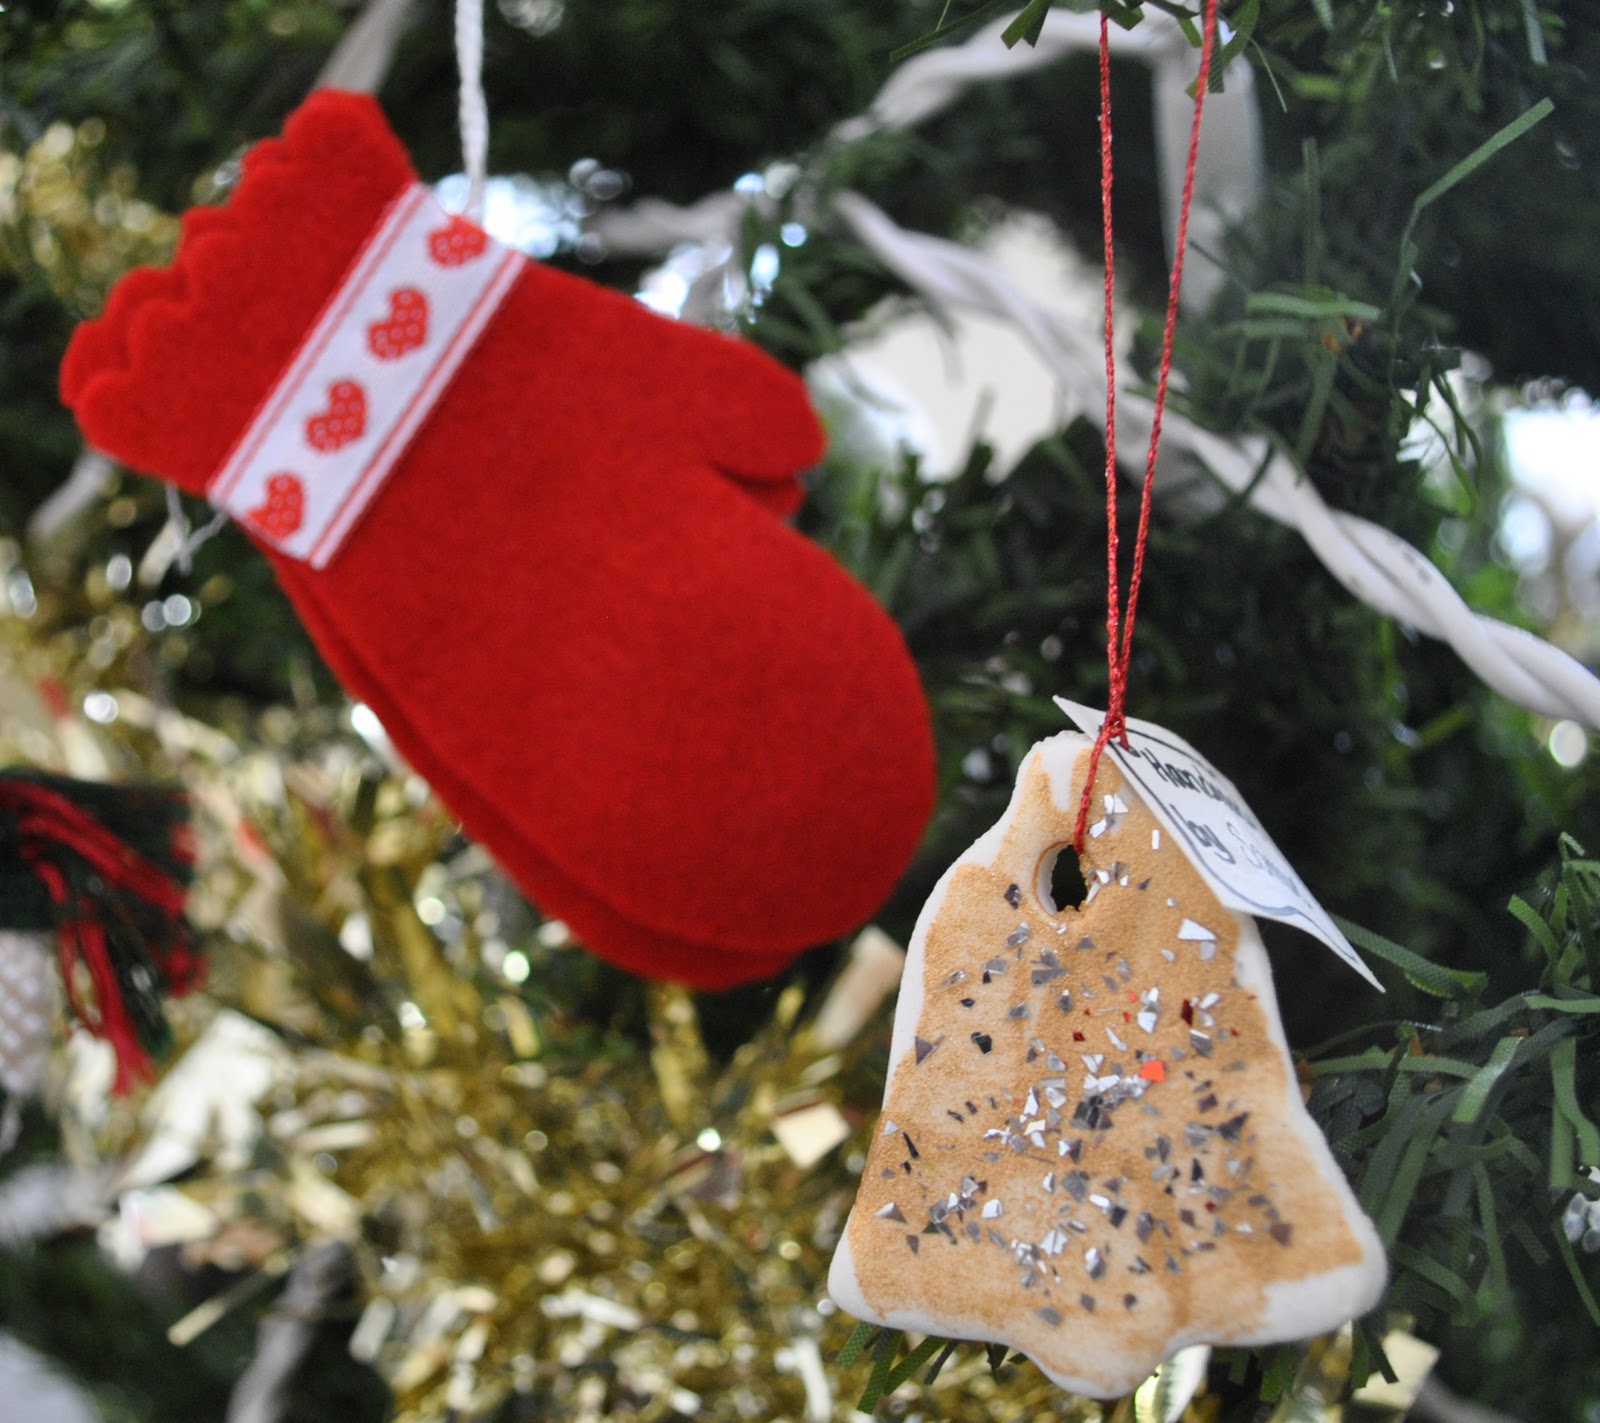
Secondly; I have an apron and oven mitts set; made by Cassie when she was in year 11 for an Art assignment.  

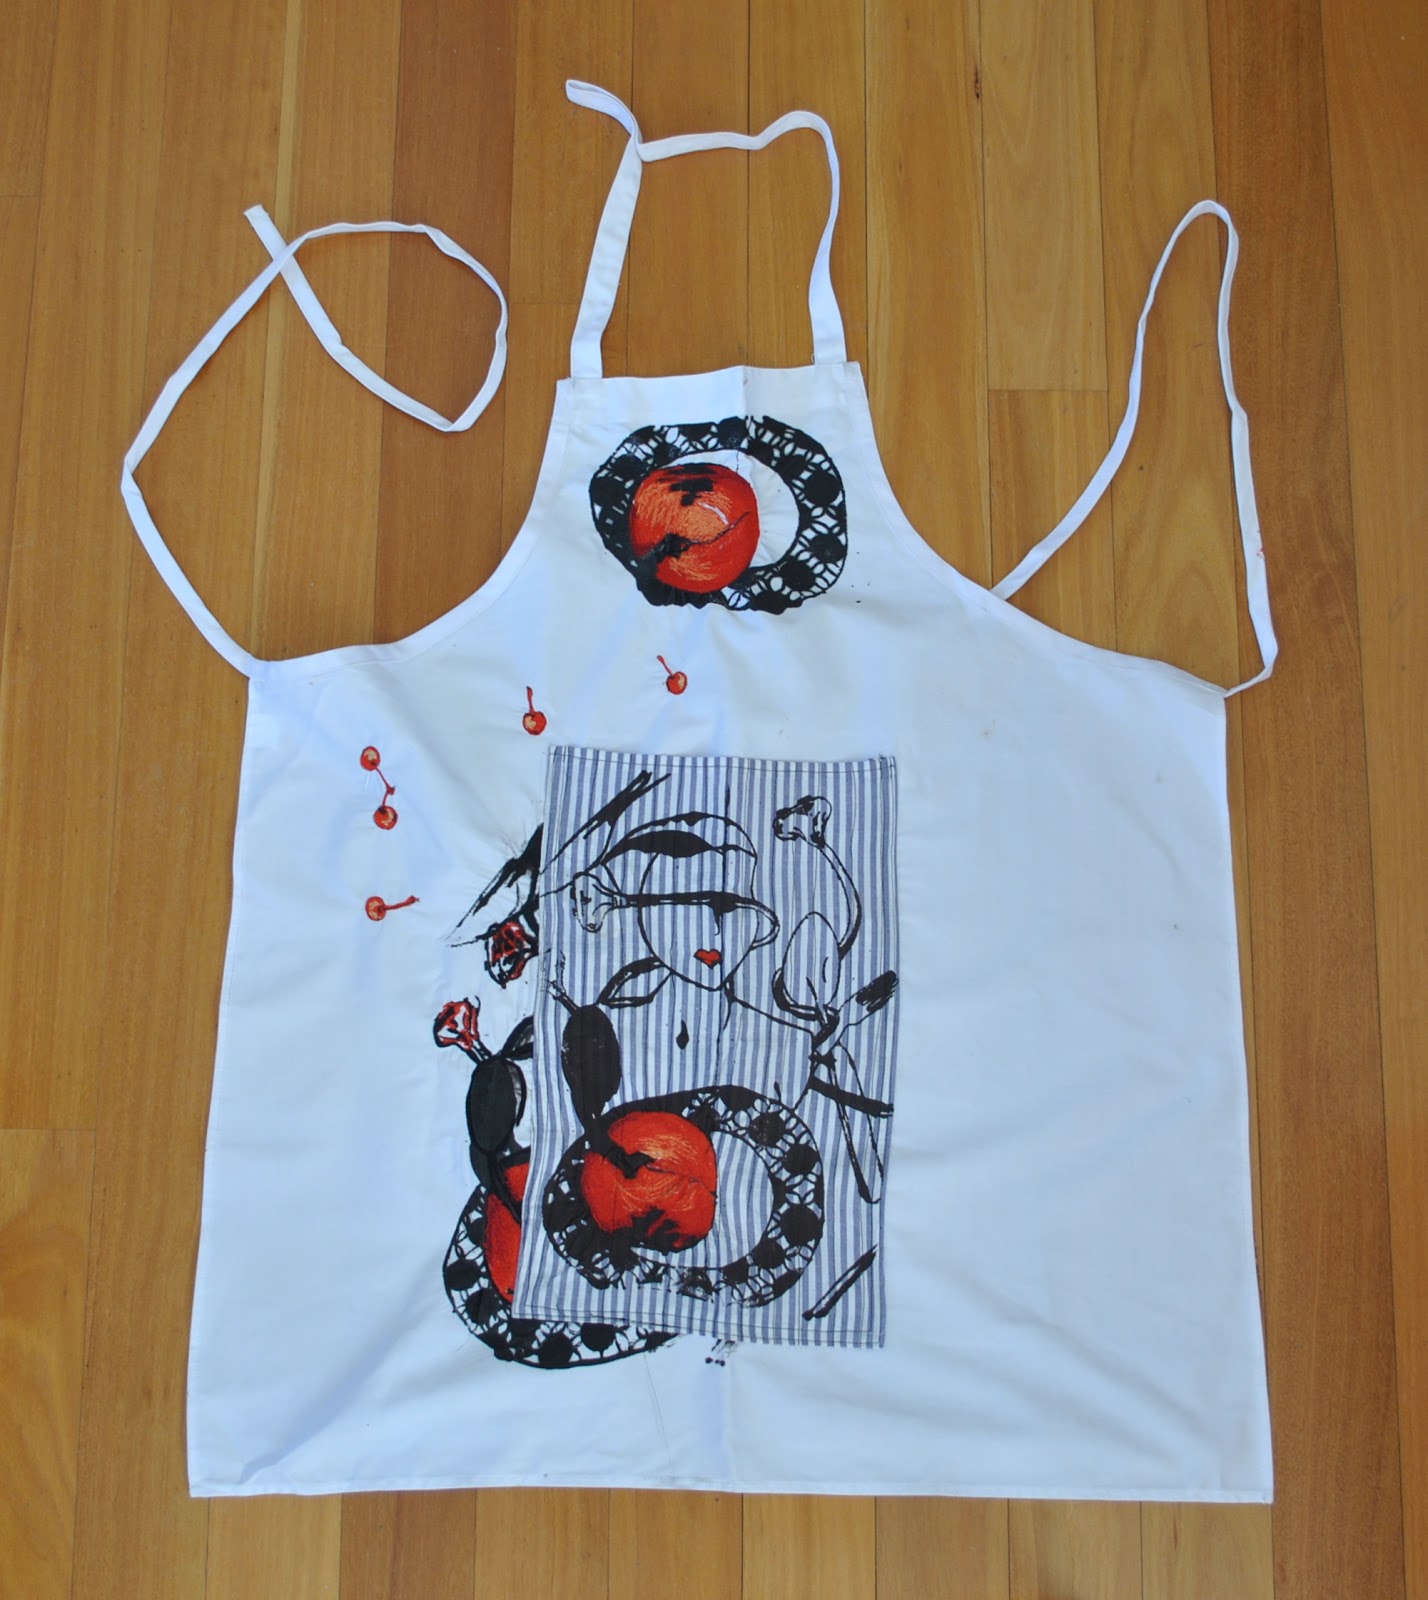
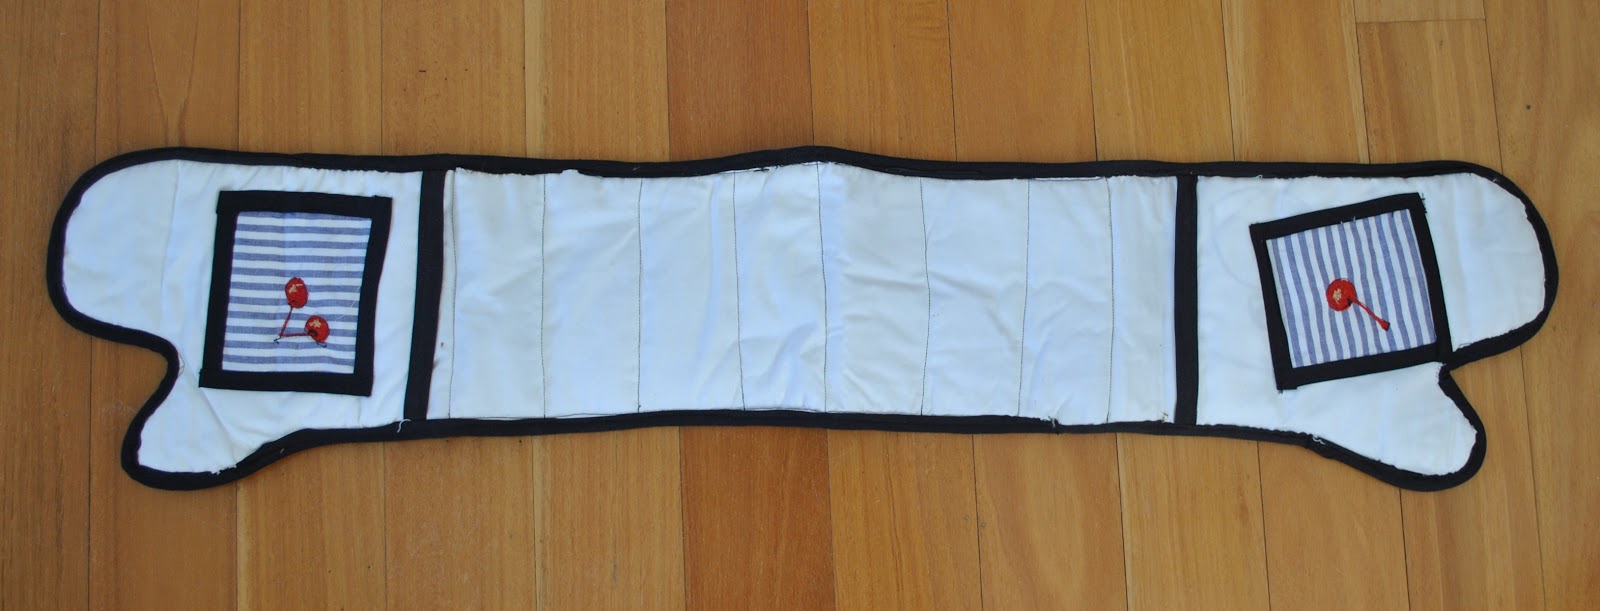
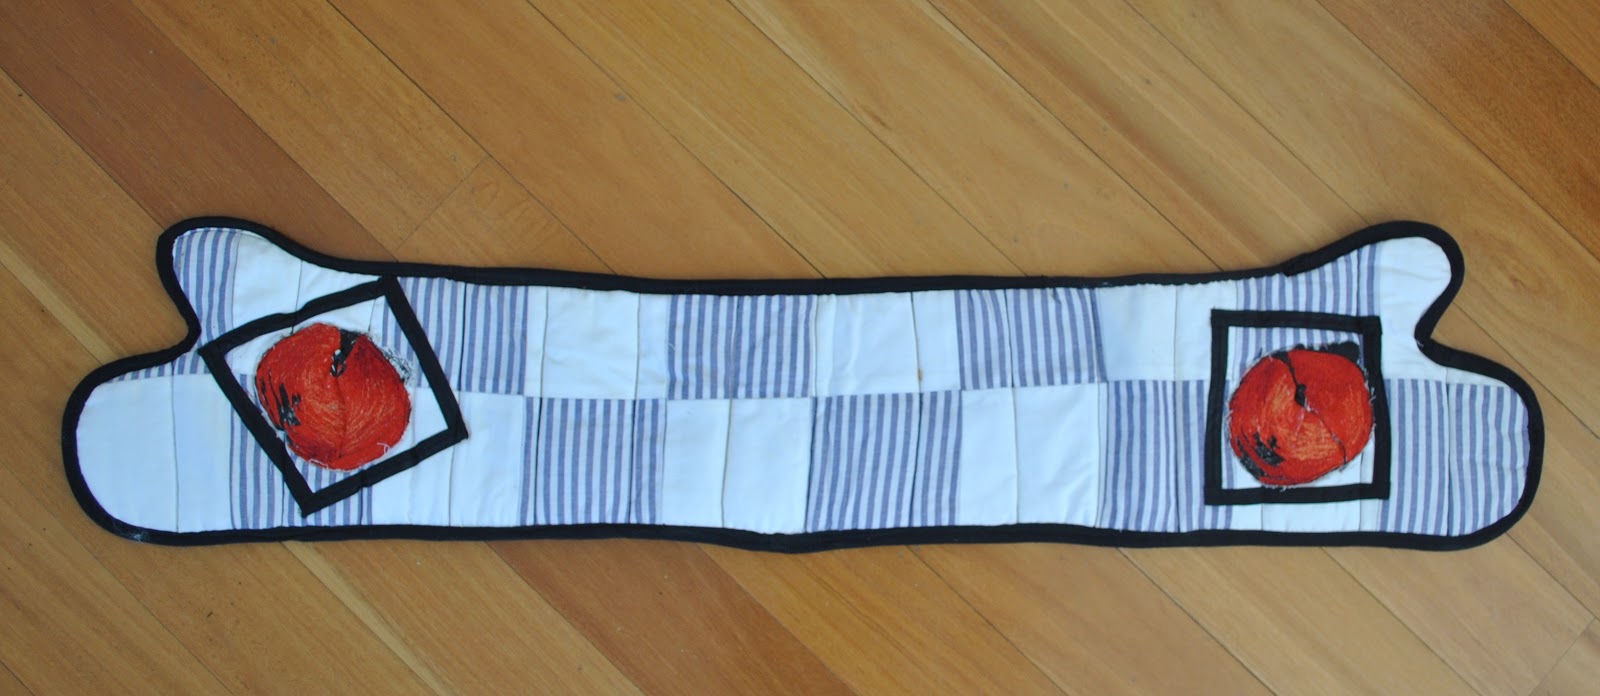
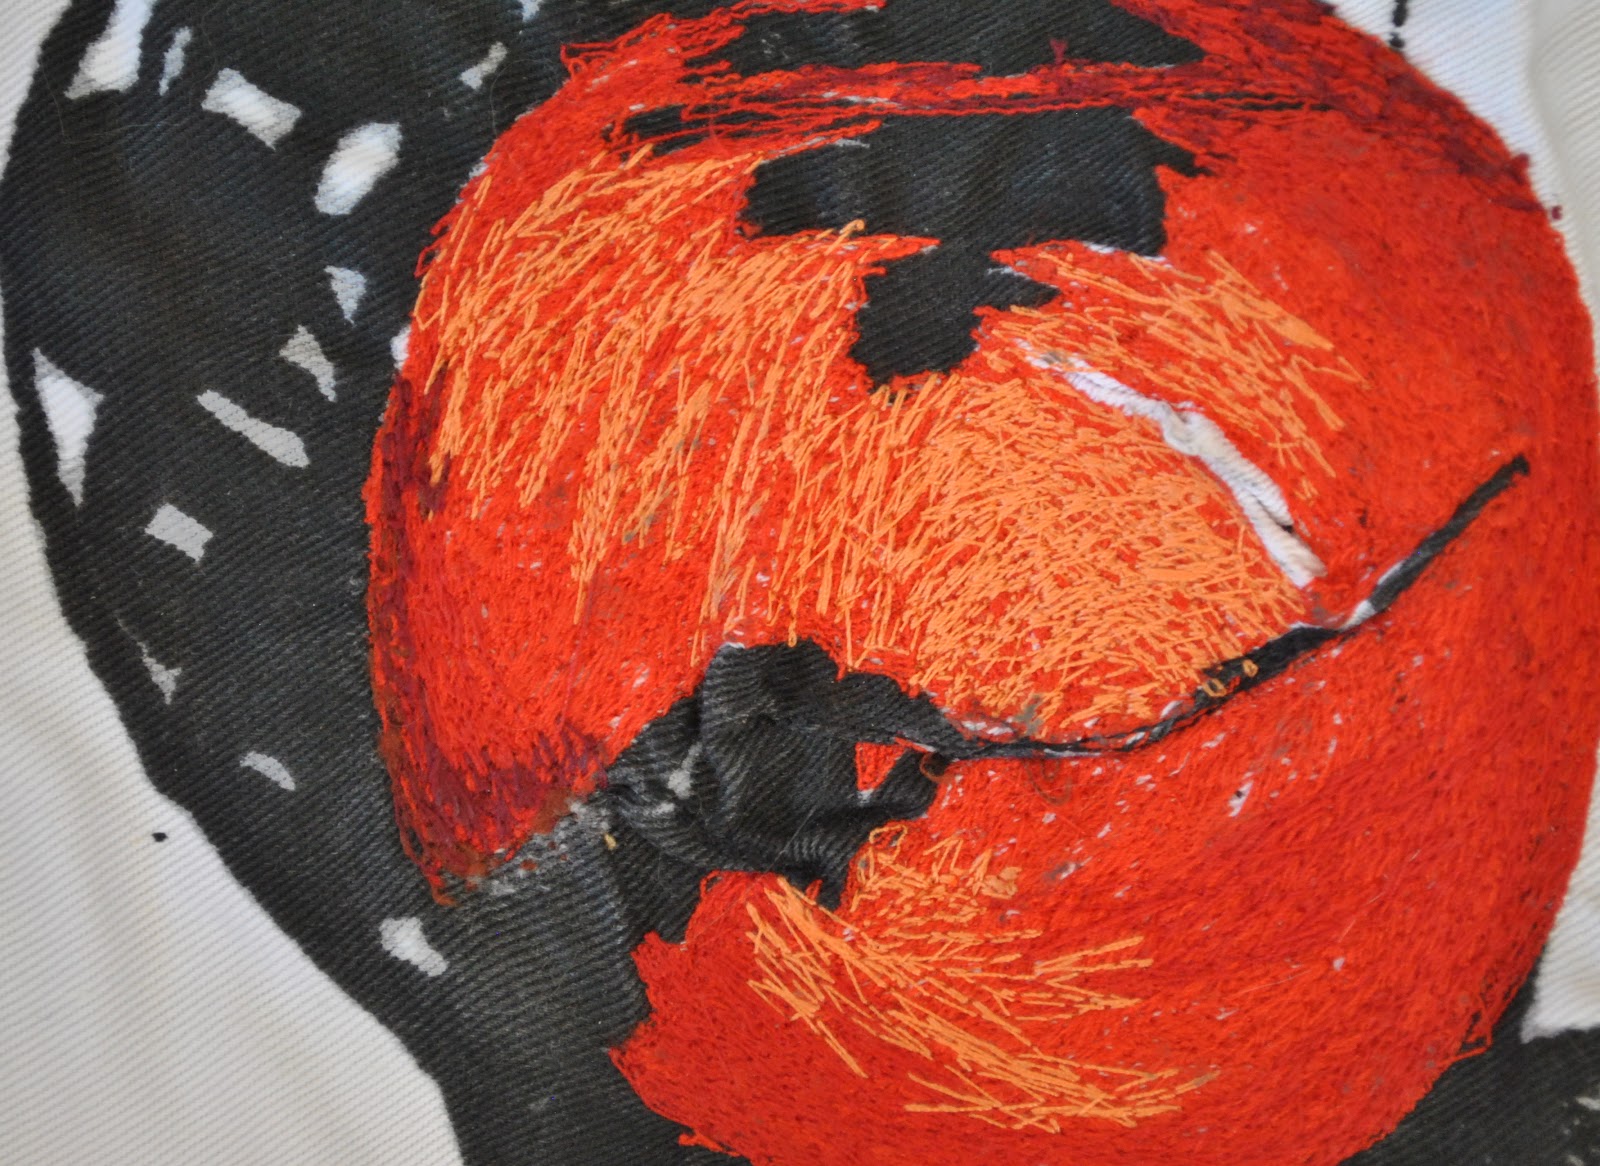
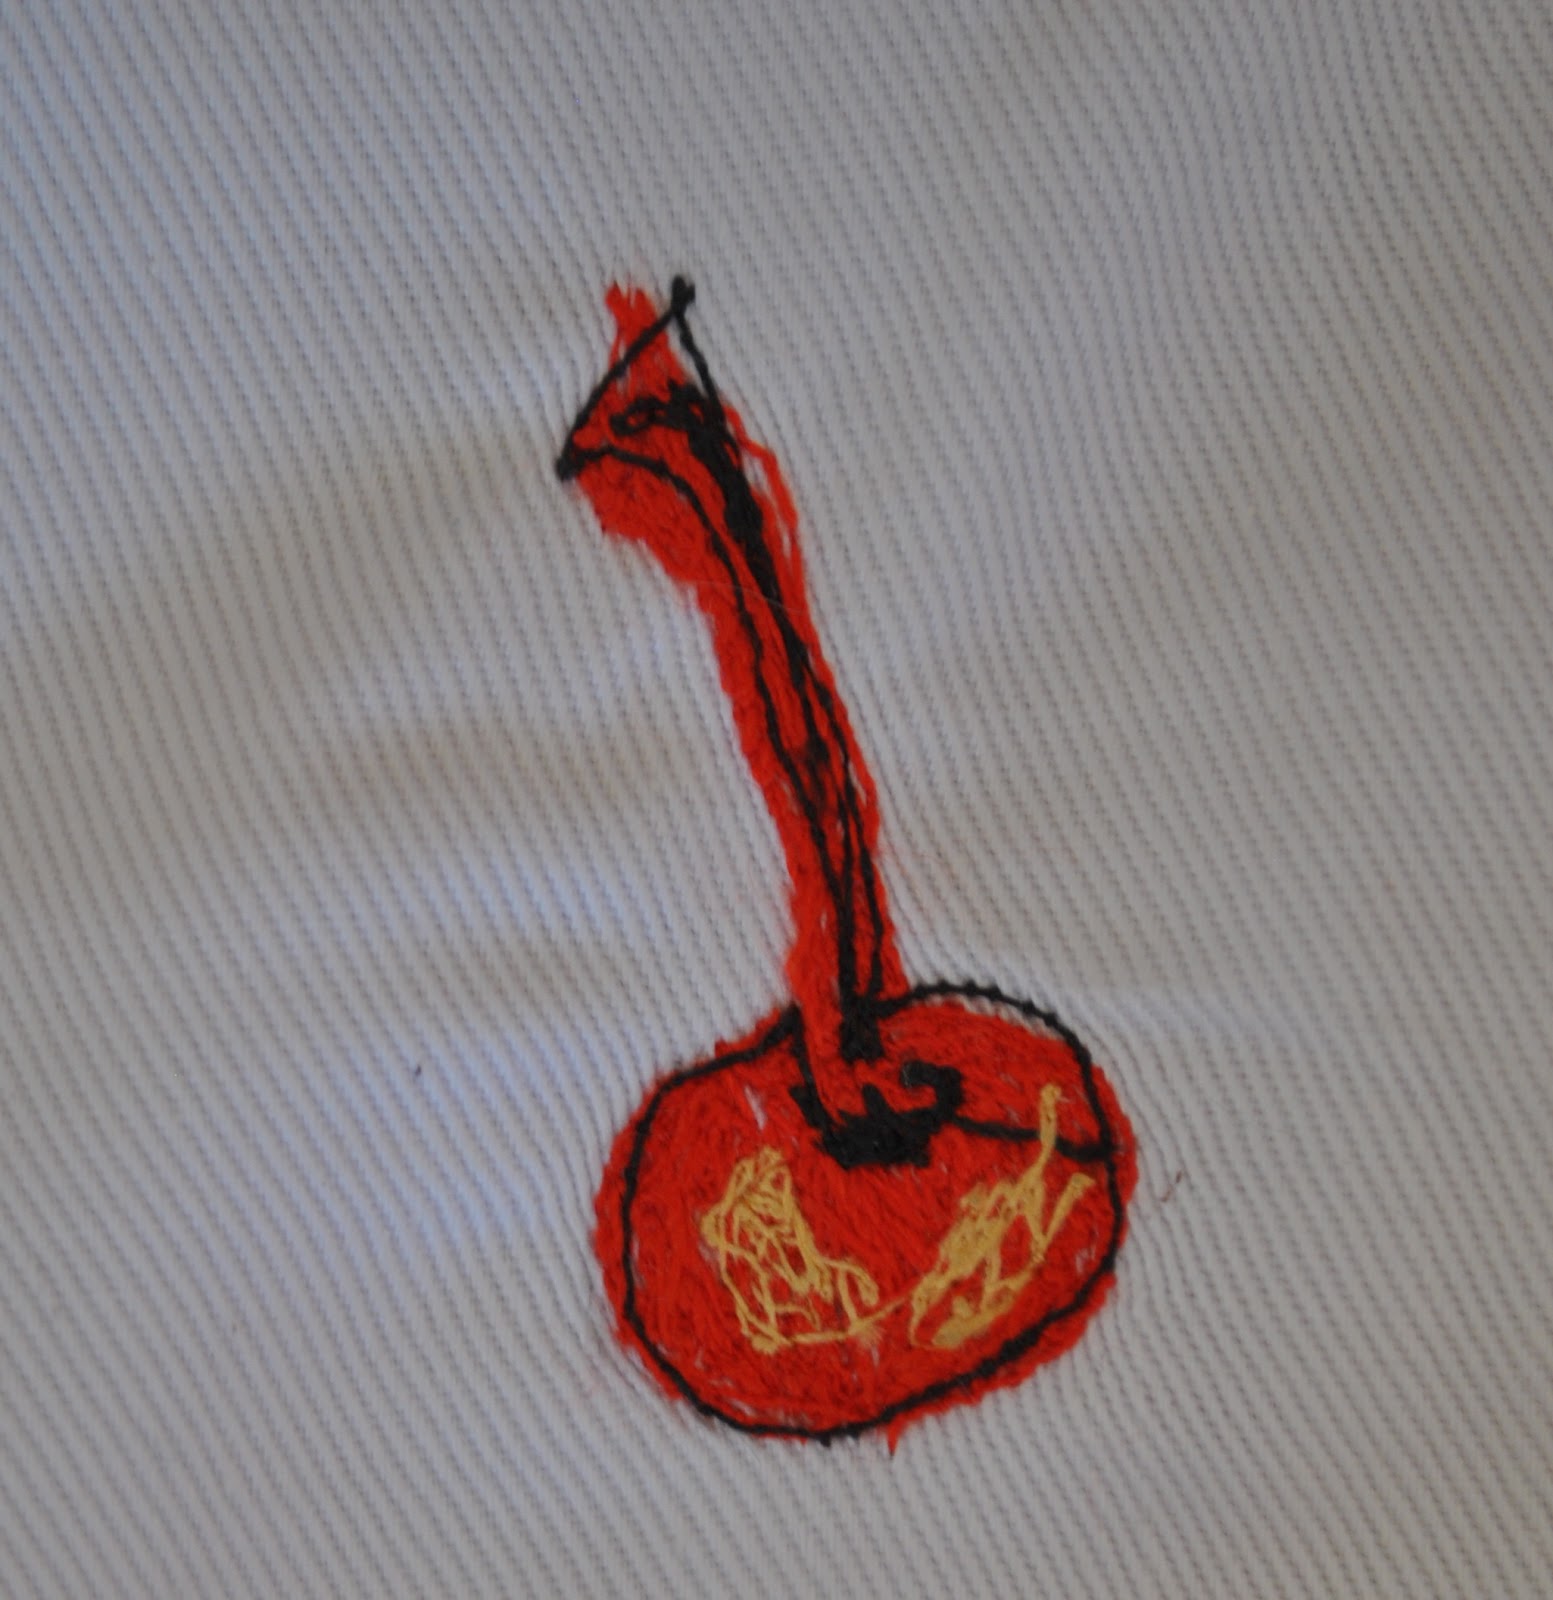
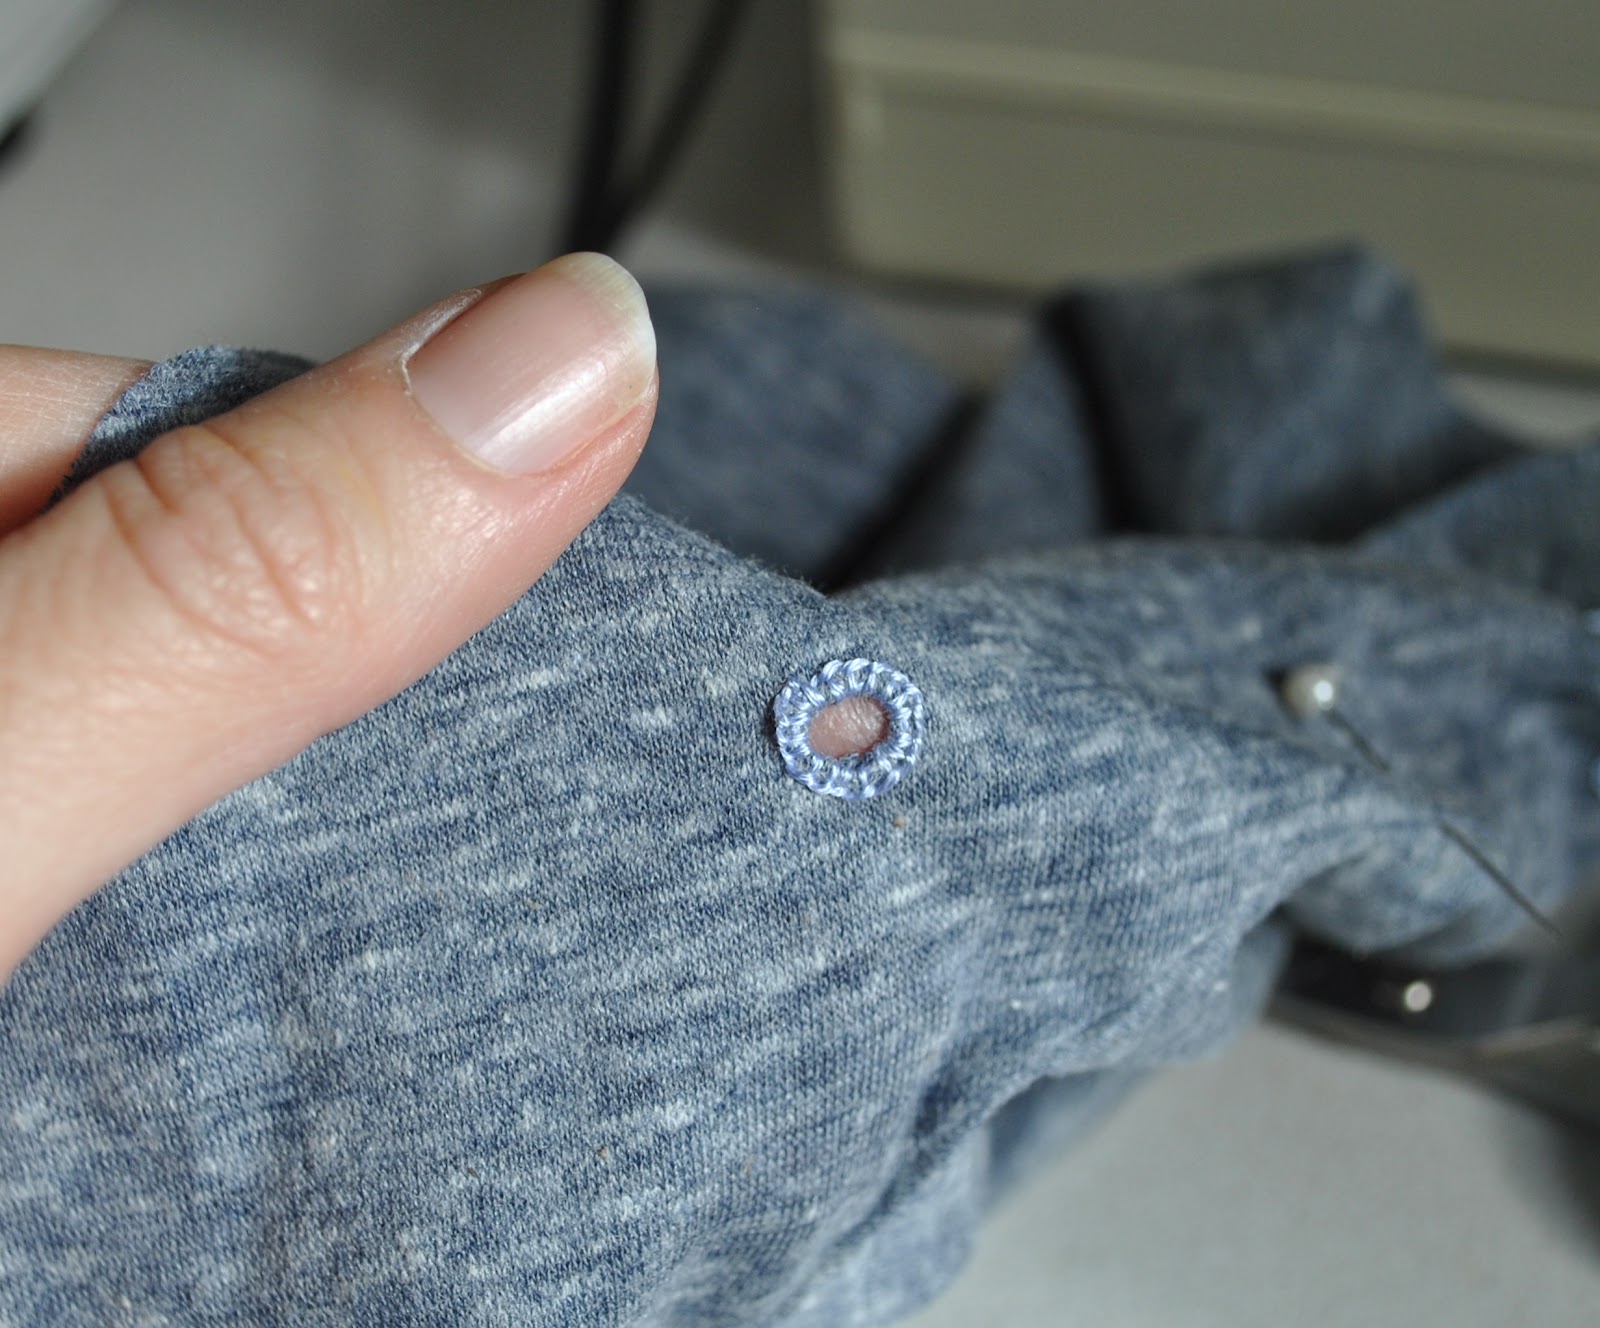
This was term project, culminating in this apron and oven mitt set, a framed painting, and a whole portfolio of sketches.  The name of the project is Eve’s Temptation… thus the sprinkling of cherries (innocence) and apples (temptation) over the textiles.  The fruit is all embroidered in three different reds, plus yellow and black, and is richly textured.

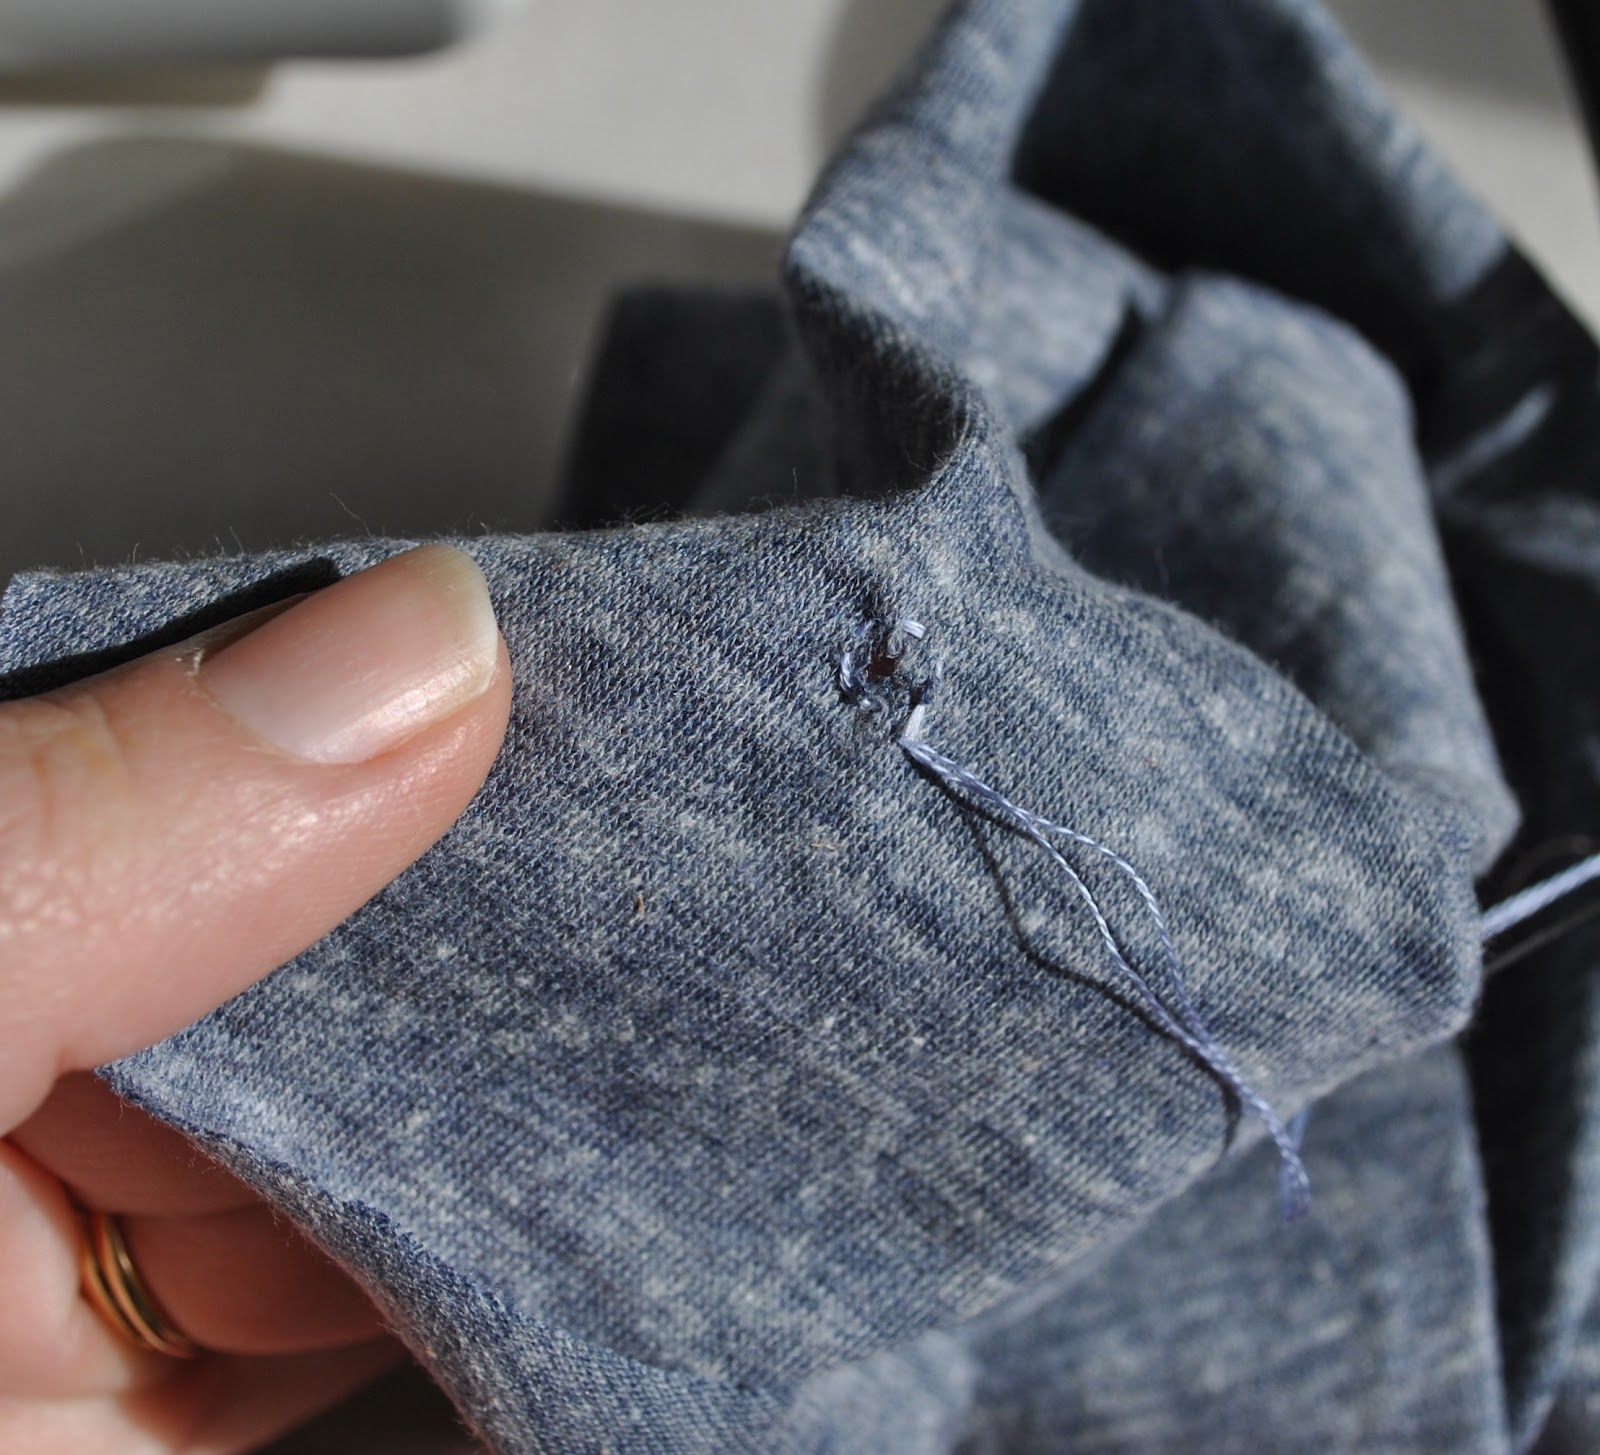
The embroidered bits were all created by Cassie devoting hours to madly feverish back-and-forth sewing on my daggy little sewing machine, that ahem, does not do embroidery.  It overheated and broke down during the saga, which was pretty devastating to both of us, for entirely different reasons!… but we won’t dwell on that melancholy time; my machine was repaired, Cassie finished the project with a fresh perspective on respecting other people’s property, and we remained friends ….  happily ever after etc etc!
The black designs are screen-printed and with some random areas of machine embroidery for a bit of added texture, and Eve’s red lips are embroidered too.  Also all done on my very ordinary non-embroidery machine.

So you can see I’m pretty right in the apron department.  I am so lucky to have such clever creative women in my family!

(I am also wearing here my Bamboo shoot top from Pattern Magic; and my curtaining skirt from Vogue 1247)

pinterestmail

Blue-grey hoodie

I have made a hoodie; this one for Sam.  
Sam is my quiet one; he never asks for anything, on the contrary he will firmly and testily deny that he ever needs new clothes or any new belongings at all.  But one of the fabrics in my stash was this beautifully soft jersey; a very fine quality knit in a shade of cool grey/blue that I think really is perfect for Sam’s fair colouring.  So I set about making him something new anyway.
The fabric is part of a fabulous stash I bought at the Morrison remnants sale.  This particular “remnant” was about 5-6m and cost $15.  I know, right?!  That Morrison yearly sale is well worth checking out!!

For a pattern, I used the same old hoodie of Craig’s that I used to draft his new hoodie, altered slightly to custom fit Sam.  Namely, I narrowed the body and shoulders, and raised the height of the hood.  The hood on the original Tshirt is a bit short, not really sized to be actually worn comfortably over a man’s head.  However I know Sam probably will want to wear it up every once in a while, so made it a touch taller than the original.
kbenco and Rachel both expressed an interest in seeing more specifics of that interesting combined collar/hoodie, thank you for the request, ladies!  So I took a few snaps to illustrate how it all goes together…

The hood is composed of two shapes; a hood piece cut less wide than normal, and a U-shaped collar piece, slightly wider at the bottom of the U than at the edges, that forms a combined hood edging and collar.

Sew the two hood pieces right sides together just like normal.

 Sew the two short ends of the U-shape together, right sides together, on each piece.

Lay these two pieces together, right sides together, and sew together around the entire inner shorter edge of the curve.  Turn out and press.  One layer is the outer collar; the other the facing.

Measure and mark for the holes for the drawstring in the collar; mine are situated 1cm below the lowest point of the inner curve, and 12cm apart.

You can make life easy for yourself and hammer in some eyelets, but if you are me and like to make challenges for yourself where none need exist; embroider some nice little eyelets using embroidery thread…
Only in the outer collar layer of course!  snip a tiny X for the drawstring hole.  Leave the inner (facing) layer un-snipped!!
With a double strand of embroidery thread, sew a running stitch circle around the snipped X

Back where you started, commence embroidering tight blanket stitches, situated hard up against each other, around the hole.  When completed, run the thread around underneath the stitching at the back to finish off.

From now on treat both collar layers as one; lay the right side of the collar piece against the right side of the hoodie piece, lining up the top centre seams and ensuring the hood edges join at equidistant points from the centre front of the collar piece.  Stitch together, and press.
Again treating both collar layers as one; lay the completed hood right sides together against the neckline of the top, ensuring centre fronts align and the hood seam is in the exact centre back.  Stitch together and press.

The drawstring is simply a 1m long, skinny strip of the fabric, with the long raw ends folded in on themselves, and topstitched down from the centre out to each end with a wide zig-zag stitch.  The original had fancy cover-stitching to finish it off, not having a cover-stitch machine this is my best it’ll-do.  And a perfectly fine and dandy option too, in my opinion!  Thread it through the collar and up around the hood edging with a safety pin, and tie each end off with a little knot to stop it slipping back through the hole.

The hoodie has a kangaroo pocket and a wide self-band at the lower edge.  The sleeves are hemmed using a twin needle.

Once it was finished and Sam put it on; he quietly, briefly, but spontaneously, mentioned that he liked it.  I count that as a fairly enthusiastic expression of approval of the new hoodie.

pinterestmail

Bees on white cotton

(to be sung to the tune of Knights in White Satin, of course  ðŸ˜‰  )
I was quite taken with the grub roses kbenco has been embroidering onto her knits, and was inspired to follow suit…  so for my latest lingerie set I delved deep into my memory banks and dredged up a few rusty ol embroidery skills…  
There is a single fat little bumblebee on each item.
Tres cute, no?!

The bra pattern is KwikSew 3300 (my review of this pattern here), and the two pairs of matching undies are made using my swimwear pattern, McCalls 2772 view E.  Yup, exactly the same as my previous set.

I used a soft ivory cotton knit from Spotlight.  It is absolutely lovely stuff, but I have only the smallest issue, in that the fabric only stretches one way, so while it all fits just fine it is ever so slightly less easy and comfy than my grey jersey set.   I positioned the pieces so the stretch went where it counts, but I definitely feel a bit more firmly held in place, so to speak.  Maybe that’s a good thing…. 🙂
The fabric is quite soft and spongy, almost with a brushed quality; so to embroider my bees onto those fronts of the undies with just that single layer of the fabric, I ironed a small square of iron-on interfacing onto the back where I wanted my bees positioned.  Then I embroidered the bees, and then ironed a second small square of iron-on interfacing over the back for a neat finished look, ironing carefully so as not to squash the embroidery too much.  I realise the second squares will probably disappear in the wash some day, that iron-on stuff is notoriously prone to unsticking pretty quick.  But it will be fine for a while and I can always iron on a new patch.  The bra joiner bit, having a piece of woven cotton as interfacing sandwiched between the two layers of knit, was easy to embroider on just as is.
For the top-stitching I tried out another of my machine’s decorative stitches… I like how those jagged spikes sorta references a row of bee’s stings.  It’s funny, I use these decorative stitches on my machine like, barely once in a blue moon? and now I’ve used them twice in the past month!  A record!
Oh, and in response to an email question from Sue…  thank you for the interest Sue!  I do all my sewing on these two machines, and in the picture of my Janome in that post you might just be able to make out the small selection of embroidery stitches I have on my machine.  It’s not a fancy machine at all, but it has served me very well for me for many many years and has everything I could want in a sewing machine  ðŸ™‚
pinterestmail

A handmade Christmas, II

some Christmas decorations…
a series of mittens and gloves, of a single width of felt and decorated in various ways.  These made nice and simple little gifts for friends.  The little glittery gold bell was made by a 4 yr old Sam, and he made 4 of these in different colours and shapes.  Cassie made the stuffed stocking

a fairy… a lot of girls of my age would have come across this project, made out of safety pins and beads.  I think it was out of a magazine, or on Better Homes and Gardens, or something like that.  A group of my friends and I all made one together.  Her place is on the top of the Christmas tree, when she has a fairy light stuck up under her skirt (keep it clean now) she actually looks pretty speccy*!                   (* Aussie slang for spectacular)

… beaded snowman and white beaded and embroidered pillow both from kits (by me); the blue sequinned and embroidered stocking by a pre-school Cassie

Using up some leftover wool, one year I made a series of knitted envelopes filled with pot pourri, to give to friends.  The star buttons are made from Fimo clay, painted with acrylic paint and with glitter sprinkled onto the wet paint.  (the gold and green ball was a kindy project by Sam too)

A few years ago I got really enthusiastic and made everyone in our family a glitzy Christmas stocking; big enough to be worn on a real adult foot, believe it or not…  These are all of satin, each front and back double-layered and padded with old ironing board padding (yup, I keep stuff like that, just in case; sad, huh?), and with velvet cuffs, all decorated in an individual way.  They each have a cotton loop to hang them up, even though they never ever actually get hung up since I baulk at having nails hammered into our beautiful jarrah mantlepiece… (that’s an over-my-dead-body sort of a thing)  They usually lie flat around the bottom of the Christmas tree.

pinterestmail

A handmade Christmas

I do admire other people’s Christmas trees, the ones which are all glitzy and sparkly and beautifully colour co-ordinated, sometimes even with a new colour scheme each year, but it is just not for us.  We have a small artificial tree that we use each and every year.  It was bought when we were first married 23 years ago and our collection of decorations has grown and been added to over the years and each one tells a story.  Hardly any of our decorations have been bought cold, as a finished object.  
Some of them are souvenirs that we have bought on overseas holidays, or are gifts from dear friends.  Our most precious decorations are the ones that our children made with their own chubby little fingers, and proudly brought home from kindy, daycare and preschool, and even sometimes as they got older too!  I used to be into beading and embroidery, and so made some decorations too… and some of our decorations are little things I did with the kids as fun little activities, to fill in those long weeks when Craig was working and we were home alone.

According to Aussie tradition, these gumnut babies have to be hung somewhere so they can “see” a gum tree. (embroidered and beaded on cardboard by me)

one year, Cassie and I ceremoniously transformed her Kelly dolls into elves and pixies…   Tim made the sparkly gumnut elf with googly eyes…
Cassie made this beaded gingerbread man…
you can make cool decorations using origami too… one small sheet of paper is all it takes!
the advent calendar… when my children were little this would have 3 lollies tucked into each heart pocket, and it was such a treat to take one out just before bedtime… !   The top heart would have 3 Freddoes; it was a tight squeeze to get them in there but you’ve got to have something a wee bit special for Christmas Eve! 
a clothes peg with toothpick arms and wrapped up in embroidery thread makes a cute Father Christmas… don’t you think?
a pine cone. stuffed randomly with glued-in cellophane and tinsel, makes a pretty good table decoration I reckon.  This is the very first one Tim brought home from kindy, and the beginning of my obsession with non-commercial handmade decorations…
pinterestmail

Embroidered chair cushion

I embroidered and sewed up this chair cushion cover when my oldest two were tiny, using a pattern transfer given to me by my much loved granny.  Unfortunately as this is a cushion that has been used, and well used, it is looking a tad tatty now.  Quite a lot of the time a pussycat is stationed on top.  It’s a shame I didn’t get a photo of it looking at its best, but better late than never…
The white wicker chair it sits on is also one of the few mementos I have from my granny.  I used to have it sitting out on our front porch.  Then one day a friend asked if I wasn’t worried about it getting stolen.  Up until that point I hadn’t.  On that day I moved it inside to our bedroom where it now lives…  I don’t like to be too precious about household items; I like to use all my “good” things and not have them tucked away for special occasions, which really just means they will never to be looked at or ever used… at the same time I would be pretty devastated if this chair was to “disappear”.

pinterestmail
Switch to mobile version
↓