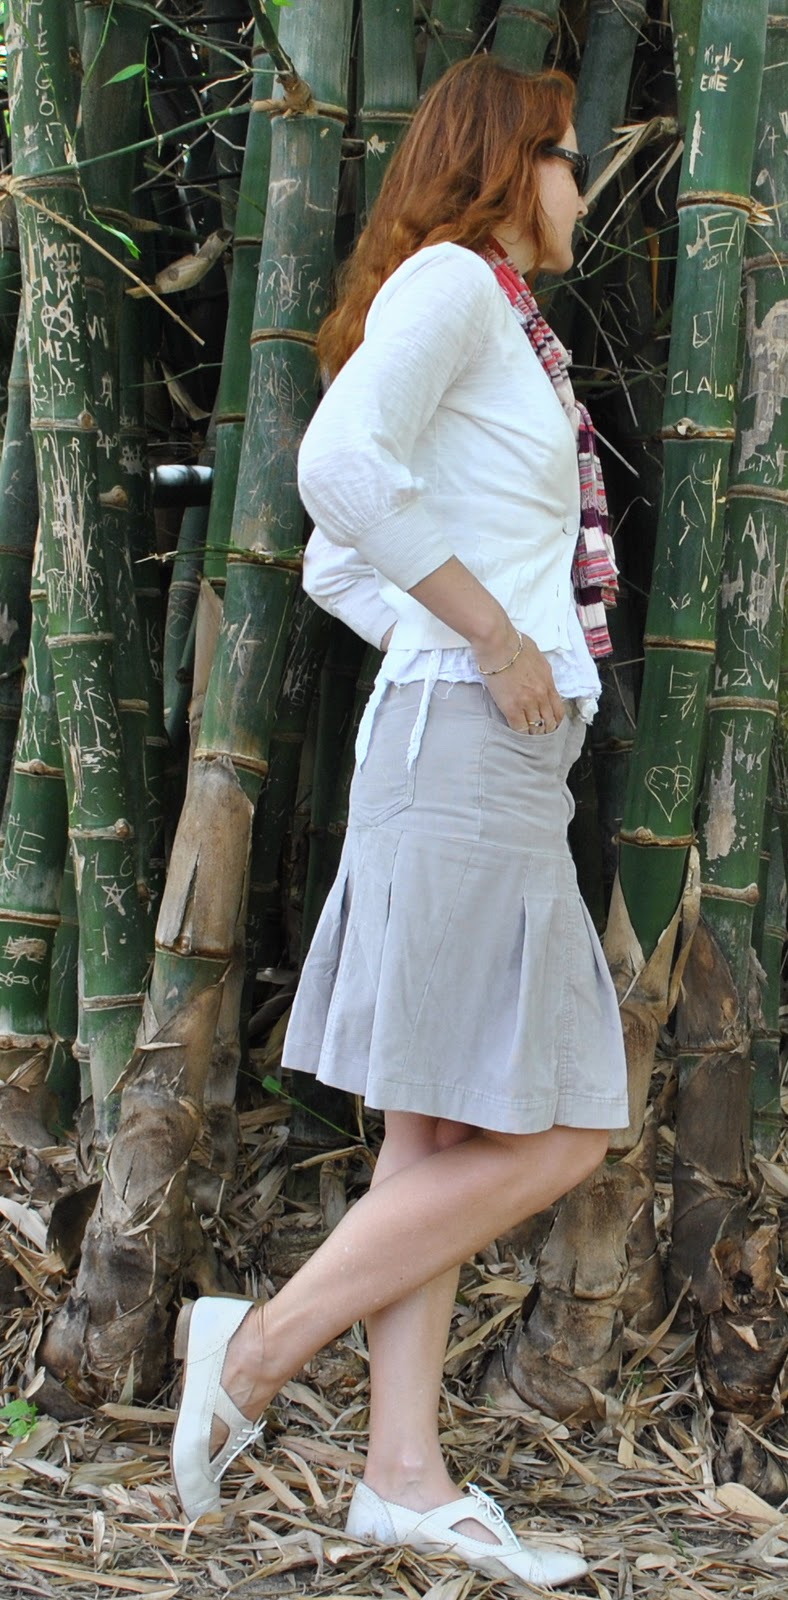
Tag Archives: Skirt

A sludgy little skirt

Hooo boy.  We are having an insane heatwave right now… been 37C or above for over a week now.  Australia Day was 42C, phew…  We all spent the entire day in bathers, in and out of the pool.  The fireworks teetered on being cancelled because of the fire risk, but luckily at the last minute some clouds rolled in, the temps dropped and we even got a few fat raindrops!  And then the fireworks competed with an amazing lightning display (pictured below)  Today is supposed to be another 42C-er, so I am in my bathers … again!
But unable to resist a smidge of sewing, as can be seen.  And dyeing.
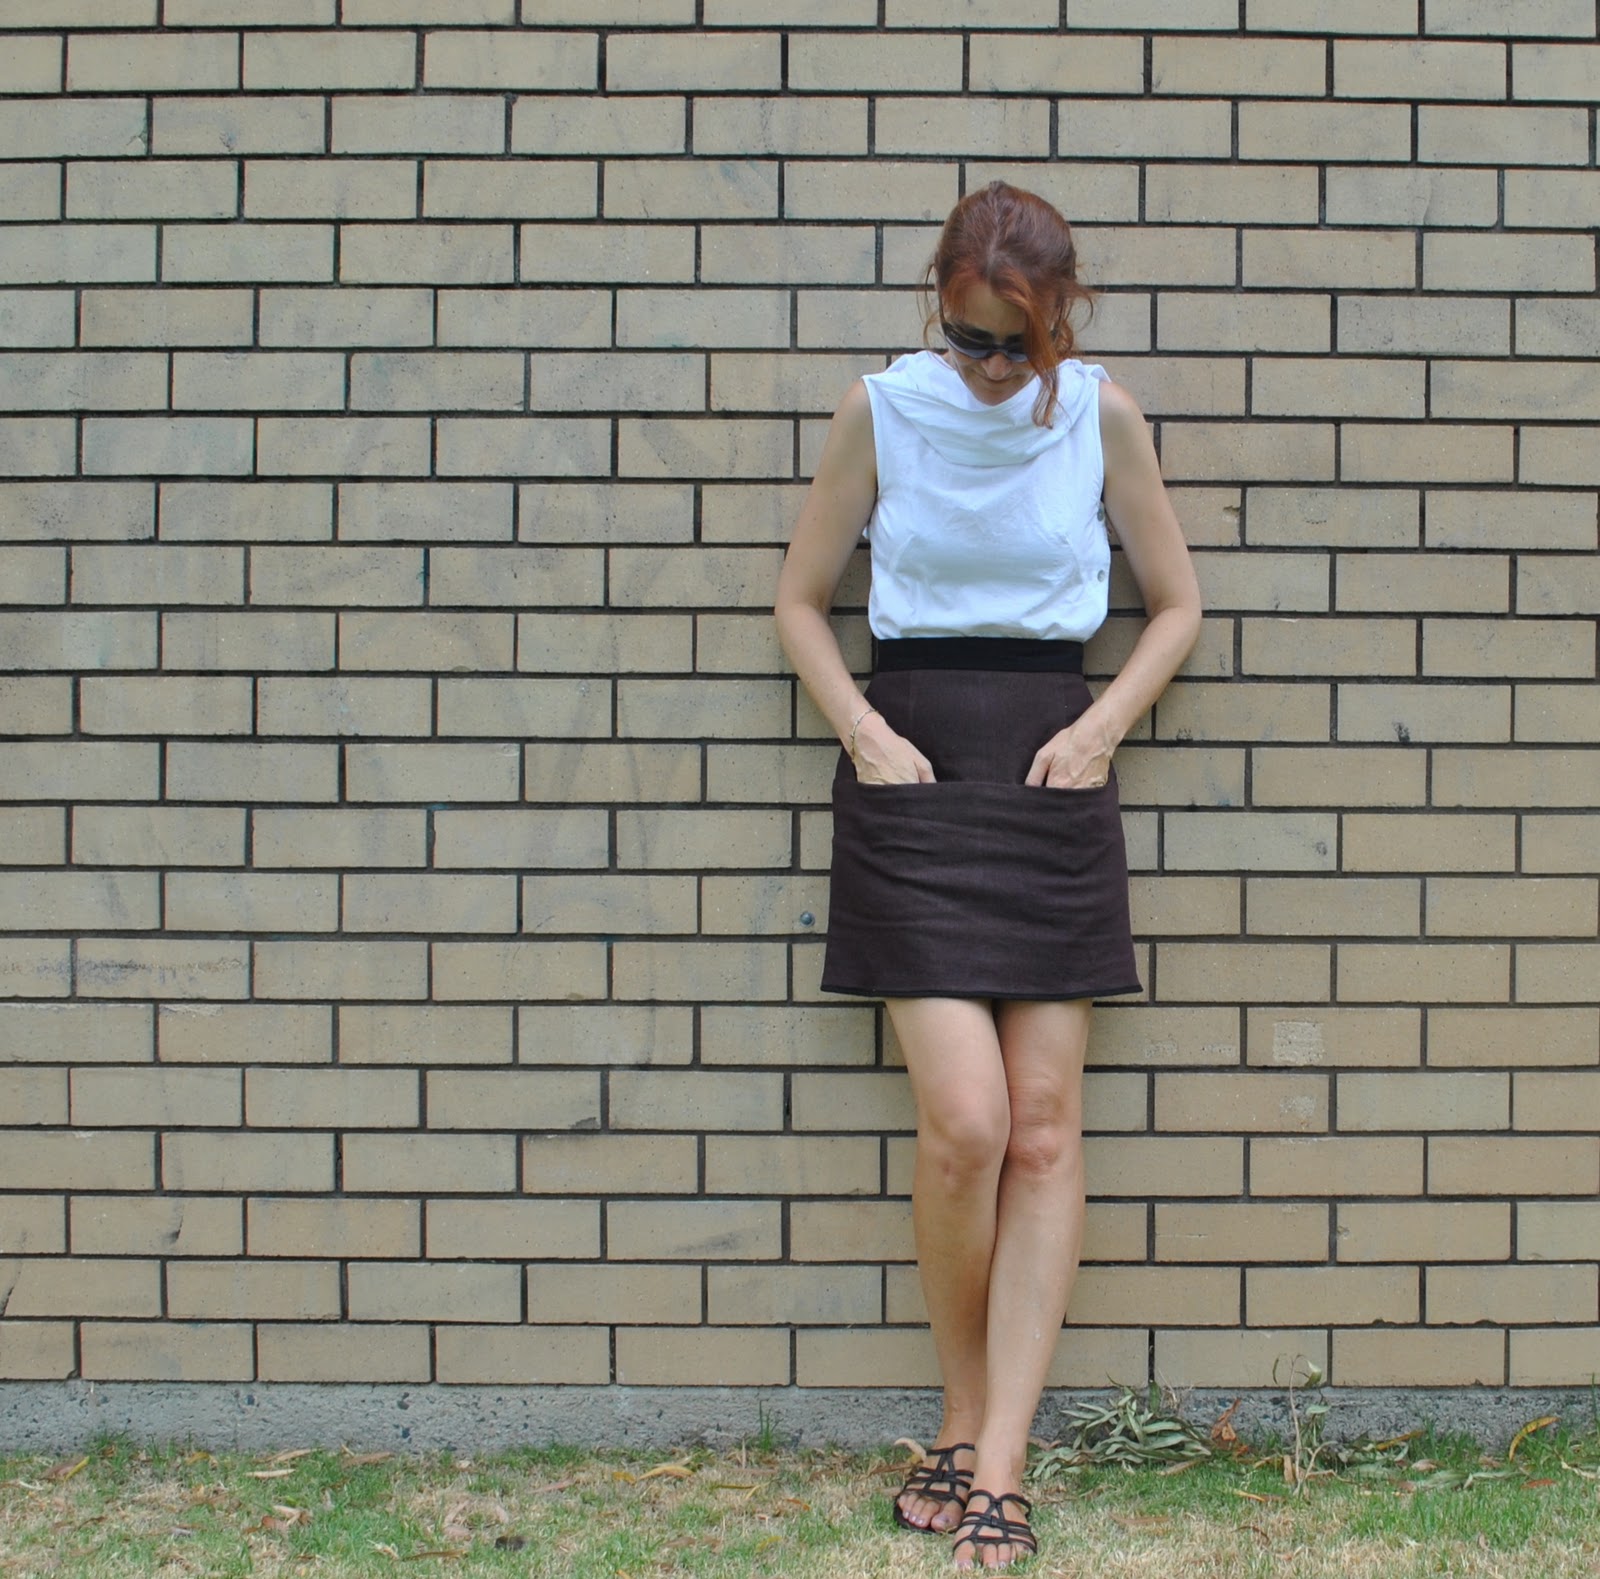
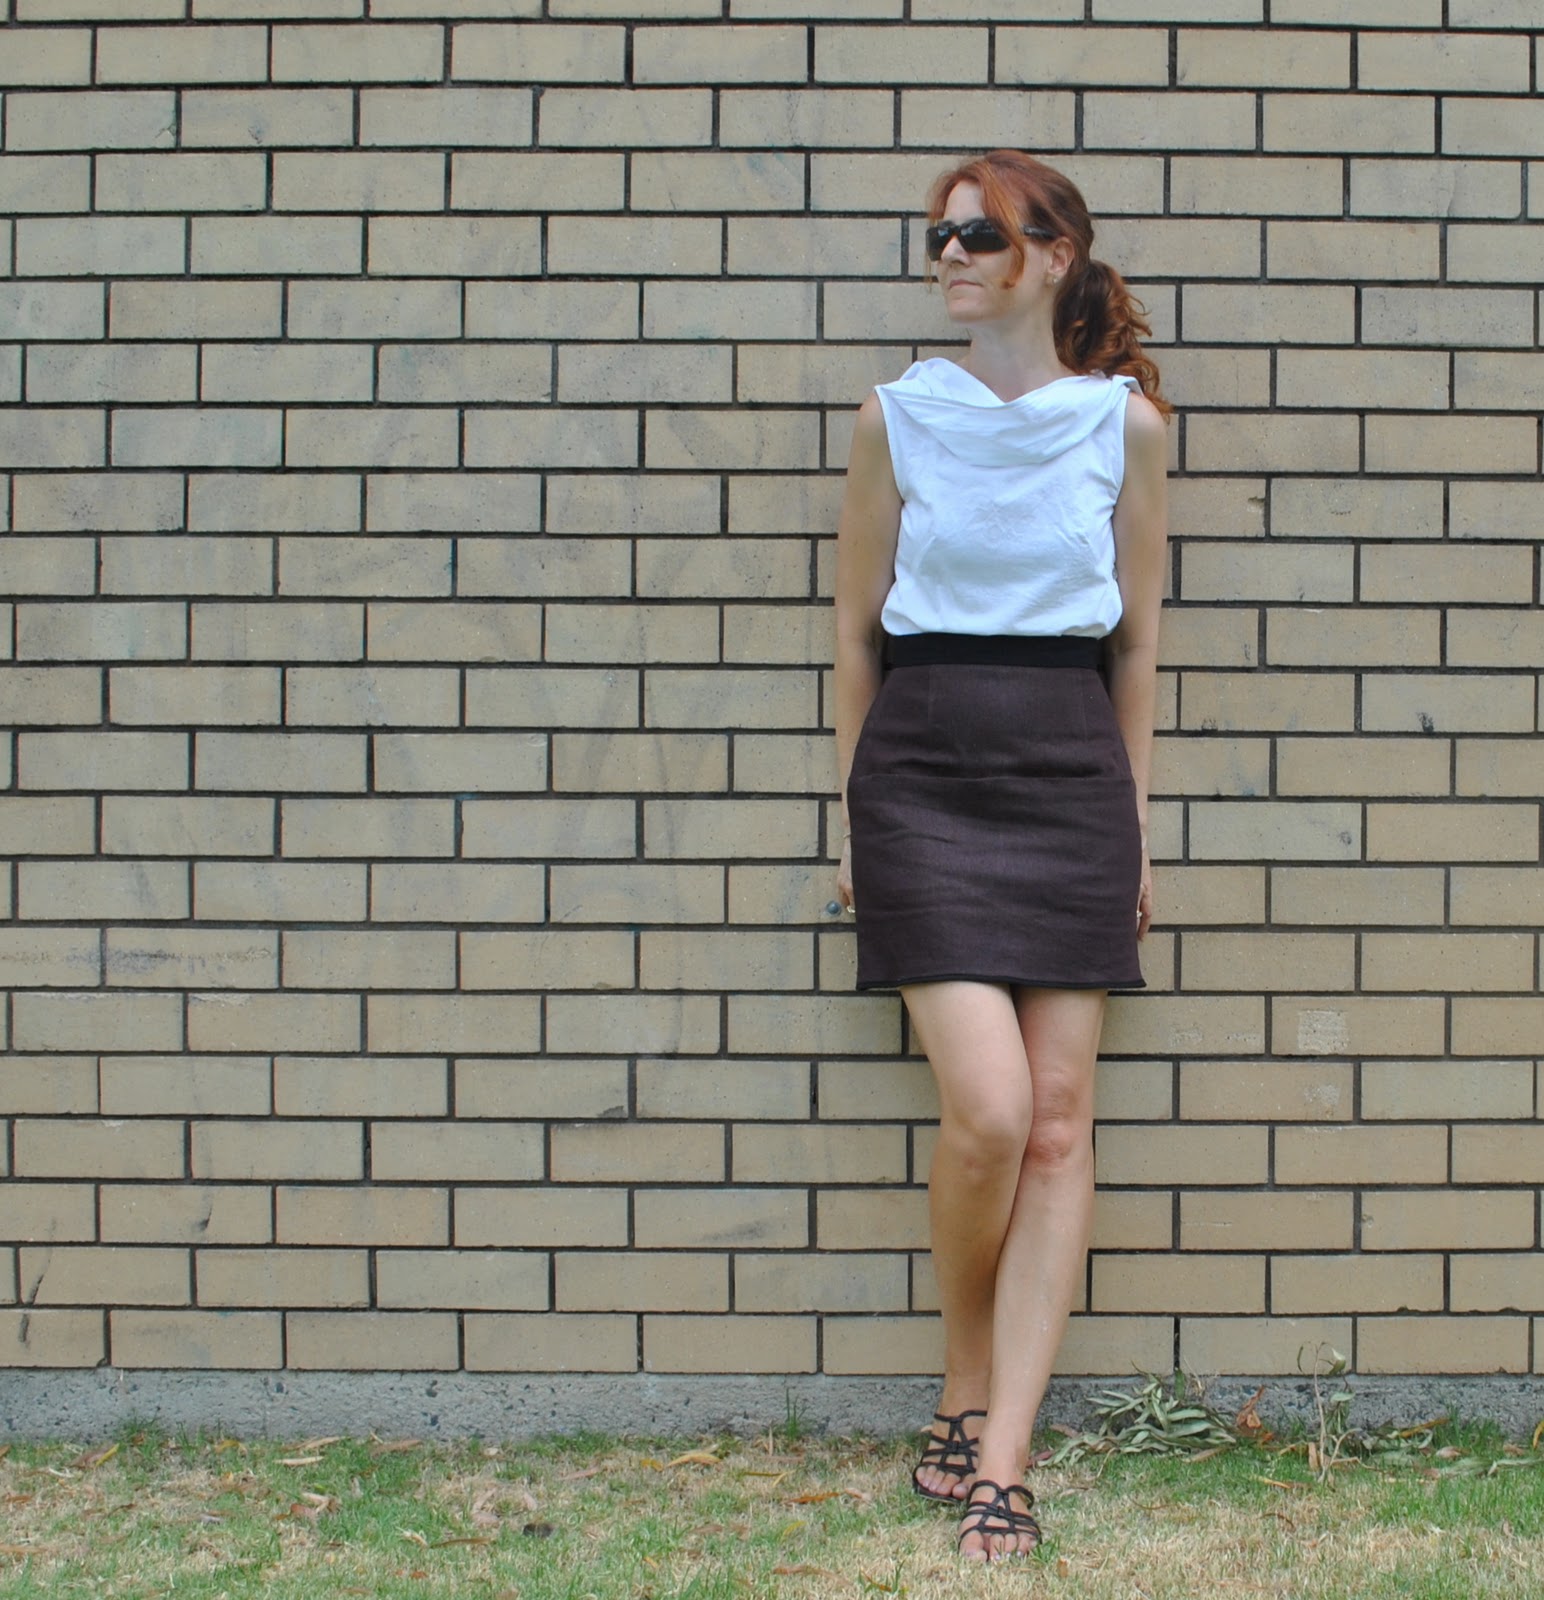
I’ve made a skirt.  Now, it probably doesn’t look very exciting, but I know this will be a wardrobe staple that I will wear into the ground….  You see, part of building up a wardrobe that is well-suited to each individual woman, that you enjoy wearing and is versatile and comfortable, is recognising items of clothing that are indispensable for you and your own particular style.  For a while now I’ve been wanting to replace an item that I determined long ago is one of my own indispensables; a short straight sludgy coloured skirt.  I was pretty sad when my old khaki corduroy one finally died, it got all stretched out around the waist in an ill-fitting and ugly way, and for the last six months of its life I could only wear it with long shirts hanging out over the top, which was an utterly ridiculous state of affairs, so I finally said goodbye to it.  I tried to move on, do without it, but eventually conceded I really wanted another skirt just about exactly like that old one, and soon!
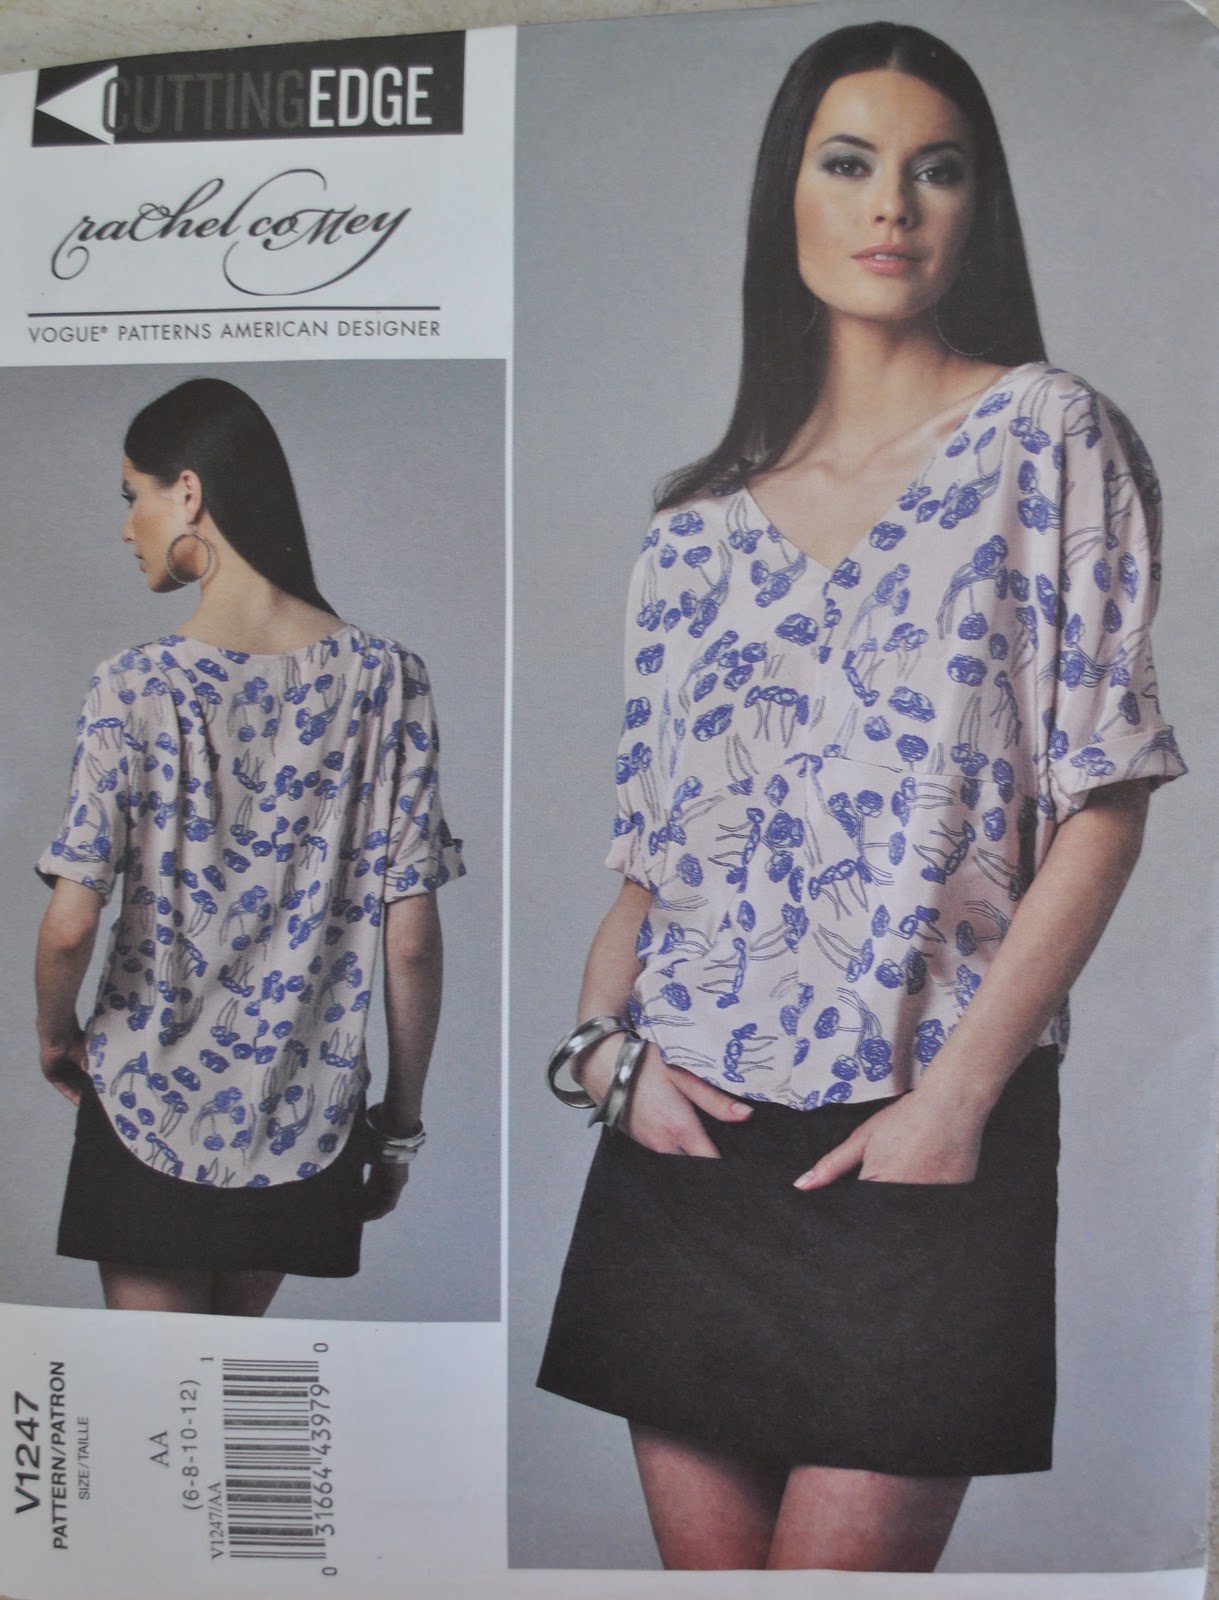
That skirt was thisclose to perfect, but of course a skirt does not qualify as actually perfect in my opinion unless it has pockets.  When I checked out the line drawing of the skirt in Vogue 1247; I was pretty excited … Little skirt; check!  Plain and basic; check!  Pockets; check AND check!!!!  These are all the features adding up to the perfect little skirt in my book…  and it also has a waistband, something I am currently into in my skirts…. WIN!
I made the skirt from purple stretchy denim, the leftovers from my plum jeans here.  The waistband is black corduroy, with its wrong non-fluffy side out, leftovers from these jeans, and instead of folding the waistband in half so it is self-faced as suggested in the pattern, I pieced the waistband in half horizontally with a lightweight cotton (shot cotton in Ice, also a leftover) to reduce bulk around the waist…  just a personal preference.  The pockets are lined with the same lightweight cotton.

The waistband is a contrasting black; for the following reason….  usually I add a bit of length to my pattern pieces, but I was working with scraps here and could only cut all my purple skirt pieces to their pattern-stipulated length… and this skirt is short!  Now, I like my skirts short it is true, but this one was going to be really short… even by my standards.   So I didn’t hem, but instead enclosed the lower raw edge of the skirt in the same black bias binding used for the HongKong finishes on all the other raw edges inside the skirt.   And cut a new black waistband, so as to have the colour of that black edge picked up somewhere else in the garment.
The HongKong seaming does constitute part of the pattern instructions and there is a pattern piece to aid you in constructing your binding.  I dutifully cut this out and make up the continuous bias binding as instructed.  However it was too skinny to work effectively on my thick denim fabric, so I ended up cutting a whole new new lot of 50% wider bias binding in black quilting cotton.  Which means I have 6.5m of skinny off-white bias binding now, to use in some other project  đꙂ

I dyed the finished skirt using 1/4 tsp of iDye in Brown.  I’m very happy with this final colour.  It is very satisfyingly muddy and richly sludge-y, wouldn’t you say?  I would describe it as eggplant, rather than either brown or purple.  A sort of deep n’ dirty purple, that reads as a strong chocolate brown on first sight, but still recognisably has that warm purple-y base underneath when you look at it more closely.
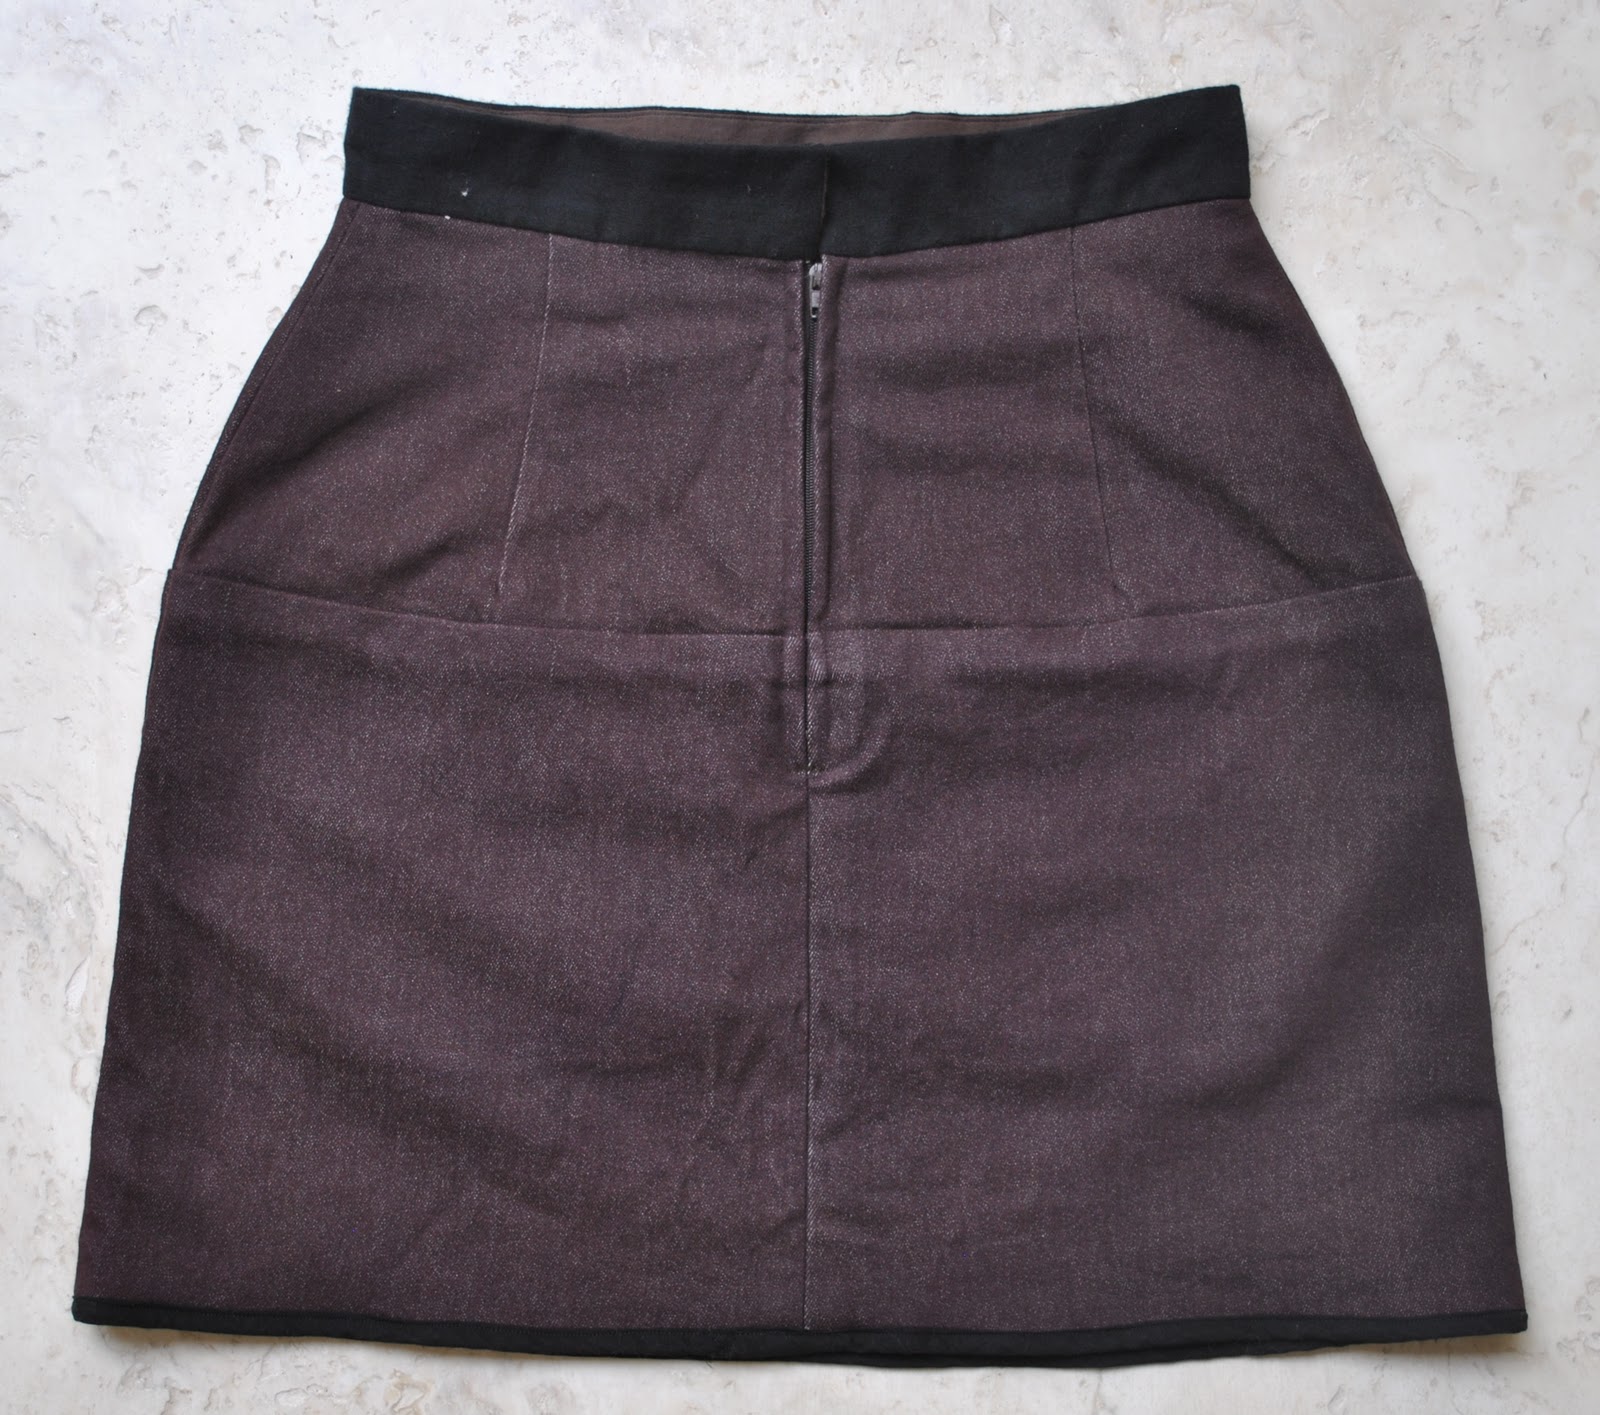
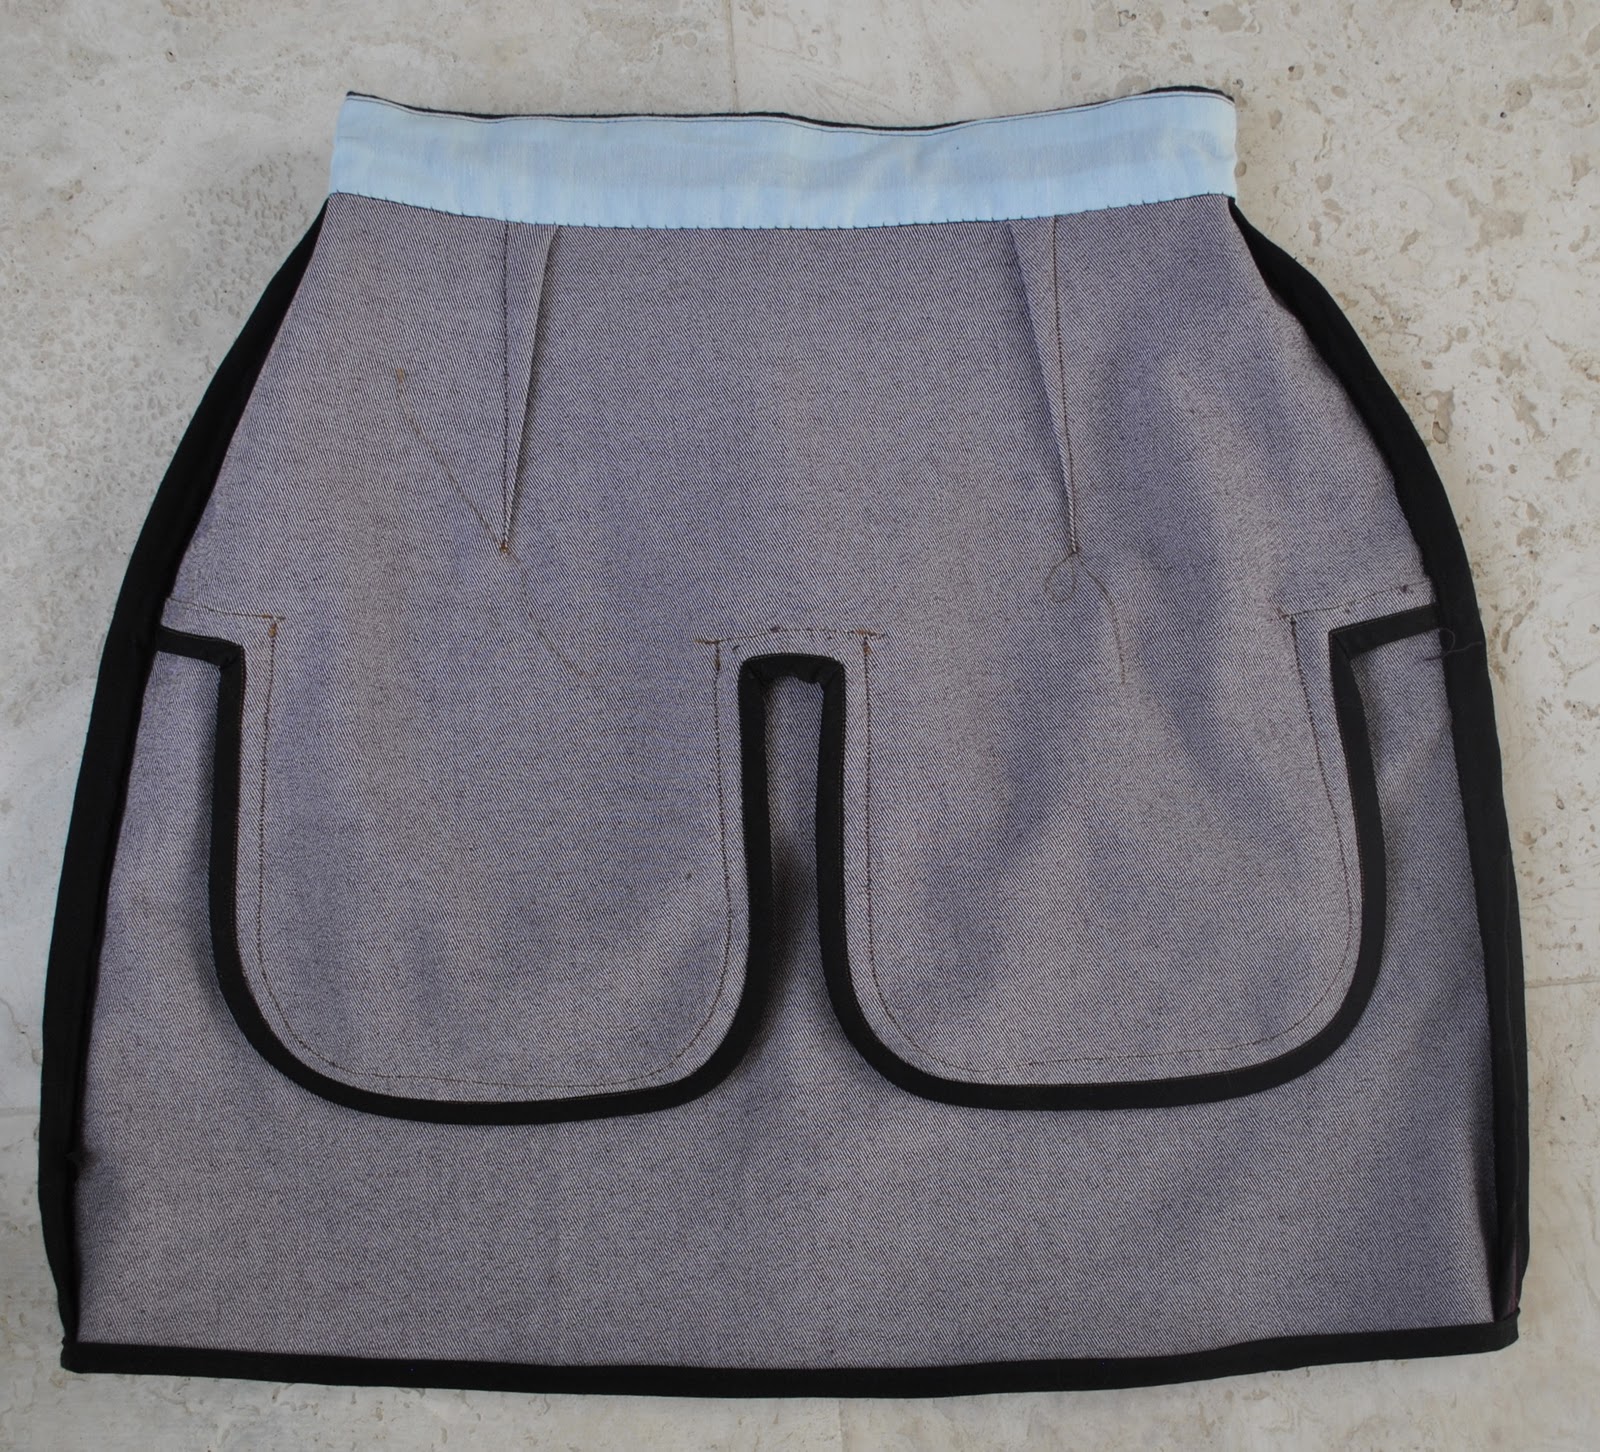
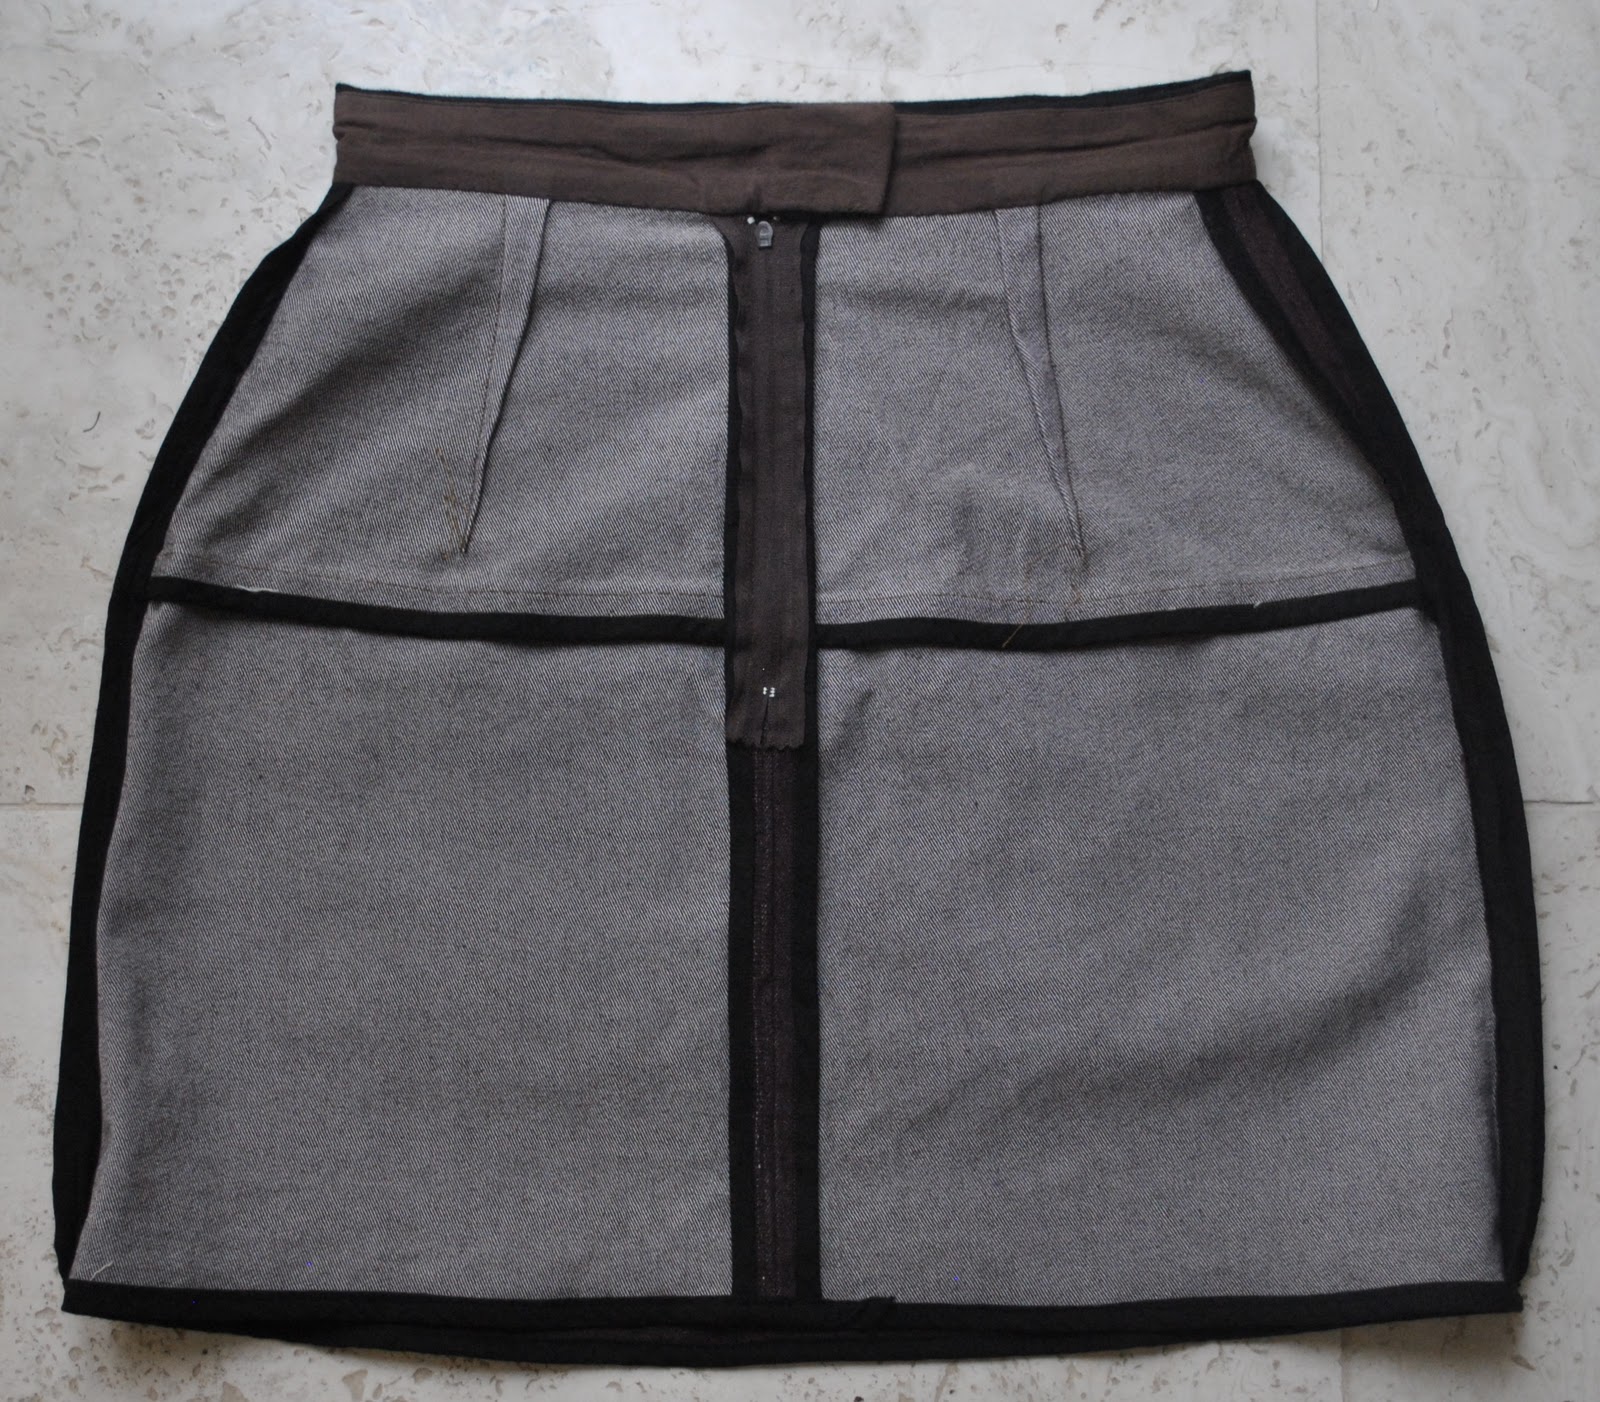
(at left: front, before dyeing, at right; the back after dyeing)

Inside the skirt: at left; the front, before dyeing, and see the pale blue waistband facing? and at right, the back view after dyeing the skirt… that 100% cotton waistband really picked up the brown dye beautifully compared to the denim, which having some synthetic elastane in it didn’t pick up the colour quite as vividly….

Details:
Skirt; Vogue 1247, purple stretch denim and black corduroy waistband; dyed with iDye in Brown
Top; top “a” from Unique Clothes Any Way You Like by Natsuno Hiraiwa, of white cotton, details here
Sandals; Micam by Joanne Mercer, from Hobbs shoes, details here

Pattern Description:
Short straight skirt with deep front pockets set in a horizontal seam.
Pattern Sizing:
6-12; I cut the size 10
Did it look like the photo/drawing on the pattern envelope once you had finished  sewing it?
Yes, except that mine is 5cm longer because I did not hem, but finished the raw lower edge with black bias binding.
Were the instructions easy to follow?
Yes
What did you particularly like or dislike about the pattern?
I just love this skirt pattern; the slight A-line shape with a minimal flare, and the pockets most of all.  The smaller pattern pieces also enable you to make use of smaller leftover pieces of fabric, which is a big plus… 
I like the HongKong seaming in the skirt and the French seaming in the top; that the instructions are encouraging users to finish their garment to high standards.
The skirt is very short as it is, but that is the easiest thing to alter in a skirt pattern…
Fabric Used:
Medium-weight stretch denim, corduroy waistband, lightweight cotton for the waistband and pocket facings, quilting cotton for the bias binding.
Pattern alterations or any design changes you made:
I finished the lower raw edge with bias binding instead of hemming; this skirt is short!  In stead of the self-faced waistband, I pieced the waistband horizontally in two halves; the outer half is the fashion fabric and the facing half a thin lightweight cotton.  I thought this a better choice to face the thicker denim I chose for the skirt fabric.  Likewise the pockets are lined in lightweight cotton.
Would you sew it again? Would you recommend it to others?
I will definitely sew this again sometime!  Probably lengthened… 🙂
 Conclusion:
A short straight fitted skirt, AND with deep pockets?  it doesn’t get much better than that!

For interest: the lightning vs. fireworks over Perth on Australia Day…

photo by Matt Titmanis; source
pinterestmail

Aquarama

I made a skirt for my daughter…
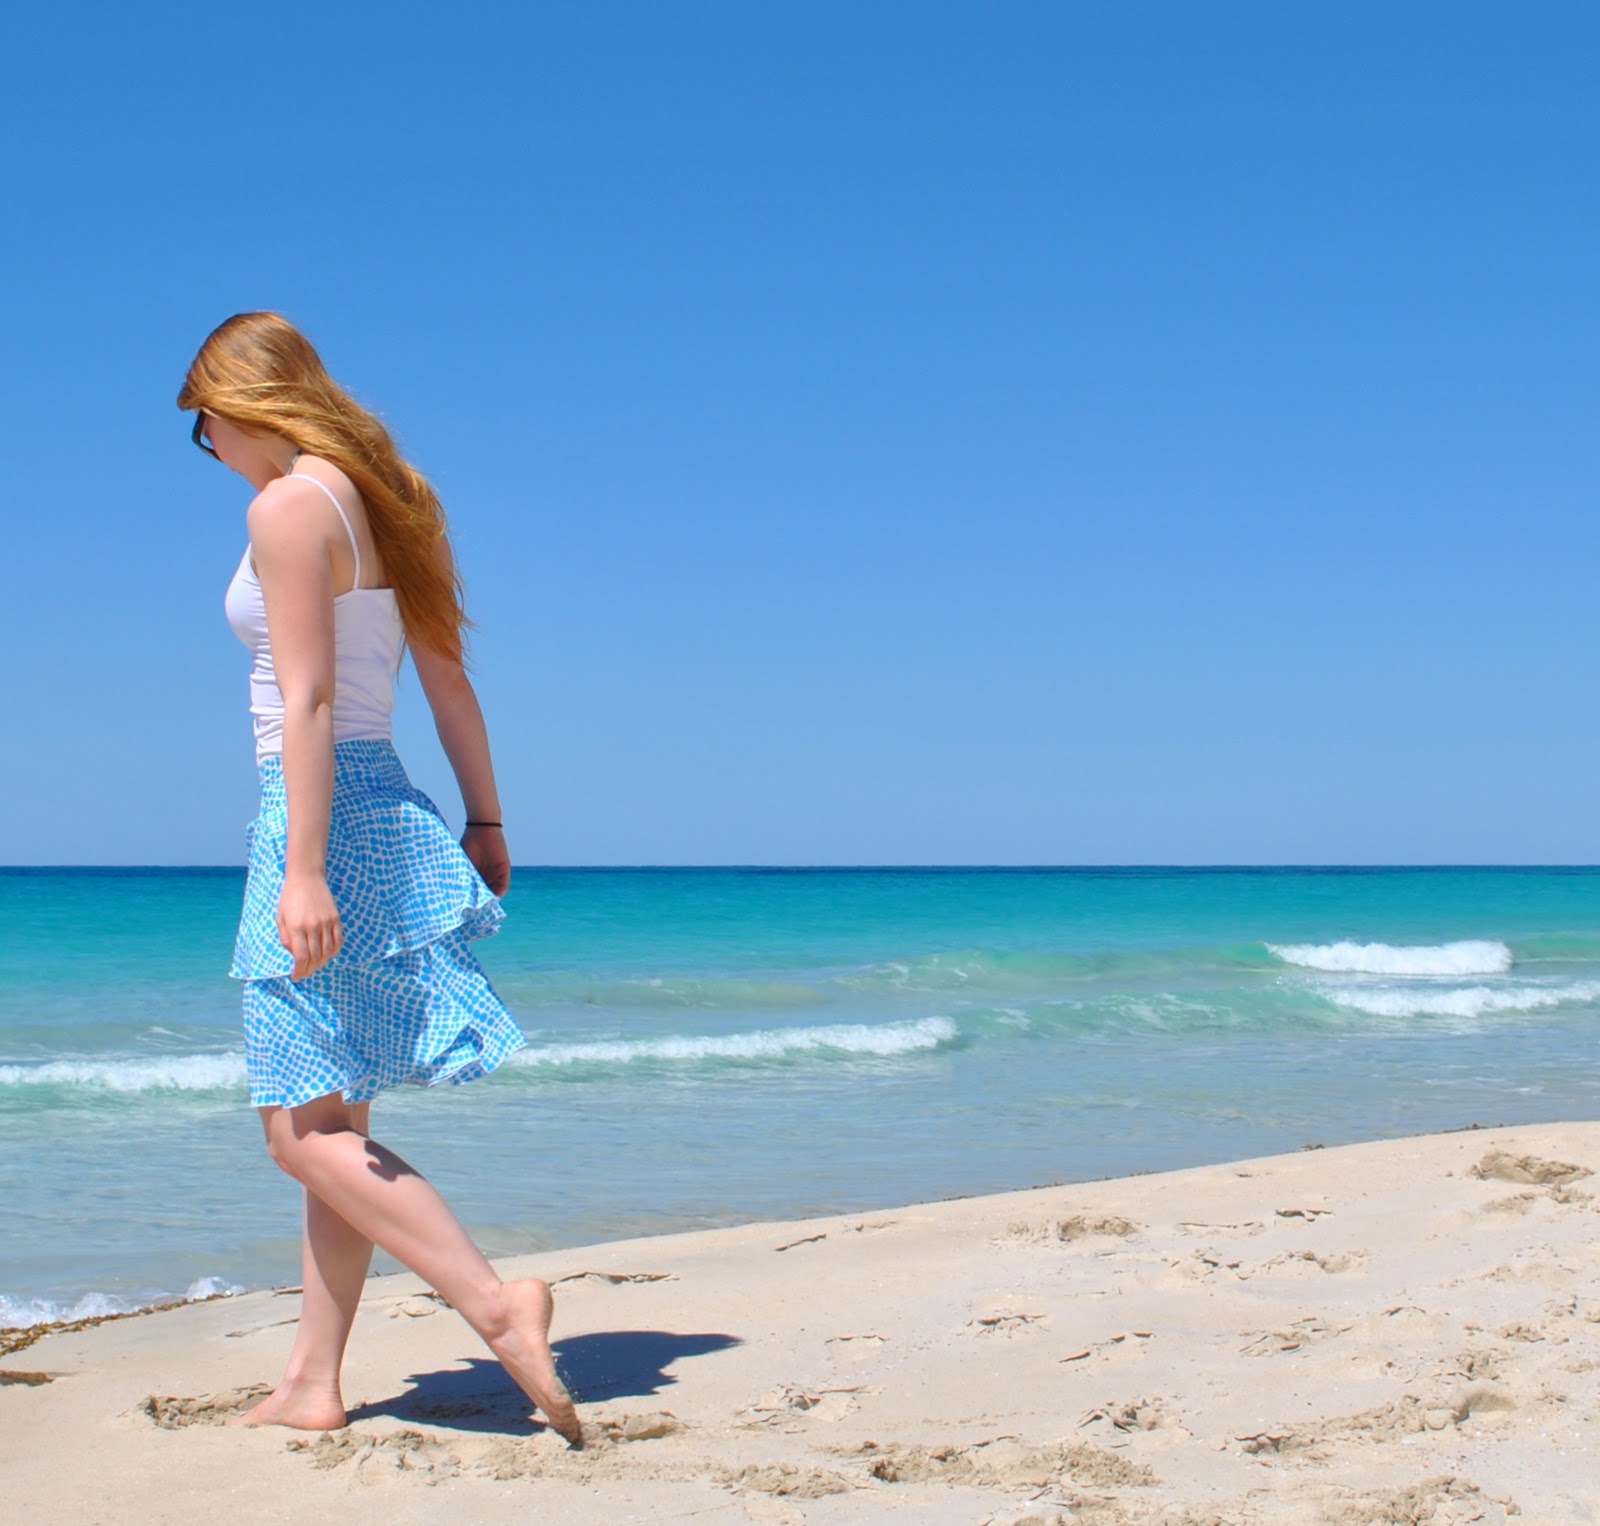
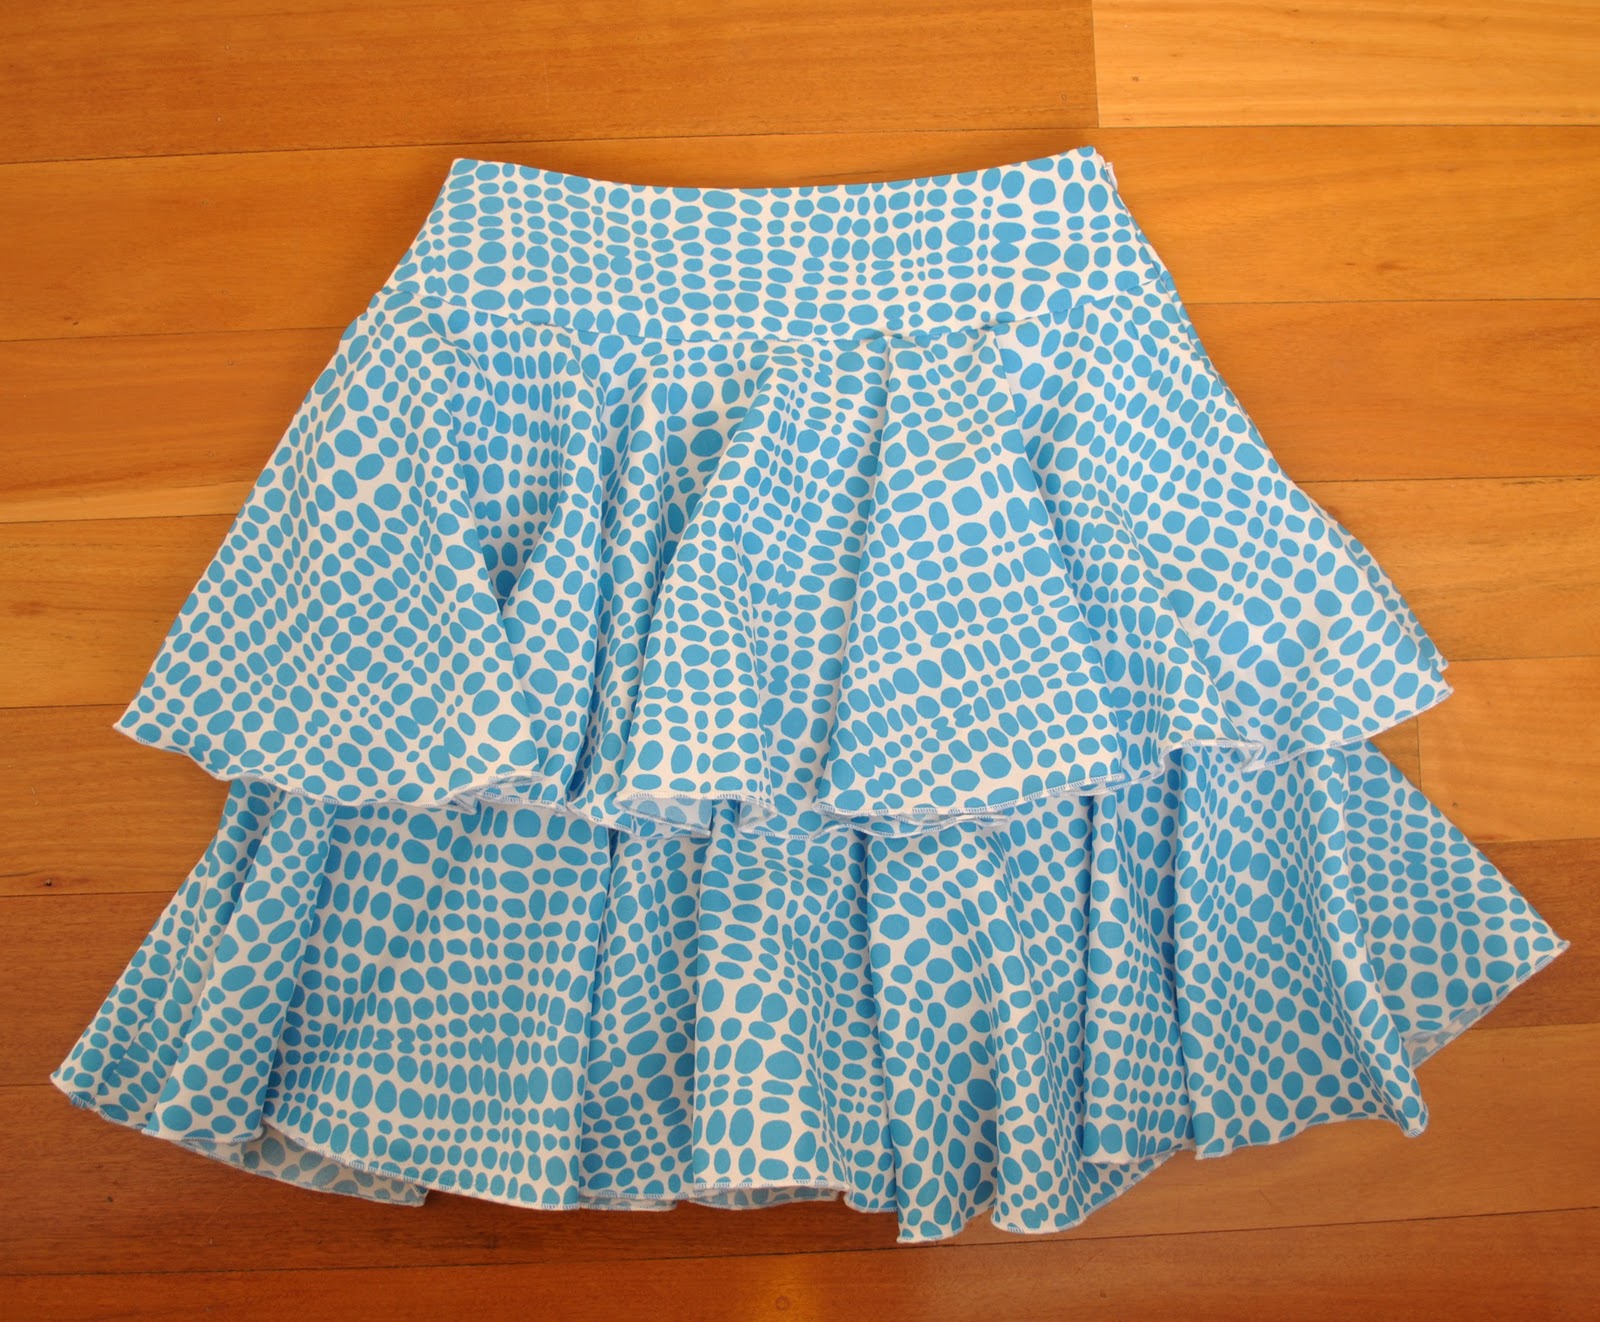
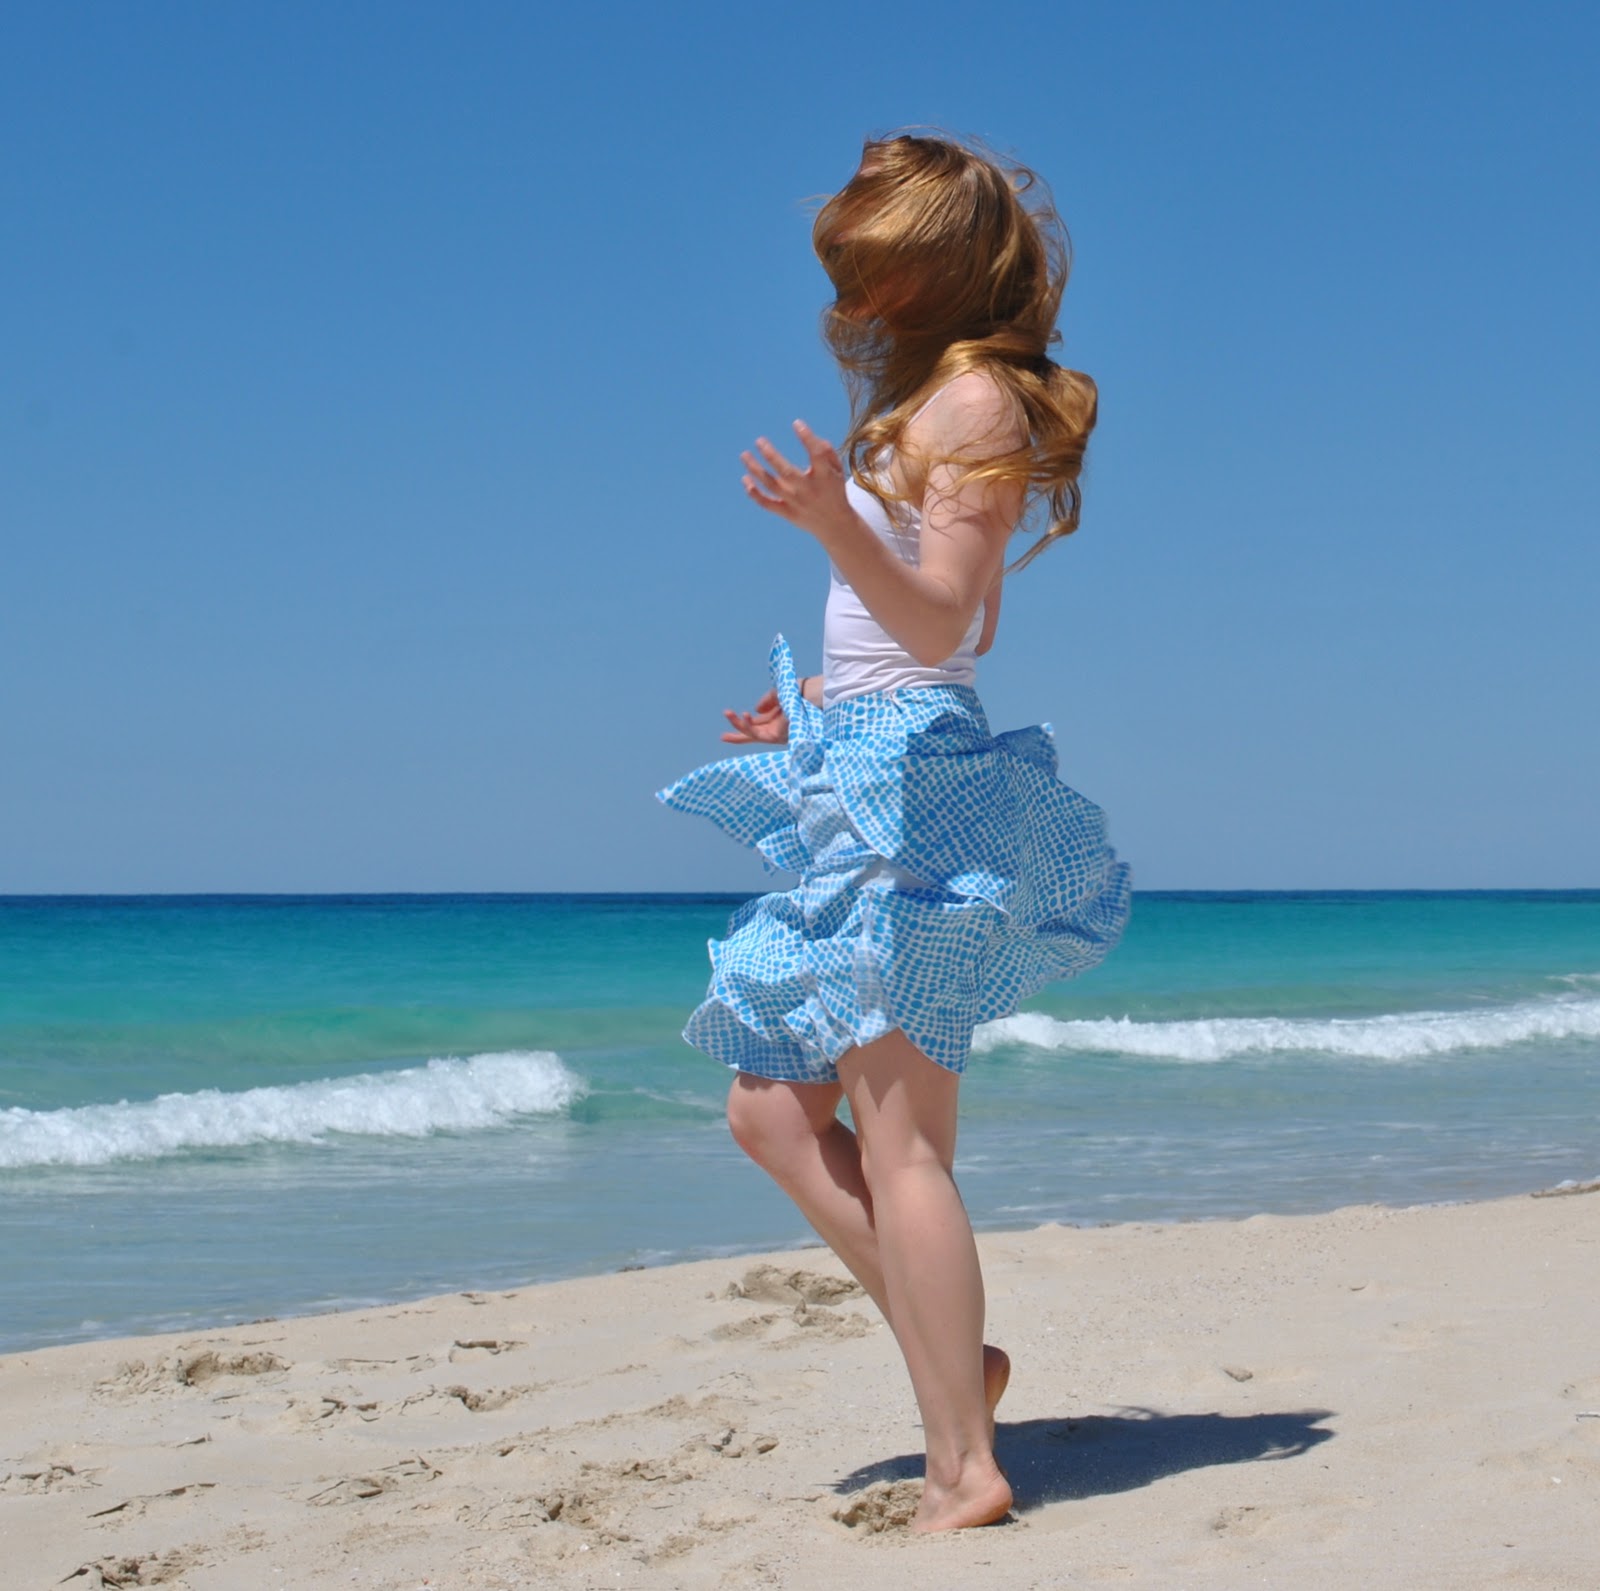
I used another piece from the bundle of fabric given to me by my friend C, from her late mother’s stash.  Going by certain clues (only 90cm in width, a stapled-on tag from a long-gone local store with imperial measurements penciled on it) this piece must be at least 35 years old, and probably the loveliest piece of the lot; densely woven, light/medium weight and slightly crisp with a matte crepe-y texture.  It cut like butter and sewed together beautifully.  I don’t know if it was expensive, but it feels like it could have been quite expensive… and I even started to wonder if it could be silk so I did a burn test on a scrap.  Well, it shriveled up faster than you can say “omg, where has my skirt gone?!”  
SO, a fairly important modesty as well as a safety tip there for Cassie….
The print, of random wave-y rows of organic turquoise blobs on a snowy white ground is pretty cool… don’t you think?  Lava lamp-ish, sorta.  Optimistic and space-age-y both, just like the 60’s and 70’s were.  So a bubbly kinda print for a bubbly kinda skirt, y’know.  I think it works well, stylistically. And she likes it!
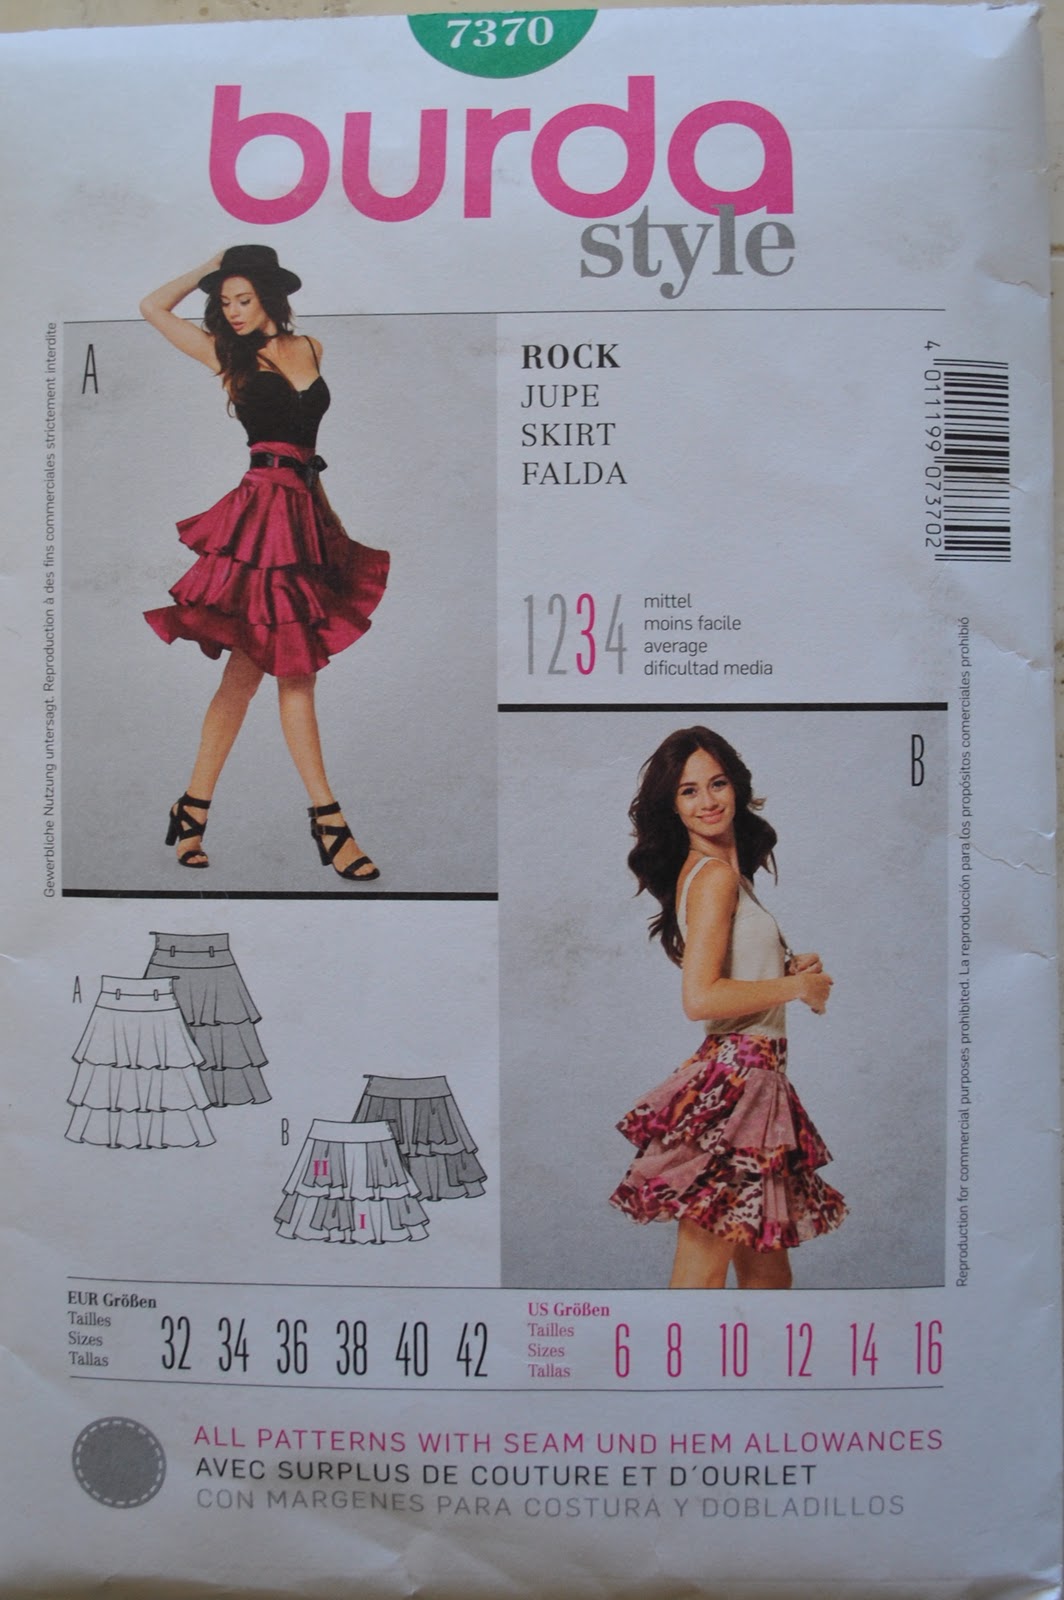
I used Burda 7370, the 2-layered skirt in view B but without the extra insert bits.  I knew she liked this shape, since it is a pattern we bought together for her recently and she has made one up for herself already in a denim-blue burnt-out jersey.  Having Cassie’s perfectly custom-fitted version for comparison made this second version an easier job for me….  Incidentally, I think it is interesting that Cassie has exactly the same fitting issues as me; taking in several centimetres off the waist is a given in any skirt pattern.
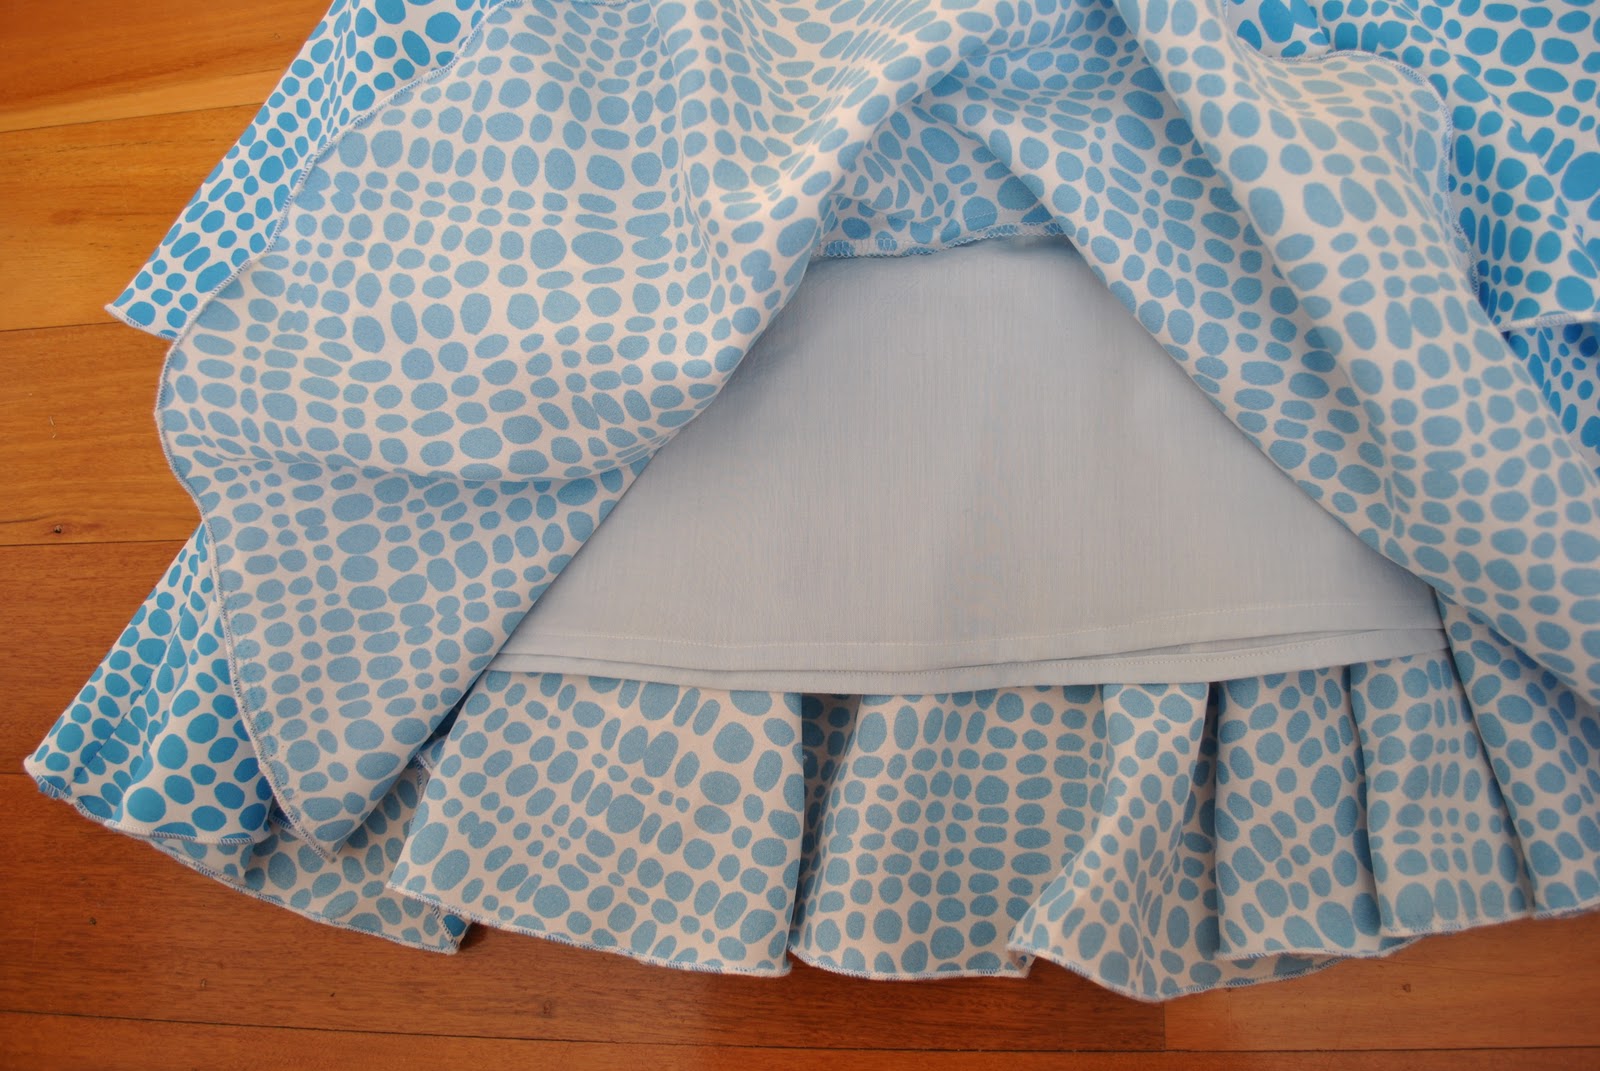
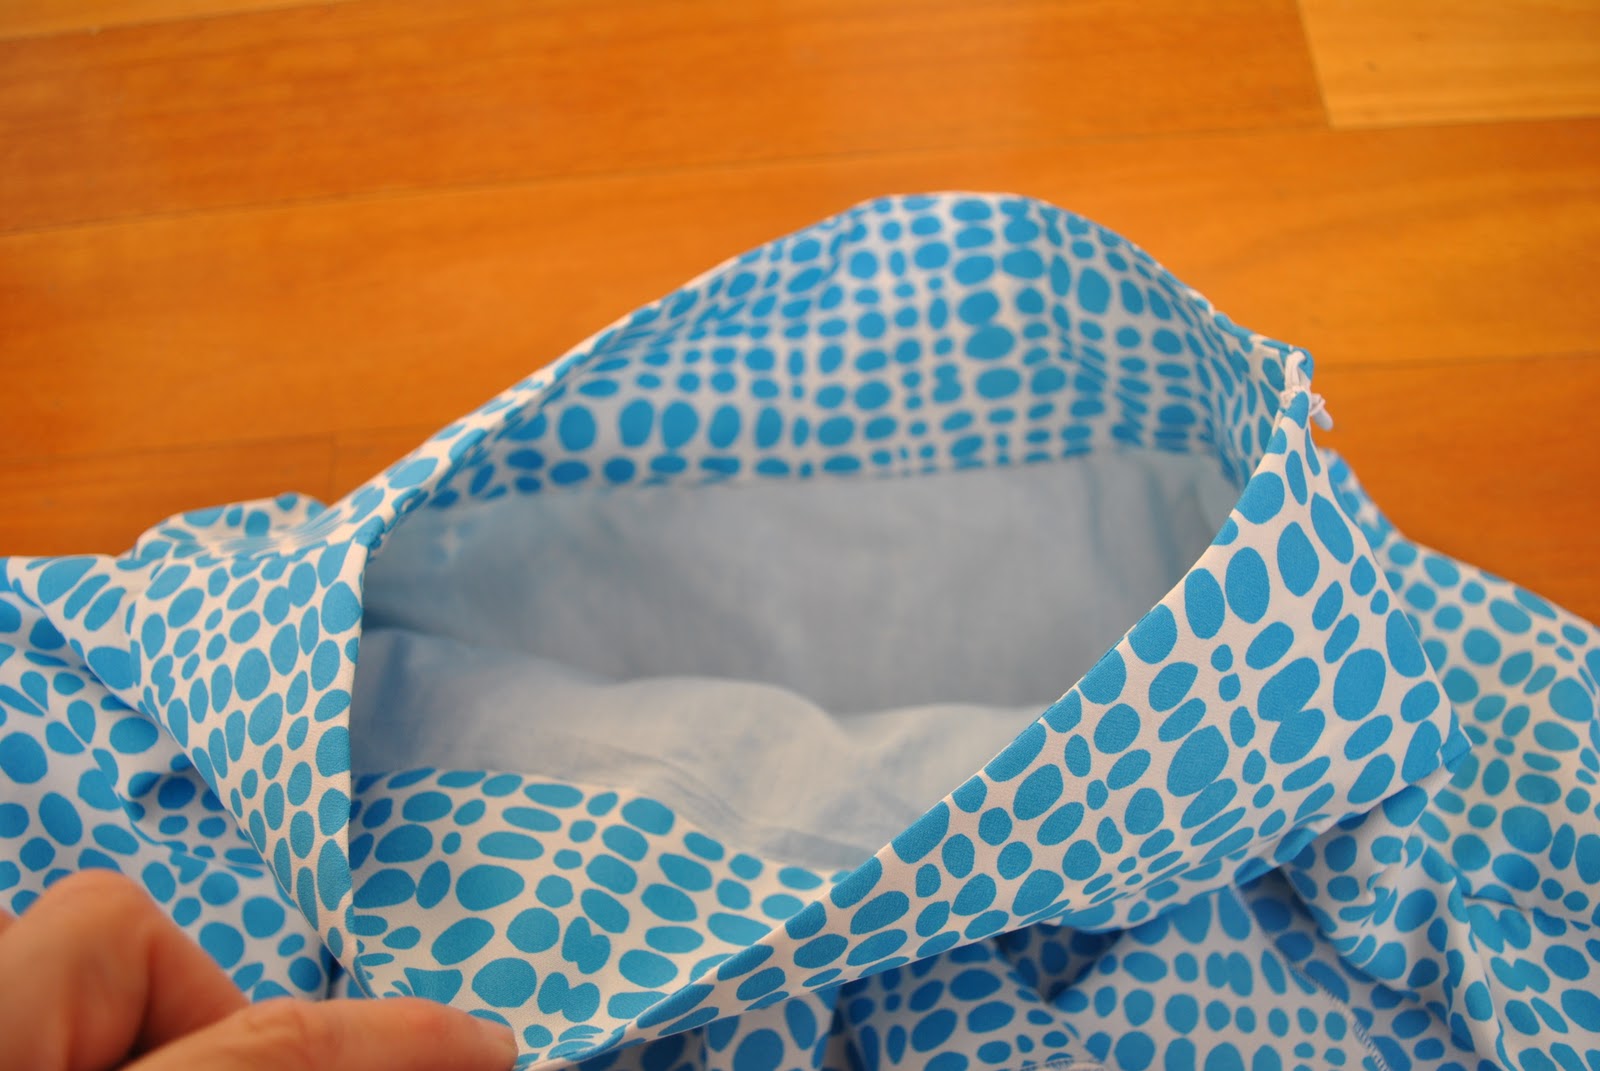
The skirt lining is of pale blue shot cotton in Ice, hemmed by folding in twice and machine stitching.  All the raw edges inside the skirt are overlocked to finish, and the hems on both layers finished with the rolled hem on my overlocker.
Details:
Skirt; Burda 7370 view B, turquoise and white print synthetic crepe, at least 35 years old
Camisole; Country Road
In twirl mode…
Pattern Description:
Flared skirt, either two or three layers, two yoke variations and side zip
Pattern Sizing:
European 32 (US 6) to European 42 (US 16).  I made the size 8.
Did it look like the photo/drawing on the pattern envelope once you were done sewing with it?
Yes, except that I left off the extra inserts.
Were the instructions easy to follow?
very easy
What did you particularly like or dislike about the pattern?
Love the cute flippiness of this skirt, a perfect dancing skirt for a girl who loves to dance like my daughter.  It looks adorable when on, swishes about gloriously and accentuates her waist beautifully.
I’m not thrilled that it requires such a lot of fabric, but that is just stinginess talking…  The first time she made up this pattern and we were buying the (not particularly cheap) fabric that she had chosen, I really had to bite my tongue at how much it was costing!  However she did a superb job of making it up.  And she’s worn them a lot.  This version pictured here is the second skirt using this same pattern.
Fabric Used:
Light/medium-weight synthetic crepe
Pattern alterations or any design changes you made:
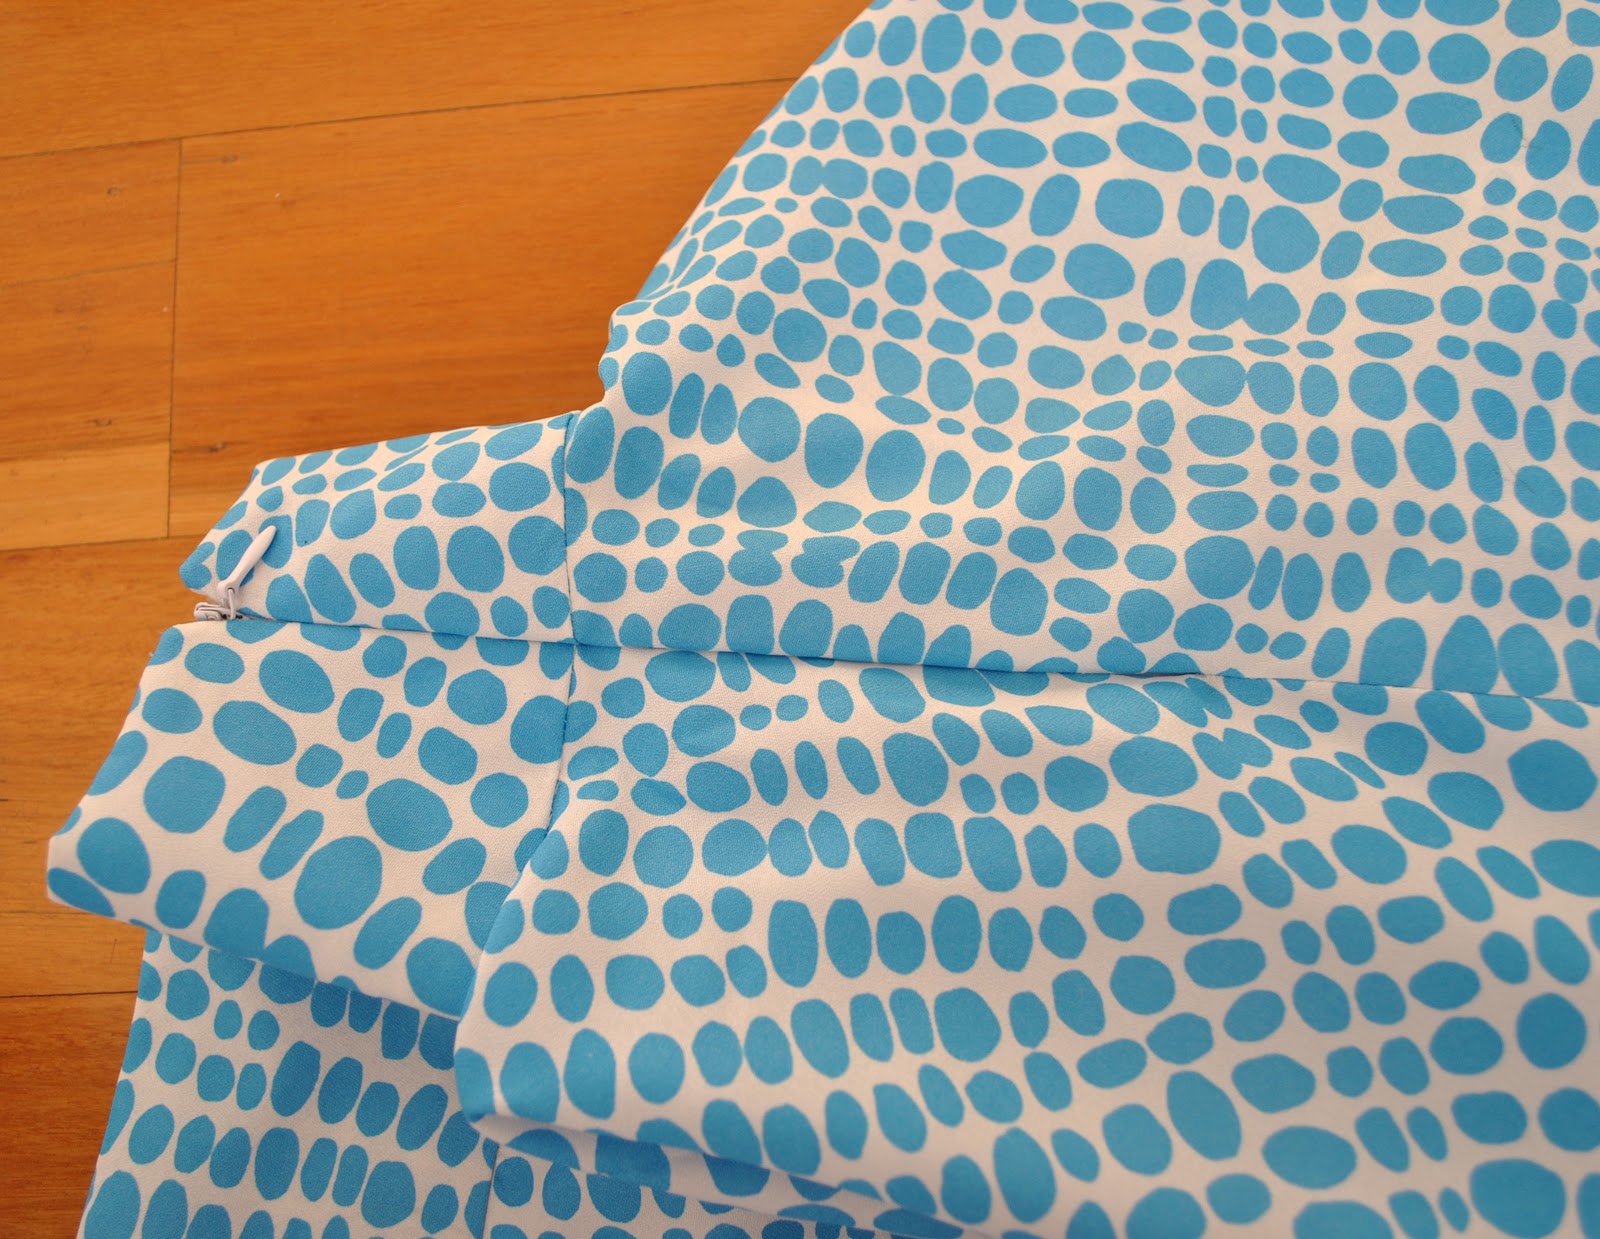
The pattern is gorgeous just the way it is.  The only alteration to the instructions I would suggest is my usual one; when inserting an invisible zip I get a much better and smoother result by sewing in the zip BEFORE sewing up the rest of the seam allowance below the zip.  This requires some careful measurement to get the lining and skirt seams lined up and sewn up perfectly, but is worth it for the superior finish. 
I finished the lower hem using the rolled hem stitch on my overlocker.
Other than that, the only adjustments I made were just custom-fitting issues, taking in a few centimeters off the waist.
Would you sew it again? Would you recommend it to others?
Probably will sew this again for my daughter.
If you love to dance and twirl about then do I highly recommend this one!!  My daughter cannot resist sashaying about, just by putting this skirt on! 
Conclusion:
Uses a lot of fabric, but is so cute and feminine and so darn flippy that it is well worth going there.  My daughter went out dancing with her friends, was the only one in her crowd not wearing a miniature mini dress, and the only one who didn’t have to worry about constantly pulling down said miniature mini dress whilst on the dance floor.  She enjoyed that freedom, and said that she got lots of compliments… win!  Apparently she got offered lots of free drinks too… hmmm
pinterestmail

Turning old jeans into a skirt…

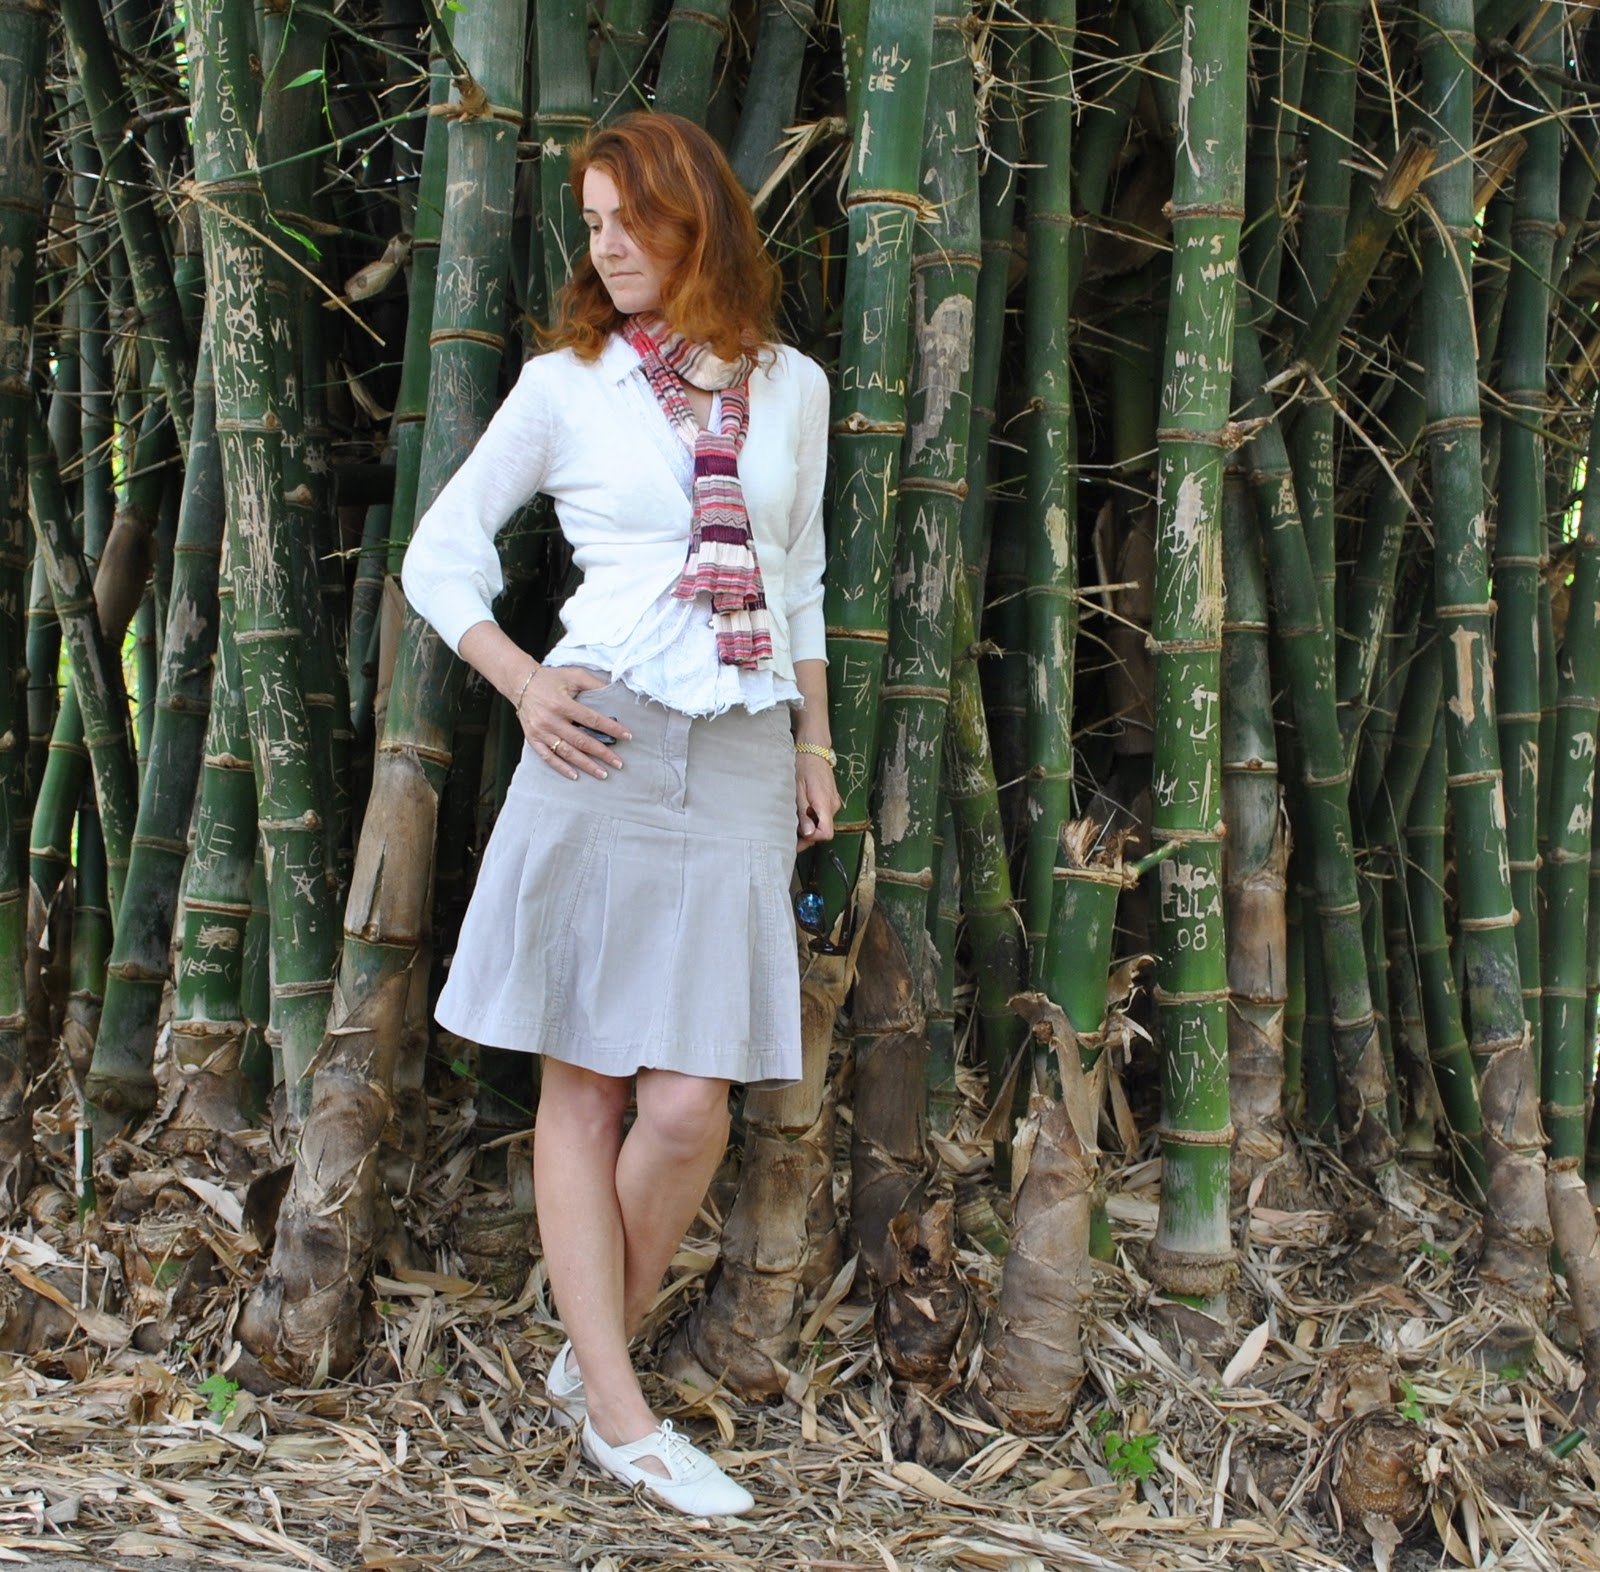
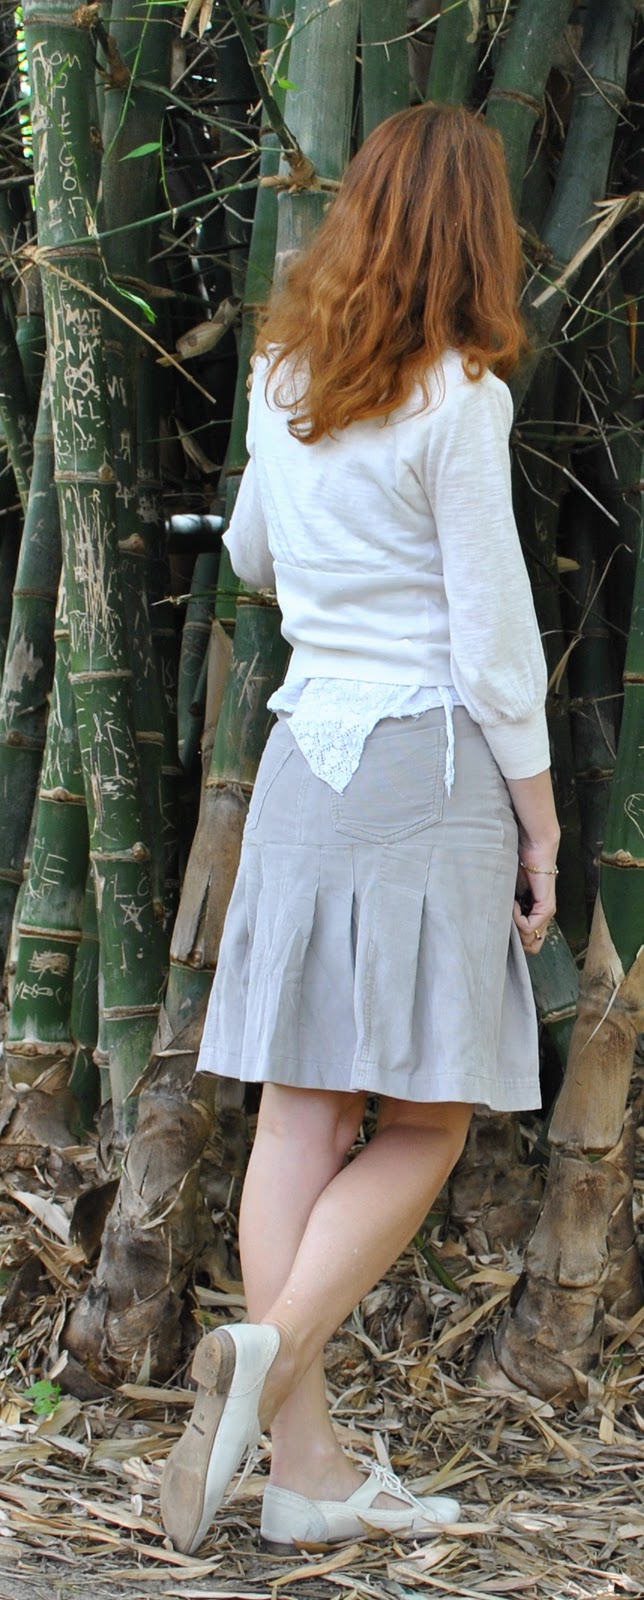
…  I decided it was high time for another refashion since I still have a small mountain of perfectly good fabric in the form of old clothing sitting in my stash.  eep!  Do you remember these jeans?   They had got a bit saggy and baggy about the crotch and seat area, thanks to me using almost-stretchless fabric.  Thus I learnt jeans really are so much better with a bit of stretch in them… anyhoo so I could barely stand to see myself in them as jeans anymore but the corduroy was still in pretty good knick overall, and I still absolutely looooove the colour.  It’s the perfect “white” for me, a sort of warm shade of grey-white that I love.  Oyster white, to get all referentially descriptive, if you like that sort of thing.  Yeah, I do too  đꙂ
So.  I’ve seen dozens of jeans-to-skirt refashions on the net but none of them have ever ever appealed to me.  Why?  People can’t get past dealing with that big curved crotch seam, and will just leave it there, sew it down boom onto the front of their new skirt as is, and I just can’t bear that look.  When I do a refashion I want it to actually look like a skirt, thanks, and not for people to look at it and go, “oh, she obviously converted her old jeans into a skirt, yeah.  Hmmm.  Okaaaaay…  No attempt to do anything at all about that crotch seam….  And what about the rest of the fabric from the legs?  Why not make use of that somehow?”
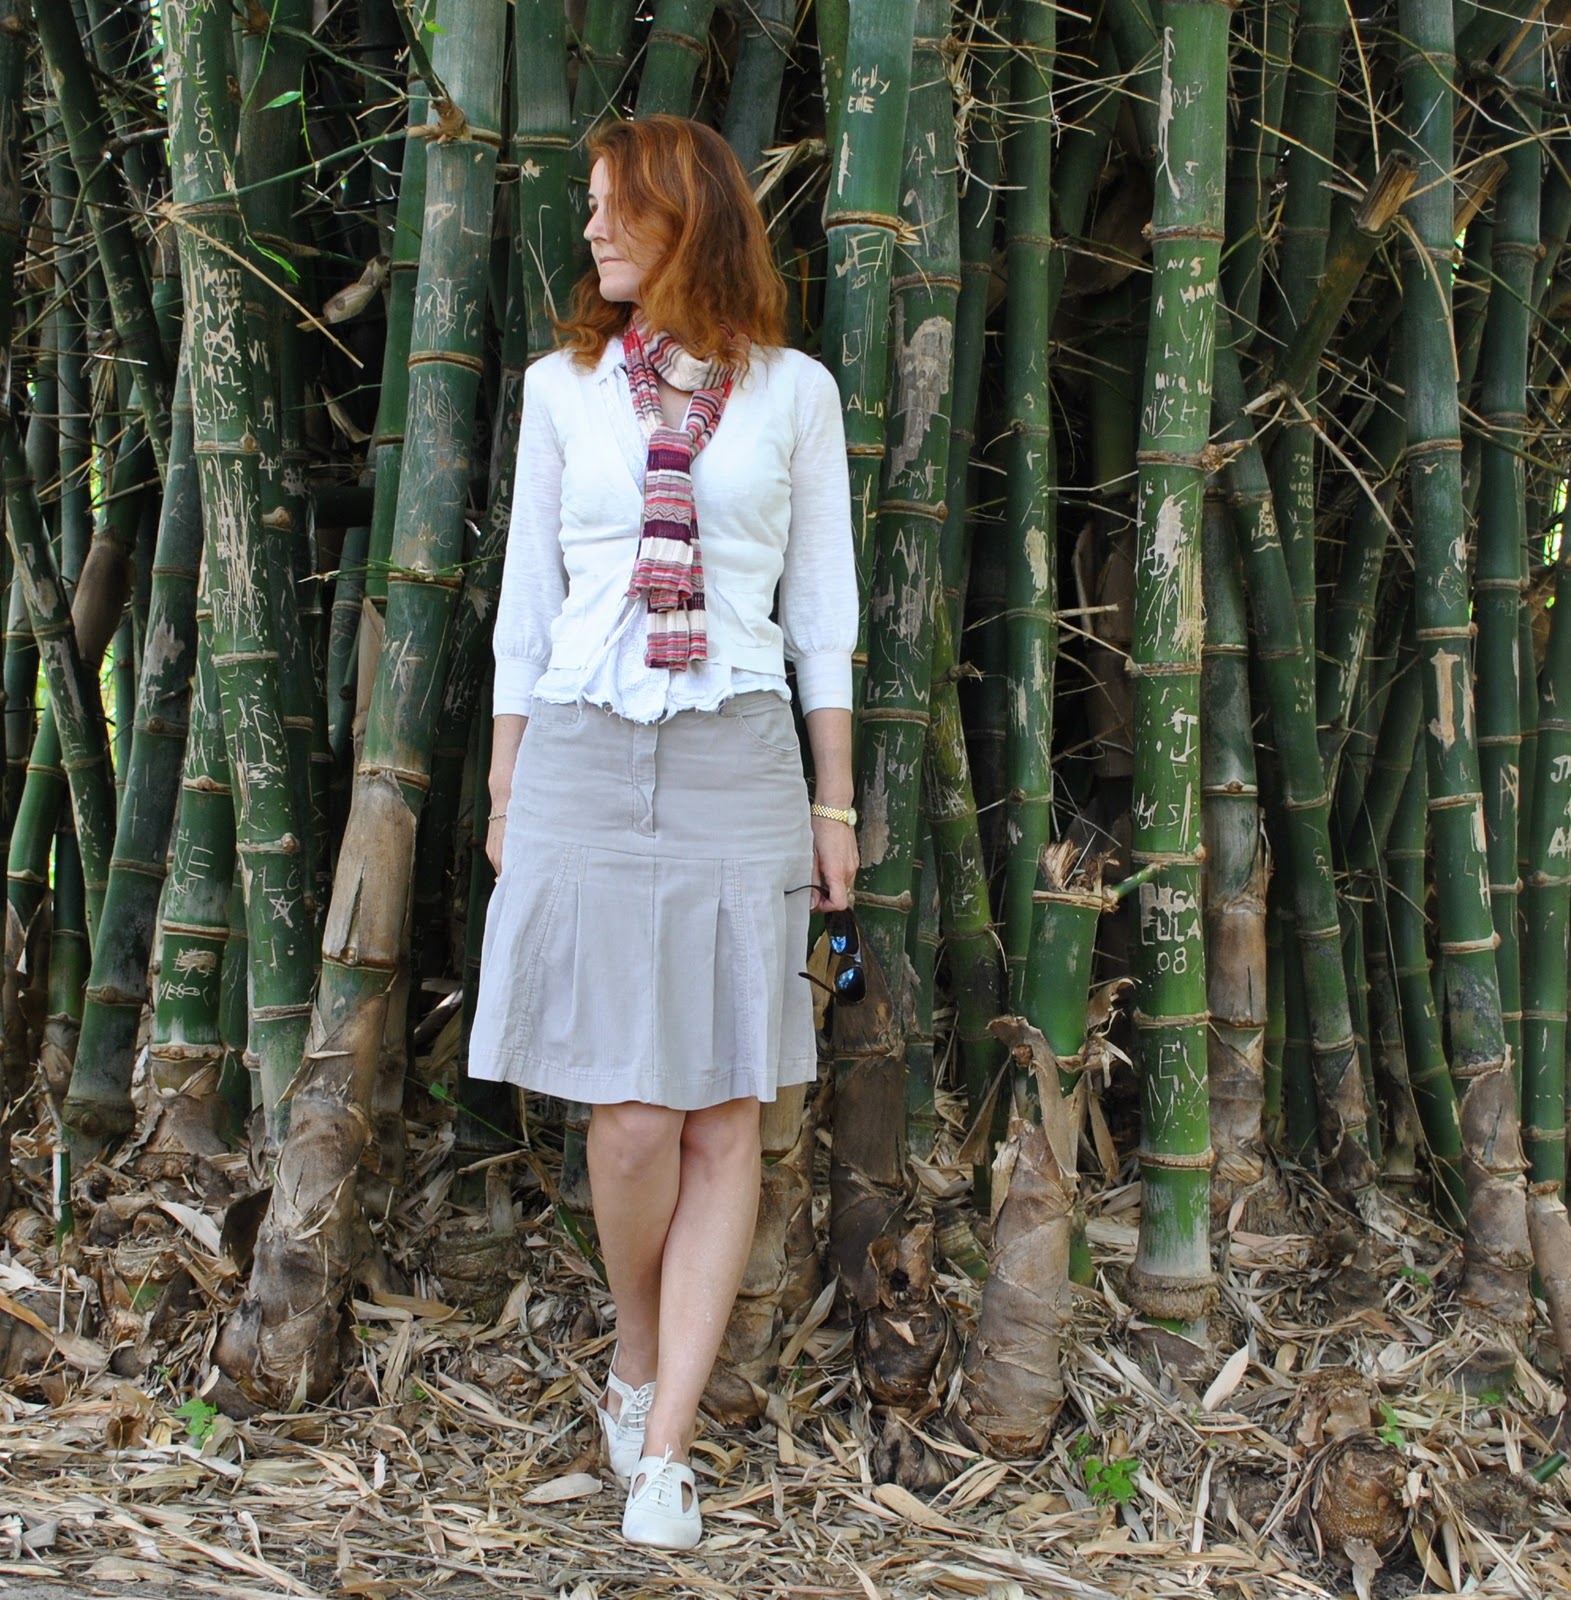
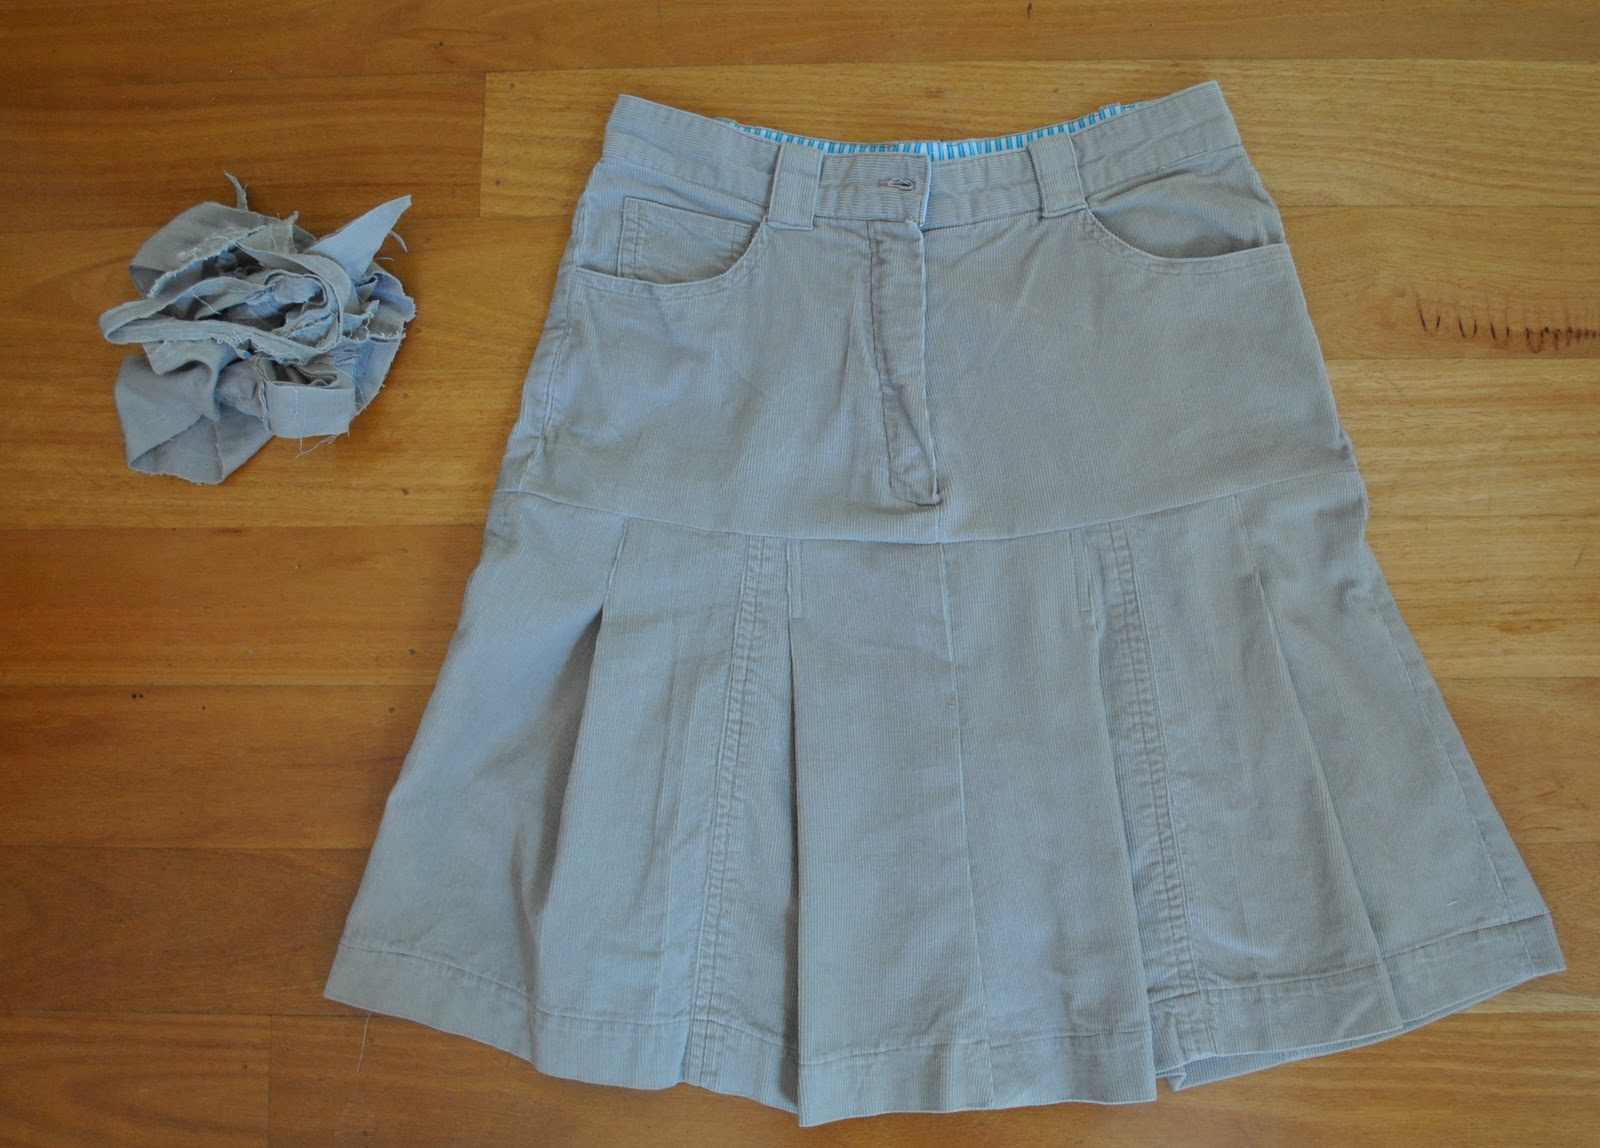
So I gave it some thought and came up with this refashion (details below), that actually used up nearly all of the fabric from my old jeans.  The whole top bit, with the waistband, fly, side pockets, coin pocket and rear patch pockets is still there completely intact too.  I think it ended up looking quite fun and flippy, and almost sporty too, don’t you?

Details:
Skirt; my own design, a refashion of an old pair of off-white corduroy jeans (originally made by me too, using Burda 7863 here)
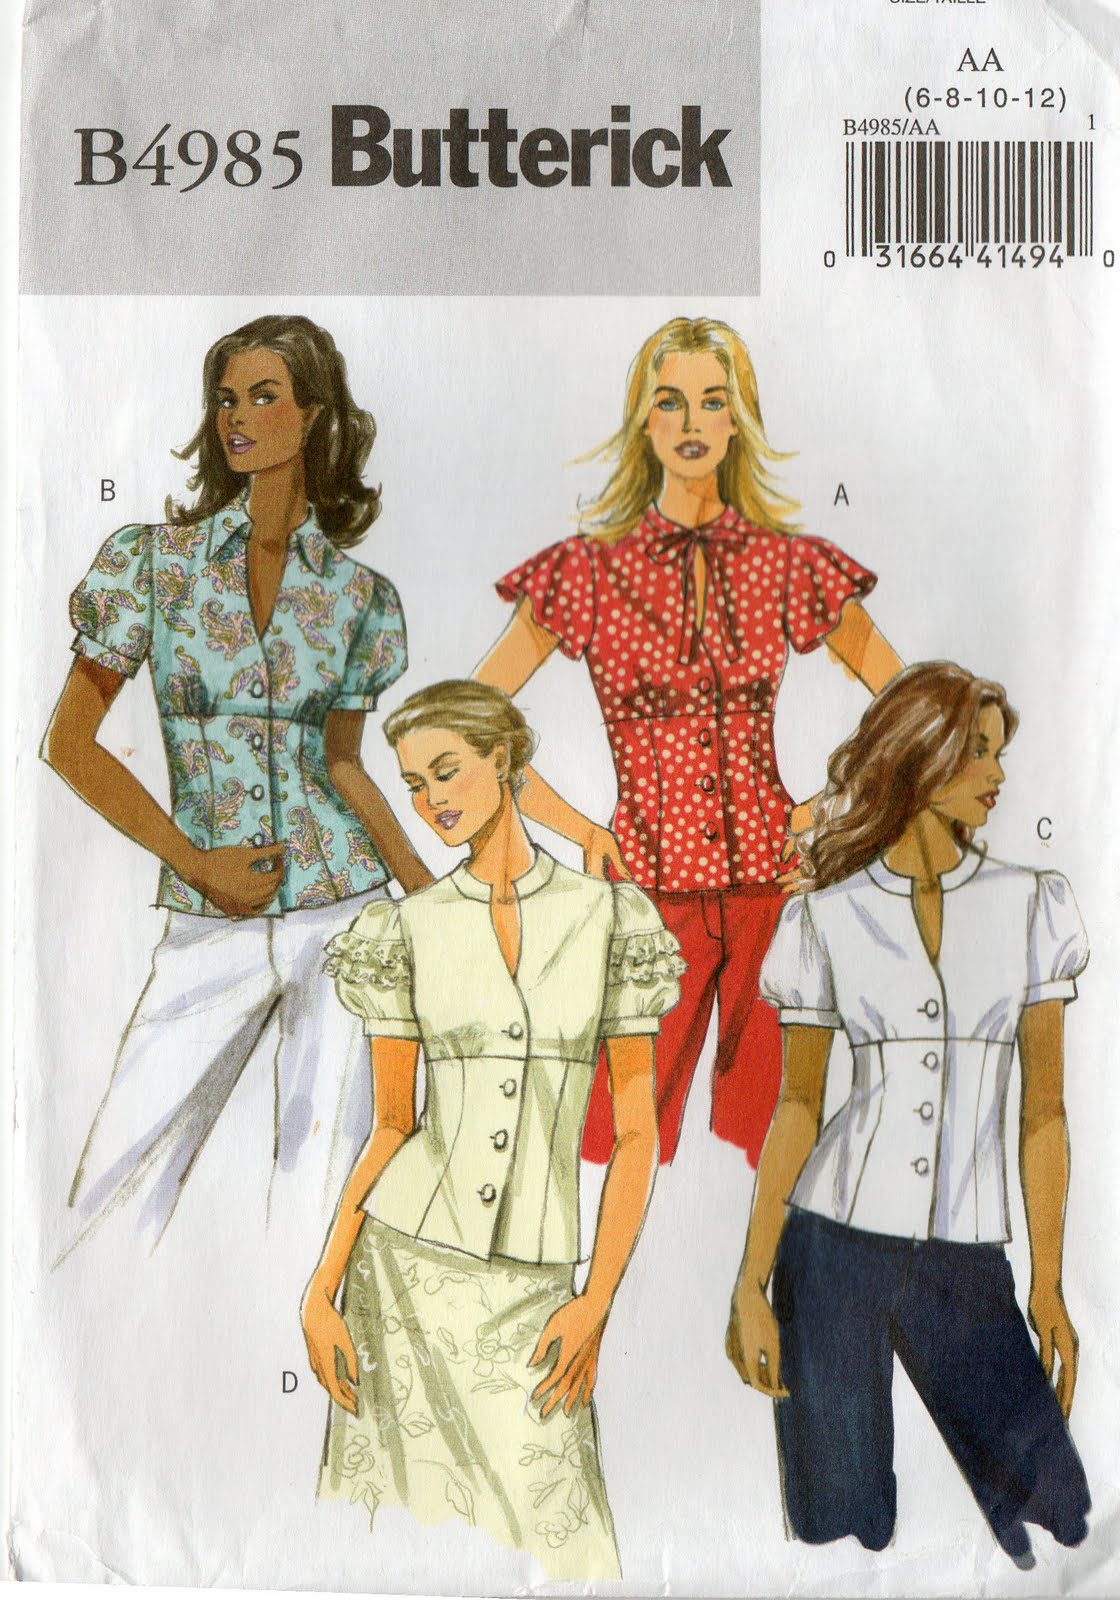
Blouse; Butterick 4985, ivory eyelet cheesecloth with lace trim
Cardigan; Country Road
Scarf; Missoni
Shoes; Bronx, from Zomp shoes

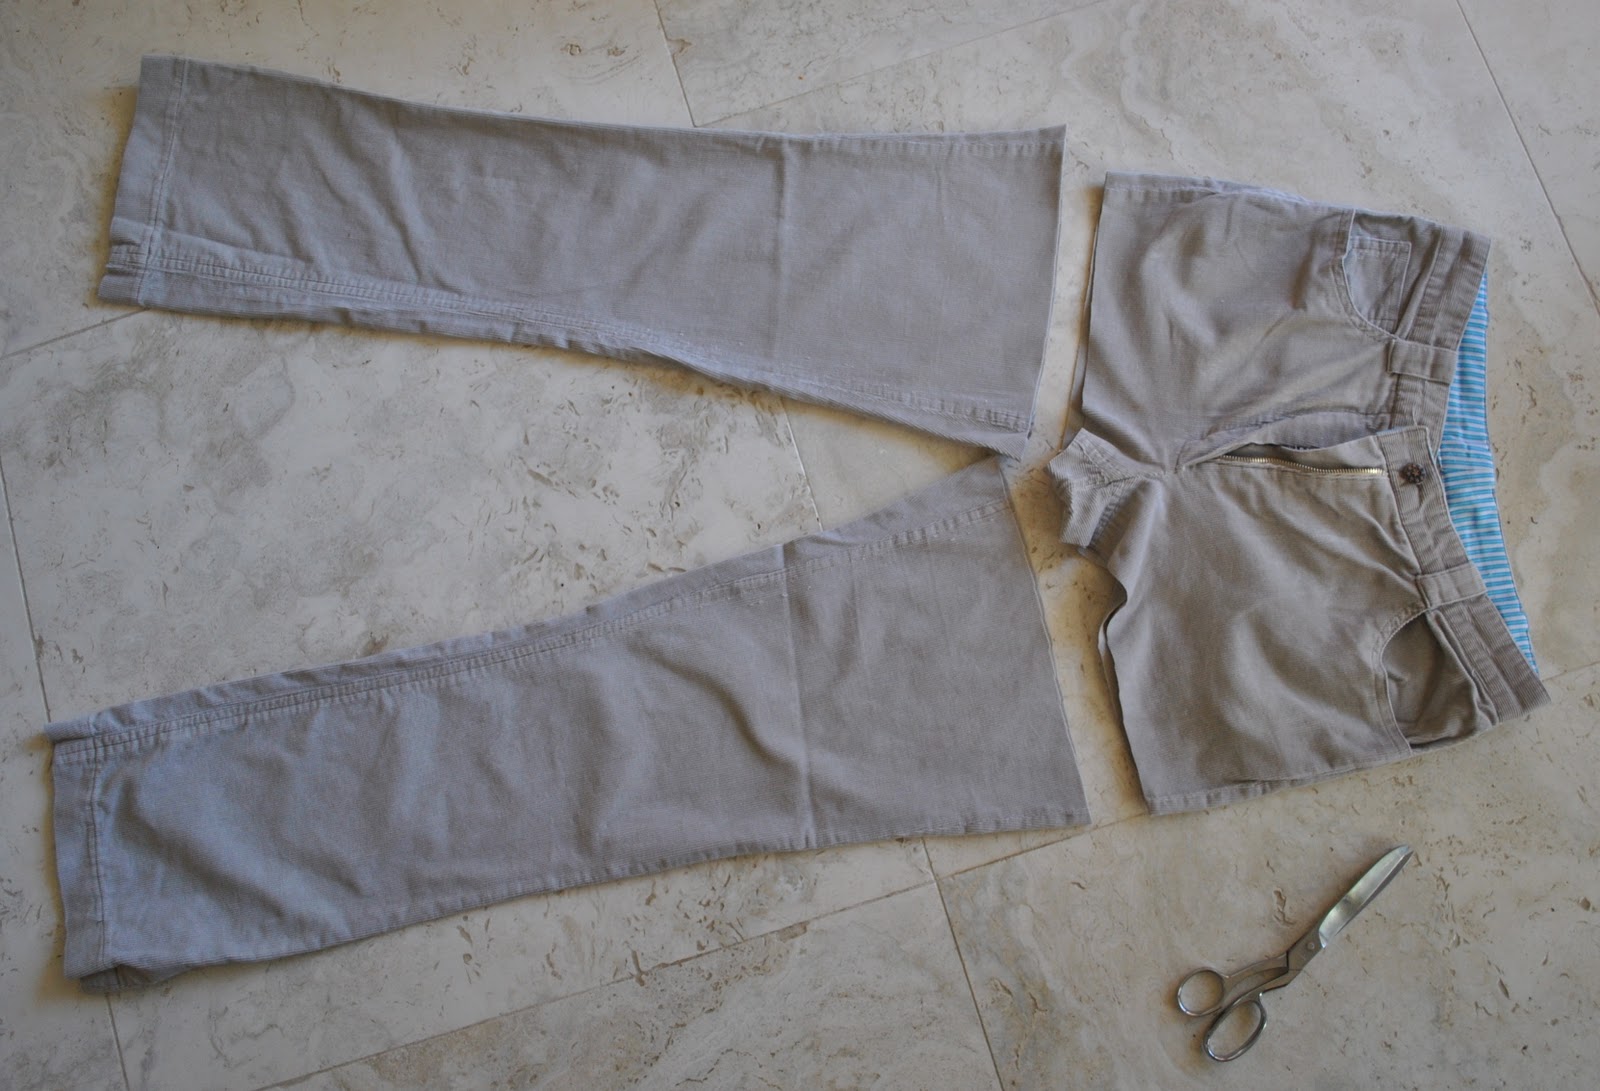
It was a pretty simple refashion…. firstly I cut off the top bit, and unpicked the curved part of that offending crotch seam.  

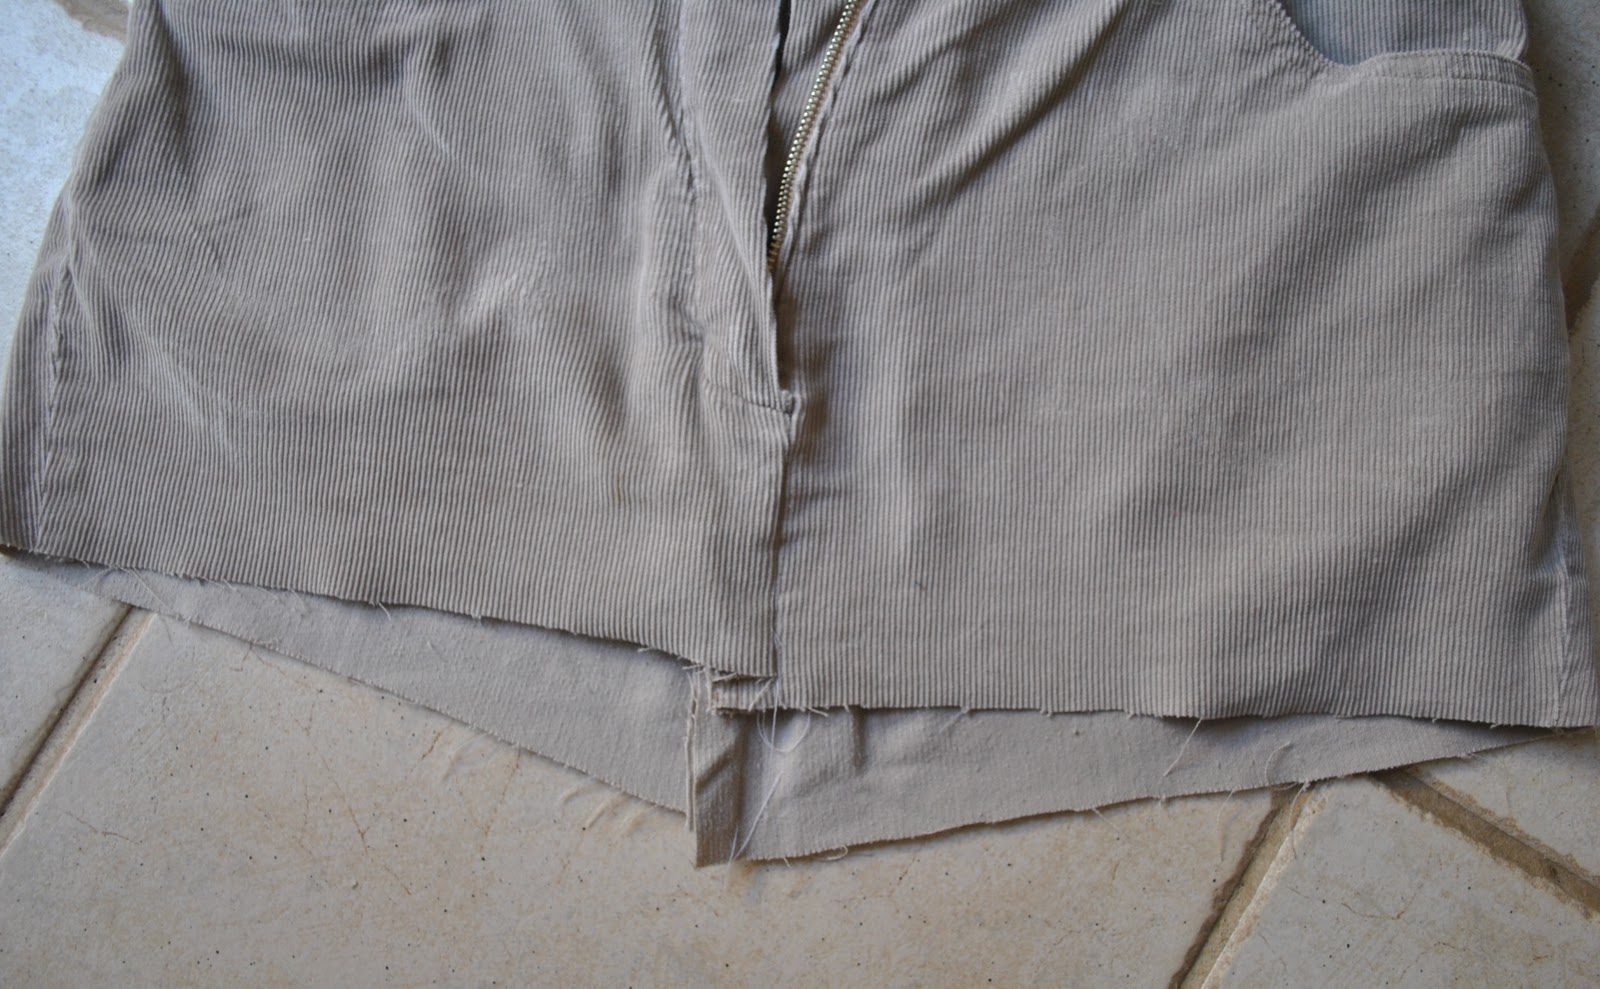
Pinned and resewed centre front and centre back respectively into a straight front and back seam… aaah; already, things are looking a lot more skirt-like here, right?   I also re-double-topstitched that centre back seam down again to match how it was originally…

Now for the legs bit…
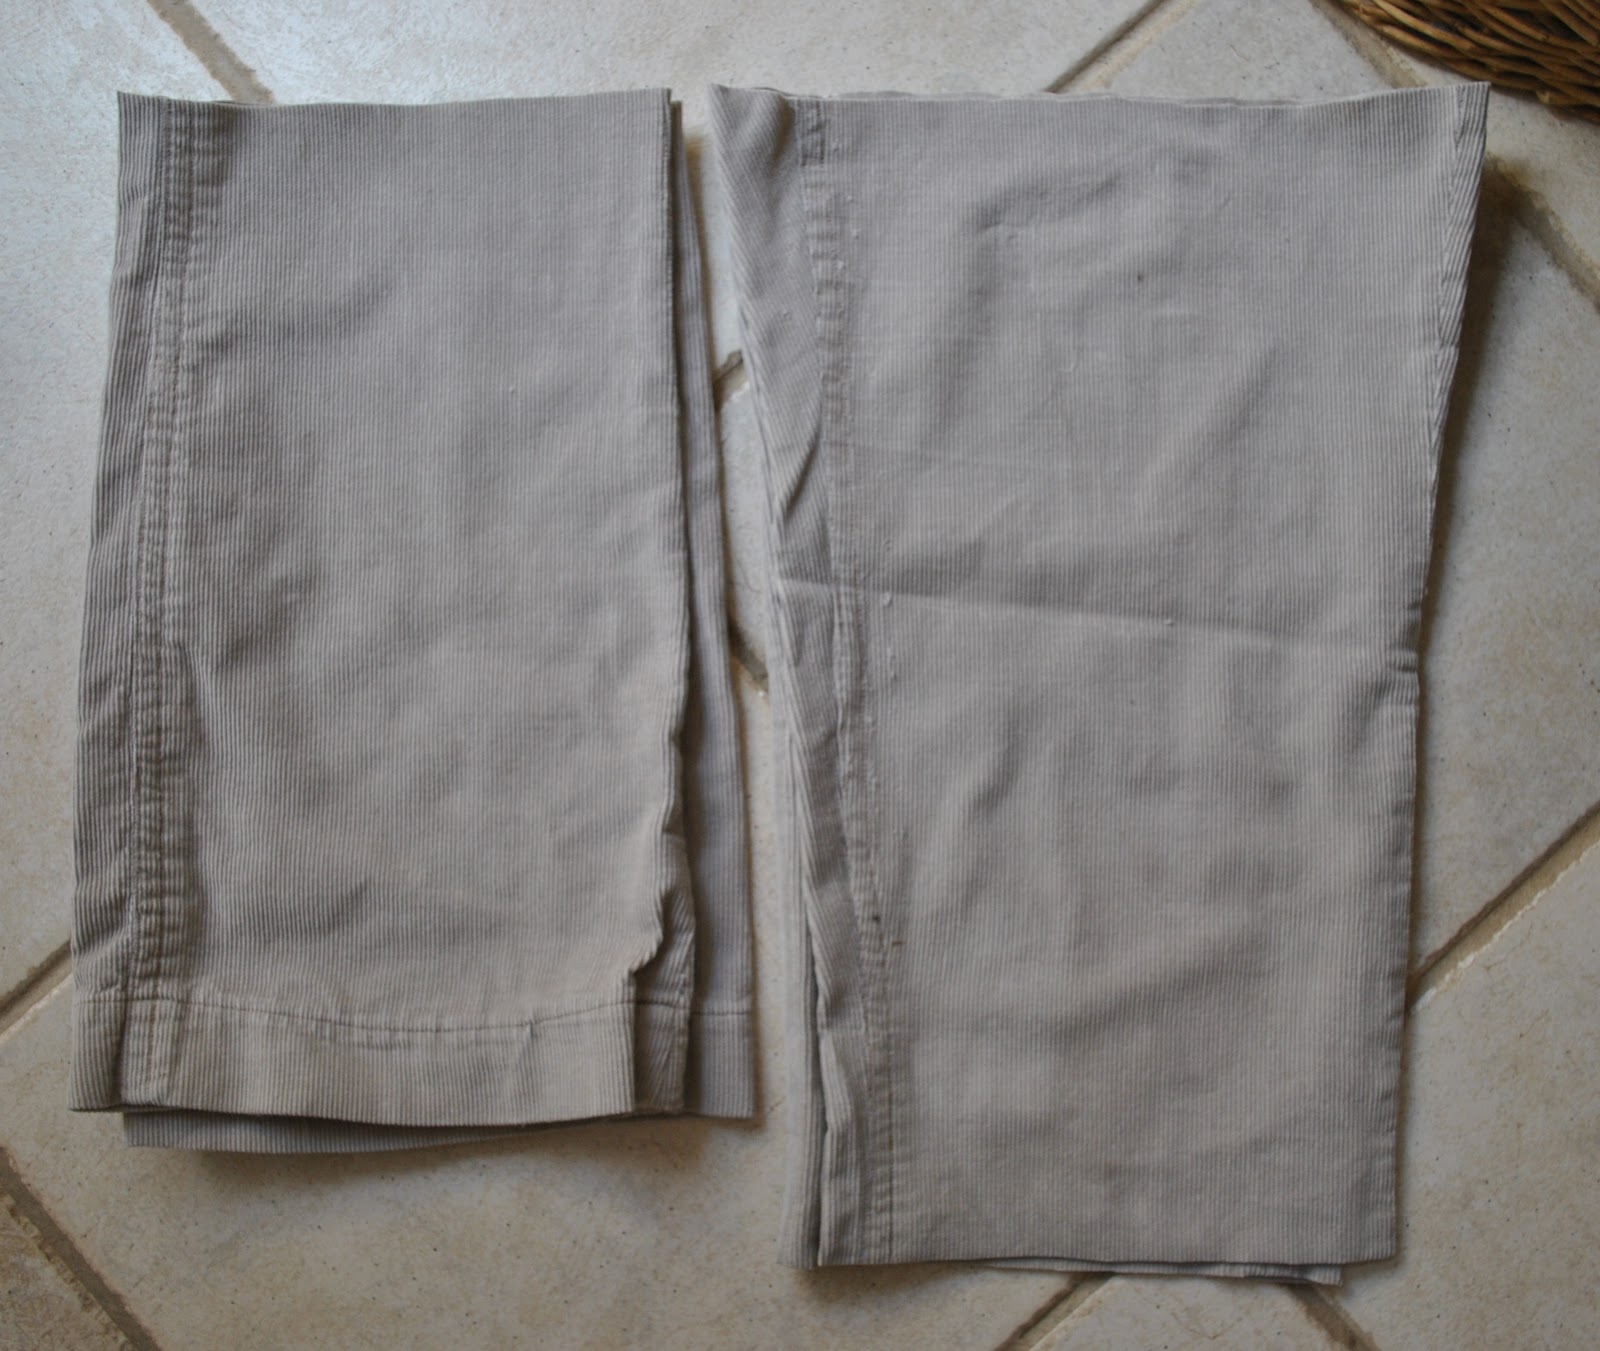
Measuring and allowing for an equal depth hem cut each two leg pieces in almost-half horizontally.  

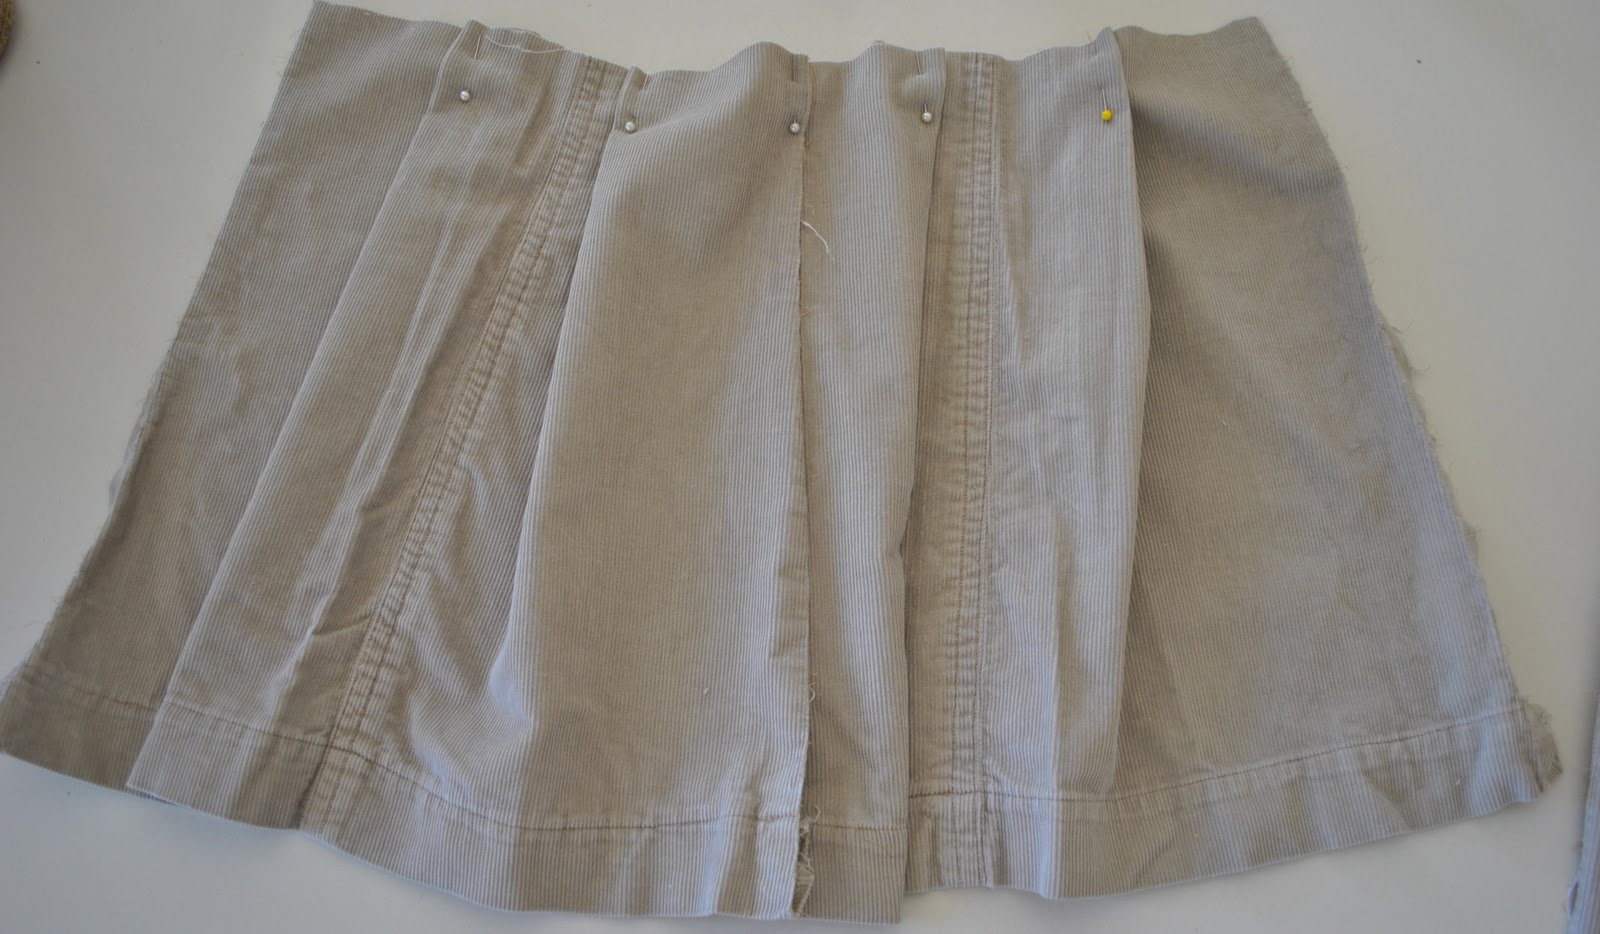
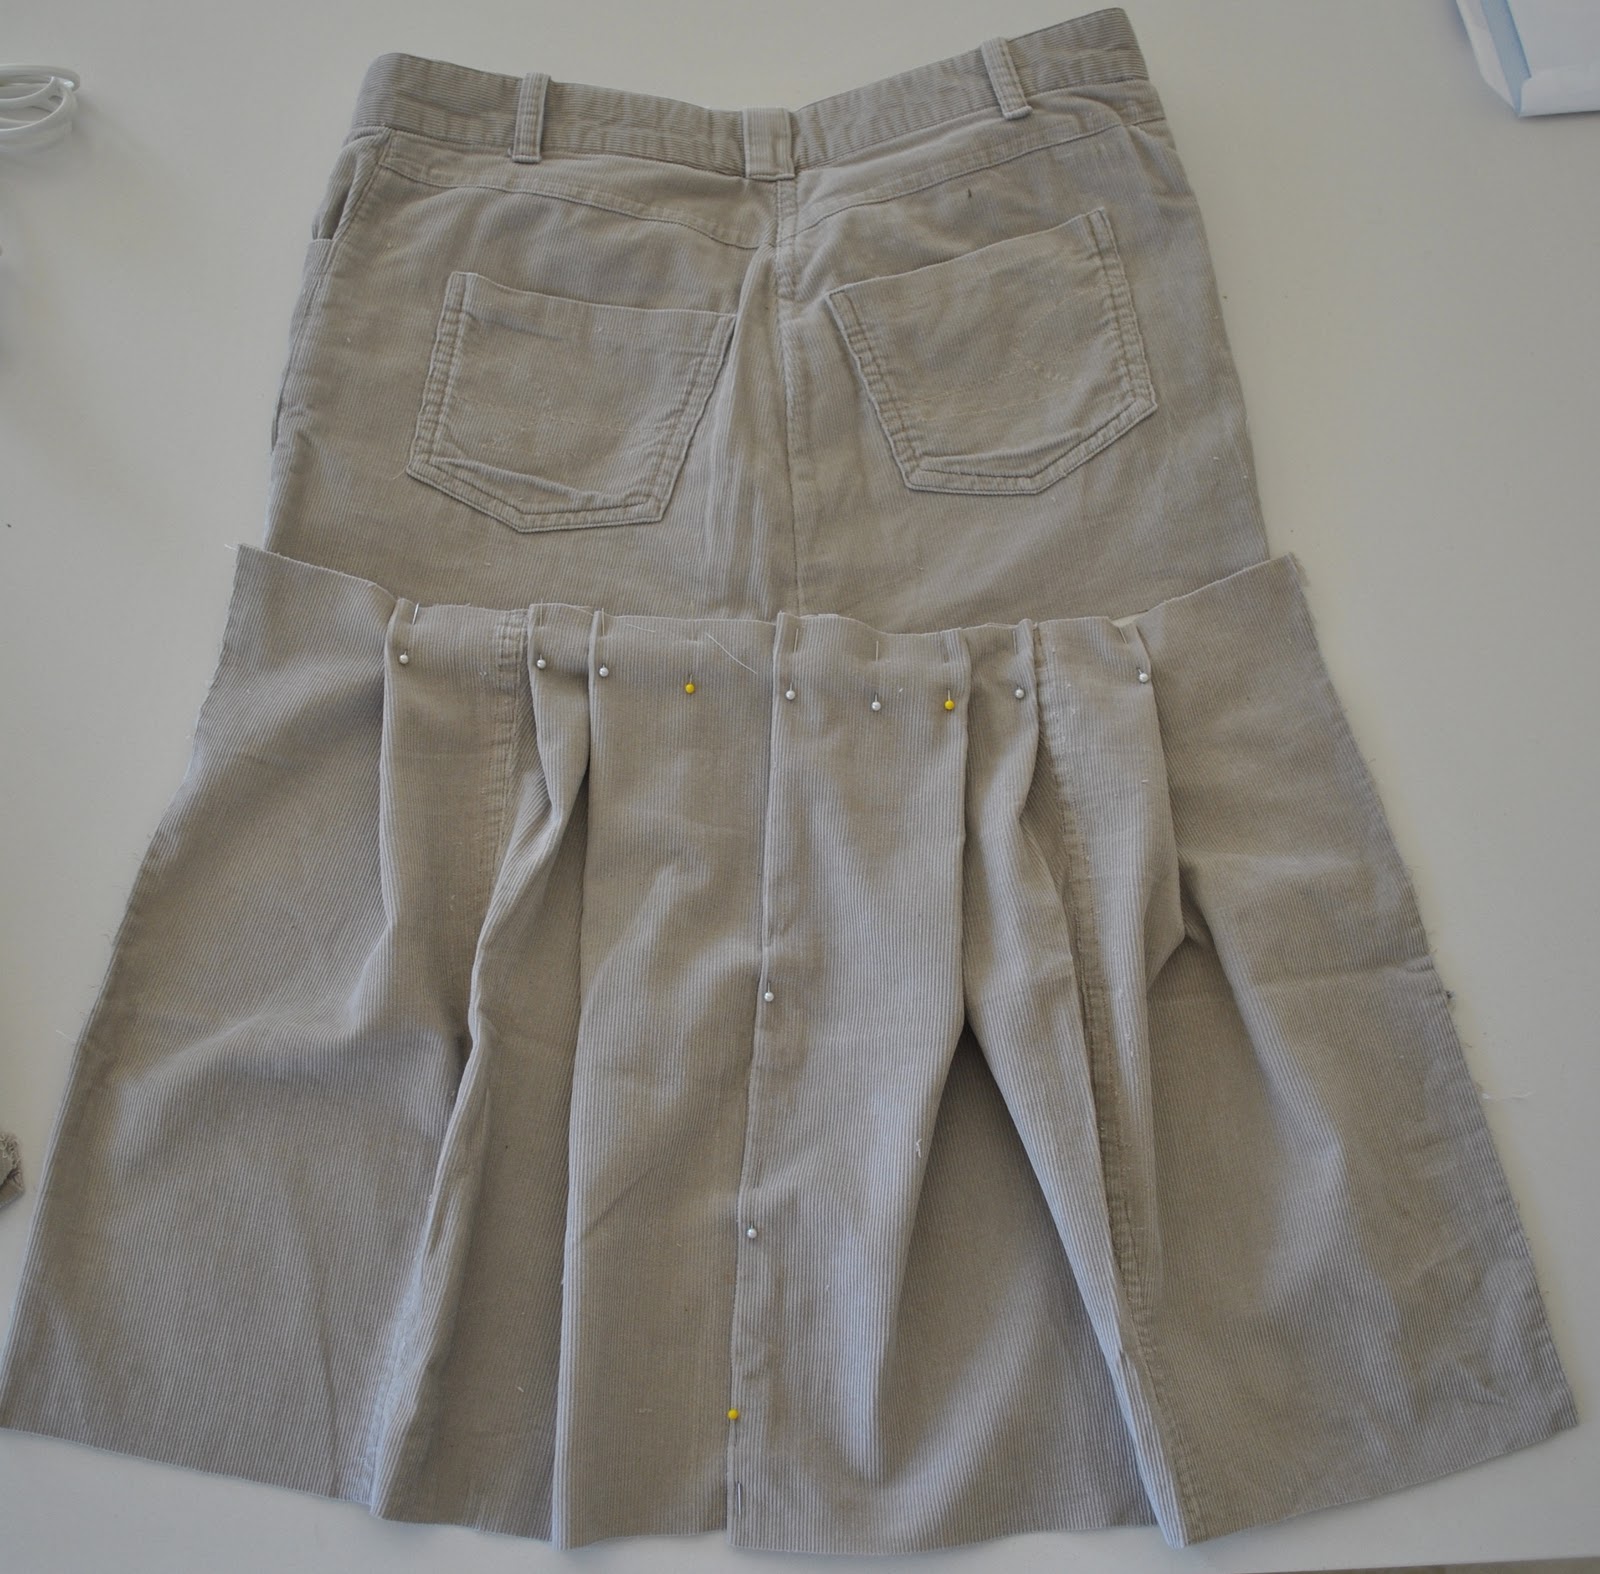
I wanted to keep the original hem down at the bottom of the legs intact, and so just unpicked a small area of hem near the outside leg seam… so I could unpick that long outside leg seam.  I chose the outside leg seam for unpicking like this since I had originally double-topstitched the inside leg seam down, and so the outer leg seam was a far easier option here…!!  And those double topstitched seams makes a nice random feature on the final skirt too.This gave me four largish pieces of leg, in pairs of two mirror images.  I used the lower leg pieces (with the hem mostly intact) for the skirt front and the upper leg pieces (which as yet have no hem) for the skirt back, and checking to make sure the nap of the corduroy is all the same way as each other and the top of the skirt, sewed up the side seams, and centre front and back seams.

The  next step was to arrange the excess fabric in the lower skirt piece into folds so that it fitted the upper skirt piece.  This was just a matter of measuring and arranging the folds to be as near as perfect mirror images of each other, front and back, and checking every now and again to see that it was fitting into the top section.  

Once the folds were all evenly in place I basted them all and then sewed the skirt top and skirt bottom together.  I top-stitched each fold down in place by about 5cm vertically, some single- and some of them double-topstitching.  Then hemmed the skirt back, to match the hem of the skirt front (which is already in place, and only required the centre front bit of the hem to be sewn into place…)

Voila!  A new skirt, and with very little waste!  The only waste fabric was from the crotch area, plus I ended up shaving a few inches off the top of the lower skirt section also to get a length that pleased me.  Note, I took length off the top of the skirt, not the bottom, since I was keeping that existing lower hem in place.  When re-fashioning a garment it is well worth incorporating those existing hems into your new garment somehow, since years of washing and wearing creates a permanent and very visible line of wear into the fabric, and a fold that will never ever iron out … thus removing length from that top area (that will just be disappearing into the joining seam anyway) is definitely the way to go here.

Better, yes?
pinterestmail

Burnt-orange skirt; 6 different ways

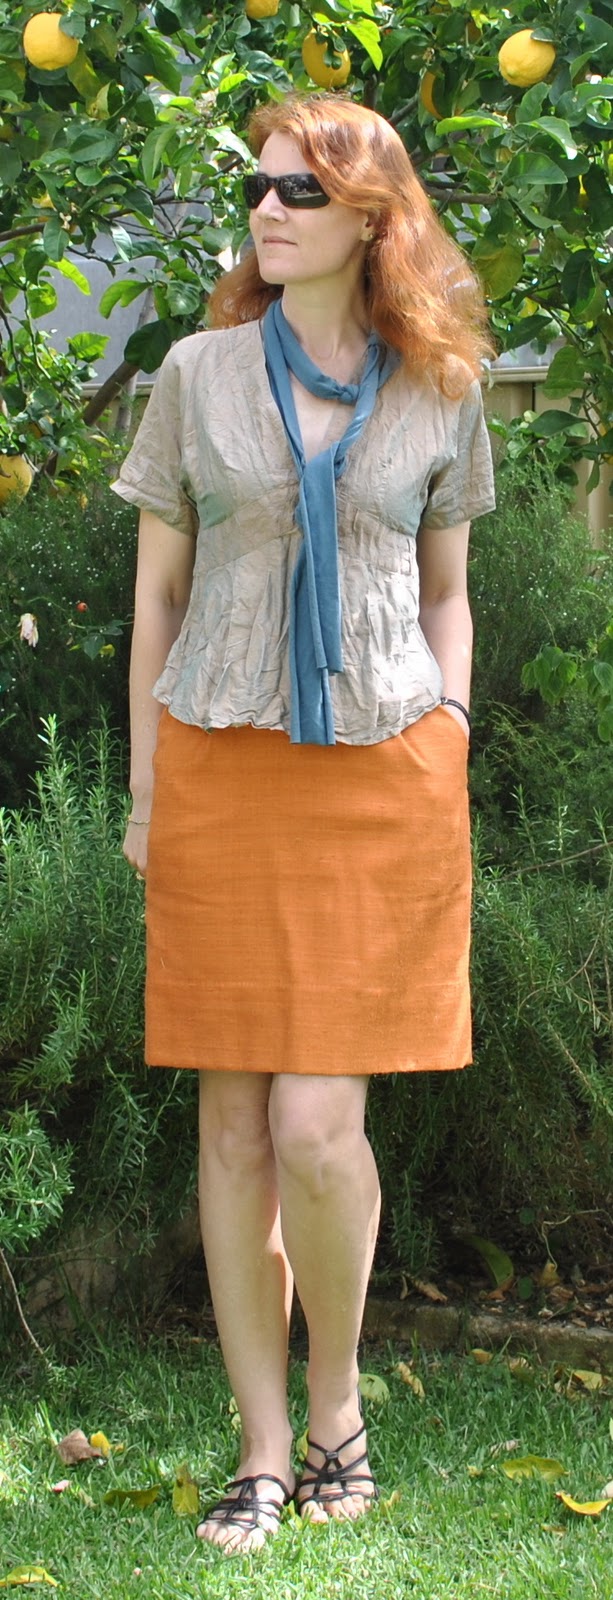
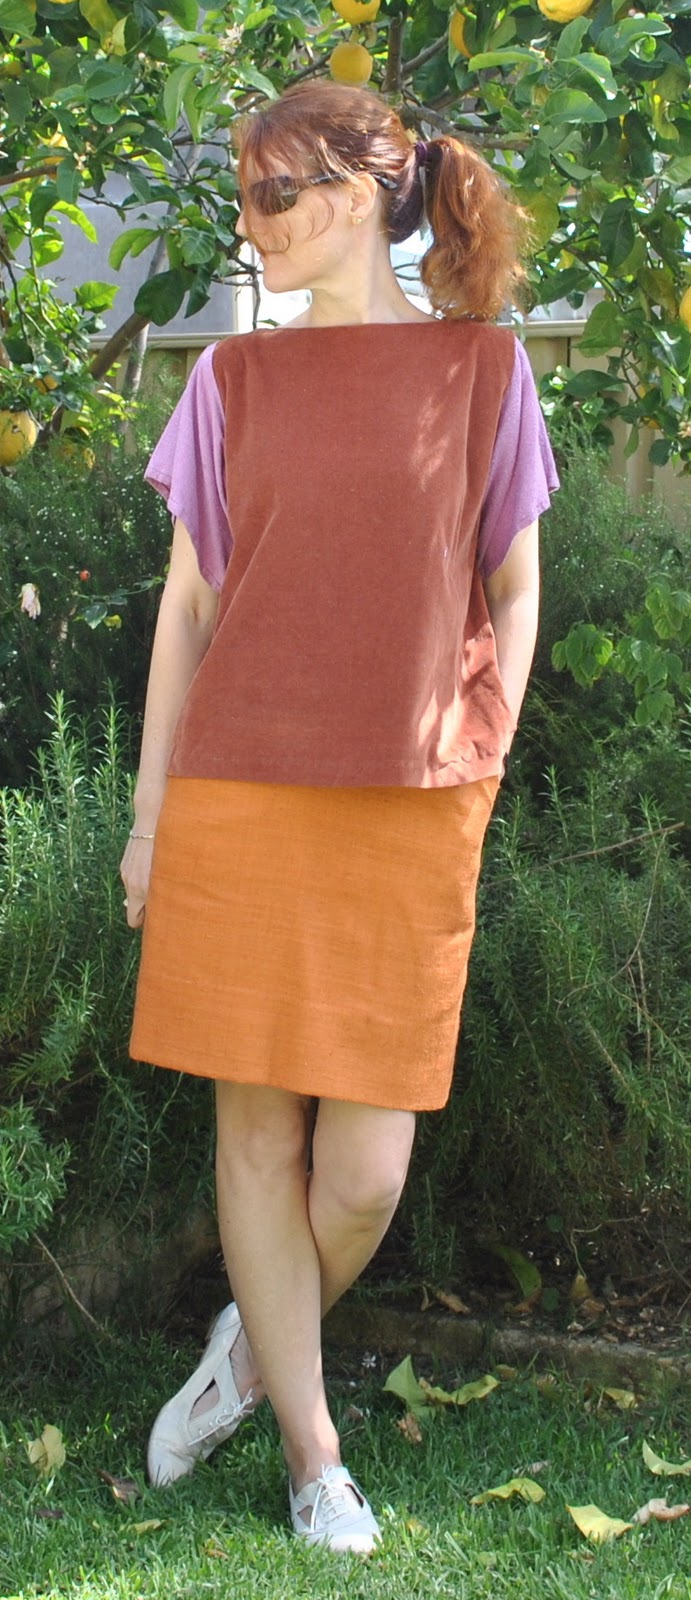
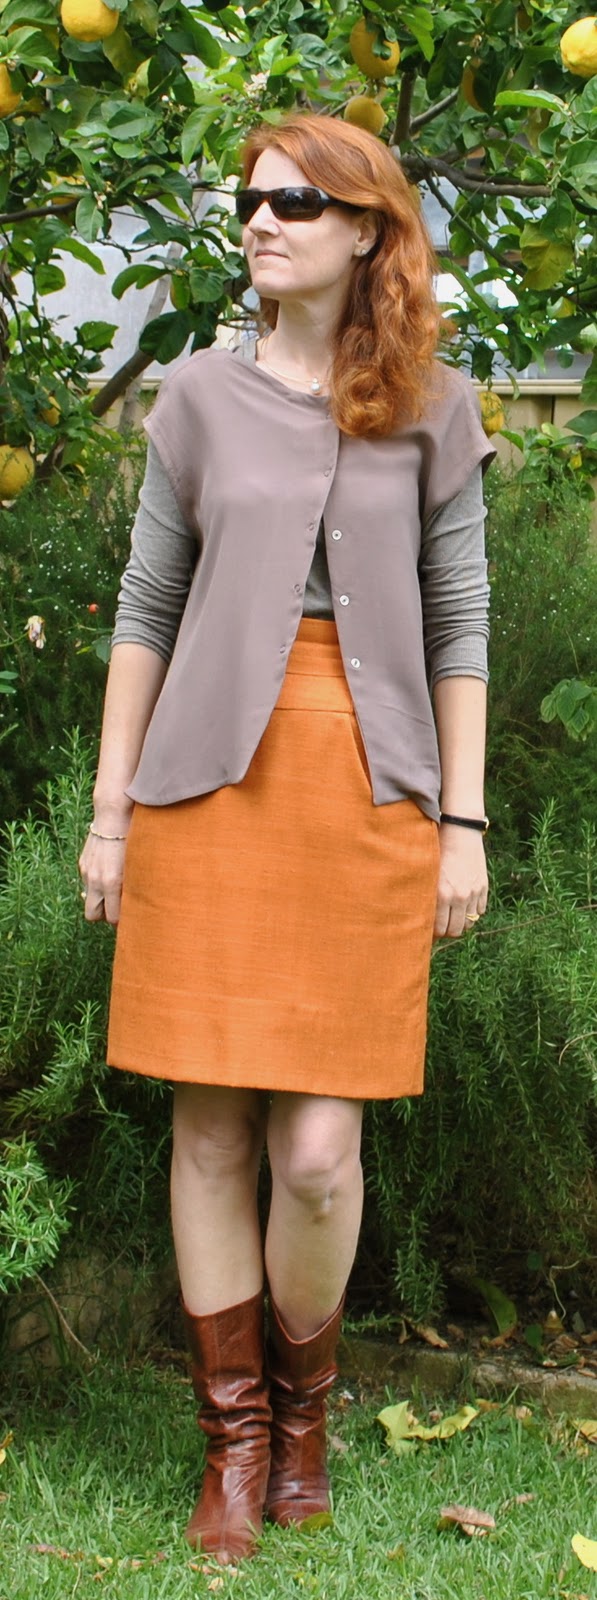
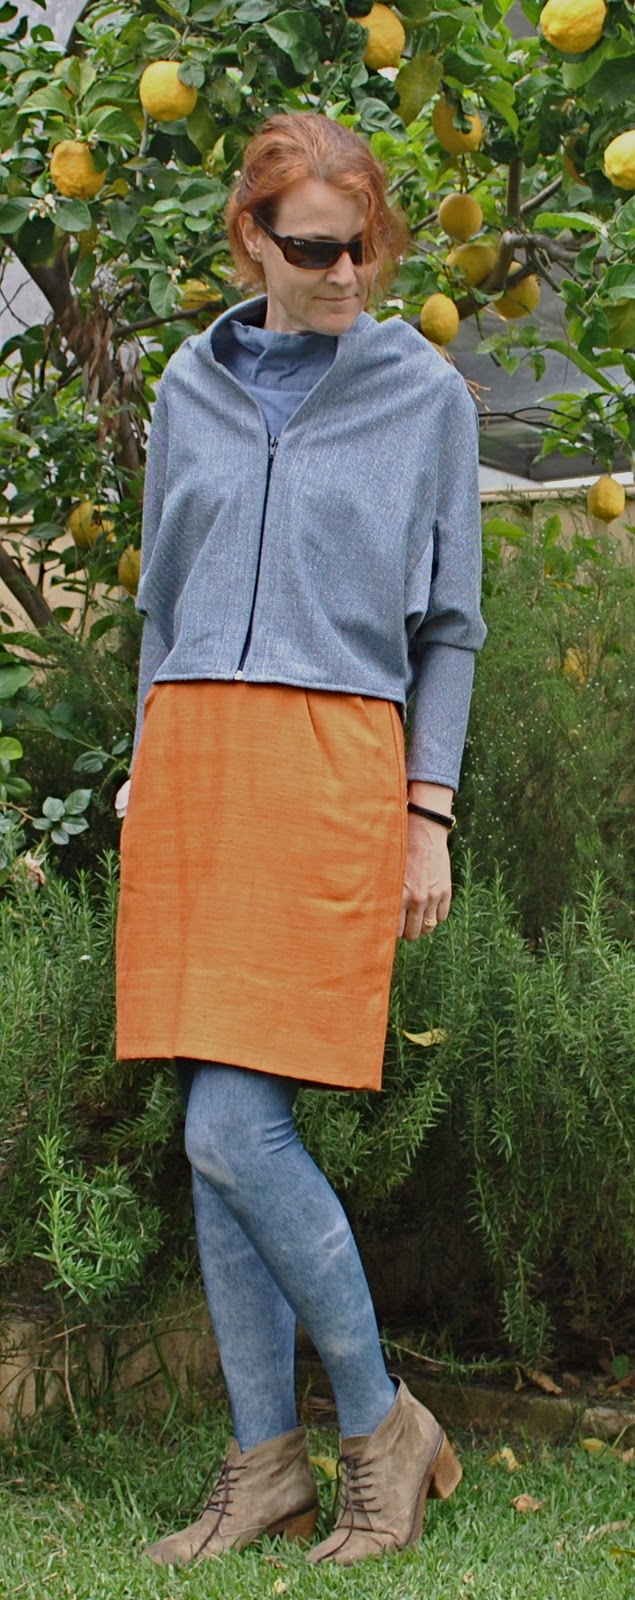
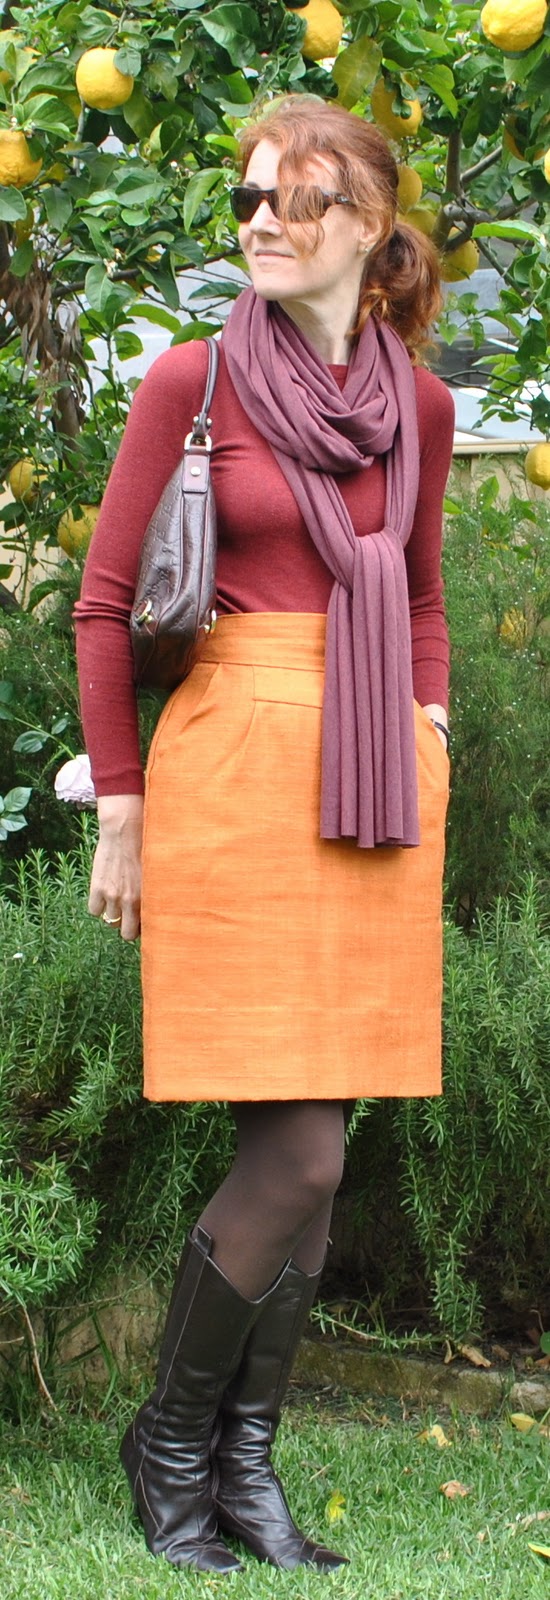
I’ve been playing with my recently finished burnt-orange skirt, styling it up for a variety of seasons and the different degrees of formality that my lifestyle requires.  When I bought this silk hessian I knew its autumnal shades would go with a lot in my wardrobe.  But I had such fun putting together outfits based on this skirt…  OK, sure I always have a lot of fun playing in my wardrobe, but this time was an easy breezy spoilt-for-choice kind of a fun; because this skirt really goes with just about everything I own!  I could have had twice as many outfits as I have pictured here… either a sign that I have far too many clothes (a distinct possibility), or that I am getting a lot better at colour matching my fabric purchases to each other, and to myself and my own colouring.  The latter can only be a good thing; the former… hmmm, well we won’t go there…
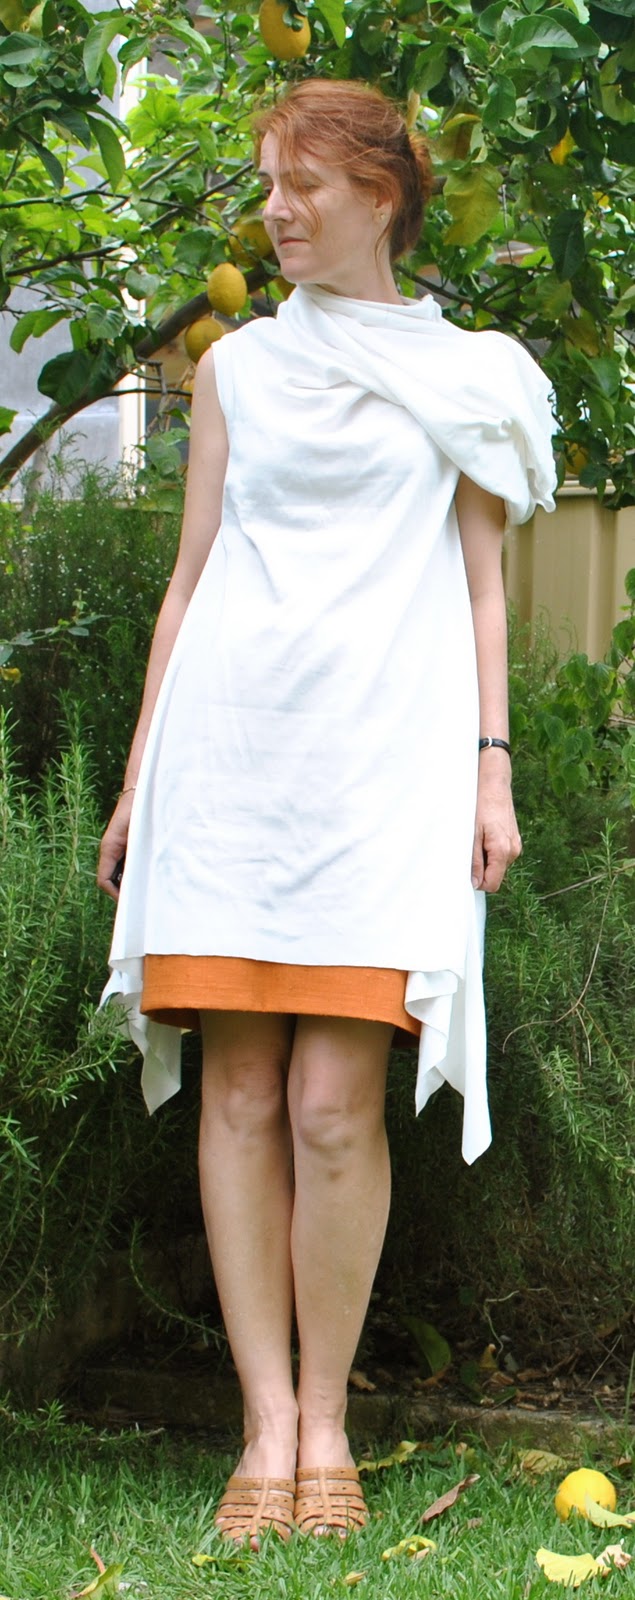
I made this little skirt during the tail end of winter and styled it then with charcoal grey and black here, and I thought the colour of the skirt added a nicely rich yet still citrus-y zing to those sombre winter-y shades.  Naturally the orange will also look fresh and tangy with a pure white top during the warmer months, so I avoided that obvious choice here, with just one exception which I’m guessing will be a much harder item to mix-and-match in my wardrobe…
namely this avant garde white dress, at left.  It’s quite short on its own so really needs at least a little skirt underneath.  To be  honest, I’m already re-thinking this white dress (it’s pretty ….er, voluminous) and have a few new plans… watch this space.  But in the meantime, wouldn’t this be a good choice for a half-way glamorous, semi-formal summer do?  Just imagine the champagne glass in my hand… yes?
At right; for a more casual kind of a summer’s day, well my top here is of shot silk, with an orange warp and a blue weft, so its resultant drab pink colour is actually a mixture of the other two colours in the skirt and scarf of this outfit… how’s that for painterly colour analysis of an outfit?  Sorta impressive…huh?

For days of middling temperature: 
At left; Casual required?  I would wear this outfit, and thus serendipitously be sorta colour-blocked.  The current fashion buzz-word.
At right; going somewhere nice?  Mixing the burnt orange with milk chocolate brown, khaki and rich brown leather; and getting into those toasty autumnal sorts of shades here.

Going winter-y:
At left; I wore these denim-y blue garments with my rusty red skirt during SSS11, and I really like them with the burnt orange skirt too.  Will definitely wear this on a cold and casual day next year… hopefully these tights will hold out that long, fingers crossed  :S
And lastly at right; for a semi-smart winter’s occasion, the burnt orange colour works beautifully with the rich jewel shades of ruby red, purple-y red and with the chocolate brown in my tights, boots and bag…  well rugged up, and these colours are psychologically half warming me up already!

What am I wearing today? well I met with a friend for her birthday lunch, and I wore the “brown” outfit with my slouchy boots.  It was perfect for visiting a cafe, and for these pleasantly warm but not hot days that we are getting now.  
Which outfit here do you like the best?

pinterestmail

Do you like big pockets…?

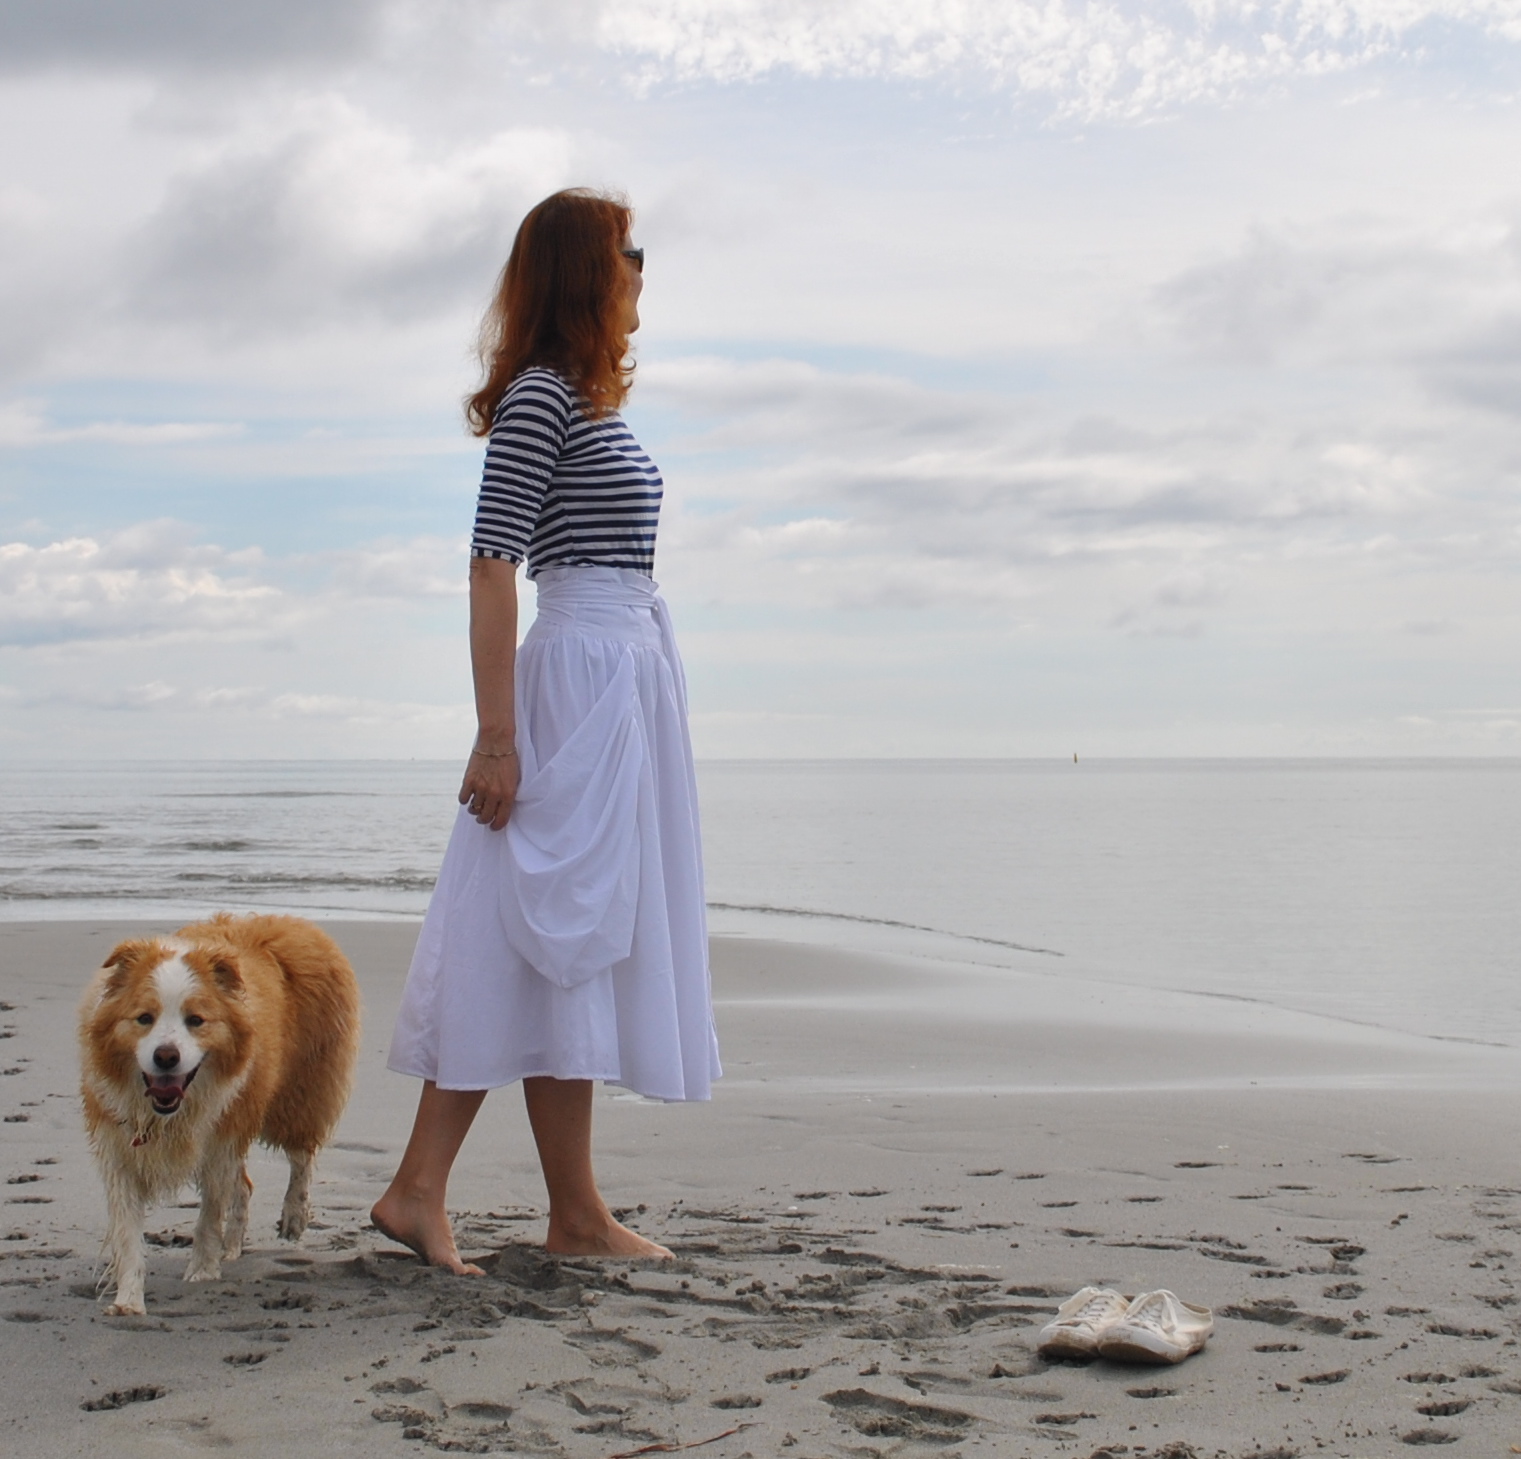
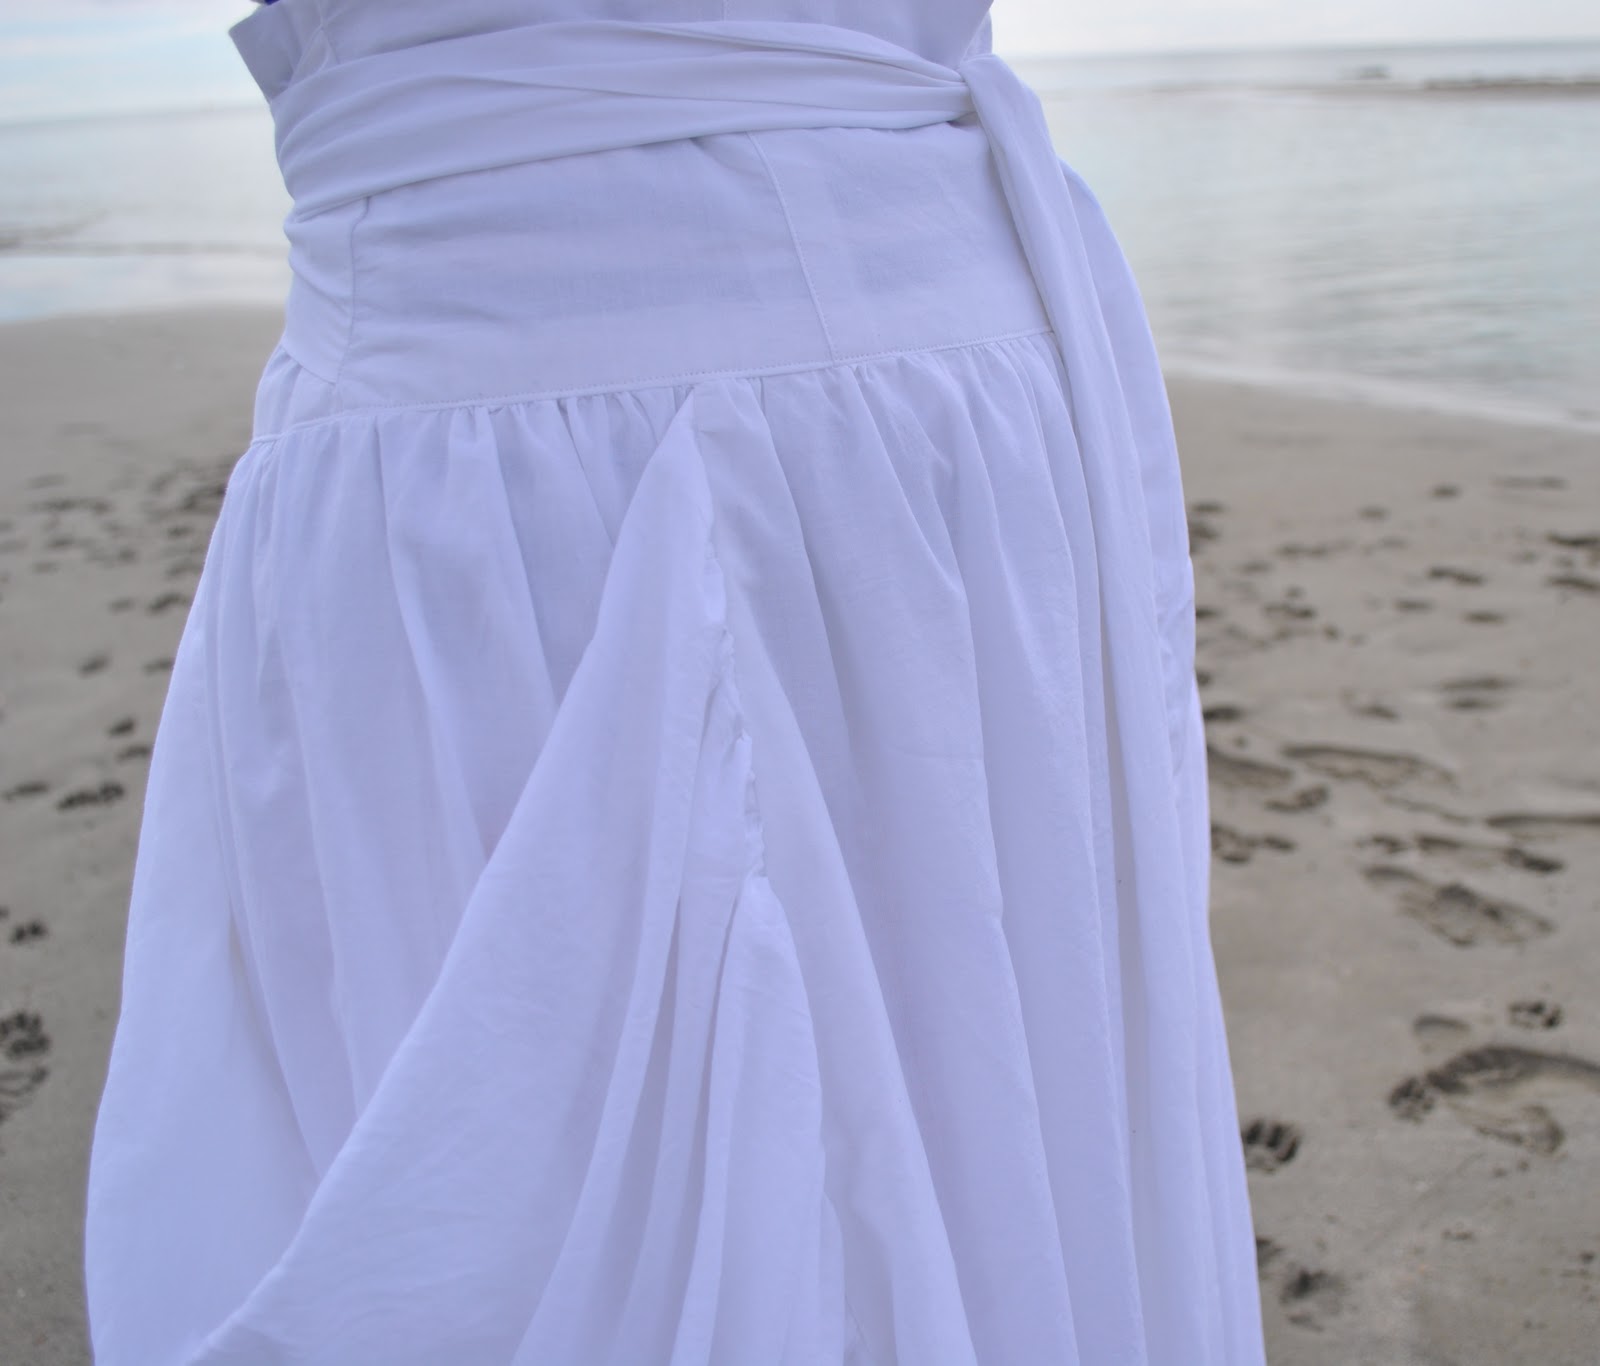
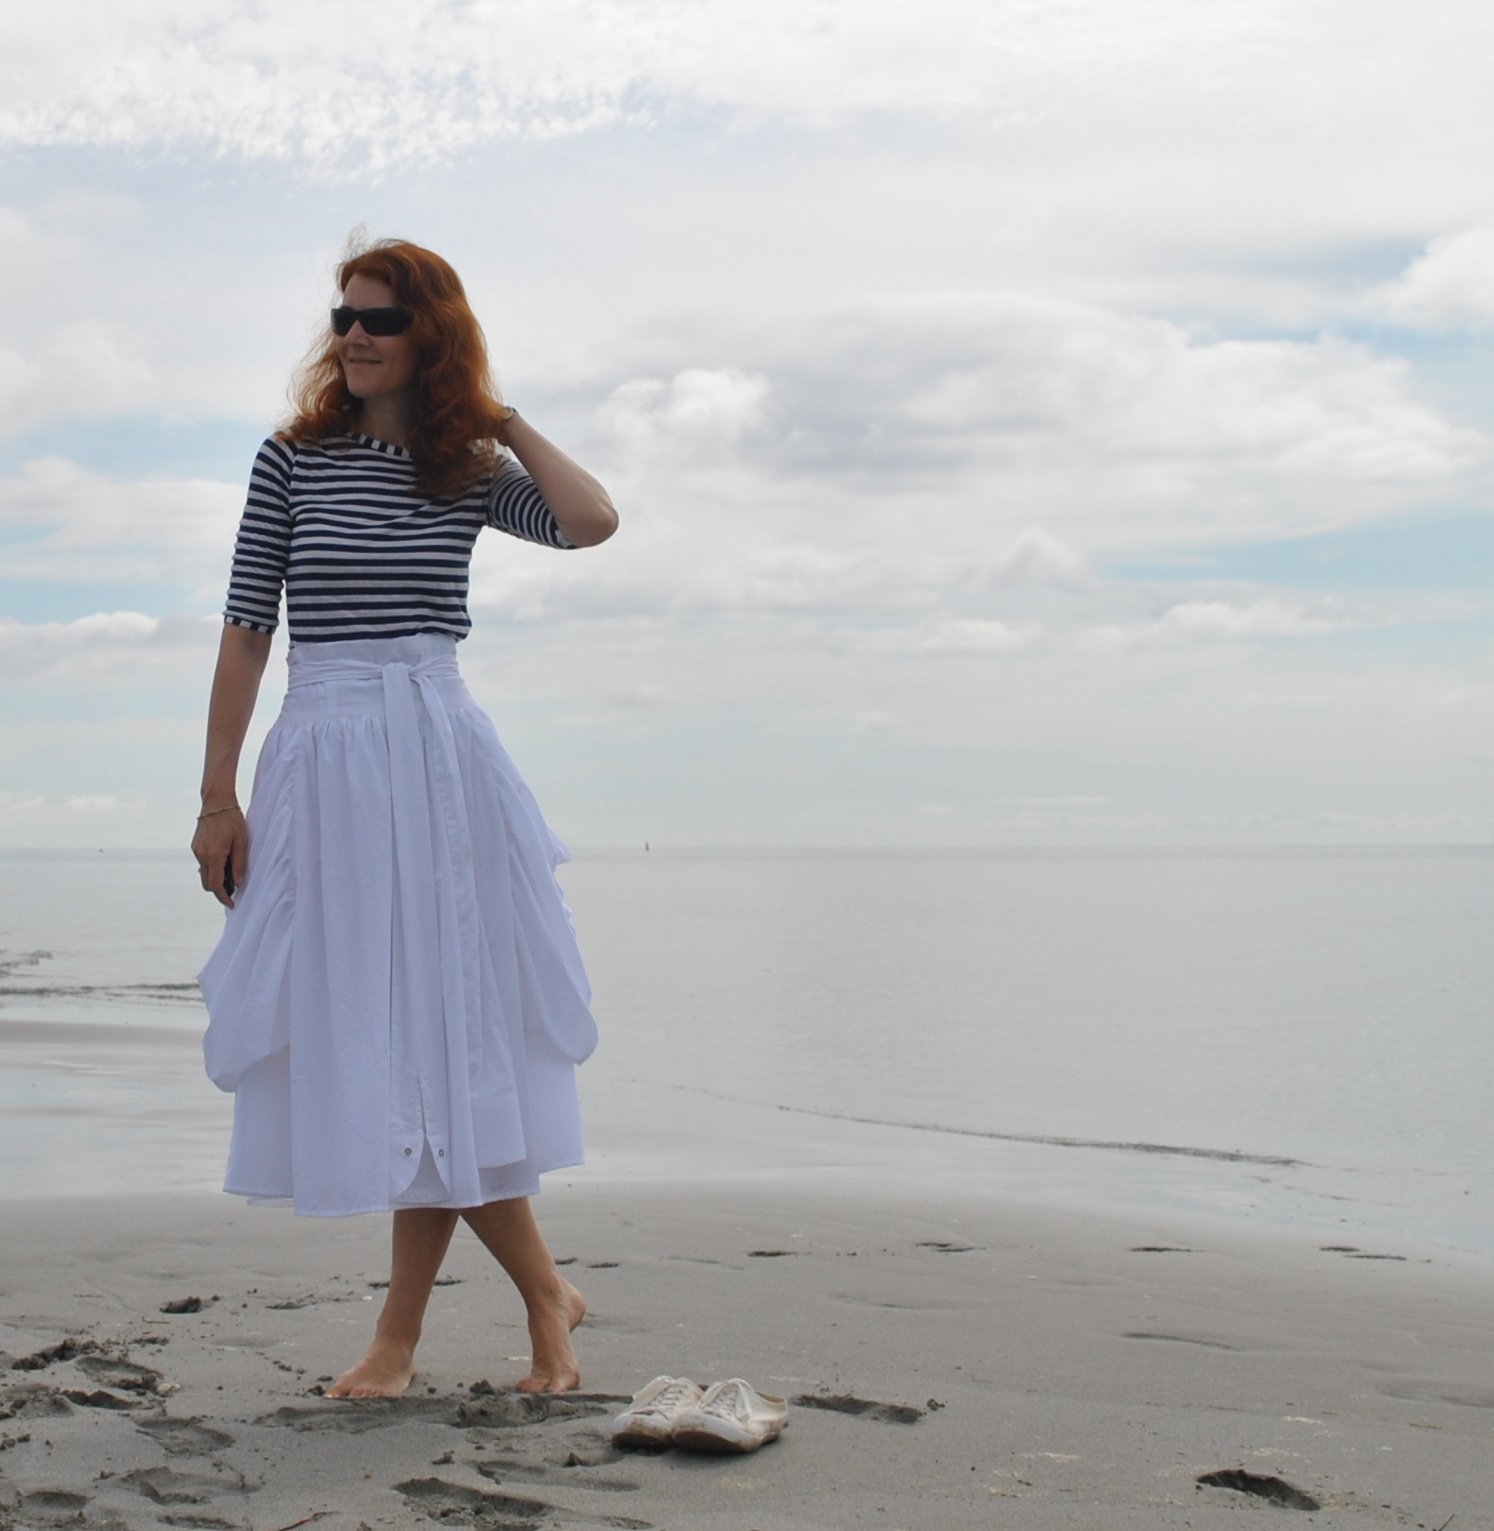
… if so then this is the skirt for you!  I have never seen pockets to rival these, ever.  I knew (intellectually) the pockets were big by the picture on the pattern envelope, but the (realistic) first sight of the pocket pattern piece was still a bit of a shock.  Seriously about as big as the skirt pieces, and the skirt pieces are big.  Lol!!
But of course, the pockets are not mere pockets at all, but a clever design feature to enhance the pouffiness, the floatiness, and the gathered, over-the-top loveliness that is the hallmark of this beautifully feminine skirt pattern.  Side note; my husband commented spontaneously that he loved me in big floaty skirts like this; double WIN! since I love it too.
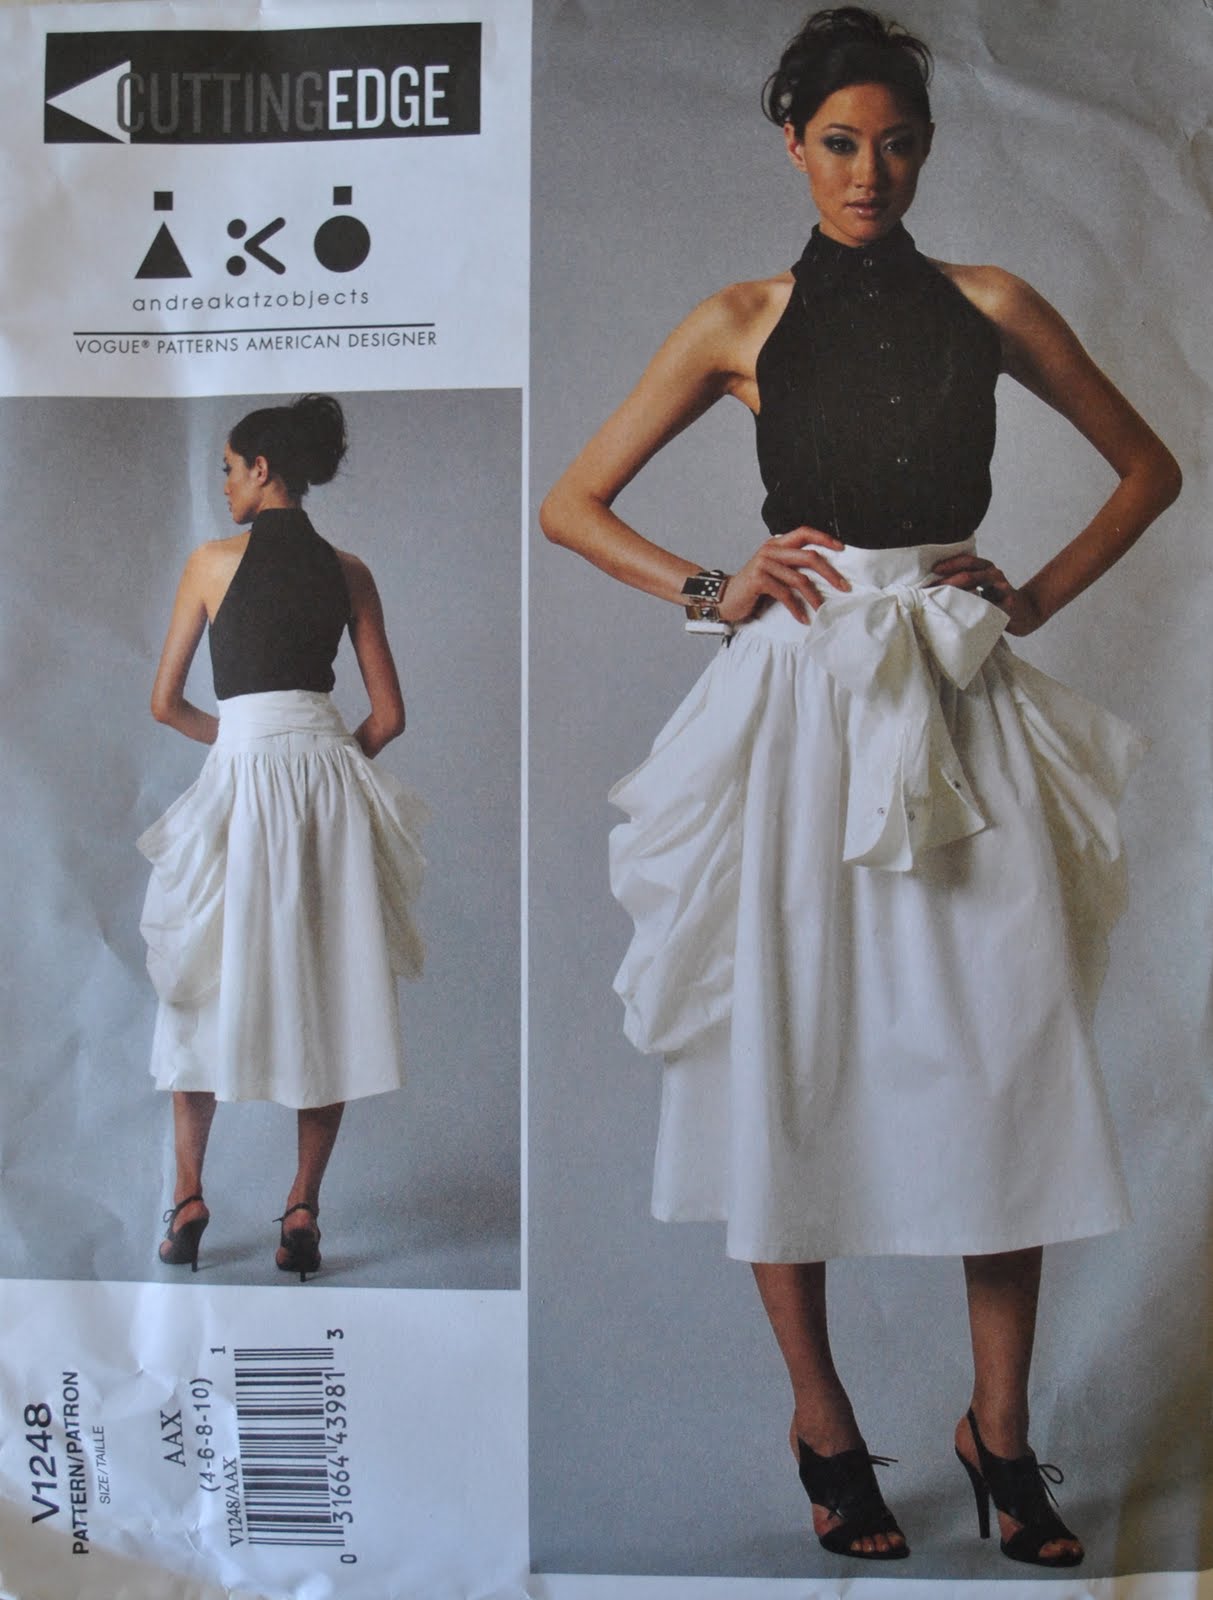
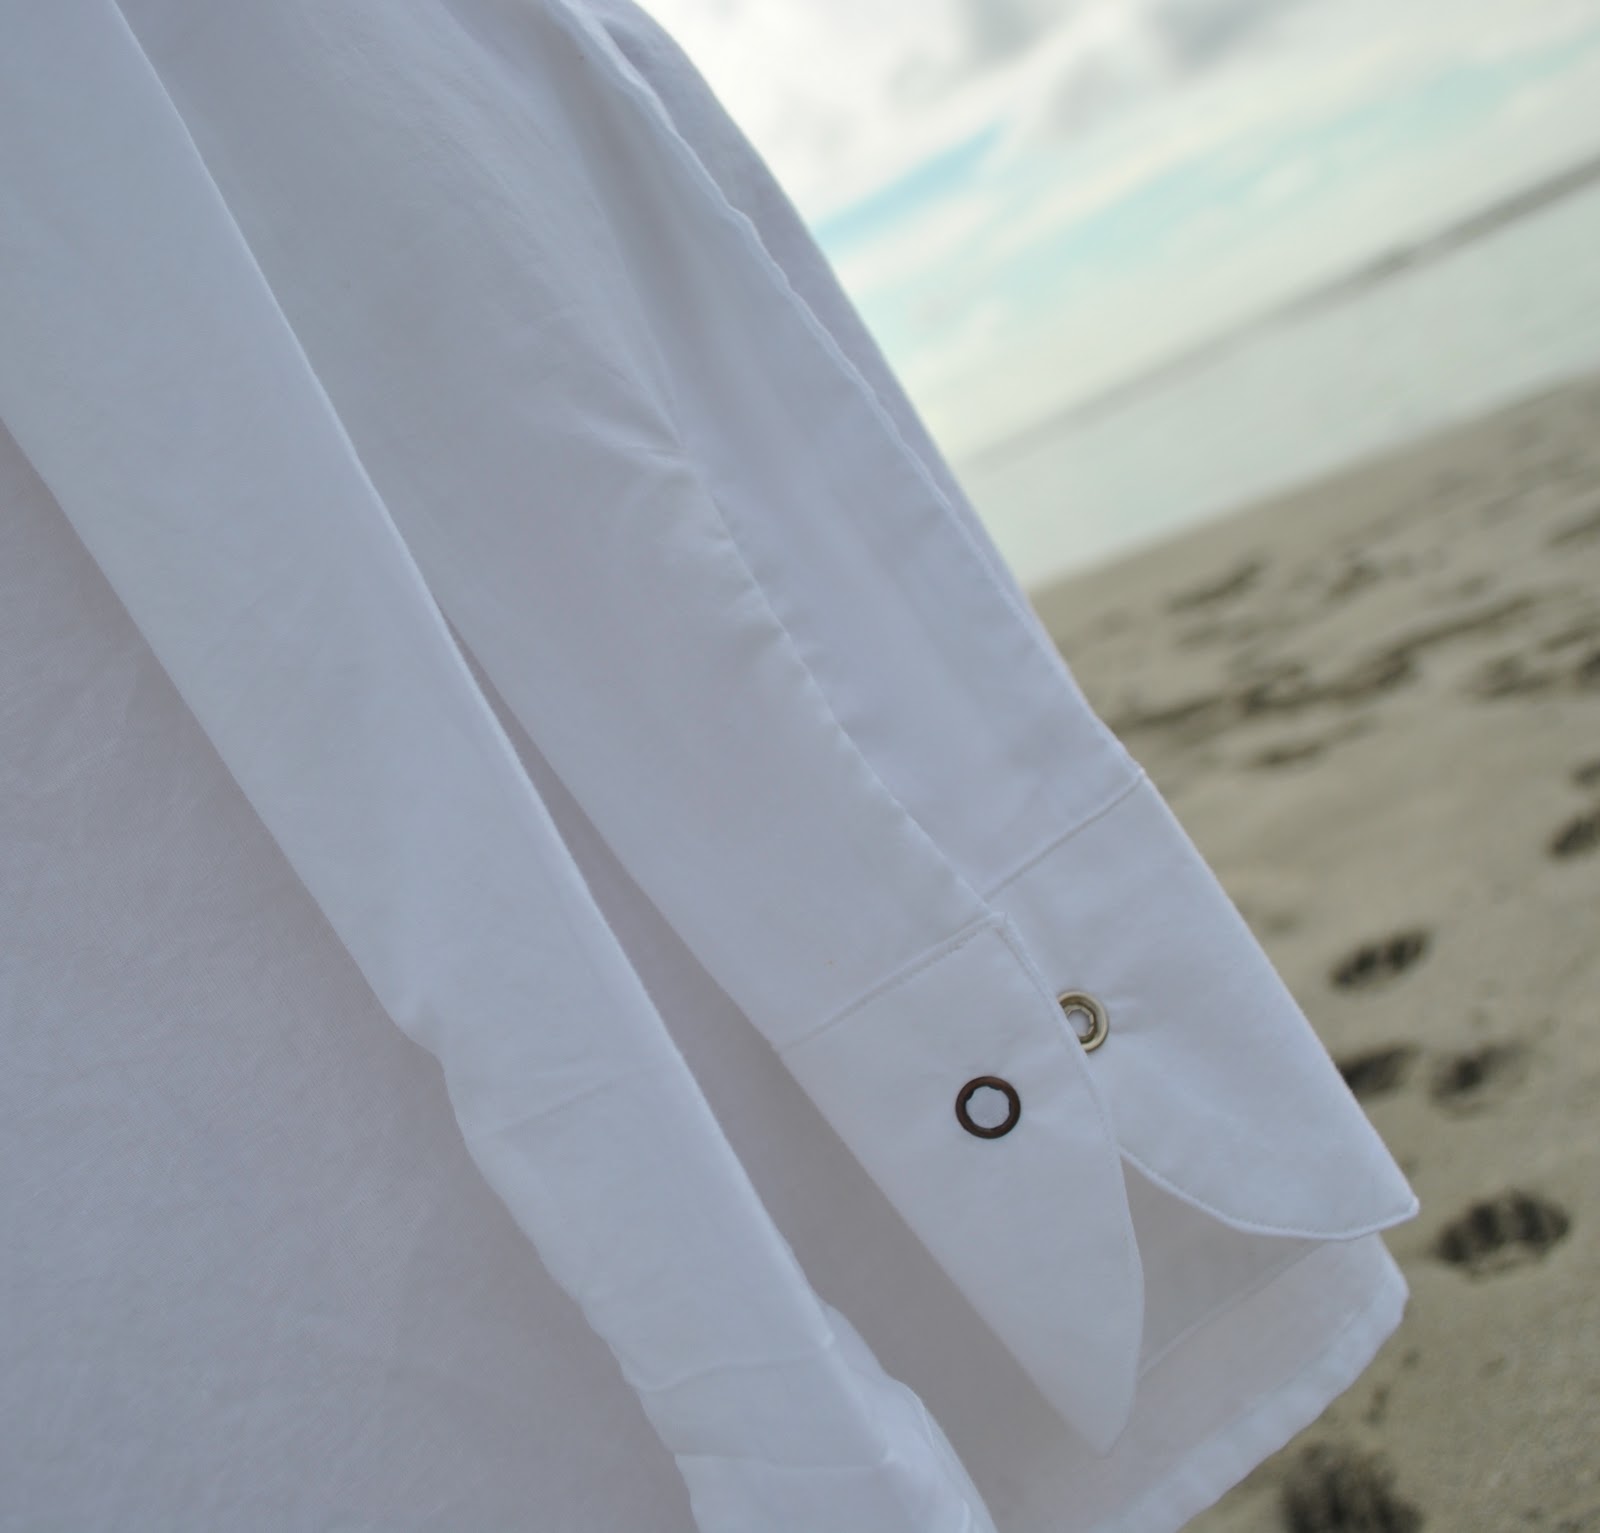
Funny little anecdote about the pattern… I first saw this on shams’s blog and knew I just had to have it.  Those shirt sleeve cuffs on the ends of the sashes; so adorable!!  (salivating) must have… 
I immediately visited Fabulous Fabrics and asked for the pattern… no, they didn’t have it.  I was actually hoping against hope that it was miraculously hidden in the back of the pattern drawer since I had already looked through the Vogue catalogue and noticed it wasn’t there (eek!)  I assumed its time had come and gone.  I then started trawling ebay, looking for somebody getting rid of their old copy… no dice, although I did fall victim to must-have-itis for a maxi-dress pattern… the product of which has also recently exited my sewing room and been welcomed into the wardrobe… But I digress…   
So, in a masterstroke of going to every extreme to get that pattern by hook or by crook, I did some more detective work and eventually discovered and joined BMV where I was amazed to see I could get it for a price that was an incredibly delightful surprise; $3.99.  This is about a fifth of the usual price of Vogue patterns in Australia… no, I am not kidding nor exaggerating!!)  The cheap price just reinforced my belief that it must be an old pattern and I was lucky to have found it…  My pattern arrived and I was supremely happy.  Then, get this, the last time I was in Fabulous Fabrics (er, yesterday, hehe… yup I am a regular, on a first name basis with staff) I had a quick flick through the new spring Vogue catalogue, and you guessed it, there was the pattern.  It is actually new season, like this season!  To us southern hemispheries, that is…  thus all finally became clear to this very behind-the-times seamstress why I hadn’t been able to get it before… doh!
I used a very light cotton voile, which I sometimes use as a lining fabric, and the same fabric for both the skirt main and for the lining.  I completely love the long long sashes with shirt cuffs on the end, a fun and quirky touch that drew me to the pattern in the first place.  Because of this little feature, to my mind the skirt just had to made of white cotton.  Nothing else would do…  Those shirt cuffs just wouldn’t have the same witty flair unless the style directly referenced the Classic White Shirt.  Plus I just adore big white floaty skirts for summer.
And those pockets…? well, they are graaaand, in every sense of the word.  I don’t think I could actually really put anything in those pockets, really.  Stuff could get lost forever in there…
I have some more fabric to make up the little top as well, but for now, below is my review of the skirt pattern…

Details:
Skirt; Vogue 1248, white cotton voile
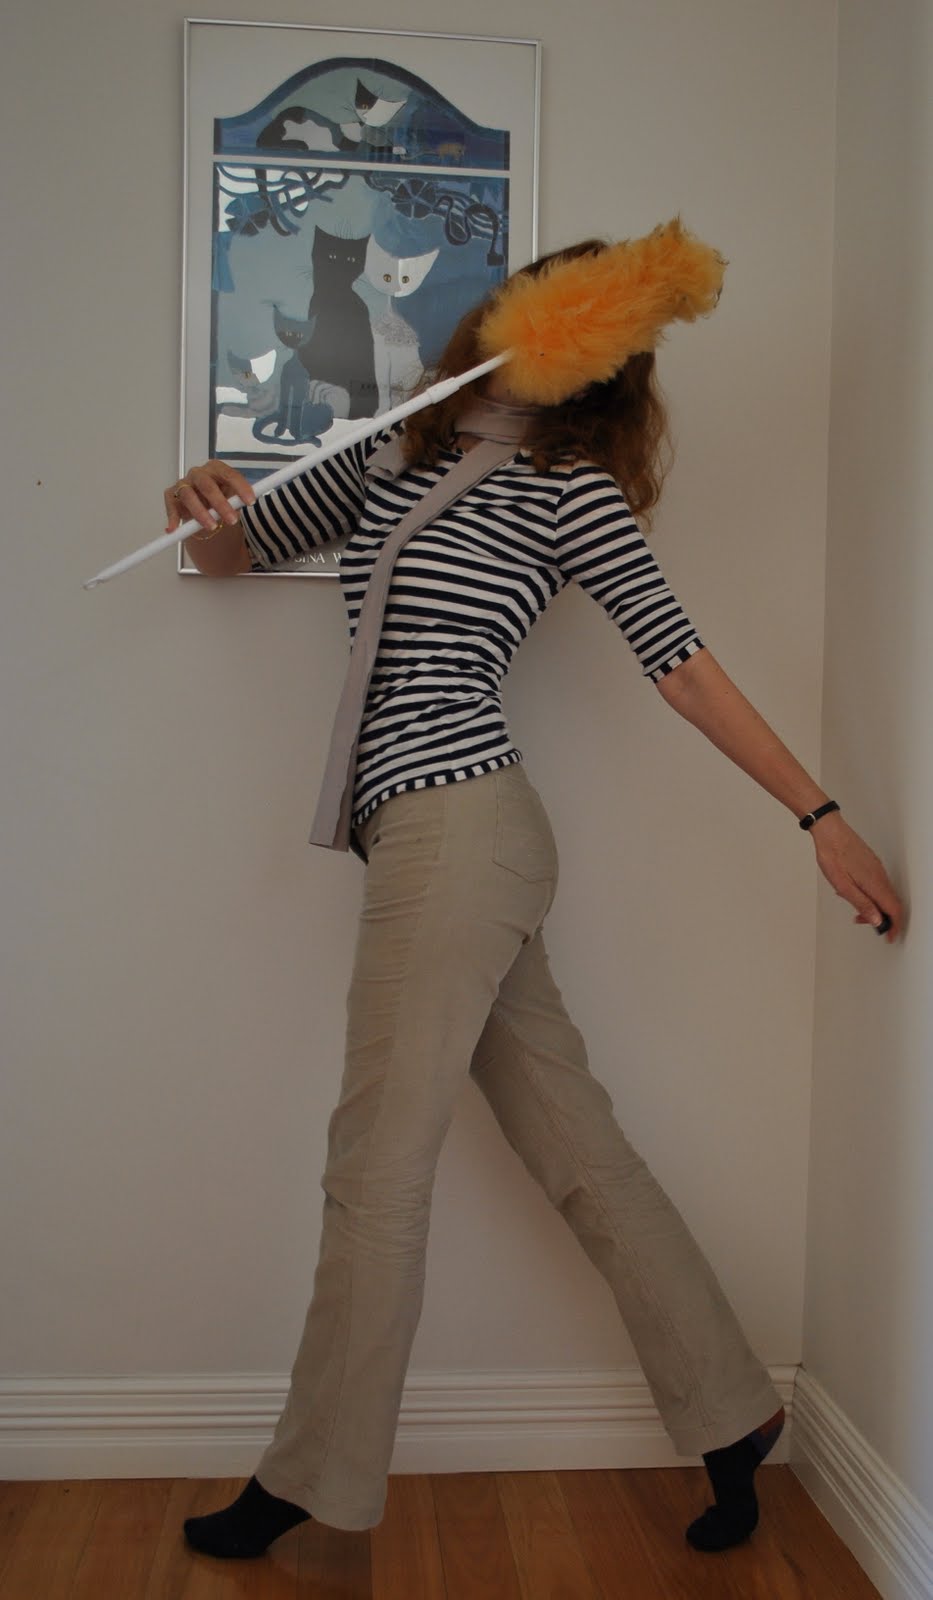
Shirt; self-drafted, navy and white stripe cotton jersey, details here
Shoes; Country Road

Pattern Description:
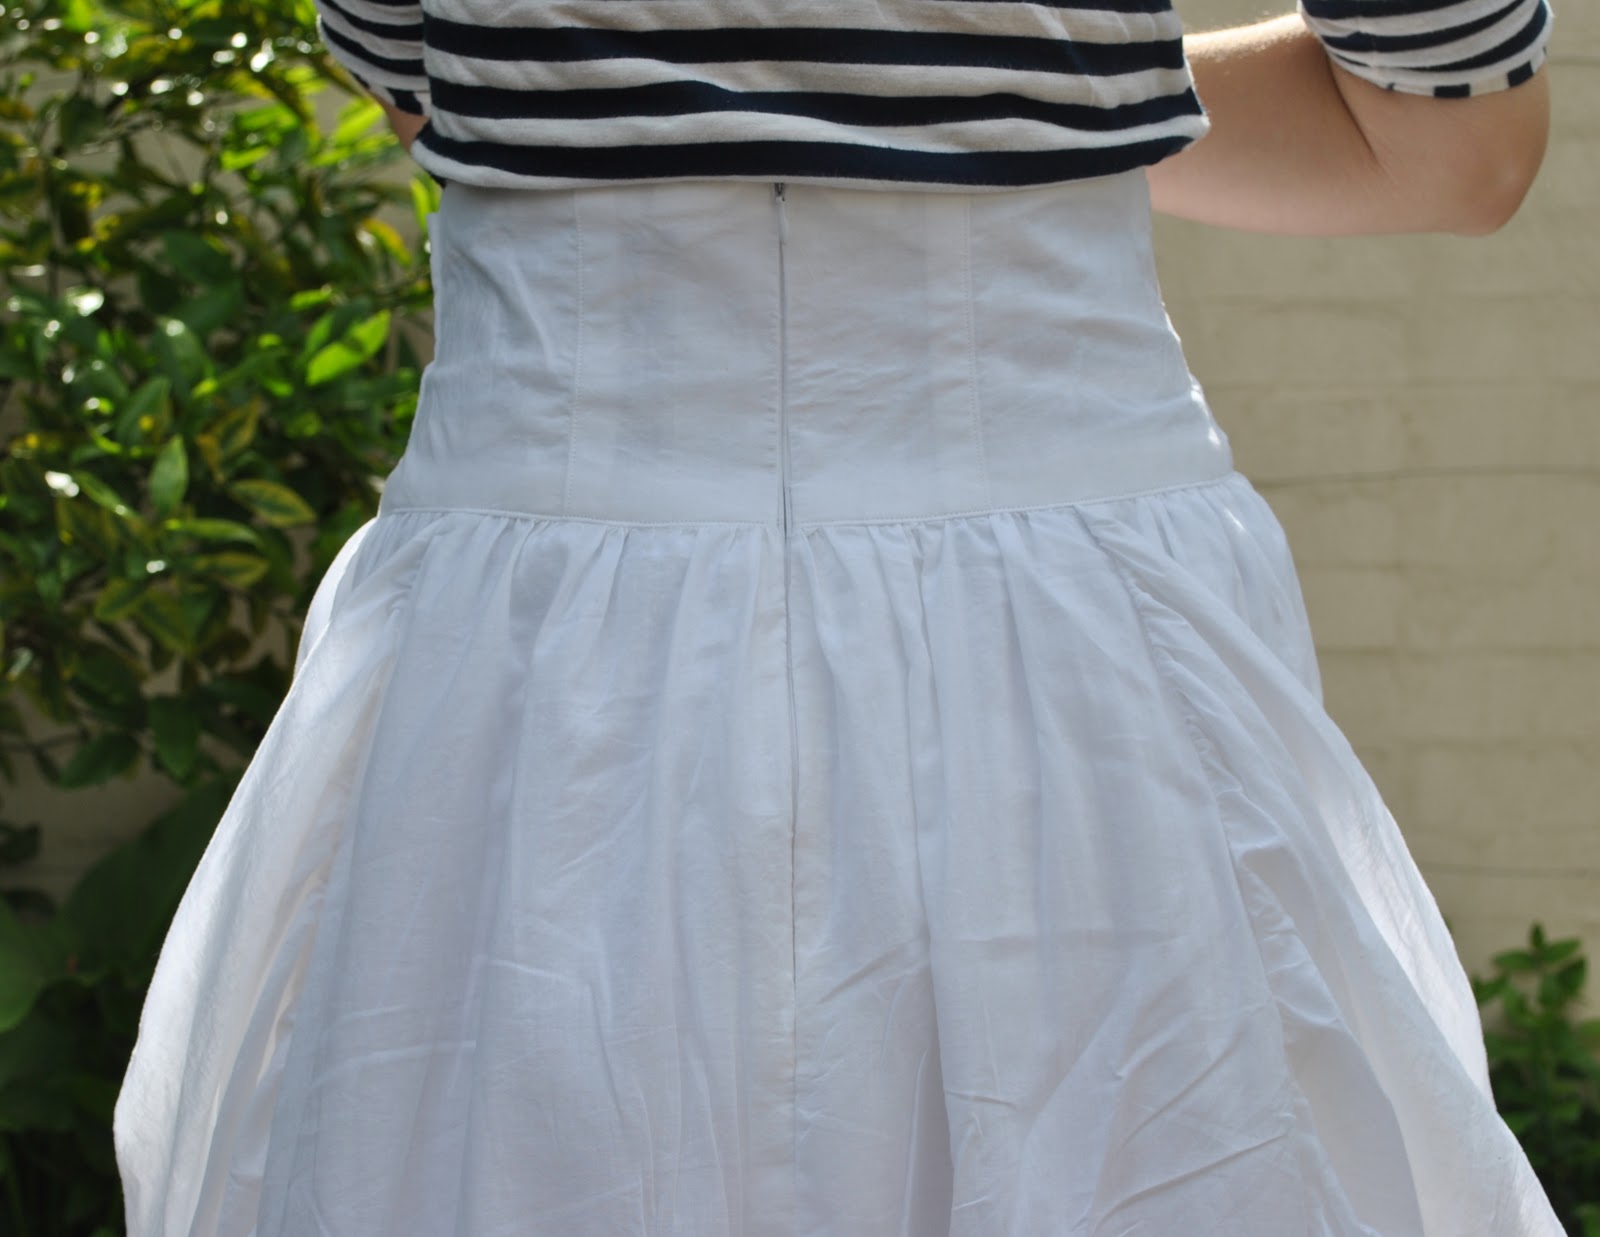
Skirt, gathered, flared and lined, with fitted contoured waistband, centre back zip closure and long attached side sashes with shirt cuff features.  HUGE gathered pockets.
Pattern sizing; 
I bought the AA 8-12, and cut a size 10.
Did it look like the photo/drawing on the pattern envelope once you had finished sewing it?
Just about exactly, since I used white fabric too!
Were the instructions easy to follow?
yes
What did you particularly like or dislike about the pattern?
The pattern is great.  Vogue patterns are always accompanied by clear instructions and detailed illustrations. The pattern pieces went together beautifully.
There is one small thing I would change… the instructions stipulate to gather each skirt piece individually, before joining them together along the side seams.  I find I get a much better and smoother gathering result when the whole skirt is gathered as a whole; that is, you join up the skirt pieces at the side seams, THEN run the gathering stitch around the skirt top in one long go.  This is because I find that the first and last few centimetres of gathering do not gather as evenly or as ideally as if they were part of one long continuous line of stitching and if the skirt is broken up into several sections you have several of these gathering stitch stop/starts.  I would recommend to gather the skirt as a whole.  And also to gather the lining skirt as a whole, too.
Fabric Used:
very lightweight cotton voile
Pattern alterations or any design changes you made:
I took about 5cm (2″) overall off the waist band pieces.  Also I gathered the skirt as a whole, as discussed above.
Would you sew it again? Would you recommend it to others?
Yes, I think I might sew this again, I love it!  I highly recommend this skirt pattern to others.  Just bear in mind it needs very lightweight drapey fabric, because of all that gathering.  I have some fabric to sew the little top, so I will review that separately.
Conclusion:
I just love this skirt!  Firstly, the silhouette is delightfully feminine, and the floatiness and frothiness of all those light gathered swathes of fabric floating about you is highly satisfying.  I feel just so darn feminine in a skirt like this!!
Secondly, the shirt cuffs on the ends of those sashes are completely adorable and what drew me to this pattern in the first place.  Such a witty and unique little detail, that really makes the skirt stand head and shoulders above your average everyday gathered skirt.  Not to mention those pockets, which must be the biggest in known history!  Another fun and interesting feature…
I’m going to love wearing this skirt over this summer!

pinterestmail

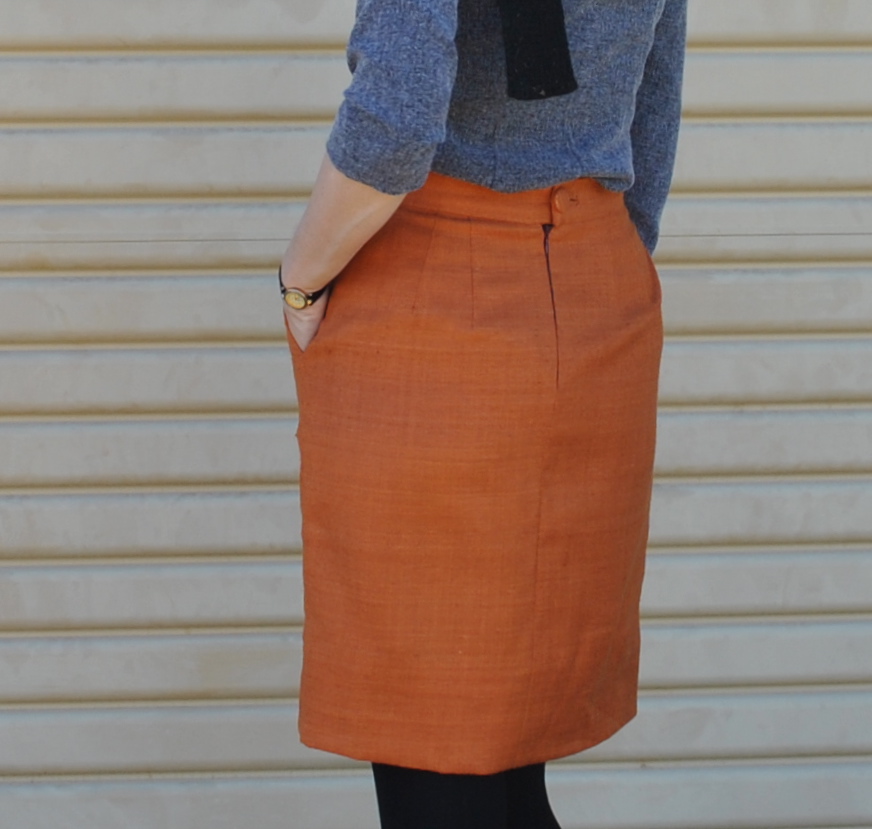
Burnt orange skirt

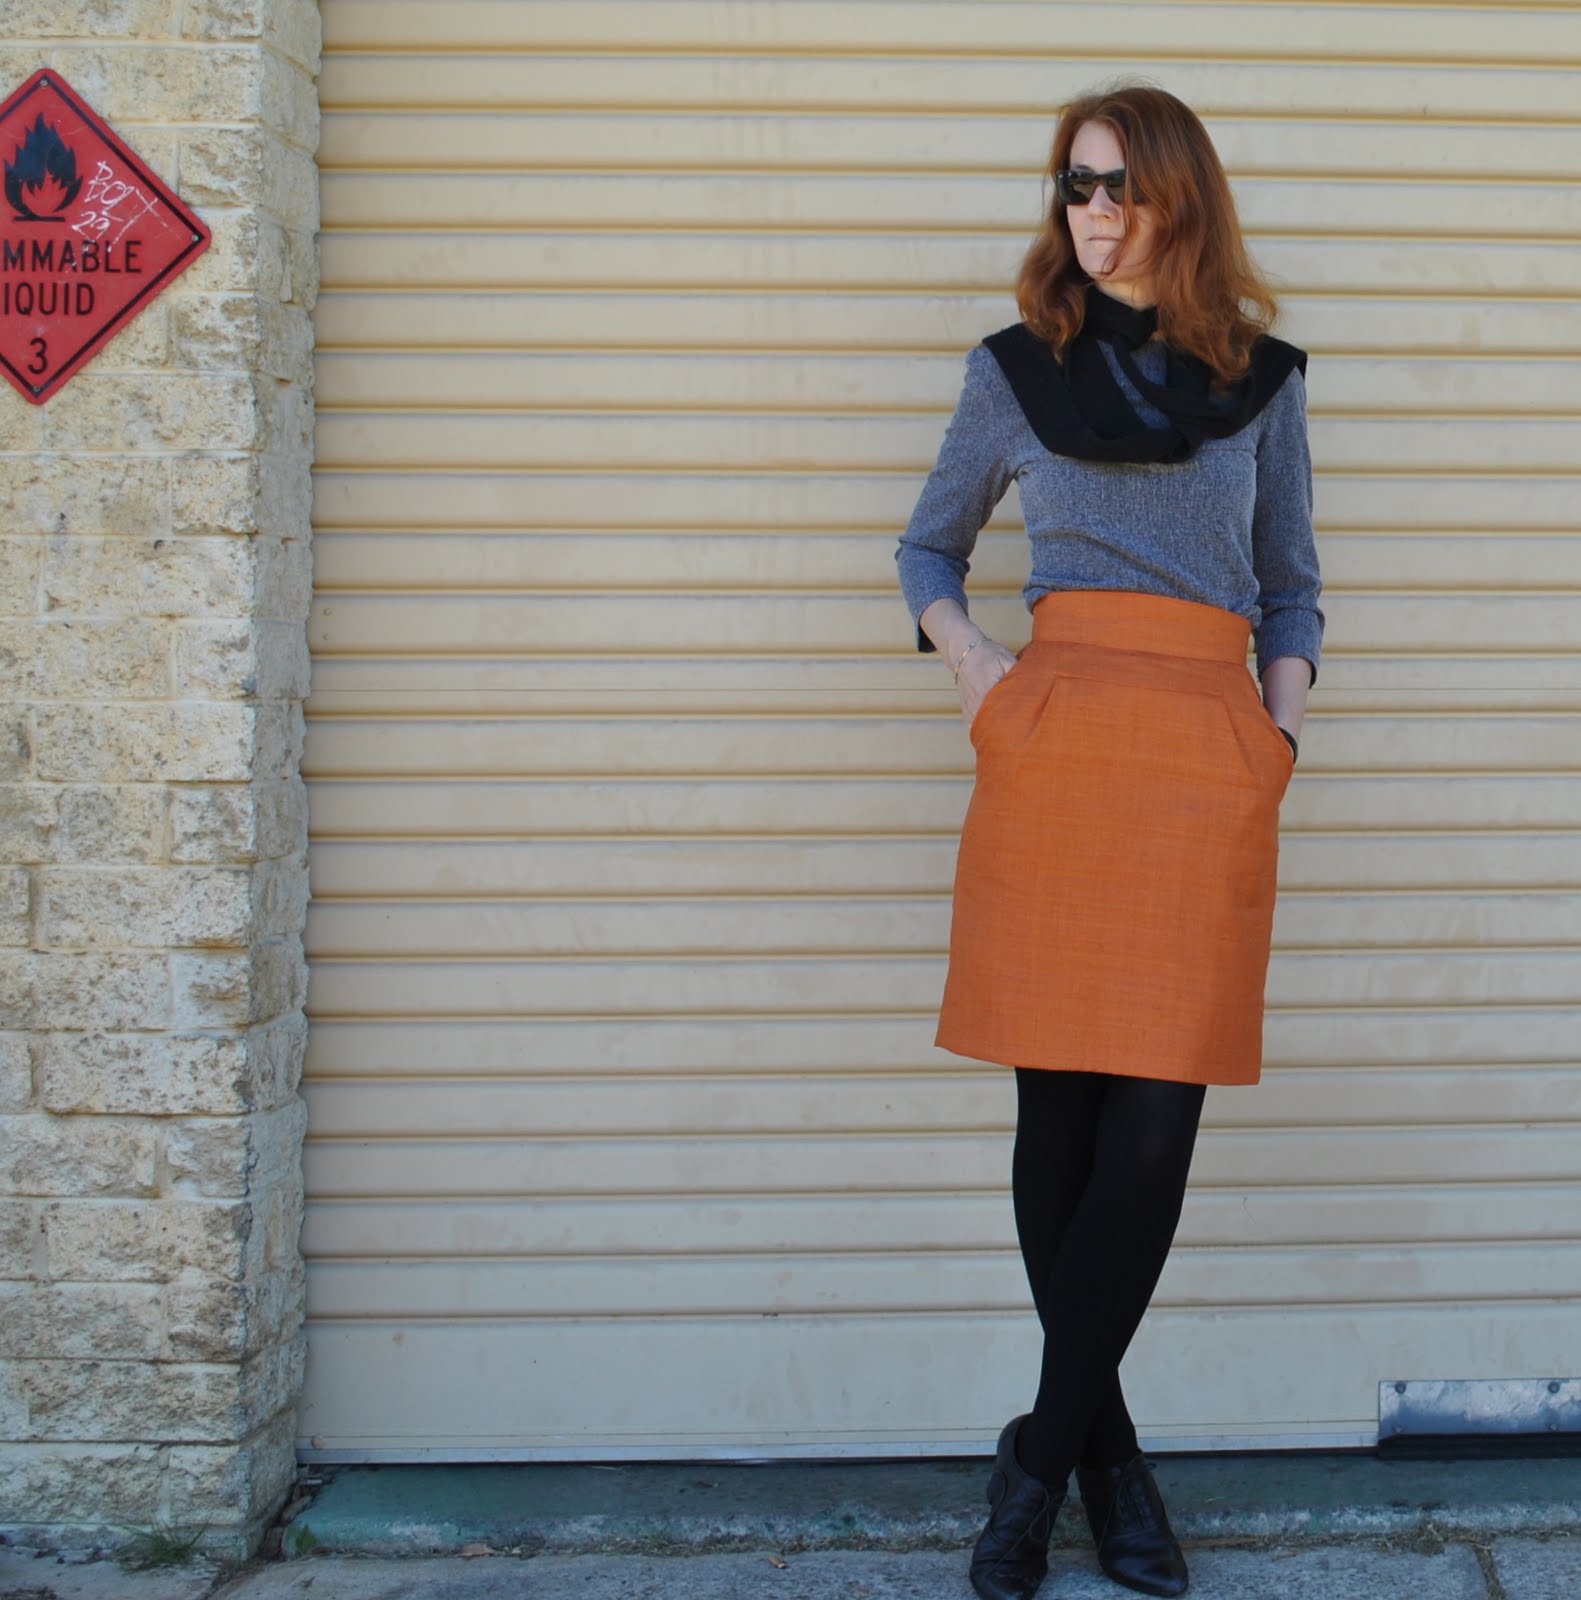
I’ve seen a couple of other little orange skirts just like this recently, namely Gail’s and Yoshimi’s, so you will have to take my word for it that I bought this fabric a couple of months ago and have had this skirt at the nearly finished stage for a few weeks!  So, I claim immunity from copy-itis, but instead invite you to marvel for a minute at the like-mindedness of great minds…
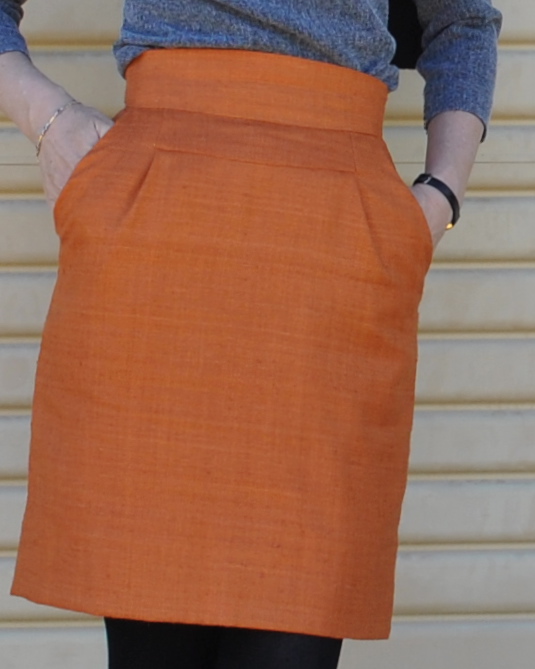
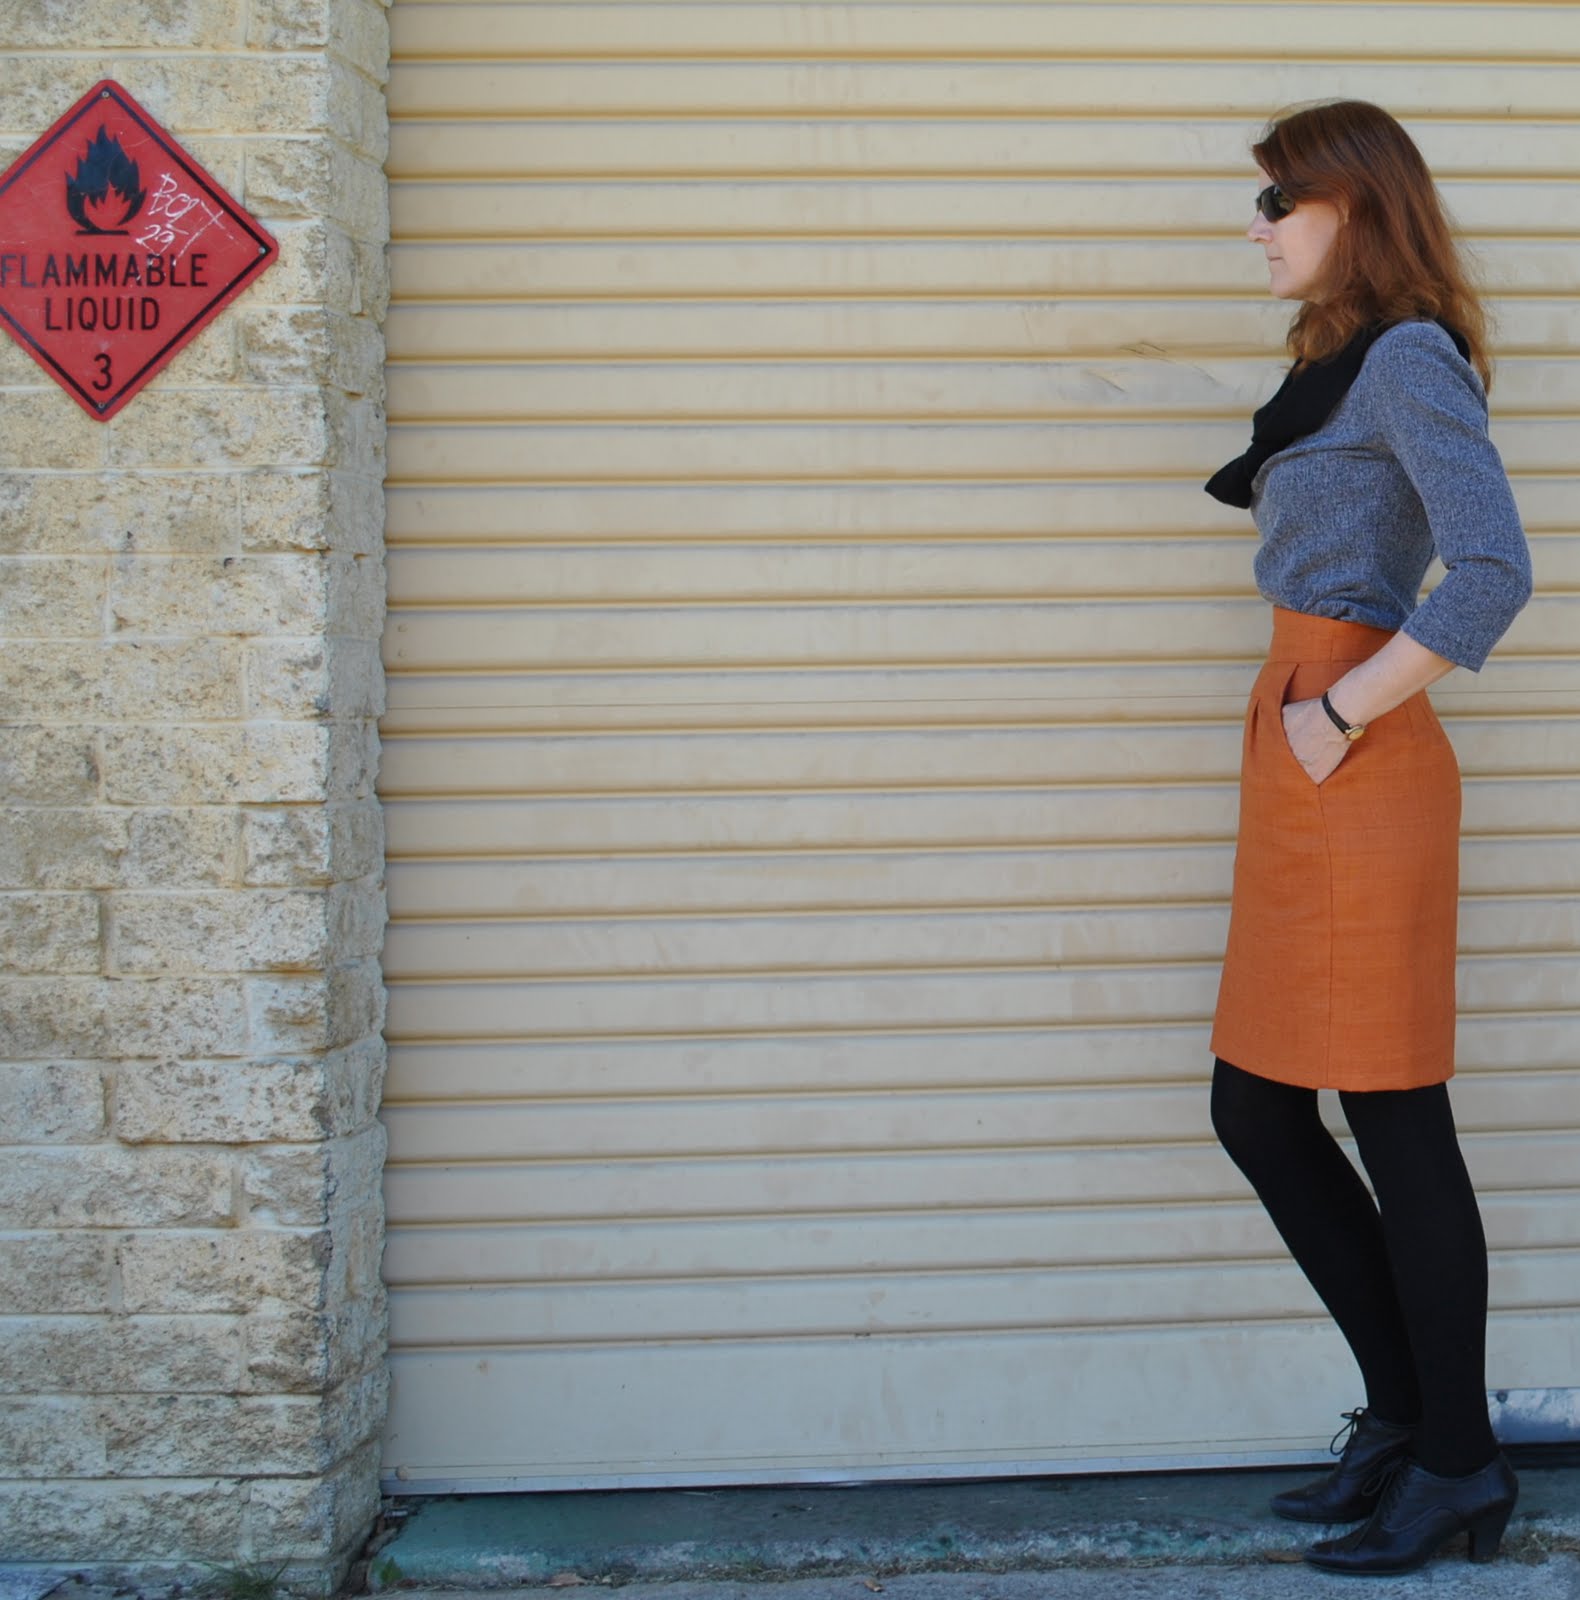
Now actually there is an element of copy-itis going on.  I saw a skirt in the window of Cue with an interesting waistband, pleat and pocket feature.  I am always on the lookout for interesting ways to incorporate pockets into straight skirts, a silhouette that I think suits me but is often difficult to put a pocket in successfully.  I thought the Cue team had done a marvellous job.  All Aussies will know how Cue along with its sister store Veronika Maine are veritable goldmines for interesting little features a seamstress can think about incorporating into her garments.  I just love browsing these stores, and if I wasn’t making my own clothes I would be wearing their designs.  Along with my all-time favourite Metalicus, of course…  Anyhoo, I digress; so, I went home inspired, then it was a week or so before the next visit to the fabric store, then it was another week or so before I got around to constructing my skirt.  So I was doing it from memory and it turns out mine is quite different from the Cue one, which on my next pass by the store window I noticed had two pleats, both situated between the front middle panel and the pocket.  Mine ended up having but one pleat, situated underneath the front middle panel.  Oh, OK OK, a fairly miniature difference that only a nit-picking detail-maniac like me would notice…  but, doesn’t matter the design still works for me…
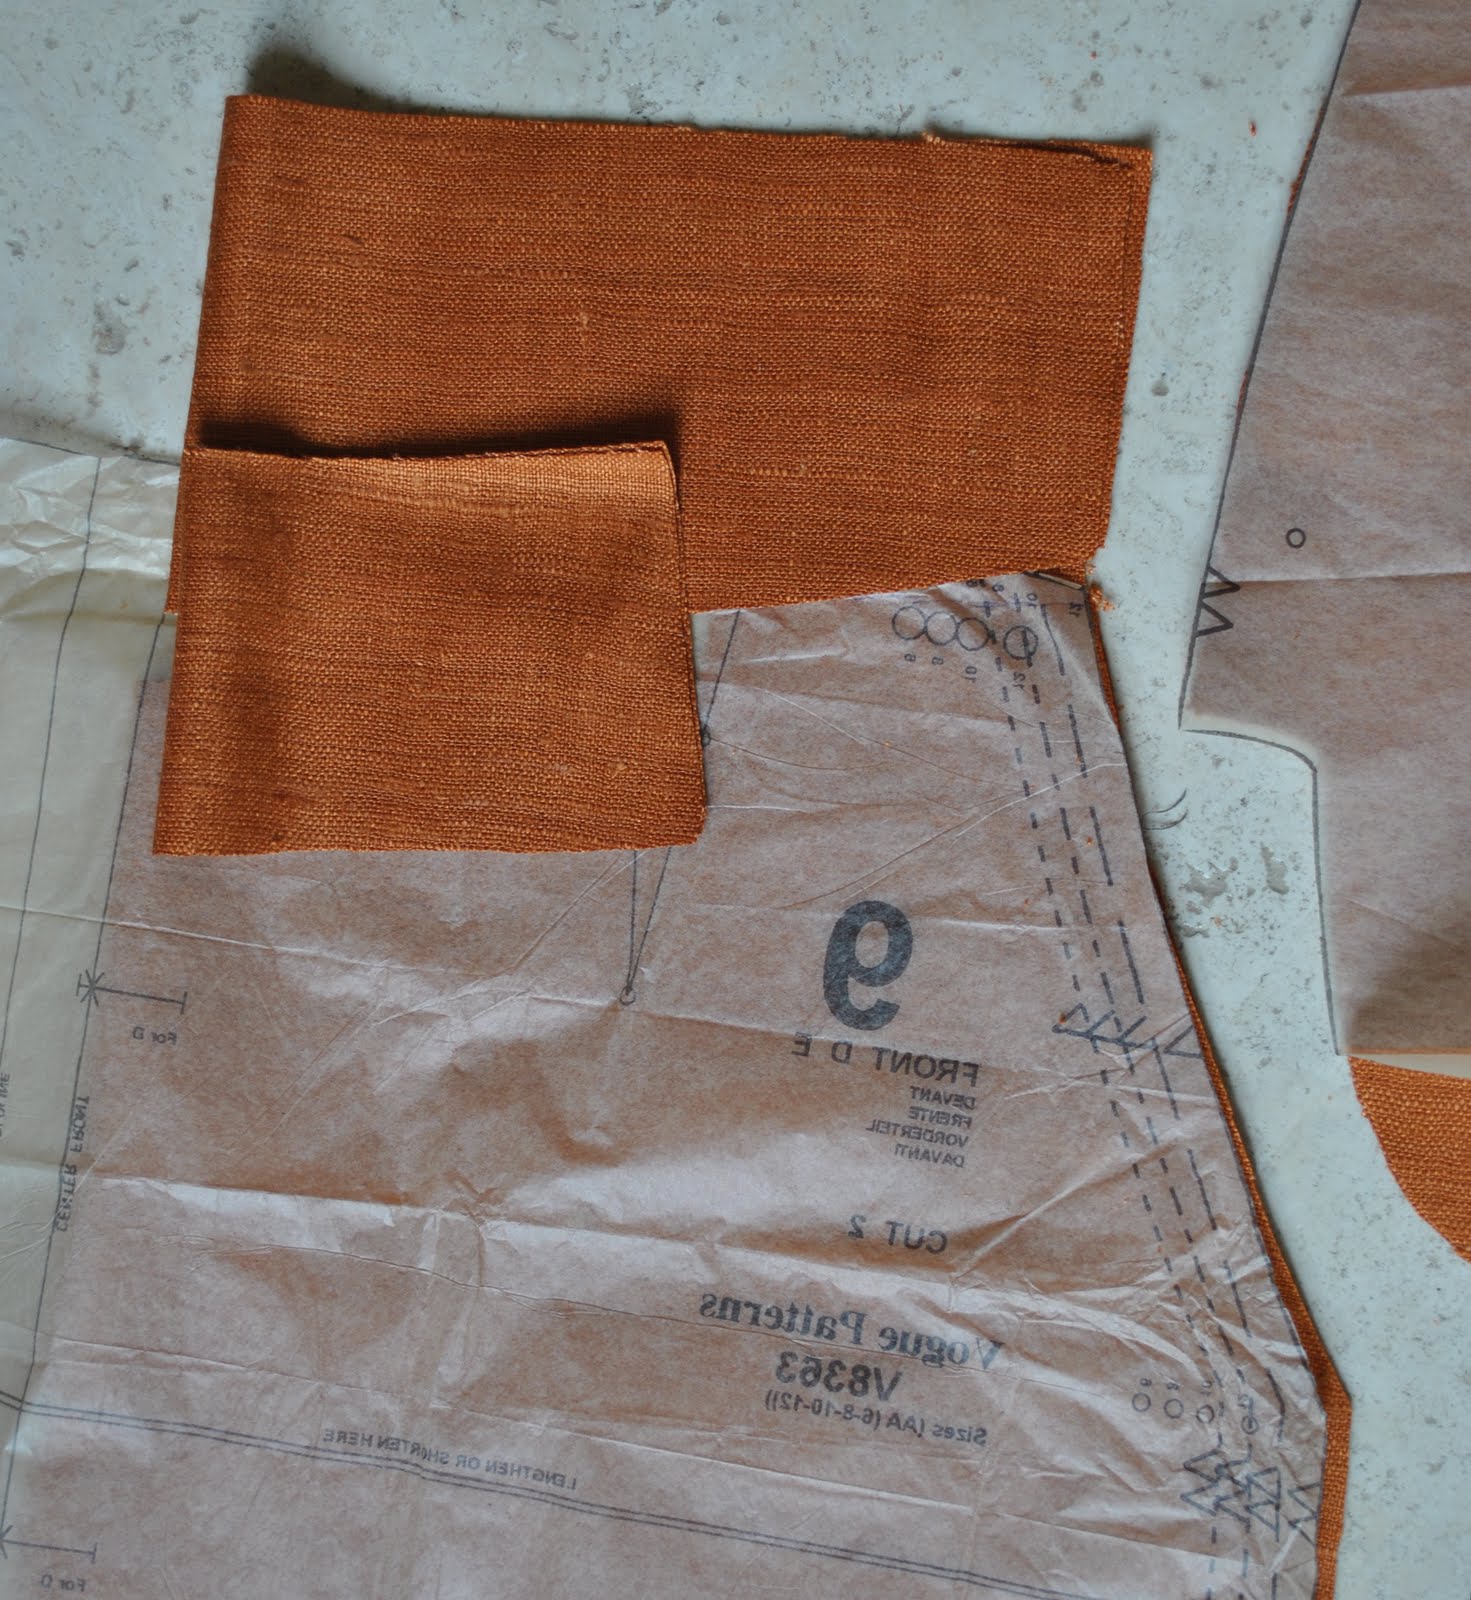
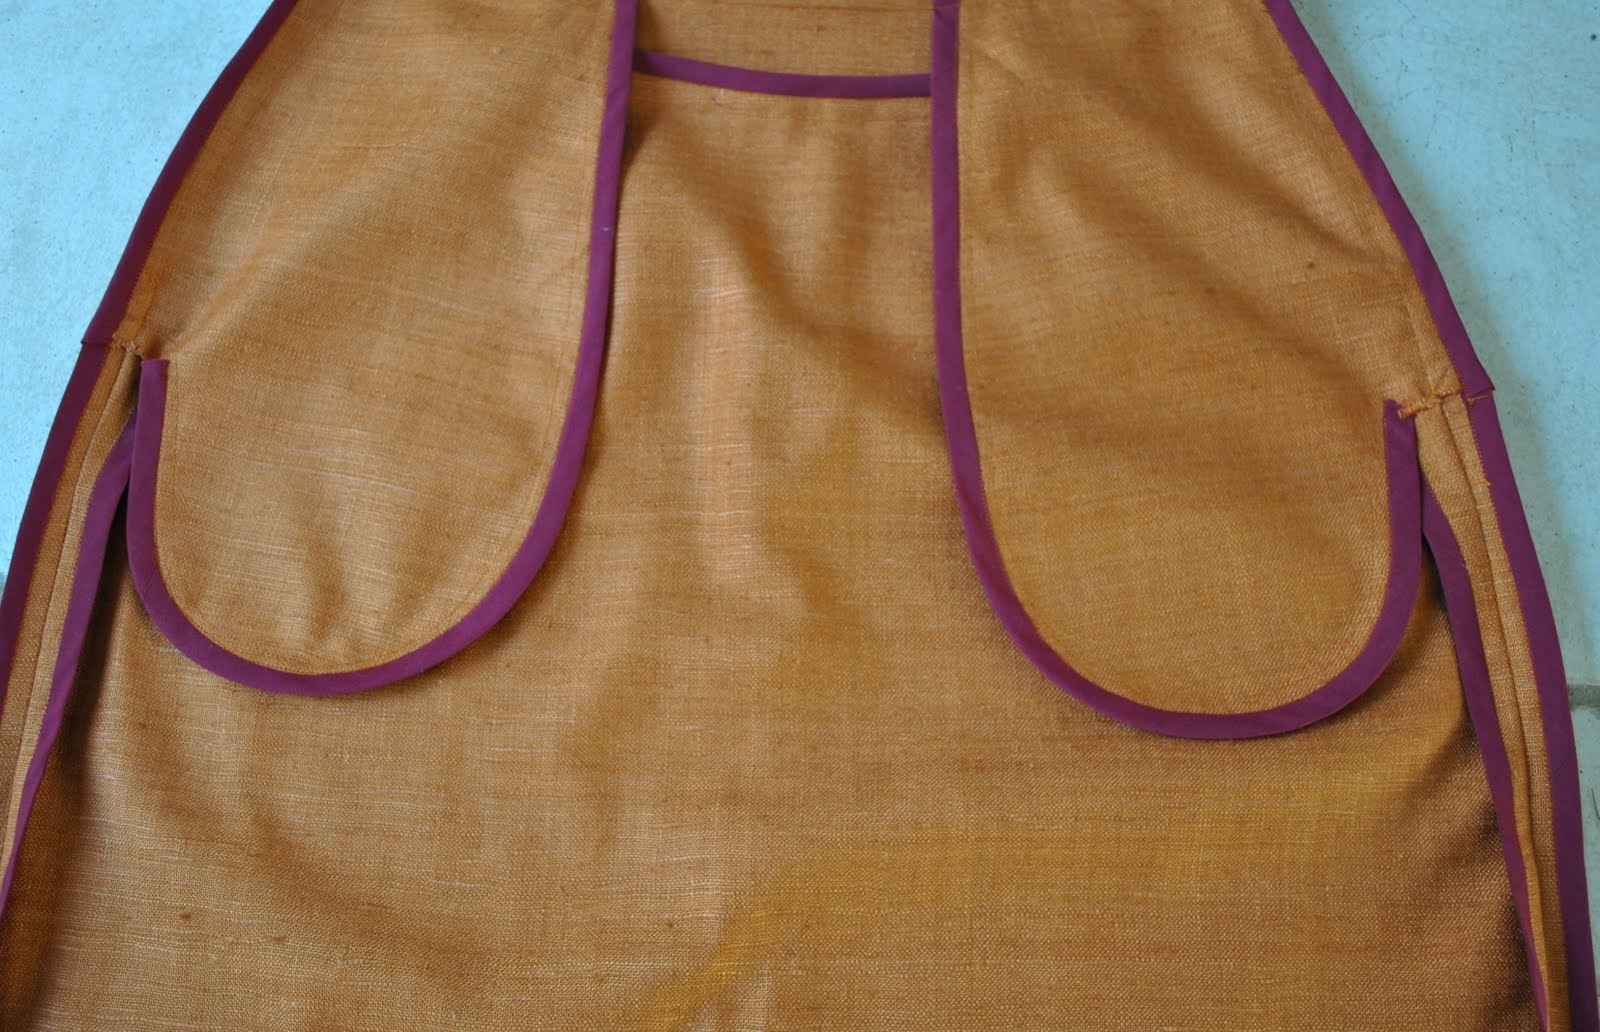
I adapted one of the Vogue 8363 variations, modifying by redrafting the front waistband piece to have a lower curve (I wanted this shape as opposed to a flat straight waistband) and drafted a middle front panel and re-drafted the skirt front piece accordingly to accommodate these two changes.  The two front darts of the pattern were partly integrated into the middle front panel, and partly transformed into the small pleat.  The beauty of this pleat is that it enables some “hand-room” for when one is using the slanted front pockets.  Voila!  I’m extremely pleased with how it turned out.  I can shove my hands down deep into the pockets and the discreet little pleat enables one to do this comfortably, while still maintaining a nice little straight skirt silhouette.

The only thing about the design I’m not completely happy with is the middle front panel.  On the Cue skirt it looked really good, on mine I think it looks less so, and wish I had kept it as part of the front skirt piece.  I think it is do do with my fabric choice, the flatness of the fabric means the less seaming, the better it looks.  The Cue skirt was made of a quite textured fabric with a very busy multicoloured weave, which looked very good with the separate panel pieces… if I do this again I will try to remember this…
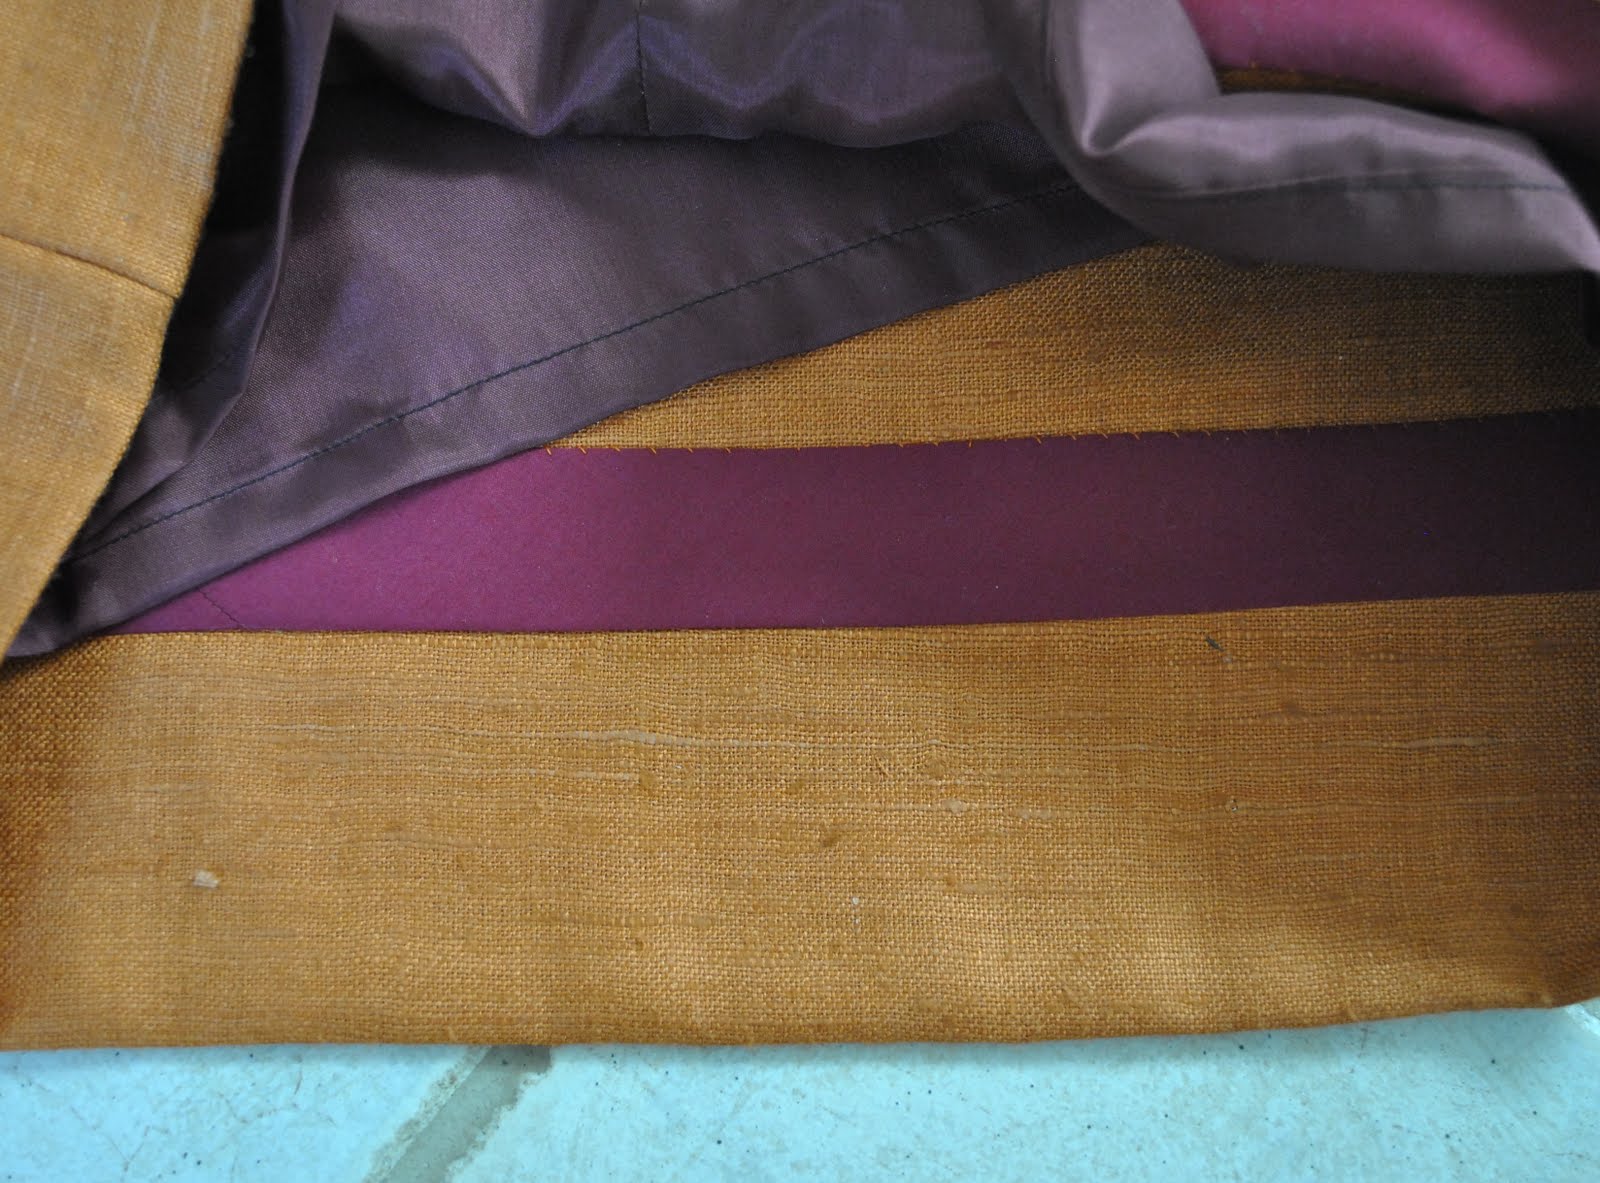
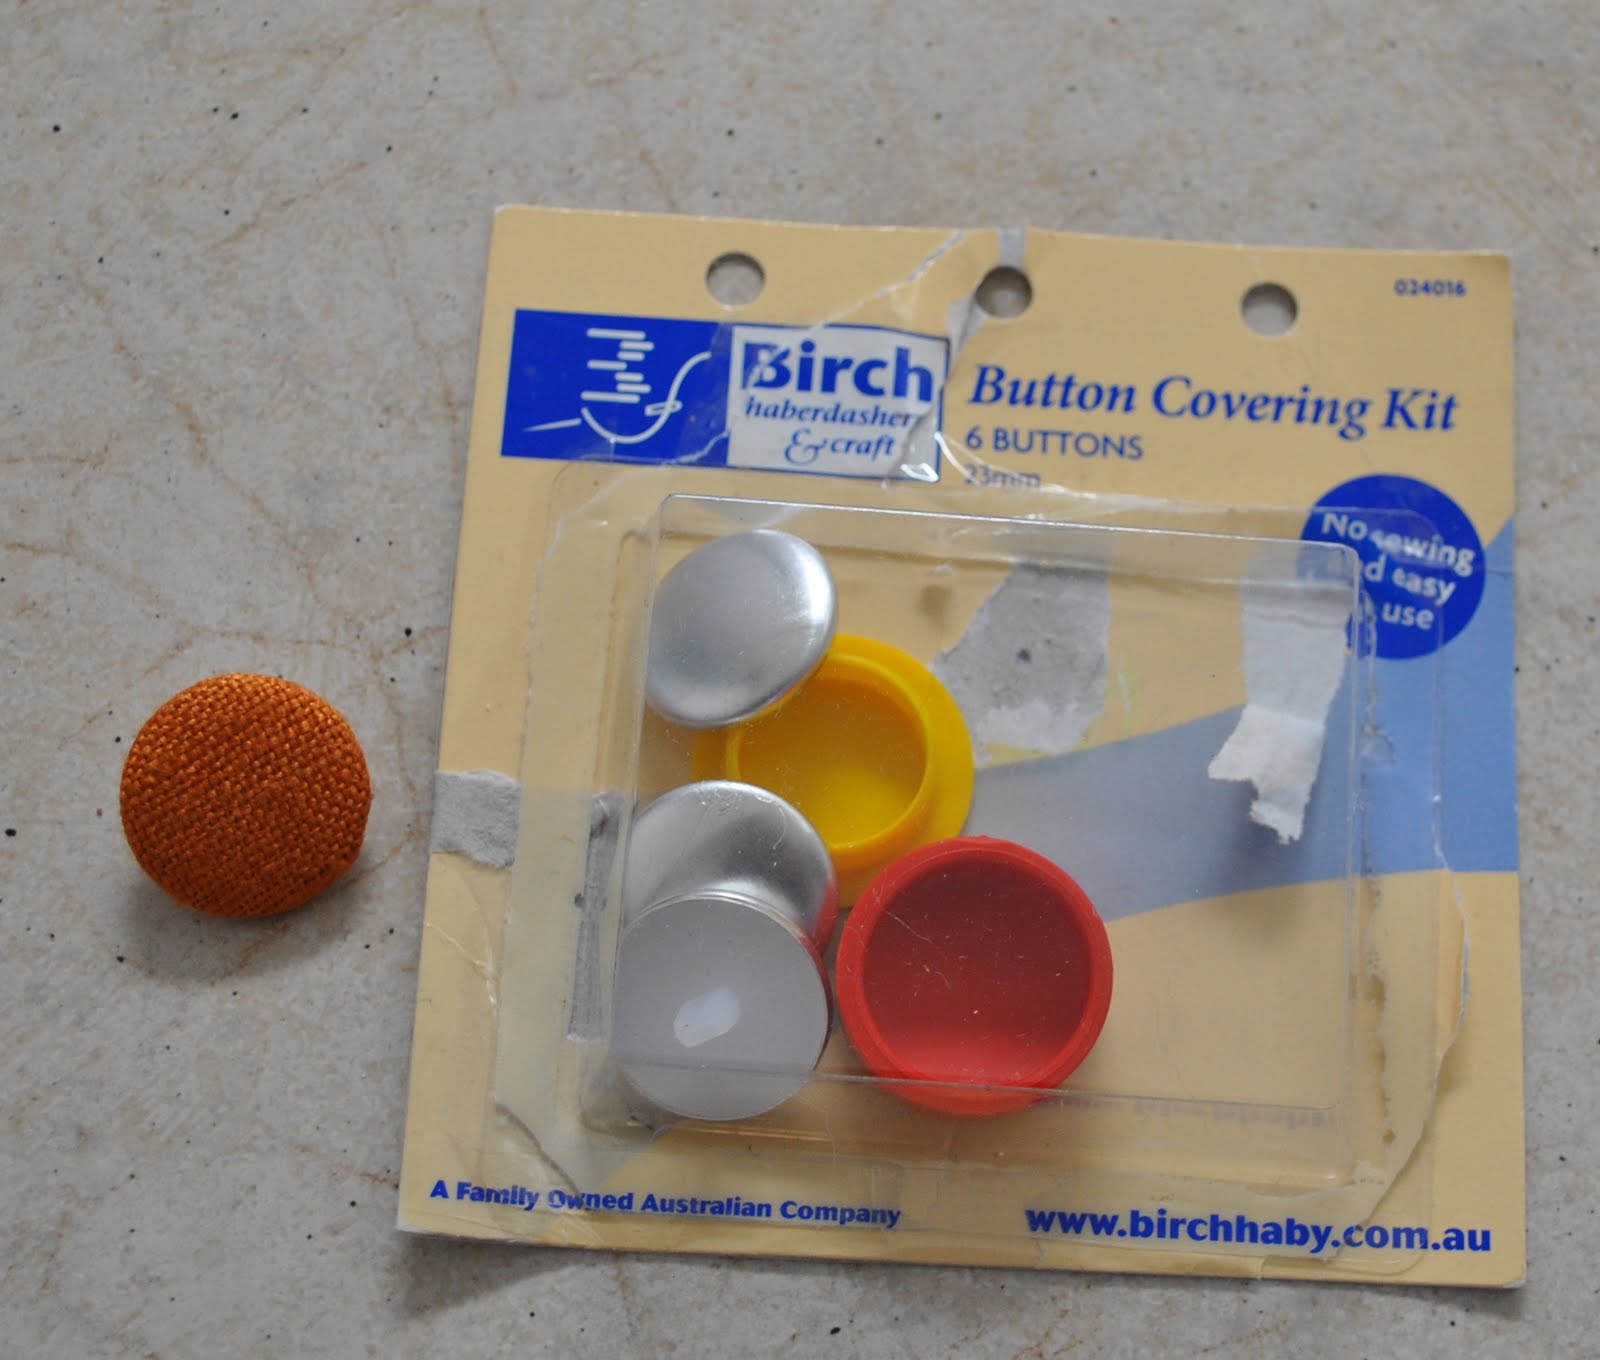
When I bought the burnt orange, there was no matching lining fabric nor zip to be found, so instead I went wild and bought a contrasting maroon lining and zip, and also for the cotton to make my HongKong seaming tape and hemming tape.  You can see I went happily all out on the HongKong seaming there…  this silk hessian is one of my favourite fabrics but frays like a madman…  so raw edges are a big no no.  I covered a button with some of the fabric, and also made a bound buttonhole, but took absolutely no close-ups of this.  For a reason…  After viewing Sherry’s superb bound buttonholes I’ve decided mine is nought but a travesty of a bound buttonhole.  I salvage my pride by saying humbly yet again that this fabric frays like a monster… I did my best but it is sadly far far from a perfect thing.

Details:
Skirt; my own adaptions of Vogue 8363, burnt orange silk hessian, my review of this pattern here
Top; the bodice part only of Burdastyle magazine 08/2009, dress 128, charcoal wool mix, details here
Scarf; my own design, details and my pattern here
Tights; Kolotex
Shoes; Django and Juliette, from Zomp shoes

pinterestmail

Crocheted Granny-squares skirt

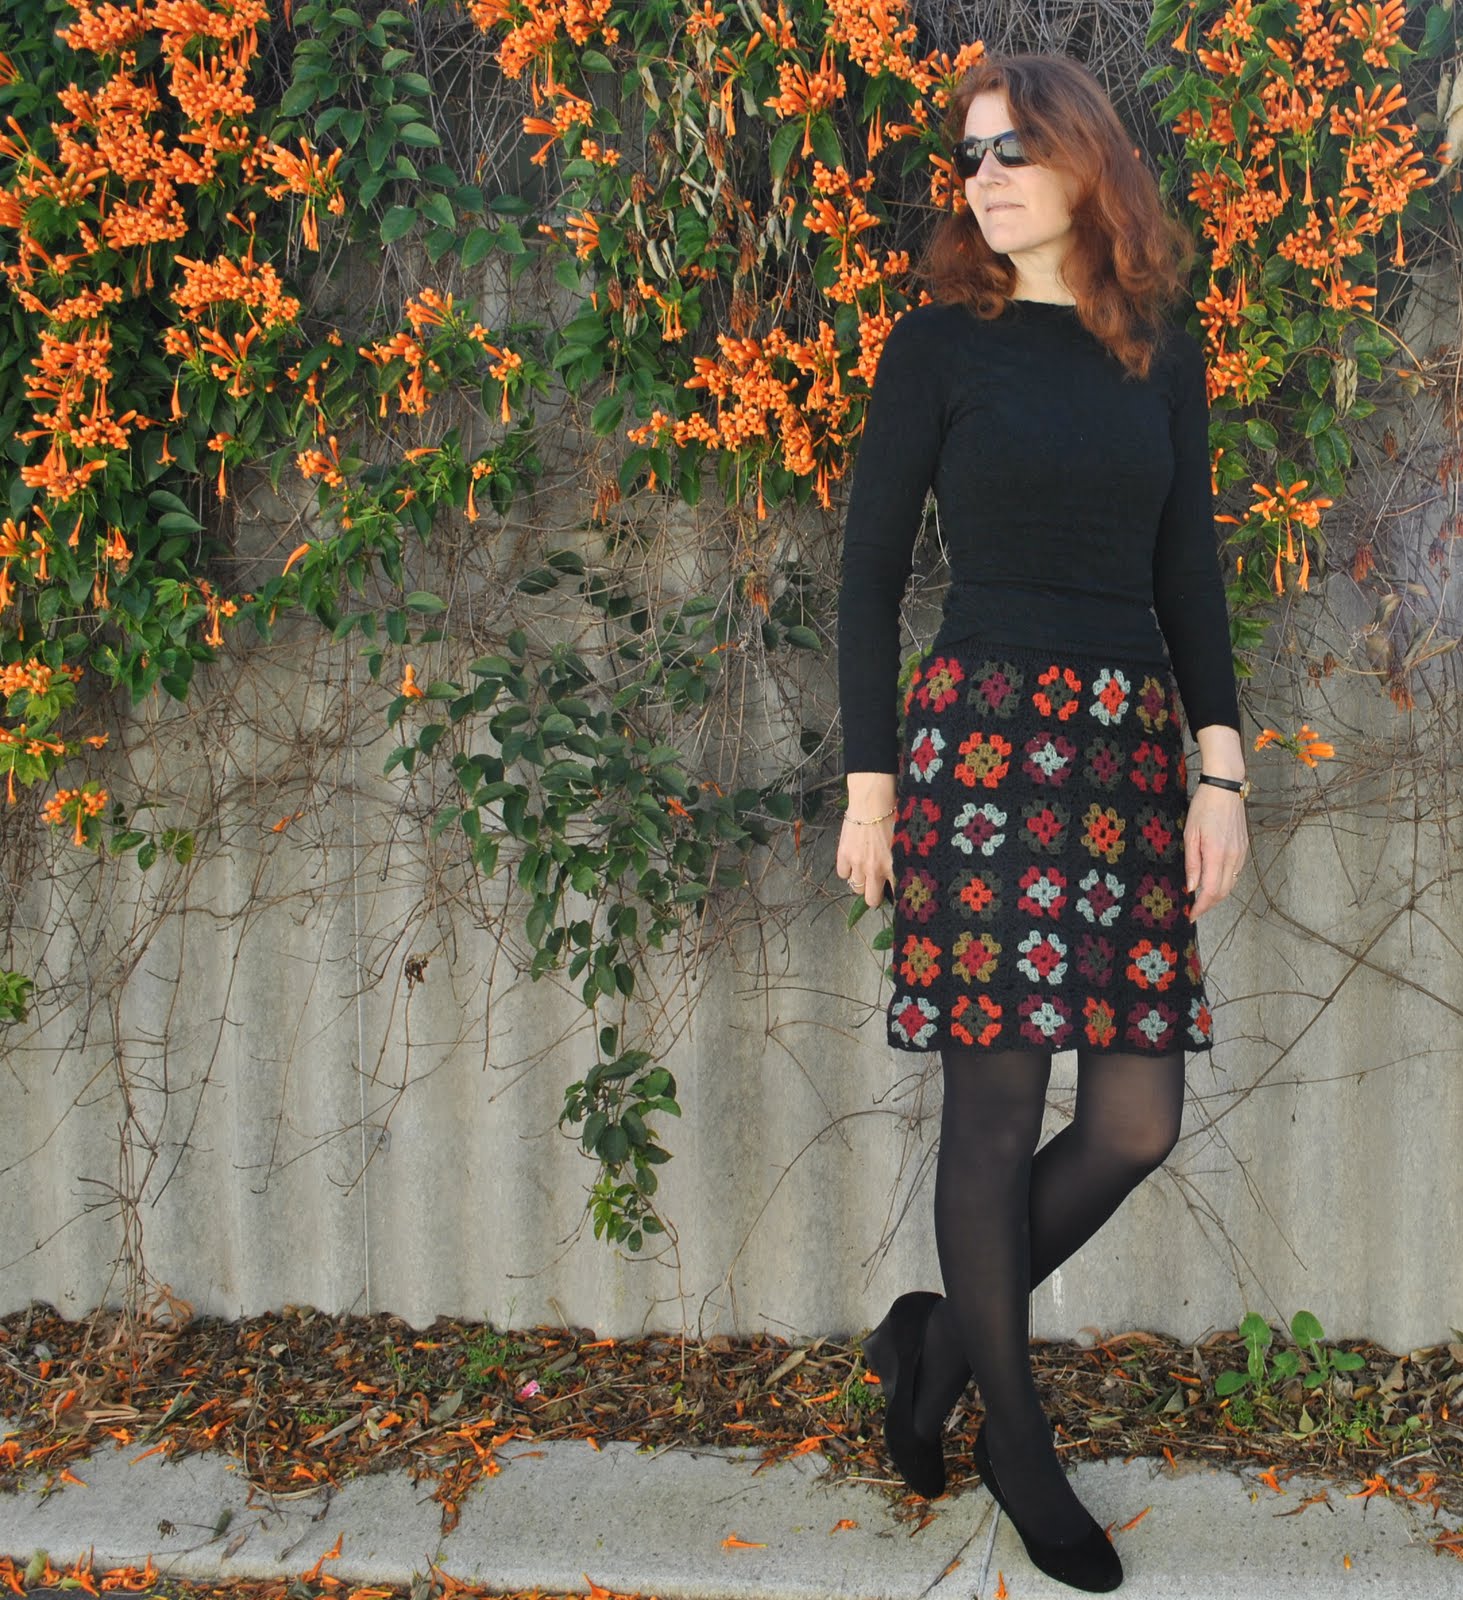
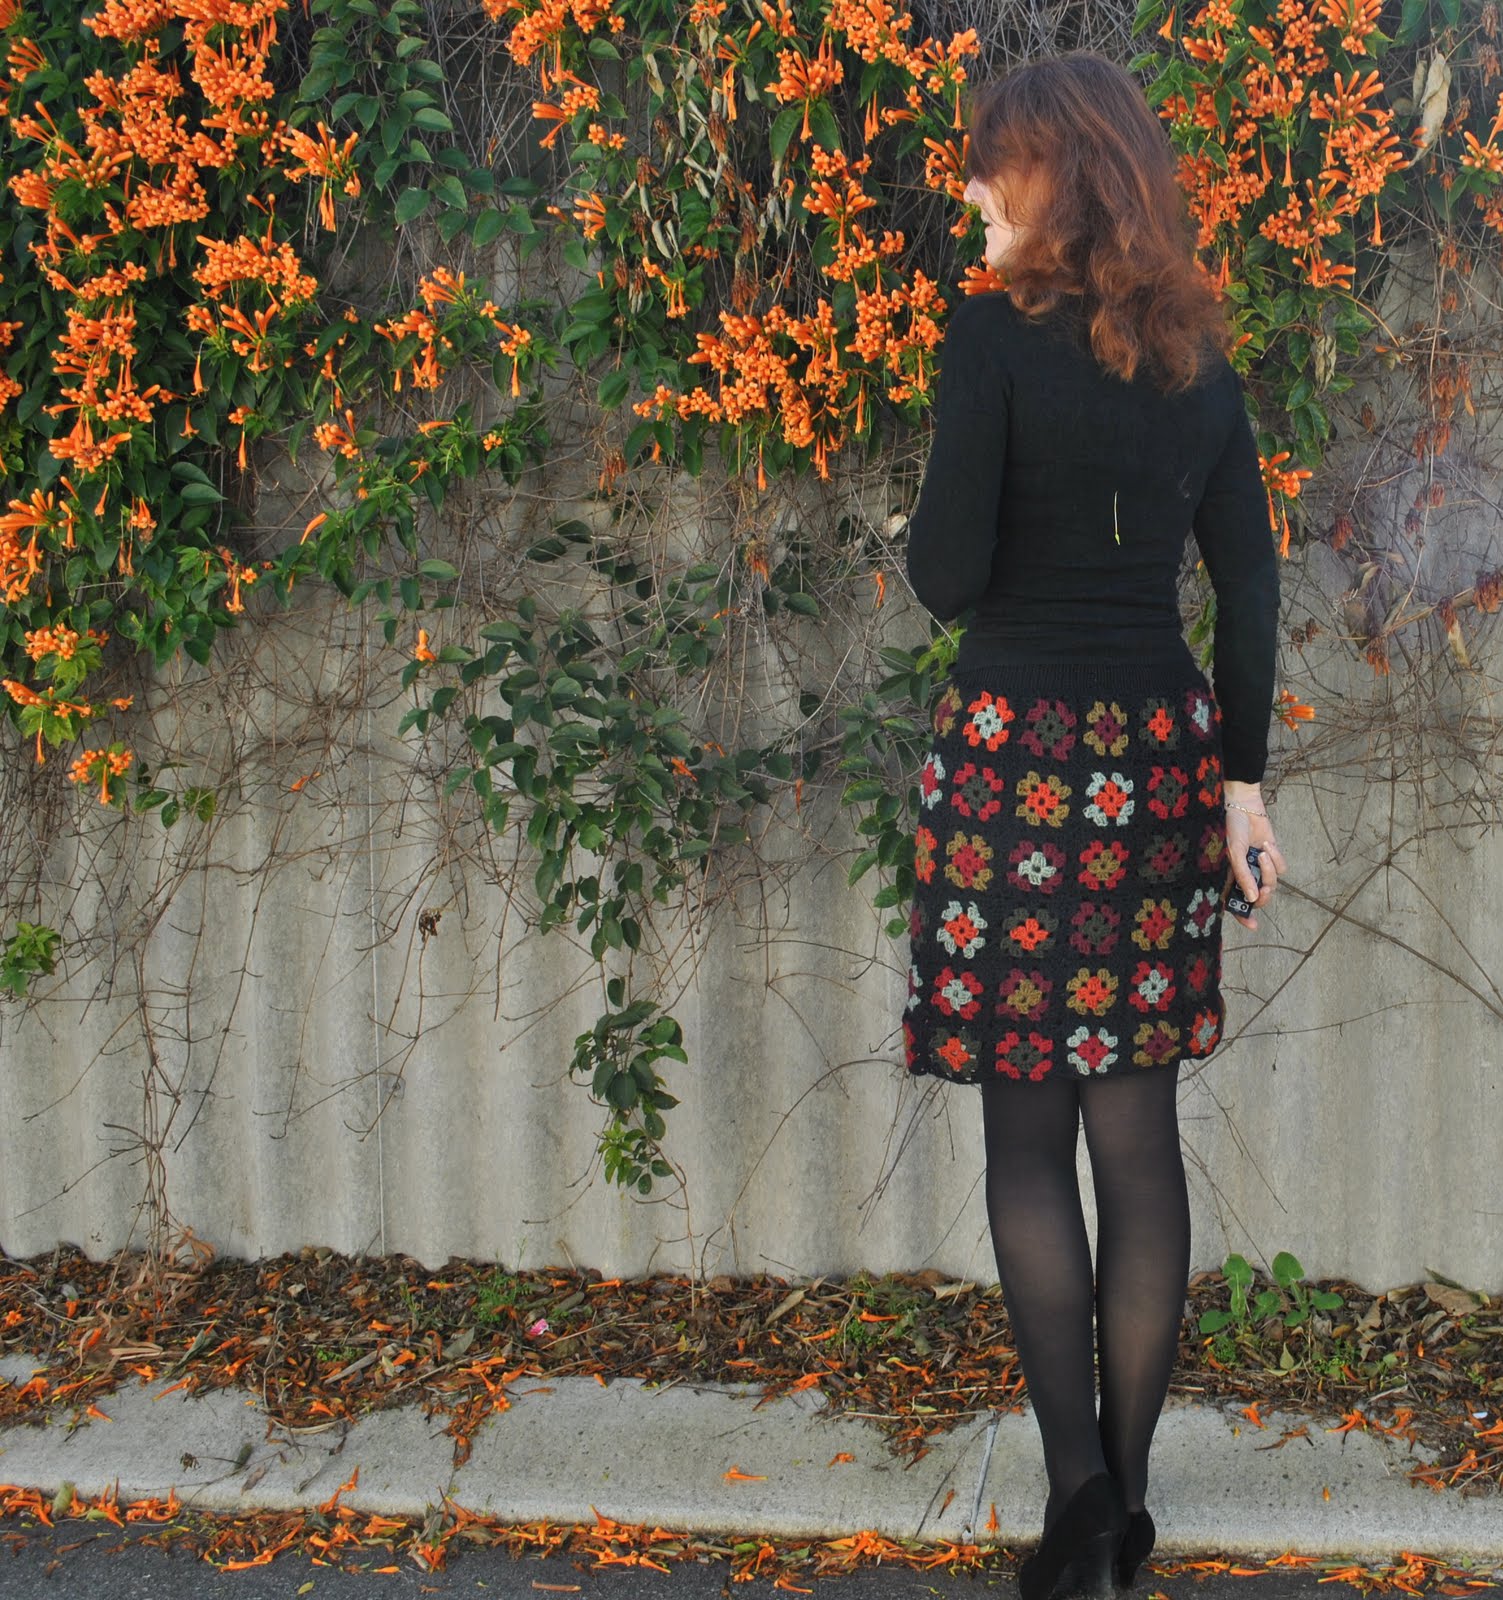
I crocheted a skirt!  Yup, a whole skirt…. almost can’t believe it myself, since crochet is not my forte.
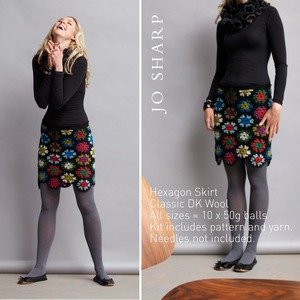
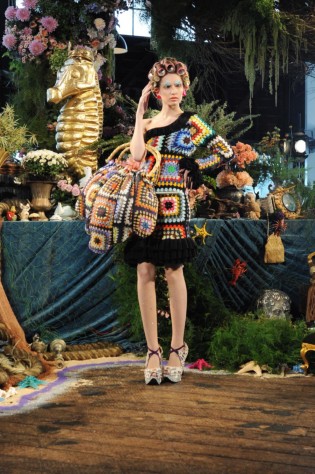
Now I was initially inspired by Jo Sharp’s Hexagon skirt, but have discovered this new-wave trend was set by Australian designers Romance was Born in their whimsical Spring/Summer 2009 collection, itself inspired by the crocheted granny-square rugs of the 1960’s and 1970’s.
I really love it! it’s so warm and cosy, and I love the unexpected jolt of seeing so-unhip-it’s-actually-kinda-hip granny-squares in a wearable item.  I think it is fun and funky; when I first posted my plans for this skirt I did get a comment that “these are everywhere right now” but I haven’t seen a single one out and about around where I live, so I guess the trend hasn’t caught on in Perth yet.  I feel happily unique so far.
Viva les granny-square!


Details:
Skirt; crocheted to my own design using Jo Sharp yarns, my pattern below
Top; Sexy Woman, found second hand
Tights; Voodoo
Shoes; Misano from Labels boutique

(at left, Jo Sharp’s Hexagon skirt; at right from Romance was Born Spring/Summer 2009)

I wrote down the pattern I used to make my own skirt if anyone is interested in making one too.  There are multiple small variations on the crocheted granny-square.  I trialled several different variations before settling on this one, but a granny-square is a granny-square is a granny-square really…

Crocheted Granny-Squares Skirt:

6 balls of coloured 8ply yarn
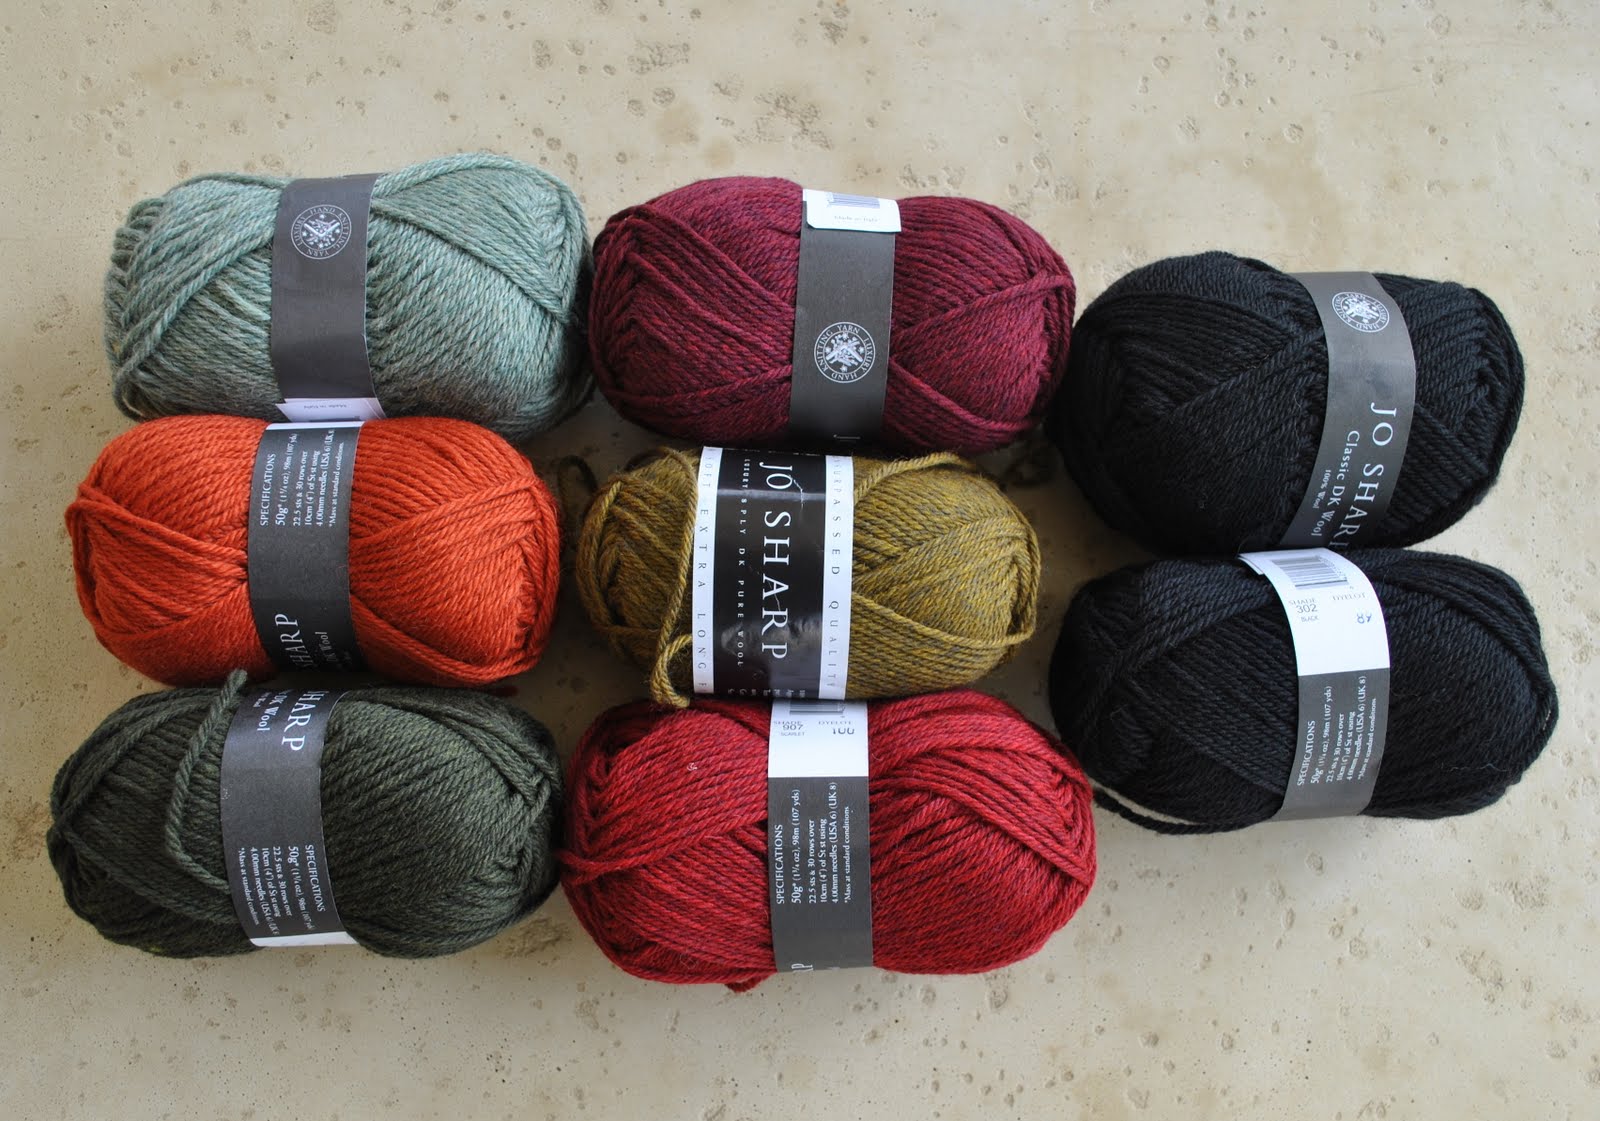
I used Jo Sharp  Classic DK Wool; 3 “greenish” shades (Glade, Lichen and Orchard), and 3 “reddish” shades (Brocade, Scarlet and Nasturtium)
3 balls of Black 8ply yarn
3.5mm crochet hook  *
3.5mm round needle  *
(*warning, I am an extremely loose knitter and crocheter, and a “normal” person would probably use a needle/hook 3 sizes bigger…)

Abbreviations:
ch; chain
tr; treble stitch (US double)
sl st; slip stitch

Using colour 1, ch 6, join with a slip stitch in the 1st chain to make a ring.
ch3, tr x2 into ring, (ch 3, tr x3 into ring) 3 times; ch 3.  Sl st into top of 3 ch at beginning, end wool.
Join 2nd colour into corner:
ch3, tr x2, ch 2, tr x3; (ch 2, tr x3 into next corner, ch2 tr x3 into same corner) 3 times,  ch 2, sl st into top of first ch 3 in this colour, end wool.
Using black, join into corner:
ch 3, tr x2 into corner , ch 2, tr x3 into same corner, ch 2; ( tr x3 into side, ch2, tr x3, ch 2, tr x 3 into next corner, ch 2, tr x3 into same corner, ch2) 3 times; ch 2, tr x3 into next side, ch 2, join with a sl st into top of first black ch 3, end wool.

Voila! you have a little granny square!

How many you need to make depends on the size of your granny-squares, your own hip measurement and how long you want your skirt to be; this is an individual requirement.
I made 78, having one “green” and one “red” shade in each one, and alternating to have equal-ish numbers of each variation. Then overstitched them together to make a tube of 6 x 13 squares.
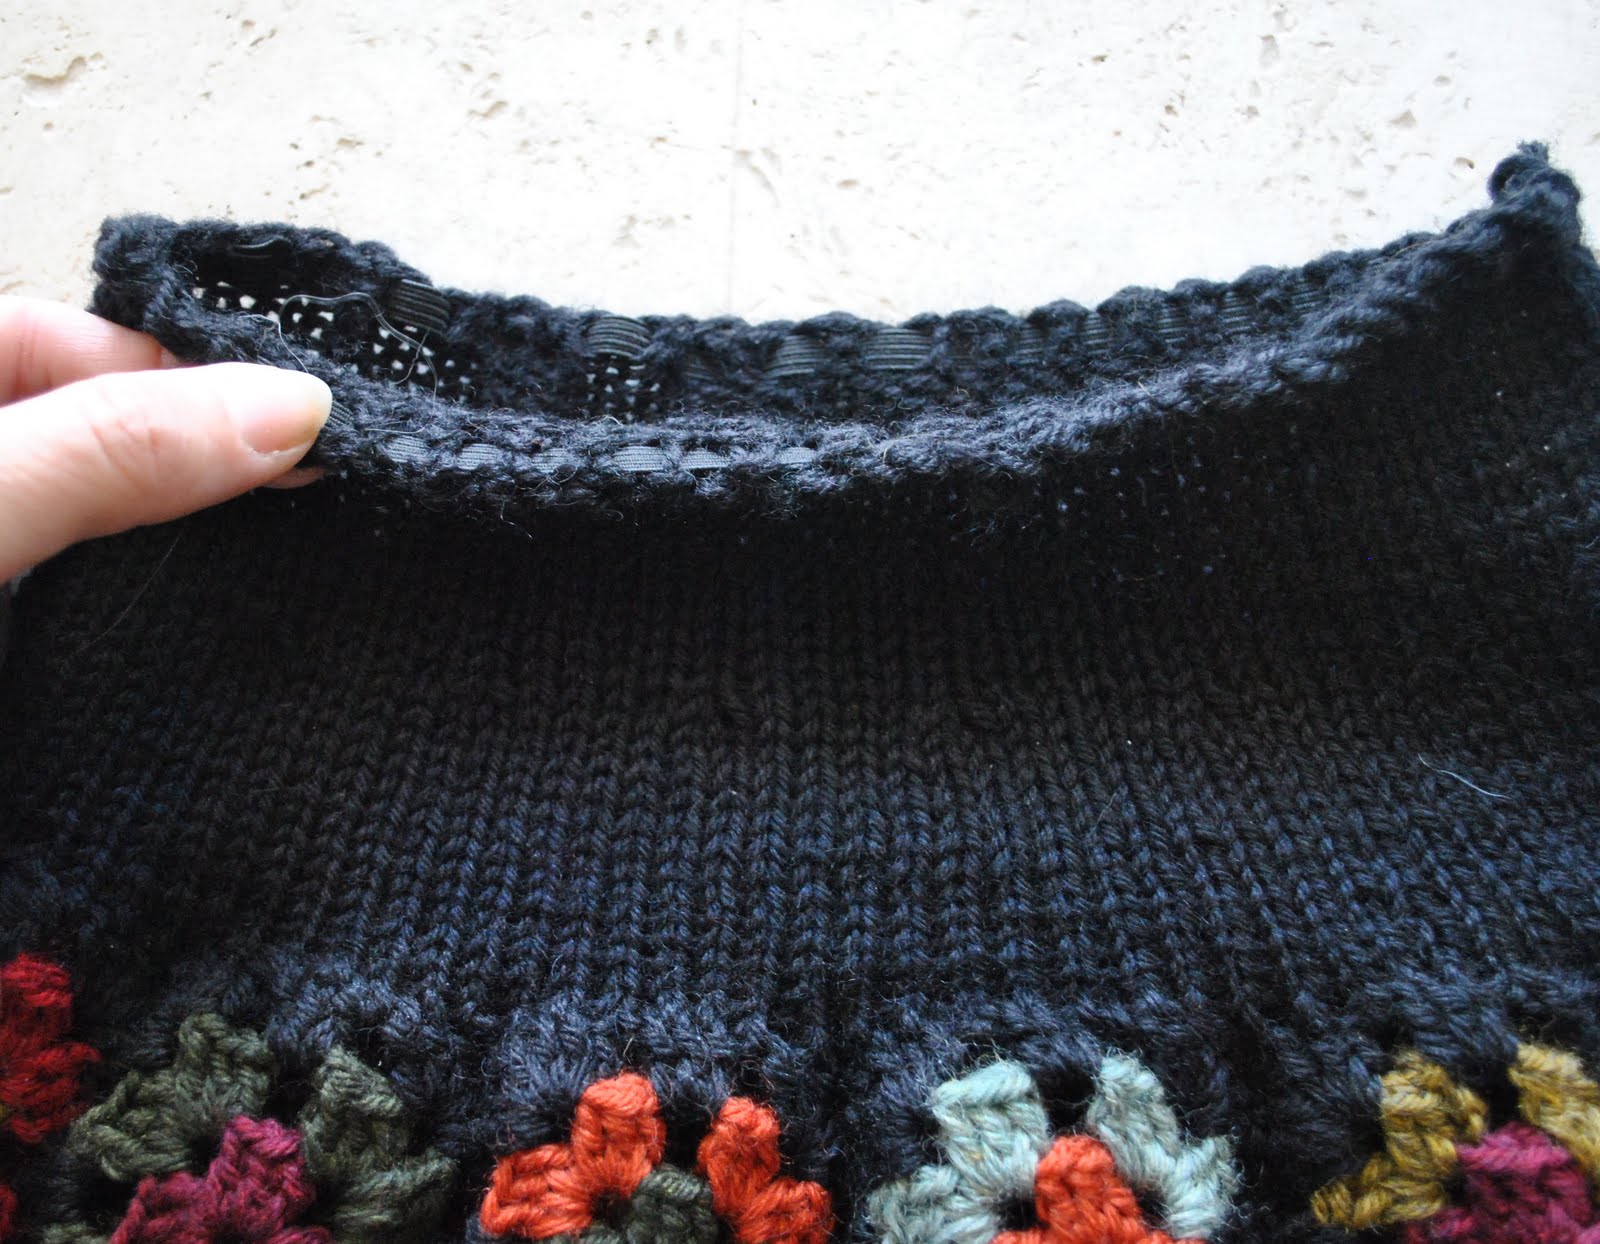
Then using a 3.5mm round needle, I picked up 92 stitches around the top (as a guide, 7 in each square and then 1 extra in the last),
K 15 rows in the round in black.
Row 16; (K4, K 2 tog) rep until you get to the last 2 st, K2  (78 st)
K 15 rows.
Cast off, veeeeery loosely (otherwise you won’t be able to fit the skirt over your hips!)
Take a piece of 2mm black elastic cut to fit your waist, and weave it in and out through the stitches in the second to top row, then machine zig-zag the ends together firmly.

The beauty of this is that it has no front or back, so there is less chance of developing a “seat” by sitting in the skirt the same way every time.  It can just be swivelled around any which way.  And since it is all wool and crocheted, it can be reshaped after laundering, if necessary.

SaveSave

SaveSave

pinterestmail

Blue-black basic

A new skirt… I’ve been casting a critical eye over some of my older skirts, and much as I still love them I can see some are sadly looking a wee bit on the shabby side.  So with the warmer weather just around the corner (thinking positively here) I’m looking to replace some of them.  I had a shortish length of charcoal fabric sitting in my fabric pile, leftover after Cassie had made herself a skirt.  Only about 65cm, and when I have leftovers of this measly size the standby option is often my old trusty faithful skirt pattern Vogue 7303.  So I made it up; lined with black acetate lining fabric, and hemmed with a bias strip of black cotton.  The inner raw edges are overlocked to finish.
But the colour was deeply uninspiring.  I hung it up in my wardrobe and it actually sat there for over a week with no desire on my part to wear it even once…  and really I do have a perfectly good little charcoal skirt already, and a newish black skirt too.  The fabric is a marle, woven in a drill-like weave similar to a denim, and had a distinct white fleck amongst the predominant charcoal grey, so I thought the white fleck-y parts of it would take up a strong coloured dye OK to give it a sheen of some colour.
So two days ago the brand new skirt was plunged recklessly into the murky depths of the dye-pot…
(before)

Do you like my dyeing stick; for stirring, poking and prodding?  I found it in the garden, and it has a perfectly placed twist in it to enable it to sit stably against the edge of the pot.  Pretty good, huh?
 I used iDye Poly in Blue and am pretty happy with this new deeply intense navy-blue colour.  The fabric doesn’t look like suiting any more, but now looks in close-up a bit like a soft woollen denim.  Quite interesting, and more inspiring than the rather predictable “before” skirt.  

Oh OK; I agree it’s still not a super exciting skirt but I think it will turn out to be a very useful little basic, as seemingly boring garments often are.
And it sure does feel gooooood to get rid of those leftovers from the stash!  In the past few months I’ve managed to use up several smaller amounts of fabric and gained useful garments in the process, so I’m feeling pretty virtuous right now.  Virtuous enough to offset just a little of the guilt from three new pieces of fabric recently added to my collection, anyway… hehehe.

Details:
Skirt; Vogue 7303 with modifications, charcoal marle fabric dyed with iDye Poly in Blue
Top; Veronika Maine
Cardigan and tights; Metalicus
Scarf; made by me with a jersey offcut, details here
Shoes; Django and Juliette, from Zomp shoes

pinterestmail
Switch to mobile version
↓