Tag Archives: Top

A Man-hoodie

I sew mostly for myself šŸ™‚  Now my children are all grown up they select and buy their own clothes, of course.  It’s a rare occasion for anyone to make a request  šŸ™ although I do so love it when they do.
My husband also doesn’t ever ask for very much for himself either, so when he does then I pay attention because I know it is because he really really wants it.
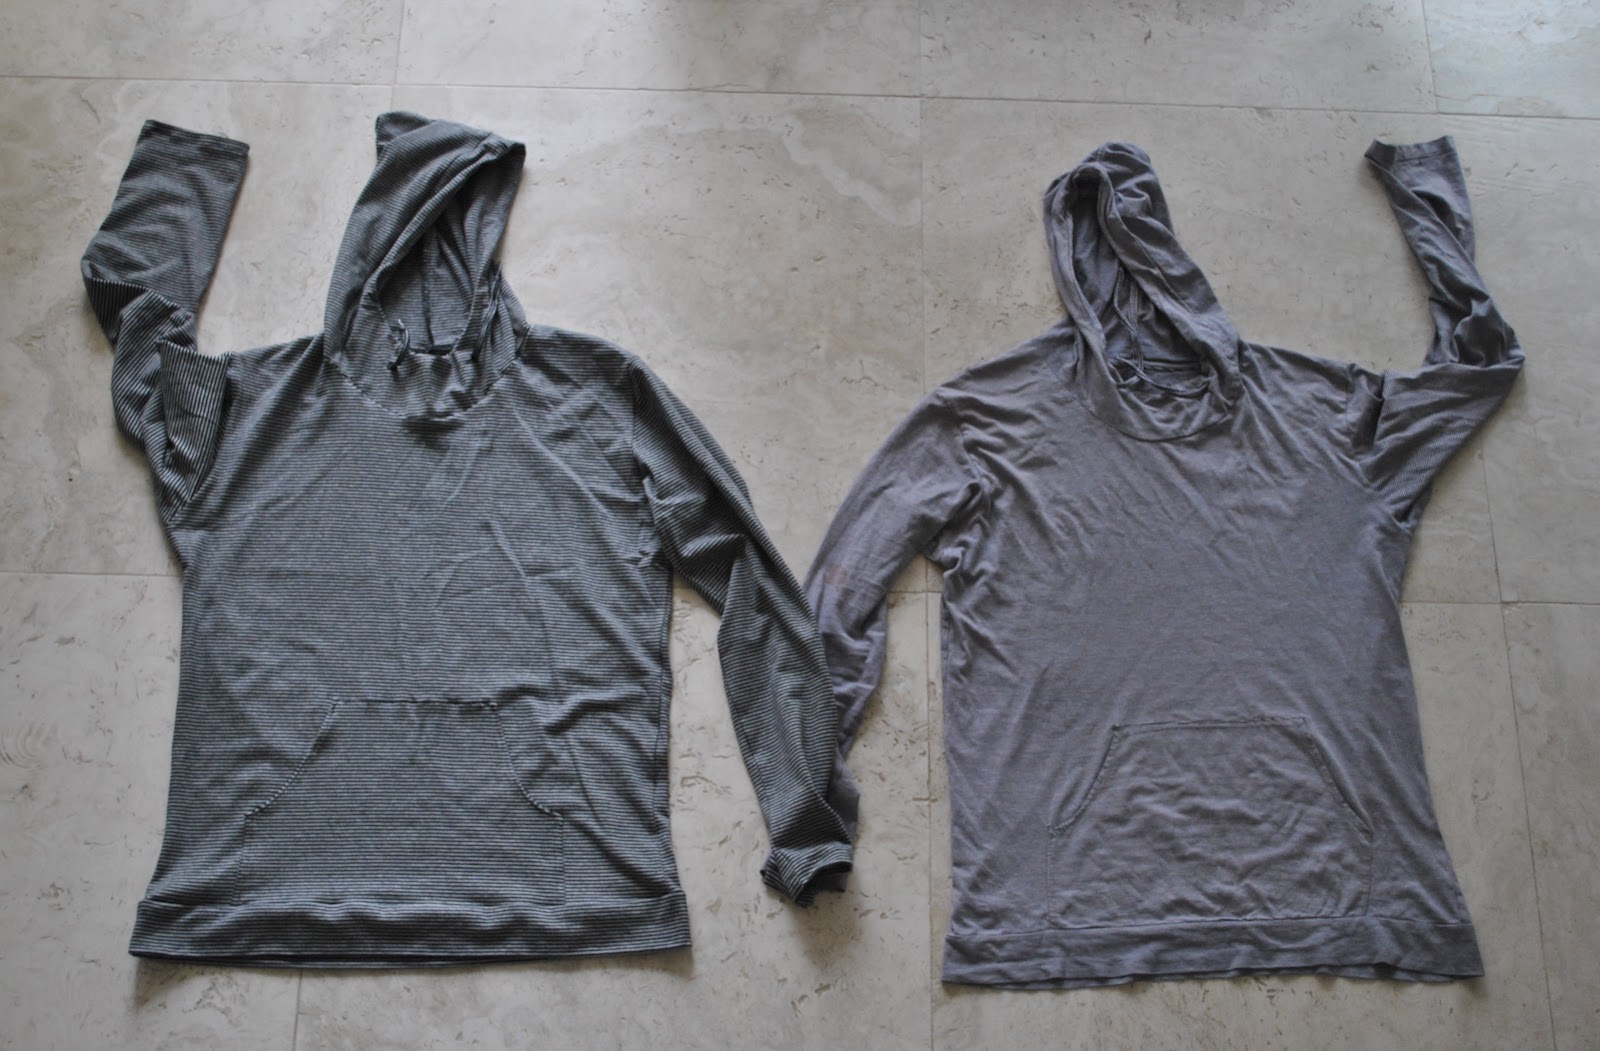
He had a favourite RTW Tshirt hoodie thing, and he wanted one to replace it.  The new one had to be as close to the old one as humanly possible, please.  The old one was thin and brittle from washing and all stretched out and sad, and had some stains on it since as it was truly his favourite favourite Tshirt of all time, he has worn it for everything, including the day he applied wood stain to a set of jarrah chairs.  Woops!  And there were holes too.
Finding the perfect fabric for Craig’s Tshirt has become something of a quest over the past few months.  Seriously, I have searched and searched, and so has he.  In the meantime the old Tshirt got even more truly horrible….
When we were in Europe and visiting the occasional fabric store together, I set him the task of finding fabric for his shirt.  Have you ever asked a non-sewing person to choose a fabric for some garment?  It is at these times that one starts to realise that one has actually learnt some fundamentally important things after years of sewing after all… like that a knit is a knit and that a woven is not going to ever do the job of a knit, no matter how gorgeous it is.  He had a thing for the lovely pin-striped linens in Milan and kept choosing these as the fabric for his new Tshirt.  I explained the difference, and sent him back off to look for cotton jersey knits.  He would come back, triumphantly bearing another bolt of pin-striped linen.  Sigh.
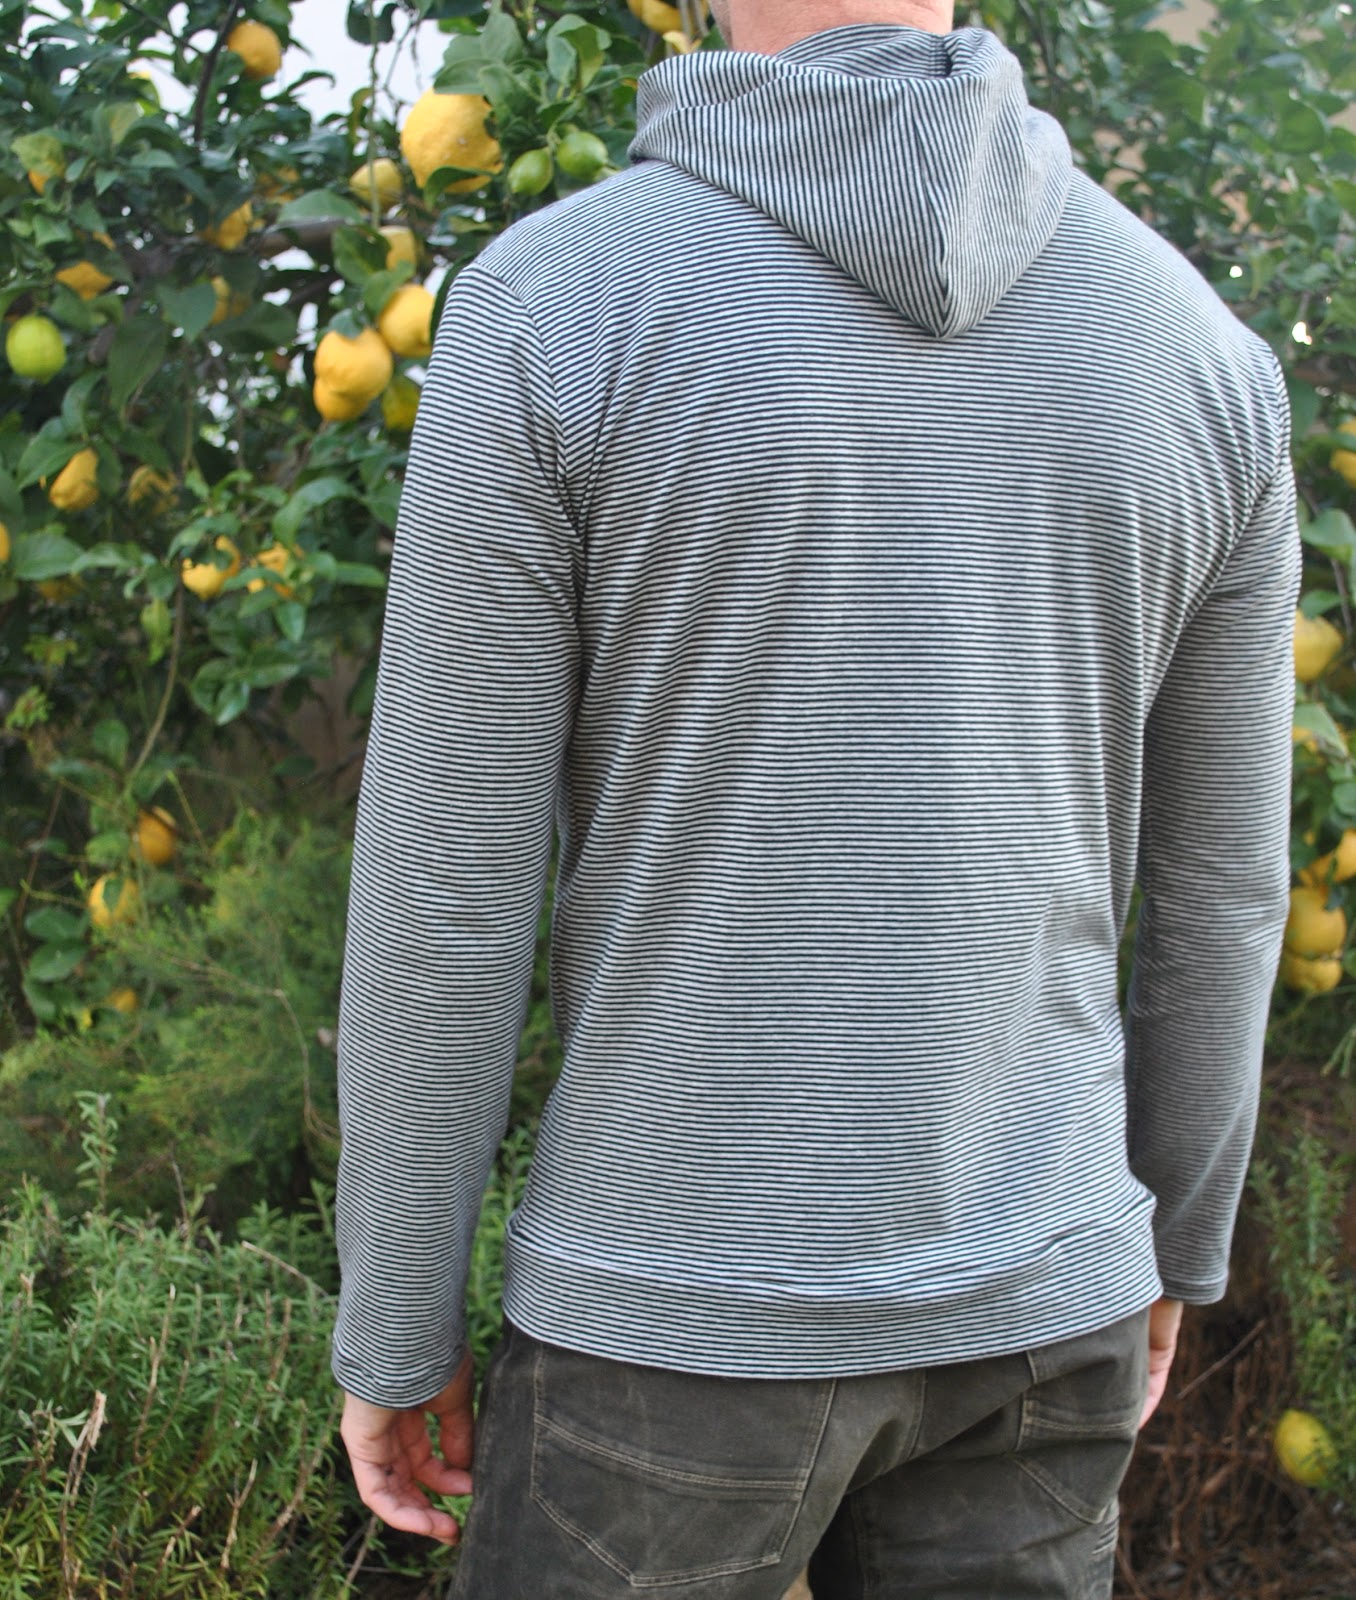
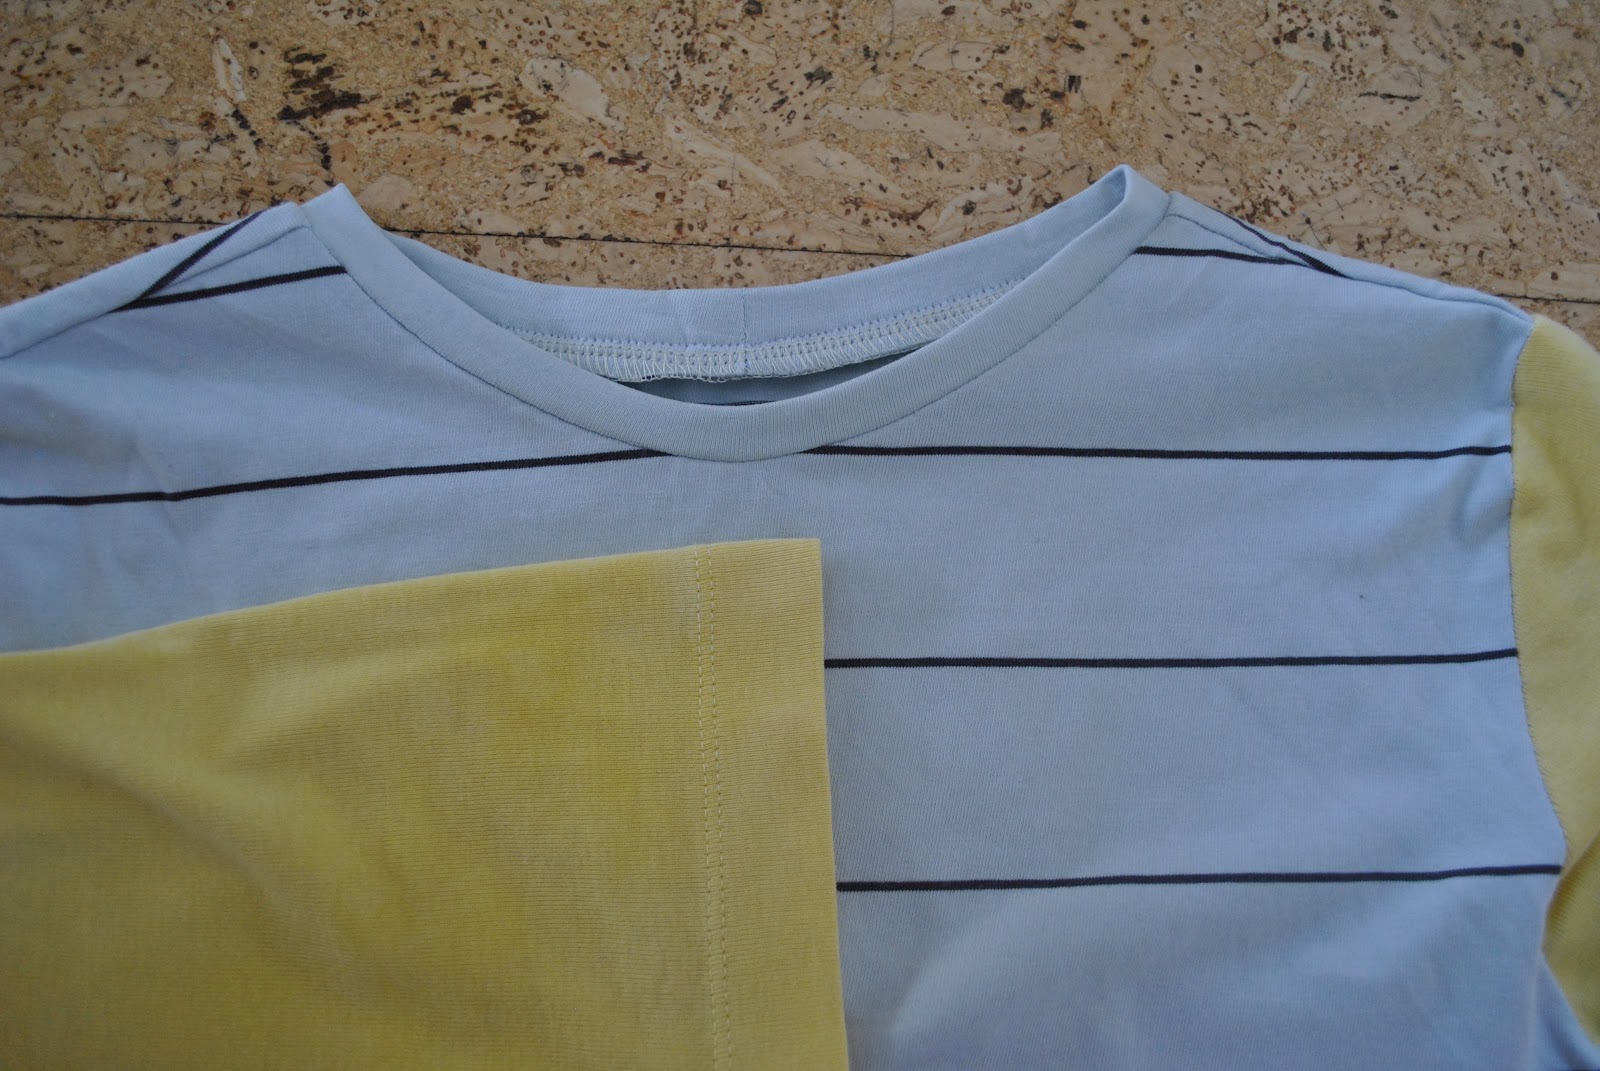
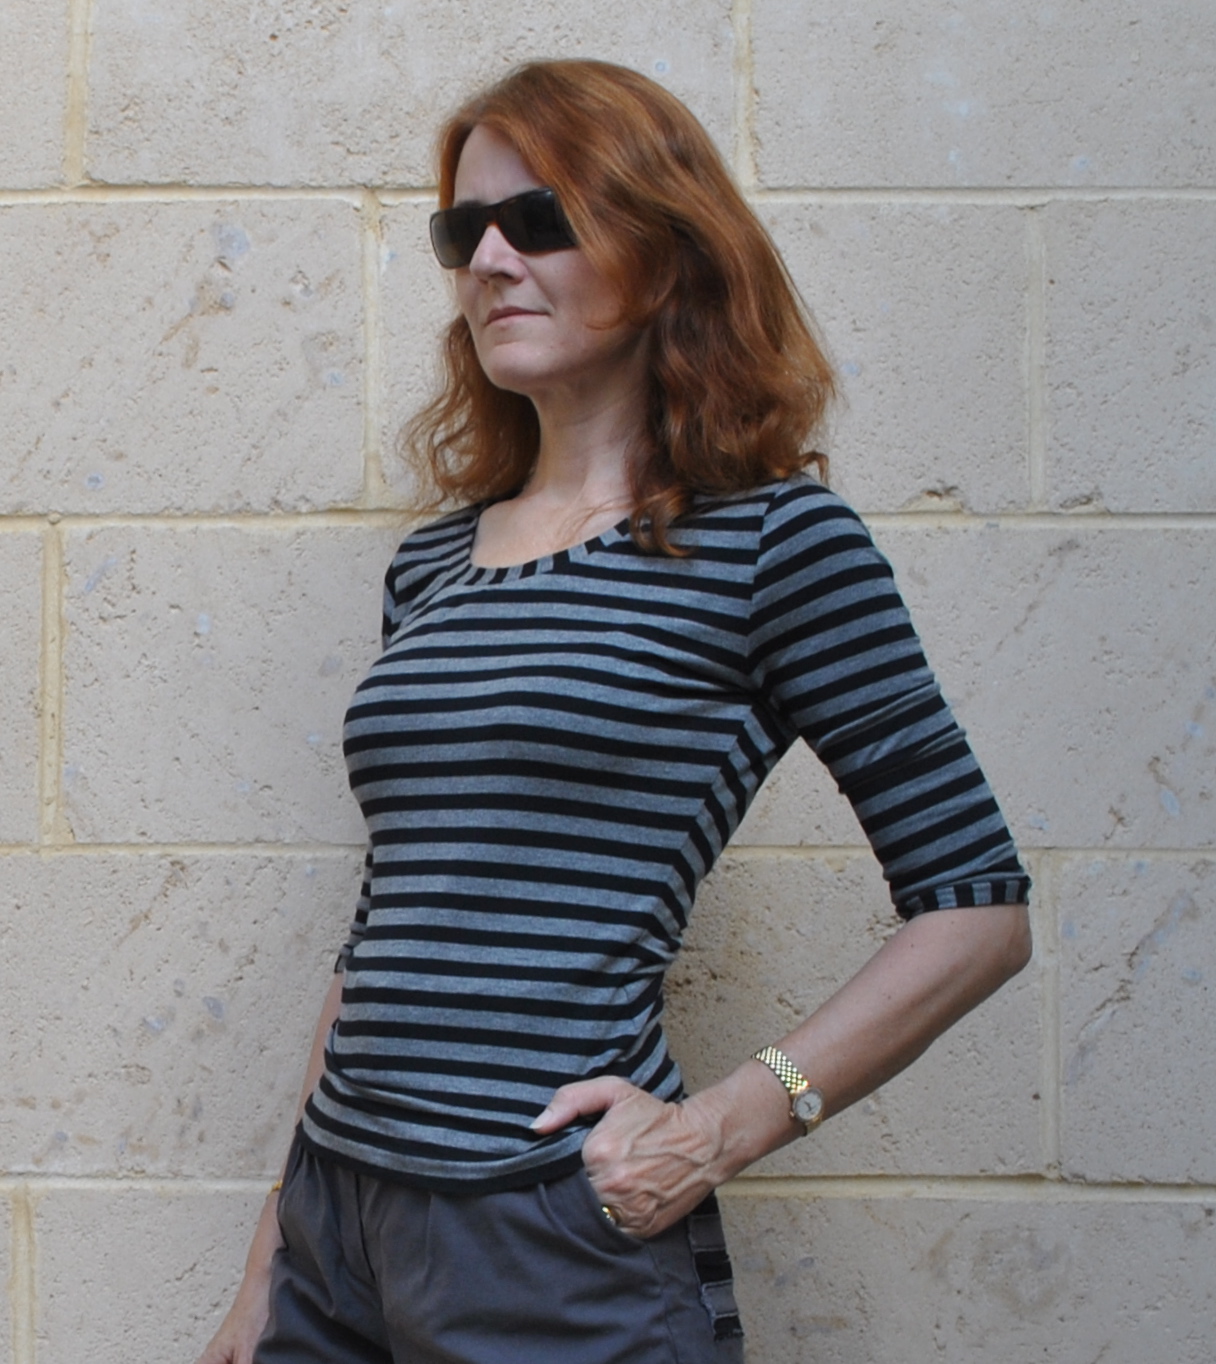
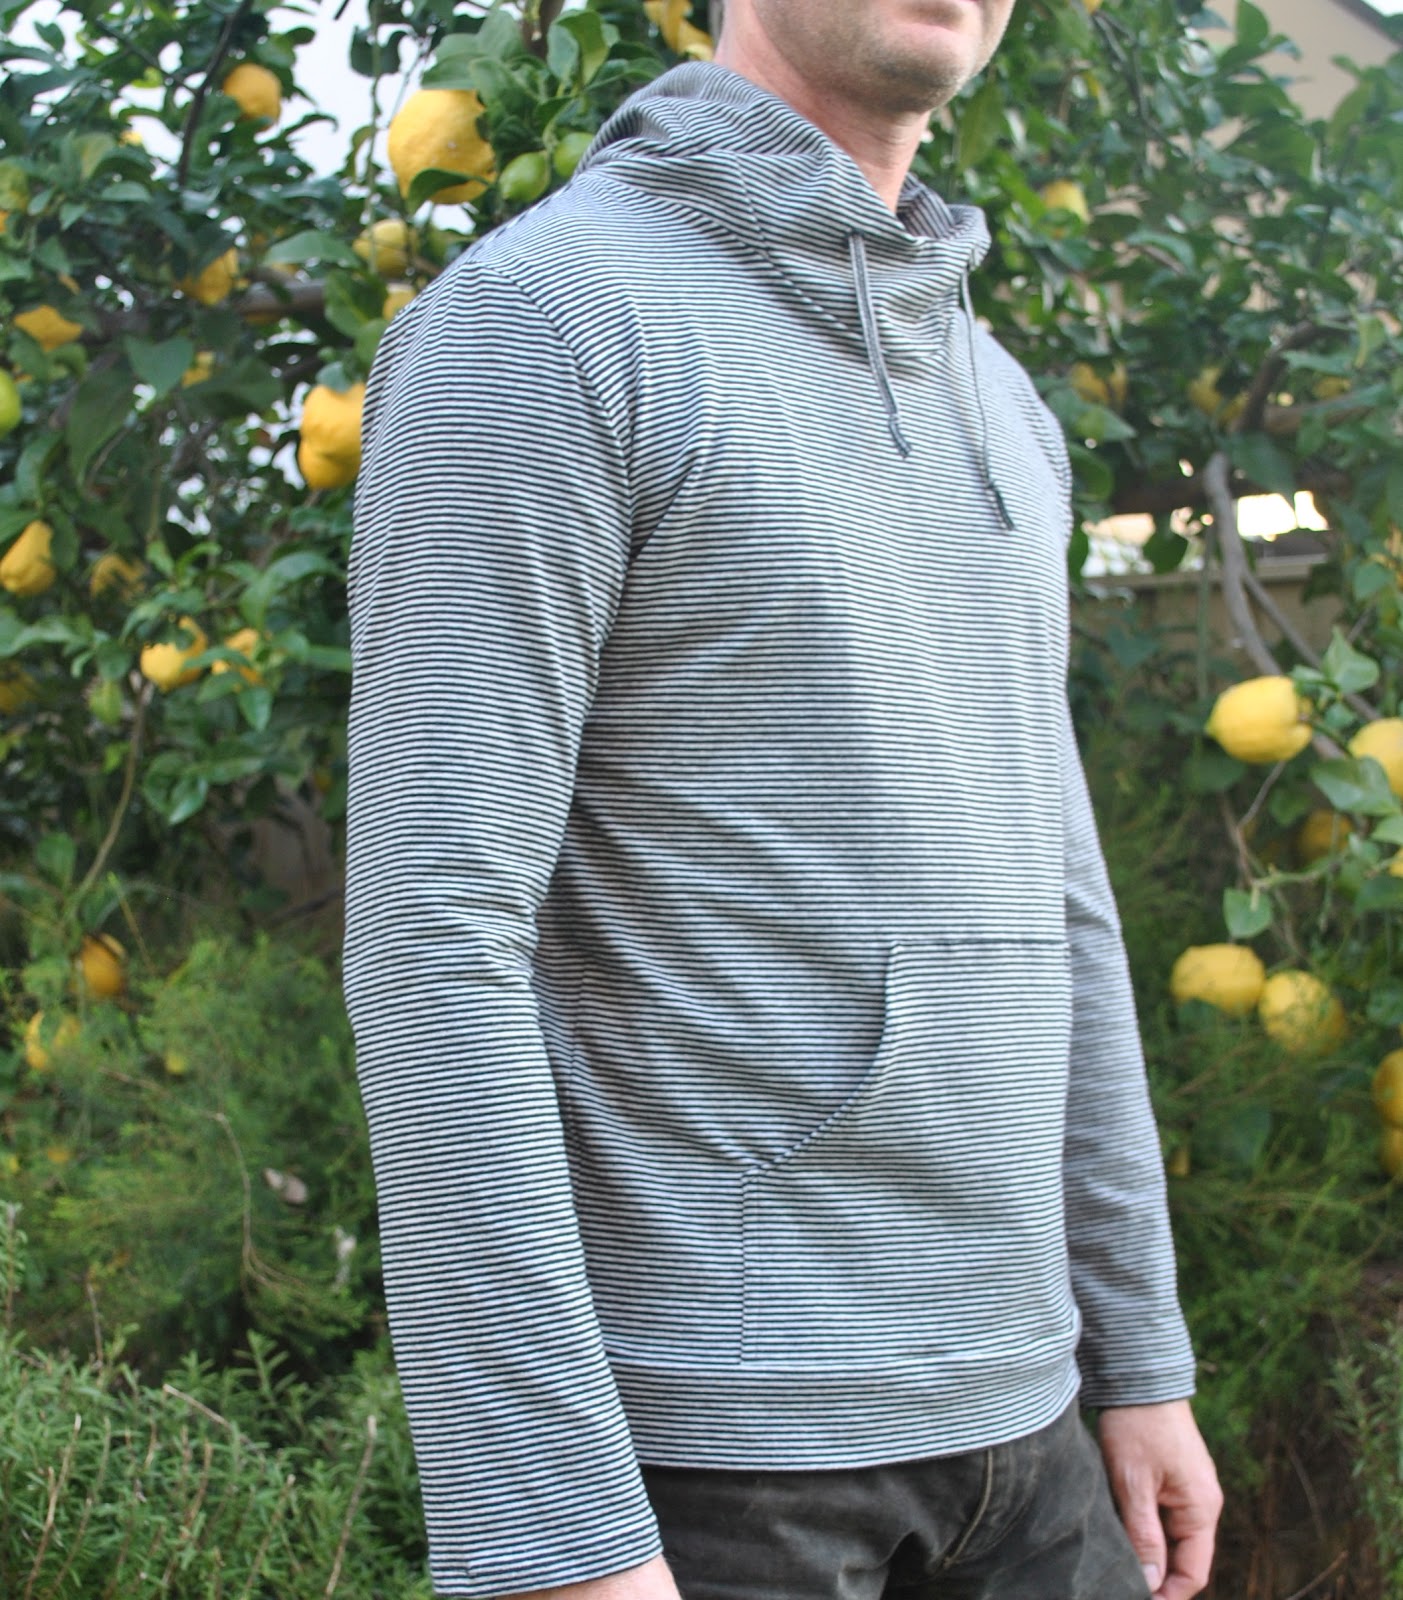
I think we had both started to wonder if I would ever make the Tshirt, when I spotted it.  In Spotlight, of all places.  The perfect fabric.  Really nice quality cotton jersey, in a nice manly pinstripe, in nice manly shades of charcoal and black.  Sheer unadulterated perfection!  I couldn’t believe my luck and I reacted like a frog’s tongue to a passing fly…  pow! the fabric was snatched up and clutched in a death grip to my chest and I rushed straight over to the cutting counter (maniacal witch-cackle mentally sounding in my head)
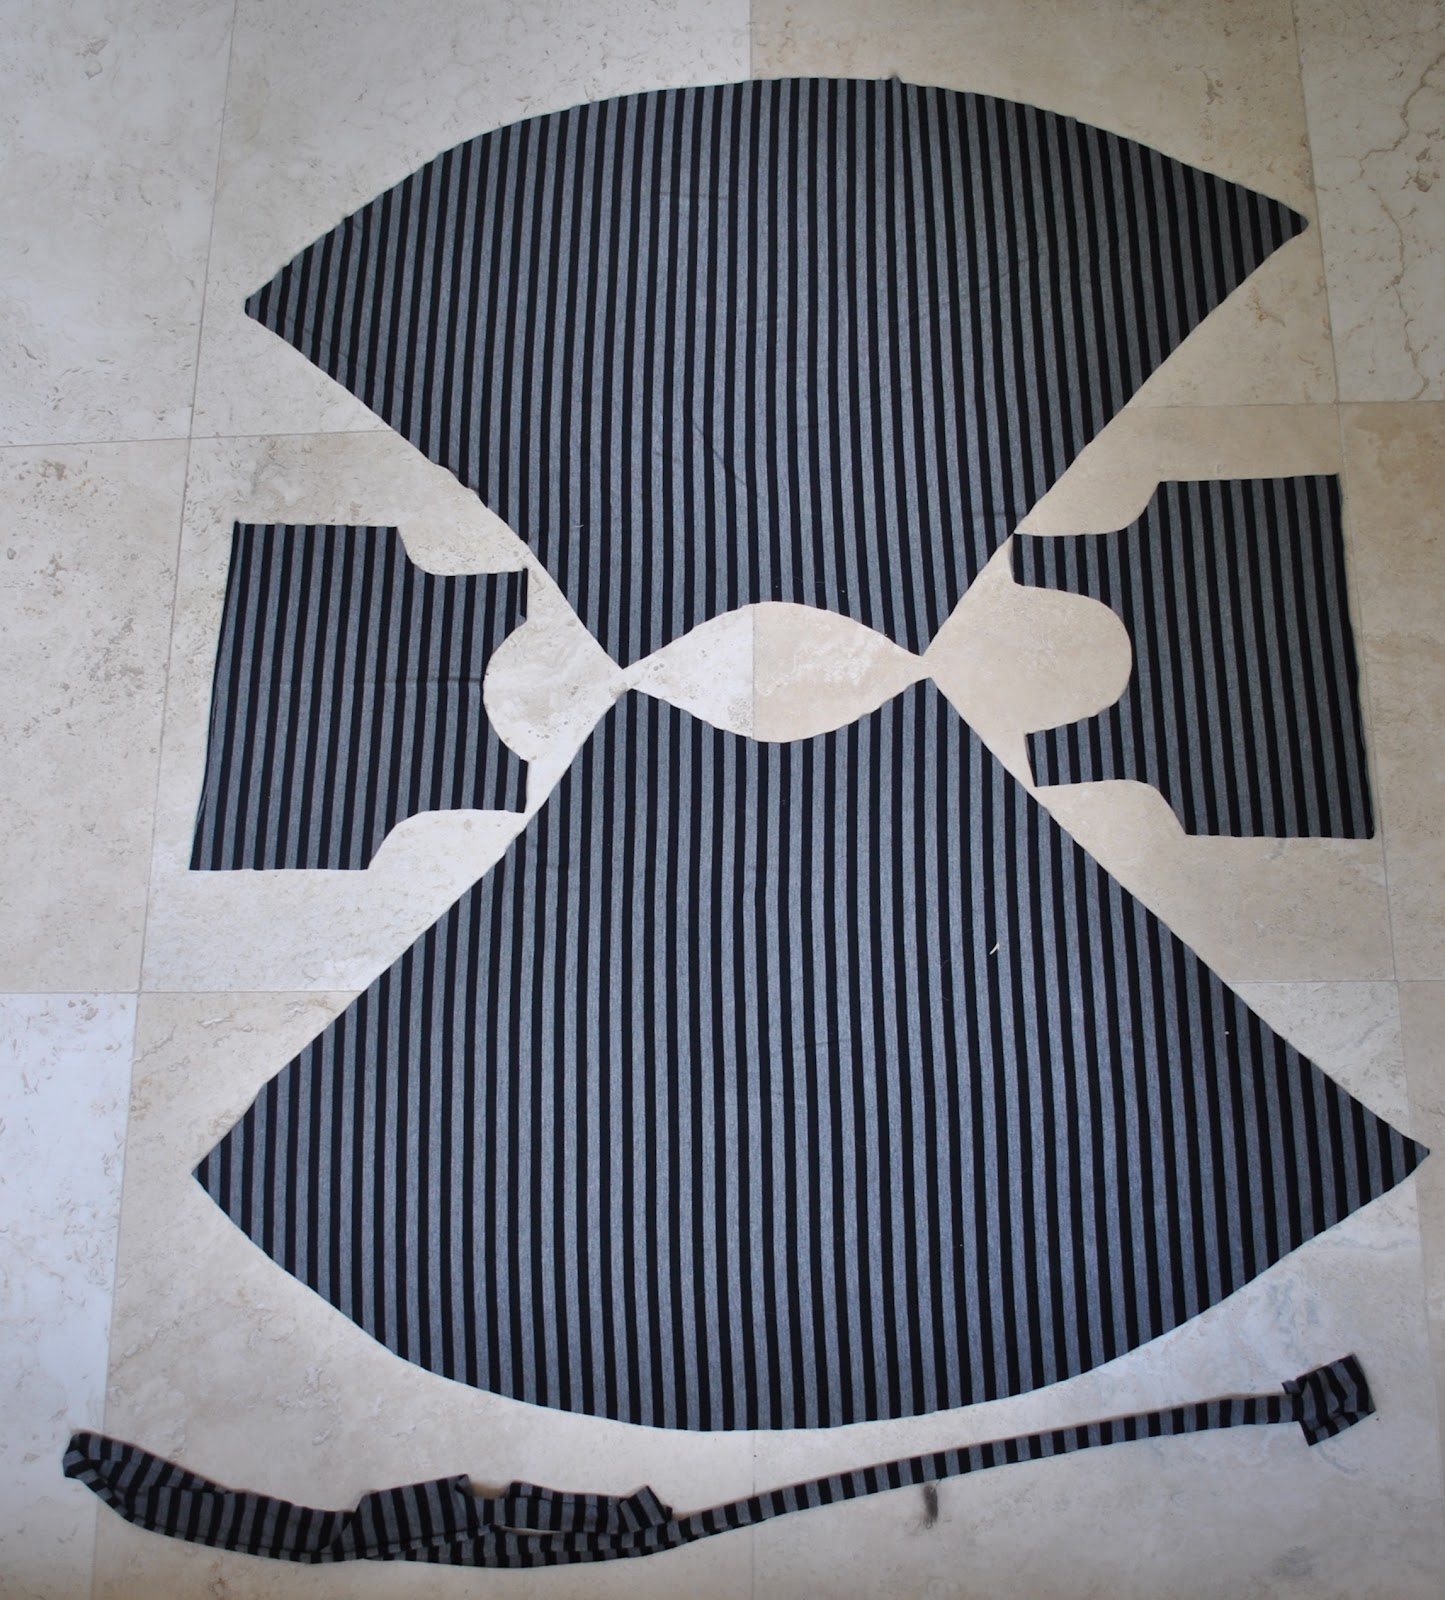
I drafted a pattern by laying down the old Tshirt and drawing around it.
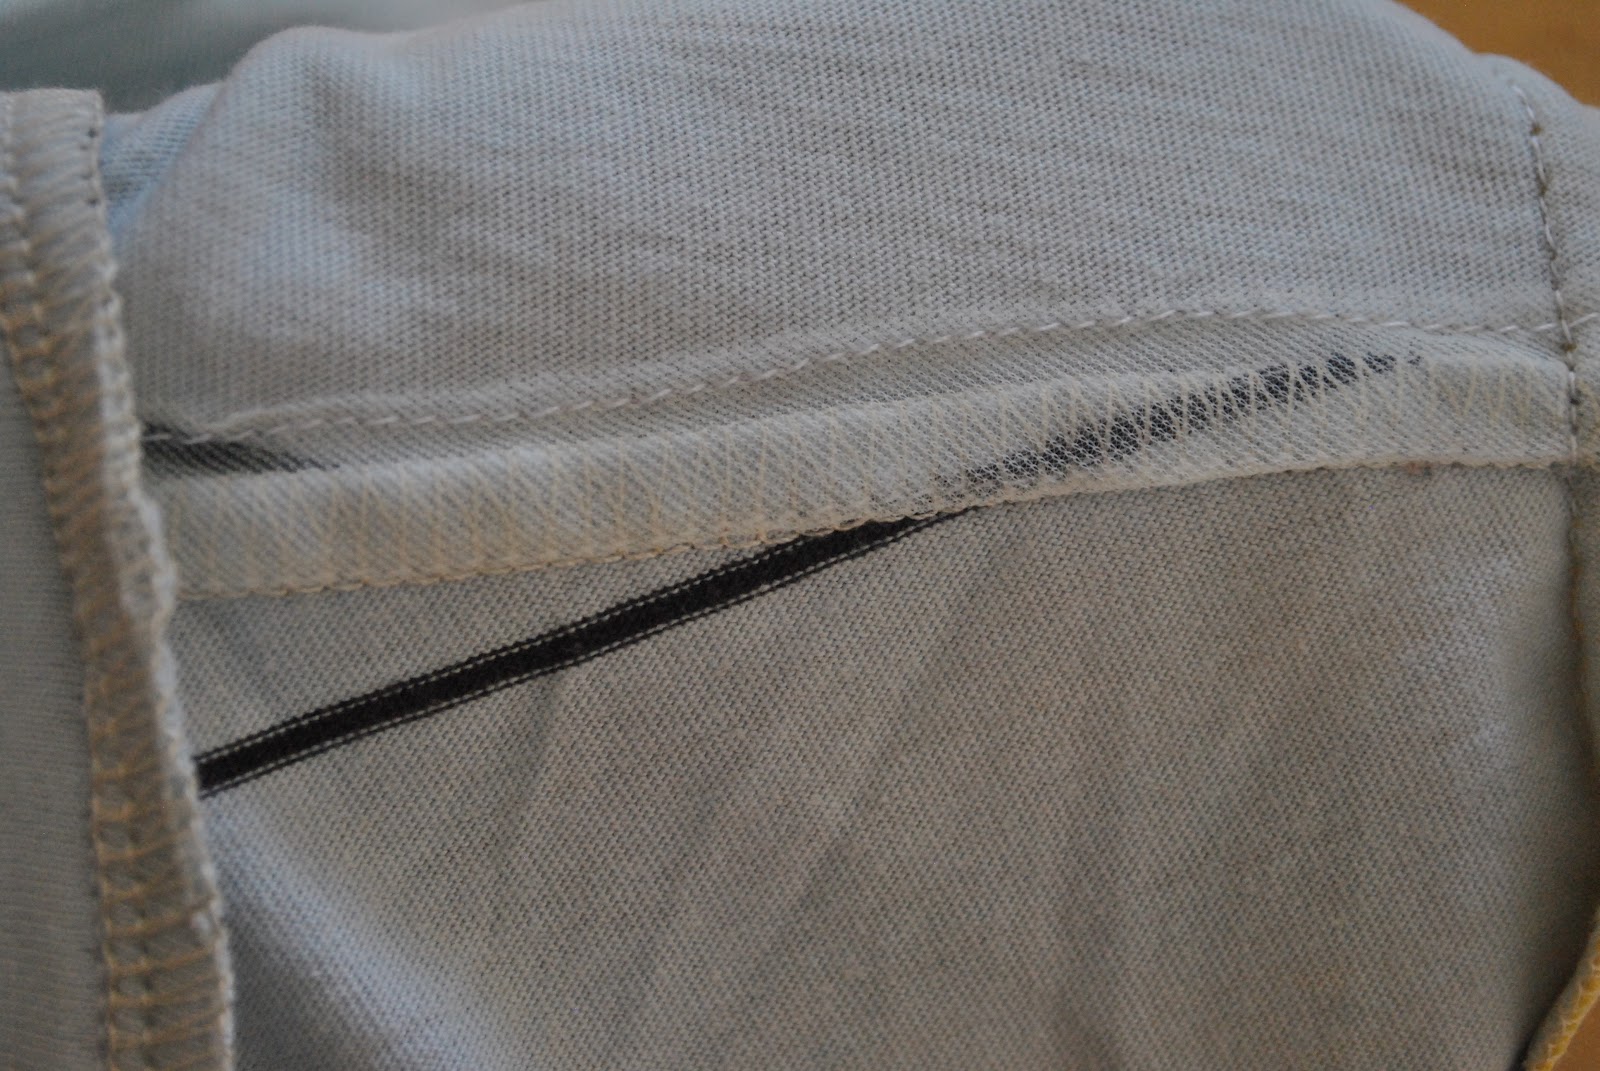
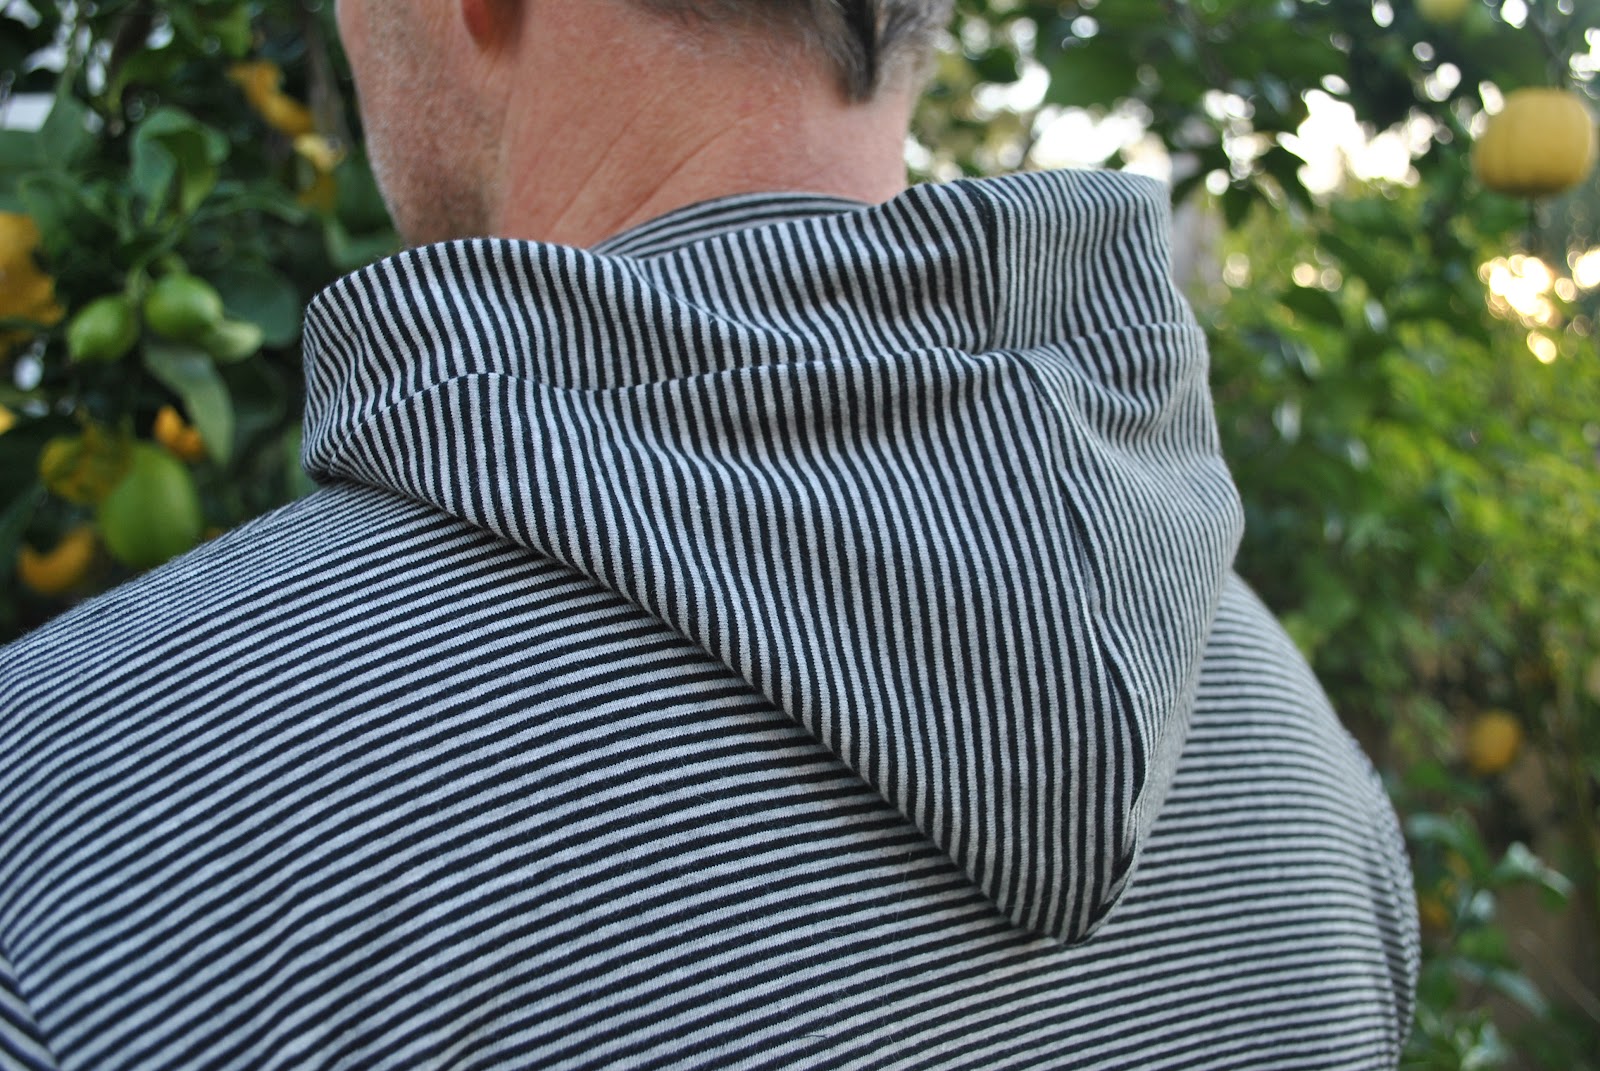
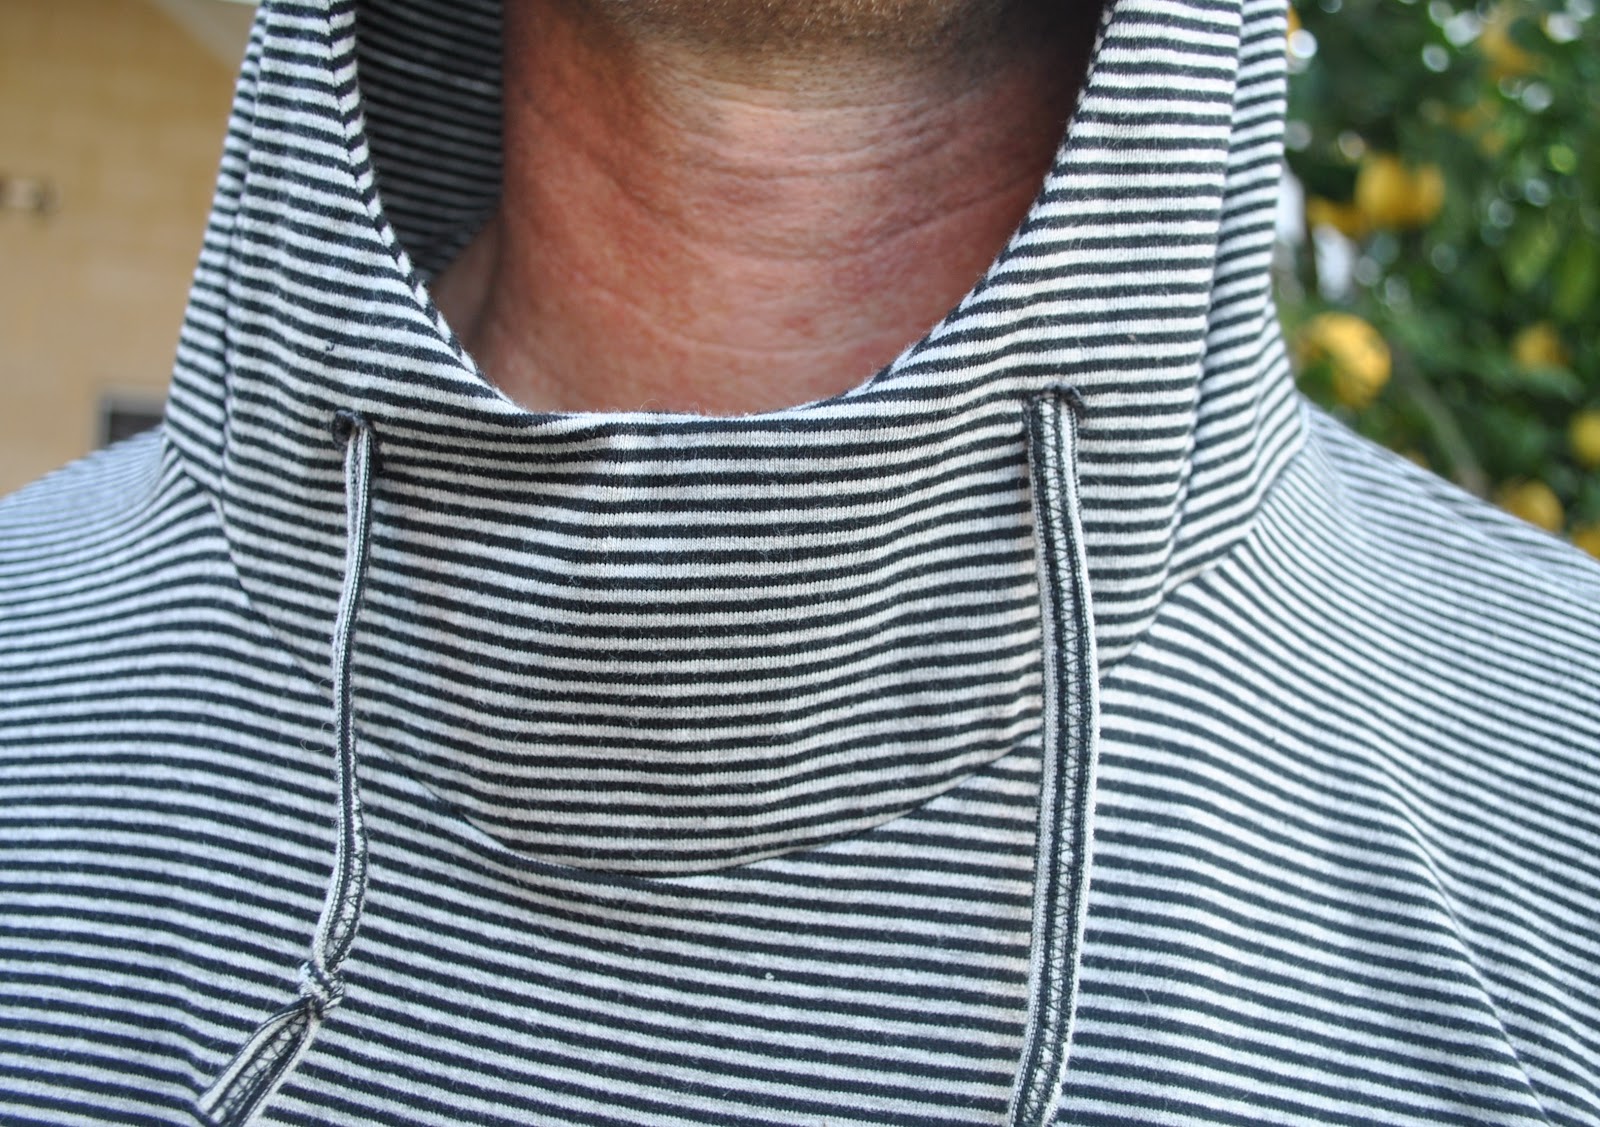
It does have a pretty cool hood actually… I was intrigued when I inspected it closely and pretty excited to see it drawn out flat.  The hoodie has three pieces; the conventional two “hoodie” pieces cut somewhat shallower than normal, and another self-faced front piece shaped like the letter “U”, that becomes a sort of casing/collar on the front.  I really like this feature, and will probably use it over again.  There are two little holes in it for the drawstring, and I finished the edges of each hole with miniature blanket stitches, having newly re-discovered my latent embroidery skills, hehe  šŸ™‚

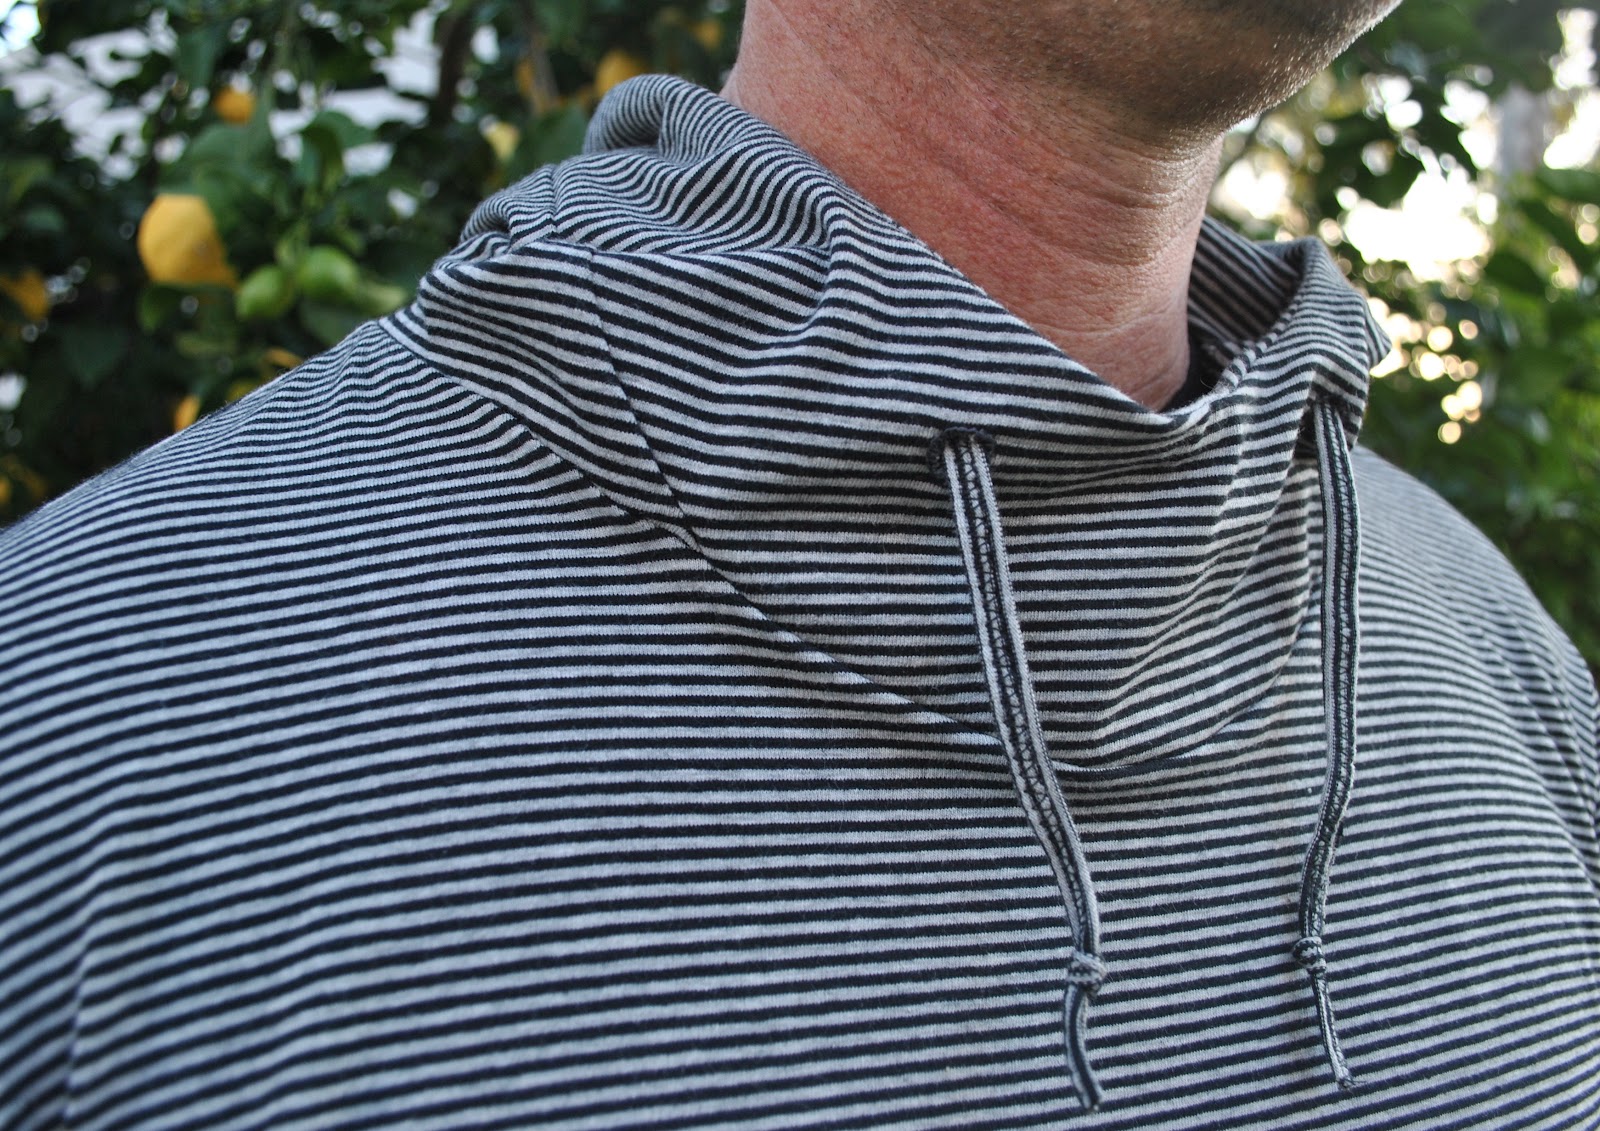
The self fabric spaghetti drawstring is a long strip of fabric; I folded the two long sides in evenly as I was going along, guiding it through the machine on zig-zag stitch.  The fabric wanted to curl in on itself anyway.

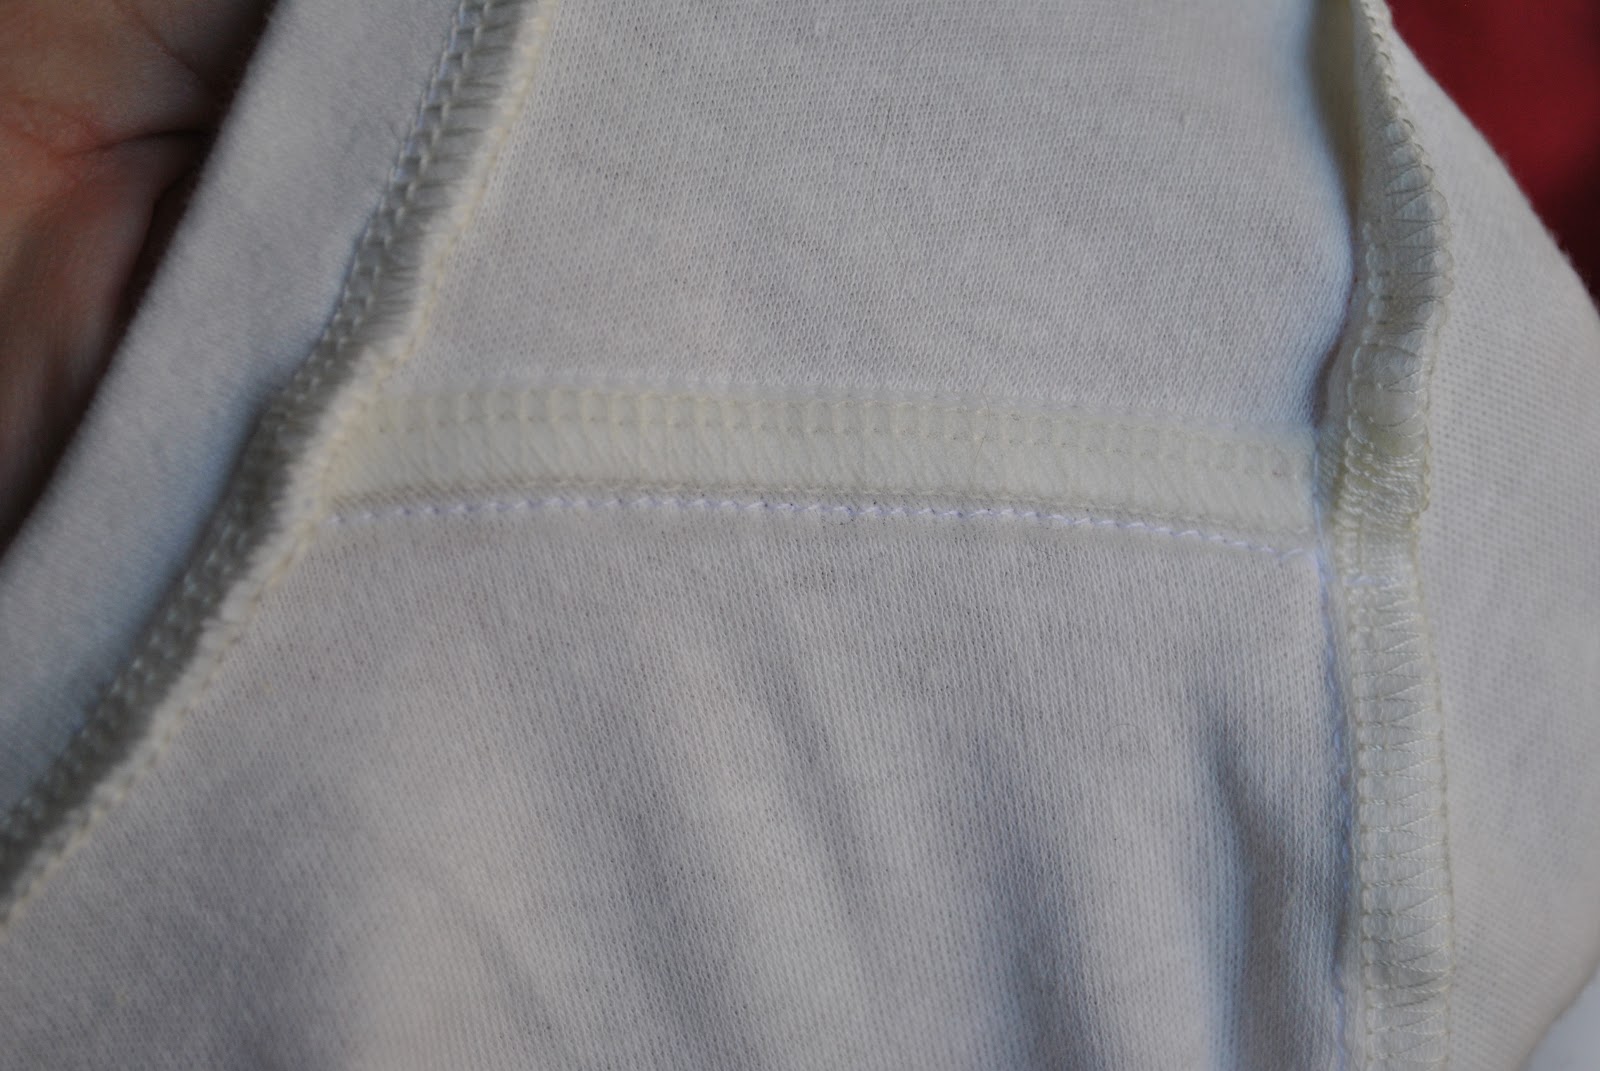
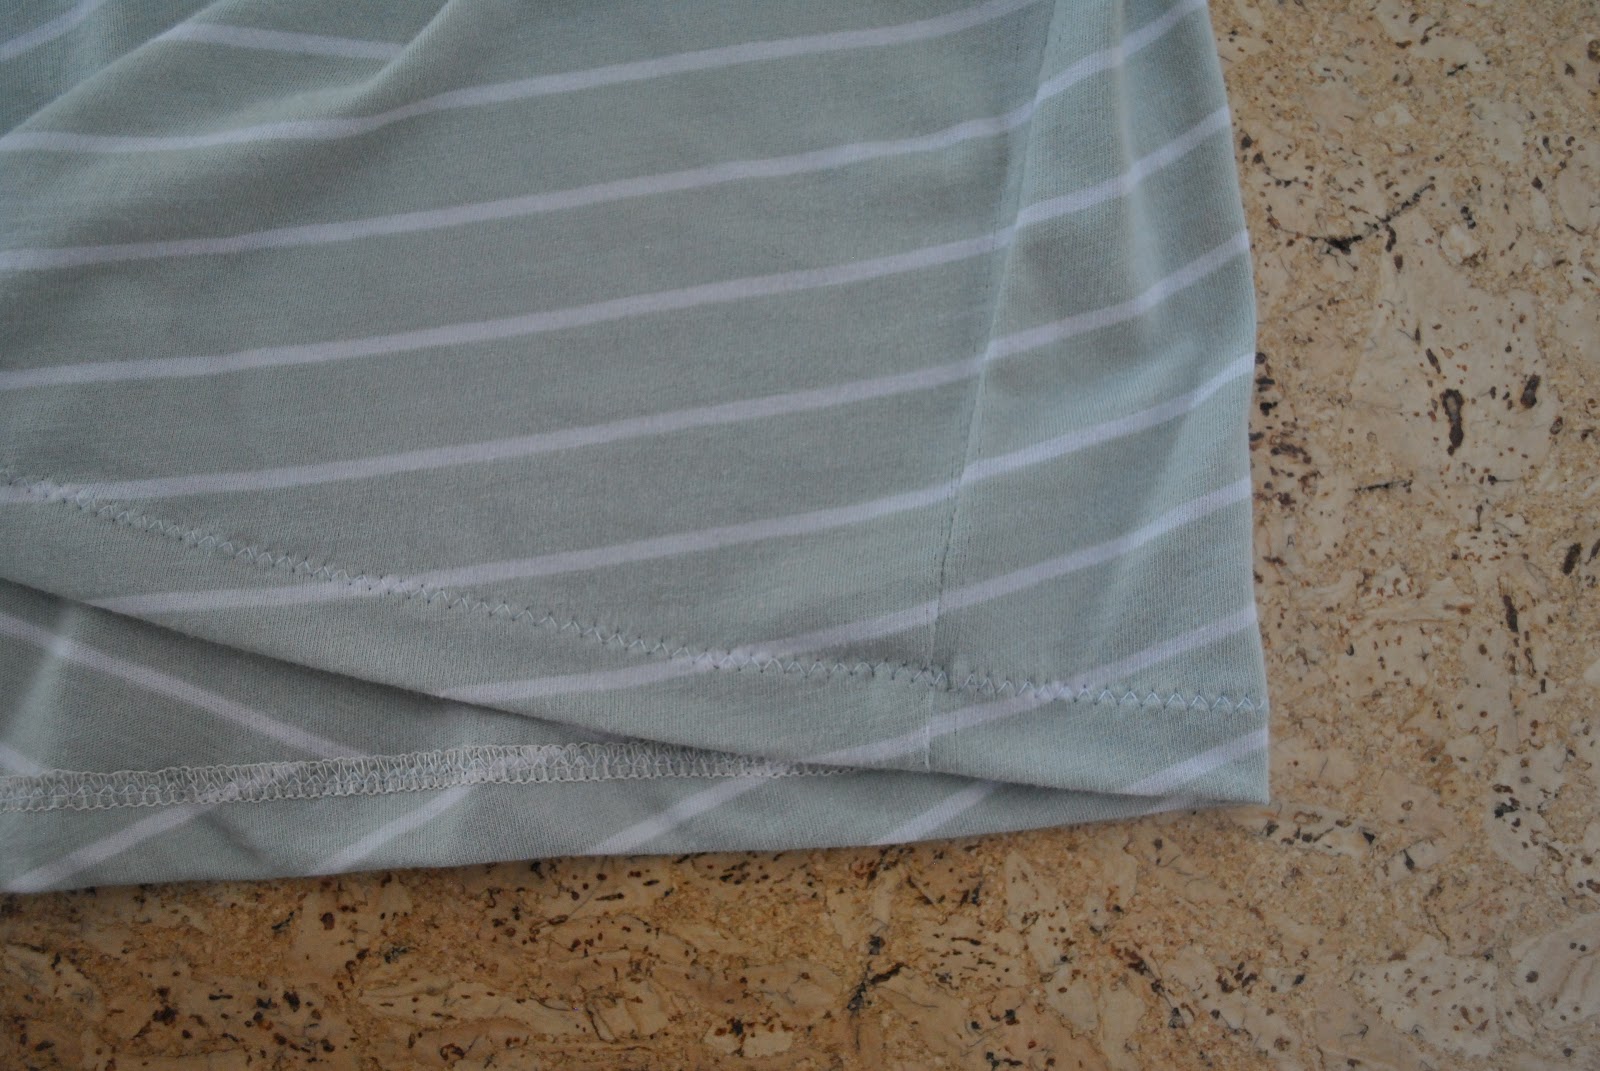
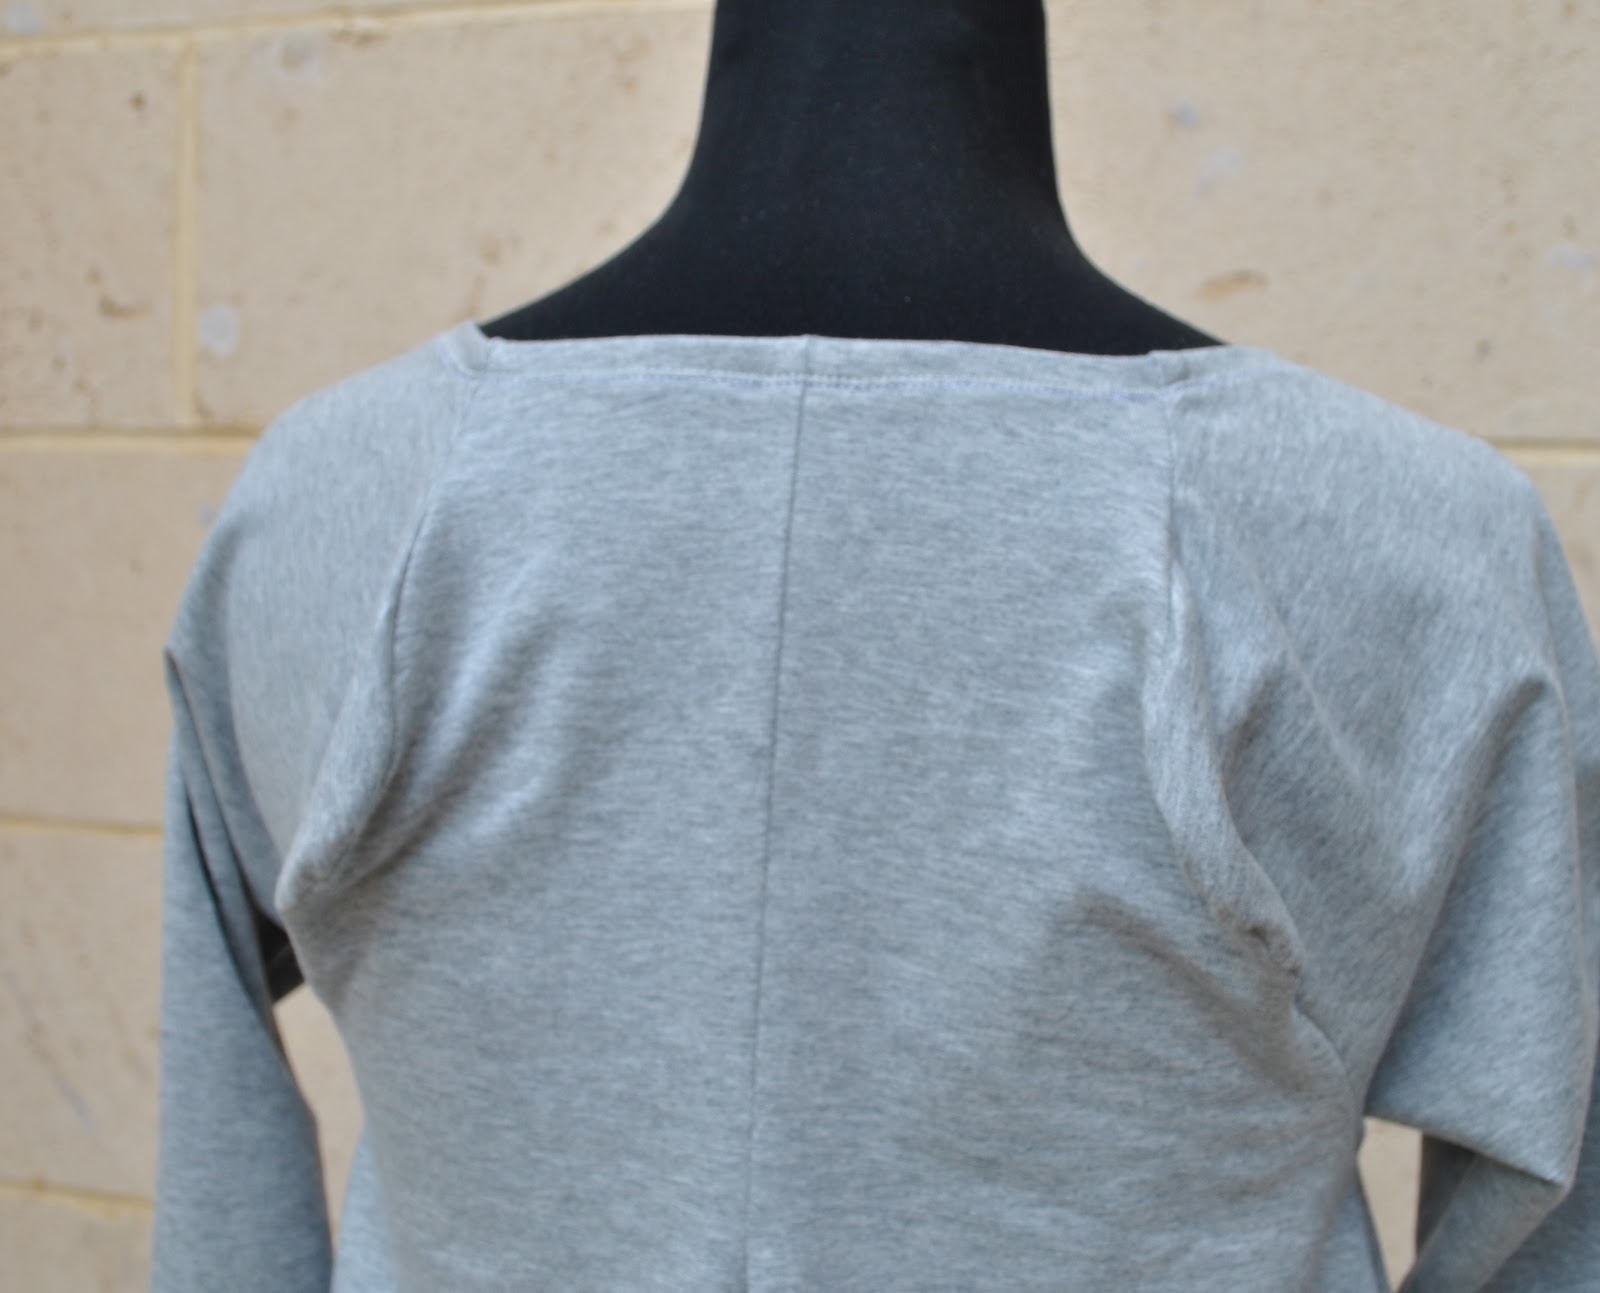
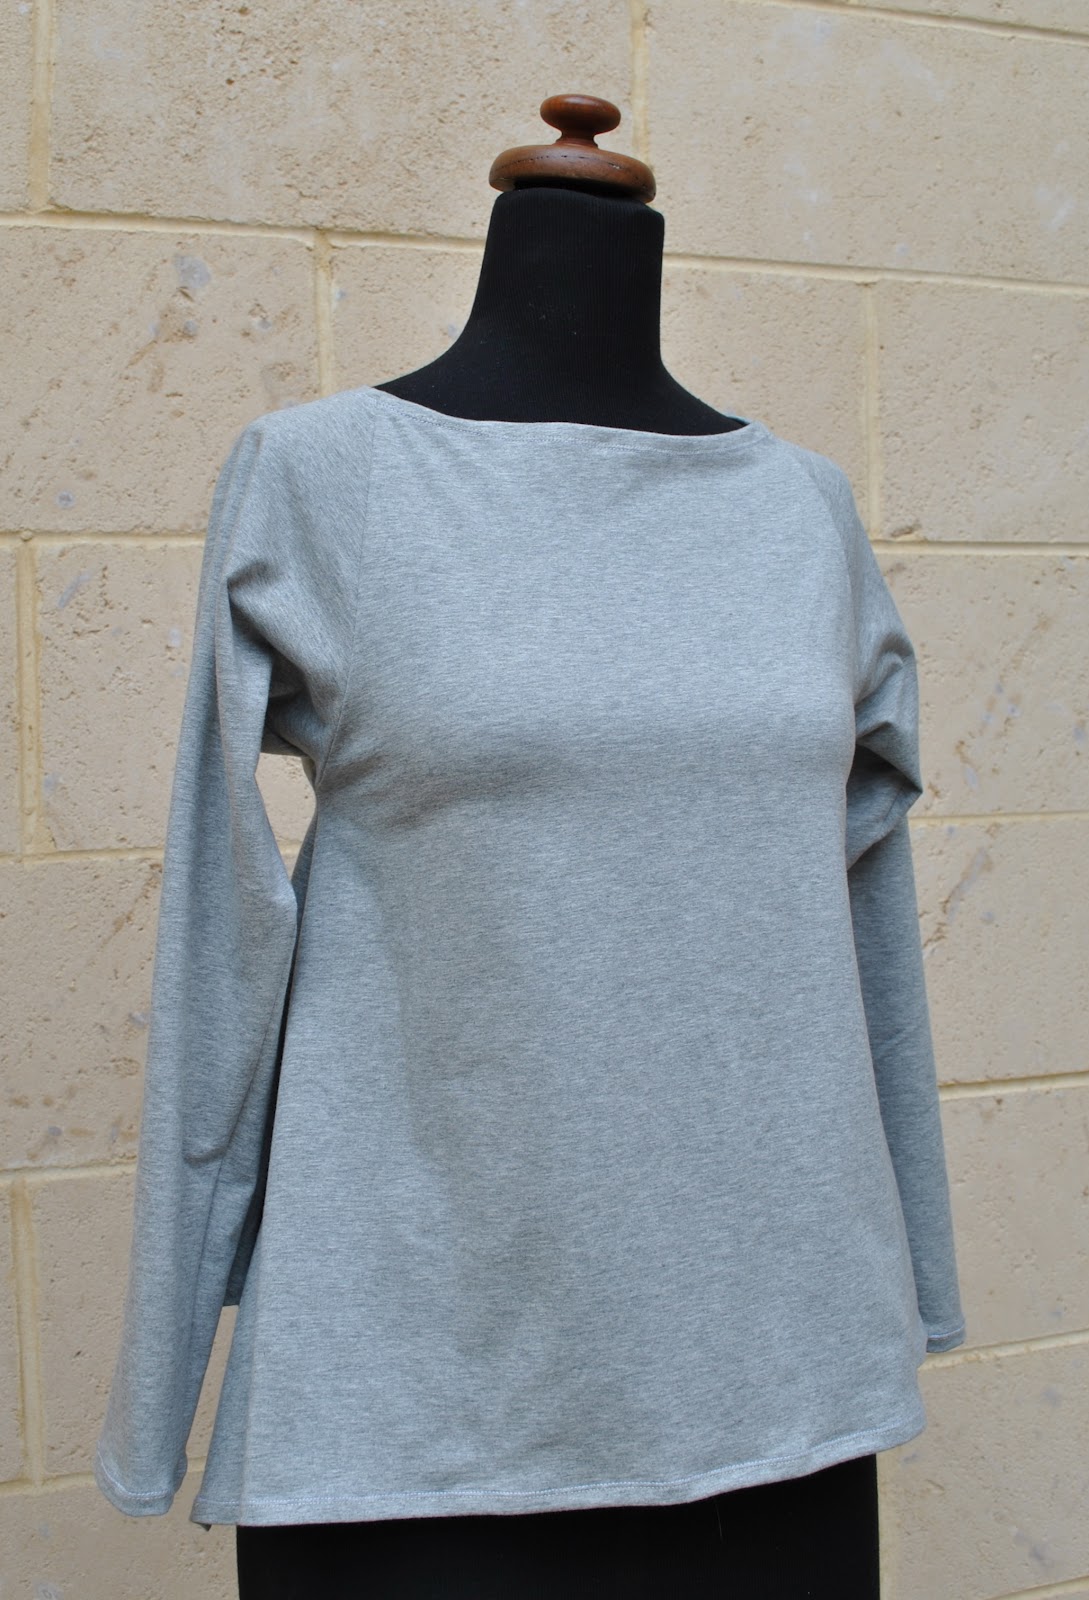
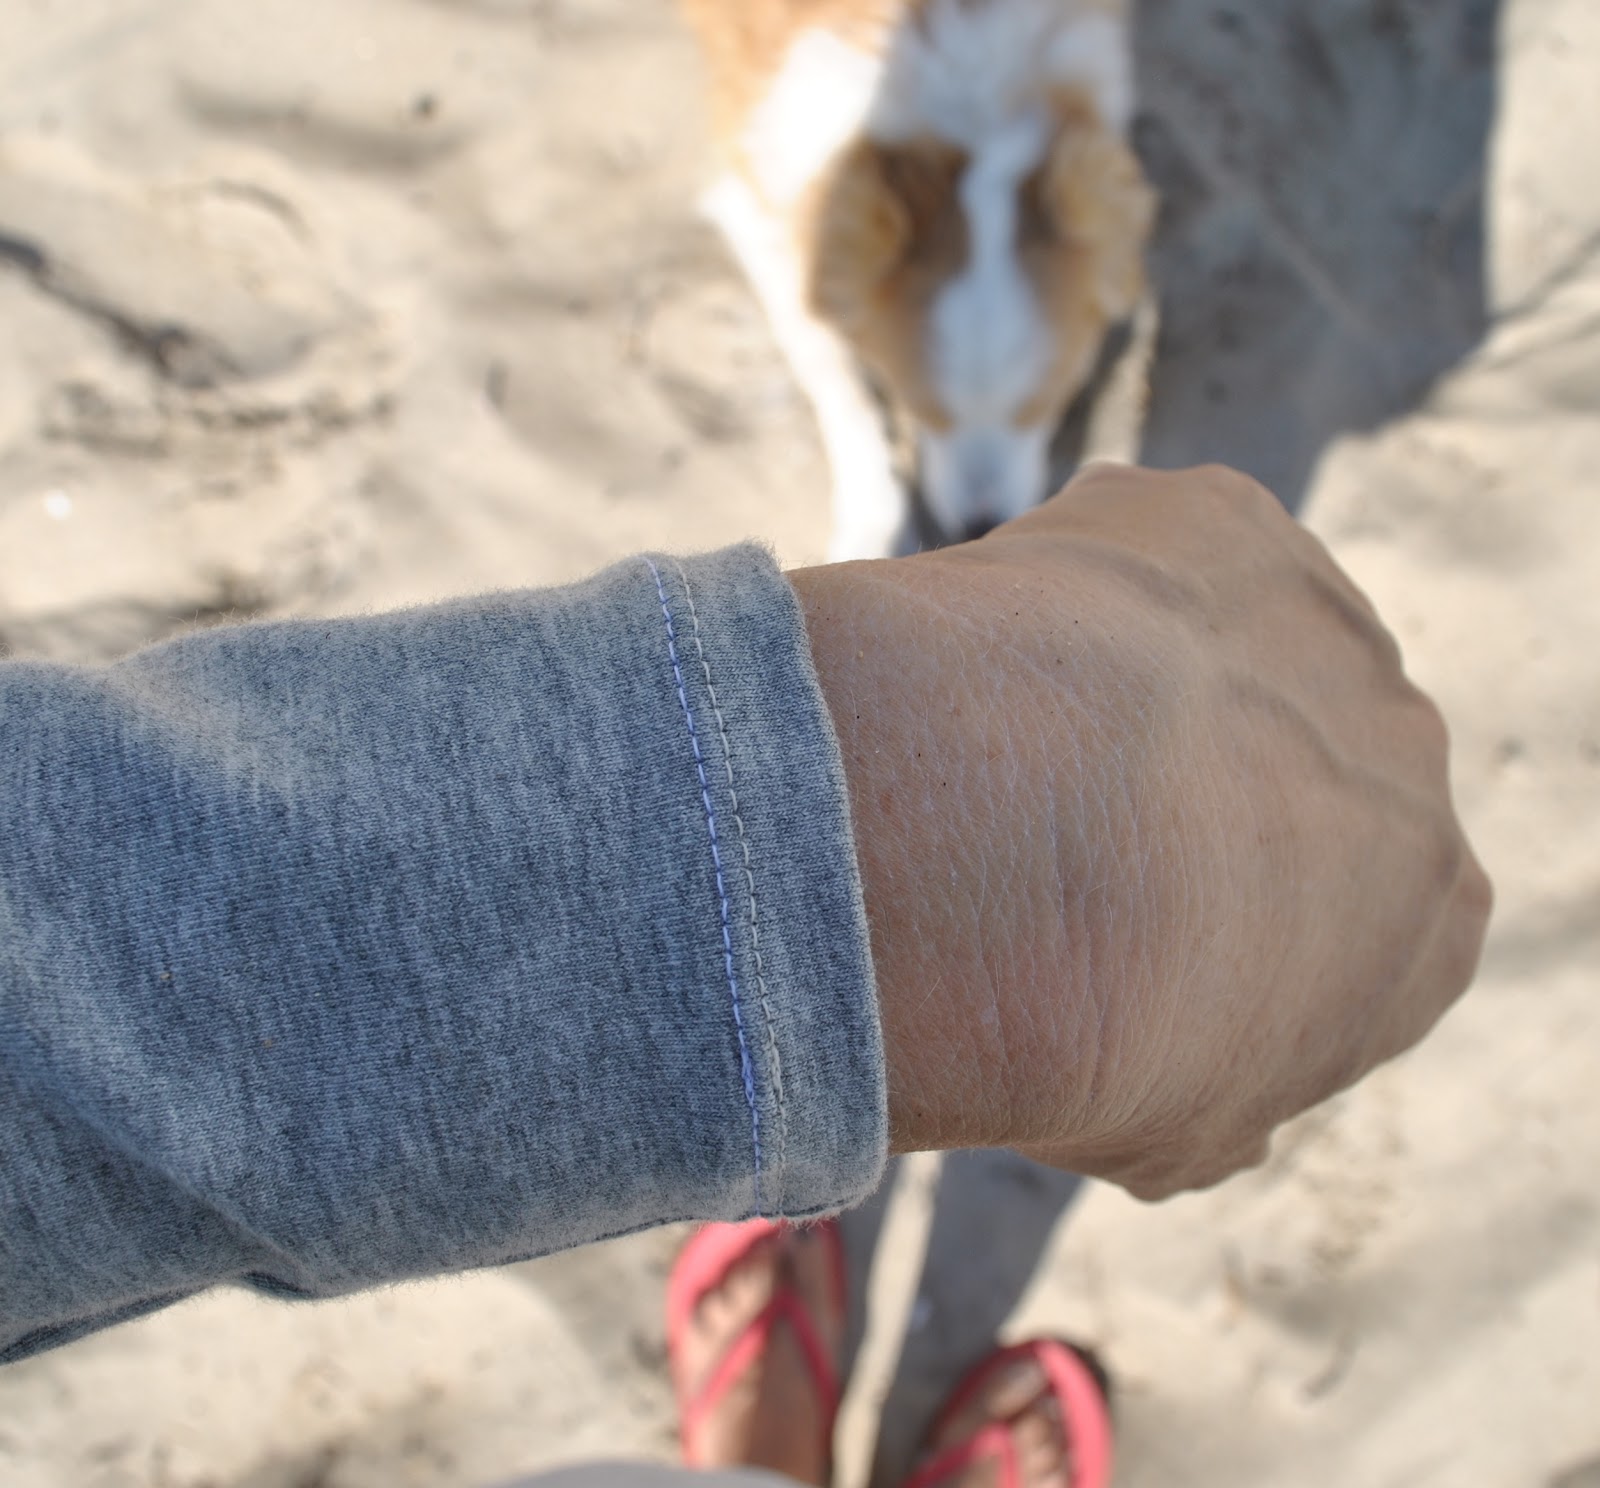
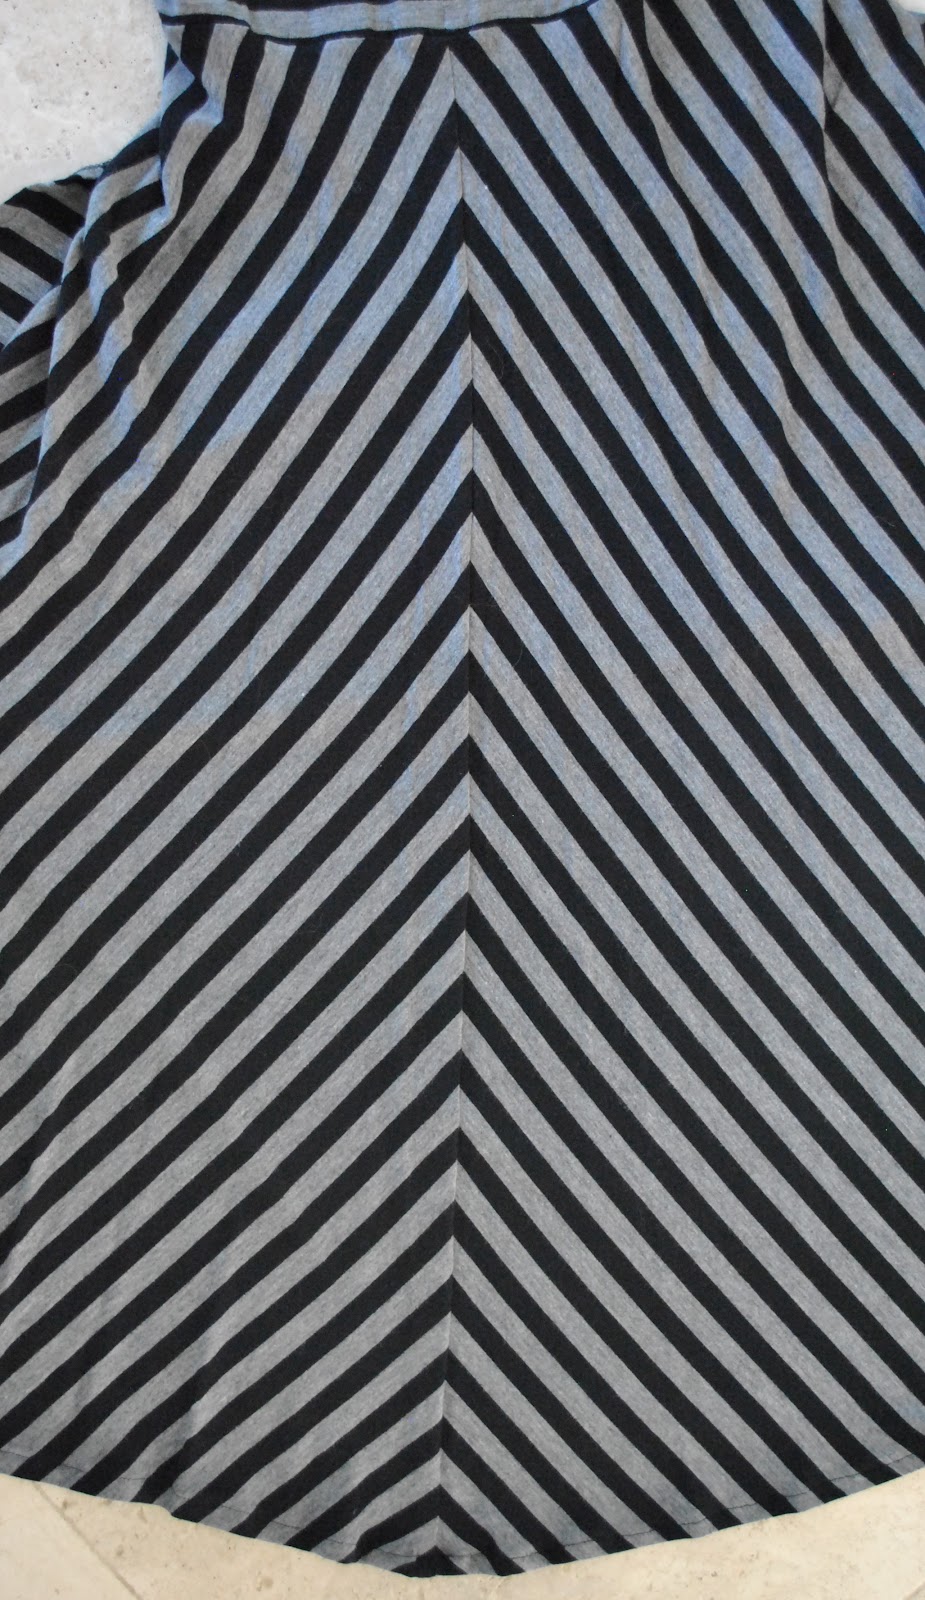
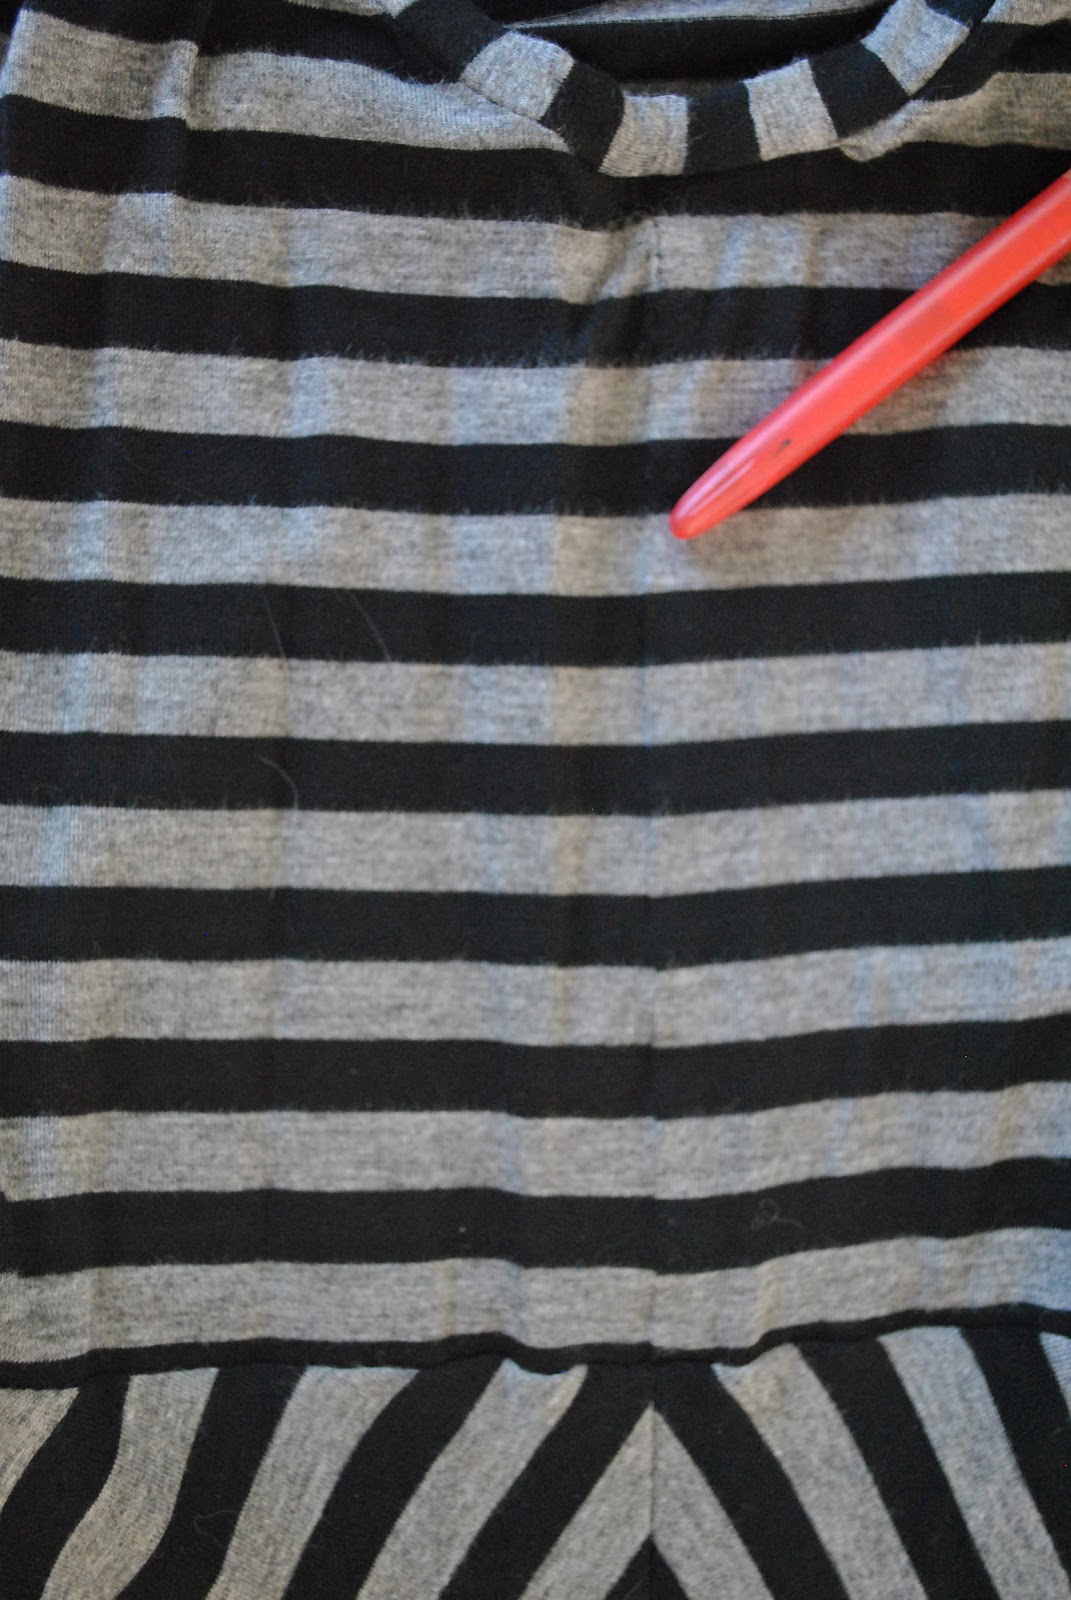
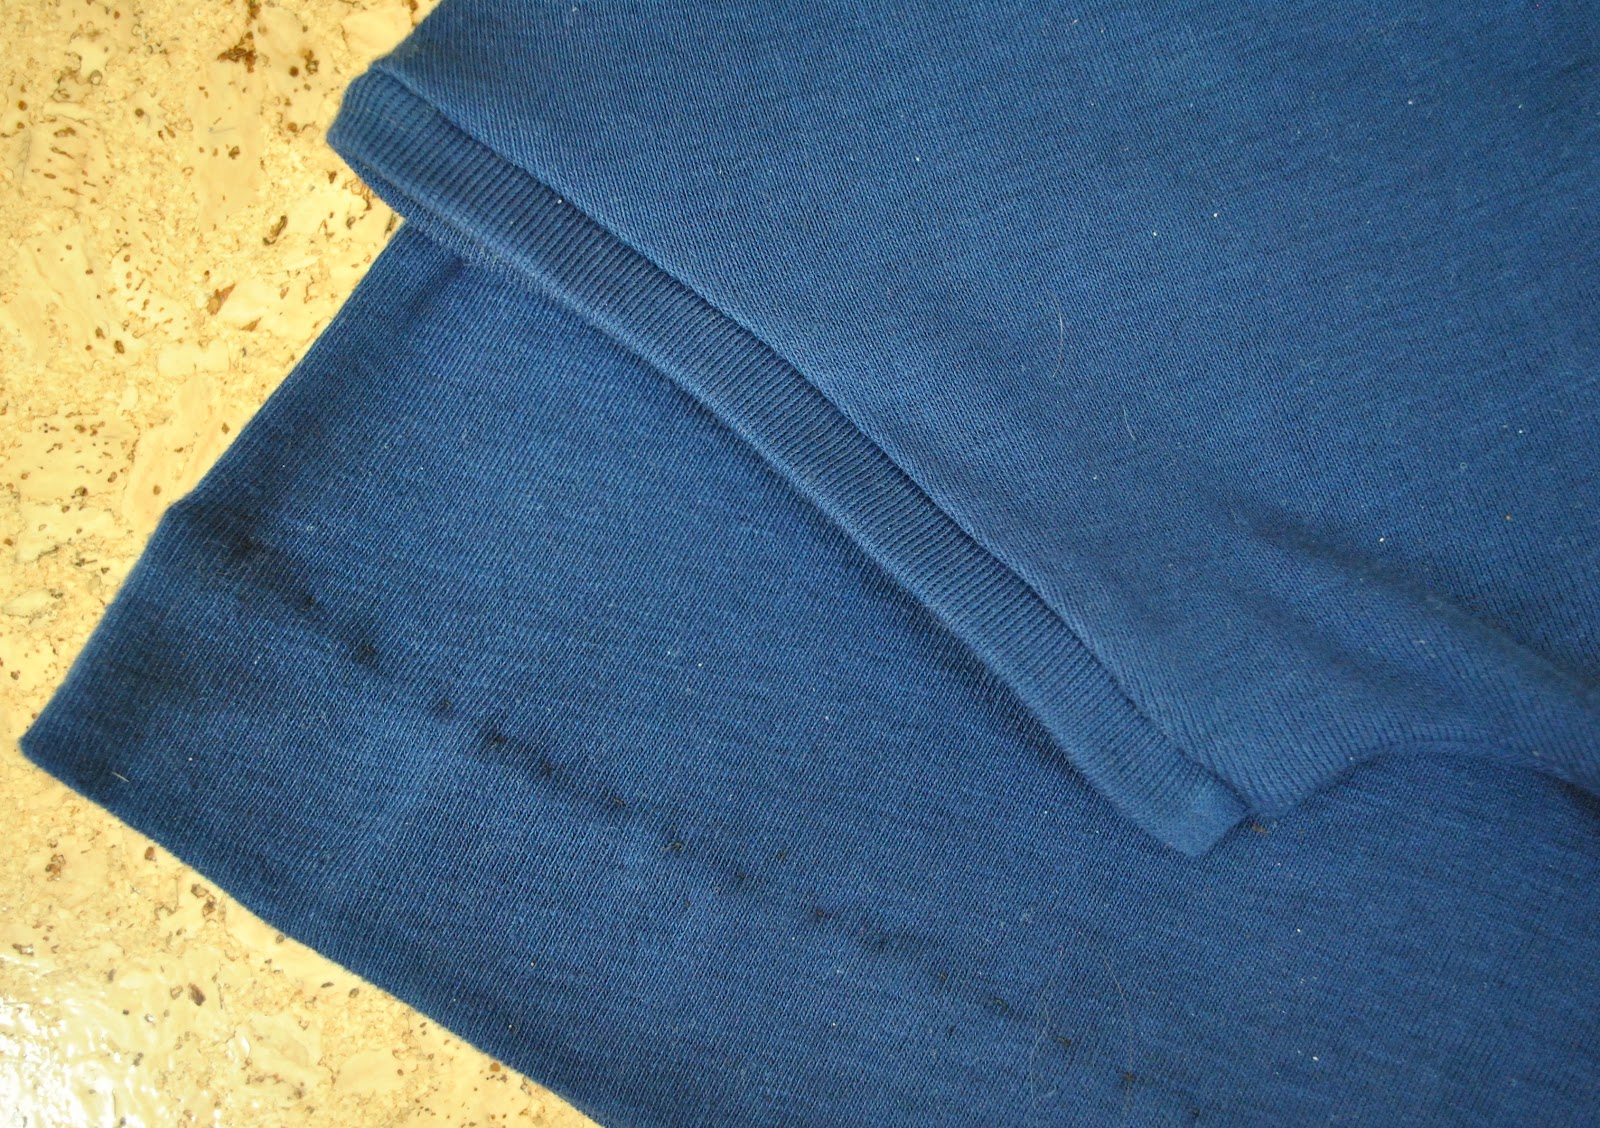
There is a kangaroo pocket on the front, and a deep “Metalicus” band around the lower edge.  The sleeve hems are finished with my twin needle.  I stabilised the shoulder seams with strips of Seams Great (thank you velosewer!) and double stitched the neckline seam down to the back for stability and to lessen the chances of the back neckline stretching out.
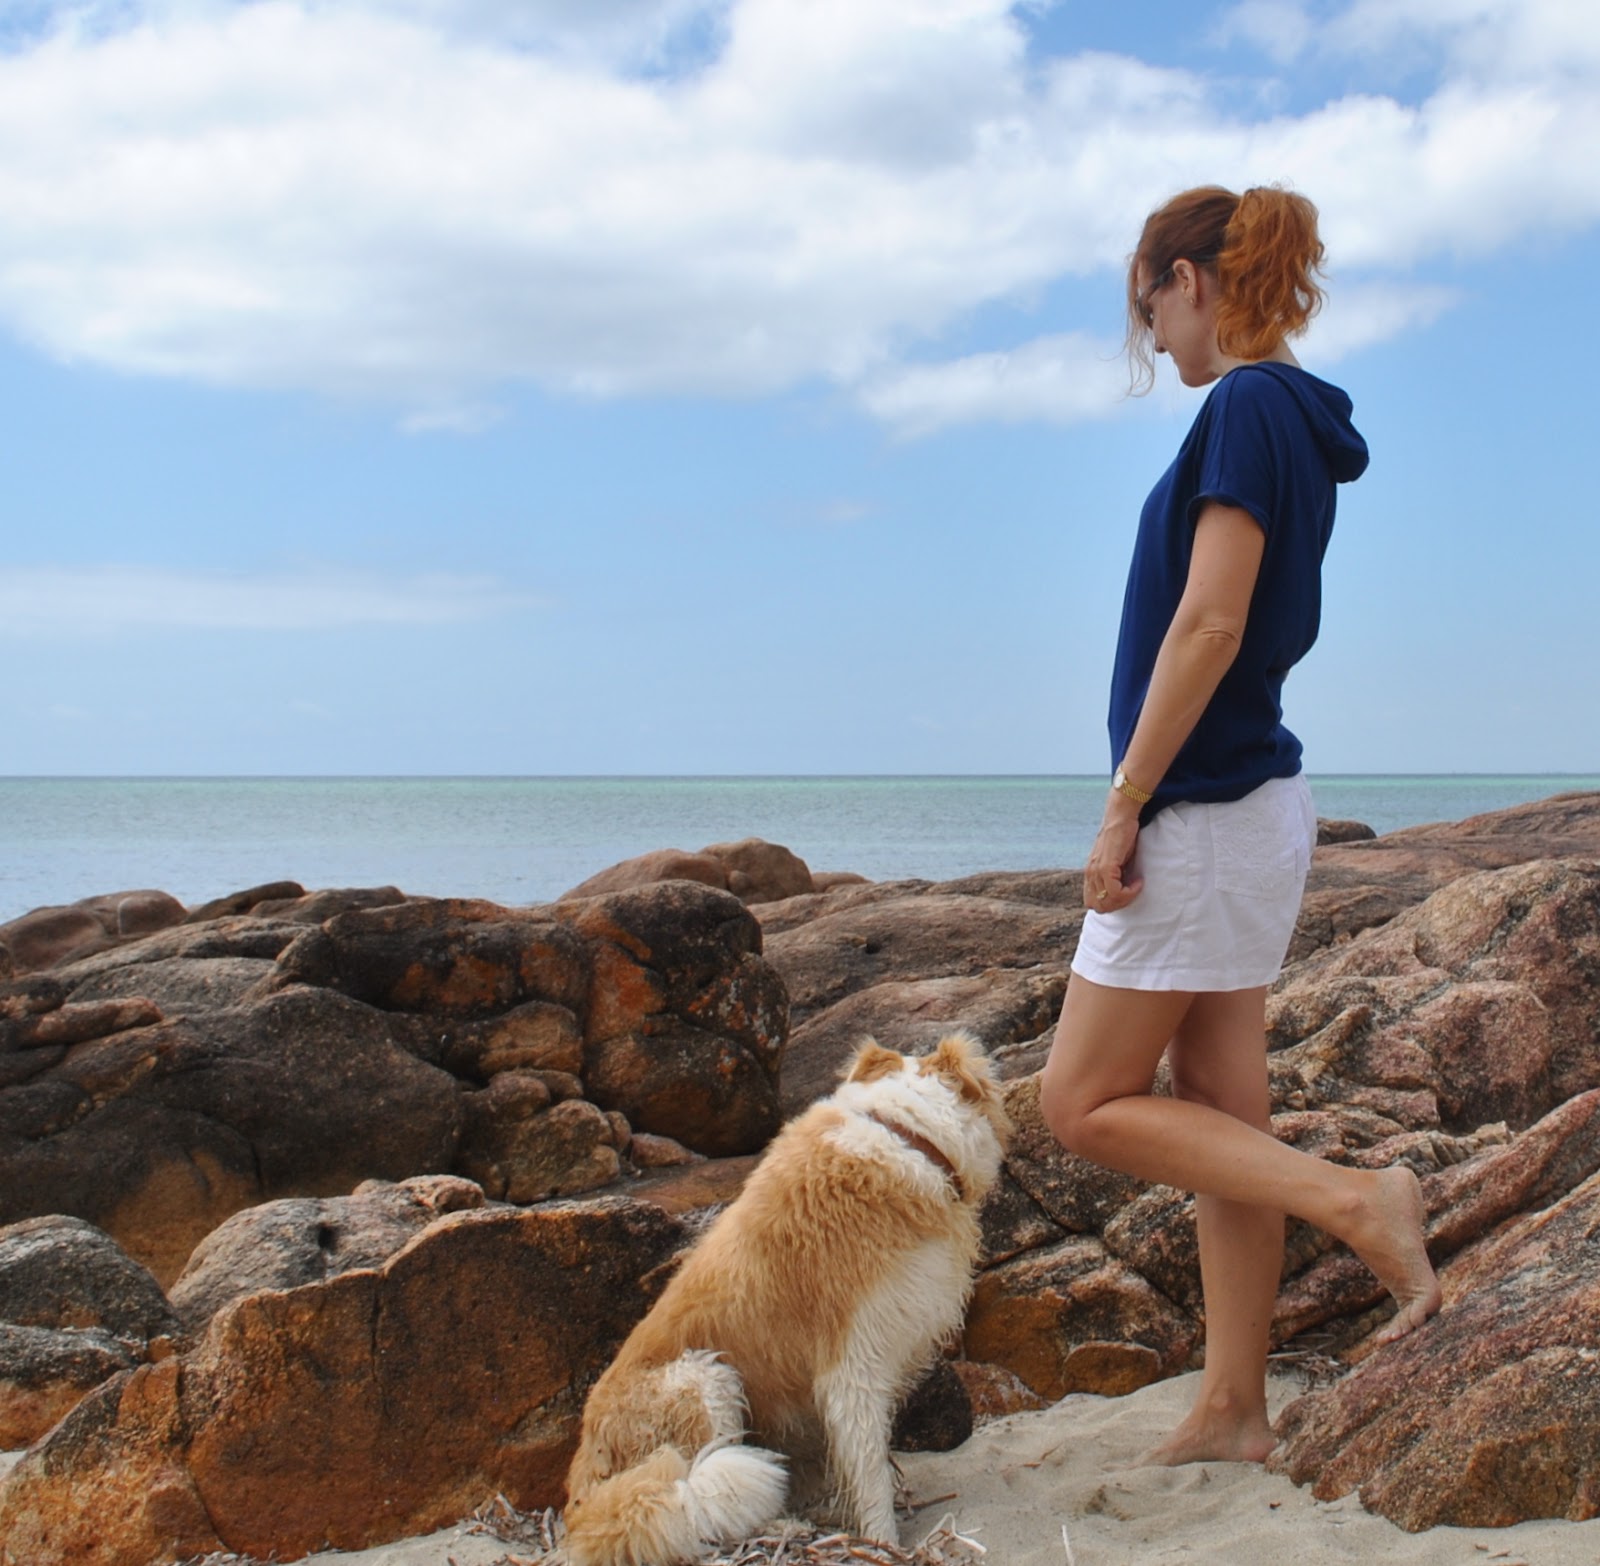
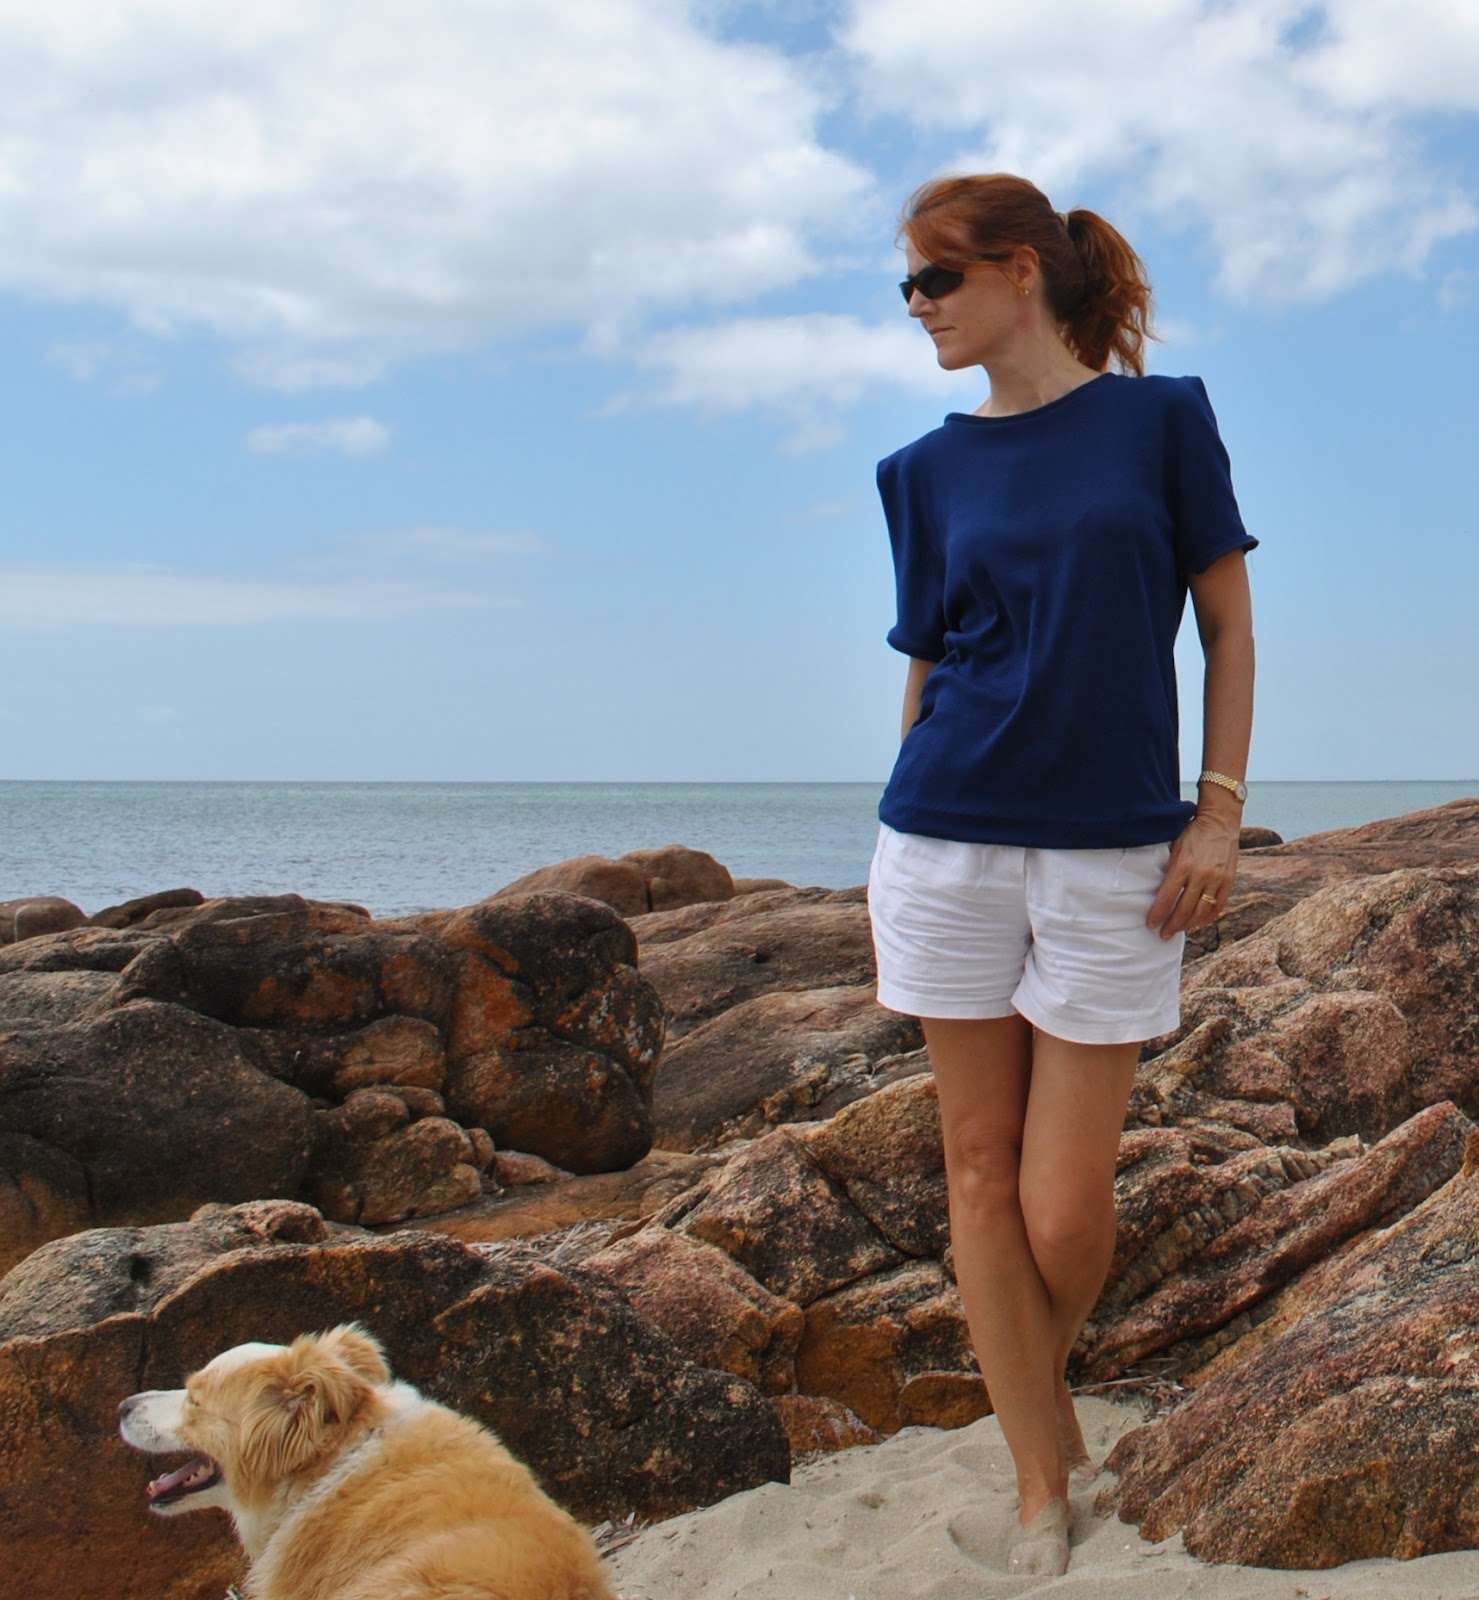
Now the favourite old Tshirt looks tired and bagged-out and kinda disgusting compared to the svelte new one in nice new firm fabric!  

the clone and the clone-ee

He is very happy with the new shirt, therefore I am very happy too!

pinterestmail

Sleeve

Tattoo-ed sleeves are a “fashion” trend just like anything else, and so hot right now!  (ergo, probably destined to be so not some day  šŸ™‚  )  in the meantime I’ve made for myself a new Tshirt that is a nod to the trend…

The sleeves of my Tshirt are cut from an old child’s Tshirt with a graphic print on the front, the second, white sleeve is cut from the back obviously! and the body is cut from another white plain Tshirt, both are recent toss-outs from my boys’ wardrobes.  I got the idea for my new Tshirt when it occurred to me that the print reminded me of tattoos; a swirly print in bright children’s paintbox colours with a thick black outline.

Thinking about a real tattoo sleeve: it continues up and over the shoulder smoothly without interruption; and so I decided a conventional set-in sleeve with the seam on the shoulder would truncate the print and end up looking kinda wrong.  The best style for this look would be a raglan sleeve.
For which I did not have a pattern…
It’s funny; a raglan sleeve, whilst a recognised “thing” in the sartorial world, is very poorly represented in the sewing pattern kingdom, don’t you think?  In terms of population: the almighty set-in sleeve is the over-ridingly dominant species in the gene pool, closely followed by the kimono sleeve and the humble raglan sleeve is verging on being an endangered species!
So I set out to make my own pattern.  Luckily, I have a small raglan Tshirt from  many years ago which has long since passed into Cassie’s possession, so I temporarily repossessed it, and laid it down to trace around the sleeve, and then played around with my own self-drafted Tshirt pattern to fit in the new sleeve with a few minor sizing adjustments.  
So now I have a raglan Tshirt pattern  šŸ™‚  
The raglan sleeve is a very tall pattern piece compared to one’s common-or-garden, set-in sleeve pattern piece, so it took up practically the entire Tshirt!  But I tried to get in as much of the design as possible…  and I love the wide and flattering boatneck-line.   I preserved the lower hemlines of both the Tshirts intact to be the new Tshirt’s sleeve and lower hemlines respectively.
My family have all voted this their favourite of my new Tshirts!

Details:
Tshirt; self drafted, made using two old Tshirts
Jeans; Burda 7863 modified, black stretch corduroy, details here
Boots; Andrea and Joen
Sienna; wearing her own fur coat

pinterestmail

A tee or three


I have made a few new
Tshirts…
I’ve noticed a few examples
of mixing and matching different colour and/or width stripes in the one Tshirt,
and decided to have a go at adding something like to my wardrobe; using up some scraps and a few more of the old Tshirts in my bag
of refashioning garments…
Below: I took both these
pictures from Australian Vogue, at left is part of a Tommy Hilfiger advert; at
right, from the Antipodium resort ’13 collection.
Quite interesting, yes?
My Tshirt is made from: the baby blue with thin black stripe is cut
from one of Tim’s old Tshirts; the sage green with diagonal white stripes is
leftover fabric from a top Cassie made for herself; and the yellow sleeves are
cut from one of my old tank tops, that was once white and that I dyed yellow
with ground turmeric, here.  The
green/white stripe fabric is an interesting print; the stripe is on the diagonal!  So while it looks like the lower part
of the body is cut on the bias, it is not!  
The pattern is my own
self-drafted pattern, with the sides cut straight down, instead of my usual
fitted-to-the-waist curve, because I wanted to match those diagonal stripes
down each side, this would have been a Mission Impossible with a waist curve!  I’m pleased to say, mission was accomplished.
I’ve also made a coupla new
plain white Tshirts.  I came across
some white cotton knit, leftover from this dress, while searching for suitable
candidates for lingerie, and while I decided it was not suitable for lingerie it
is perfect for Tshirts.  So I cut
out two new Tshirts.  Only then did I remember that I had mentally set this fabric aside for another Pattern Magic thing… (headslap)
oh well!  There is fabric aplenty
still for Pattern Magic things!
These will be great for thermal purposes and just basic useful things… one can never have too many white Tshirts, no?
The only special thing
about these new Tshirts is that I stabilized the shoulder seams with Seams
Great.  This was a gift from
the kind and clever velosewer; thank you so much velosewer!  This gossamer thin tape is new-to-me, and I am thrilled with how unobtrusive and tidy it
looks sewn over those shoulder seams!
The lower hems of the two
white Tshirts were finished with a twin needle blahdy blah, but for the striped Tshirt I
just decided on a whim to go with a simple zig-zag.  Man, but I’m just one crazy rebel, sometimes  šŸ˜‰  If it goes wave-y or funny I can always re-do it with a twin
needle, properly.
 
Details:
Tshirt; self-drafted, from
a mix of old and leftover cotton knits
Skirt; Vogue 1170, PU
laminate, details and my review of this pattern here
Shoes; Perrini, had these
for donkey’s years
pinterestmail

Clipped Wings; a top

Here is my latest from Pattern Magic 3, by Tomoko Nakamichi; this is the top from p61/91. The seamlines at the side and centre back seams of this top are gently angled out, causing the top to fall in a series of rather lovely, loose, triangular folds around the small of one’s back.  Interesting, and also quite flattering.  I loved the wide high square neckline and the elegant long raglan sleeves.  I also loved that the top has a bland front view and a busy back view.  But to be honest; I wasn’t sure I loved the look of the ā€œbumpsā€ (pictured below). 
Without understanding the Japanese text, I think that the aforementioned bumps; two protrusions sprouting from the back of the raglan sleeve seam right where one’s scapulas sit; are intended to be the focus of the project, the challenge to be mastered from drafting and making up this piece.  But I’m afraid I just thought they looked a bit …er… odd.  As though if one was thinking of transforming oneself into an angel then the top was all ready with some pouches to accommodate one’s budding wings.  But sadly I am no angel  šŸ™‚
I went ahead and made up the top with the angel-wing bumps, for no better reason that to prove something to myself.  The long suffering Bessie modeled the bumpy version of the top for a photo (oh, it’s OK, like a true professional she doesn’t really mind how strange are the clothes I make her wear) 
below: the winged version; pre-clipping; see those bumps on the raglan seam?

Then straight away I unpicked that back raglan seam and sewed it up again, sans bumps!  Sorry, but sometimes the authenticity of the design is of a lesser consideration to me than the wearability, and I pretty certain a non-sewing observer would consider those bumps, clever little feature though they are, and definitely not an easier option than a straight seam; to be a mistake on my part.  So.  Off with their heads!
I used a rather nice cotton knit jersey from Knit Wit, in a light grey marle with distinct yellow undertones.  I bought a long length of this fabric last year, specifically for the purpose of running up Pattern Magic projects.  This is the first time I have bitten into it, having now used up the jersey knits in the stash given to me by my friend C.  Future projects using this grey fabric may or may not be subjected to some sort of colour treatment šŸ™‚
I overlocked all the raw edges before sewing any seams, and the neckline, sleeve hems and lower hem are folded in once and finished with a twin needle on my sewing machine.  If you look real closely, you can see that I used a creamy-ivory thread and a white thread in the twin needle.  I didn’t bother with winding a second spool with the creamy colour that matches the yellow tones in my fabric, but y’know what? I think it turned out kinda cool.  The more I look at those two different colours the more I like that effect.  Will probably do that again!
Details:
Top; from p61/91 of Pattern Magic 3 (by Tomoko Nakamichi), and made of grey marle cotton knit jersey
Shorts; Burda 7723, hot pink linen, details here, and these shorts styled in 6 different ways here
Thongs; cheapies from Kmart (I know, but it was an emergency purchase.  My previous beach thongs broke)
(below; spot the dog…)
(btw; Beryl commented wondering whether the extra challenge I alluded to for Me-Made May was a pregnancy… NO!  but thank you so much for even considering me in that age bracket….!   I am flattered; but no, I will be travelling during the month of May!)
pinterestmail

Grey stripes

I’ve made a new dress for autumn! (sneaky peeked in my Fashionary here)  More accurately, I made this about a month ago and have been awaiting a day I can actually wear it without unladylike perspiration marring the photograph. (ew)
It is a Metalicus sort of a dress.  
Oh, OK; it is pretty much an almost exact copy of one from their summer range.  (pictured at right)
Well, I saw, and I was helpless to resist.  I just had to have.  (shrug)
I used a cotton knit jersey with a charcoal and black stripe from Fabulous Fabrics, and drafted my own pattern with the help of a tank top.  The skirt is just a slightly shaped to-the-waist and then flared A-line design.  I bought 2m of 150cm width fabric, but found that 1.2m was plenty to cut out this dress shape using the layout pictured below.    

Don’t worry, the leftover 80cm has been put to good use already, undergoing a rapid transformation into a three-quarter sleeved, scoop-necked Tshirt.  This using my now go-to Tshirt pattern, the one formerly known as Burdastyle 06/2011, 120 (altered completely until beyond recognition, but still one must give credit, non?)

I edged the neckline and armhole/sleeve edges of both the dress and the Tshirt with a folded band, the type that you see on just about all Metalicus pieces,which is why I have it stuck in my head as The Metalicus Finish, lol.

Please note; the Absolute Perfection in Stripe-Matching.  I pinned the junction of each and every stripe to achieve this.  No, I am not exaggerating.

The red pen below is pointing to a bodice side seam.  Can you even see it? (said with an unseemly lack of humility)  
This is the kind of thing not noticeable to a, er, normal person (read: someone who does not sew), but is the ultimate in self-satisfaction for those of us who have ever sewn stripes together.  Stretchy jersey stripes, I might add.  (insert deep and disgracefully un-humble sigh)

The lower hem is overlocked, folded under once, and finished with a straight stitch.  I hemmed my dress exactly the right length to work perfectly over one of my favourite actual Metalicus pieces, this frill-edged white petticoat.

Details:
Dress; self-drafted, from charcoal and black striped cotton jersey
petticoat; Metalicus
Sandals; Misano, from Marie-Claire shoes

Now OK; do I feel bad about outright copying a dress like this?  I do, a bit.  You see while I like to make my own clothes nowadays, I have a lot of respect for Metalicus.  I used to buy their clothes.  And actually I will own up now that in a small transgression of my pledge I did indeed buy a few pairs of Metalicus winter tights at their New Year’s sale,  eep!  But they were such fantabulous colours!! (the colours made me do it, your Honour…) and anyhow, tights can be classed as underwear, right??
I am OK with supporting Metalicus, since it is an Australian company, with the clothing traditionally made here in Australia.  I am of course a big supporter of ethical fashion which includes buying locally made stuff wherever possible.  So I wish to see Metalicus successfully continuing on this path and not succumb to the evil lure of the profits that come with overseas manufacturing.
It was during this visit to Metalicus I noticed that a few “made in China” pieces were making an insidious and very unwelcome appearance in the range.  I did feel sad about this and wondered briefly (and probably foolishly) if my boycotting of RTW had contributed in even some minuscule part.  And copying a dress from the store, even just one, for me, is also part and parcel of taking away business from what is a legitimate Australian business.  So I did feel a bit guilty.  But if Metalicus is going to go to the dark side and send  their manufacturing overseas, taking away Australian jobs, then while I am very sad about that it does at least make it a heck of a lot easier for me to stay away from RTW.
btw I did check my tights before I bought them, and they are indeedy of the Made in Australia variety.
So I’m resting easy on that purchase.
Sort of.

pinterestmail

Peekaboo in blue

New top, woot!
Its real name is a mystery to me, but the word peekaboo just pops irresistably into my head every single time I look at it so there it is! Ā This is the project on p20 of Pattern Magic 3, by Tomoko Nakamichi. Ā As far as wearability goes, this is probably one of the better projects in the book, and ditto for the ease of construction. Ā Super easy!
In hood down mode this appears not unlike an ordinary little Tshirt, plain-ish but with a just-interesting-enough little variation to redeem it from being outright featureless and boring. Ā The incorporated hoodie thingie (that’s a technical sartorial term there) looks a bit like a backward cowl neck when it is flipped down like above…. Ā it’s actually quite cute, yes?
Hood up… well, okaaay. Ā Quirky, yes. Ā  A bit noice, unusual, different. Ā Definitely funky. Ā Wearable? Hmmm, borderline, methinks… Ā šŸ™‚
But hood down? yes, I likey!
I used a length of jersey in a lovely shade of deep royal blue, part of the bundle of fabrics given to me by my friend C from her late mother’s stash. Ā It is quite thick and sturdy stuff, so I am really looking forward to wearing this more as we head into the cooler days of autumn.
I attached a folded band to finish the armholes and the neckline, a technique I think of as the Metalicus finish since they use it extensively on all their pieces and is where I first noticed it. Ā The lower hemline is turned up once and slip-stitched in place.
I’m very happy with this funky, slightly sporty addition to my wardrobe. Ā The concept of the design is totally to my taste; unique and simple, but with a twist!
Oh, and I’ve updated things on the blog a bit; now all my projects from each the Pattern Magic books have been gathered into sets, and can be viewed by clicking on the picture of that book in my sidebar over there. Ā They’re a bit jumbled up right now, as I am still working out how to order the pictures in those albums…. Ā that’s a work in progress!
Later peops!

Details:
Top; from Pattern Magic 3, by Tomoko Nakamichi, made from royal blue jersey
Shorts; Burda 7723, white linen, my review of this pattern here

pinterestmail

A pretty silk blouse

I’ve made a blouse!  And it turned out raaather lovely, if I say so myself…  I used Vogue 1170, one of the patterns given to me by my children for a Christmas present.  I am super pleased with it! 
It is of very luxurious and quite expensive ivory silk charmeuse, with the exact same colour and the same classy, softly subtle sheen of a beautiful and perfect pearl.  It feels so luxe, and like the story of the magic cloak I immediately feel extra ladylike and elegant simply by the act of slipping it on!  
I felt uncharacteristically hesitant and nervous about cutting this out.  Mostly because, although I was excited about the idea of this blouse, and out of this completely divine fabric, I was still a weeny bit unsure that it would work out, and/or even suit me!  It is just such a very very feminine, pretty and super-sweet style, and I was worried that I could not carry this look off.  Trying it on during the making of it didn’t even assuage my fears.  I continued to be doubtful right up until the time I tried the finished thing on, finally.  And was relieved that I did actually still love it, even on me!  It is quite formal, I think; so I will be keeping it for smart and dressy occasions.  Although it does feel sooo nice against the skin, perhaps I should allow myself to wear it just whenever??  Hmmmm.   We shall just have to see about that one  šŸ˜‰  anyway, tonight I wore it out for a special dinner at a swisho restaurant; and I felt perfectly chic.
This pattern stipulates a button band in the centre back, which I didn’t think is a particularly classy finish, especially for the quite formal blouse I envisioned.  So I sewed up most of the centre back seam, and inserted a short invisible zip at the top for closure, instead.  This does look quite good, but now I wish I had made a little faced slit instead and sewed on a few pearl buttons with skinny loops for closure.  I think now that would have looked much nicer!

Details:
Blouse; Vogue 1170, ivory silk charmeuse
Skirt; Vogue 8363 with modifications, of burnt orange raw silk, details here, my review of this pattern here, and see this skirt styled in 6 different ways here
Shoes; Sandler, I’ve had these for donkey’s years and they match the blouse perfectly….

Pattern Description:
Very loose-fitting top has front keyhole opening with knot, back yoke, back band extended sleeves tied into knots and back button opening.
Pattern Sizing:
4-10; I made the size 10
Did it look like the photo/drawing on the pattern envelope once you had finished sewing it?
Yes
Were the instructions easy to follow?
Yes
What did you particularly like or dislike about the pattern?
I thought it looked fantastic on the pattern cover, and I love the little knot and how the fabric falls in these beautifully draped folds across the front.  The little ties on the sleeves are really lovely.  The blouse is just so elegant and feminine.  A tad on the formal side for my everyday tastes, but a girl needs a few pretty dressed up tops too!
What don’t I like about this pattern… The instruction to hand gather the underarm seam seems like an uninspired finish, especially considering one has gone to the trouble to apply French seams throughout otherwise.  After hand-gathering mine I thought it looked shoddy.  I tried going over it with the machine but my fabric is very densely woven as well as slippery and the gathers are quite tight and I was terrified of ruining the (almost finished) top.  So I let it be, as partly a hand-gathered seam and partly machine-finished.  But I’m not completely happy with this bit.
I thought the back button band too casual a feature on what is quite a dressy little number, so I did something different on my version.
Fabric Used:
Silk charmeuse
Pattern alterations or any design changes you made:
Instead of the button band down the centre back I substituted an invisible zip and sewed up the back seam.  But I wish now though I had left a short opening and used a couple of pearly buttons and skinny button loops for closure, I think that would have looked a lot nicer and neater.
I considered doing those narrow hems on the neckline and the sleeve ties as per the instructions.  Briefly.  But my fabric is exceedingly slippery dippery stuff; and so decided instead to use the rolled hem attachment on my overlocker for these edges.  This gives a much neater and more consistent finish for this fabric.  Trust me, I’m speaking from experience here…!
I finished the lower hem by hand.
Would you sew it again? Would you recommend it to others?
Probably not, but one should never say never!  Maybe I will want another one of these one day, but will first have to think of some better way to finish off that underarm seam! 
I highly recommend this pattern for a very pretty and very feminine evening top.  It gets muchos compliments!
 Conclusion:

I’m very happy with my blouse now, but my fabric was very difficult to sew.  It didn’t want to be French seamed, and even less did it want to be narrow hemmed and then gathered and oversewn, as in the underarm bit.  Silk charmeuse is tricky at the best of times and in the simplest garments, and forcing it into curved French seams is not an easy ask.  But I am glad I persevered with this fabric, since I absolutely adore the pearlescent sheen of this luscious and luxurious fabric and it feels simply divine against the skin!!  And the end result is a very pretty and chic blouse, one that I will be very pleased to pluck out of the wardrobe for semi-formal events.

pinterestmail

White, with a navy grid

I’ve made a new little top….   well, just a summer version of a T-shirt really, from scraps, the leftovers from this shirt.  Constructively finishing off another small wad of fabric from my stash.  Smug self back-patting ensues.
This stuff is pretty good top/blouse/shirt fabric.  It is uncrushable and beautifully light.  Sam has been wearing his shirt stacks.  And luckily has no neuroses about his mother having a garment in the same fabric, although for both our sakes I have undertaken to only wear it if he’s not wearing his.
We do have some pride.  šŸ™‚
I had dreamed that this top would be cut on the bias, with those gridlines laying diagonally across the design, and to have little kimono/cap sleeves, like my preliminary sketch below.  I thought it would look pretty cool like that, and had been thinking about it long enough that my heart was virtually set on it.  But cutting on the bias is such a fabric hog, demanding way more than I actually had and so my plans were sadly not to be….  Visiting the fabric store to purchase just a leeettle bit more to indulge myself was pretty tempting as the fabric was not price-y, and still plentifully stocked.  But I had to admit that doing so would utterly defeat any aspirations to green-dom.  sigh
So …
I used the pattern for top “a” from Unique Clothes Any Way You Like, by Natsuno Hiraiwa, a very simple design that really does use a very tiny amount of fabric.  In its simplest pared-back form this is a fab basic little top pattern.  I grudgingly economically cut the pieces out on the straight…. which might not look as cool as my original idea, but is very effective for stash busting  šŸ™‚  And it is a good useful and casz little summer top.
The seams are all French seams.  It doesn’t have any closure but can just be pulled on over my head.  I left off the stipulated bias finish to the armholes and neckline, and instead made three sort of tubes or funnels to finish the apertures off.  The sleeve tubes are just single fabric width, and sewn into the armholes and finished with a little hem, and the neckline tube is doubled over, and slipstitched invisibly down on the inside. 

Details:
Top; modified top “a” from Unique Clothes Any Way You Like by Natsuno Hiraiwa, in navy and white check stuff.  I have made this pattern up twice before, here and here….
Skirt; Vogue 1248, white cotton voile, details and my review of this pattern here
Thongs; Mountain Design

pinterestmail
Switch to mobile version
↓