Tag Archives: Top

Old things…

… this will be the very last of my “old things” posts.  I promise.
I’ve done a mammoth sort-through of the photos and I think this is it!  (heaves a sigh of relief…)
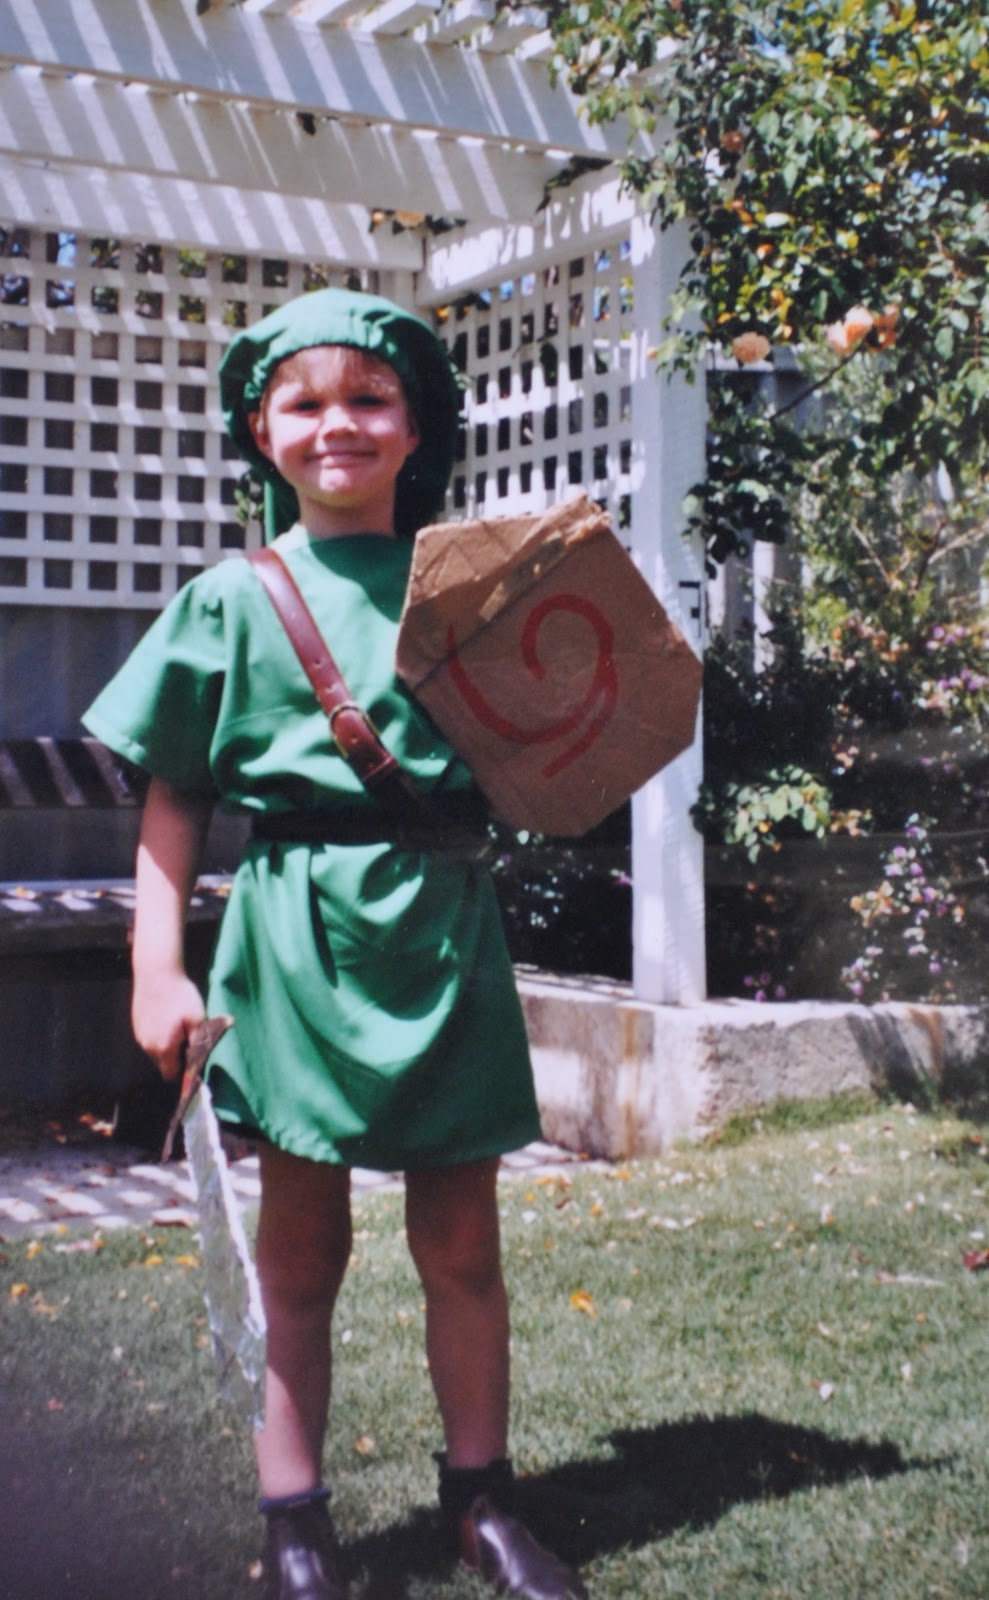
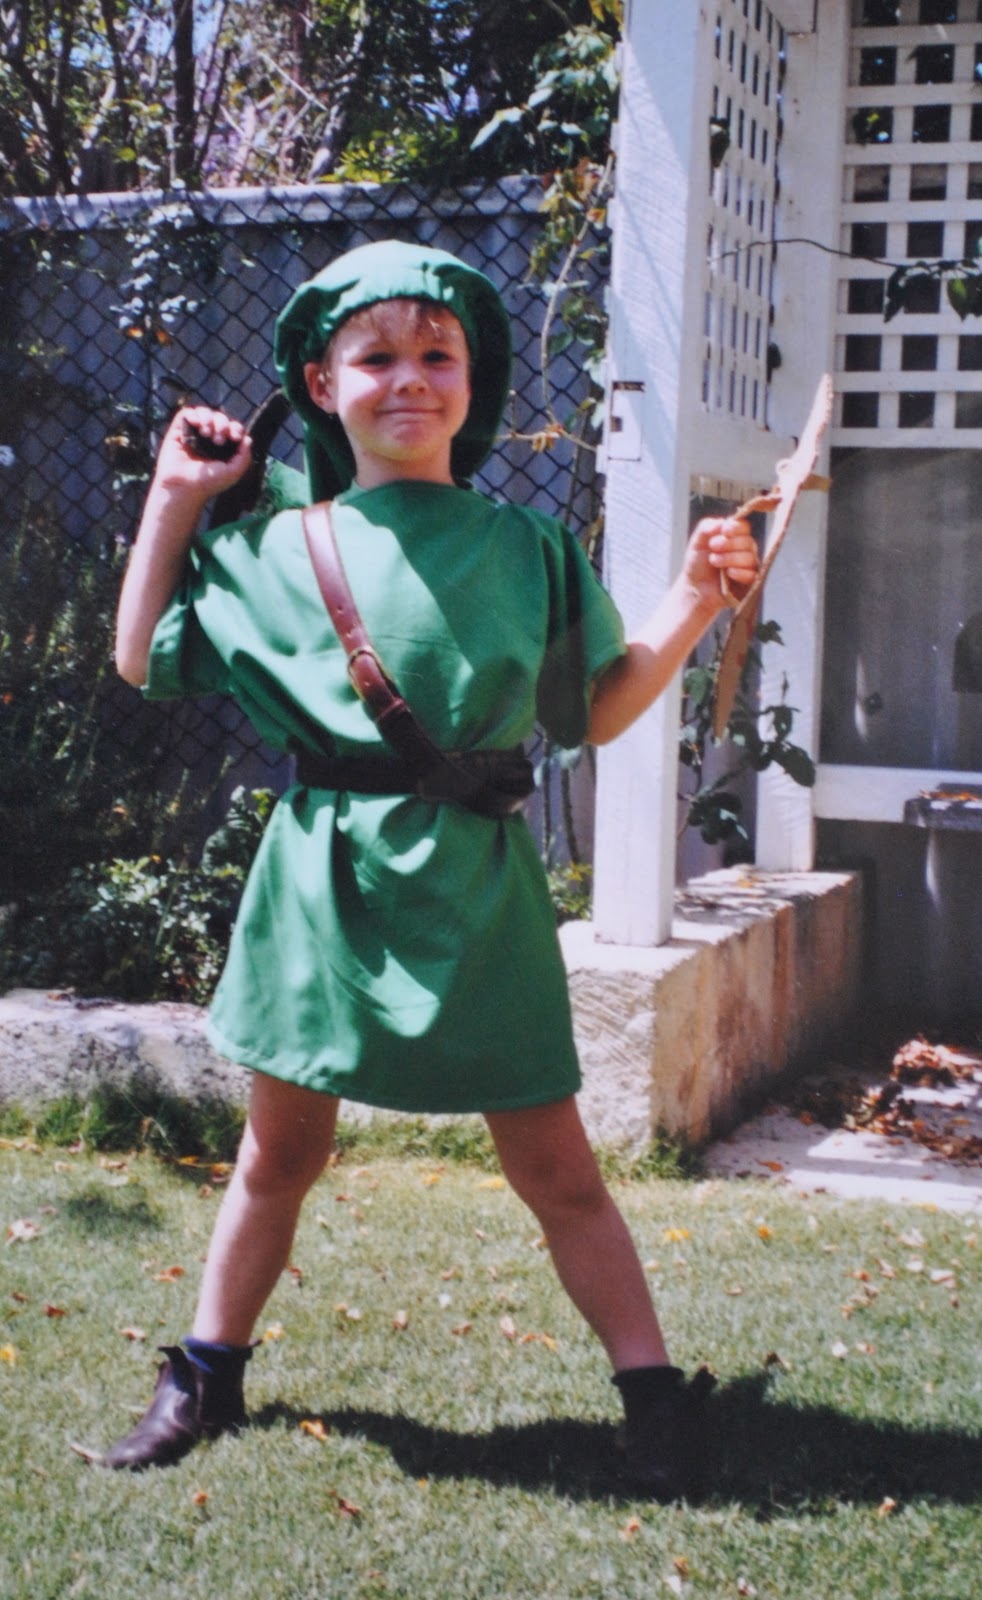
Firstly, since this is the only garment in this post still in our possession (apart from the Grim Reaper come burqa outfit, that is); a cardigan I knitted for Craig.  It is knitted in the fair isle method.  Above is a picture Craig took of me wearing his cardigan on a holiday last year (isn’t he sweet, giving his cold inadequately-dressed wife his nicely pre-warmed cardigan to wear, hmmm?  What a gentleman!)
And some close-ups of the cardigan I took today…
showing the right front, and at right the wrong side of the fair isle knitting… (as is correct, the yarn is carried over at the back with no weaving in, only if the distance is four stitches or less…)

Now, some costumes…
Sam as “Link”.  I thought he was so cute in this.  He loved this little outfit and often wore it just for everyday wear.  (if you would like to see what this cute little jigger looks like now, go here…)

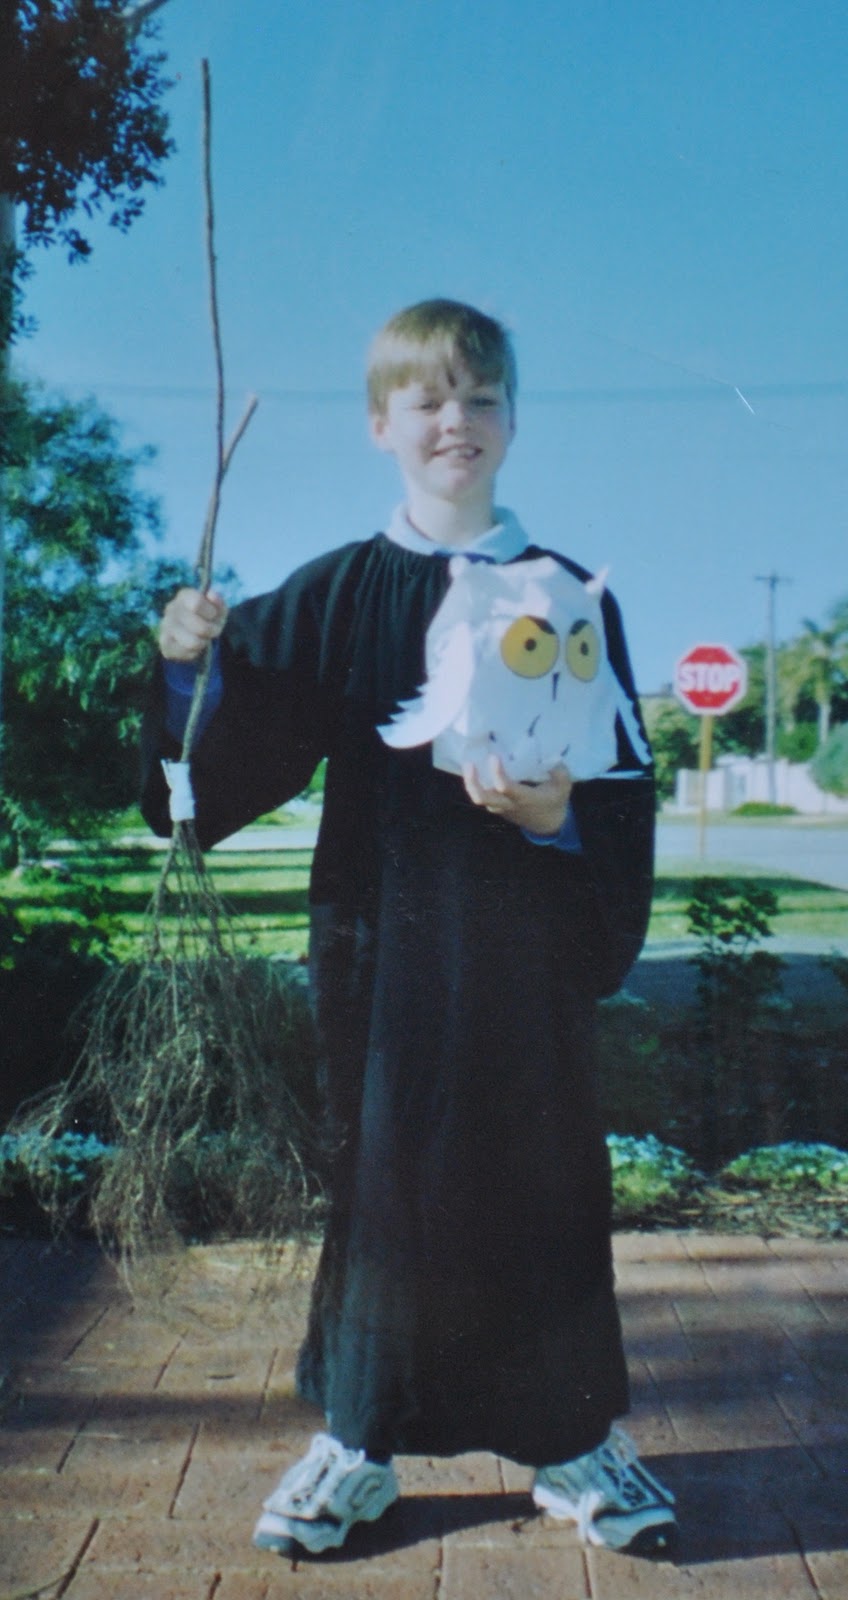
Sam, as… guess who?  Hehe, the famous Harry Potter, natch, compete with broomstick and Hedwig the owl.  
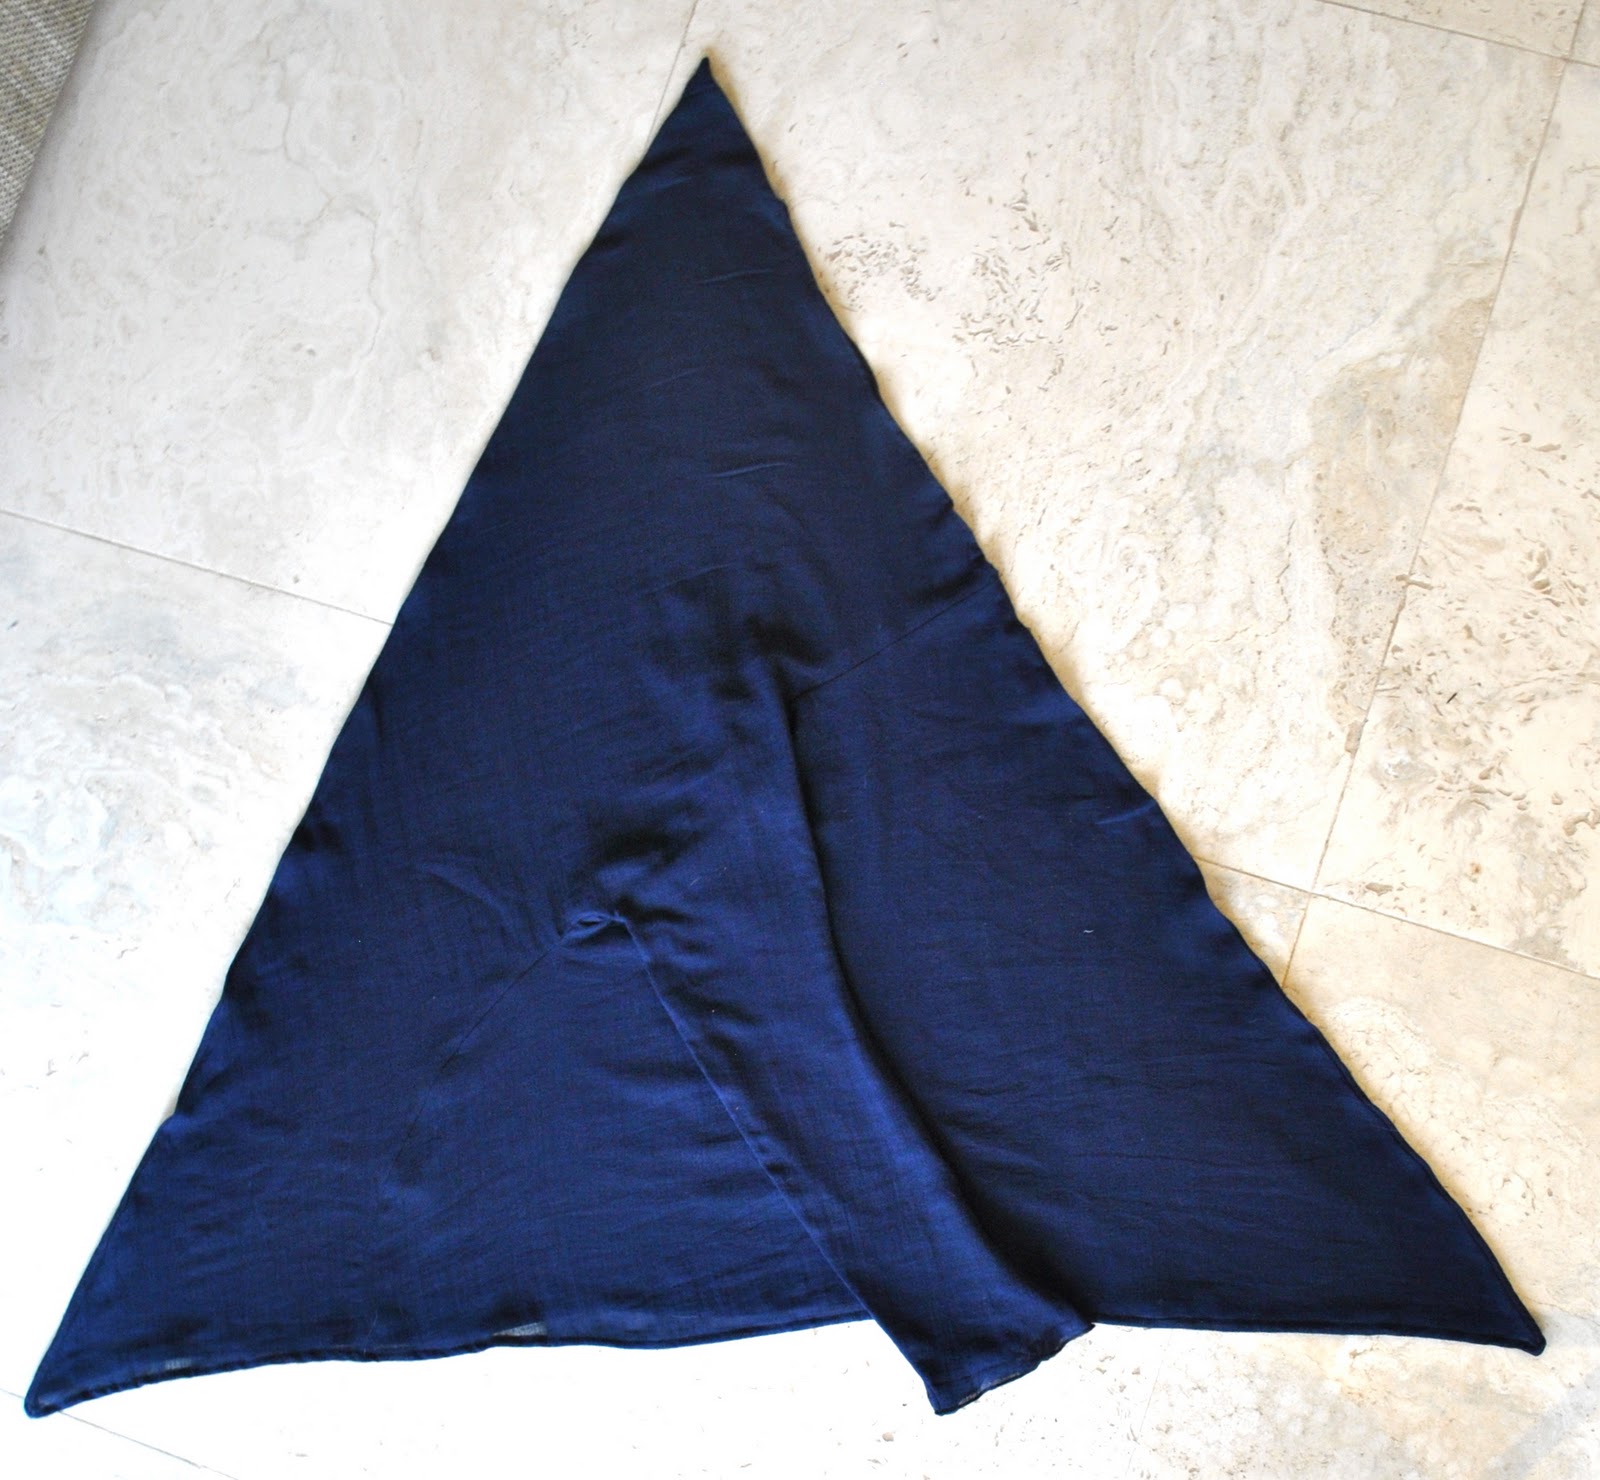
On that note, a black cloak is such a useful thing to have in the dress-up box.  It can be the basis for so many costumes.

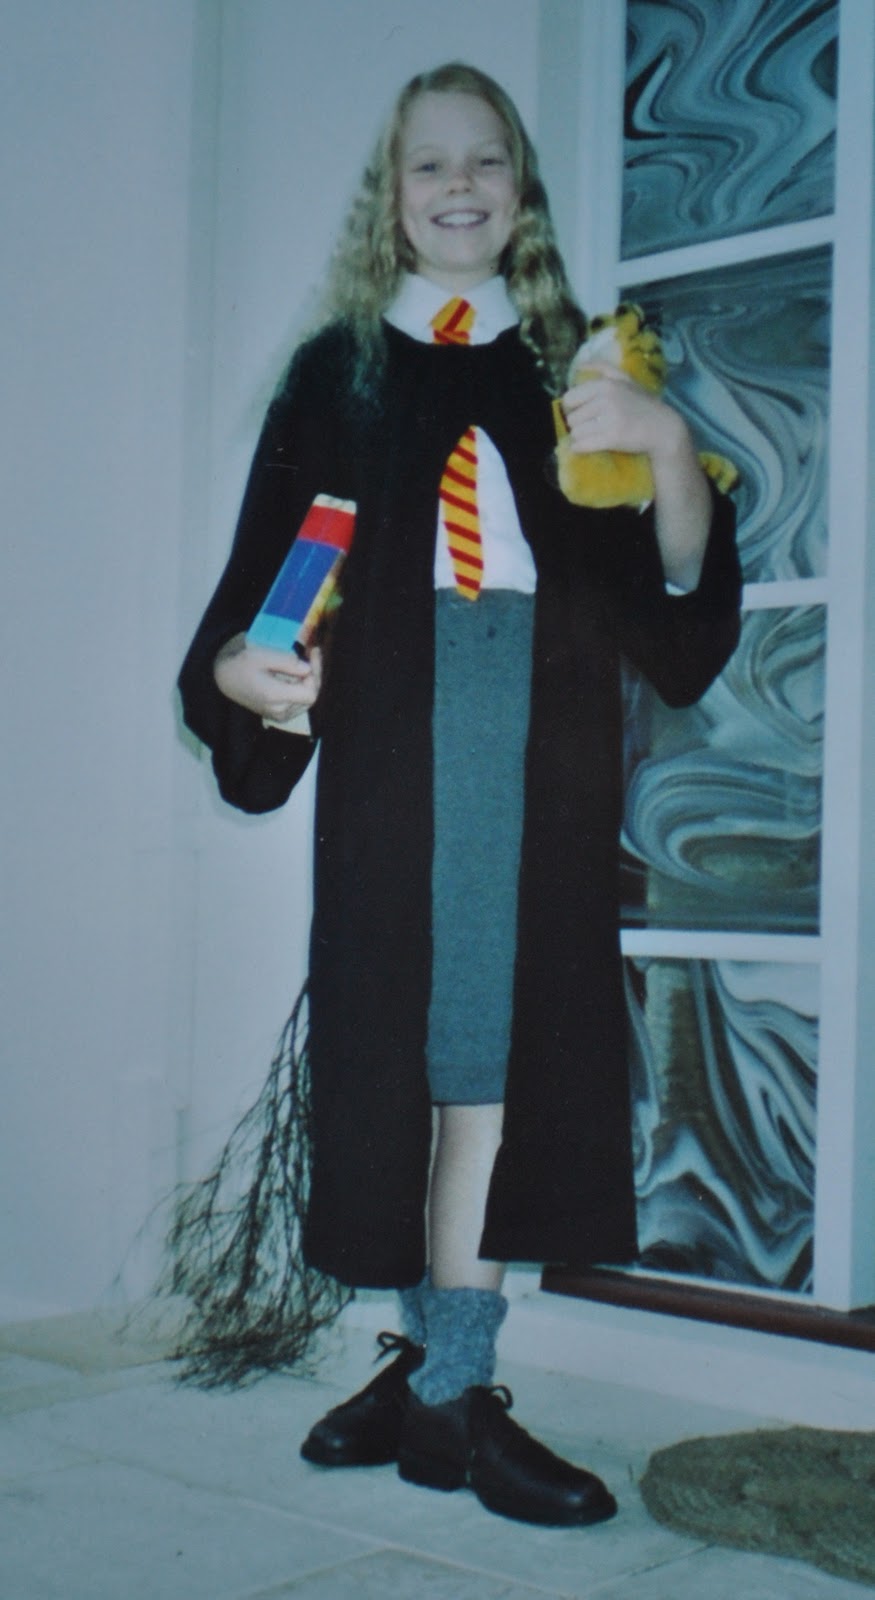
Here is the same robe again, worn by Cassie as Hermione, complete with Garfield Crookshanks the cat… I threw together the skirt and tie as well, but they do not bear close inspection…!)

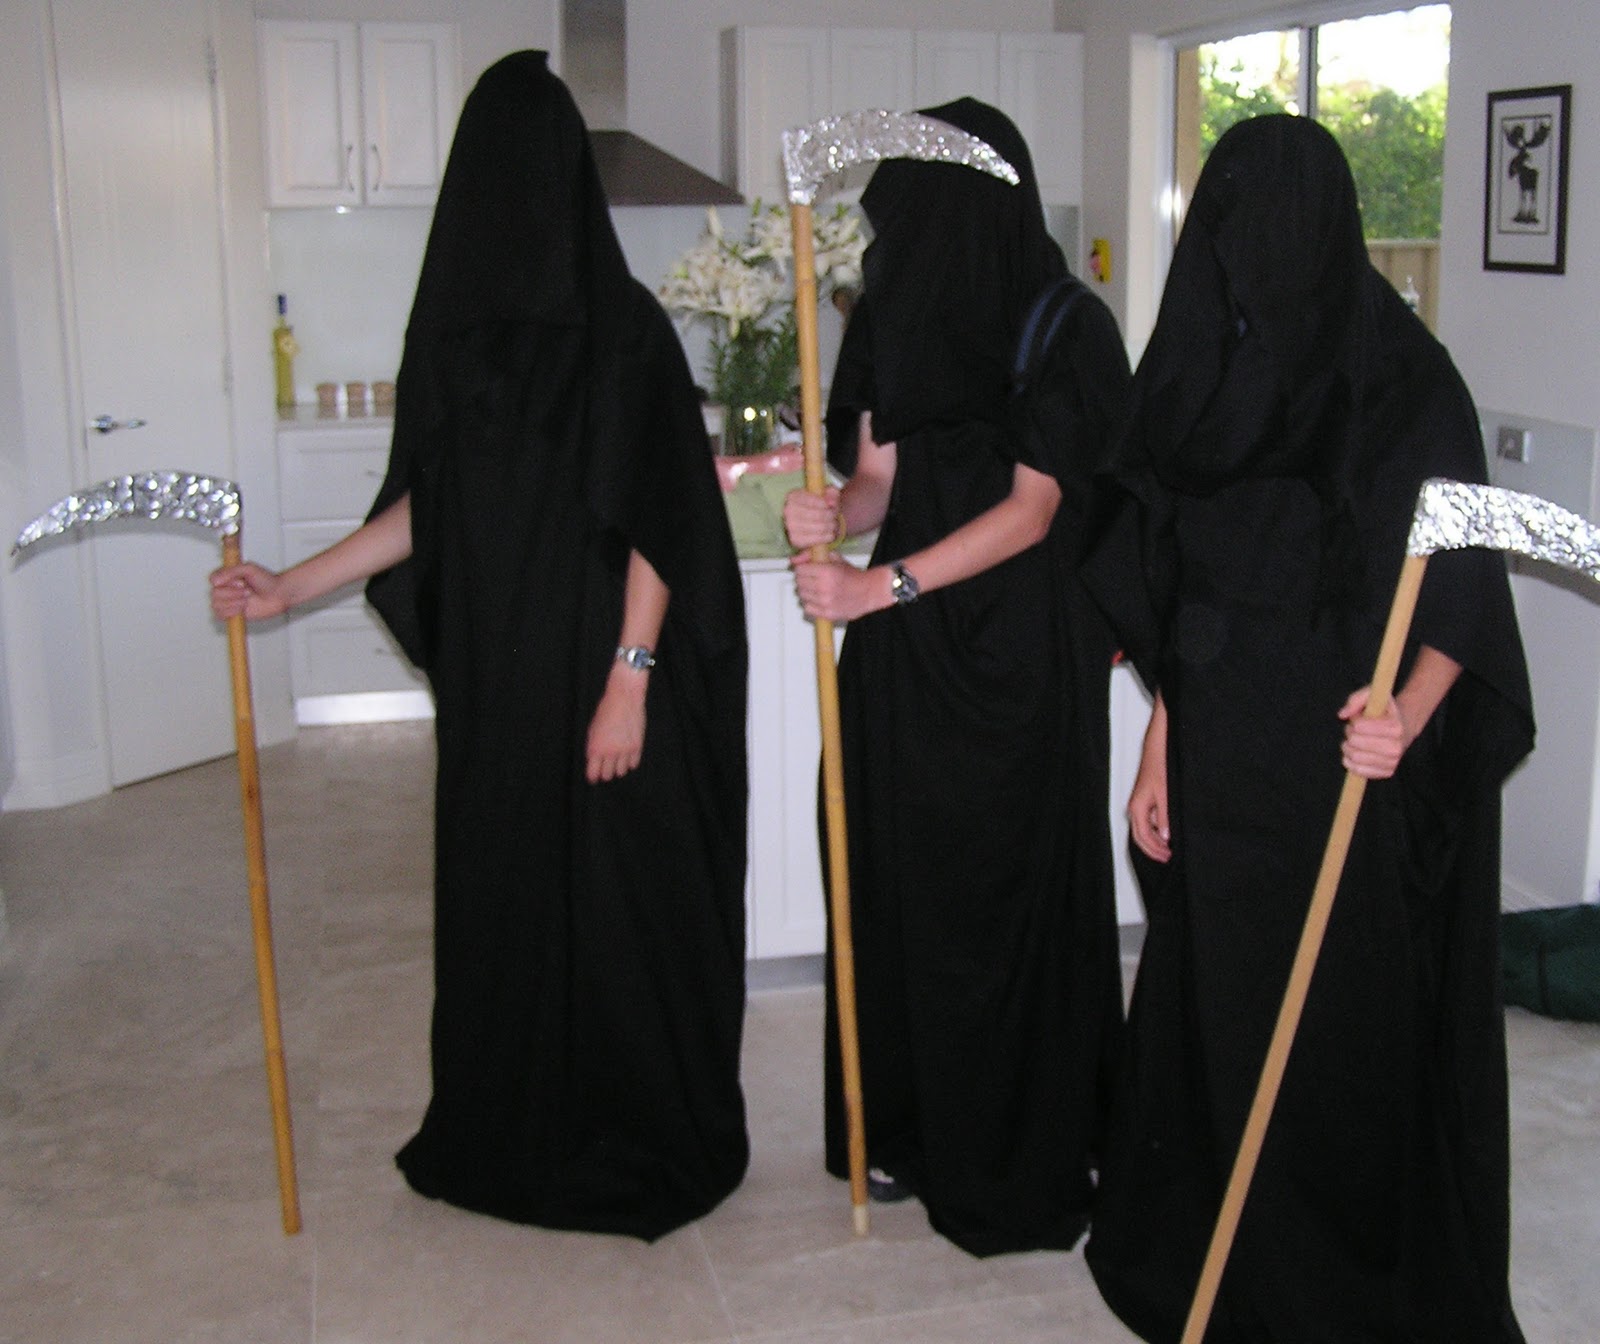
(I’ve shown this picture before… but here it is again just to illustrate the versatility of the plain black robe as a costume), Tim and two of his mates as Grim Reapers.  I made all three of their costumes.

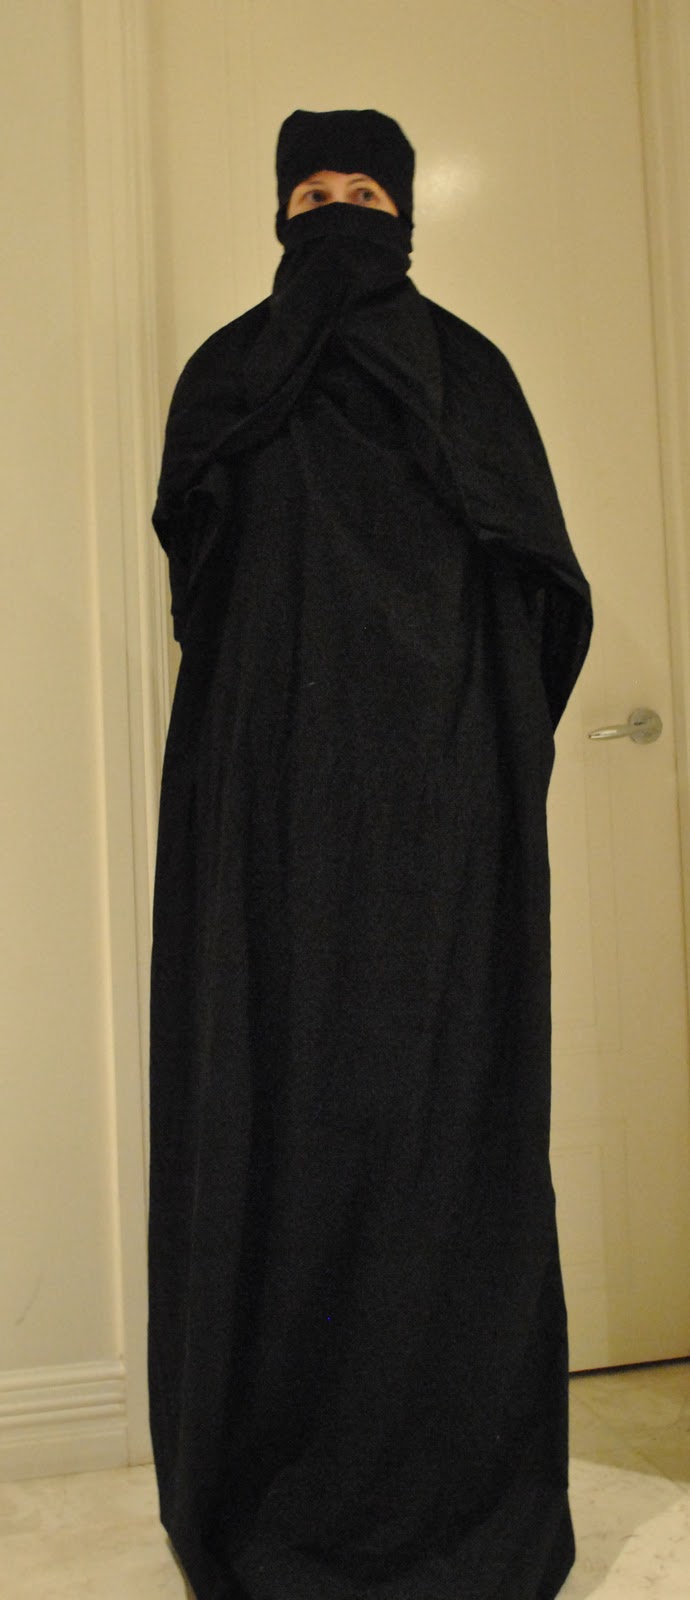
Tim’s same costume again, this time worn by me to an Arabian Nights party.  I didn’t want to hire an outfit and I didn’t want to make some bejewelled thing I would never wear again, and as every single female I have seen in the Arabian region is dressed something like this, so I was like, yeah this’ll do.  I naively assumed other girls would have the same idea…  As it turned out I was literally the only female dressed (I thought) anywhere near authentically!  Also the only one not heavily sequinned and baring plenty of belly-flesh…  I confess the costume was abandoned when we decided to start dancing!  Don’t worry I had a skirt and top on underneath…

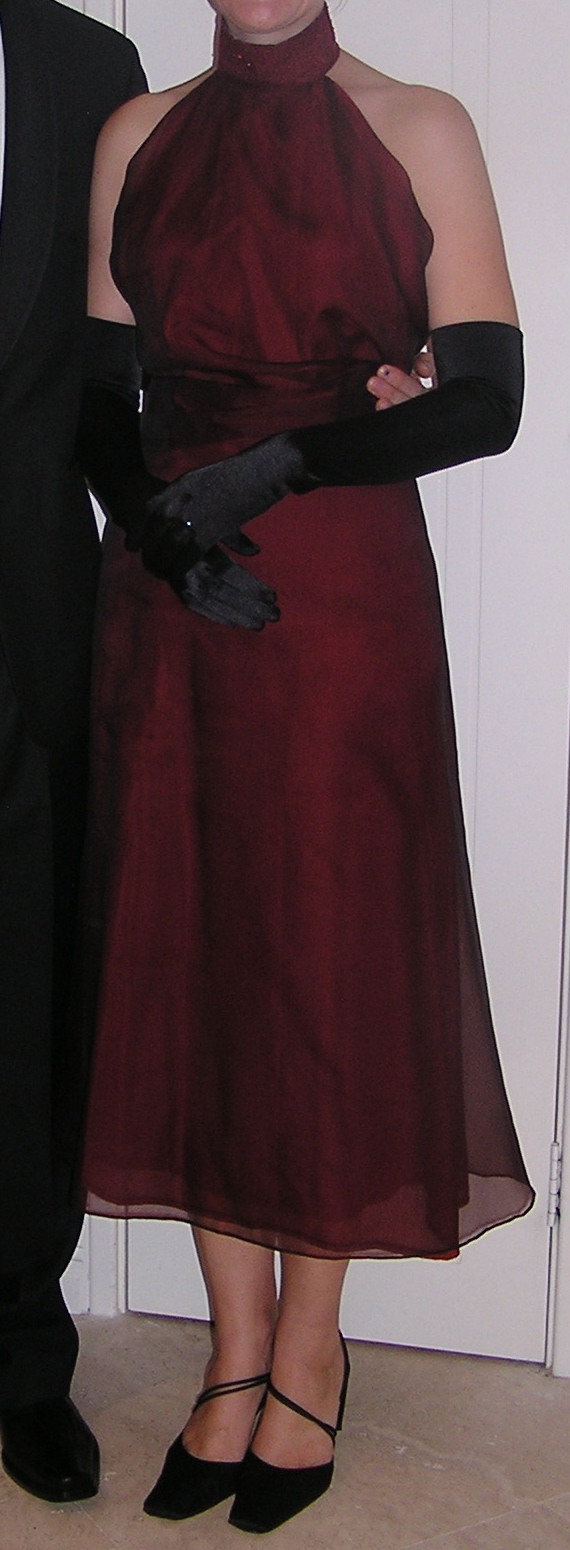
So, away from costumes now, and a ball-gown of my own design that I made for balls in years gone by (Sorry for the headless shot but my face and my hair look awful in this picture…!)  It is silk organza, overlaying silk and silk jersey layers, three layers in all.  It had a beaded and embroidered neckpiece, both beaded and embroidered by me, that is…

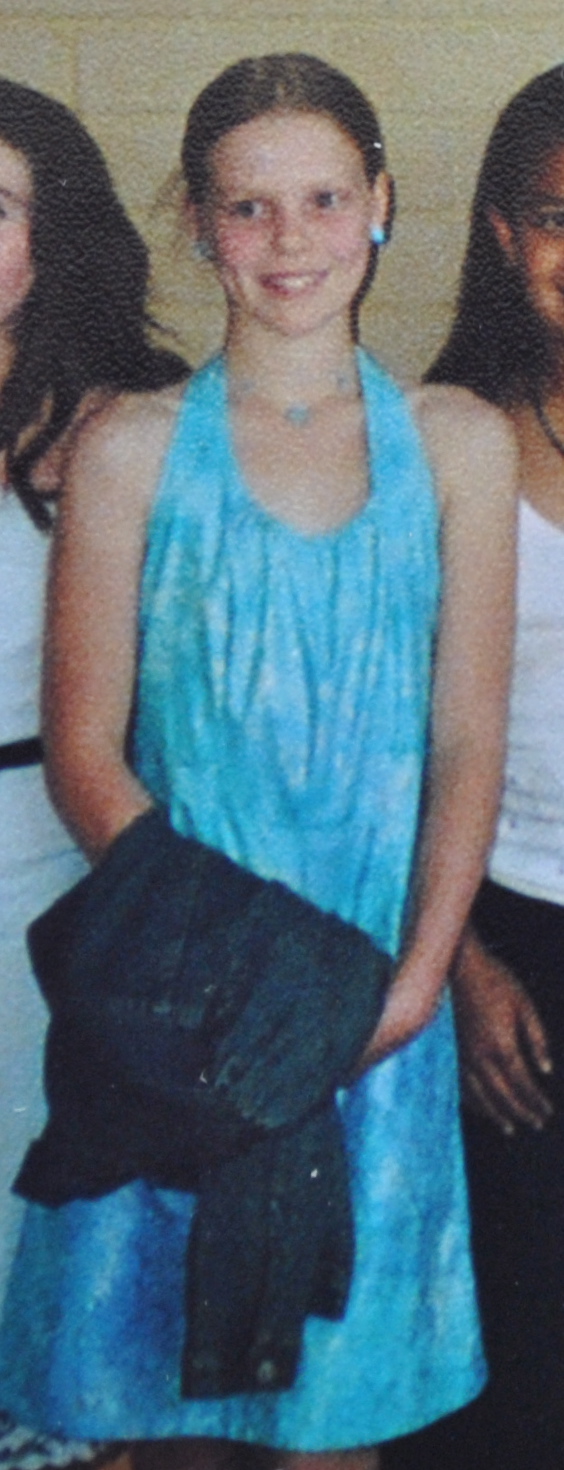
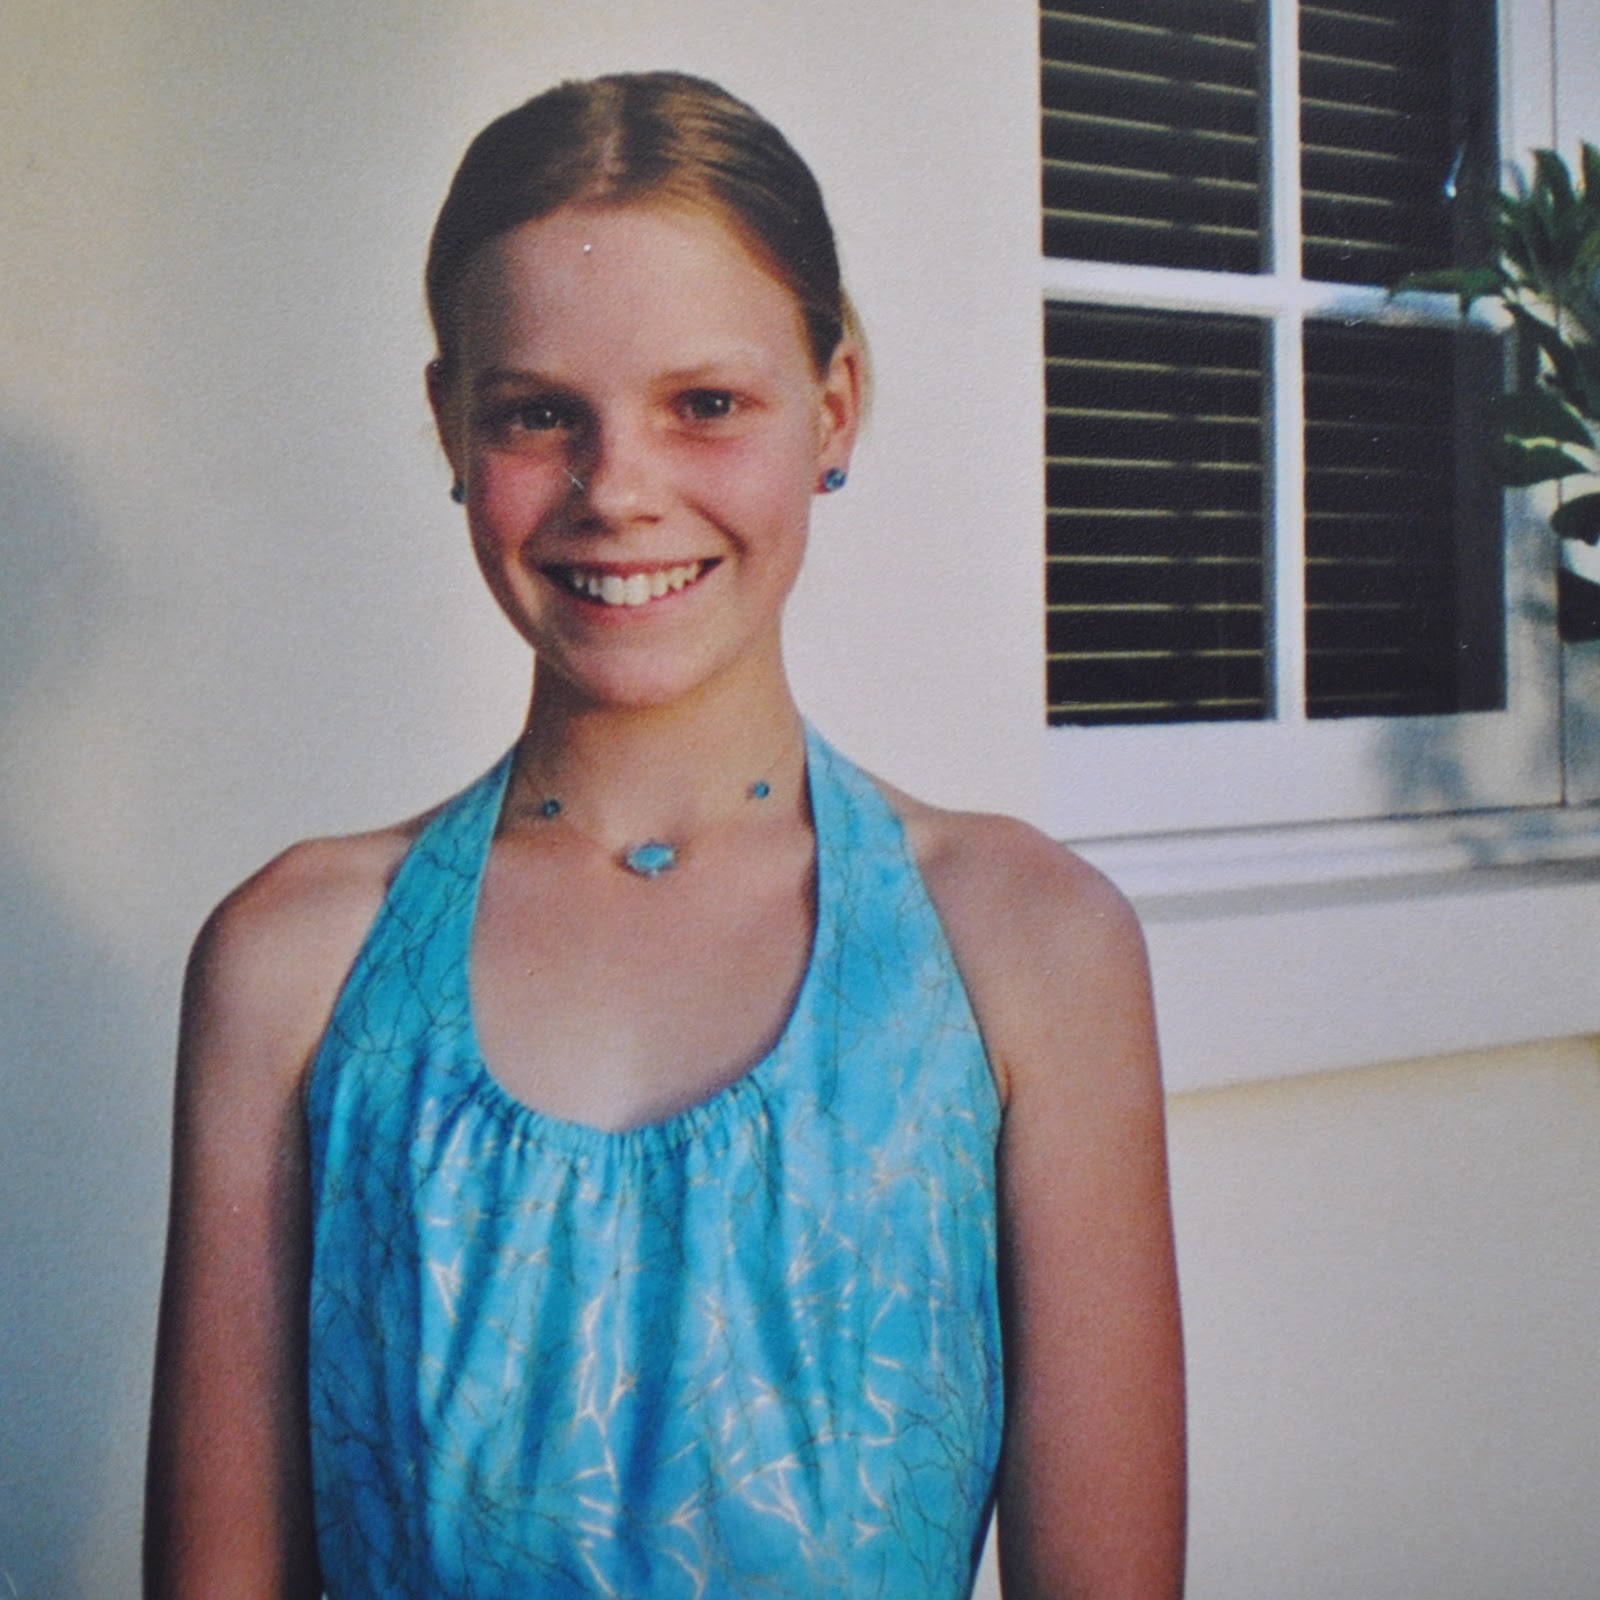
A dress I made for Cassie for her graduation dance at the end of primary school.  It was a simple turquoise cotton halter neck dress, the fabric had metallic gold lines randomly strewn across.  I also made her jewellery, of turquoise glass fish beads and strands of gold wire.

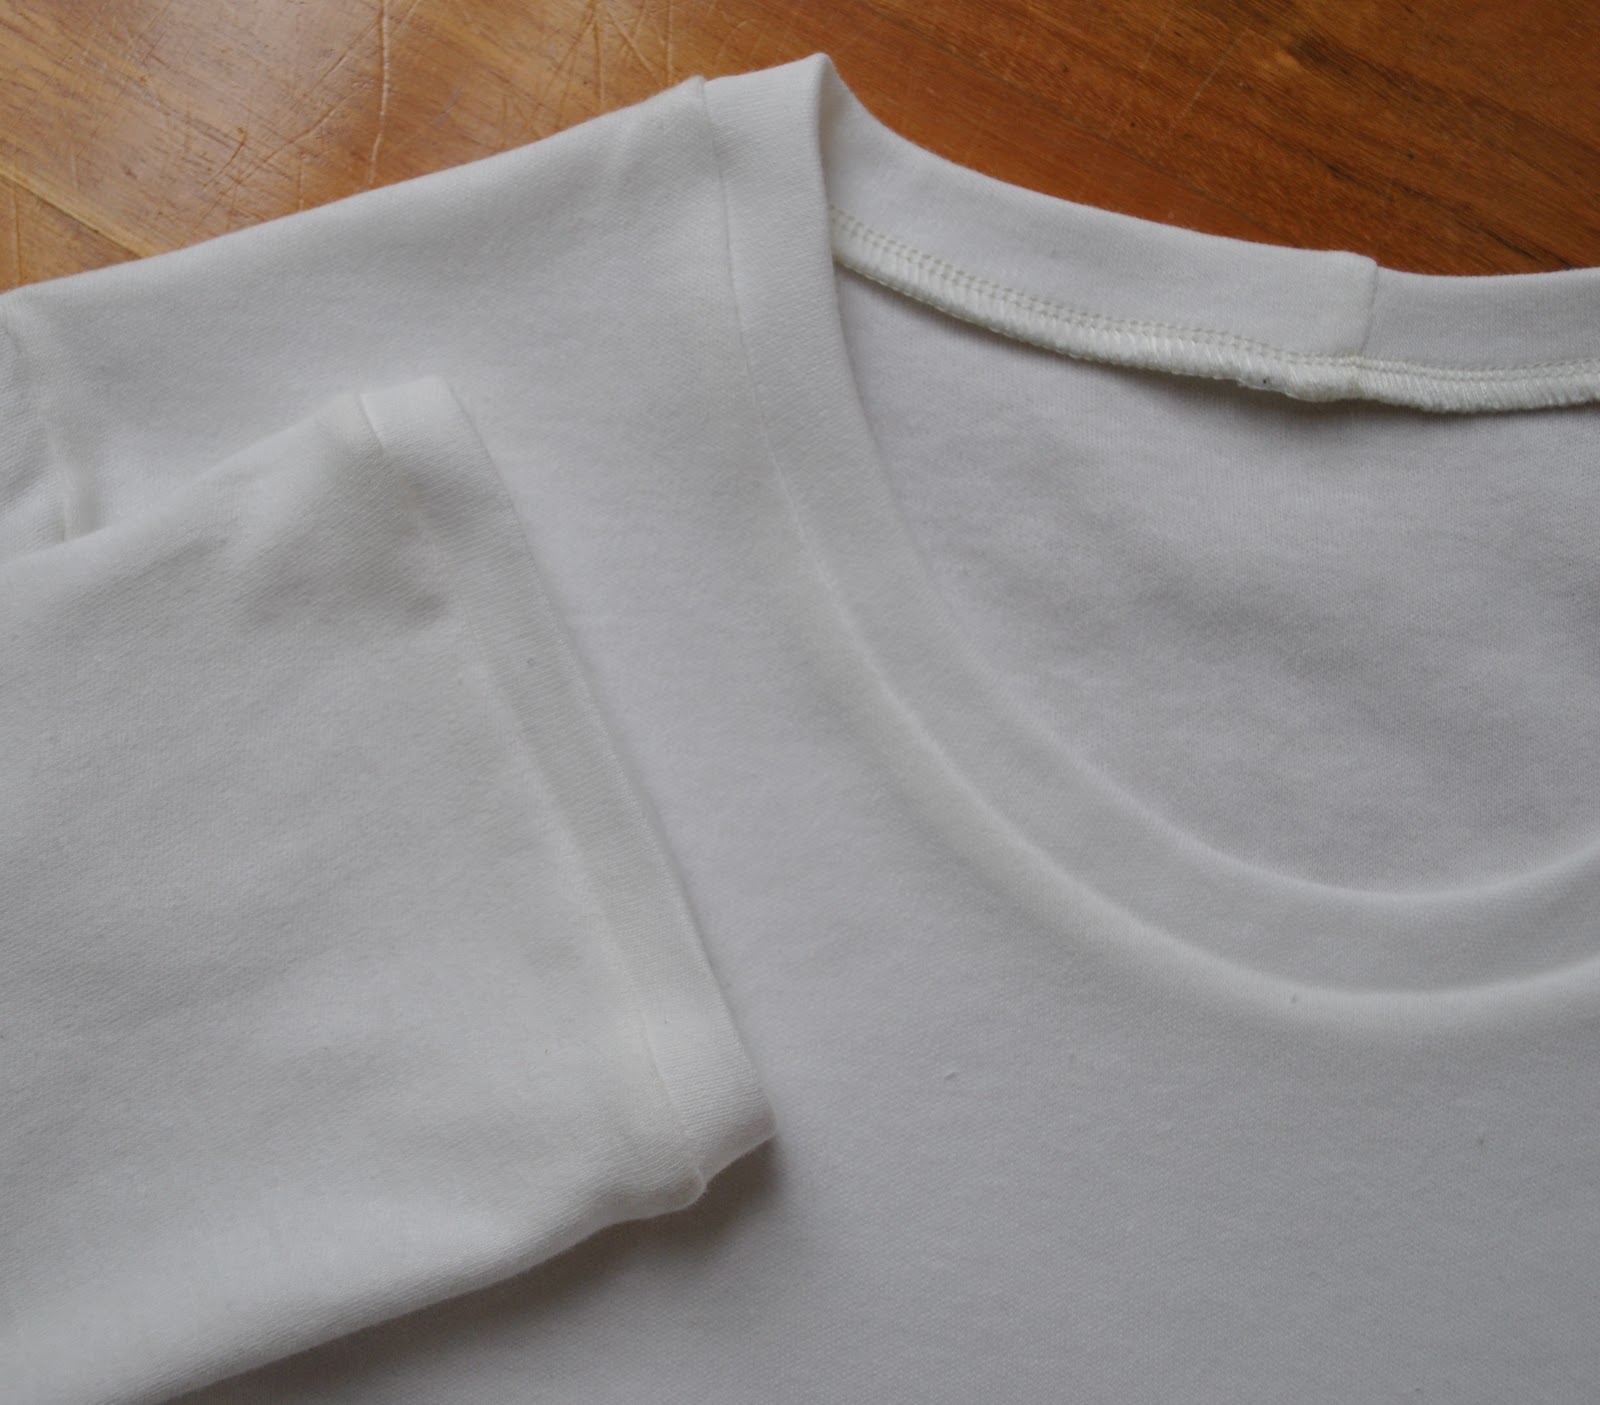
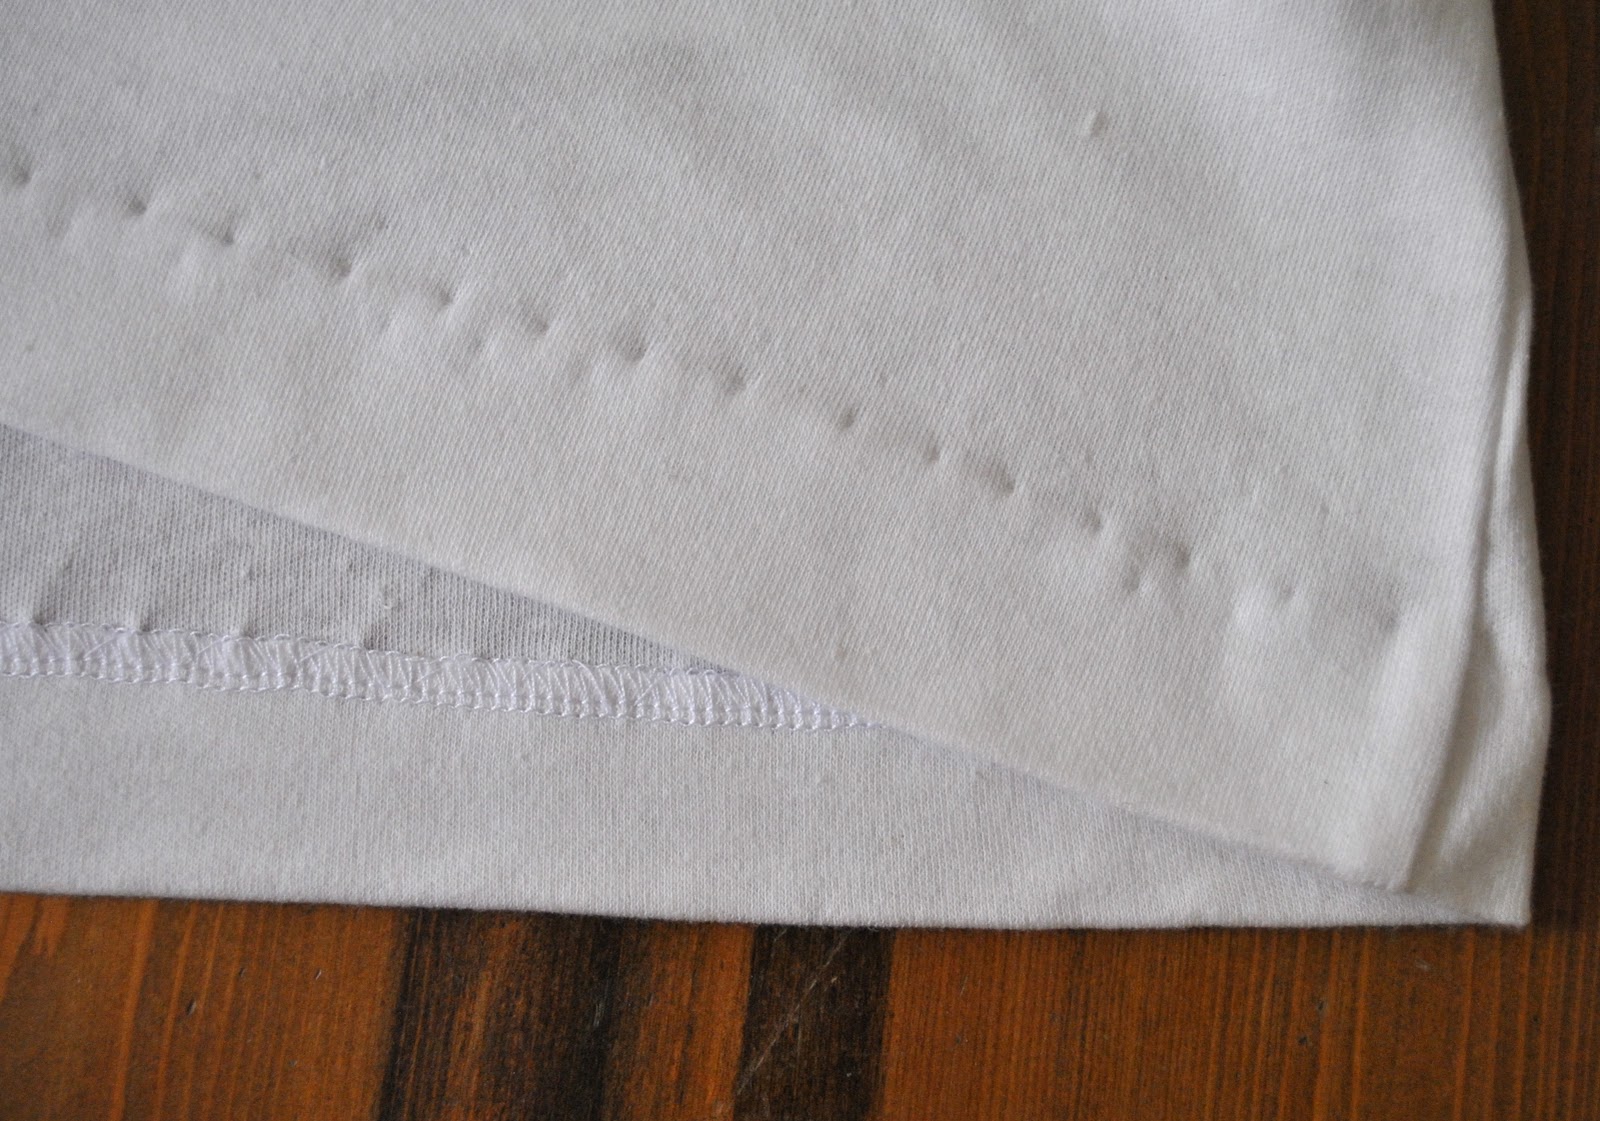
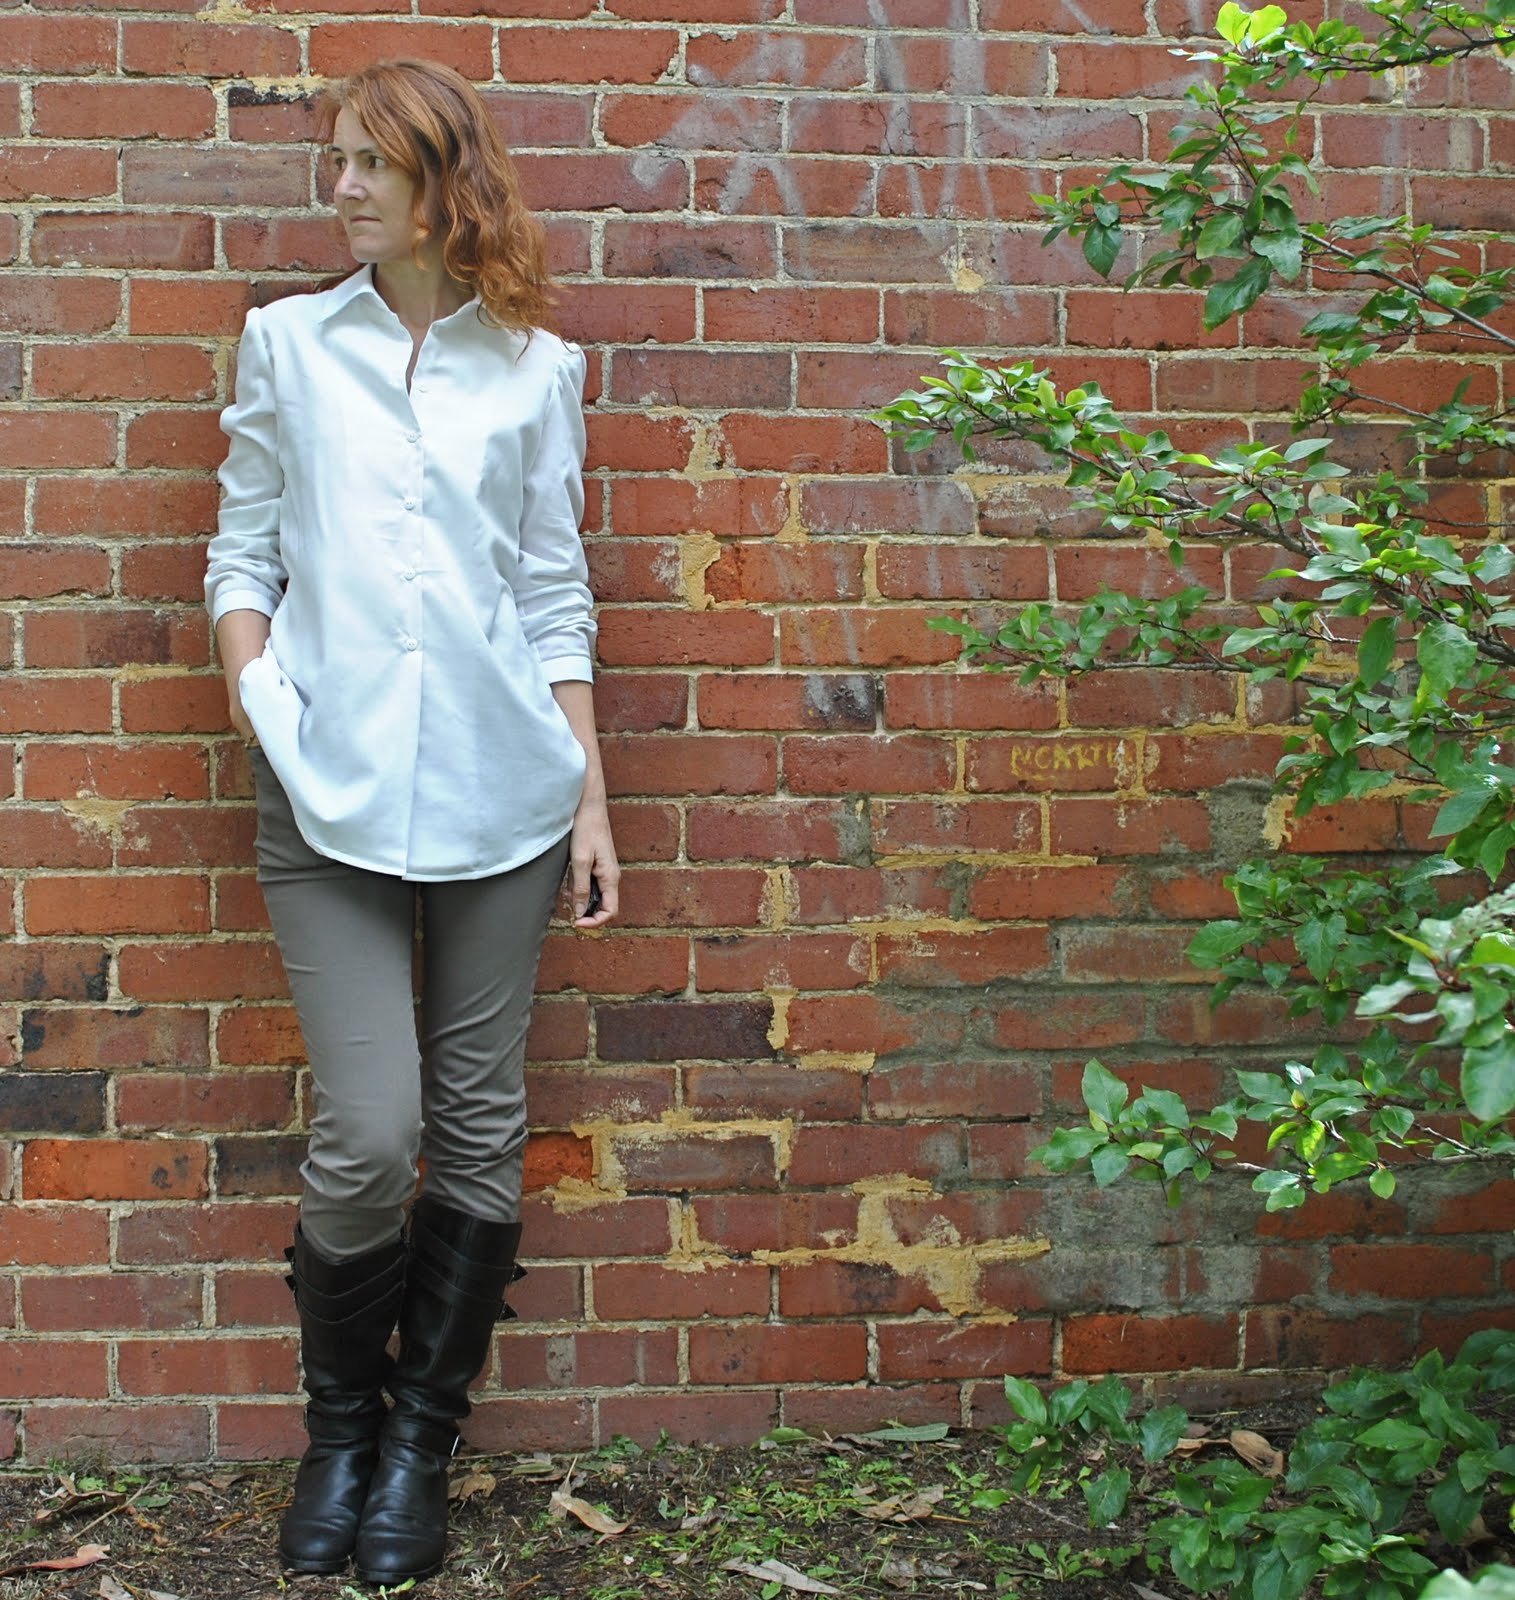
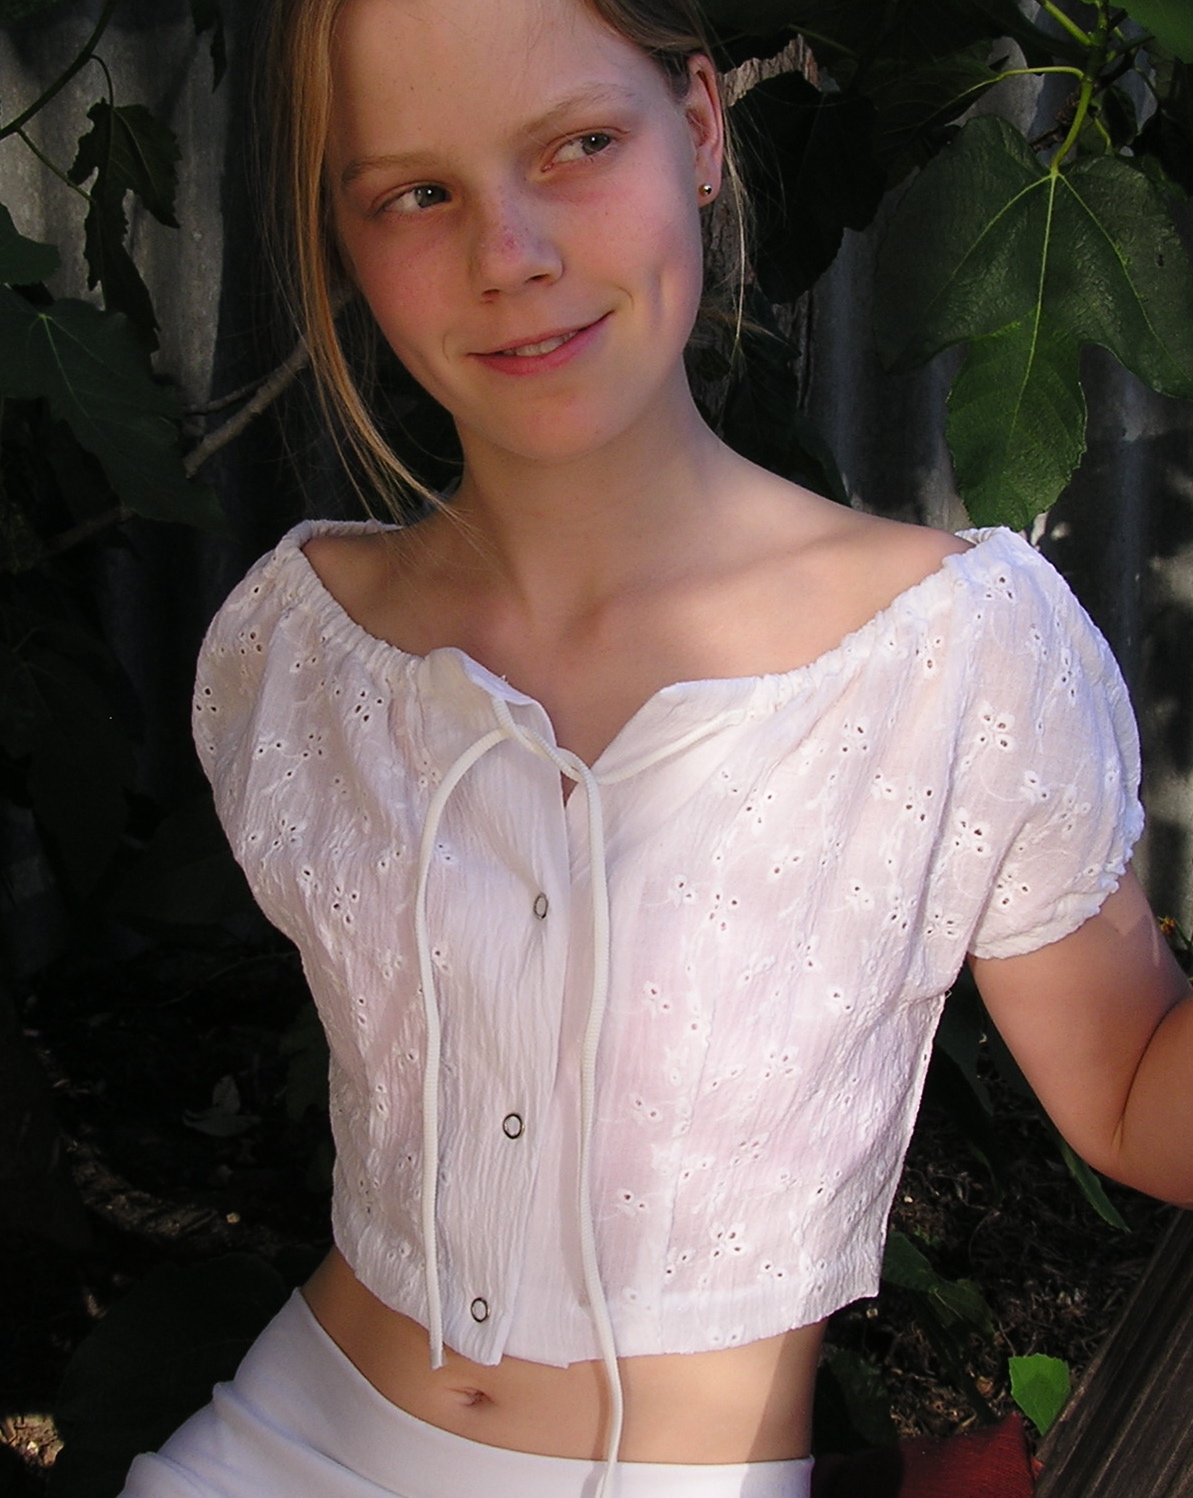
Some rather lovely (if I say so myself) wide-legged white pants that she wore almost constantly for a summer, and a little white broderie anglaise blouse.  Both my own design.

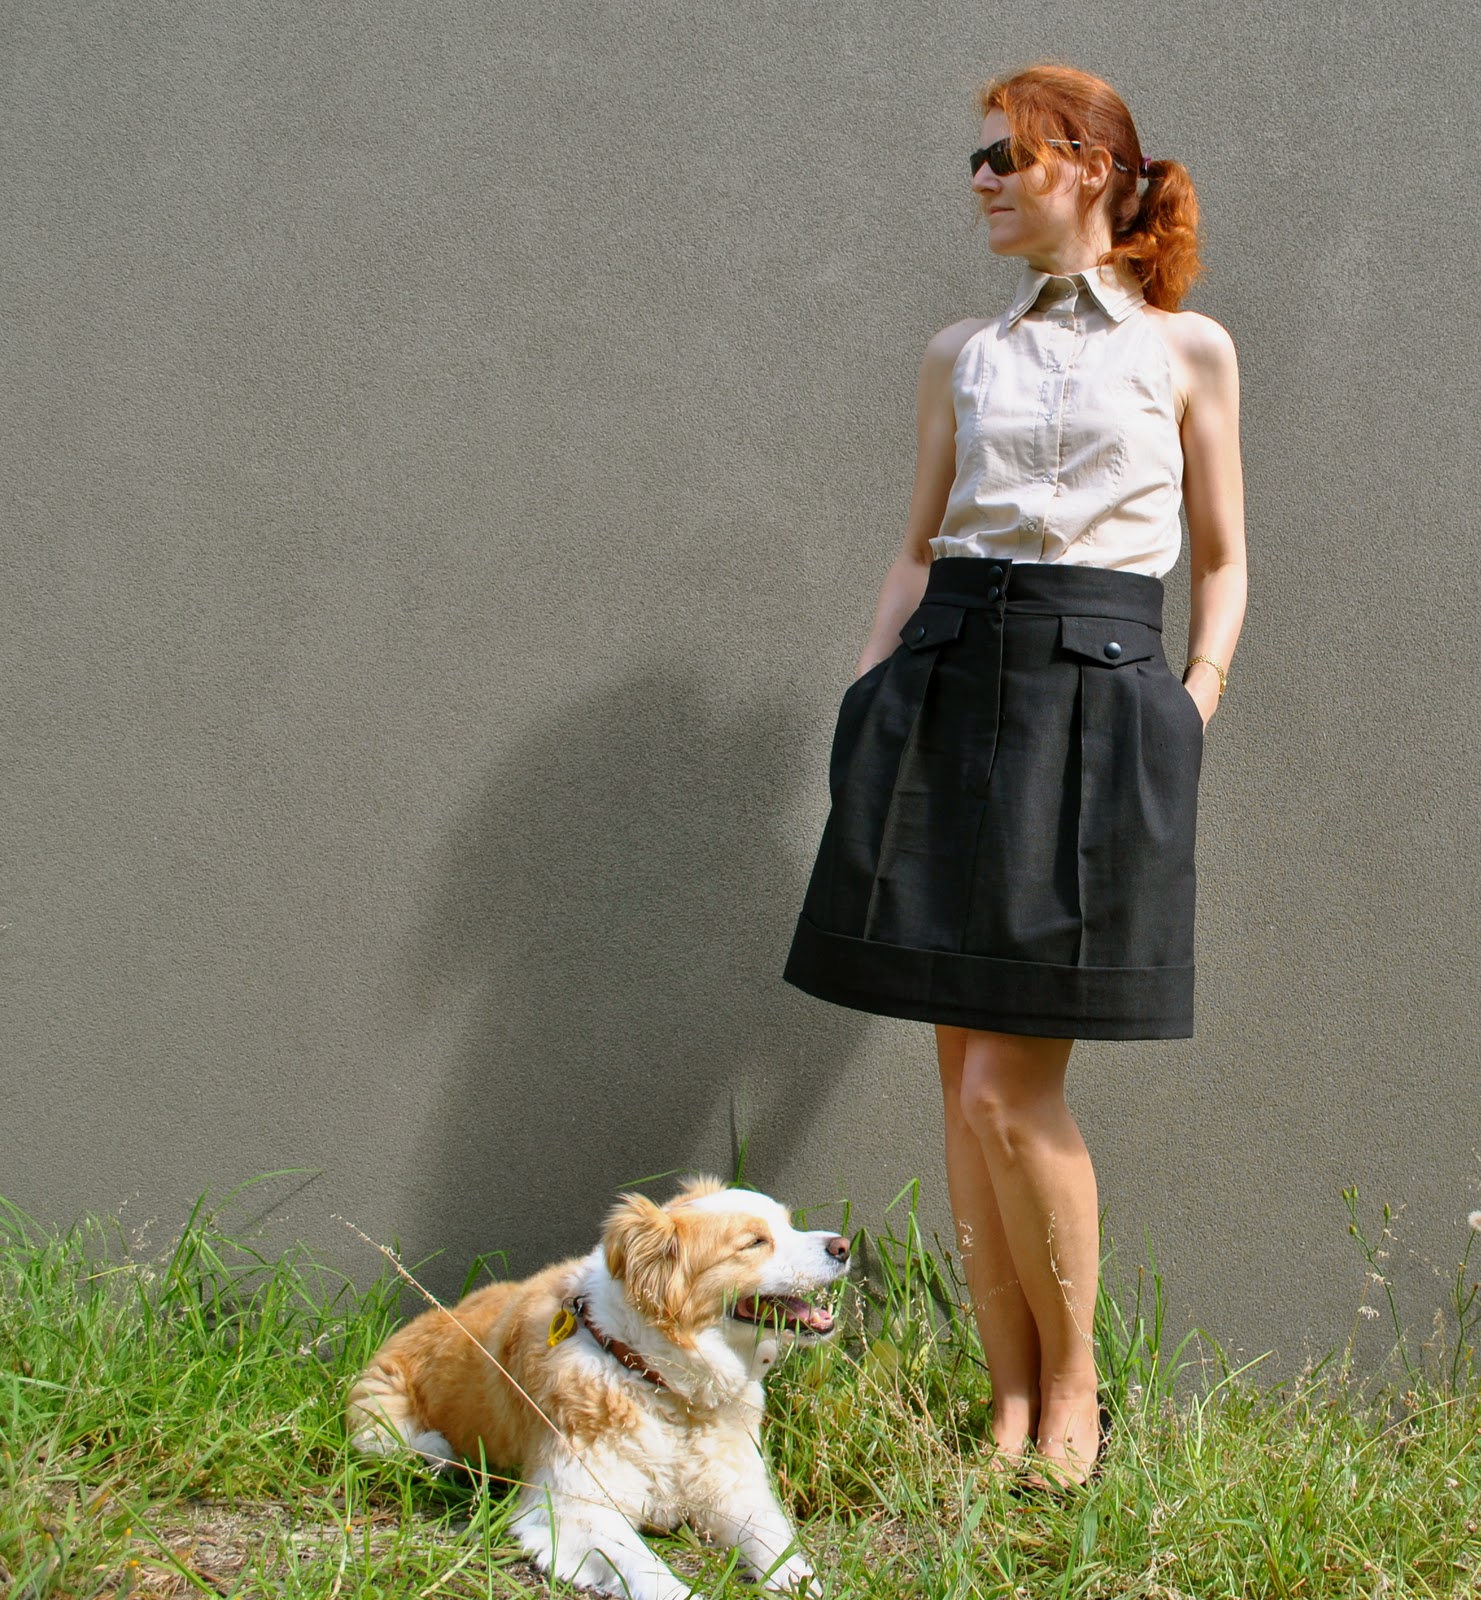
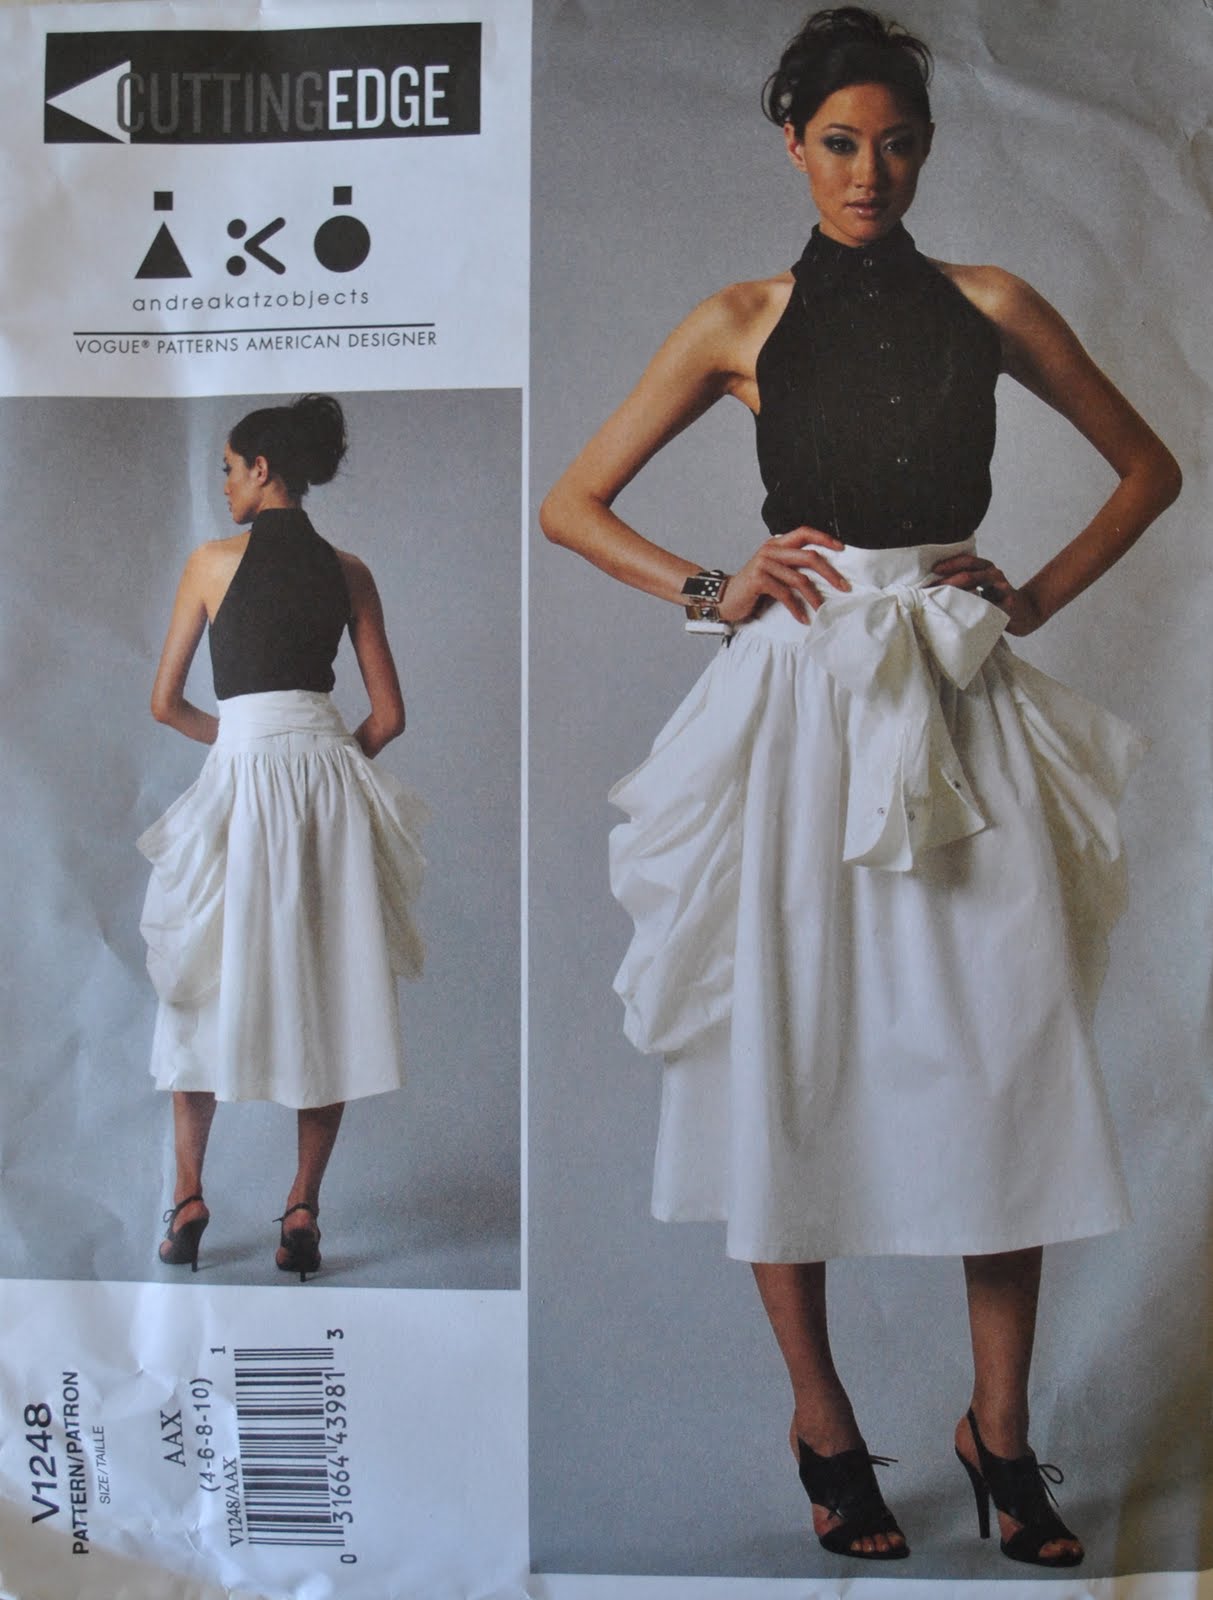
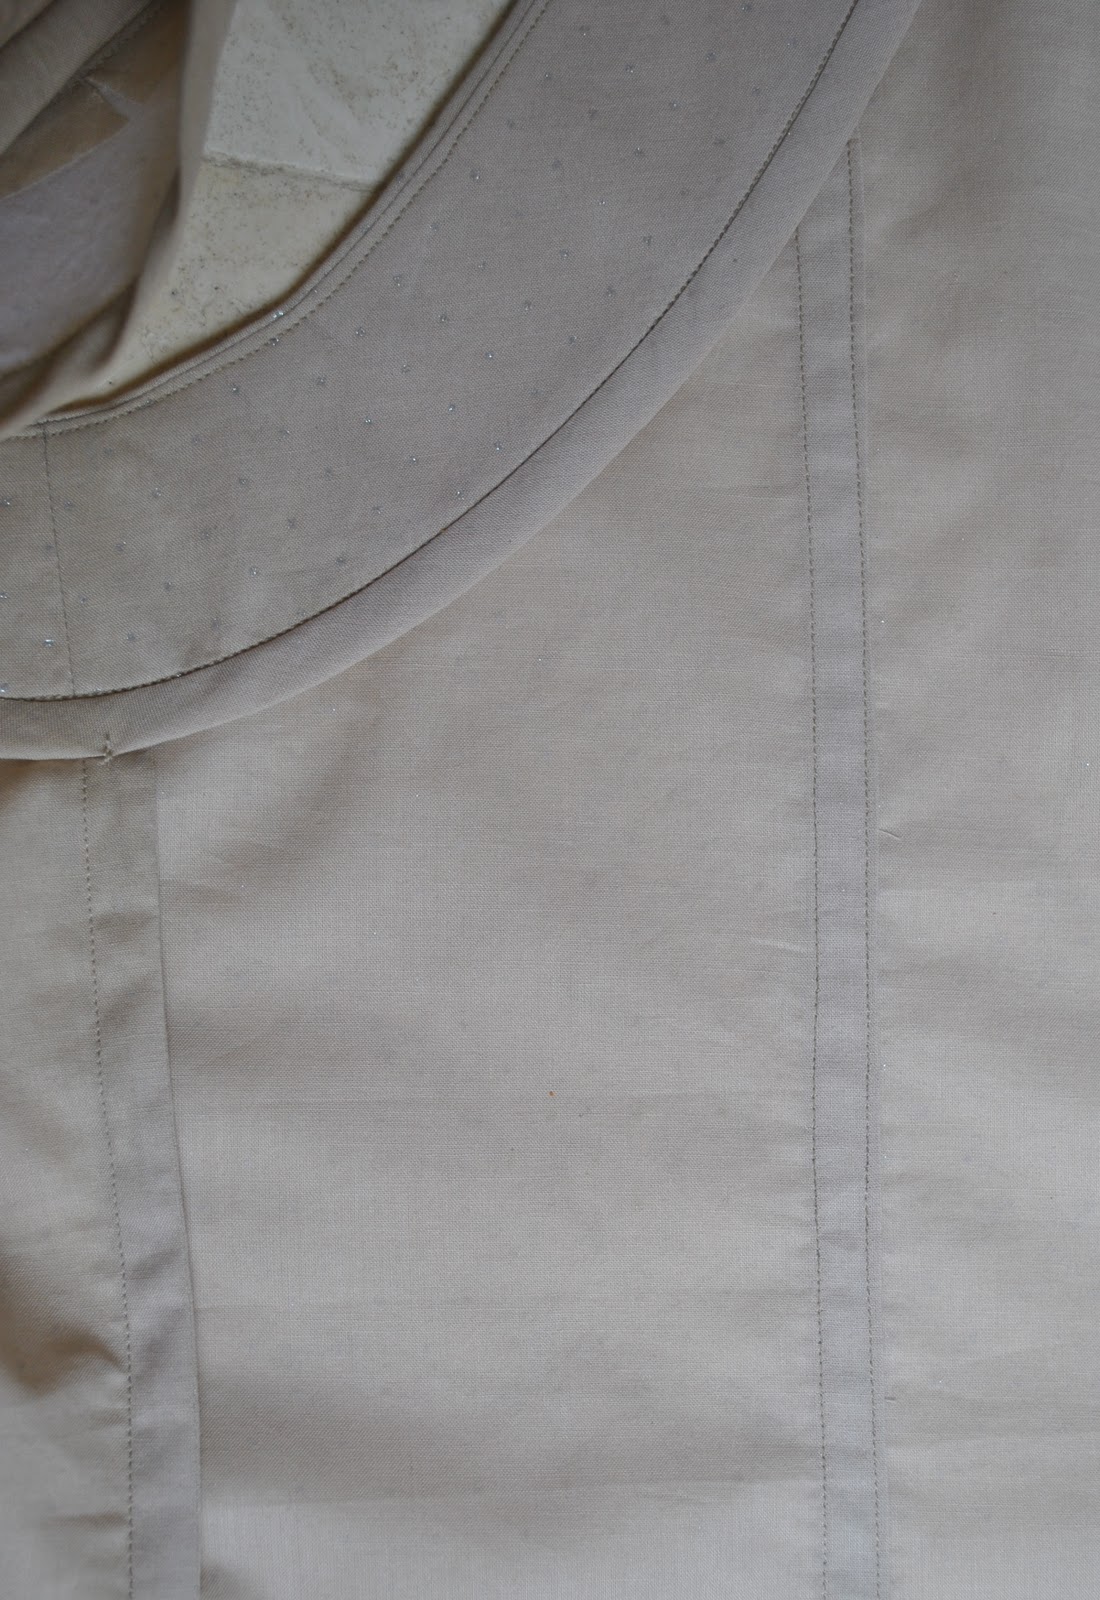
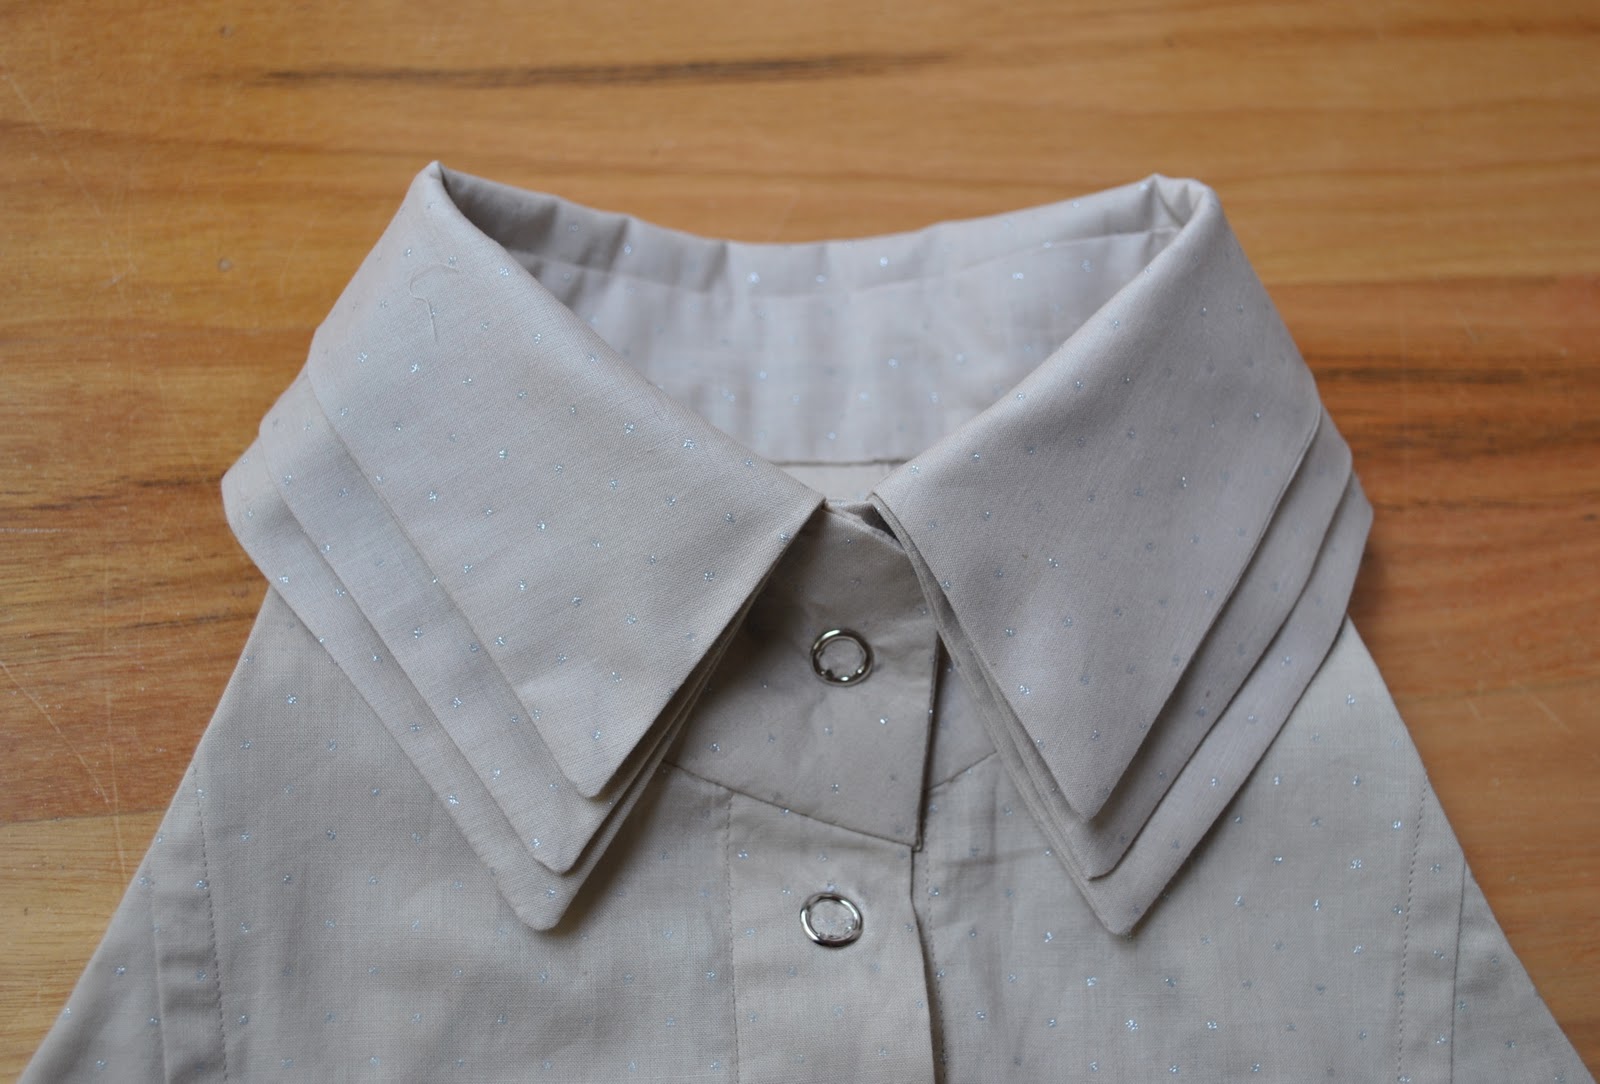
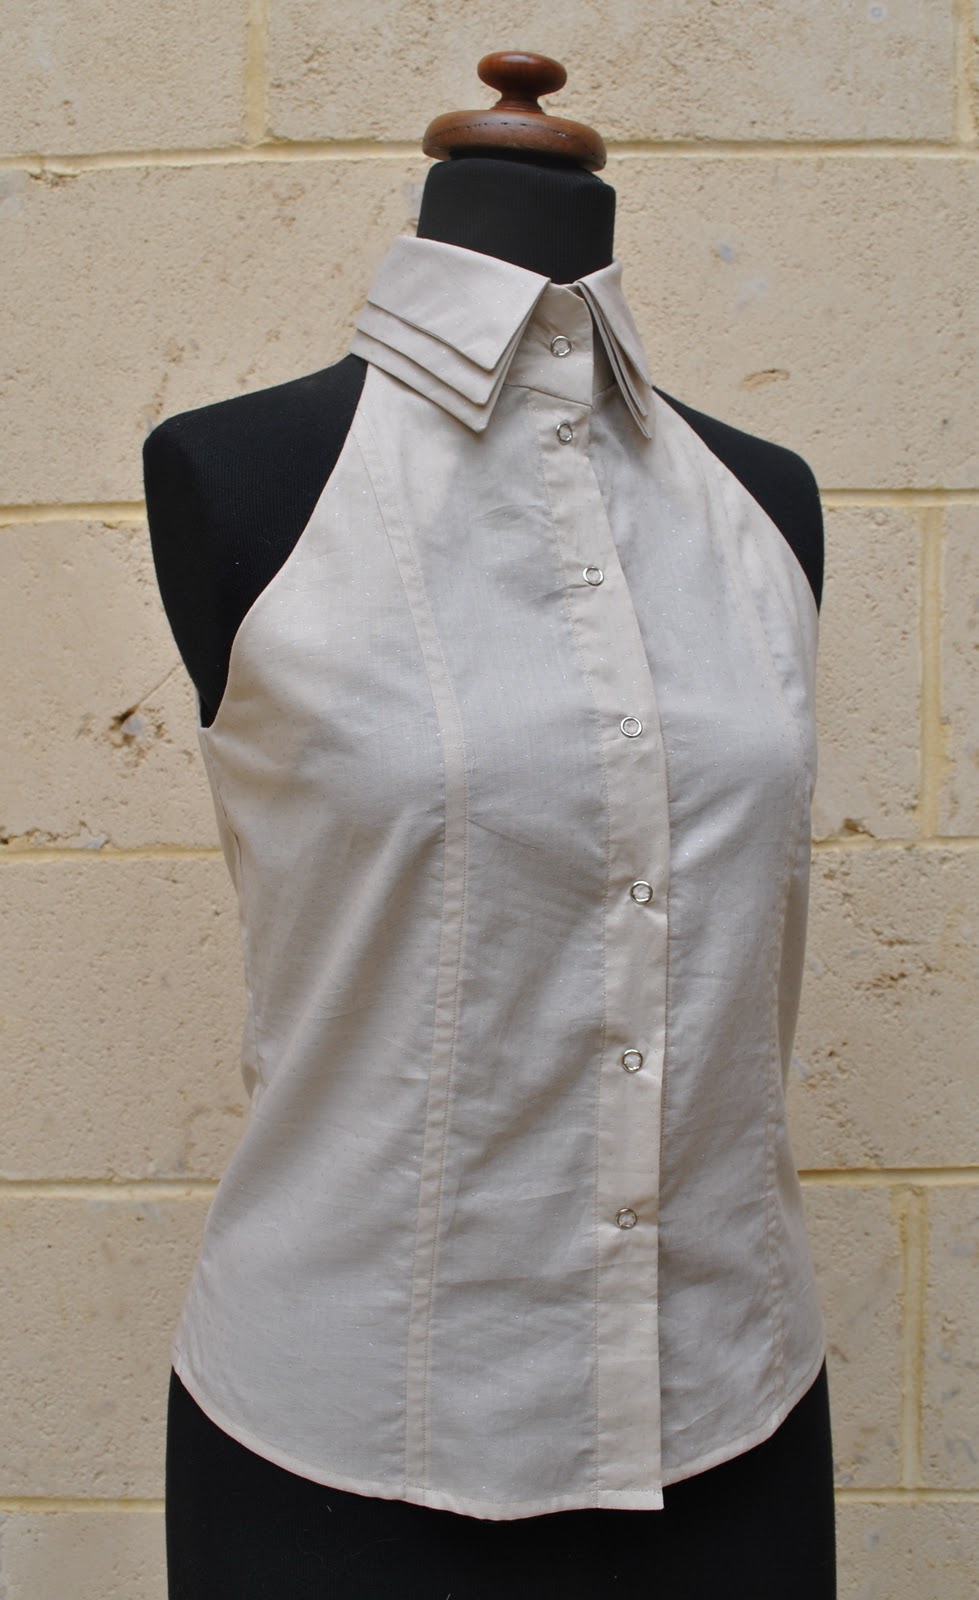
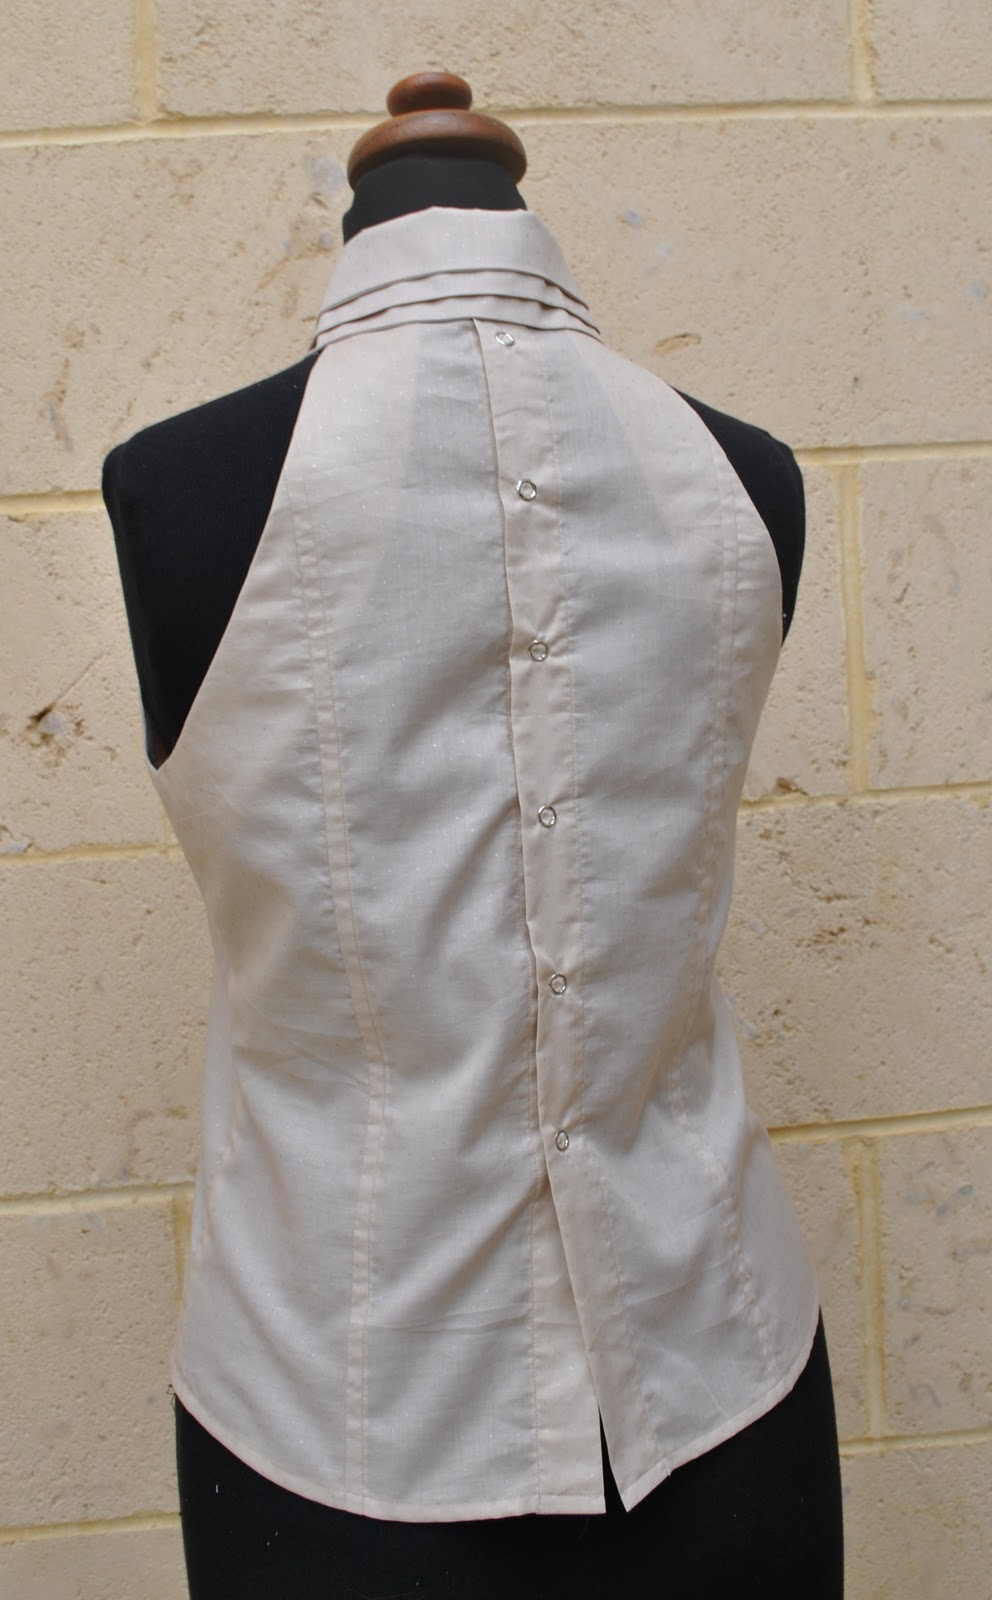
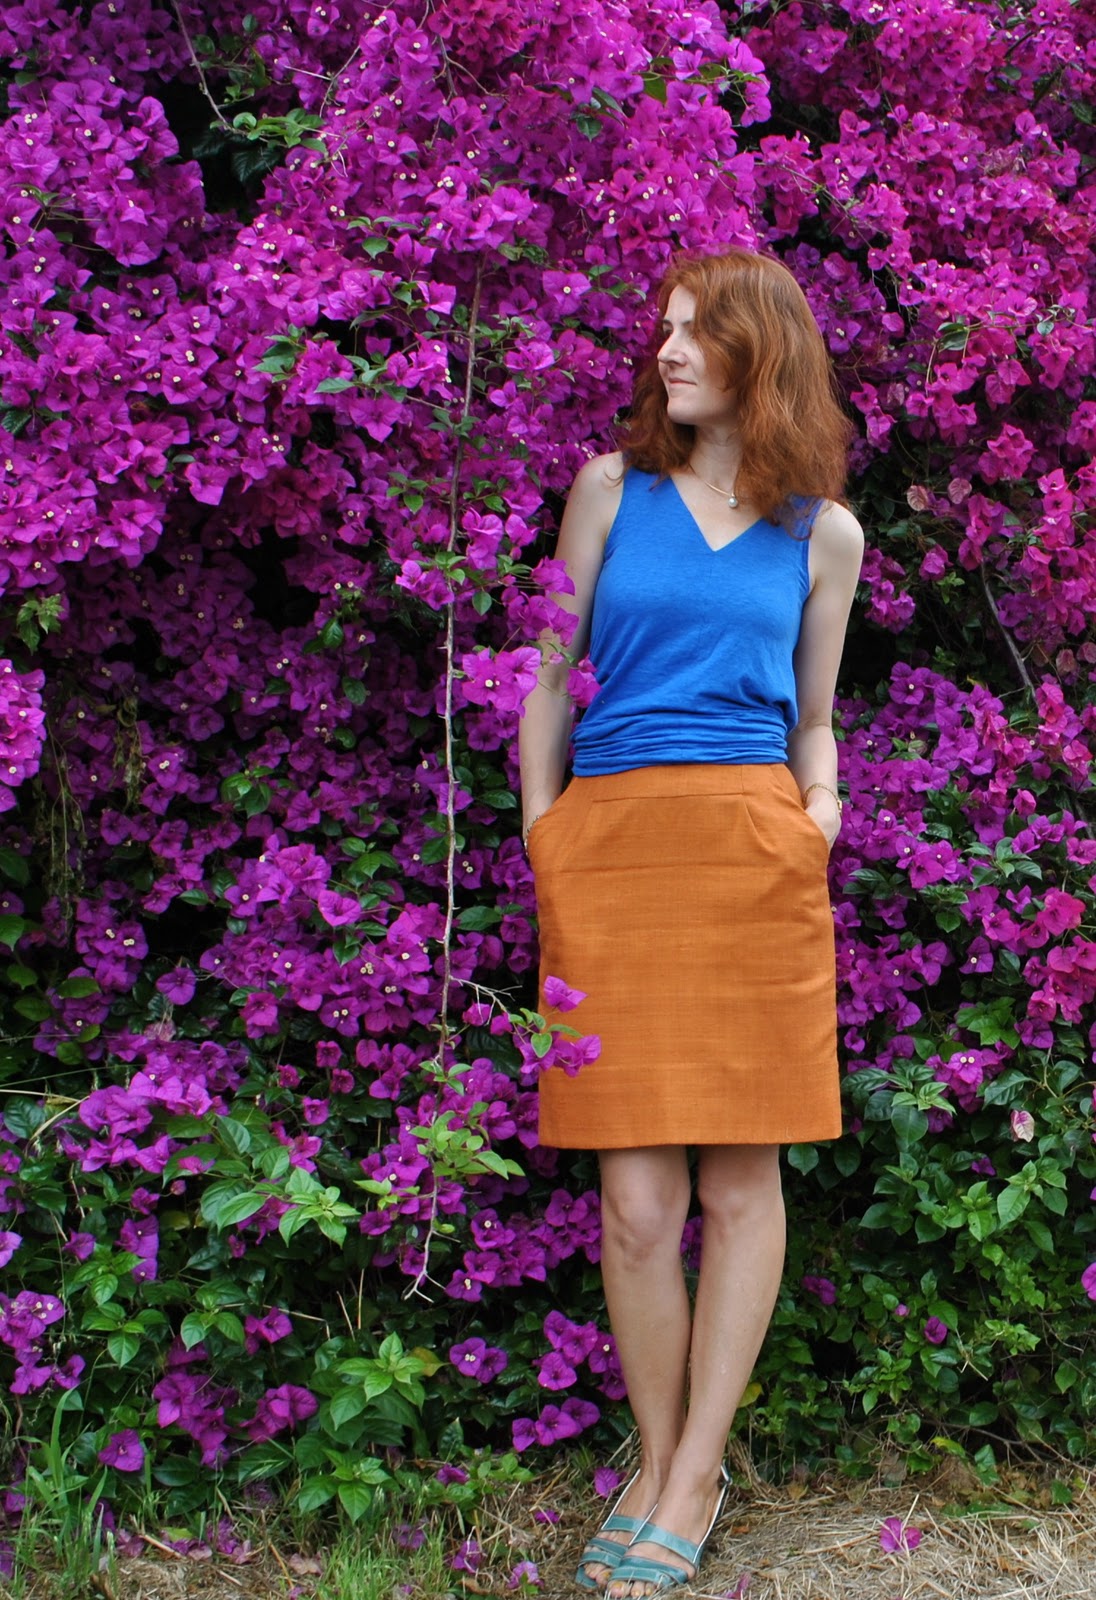
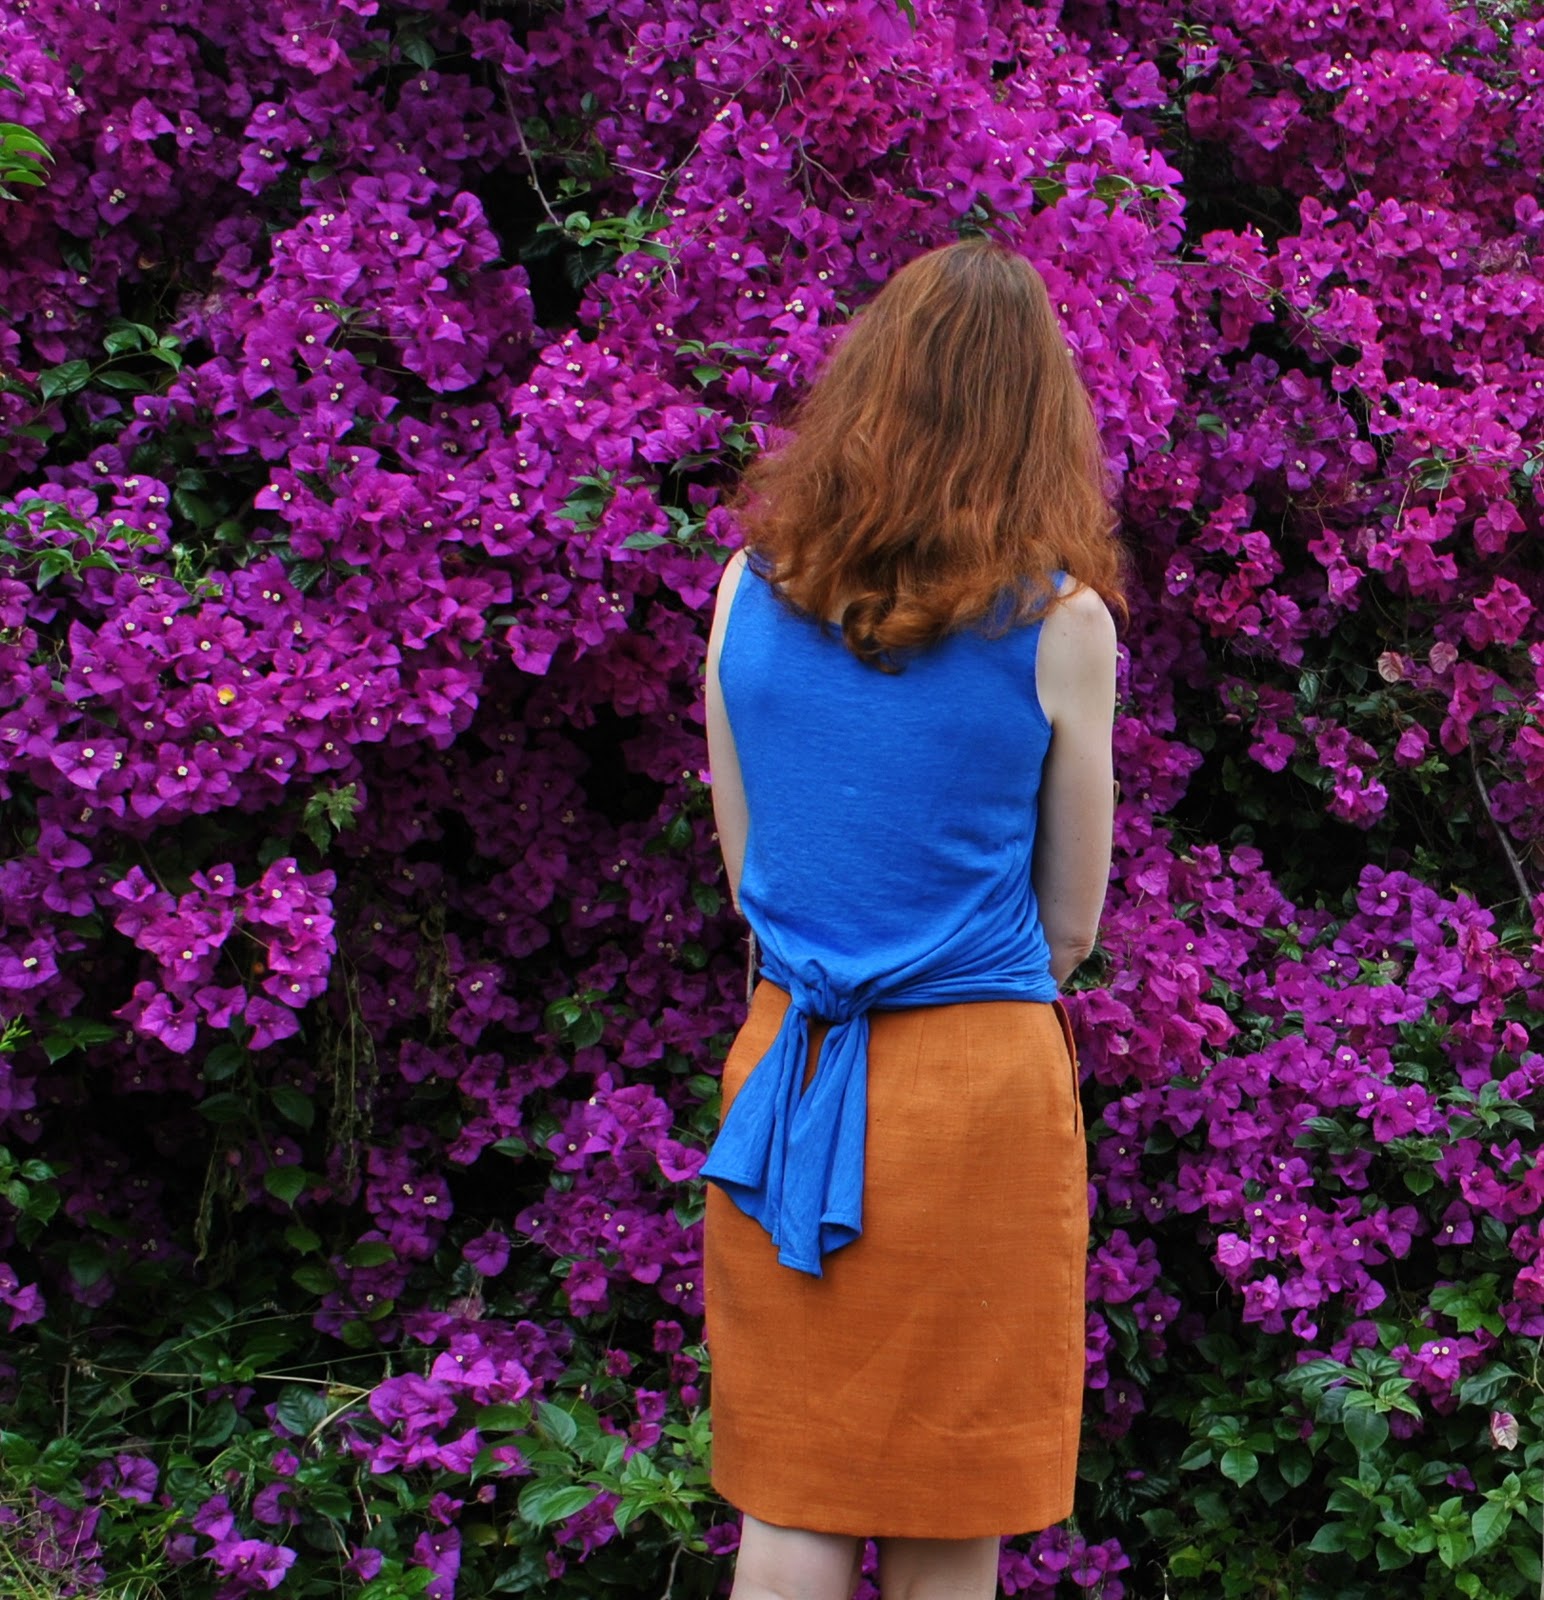
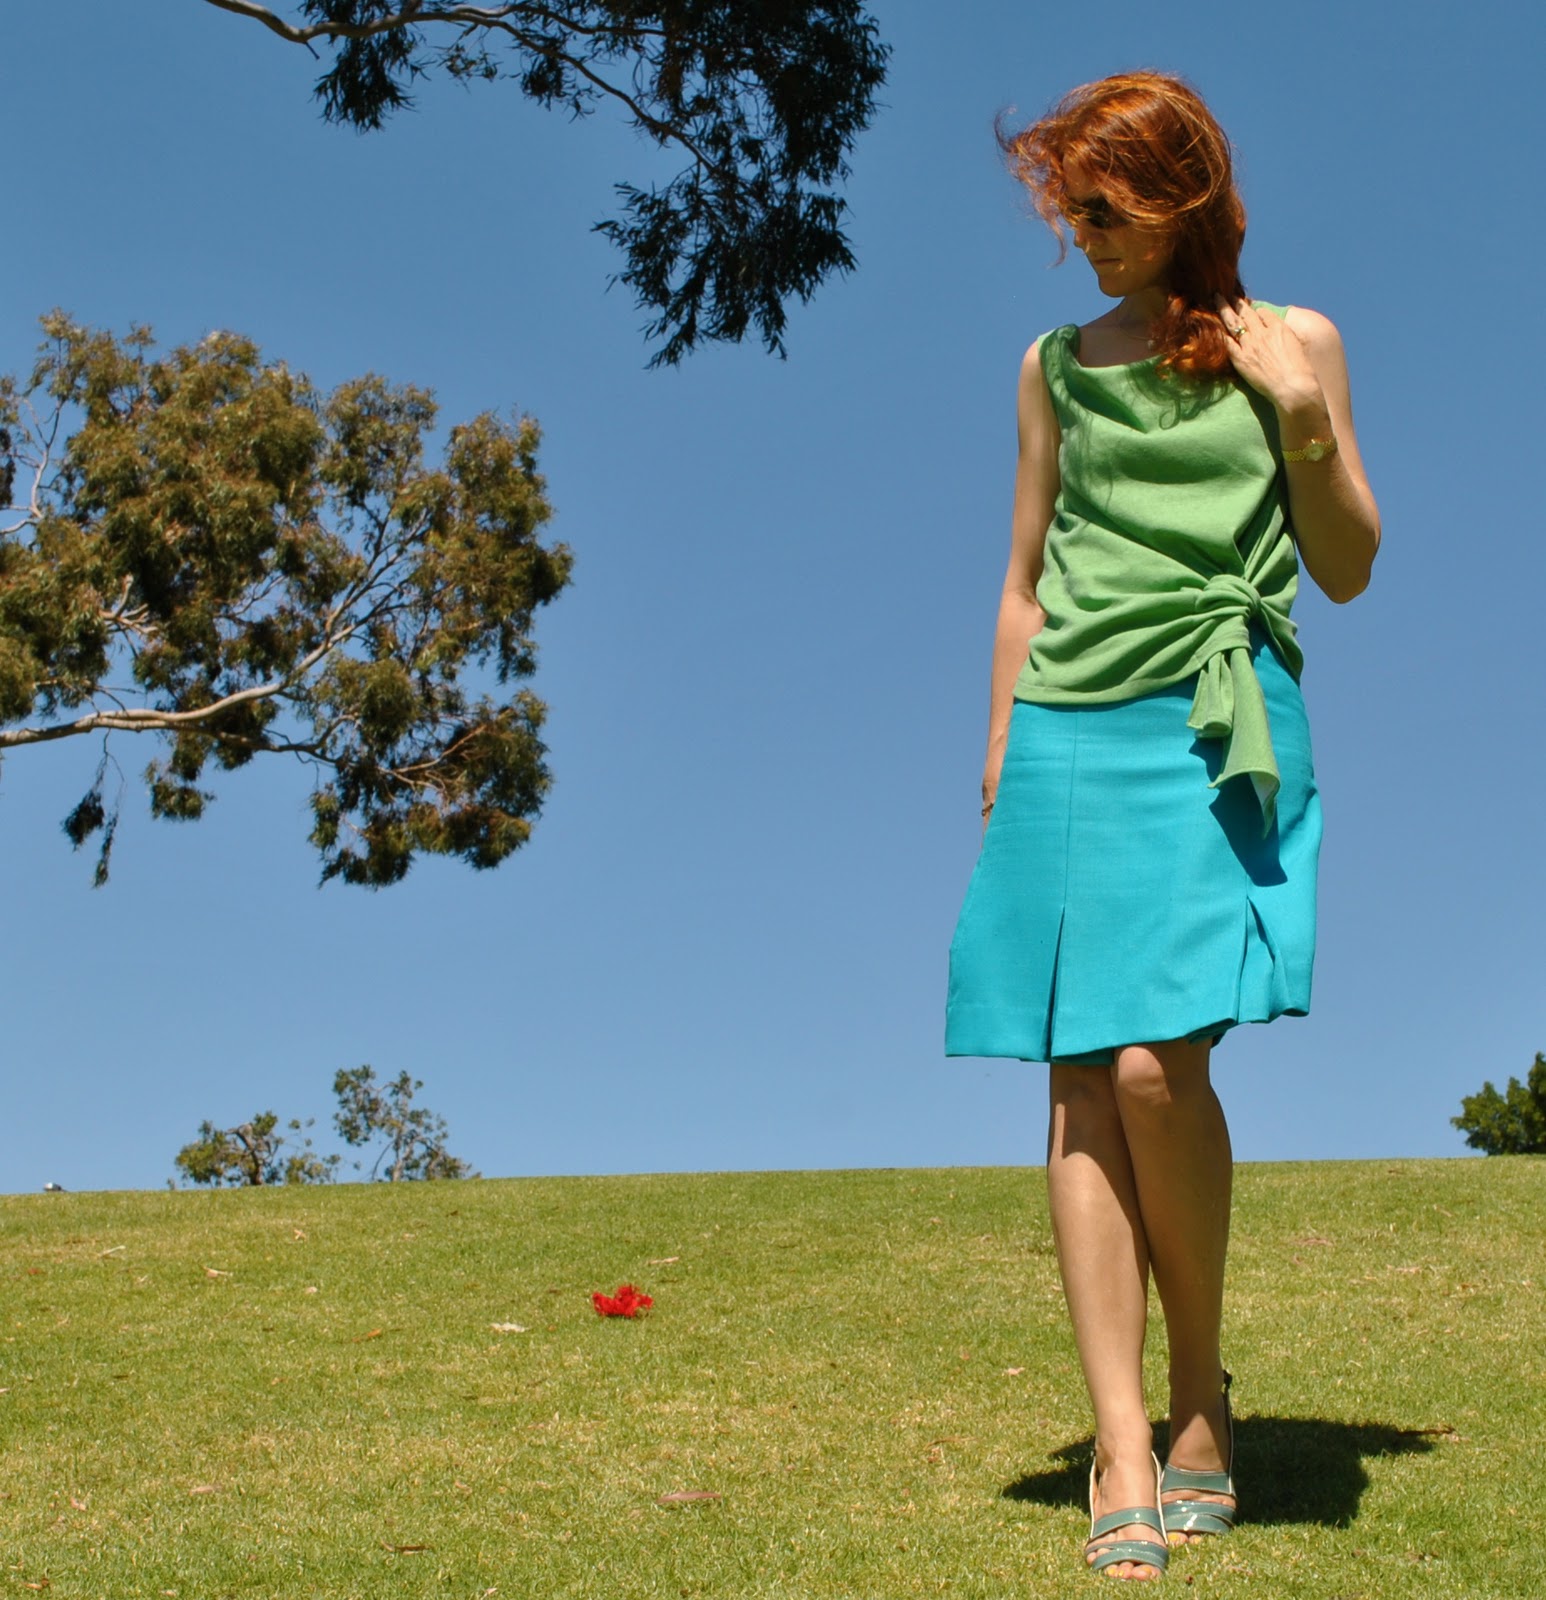
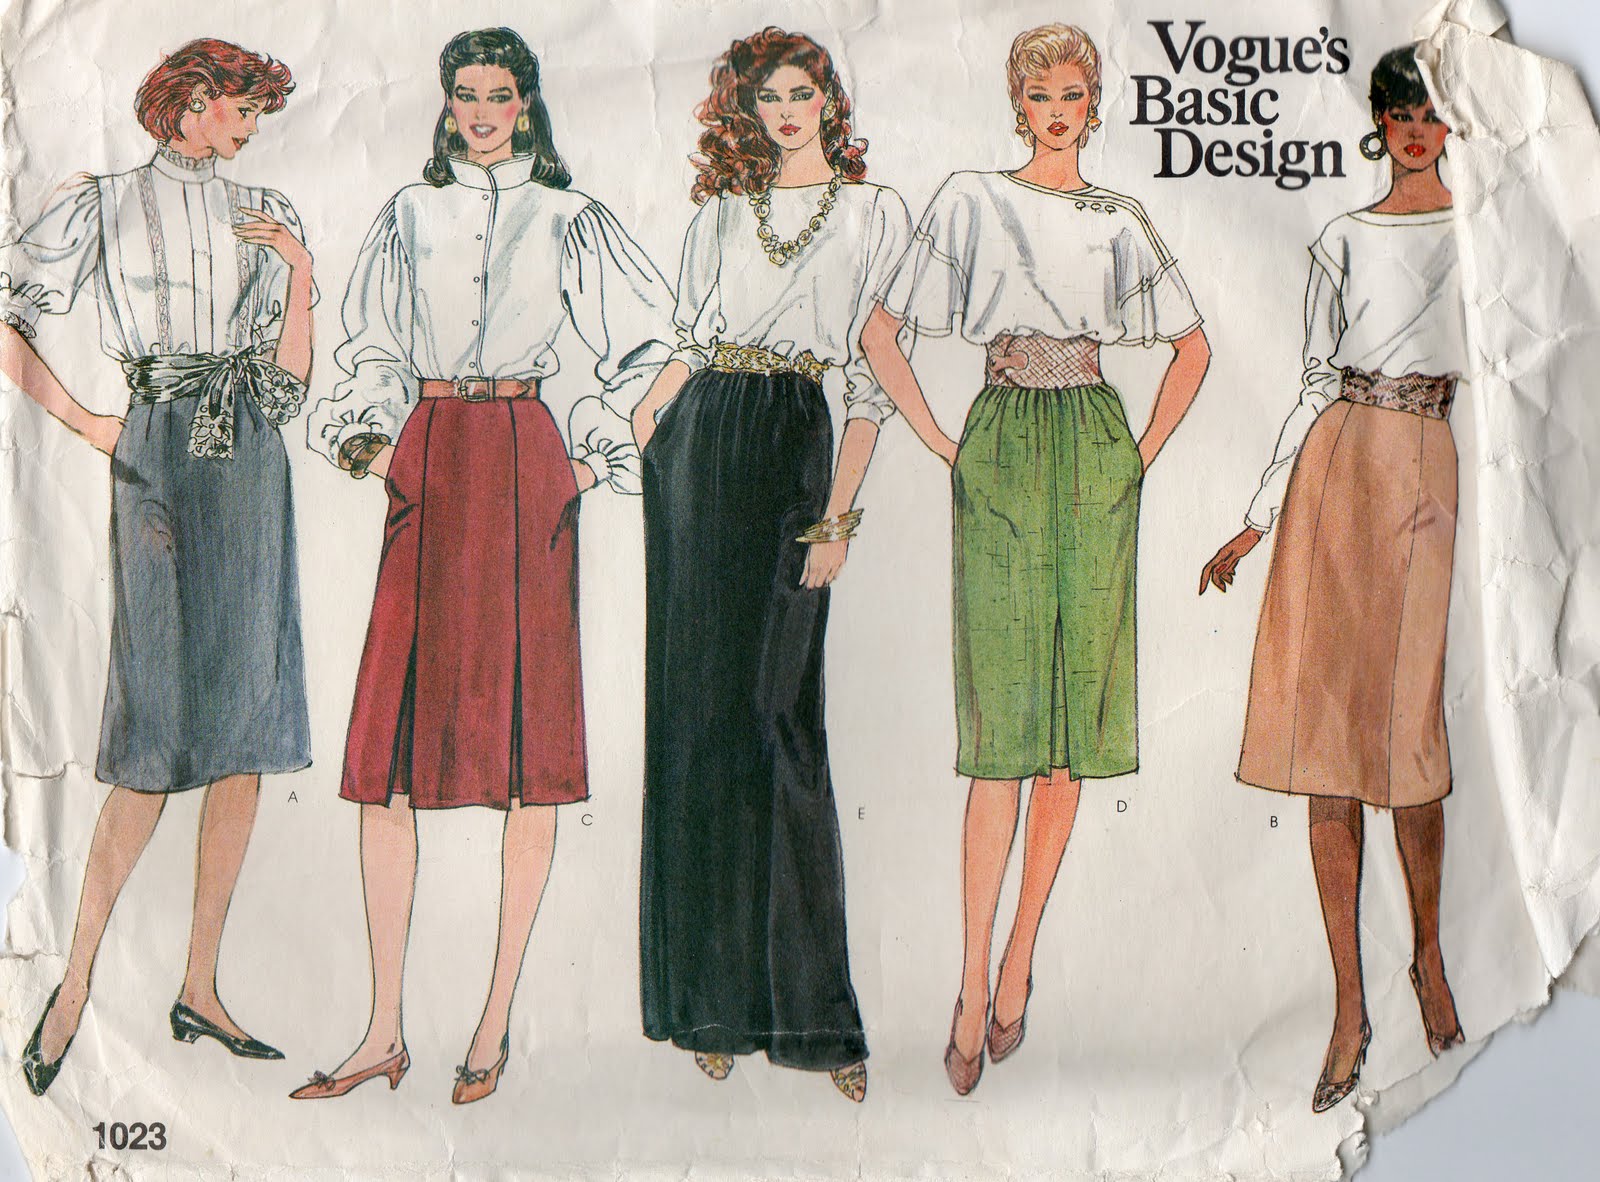
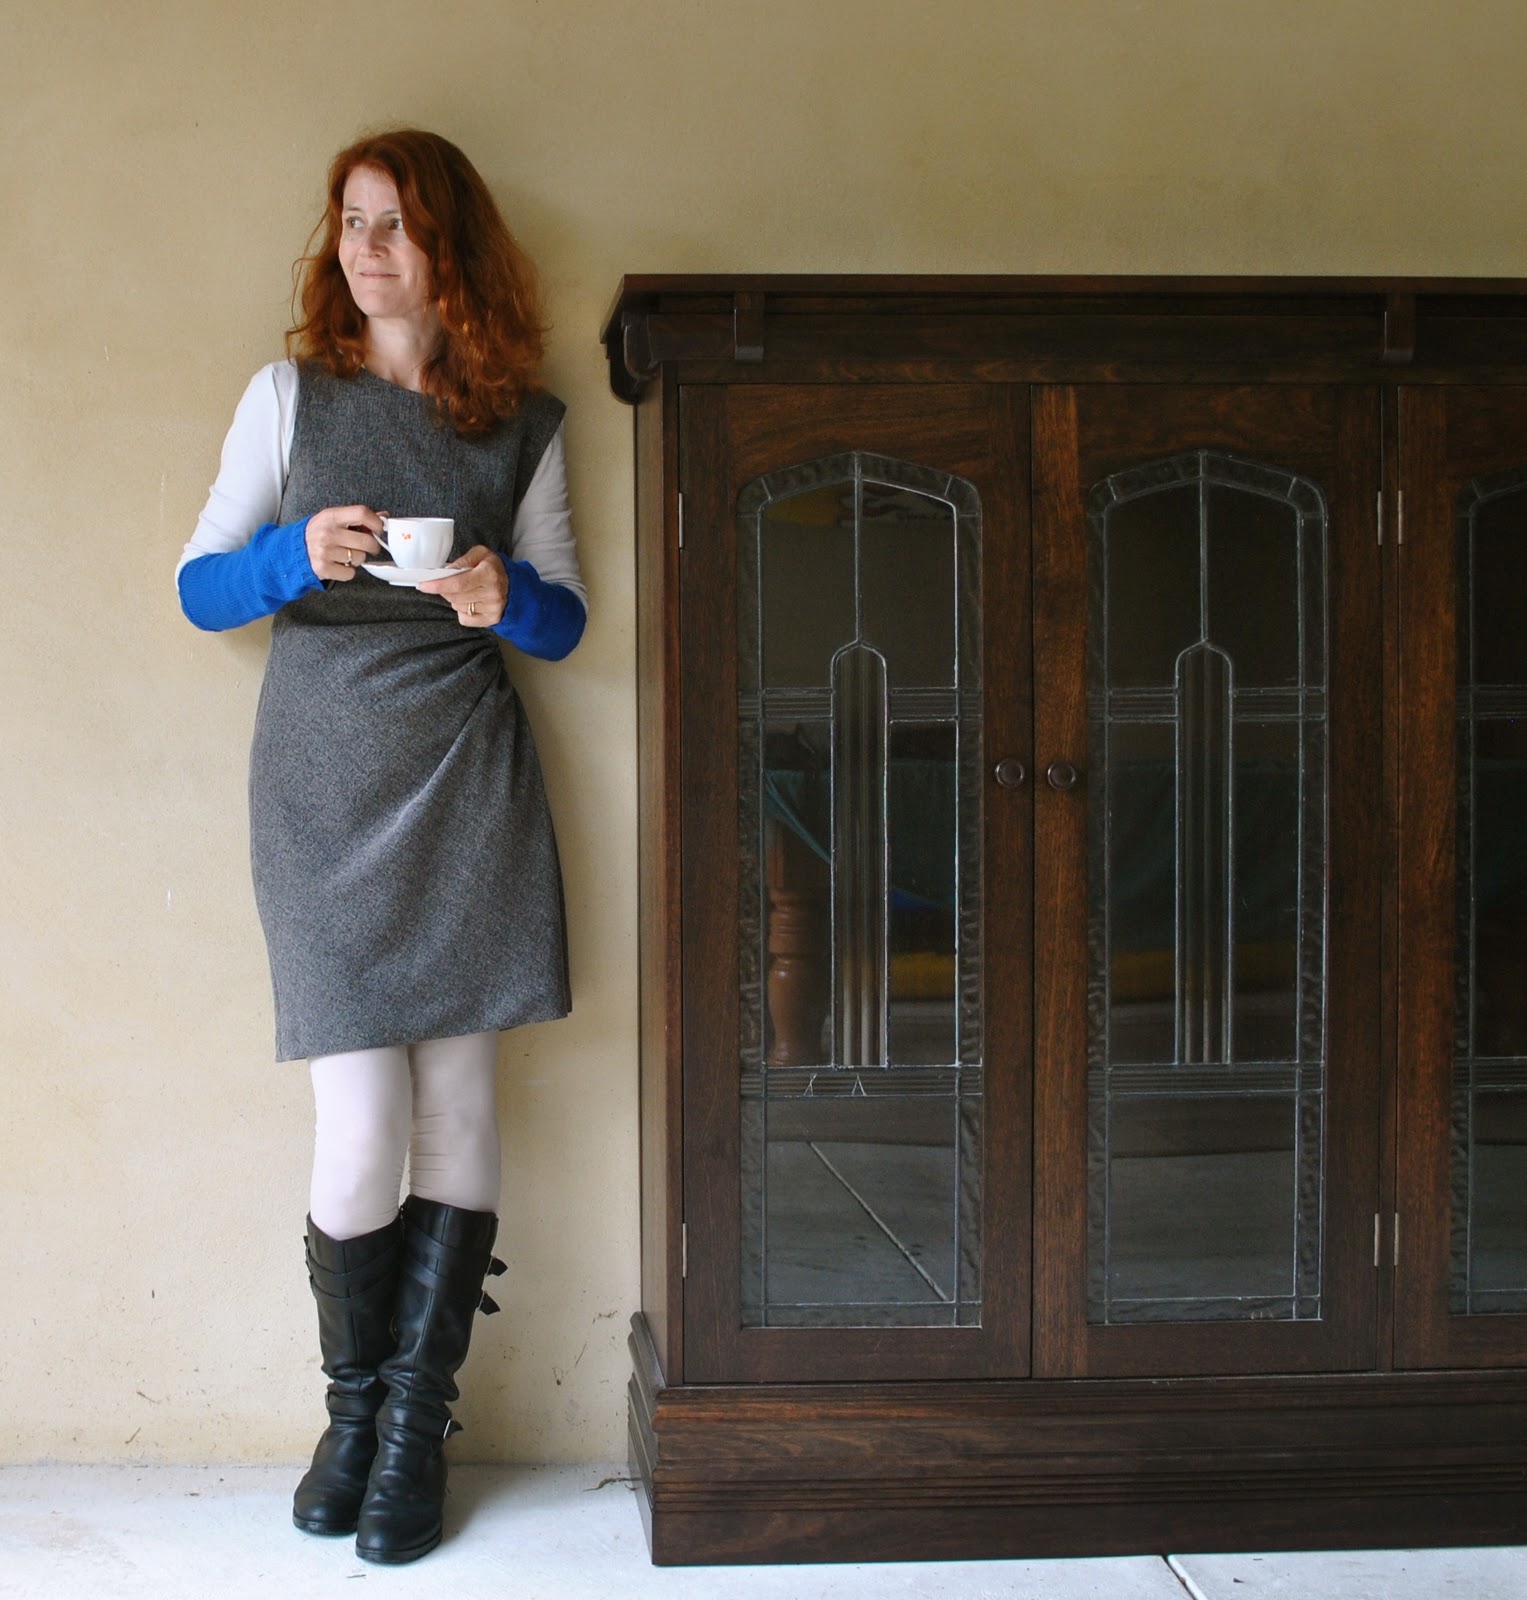
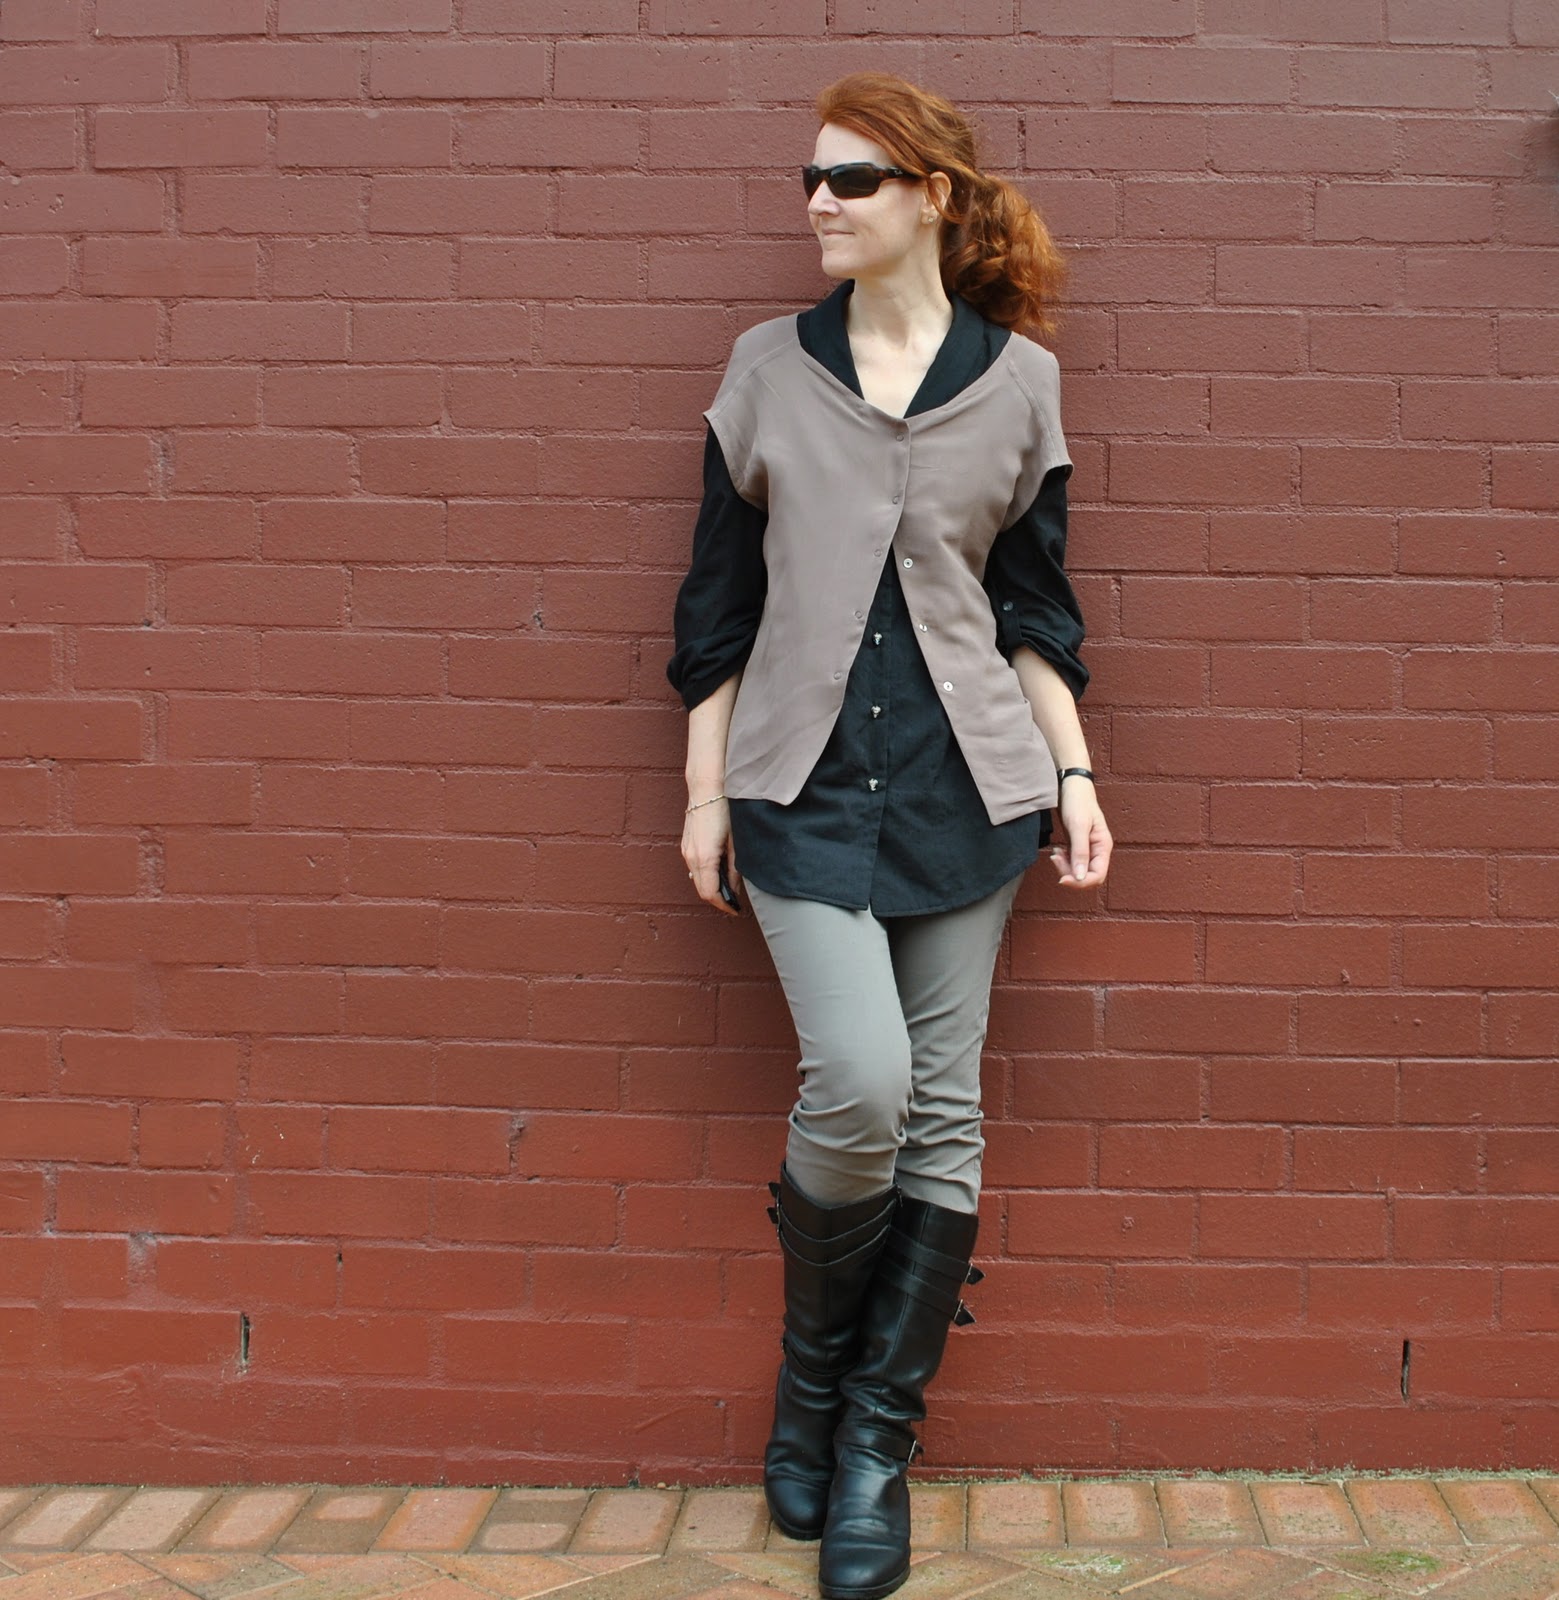
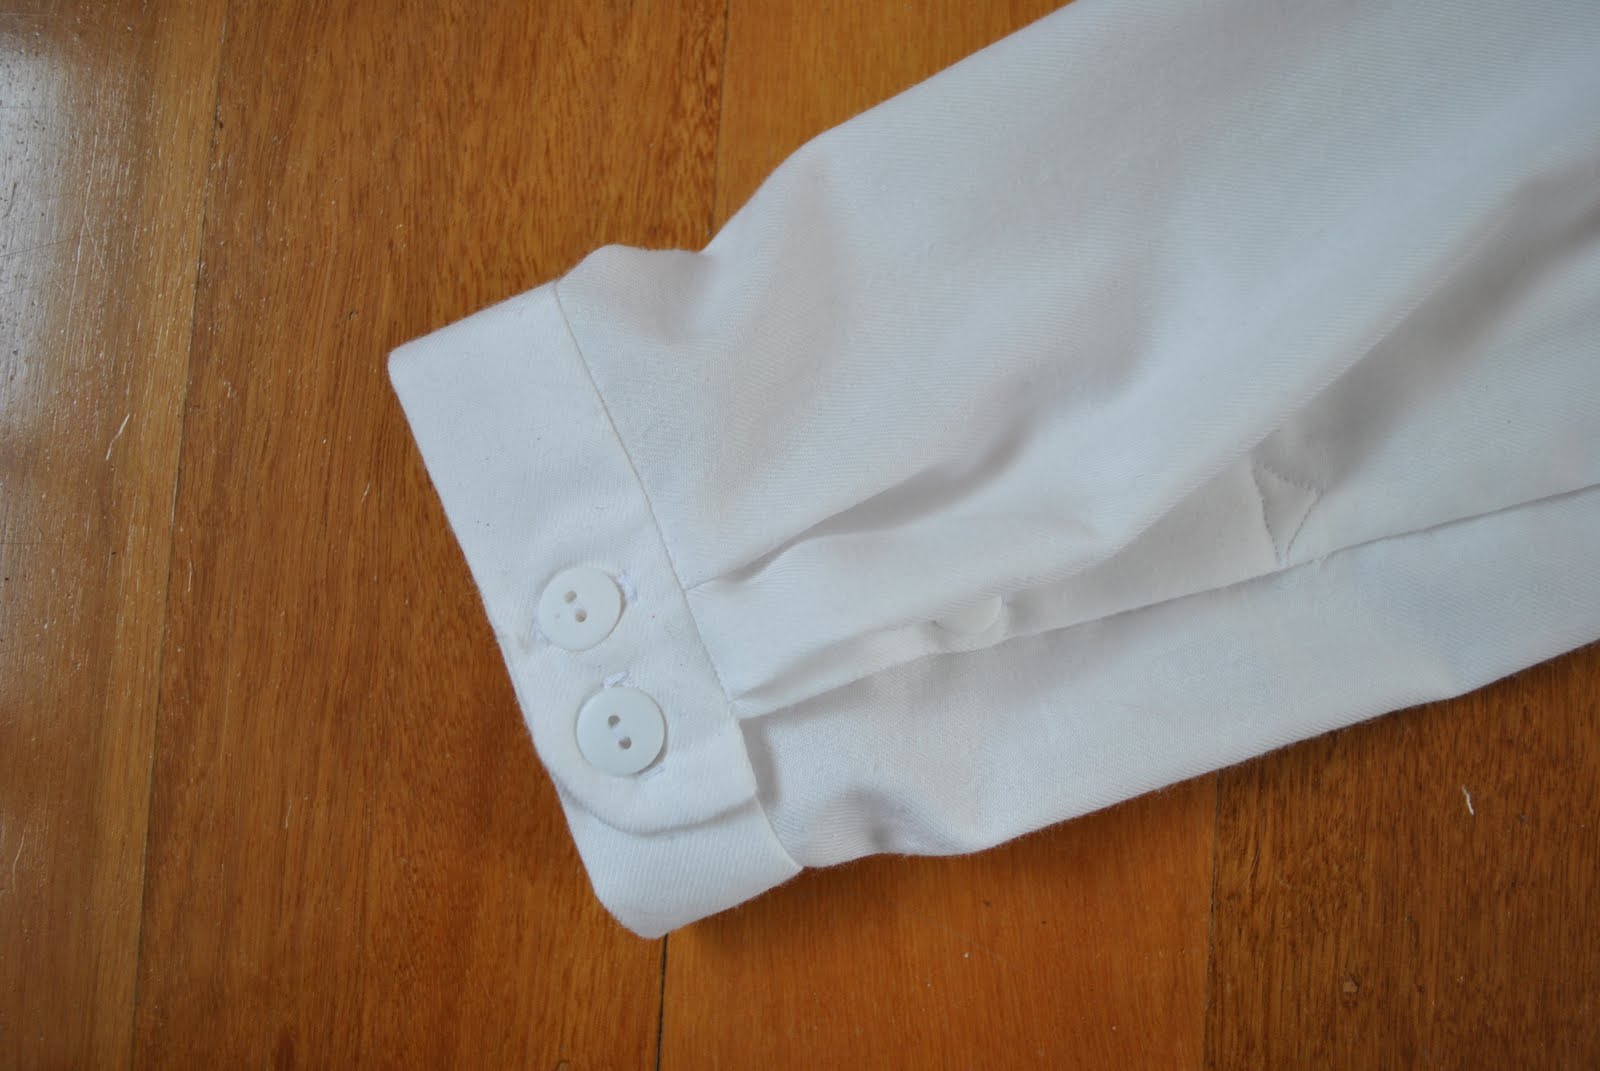
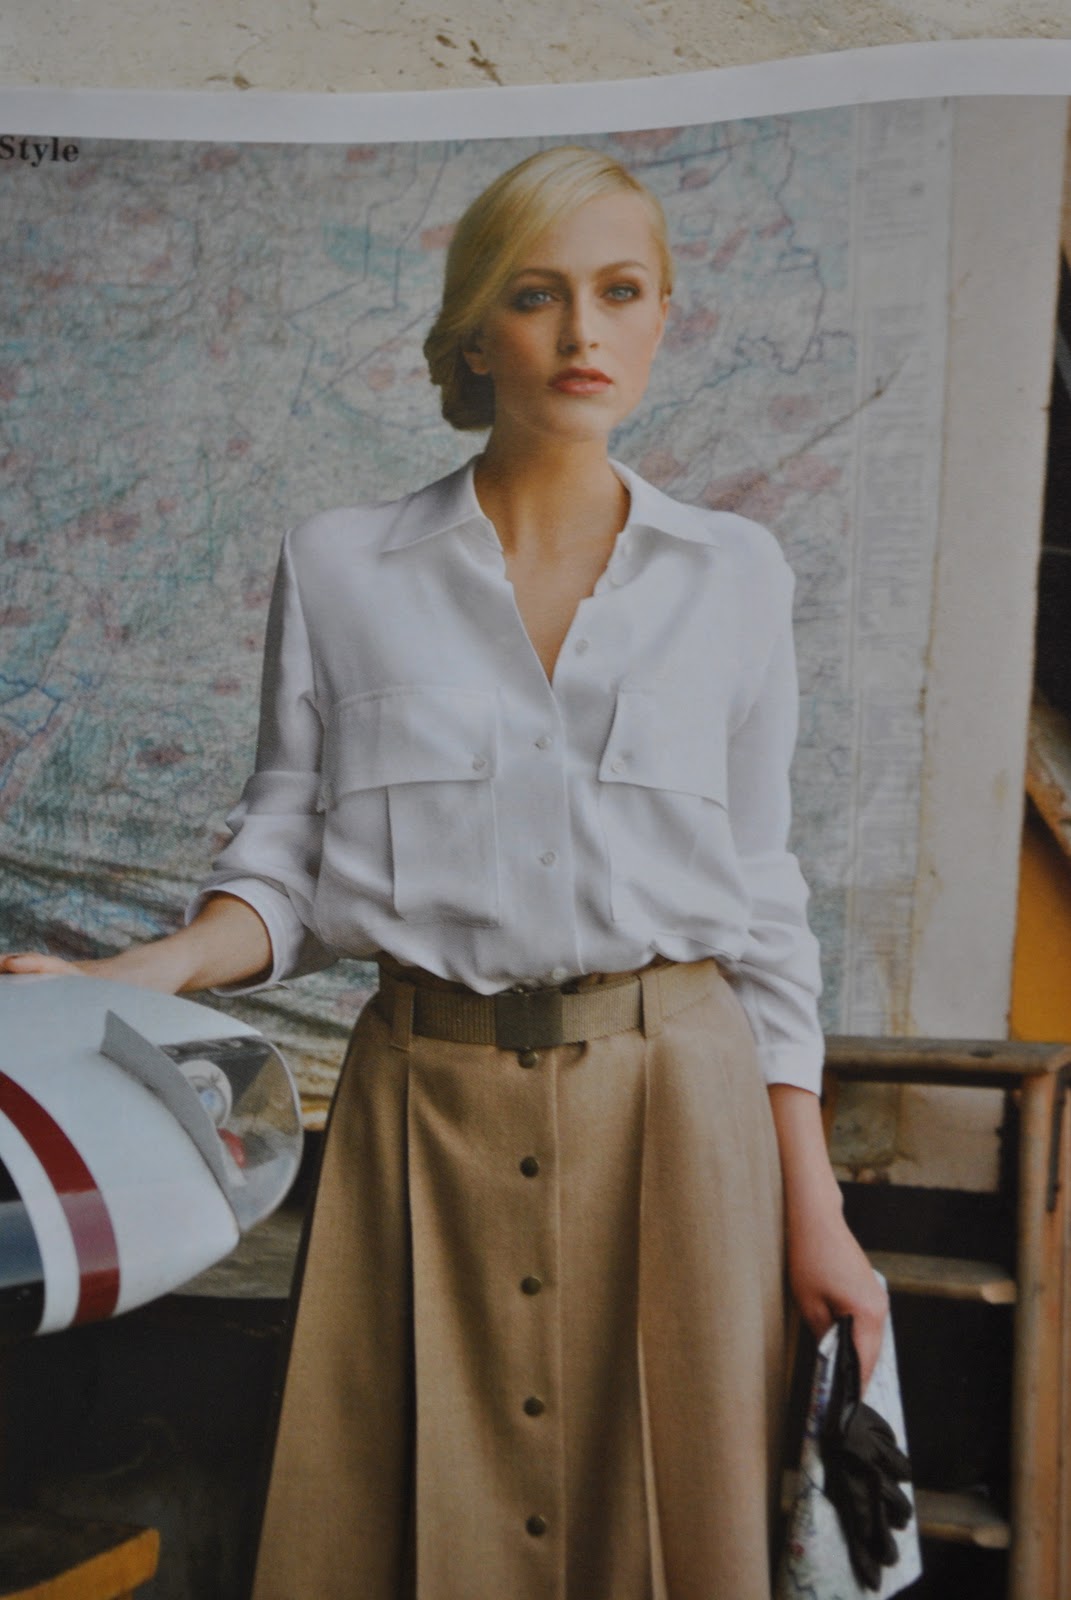
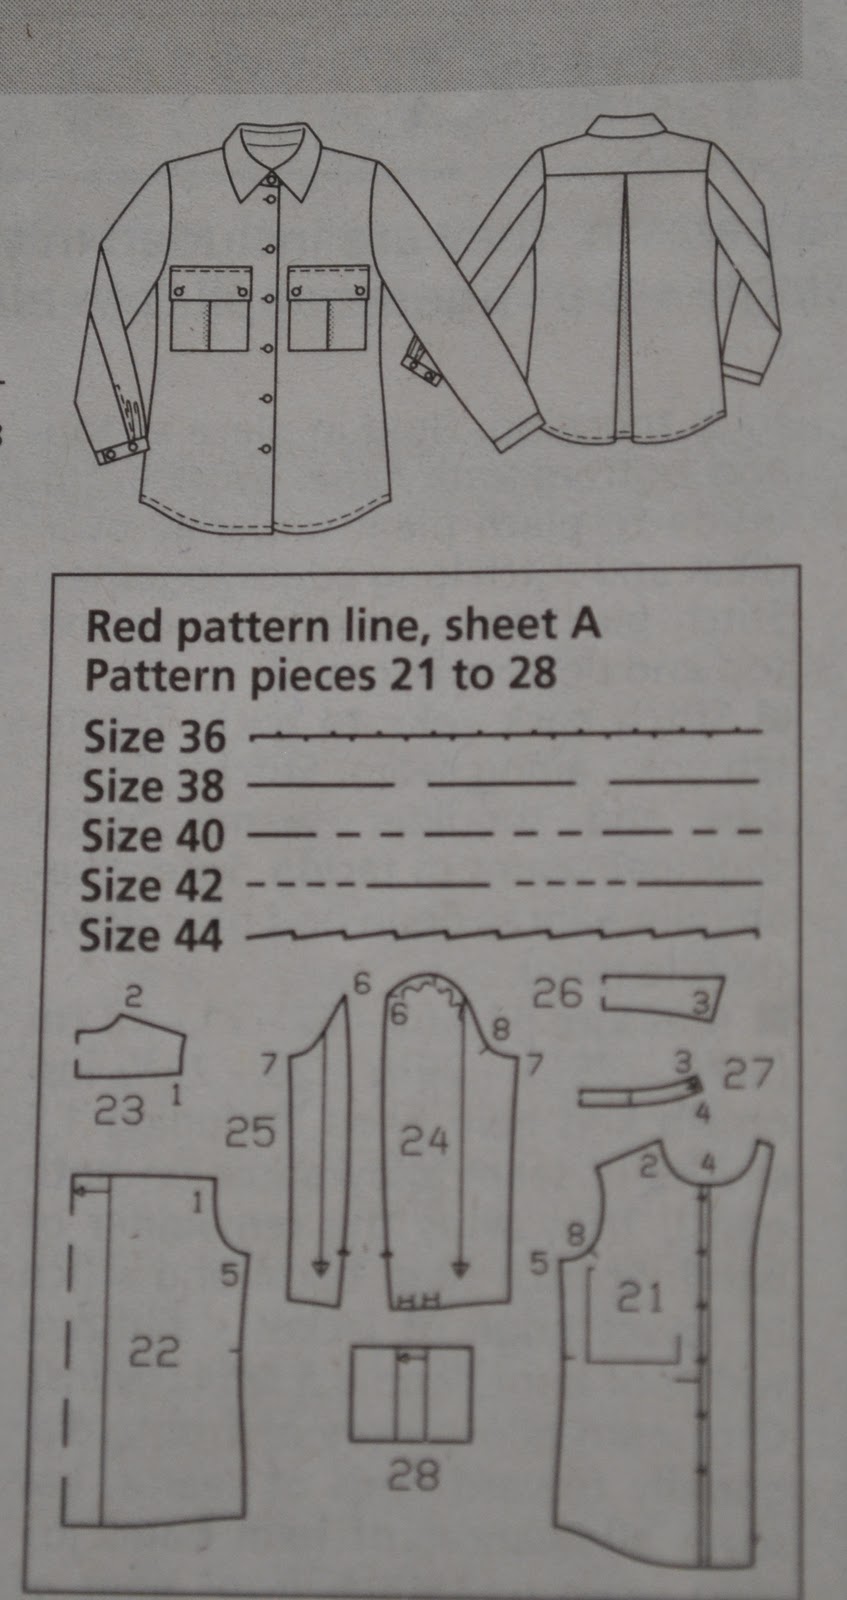
Going way back, and this shirt is from a Vogue designer pattern that I believe my mother still has my copy…  I know I also made and am wearing here the small-waisted and very flared skirt from the same pattern too…

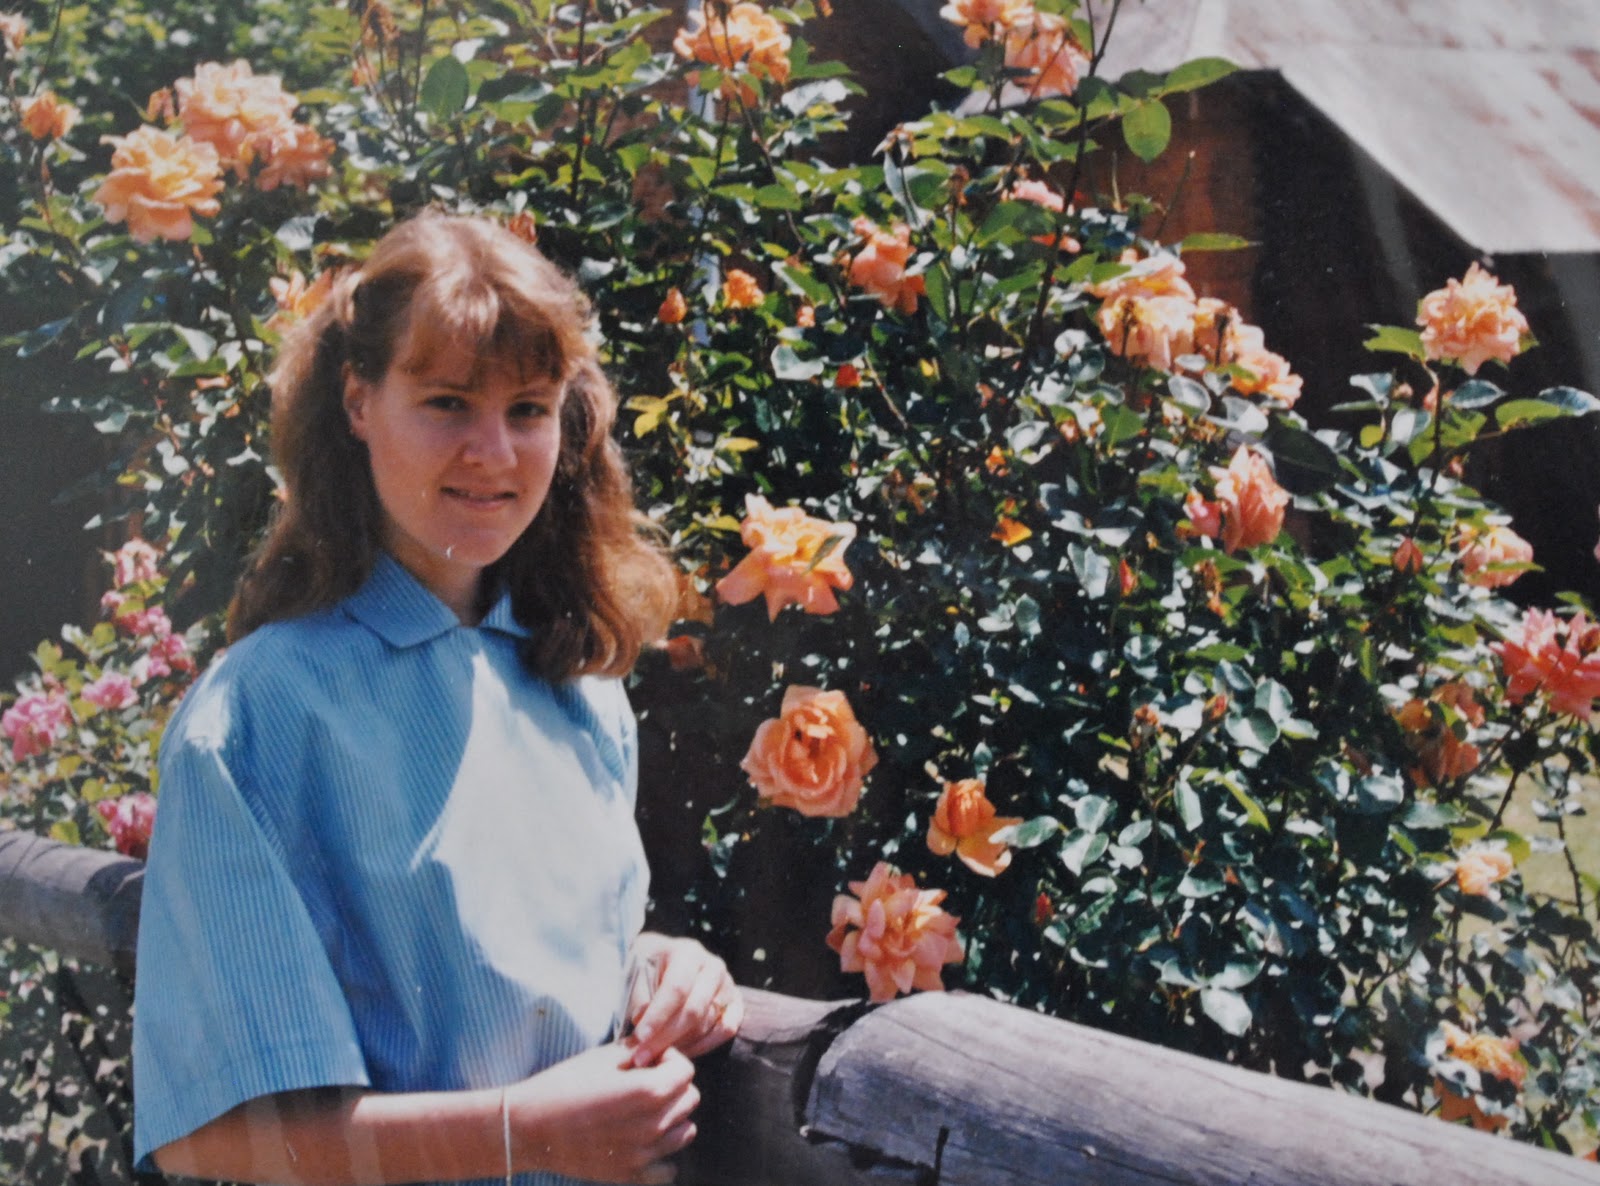
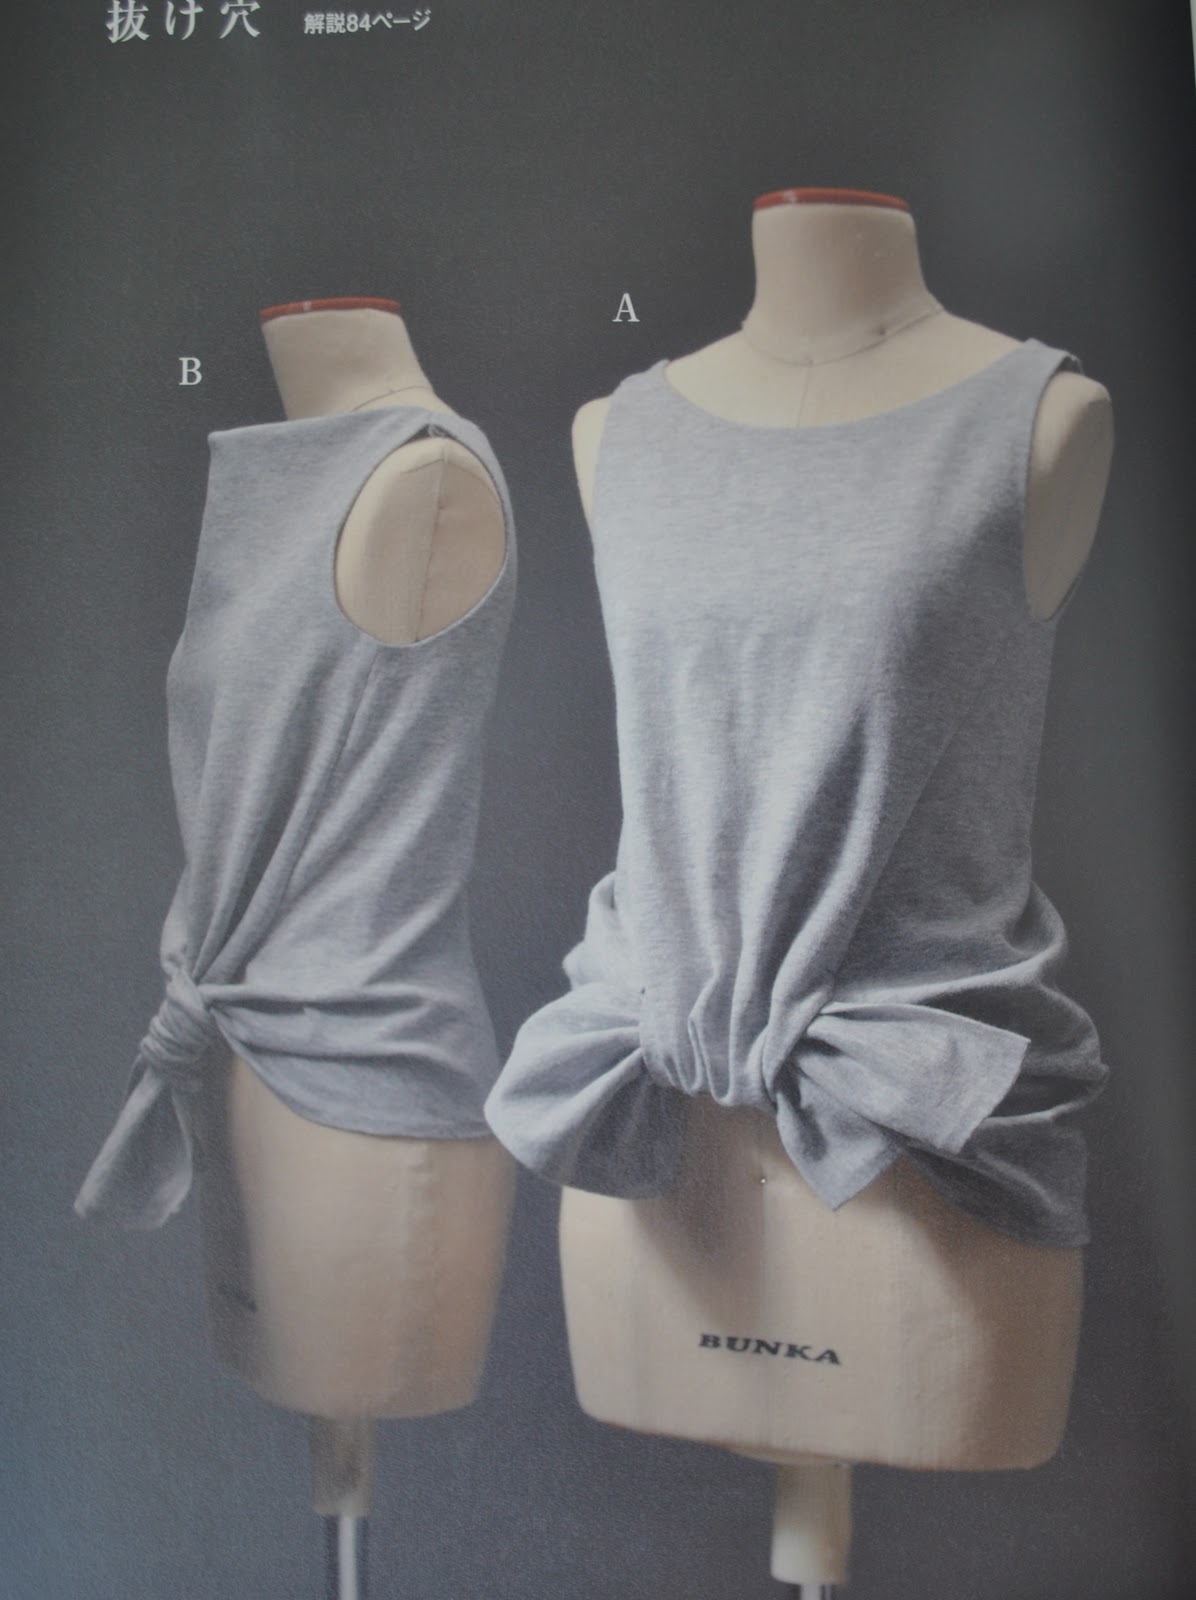
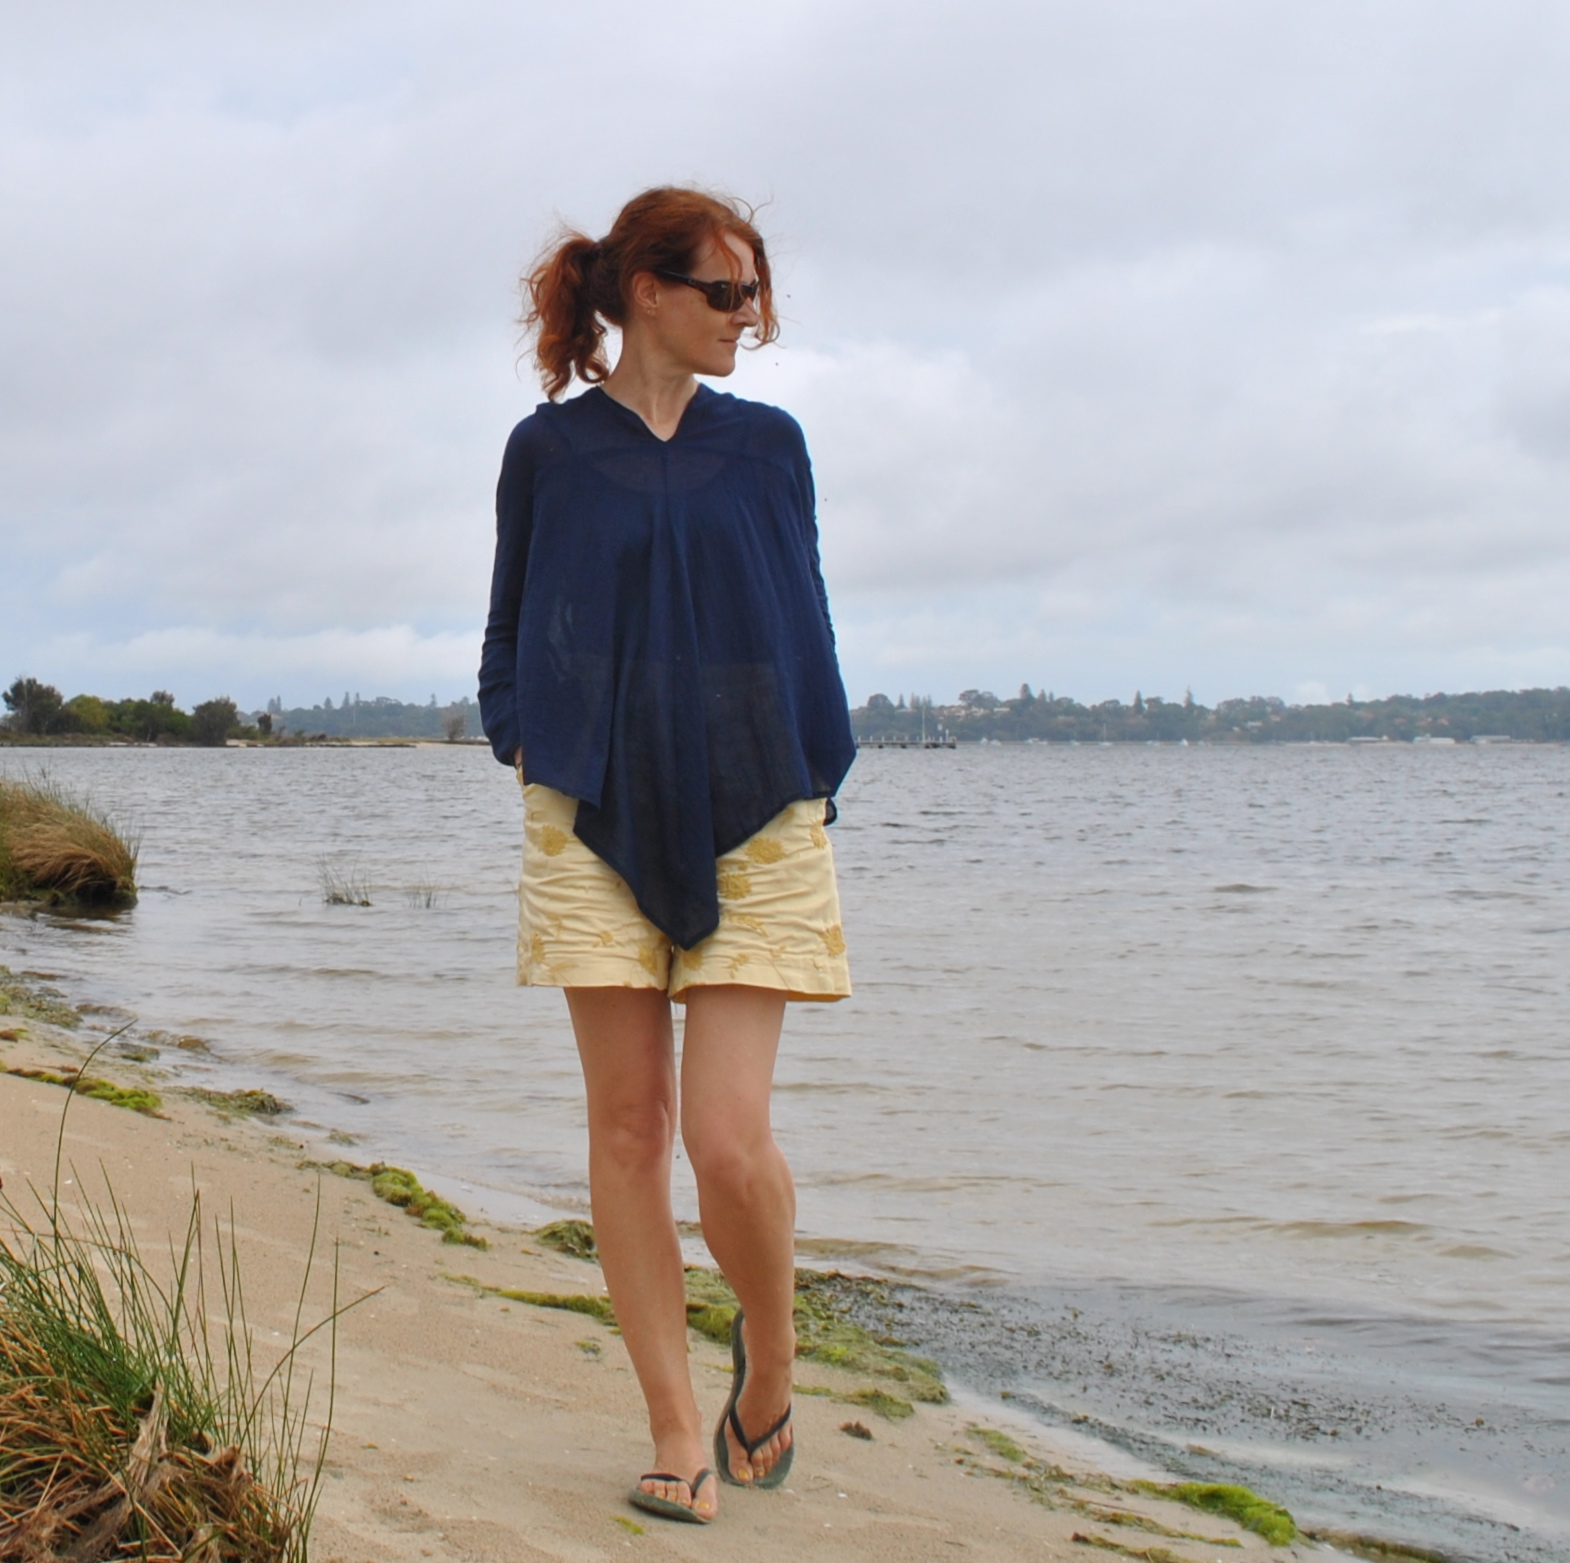
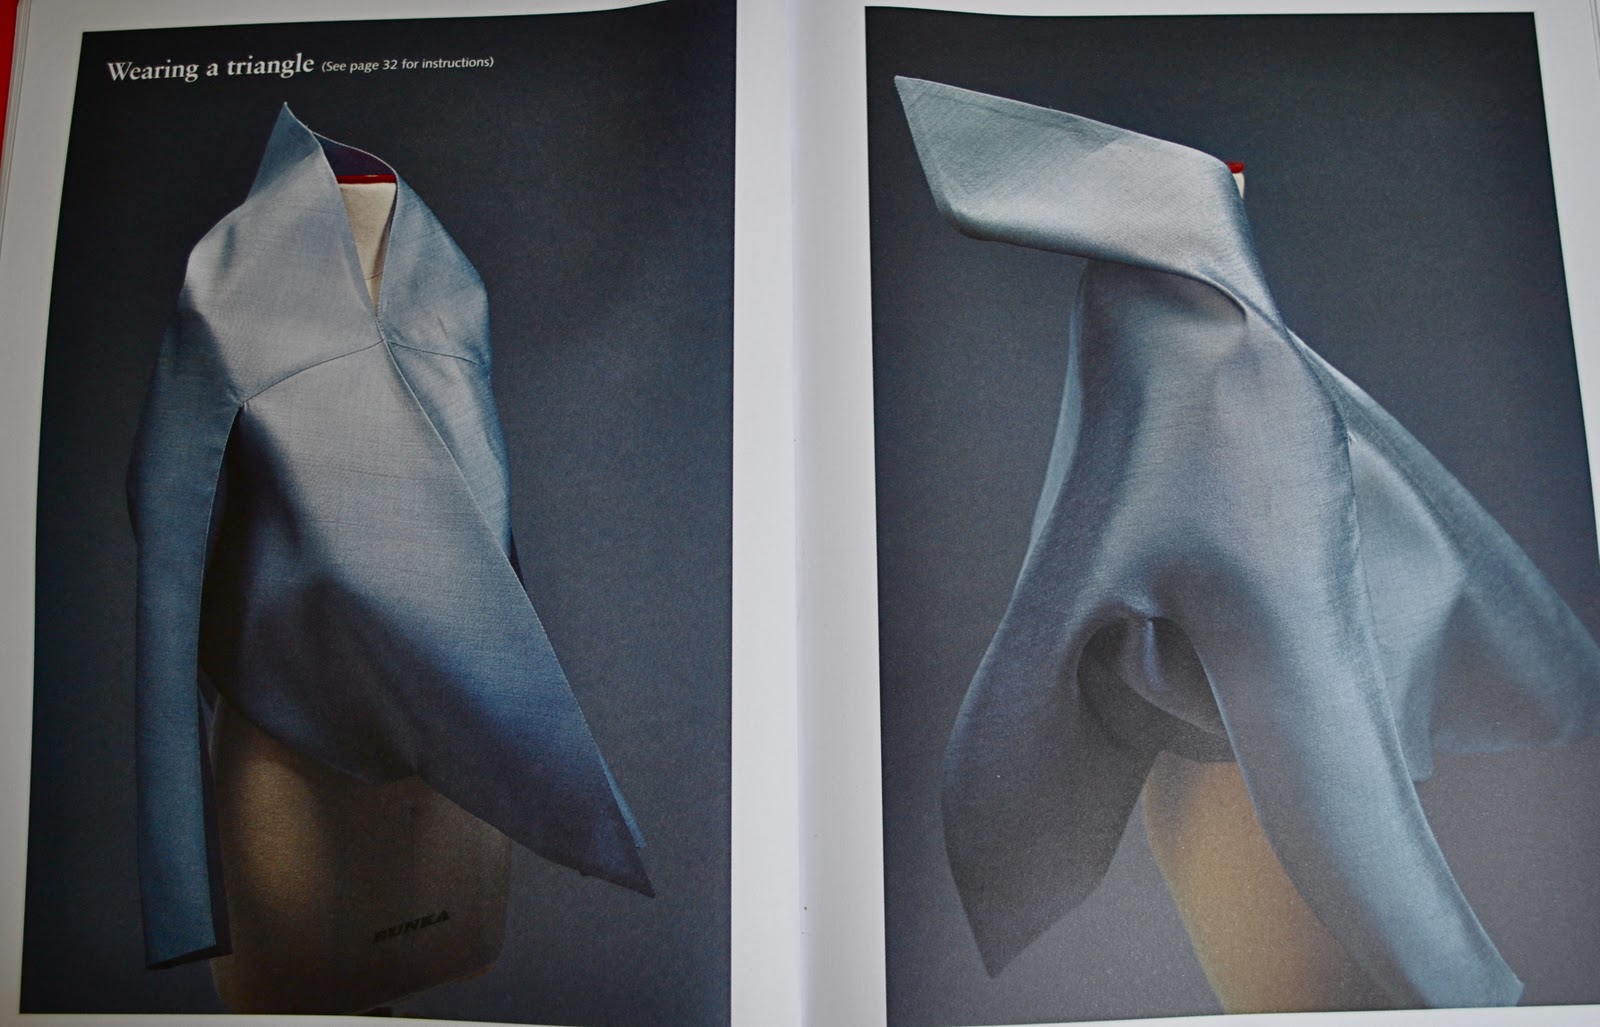
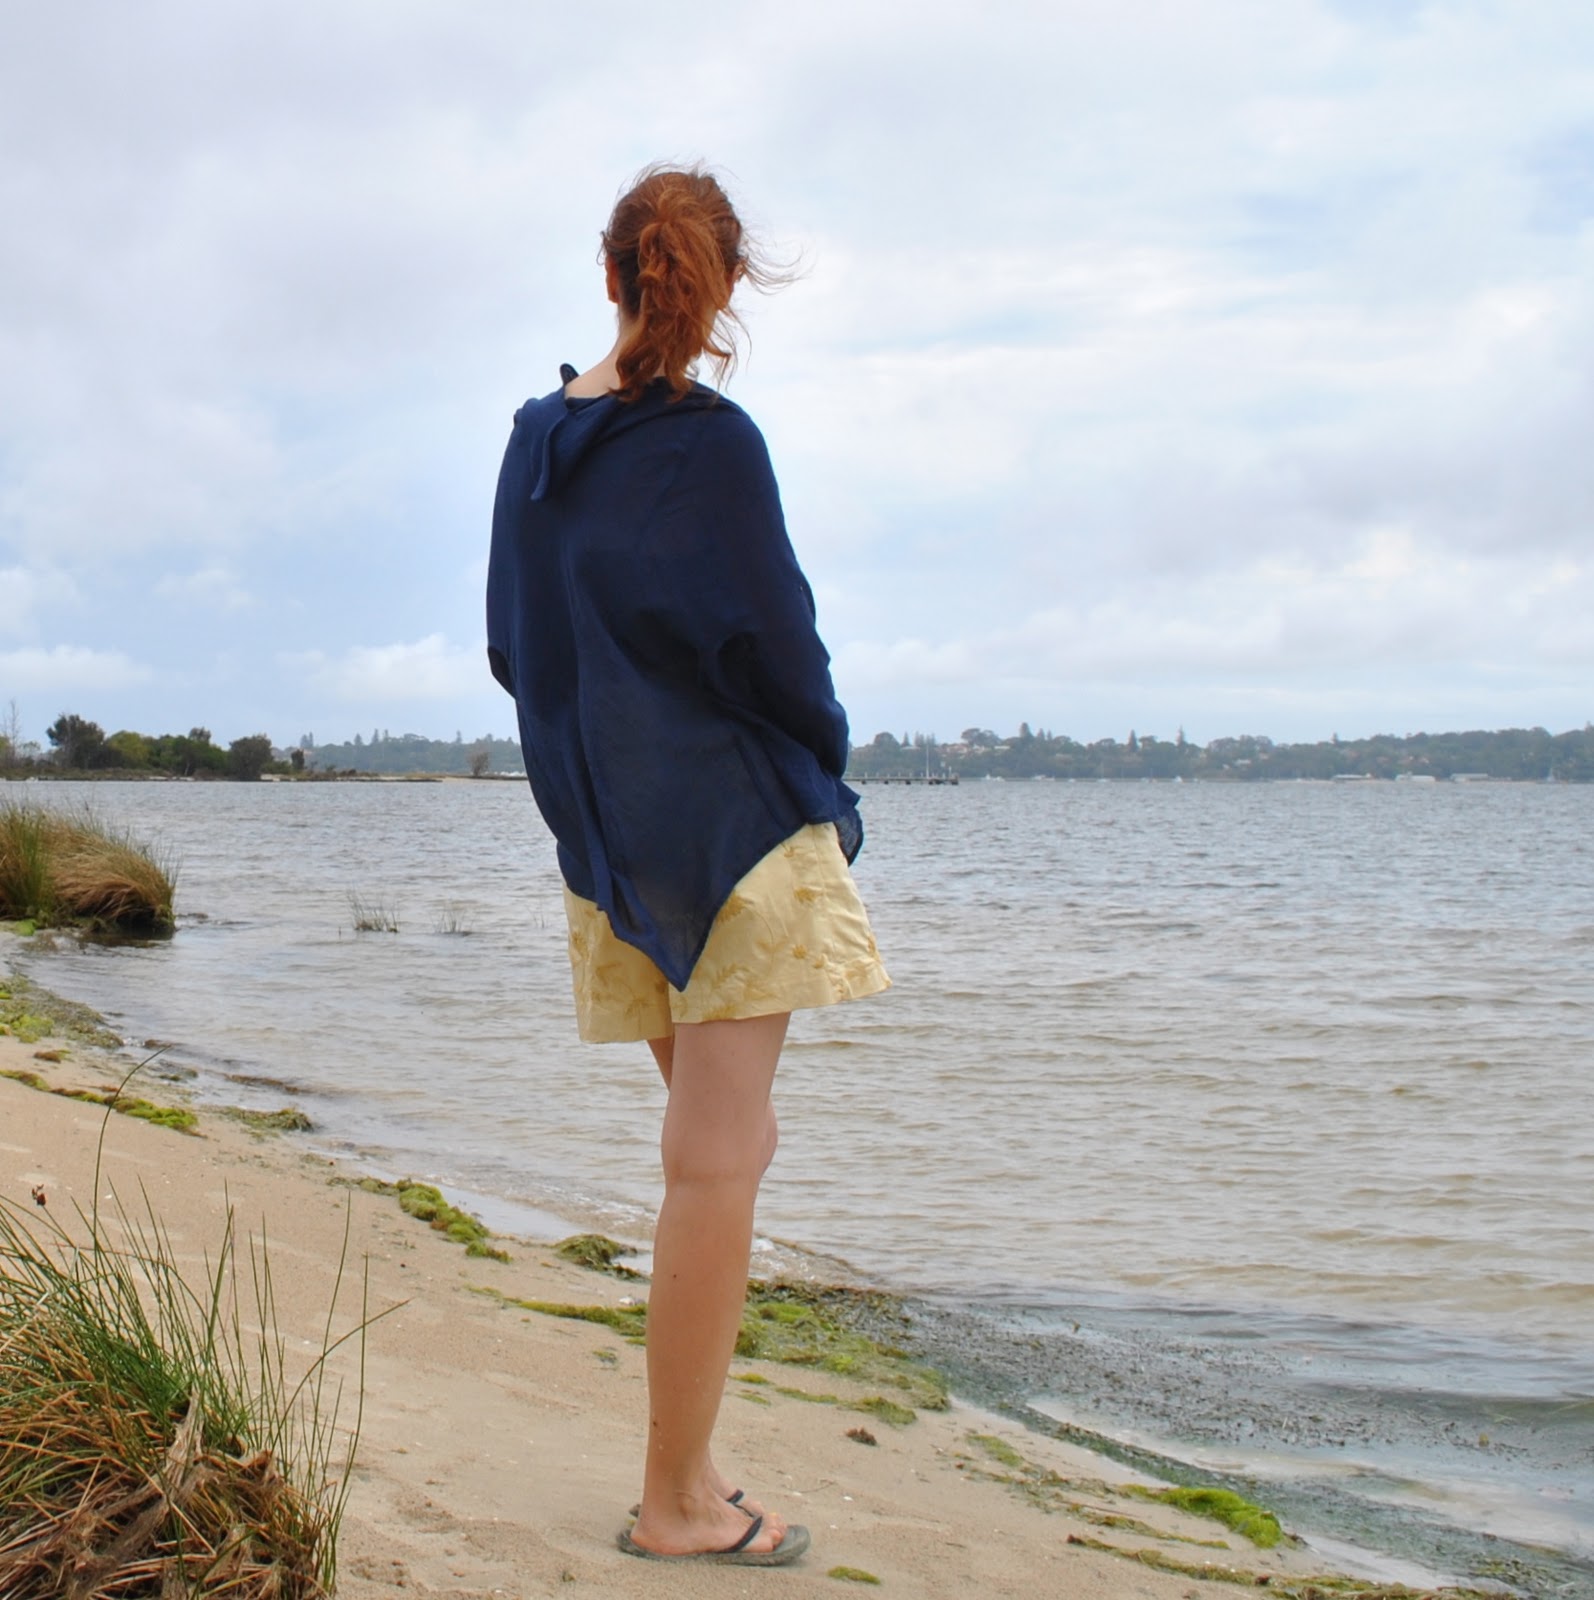
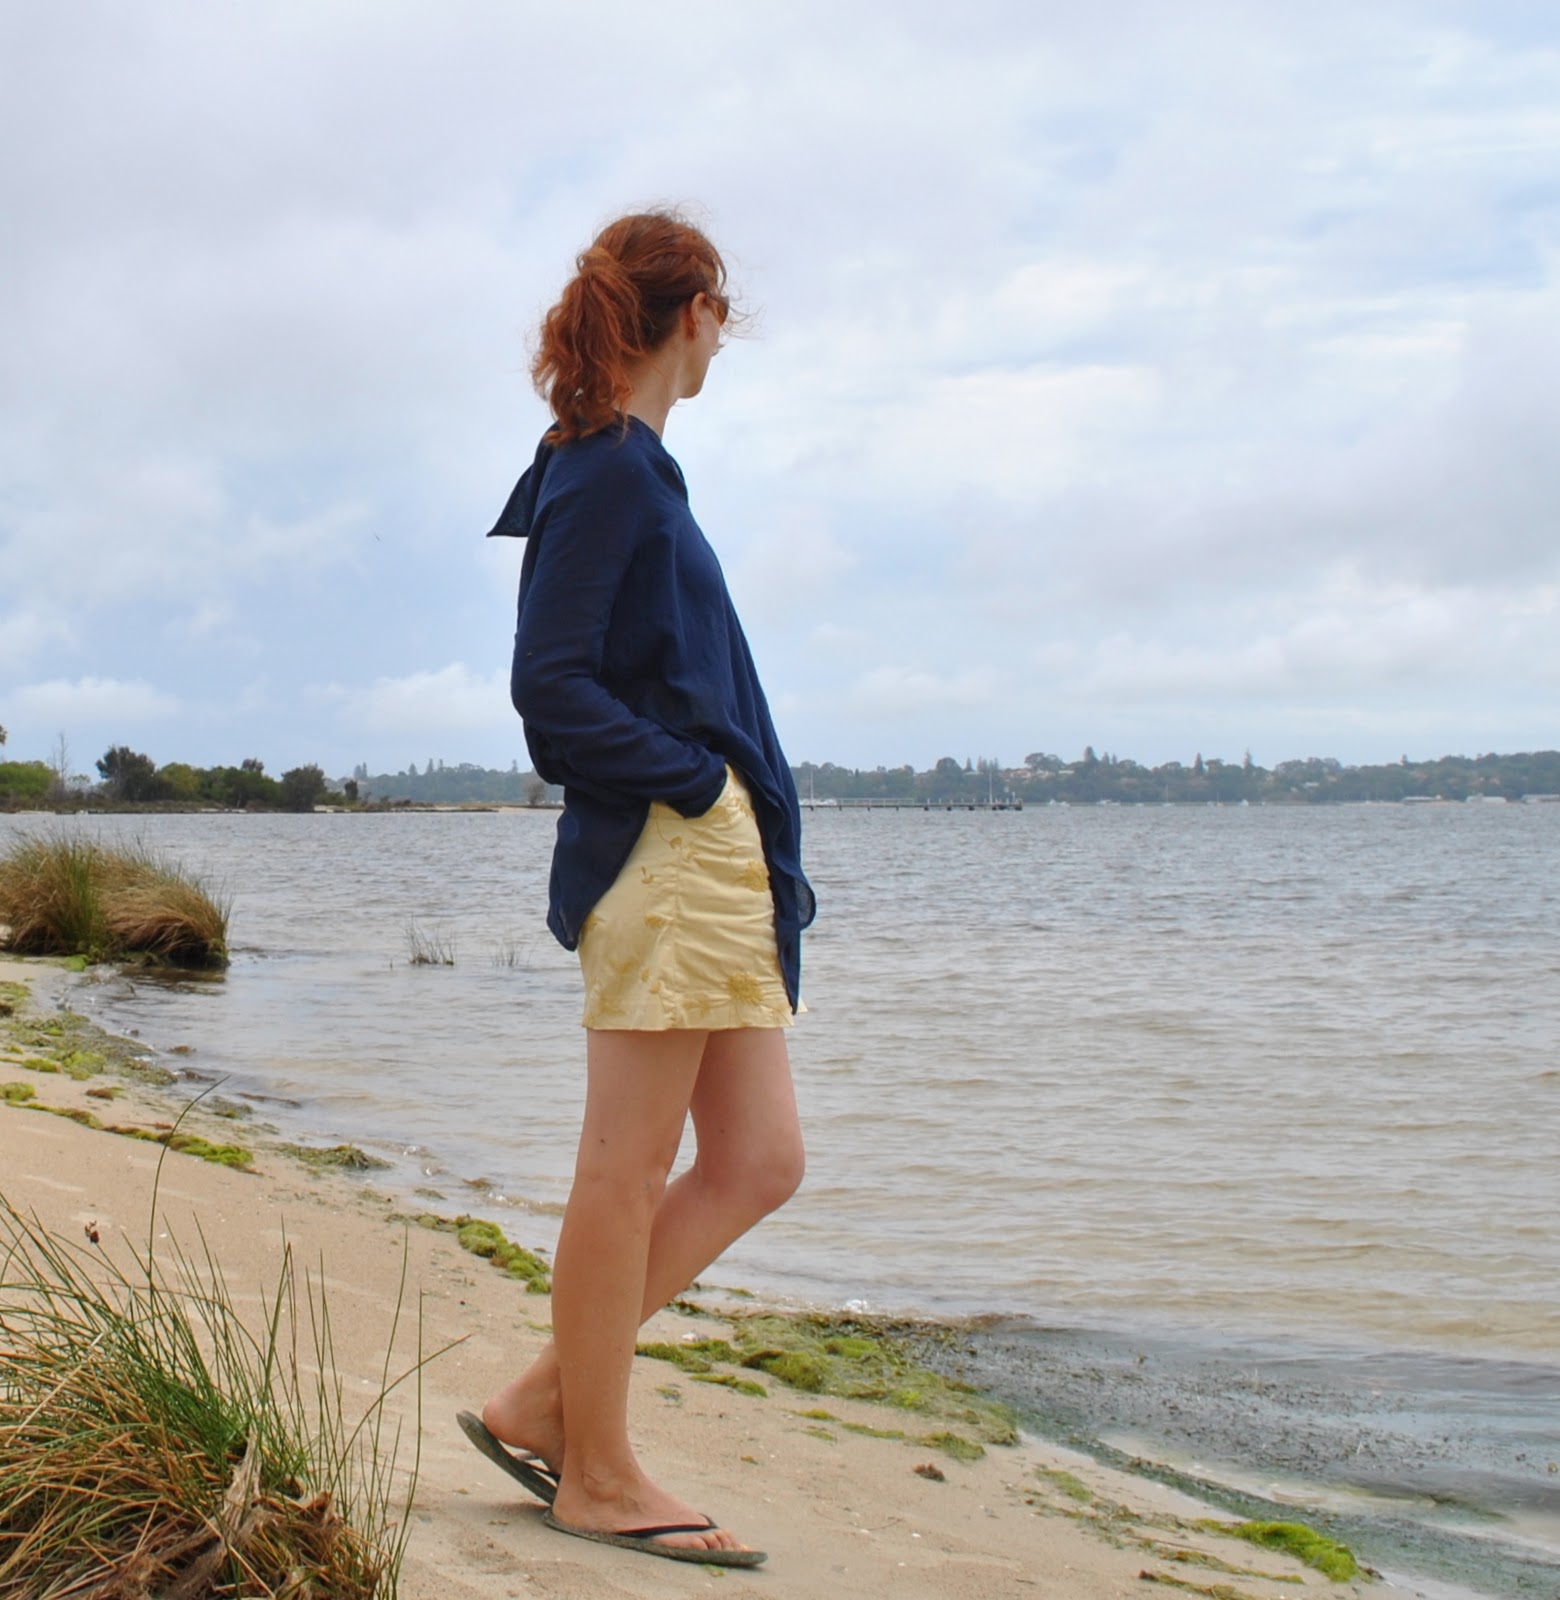
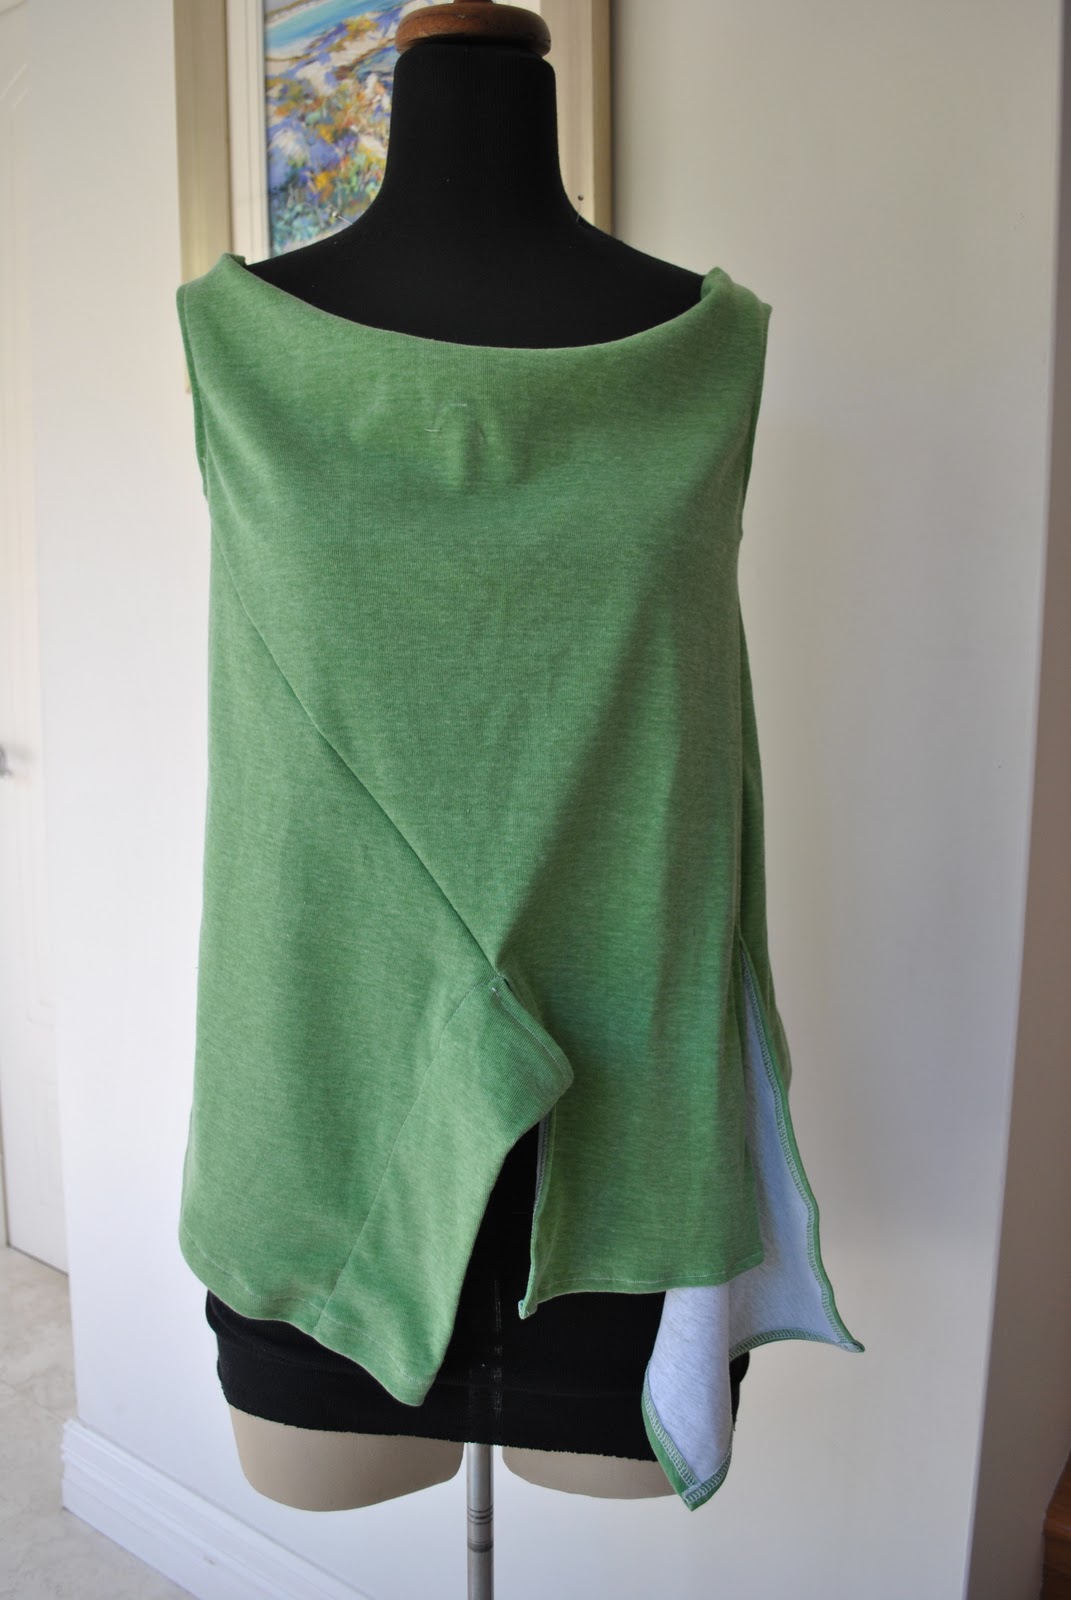
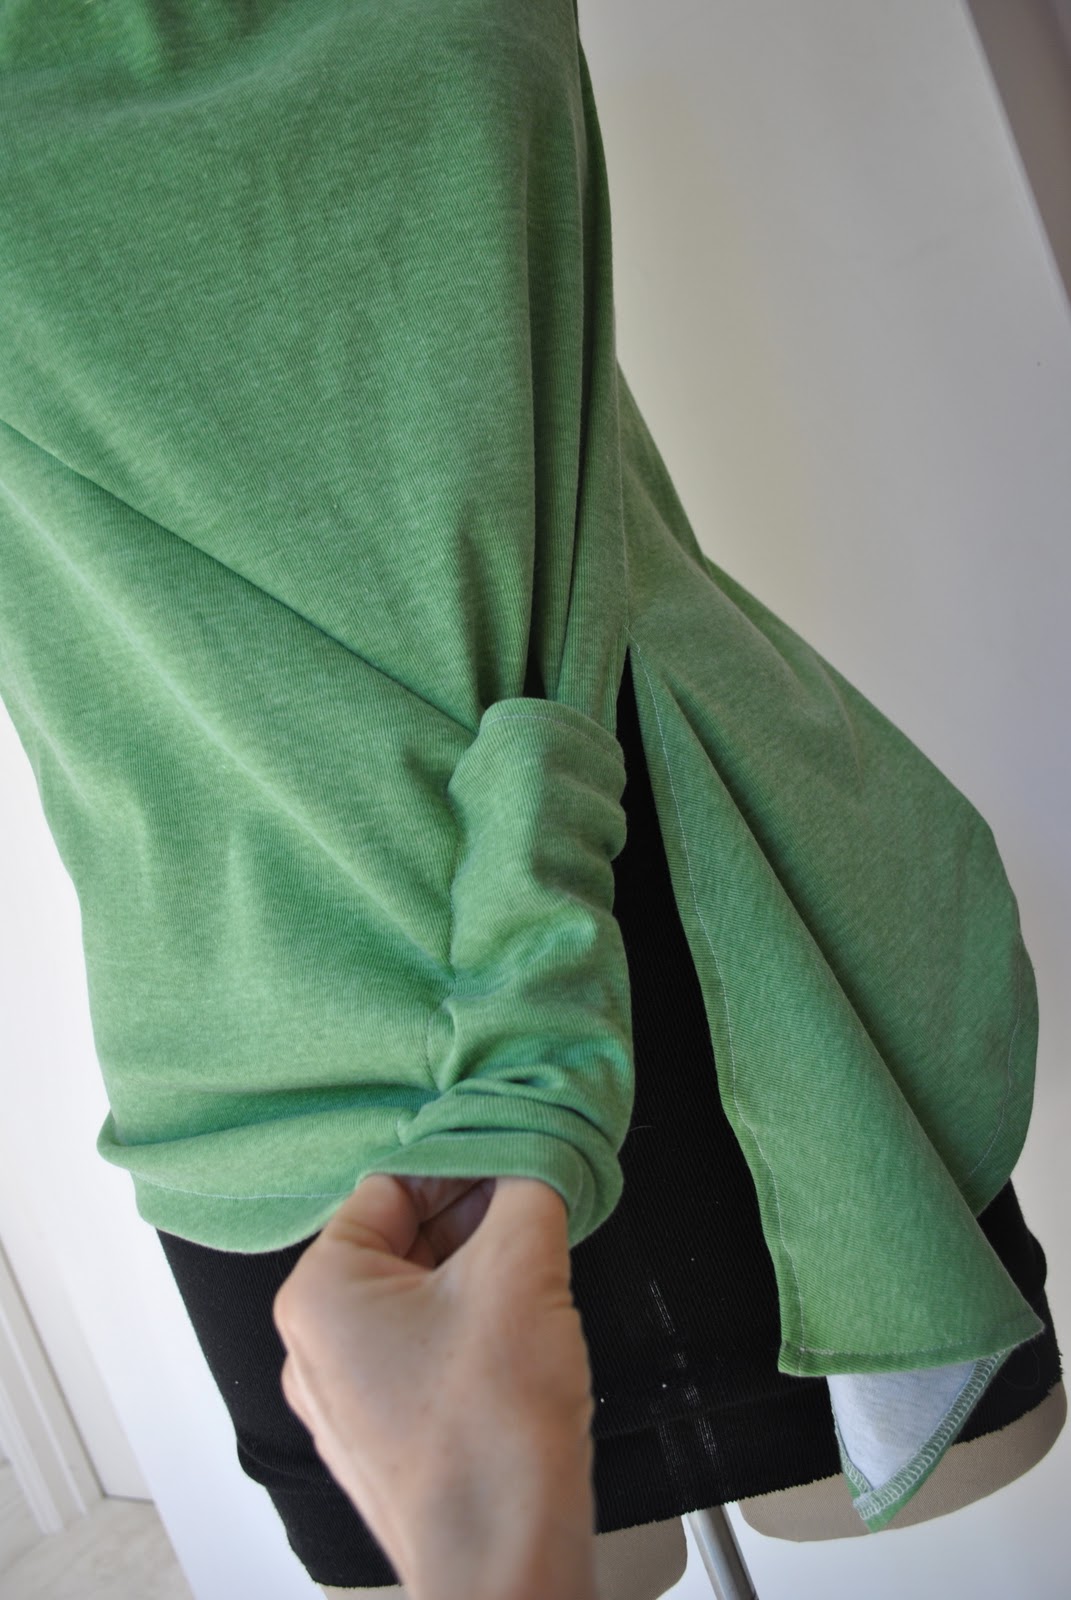
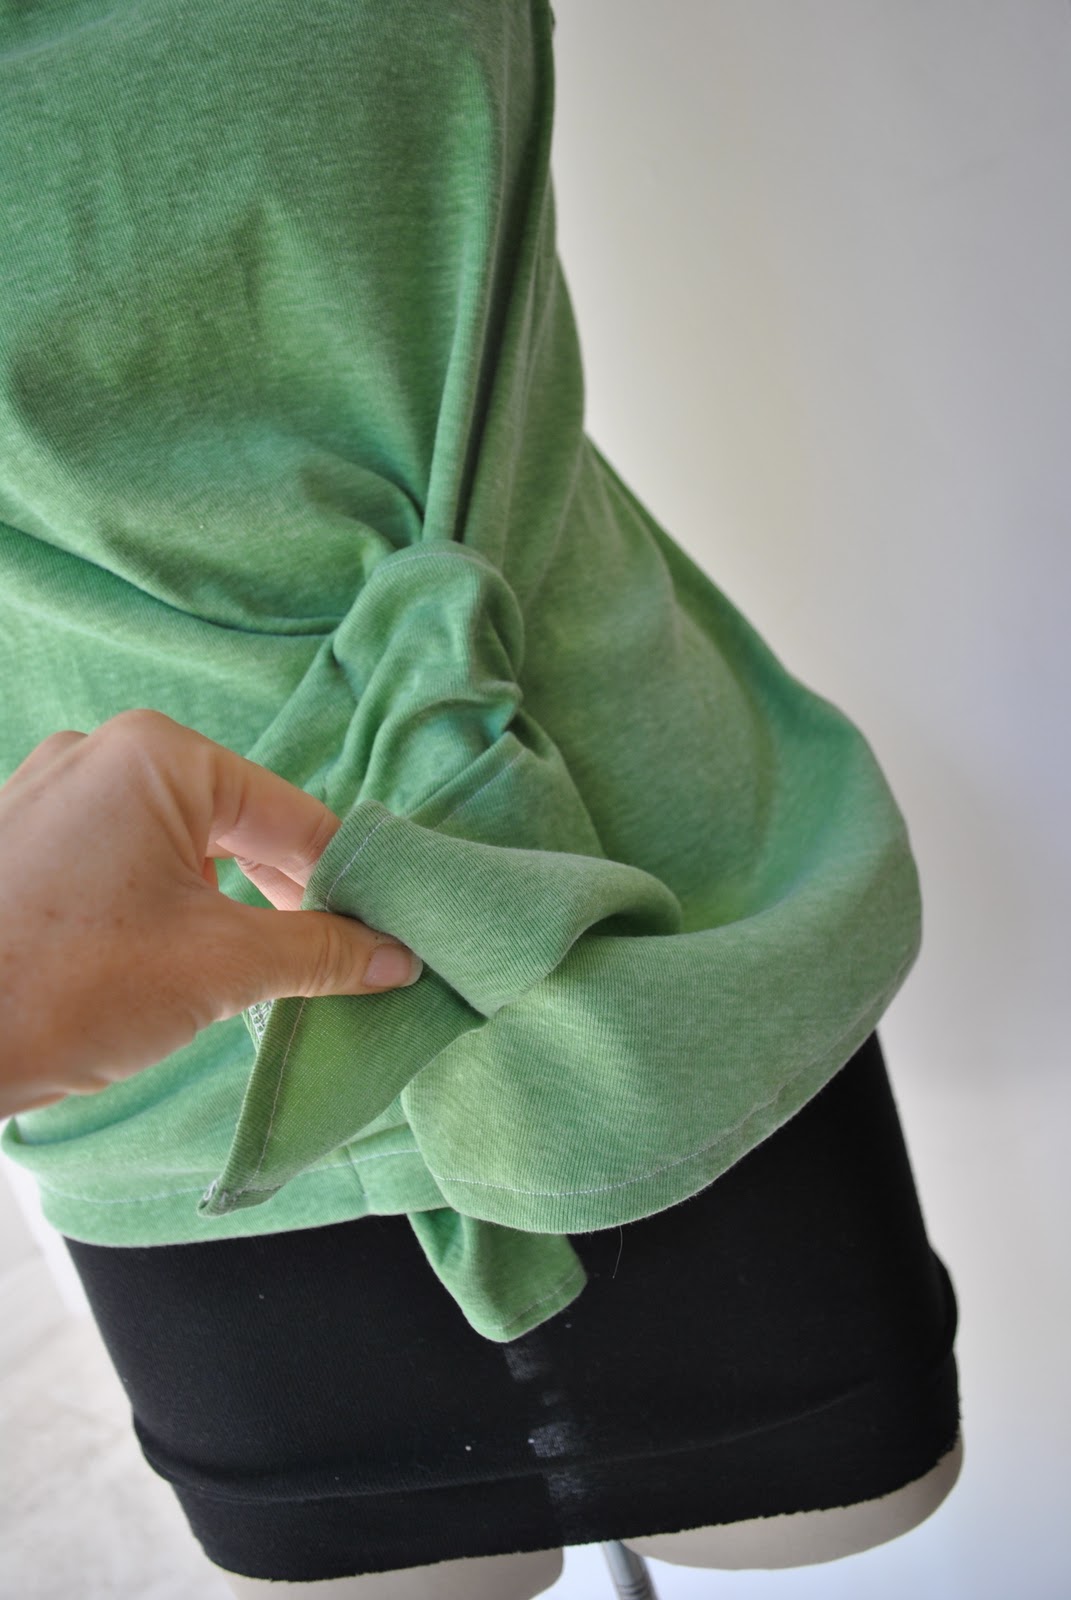
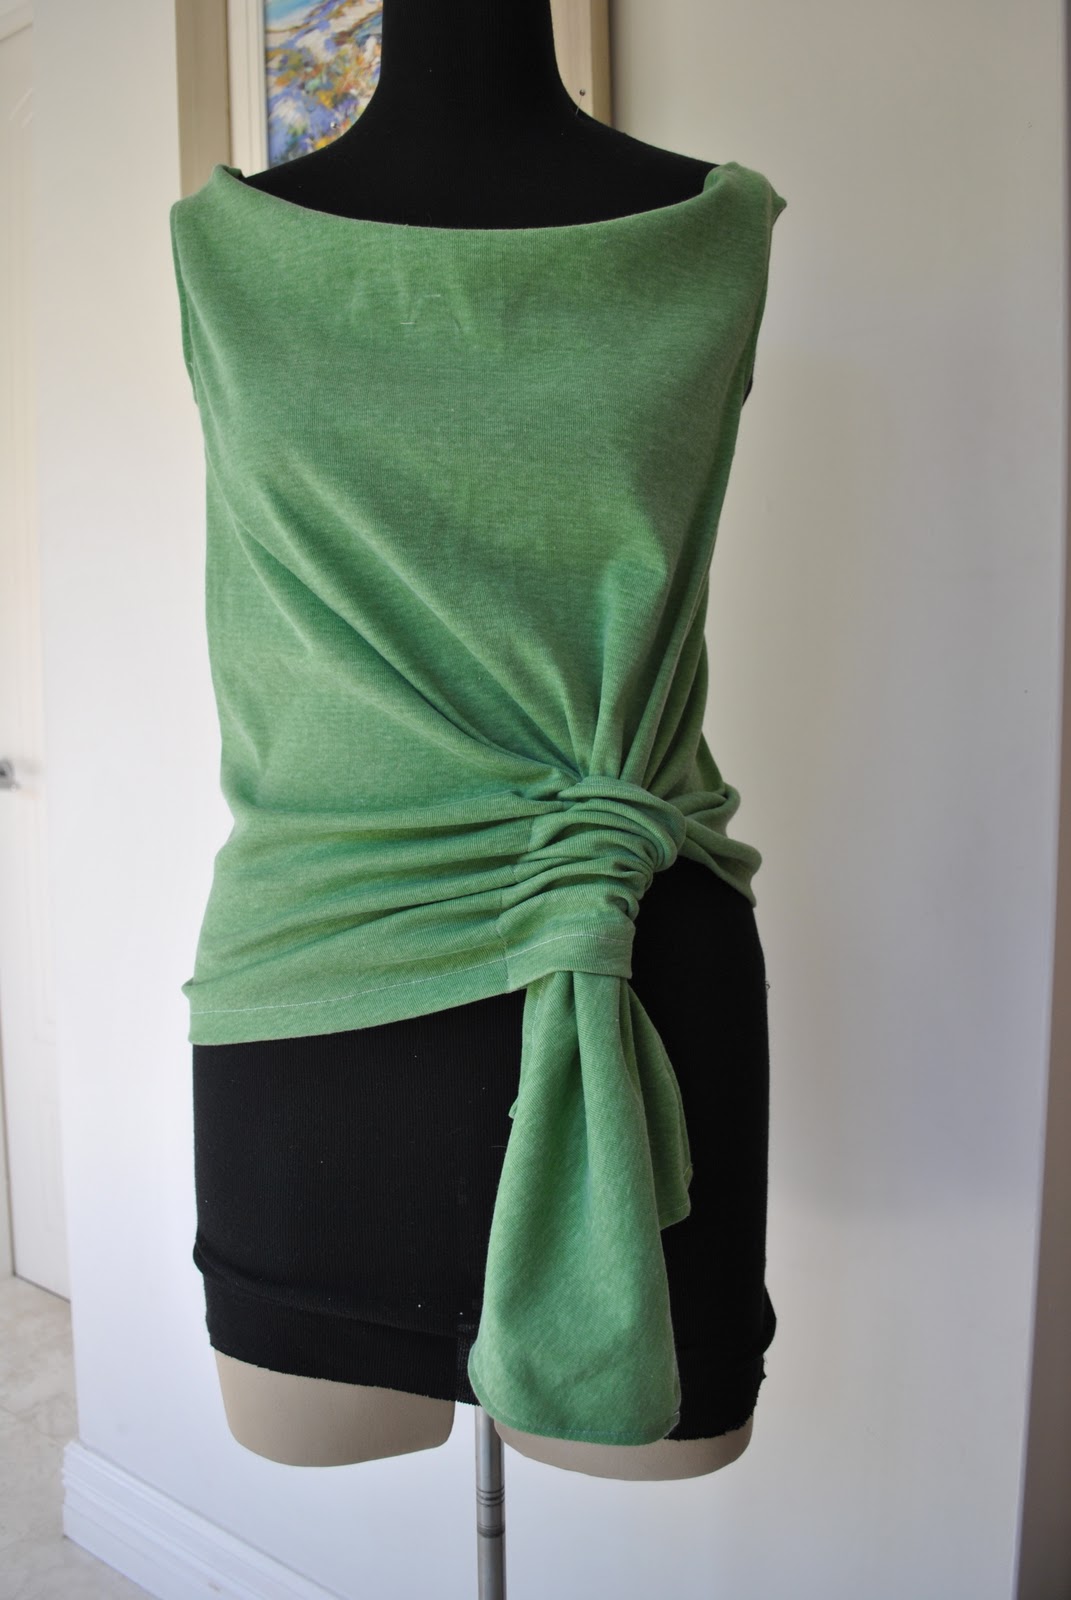
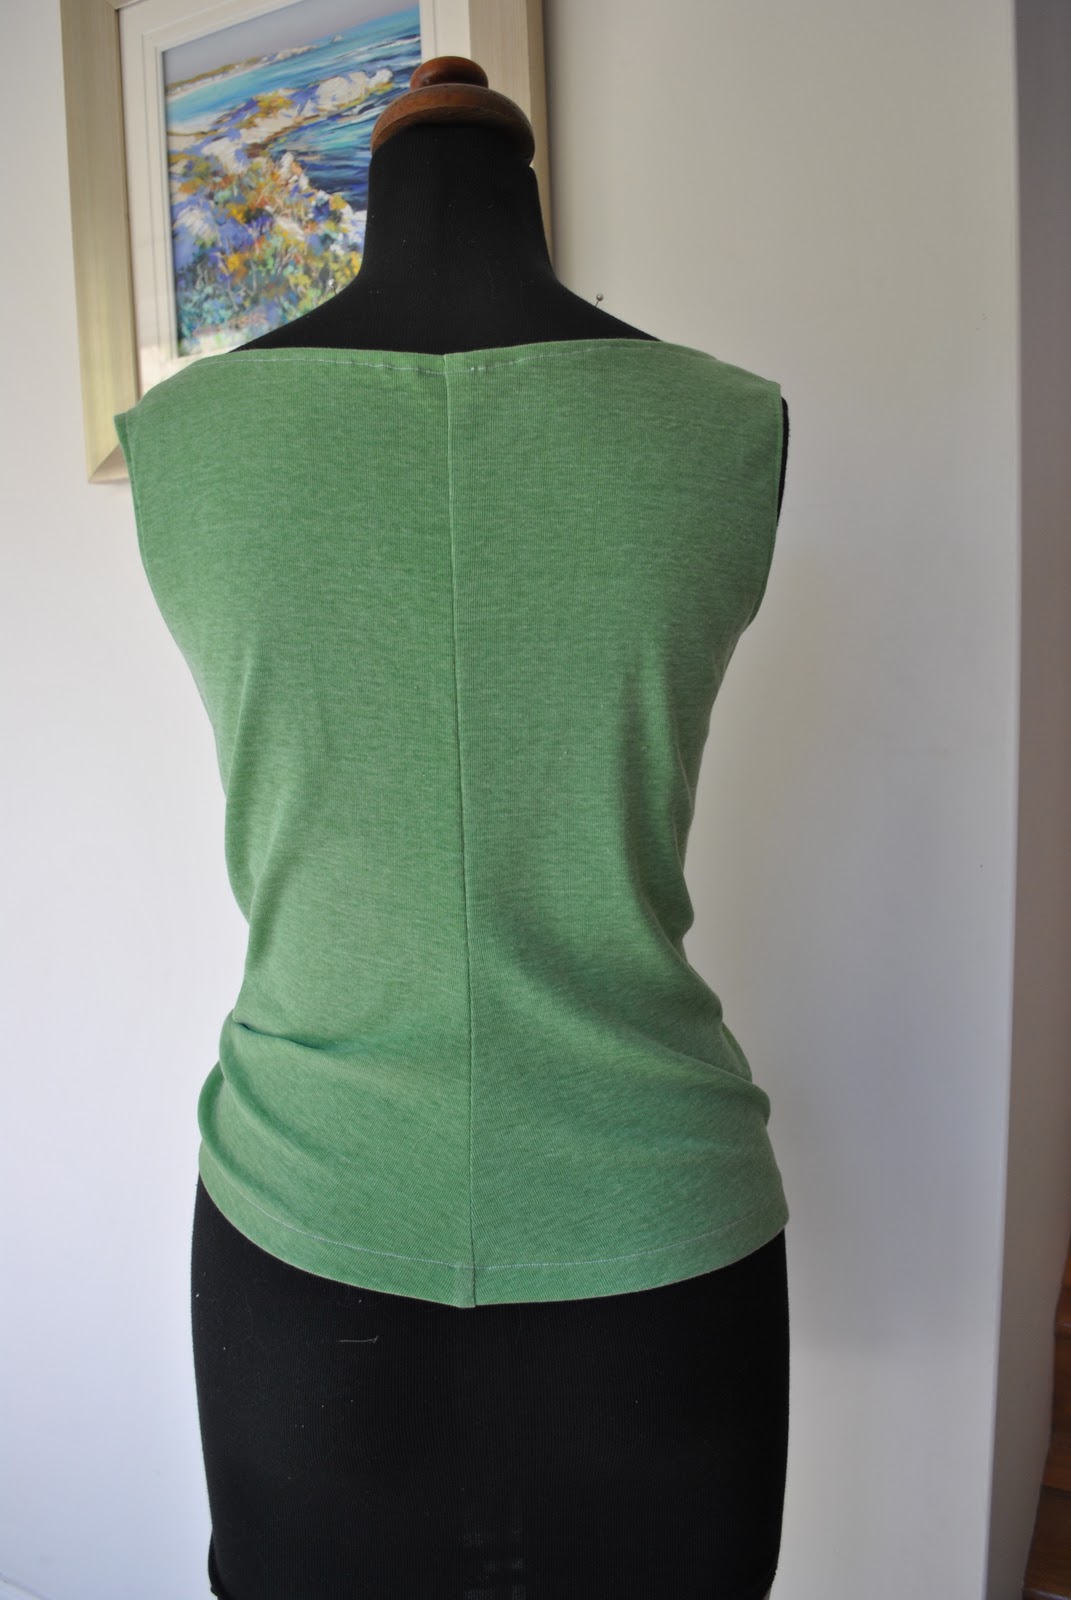
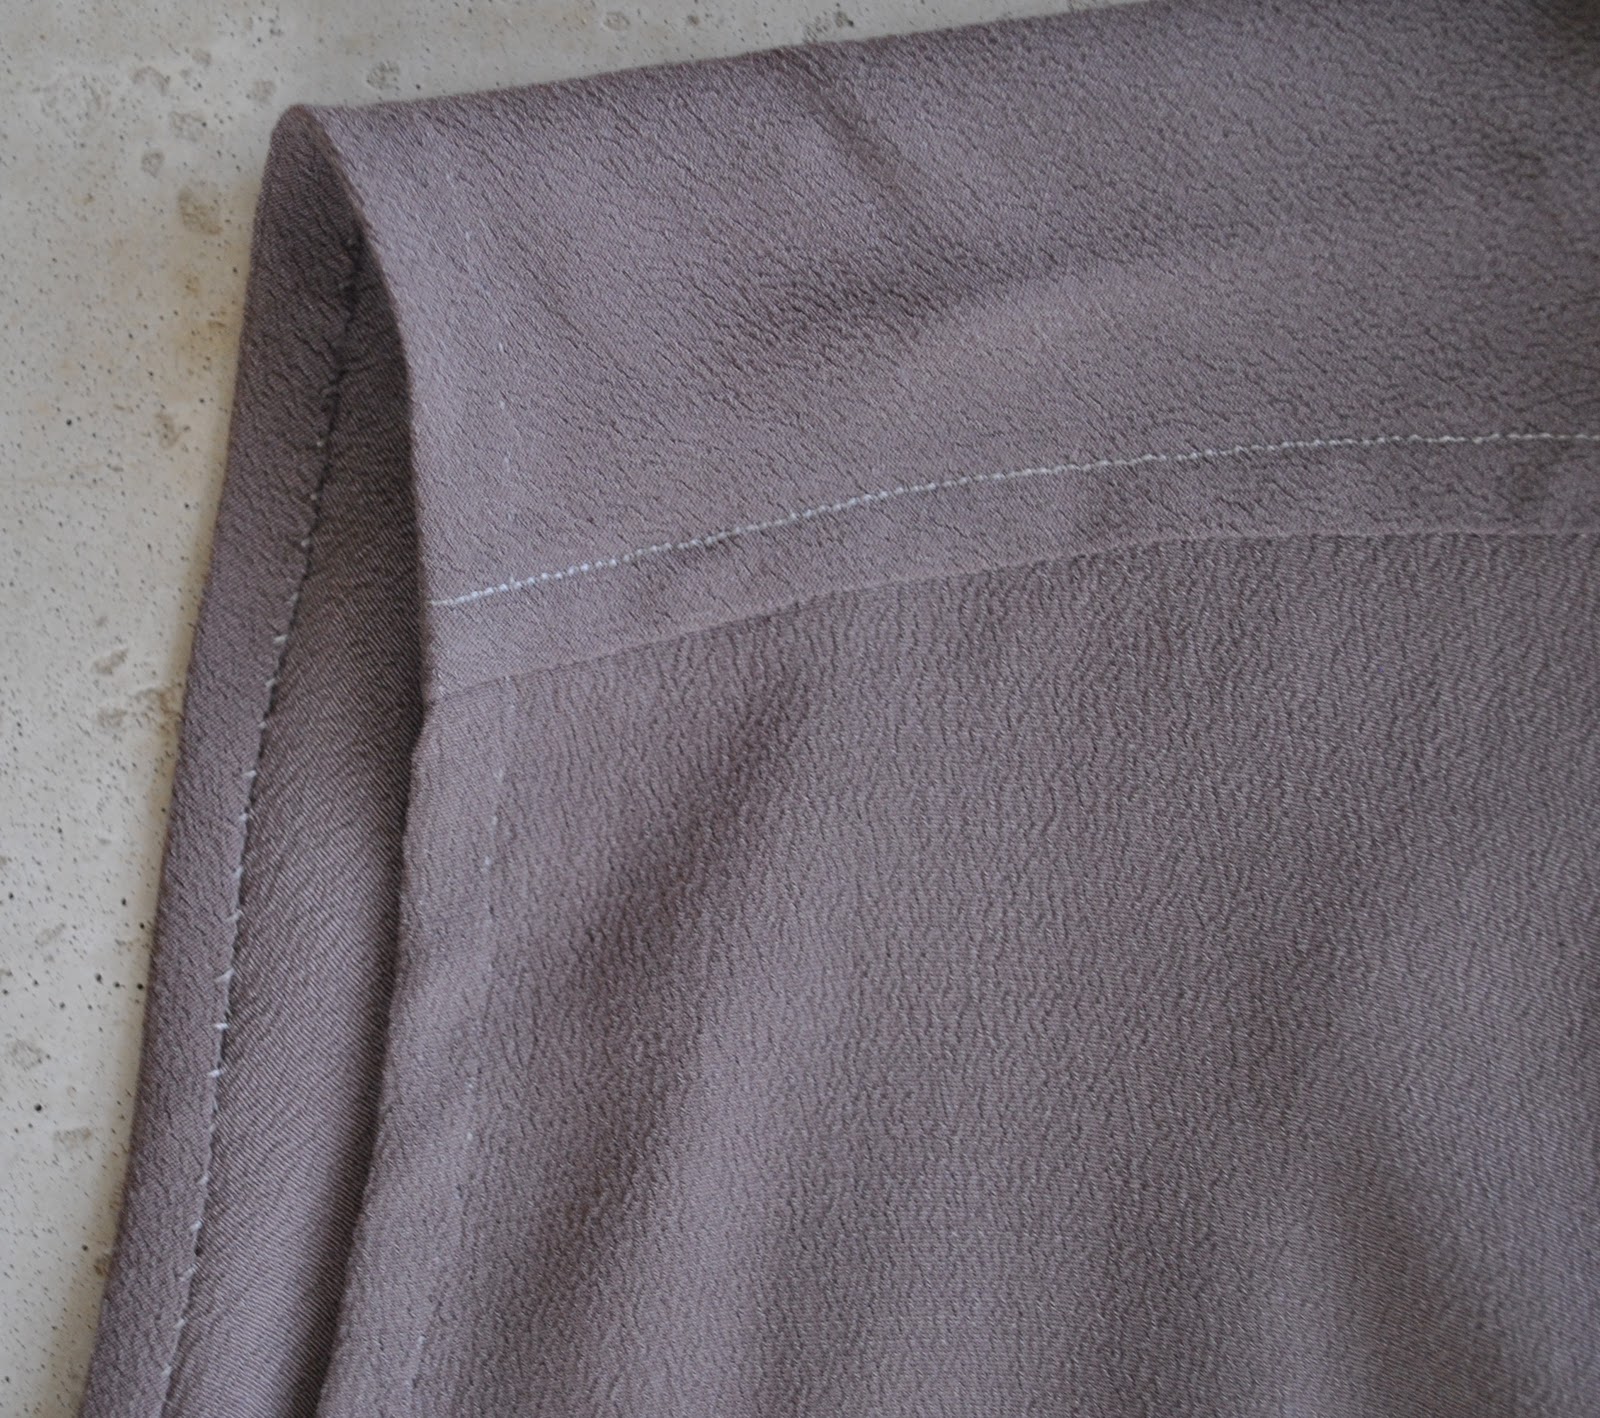
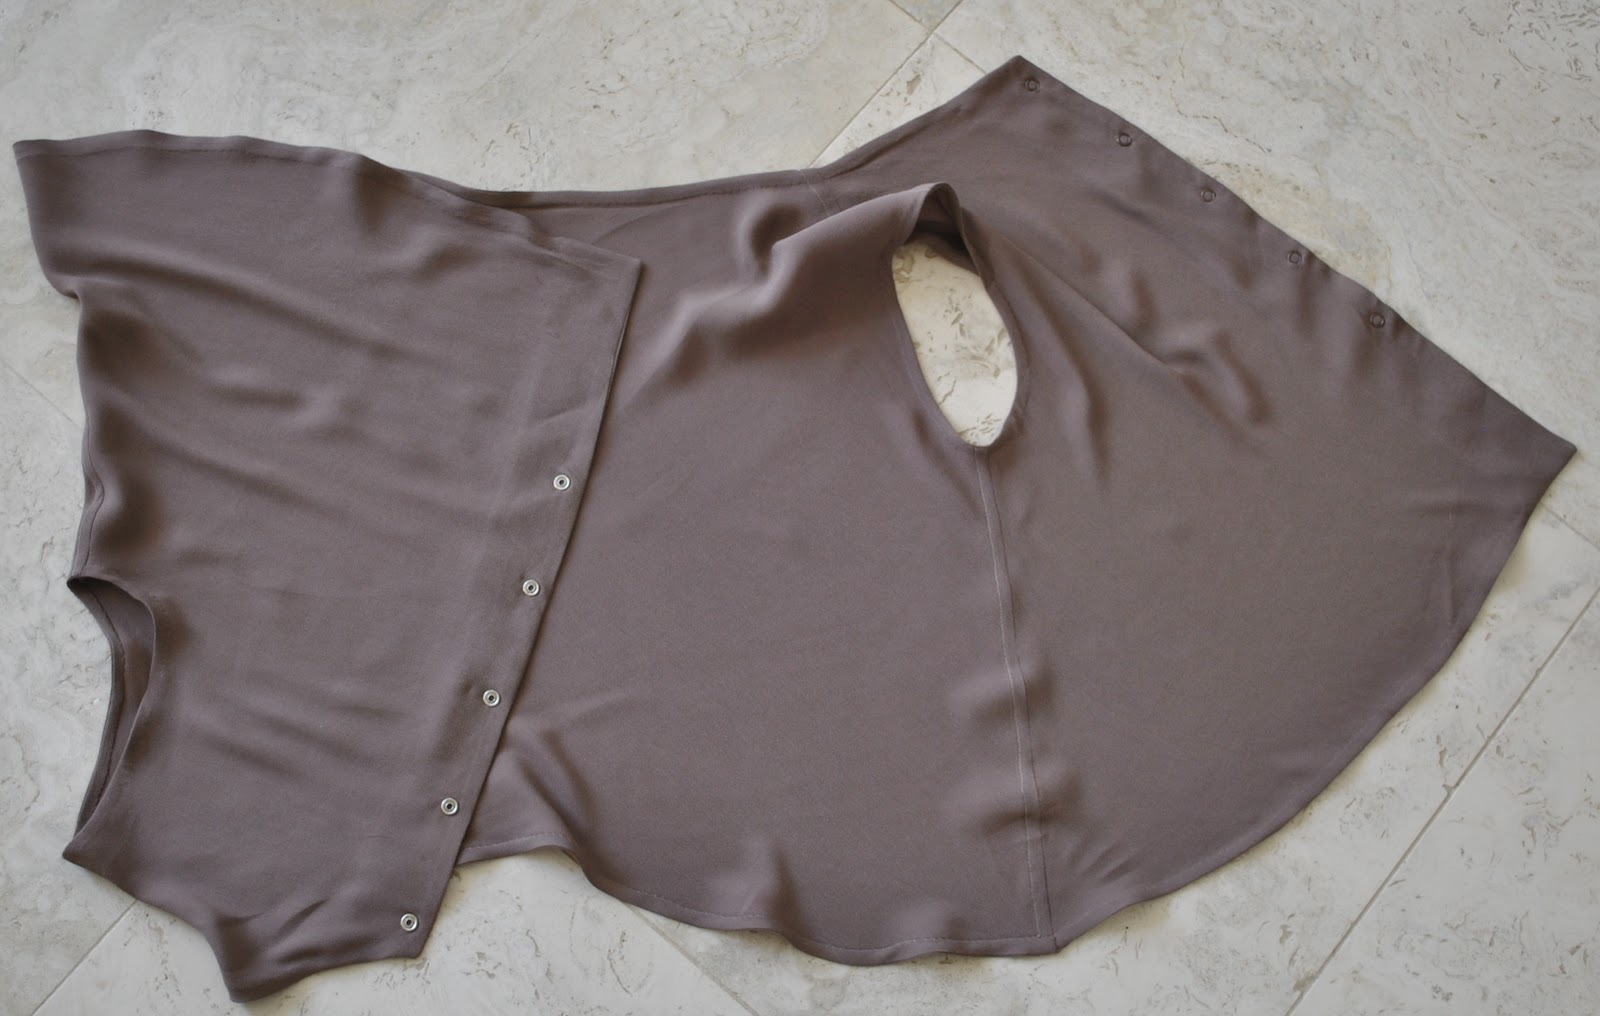
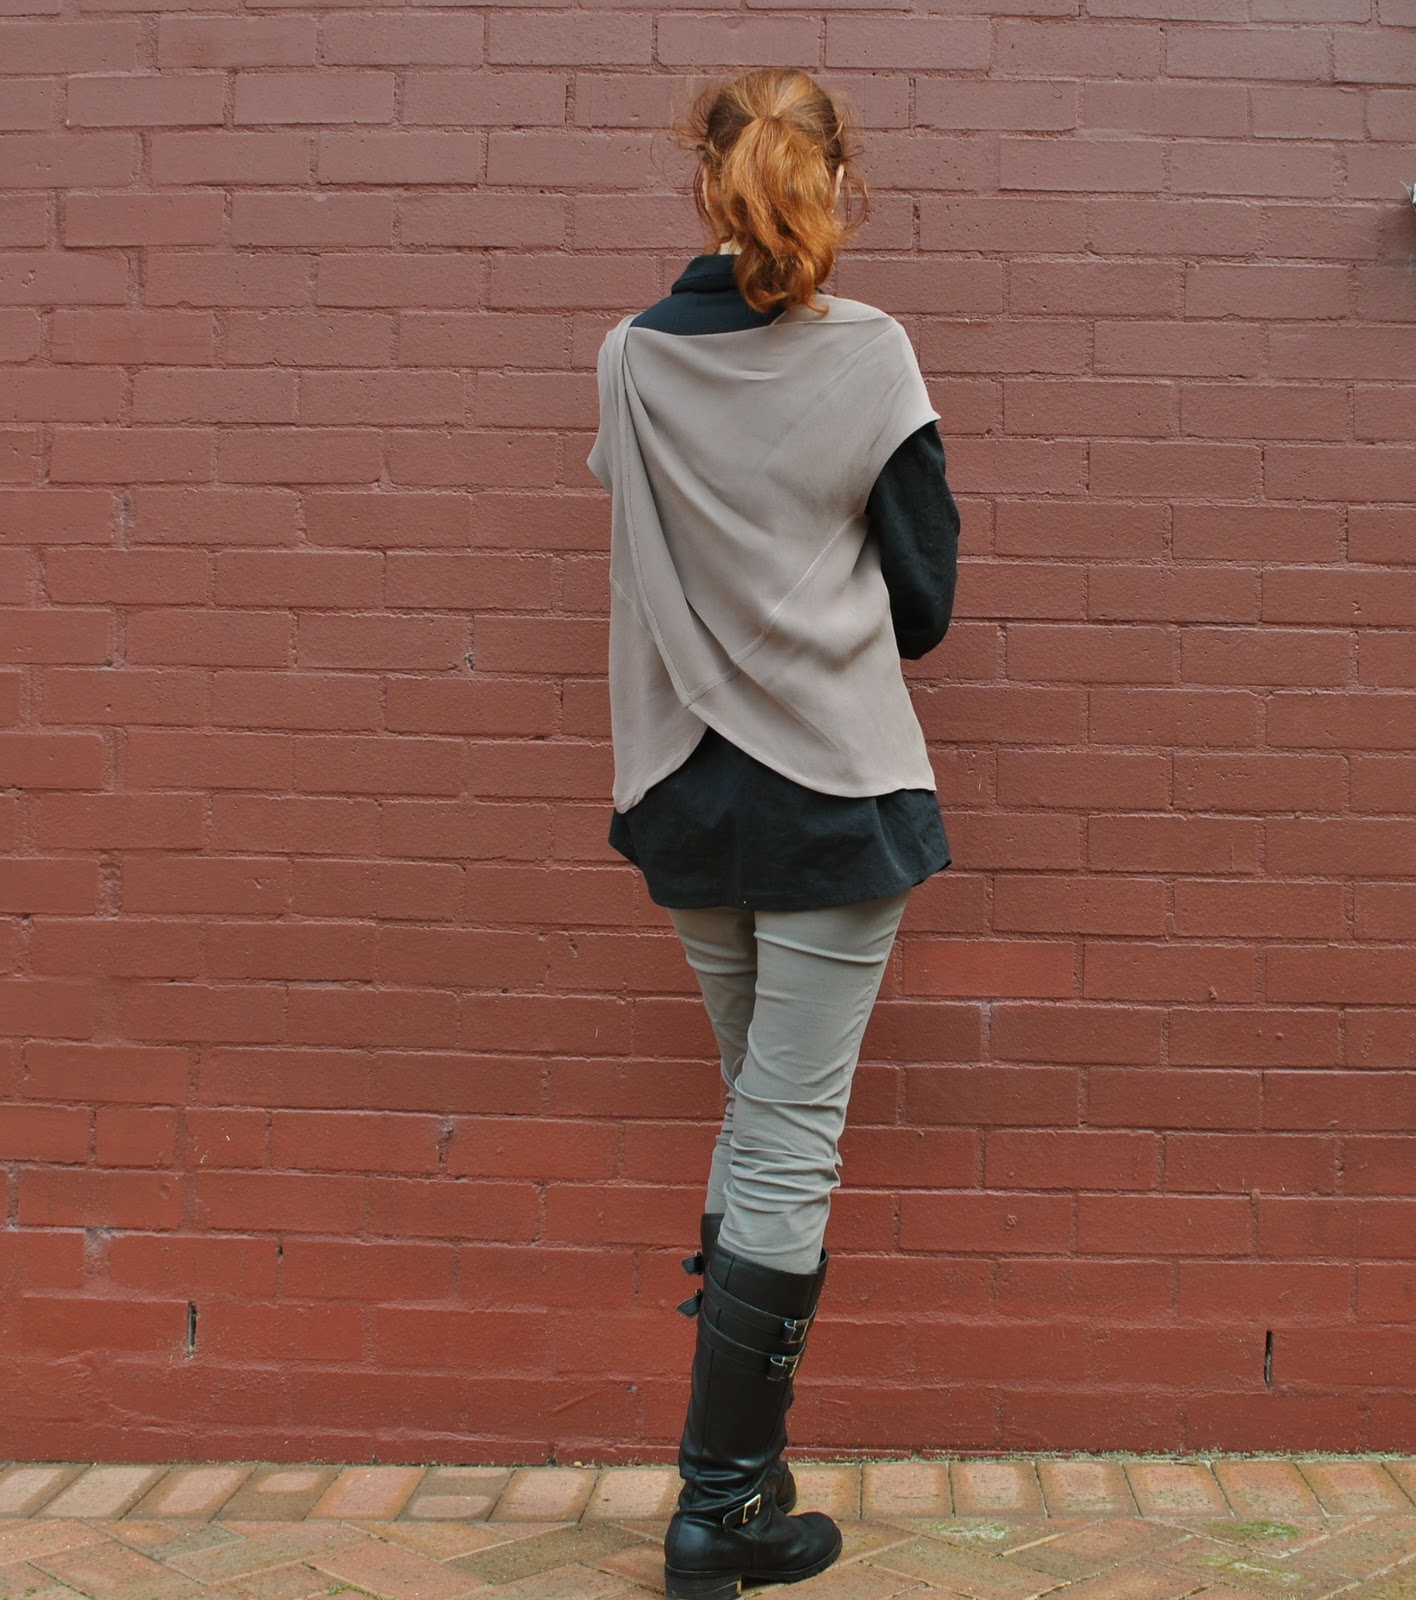
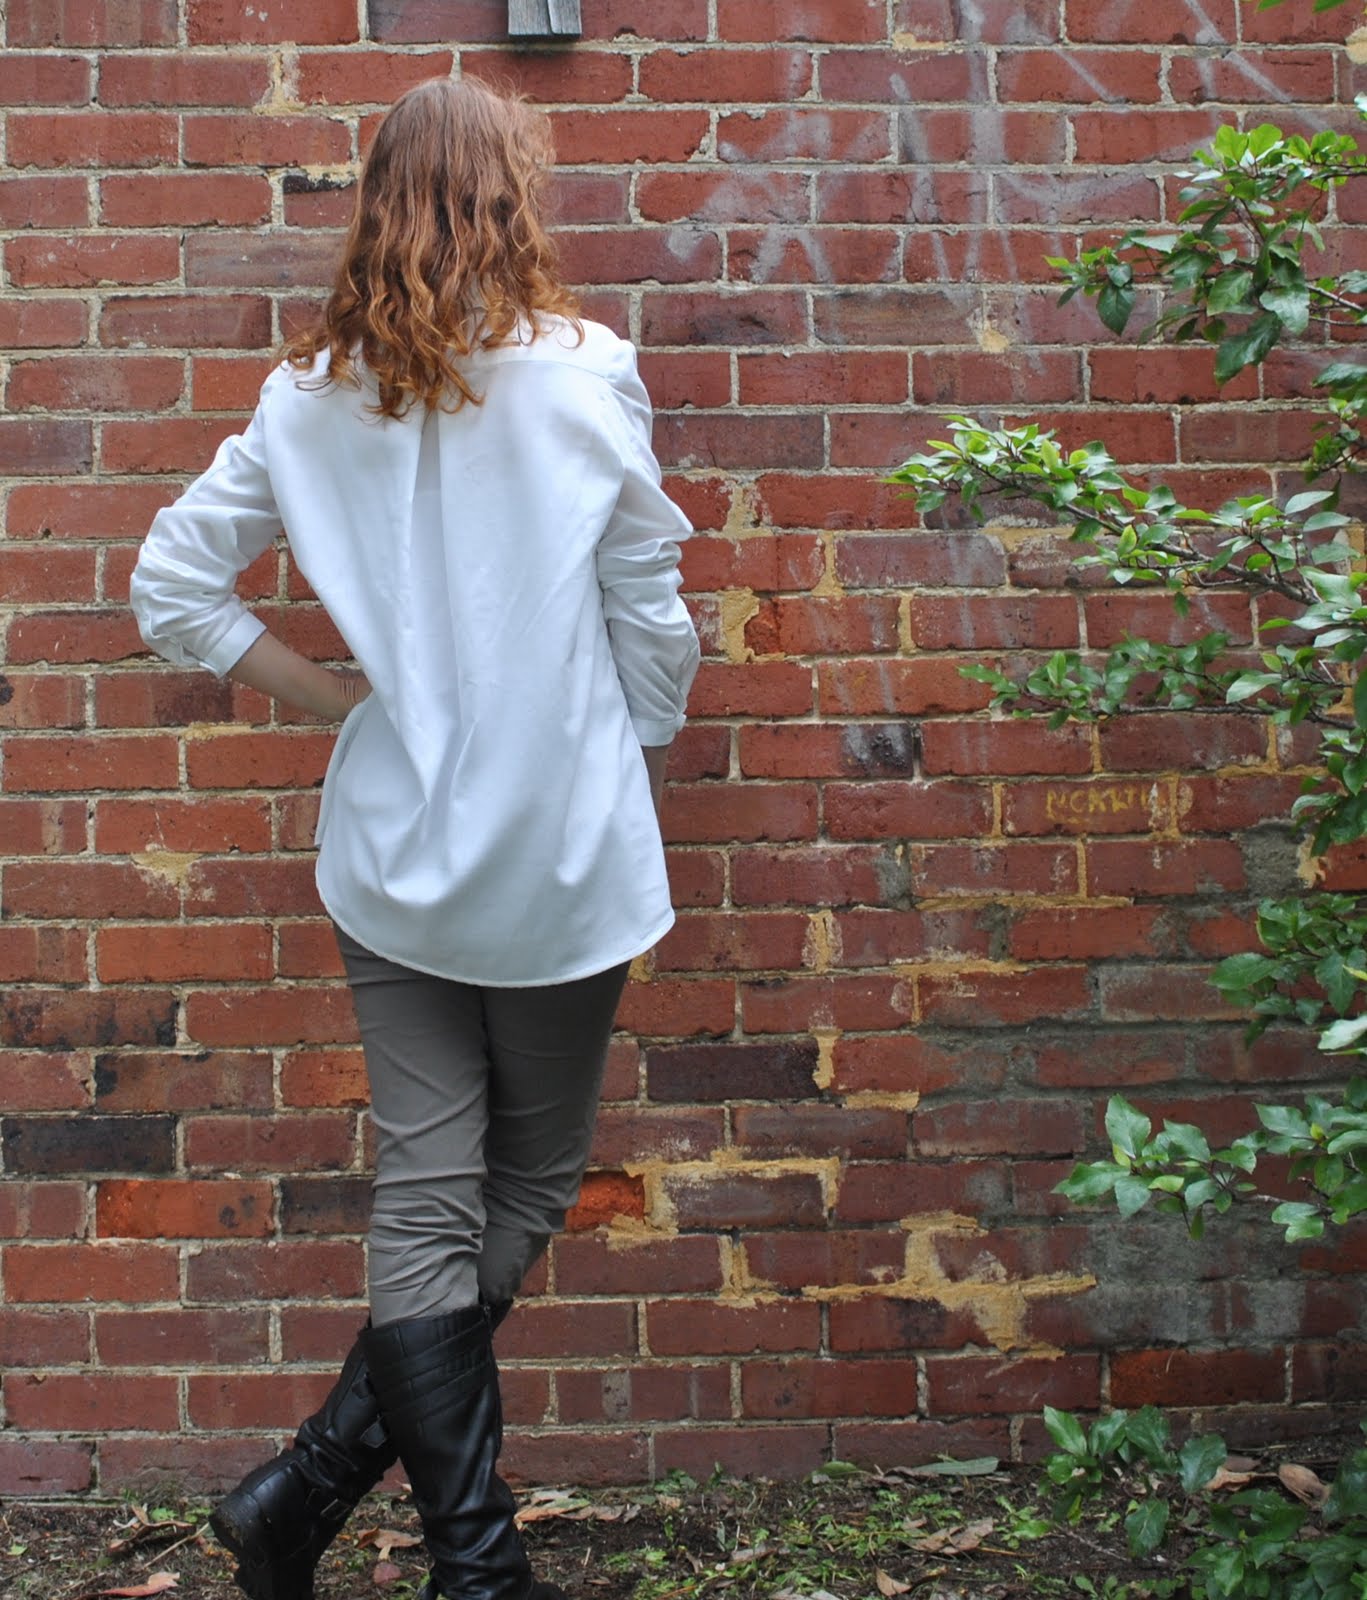
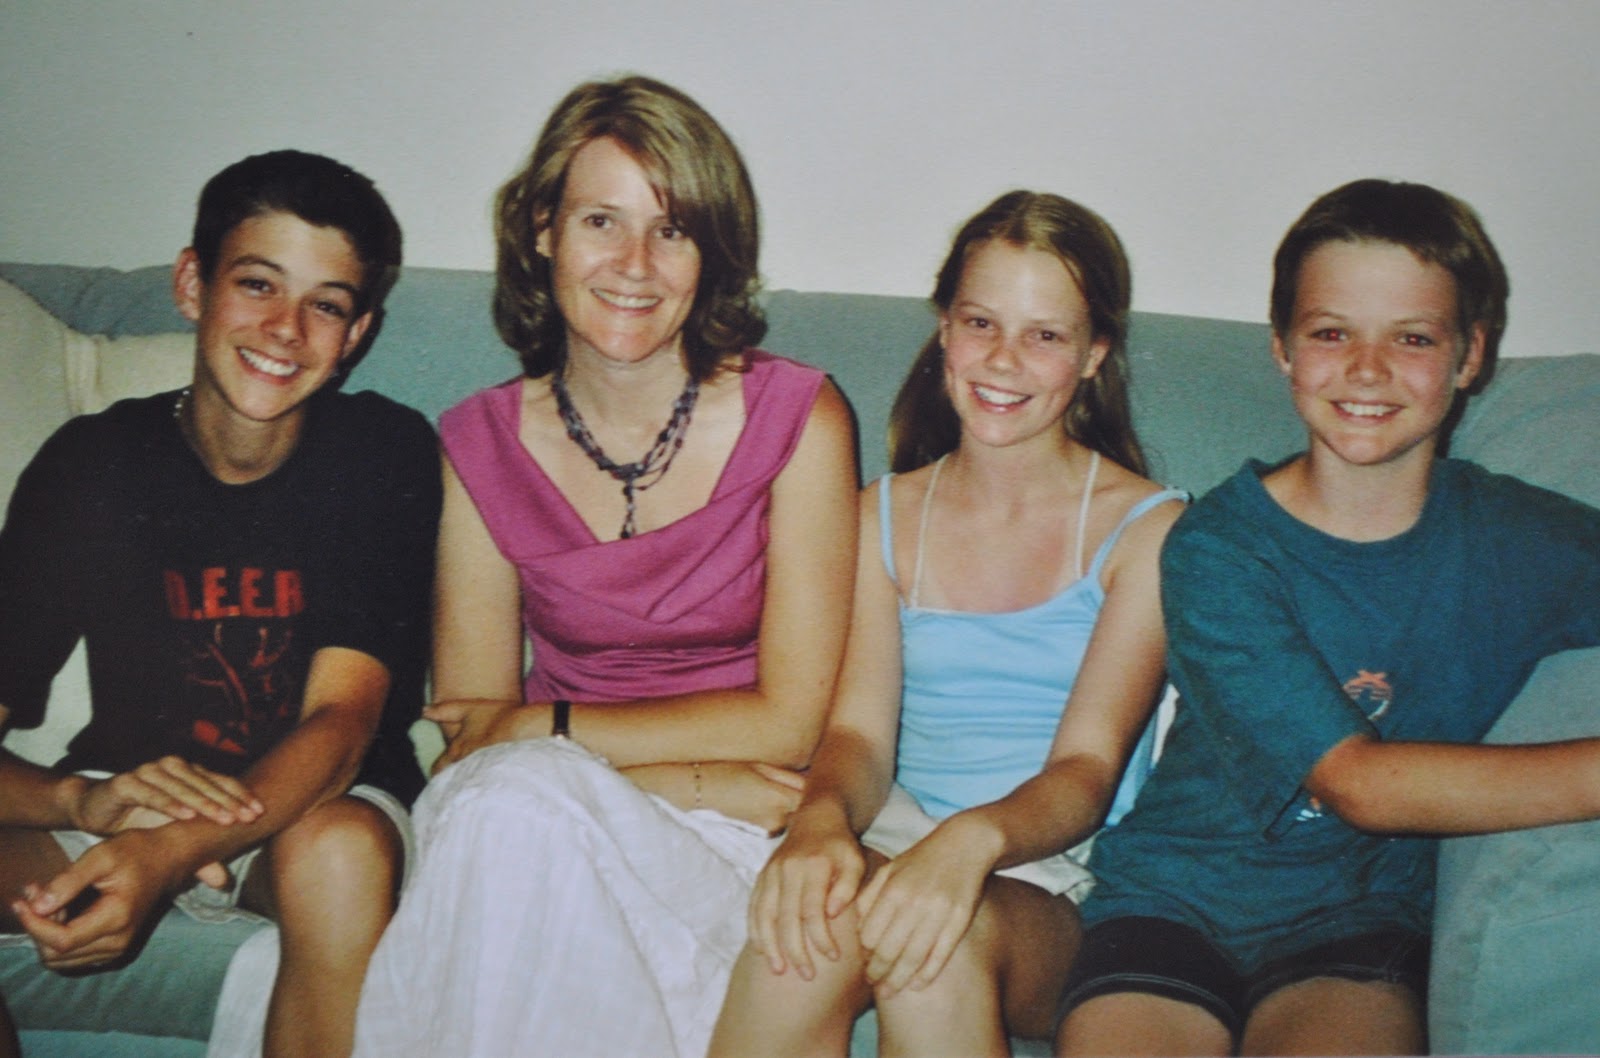
I made both the skirt and top and also my necklace here.  The top was an experiment, I flipped the shoulders out in a twist to get this cowl-like effect.  It used to get a lot of compliments, believe it or not! (my friends are very kind)  We are sitting on one of our sofas in its first slipcover, made by me too…  (now looks like this)

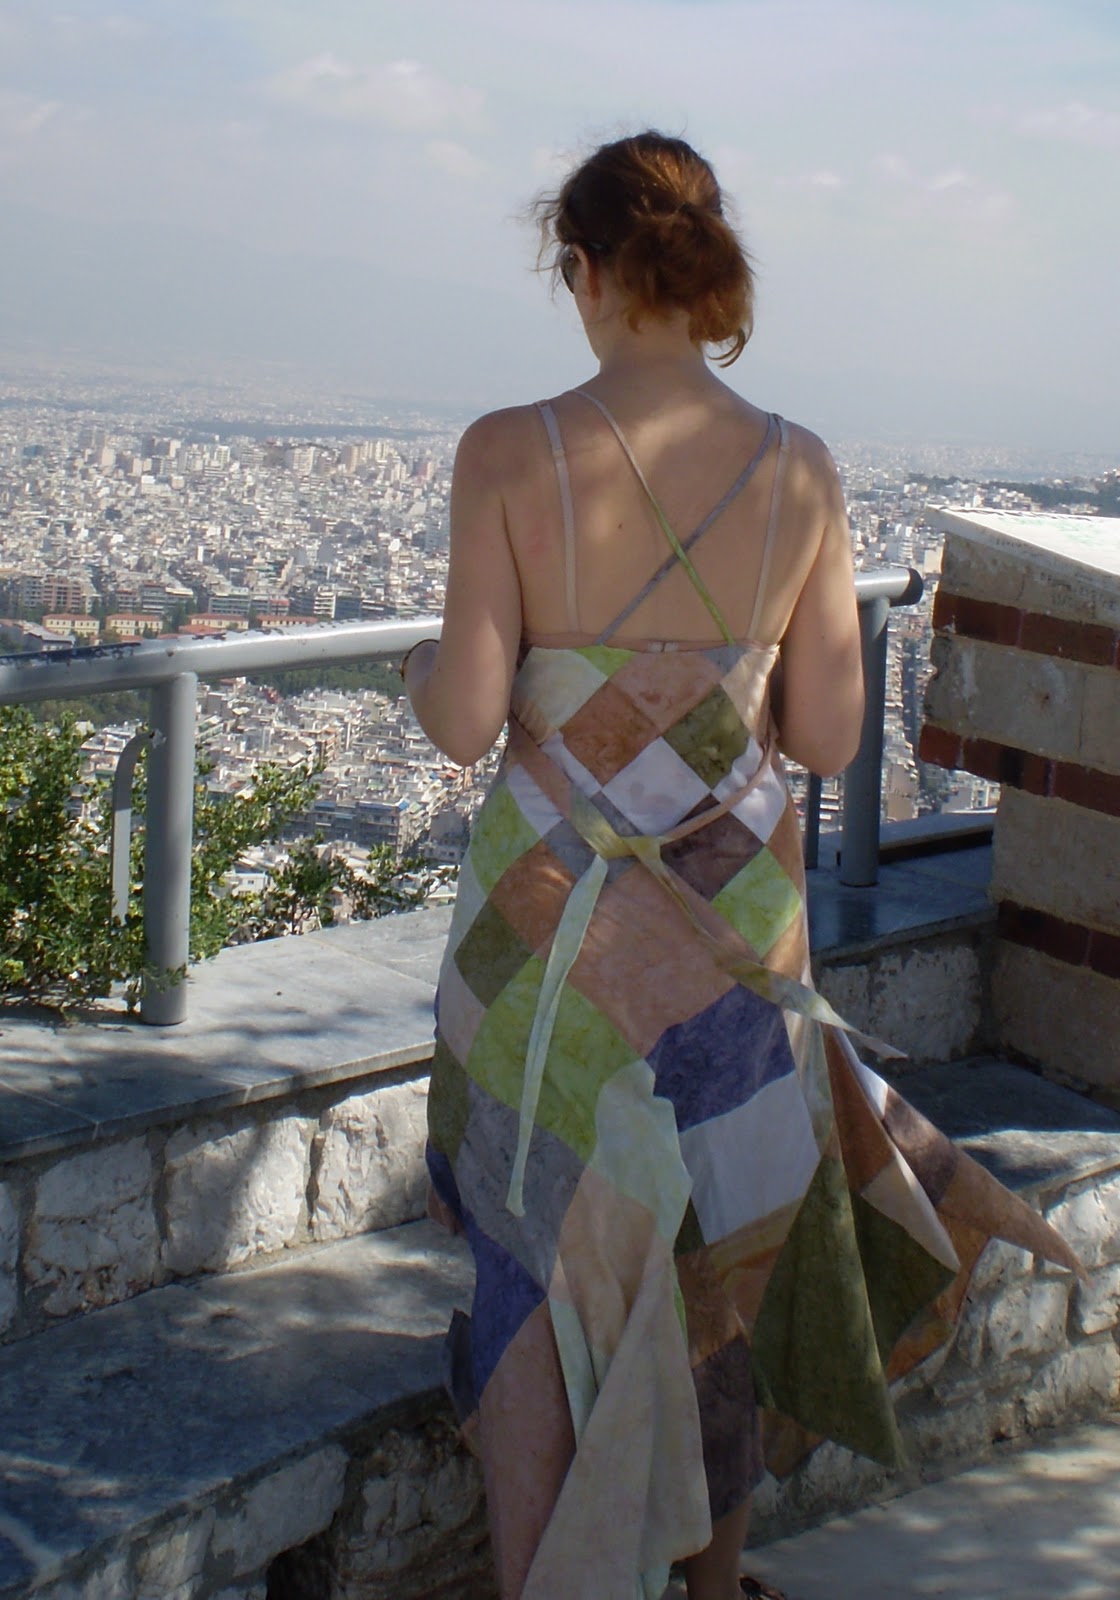
Some more dresses.  I really regret now I never got any good pictures of these two.  The white and red one was rather nice; it was a dress, but looked like a matching skirt and camisole when I was wearing it, as it had layers in several graduated lengths.  My own design.  The patchwork dress, also my own design, took lots of planning; I bought the fabrics separately and cut and pieced them together, then made the dress.  It has smaller squares at the top, graduating to larger squares around the midriff, and then down to the largest squares at the hemline.  It is all on the bias, with a handkerchief hem, and I loved it!

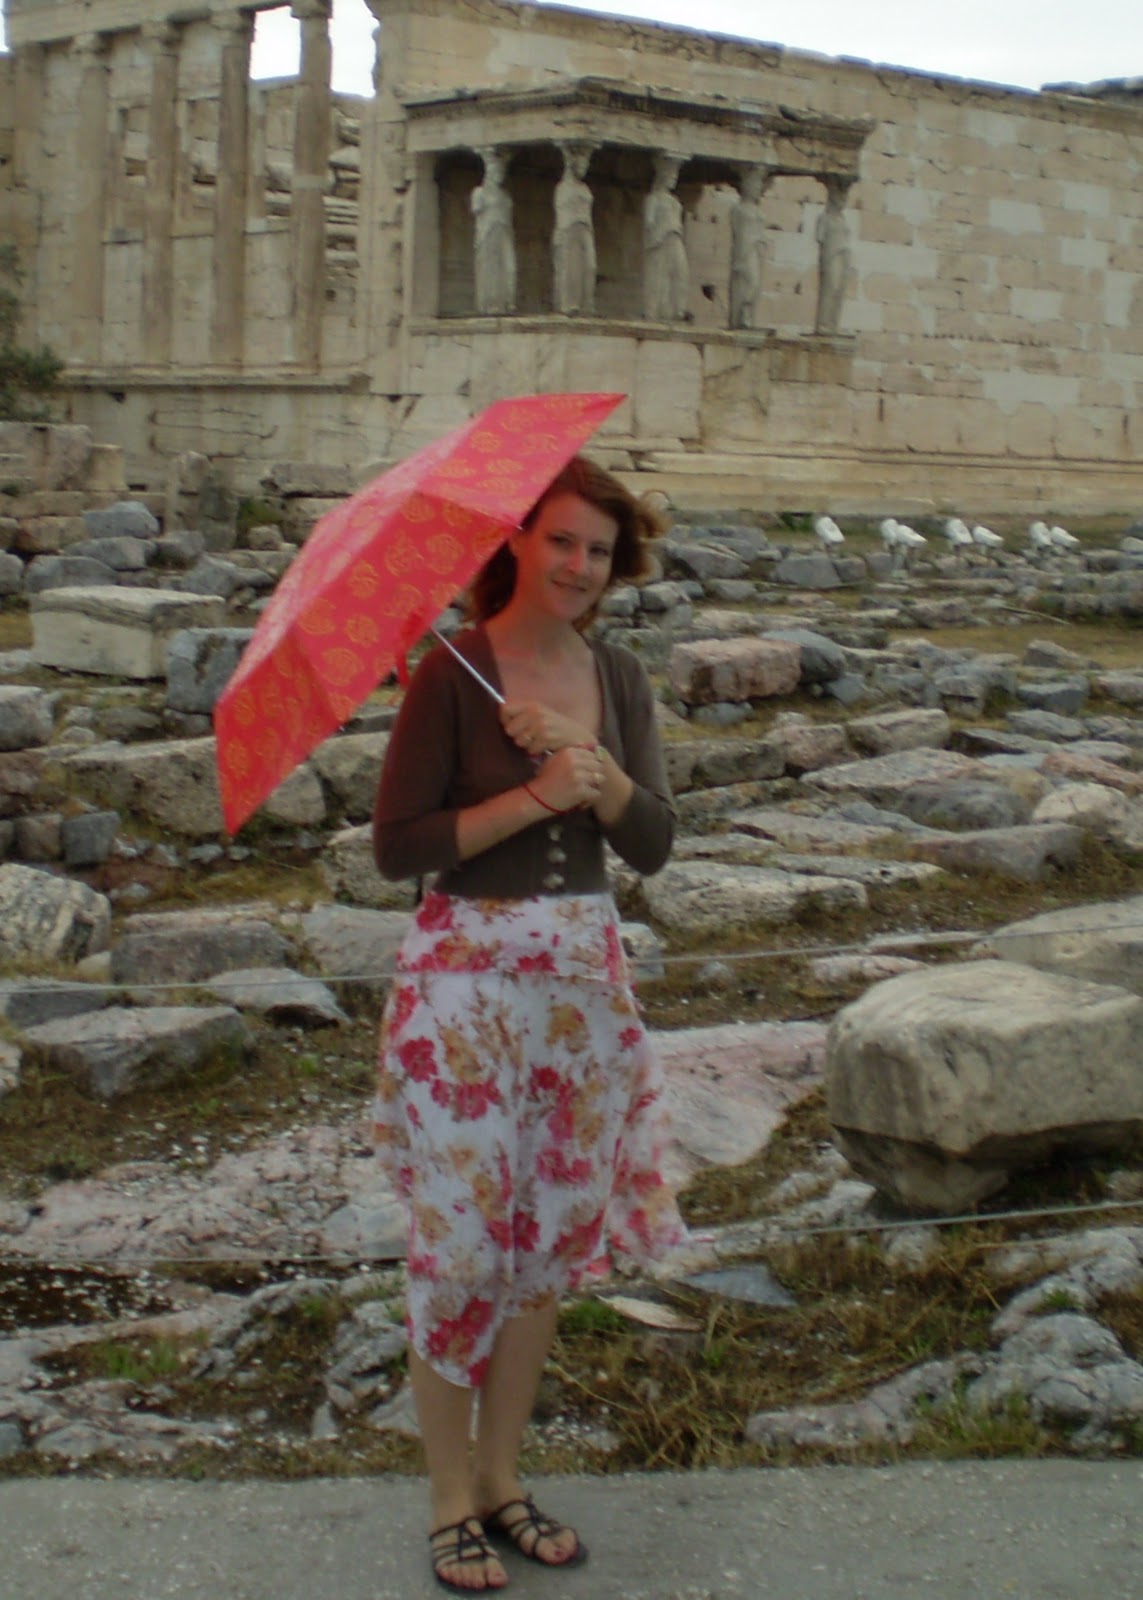
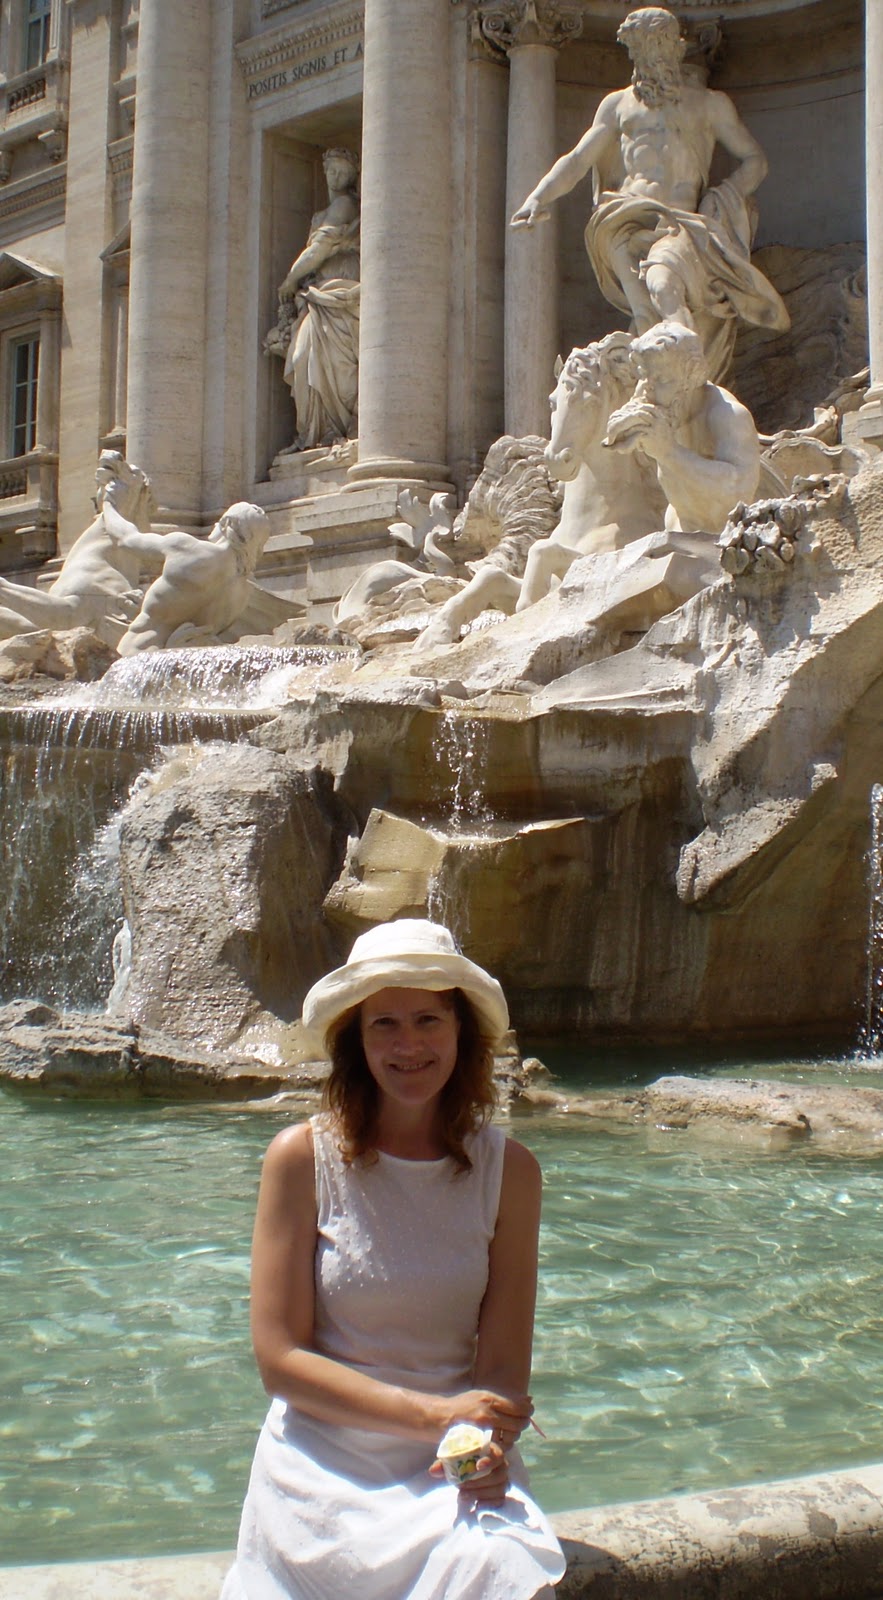
A drop waisted, handkerchief hemmed dress of white dotted swiss voile, pictured against a famous backdrop.  I still have this Vogue pattern too, actually…

And that should be all folks!
From now on, I will only be showing newly made stuff here….

pinterestmail

A sleeveless top, con latte

I’ve made a new top!
This is the little top from Vogue 1248, made of a light cotton voile the colour of pale milky coffee, and with miniature metallic silver polka-dots dotted sweetly all over like a starry starry sky…
the most interesting feature of this top is that it has a triple collar.  This, I love.  How cool and easy is this idea? so simple and so cute and yet you don’t see multiple collars very often, if at all.  When I was planning the top, I thought how wonderful it would be to make the collars in different colours to really show off this feature but couldn’t find matching weight fabrics in colours I liked, and I vetoed as being too wasteful the idea of dyeing tiny little collar-sized pieces of fabric.  So in the end I took the easy route of just using all one fabric.  Next time… and yup, I am already plotting a next time, mwahaha (watch this space!)
The top also has snap-opening plackets both front and back, and I chose silver snaps to match the tiny silver dots on the fabric.
I’m not thrilled with the snaps… because my fabric is very very light and just may be too fragile for snaps, yikes!  Undoing the snaps I am veeery carefully and slowly prising them apart, absolutely terrified of ripping the fabric.  But this is completely my fault for not putting in heavy-duty enough interfacing to stabilise the plackets enough, something to bear in mind.
Another unusual feature about this little top; the two fronts and the two backs just go into the collar; with no shoulder joining seams, or any shoulder at all, for that matter!  So really my calling it a sleeveless top is not going far enough; it is more specifically a shoulderless as well as a sleeveless top.  I just went with “sleeveless” because; well, “sleeveless and shoulderless top” up in the blog post title is not super-succinct but is a bit of a mouthful and would have just befuddled and confused and had y’all going, “wha’?? no sleeves and no shoulders, well how can there be any top even left?”…. but yeah, one’s shoulders are bare too.  This will a good feature for summer in a hot hot climate like ours; just as long as one remembers to slather on that suncream before heading out.
Following the “finishing off as well as I can” policy; the princess seams are flat-felled, the side seams are French seams, and the armhole facings are edged with self-fabric HongKong seaming but with the fabric reversed so as to have the silver dots hidden inside.
(left; inside the top and clockwise; HongKong seaming around the facing, flat-felled princess seaming, French side seaming: at right; that interesting triple collar)

Details:
Top; Vogue 1248, pale coffee cotton batiste with tiny silver polka-dots
Skirt; Burdastyle 10/2010, 136, made of black suiting, details and my pattern review here
Shoes; Misano, bought from Labels boutique

Pattern Description:
Top: fitted front and back snap closing
Pattern Sizing:
4-10 in this envelope, I made a straight size 10
Did it look like the photo/drawing on the pattern envelope once you had finished sewing it?
yes
Were the instructions easy to follow?
yes
What did you particularly like or dislike about the pattern?
I totally adore the triple collar feature!!  Sooo cute!  Will be doing this one again for sure, and using different coloured fabrics to highlight the three collars next time…
The length is a nice one which allows the top to look equally good out loose as well as tucked in.
Fabric Used:
very lightweight cotton batiste
Pattern alterations or any design changes you made:
I didn’t make any pattern alterations, but I did flat-felled seams on the princess seams, French seams at the side seams, and applied self-fabric HongKong seaming on the armhole facing edges.
Would you sew it again? Would you recommend it to others?
Yes, I am already planning my next version in multiple fabrics, to show off that adorable triple-collared feature…!  I do recommend this cute and slightly unusual little top pattern to others too.
Conclusion:
Initially I was a little skeptical about this top pattern, as I tend to shy away from clothes which require special undergarments, but well, logically if you own a halter neck bra then you should wear it at least once in a while, no?  And I do love this cute little top, I think the shape is flattering, feminine and quite unusual.  My husband likes my shoulders on show like this, and I think the high neckline still gives the top a modest flavour and doesn’t make me feel too exposed so it is a win all round!

pinterestmail

Blue bunches

Next up in my Japanese pattern book experiments…
When I saw this top in Pattern Magic 3, by Tomoko Nakamichi, I nicknamed it the “bunches” top.  Y’know because the other one on this same page was the “ponytail” top (not its real name, btw)  Well this one had two fabric thingies bursting out of each side of the self-fabric scrunchie thingy (it’s OK, I know what I’m talking about) so since we used to call this hairstyle “bunches” when I was in primary school then that is what I have dubbed this top.  In actuality, it has the same name as the ponytail top, (thread escaping loophole, thank you to Yoshimi, Janine and KD!) version A
But I have to admit the final result is actually not super “bunch”-y but is just sort of “knot”-y.  Even verging on “bow”-y.  This is because of my choice of fabric, a rather fine and light cotton knit and with not as much body as the green cotton jersey I used for the ponytail top.  So in my version here, that long casing for the bunches hasn’t held its shape at all but just collapses in on itself.  I thought that the lighter fabric would be better, but now I see that the thicker fabric did give a better structural result.  Don’t worry, I will still be wearing this top a whole bunch (hehe) this summer; its bright bright ultramarine blue shade is very vivid and therefore so very now.  Very colour-blocking…  See that, how I manage to slip trendy buzzwords like colour-blocking in to my posts like that, hmmm?  Oooh, I’m so with-it…  not!  But I do newly love this intense colour.  I confess I’m seriously craving shoes in this colour…
I think it can be worn successfully either way.  With the bunches at the back you get some interest at the back of the outfit, which is nice.  It’s noice it’s different it’s unusual… *  Often in an outfit there is nothing interesting to look at from the back view.  Something else I’ve discovered since I started taking pictures of my clothes…  
I think I like better it with the bunches at the back.  What do you think?

bunches; source

* an Aussie in-joke

Details:
Top; drafted from Pattern Magic 3, by Tomoko Nakamichi, made of lightweight cotton jersey knit
Skirt; my own modifications of Vogue 8363, burnt orange raw silk, details here, and this skirt styled in 6 different ways here
Sandals: la soffitadi Gilde, from Zomp shoes

pinterestmail

Wearing a triangle

First impressions can be deceiving.  And one’s first impressions of the “Wearing a Triangle” design from Pattern Magic 2 might just be that it is one of the least wearable designs in the book.  That was my own naive silly first impression anyway… I admit this photograph of the garment did not endear me to it one little bit; it was a disturbing reminder of the freaky monster shape the rather dishy (in those days, sigh) Alec Baldwin transformed himself into in Beetlejuice. 

(Alec Baldwin at right, in not-so-dishy mode)

I had a bit of a crush on Alec Baldwin way back then, and this apparition when it appeared in the movie was like a bucket of water over my girlish daydreams…

But the more I though about the Wearing a Triangle design, the more I started to think that it did have great potential to suit my style… if a few seams were left unstitched, and in a light flow-y fabric… hmmm, so I went and found some really light flow-y fabric.  Fortunately for me, Fabulous Fabrics had this sheer, ultra-flowy, navy blue muslin-y stuff on their super cheapo bargain table… I bought quite a lot.  Hangs head in shame at the utter failure to stash-bust there… “but it was so cheap”, she wails unconvincingly.  You might be seeing something else made out of this fabric, hehe…  But this particular fabric was just the ticket.  And I’m so happy with the result!  This project may well turn out to be a surprise favourite from the book, so far the odds are good…
I love the long, pointy handkerchief hems, and the vaguely hoodie shape hinted at with the top point of the triangle.  The drape-y, sharply A-line folds of lightweight billowy fabric are lovely and easy to wear, and I think quite flattering.  The very light and loose nature of this garment makes it a perfect summer cover-up.  I’m planning to wear this faux hoodie-of-sorts to the beach over shorts and over my wide-leg white linen pants on hot evenings.  The lightness and looseness will keep it cool, while the long sleeves will keep me from getting sunburnt.

Details:
Top; the “Wearing a Triangle” design from Pattern Magic 2, by Tomoko Nakamichi, made of navy blue muslin
Camisole (underneath); Country Road
Shorts; Burda 7723 modified to be flat-fronted and flared,  made of yellow embroidered cotton, details here
Thongs; Mountain Design

flat view
back view

Dressmaking details (for diehards who are interested in the sewing nitty gritty)
The design was quite time-and-resource consuming to draft.  This is because there are several stages…  cutting the triangles of fabric and making up a sort of half-stage fabric muslin, and then cutting armholes and using that much fabric again to draft the pattern with sleeves.  At this stage I was (uncharacteristically) not confident about the size so I went on to make a trial garment as well…  I used up practically half an old sheet just on the drafting of the pattern stage.  To my naturally very stingy frugal nature using up so much fabric, even “waste” fabric, for just one little top pattern was like torture.
The seams are sewed and overlocked to finish, the lower and neck edges overlocked and then folded in once and top-stitched.  The sleeve ends were finished with a “lettuce-leaf” rolled hem on my overlocker, I really like this slightly romantic finish to a casual long sleeve.
The design calls for the lower hem to be stitched closed partway along each end of the bottom edge of the triangle; I left these parts unstitched, which to my eyes improves the design immensely.  Ya, I know it doesn’t look so much like a structural “triangle” now, but I’m very OK with that.  And; final analysis, using up that half an old sheet on toile-ing was totally worth it!
side view

pinterestmail

Pattern Magic 3; ponytail top B


I’ve made an interesting little top…  
This from the marvellous book Pattern Magic 3 by Tomoko Nakamichi.  I’ve nicknamed it my “ponytail” top (version B), because of the way the pieces are pulled together, bunched up and held together with a sort of self-scrunchie and flow out of the other end like a girl’s ponytail.  As for its real name… well my husband and I have seriously spent the last Half.  An.  Hour; pouring over Japanese character translations and come up with “pulling hair through a hole”.  Could be completely wrong, but just maaaybe my nickname might be vaguely related to its true name bestowed by its Japanese designer?  If somebody actually knows and could correct my bad translation then that would be super wonderful, hehe.  
So, on the down side I think I am a failure at Japanese  :(((
But on the bright side I don’t think my new top is a failure  🙂
Pretty cool, no?  It has a wide, slightly cowled neckline which is quiiiite nice, but which is a wee bit flappy on my figure, so I just fold that down into the inside and it looks pretty good like that.  I considered stitching it down to the inside, but decided that isn’t really necessary as it sits down nicely all by itself.  
All the seams are stitched, then the raw edges overlocked together to finish.  The raw edges of the hems, armholes and neckline were overlocked, then the allowances turned under once and topstitched in place.   Simple dimple!
I used some green cotton jersey that has been in my stash for yonks, initially intended for some St Patrick’s Day thing which never got made.  And I still have a bit left over which I am in the process of transforming into a little cardi… 

Top; this is one of the designs on p58 of Pattern Magic 3, by Tomoko Nakamichi, made of green cotton jersey
Skirt; Vogue 1023, turquoise synthetic stuff, details here, and this skirt styled in 6 different ways here
Sandals; lasoffitada Gilde, from Zomp shoes

pinterestmail

Having a cuppa…

Self-stitched September, Day 21
Today’s mini photo challenge, to be eating/drinking.
I whipped up a new Tshirt yesterday.
Hehe, “whipped-up”, a phrase that is music to the seamster’s ears, no?  Don’t you just love the very thought of it; whipping something up.  Especially since I am normally not much of a whipper-upper, but more of an agoniser-over-the-smallest-detail-er… well whipping something up is nice thing to do once in a while.
As whipping-up implies, my Tshirt is devoid of exciting or innovative dressmaking features.  It’s just an ordinary white Tshirt and is not exciting at all.  But I decided to be kinda official about it this time… usually I lay down one of my existing Tshirts and trace around it but I’ve decided that I should do something about getting a proper pattern that is reproducable over and over.  In the 06/2011 Burdastyle magazine I noticed this Tshirt pattern 120 immediately and thought I would give it a whirl.  So traced out my size based on my measurements, cut it out, machine basted and tried it on (normal modus operandi for trying out a new pattern)  Was a bit surprised to find out I swam in it!  Look at the photograph; the model is hardly swimmming in her Tshirt now, is she?  In fact it looks like a remarkably well-fitting garment, so what is going on here?  Here below are my pattern pieces; the black lines are the stipulated stitching lines and the red lines are my adjusted stitching lines in order for me to get a garment that looks like the one in the picture.  Only the shoulder seams remain unaltered…  ridiculous, no?  

I also noticed that the pattern calls for an invisible zip closure in a centre back seam and for front and back neck facings. Personally I think that is overkill for a Tshirt.  Invisible zips?  Facings?  I think not.  Instead I opted to cut the back in one piece on a centre fold and cut bands to finish the sleeve and neck-hole edges.  This is a very nice finish I learnt it by studying some of my Metalicus tops to see how they finish some of their knit edges, so I think of it in my head as “the Metalicus finish”.  I think it is a beautifully clean and easy finish.  It uses the self-fabric so blends in nicely with the garment and doesn’t require you to find matching ribbing or to own an expensive coverstitch machine.  You just cut a band to fit (or a little bit smaller), sew it into a ring and fold in half along its length, then serge the raw edges together with the raw sleeve and neckline edges in one seam, like so.  I like this finish for a Tshirt.  For the lower hem I just overlocked the raw edge, pressed under by about 4cm and hand slipstitched into place.  This is a flatter and smoother finish than the Metalicus band method, so works well for the lower hem where I wanted less bulk.
I also altered the neckline of the pattern, cutting a deeper and wider curve, and lengthened the sleeves to elbow length.  Hehe, I guess it is not even the same top now, is it?  
So, since I haven’t really used the pattern as intended I won’t write a pattern review, but will save that for a time when I actually check out the pattern properly!

Details:
Tshirt; kinda my own design, using Burdastyle 06/2011, 120 as a starting point, white knit stuff
Dress; the gathered hole dress drafted from Pattern Magic by Tomoko Nakamichi, grey wool mix, details here
Leggings; my own design, beige knit stuff, details here, and my tutorial for making your own custom fit leggings pattern here
Hand warmers; knitted by me using Morris 4 ply wool in Imperial Blue, details and my pattern here
Boots; Andrea and Joen from Uggies in Dunsborough (now Eco boutique)

pinterestmail

Unique Clothes, top “p”

A new top; this one is top “p” from the Japanese pattern book Unique Clothes Any Way You Like, by Natsuno Hiraiwa.  I was intrigued by and loved the look of this little thing from the first, and always knew I would get around to making one up.  I love how when you see it from the front you are just like… oh, an ordinary little top, it’s OK but not breaking any ground here; but from the back, wooo, what is happening with that top?  Is it a wrap, is it a shawl or is it a top?  As is usual with the delightfully unpredictable nature of Japanese designs, one isn’t quite sure.
I finally got brave enough to use some of the fabric I bought from Tessuti’s in Melbourne nearly a year ago (!), a piece of milk-chocolate coloured heavy-ish silk that has a quietly textured matte surface, and blessedly no right side, making it ideal for this project.  It is completely divine against the skin; soft, slippery and drape-y, so naturally a real *&%# to work with.    Out of the three pieces I bought in Tessuti’s this is the first to be made up.  So if you hadn’t worked it out, I have to confess right here to being pretty overwhelmed by those fabrics; I know that is pretty silly and illogical, but you know when you’ve bought something really special the likelihood making a big ugly expensive mistake looms a heck of a lot more menacingly…   Well, it’s not like I can just pop back to the store to get a bit more now, is it?  Hmmm, whole different kettle of fish when you’re two thousand miles away, right?  And fabric from Tessuti’s is not cheap even to start with… I think you can grasp at the foundations behind my trepidation here now.  But I think my new top is a success.
The design is a simple concept once you’ve seen it laid out flat like below; the back when worn has one twist in it, and the two fronts are attached one positioned up the other the down, and the back piece has the armholes; one up and one down.  So clever, no?
The top is not difficult to make, the only proviso is that care must be taken with the finishing.  Since the hemlines are sometimes inside sometimes outside the finishes are visible and so have to be done well.  Hence, the side and shoulder seams are flat felled, and the lower/upper hems are finished with a self bias strip and hand-stitched down to the other side.  So the bias strip ends up half on the inside and half on the outside and switches from one to the other halfway along the hemline.  Hmmm, if you’re not understanding well it’s kinda hard to explain.  But nowhere near as hard as it was getting those silk bias strips stitched down neatly in an even width hemline… whew.  This fabric is soft and drapey, but it has quite a springy robust nature and was not the slightest bit obedient.
I need get out some nice easy cotton or linen next I think…

Details:
Top; top “p” from the Japanese pattern book Unique Clothes Any Way You Like by Natsuno Hiraiwa, made of brown silk
Shirt; my own design, a mix of patterns, black cotton, details here
Jeans; Burda 7863, khaki stretch gabardine, details and my review of this pattern here
Boots; Andrea and Joen, from Uggies in Dunsborough (now renamed Boutique Eco)

pinterestmail

Ivory blouse

I finished a new blouse.
This is a project that took me far longer than it should have, actually.  Been working on it for a few weeks! and that is not like me…  I had it nearly finished, and then toddled off to get buttons.  Got completely distracted by a sale on at Spotlight and the dye selection and, you guessed it, came home with a heap of new dyes and some other odds and sods, as you do, but no buttons… then it was a while before I could get back to the fabric store, blah blah blah.  Then I went off it for a bit, thinking it was awfully boring and uninspiring, and it came thisclose to getting dip-dyed on the weekend, but then I came to my senses.  I think I will be glad I kept it snowy white.  Everyone could use an ivory shirt in their collection, right?  And now my husband’s white linen shirt will finally be safe from my clutches…
The fabric is a light slightly fluffy brushed cotton, and I used pattern 102 from Burdastyle magazine 10/2010.  I have used this pattern partially before to make my black blouse, so I know it to be quite nice; billowy but still slightly mannish.  I do like that in a ladies’ shirt.
Because the fabric is slightly sheer I finished all the seams with French seaming, except for the armholes which were just overlocked.  I curved the top edge of the sleeve cuff and put on two buttons and buttonholes, one perpendicular to the other for a little touch of something interesting.  I did this because the sleeve cuff dimensions provided by the pattern are overly generous and I found them to be too long.  So rather than clipping them off to the right length I just kept them long and put in this double offset buttonhole feature for fun.

Details:
Blouse; Burdastyle magazine 10/2010, 102, ivory brushed cotton
Jeans; Burda 7863, khaki stretch gabardine, details here
Boots; Andrea and Joen, from Uggies in Dunsborough

Pattern Description:
Loose-fitting button-up blouse with two piece sleeves, cuffs, collar stand and collar
Pattern Sizing:
36-44, I made a straight 38
Did it look like the photo/drawing on the pattern envelope once you had finished sewing it?
I left off the breast pockets, but otherwise yes
Were the instructions easy to follow?
If you have made up a tailored shirt before, then yes.  For a beginner I would recommend getting a pattern with step by step illustrations, like one of the big 4 for example, for a first go at a tailored shirt.
What did you particularly like or dislike about the pattern?
I love the big blouse-y shape of this blouse!  If I was making it up again, I don’t know if I would bother with the two piece sleeves but instead go with a one piece sleeve with a slit and a separate placket piece for the vent, a procedure I am more familiar with.  And these sleeves are so loose-fitting that it doesn’t seem worth the effort of that little bit of shaping you get with having the two pieces.
Fabric Used:
lightweight, slightly fluffy, brushed cotton blend
Pattern alterations or any design changes you made:
I left off the breast pockets.
The method for putting together the front facing and collar stand was inefficient in my opinion, so I did it instead by turning the facing to the outside around the collar stand and sewing it in one seam, then turning the facing to the inside.  This not only means less fiddling about with slipstitching the collar stand seam allowance under, but also means the collar stand seam allowances are down inside the facing and not up inside the collar stand itself, meaning less bulk.  The usual issue of all those bulky seam allowances inside the collar stand are a slight pet peeve of mine, and I thought having a front self facing that branches up into the shoulder seam is a great solution to this small problem…
I also altered the button placement.
The pattern stipulates one yoke piece; I cut two and enclosed the seam allowances of the back piece and shoulder edges of the front pieces between the two yoke pieces.  A double thickness yoke is more stable too.
The cuff dimensions are generous and I found them to be too long; but I kept the extra length, curved off the top edge and just had two buttonholes and two buttons, for an interesting little feature.
Would you sew it again? Would you recommend it to others?
Probably I will sew this again sometime, and yes, I do recommend this to others!
Conclusion:
Nicely blouse-y and feminine, but still with a slightly tailored and mannish air about it, so I am pretty happy with the look of this lovely and flattering pattern.  I think I will get a tonne of wear out of this!

pinterestmail
Switch to mobile version
↓