Tag Archives: Wardrobe Refashion

fractal

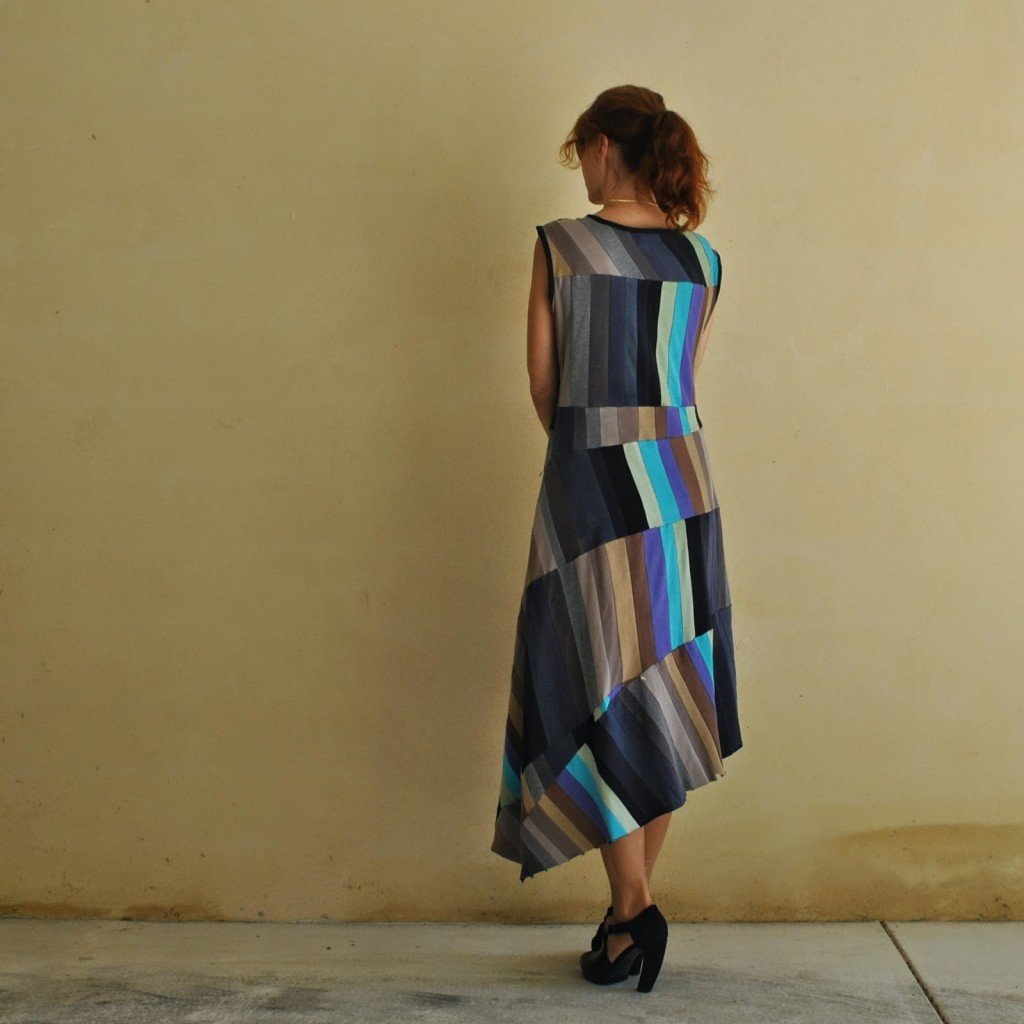
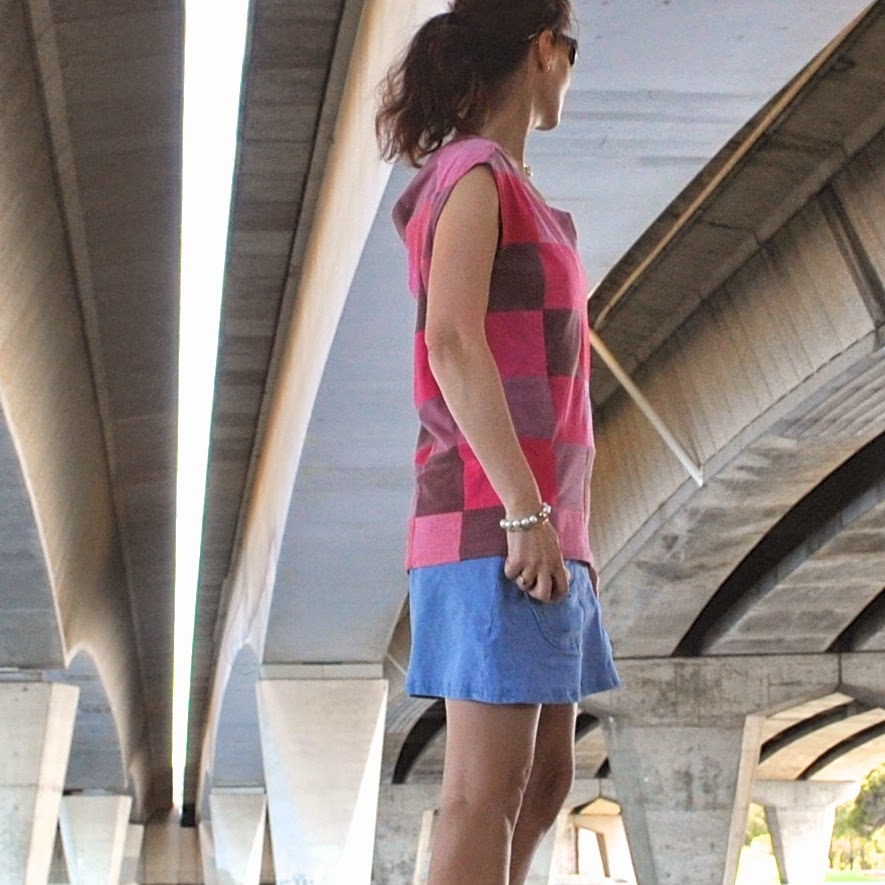
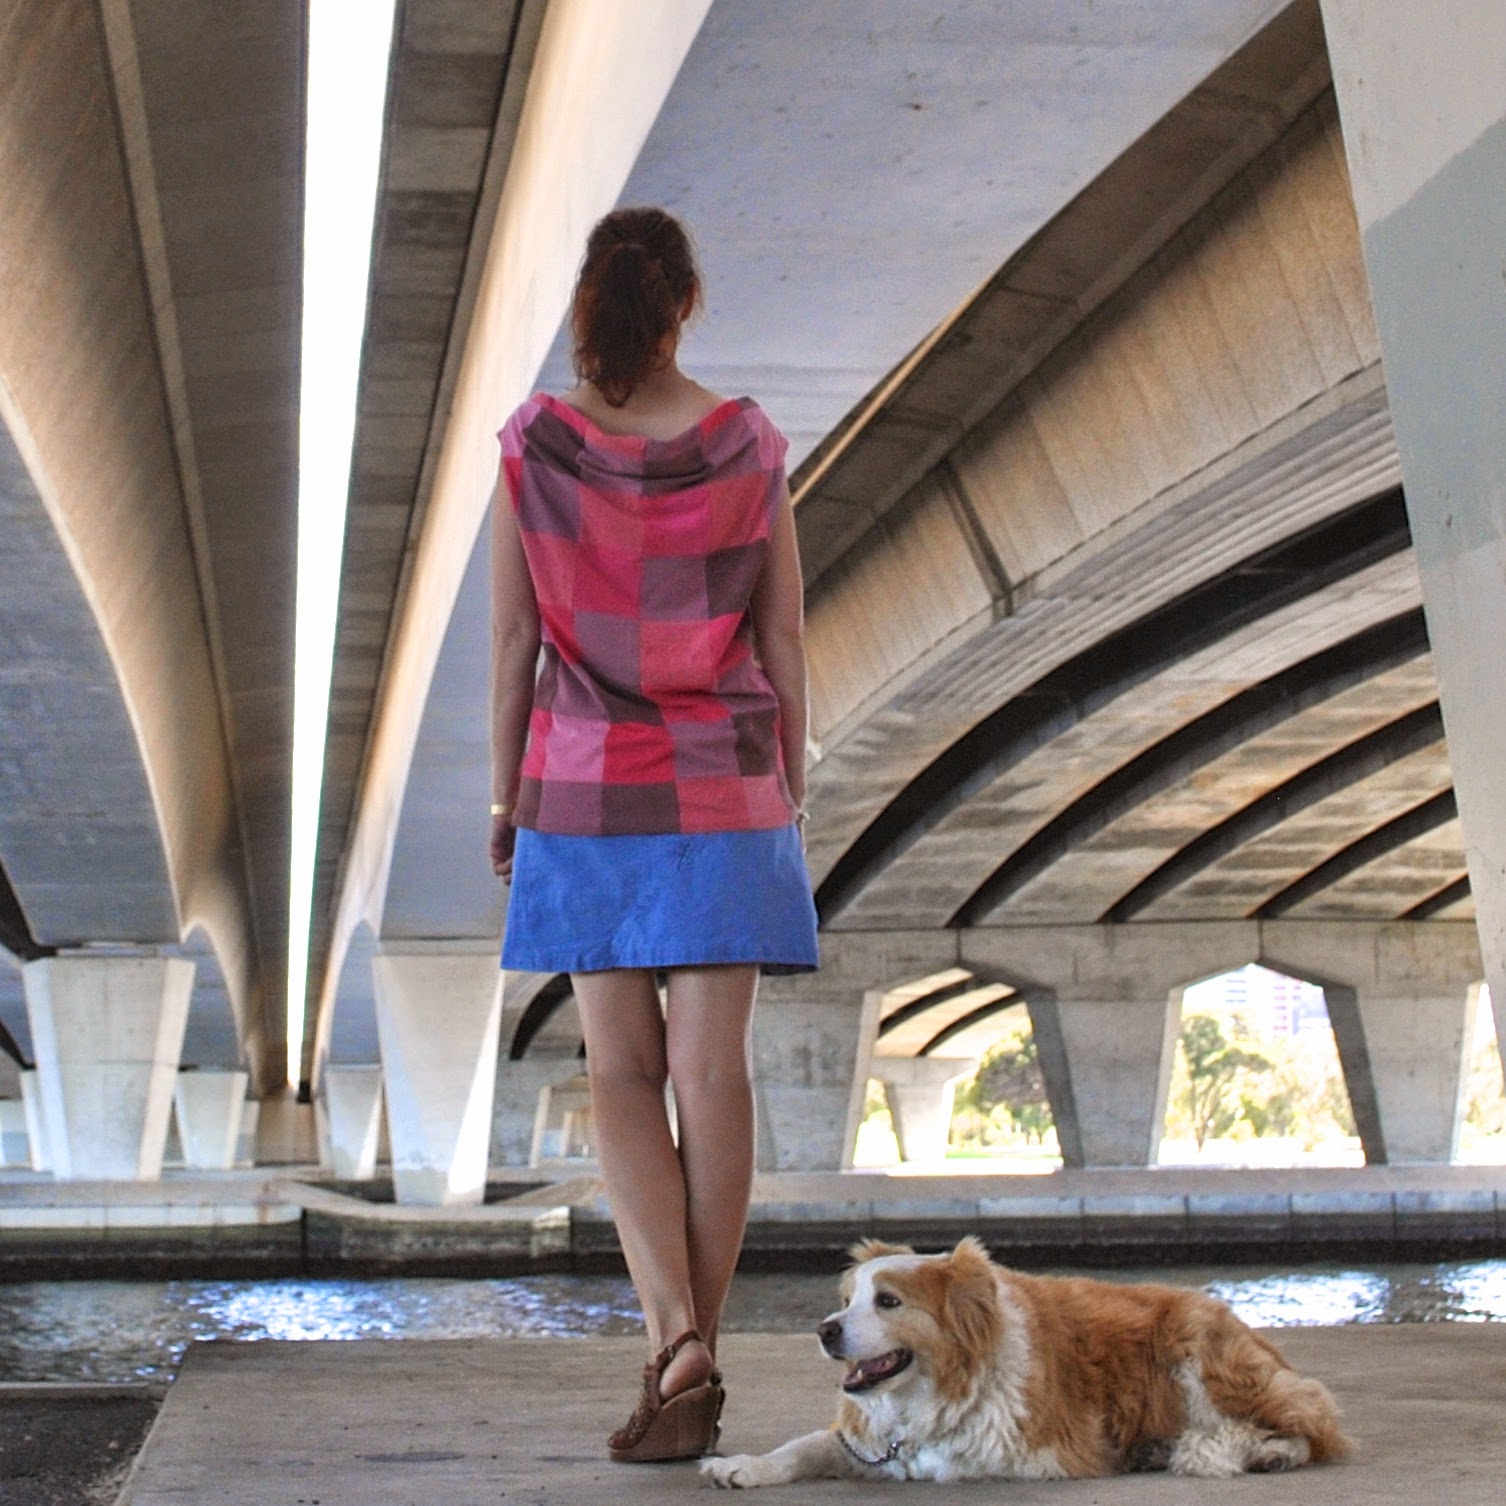
I’ve made a weird patched dress using twelve old Tshirts of my boys’.  I know it’s bizarre and crazy and probably a little bit ugly but I totally love it!
I’m constantly pinning patchwork-y and randomly asymmetric things.  I’m actually very inspired by and crave to wear stuff like this A LOT in reality, even though I also make and wear a lot of plain things.  I think I have a very non-cohesive brain, wardrobe-wise.  It plods along all plain and quiet and unobtrusive for a while, “fitting in” with the norm *yawn* and then will suddenly have the urge to zoom off into arty, thrown-together-land.  Making something kinda weird and wild like this makes me feel quite exhilarated; sorta free and unconstrained and satisfied and happy.  I don’t think I act upon this often enough.  Clearly, I need a little more such craziness in my life!
Anyway, the new dress.  I was inspired by this dress credited to Jurgen Lehl.    
I used one of my oldies, Vogue 7795 with some adjustments; namely with the front bodice tucks and back bodice darts removed and the waterfall skirt drape transformed into an asymmetric box pleat.  Also I made the back bodice and back skirt as one piece each, with the CB seam removed from both.  In my memory this is a very drop waisted design, so I also shortened the bodice pieces by about 4cm.

I’ve made this pattern up a couple of times before; both many years ago, my first version in white swiss dotted voile is pictured here looking tres touristy with a gelato and at the Fontana di Trevi in Rome, and my second version was pink, although I can’t find any pictures of that one.

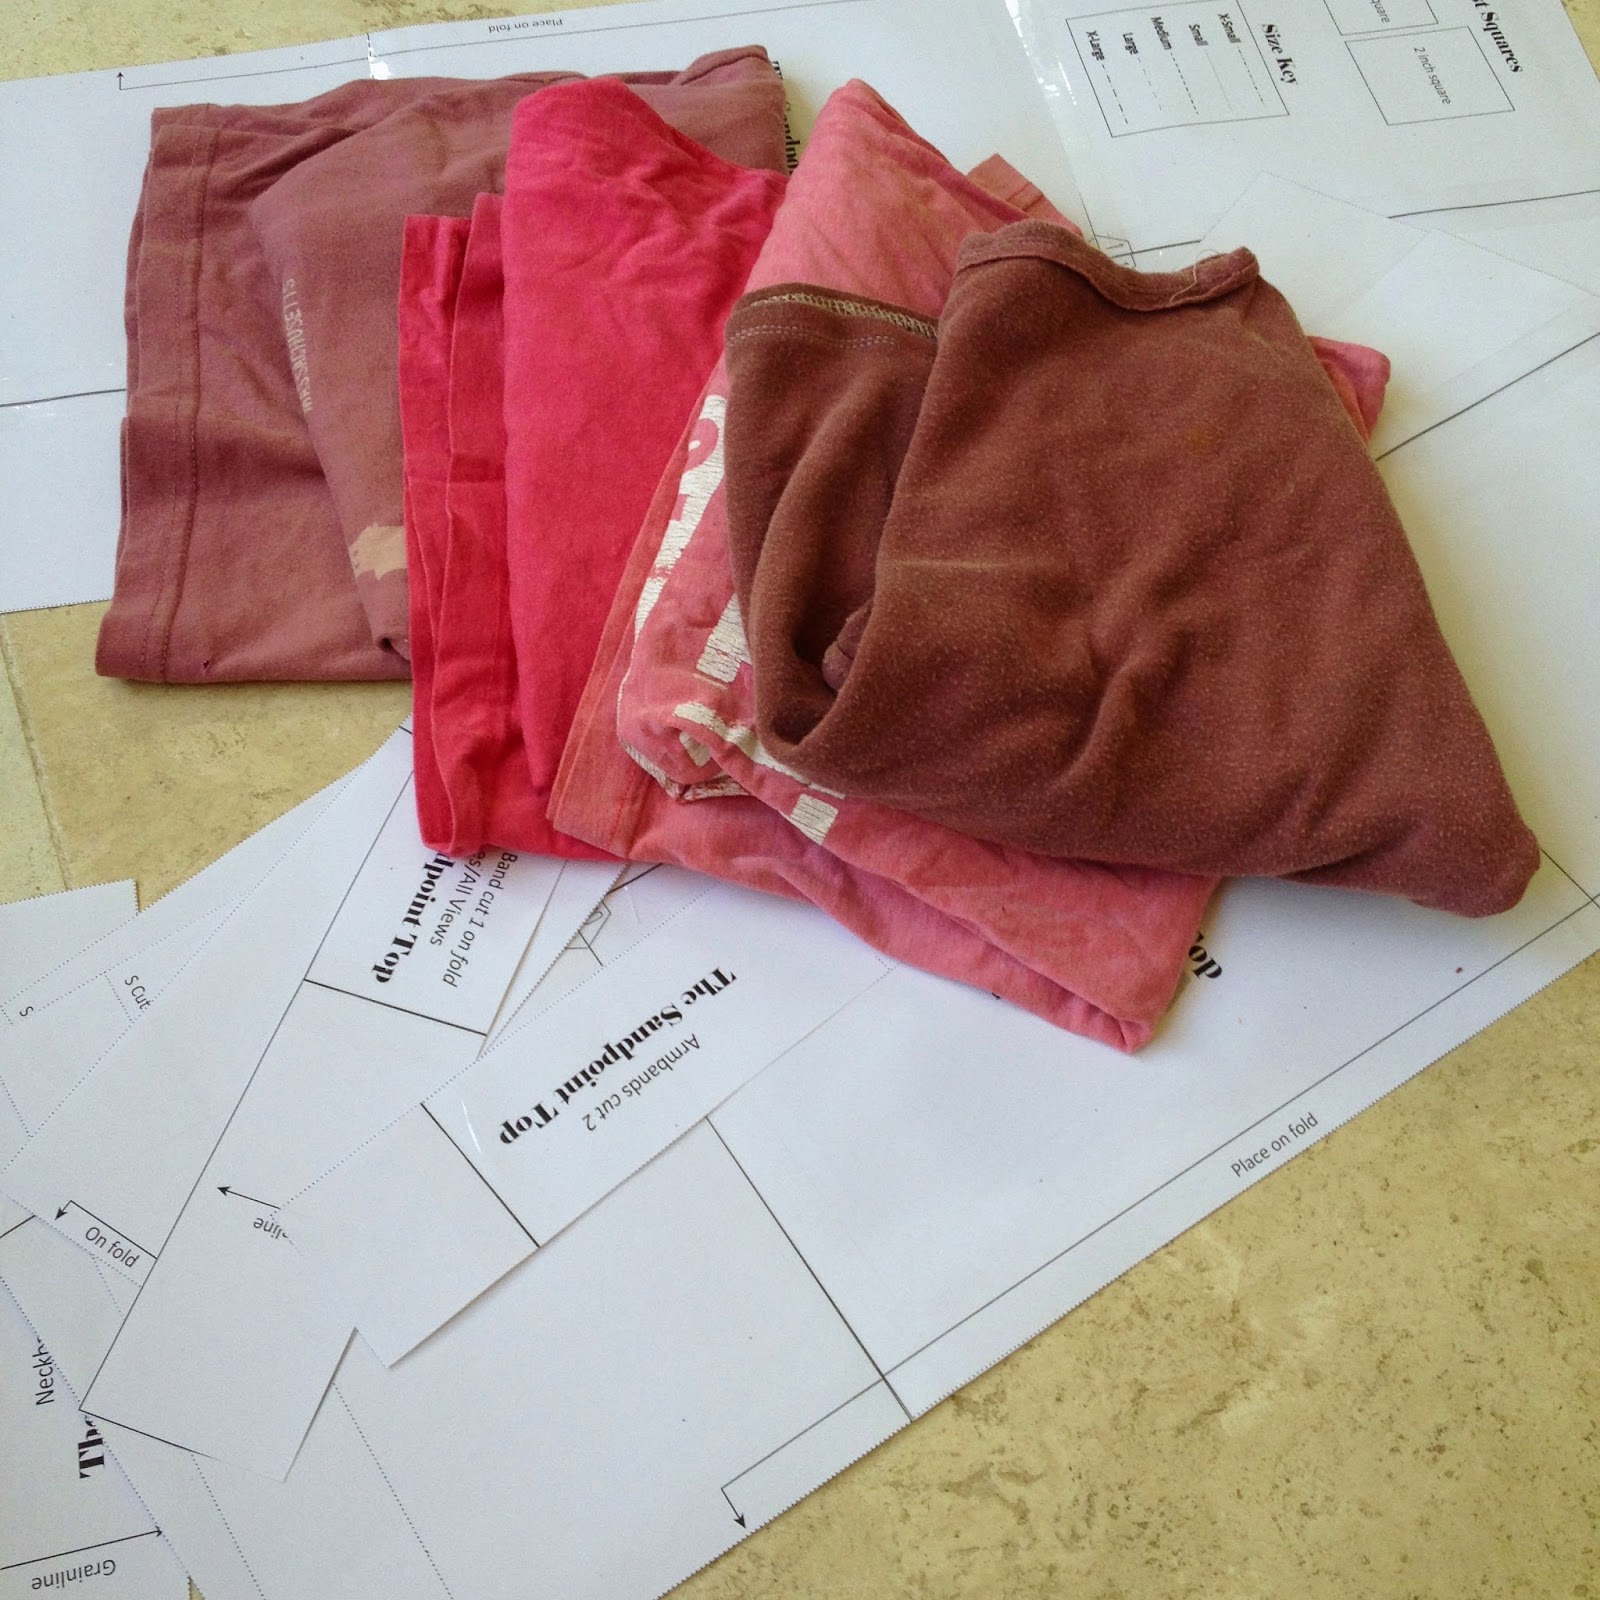
When you’re making a large scale, randomly patchworked design like this one, I’ve found it’s a good idea to draw out the adjusted pieces full scale and lay them out as a guide for the patchworking.  That way, you can see how the design is looking on the scale of the dress as the piecing progresses.

I selected twelve Tshirts, all old, some very old, cast-offs from my boys.  This is one of the things I love the most about it actually, in that I am so familiar with each and every one of these shirts, having watched my boys run around playing in them a zillion times, also of course I’ve washed them all, hung them on the line, folded them and tucked them away into their dressers about a zillion times each also.  
A sentimental dress then, in a way  ðŸ™‚

There’s also one “new” fabric, harvested from a recent Absolute Fail… *sad face* IG’ed here.  
I cut all the fabric into varied width strips and then just got creative.  

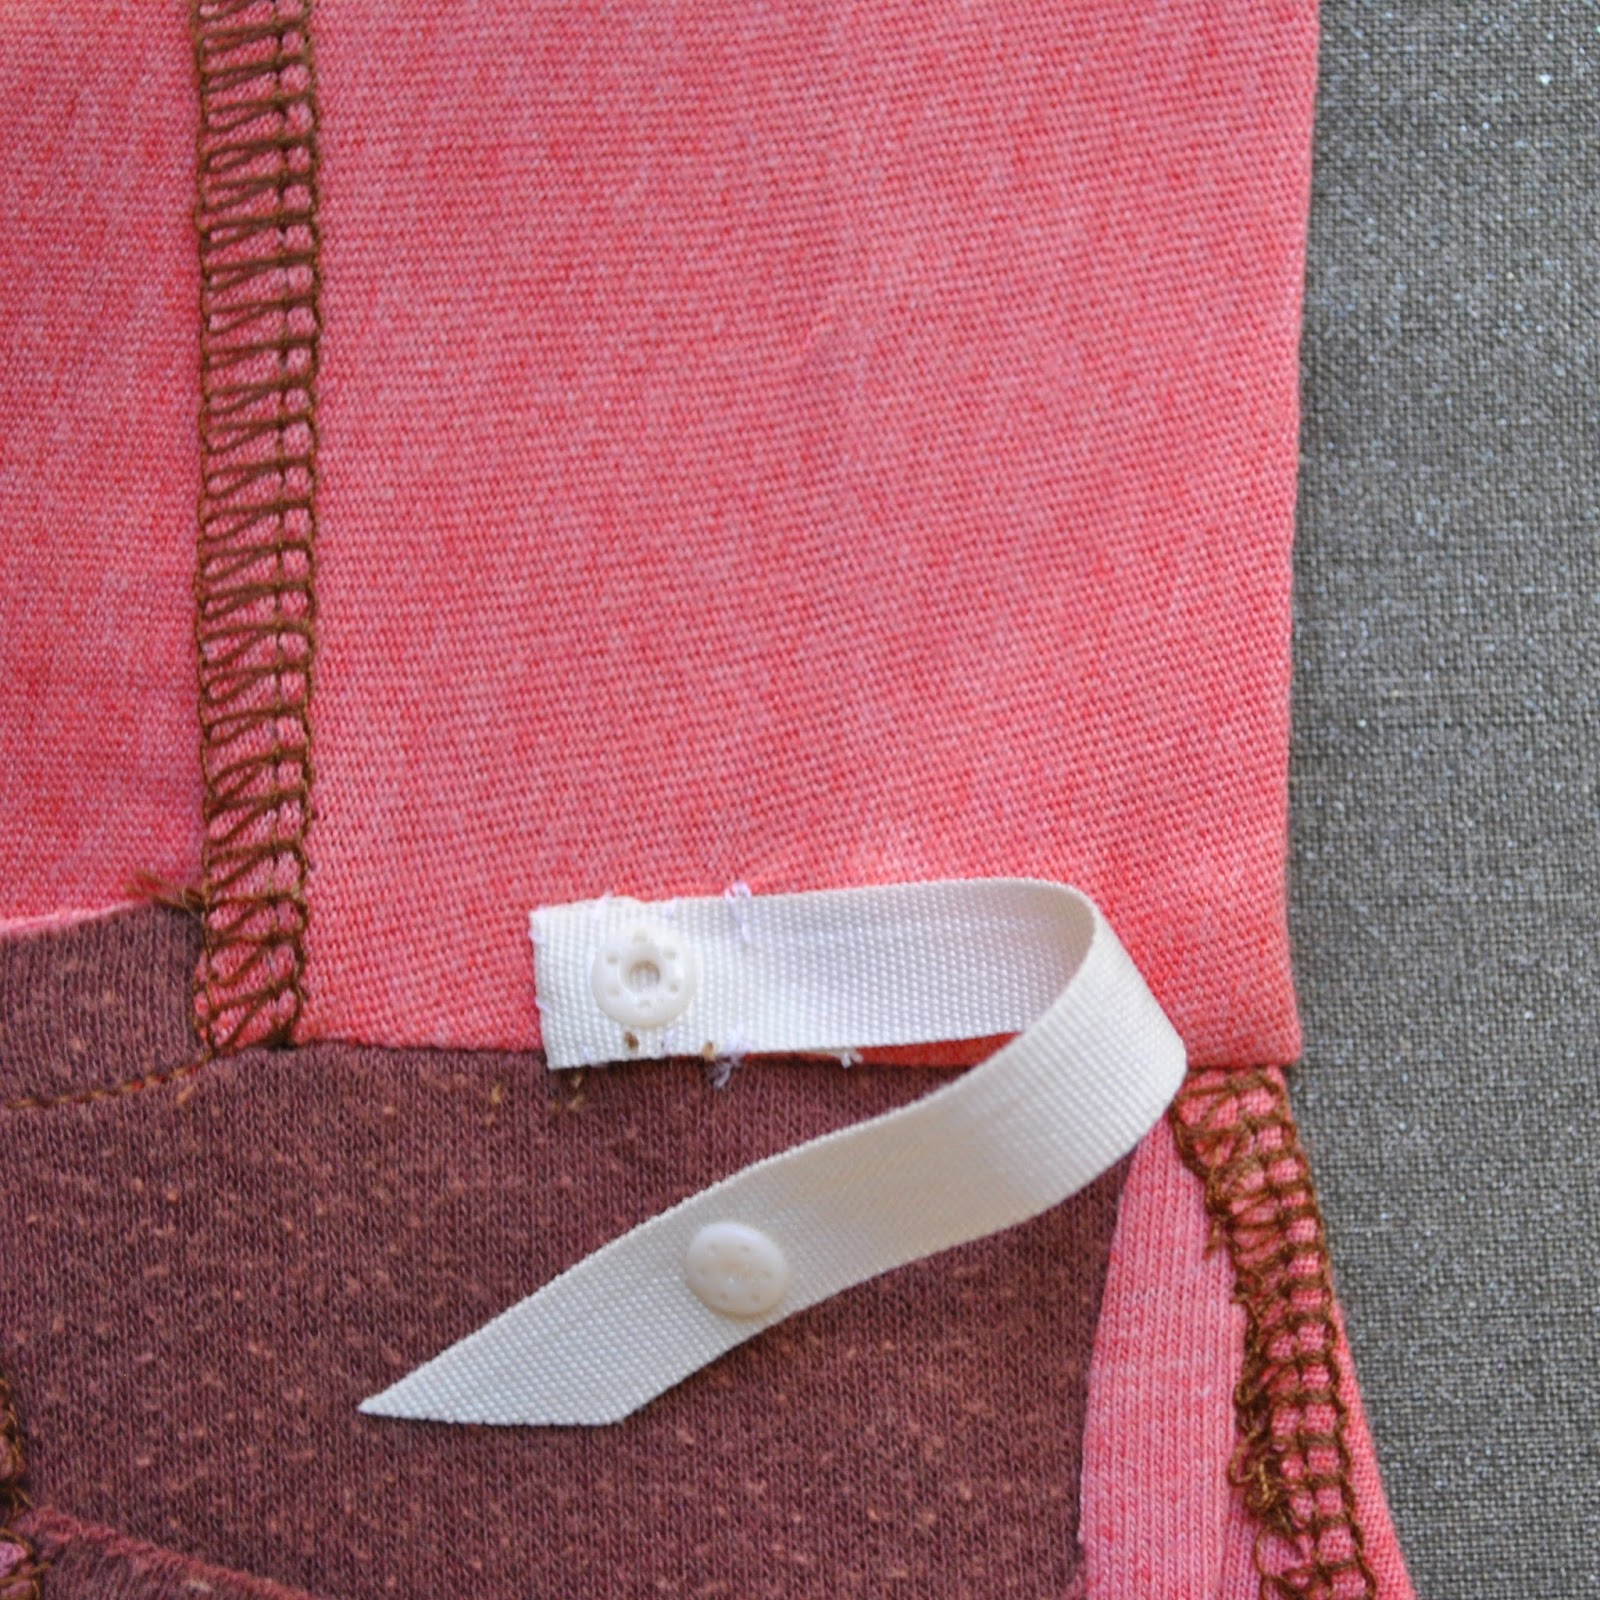
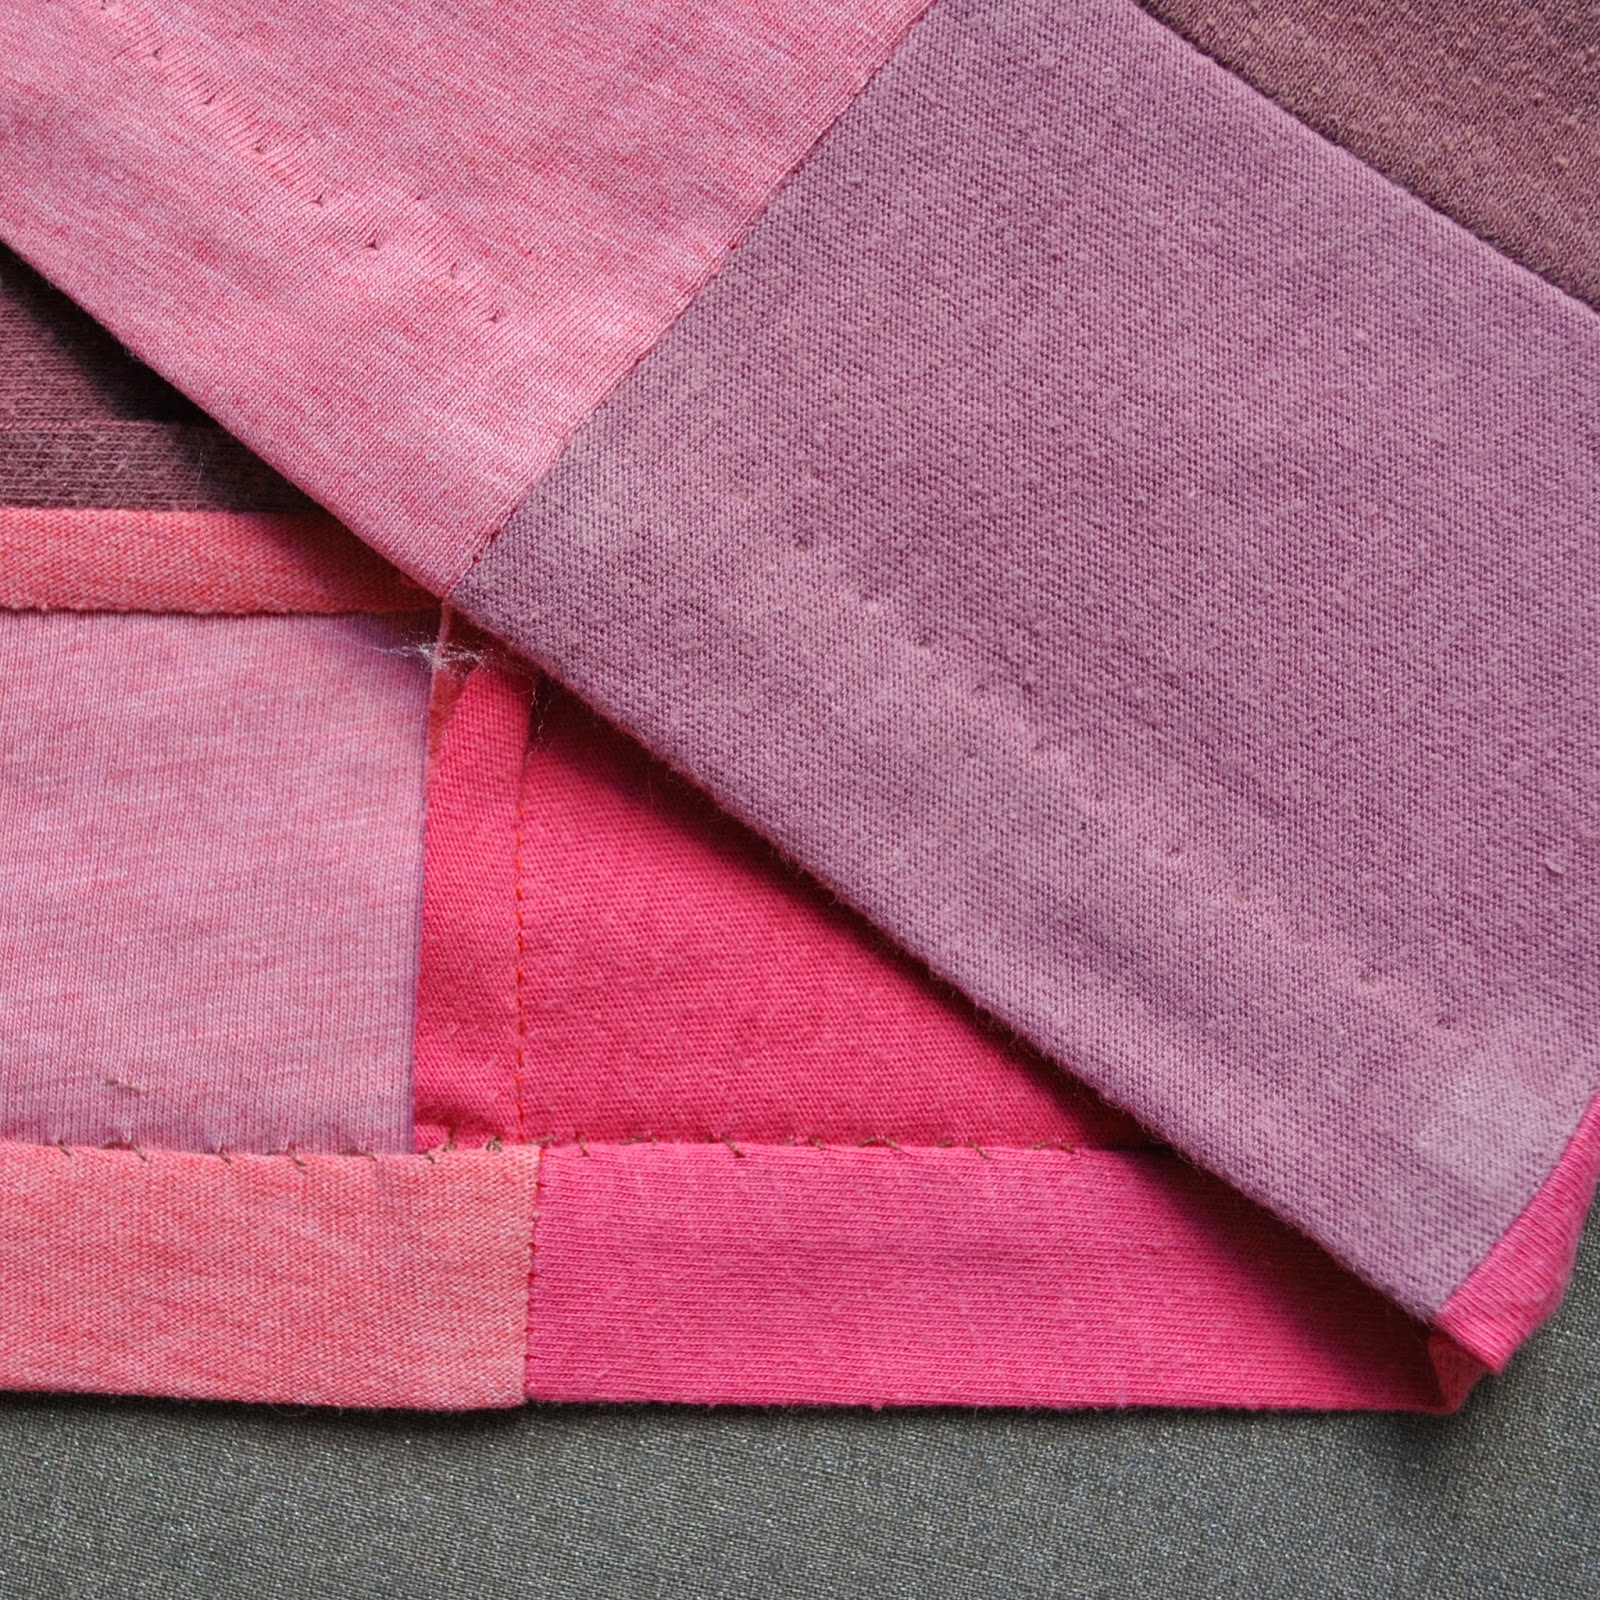
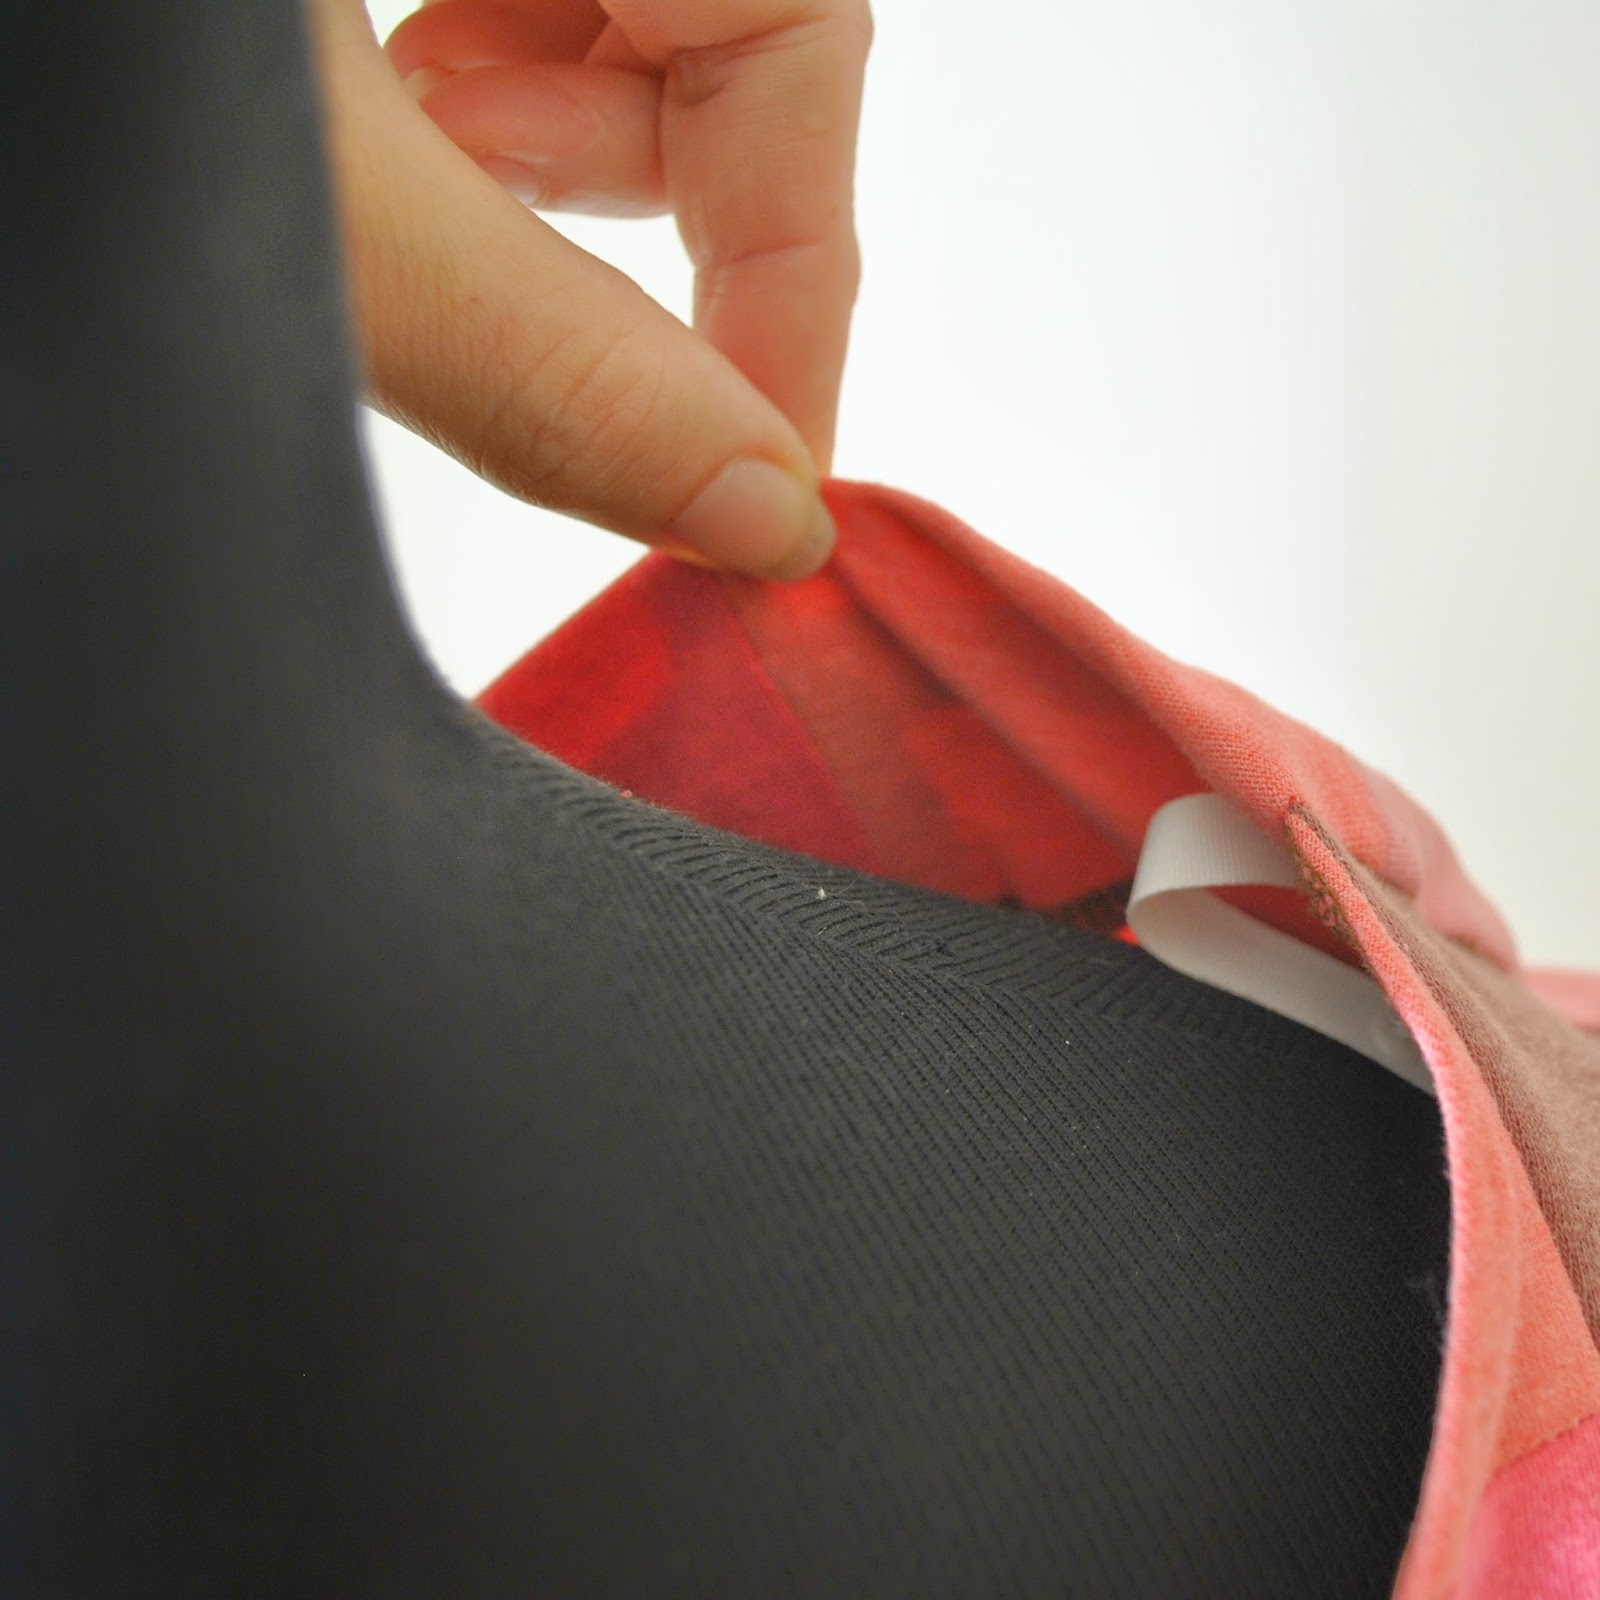
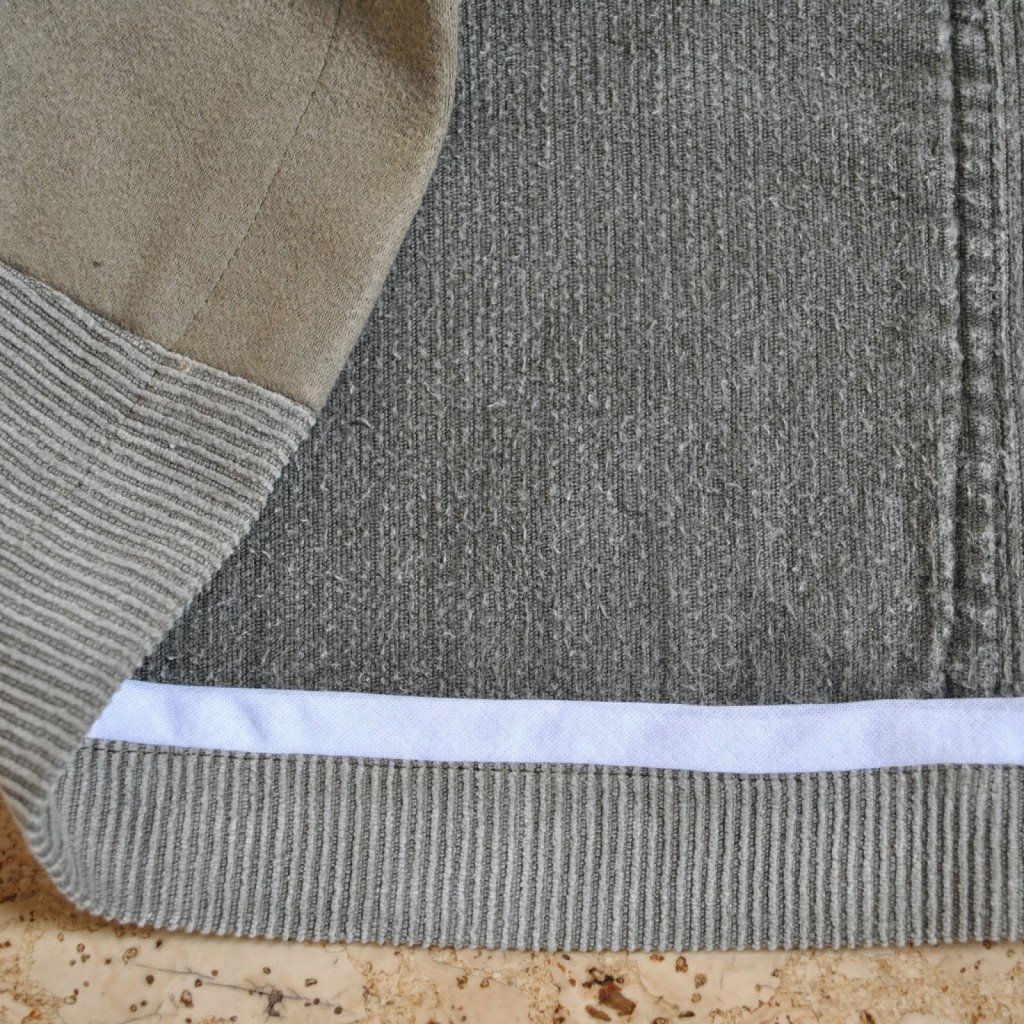
In a super random design like this one it’s good to install some order to the thing somewhere, and in this case I stuck to the same order in the colour arrangement.   I finished the neckline and armscyes as simply as possible with strips of black Tshirt, stitched on right sides together, then folded to the inside and topstitched.

So, my dress is fulfilling several intentions; firstly to satisfy that creative urge, and my desire for a bit more crazy in my life as outlined above.  Tick!
Secondly, I made it as a kind of a muslin for another project that I’m planning right now.  Then I had the patching idea, was distracted and got  a bit carried away.  I may or may not go ahead with that original plan, but I’m very happy with this particular result! I’m pleased to say  ðŸ™‚

And lastly, I recently received an email from Charlotte regarding the sew solidarity challenge run by the charity TRAID.  Essentially it’s this: to commemorate the Rana Plaza garment factory collapse you select an old, not new! mass-produced garment, possibly from Bangladesh although I didn’t restrict my options country-of-origin-wise, re-fashion it fit for a new life and then you’re supposed to wear it on 24th April.  Last year I joined in the same-aimed Fashion Revolution movement by wearing my self-made clothes inside out.  Theoretically this year I could do either of these commemorative activities… option 1, wear this dress as per the Sew Solidarity challenge; option 2, like last year wear something else I’ve made inside out as per the Fashion revolution challenge; OR option 3, combine the two challenges and wear this dress inside out.  The only problem with option 3 is that I’m pretty sure my insides might be kinda too ugly for me to get away with this in my very conservative suburb!  The insides are a gridlock of overlocked seams, and because I used some fabric pieces wrong side out, the prints are then on the inside of the dress; so it’s a bit of an unholy mess in there.  But I guess the option is there, should I choose to look irredeemably ridiculous.

Details:
Dress; modified Vogue 7795, made from old Tshirts
Shoes; Zomp, from Zomp shoe boutique

pinterestmail

patchwork Sandpoint top

I’ve made a new top.  Well, kinda new from old actually, since it’s made from 4 old Tshirts cut up and patched together.  My refashioning bag yielded; a light purply-brown from Craig, two pinks from Tim, and a chocolate-y one which is one of my old self-made Tshirts.  They were all old and a tad tatty here and there but still had some good bits left in them.  And I liked these yummy Cherry Ripe colours together.   mm-mmmmm  ðŸ™‚

The pattern is the Sandpoint top designed by Helena of GreyDay patterns.  Mel of the curious kiwi contacted me to ask me to make up the pattern and review it and well, I love trying out new patterns; so ta da!

The Sandpoint is described as “a loose fitting T-shirt
with a surprise cowl in the back”.  It is a nice little top pattern suitable for a beginner, having separate front pattern pieces for the two neckline options, V-neck and round neck.  I think it’s biggest point of difference from other similar designs is a “shoulder band”, essentially a strip which is supposed to be worn behind the neck.  I think its purpose is probably to keep the top actually up on your shoulders and not fall off, which is pretty much a given with these necklines.  However I wasn’t keen on the shoulder band and decided to leave it off, and sewed lingerie holders inside on the shoulder seams.  I have previously used lingerie holders to keep up the shoulders of my other oversized cowl, drape-y tops, here and here, and have found them to work just fine for the job.  Fortunately they do for this one too  ðŸ™‚

Because I wanted my rather bold patchworked fabric to speak for itself I decided that arm and neckline bands would be a visually distraction, fighting for attention.  So I left these off also and finished these edges by simply overlocking, turning under once and hand slip-stitching a hem in place.  My lower hem is likewise, invisibly hand stitched, and actually my top is 6.5cm longer than the pattern… for no real reason other than my patched-together fabric had the extra length, and who was I to ruthlessly cut it off? after all that careful cutting and patching it together!?  Plus, I just happen to like tops to be a little bit long.

Because I was leaving off the shoulder band, I put my top together quite differently from the instructions… namely: the instructions say to fold the back cowl allowance inside and then stitch the front and back together at the shoulders.  However this would result in a visible end-of-seam at the neck, which in the design is to be covered up by that shoulder band.  So, instead I pinned the front and the back together at the shoulders right sides together, then folded the back cowl facing allowance out to wrap around the front; then stitched the shoulder seam.  This way, when the shoulder seam is turned right side out the shoulder seam is nicely encased and hidden away within the facing, which gives a neat, more polished finish.

Details:
Top; Sandpoint by GreyDay patterns, made using 4 old cotton jersey Tshirts
Skirt; an adaption of Vogue 1247 and Vogue 8561, blue, slightly stretch denim, details here
Shoes; c/o Misano

pinterestmail

pink

I’ve rejigged these strawberry pink jeans into a skirt.  I made the jeans two years ago using an Au Bonheur des petites mains pattern courtesy of shams, thank you shams!  There’s lots of things I liked about the jeans; they were so comfortable and easy to wear, I loved the detailing on the pockets and seams but my little measuring stuff up re the positioning of the knee piece had always kinda bothered me whenever I happened to glance down and notice it.  So I hadn’t been wearing them, even though I lurrrve this delicious colour so much.

It’s pretty easy making a skirt from jeans, even avoiding like the plague those versions with the J-curve crotch portion of jeans top-stitched down on the front of a skirt and a big triangular insert plonked underneath.  No offence if you love that sort of thing, but I just do not.  I prefer for a skirt to look like a skirt.

I followed the same basic concept I did for my previous jeans to skirt refashion.  I cut out the offending knee patches and discarded them altogether; the 3D-ness of them made them too difficult to incorporate into a skirt, without looking uber-weird.  The front of the skirt is essentially straight from the hips down and the back has two flared sections in the centre lower part to give it a bit of a kick at the back.  And to enable me to stride in a brisk and purposeful manner, unfettered by a tight skirt.  
I like this shape, how the skirt appears very straight up and down from the front but has plenty of leg movement because of those flared bits. And I’m happy it’s got a new lease on life.  This colour!  It just screams spring, yes?  Yuuuum!

Details:
Top; from Pattern Magic 3, ivory cotton jersey, details here
Skirt; from au bonheur des petites mains jeans, strawberry cotton denim
Shoes; bensimon, from seed boutique

pinterestmail

Denim slides!

I’ve made some shoes!!!  This is my first foray into “proper” footwear.  Yeah, I made slippers recently, but I’m not counting those.  And technically these are slides, which are pretty basic things on the shoe scale, really.
But still.  They are real shoes!  Wooooooooooooooo!
ok, I’m sorry, calming down now.  I’m just a bit excited about them  🙂
So, for ages I’ve dreamt longingly about having a go at making my own shoes.  However cool stuff like shoe-making courses are just not on offer here in Perth.  Well that’s just that and it can’t be helped, but life is too short to not do stuff that you really want to do, right? so I just decided to GO FOR IT!  havva go, just DO it, whatever, even without a teacher or the tools or even the faintest idea of what I was doing.
The choice of denim; well every time, and I mean every time my friend J and I go out on girly shopping trips, as we head into our favourite shoe stores I say for the eleventy-billionth time; “ooh, I really would like a pair of denim- or denim-coloured shoes.”  I’ve often though they would be sooooo useful and would go with a lot of my wardrobe.  I mean, we all know denim jeans go with everything, right?  So, it stands to reason, denim shoes should go with everything too.  And; quick aside; honestly, why has that thought not occurred to shoe-makers yet?  Because so far my search for denim-y shoes has been one big, long, mournful FAIL.  It’s sad, but they are a non-existent beast.  Or should that be a pair of non-existent beasts, maybe?  I still wanted them though.
And now I have some!
Now; before I introduce my procedure for making these, obviously I am no expert and I have no idea what I’m doing.  I’m making it up as I go along with educated guesses, and I don’t have the proper equipment, like lasts or an industrial sewing machine.  I’m sure shoe-making experts would look at my efforts here and roll about, laughing helplessly at how awful they are.  It’s true, they are far from perfect.  Hopefully I can improve!

For the bases I used two balsa wood blocks from Bunnings; chosen mainly because I spotted them and it seemed like a good idea at the time.  I drew a template of each of my feet, overlaid/combined them to draw a single “master” template.  I used a coping saw to cut out the main chunks and get the right shape; and then three sheets of sandpaper to smooth and contour, ranging from super rough to light.  I used the roughest sandpaper to do most of the contouring for my foot pads and heel pads to sit in the base nice and snug and comfortable.
Shaping/contouring the wooden bases to be equal-sized and -shaped mirror images to each other and to fit my feet was the MOST time consuming part of the whole thing.  Really, ten progress photos slotted in here would be a fair and accurate representation of this step rather than just one; but that would be extremely boring, so just a few then…

I used an pair of old jeans for the denim.
I cut long strips for the side coverings, and topstitched the ends down using orange thread, to match the orange thread usually used in jeans topstitching.  Glued it in place using PVA exterior wood glue.  I chose this glue because it was not too quick-drying therefore easy to work with, and yet is still super hardwearing and durable and dries to a hard, water-resistant finish.  Not waterproof, mind you.  NOT that I’m planning to wear my shoes to slosh about in puddles or anything like that, aiyiyi perish the thought!
Clipped the curves etc, to minimise overlapping, so the edges would lie as flat as possible; and glued them down, upper and under.

Made a template for the top bits via the auditioning of a thousand “muslins”; well, not really, but it felt like it.  The winning design was cut so as to make a feature of the existing jeans’ side seam with the allowances double top-stitched down in that distinctive shade of Levi’s orange.  The tops are double layered; lined with plain denim, sewn right sides together then turned out and under-stitched.  The excess at the sides was trimmed to wrap right around underneath my foot then glued in place.

I made a padded insert by trimming a purchased foam shoe insert from Coles to fit, then stitching to a piece of denim around the edge using orange thread.  The ends were clipped, turned under and everything glued in place.

I covered the curved part of the sole with denim…

Finally, I cut thick rubber floor matting (Bunnings) to fit the soles using a stanley knife, and glued this in place.  This will be quite hard-wearing and will stand up to a lot of knocks, hopefully.

Making these was an interesting experiment, and a learning exercise in how not to do a few things.  Yes, a second pair of shoes is in the pipeline already.  My second pair will definitely be better, I think.  My first mistake; balsa wood does not hold nails, thus the need for lots of glue.  I’m definitely going for harder wood and nails in the future.
The big question for me is: am I going to dare to actually wear my shoes? outdoors? like, for a full day?  well today I almost did since I was meeting my same friend J for lunch, and I thought they went really nicely with my outfit… but then I chickened out!  Too many puddles around from the recent rain :S
Maybe I’ll just keep them exclusively for me-made May, haha!  😉
No, of course I’ll wear them, but it’s going to be hard to avoid babying them.  I’m ridiculously pleased with them.  Well so far, until I can make something better anyway!

pinterestmail

Dusting slippers

I’ve made something useful; slippers, that clean!
I pinned these mopping slippers a while ago, and have now got around to making my own.  See, we have no carpets in our house and lots of animals; meaning furry dust-bunnies appear on a daily basis to scurry and swirl across the floor like mini tumbleweeds across the desert.  Meaning I’m forever getting out my big floor dusting mop thing out from where it lives in the cupboard under the stairs and doing the sweep of the house.  Which is a chore.  Well, now I can do the same job just by performing graceful balletic sweeps with my dainty pointed toes into the corners of the room, as I glide about the house, doing whatever I’m already doing, without having to go and fetch the duster.  Hands-free.
Which is not a chore, but fun!
Well, that’s the theory, anyhow  🙂
Making them is a very simple procedure…

I bought a couple of  dusting pad refills; and also used some extra odds and sods from around the place; a thick cleaning sponge for padding so they are comfortable to walk around in on our hard floors, and an old towel for the straps and lining.  I also used a bit of an old bedsheet to “interface”, if you will; effectively it’s there to stabilise and hold all the lining and padding bits together.   The sponge I used for padding is actually a bit smaller than my feet but it still does provide a nice soft comfy padding when I’m walking around on them.  I already had these in my cleaning cupboard, which was lucky!  The sponge is very thick, so I cut it into three layers like you would a sponge cake.
I drew a template of my foot and cut out two generously sized versions out of the towelling and bedsheet lining, sandwiched a piece of the sponge between them and sewed the three layers together around the edge of the sponge.

Then cut the foot straps from the edges of the towelling, making use of the existing selvedge on one side and hemming the other edge.  Fitted it to my foot dimensions, making them nice and snug so they stay on my feet ok; but not so tight that I can’t slip my foot in easily in one go.

Finally cut the micro fibre dusting pad with a big fold over allowance all around the edges, and simply folded the edges over as I went along, top-stitching it down around the edge.

Dust bunnies; begone!
pinterestmail

a split-backed top

Once upon a time there was a shirt, a man’s shirt.  This shirt was superficially unremarkable, but was made out of a wonderful microfibre that had extraordinarily silk-like properties.  Soft, ripply, with a quietly glossy sheen, it felt wonderfully cool and smooth against the skin just like silk; but unlike silk it was as tough as guts.    It barely ever needed ironing, thus earning the everlasting approval of the laundry maid of the house. 
 After a few years of regular wear it was designated “old”, signalling the end of any special care in its laundering, from then on it just got tossed in the machine with jeans, whatever, no special cycle.  It soldiered on, looking just exactly as lusciously silky as it always had.  
The Indestructible Shirt.  Winning further admiration from the laundry maid, who alone in the household truly appreciated such a magical fabric … all the benefits of silk but without the maintenance… ! o-kaaaay!
After twenty years of use, its owner carelessly tossed it in the Salvoes bag, whereupon the laundry maid astutely retrieved it and planned a feminine new life for it, hehehehehe.

The End.
Well maybe more like a brand new beginning!

Technical bizzo…
The pattern is Vogue 8879, view B.  Funny thing; Spotlight had a $5 pattern sale last week, I bought um, 6 patterns *blush* call Patternaholics Anonymous; I need help!! anyway, I bought some of the more glamorous interesting and unusual designer Vogues that caught my eye, and then this funny unassuming little one too.  Guess which one was the one I was most excited to try out first.  Ha!
I love the split back; it’s quite elegant in my opinion, and just quietly sexy without being the least bit tarty.
The old shirt was completely cut it apart to make the new one,  and I modified the existing button band and sewn-on buttons to accommodate the split back.  The old front is now the back of the new shirt, and the old back is the new front.  The sleeves! it often astounds me how difficult it can be to cut a new thing from an old thing even if you think the old thing has masses of fabric; the sleeve pattern pieces barely fitted on the old sleeves, taking up the full length of the sleeve from the cuff to the armscye!  Amaaazing!
One new buttonhole was required at the very top, and the left breast pocket was picked off and repositioned it at a funky angle on the lower front of the top.  All the seams are flat felled to honour the original beautifully flat felled seams in the original shirt: although obviously none of the original seams remain after it was hacked apart I still felt compelled to try and reproduce those immaculate finishes in its new incarnation too.

Rather than the quirky but fabric-hungry twisted sleeve bands of the pattern, I made hidden, shaped facings for the lower edge of the sleeves instead and I finished the neck edge with a narrow bias cut strip; these were cut from a scrap of deep blue real silk, the leftovers from this top, and stitched, under-stitched then top-stitched.

One thing: the pattern stipulates two way stretch fabrics only; but I found that this view B is so loose and easy fitting that my decidedly non-stretchy microfibre version is absolutely fine to slip on over my head.  Don’t need to un-do even a single button.
So it’s got that going for it too!

Details:
Top; Vogue 8879 view B, blue microfibre, a refashioned mens’ shirt
Skirt; my own design based on Vogue 7303, white stretch lace, details here
Thongs; Havaianas

pinterestmail

Olive Frankenstein skirt

I am notoriously bad at tossing out old scraps of fabric. Particularly if I really really like the colour.  
And I really really like olive.
So; after finishing my patched pockets skirt I still had some promisingly largish pieces of grey-green corduroy and olive-green moleskin leftover, and I unearthed from my “useful scraps” bag the remains of a different pair of grey-green corduroy pants that both my boys had worn at the age of eight to ten or thereabouts.  Yeah, I keep stuff a long time.  The knee areas were a bit thin in them all but there was still some nice sturdy fabric to be had there.  And the colour!

oh ok I agree, doesn’t look very promising…

So I’ve made a little skirt; just a casual knock around kinda of a thing.  It is patched together from three different fabrics but it still looks quite plain I think since the colours are so similar to each other.  I’m pretty chuffed with it!  Of the pluses of working with old unwanted textiles; it’s green, it’s economical, you can sew to your heart’s content unfettered by fear of failure.  If you’re reworking with the constraints of an old garment it exercises the ol’ brain cells a bit.  And so a successful outcome feels like a mega bonus!

The boys’ old cords had kinda cool, oversized patch pockets on them that I’ve always liked and kept because I thought they might come in handy one day.  I used these pieces with the pockets still in situ.  Some of the leg fabric of these pants had previously gone into making the Green parliament, here.  I also added some oddly shaped patch pockets to the back of my new skirt too, just because the back was a bit boring-looking without them.

Technically speaking; I used the upper skirt pattern pieces of Vogue 1247 to cut the waist to hips part with the waist-shaping darts but the overall shape of my skirt is more A-line than the pattern.  This is pretty much my favourite “little skirt” silhouette at the moment.
I used an invisible zip in the back, an old button harvested from something else long forgotten, long ago, and plain white cotton to face the waistband,  I made a bias strip of the same plain white cotton to finish the lower raw edge, turned up the lower edge once and stitched in the ditch by machine to hem.  I reckon this is the best hemming method for thick fabric since bulk is minimised by only turning up once and a bias strip looks a lot neater and prettier than overlocking. Also if you are short on fabric you can still get a nice deep hem without losing length off the skirt. . 

Details:
Skirt; my own design based upon Vogue 1247, made from three old pairs of jeans
Shirt; my own design variations upon Burda 7767, deep olive linen, details here
Thongs; Mountain Designs

this picture just because it made me laugh… o well hello there!
pinterestmail

“Baseball” skirt and tee

This is just a bit of silliness really; remember I said I had some idiotic plans for my leftover off-white leatherette? well I just hopped straight into it.  This is a new skirt, leatherette with red stitching to delineate the seam lines, baseball-like.  Yeah I know, kinda weird; and I’m still wondering if I ruined the skirt with that stitching! but it’s just a bit of fun really.  I figure if I absolutely hate it down the track I can always pull out the baseball stitching  ðŸ™‚

I used this picture to help me

The pattern is Vogue 1170; my fourth iteration of this pattern.  I chose it because it had lots of seam lines! and I lengthened it as much as I possibly could given my small piece of leatherette.  Actually, this is a good skirt for a smallish odds and ends of fabric; surprisingly good considering its flippiness.  It’s only the two large front-and-back pieces that take up the most fabric; the smaller pieces can be cut out of edges and corners and other off-cuts.  I left off the pockets and fully lined the skirt with cream polyacetate lining fabric; and I cut the waistband a lot narrower and on a curve to follow the curve of the skirt top.  This resulted in a much better fitting waistband than the original straight one, imo.  Also, I’ve learnt my lesson from my previous leatherette skirt where I found the leatherette waist facing kinda icky worn against the skin; and cut the waistband facing in white linen.  Much nicer!

The stitching is in red silk thread, which I’ve had for years… er, 21 *blush* but who’s counting!  ðŸ˜€ a leftover from knotting Tim’s quilt; and a small portion in matching red topstitching thread, which I ended up having to buy new (grrr!) when I didn’t have just quite enough of the silk.  Don’t you hate that!!
I did the stitching in two passes, first time you do alternate halves of the “wings”, and the second pass you finish off the other side of each one.

And because a baseball skirt needs a baseball tee, I made one; just because  ðŸ™‚   I used two old Tshirts from my refashioning bag.

OK, I thought that this is what a baseball tee looks like; but imagine my disappointment when I googled images of baseball players to see that they actually don’t wear this sort of two-coloured raglan-sleeved tee at all! but instead have a big baggy short-sleeved top, sometimes with a close-fitting long-sleeve top underneath.  NO raglans to be seen.  Confused!   So; why is a tee like this known as a baseball Tshirt, when actually it is not?!  I would love to be enlightened.  Anyhoo; I made it from from my own custom pattern, using an old raglan sleeve tee to help get me started and then fiddling and fine-tuning to fit me.  The embroidered motif on the front of the blue Tshirt, I positioned on the back of the new Tshirt.  It was either that or cut it in half, and even though my new tee is a cobble-together job, doesn’t mean it has to look like one!

With the neckline binding; I cut strips from the sleeves of the cream tee and joined them to get one long enough to do the neckline.  And this time I cut the strips with a bias joining edge: you can just barely make out the join in this picture.  This gave such a vastly superior finish to my usual method of joining on a straight seam!  and I can’t believe it has taken me sooooo long to work out this might be a better thing to do.  Up until now I’ve used a straight joining seam, and the bulkiness of all the layers in that bit make for a slightly bubbly and bumpy bit at that spot on the neckline.  So I hide this by positioning it at the back of the neck somewhere; but if the seam is on the diagonal, like here, then there is less bulk and very little bump issues.  Don’t know why it’s taken this long for the lightbulb to go off, but better late than never  ðŸ™‚

Details:
Skirt; Vogue 1170 with minor modifications, off-white leatherette with red decorative top-stitching; my review of this pattern here and my tips for working with leatherette here
Tshirt; self-drafted, made from two old Tshirts
Shoes; Bronx, from Zomp shoes

pinterestmail
Switch to mobile version
↓