Category Archives: Uncategorized

I’ve been making a whole bunch of stuff…

Ok… stuff!   I just have to write this quick blog post or … I dunno, explode or something!  because right now I am the Red Queen, running as fast as I can just to stay in the same place… and if I don’t just get on with a thing right this very minute then will it ever ever get gone on with, at all?!  That is the question?  So, on with the stuff!

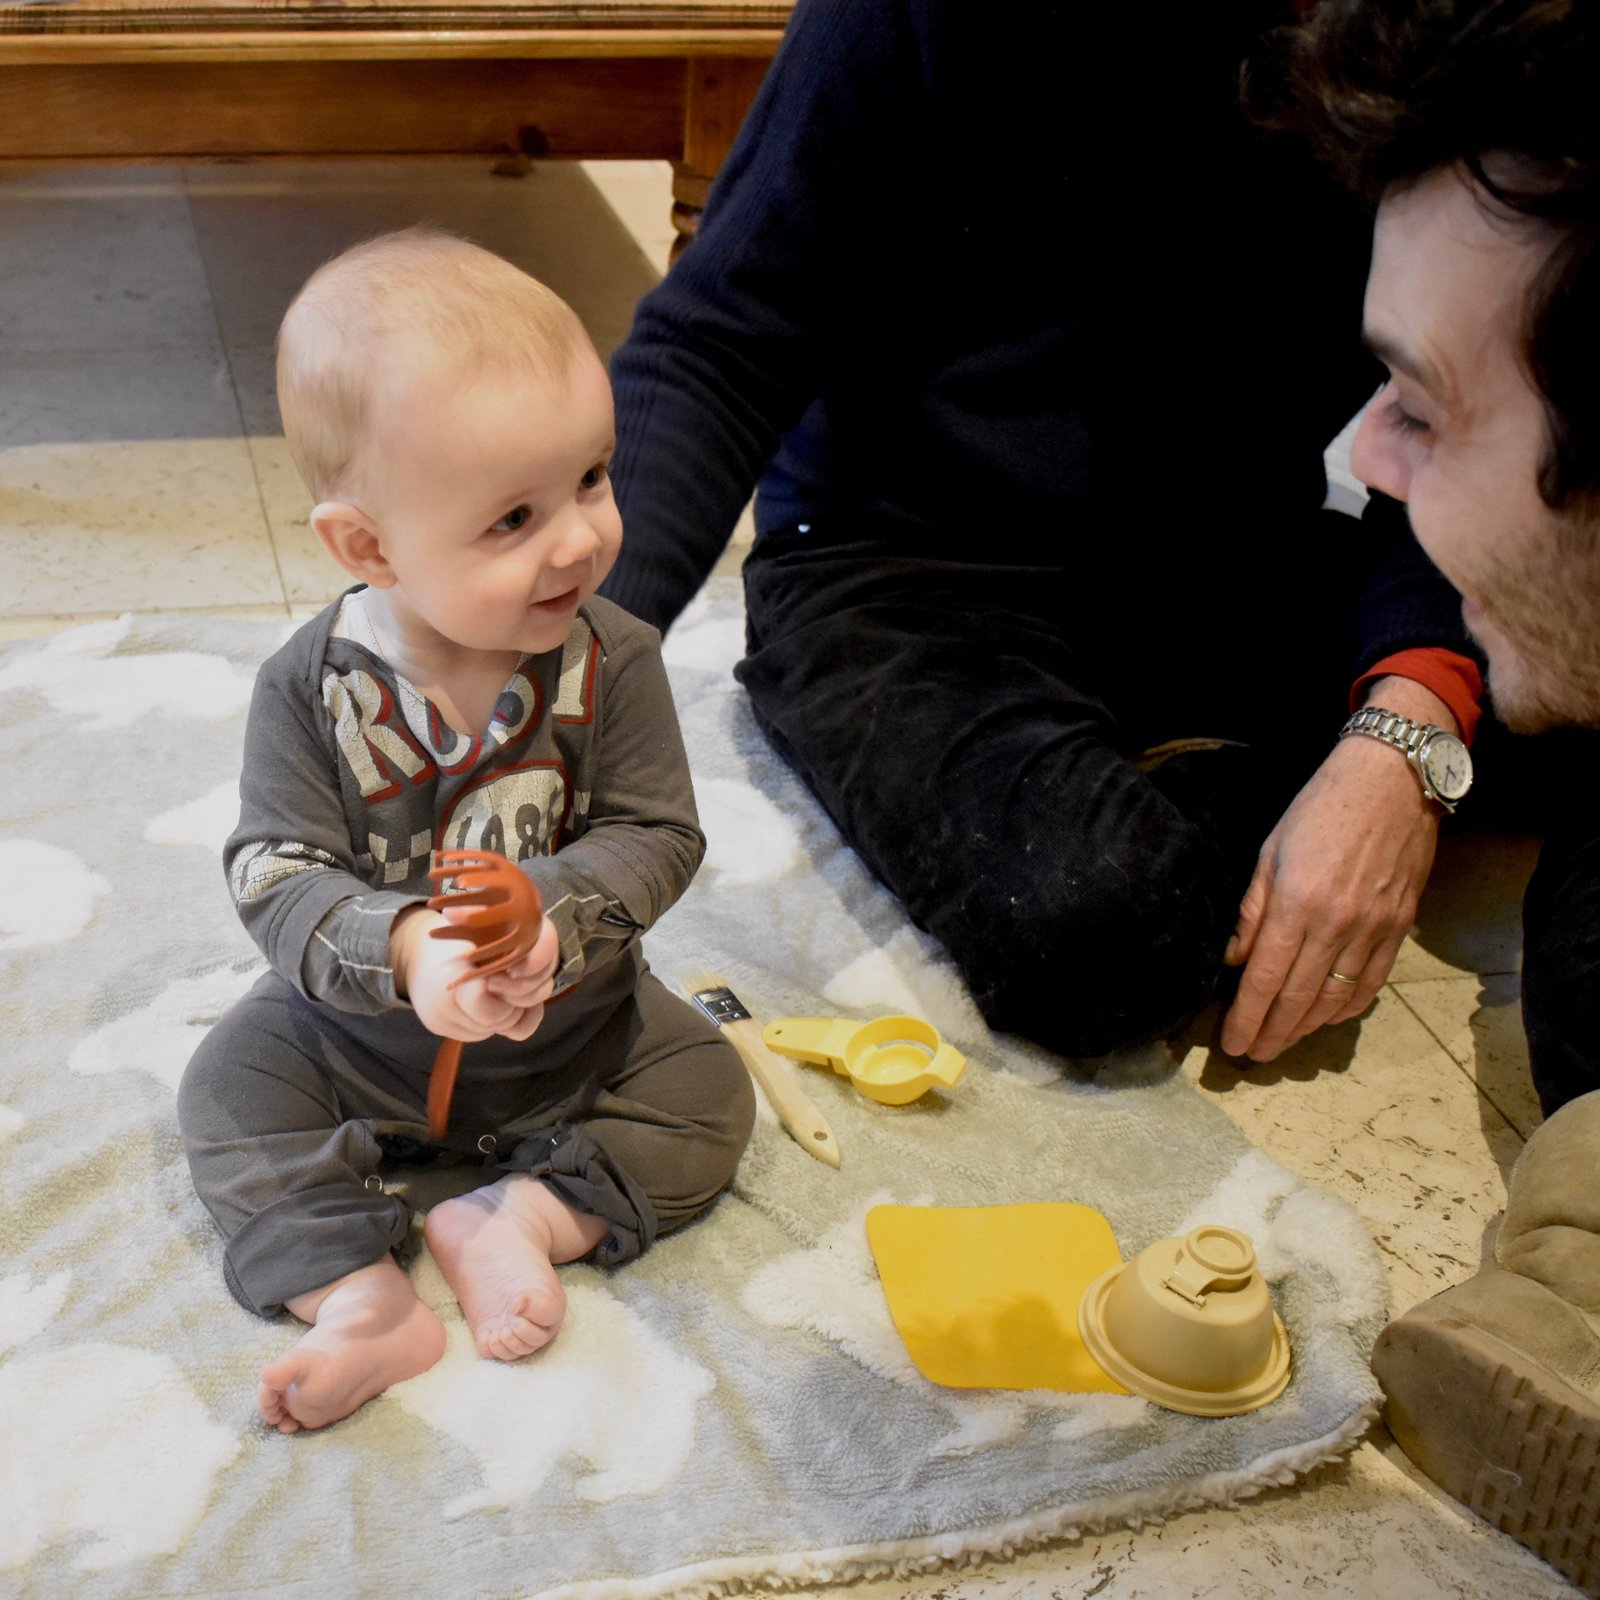
So, a while ago I’d written about how the Burda baby onesie pattern I’d been using for Arthur had proved itself to be too wide for the height of it? Like way too wide, fall off the shoulders wide, while the poppers at the crotch were straining to stay shut?  Well, I made a new pattern, and it’s super cute.  Of course it is!  When are tiny weeny baby clothes NOT cute, hmmm?  Exactly!

So above is the first one… yellow striped cotton jersey from Spotlight stores…  At the same time that we got this fabric, we also bought some lengths for bunny rugs for the baby.  When I say “we” by the way, that is NOT the royal we, although I am indeed in the thick of watching the Crown at present and as such am become quite proficient in such conversational niceties…  no, actually Cassie and I went to Spotlight together and selected fabrics for the new baby’s, new nursery.

I had also previously bought some white cotton jersey, to make a maternity frock for Cassie.

She’d sort of semi-designed what she wanted in the dress, a tank dress, with the tank front able to be lifted up for breast-feeding, layered over a sort of boob tube with an elasticated top edge underneath.  The skirt is a quarter circle skirt. It’s a pretty simple design and style, and she loves it!

Side note: I’ve had to look at the messy lower half of this dresser for years.  It took putting the house on the market for me to finally do something about making this a wee bit prettier to the casual observer.  Voila!!  A sweet lace curtain!  Side note to the side note;  we sold the house… very quickly as it turned out.  The beach house also sold very  quickly, like before it even went officially on the market.  My head is spinning!!  I’ll talk more about this later, right now it’s all still a bit overwhelming.

Next!  I bought this shark print cotton jersey from Spotlight… actually, ALL these fabrics are from Spotlight, to be honest!  I bought this fabric months ago, pre covid, always with the intention of making a little Watson bra and briefs set… ta da!  Simple, pretty – well as pretty as a shark can get I guess! – and comfy.  And finally done!

Lastly, I had a small bit of sharky leftovers.  So, obviously…  🙂

This one is a little bit bigger than the yellow one.

So, I think that’s it for now!  I have a few other things in the works, and will definitely/hopefully?! be posting everything before the end of the year.  I’d better pull my socks up, eh?

pinterestmail

separated Cissy… and it’s green

Seems like a bit of a non-sequitur, but kinda sums up the whole process actually.  Let me explain…

So I set out to make another Homer and Howells Cissy dress for myself because I was so pleased with the rust lace one that I’d made first off the block.  This is back in April by the way, back when we were in a lockdown of sorts here in Perth, when we were all terrified of the virus and didn’t know as yet that there was no community transmission here.  Yes, I do indeed know how very lucky we are! and it’s fantastic that everyone here is working hard to keep things that way too… but I digress!

I needed a sewing project!

I had some khaki-olive-blue-grey, slightly crinkly cotton in my stash  that Mum had chucked my way, when she cleaned out her own stash, and it was just enough to cut out the Cissy pieces.  Awesome!  It was meant to be!  However when I put it together I was just like…. blah.  I think when you’re feeling anxious and depressed then your soul cries out for cheer and vibrancy, or even just strength, even in colour form; and drab colours just kinda drag you down … however at the time I determined a waist was what was needed.  So I proceeded to cut a straight waistband from the scant remains of fabric, miraculously I had a strip just long enough! I took off the bodice and skinny-hemmed it, making a cute little loose crop top.  I the sliced up the centre back of the skirt and inserted an invisible zip, re-folded the skirt pleats into my new waistband, and stitched on a button.  Ok! I thought.  This is going to be great!

ORIGINAL COLOUR… yeah it’s not awful, I guess


It lay in my wardrobe during winter and I was anticipating a lot of wear once the warm weather hit… and when I did my rainbow week mini-challenge I thought it would be my “green” ensemble…  I frocked up and took a few photos, a sample of which is below, and man, at that moment the not-greenness of the whole thing just killed me, so it did not feature in that week after all.  I still thought the ensemble had promise and I was on a mission to save it now!  I wanted GREEN!   I had to wait until Spotlight had restocked its dye supplies but finally they came in.   And into the spa dye-pot it went!

looked terrible in this light!…

I used a whole pack of Rit Kelly green, and I very happy with it now, I think the strong colour is just what it, or maybe I – needed!  The crop top is very cropped, and I have to be careful about lifting my arms up too high, and I’m planning next to make some pretty little lace camisoles to wear underneath.
Watch this space!

Details:

Top and skirt; from the Homer & Howells Cissy pattern, old cotton, overdyed by me
Caramel sandals; super old, originally from an op shop.  I need to replace these, desperately!

Green turtleneck: modified Closet Core pattern Nettie in green merino
Black tights; my own design, black stretch poly
Black booties, from Zomp boutique

pinterestmail

I made some cool blue sandals (shoes)

Woo-eee!  I really really wanted to add another pair of handmade shoes to my collection this year and after a whole bunch of postponing and procrastinating and a little bit of prevaricating too… ta da!  I basically had to force myself to get started – I hadn’t made a pair of shoes in over a year and it suddenly seemed quite daunting, and hard! but of course in the end I really enjoyed myself making these.  And I LOVE them!

I bought this quite thick blue suede from The Fabric Store in Auckland, during one of the massive stopovers that Air New Zealand gives you when you’re flying onto North America.  Which I have done twice over the last three years.  I think this might have been the Alaska trip.  I’d originally thought I’d try to make closed toe, oxford style shoes or derbys but realised the suede was really too thick for that.  You need for the leather/suede or whatever to be quite flexible and easily mouldable around your lasts without wrinkles or puckers, which is pretty much impossible in a thickish material.  So I eventually went with this, quite simple style instead.

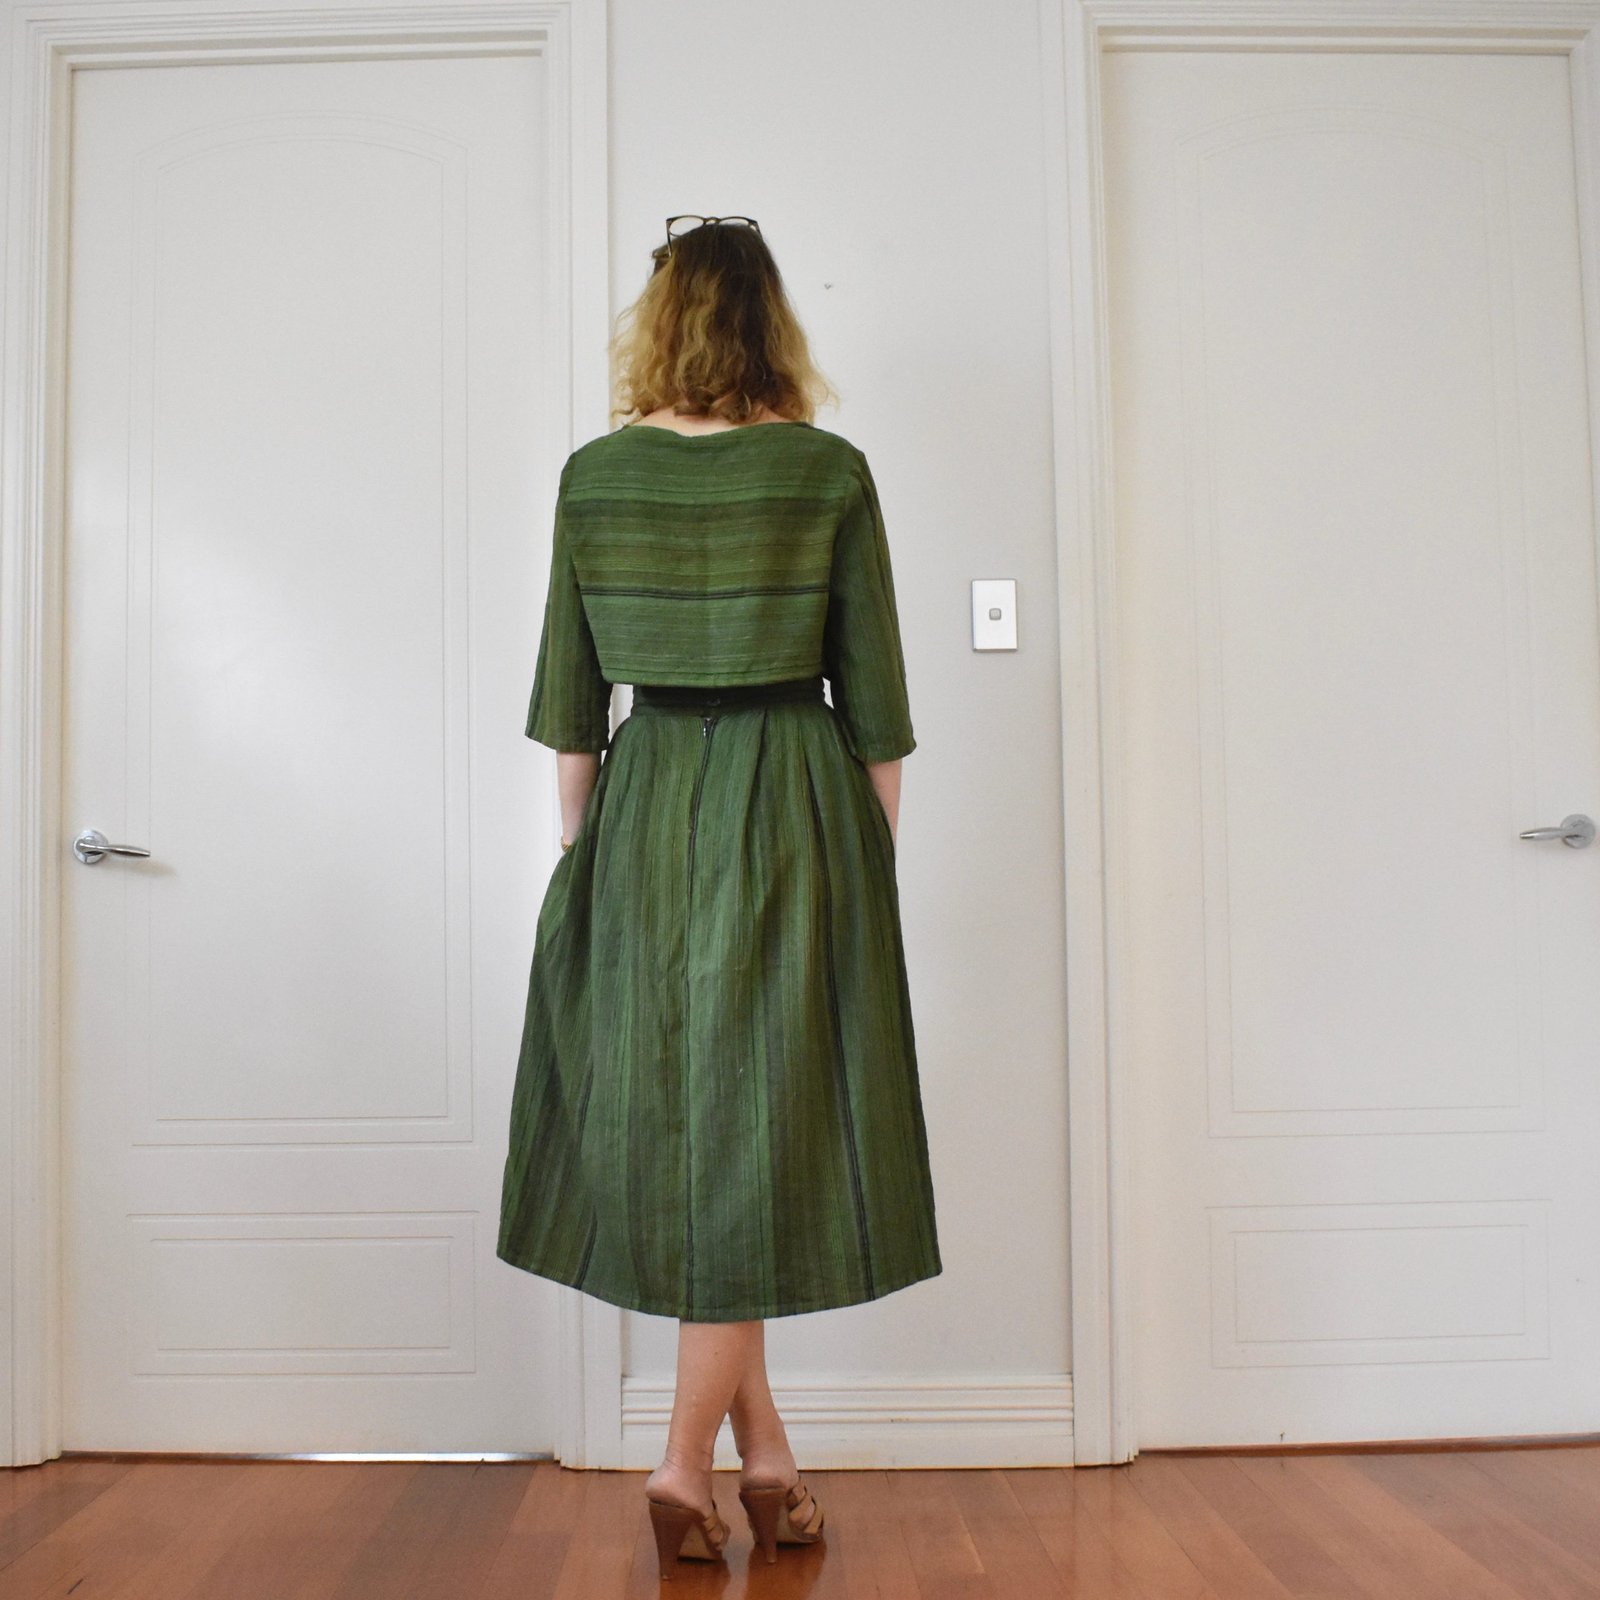
Cute, huh?!  I’m pretty thrilled with them!  Most of the other components are from one of the kits I bought from Lisa of the Shoe Camaraderie, and I followed all her instructions too.  Although like I mentioned, I used my own leather and the design of the uppers is my own too.

I really wanted a matching blue thread for those visible stitches on my shoes, but didn’t have any, not even embroidery thread in the right colour!  which is why I settled upon the beige waxed thread that Lisa supplied with my kit.  Obviously this is the perfect stuff to use for the job anyway, and I think I’m fine with it being a contrasting colour, since it is the same colour as the bottom part of the sandal too.

Having a kit makes it all so much easier, plus I’ve done two workshops with Lisa now… so you’d think I would just barrel through, no problem; whip up a pair of sandals in no time.

Nope!  I stuffed up on multiple occasions!

Firstly, I went to the effort of masking up my lasts and drawing out a fabulous and as it turned out, ridiculously complicated style for my sandals.  And made a pattern and all.  Let’s just say, it did NOT WORK.  I did try pretty hard to make it work and then moved on to trying to force the pieces into a different design, which obviously was not going to work either.

Settled upon this, much simplified design, cut out a whole new set of pieces.  Confidently whipped up a coupla buckle and strap sets and practically finished the sandals.  Smooth sailing!

Noticed the buckle and strap were going the wrong way, ie buckling forwards rather than backwards.  *cue silent scream*

I almost just let it go, but then realised I had plenty of leather actually, enough for new straps, and if I was going to do this thing, may as well do it properly.  Cut new strips, made new buckle and straps sets.  Completed the rigmarole a second time.  Obviously not quite so smooth sailing this time.  It never is.

Next, I’d applied glue to the soles with great thoroughness and excellent coverage… or so I thought.  After leaving them overnight, I noticed in the morning a few millimetres of lifting on the side of one of the sandals.  This is very very bad.  You do NOT want gaps.  I managed to pry open a slightly bigger gap, enough to dribble more glue down, spread it around with an opened-out paper clip, and propped it open with another paper clip to go tacky.  I gave it masses of time, and fortunately this very very NOT-recommended trick seemed to work.  A miracle!!!

On to the finishing touches… went around to Tim’s place to retrieve the sander, which he has for some time, I might add.  Plugged the sander in, very happy I was basically on the home stretch now, and turned it on.  Nothing.  Dead as a doornail.  Hunted out a different extension cord, tried different sockets.  Brushed sawdust and cobwebs from out of likely looking spots.  Nope.  Finally rigged up the the orbital sander instead and got the job done, which did take longer but of course not nearly so long as if I had to sand by hand, so all’s good.  Apart from the fact that maybe we now need a new belt sander, of course!

So, this is the tenth thing in my make twelve, the “making plan” I set up for myself at the beginning of the year.  This particular project was arguably the most intimidating out of the entire twelve, maybe the most challenging too.  I do love making shoes but it’s definitely next level stuff, catapulting me right out of my comfort zone … so I feel like the final two are going to be easy peasy, lemon squeezy!  We shall see!

pinterestmail

Tjilkamala Rockhole

I’ve made up the first of my indigenous fabrics that I bought back in … June? I think, and I posted about it here… 

this stunning print is Tjilkamala Rockhole, designed by Alice Nampitjinpa; it was produced by Ikuntji Artists and I bought it through FlyingFox Fabrics

I decided upon a simple little dress with matching hat ensemble, inspired by this Marimekko outfit I’d seen many years ago…  btw I had to search and search and search to find this image!!  Note to self; always “pin” your favourite pictures!

I picked one of my favourite “simple” little shift dress patterns, the Named Inari tee dress, and Vogue 8844 for my matching hat.  These are both patterns I’ve used many times before, and I love them both.  I did my usual modification for the Inari dress by putting inseam pockets into those elegantly swooping side seams.  Oh, and I also widened the sleeve at the hem edge with a big big wedge insertion, as described here.  This adjustment enables you to lift your arms over your head without the dress riding up so much as to expose your knickers underneath.  Truth!  It does make quite a difference to the wearability of this dress, particularly in a non-stretch fabric.

For the neckline facings, I used a deep chocolate brown cotton voile, bought originally from Fabulous Fabrics.  I also cut the artist’s name and that of the print from the selvedge, and stitched them to the back facing.  I like doing this for special fabrics, and this is surely a very special fabric!

I did a search to find out which way up the print was supposed to go.  To the best of my knowledge, this is correct  🙂

I’ve made the Inari so many times before I don’t have much else to add … oh, except I did do something a bit different with the hem!

wait; what’s this?  WHERE’S THE HEM?!!


So the hemline for the Inari has side splits and a high/low hemline, so you can see the underside of the fabric quite clearly when you’re wearing the dress, especially when sitting down… and the wrong side of this fabric is the solid, deep chocolate brown that is the background of the print.  I decided I didn’t like the idea of seeing the print of the hem visible inside the dress and only wanted to see plain chocolate brown fabric.


So; to “camouflage” those hems I cut wide bias cut strips of same chocolate brown voile that I used  for the neckline facings and attached these along the fold line for the hem.  I then folded the top edge over and inside the raw edge of the hem, to hide the print and machine stitched close to the edge.  Finally, I hand stitched the hem to the dress as normal.  So yes, the full 3cm hem of the dress is there, and essentially the chocolate brown voile is acting like a “mask” over the top of it, hiding the print.  The side splits were also “masked” under bias cut strips in the same way.

All side splits and hems were hand-stitched, so as to avoid any visible stitching on the outside of the garment that would besmirch the purity of that beautiful print.

The hat: I LOVE the hat! even though if I’m realistic I know I’m probably going to get more wear out of the dress, but I still love it!  Serendipitous thing; when I dug out the pattern, I found to my great joy that past me had cut an extra brim interfacing, once upon a time. It was neatly folded up in with the pattern pieces.   I’d completely forgotten about it, but I guess the last time I’d made the pattern I must have thought I needed two.  Yay, past me!  Making the hat is simple enough… you can read my review of this terrific pattern here…  I used the same chocolate brown cotton to line it as for the inner bits of the dress.  I did put my own label in the hat!  I also put in a hanging ribbon in under the grosgrain ribbon just a small scrap from my sewing basket.  A hanging loop is not part of the pattern, and not an essential thing either, but it’s also something I think comes in very handy when you do have one in the hat.  I’m really glad of the one in my khaki hat and many times I’ve thought about putting one in my white hat.  I think I’m just going to get on and do that right now…

I bought the chocolate brown grosgrain ribbon from Spotlight.  You can see here a patched bit in the brim lining… I didn’t do this because I didn’t have enough fabric, I have plenty!  I actually have enough leftover for a little skirt sometime down the track too, but only if I was a bit devious with my cutting out here.  I decided a small patch in the brim lining was a small sacrifice to pay to leave myself enough fabric for that future skirt!

my labels are from the Dutch Label Shop

So, obviously I’m pretty happy with my new ensemble!!  It feels super special. I love how it’s such a visually exciting and eye-catching print, but most of all I love how it’s also so completely Australian.  It’s just beautiful.  I am particularly happy and thrilled to have found places to buy indigenous fabrics, to be able to support indigenous artists, and of course I am most certainly going to purchase more in the future, once I’ve finished making up the other print I bought in June.  I already have my eye on a few more!


Details:

Dress; the Inari tee dress, pattern by Named, in Tjilkamala Rockhole print cotton, designed by Alice Nampitjinpa
Hat; Vogue 8844, in Tjilkamala Rockhole print cotton, designed by Alice Nampitjinpa
Sandshoes; Trenery

location; Winjee Sam, Yallingup

pinterestmail

a colourful coat

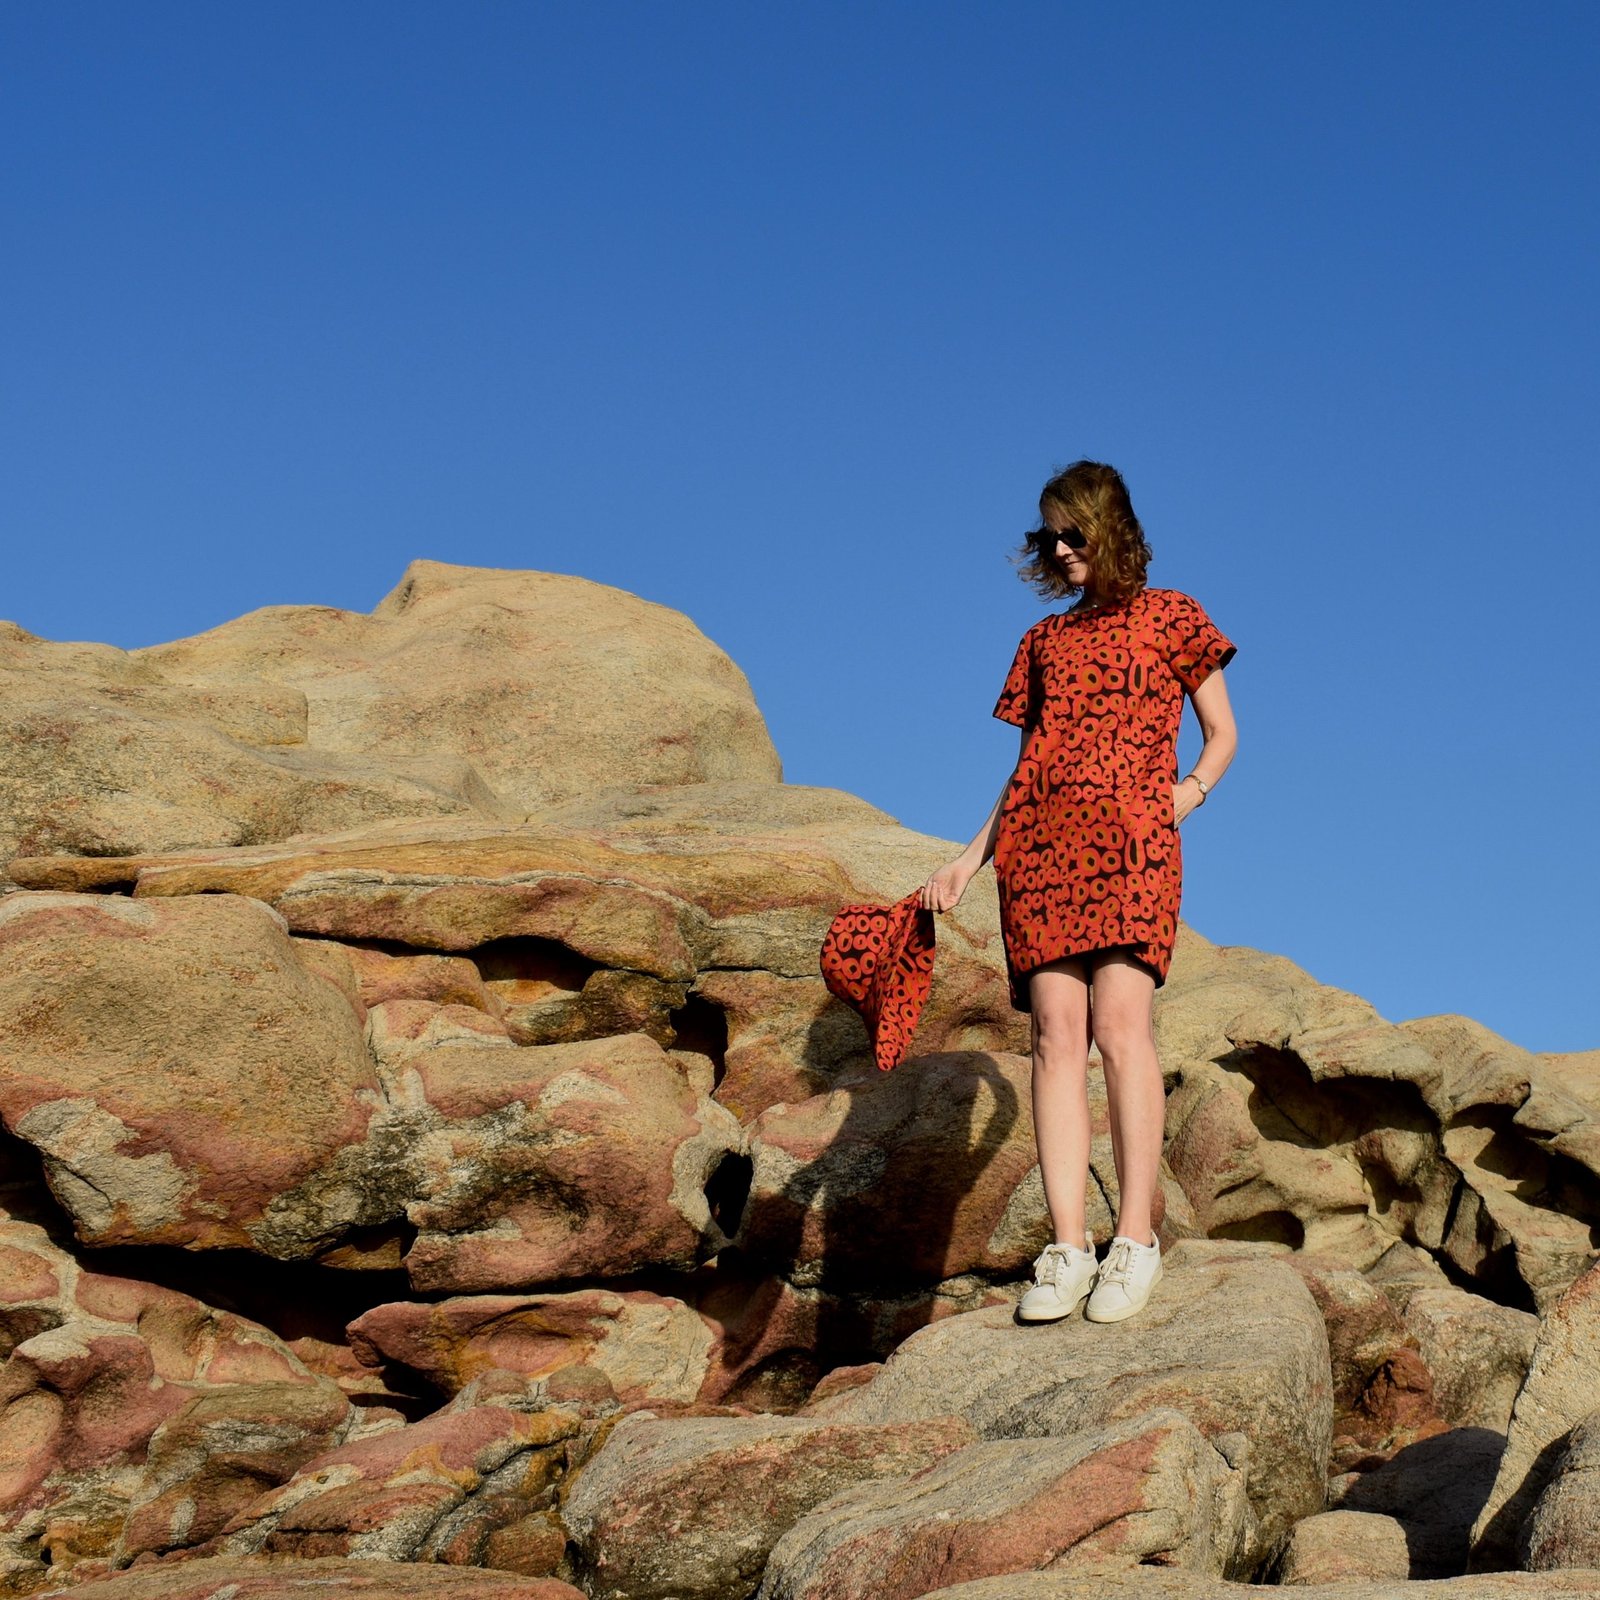
I made this new coat-ish/dress-ish/shirt-ish sort of a thing for myself!

How beautiful is this linen??  It’s stunning, isn’t it.  I’m head over heels in love with the print – gorgeously colourful, bird-strewn, with the looks of an ancient, beautiful patchwork… the colours are so painterly/flower-garden with that lovely distressed quality that appeals to my quixotic little heart that likes stuff to be rustic but also pretty too.   I’d only bought a shortish length really, and it really teetered on the verge of being Too Good To Cut, I had it laid out for quite a while, trying to gathering the courage to take the scissors to it!  I only managed it really because it was on my list of twelve things and having those intentions blogged sorta forces me to stick by my own self-commitments.  I bought it some time last year from Fabulous Fabrics, using a voucher that was a birthday gift from some of my lovely friends.

The pattern is the Carolyn pj pattern by Closet Core patterns, yes, the one named after ME!  I can’t say still how thrilled I STILL am to have a pattern named after me, it was such a huge honour, and I often think how I’d like to have more of “my” pattern in my own wardrobe too… I still wear my white Carolyn shirt quite a lot.  I saw Rosie from ArtworkerProjects had made her Carolyn as a shirtdress, and this made me think I’d like to make something like that, and I’d also seen, and pinned this beautiful coat once upon a time, and the two thoughts slowly alchemistry-ed  and absolved themselves into this one project in my mind, eventually…

I lengthened the body pieces, obviously, and I also lengthened the turning point of the lapel a little, so the coat buttons a little lower than it does on the pattern.  The other, internal, change I made was to add a back facing… this stabilises this area, something not necessary in a shirt but that you definitely want in a coat, for sure!

Oh, I added pockets… #ofcourse

I finished all the internal raw edges with HongKong seaming… because obviously in a garment that will flap open while you’re wearing it you want the insides to be as pretty as possible!  For this, I used the leftovers of the turquoise poplin, that I used for one of the masks I made for Craig’s Mum.

Now’s the moment when I indulge in a bit of zero-waste bragging, ahem #insufferable?  #moi? … so; I made a long bias strip using the entirety of the turquoise leftovers and have about 15cm of it left…  when this happens in a project it’s actually SO satisfying!!  Also, there are only the smallest of the colourful linen print scraps leftover too…  I might have enough for a doll’s mini-dress, but not much else!

For the button, and continuing on with my policy of not buying any buttons unless I Absolutely Have To; I found this purple, wool-covered button in my stash, and I love how it doesn’t really match, but at the same time it’s kind of a perfect match too.

So, if you hate obsessiveness in sewing, look away right now.  I initially just used off- white thread in my bobbin for when I stitched down the front and back facings… and it looked pretty terrible. I tried to not let it bother me, but ultimately twas a lost cause… eventually I had to unpick most of it and re-do it using matching threads.  So, some of the sections are in blue, some are in red, some are in off-white and some in pink.  Yes, this is a weird thing to do, but I’m very satisfied with how it looks, so… yeah.  I think it was worth unpicking and re-doing, from my point of view!

This is the latest, and ninth, thing in my little collection of twelve things, that I proposed I would make for myself at the beginning of the year and … regretted…?  many times over?!?!  ok, not so much “regretted-regretted”, because I sincerely love all the fabrics, and have sincerely loved all of the finished products too, just “regretted” as in “have struggled with” as in I just don’t have as much spare time nowadays to lavish on them as I initially thought I would.  I’m NOT trying to busy-brag because I kinda loooooathe when some people go on and on about not having time for fun stuff like it’s your job or something, so I apologise for those overtones… wooo!  Sorry about that.

Anyway!  I’m so happy I’ve got this made! and also that I stuck with my original “coat” plan and didn’t get sidetracked into some little sundress like I was SORELY tempted to do instead, multiple times over!  I really love it!


Details:

Coat; from the Closet Core patterns Carolyn pj pattern, linen from Fabulous Fabrics
White dress; Vogue 1351, white crepe from Fabulous Fabrics, details here
Sandals; ye olde favourites from Zomp boutique

pinterestmail

stuff for Arthur…

those little pursed lips!!

So, Kelly had lent me one of Arthur’s onesies so I could make a better fitting pattern than the Burda one I’ve been using up until now… for some reason that pattern makes for a very short, wide onesie.  And I guess he could be a very tall, skinny baby?  Although I think the sizing could be a bit off, because he looks like a perfectly normal shaped baby to me?!

Anyway, my first go was using one of Tim’s old T-shirts, above.  To be honest, these are my favourites for babies, teenage T-shirts are so cool and so they of course make for very cool babies’ onesies too!  I used some of the details for the new onesie, even the little Rusty tag which I un-picked and re-stitched into the sleeve seam.  Cute!

Then I made him a new one using new fabric.

So, dilemma… The new one will be a lot more robust, because of being made of new fabric, obviously.  The ones made out of old T-shirts are a little fragile, since the T-shirt itself has been washed and worn, over and over and over by the time you’re refashioning this much-loved thing, with all its sentiment and memories, into a new thing for your much-loved baby.

The new onesie, though it’s going to be a “better”, has none of that, so it’s just not quite as cool or interesting.  I kinda love the refashioned ones the best, though you know they just can’t wear them with as much confidence in durability as the new.  Hmmm.  Anyway, he still looks cute in them both!

And, I have a reasonably good pattern now.  The clincher, which gives it a really great fit, is that gusset bit.  To make the neckline fit over his head, it is one of those open ones, where the front laps over the back at the shoulder, but is otherwise not stitched together.  It works really well.

Also, I’m looking forward to making Cassie’s baby some things out of the new pattern too.  When/If I get time!

pinterestmail

heaven…

Heaven by name, heavenly by nature?  Well, I think it’s a pretty nice dress, at least!

🍓
this is the new Heaven dress pattern by @fibremood; an unusual design with a chic, wide trapezoidal neckline and an interesting combined sleeve/yoke arrangement that I’ve only ever seen in a few Japanese patterns before now.

I’ve learned to overlook the awfully unflatteringly “puffy” line drawings featured in all the fibre mood patterns, because the finished products are invariably not at all like that! anyway I was quite intrigued by the lines of this design…  initially, while perusing the promotional photos… see below! I did worry that the sleeve/bodice corner junction at the neckline looked like it might be a little on the tight side… however when you’re wearing it, it’s more like nicely “firm” rather than tight and I think that structure is necessary to keep the neckline in place and also from gaping open.  The dress is actually very comfortable and I really enjoyed wearing it!  I even got down on the floor and had a play with Arthur in it, and was perfectly fine!

🍓 I also feel like it turned out to be pretty cute too  🙂  I bought the lovely cotton/linen mix fabric from the upholstery section in @spotlightstores … I just fell in love with the gorgeous deeply, dusky-raspberry pink colour and HAD to have it!

🍓This dress really was a fun thing to make, very quick and easy… I like the way the elegant and unique sleeves are set off against a sleek, just slightly fitted body section.  I like the sleeves pushed up, but they do look very elegant let down to the wrists as well, I think.

sleeves down

🍓 closure is by invisible zip in the L side seam.

🍓I didn’t line it but to be honest I think it would be better lined, particularly for an “autumn” dress, which it is definitely designed to be. I might even have a go and add a lining somehow, when I get a bit more time… I will update here when I do!

another bonus; all that ugly overlocking will be covered up if I line it!

It has to be lined, a petticoat will not do.  I did try it with a few of my petticoats and they all show at that wide wide neckline.  Yes, my bra strap shows at the neckline in a few of the pictures here, which I know is such a no-no.  However I felt a bit better about this when I noticed that even the model’s bra strap shows too.  I’m in good company!

🍓 btw, I did NOT shorten mine, this the length of the pattern.  I honestly think they must have added length to the above one modelled for the magazine!  Actually, I prefer it as that little bit shorter than knee length… it feels more like an autumn-al length, if that makes sense.

Details:

Dress; the FibreMood Heaven pattern, upholstery linen mix from Spotlight
Shoes; asics, from the Foot Locker

pinterestmail

snowy white dress


It’s a bit sad that this dress looks like a white-out and doesn’t photograph as “exciting” because it’s a thing that’s been on my sewing bucket list for YONKSSS, and I absolutely love it!  I think it’s elegant and beautiful and, excuse me for saying so, but I think perfect also … and I’m gonna wear this to death!!

Cassie gave this piece of soft ivory crepe to me for Christmas one year… quite a few years ago actually.  I feel a little terrible that it’s taken me such a long time to getting around to making it up, but I also don’t! because I really wanted its outcome to be perfect. Ok ok, to be as close to perfect as possible… and I’m so very happy with how it did turn out that at the same time that I’m relieved I waited til I was really ready.

The crepe is from Fabulous Fabrics, as is the lovely, light beige lining fabric.  It’s actually leftovers from my mother of the bride dress, for Cassie’s wedding, and beautiful quality too.

Ordinarily I wouldn’t put one of my labels into the back of a delicate dress like this, but I’m determined to use these labels as often as I can, because they’re such fun! and it gives me such a kick to see them in my clothes.

For the hem, I used this triple-stitched method, which makes a really nice, beautifully clean finish.  The only thing to be careful of, especially in a slightly “sponge-y” fabric like crepe, is to just slightly stretch the fabric as it goes through the machine… if you don’t I find the fabric bunches up just a bit, draws in the hemline.  Stretching it doesn’t give the expected lettuce leaf finish but instead gives a beautifully smooth hem.

This is my eighth thing in my #maketwelve this year, from my twelve selected designs and fabrics… hmmm what should I possibly make next?!! I wonder!

pinterestmail
Switch to mobile version
↓