Category Archives: Uncategorized

Cut me a little Black

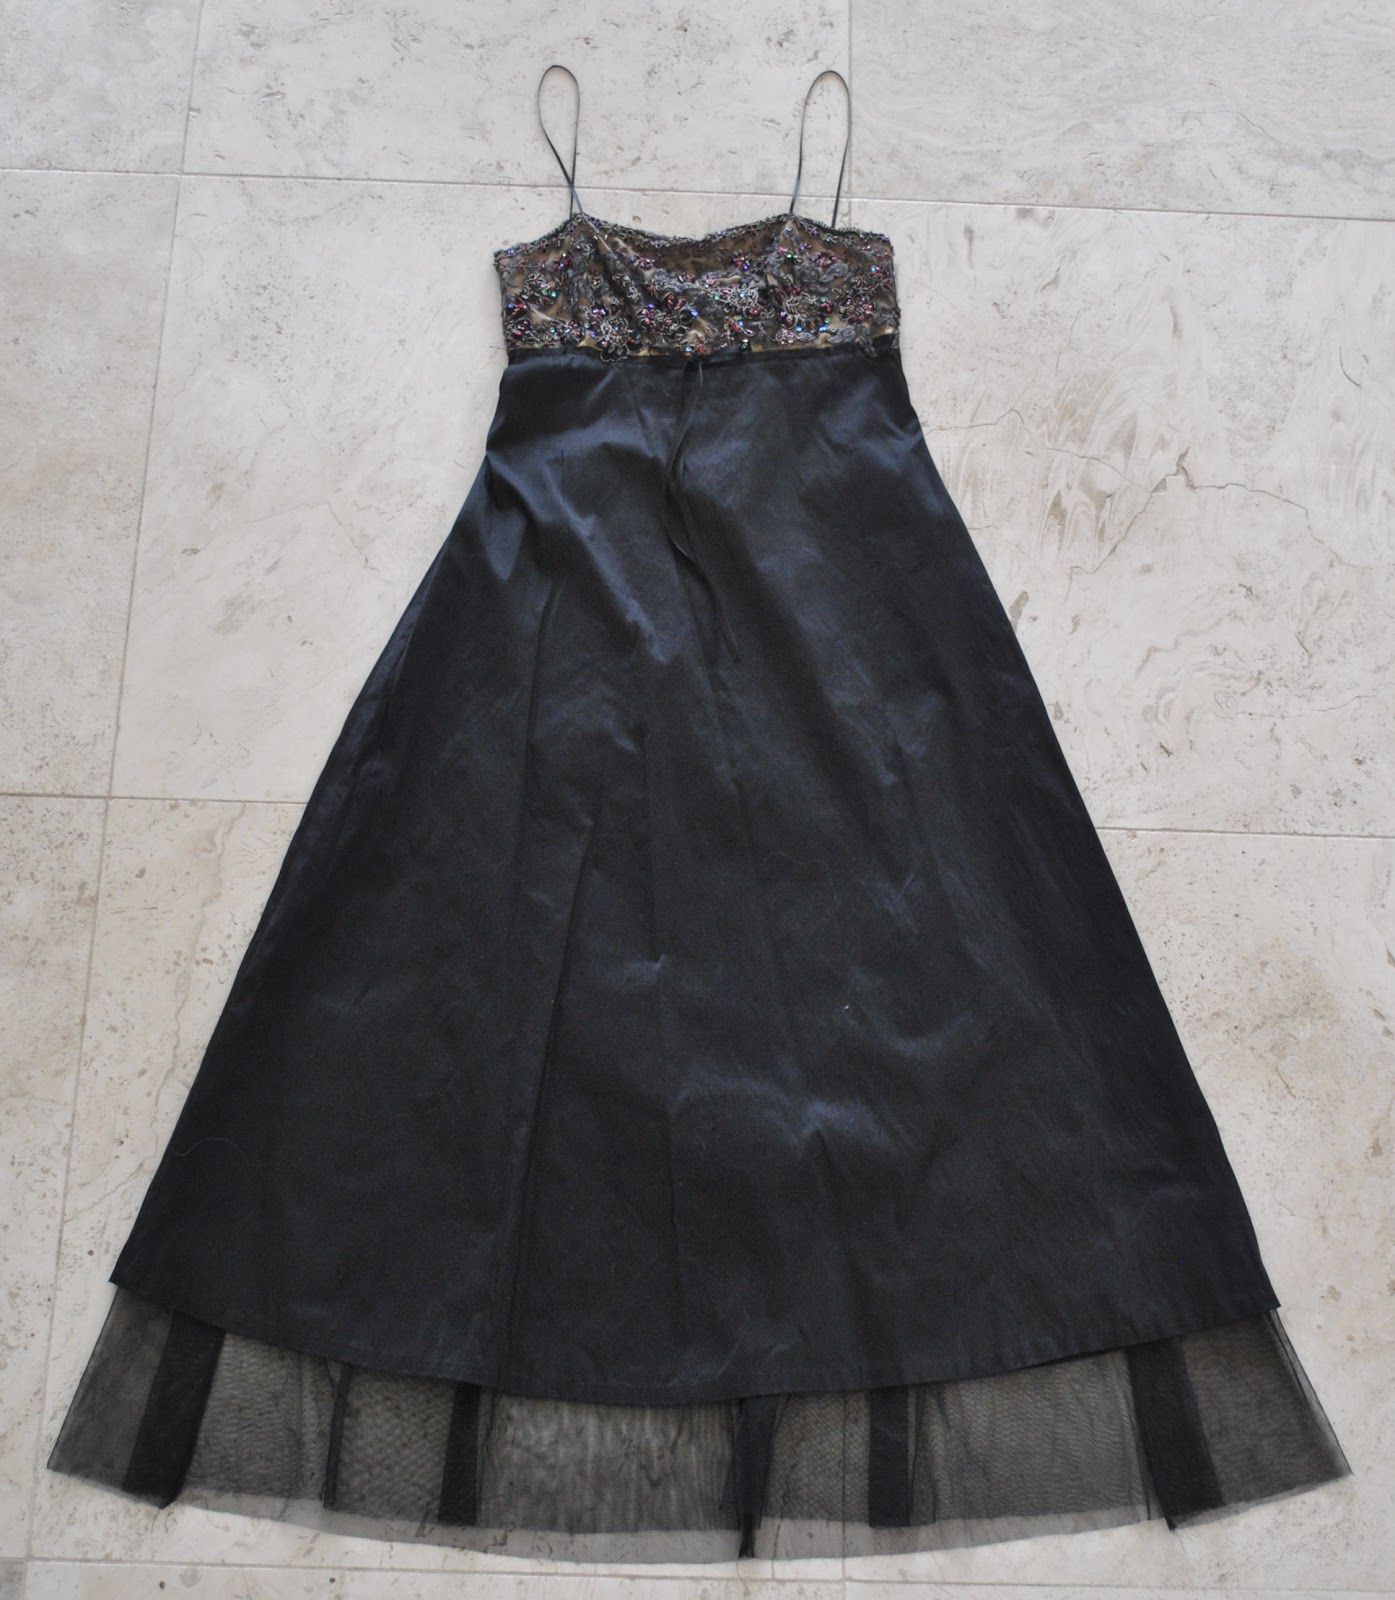
In my recent, gloriously ruthless, spring clean-out of my wardrobe, I culled an evening gown, originally made using Burda 8046 and first posted here.  I’ve worn it about seven times in total; none in the past three years; and have now decided it is too young for me.  Cassie didn’t want it either… so rather than toss it the Salvo’s way where someone might snap it up only to butcher it for something else, I decided I wanted to have that wicked pleasure for myself… mwahaha   πŸ™‚
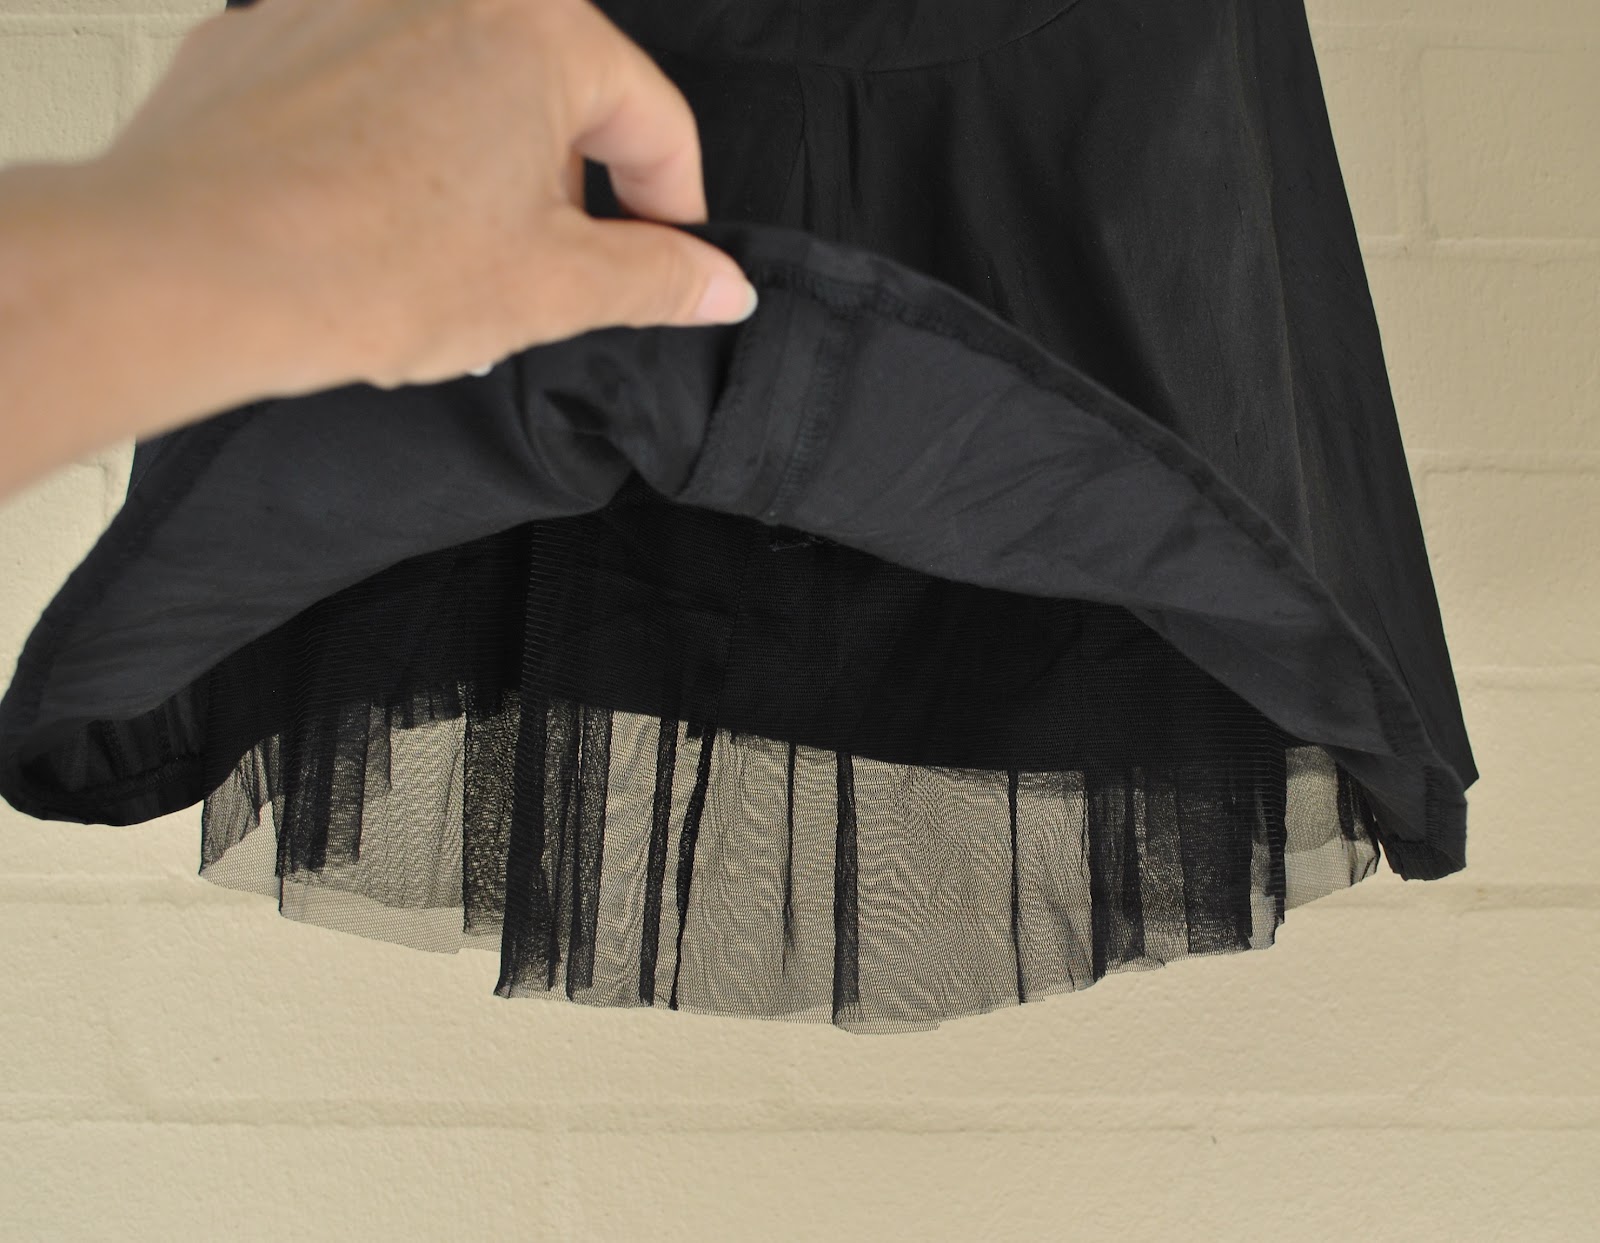
The fabric of the lower skirt section is an almost translucent, lightweight, black silk taffeta, and it has a combined lining/crinoline of soft black tulle.  And please don’t worry about that beautiful heavily sequinned and beaded fabric on the bodice section, it will not be wasted and will be put to good use, I absolutely promise!

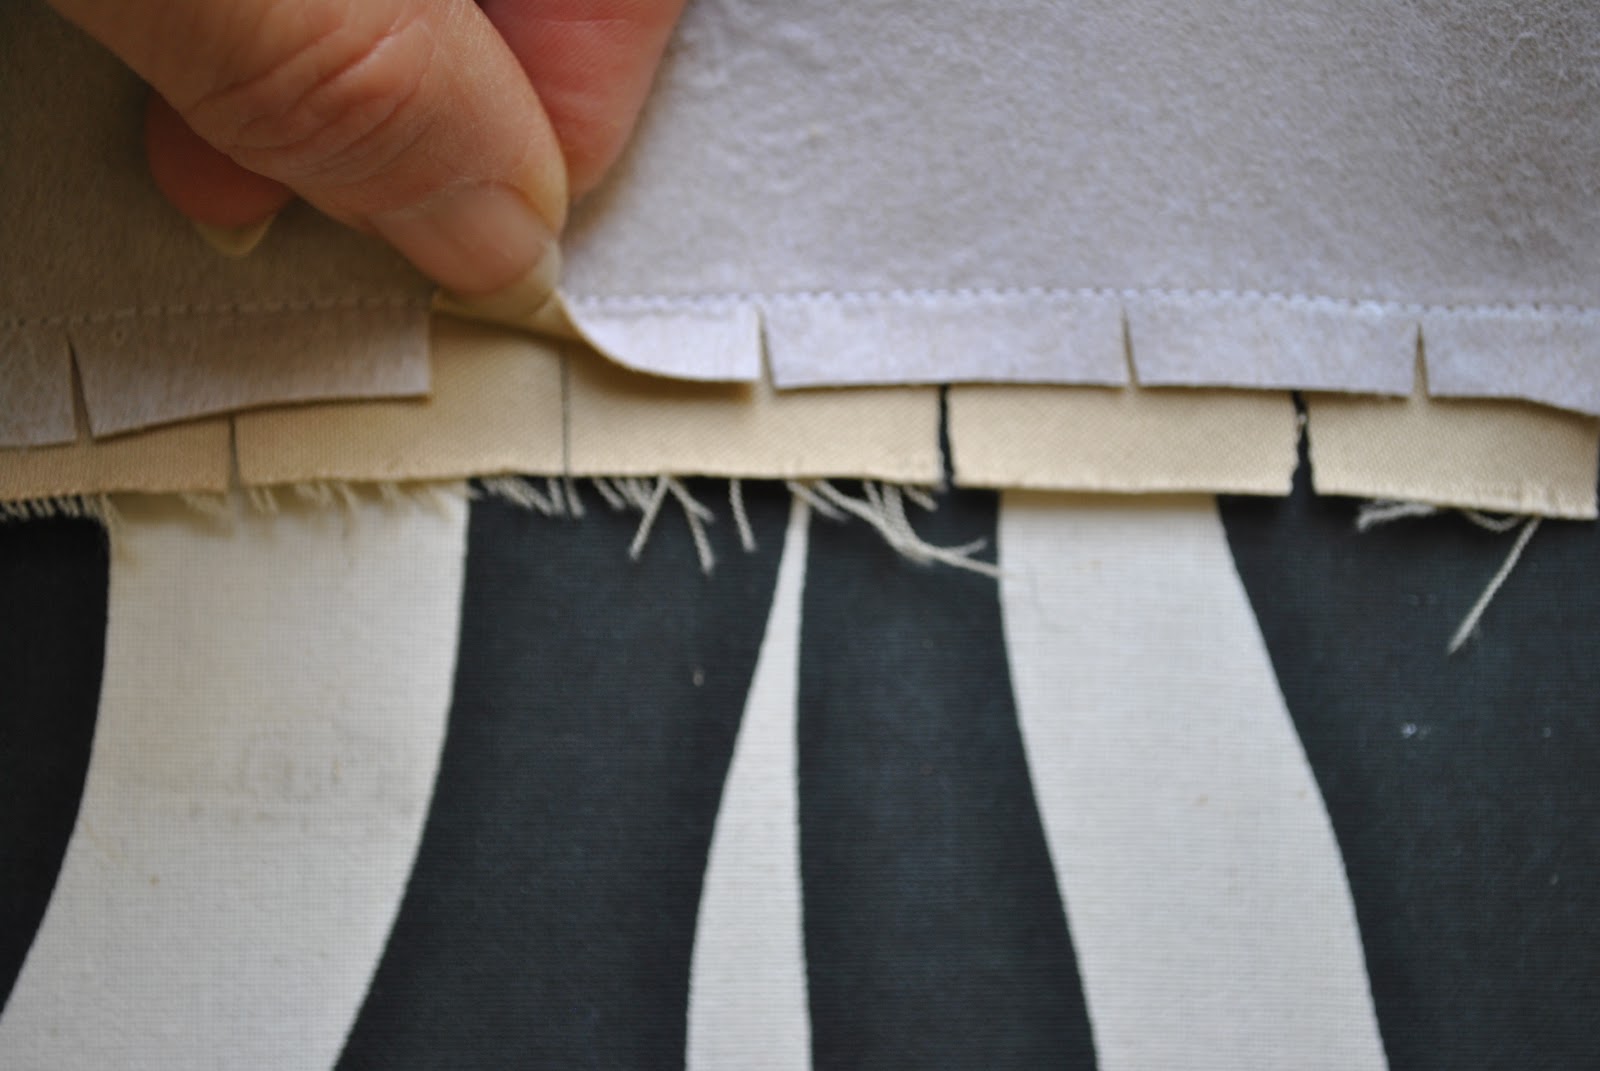
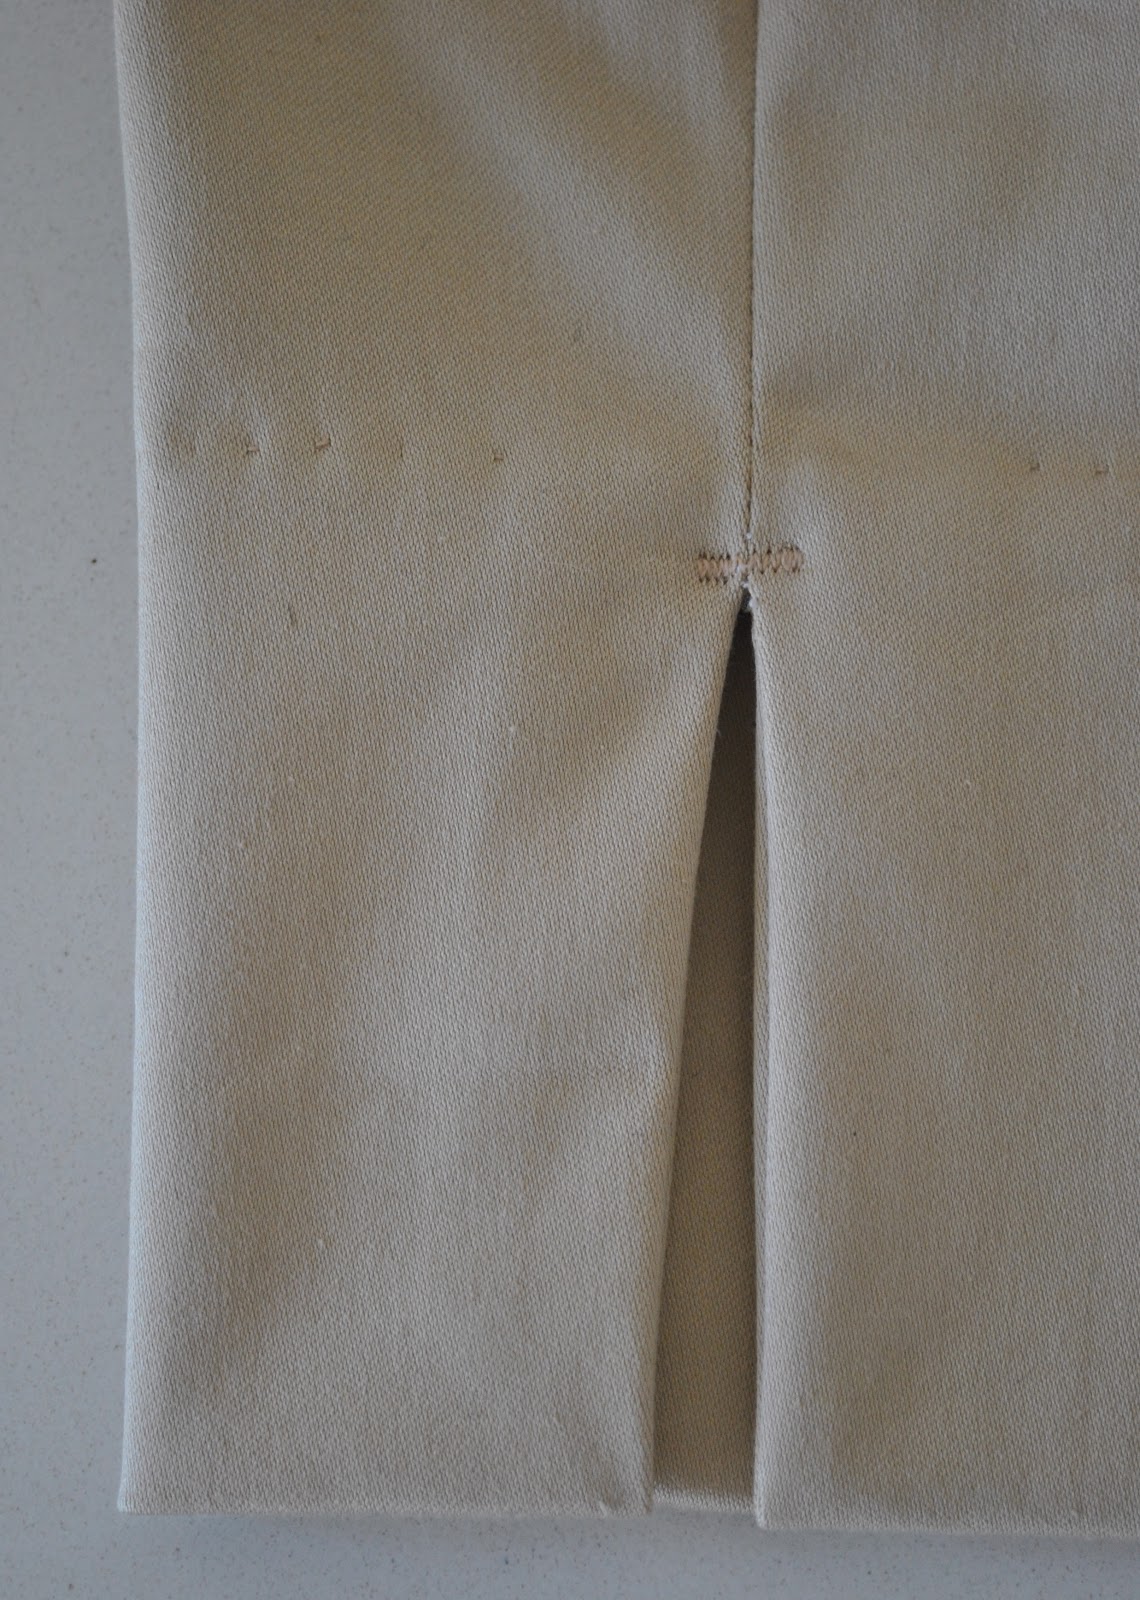
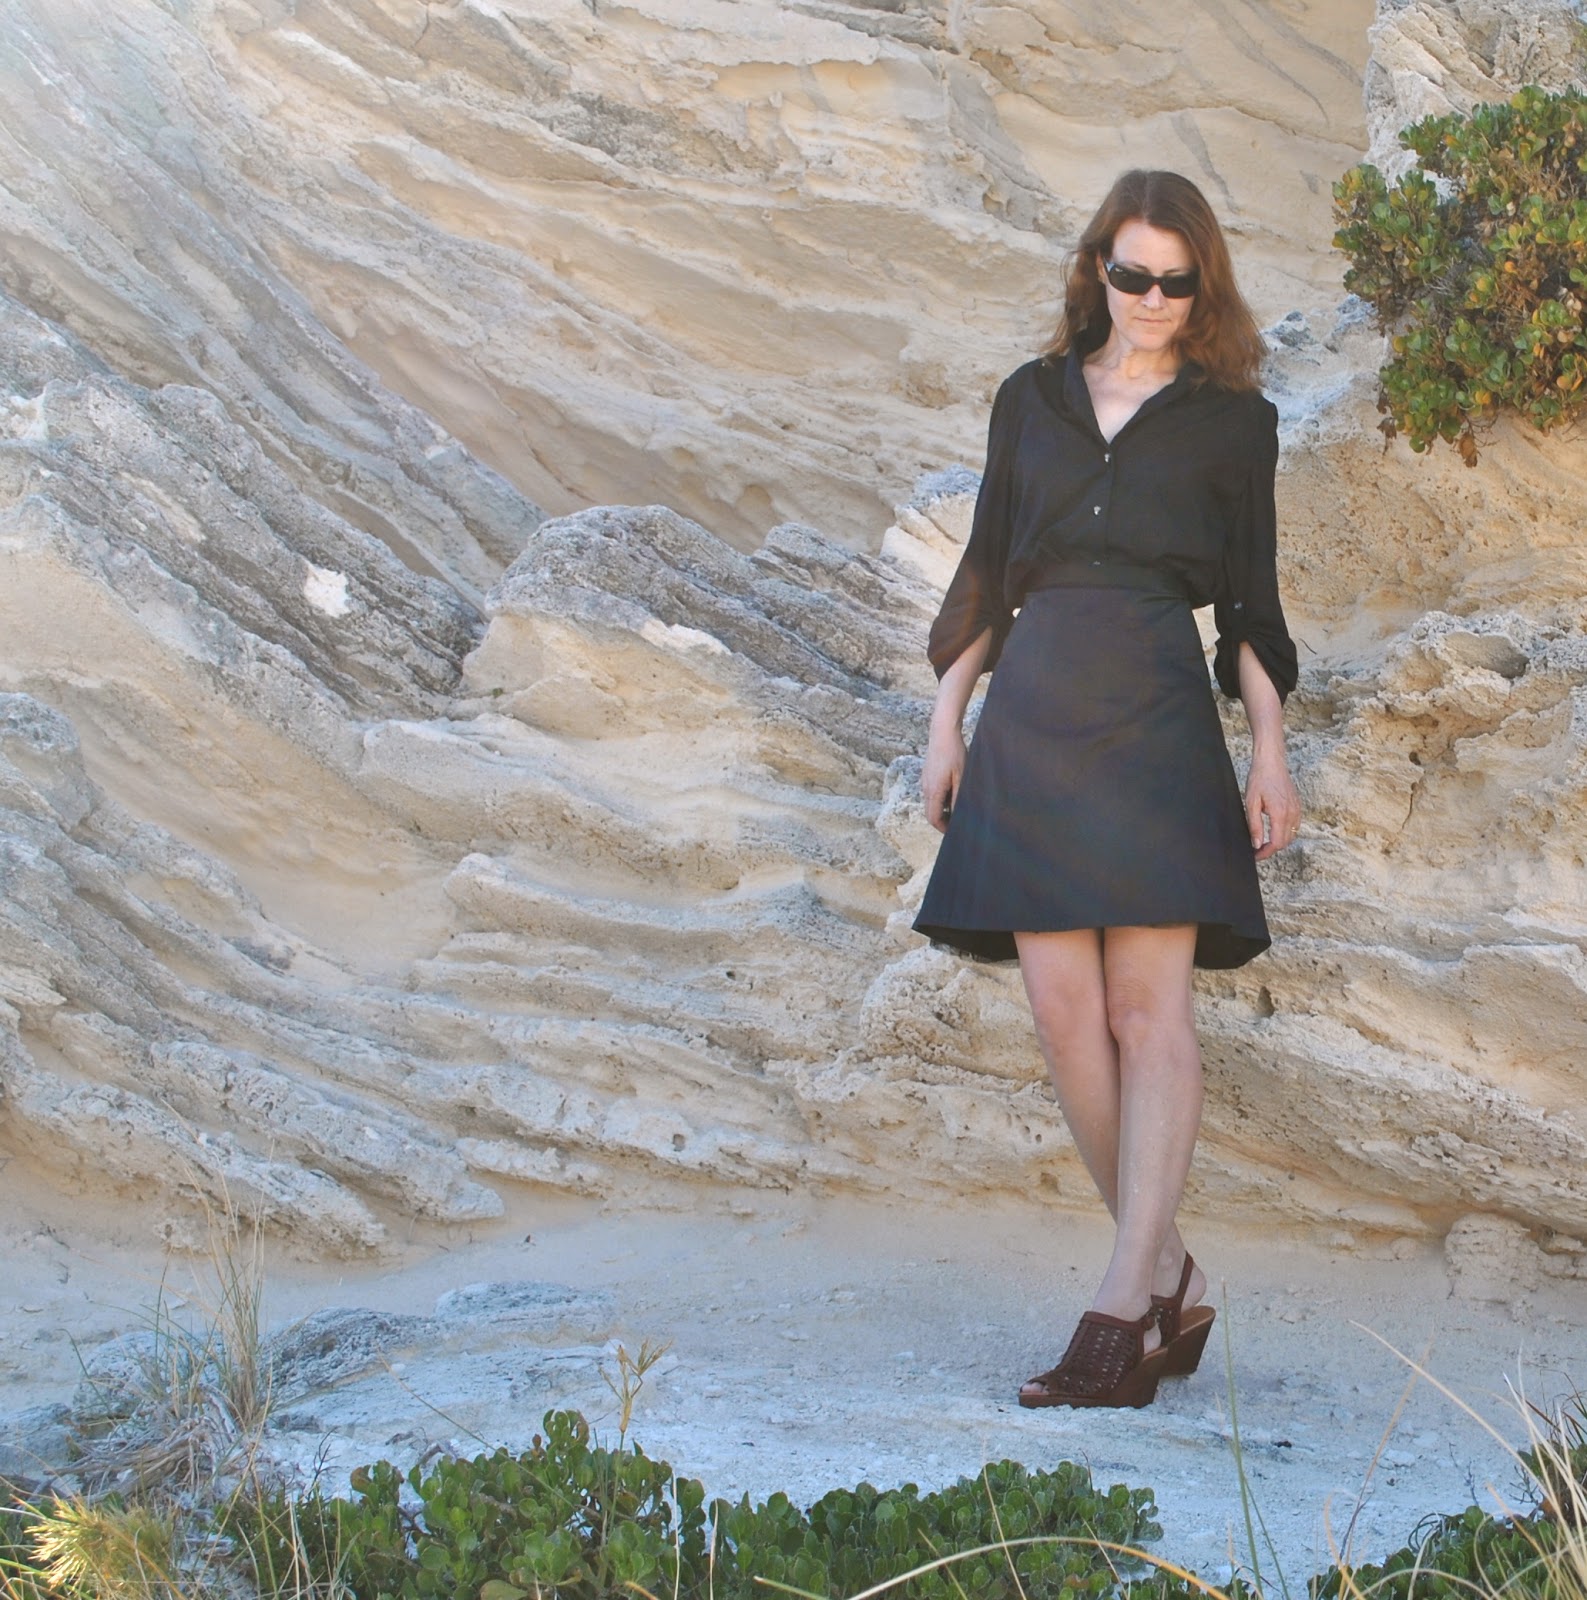
I was pretty pleased to get the skirt pieces of Vogue 1170 from the lower skirt section, and I also fashioned a new attached crinoline from the old one too.  This has a lot of extra gathering in the very back region, creating a really frothy bit to help that flounce flounce.  Hopefully in a feminine and attractive way  πŸ™‚

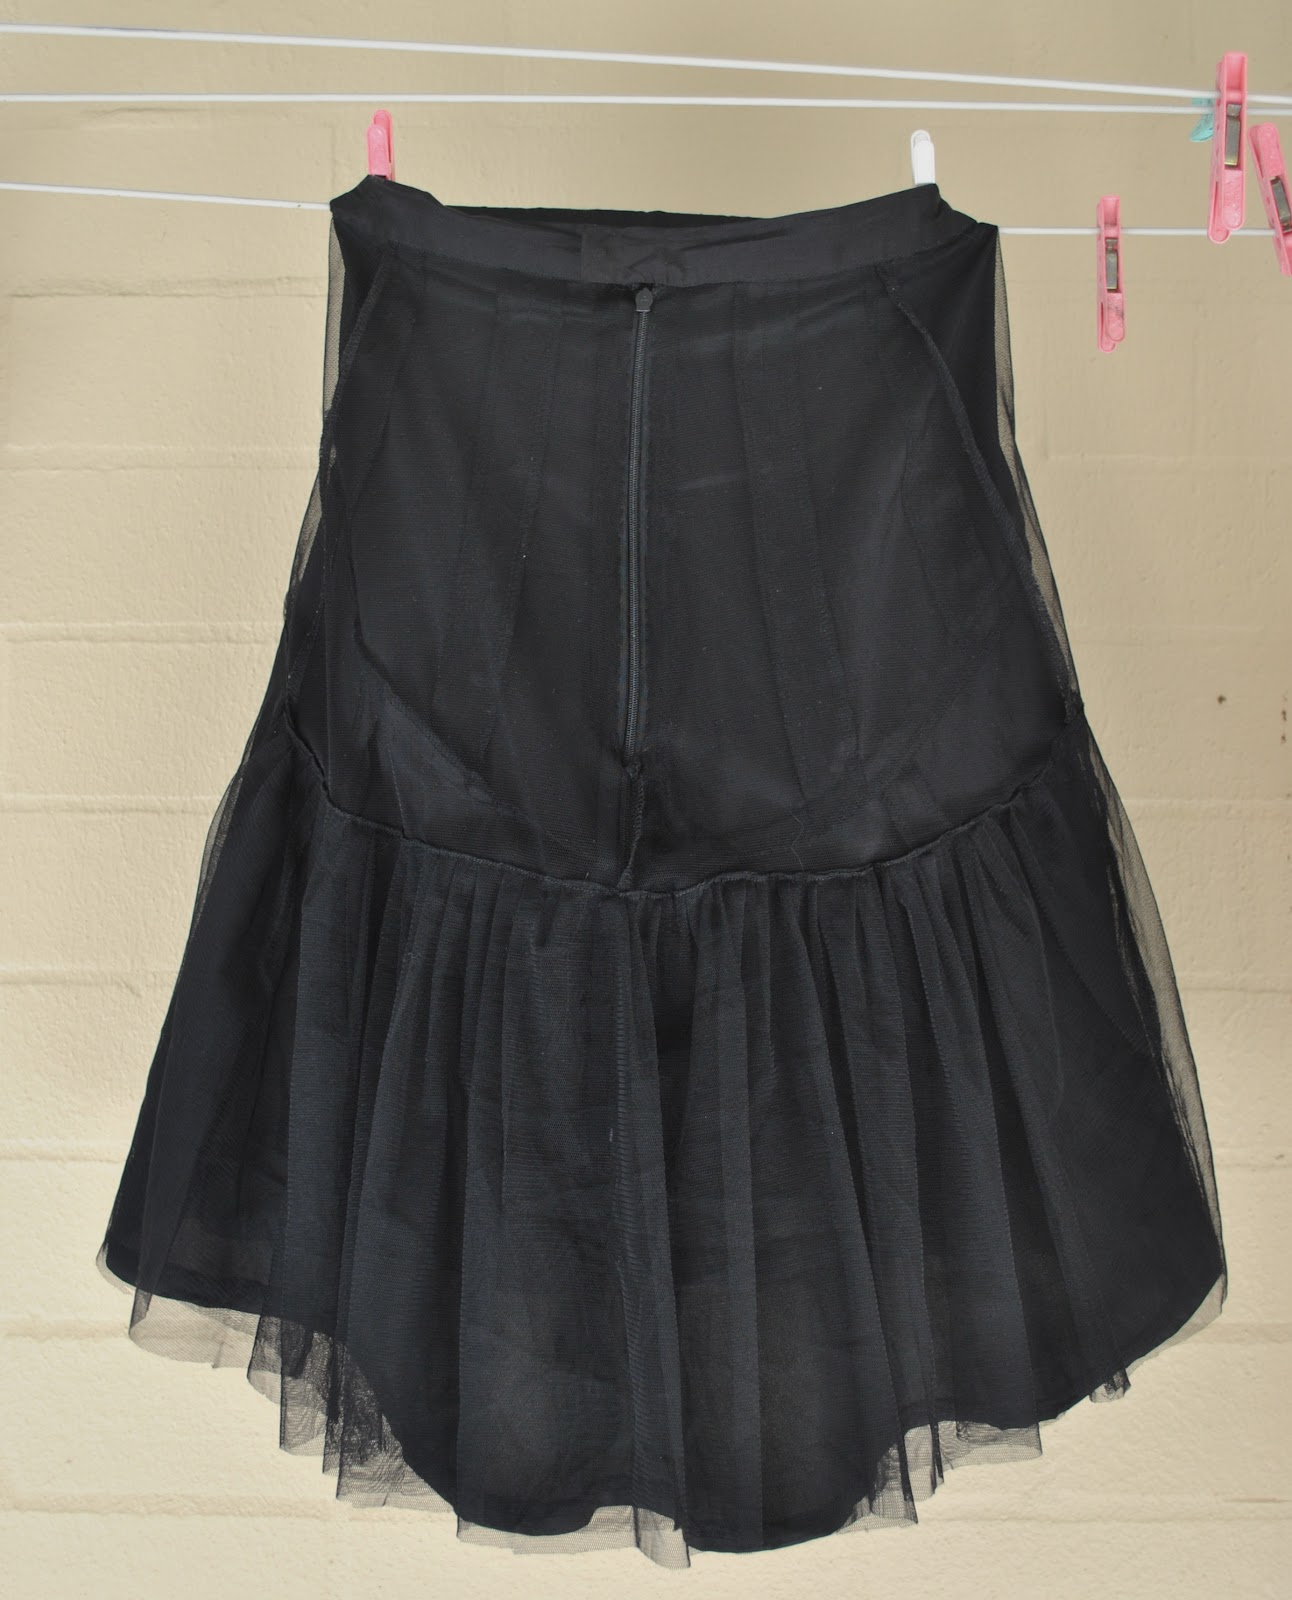
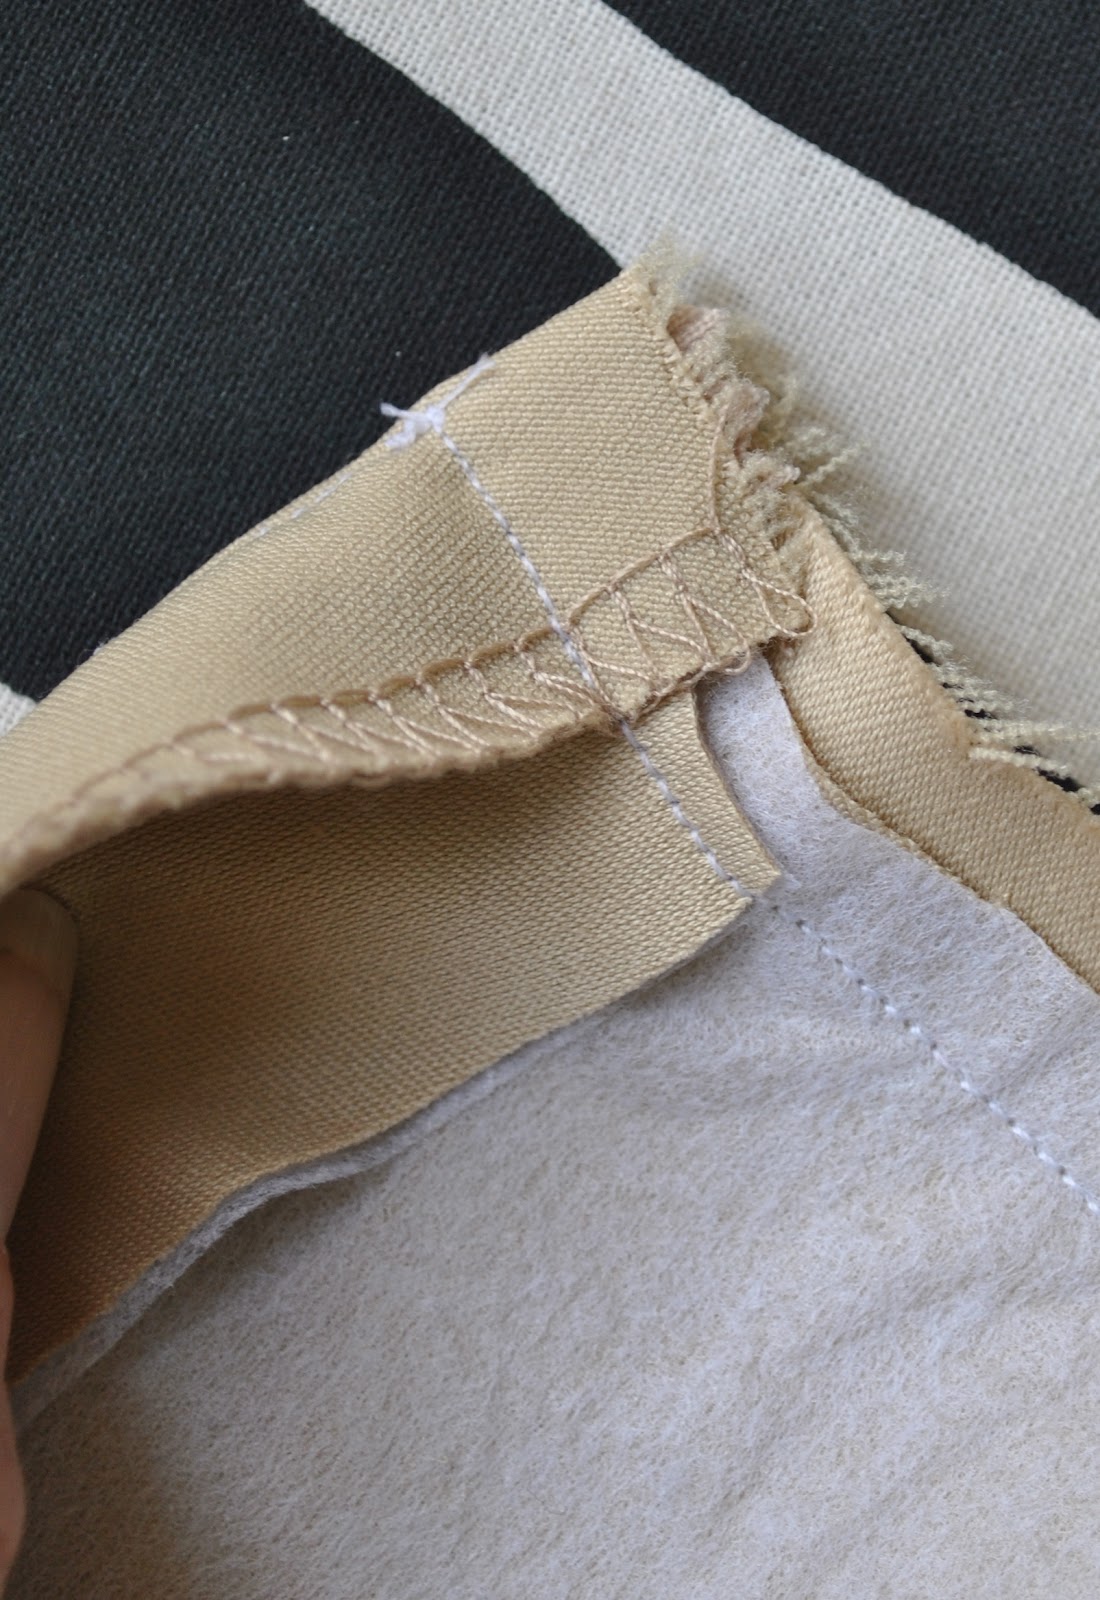
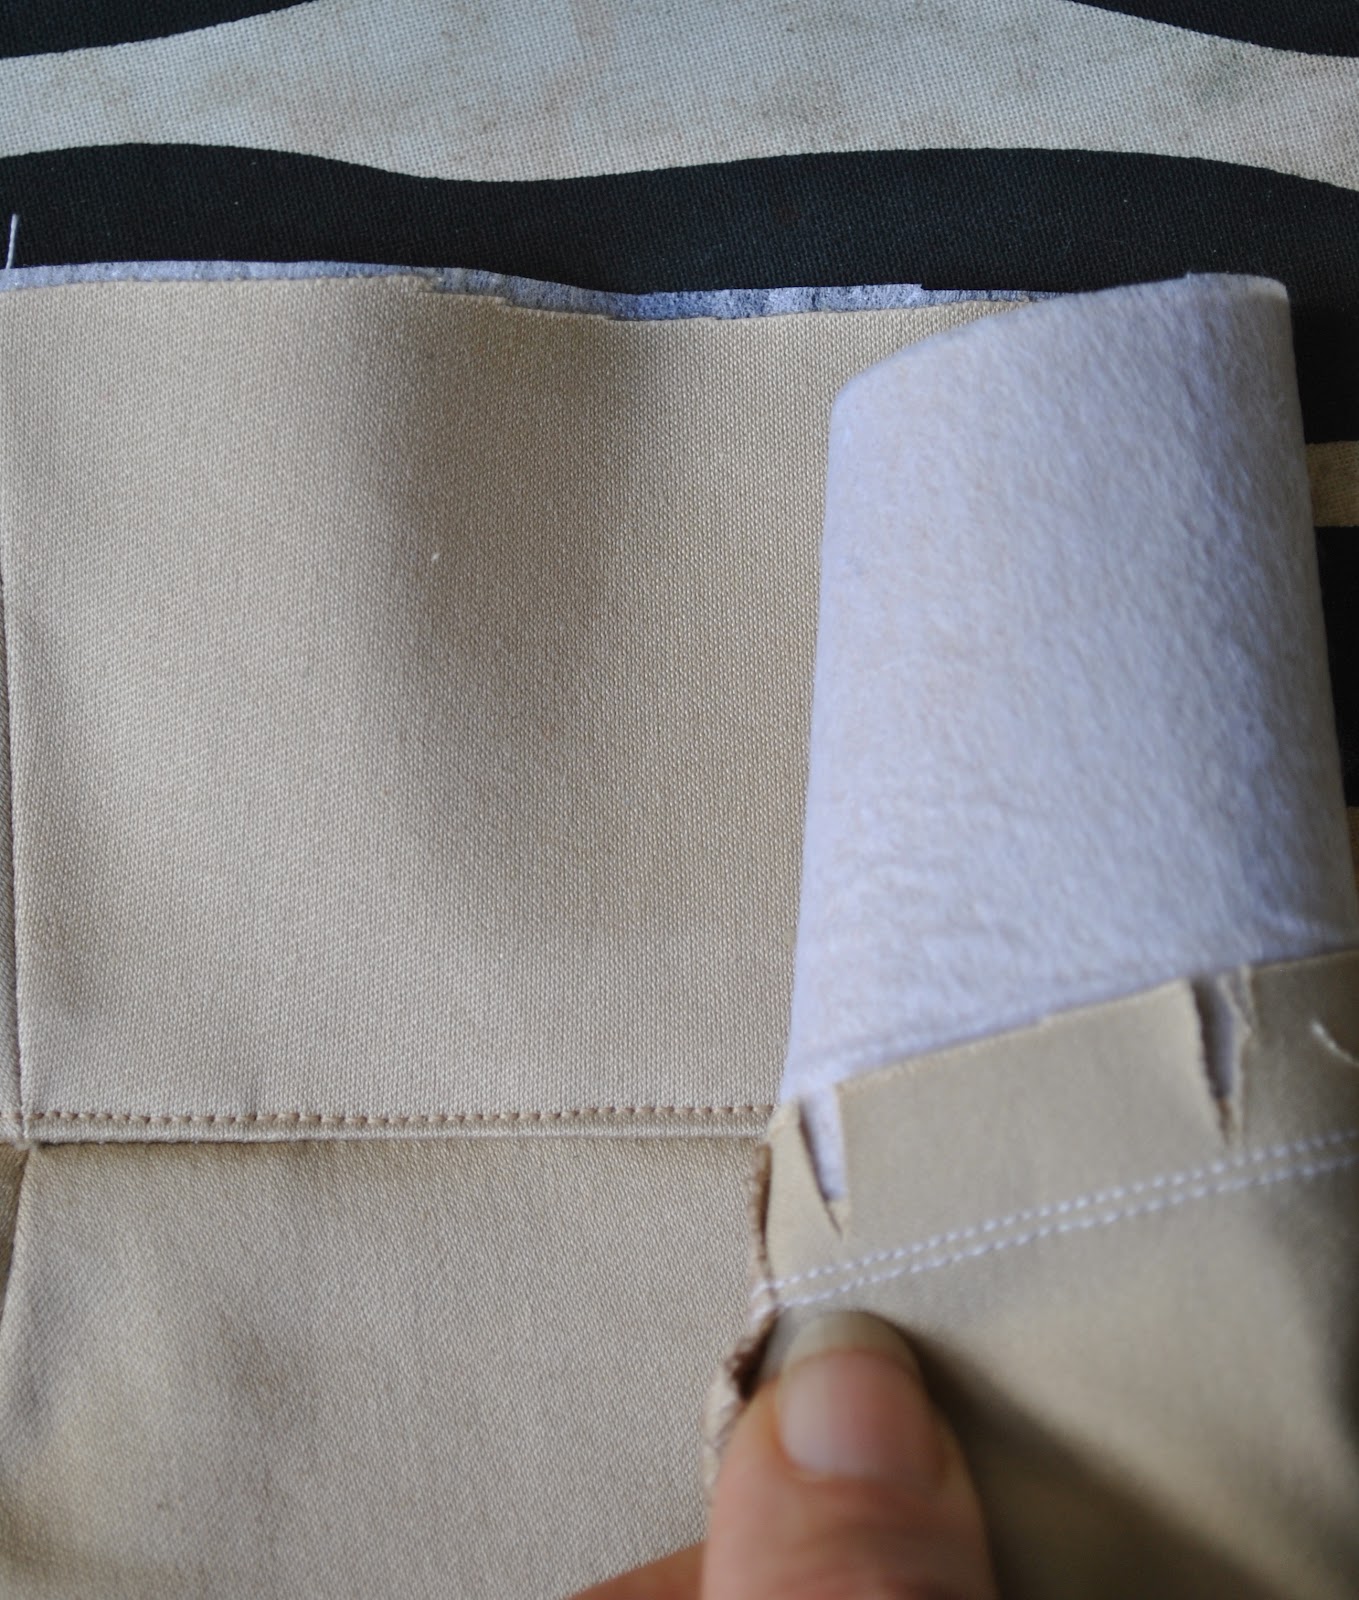
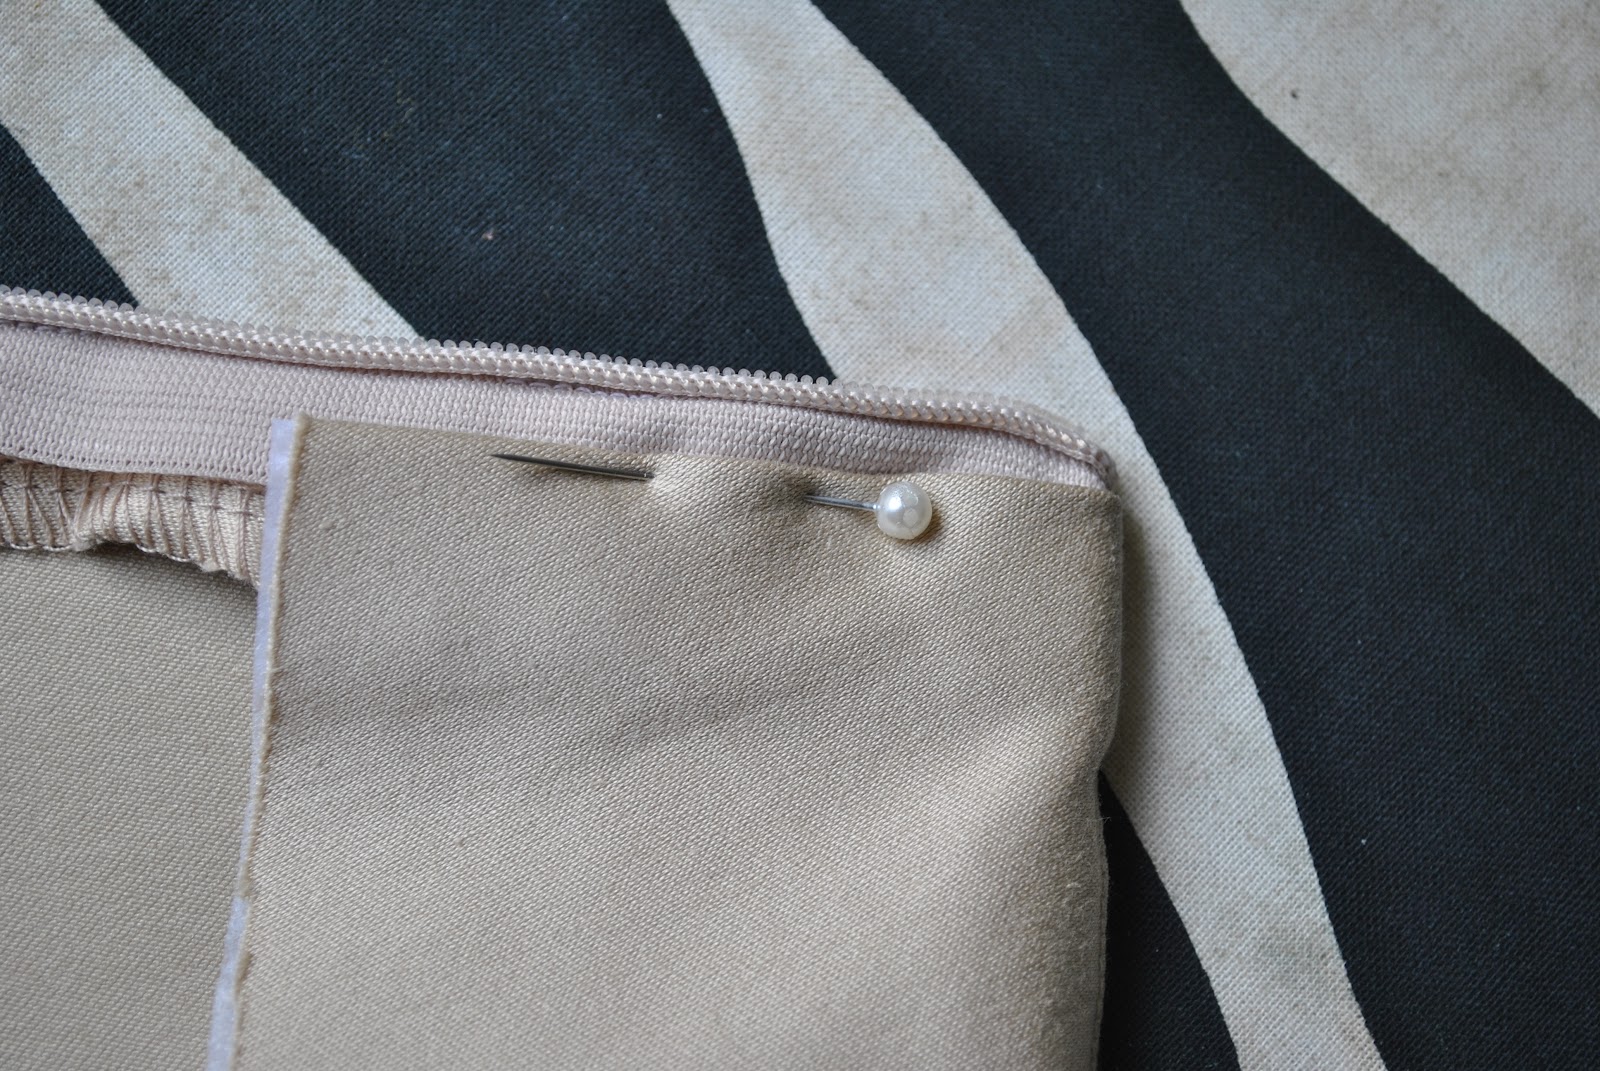
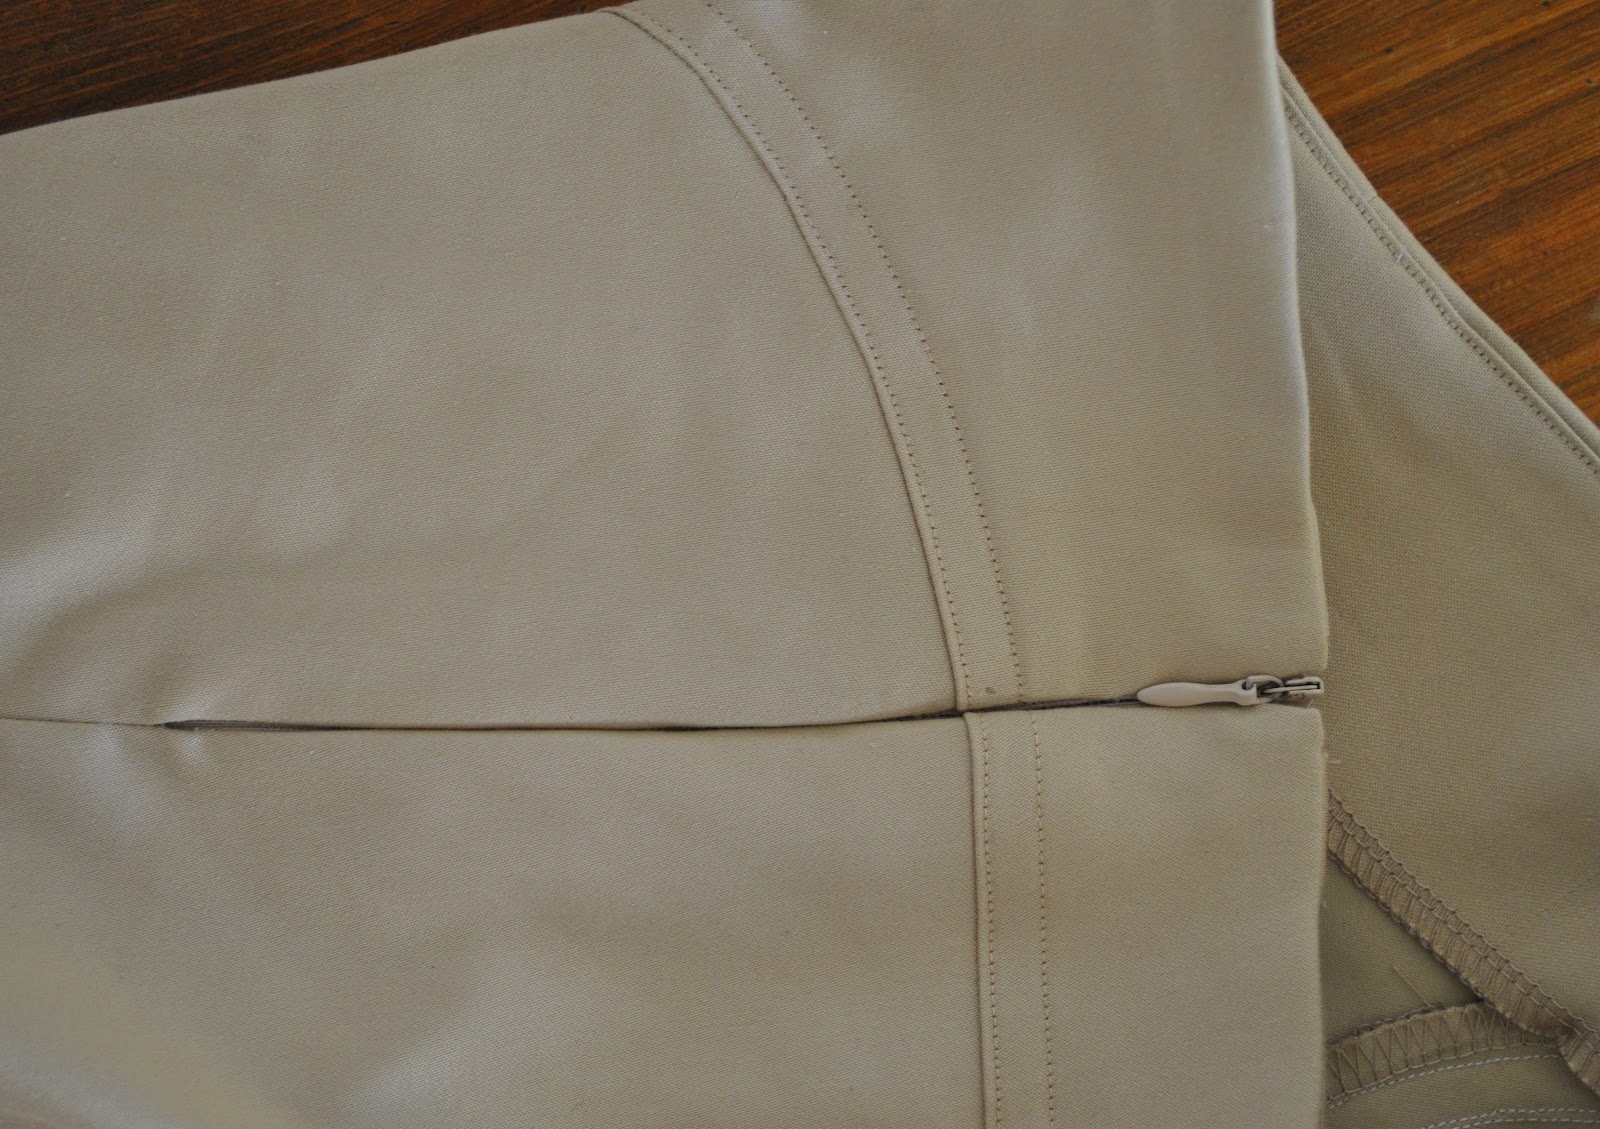
I even re-used the zip! hehe, of course it was too long but I left it long.  It is no bother; sandwiched unobtrusively between the skirt and those tulle gathers it cannot be seen or felt!
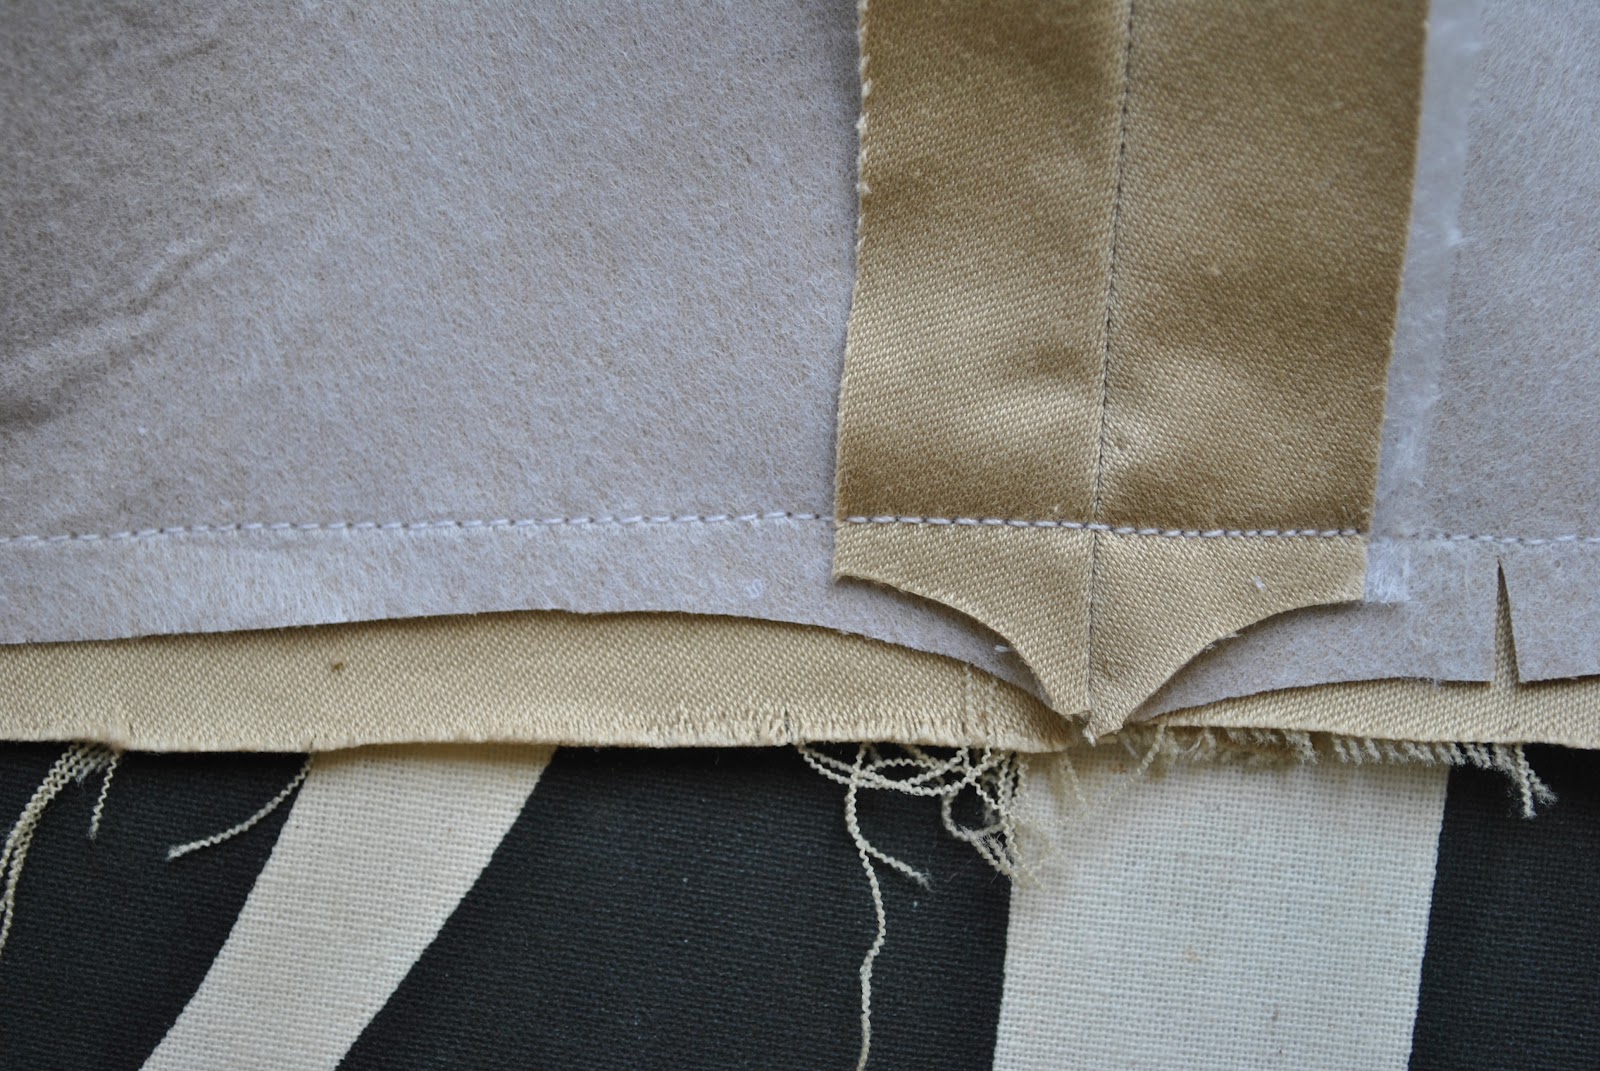
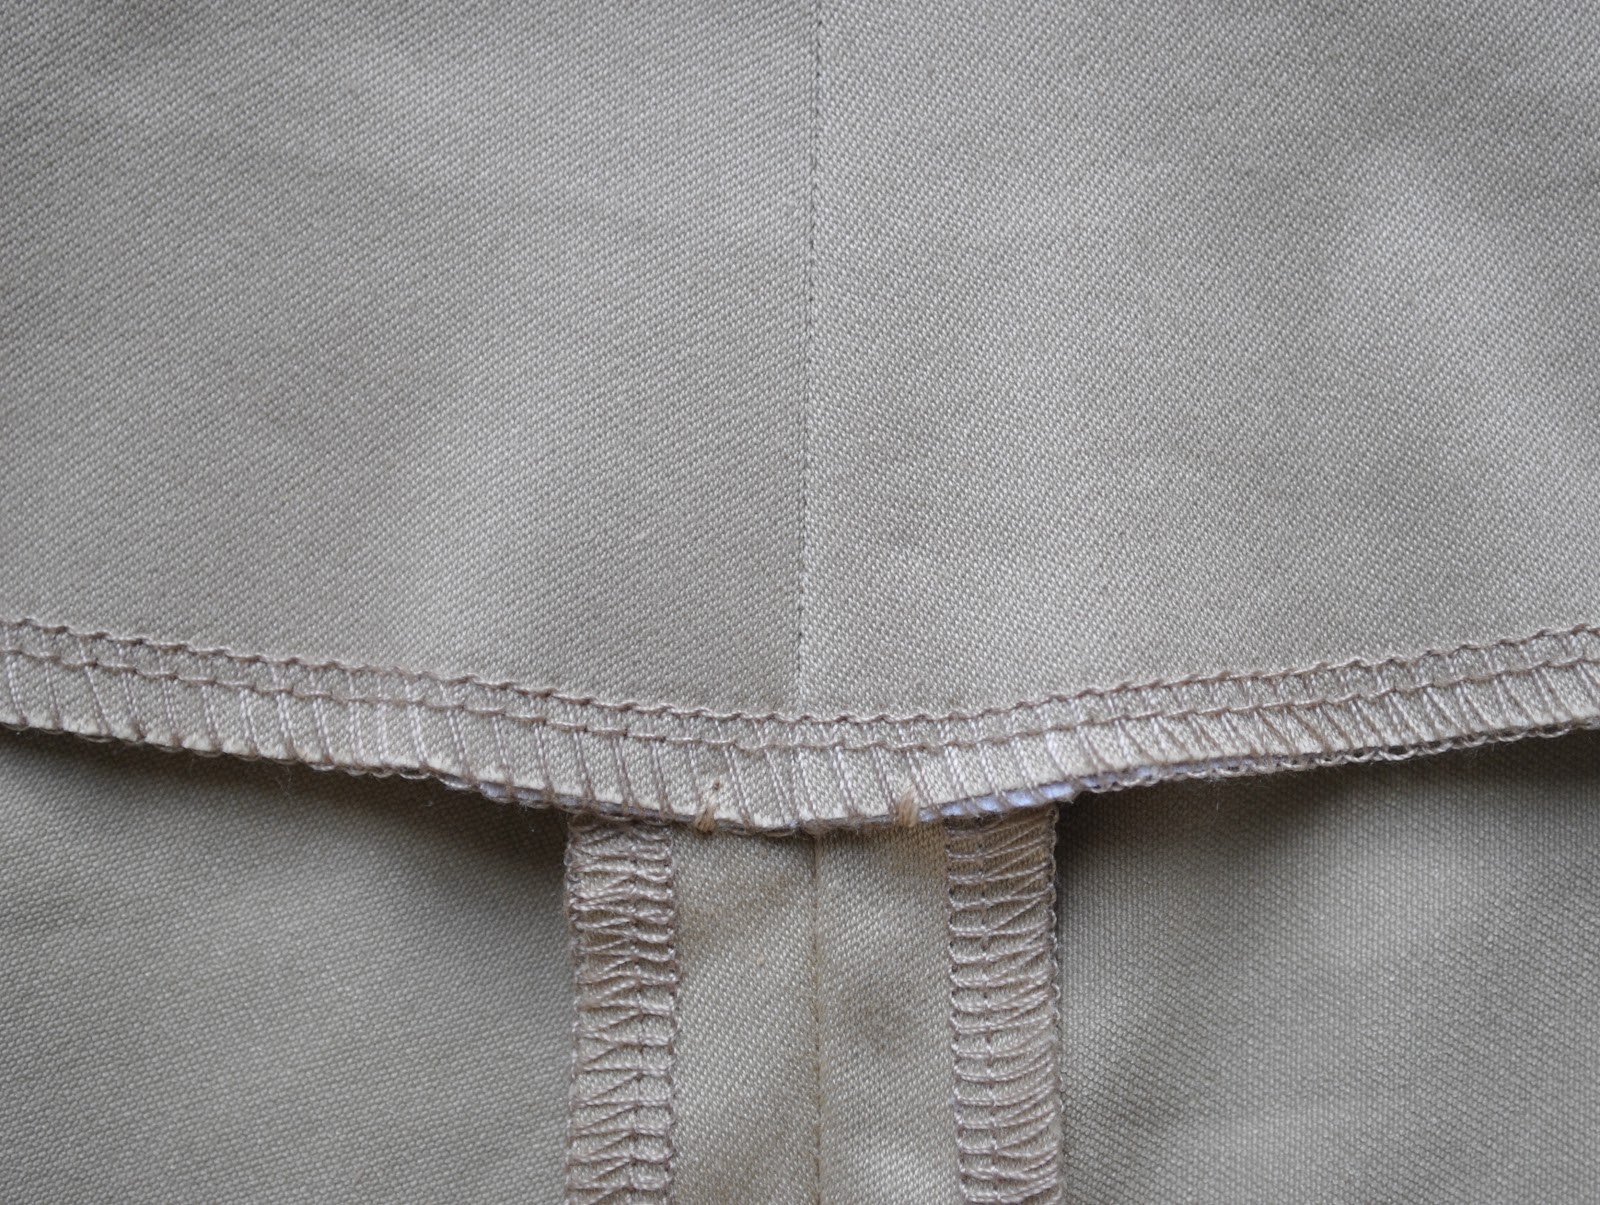
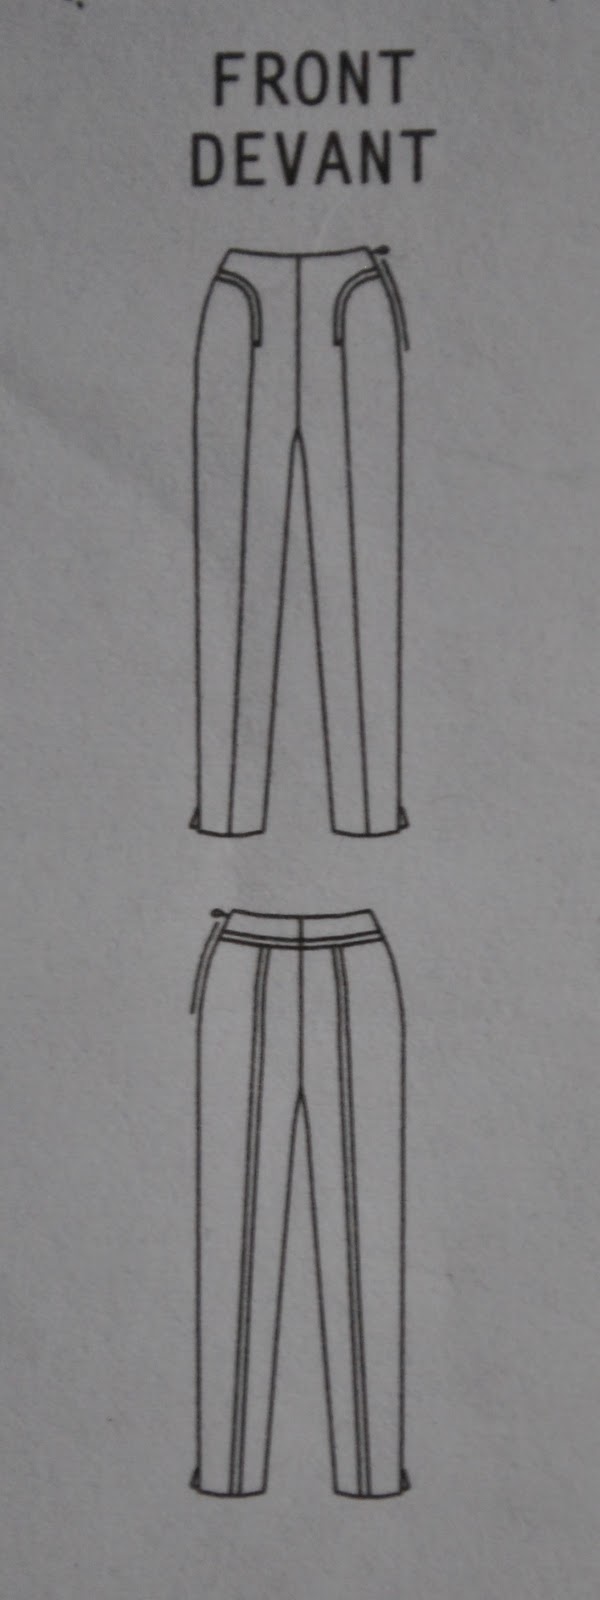
I eliminated the centre front seam and cut the skirt front/back section as one big massive piece.  I was able to do this by incorporating part of the ballgown side seams, and at the centre front and halfway around towards the back some of the original hem has also been left intact.   Instead of cutting a hemline facing as stipulated in the pattern, I hand-stitched a narrow hem to mimic the remains of the original on my ballgown.  My skirt is about 10cm longer than the pattern.

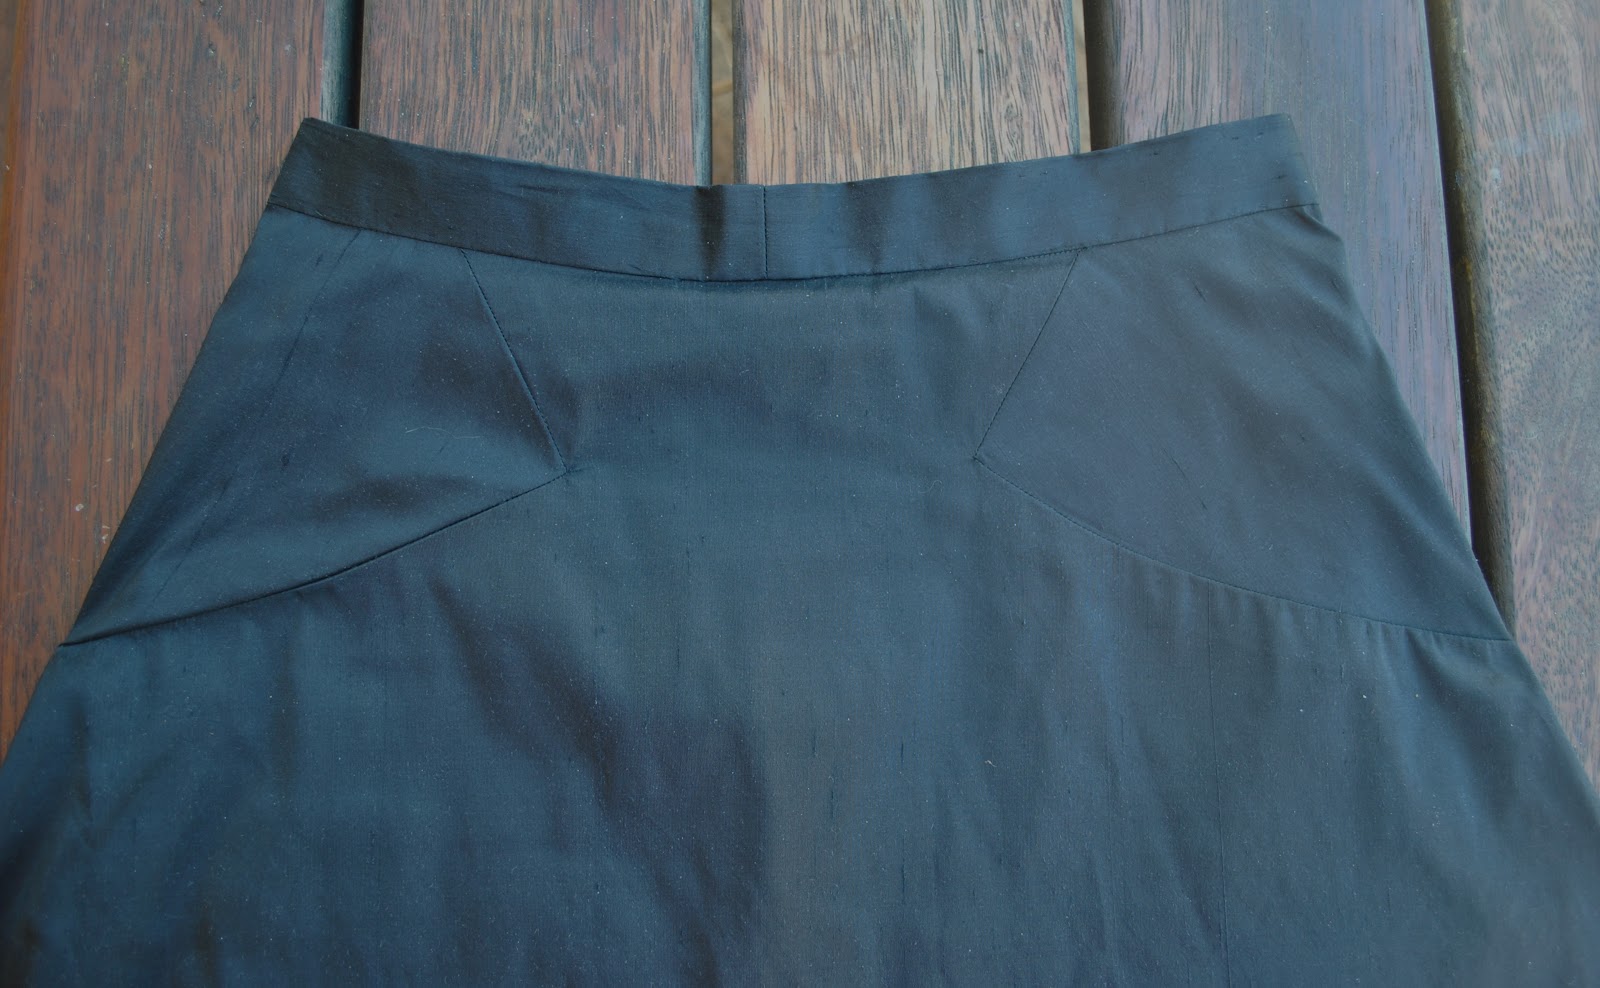
I also cut the centre back and side back pieces to incorporate my slight sway back alterations to the pattern, illustrated in my first version of this pattern here.
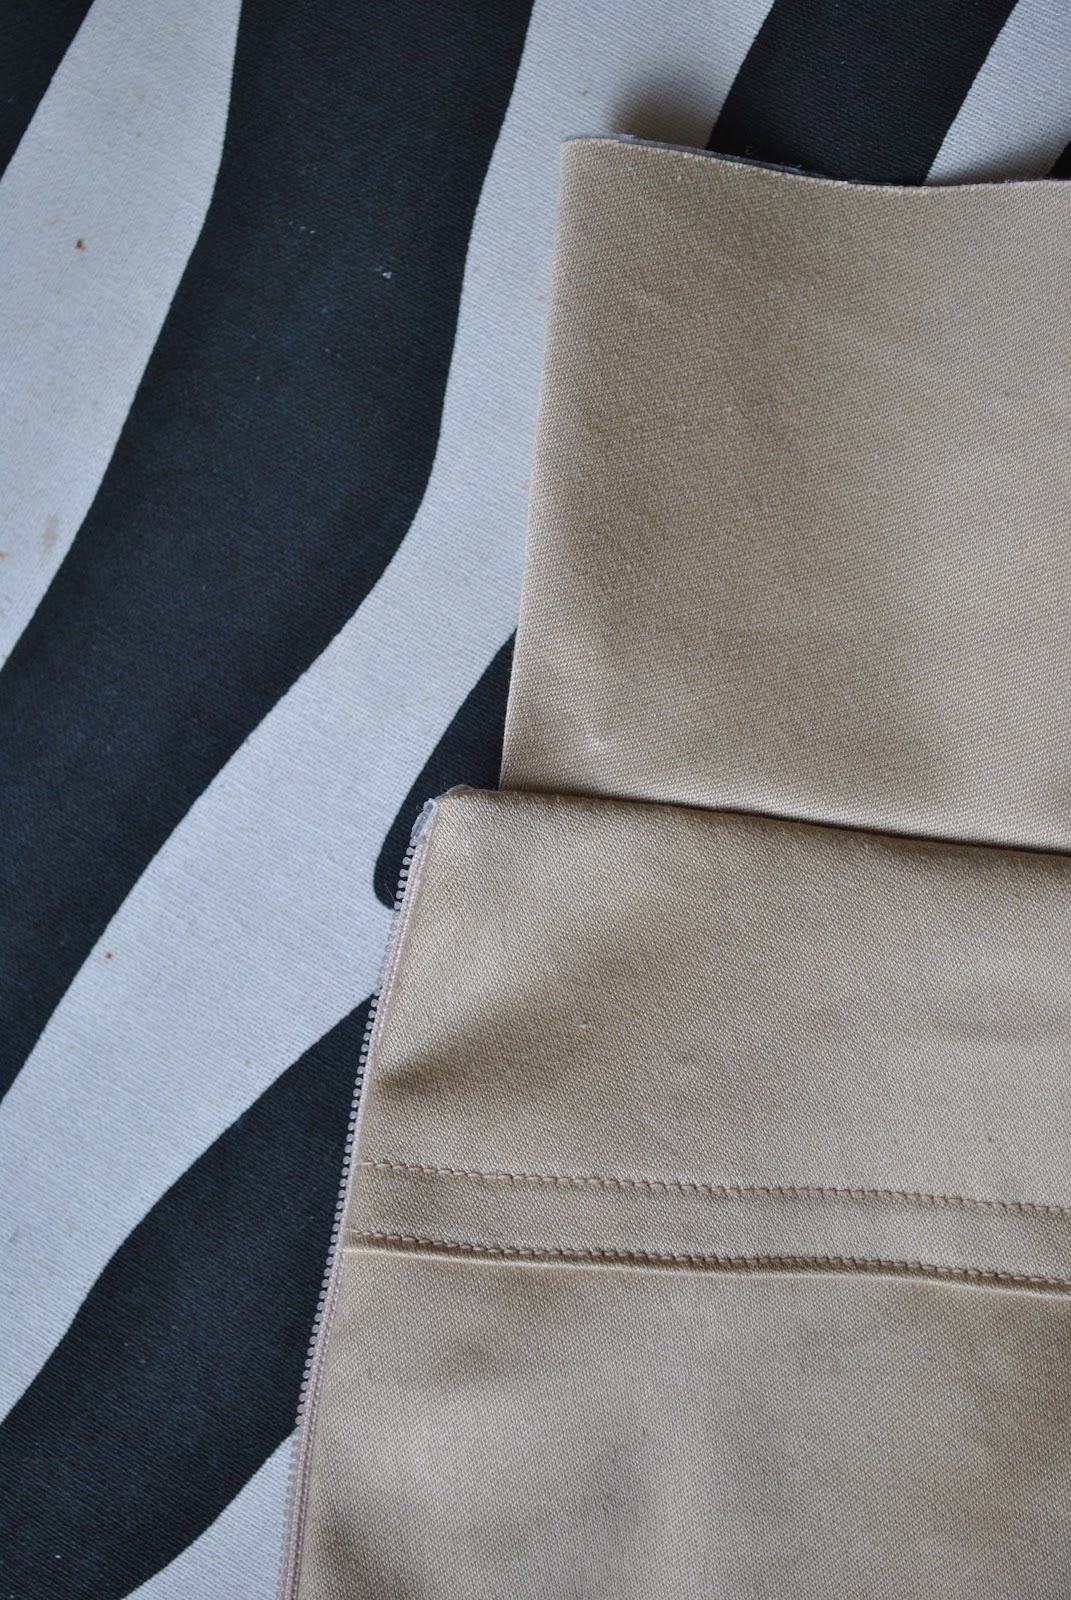
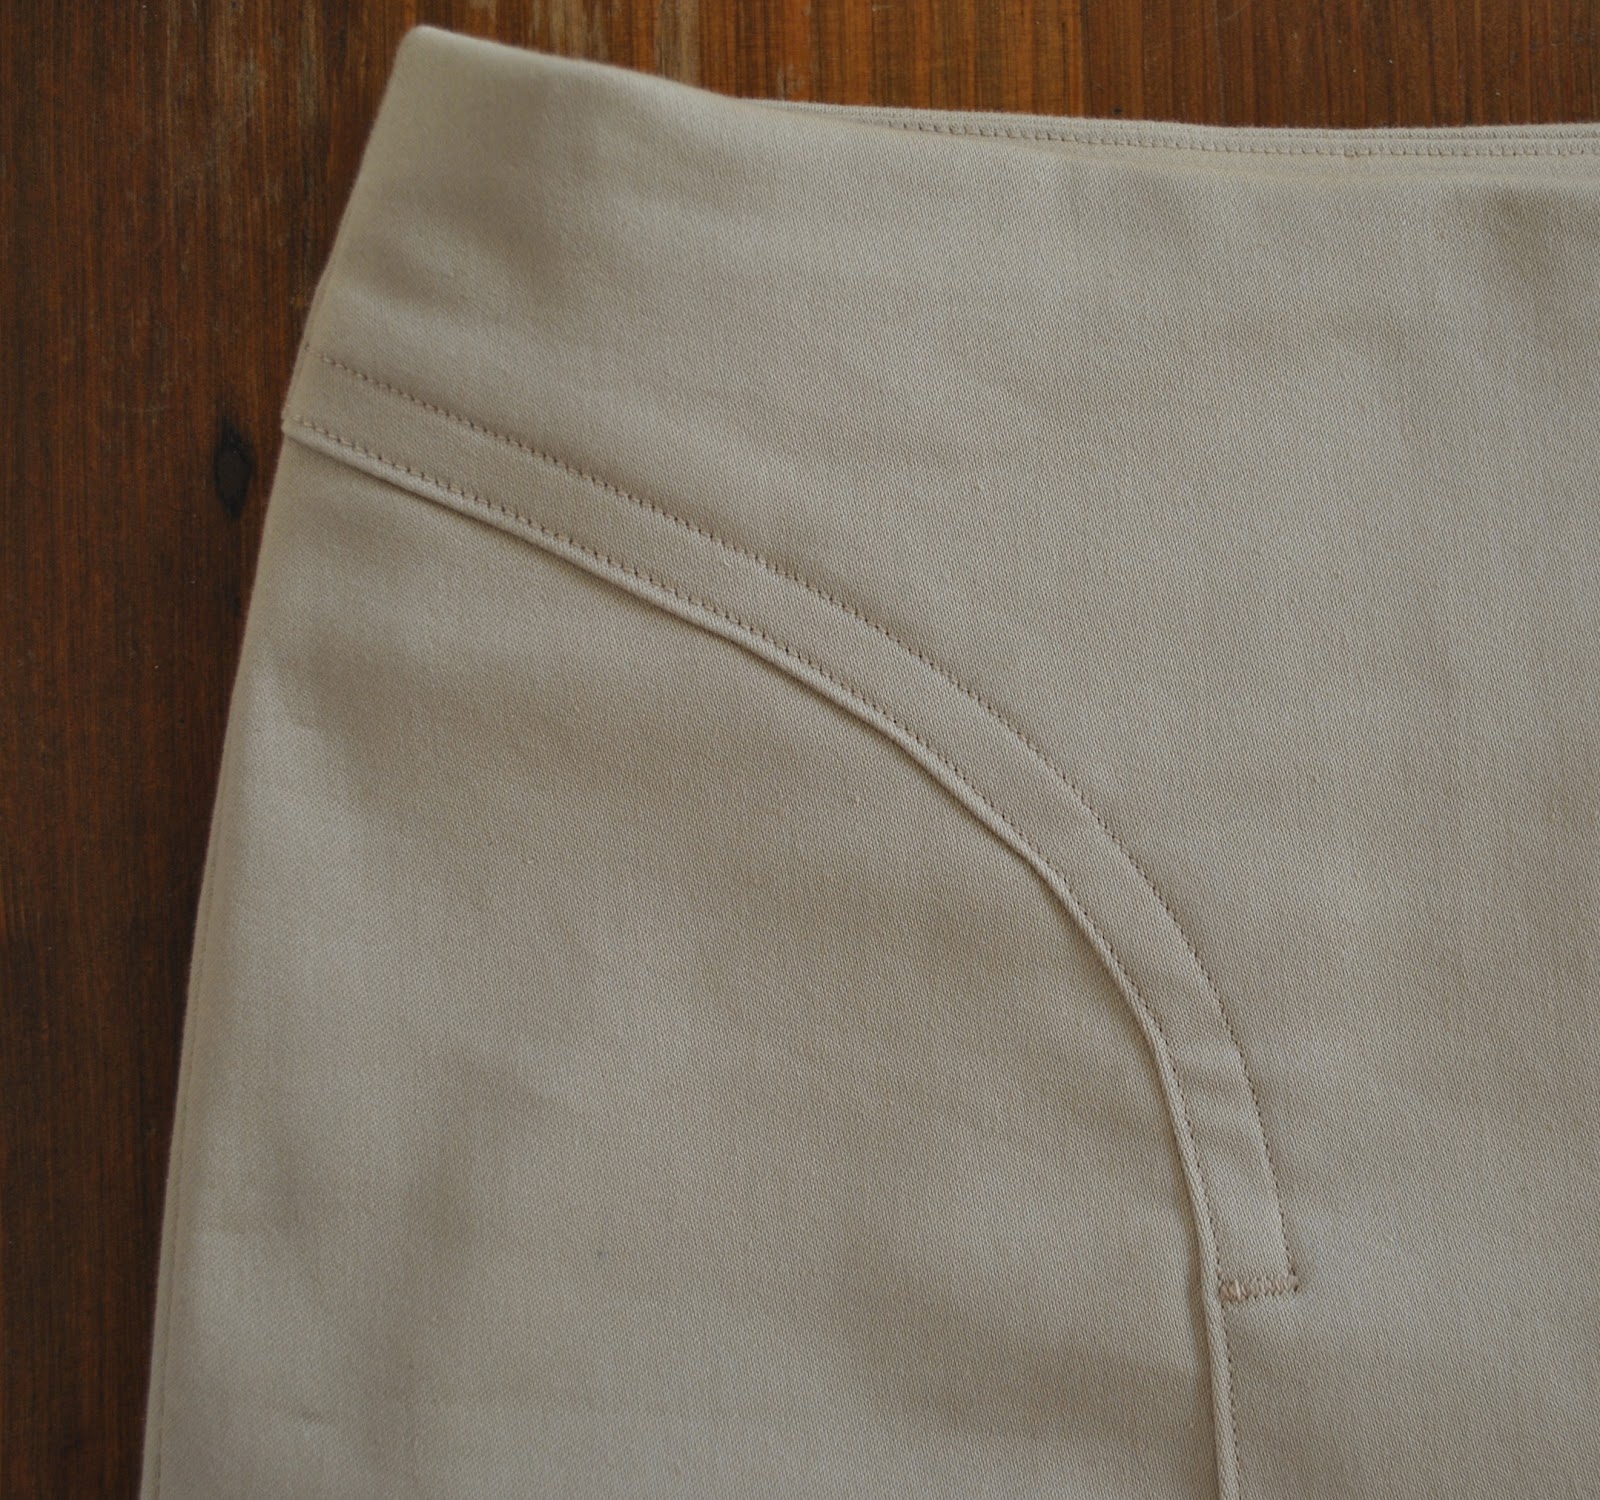
The waistband has a central vertical joining seam, and is about half the width, necessary adaptions due to the lack of fabric.  I think I do actually prefer it this narrower width too!

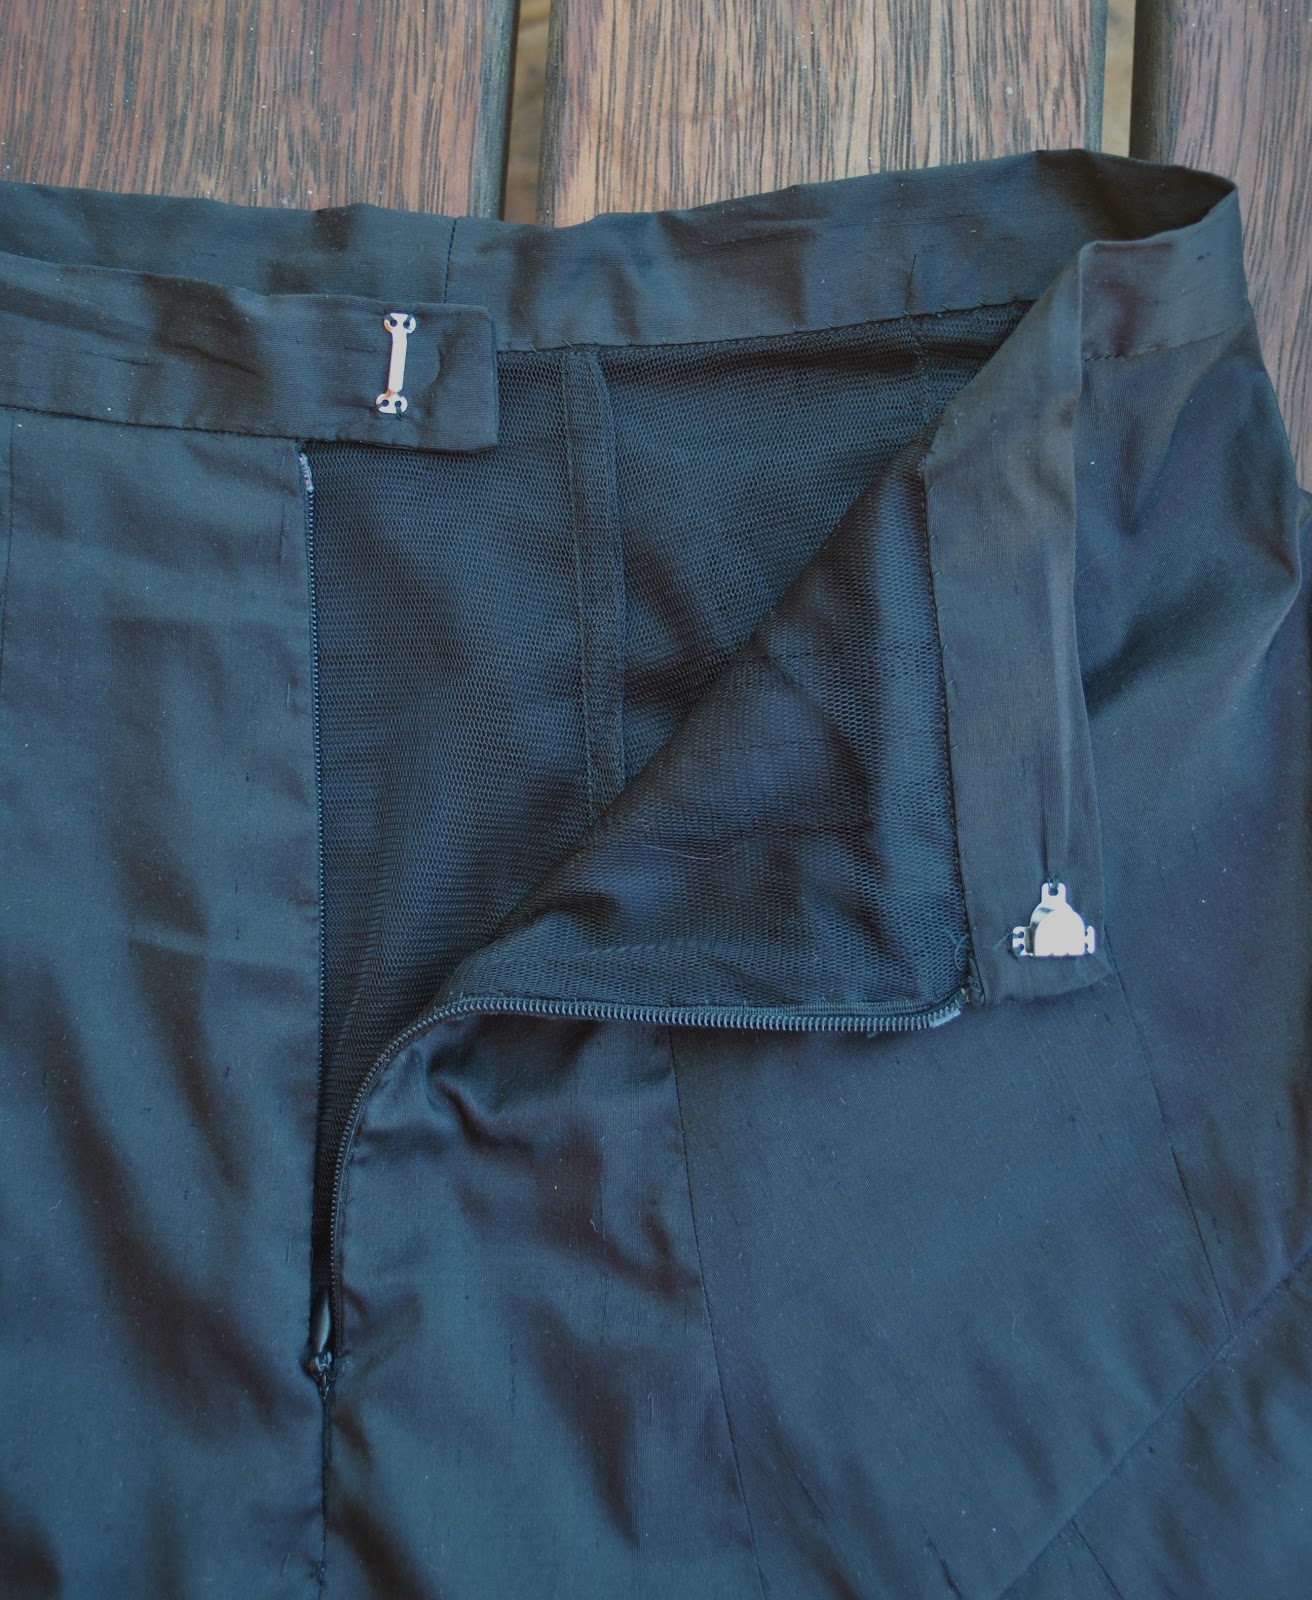
OK (deep breath, confession time)…. er, I left off the pockets too.
:O  
Hehe; normally I am such a rabid pocket-lover I wouldn’t dream of leaving off something so inherently marvellous, buuut…  (here we go) I sorta had to mostly through lack of fabric, but also, while wearing my previous two versions of this skirt pattern (here and here) I have found that I pretty much never use the pockets.  They are situated very high, and have a very narrow opening that is almost impossible to widen without disrupting the structural integrity of the skirt/waistband junction.  Furthermore: they are actually kind of a nuisance.  Since they are true “bags” that just hang there with nothing to tether them, they have a tendency to bunch up a bit when you’re putting the skirt on; and need to be manually smoothed down flat to avoid obvious bulges on one’s hips.  When the skirt is lined like this one; that is even more annoying to sort out: since you have to either do it from inside the pockets themselves (see previous note about laughably small pocket openings) or lift up the skirt and pull them down straight from underneath.   In short: I have to concede that this particular design is better off without them!   Shock!
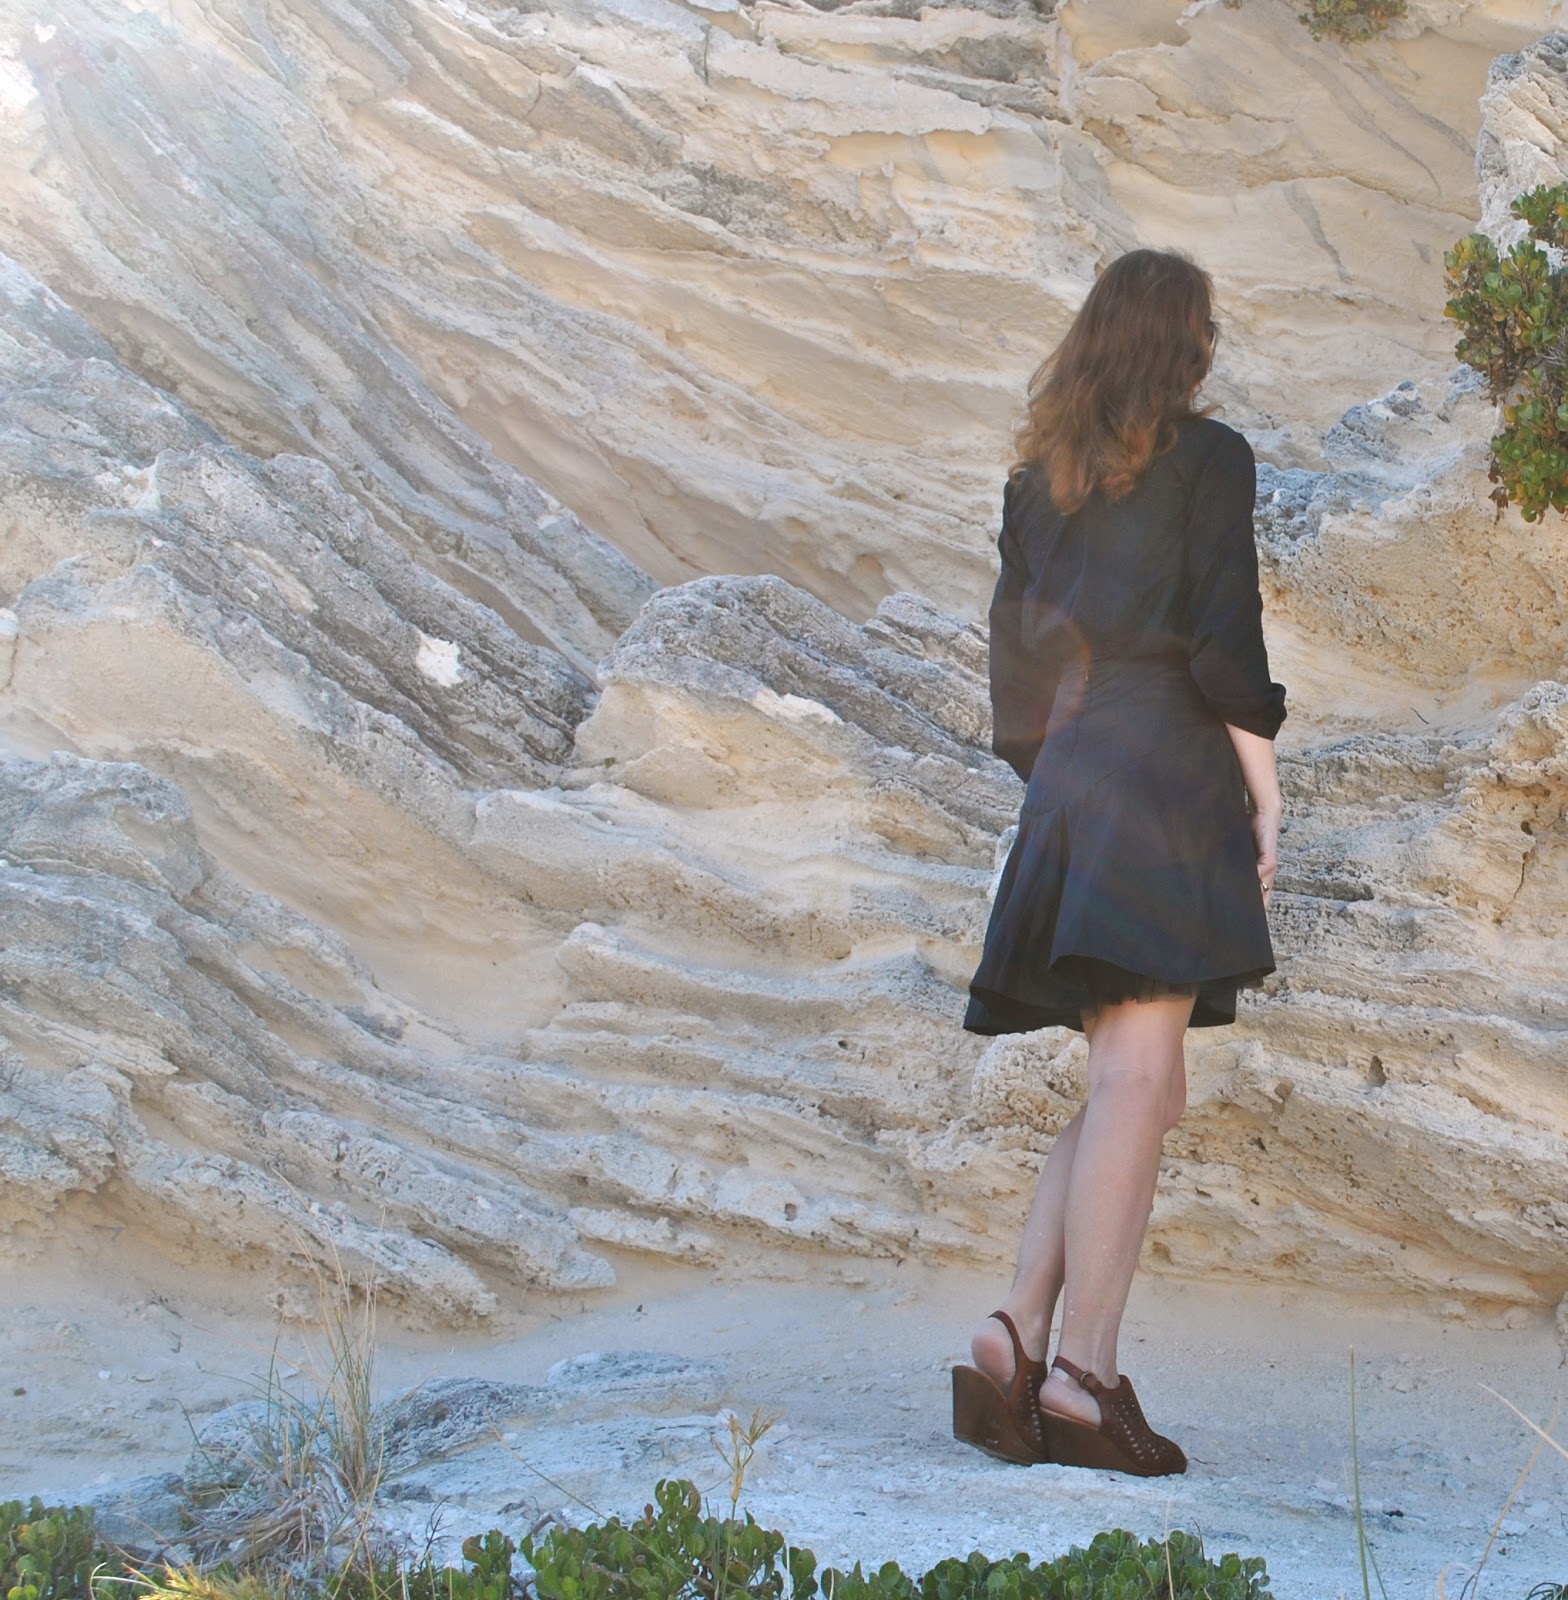
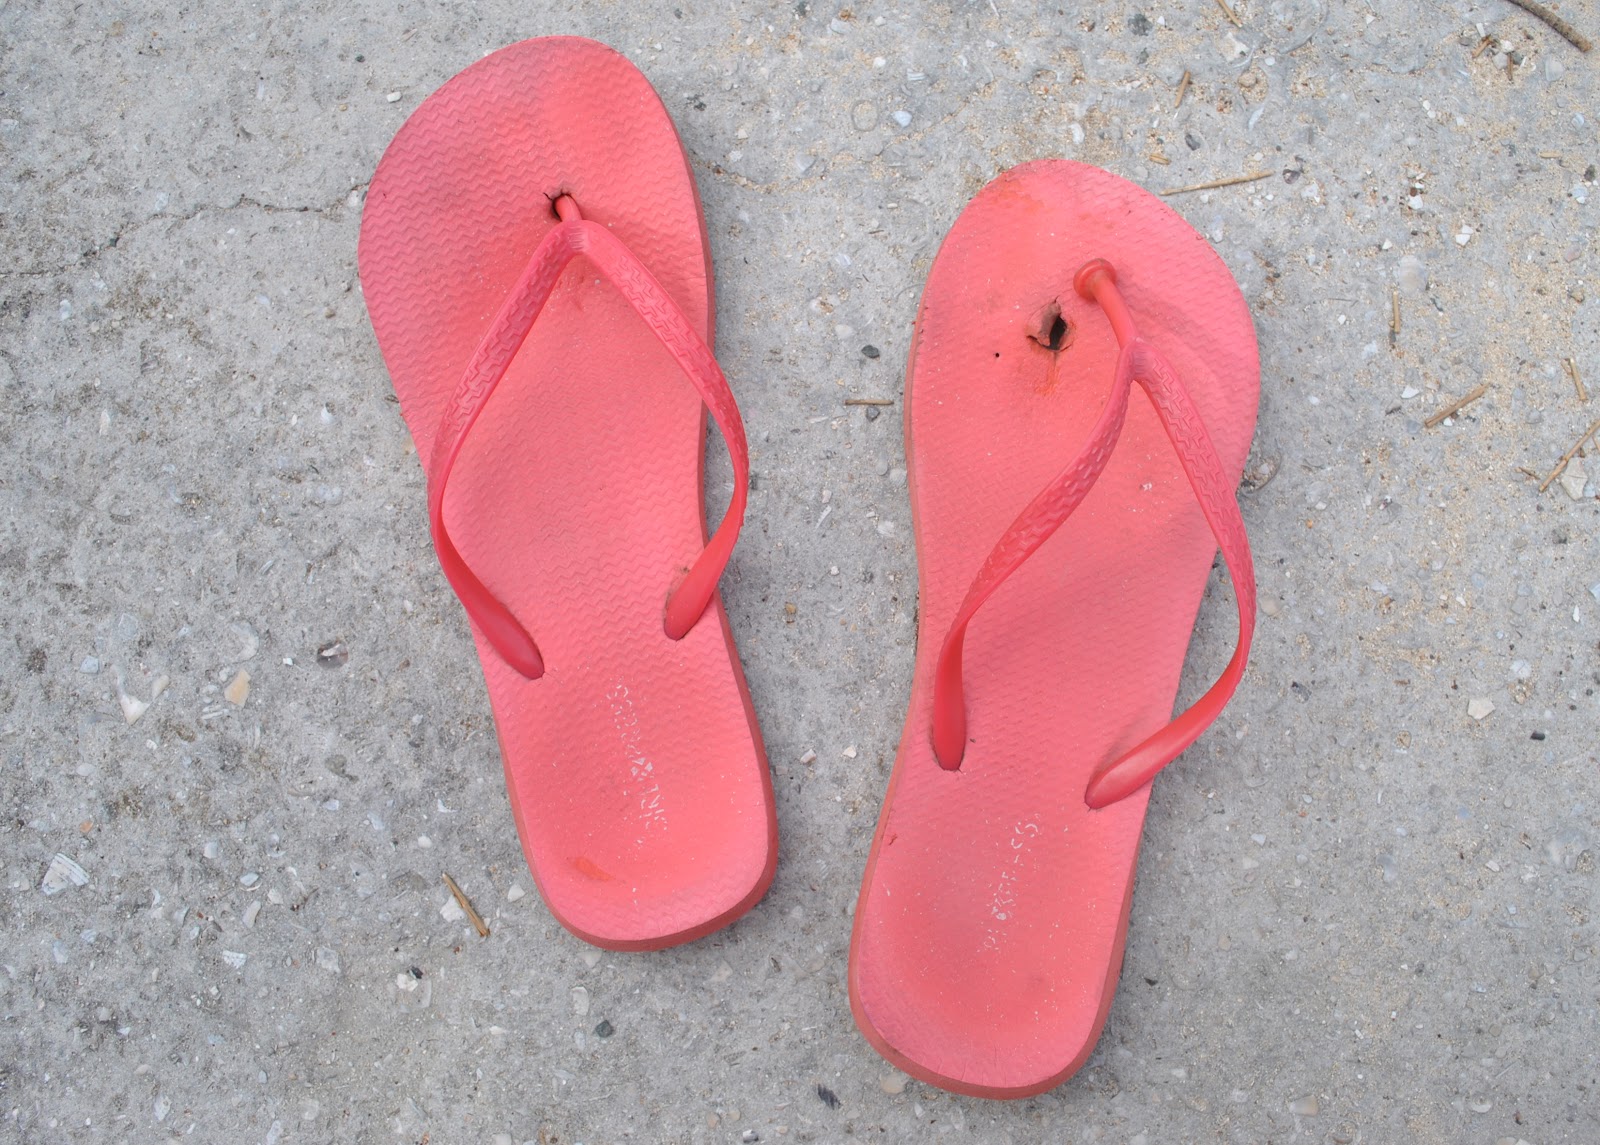
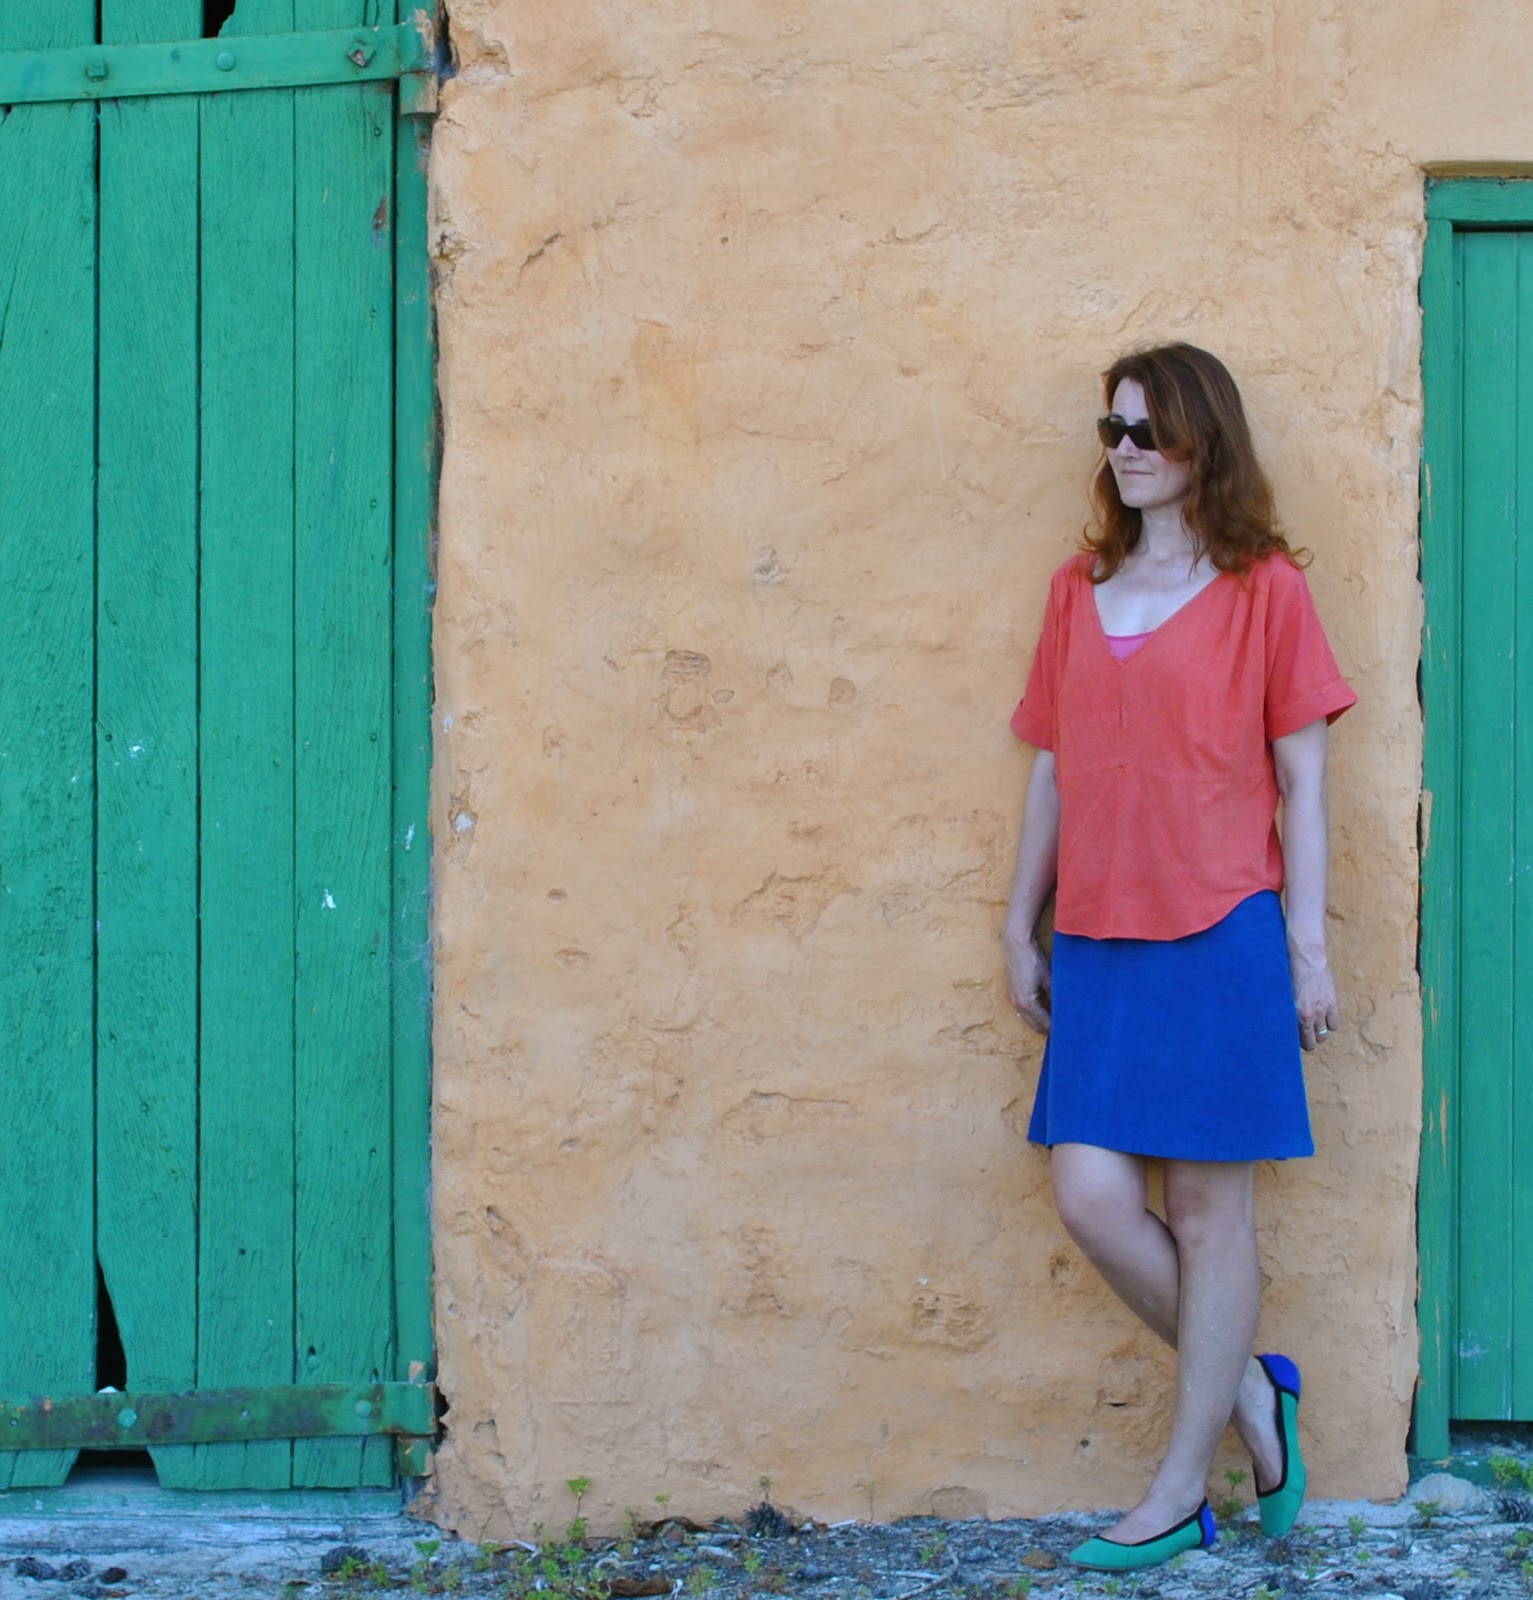
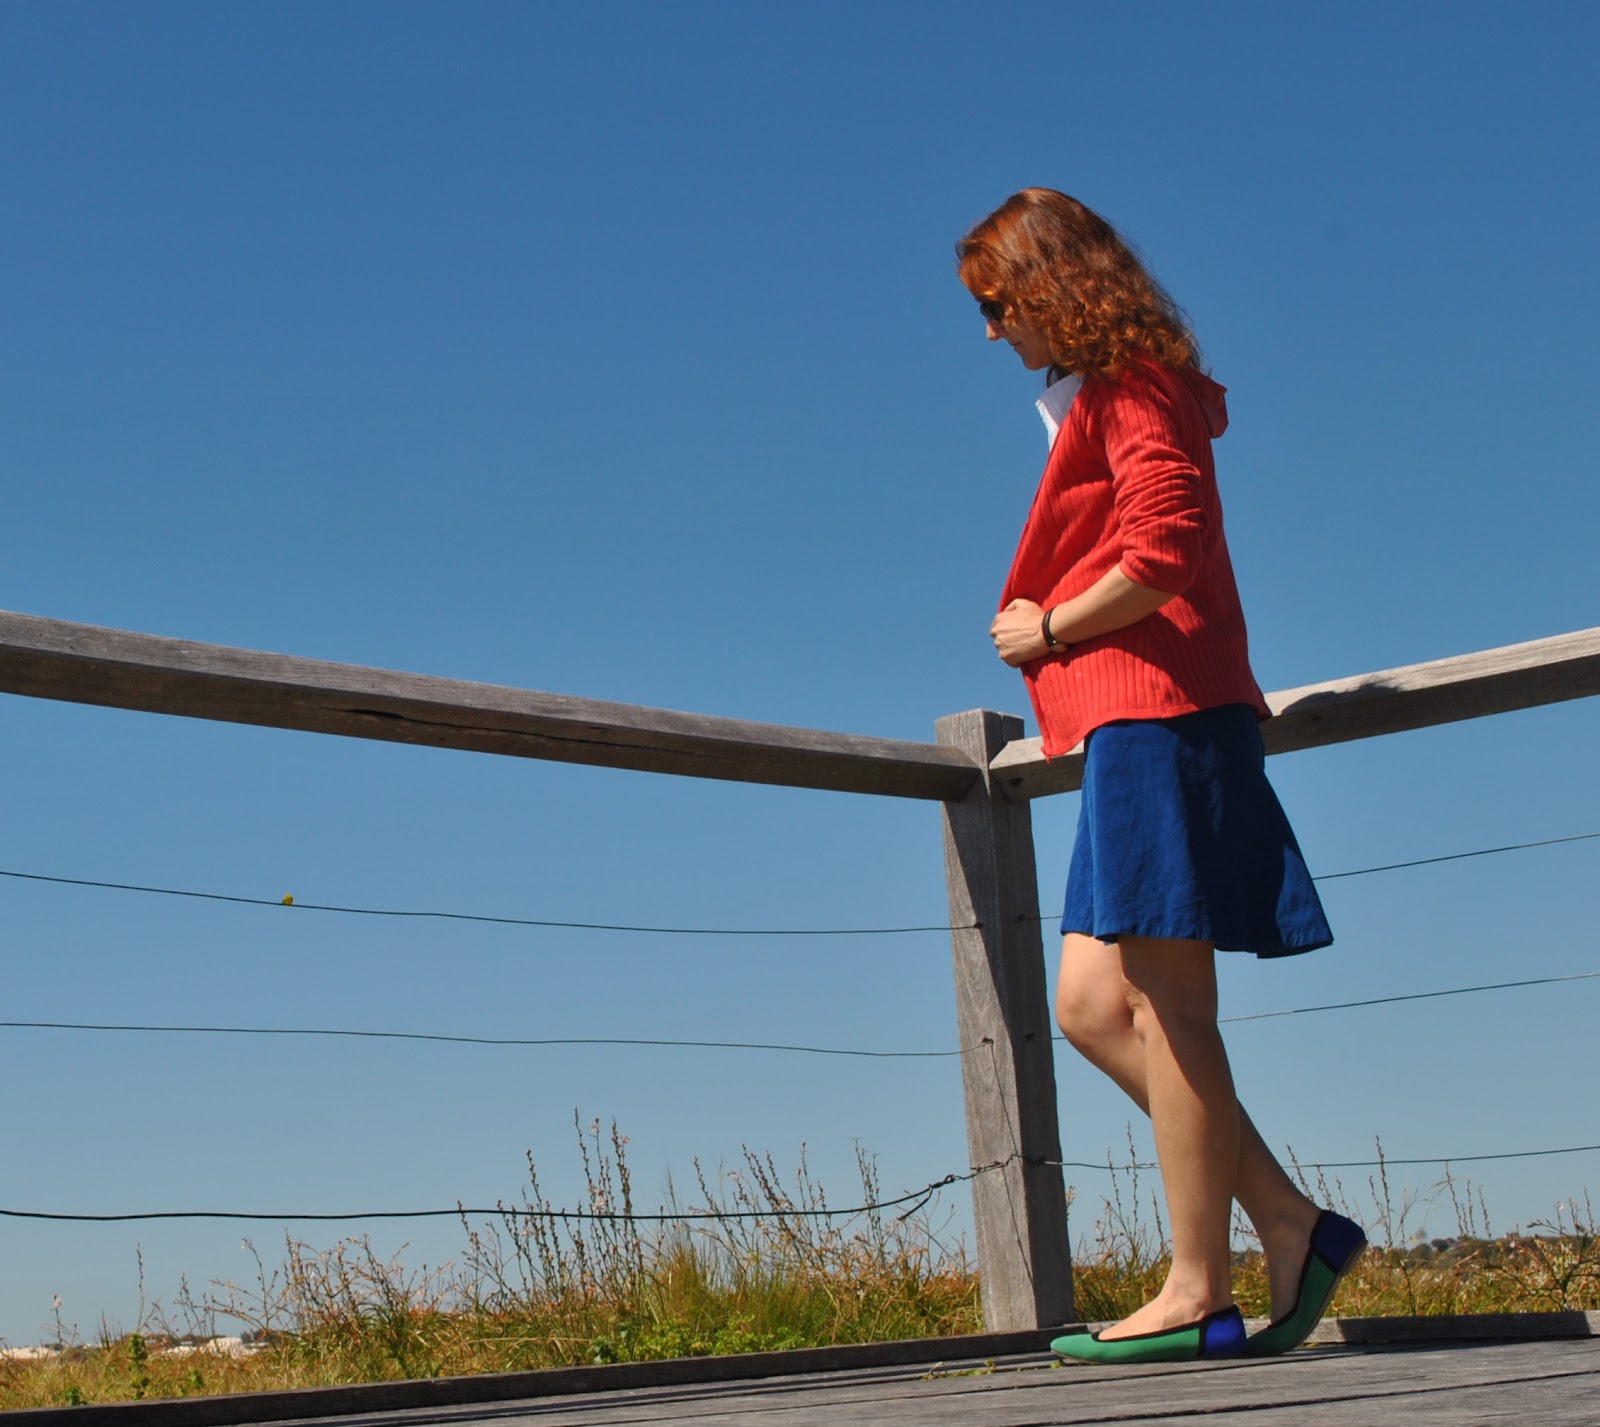
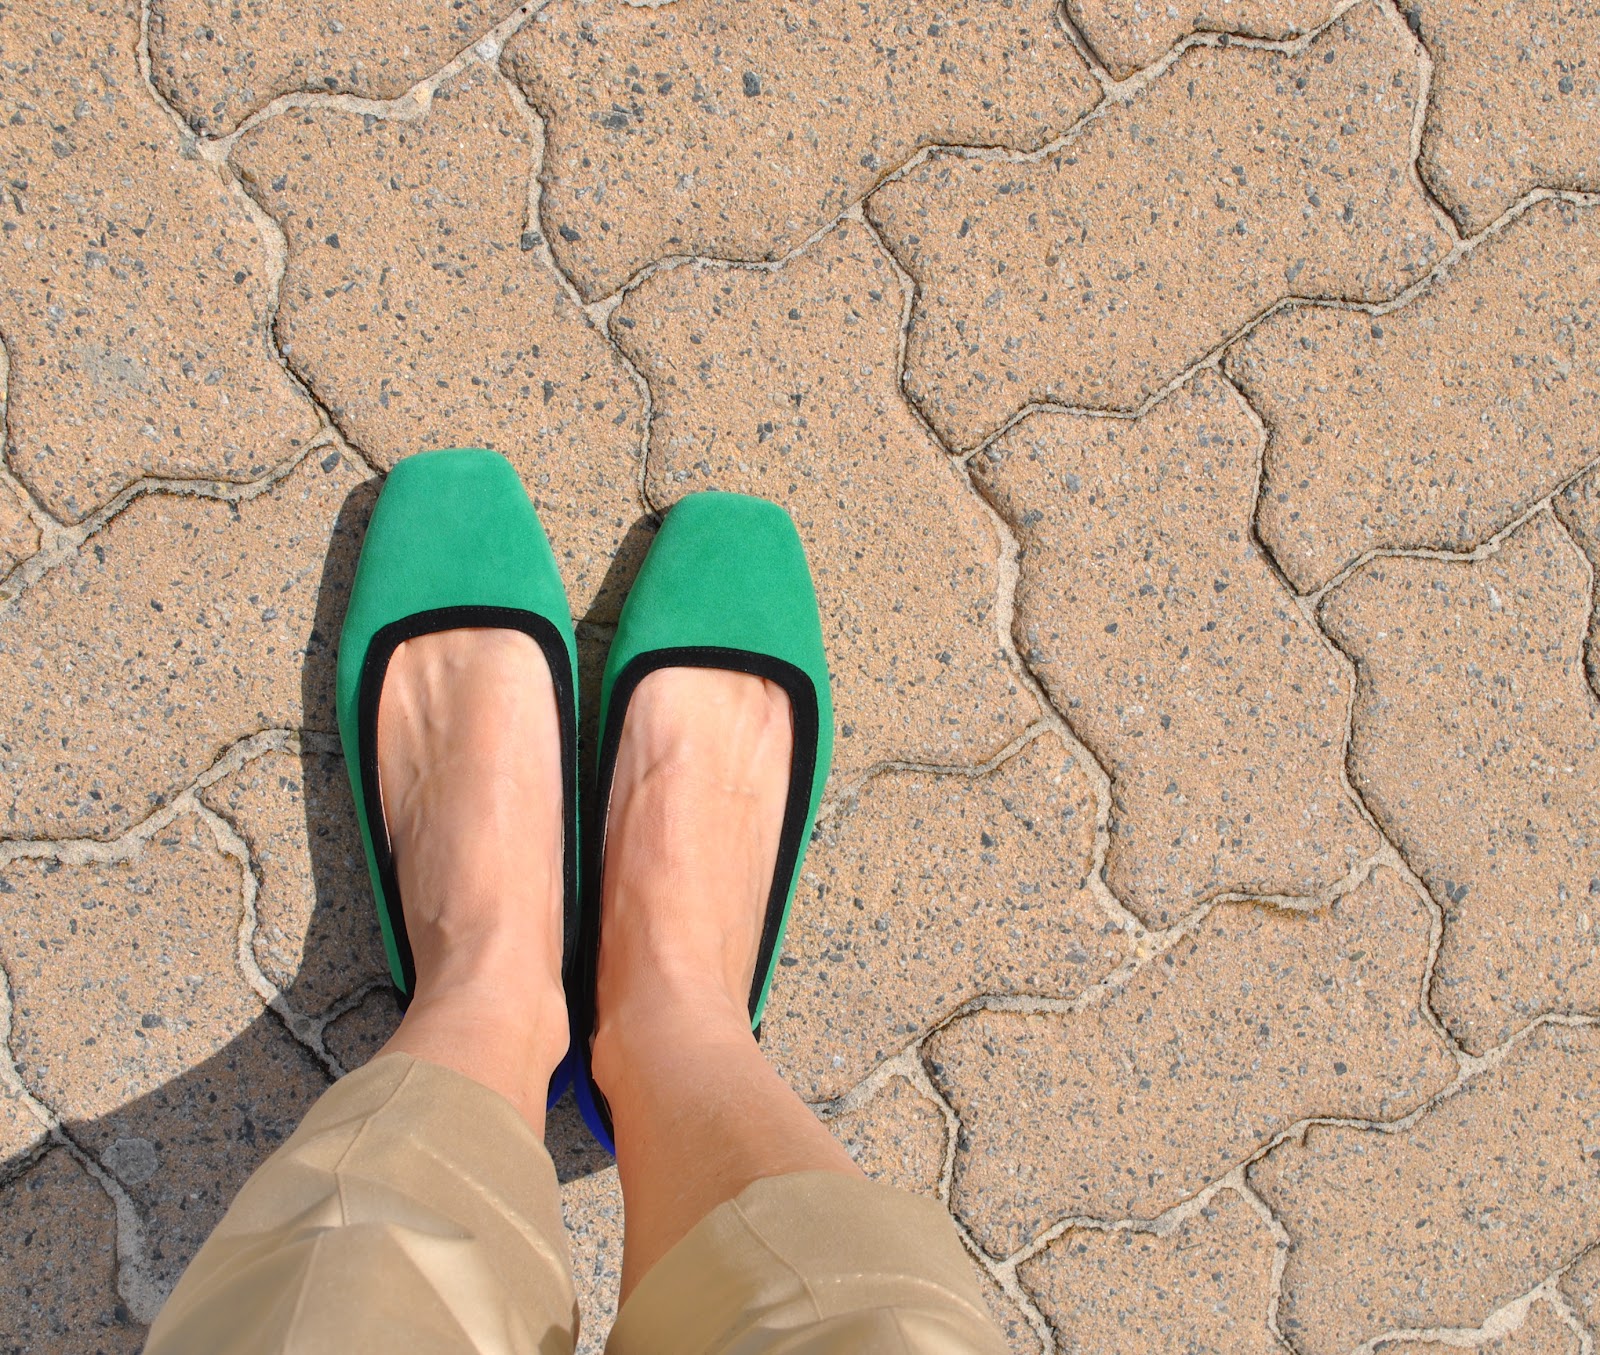
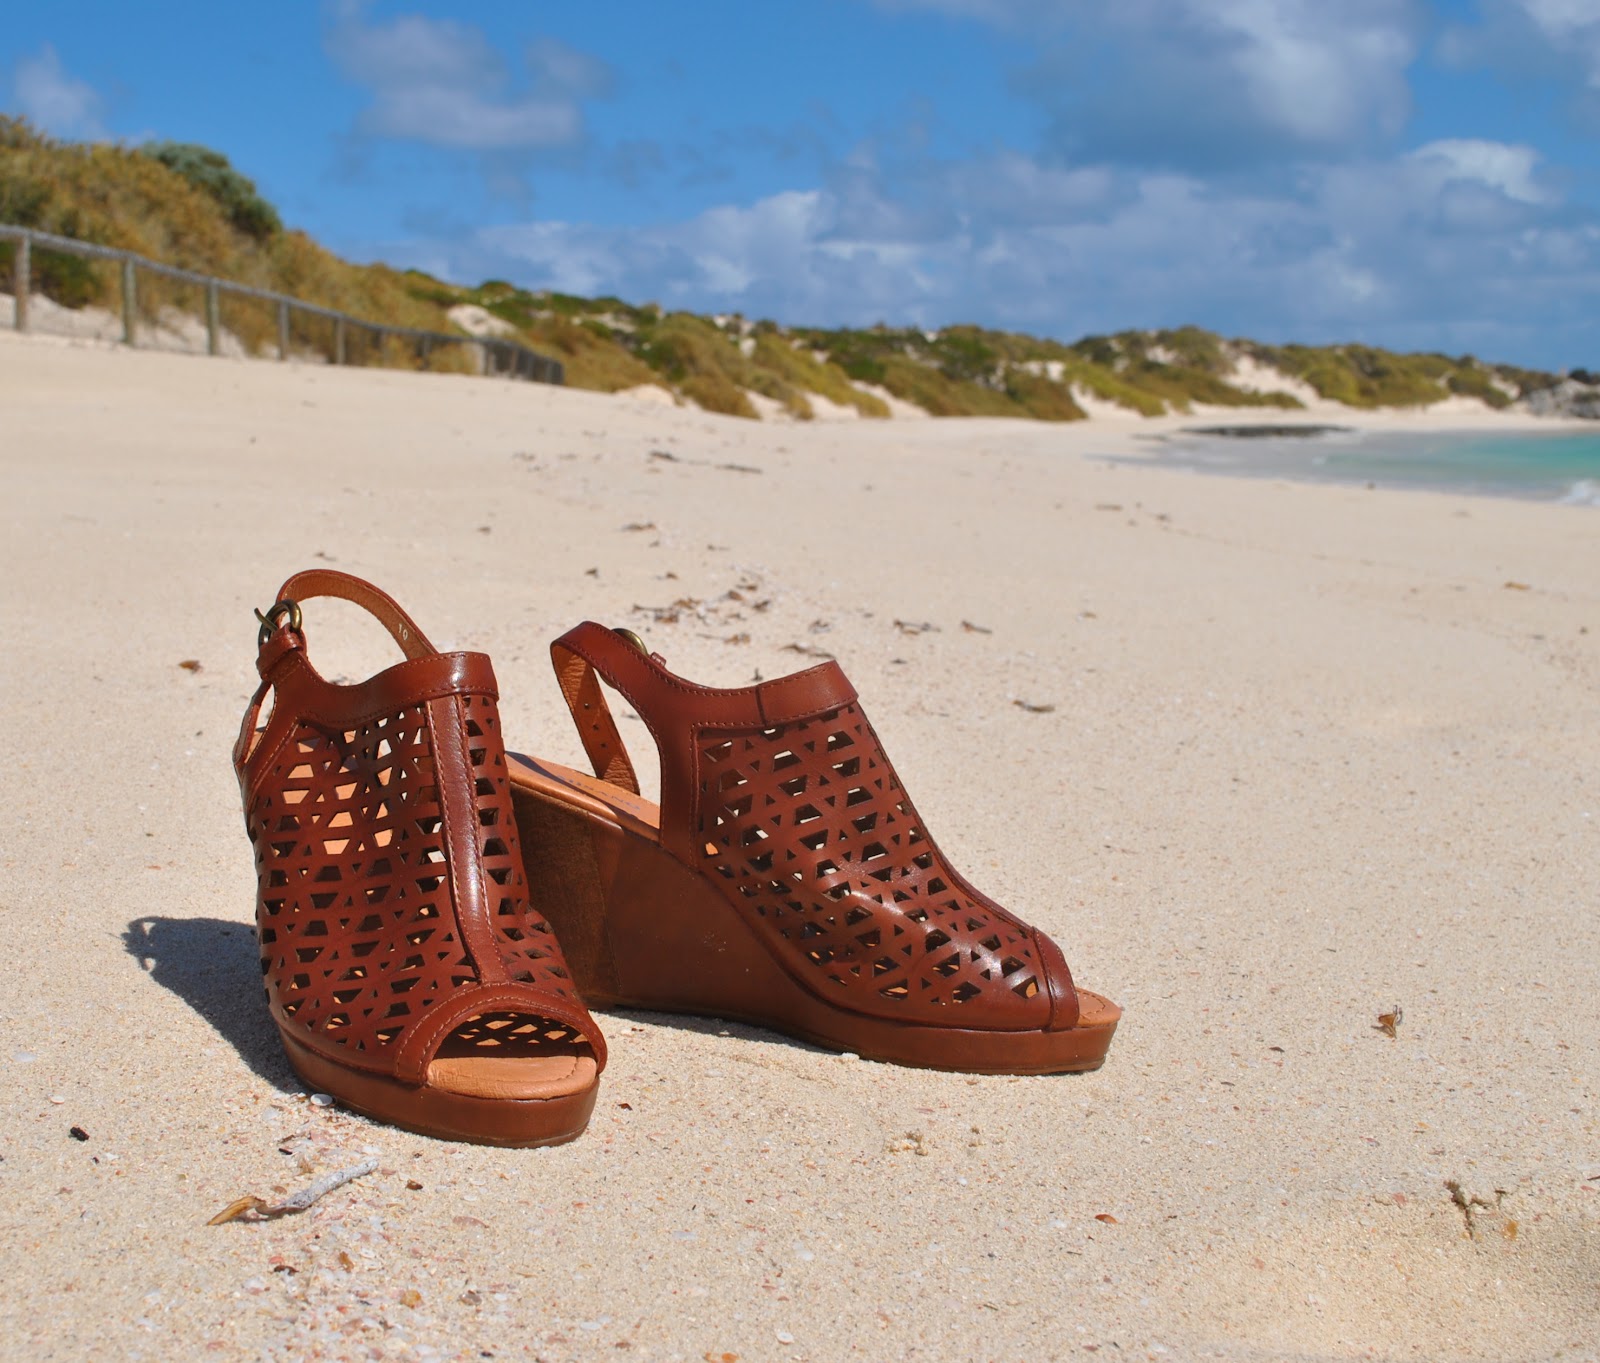
And please admire my rather fantabulous new shoes for summer too.  They are from Misano, like my ballet flats.  This warm rich shade of caramel leather is definitely my kind of shade, and will liven up and enrich all of my favoured neutrals.  I like that practical wedge heel too, safer and a lot easier to get about in than a stiletto.  I am really looking forward to wearing them and wearing them.  These are going to be long term players in my shoe collection!

Details:
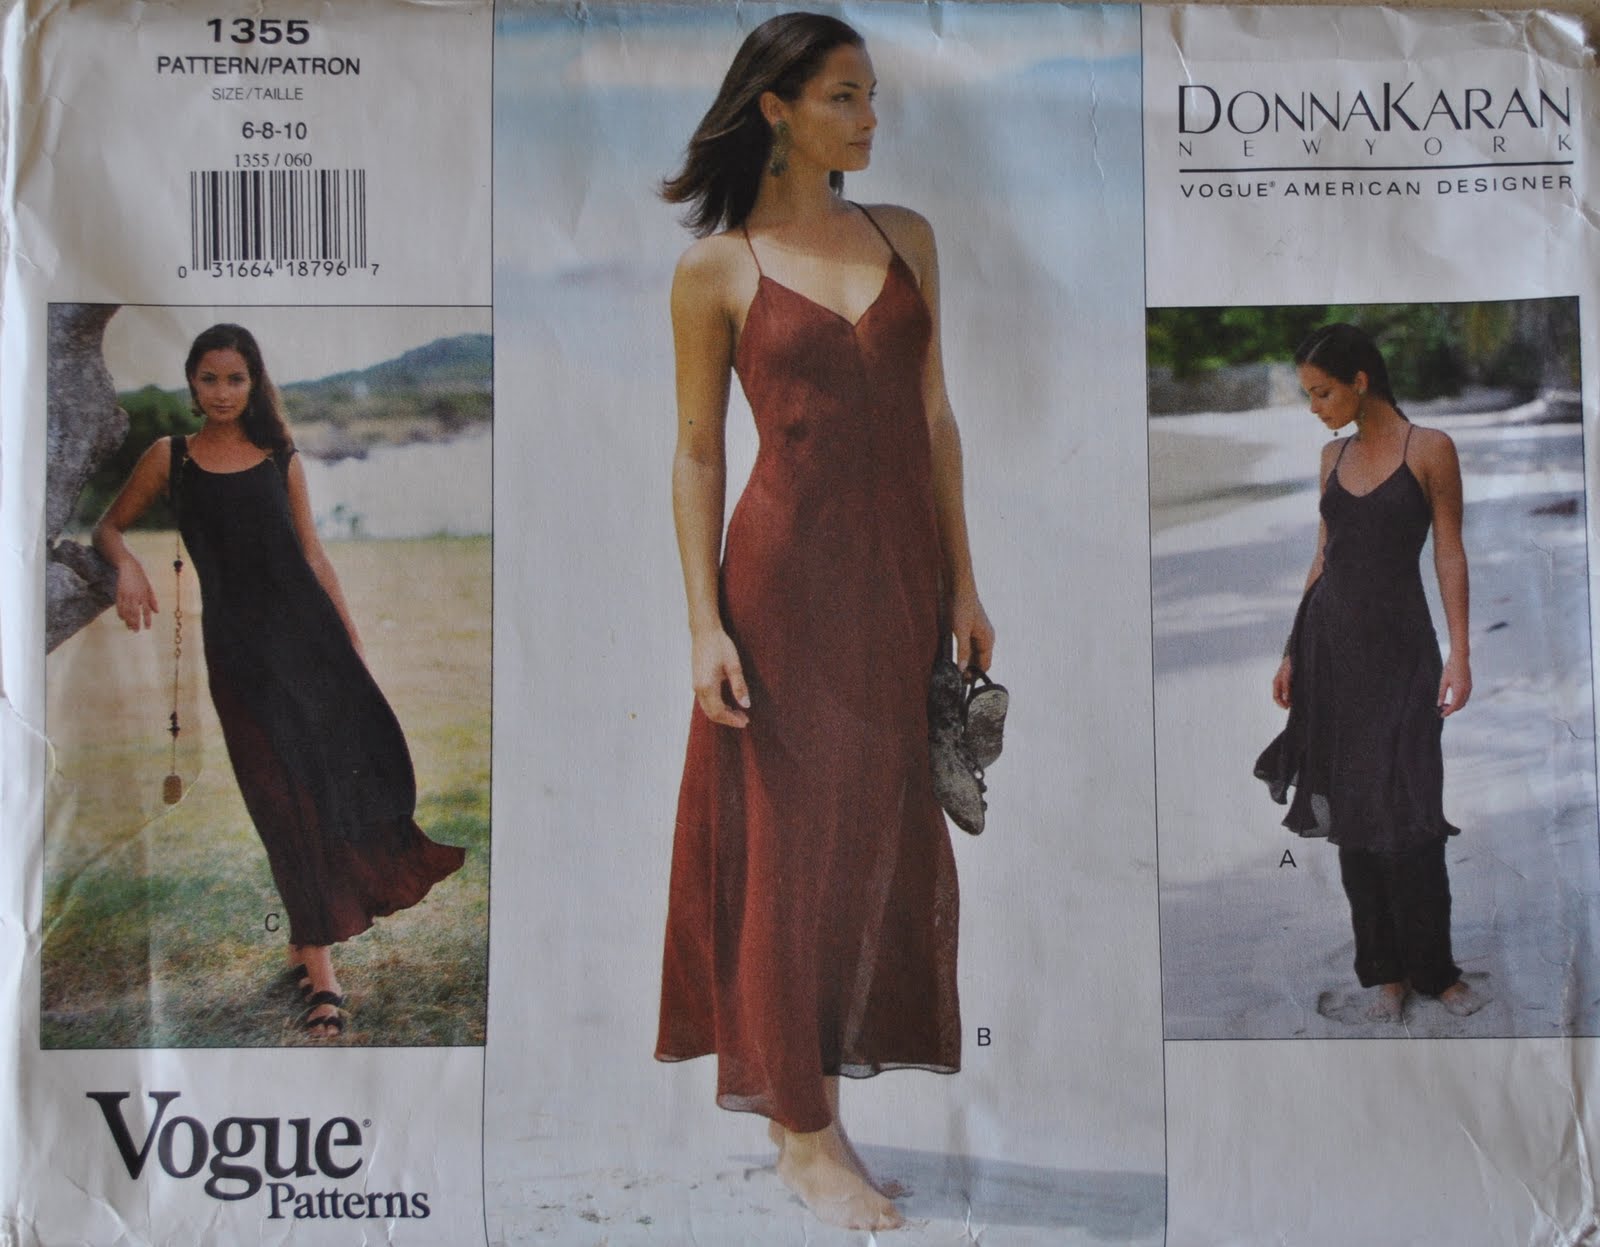
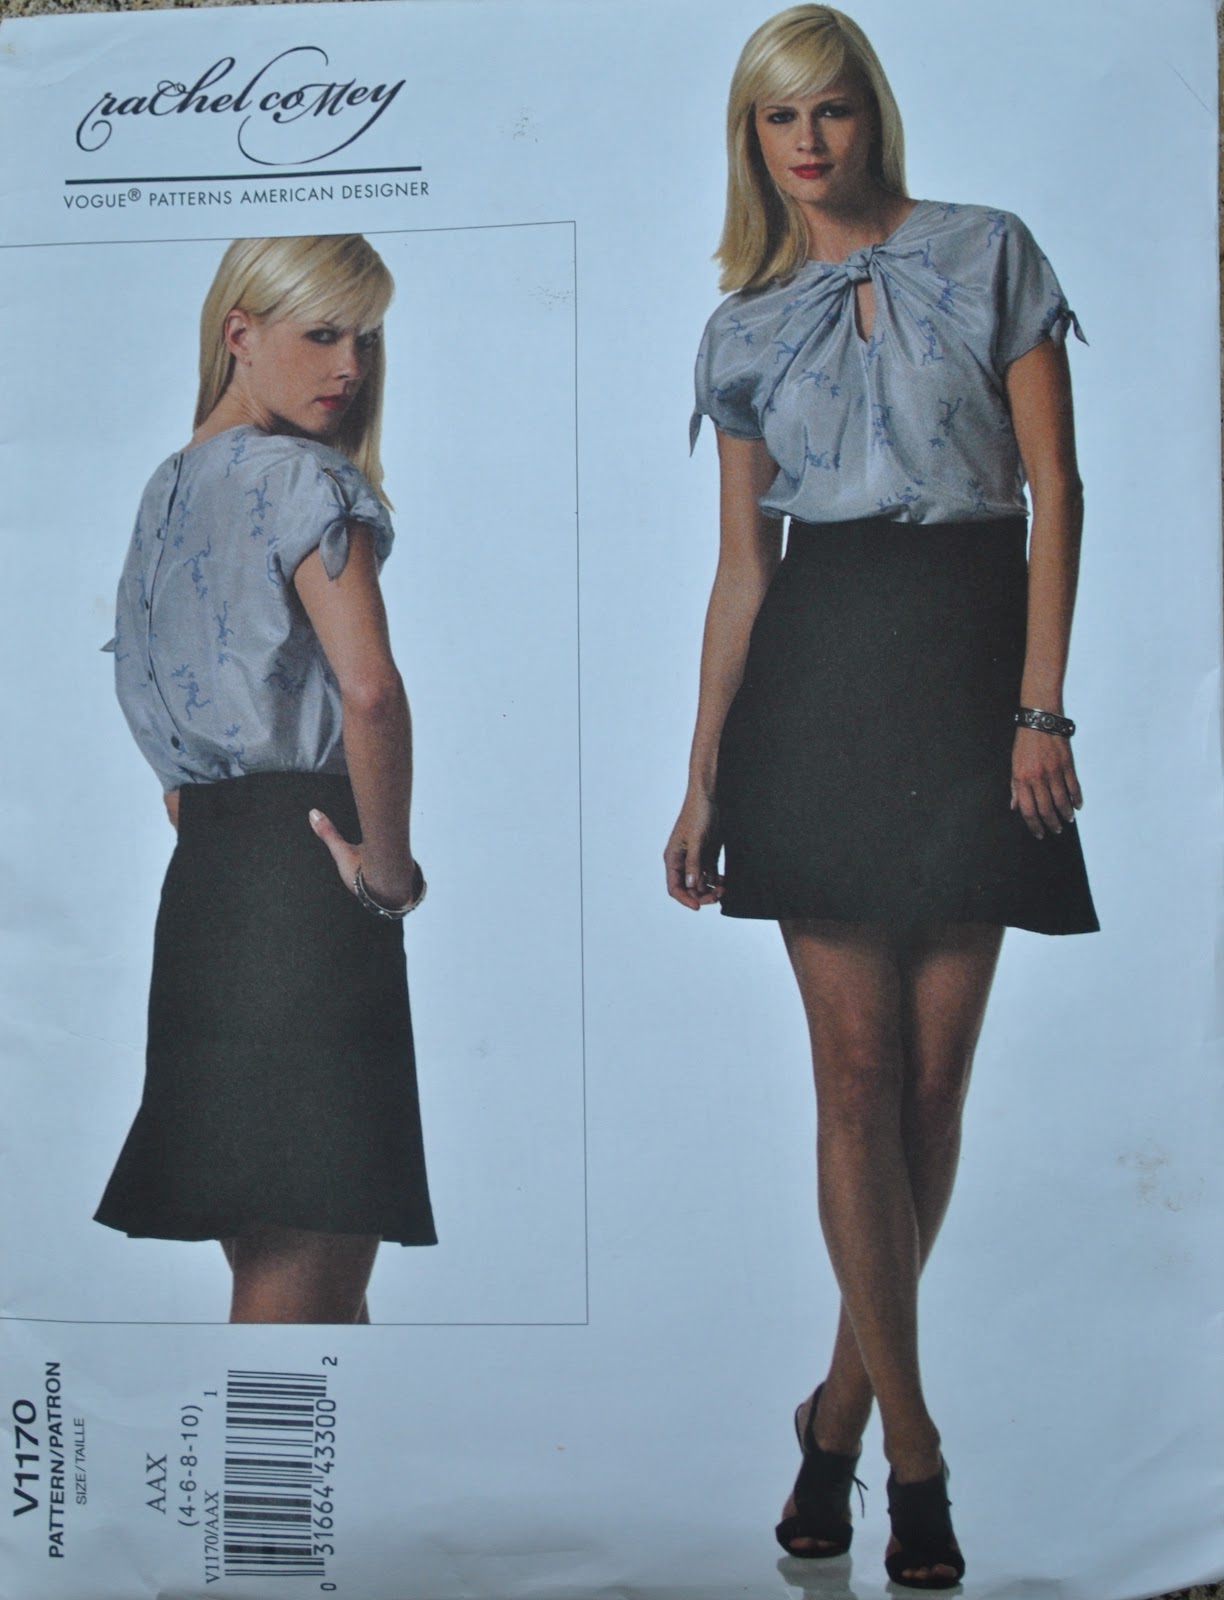
Skirt; Vogue 1170 with minor modifications, a refashion of an old ballgown; black silk taffeta with a black tulle crinoline, see my review of this pattern here
Shirt; my own design, of black polycotton, details here
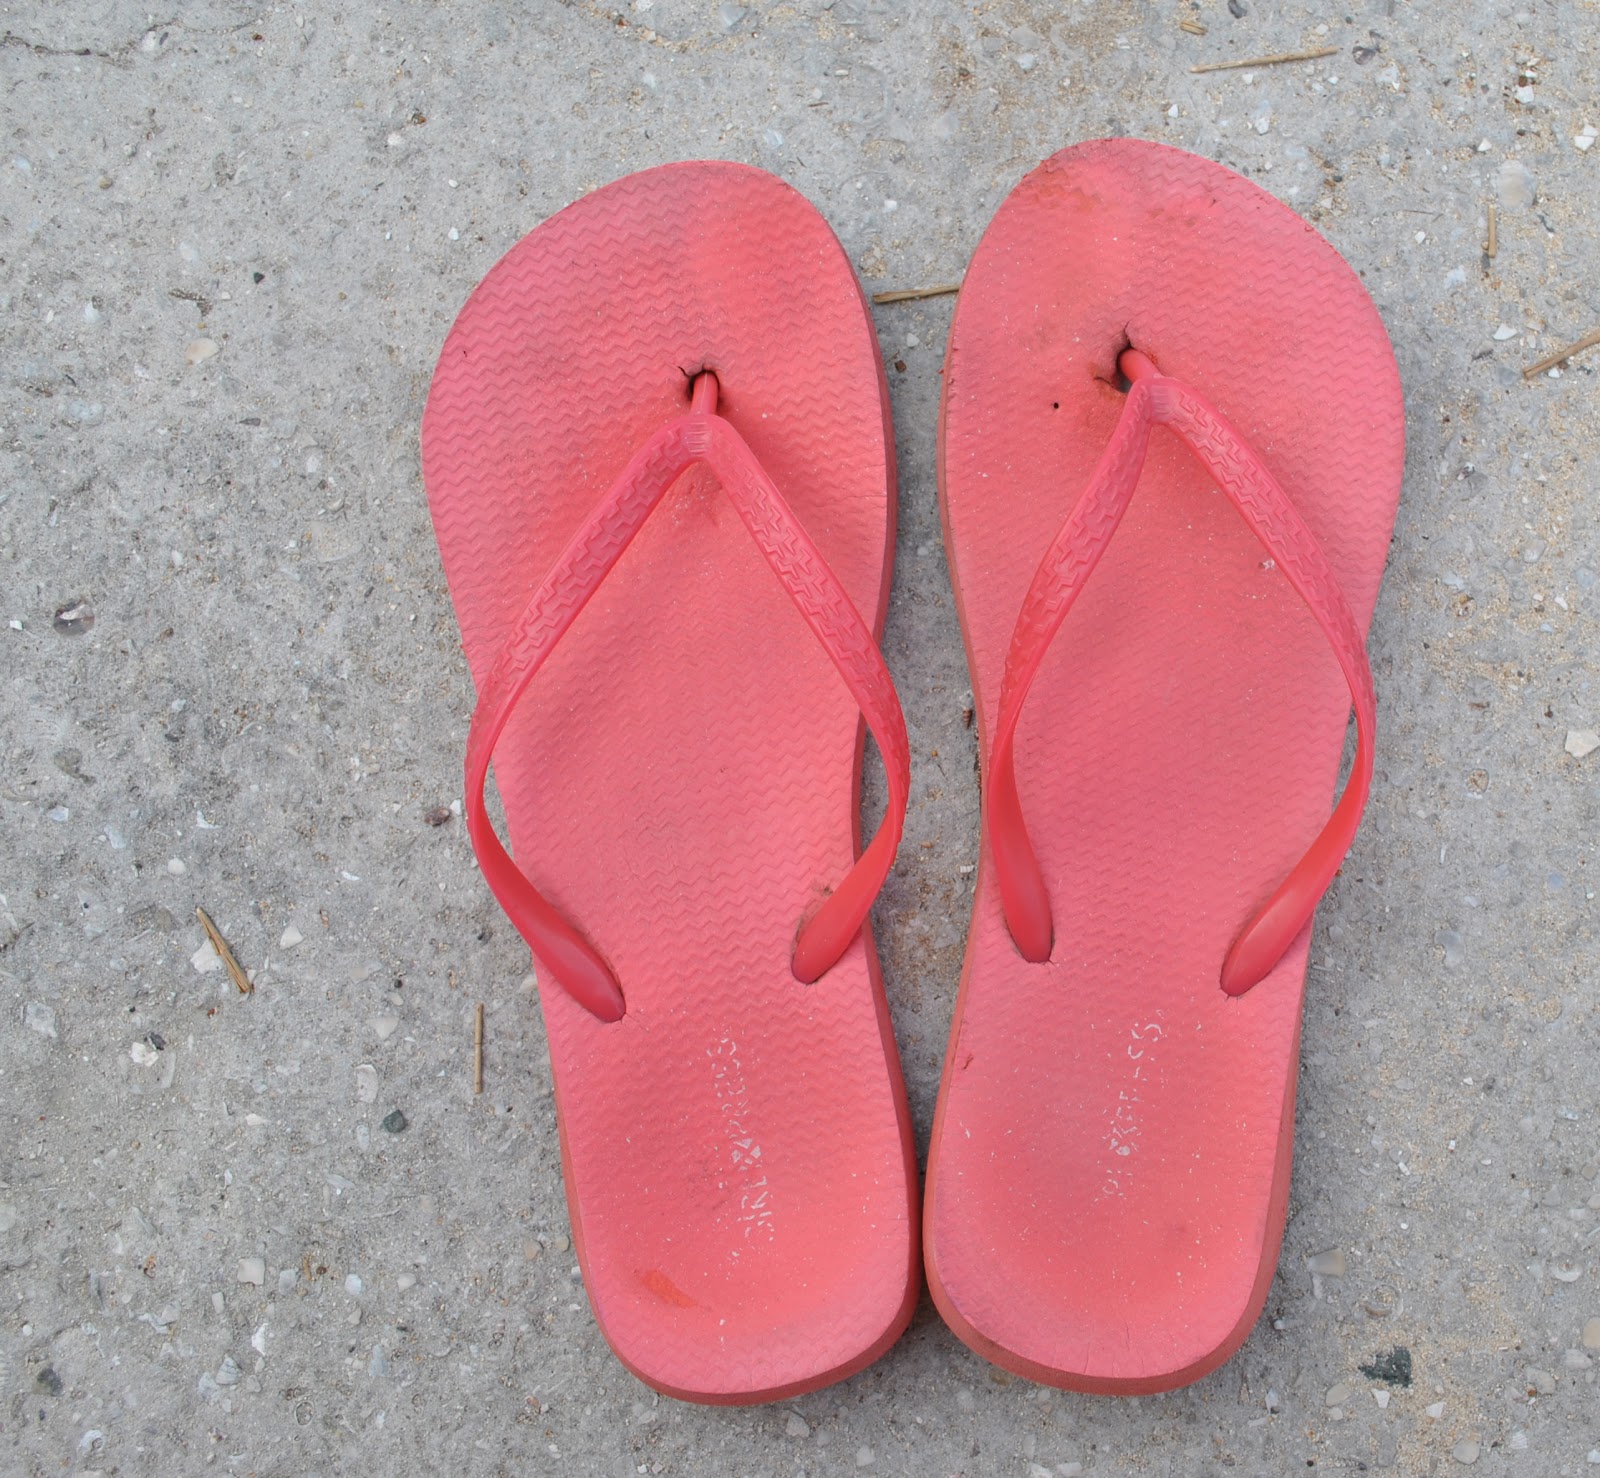
Sandals; a gift from Misano

pinterestmail

Facings; some inner workings

I took a few photos while constructing the waistband of my new capri pants to illustrate a few of my own finishing methods, but first…
Online sewing tutorials.
Since starting my blog I have penned a few of my own sewing tutorials; snapping photos and writing happily and freely about my methods… but lately hesitation has crept in…
why? because scathing criticisms of online amateur sewing tutorials have popped up in the previously harmonious bloggy sewing world.  Some people out there loathe and detest them….  on the other hand, some people find satisfaction in seeing the inner workings of other people’s sewing projects.  Personally I do too… when they are done well.  I don’t enjoy seeing close-ups of snafu’s or obvious stuff ups.  If I have made a glaring mistake I prefer to unpick it, take it apart or do whatever possible to fix it up, not take a photo and show it off!
But I do really enjoy seeing beautiful finishes and inner workings; I strive to make my own the best I can and I like reading about how others achieve the same.
So.  
Finishing a facing, on an edge with an invisible zip closure.

The zip is in, and I’ve attached the interfaced waistband facing.
The next step is to trim and clip the seam allowances.  My own approach to trimming the seam allowances I have been doing for years, with no concrete memory of where I learnt it: the layers closest to the inside, or closest to your skin are trimmed away the most, graduating from a narrowest layer out to the wider-most layer closest to the outside of the garment, which are trimmed the least.  So, the wider allowances are always against the outside of the garment, the narrower ones to the inside.
I rarely trim the stitching of the seam itself away, but trim out to the edge, so as to preserve intact the backwards/forwards securing stitches at the beginning of the seam.

When clipping curves, and especially if the fabric is thick, I sometimes take the precaution of clipping in an offset pattern of clips, like so.  This lessens the likelihood of the seam allowances showing up like a little row of “teeth” in embossed shadows around the edge after pressing.

Below is the opening edge, with the facing folded back on itself (wrong sides together), and the zip edge with the garment seam allowance (with overlocked raw edge) folded over it, right sides together; and stitched.  I never ever ever (ever ever) diagonally clip away the corner of that fold, but leave it intact, just like this.  With care, when you turn it out you should be able to get a nice square point at the corner of facing/waistband just like below right.  If the corner does seem a tad too bulky with layers of fabric, turn it back out wrong side out and right on the very corner, just inside the seam allowance at the starting point of that stitching, give it a few good sharp whacks with a heavy wooden spoon to flatten it; then try turning it out again.  I promise you, this does work!!  Just be super careful not to whack the top of the zip….  This is an old “couture” trick which I read in the Vogue 8333 instructions.

Under-stitching.  When I was a younger slapdash thing I sometimes used to lazily skip this step.  So foolish!  It makes all the difference to a neatly turned faced edge.  Do it!

btw, a note on the different coloured threads I have used in this project…
this is not a tip really, but an economical thing; I save my matching coloured thread for any stitching that is going to be visible either inside or outside the garment.  I use either black or white whichever is the closest in shade, in this case white, for any stitching that is hidden away inside the folds of fabric.  This is because I buy matching colour threads for a project in the smaller and more expensive 100m reels; and I buy black and white thread in the cheaper 1000m reels.  I have a black and a white bobbin permanently threaded up, and wind a bobbin in my matching thread before a project, as well as the reels for the top of the machine in white/black and my matching thread: and interchange them depending on whether the thread is going to be visible or not.  I know this means extra fiddling about and is not a tip everyone wants to bother with, but it does save money, which can be spent on other things  πŸ™‚  This is why you can see some stitching, the visible stitching, is in the matching beige thread, and some stitching is in white.  I’m Ok with that because the white stitching is in the hidden spots, and will invisible both inside and outside of the finished garment.

Fold the facing opening edge in smoothly to an even width against the zip tape.  I nearly always have to adjust my waistbands, so it is not a given that this will be the same as the allowance dictated by the pattern piece.

It is only at this point that I finish the lower edge of the facing, all in one go.  This time I opted to use the overlocker for a flatter finish, but HongKong seams look real nice. I overlock the opening edge fold down in place as they are pinned above, and also the facing seam allowances down to the facing at this point.  Neat and tidy!

The facing edge is hand stitched to the zip tape using fell stitches.
The facing at the centre back and the other side seam is stitched to the seam allowances.  It can be seen clearly here how the seam allowances of the facing have been overlocked down to the the facing in just one pass of the overlocker.

Finito!
pinterestmail

First aid for thongs

My sister-in-law S gave me this fabulous quick and easy fix for thongs, to help eke out their oh-so-tragically-short life span for just a little bit longer… if you love wearing thongs as much as I do then this one is a real goodie.
The hole on my old pink pair had enlarged over time, enough for the thong-y bit to start popping out with frequent and very annoying regularity….  In my lifelong scientific observations and road-testing of the humble thong, I have observed that this is the traditional problem spot, the first piece of the apparatus to fail…

S suggested making use of another common and oft-unappreciated little household gadget, the bread-bag closure thing-y
clipping it on over the thong-y bit underneath  (please excuse the highly technical terms in use here) and pull it in nice and firm

voila!
There is a tiny bit of a hump underfoot but they will be perfectly good for a spare pair…
and your thongs will live on to walk another beach  πŸ™‚

pinterestmail

Rotto; a travel wardrobe…

We have just returned from a really delightful island holiday…  :)))


Time away
5 days
Where to:
Rottnest Island
Season:
Mid spring.  Cool nights, daytime highs from 20C right up to 30C
Expected activities:Veeeery casual island lifestyle; swimming, walking on the beach, cycling, bbq’s and some dinners at the pub.
Colour scheme: nearly all !Brights! and with the freshness of white and just a touch of black

What I packed: (click on each garment name to link to its original construction post)

(left to right; top to bottom)
green/ultramarine ballet flats, a gift from Misano
pink thongs, KMart
straw hat, Country Road

Verdict:
This was a great assortment for a fun and relaxed family beachy holiday; I stepped out of my comfort zone with all those !brights! and was pretty pleased I had done so.  All my ensembles felt cheerful and happy; and vibrant in the brilliant sunlight.
In retrospect, having two white shirts on such a short holiday, I felt like I was doubling up too much and had less choice. I love love love white shirts with the deepest passion imaginable; but I think an improvement would have been to substitute one with one of another colour, for a bit more variety.
The raincoat was useful for, oh let me think, about a minute? total? but I wore it as a “cardigan” for one day, so it didn’t go unloved.  It’s best to pack it at this time of year, just in case…

on a happy note, I have discovered that this skirt design, Vogue 1170, is ideal for bicycling! it’s like it has been designed for just this very activity…  If you click on the link in the list above to see the back view of the skirt you’ll see what I mean… that high curved back flounce sits perfectly on a bike seat with no straining of fabric, there is plenty of room for pedalling, and minimal creasing of the back.  The front is quite flat and straight too, so it doesn’t flip up.  Win!

and on a sad note, my pink thongs broke during the holiday, so in a spur-of-the-moment holiday purchase…

Welcome newbie scarlet thongs;  may you live long and prosper….
(and yes, the outfit in yesterday’s post was a part of this travel mini-series too…  πŸ™‚  )
pinterestmail

September summary

(random holiday daily outfit  πŸ™‚ )

Details:
Top; top “b” from “shape shape” (formerly known as Unique Clothes Any Way You Like) by Natsuno Hiraiwa, white cotton, details here
Shorts; Burda 7723, hot pink linen, details here
Hoodie; refashioned oversized cardigan and Tshirt, details here
Scarf; knitted by me, details here
Thongs; Havaiana

and some silly stuffy sums for September

White-y Tighties

Fabric;
$10.00
Pattern;
Burda 7863, used previously
Jeans zip;
$1.99
Jeans button; had already
Total
cost: $11.99
Fabric;
$8.00
Pattern;
Burda 7401 (on special) $7.50
Fabric for the HongKong seaming; $7.00
Total
cost: $22.50
Fabric; $15.00
Pattern;
self-drafted
Total
cost: $15.00
Fabric;
leftovers from Craig’s hoodie
pattern; self-drafted
Total
cost: free
Fabric;
gift from Mum
Pattern;
from Burdastyle magazine a gift from Alexandra Mason
Thread; $2.68
Total
cost: $2.68
Fabric;
leftovers
Patterns; KwikSew 3300 and McCalls 2772, used before
Underwires; $2.49
Closure; $2.49
Elastic; 2x$3.49= $6.98
Cup Inserts; $12.95
Total
cost: $24.93
Fabric; $20
Pattern; self-drafted
Total cost; $20
Fabric; from my friend C
Pattern; from Pattern Magic 3, used before
Total cost; free
Brocade dress with zips
Fabric; birthday gift from Sam
Pattern; traced from Pattern Pyramid Burdastyle magazine, free
Zips; $18.49
Lining fabric; $8.39
Total cost; $26.88
Bared ankles capris
Pattern; Vogue 1115 (on special) $8.75
Fabric; $10.00
Zip; $2.29
Total cost; $21.04
Miscellaneous

No
miscellaneous purchases this month

Total cost to add to my wardrobe this month (not counting the kiddles’ stuff, naturally)  $87.52

pinterestmail

Bared ankles and showcased shoes

O hey peeps!
Today I am sporting new capri trousers, and a pair of new ballet flats!  This may not seem a particularly momentous thing to announce, but aack-choolly… I am recklessly smashing through two new-to-me fashion ceilings in one fell swoop!  
Whoaomigoshholdthephone!
I used to worry that I was too tall and not cute enough for the capris/ballet flats look.  But y’know what?  I’m kinda newly loving this look quite a lot lately…
My capris are made using Vogue 1115, and the fabric is a pale sand-coloured stretch sateen remnant from the Alannah Hill fabric outlet in Melbourne, bought during a visit two years ago….  hmmm, high time it was made into something, non?  Well, I think this fabric was just waiting for this very pattern, like Cinderella waiting for Prince Charming.  Or was it that she was waiting for the glass slipper?  Hmmm, not sure the analogy is holding itself together there…  anyhow, the remnant happened to be exactly the right size to just perfectly fit the pattern pieces.  And they all lived happily ever after  πŸ˜‰
I love the top stitching details, with the little bar tacks.

I chose this Chado Ralph Rucci pattern partly because it is rated Advanced/Plus Difficile, and I just love trying out challenging patterns.  However, a seamster of only a few years experience should not be put off by the Advanced rating; it only takes one quick scan of the pattern sheet to realise that this only applies to the matching top …. the pants could hardly be simpler!  Particularly if one chooses to leave off the full lining.  I live in Australia.  It gets hot here.  One chooses.  πŸ™‚
The only other change I made was to cut the legs pieces longer, to enable me to fold up a deeper hem and so therefore to sew the side seam slits to be longer.  I really like the look of the hem slits, I think they are really cute and I wanted them to stand out!
I might be a teeny bit disappointed that the pattern posed no challenges, but I am not disappointed with my new capris.  According to the fashion mags, trousers this season are falling neatly into two distinctive silhouettes; either over-long and flared 70’s style (tick!) or with higher hemlines to expose a slim ankle a la Audrey Hepburn.  Tick!  And a nice thing about capris is that the higher hemline beautifully showcases the shoes.  Like these lovely colourful little ballet flats from Misano.  
These are soooo ultra cute, yes!?

Details:
Capris; Vogue 1115 with the lining left off; sand-coloured stretch sateen
Shirt; my own design, made from an old pair of white linen pants, details here
Scarf; knotted strips of jersey, first shown here
Shoes; a gift from Misano

Following is my review of the pattern, if you’re interested  πŸ™‚

Pattern
Description:
Lined,
tapered above ankle-length pants, have seam details, side slits, zipper and
back yoke.
Pattern
Sizing:
American
sizes 6-12; mine are a size 10
Did
it look like the photo/drawing on the pattern envelope once you had finished
sewing it?
Yes.
Were
the instructions easy to follow?
Very
easy!
What
did you particularly like or dislike about the pattern?
There
is nothing not to like!  I love
absolutely everything about these pants…  I really like the curved seamlines down each leg, and the double topstitching detail with a little bar tack.  I adore the hemline side seam slits.  Subtle, classy and cute!
One of the reasons I chose the pattern is because it is an advanced/plus
difficile pattern, and I love challenging patterns.  However that rating must only apply to the matching top, because the
pants are super easy!
Fabric
Used:
Stretchy sateen
Pattern
alterations or any design changes you made:
I
left off the lining because the climate I live in is not conducive to lined
pants!
I cut
the trouser legs a little longer so I could fold a deeper hem and therefore sew
the side slits to be longer, because I really liked this feature and wanted
them to stand out more.
Would
you sew it again? Would you recommend it to others?
Without a doubt;
and highly!  I am looking forward to
sewing up the top sometime too.
Conclusion:
A
very nice pattern; easy, with classic lines and a very current silhouette.  I am very happy with my new
capris.  Seriously, I cannot
believe now it has taken me this long to hop onto to the capri bandwagon…
pinterestmail

Blooming lovely

Thank you so much for all the gorgeous birthday wishes!
I was very spoilt, and I would love to share the beauty of my birthday bouquet with you.  Please enjoy!
I wish I could share my birthday cake too, made by Cassie.  It was quaite delicious  πŸ˜‰

pinterestmail

B-Day

Hmmm.  It’s my birthday.
Yes.  Well.  I’m too shy to go into sordid details, like giving an actual number or any nonsense like that.  OK, so maybe I just don’t feel like it.  But here is a hint; one of my favourite bloggers Yoshimi, and I share the same birth year.  So if you are familiar with Yoshimi, then you know!
Whoo; I haven’t done a random daily outfit picture for a while, so I thought what the hey.  I must be missing those me-made months…   on which note, it’s occurred to me that if there is ever another one, then I will be able to go into it having made my entire wardrobe, including all the underpinnings!  (nerdy woot)
ahh, the small things that amuse small minds….  πŸ˜€
Walking along the beach with my dog is always high up on my list of favourite daily activities, on my birthday as well as any other day!  I’m also looking forward to being showered with gifts spending quality time with my family, hehe.  Tea, and quite possibly cake, will be consumed sometime during the day with my girl friends too.
Naturally, I must wear something fab.
Tootles, friends!

Details:
Dress; Vogue 1355, polyester chiffon lined with cotton voile, details here

pinterestmail
Switch to mobile version
↓