Yearly Archives: 2013

You are browsing the site archives by year.

2013, a retrospective

Separate from my rather nerdy previous post, on the last day of the year I like to reflect on my favourite posts, one from each month…
January

February

March

April

May

June

July

August

September

October

November

December

A sewing summary…
Number of garments made, counting each set of 1 bra+ 2 undies as one garment: 64, including 9 items for family
Knitted garments: 4 hmmm, it’s been a slow year for knitting (blush) However, it was nearly all from stash; the only new yarn I bought was for my Hunter Miette and I think I redeemed myself by knitting it up straight away
re the Stashbusting:
Garments sewn from new fabric: 20
Knitting from stash: 3! out of the 4 things made 🙂
Garments made from stash fabric: 31
Not exactly drastic reductions in the stash, but it gets me an A+ in my stash-busting pledge 😉
Refashioned garments: 9 Another 3 were rejuvenated with dye


Favourite garments: Faux leather jacket I might not have worn it a tonne yet but I really LOVE it and am rather proud of it 🙂 I also really adore my Panellist dress.
Any fails?: I just haven’t worn my bright roses top at all. There’s nothing wrong with it and I don’t hate it or anything. I just don’t reach for it *shrug*
The biggest thing for me this year was doing a screen-printing course; I LOVED it, and have printed eight pieces of fabric; seven of which have been sewn into garments already. My favourite self-printed project is a toss-up between my poppies lingerie set and the beach-y polka dot dress.
So that’s it for another year! Thank you so much to everyone who reads my blog and takes the time to comment, I am so very grateful and appreciative of all you gorgeous sewing- and fashion-loving peeps. We who sew tend to do so on our own, so the big ol’ fantabulous internets has been pretty good for our socialising, yes? 😉

See y’all in 2014!

pinterestmail

The Year of Handmade; a summary

So for this past year I chose to forego all RTW clothing and only allow myself to wear things that I had made myself.  All my clothing, including underwear, bathers and raincoat, hosiery and socks; everything had to be sewn or knitted by me.  The only exceptions I allowed were shoes and boots.

I drew each of my daily outfits in my Fashionary, thus keeping track of the wearing tally, if you like, of each item of clothing.
So, the quantitative assessment:  I’m slightly embarrassed to admit that yes, I analysed all those funny little paper dolls, itemising all my clothing worn this year along with adding up the number of “wears” that each item received this year.  I plugged my results into an excel spreadsheet, which is to say that I sure don’t expect anyone apart from me to be the slightest bit interested in the nitty gritty, of course!  I just did that bit for fun. 

But to summarise, the most worn items in my wardrobe this year are:

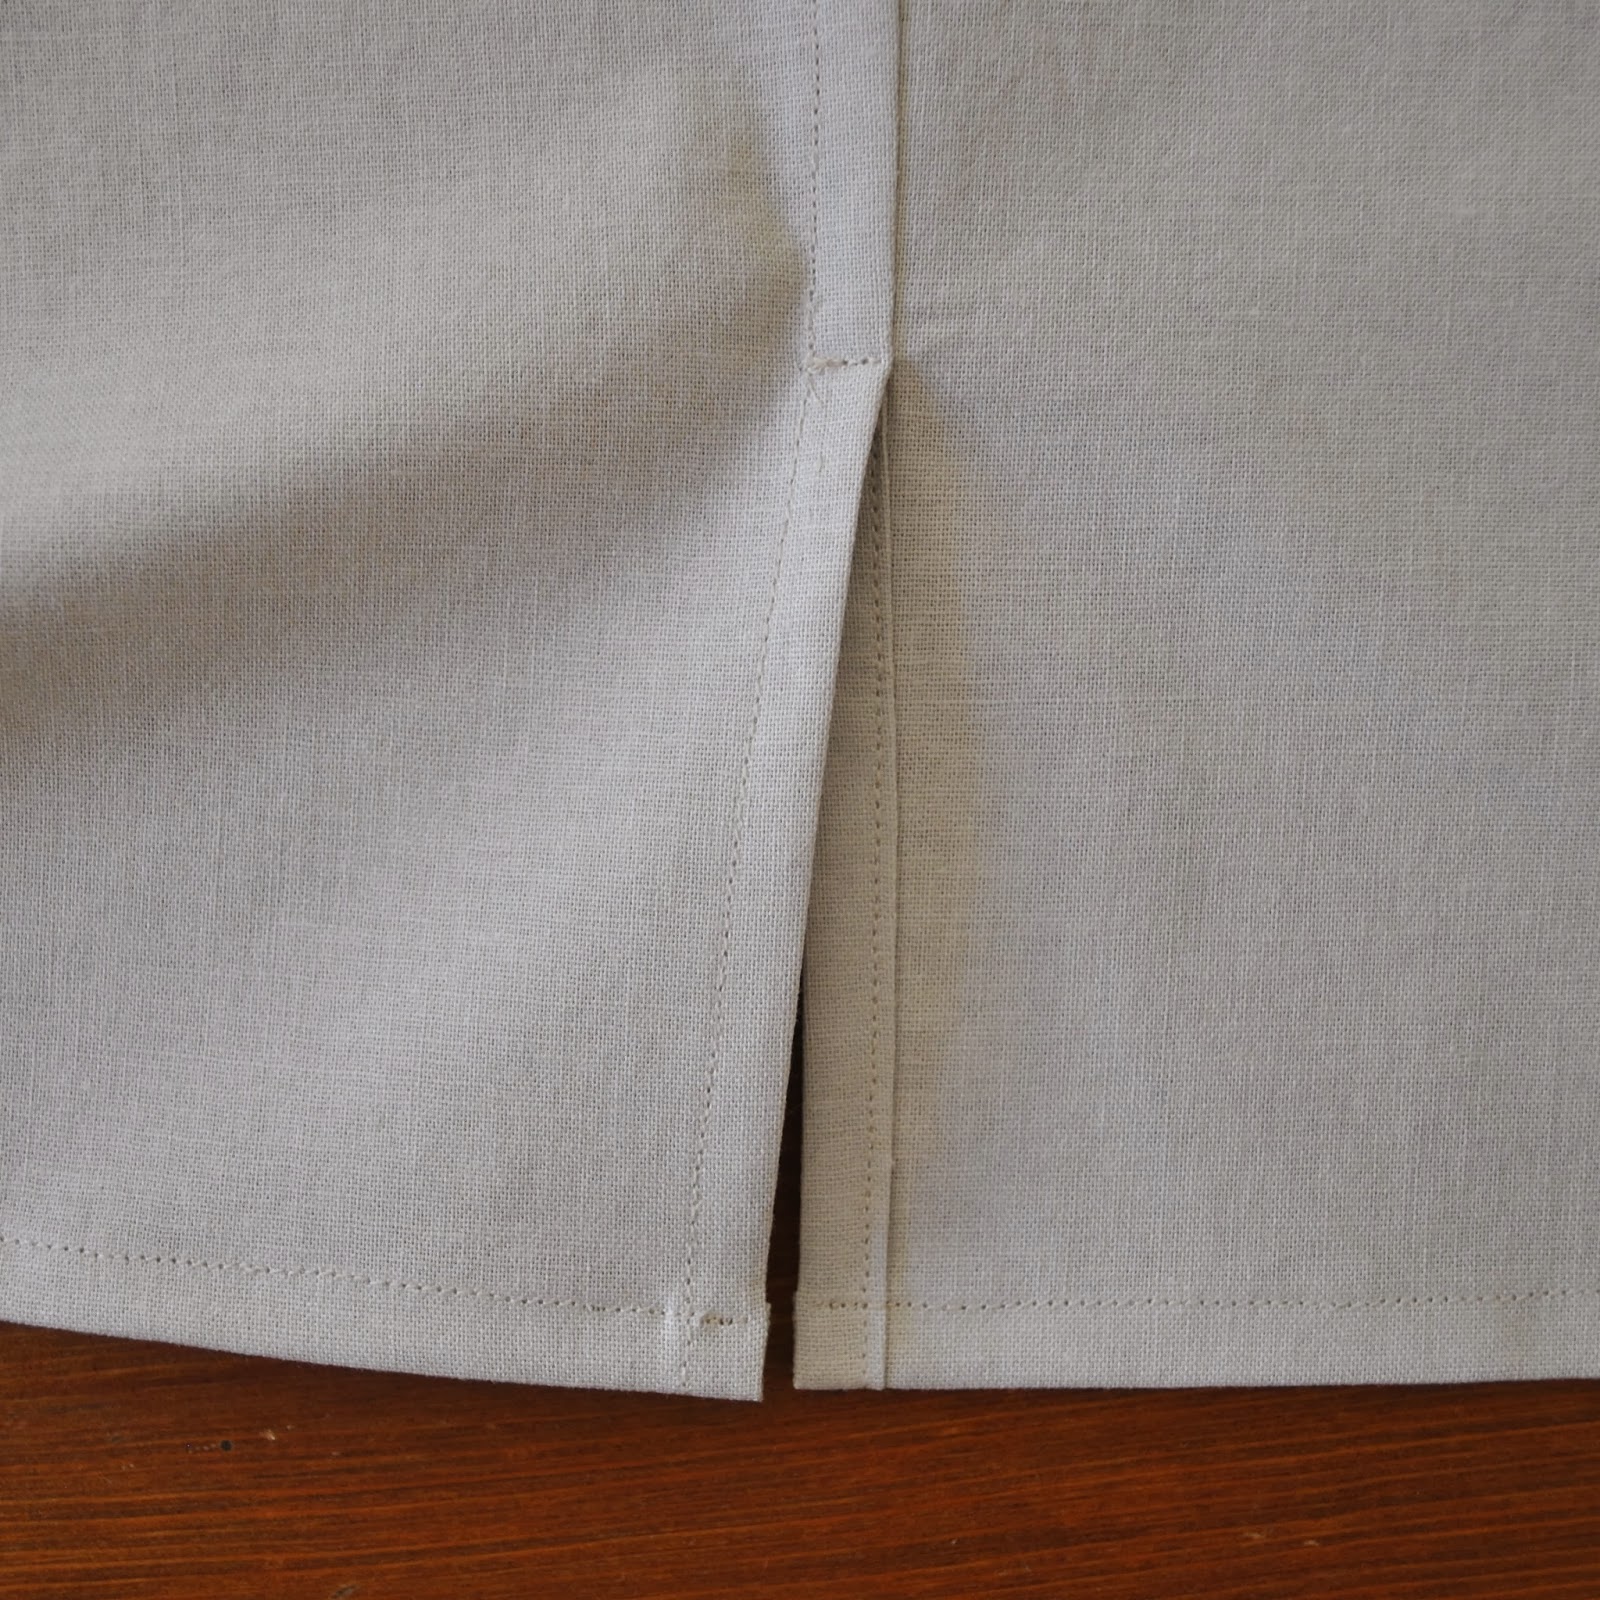
White Tshirts, by a country mile.  I have 3 identical white Tshirts, and each one alone got more wear than any other top in my collection.  Skirts: my ivory curtaining skirt (left) ; my refashioned, little denim skirt (right), my midnight blue, over dyed corduroy A-line skirt (centre).  Re-dyeing that blue skirt really did give it a fabulous new lease on life, elevating it to the third most frequently worn skirt in the wardrobe.  (left) Oversized peppercorn cardigan and (right) chocolate cotton cardigan.

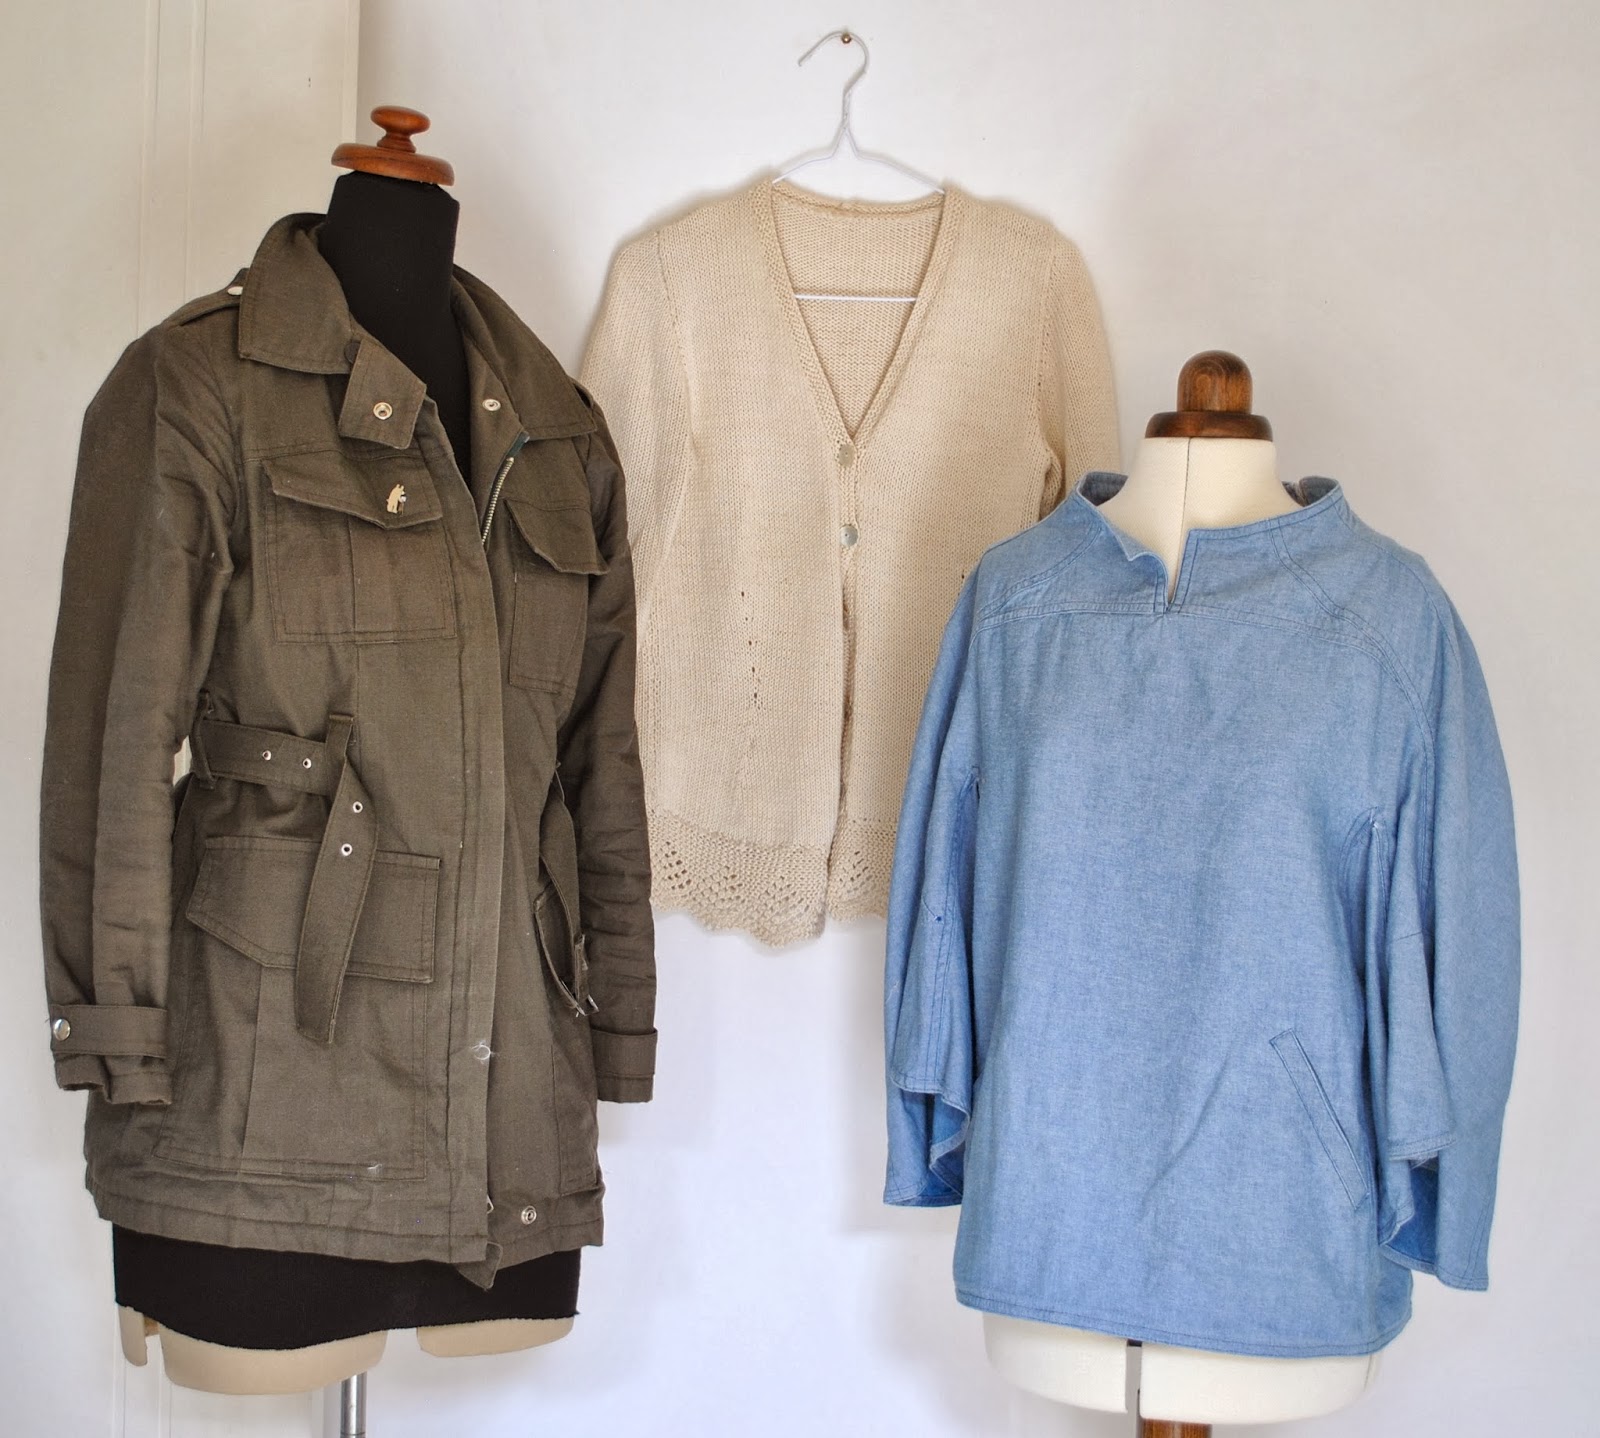
My army jacket was the second most worn item in my wardrobe this year… love that thing!  My ivory cotton cardigan and the blue bell-sleeved top also came in pretty high.

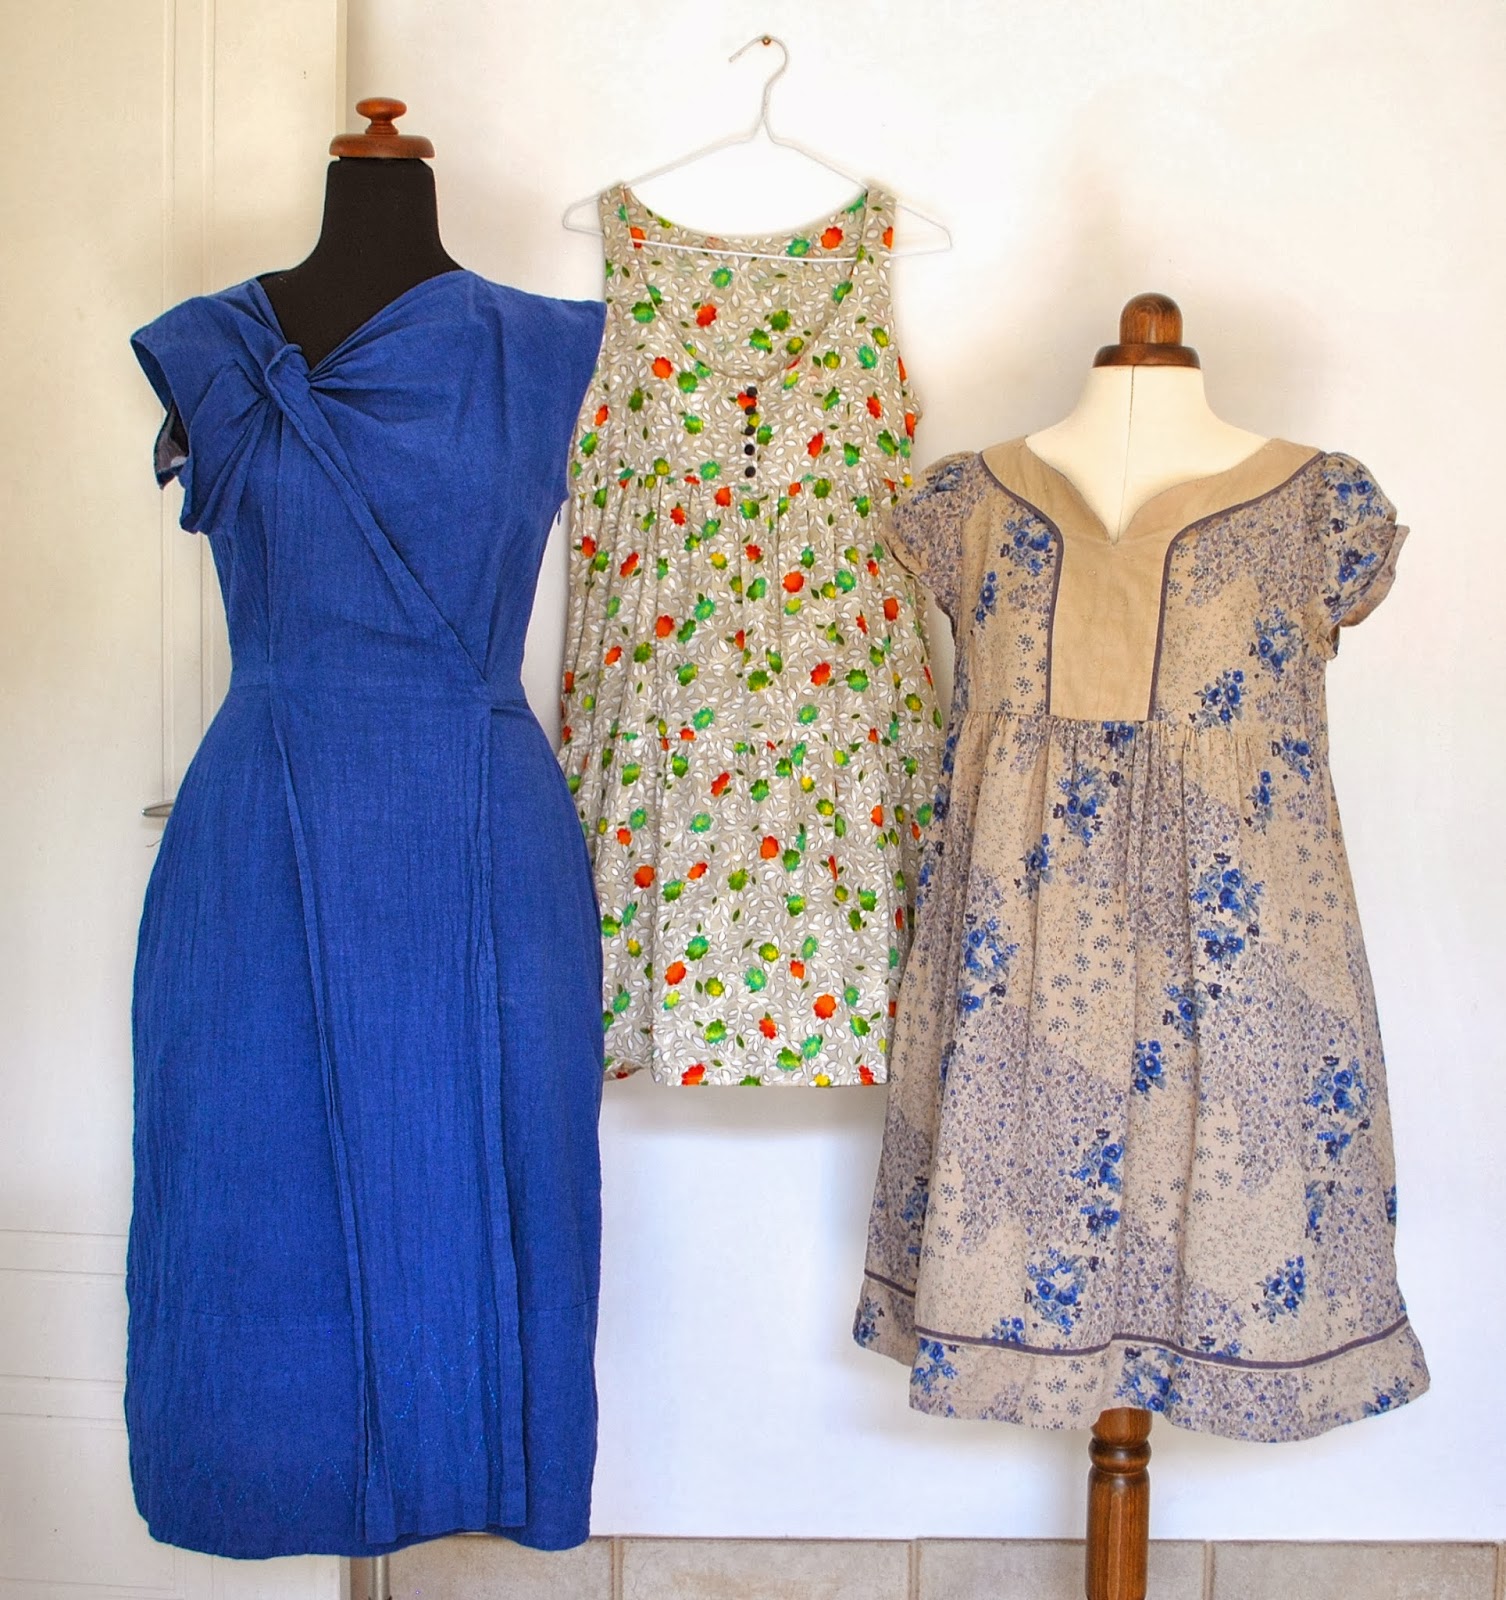
Dresses, from left; the Aquarius dress, Japanese cotton sundress and the sew bossy dress.  Statistically, the sew bossy dress squeaked out on top, but actually all of my dresses got a heck of a lot of wear, even my winter dresses; with “wears” spread pretty evenly across the board.  I wore 28 dresses this year…  sounds like a LOT I agree, but actually 9 of this number have already move on to either the scrap bag or the Good Sammy’s.  None of these three, but.
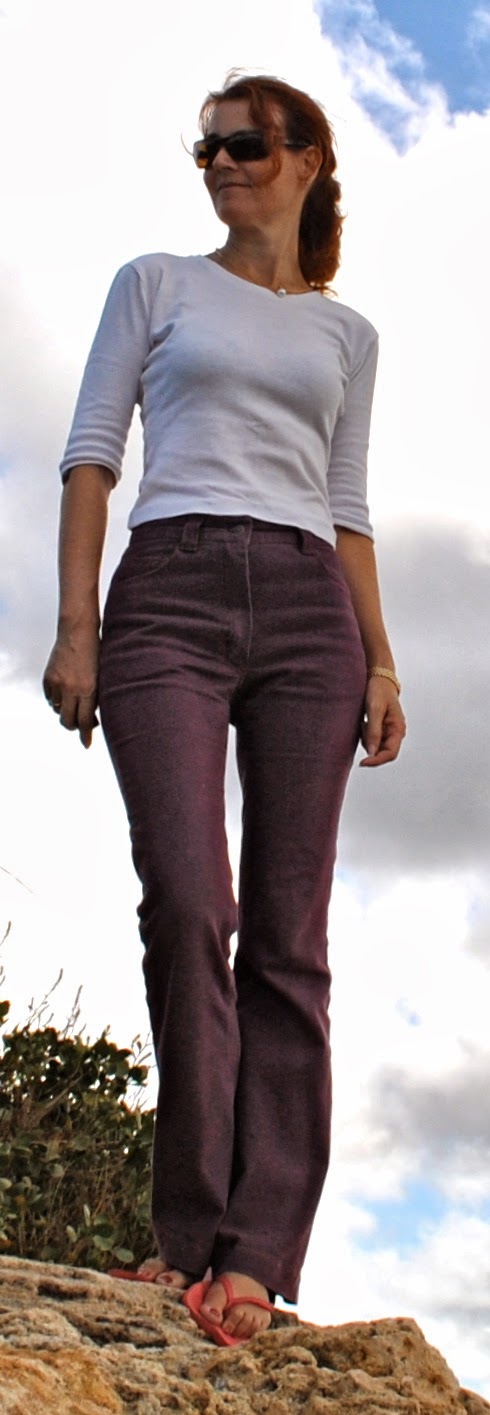
Jeans:  The frequency of wears for my jeans is quite low; I’m very much a skirt/dress wearer, with tights for winter.  I think I really only need a new pair once every two years or so.  The purple flares got the most wear.

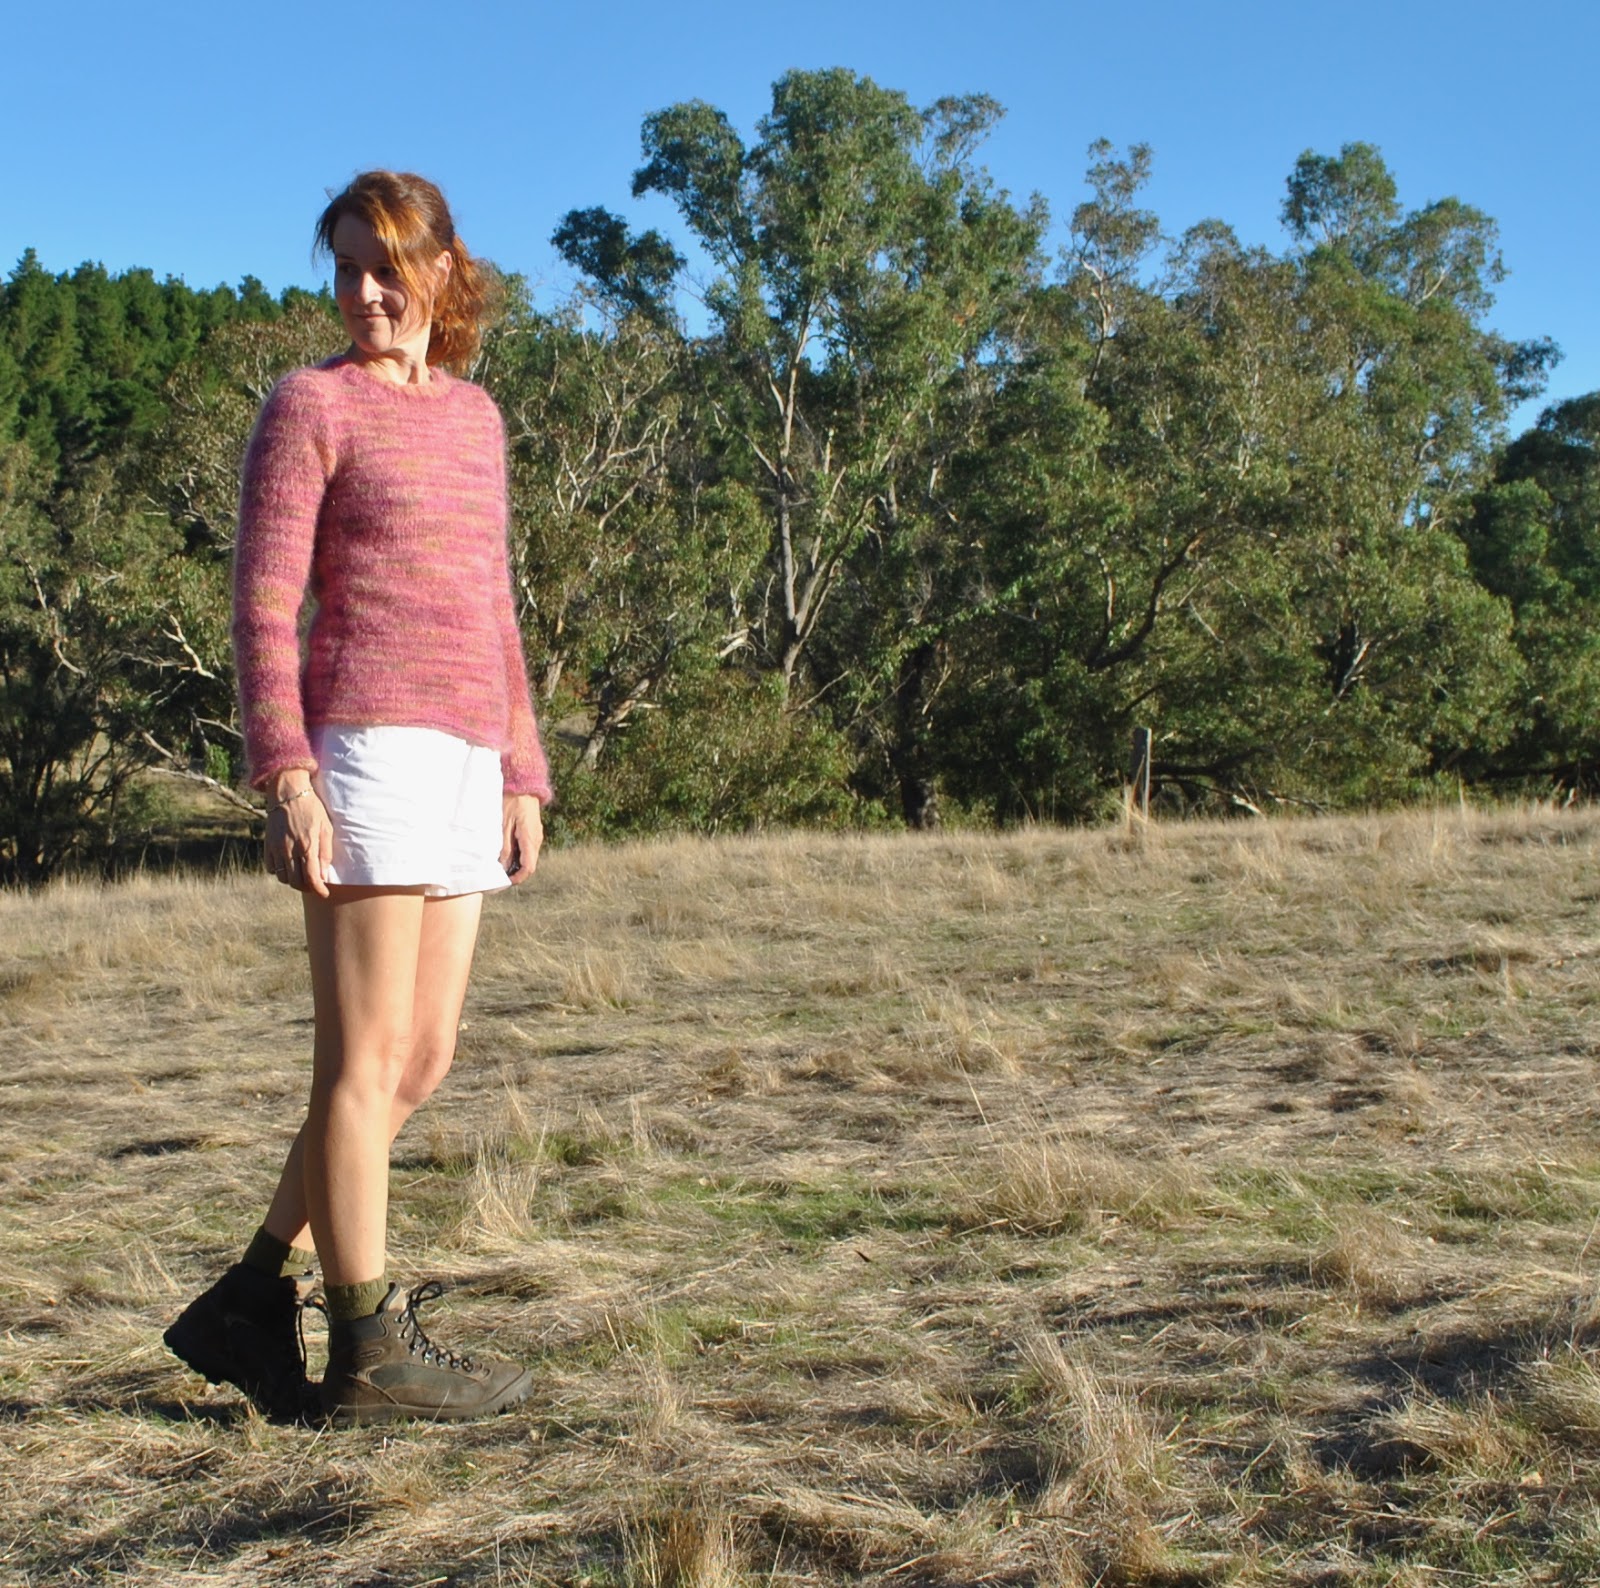
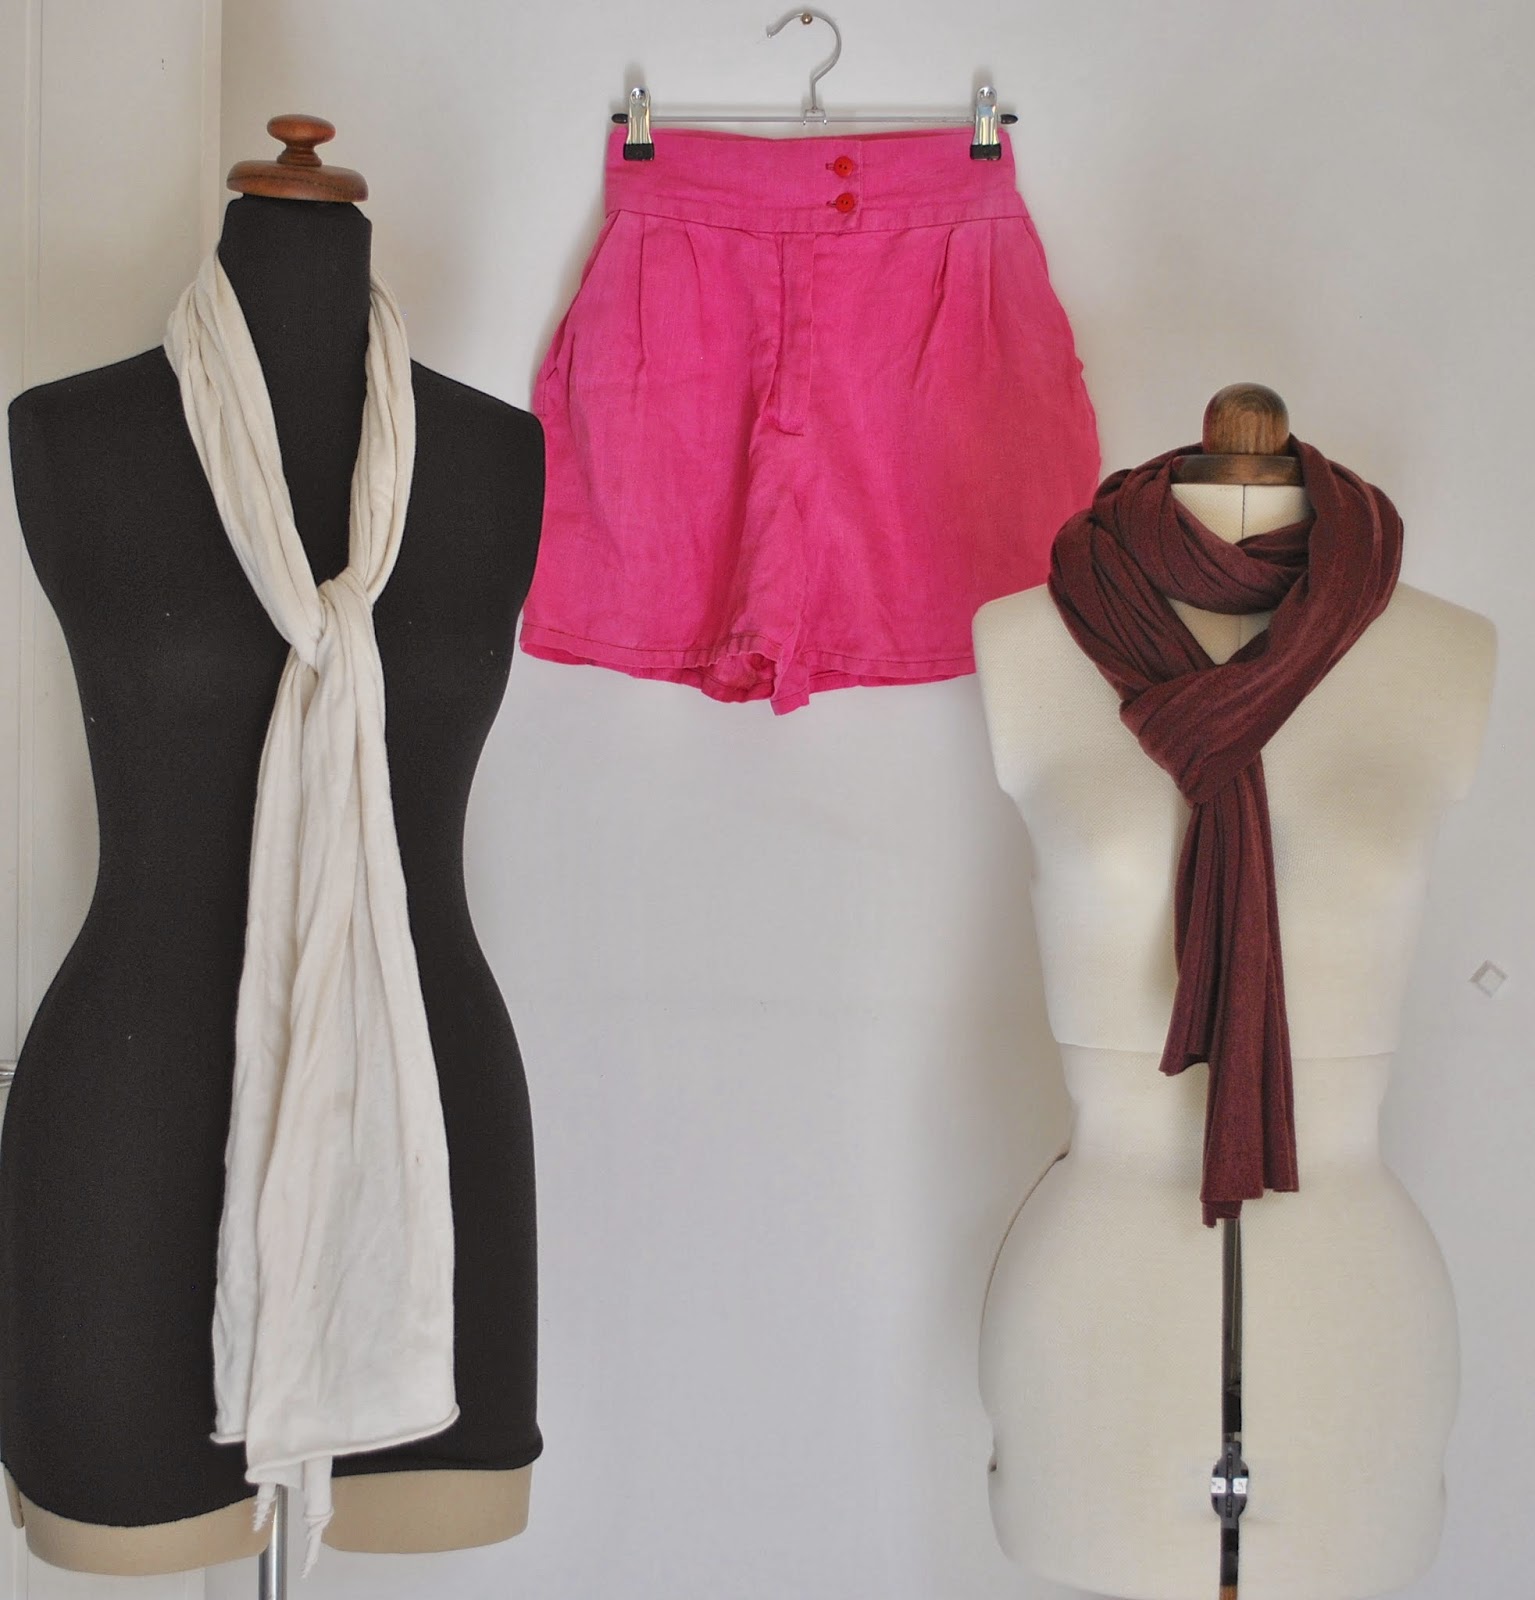
Shorts get about the same wearing frequency as jeans.  My hot pink linen shorts are firm favourites, which is interesting since they felt like a very whimsical and possibly crazy addition to my wardrobe at the time!   2013’s two favoured scarves were both simple, unhemmed pieces of jersey knit, for summer a light and breezy ecru, and for winter, a long long raspberry.  Please tell me, if a rectangle of fabric is enough to keep me happy then why o why do I knit so many scarves?
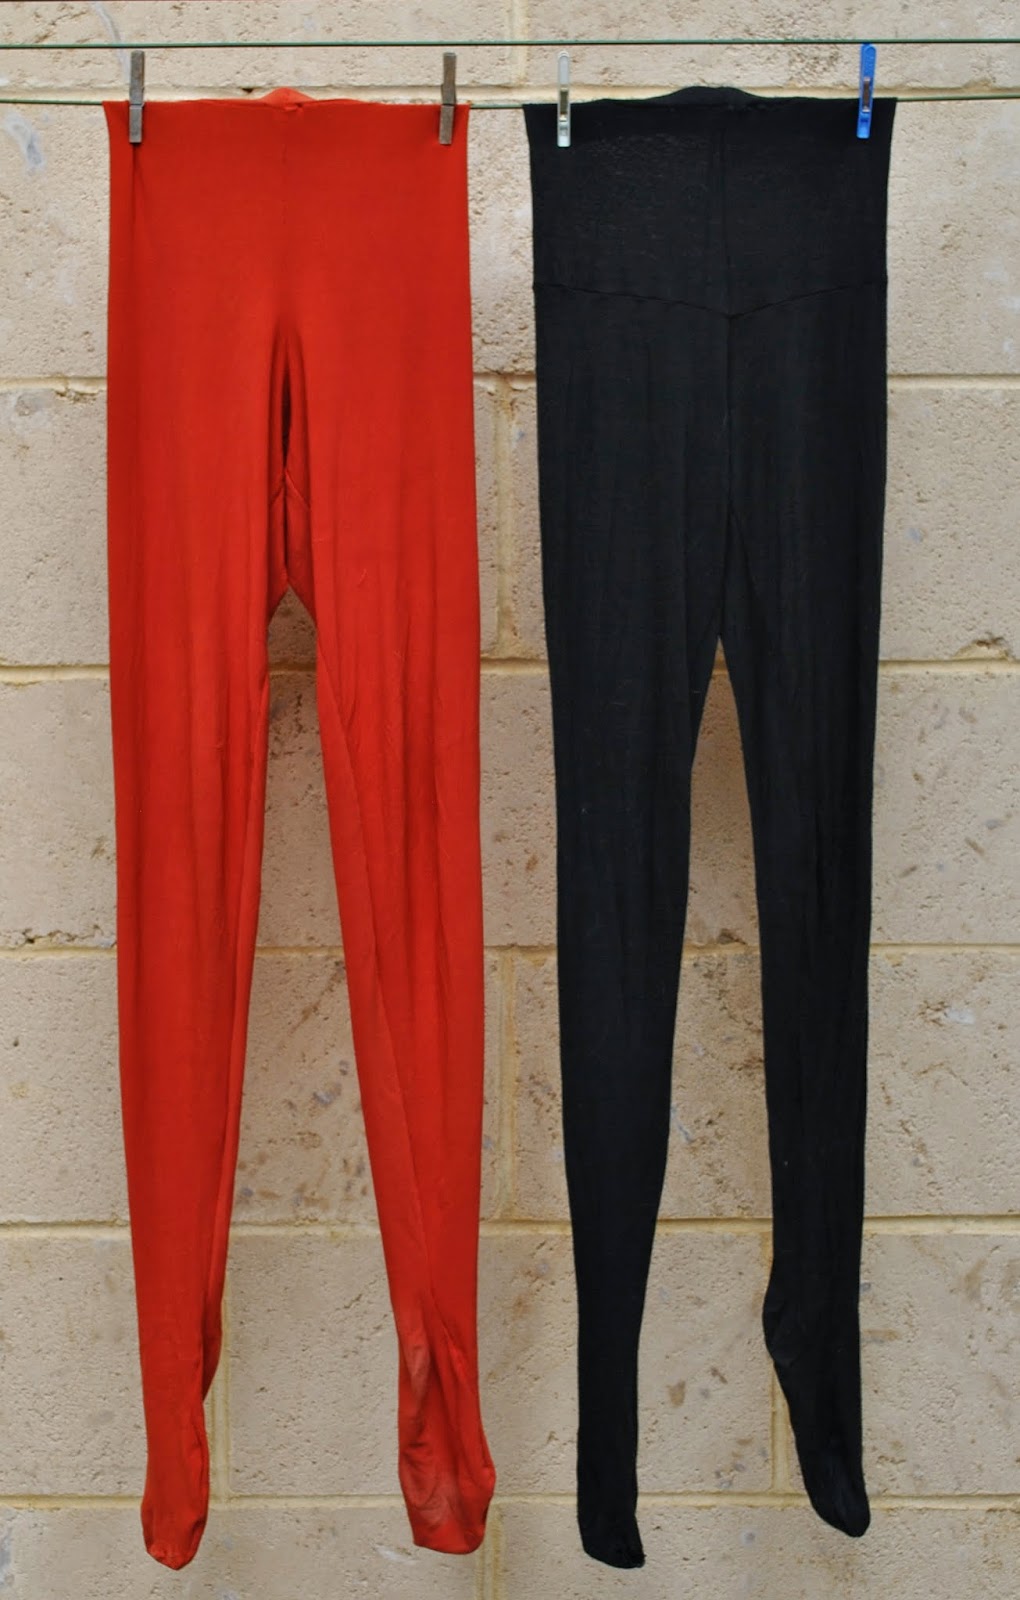
Tights; two pairs of plain black wool tights, and my paprika tights got a lot of wear too.

Um, underwear; yes, well all of that got worn too…
Obviously some of my more recently made items did not get a look in, and their usefulness will not be apparent until after next year; but this can’t be helped at this point.

Now for the qualitative assessment:  Going into this project, I wondered whether I would feel needlessly restricted by not allowing myself to wear RTW this year.   That was dumb, since I have absolutely masses of me-made clothes and didn’t feel lost for choice, not at any time.  However, and these thoughts have been with me from the very start of my totally me-made journey, ?four? years ago: I do admit to ebbing waves of uncertainty about my sanity.  I mean, making all my own clothes seems both silly and masochistic sometimes, even to me, a battle-hardened convert of several years.  When I look at and admire other ladies’ outfits it would not even enter my head to judge them on whether they made it themselves or not, and yet, I do judge myself quite severely on this basis.
But whether it’s good/sensible or not, I’m in the habit of making all my own now, and would find it hard to buy clothes in a store.  I would feel too guilty, believe it or not.  I’ve successfully brainwashed myself.  I’m in two minds whether or not to actually act on this.  Whether to continue as I am, or to rehabilitate myself, so to speak… maybe see if I even am capable of buying something.  
Yes, I do realise how very silly that sounds.
If I’ve proved anything at all to myself, it’s merely that making all your own clothes can be done.  Be your own sweatshop, yo.  I am.  I can, and I did.  Which has precisely zero significance at all, to anyone, anywhere.  And yet I feel strangely proud of myself, nonetheless.
Will I keep this up next year? well yes and no.  
NO I will not be regaling the blog with fashionary pictures any more.  And I will be happy to welcome back into my life some of my old RTW items I’ve had for many years.  That amounts to some Metalicus Tshirts and a petticoat, a handful of Country Road camisoles and a few cashmere cardigans, all very high quality items and all years and years old now.  I also have a few scarves that have been given to me as gifts by family, that will enter rotation as of tomorrow.  Black tights!  The two woollen pairs I wore this year have both sprung holes in the toes.  I think I could spoil myself and just buy these from now on, at least.
However, YES, in that I think I will continue to keep tabs on my clothing next year too… just because I found it really interesting and a useful  exercise in future wardrobe planning.
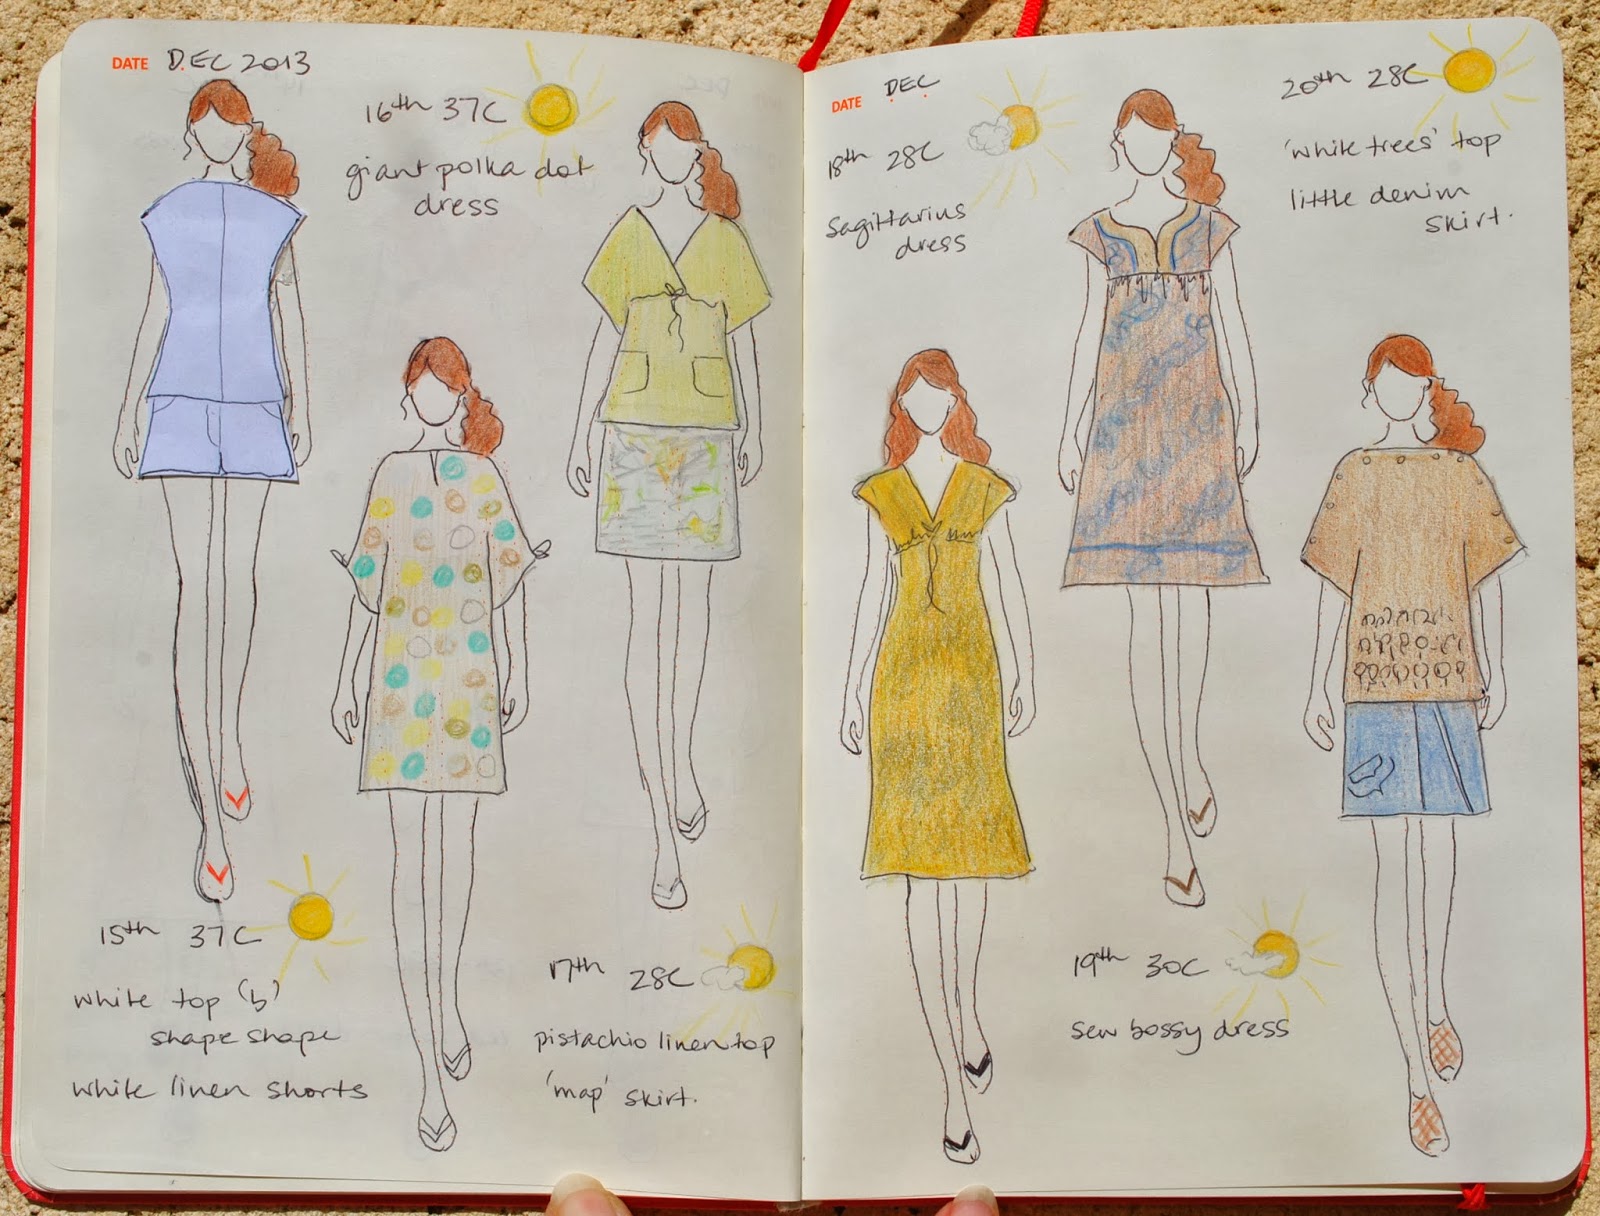
The final paper dolls…  ðŸ™‚

15th-20th December
from left:
white top “b” from shape shape, white linen shorts
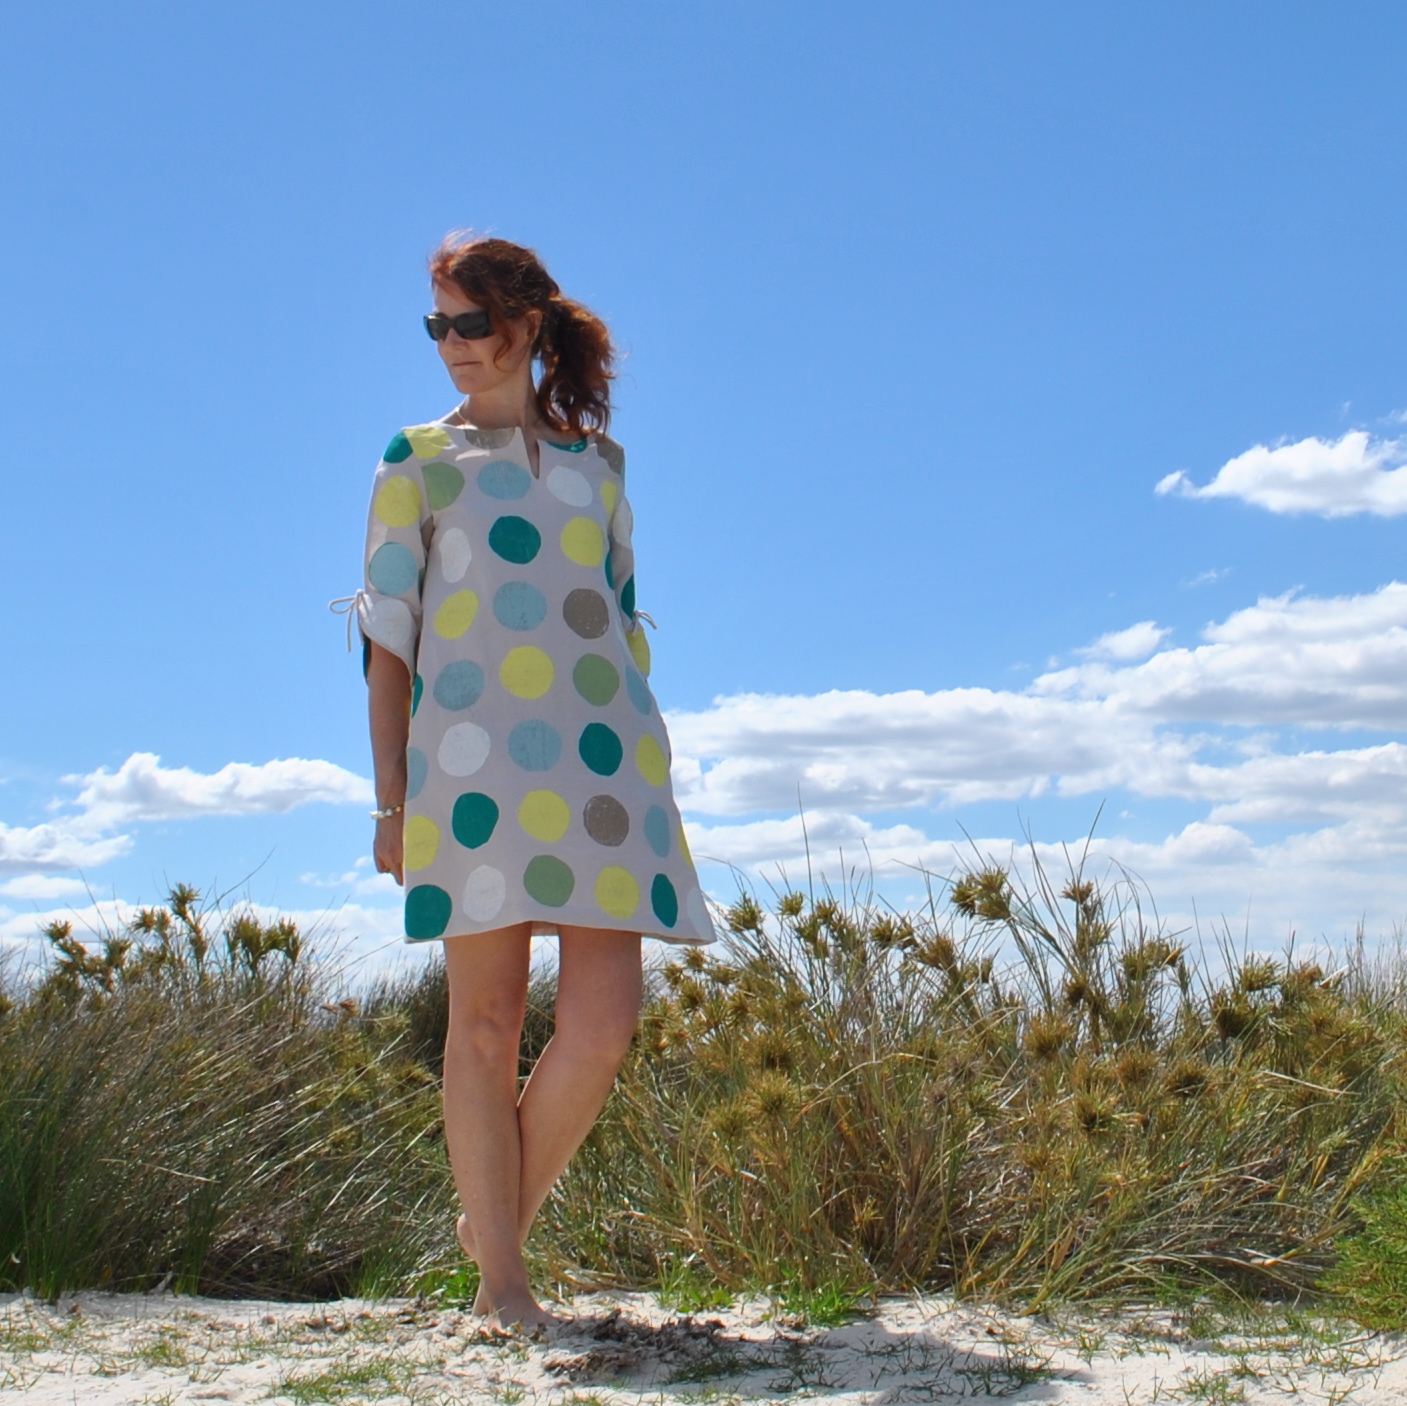
polka dot dress
pistachio linen top, “map” skirt
Sagittarius dress
sew bossy dress
“white trees” top, little denim skirt
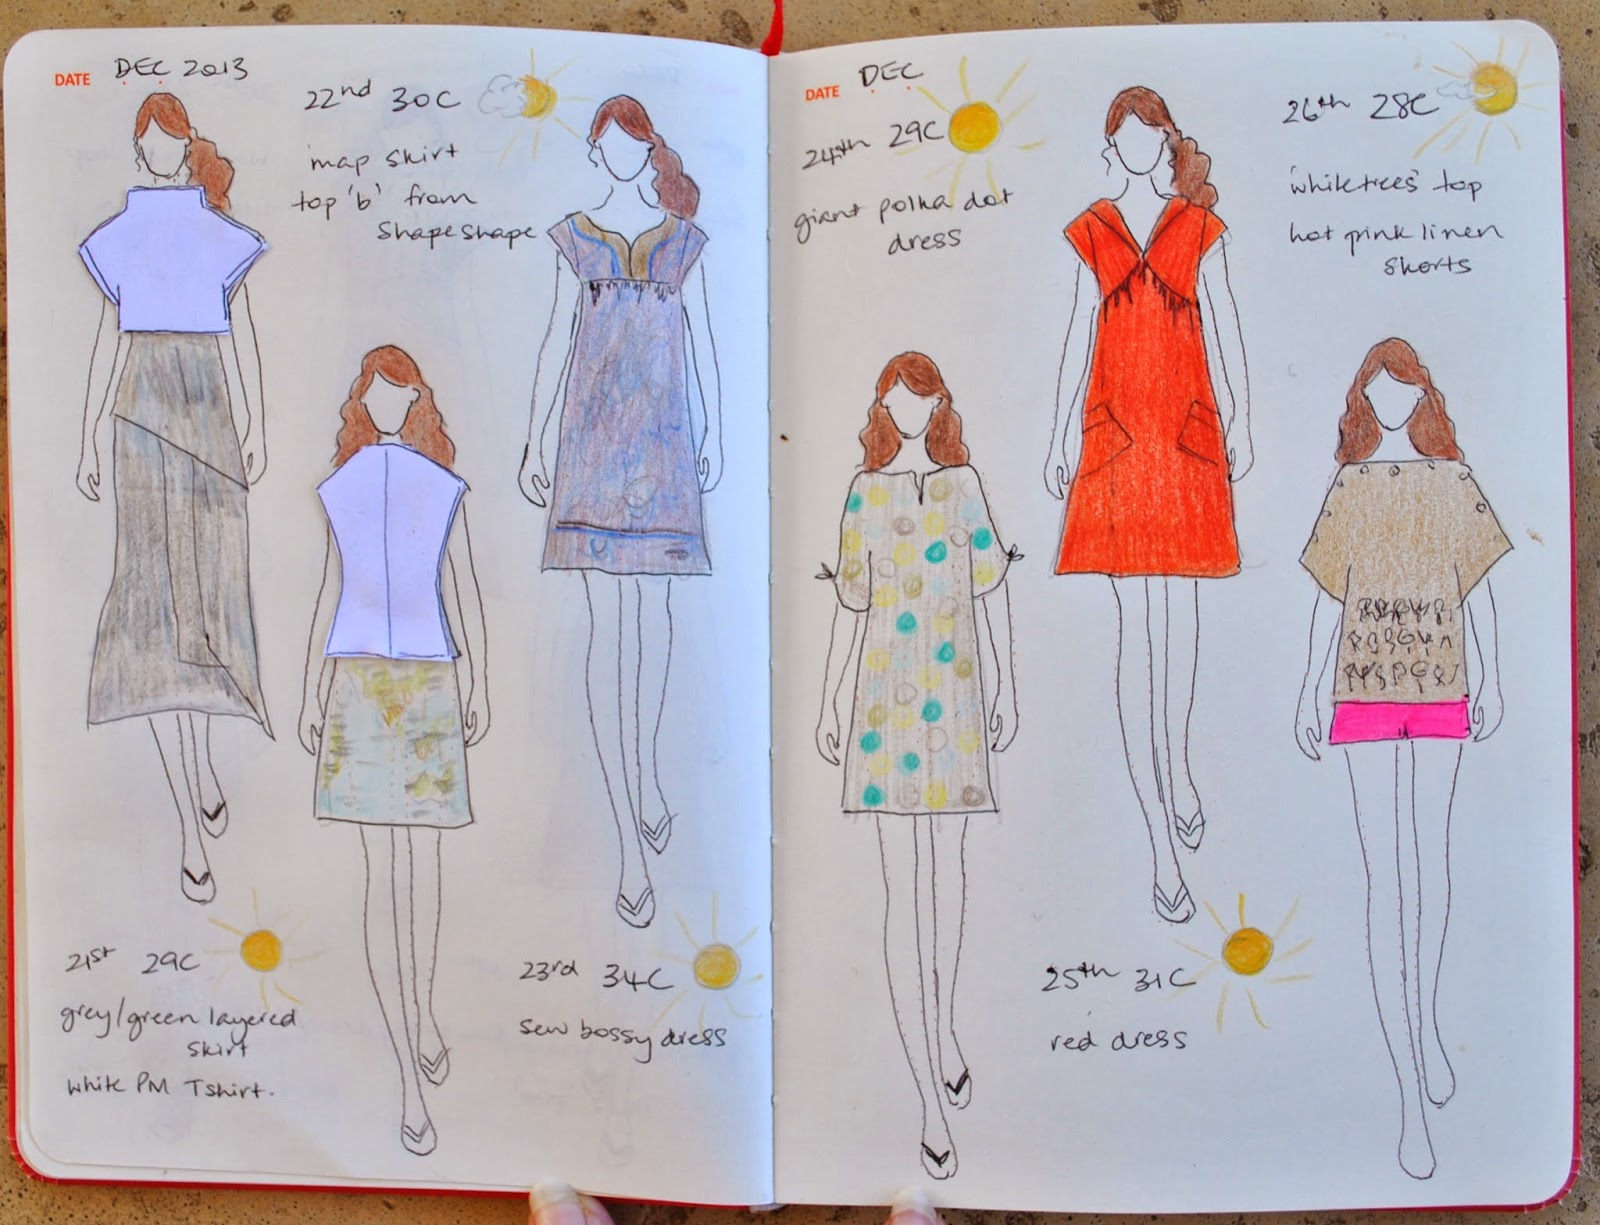
21st-26th December
from left:
grey/green layered skirt, white PM Tshirt
map skirt, top “b” from shape shape
sew bossy dress
giant polka dot dress
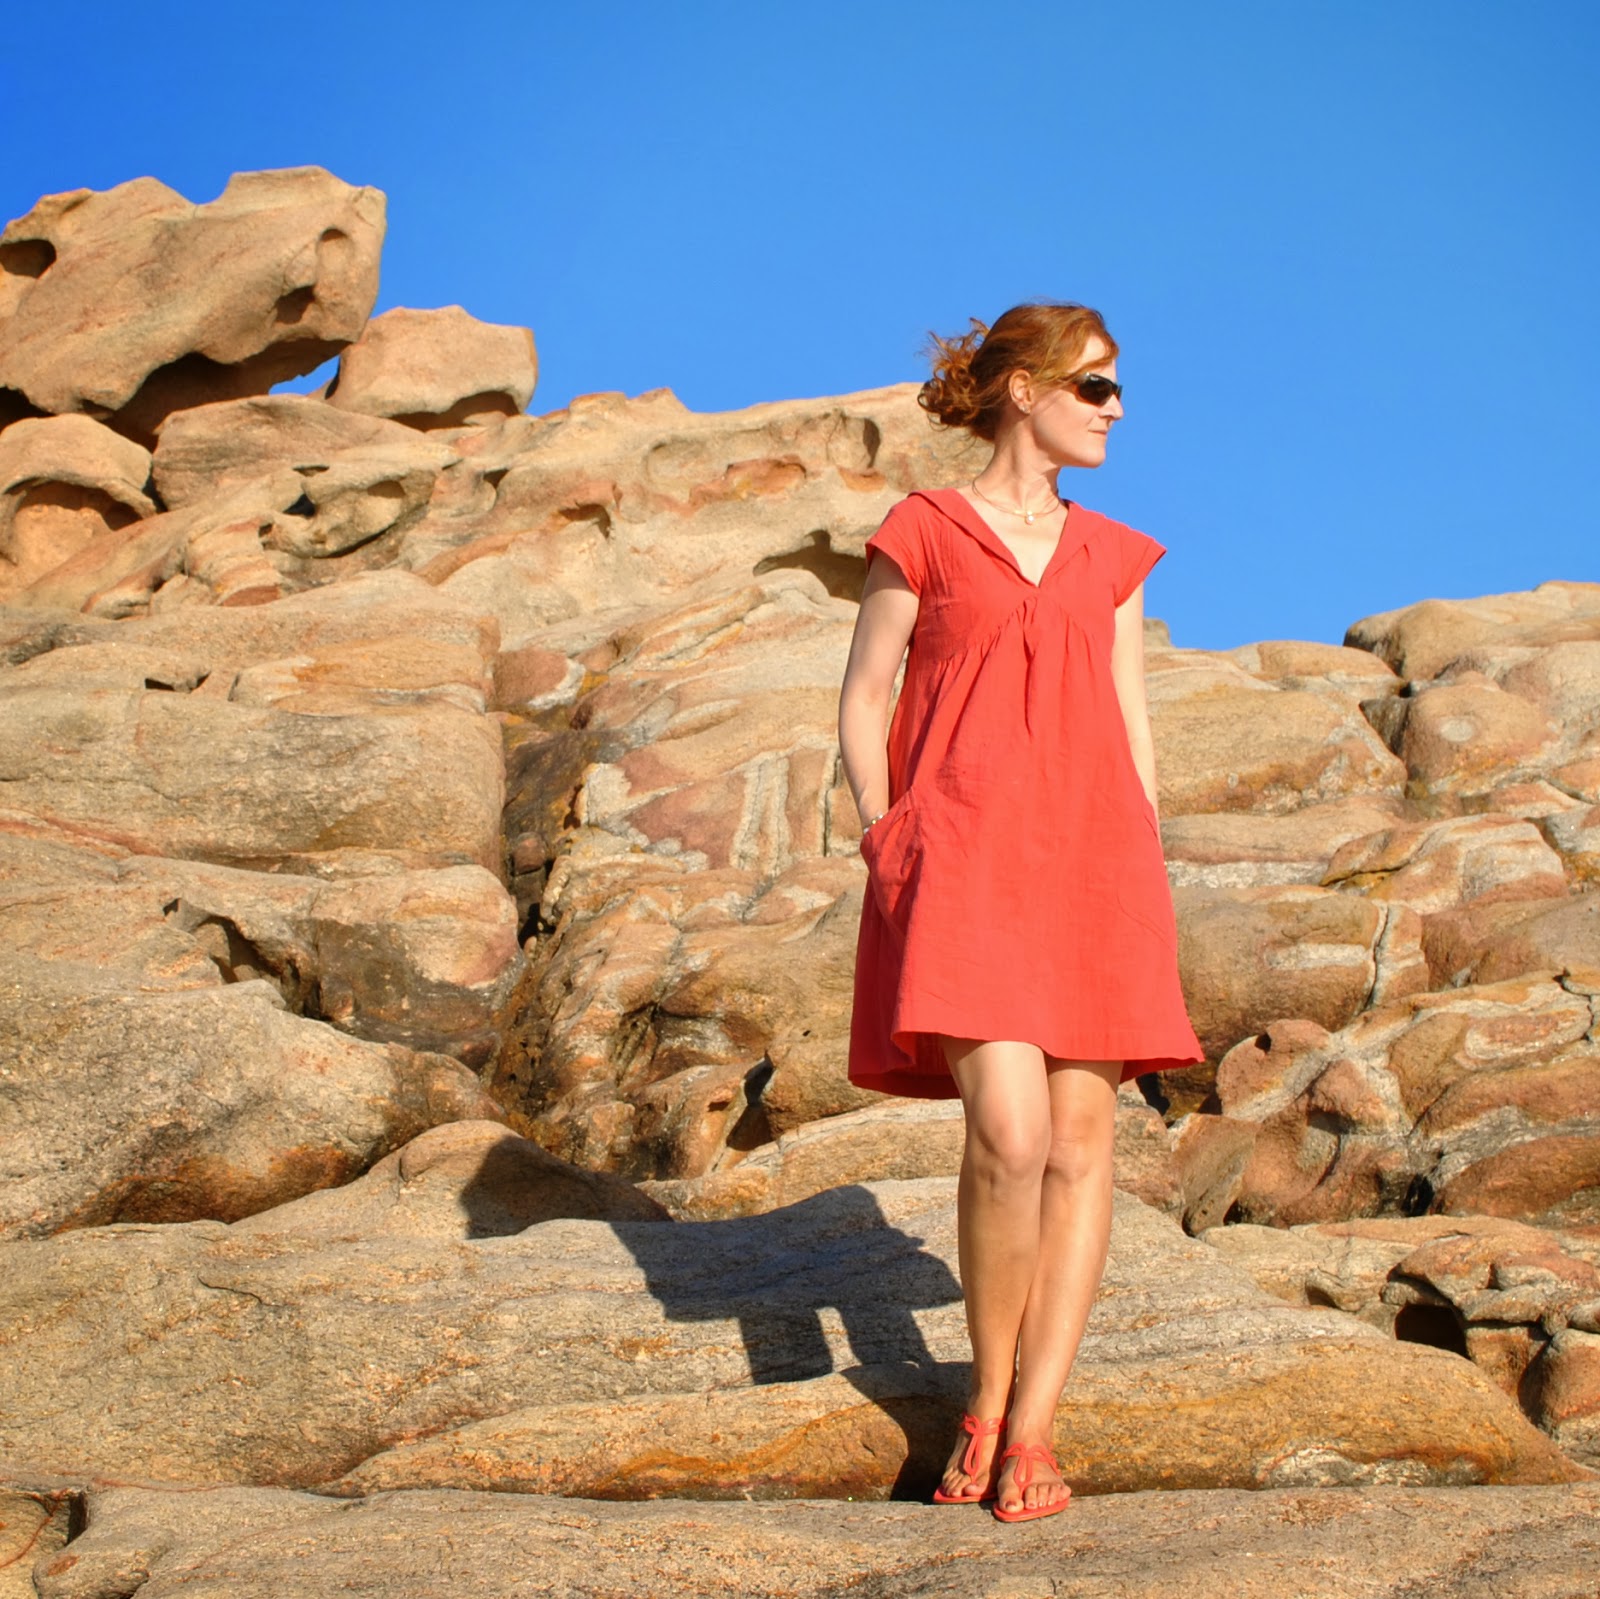
red dress
“white trees” top, hot pink linen shorts
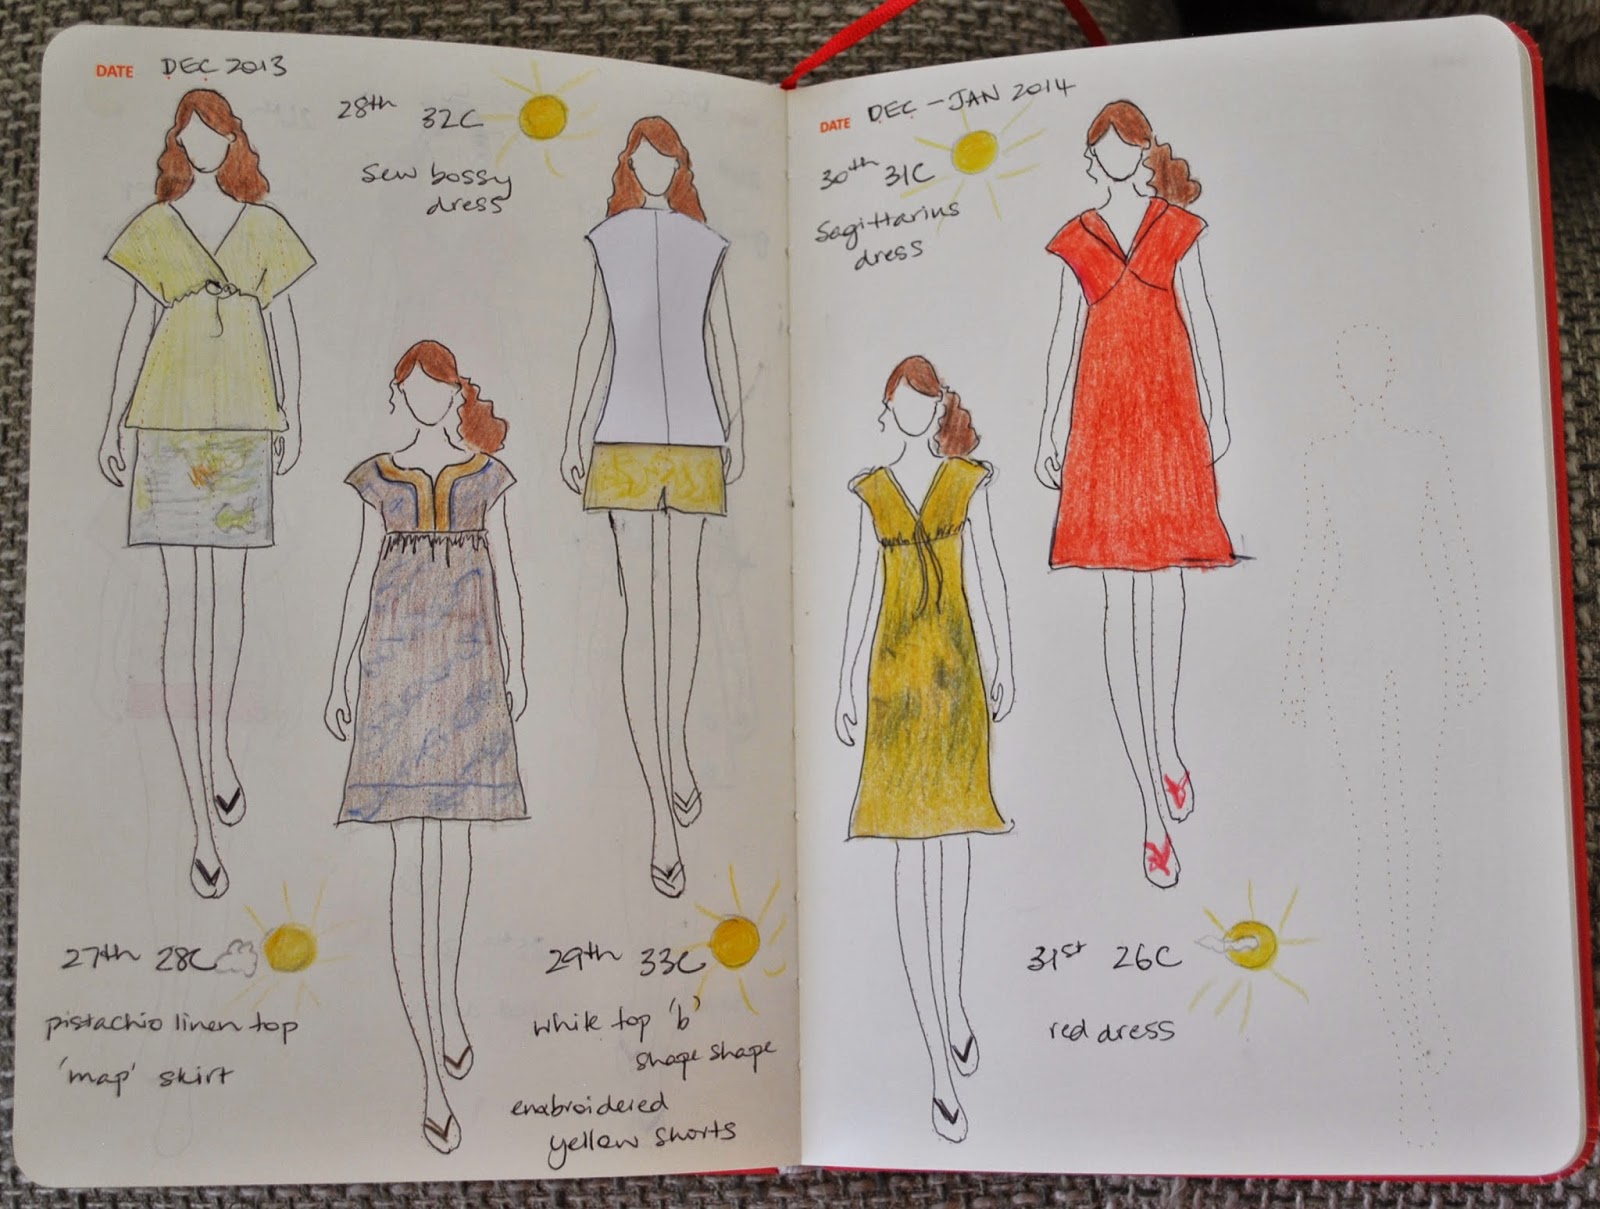
27th-31st December
from left:
pistachio linen top, map skirt
sew bossy dress
top “b” from shape shape, embroidered yellow shorts
Sagittarius dress
red cotton dress

pinterestmail

Three pin-striped shirts

My Christmas present to my boys this year is a tailored shirt for each one; in pin-striped linen with contrasting white collar, cuffs, and buttonbands, and a double welted breast pocket with looped button closure.

Three shirts in addition to Cassie’s outfit and Craig’s birthday shirt.  Phew!  These have kept me super busybusybusy, nose to the grindstone sewing machine for the last few weeks since we got back from Melbourne!  This is the first year I’ve made three long-sleeved shirts for Christmas, the past few years I’ve made things a little easier on myself by slipping at least one short-sleeved one in there.  The cuffs and little sleeve plackets are quite a bit of work, and a short sleeved shirt feels almost quick and easy by comparison.  In the past I’ve always given each item I make its own post, and particularly because of the amount of work that goes into a highly tailored item like a man’s shirt, I kinda reckon they deserve a post each; but this time I just couldn’t with that.  It’s all been just too much!

All three shirts are made using Burda 7767, with the personal fitting modifications for each of my men that I’ve fine-tuned over many many shirts.  How many of these am I up to??  Must be over 30 of them by now, I think.  

Craig’s is a white with purple pin-stripe and brown-y purple buttons, Tim’s is a charcoal with white pin/stripe and black buttons, and Sam’s is a white with blue pin-stripe and caramel-coloured buttons.  All three pin-striped linens are from Tessuti’s in Melbourne, bought during my recent girls’ weekend away with Mum and Cassie; and all the buttons are from Fabulous Fabrics.  The  white contrasting fabric is a silk/linen mix bought from Fabulous Fabrics.  I’ve totally hoarded this lovely and quite expensive stuff for aaaages and had toyed with bravely cutting into it for one for my own SWAP projects, but decided that my boys deserved the best… (deep breath, must learn to let go of precious fabrics) Fortunately I should still have enough to make something for myself.  Bonus!
All the seams are flat-felled; I used my own tutorial for flat-felling a curved seam to get a nice finish along those sleeve caps.  Craig’s shirt has a long curved hemline because it’s more business-like, and the boys’ shirts both have straight hemlines with a lapped split side seam.

My review of this excellent pattern is here

pinterestmail

Cassie in burnt orange

I made a little tank dress with a matching top for Cassie… I’m hoping these will be very useful and versatile items in both her working and her weekend wardrobe.  The two pieces can be worn together as a smart/casual ensemble; also either the tank dress OR the loose top can be worn with a pencil skirt and cardigan to work; the tank dress can be worn alone or as a tunic with with jeans as a casual weekend option, or as a petticoat underneath a sheer dress; and the top can be worn with shorts or whatever.  And imho the colour is absolutely glorious with her strawberry blond hair!!

I bought the rich orange cotton-poly mesh from Tessuti’s in Melbourne during our weekend away together, and both pieces are self-drafted.  The tank dress is a pretty simple silhouette; but sewing it together was like an exercise in spatial thinking.  The fabric is completely sheer so I made it double-layered, both layers are completely sewn together before the whole dress was finally pulled right side through a gap in the lower hemline, which was hand slip-stitched closed as the very last thing.  Meaning, all the seams are enclosed between the two dress layers.  I was so pleased when it worked out successfully!  The fabric was lightweight enough that the whole thing could be bunched up and pulled through a 10cm gap quite easily.  The outer layer is 6cm longer than the inner layer, so the joining seam sits on the inside of the dress, 3cm from the lower fold.

below right; the finished dress was pulled right side out through the short gap in the hemline joining seam at lower right, now hand slip-stitched closed,

The top is also self-drafted, and loosely based upon the shape of the pieces in a very simple top that I’ve had for years, designed by a Melbourne company, tutte which seems to be no longer around.  Basically, the front and back panels are straight rectangles, and the side panels and sleeves are cut as one piece each, on the fold at the top of the sleeve/shoulder: like capital T’s with the downstroke as the sleeve.  

I cut the neckline as a gracefully curved scoop, extending and joining the front and back panels at the shoulder, and added double thickness “flaps” at the lower edge of the front and back that enclose the raw edges.  I hand-stitched the side panel lower edges and and sleeve hems in a narrow rolled edge, and finished the neckline with a long strip, stitched on the right side, turned under and hand-stitched around the inside.

Details:
Top and dress; self-drafted, in slightly stretchy cotton-poly mesh.  I think it could be this stuff

pinterestmail

Salted caramel bon-bons

This year I’ve made an army of salted caramel choccies to give to everyone.  Salted caramel is the flavour of the minute around here.  So hot right now!  It’s funny, a few years ago the very thought would have provoked ewww!’s,  but now everyone here is jumping happily on the salted caramel bandwagon and totally digging it.  I do too  ðŸ™‚  I fudged together my own very simplified version.  They seemed to work OK.  Actually, unfortunately? they are delicious; too delicious.  I had to gift-wrap them up really early to keep them safe  ðŸ˜€ 

Now it’s only one sleep to go, so please allow me to take this opportunity to wish everyone who reads my blog a very joyous Christmas and a safe and happy day filled with plenty of laughter and love… and maybe a bonbon or two  ðŸ˜‰
Cheers!

Salted caramel bonbons


1 cup whipping cream
2 cups white sugar
200g sweetened condensed milk
30g butter
2tsp salt
about 300g dark chocolate, for coating

Dump everything, except for the chocolate, together in a saucepan and stir constantly over a low heat until all the sugar and salt are dissolved.  If it seems like it might start boiling take it off the heat immediately and keep stirring to dissolve.

Once dissolved, allow the mixture boil without stirring, for about ten minutes, or until golden brown, and a little bit drizzled into a bowl of cold water goes nicely chewy and caramel-ly.

Immediately place the saucepan in a sink of cold water, to cease the cooking process.

When it has cooled down a little, pour it out onto baking paper, and when cool enough to handle, cut off chunks, roll them into a ball and dip into melted chocolate using a skewer.

Finish with an extra sprinkling of salt on top.
These quantities make about 45 bonbons, give or take.

pinterestmail

Lapped flat-felled split side seam

Florencia and Jana (by email) both asked about the lapped, flat-felled split side seam, thank you for asking!  Since I finished all my Christmas sewing today… and, can I just say; Whoopeeeeeeeeeee!!!!   I had time to get out some scraps and  show how I did them…
Bear in mind that a tiny bit of the wrong side of the fabric will show in this technique, so it is best confined to fabrics where this doesn’t matter.
To have this feature, you have to plan ahead and cut an extra little extension, or tab, on the outer edge of either front or back; about 11.5cm in height for a 10cm split.  I randomly chose for the front edge to have the tab so as to flat-fell the seams towards the back as my own convention; but it looks equally fine either way.

Stitch the side seams to level with the top edge of the tab.

Press the side seam open above the split, at the same time press down the seam allowance on the un-tabbed side and leave the tab un-pressed.  Snip the untabbed seam allowance to the endpoint of the previous stitching.

Fold under and press the untabbed seam allowance below the snip, and stitch.

Trim the remainder of the untabbed seam allowance to half its width, along the entire length of the seam.

Press the tabbed seam allowance over the trimmed seam allowance, and wrap the raw edge around the trimmed edge of the other side to enclose it, the entire length of the seam.  At the same time, press the tab under along the same line to the lower edge.  Pin in place.

Stitch the flat-felled seam, stopping at the top edge of the split.

If necessary, trim the tab; then turn under the raw edge and press.  Stitch.

To strengthen, stitch a short row of horizontal back and forth over the top of the split.  Alternatively bar-tacking, or narrow, closely spaced zig-zagging can be used at this point.

Hem the lower edges.  Remember:  the underside split is hemmed facing out, so mind you don’t accidentally stitch the hem on the outside on this side!  I almost got caught here the first time!
Finished views: below left, the inside; and at right, the outside view

pinterestmail

Grey shirt, with some floral

I have made a shirt for Craig’s birthday  ðŸ™‚
Burda 7767, again.
Looks kinda plain from a distance? well, up close it can be seen the shirt has a secret floral surprise!  

I’ve seen a few shirts in up-to-the-minute menswear boutiques with some panels and parts cut from contrasting prints like paisleys and florals, and wanted to make something like this for Craig.  Thing is though, he’s a fairly conservative dresser who would give major side-eye to anything full-on floral…. too scary!  so to ease him into the trend gently and painlessly I just sneaked it in, in innocuous spots, for facings and mostly inside parts.  Meaning at a casual glance you only get tantalising glimpses that it is not just a boring old plain grey shirt.   Fortunately this was acceptable.  Phew!
I’m really pleased with how it looks!  It’s always a bit nerve-wracking choosing fabrics for the menfolk, they can be so easily spooked.  The floral is a little hipster, it’s true; but I think the soothing presence of all that grey cotton broadcloth makes it ok for a man like my husband.  

Both fabrics are from Spotlight, and I used the soft floral Japanese cotton wrong side out to get a softer, pleasantly faded and muted effect.  This is used for all facings: the collar, collar stand, pockets, button and buttonhole bands, sleeve hems and yoke.  The variegated pale/dark grey buttons are from Fabulous Fabrics.
I gave the left breast pocket a pen division, because apparently he actually uses it.

All the seams are flat-felled, and I used my own tutorial to get that sleeve cap curve sitting down nice and flat around the shoulder.  

At the lower edge of the side seams I tried something new, and finished them with a lapped flat-felled split.  I really like how this turned out; it’s strong and looks both neat and smart and I will use this technique for a lot more shirts in future  ðŸ™‚

Details:
Craig’s shirt; Burda 7767 with minor modifications, my review of this pattern here

pinterestmail

Capricorn

Capricorn; the sign of the goat.
Baaa.  No, not me.  So the “goat” is in the form of my new knitted mohair jumper, or I reckon it’s more like a Tshirt really.  And this is the very last thing in my zodiac series…  Yay!  Finished!  ðŸ˜€  
This is the Mohair Sweater, available for digital download here, knitted in Jo Sharp Rare Comfort Kid Mohair Infusion col 617 (Rosehip)  I bought the yarn a few years ago, when Jo Sharp closed down their shop here… (sad face) oh I still miss that shop, waah!  Pink is a colour I’m not supposed to wear, but I do think I might be able to get away with this warm deep shade.   I LOVE pink… LOVE IT I TELL YOU! and one of the saddest things about getting my colours done was being told that pinks were Not For Me.  But hopefully this almost orange-y pink will be alright   🙂
The design is a really fantastic basic, the sort that seems boring at first but you could easily have one in every colour.  It’s beautifully shaped so it curves nicely into the waist.  Ribbing at the neckline, but not the sleeves nor lower edge so they curl up attractively.  One I will use again; a nice and easy project.  Except… well, for the mohair.  I find mohair a very temperamental beast.   The reason why it has taken me yonks to finish this simple little thing…  it’s hard to see the stitches for fluff, and it sticks to itself, so if you make a booboo then unravelling is pretty much impossible.  Please remind me to never ever buy mohair yarn, ever again?  Next time I’m going to seek out some alternative.
To be honest, it is way too hot to wear things like this right now.  It’s sheer madness that I’m even wearing it here.  But I had to show it, yes?… and at least I know now how very very cosy and warm it will be for next winter  ðŸ™‚
Details:
Top; knitted by me, Jo Sharp’s mohair sweater in mohair, col 617 (rosehip)
Shorts; Burda 7723, white linen,  my review of this pattern here
Socks; knitted by me to a 60’s pattern, Morris and Sons 4ply wool, details here
Boots; hiking boots, hand-me-downs from Mum
pinterestmail
Switch to mobile version
↓