Monthly Archives: January 2014

You are browsing the site archives by month.

“swoosh” welt pocket

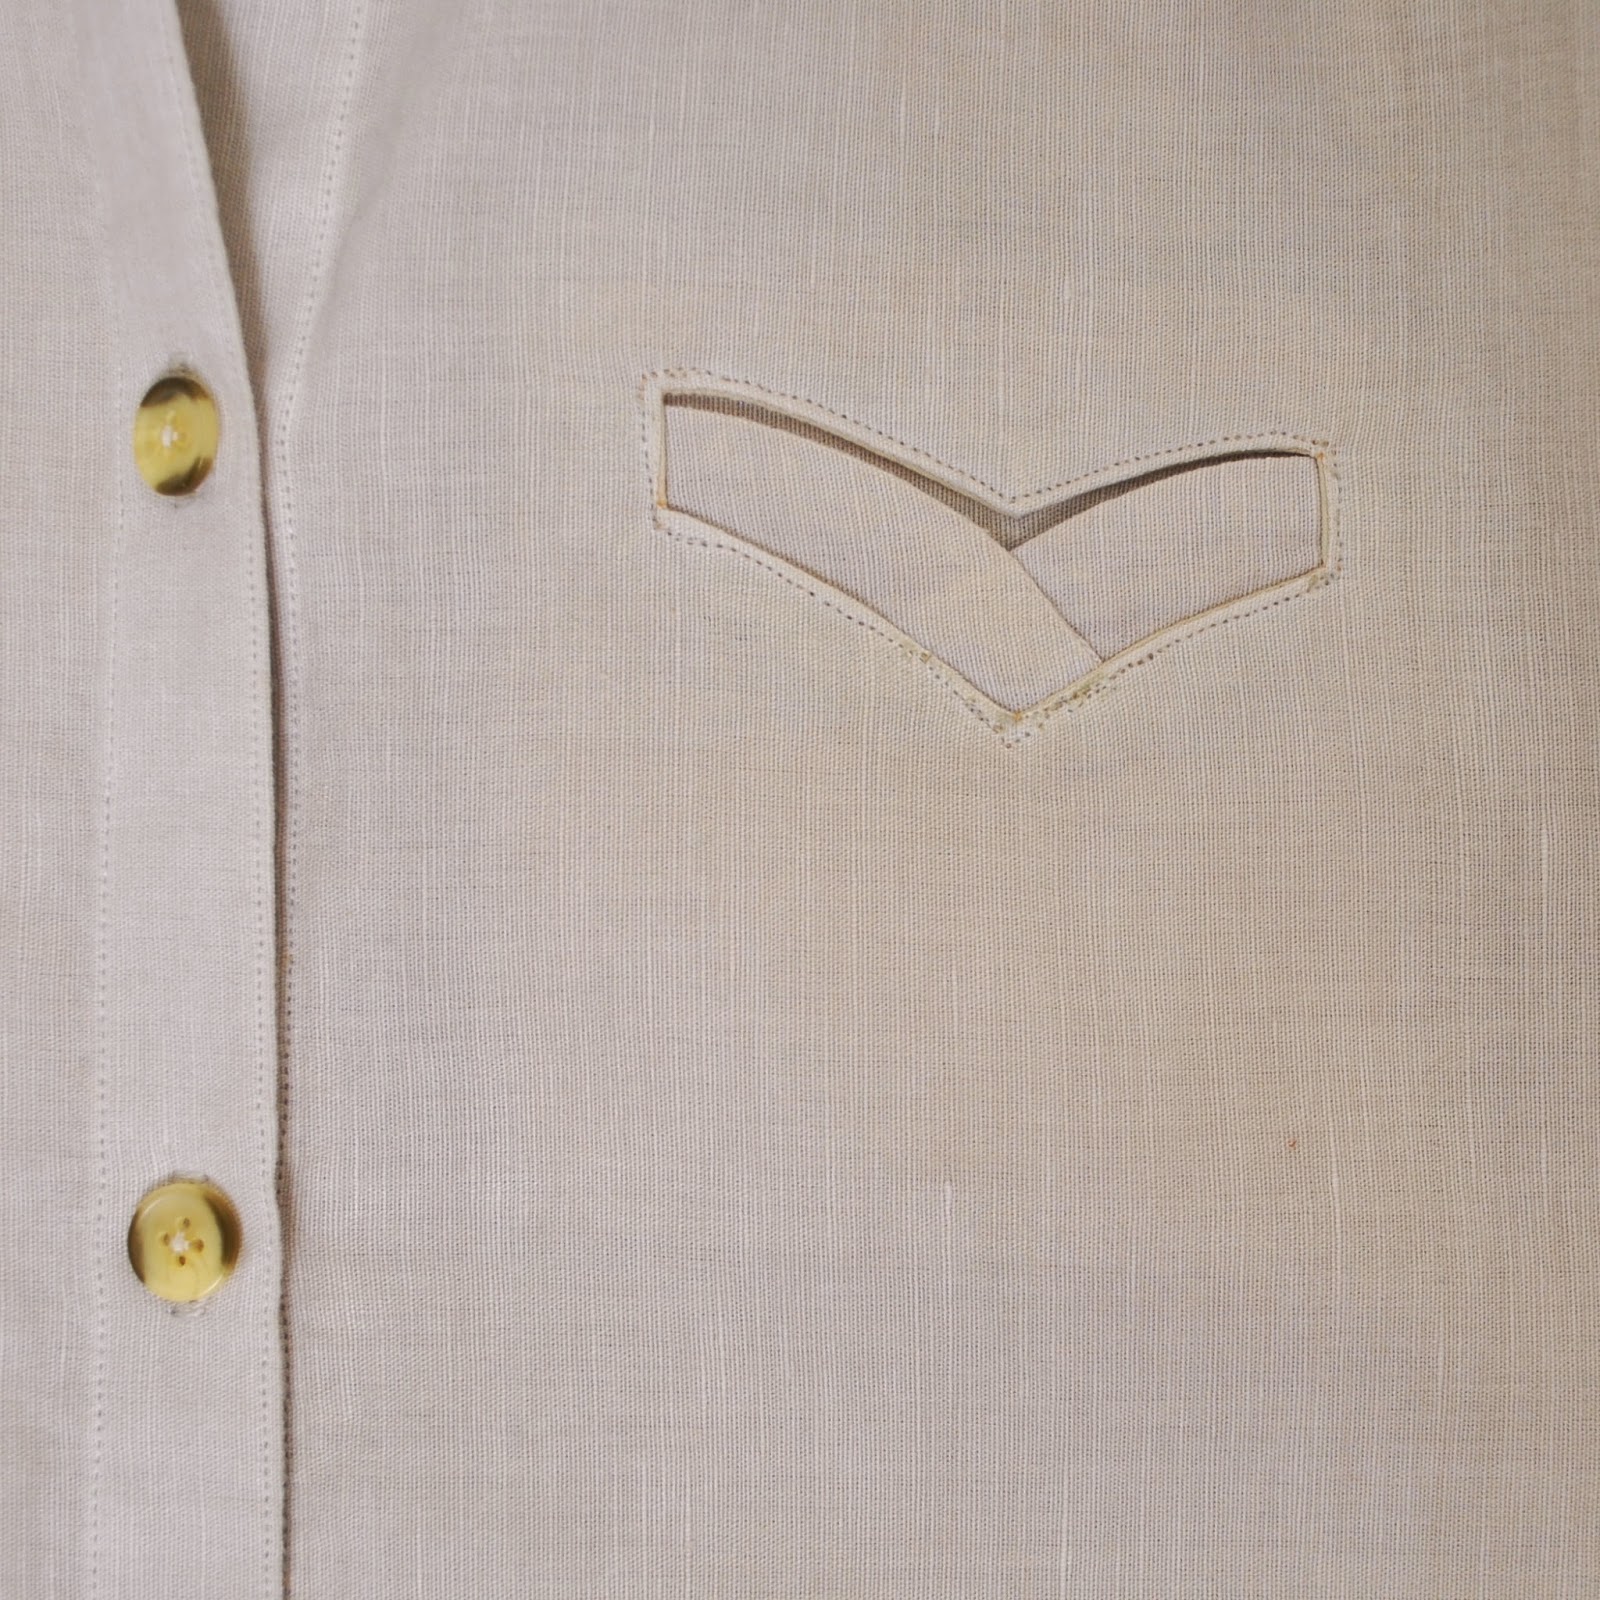
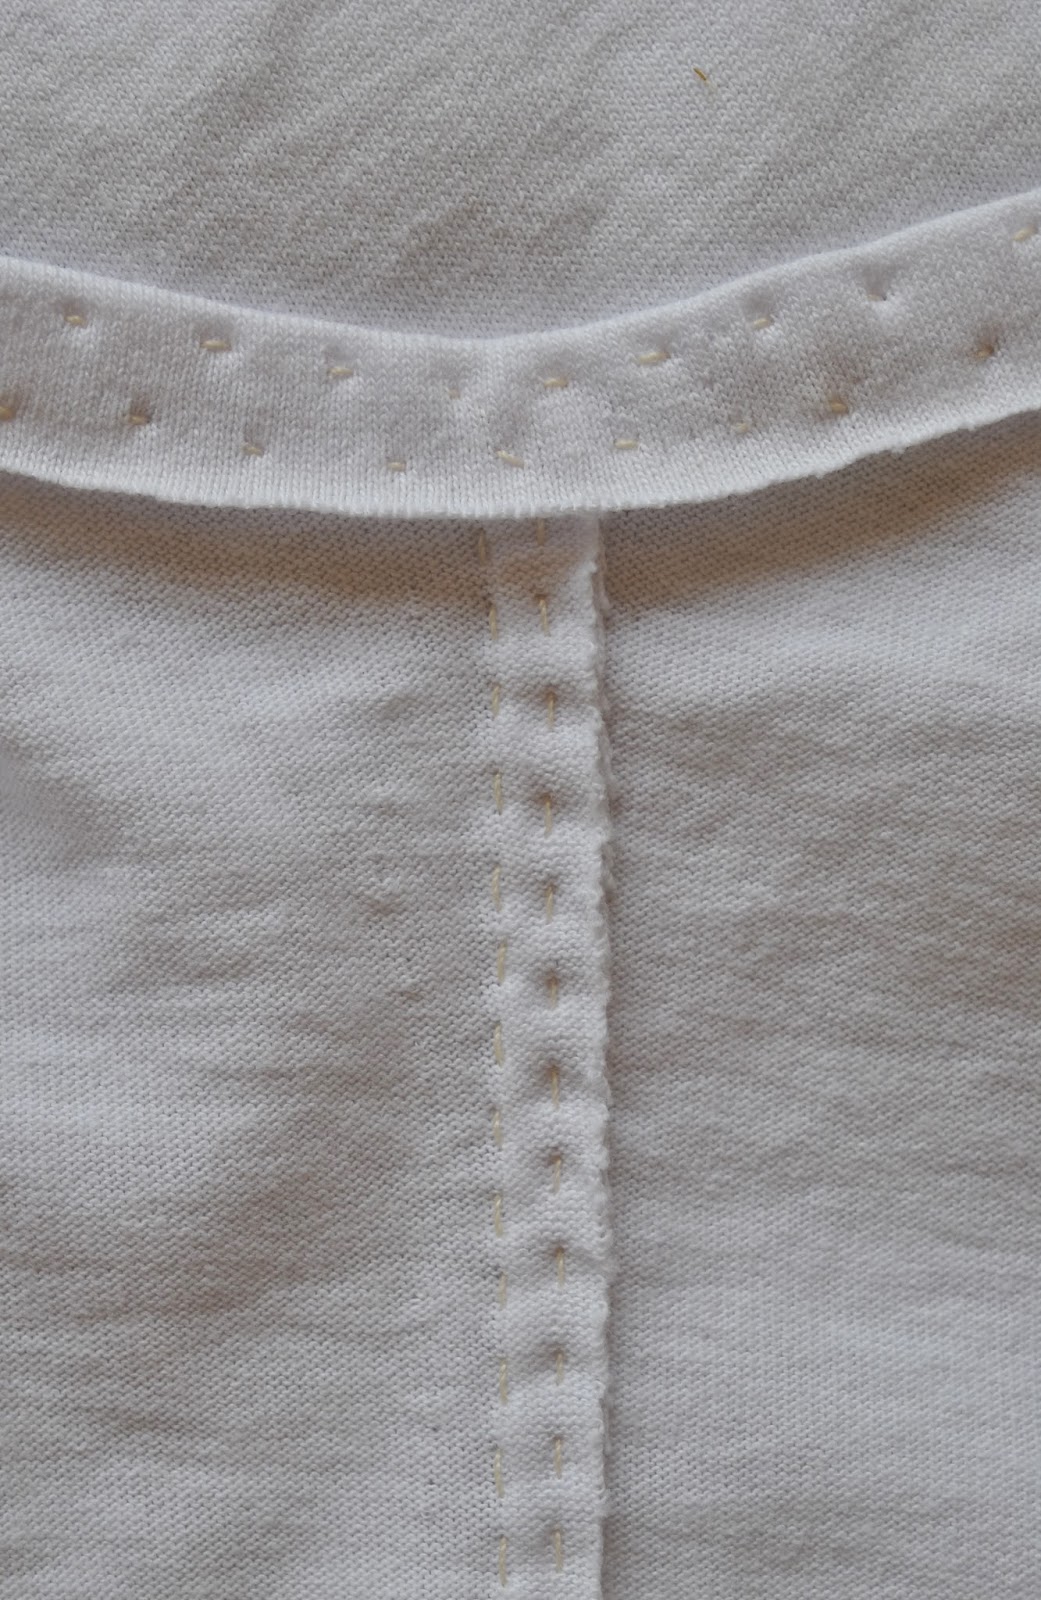
To those who showed an interest in the swoosh welt pocket on my Tao blouse; thank you 🙂 and it was my take on this welt pocket for which Patty wrote a very in-depth tutorial.  The fabric I used for my blouse is quite light-weight; allowing me to devise a simplified method  as follows  …
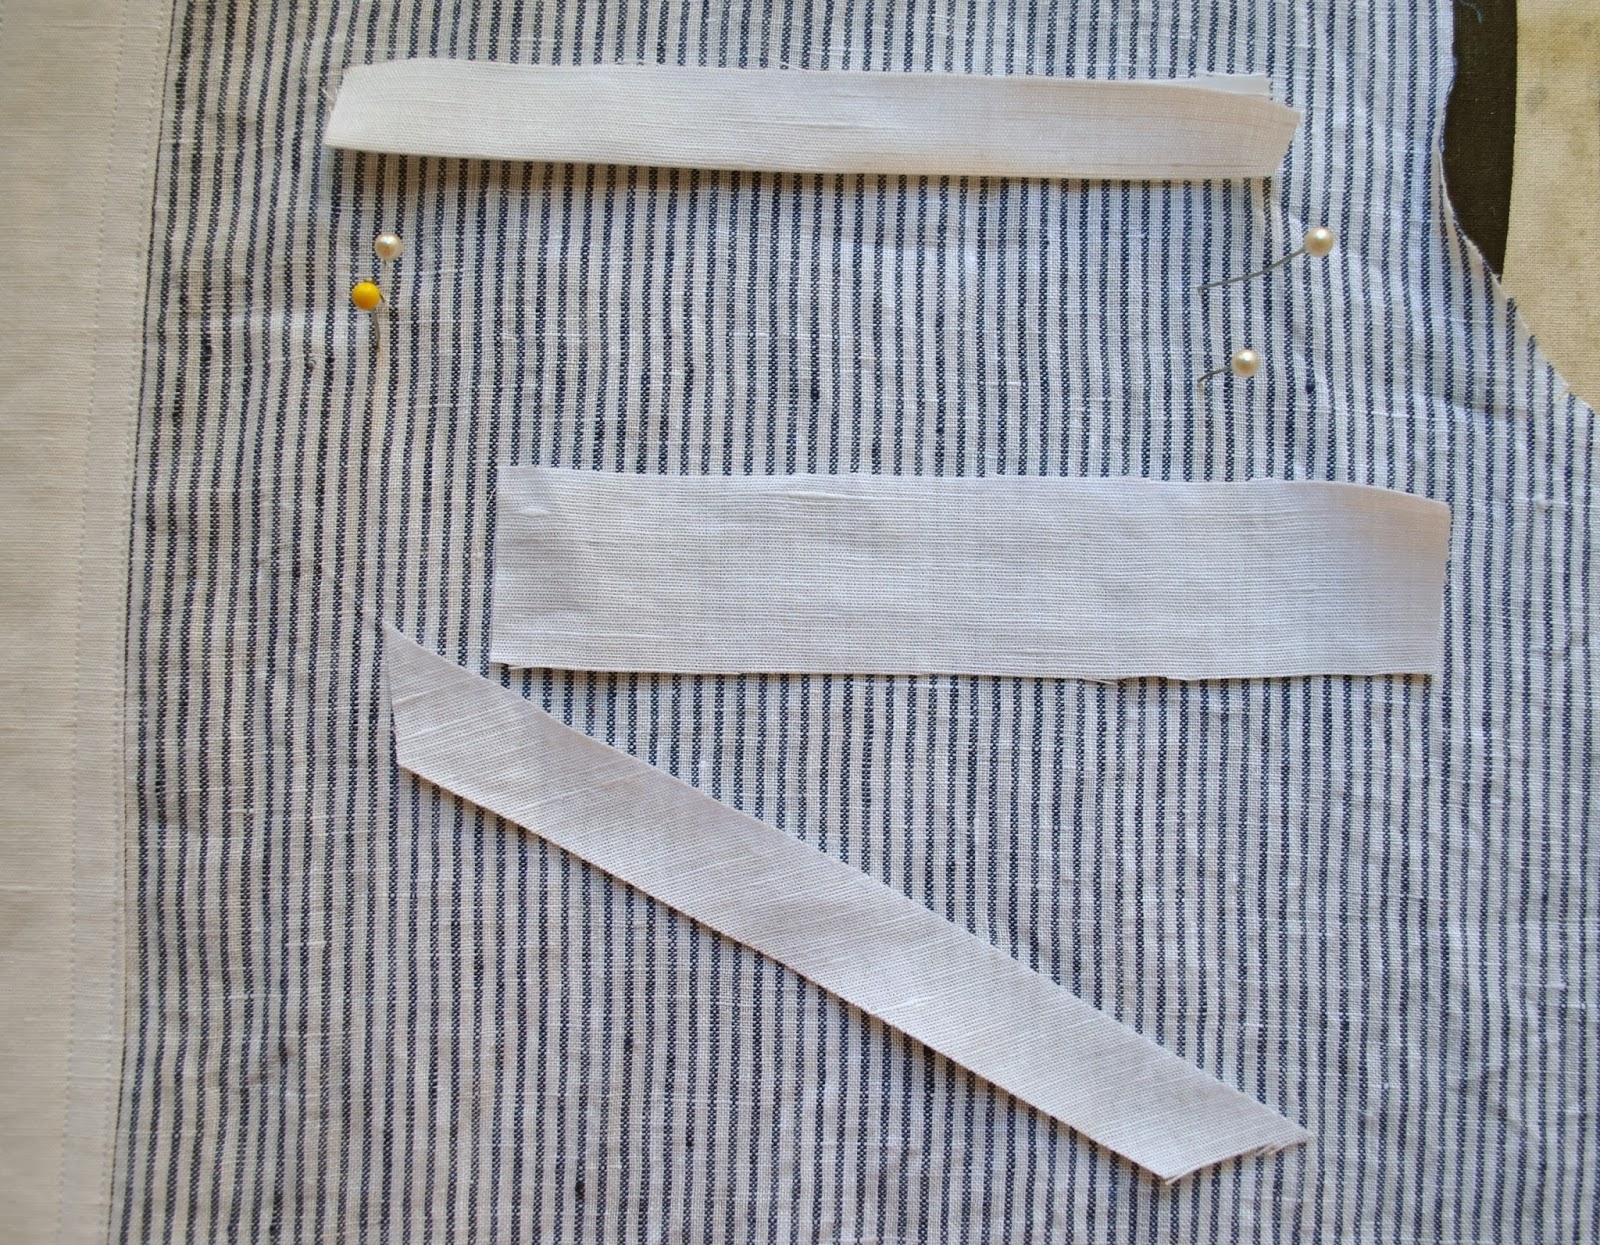
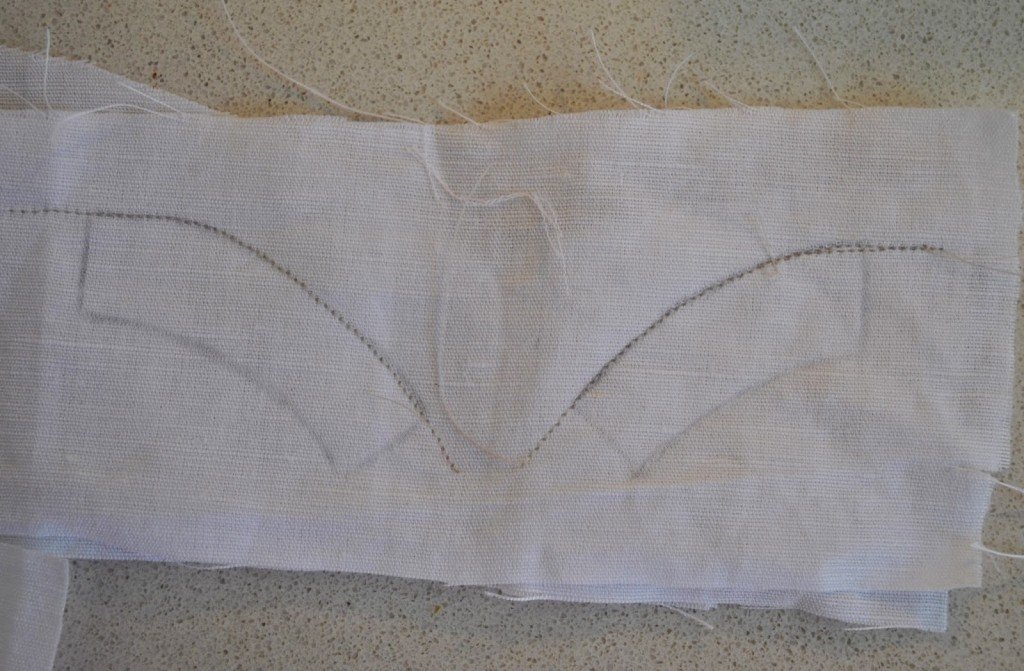
Sketch the shape of the welt.  Then accurately trace the two halves onto a small piece of the fashion fabric with plenty of room around each,  and including the overlap on both sub-sections.  You could also just trace the shape in entirety, making it as a one-piece welt.  With hindsight that would be a bit easier; but anyway it does look kinda cool as a two-piece welt…
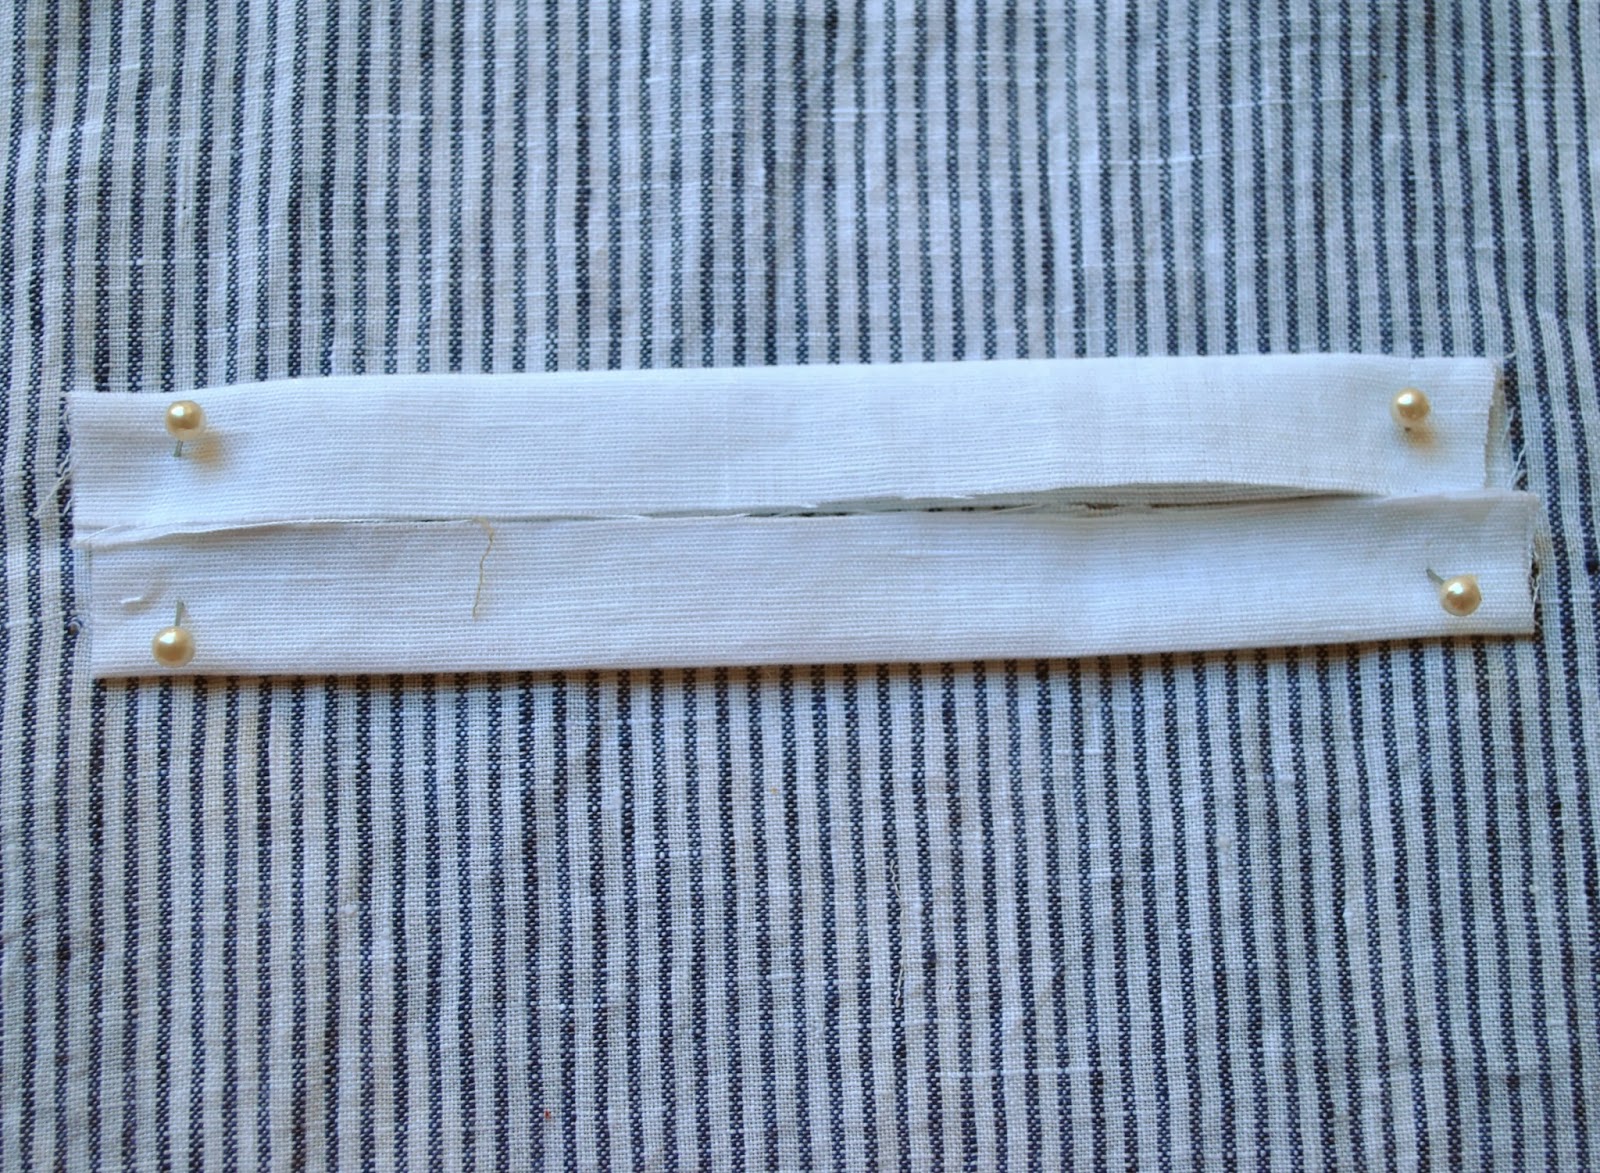
Lay another scrap of fabric under the traced sections and stitch along the top curve, extending the stitching well past the pencilled lines to allow for seam allowances.

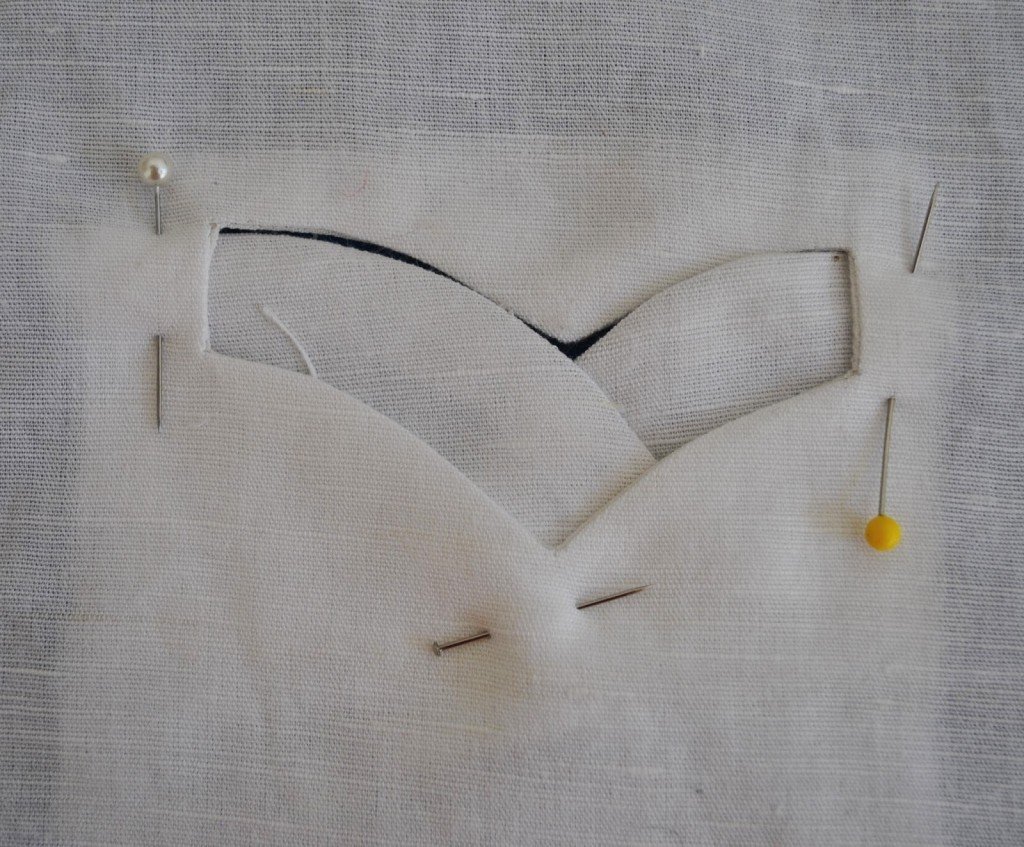
Trim, grade and clip seam allowances outside the stitching, turn out, finger press the curves out, and press flat.

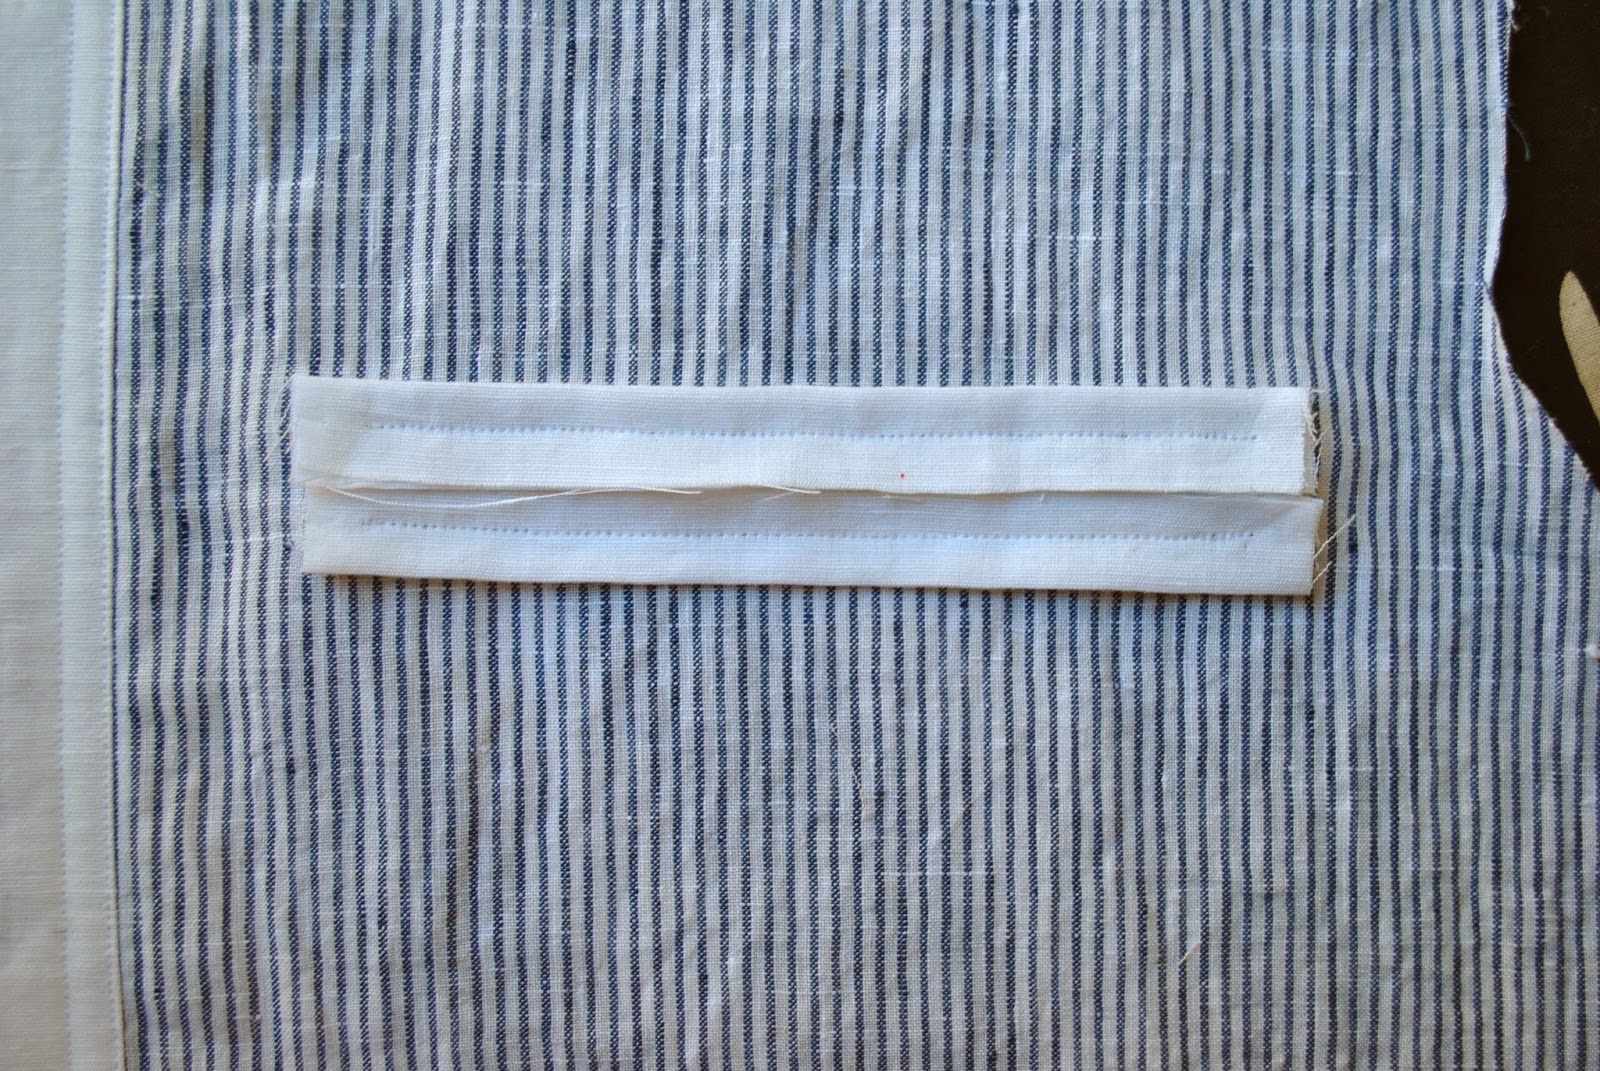
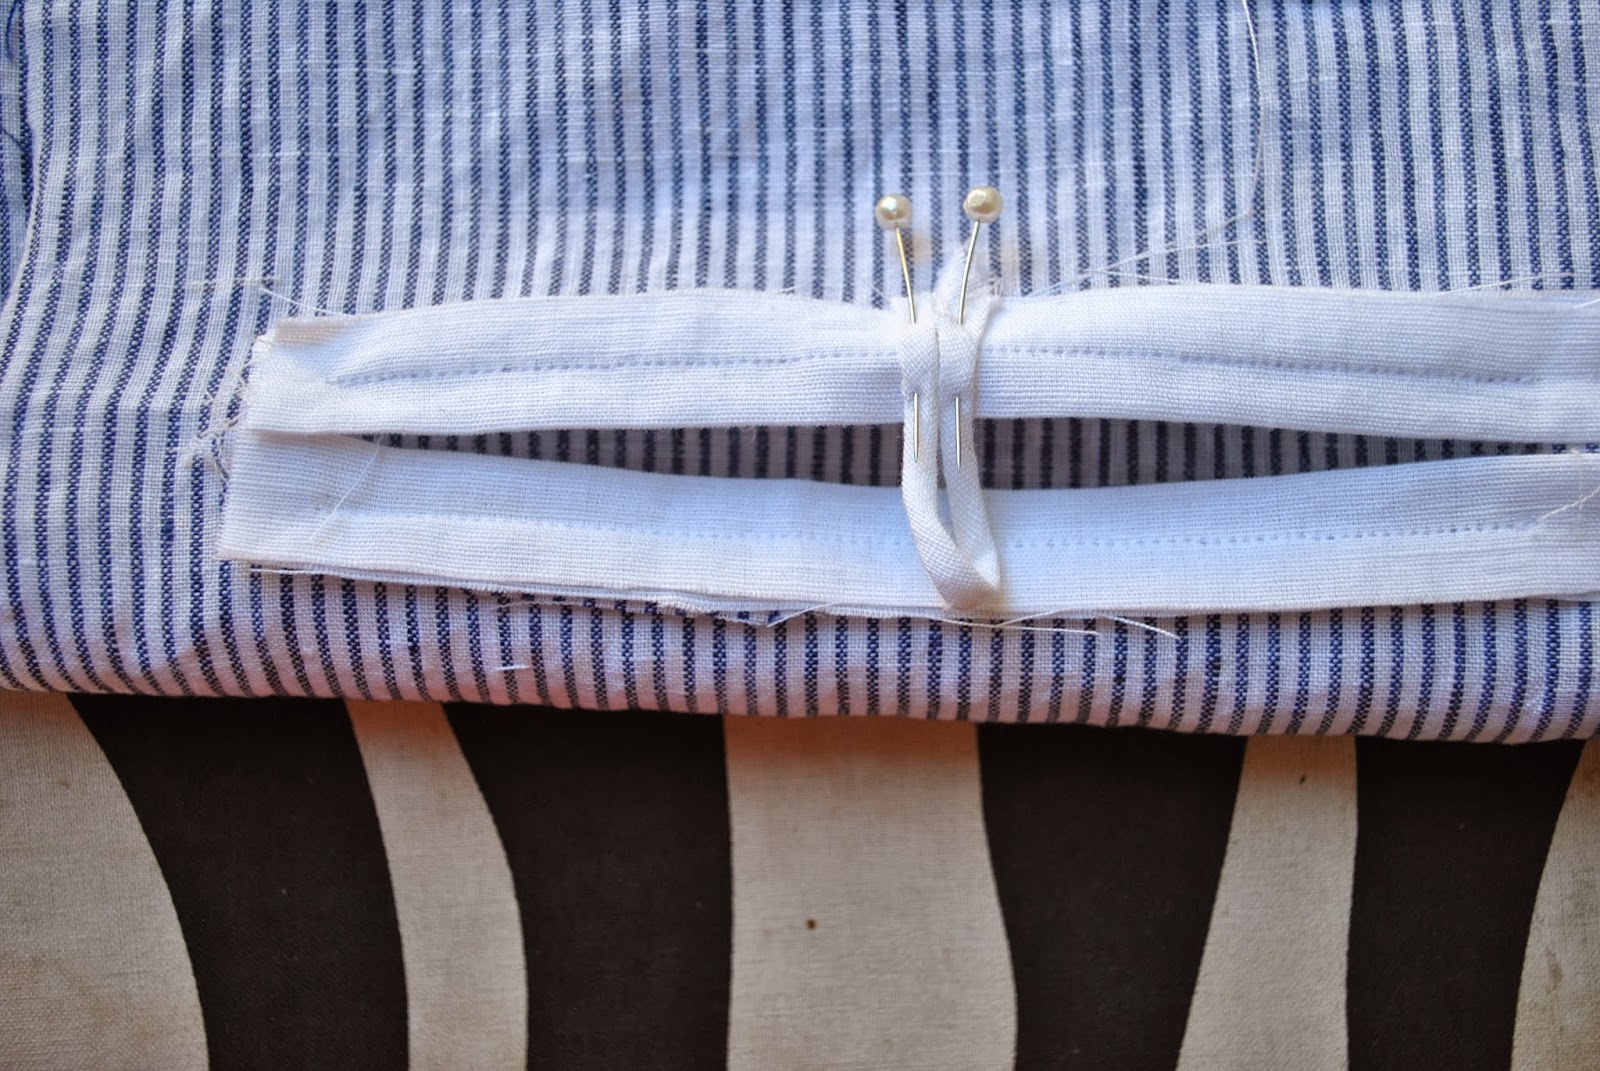
Using the original sketch to check for placement, pin the left-hand welt into position over the right-hand welt.  Open out the left-hand half and stitch it into place onto the other half; exactly over the previous stitching.

Determine where the welt pocket is to be sewn on the garment; mark its position.  Cut a strip of iron-on interfacing big enough to cover the area of the welt, and apply this to the wrong side of the garment to stabilise.

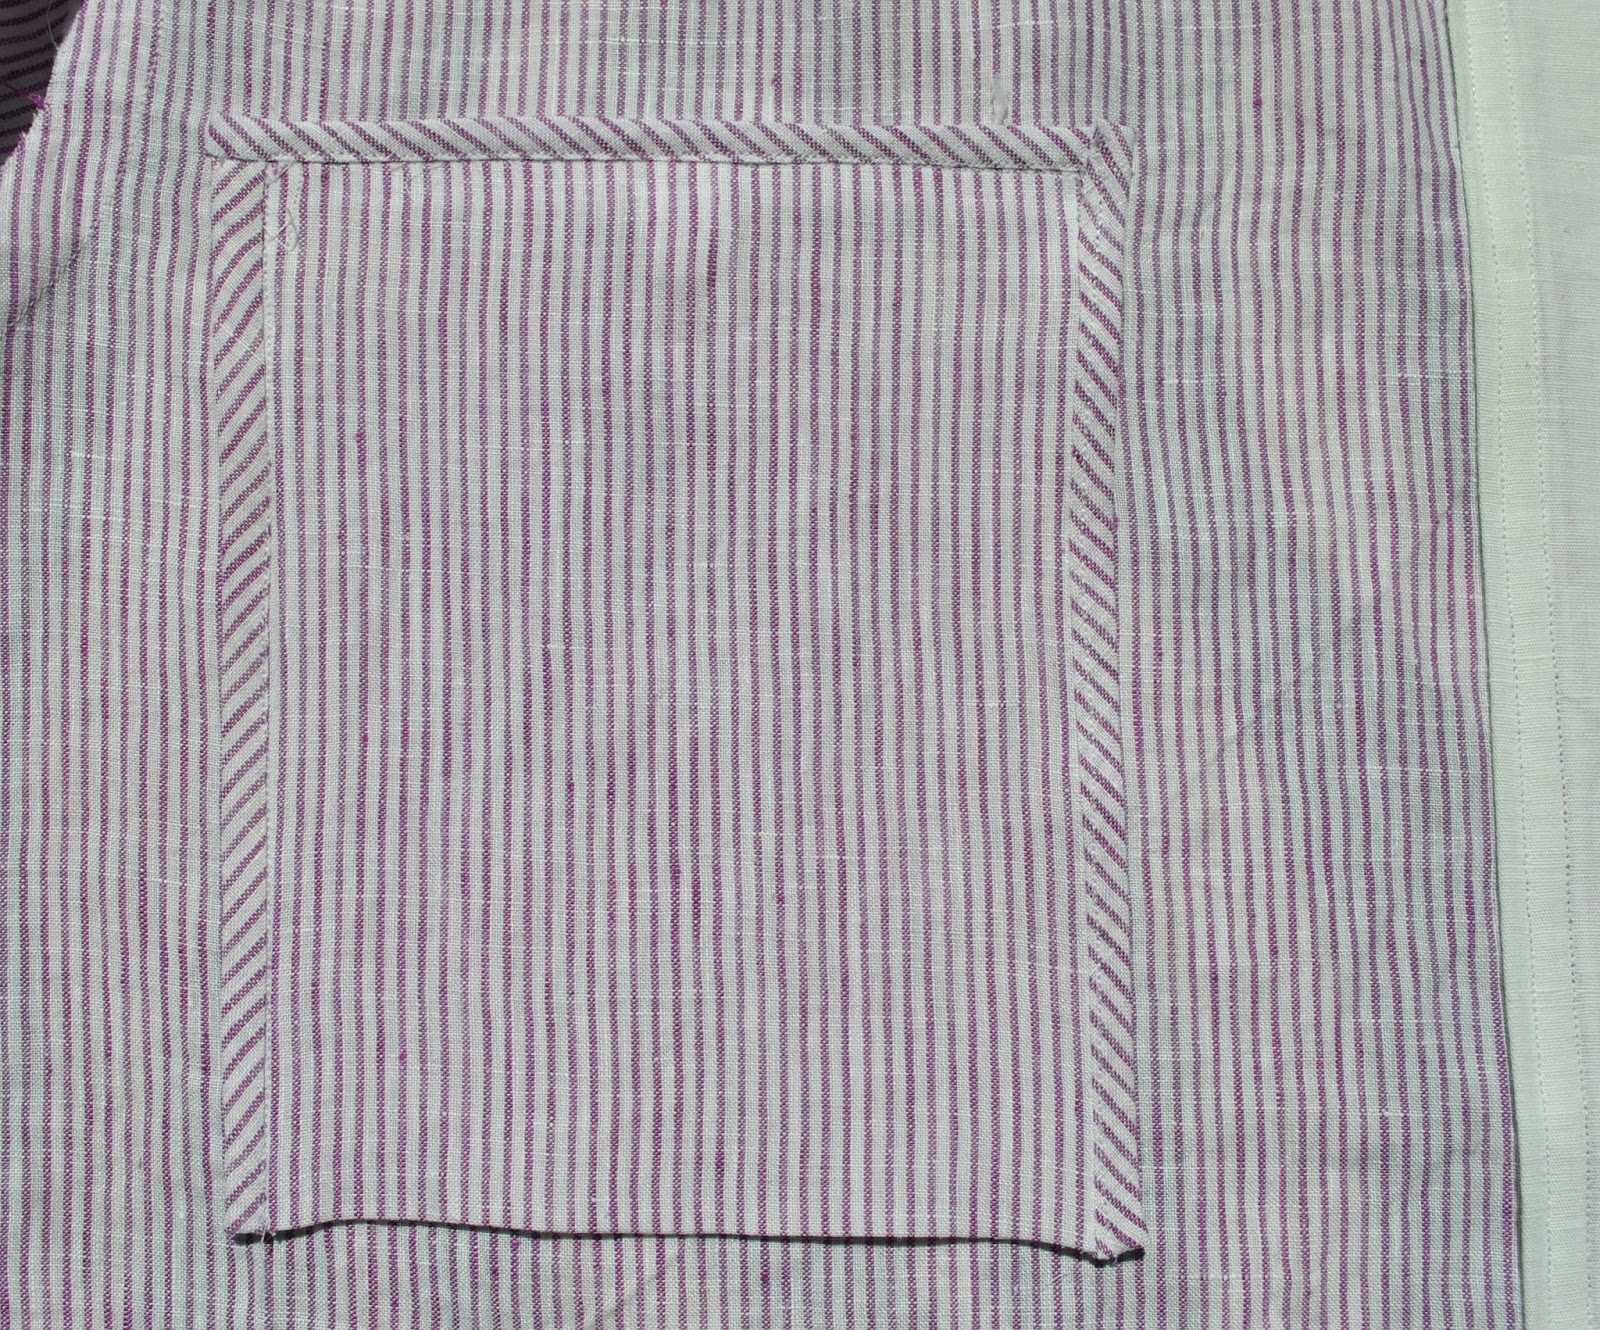
Cut a rectangular piece of fabric for the pocket lining and trace onto it the welt shape, using the sketch from the first step.  Position over the stabilised section of fabric where previously marked, and stitch garment and pocket lining together, following the perimeter of the traced welt.

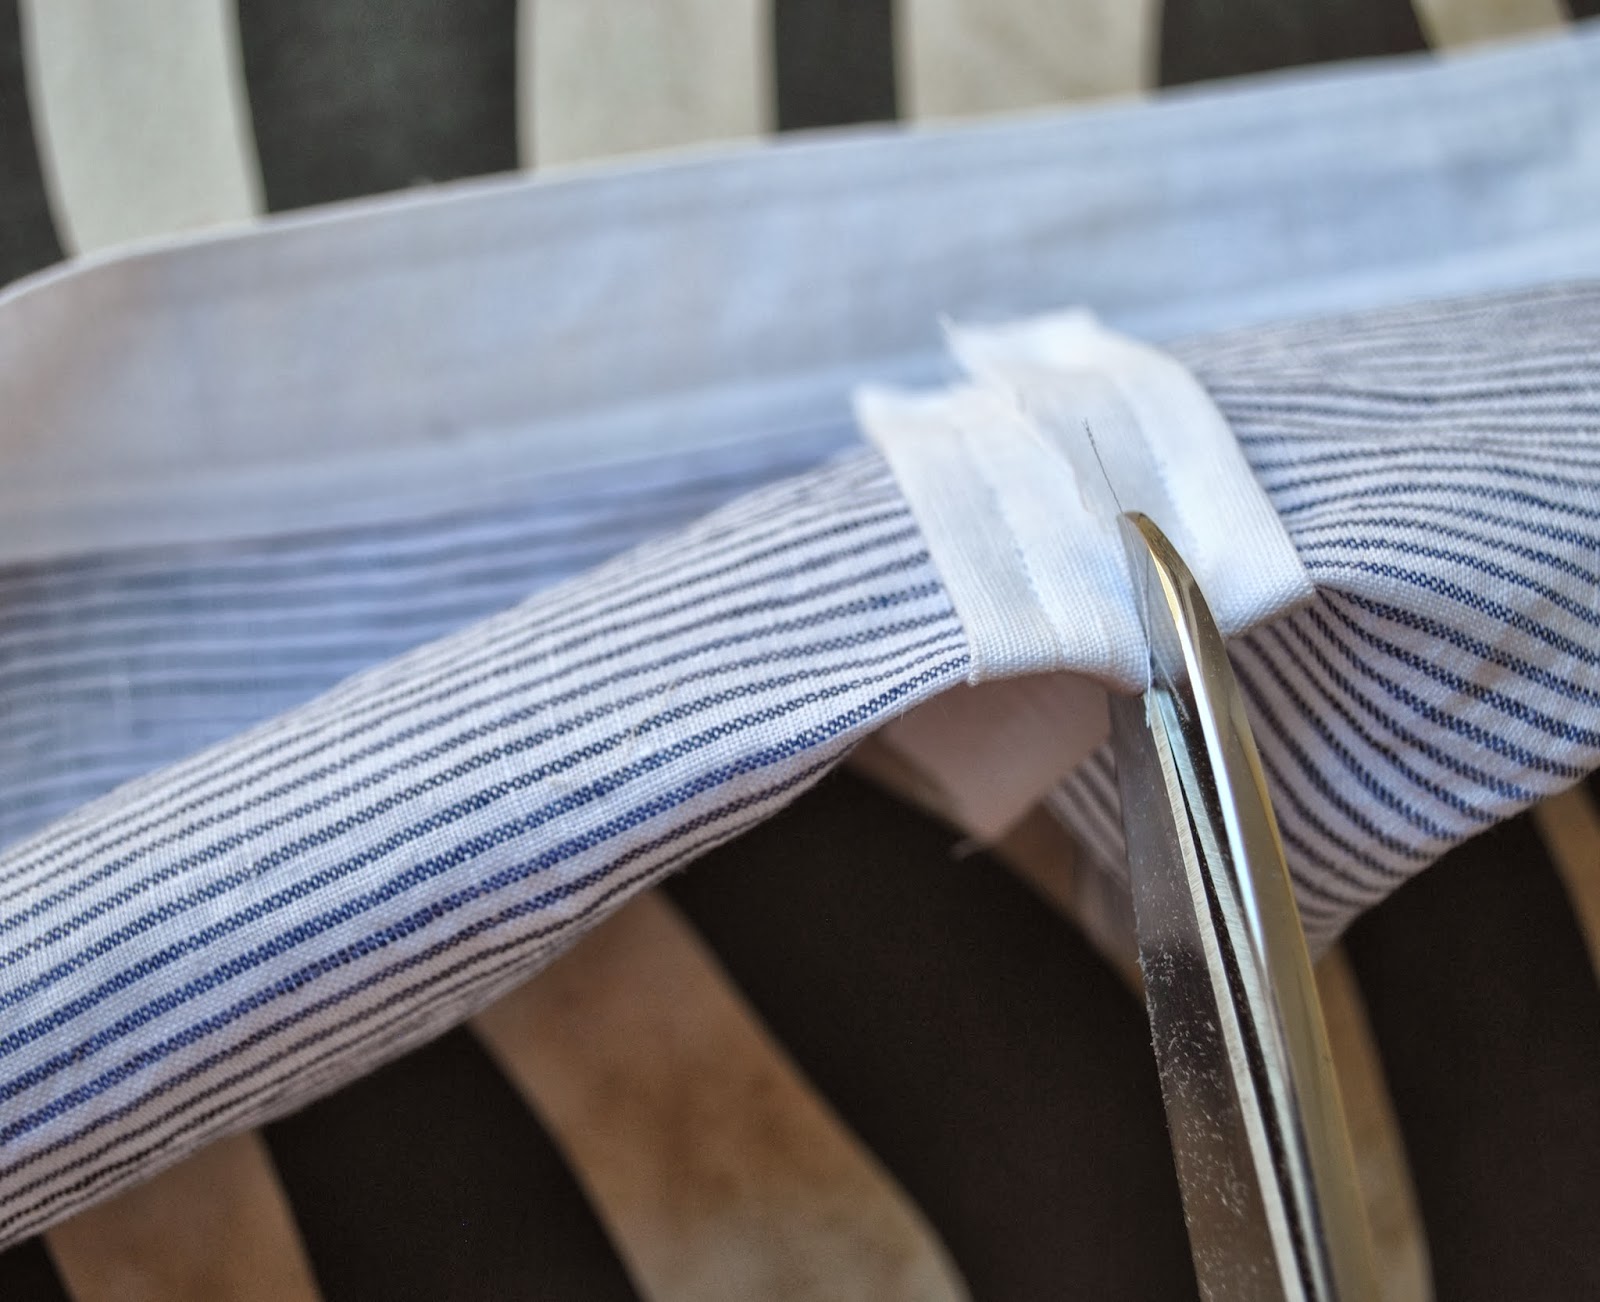
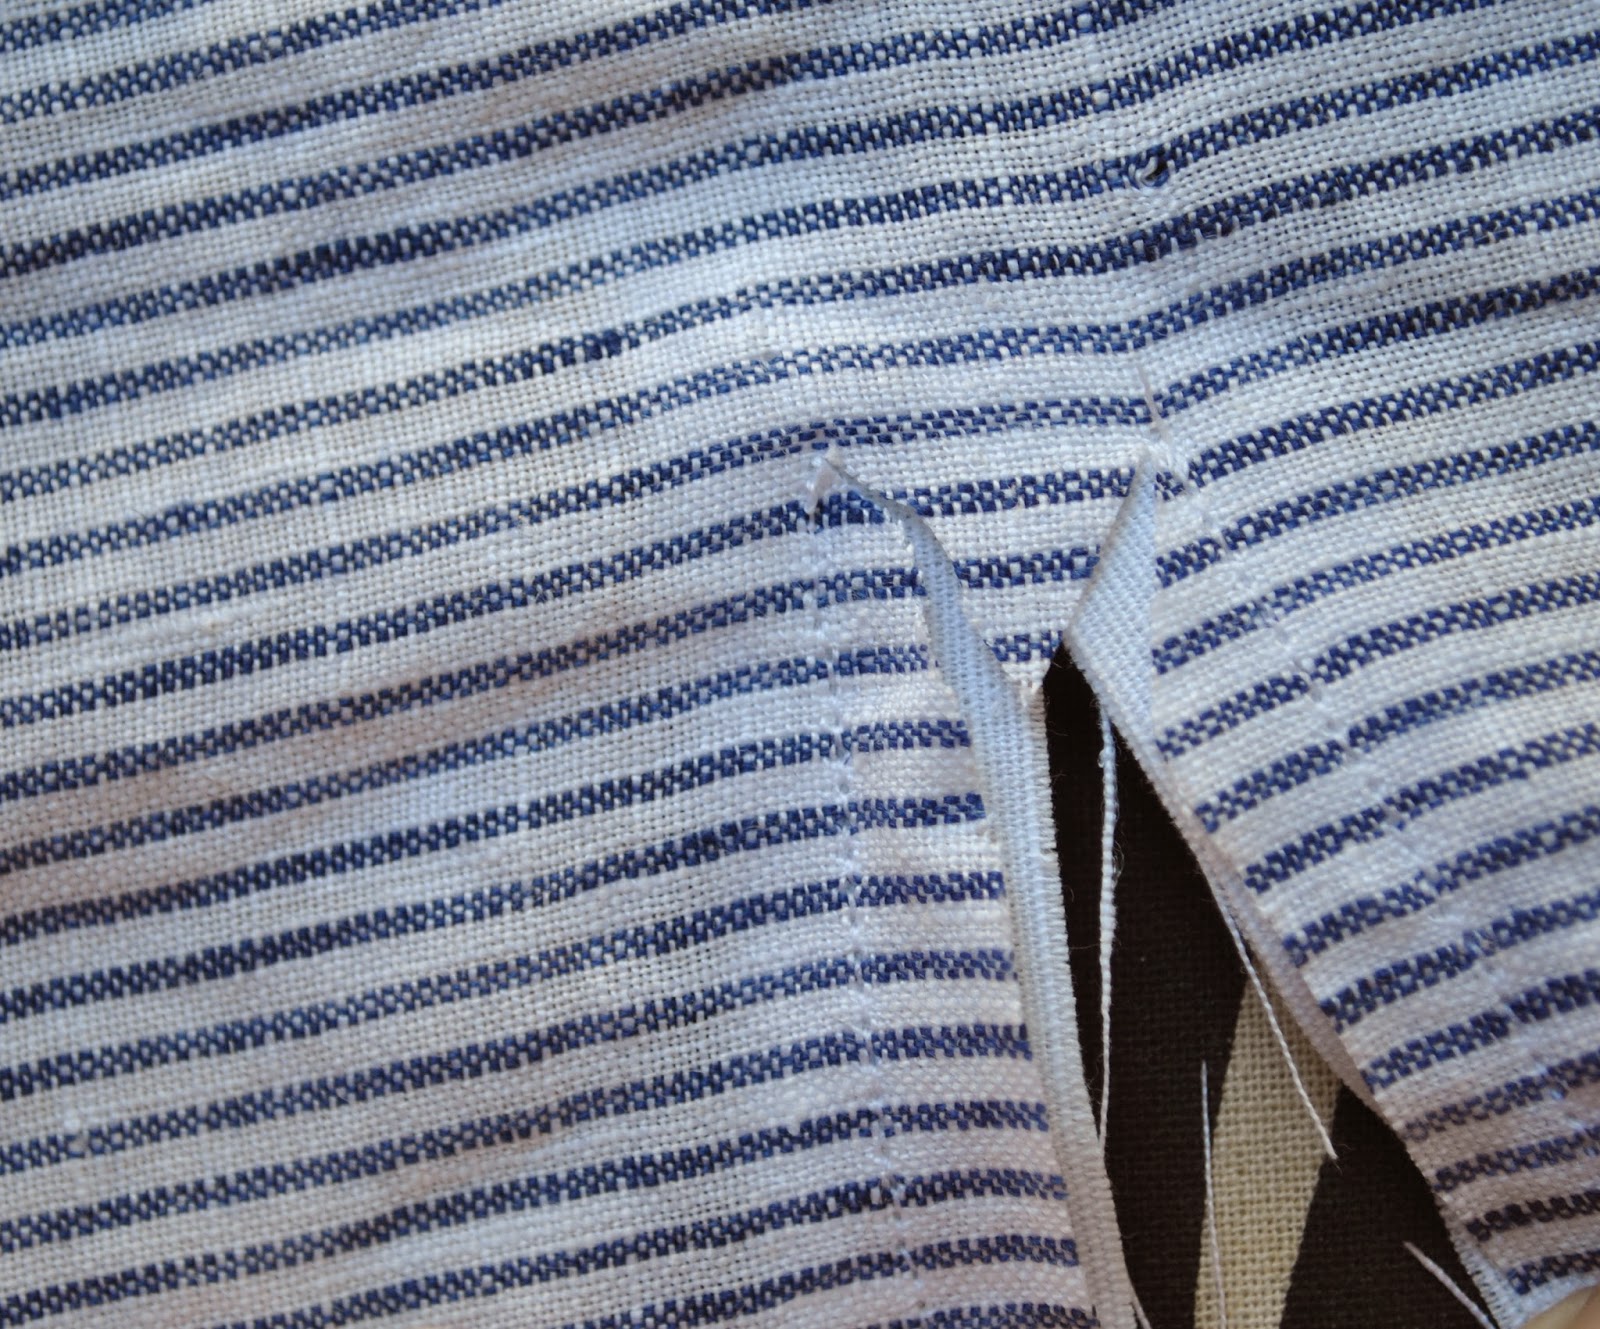
Snip along inside the centre of the stitching, and out into the corners and turning points, grade and clip curves.  Turn the pocket lining through to the inside of the garment, finger press out along the stitched curves, and press flat.

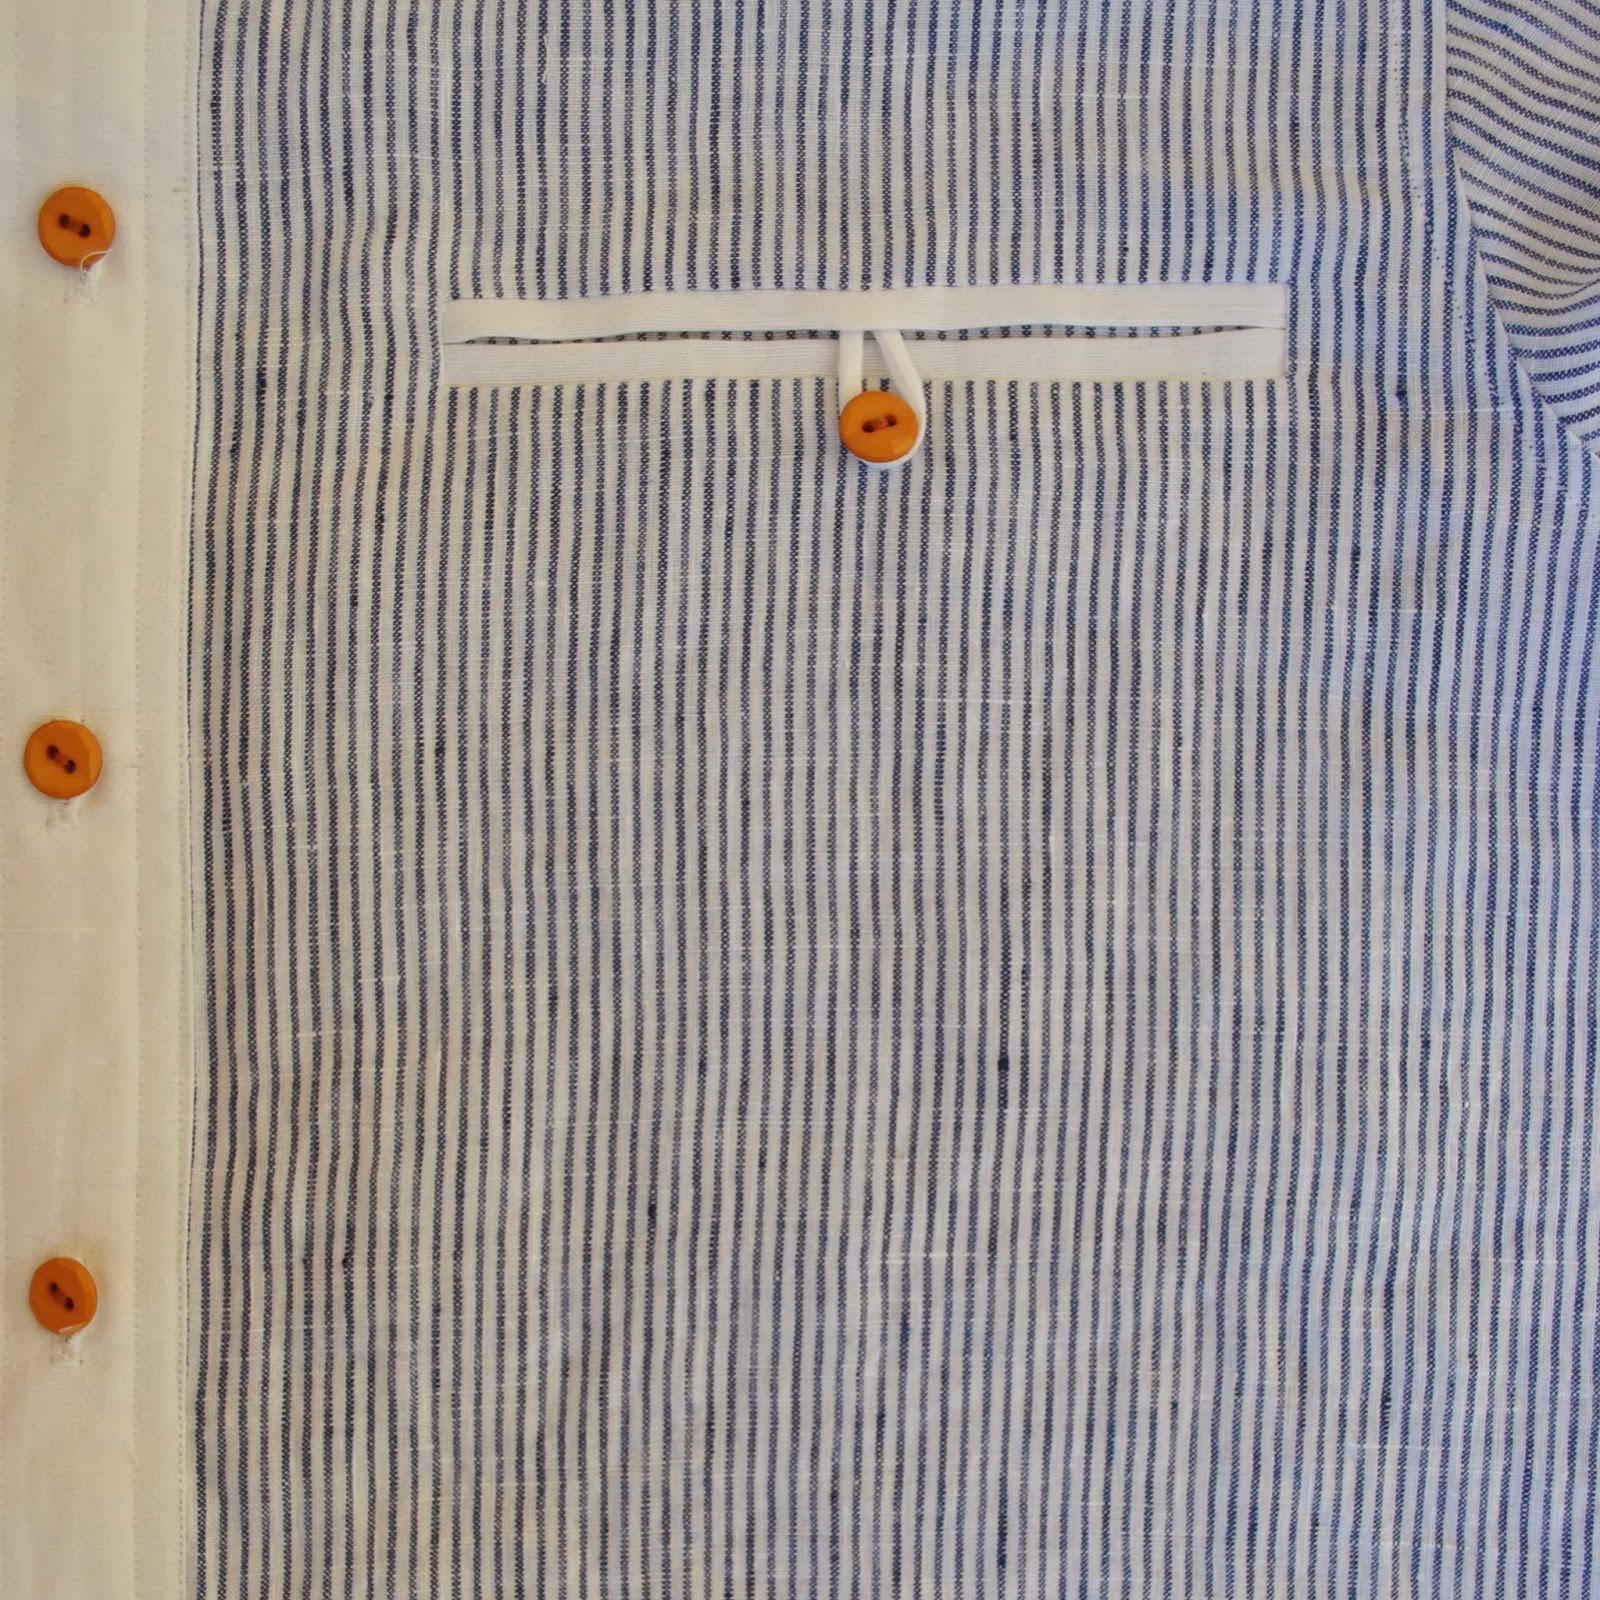
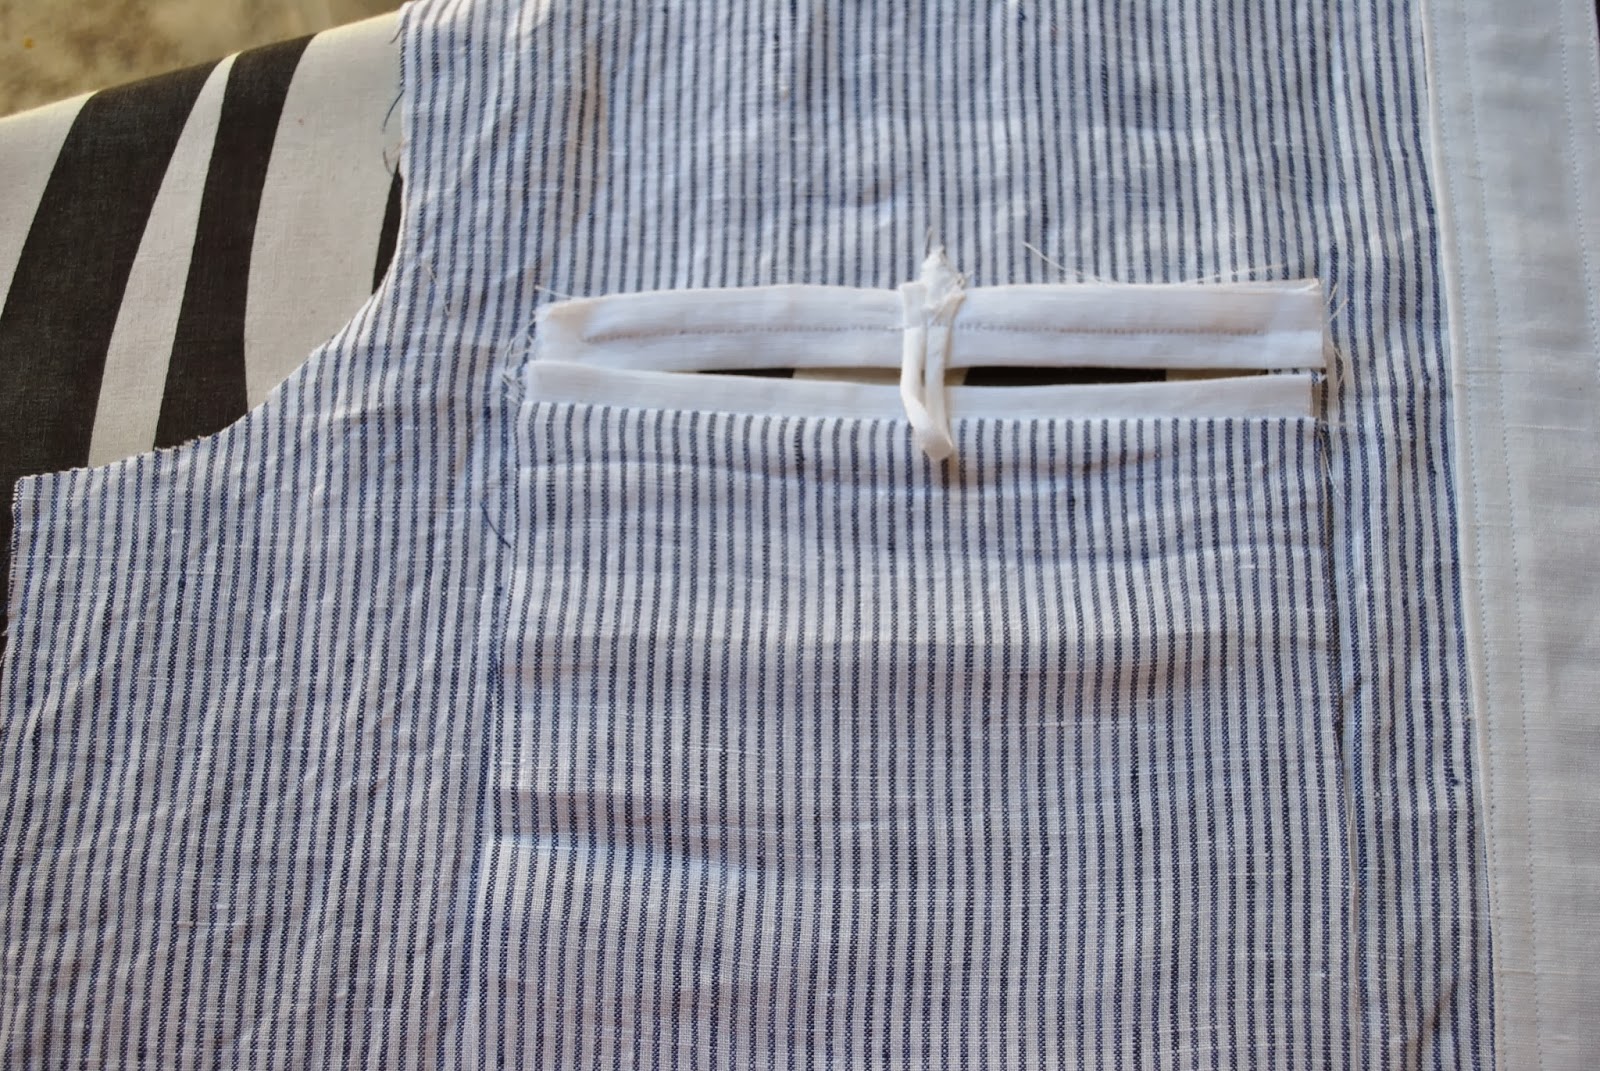
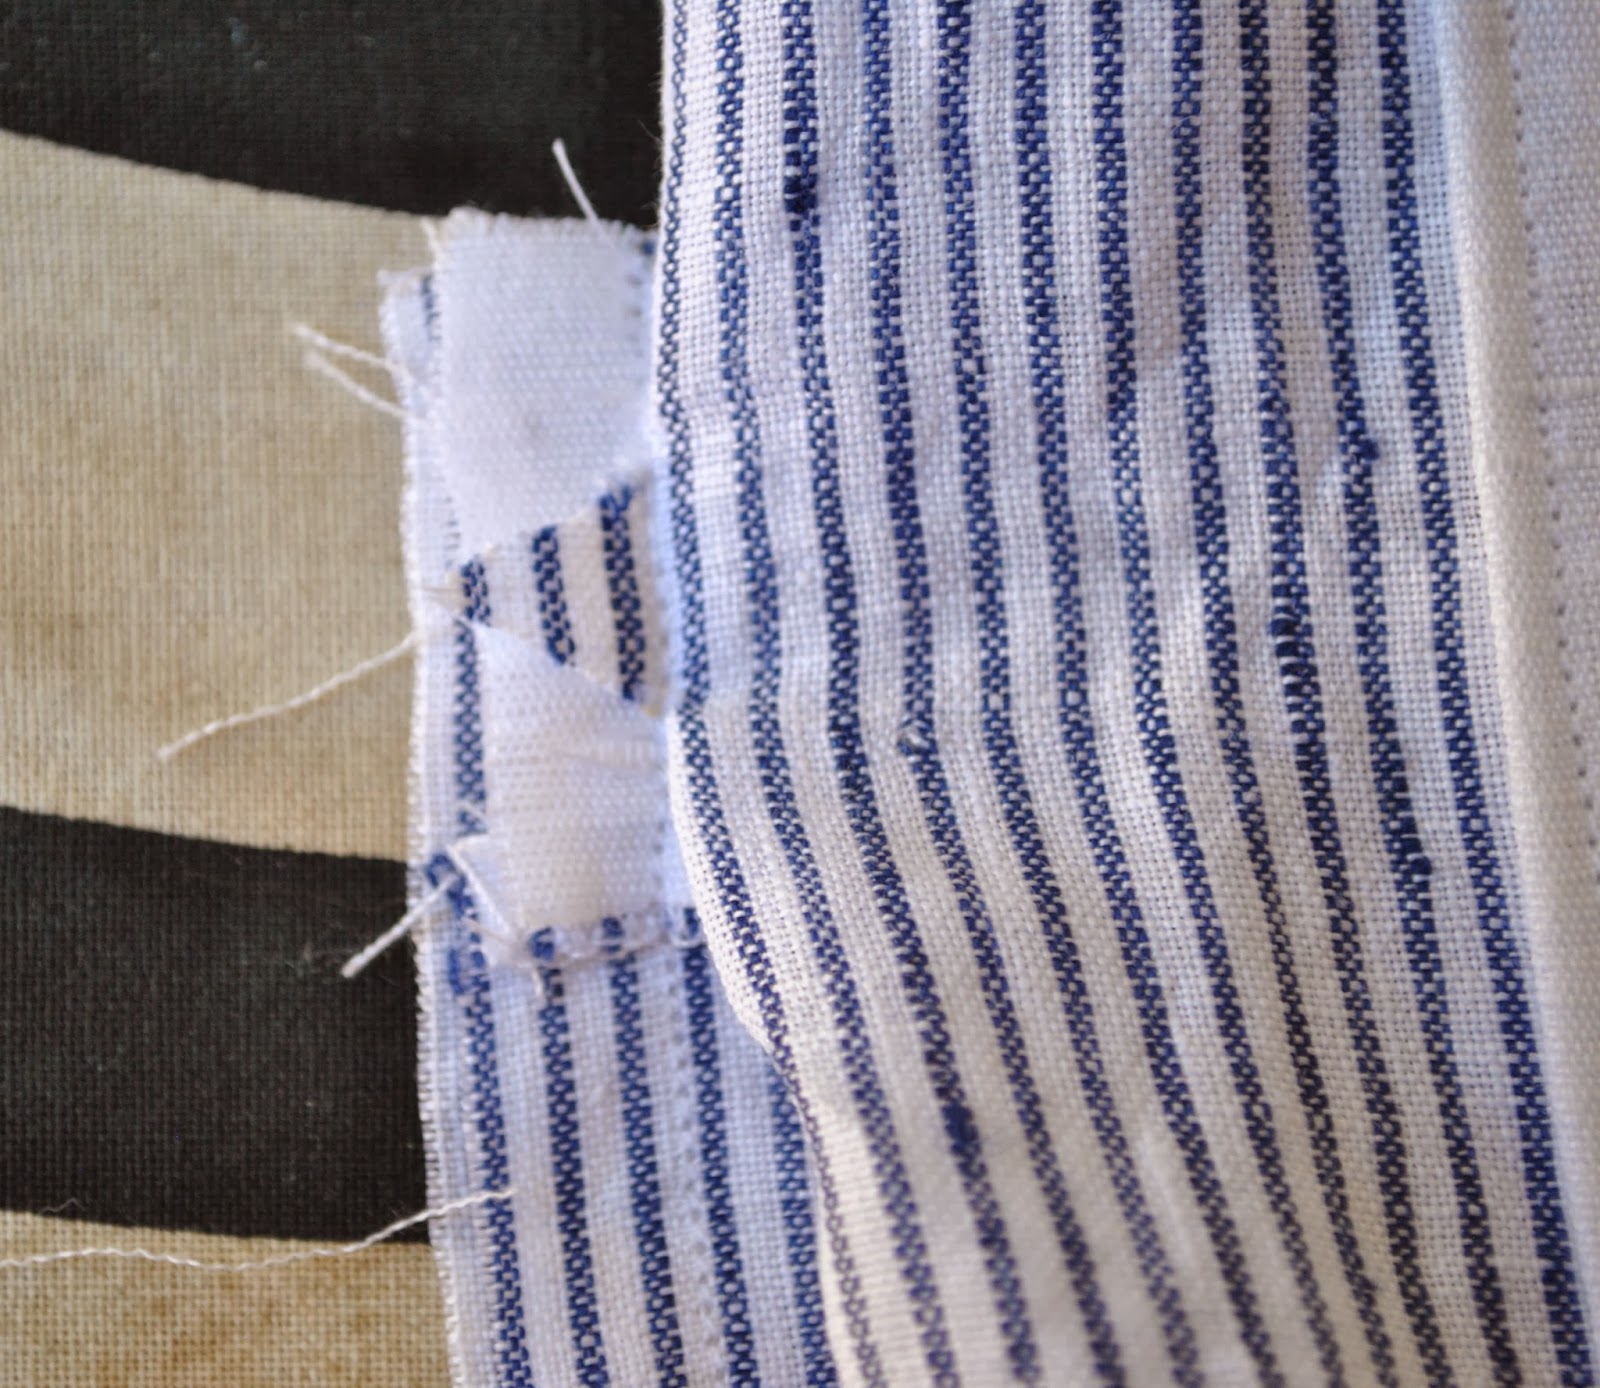
Pin the welt in position behind the pocket opening, and top-stitch along the short sides and along the lower curved edge.

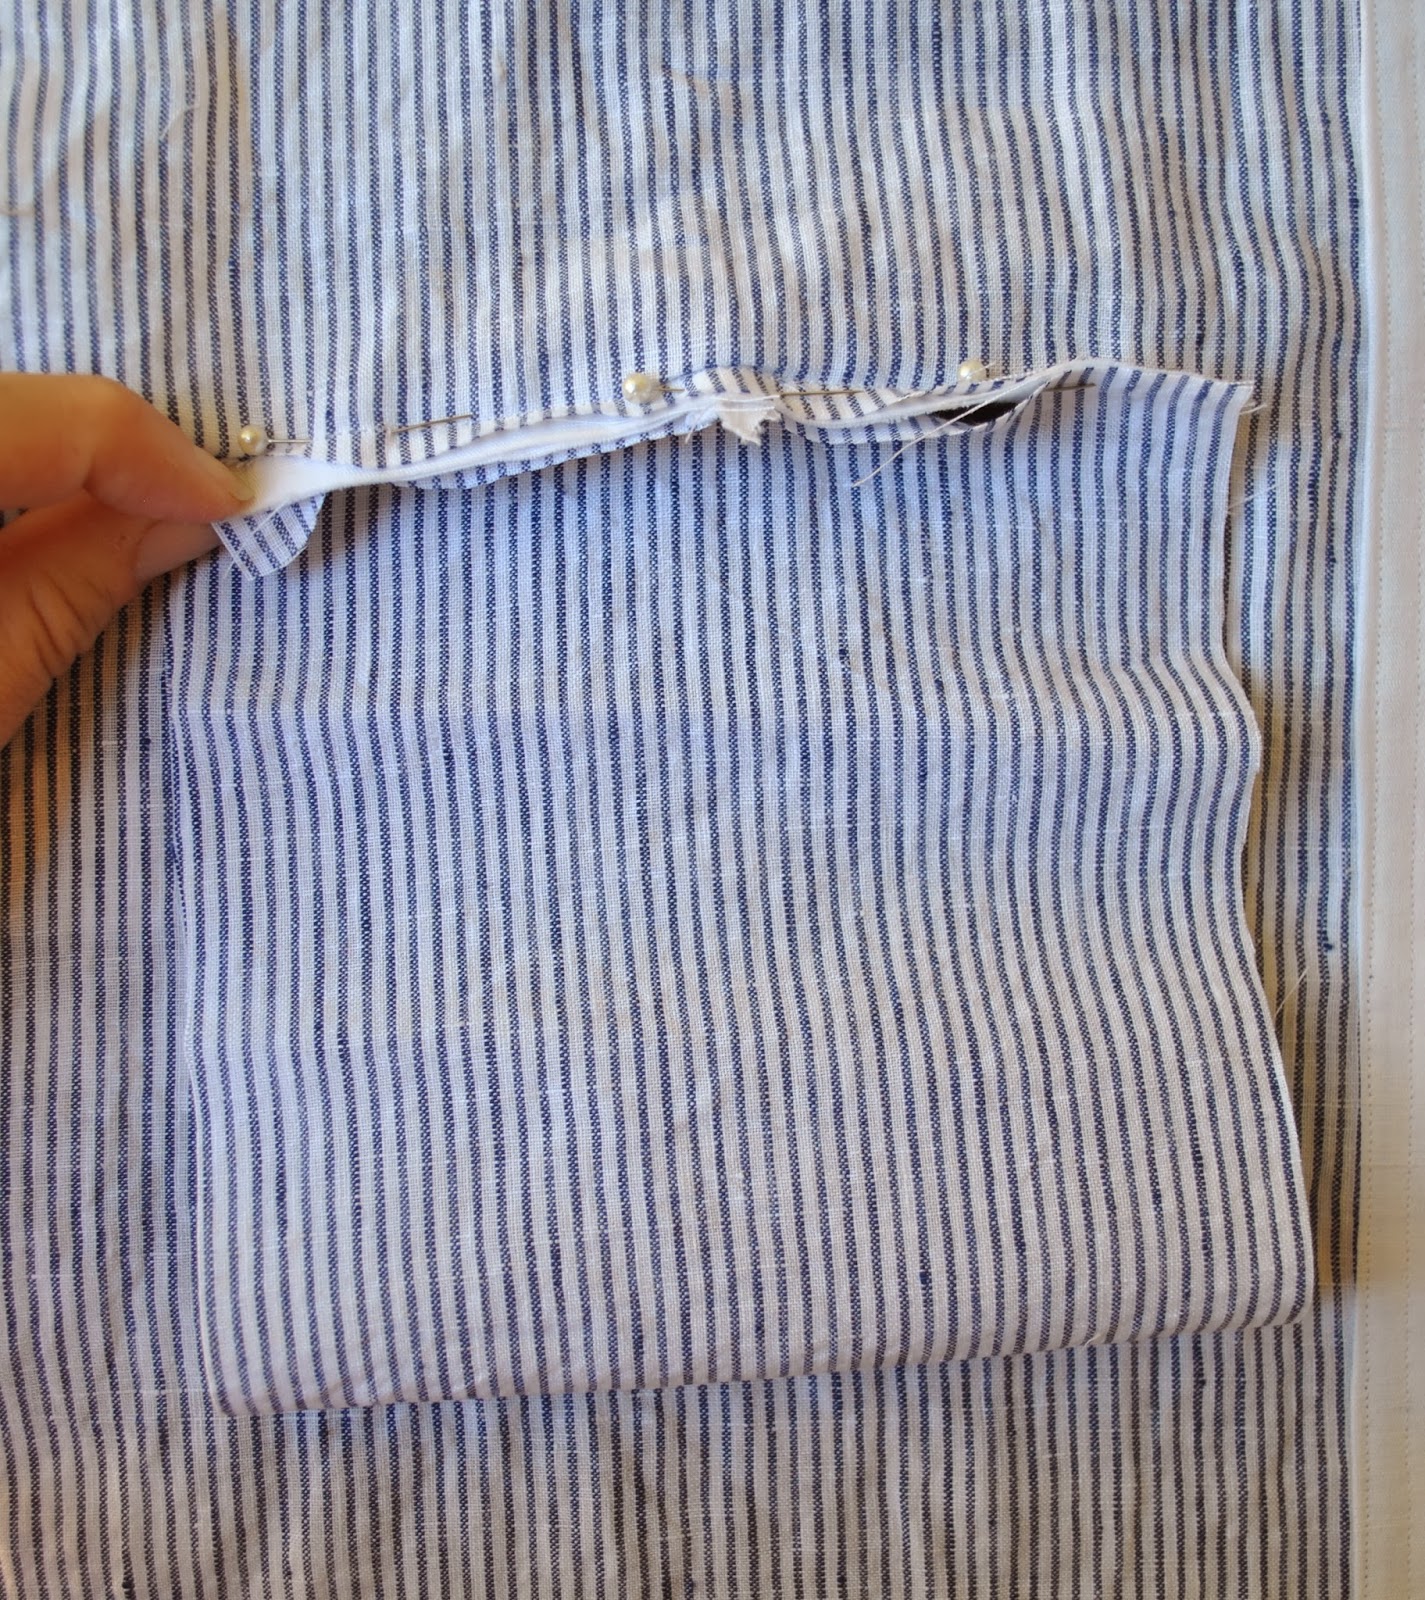
Inside, trim the lower edge of the welt.  Being careful to keep the garment free, pin the pocket backing piece to the pocket lining.  Stitch around the edge, finish the edge either with overlocking, zig-zag stitching or pinking.

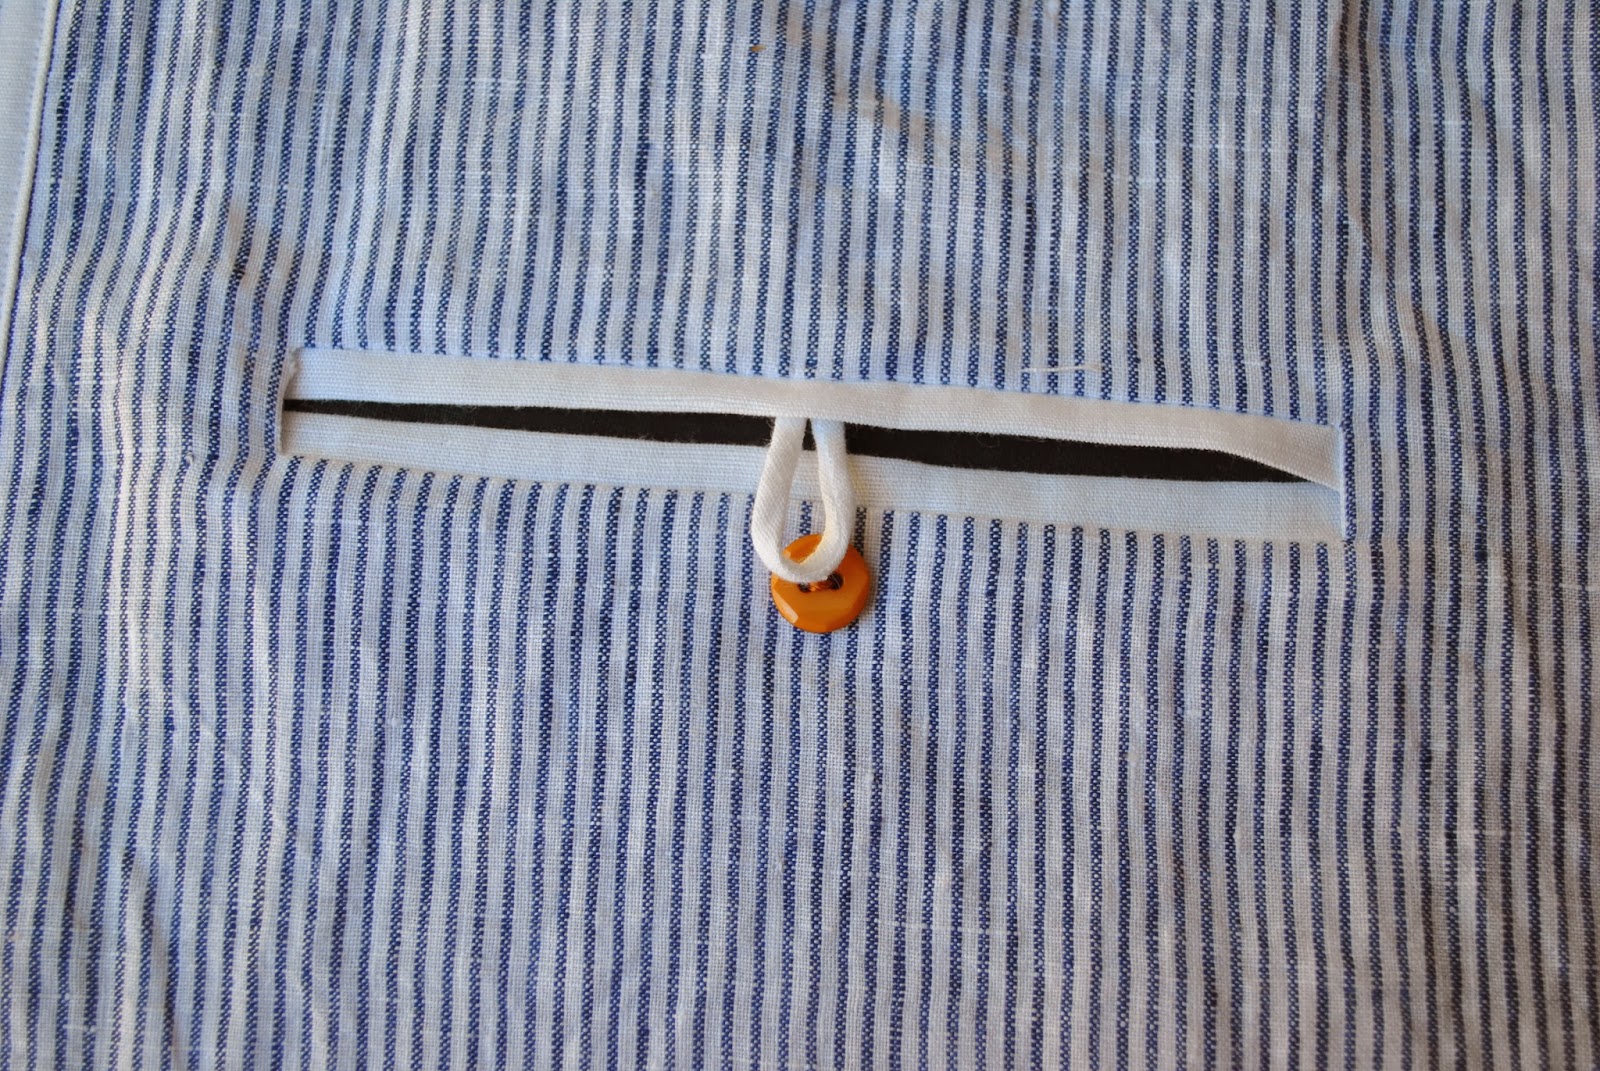
Last step, from the right side of the garment, top-stitch through all layers along the upper curved edge of the welt.

C’est fini  🙂
pinterestmail

Hayward, in Noro Ayatori

Hello!  In further knitting news I have also just finished a comfy new jumper recently.   The pattern is the Hayward, by Julie Hoover, and the yarn is Noro Ayatori; a wool/silk mix, in colour 19; a beautiful variegated collection of raspberry pink, grass green, warm pinky/ivory, mint green and hot chilli pink.  The yarn was a birthday gift to me from the lovely Yoshimi; thank you so much Yoshimi!  

When I was trying to decide what pattern would be worthy of this eye-catching yarn, I remembered an elegant Hayward Yoshimi had knitted for herself and I have to admit I seriously wanted to copy  🙂  I enjoyed wearing my new jumper for the first time on our recent day out in Tokyo together.
And actually Yoshimi also wore her own Hayward that day too!


I think this is a very chic style; I like the loose and wide boxiness, the wide unstructured boatneck and the curling up lower edge and neckline.  It’s soooo supremely comfortable!
I knitted mine pretty much to the pattern, the only change I made was to the neckline: I kept all the top stitches live without casting off, and once I had sewn the front back and sleeve pieces together; knitted in the round around the neckline using all live stitches, for 4 rows before casting off loosely.  I did this mostly because I’m lazy and loathe picking up stitches, but really it makes more sense to do it this way since, well c’mon it is so much easier and as well makes for a much smoother seamless look at the neckline.  My jumper is size 48″ (34-36″ bust) and I found it necessary to have eight balls of the Ayatori to complete the jumper with stripe matching at the sides and to have the sleeves identical to each other.
I had already started knitting this last year so unfortunately I cannot include it in my SWAP wardrobe; but it’s going to go very well with all my planned olives and ivories  🙂

Details:
Jumper; the Hayward in Noro Ayatori yarn,col 19, the pattern is available here
Beige high-necked Tshirt (under); Metalicus
Jeans; Burda 7863,white cotton denim, details here and my review of this pattern here
Ski gloves; had for years, can’t remember where they’re from
Snow boots; I bought these from Big KMart in the US, 13 yrs ago!  while we were living there  😀  We come across snow so rarely I expect these will last me forever!
pinterestmail

Sheen green hand-warmers

Obviously I’m not in Australia here….  😀  we’ve been visiting Japan, and have thoroughly enjoyed seeing my friend Yoshimi again.  Thank you Yoshimi, it was so lovely to spend time with you and to meet your gorgeous family too.  It was lots of fun!
Sorry for my silly photos here. Snow is still such a huge novelty to me, you see.  I can’t stop marvelling at it.  It seems like such amazing and magical stuff! and maybe it puts me in a kinda loopy mood  😉  I never even saw snow until I was in my late 20’s, and first put on a pair of skis at the age of 36.  Meaning, I’ll never be anything more than a really slow and cautious skiier, but I still love it!  My quads are killing me, but!!
Now for the point of this post: hand-warmers.  Bright ones!  Highlighter hand-warmers!  These are brand new, fresh off the 2mm bamboo dpn’s.   I lost my ultramarine blue arm-warmers last year, I’ve searched and searched and searched, in vain (massive sad-face).  No time for moping but; I needed some more, pronto!  These were cast off in the nick of time to be pressed into immediate service….  🙂  
They are basic tubes knitted in the round with a gap for my thumbs, using Morris and Sons 4ply merino wool.  The colourway, Sheen (col419)  is kind of a whoa! in-your-face colour, like a hi-vis construction worker vest.  In my present surroundings though, I’m considering that to be a plus.  If I get stuck and incapacitated in a snowdrift I can just stick my arm up, and the arm-warmers will be like a beacon for the rescue crew.  In-built safety feature!

Ahem; and now, a silly little haiku…

Neon hand-warmers
on tatami mat.  Empty,
Momentarily.

Hmmm, okaaaay then….  Poetry has never been my forte 😉

Details:
Hand-warmers; knitted by me
Beanie; knitted by me, details here
Thermal top; Kathmandu, neckwarmer; Kaos (both old items I’ve had for years)
Ski pants and boots; hired

pinterestmail

ootd blog

It might be a good time to introduce a new thing I’ve been doing lately… well, a new blog actually!  It’s a daily outfit blog, with basically a no-frills photo of the ootd *, and when applicable, the ootn *, with a very brief summary of the day’s weather for an indication of how weather appropriately I am dressing.   I created it at the beginning of the year and have been updating it daily, and had considered keeping it private; but then I just thought, oh, what the hey.  I actually like looking at daily outfit blogs myself but then I am a bit of a nosey parker about other ladies’ outfit choices  😉
Last year I drew all my daily outfits in my Fashionary, which was both fun to do and also I think turned out to be quite helpful for the end-of-year analysis of my style preferences and how well my sewing is serving that, and as well I just really enjoy looking back through my little book at the year of outfits.  I was inspired by The Makeshift Project, and actually I still enjoy going back and looking through Natalie’s blog every now and again.
My new blog won’t be like a real fashionista’s personal style blog since almost everything I have is home-made and my style is quite, um, maybe unaccessorised? would be a good way to describe it?  I’m going to continue to wear as much  of my own handmade clothing as I can, although there might be some specific situations this year in which I am unable to be completely strict about that rule.  Like right now for example!!   
I will use it for analysing my style and wearing habits again.
It’s currently called Handmade by Carolyn too, since, well I dunno, I guess I’m a creature of habit and pretty unimaginative, but maybe I’ll change that if something more interesting occurs to me  🙂

*  #ootd; outfit of the day: #ootn; outfit of the night

pinterestmail

Cocoa Tao

Hello!  I’m wearing a new blouse.
It is the Tao, by Tamanegi-Kobo.  I’ve seen lots of lovely Tamanegi-Kobo designs made by Yoshimi, and then during me-made May saw even more worn by Japanese ladies, including the adorable and very talented designer Miho.  And since I loooove Japanese designs I just had to try one out!
On a crazy spontaneous whim I added a funny little swoosh-shaped welt pocket.   I had finished sewing the blouse, tried it on and just thought; hmmm, pocket…  I had some scraps left over, the bobbin still had some of the pale grey thread wound on.  I had recently pinned this dinky little welt pocket.  Snap decision.  I just decided to go for it.  I think it turned out quite cute!

The Tao really is a very lovely style, loose and artistic, comfortable and still very feminine and flattering.  I’m still getting used to pdf patterns, I don’t mind them as long as there aren’t hundreds of pages to tape together.  The Tao is 24 pages, which is do-able.  The collar is a petite little thing,  stylistically matching the boxy cropped feel of the blouse, and I think it looks equally sweet buttoned right up.   Normally I don’t button my blouses right up to the collar stand, ‘cos I’m a laid-back Aussie beach bum, but I like this one both ways.

I made the blouse out of, believe it or not, a stark, optic white linen/silk mix from Fabulous Fabris, the leftover piece from after I had cut out the collars, cuffs and button bands for the boys’ Christmas shirts.  But since I’ve made two white shirts in hot succession recently, this one was always going to get a dye-job.  I stitched it up using a pale grey/brown thread, and once I’d finished sewing it and prior to chickening out, quickly gave it a light wash in a very weak dye solution of Brown iDye.  Giving it this subtle and rather delicate shade of pale pinky/cocoa brown.  I think this is a colour quite flattering to my skin tone.  🙂

Details:
Top; Tamanegi-Kobo Tao, white linen/silk mix dyed with a teeny amount of Brown iDye
Shorts; Burda 7723, white linen, details and my review of this pattern here

My review for this blouse pattern is below….

Pattern
Description:

The Tao is a loose-fitting, button-front
blouse; with two collar variations, wrist cuffs and a continuous
sleeve vent, cut-on sleeves and a long wrist-to-wrist yoke.
Pattern
Sizing:
Size 36-42.  I made a straight size 38.
Did
it look like the photo/drawing on the pattern envelope once you had finished
sewing it?
Yes.
Were
the instructions easy to follow?
I
could not follow the Japanese written instructions, but the illustrations are quite
clear and helpful.  The seam allowances
are clearly marked.
The
notches that you need for piecing and pleating points can be seen clearly and
easily, but I did think the Japanese character markings looked a little
chaotic, repeated for each of the sizes and heaped on top of each other. There
are two collar pieces: one the under- and the other the upper collar; if you’ve
made a collared shirt before and so know that the under-collar is supposed to
be a touch smaller then you should have no trouble working out which piece is
which.
What
did you particularly like or dislike about the pattern?
It
looks so pretty in the photographs on the website, and I like the loose
artistic shape.  The style is really
pretty and a very nice feminine alternative to the traditional style of
button-front shirt; and easier too, in fact, since you don’t have to insert the
sleeves!  The prim little collar looks
sweet, both unbuttoned and also when buttoned up all the way to the top.
It is
a pdf pattern, which I am slooowly getting used to, old-fashioned thing that I
am  😉
Fabric
Used:
Silk/linen
mix
Pattern
alterations or any design changes you made:
I added
a little asymmetrical swoosh-shaped welt pocket 
😉
Would
you sew it again? Would you recommend it to others?
Definitely!
and yes  🙂
Conclusion:
Oh, I
love it!  I’ve used Japanese pattern
books before and this is the first time I’ve made a “regular” Japanese
pattern.  I’ve made it in a summer-weight
linen/silk mix but I think it would be equally appropriate and just as
cute in a soft comfy flannelette for winter.
pinterestmail

Double welt pocket with looped button closure

I wrote this tute just before Christmas then completely forgot about it …! anyhow 

This is a pocket often used as the back pocket on mens’ trousers although of course you can add one to whatever garment you wish… in this case I have used for the breast pocket on a mens’ tailored shirt.

Measure and mark the position of the welt pocket.  My welt pocket measures 13cm x 1.5 cm  (5 1/8″ x 5/8″).  Cut two strips of fabric equal in length to the length of the welt pocket plus two seam allowances, and equal in width to twice the height of the double welt; in this case my strips measure 15cm x 3cm.  Also cut a strip of fabric on the bias for the loop closure.  

Stitch the bias strip, and cut the stitching threads leaving a long length, at lease as long as the bias strip itself.  Thread the long end through a needle, and with blunt end leading, pass it through inside the strip.  Turn the strip right side out.

Press the welt strips in half lengthwise, wrong sides together, and place pins in each to mark the length and width of each welt.  In this case, a length of 13cm and a width of 7.5mm.

With the pressed folds of the welt strips facing out and the open raw edges towards the middle; put these pins in exactly the same pinholes as those previously made to mark the welt position.  Arrange the welts to lie smooth, flat and straight.

Stitch the long edges of the welt, in an exactly 13cm long line, positioned exactly 7.5mm in from the folded (outer) edge of the welt.  Note; the folded edge is the visible and therefore the important one here; the accuracy and precision of your stitching MUST be relative to that outer edge).

Fold to snip into the centre of the welt. and cut to about 1cm in from the start and finish of the stitching. From this point, snip outwards in an inverted arrow shape into the very corners of the welt.

Turn welts to the inside and pin the loop closure in position to the seam allowance of the upper welt, at the centrepoint.  Stitch.

Pin the pocket piece to the lower welt seam allowance, and stitch exactly over the previous stitching.  Press down.

Stitch a button through both thickness of fabric; the shirt layer and the pocket layer, for stability, using the loop closure to determine the position of the button.

Fold up the pocket piece and pin to the seam allowance of the upper welt.  Stitch exactly over the previous stitching and press.

Complete the box of stitching around the welt by catching down the little triangles at the outer edges.  Continue stitching down the sides seams of the pocket.

Finish raw edges by overlocking or zig-zagging.  You can also finish by binding with bias binding; I tried doing this for the pocket of one shirt, the purple pin-stripe pictured below.  It looks real nice but it made the pocket feel kinda bulky and stiff.  I would probably  just stick with the overlocker in future.

pinterestmail

Tear drops top

White tops, and particularly if lace or broderie anglaise or any wildly impractical snowy stitch-festival are part of the equation, have always been a weakness of mine.  Not just during summer but any season.  One of my earliest pins as a freshly minted Pinterest-er was this Isabel Marant top.  It was immediate love at first sight.  The perfect summer top; feminine and chic, cool and blowsy, romantically pretty and casually easy-breezy.  I wanted one, and began plotting…
At first I thought to re-create the style using plain white cotton and finding some sort of broderie border to attach to the lower edges.  Then during my long weekend away in Melbourne with Mum and Cassie I chanced upon this fabric in Tessuti; white cotton voile with beautifully intricate broderie anglaise borders already in situ.  One selvedge had very wide embroidered borders, and the opposite had a narrower border in the same design.  Utter perfection!  I used the deeper edge for the body of the blouse and the narrower edge for the sleeves. 

The pattern I used is top X, from the Stylish Dress Book by Yoshiko Tsukiori.  A big oversized loose T-shirt/peasant blouse thing, slightly gathered into a narrow neckband with a faced front split.  

A plain and simple top with very little shaping, designed to showcase to best effect a gorgeously bordered fabric.   I only very slightly altered the side edges of my pattern pieces so the motifs and the scalloped edge would match up seamlessly.

The shoulder seams are French seams but for all the seams within the embroidered borders; I just overlocked the edges, stitched the seams then pressed them open; that broderie is just too thick with stitches to attempt any fancy seam finishes!

So; a nice easy project but I still had to steel myself to take the scissors to my fabric.  That awful first snip!  Of course, ruining beautiful fabrics is terrible and the fear of that can spiral you into major second-guessing, but maybe it’s worse to hold back forever and never allow yourself take the chance on making something beautiful with it.  Give yourself permission to try… that is why you bought it, remember?  
I have to repeat that to myself, like a mantra, every time I’m faced with special fabric that I totally and utterly adore.  And I’m so relieved that I didn’t ruin this lovely fabric!  

Details:
Top; top X from the Stylish Dress Book by Yoshiko Tsukiori, broderie anglaise cotton voile
Skirt; Vogue 7303, lime print cotton
Sandals; Misano

pinterestmail

Alabama Chanin skirt and tank

Hello!
So! after hours (and hours… and hours…) of aeroplane and in-front-of-the-TV stitching, I have finished my first AC project(s).
This is the mid-length skirt and the fitted tank top, both from the book, Alabama Studio Sewing + Design, by Natalie Chanin.  The two are actually just one pattern, a full length dress pattern, which you cut off at the relevant places to make either a skirt or a top.  Or a tunic or a dress.
Great idea, by the way.    I love the economy of one all-inclusive pattern.  Means you only have one thing to store, but about a zillion “making” opportunities in there.  OK, to be accurate there are eight garment possibilities from the one pattern, but surely at least a zillion wearing and layering combinations to be had.

My skirt!  I’m so pleased with it!  It is totally hand-quilted and stitched in the reverse appliqué technique described in the book;  using a top layer of lightweight deep olive bamboo/cotton knit, bought originally from Potters Textiles years ago, and the base layer is a thicker and more stable dirt-brown cotton jersey from KnitWit, also bought years ago.  These are my colours, yo  🙂  I also used some of that same brown cotton to make part of Tim’s hoodie, here.

The stencil pattern is Anna’s Garden from the AC book, enlarged 306%.  I applied the stencil to the olive fabric using a small foam roller and regular household paint, as described here.  The thread used throughout is a brown/grey Gutermann’s upholstery thread, although Spotlight ran out of my colour (grrr!) so a small portion was done in the same colour of Gutermann’s topstitching thread.  Top-stitching thread is kinda OK stuff but I really prefer the upholstery thread; much smoother and less prone to the strands separating from each other.
All the seams are hand stitched too, and felled by hand.  I had initially toyed with machine stitching the seams; but of course after all that hand embroidery I knew I had to finish off properly….   This took a blink of an eye compared to the embroidery side of things, so I am so pleased I opted to “do it right”, so to speak.  I like the way the felling shows upon the right side as a row of dimples; barely hinted-at stitches along the seams.

I finished the waistband with chocolate brown fold over elastic, bought from Tessuti’s in Melbourne. This stuff is extraordinarily expensive here and pretty hard to find in Perth.  Believe it or not; this colour is the closest match that I’ve found… anywhere

My top: I actually do have a matching deep-olive-and-dirt-brown fitted tank top printed, planned and ready to go, but as soon as I finished the skirt I had a Vision; only the plainest of plain white tanks would be the absolutely perfect-est accompaniment to this busy busy skirt.  I had the immediate compulsion to make such a thing.

I bought the white cotton jersey from KnitWit, and made up a very simple fitted tank; no frills but still constructed in the Alabama Chanin way, so stylistically it matches the skirt really well.    The seams are stitched and felled by hand, and the binding applied with herringbone stitch.  Although there a visible knots aplenty on the inside of the skirt… unavoidable!  I went out of my way to hide them on the inside of the tank top, concealing all the knots inside the layers of the felling and binding.
Neckline and armhole binding and seams: below left, right side view; at right, inner view with felled seams

Fitting-wise;  I raised the back neckline of the tank and made the shoulder straps a little wider also.  In my early experiments, I sliced a biggish sway-back wedge from the pattern which affected both the tank and the skirt pieces. 
Time-wise; the tank top took, like, one day at the most? while the skirt has taken weeks!  Although I would like to add more Alabama Chanin pieces to my wardrobe, there is no danger that I am going to get addicted to this technique.  It is basically identical to hand-quilting and I have made enough quilts to know I can only take so much of that.  My left pointer finger needs time to rest and recuperate.  The tip of that finger has skin like a rhino now.  Seriously.
Obviously I am thrilled to bits with my first Alabama Chanin project, and the second!  however there will be one little hurdle; I’m going to have to force myself to wear the skirt and not treat it like a museum piece.  I’m having visions of unwittingly sitting down on a patch of oil, or brushing against a spiky bush or someone carrying a glass of red wine tripping and falling in slow motion  in my direction…. aaagh!  The stuff of nightmares!  😉

Details:
Skirt; the mid-length skirt from Alabama Studio Sewing + Design, hand-embroidered and stitched cotton jersey in two solid colours
Top; the fitted tank from Alabama Studio Sewing + Design, hand-stitched, white cotton jersey
Sandals: Franco Burrone, from Marie Claire

pinterestmail
Switch to mobile version
↓