
 OK. Sooo, it’s early days, since this little sheath o’ my dreams is basically brand new, but I’m so in love with it already I’m just tentatively putting it out there… I think I’ve just managed to make a forever dress for myself. I just love love love ivory, as a colour, and lace as a texture, and ivory and lace combined together in one swathe of gloriously snow-dusted curlicues is just always a fabric that’s going to make me sigh with happiness.

Silk World Australia had contacted me to ask me if I would showcase one of their fabrics, and I chose one metre of this guipire lace, one metre being the minimum order; thinking I could make a little skirt. Silk World have up until recently been wholesalers, and now their beautiful laces and specialty fabrics are available for everyone! which of course is the best news for fabric lovers everywhere. I was blown away when my lace arrived.. it’s heavily and beautifully detailed, and luxuriously thick with that matte texture that whispers “quality” in hushed genteel notes. And when I shook out said one metre, well it was so so W I D E! I realised I could get not just a little skirt, but probably a whole dress out of it. And I did! Et voila!

One metre dictated a super pared-back, no frills, straight sheath silhouette, which is of course the best thing to show off the intricacies of the lace anyway. With something this exquisite, you only need a very little of it to make a big impact, in my opinion. I used an old favourite pattern, Burda 8511, and lined the dress with natural Irish linen, bought years ago at Calico & Ivy, when I had a voucher to burn and nothing in mind to particular spend it on… it’s really gorgeous stuff also and I’ve never really known exactly what to use it for. I love how the slightly rough ‘n rustic feel and muted stoney colour of the linen is a nice foil to the luxurious decadence of snow-dusted lace sitting on top… and now I feel like this is exactly the project what it was waiting for all along; a match made in heaven!
Cocktail dress for the season… sorted!

Aaaand, my new labels!! and oh my goodness can we just take a moment to appreciate how absolutely adorable ???

I got these from the Dutch Label Shop, and seriously, I struggled to choose a design, there were just so many cute options, and colours. I’m super super happy with these; I absolutely LOVE the sweetly funky design! and I’m also pretty impressed with the excellent quality. The labels are fabric, and the design is stitched, which is very nice; and you know how with a lot of fabric labels, you need to turn under the raw edges as you’re stitching them down, because of fraying? well these ones have all four edges nicely sealed so you don’t need to do that. They’re all ready to sew on! Also they are pleasantly substantial and sturdy, with no hint that they will buckle over time or in the wash, and the design is finely detailed and stitched tight and flat; so seems very unlikely it might snag or catch on anything, nor unravel. I am SO happy with them! 🙂
Also, I have amazing news! The Dutch Label Shop has very kindly and generously reached out and offered a discount to all my readers … enter handmadebycarolyn15 at the checkout and you will receive a 15% discount on any order.

FLOWERHEAD!!!

random tangent; do you know I’m looking at here? rhetorical question, I know, aren’t they the worst? actually there was a golden whistler sitting in the tree right by my head, whistling his little head off. I just had to rush over and grab my camera for a quick shot before he flew off… If you want to hear his lovely call, you can check it out here…

this next picture looks very loving doesn’t it? a tender mistress and puppy moment? actually Clara was having a “puppy mood” and was just really really keen to rip right into those flowers and zoom off through the garden with them.

LATER EDIT: Mary asked in the comments about the finishing and interior details, and thank you for reminding me, Mary! because I actually meant to post pictures of how I did this in my dress but forgot…
lace side seams; inside

the side seams of the lace shell I stitched along with a bias cut strip of thin, cream cotton, then trimmed the seam allowances of the lace and wrapped the cotton around to bind the edges in a Hong Kong-like seam, except I tucked the raw edge of the cotton under and hand-stitched it in place. This makes a nicely neat and tidy, cream-coloured roll; which might look like it could be seen on the right side but actually is kinda invisible when the dress is right side out.
lace side seams, outside

The linen lining; I finished the raw edges on my overlocker, and simply left them like that. The bottom edges of the zip tape I stitched down to the seam allowances like I usually do, in a short row of machine stitching.

The lace around the invisible zip on the outside; here I trimmed the lace while carefully hand stitching the raw edge securely right up to abut against the opening edge, while not obscuring it so I can still pull the zip up and down! You have to stitch every single little bit of lace down here so there are no loose bits to stick out, which would look very messy and also risk getting lace caught in the zip, so a stitch for like every 3mm or so.

At the top edge of the dress; I stitched the neckline and armscyes of the dress together, right side of linen lining to wrong side of lace shell, and added a linen facing, to hide the lace edges on the inside. This is under stitched so all edges roll to the inside of the dress. I handtacked the facing to the lining in a few key places along its edge too.

You can see in the above picture those bust darts shaping the front lining, and also (not seen) on the back lining I stitched long fish-eye darts to shape the small of the back. I lightly hand-tacked the lace shell to these back darts in a few places so the unshaped lace shell sits shaped to the curve of my back a little more than it would otherwise. I mean, without this tacking, the lace just hangs down dead straight, and I like it to curve into the small of my back just a little. The hand-tacking helps it to do this 🙂

Details:
Dress; Burda 8511, in this guipure lace and natural linen
Shoes; Zomp, from Zomp boutique
Flowers; were from the garden, I love these and they’re looking so beautiful at the moment! I actually picked them to decorate the kitchen. I was just aiming for “spring-y”, though now I think my pictures are veering just a little into bridal territory? though I do quite like the idea of this look for a modern and maybe, mature, bride! Anyway, Note to self; perhaps avoid carrying big bunches of flowers in my pictures from now on
Christmas party season? I am SO ready! though honestly, not just for Christmas, I am going to wear this dress for ever and EVER…

 Well, hello there gorgeous! I’m thrilled to introduce Ms Summer to the world! the latest in my small set of seasonal girlies…


 Of course she has cute little lace knickers too, with an embroidered rosebud on the front…


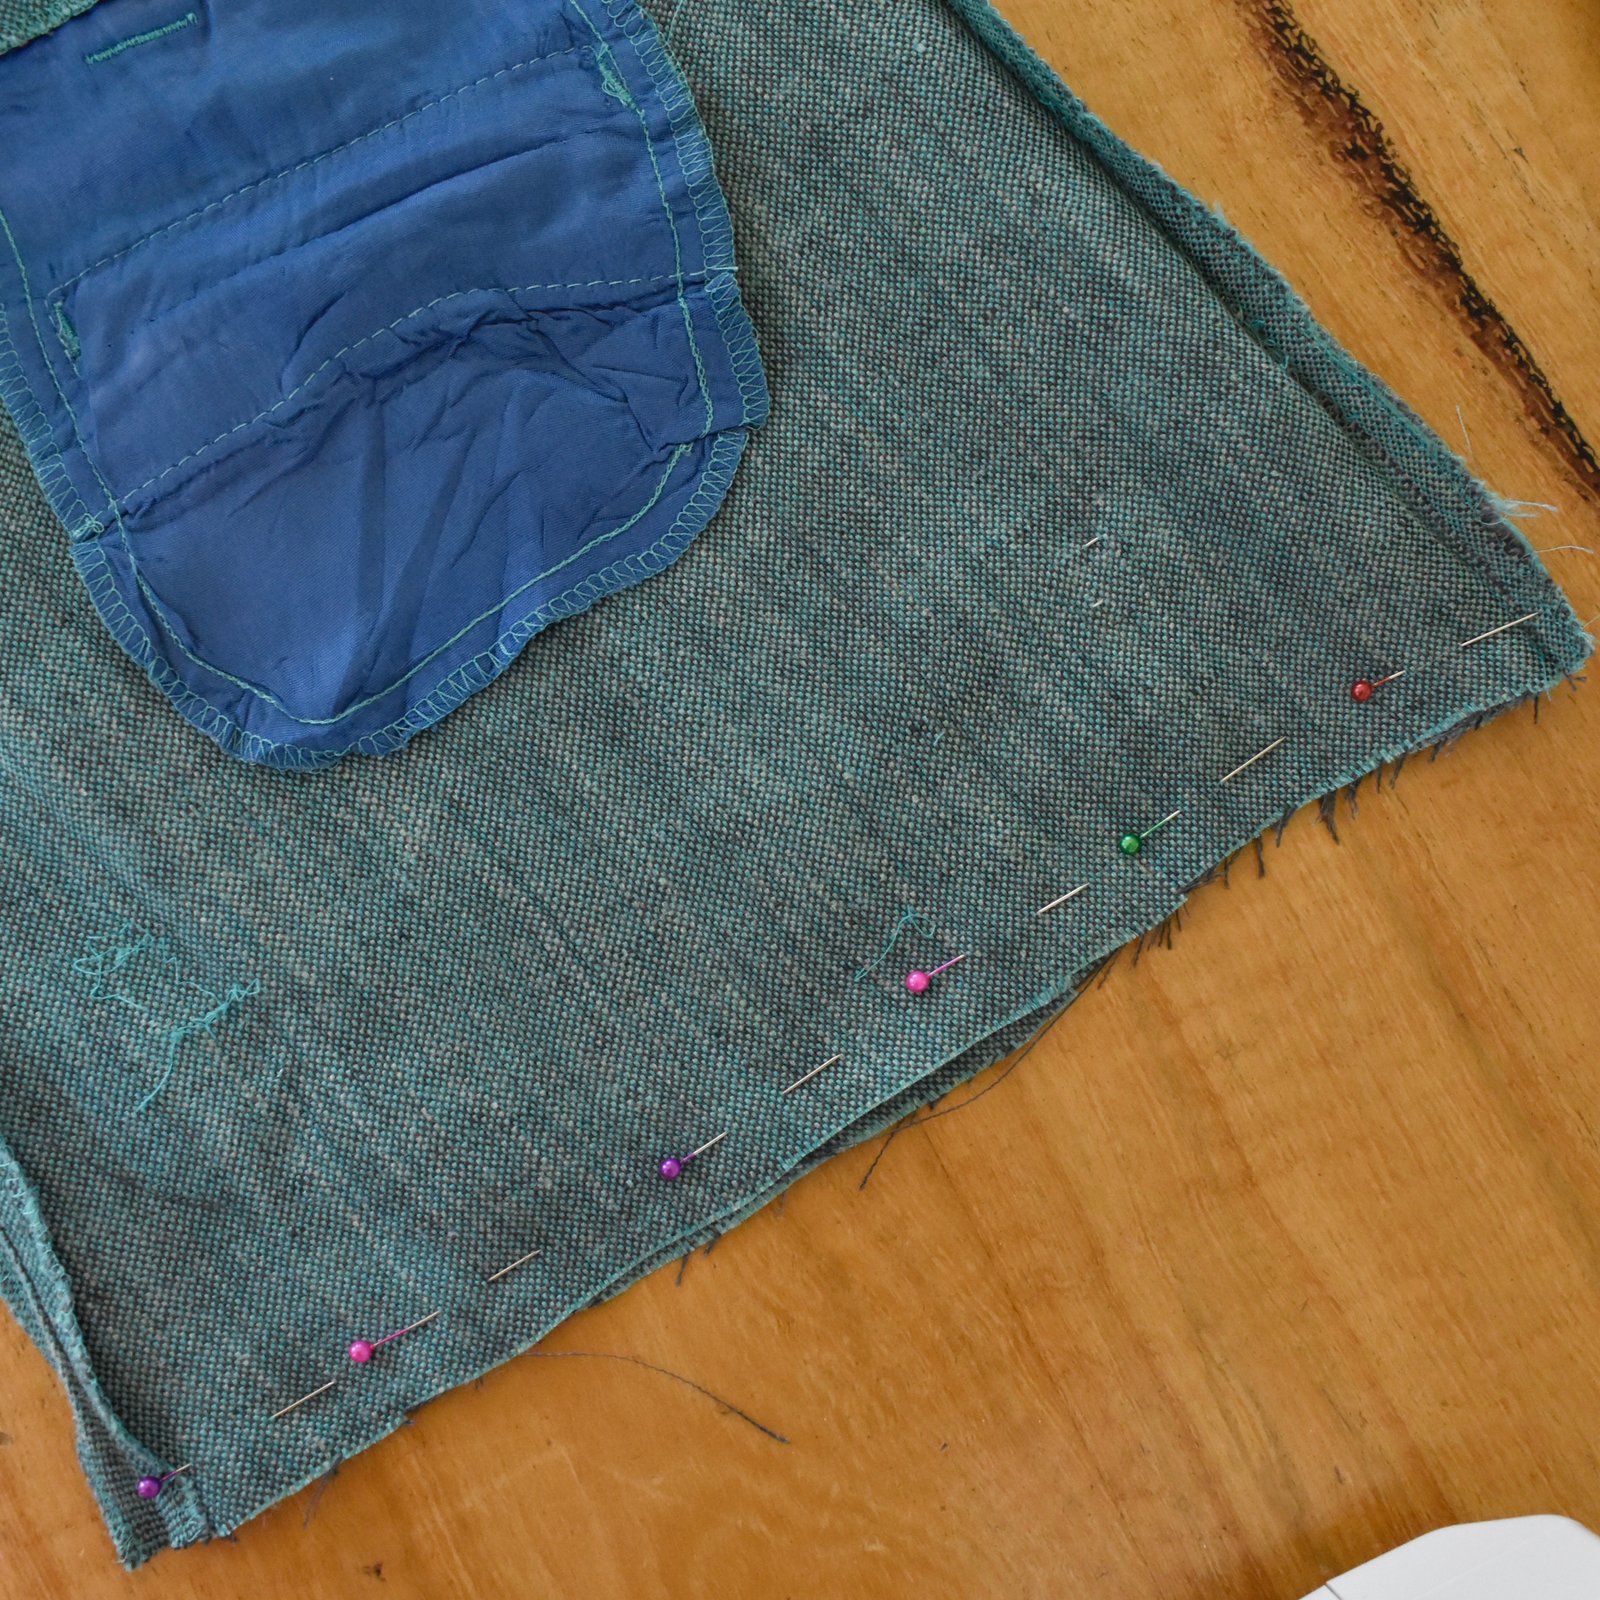
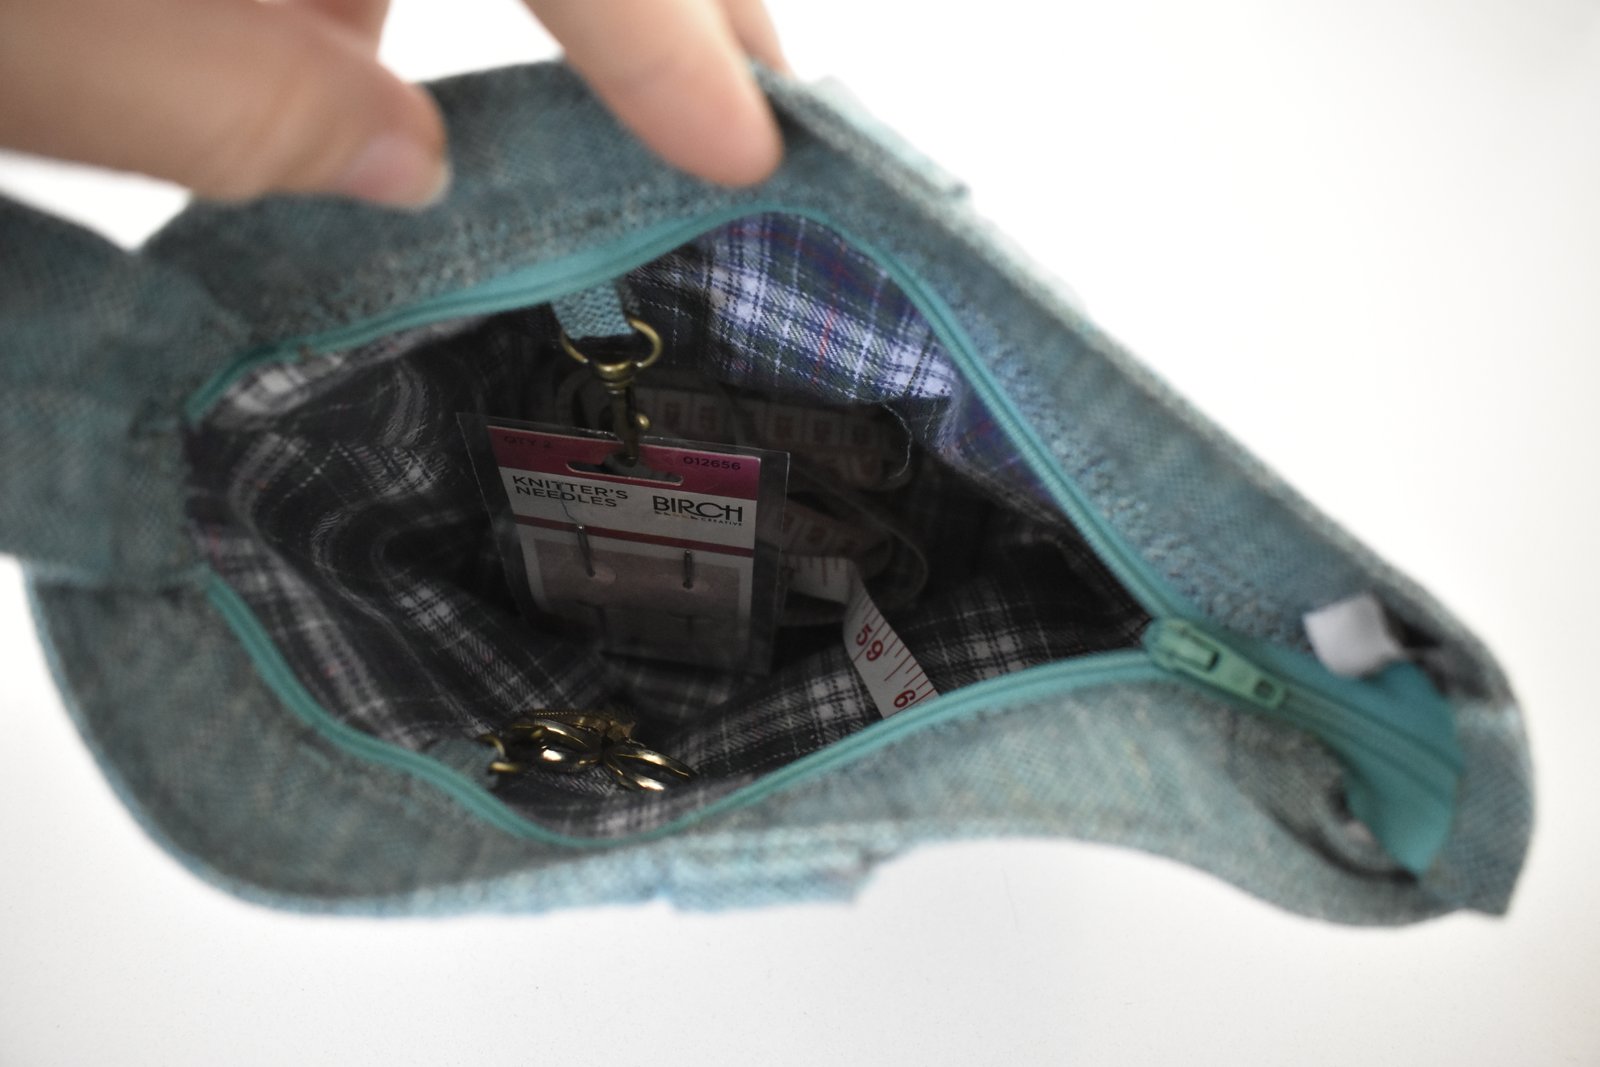
 I perused Le Stash, and my hand fell on some lovely garden-green raw silk, mainly because I knew I had a matching zip in my zip stash already too. The green silk turned out to be a pair of trousers, that Mum herself had originally give to me to use for fabric sometime. She’d originally bought them in Italy, while on holiday, and got many years of good use out of them. It occurred to me I could make a really good little project bag, utilising the trousers’ existing welt pockets and waistband… bonus that this lovely fabric is boomeranging its way back to Mum in a new, and newly useful form. Full circle! I selected some brushed tartan cotton for the bags’s lining, and inserted a new zip underneath the waistband facing inside, along with a wrist strap, so she can have the bag hanging from her wrist and still knit from it. I think the really interesting thing about the bag though is the accessories; I added three little tabs inside, two with swivel clips, to which I attached a pair of scissors, and a pack of wool needles, and the third has a D-ring to which I’ve sewn a tape measure. I left the original back welt pockets intact on the outside (above), so she can tuck small extra things into those pockets, things she might not want to go rattling around the inside of the bag.


 My dear sister-in-law S gave to me a length of precious “Outback Wife” barkcloth for my birthday… soooo thrilling to finally get a piece of this gorgeousness for myself! I’ve bought other designs of this once or twice before as gifts for others but never for myself for some strange reason, I know not why … Because, oh my gosh this stuff is just so lovely, sews up like an absolute DREAM!! I’m in love! I’m seriously thinking about sneaking out to Calico and Ivy and buying more! For meeeee!


