Monthly Archives: December 2019

You are browsing the site archives by month.

2019; a retrospective

It’s the last day of the year; the day in which tradition demands a bit of looking back on the year gone by and pondering on what I would like to do for next year.  First of all, I’m picking my fave outfits/photos for 2019, one for each month.  Some pictures are of new creations or outfits, others I’m just remembering a really nice day…

January

just a really nice day.  I’d just dyed this dress, previously a pale grey and I was newly in love with it all over again

February

wearing my new jasika blazer to head out to lunch…

March

playing on the turtle stepping stones in the Kami River, Kyoto

April

visiting the studio Ghibli museum with Yoshimi!!

hiking up in the Kizo valley

May

just dyed this top too

June

Kelly in the wedding dress I made for her

in my mother of the groom ensemble

July

wearing my new Clementine dress

August

my new pink pinny

September

new pietra shorts

October

at stone mountain fabrics in San Francisco with Yoshimi… such a wonderful holiday here and in New York with a dear dear friend, and meeting so many other dear friends for the first time too!  🙂

at the famous garment district statue in New York City

November

a new dress

December

old bathers, but a really beautiful and blissfully lovely day at the beach

What did I make?

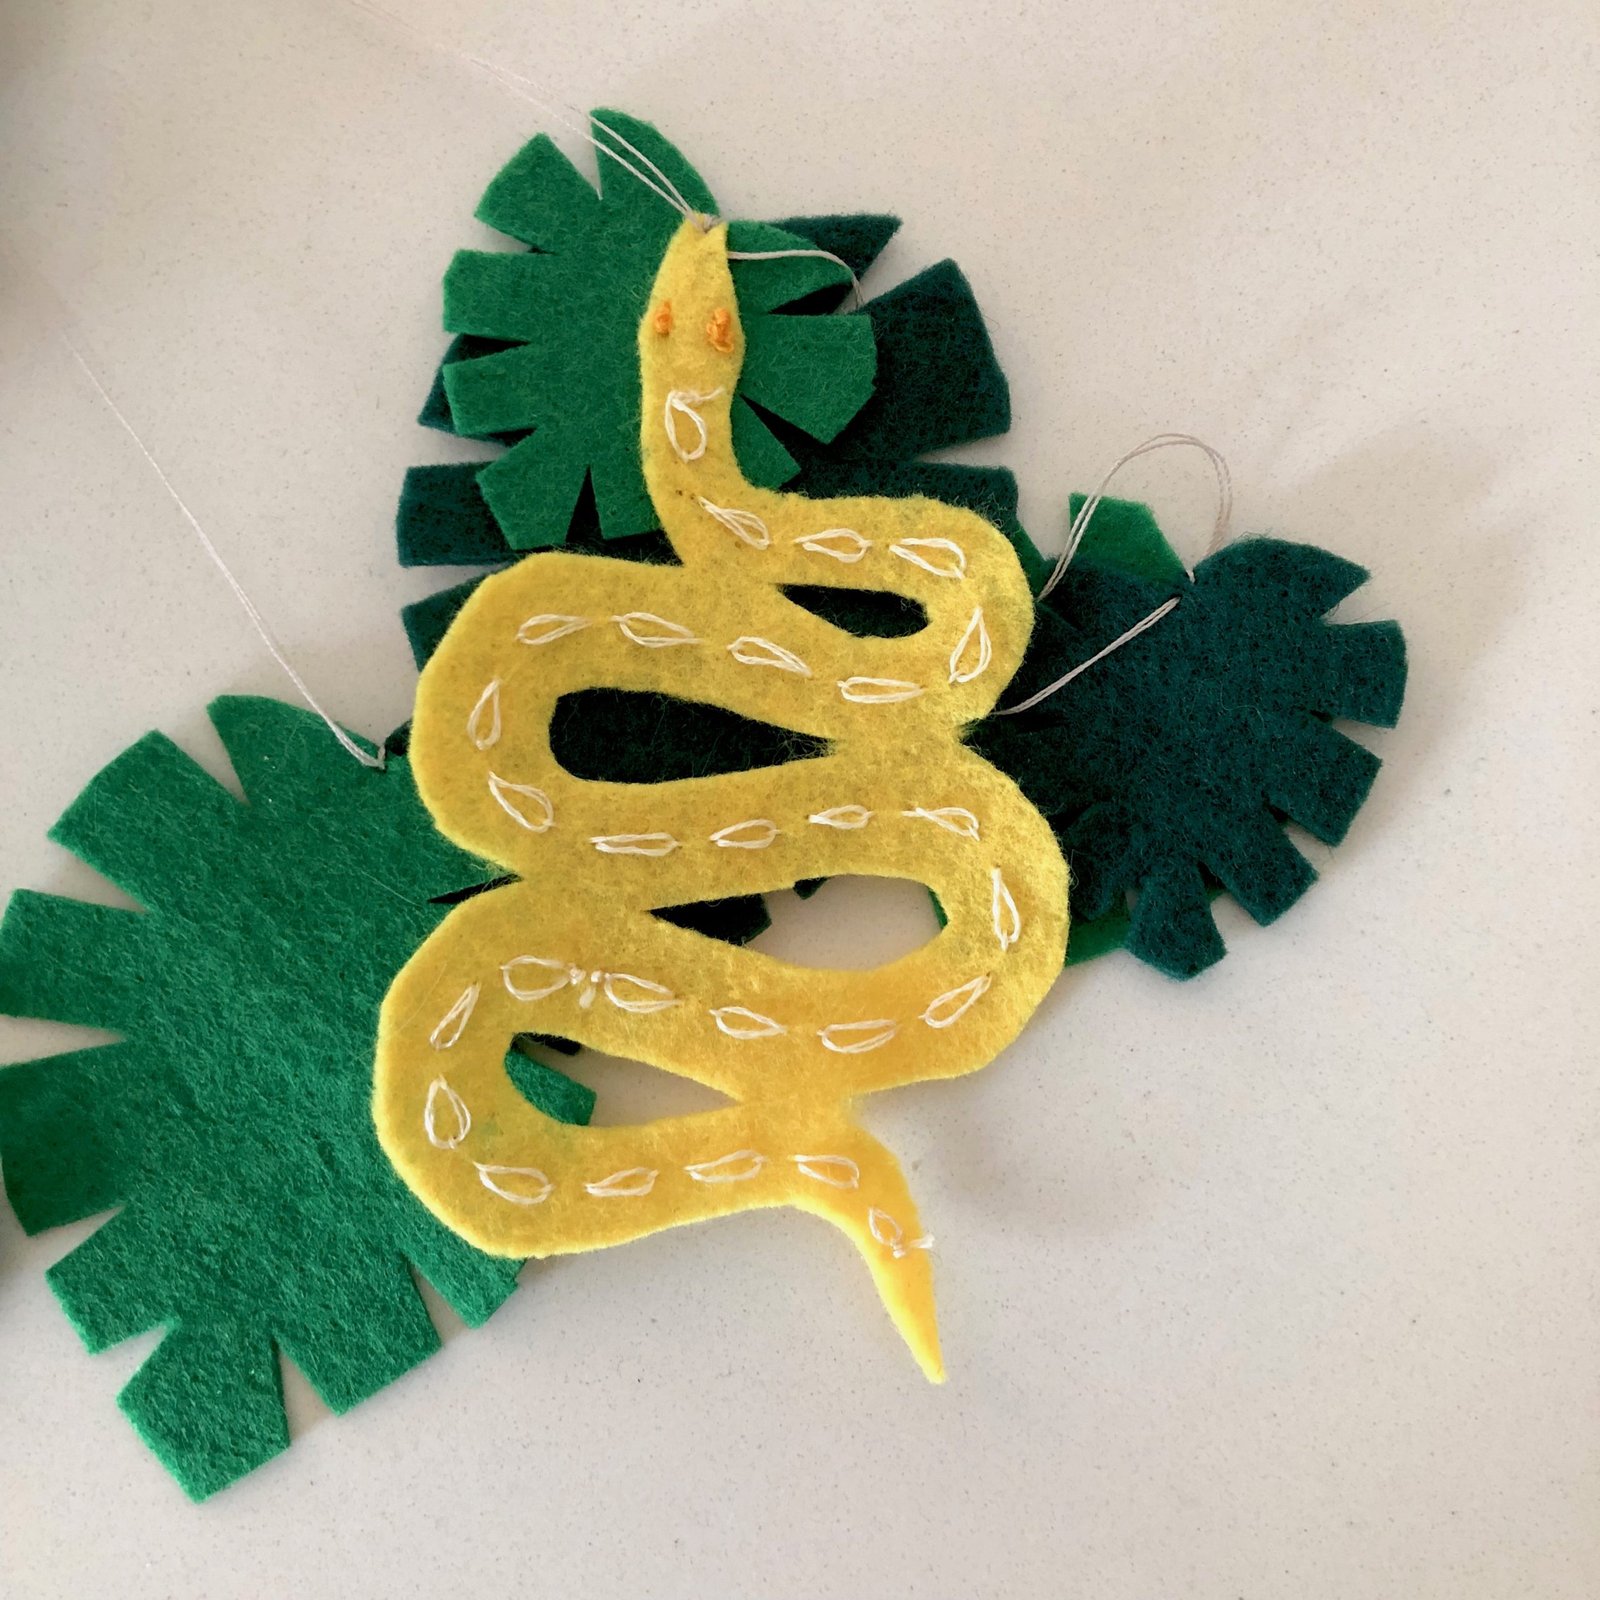
phew, here we go. This is usually where I found out how intensely I’ve been indulging my making obsession during the year… so adding it up it turns out I’ve made 73 items this year… that number includes 18 dresses, 2 prs shorts, 1 pr jeans, 8 tops, 7 skirts, 1 pr pj’s, 1 bathrobe, 1 tie, 3 bags, 4 lingerie sets, 3 petticoats, 1 pr shoes, 5 jackets/coats, 12 prs hand-knitted socks and 7 baby things – onesies, beanies and the jungle mobile.  Out of those things, 29 were for others, so I don’t think I’ve been too selfish actually.    The  major-est of major makes for the year, Kelly’s wedding dress was an entirely self-less affair, so I feel pretty good about that!

What did I wear?

so, the most worn items for this year can be summed up in the following pictures… number one spot goes equally to my mustard raincoat, and my baggy blue cords with 22 wears each, and my olive suede tunic and my dark green Sienna jacket had 16 wears each.  All the other items pictured here got at least 13 wears, most more.

When I started counting and reporting on the number of wears my clothing got, well it was all a bit of an eye opener… inevitably someone will comment “that doesn’t sound like many wears to me!  I’ve got things I’ve worn a hundred times this year, at least!”  to which I usually think – did you actually count?  The only things I would wear a hundred times in a year are my black tights, of which I have six pairs, so even those are not getting one hundred individual wears.  I do tally my black tights up too but don’t ever include them in my summary here, to be honest…  if you’re interested, my black tights got 108 wears in the past year.  Oh, I expect a few of my sets of underwear might be getting about a hundred wears each too, but I’m definitely not profiling those!

Favourite creations?

Hmmm, well let me think… haha, kidding!  the amazing and beautiful fabrics, the importance of it, the care, the love and the sheer number of HOURS spent in making Kelly’s wedding dress catapulted it straight up into number one position of anything I’ve made for a looooong time!

I loved every bit of making this exceptionally special garment, though to be sure there were some very stressful moments and at the end of it I was completely and utterly exhausted.  It’s back living in our spare room wardrobe while they’re renovating their house and I’m looking forward to dropping it off to her permanently!

Personal favourites for myself include: my colourful Ariane dress, my unicorn skirt which got itself into my most worn items of the year too! and my own mother-of-the-groom outfit  🙂

Special mention to my box of socks too! which is so pretty I don’t know if I can even bring myself to start wearing them

<iframe width=”560″ height=”315″ src=”https://www.youtube.com/embed/eU0b1i7sTgg” frameborder=”0″ allow=”accelerometer; autoplay; encrypted-media; gyroscope; picture-in-picture” allowfullscreen></iframe>

What are my plans for 2020?

Oooh! the fun bit!  SO as I’ve mentioned, I have just one or two things (haha) in the work, because Cassie is getting married to her man D this year.  And I will be making her dress.  I am also making my own outfit, obviously.  And my three nieces are going to be her bridesmaids, and I am making their dresses too.  So yes, I have my work cut out for me, just a leeeeeetle bit already!

But as far as future, “for me” plans go… so there’s a thing “make nine” where people choose nine things to make for the year…  and the pretty thing about it for instagram purposes is that you can make up a nice, 3×3 cube of plans to post on instagram.  Obviously I love the idea of this! and have decided to give it a go, although I’m making mine more of a sort of “make 12” actually, giving myself one thing to do per month.  I think it’s been well established here on my blog that I like a one thing per month project for a year!   I’ve kinda gone for a range of ideas, but nothing’s particularly set in stone, I’m allowing myself some flexibility as to specific deets.  I’ve thrown in a pair of shoes and underwear, because these are definitely things I want to making more of this year too…

Also!  I’ve nominated fabrics that are already in my stash… to make it a good stash-busting exercise for myself too. I’ve actually already got one cut out and halfway finished… so maybe I’ll make them all up in the first few months?! on the other hand there is wedding sewing to be achieved and traditionally this always turns out to be way more stressful and time consuming than I originally anticipated, hmmmmmmmm….  So we’ll see…

Anything else?

Of course the most important thing; a big thank you thank you thank you! to all who still read my blog and take the time to leave a kind word every now and then… I appreciate it so much.  I’m taking this opportunity to wish you all a very happy and successful 2020 ahead, filled with time to do the things you love to do too.

Cheers!

pinterestmail

och aye

My final creation for the year! and a couple of other things too, since of course I found/have recently finished more unblogged items which I am including although technically I didn’t “make” them.  But first things first… I shall start with my new tartan dress.  I did make this!

I think I’ve had a bit of a thing for a voluminous skirt lately, and this one is also on the flooffy side!  I used a pattern I’ve had on my “want-to-make” list for years; Burda 10/2009;119, but altered it somewhat:

A)  mine is longer and at the same time, more voluminous, more of a midi length than the knee-length in the magazine,

B) I added in extra seaming, to showcase both a bias and an on-grain tartan layout, and making it more user-friendly to put together, and

C) I changed the width of the skirt panels so I could pattern match the tartan across the skirt pleats and still get the correct width panel into the waist.

(A) needs no further explanation, so I’ll move straight on to B …. The pattern has you cutting a full-dress length centre panel that is pleated from neckline to waistline… rather than have a whole lot of, possibly unnecessarily bulky pleats in my bodice, AND having to pattern match the darn things… I cut the centre panel of the bodice separate from the skirt, and as a finished width, with no pleats.

I also cut the back bodice in three pieces similarly to the front; with a centre back centre bodice on the fold, and two bodice side pieces; and put an invisible zip in the left side seam of the dress.  Not only does a side seam zip make it easier to put on and take off the dress, but obviously … no pattern matching of plaids along either side of an invisible zip!! Since I was cutting the back bodice in this way, I took the opportunity to rotate out the waist-shaping darts, incorporating the shaping into the seams.

I’m doing the Burda styling thing here…

The back skirt pieces were cut similarly to the front skirt pieces; so as to have two side pieces and a generously pleated centre panel.  Maximum skirt volume!!!  Oh, I also cut all pieces so the bodice seamlines would match up vertically with the skirt seamlines… it just looks a lot neater.  OH! and also my skirt side pieces are just a touch more flared all round, not by much, just a few inches at hem level each side, but multiplied over the four gores and it adds up nicely!

As for point C; I carefully folded and basted the plaids together so as to pattern match the tartan perfectly across them, and then cut the centre front and back skirt panels at the finished width as indicated in the pattern.  Because of the width of my plaids, the skirt centre panels ended up a lot wider than those in the pattern, which is fine with me #maximumflooff

Originally I kept the pleats stitched together vertically for a little bit at the top of the skirt, but in the end decided it looked nicer for them to flare out immediately out of the waistline.

The skirt side pieces, as with the bodice side pieces, are cut on the bias.

can I just point out… ^^ those little Sophie-ears!! ^^

The last modification, which almost goes with saying because I’m a well-documented pocket freak, was… well I guess it just got said!  I used my most used pattern piece for this, which is one I drew up to fit my own inelegantly large hands.  I cut it from an old Vogue magazine cover, which is a nice thick glossy card; and it lives permanently stashed in a handy place adjacent to my sewing machine.

My fabric!  is a really nice, poly-viscose suiting from Minerva.  I realise poly-viscose might not sound very nice, but it really has an extraordinarily realistic wool-like feeling to it and is lovely and soft against the skin!

One of the things I really like about this dress is that while it definitely has a winter-y vibe to it, it’s sleeveless and not body-hugging either, so I think it’s going to be ok to wear it in spring and autumn, and even cooler summer days too.  In winter it would definitely need a long sleeved skivvy or tee underneath, and tights, and I’m looking forward to wearing it like that too!

The next thing!  I didn’t make this dress but I did devote an entire day to making it fit for Kelly to wear so I’m totally OK with documenting my creative input here… I remember now it was presented to me basically a few days before I flew out the the US for my holiday with Yoshimi, which is why it slipped my mind to document it here before! 🙂

Tim and Kelly were groomsman and bridesmaid respectively for their friends T and G; who were likewise their groomsman and bridesmaid respectively! and together Kelly and G had ordered the below dress off the internet … and btw, can I take this opportunity to say? never ever ever order a dress off the internet at the last minute!  Kelly had specified “for maternity” and sent in her measurements and it was “supposed” to be made to measure – inverted commas there because of course when it turned up it was instantly apparent that it was not at all suitable for maternity and also, nowhere near made to measure.  For a start, there was an insurmountable gap of five inches between the two sides of the invisible zip, and obviously poor Kelly with her pregnant belly was going to do even more baby-growing in the two weeks before the wedding!

She brought it around for some urgent adjustments…

When I opened it up, I could NOT BELIEVE the innards of this dress… it looks so soft and floaty and comfortable in the modelled picture, doesn’t it? well far from it; the insides were built like a Sherman tank…

The bodice lining AND the underlining were interfaced with firm and inflexible horsehair stiffening that had been securely fused to the fabric. The princess seams were boned, believe it or not, with the boning going directly over the bustline.  SO uncomfortable!  The skirt looks softly gathered into the waistline with a little self-fabric belt, and you might think it had an elastic waistband? well NO, of course the skirt was gathered into a securely stitched and totally inflexible waistline.  The neckline/off-the-shoulder ruffle was very not-Kelly too, she’s just not a ruffle person at all.  So the first thing was to cut it off, as neatly as possible close to the neckline edge, leaving a chic little spaghetti strap.

I actually needed to harvest fabric from somewhere to put some wedges into the side seams of the inner skirts anyway, so was glad to be able to get some so easily from the ruffle!

I opened up the side seams of the two inner layers: the underlining and the lining; and inserted wedges to add in the needed 5″ of extra width, so the zip could close at the back.  I had a bit of pretty-good matching linen, which I used for the bodice; these wedges needed to be strong because these were the layers that had been stiffened with iron-on interfacing, I also ended up using the linen in the skirt underlining for opacity, and the chiffon from the ruffle in the lining, so it looked nice on the inside.  I know it didn’t really need to “look nice” on the inside because this was emergency butchery at best, but you know; old habits die hard!  After all this, the ribbon hanging loops needed unpicking and repositioning too.

just to clarify; this is the INSIDE of the dress!!  I needed to say this because yes indeed I’m aware it all looks a wee bit scrappy… 😉

For the shell; I unpicked and opened up most of the waistline seam and let out the gathers for the required 5-6 inches of needed extra width, then restitched it up.  And re-inserted the belt loops.

Finally, it’s hard to see from the before picture, but the bodice had too much vertical height, and horizontal folds of chiffon ballooned out quite unattractively over the bust and waist seam… so I turned up as much of the extra volume as I could into a sort of horizontal “cuff” just underneath the top neckline edge.  Cassie kindly hand-stitched this down invisibly for me  🙂

It was all a bit rough and ready really, but at least Kelly was comfortable, and carried it off beautifully, plus I think she looked lovely!  And look at my handsome boy!!

The last thing, that I worked on yesterday actually! was binding this baby quilt… When we went down to visit Craig’s parents for Christmas, his Mum took it out and asked me if I could please bind it for her as she was not going to get the time or the opportunity to finish it herself.  Of course I obliged!

She had appliquéd and embroidered all these cute little motifs on squares of calico, and patched the quilt top together, and quilted it with decorative stitching, stitched around the edge where the binding was to go.

She couldn’t find any more of the blue fabric that she had wanted to use for the actual binding, but I assured her I could probably find something that matched.

It took a bit of searching because I didn’t actually have a nicely matching plain blue cotton after all, but I dug out this old shirt of Tim’s? Sam’s?  I’d thought it was one of Craig’s old shirts but he assures me it wasn’t his.  I’m not sure now which of the boys it belonged too, but I thought it was a lovely colour match for the quilt! checks in soft green and yellow, and blue too.  I cut strips on the bias and bound the quilt by machine on the top edge, and by hand underneath.  It was quite interesting to me that the sleeves were plenty for the job!  I’ve always marvelled at how men’s sleeves take up a TONNE of fabric, and here’s more proof!

btw, I could not find a good tutorial online for a nicely mitred corners for a quilt; all the ones that popped up had you encasing the edges in the folded-up bias strip and just machine stitching the lot, catching the underneath edge along with the top edge all in one go.  Maybe I’m a snob, OK I probably am! but that just isn’t nearly neat enough for me and you run the risk of the machine stitching underneath looking all wonky, and maybe even not catching the underneath edge at all, since you can’t see what’s going on under there.  In my opinion.  So I worked out my own way which I think turned out quite neat, and think I’ll write a tutorial  on here sometime, when I get time.  If I get time.  Next year, no doubt!

SO CUTE!  I think Tim and Kelly are going to love it!

pinterestmail

jungle baby mobile

Yesterday we attended a very special event, and I made a very special gift for the occasion! … Kelly’s bridesmaid and Tim’s groomsman, now a newly-wed couple themselves, hosted a baby shower for who else but our newest little not-quite-here-yet bub…  The new nursery is to be jungle-themed, so I thought I’d make an animal mobile.

I bought acrylic felt sheets, wooden beads and a bamboo hoop from the craft section at Spotlight, and everything else from my stash… embroidery thread for the embroidery, upholstery thread for stringing everything all together, and all-purpose glue… the blue/green wool that I used to wrap the hoop was from a large bag full of wool that a neighbour put out on their verge as rubbish.  When I spotted it I was like… whaaa??? well yes please and thank you! #wastenotwantnot

The designs are all my own:

toucan;

sort of a generic monkey… I kinda wish now I’d made him a specific type but oh well…

gorilla.  btw, most of them have a definite front and back so I’ve pictured both of his here…  He was one of my early favourites so I can’t believe I forgot to take his special close-up photo!  we’ll have to make do with a couple of zoom-ins …

tiger.   I’m pretty pleased with my tiger, it was easily the most labour intensive and fiddly of them all!  This is actually version three; I was dissatisfied with two earlier versions but kept going until I had one I was happy with.  He also has a definite back and front.

panther

blue and red macaw

blue and gold macaw.  Until I was making this mobile and made a point of looking it up, I wouldn’t have noticed that these macaws have black beaks while the red and blue ones have white beaks!

python.  this was a last minute inclusion and I really love him!  My python has a lovely diamond pattern along his length, and it should be noted btw that this is not a very common marking for this particular colouring but I’m claiming artistic license!

There are three different leaf sizes, and I went to a careful effort to balance everything out; the ground dwellers are at the bottom, then there’s the mid-range dwellers, with the birds flying up in the canopy.  Except for the toucan, he’s not flying but I imagined him perched on a branch.

I like the way the blue/green yarn I used to wrap the hoop is sort of “planet earth” colouring, as well as sky/leaf canopy colouring.  Seems sort of fitting.  And the dark wooden beans that are really there to weigh down the motifs, also sorta represent nuts in the trees and on the ground,  and the wooden trunks of the trees.

Lastly, here it is in motion.. thanks Cassie! for holding it up for me to film it!

Kelly sent me a picture this morning showing it hanging up already, which is so cool! and I sure hope baby enjoys watching it from his cot!

Before anyone points it out; yes I know these animals do not necessarily live in the same jungles as each other, but hey; at least they’re all actual bonafide jungle animals and I didn’t pop a cheetah or a zebra in there!

Now before I forget… I said I only had two more things to blog about before the end of the year, but I was forgetting the following!  for Kelly’s birthday she mentioned how she needed maternity clothes, so I offered to take her shopping for fabric and I’d run up a few things…  I’ve shown some of them here but not all of them for some reason, anyway, here are the rest…


a Closet Case patterns Ebony dress with set-in sleeves; in cotton jersey bought from Spotlight for this project

A raglan-sleeved Ebony tee, and a skirt made using Burda 7023.  Apart from the navy blue merino for the sleeves which is leftover from my Nettie tee, these fabrics are all long term residents from my stash, some give to me by Mum.  It’s not a glamorous outfit, but one I thought she could wearing hanging around the house or on the weekend for housework or something… hey, we all need those clothes too!

another raglan-sleeved Ebony tee, and Burda 7023 skirt combo… striped jersey a long term resident from my stash, originally leftovers from this dress; and black jersey from Spotlight, not a leftover but bought specifically for this project.  For my previous notes on adaptions to this skirt pattern, see here.


So; NOW I’m pretty sure I have only one thing left in this year to blog and it’s a lovely one if I say so myself …. stay tuned!

pinterestmail

jumbo checks

Oh hey! I made a new dress!  And I have writer’s block!


Obviously the second thing is not the least bit interesting to anyone who just wants to read – or in my case; write! about sewing… however the silliest thing about it is that it is not only hindering my efforts to document the things I’m making; the very purpose of this blog in the first place! but even sillier, it is preventing me from wearing it! Since I have this crazy self-imposed rule that when I wear something I really should have blogged it first.


So I bit the bull by the horns, or whatever I even mean by that accidental mangling of metaphors which I just decided to leave there after tapping it out without thinking… oh man… and decided the only thing to do was to wear it.. TODAY.  Thus forcing myself to sit down and attempt a blog post, and hopefully loosening up that pesky little brain block… and letting it soften and dissolve and become ethereal enough so it floats up and away and out of my head, like a puffy little cloud.  Bye bye writer’s block!!

What am I even writing about??  OH! My dress!  Of course!

yes, it’s a bit windy today… 😉

So, a few months ago, I was contacted by Sarah, of Super Cheap Fabrics, who offered me a length of fabric.. I chose this lovely, light-coffee coloured,  jumbo plaid-ed linen.  It’s absolutely divine, really.  I’d been inspired by a dress I’d seen irl on a lady; a very chic friend of a friend.  It was too long, too wide, the check too large; and I became completely inspired by the overall oversized-ness of the scale of this dress!  Like a child wearing her sister’s hand-me-downs with the thought she was going to grow into it, eventually.  I subsequently found out she’d had her dress custom-made up on a holiday in south-east Asia.

I used Vogue 1312; a Lynn Mizono  pattern that I’d bought years ago… it has a “tablecloth” skirt, very similar to the one Shams posted on her blog, many moons ago.

could not resist the inevitable twirl!!!

I went to some effort to incorporate a few things – well, ONE thing –  I really really wanted for my dress; namely, pockets.  I know, I know, we seamsters are so weird about pockets… the difficulty about pockets with this particular design was the invisible zip in the left side seam.  While of course it’s easy to put an inseam pocket into a regular side seam, it’s actually extraordinarly difficult to finagle a pocket in a side seam that has a zip in it…

in the end I settled upon the aforementioned in-seam pocket in the right side seam, and on the left side, I put in a single welt pocket, about an inch away from the seam with the invisible zip.  Sounds simple, yes?  NO!!!  Because the pocket is only on one side not both, and I’m a pattern-matching lunatic, I wanted both the pocket and the invisible zip insertion to be as seamless and invisible as possible.  I know.  I don’t know why I do these things to myself…. anyway, careful pinning and even more careful and slow sewing, and I think I did it…

Here is the front, all zipped and pocket closed and (hopefully) reeeeasonably, sorta, invisible.

and now, the unzipped, showing-the-pocket shot.

I think I’ve shown this next feature before, but I often find the bottom inside end of an invisible zip has a slightly scratchy area, pretty much invisible to the naked eye but it makes itself felt after you’ve been happily wearing your garment for a few hours.  You can feel it if you rub your finger over it a few times.  So I generally wrap the lower end of the zip in a bit of fabric, like so; and stitch it down to the seam allowances.

So, as soon as I finished the dress, I was so happy I immediately flung it on and took a few pictures, shoeless.  I love how it feels! the oversized ness is exactly what I wanted.  Large, flooffy dresses feel so incredibly feminine to me; which is kind of funny when you consider the well-established “modern” feminine perception tends to be for tight fitting and short.

I rushed out for a location shots too, but when I got back home I felt a little cool – it’s 24C today, but funny thing, 24C feels, dare I say it? cold? compared to over a week of 35C++ !! haha… so I put on a T-shirt underneath; and I think I REALLY love it with the little sleeves underneath.  I love it like this so much I might even just add little sleeves to it permanently?  Hmmm, food for thought!!

Sophie very often comes up for little cuddle while I’m taking pictures in this spot… it’s near “her spot” in the house.   Hehe, this picture of her little head sneaking into the shot above as she crept over to me gave me a laugh.  hello, my darling little snooky snookums!!


Details:

Dress; Vogue 1312
T-shirt; the Closet Case patterns
Nettie in white jersey, details here
Shoes; Zomp, from Zomp boutique

I have just two more things to share here before the end of the year… hurrah!


pinterestmail

box of socks; the December edition

Finally!  This is my 12th pair of socks for the year and my box of socks is finished!!  I decided to end up on a festive Christmas note with some celebratory scarlet socks… they are quite plain, but… LOOK AT THAT COLOUR!!  YUMMM!!

I bought this magnificently coloured yarn in Purl Soho in New York City during my recent holiday over there…it is a Koigu KPM 100% merino, hand painted sock yarn, dye lot 2227, but just says “solid red” on the label.

Actually, the thing I’m most proud of with these socks is that I finally managed to work out something I’ve been thinking of for some time… and that is to reverse engineer my sock pattern to be a toe-up design.  So happy with this!  I did it because the Koigu skein was a smaller one, and I knew I wouldn’t be able to knit two full-length socks, and wanted to make the best use of my yarn.  I divided the skein into as close to half as I could gauge (haha, knitting pun), and knitted each until I ran out of yarn.  You can’t do this with a cuff down design!  As I got close to doing the rib section at the top end, I unrolled the remainder of each ball and measured and was really pleased to see I’d managed to get the two balls within 3m of each other!  I cut the difference and joined it to the smaller ball to finish both socks off with an equal amount.

Even with all my careful and clever planning (ha!) … look at this!!  I couldn’t believe I ran out right near the very very end of one of the socks like that!  In case the picture isn’t clear, that’s about 8 stitches short!  DOH!!

It’s funny; I finished these in the middle of a massive heatwave, the worst we’ve had in years! Literally a whole week of temperatures of 39C or 40C.  It’s been almost unbearable…  Anyway, posing for these photos with the socks on was not comfortable.  One of the most common questions I used to get about the things I made was “but is it comfortable?”  And in this case, for once I have to admit the answer was a hard NO!

Later on I was sitting in the pool and took the following photo, and had to laugh… now THIS is comfortable!  basically the only kind of “sock” I can bear right now!!

And so finally… finally! here is my completed, and very squished up, box of socks… full to brim and spilling over just a little with woolly lusciousness… whooppeeee!

pinterestmail

golden Collins

I’m now desperately trying to blog everything I’ve made this year, within this year… so fair warning: brace yourself for an onslaught of making-spam…

First of all; this little dress!

I actually made this back in September! but cold weather and general lack of… shall we say? love? for the dress prevented me from wearing it for a while, or obviously blogging about it before.  However all is now well, because the dress has easily reached its 30 wears, and is probably going to go on to at least 300 wears before I say sayonara to it… how is this so? you may ask… since devoted followers (ha!) of my daily ootd blog will have no doubt noticed it has made not one single appearance over there.  I shall now explain… yes, I had not much love for it once I’d finished making it, which is strange because it actually ticked a number of very good boxes; it feels very nice to wear, very comfortable, and it is well made if I say so myself.  I think it was the colour; yellow should suit my Autumnal self; but I decided this particular yellow was too close to my skin tone to really look good on me.  I thought I might dye it, sometime.  But before that happened, the weather warmed up a bit, I took out my old summer nightie to wear to bed and was saddened to see that a hole, that I had fixed up twice before, quickly reappeared in such a ghastly, final manner I had no choice but to ditch it.  Yes, very sad, and I was too busy to make another nightie straight away … what to wear?  then I noticed this dress perched on top of a pile of summer dresses, waiting to be noticed.  I was like, well that will do for now, as a stop-gap.  But you know what?  I’m really enjoying wearing it!

Fabric; a pale yellow quilting cotton from Minerva, printed with gold snowflakes.   I think it’s part of their Christmas range.  My previous nightie was made of quilting cotton too, and so I’m accustomed to the feel of it.  It’s very comfortable! soft and lovely against the skin.  I’ve discovered that quilting cotton makes GREAT nighties!  Since I’d intended it to be a proper dress, I have to admit it did turn out a leetle bit over-engineered for a nightie; it’s got facings, pockets, inset strips to define the seams.  A bias bound hemline, for heaven’s sake.

Some deets:

Pattern; I used the Collins top pattern by In The Folds; I’ve previously made this once before, to make this palm leaf lace top here.  This time, I lengthened the appropriate pieces to make it dress-length.  In doing so, I extended the front and back diagonal lines right down to meet at the hemline in a nice neat V.  I decided to highlight this feature, by insering an inset strip into the seamlines, just like I did with this dress.  The bias cut contrast strip is mustard silk crepe; same stuff I used for my Fibre Mood Faye dress.

I’m rather thrilled with the sharpness of that point!

Cutting my “outer” pieces had used basically every last scrap of the snowflake fabric, so I unearthed a short length of soft yellow silk dupion from my stash; a remnant in merited from my grandmother.

From this; I cut my neckline/armscye facings, the voluminous pockets, and the bias cut strip I used to hem the dress,

For the button at the back of the neck; well I didn’t even really need to make an opening, since I’ve always found I can slip this dress on and off without un-doing the button! but I’d made provision for it, so needed to finish it off…

I took out one of the leftover buttons I’d covered in ivory crepe for Kelly’s wedding dress (self-covering button kit purchased here) and painted it with some gold paint.  This itself is leftover from when I made my Queen Rutela costume; I used it to paint my “jewellery” and my “hair”

So that’s it!  I have a wonderful nightie and have enjoyed wearing it a lot, since it’s basically like a proper dress.  Actually, it’s kinda half nightie, half dress… I think of it as loungewear.  I can take out the bin without worrying what the neighbours might think, haha.  Maybe I’ll even eventually dye it like I originally planned, and wear it out one day!

Details:

Dress/nightie; the Collins top by In The Folds, in printed quilting cotton
Lilac shoes; made by me at a Shoe Camraderie workshop, details here

pinterestmail

scribble-y sundress

I’ve made a new dress, and how gorgeous is this splashy, scribbly, fireworks-y print!  And the way this divine rayon challis ripples breezily against my legs was actually quite quite delicious… it was extremely hot when I took these pictures, like 39C, so soft whisper-y cool, featherlight stuff felt like exactly the right thing to wear.

While we were in San Francisco, Shams took us to Britex.  According to basically everyone who knows; Britex is a “must-visit” for the fabric enthusiast… like, every single, San Francisco shopping recommendation to me included in some form or another ” …and Britex, of course”

And I most heartily concur.  This place is insanely fabulous and I could’ve happily spent all day there..  The walls are stacked floor to ceiling with, well it felt like thousands of bolts of strong solid colours, arranged by colour to make a rainbow mural of fabric itself.  What a sight to behold!  I was crossing the rainbow bridge!  Is this heaven?!!!

I die…

can you even…??  #sigh  And this was only ONE floor, there was another one too!

Shams introduced us to the lovely owner, Sharman Spector; who was so kind and welcoming to us foreigners.  I learned that Britex is a Legacy Business, which means it is one of a “longstanding community-serving business that is recognised as valuable cultural asset to San Francisco by the Office of Small Business. Preserving Legacy Businesses is critical to maintaining what makes San Francisco a unique and special place.”  … and thank you, Professor Google for that succinct explanation…

Obviously, this is a wonderful idea, one that I wish we would adopt over here.  Imagine a world populated by lots of small businesses offering unique and special services?! This, and many other utopian customs are just part of the enormous appeal of San Francisco, and I should add, New York City too.  I think they are very innovative and future-thinking over there, while still keeping firmly in mind what is important to the happiness of human beings.

Anyway… my dress!

Sharman kindly gave me a length of this lovely “scribbled flowers” rayon challis; it’s delightfully whisper thin and feels coolly divine against the skin.  So I envisioned a floaty, nothing-y little wisp of a dress.  The print is quite oversized, so I could’ve got away with a longer dress, I think, but I’m very happy with this length; I think it’s both cute and chic, and the higher neckline balances nicely with the higher hemline.

Pattern; is my own design.  It’s very simple because I really wanted this lovely eye-catching print to shine…   so I’d made a similar dress for my friend L at the beginning of the year, a clone of a favourite dress of hers, and I couldn’t get the design out of my head.  Mine has a few key differences which I wanted to implement; namely it’s quite a lot more A-line… MORE float!! … and has pockets.  I altered the width of the top bits too, and the armscye.  Actually, the armscye turned out to be a bit of a boo-boo…  once it was hemmed it was just a leeetle bit low-cut.

You could definitely see bra-action… and I decided that if the bra was going to be seen, at least it could be a bra designed to be seen, and that went beautifully with the dress, complementing it.  I toyed briefly with the idea of a hot pink thing, – sawww tempting!! – but in the end decided the perfect bra to match this was in fact a plain black, strapless bra.  Strapless, well obviously, and plain black in order to not fight with the amaaaaaazing print, and to offset the black fabric I used for the tie.

For the bra; I used my old faithful McCalls 2772 swimsuit pattern pieces for a strapless bandeau bra; the only mods I made were to make boning channels using the side seam allowances, and inserting a short strip of boning.  This keeps the bra structured and upright and not fold in on itself while I’m wearing it.

I also gathered the centre front onto a 7cm length of black elastic, just because I think it looks nice! and I also shortened the back straps by several inches, to make it nice and tight.  Strapless bras have a tendency to migrate south, if they are not quite tight!  I like my underwear to be in sets, so I also whipped up a matching pair of undies, using the bikini bottom pieces from the same pattern.

Oh, the dress neck-tie, I cut from a black satin remnant, leftovers I think from this black Forsythe dress I made for Cassie, three years ago.

The front and back of the dress are actually different from each other, even if they LOOK identical! so in order to identify the back I used this little Kylie and the Machine label I got in the Perth Frocktails goodie bag.  It’s pretty cute, isn’t it? even if I kinda had a fleeting wish it was one of the “the is the back” labels; well I can swap that out if I ever buy a set.

But for now; it’s finished, and ready to keep me chic-ly cool in this extreme heatwave!

Details:

Dress; my own design, in this beautiful printed rayon challis from Britex 
Bra and knickers; McCalls 2772, black poly
Shoes; Zomp, from Zomp boutique

pinterestmail

Forget-me-not Sabrina skirt

In spite of being a Forget-me-not pattern I almost forgot to post this!! Except I didn’t, because here I am posting it.  But I had forgotten? for a little while anyway; that forgetful state of being ending as soon as I remembered.  I guess it’s technically not possible to “almost” forget something.  You’ve either forgotten something, or you haven’t; either one, or the other.  Like, maybe you DID forget something, but then all of a sudden, you DID NOT forget that something.  Ahem.  Yes, my brain does indeed love to devolve into such ridiculous semantics, arguing to and fro with myself.  Ultimately I did not forget, which is the main thing…

So, the skirt!  I made it a few months ago, as a tester for the pattern; it’s the Sabrina skirt pattern by Johanna of Forget-Me-Not patterns.  This is a really nice pencil skirt design of a deceptively simple appearance, I say “deceptively” because it has so many options for custom-shaping it to hug your own individual curves exactly, you really have no choice but to find that perfect fit… To start with, it has shaped gores; three in the front and four in the back; plus waist darts as well.  Additionally;  this very comprehensive pattern also contains separate pattern pieces for three different fit versions;  a straight fit, a mid fit, and a curvy fit.  You select which version you’re going to make based upon your own personal hip-to-waist body measurements.  It’s an amazingly detail-driven pattern!

The pattern also includes separate pattern pieces for the optional lining, and instructions for installing it in two different ways; the easy way or the more advanced way.  No prizes for guessing which one I chose to try out!

The advanced way results in a beautifully installed lining, with all seams and edges neatly and perfectly enclosed inside..  I’m over the moon with how my lining turned out! all steps are meticulously and carefully explained, and I found it very easy and straightforward to follow along.  In fact, the instructions are absolutely excellent; and I can highly recommend!

Fabricwise; I used a piece of rather lovely rusty-orange wool tweed, a leftover scrap inherited from my paternal grandmother, and a not quite matching deep raspberry lining fabric from my stash.  I had just enough of each to cut out the skirt, with zero leftovers.  It always makes me feel like celebrating when this happens!  It didn’t even feel like too much of a risk; entrusting my precious fabric to an untested pattern, because I knew with all those fitting seams and darts I’d be able to fudge fine-tune a really good fit.  I’d chosen my size based mostly upon my child-bearing hip measurements, and didn’t have to do much in the way of special fitting alterations, just nipped it in just a little towards the waist.

So, I finished this just as the winter was ending, and I’ve had to tuck it away to wait for next winter. I am really looking forward to wearing it though.  Not only is the fabric kinda special to me, knowing it was from Marnie, but a sleek, perfectly fitting pencil skirt is a no-brainer, yeah?  very much my style.

I’m happy!

Later edit: this skirt now has pockets!  see my how-to here:

and another edit! this skirt has been shortened!


Details:

Cowl; hand knitted by me, details and my pattern here
Merino tee; Nettie tee pattern by Closet Case patterns, details here
Skirt; Forget-me-not Patterns Sabrina skirt
Tights; made by me using my own custom-fit pattern, details here
Boots; Roberto del Carlo, from Zomp boutique

pinterestmail
Switch to mobile version
↓