bridesmaids

Cassie wanted her three cousins, my brother’s three daughters, to be her bridesmaids; and look how beautiful they are!  It was so much fun and a totally lovely and enjoyable experience for me to make these dresses for my gorgeous nieces.  I’d occasionally made little things for them when they were tiny, but truthfully it’s been a while.  It made me very happy to create lovely things for them, and for Cassie’s special day too  🙂

We had lots of discussions about the dresses; initially we were thinking of the traditional identical dresses, but thinking on it further, the idea of different dresses seemed a lot more practical.  Three sisters, who can and often do! borrow each other’s clothes, would find a lot more use for three different dresses, than three identical dresses.  And everyone wants for the bridesmaids to get further use from the dresses!

We did however, make the dresses the “same” in the sense that I used the same pattern for each dress.  Namely; view B of Simplicity 1195.  This is actually just the “slip” designed to be worn underneath the “proper” lace overdresses of the pattern, but it gave us the perfect, spaghetti-strapped, princess seamed bodice with a nice twirl-irific A-line skirt that we were hunting for.  Side note; it’s amazing how a lovely simple basic pattern like this is actually quite rare; we searched ALL the pattern books and this was basically the only one that fit the bill!  Amazing!!

Even then, it still needed a few tweaks… the pattern is actually a little drop-waisted and the girls wanted a true waist seam.  Luckily, a very easy adjustment.  Also I made each dress to be fully lined, obviously.  And the pattern runs quite large; I traced out the correct size for each girl and it was really quite baggy; I had pin in all the seams quite aggressively to get the bodice to fit.

I wanted the three dresses to look the same on each girl, so I made muslins for each one to perfect the fit.  My Mum early on said; it’s going to be so easy to make their dresses because they’re all the same size!!  And I was immediately like; No Mum, they are NOT the same size!  Mum; But they wear each other’s clothes all the time!  Yes, they can wear each clothes reasonably easily; which is great! because I love the thought that they are going to be able to swap and wear each other’s dresses in the future.  But that does not mean they have the same bodies, because they are actually very different, sharing none of the same measurements.

So I made three muslins too.  I hardly ever make muslins, only for the most important of important-est of items.  So this is a stupendous honour, just so you know  😉

Fabrics!  All the dress fabrics were bought at Fabulous Fabrics.  We had a great fun morning searching for the perfect colours … well; I actually left the four girls to play with fabrics and make their choices while I happily browsed fabrics and pattern books by myself.  And just handed over the credit card at the appropriate time. And successfully managed to not buy anything for myself at the same time! A very good day!  Cassie had made a mood board for her wedding, and chose the three colours from those on her board.

Also, it’s funny; but finding the matching lining fabric for each colour was almost as as much of a hunt as anything else!  We found the perfect yellow lining fabric at Fabulous Fabrics at the same time as we bought the dress fabrics, but not any of the other colours … I eventually found a good sage green match at Spotlight, and the pink dress is actually lined with ivory lining fabric, that I had already in my stash.  All three matching invisible zips I found at Spotlight.

T’s dress, in sage green; and J’s dress, in golden yellow are made in the same crepe-back satin as each other, and the pink fabric for C’s dress is a much lighter weight, slightly crinkly crepe.  Cassie was quite worried that the pink was a different fabric but it was exactly the right colour so I assured her we could make it work.  And it worked out absolutely fine, of course!  Because it is a much more lightweight fabric with a tiny amount of crinkle-based stretch to it, I did need to make a few changes to the construction technique of this one… for example; to stabilise the bodice of the pink dress, I constructed it so the lining plays a far more structural role with the dress/lining sewn firmly together at the waist seam as well as at the top edge.

Also, the pink spaghetti straps had a slightly elastic quality, and I did NOT want for them to stretch out over wear obviously!, so I threaded a length of cotton crewel thread through the straps, and stitched it to the straps themselves very firmly at the bodice junction; so this behaves like an ersatz “backbone” that provides hidden support and stops the straps from stretching.  Just a little secret tip/trick that no one would ever know!

I also took the step of hand-basting the seam allowances of the pink bodice down after grading.  I can’t explain exactly why I chose to take this extra step, just call it a hunch about a difficult fabric.

The green and yellow satin-backed crepe is a far more stable fabric, so these dresses have the more traditional lined dress construction, with dress and lining free from each other from top edge down.

I attached ribbon hanging loops to the waistband of each dress; this was leftover ribbon from my stash.

It was a lot of work making the three dresses, but I thoroughly enjoyed it! the fact that they were three different colours made it so much more enjoyable than if they had been the same, I think.    I machine-stitched the lining hems, and I want to give a big shout-out to Cassie who then hand-hemmed the dresses themselves for me.  This is always a much huge-er job than you originally anticipate, so I’m so grateful that she stepped in and took over this important, and arguably rather fiddly part of the process.  Thanks, darling!

These are the bouquets for the wedding, constructed by Daisy Hill Flowers… aren’t they the most stunning?!!  I was blown away when they were delivered!  And I love how the colours of the girls are selected in the bouquets too.

Daisy Hill Flowers also decorated the wedding cake. The wedding cake was a doughnut cake! made by Krispy Kreme!  this was what D, Cassie’s new husband wanted.  His one request, as it were…  😉  I think it turned out absolutely gorgeous, and the doughnuts were delicious too!

Cassie made the cake stand herself … she searched and searched for a nice stand online and in stores but nothing was just right.  So, she made it herself, as you do.  Or should I say, as we do?!  She’s such a product of her family…!!  Sam took her to the Men’s Shed one day; he does a lot of woodworking projects there, and she cut out the rounds.  She brought them around to our place, where she painted them all white, and then got the perspex rod cut into the appropriate length, and drilled and screwed them together.  Bam!  I’m so proud of my resourceful and clever daughter…

BTW; if you haven’t read it already, my previous post addresses the covid-19 situation with regards to this event…

pinterestmail

mother of the bride

So, I made this beautiful (I think) dress for Cassie’s wedding.

I had early settled upon the beautiful bohemian Carole dress by Fibre Mood … for several reasons.  Firstly;  I already have the pattern printed out AND had made it up previously too and so knew I didn’t need to do any more special fittings of the pattern to myself.  Time-saver!  And secondly, I thought it was a gorgeous style too, of course!

I found the beautiful floral print in Fabulous Fabrics.  It is a silk/cotton and the most divinely luxurious stuff to sew and to wear.  It is also just about completely see-through, so my dress is underlined fully with soft ivory lining fabric.

I basted underlining and outer shell pieces together along the seamlines first, then overlocked the raw edges together before stitching the seams

The underlining is cut 4cm shorter than the dress with a machine-finished hem, but the outer shell hem is stitched in a narrow hem with tiny fell-stitches.  I hand basted the facings to the underlining with tiny invisible stitches at both the front fold and the overlocked edge to the inside too.

My label!

Side view… I absolutely adore the gentle high-low nature of this beautifully twirly hem!

So I actually made this dress back in January, when I had a bit of spare time in between bridesmaids and bridesmaid fittings, and I’m so glad I did.  The last little bit leading into the wedding was SUPER stressful…

this counts as my make-nine-but-actually-twelve thing for March…

and OH! I almost forgot! just like I did for Tim’s wedding outfit, I quickly whipped up a matching bra and undies for this outfit too…

Well… it sorta? matches?!  I think it’s close enough, anyway.  It was actually damn difficult to find fabric even vaguely matching in either colour or design!

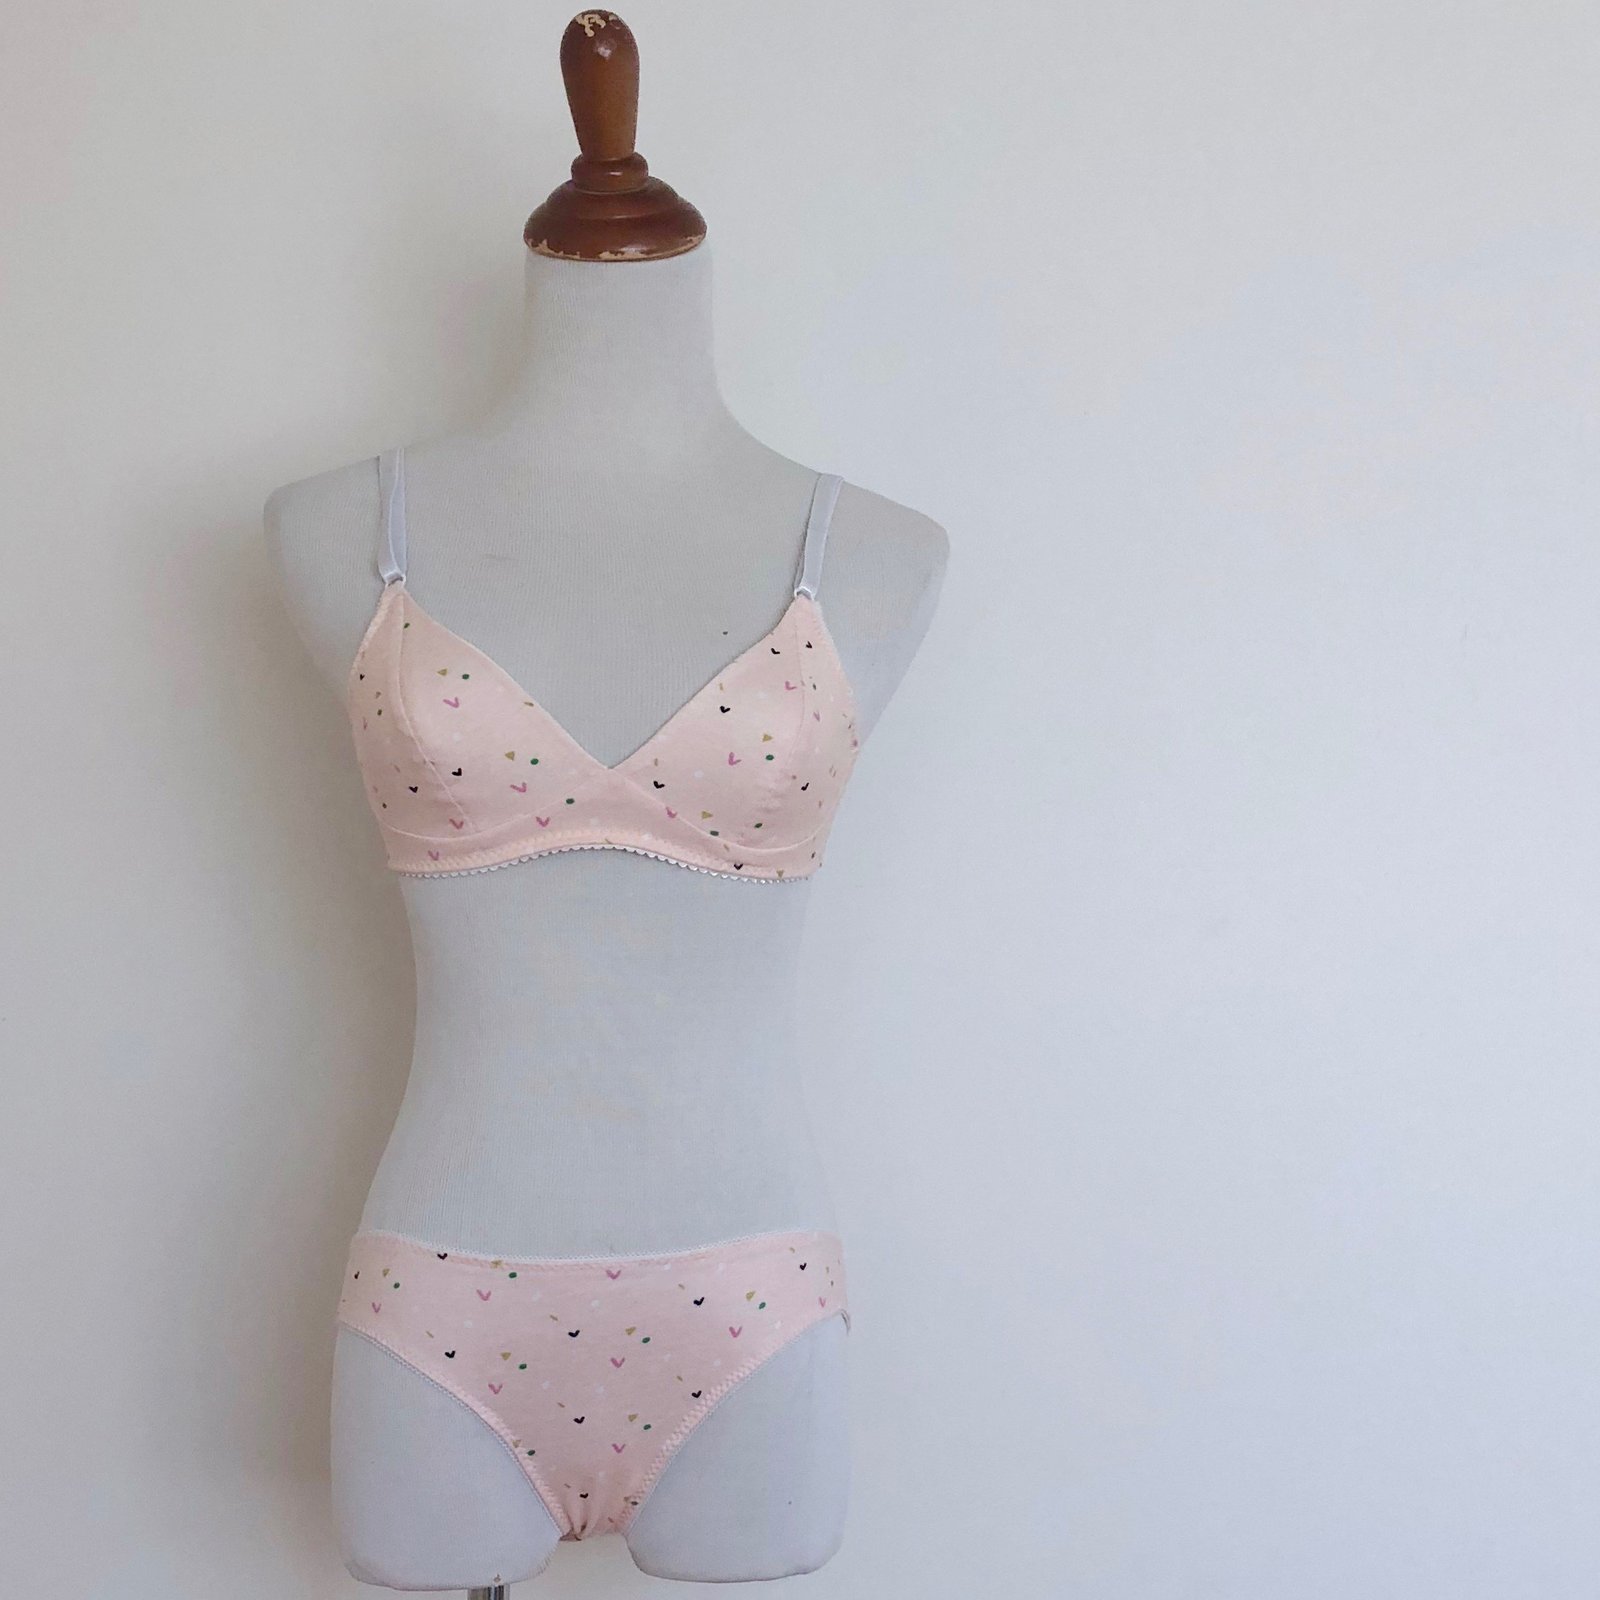
I used my favourite pattern the Watson by cloth habit, and cotton jersey from Spotlight.  The red ribbons were saved from an old, also me-made, lingerie set, and I made my usual two pairs of matching knickers…


Details:

Dress; the Carole pattern by FibreMood, silk/cotton from Fabulous Fabrics
Lingerie; the Cloth Habit Watson
Shoes; Zomp, from the Zomp boutique

I took these pictures back in mid-January, so this is the happy face of a woman who has not even heard of the novel corona virus… so hard to remember those innocent times now!

I’m a bit torn here; I’ve either finished saying everything I need to say about the dress, OR I can address the obvious elephant in the room.

As mentioned, I actually made the dress way back in January, when I hadn’t fully got revved up with the more … maybe important? shall we say? wedding sewing, and decided to just run mine up in a quiet week, in between bride and bridesmaids’ fittings, and before things got more hectic.  And, oh my gosh, but did they get more hectic.  I was making Cassies’, very involved, wedding dress, and her three bridesmaids’ dresses, this dress here, and I also ended up making my Mum’s dress too, when she was getting overwhelmed at the thought of it.  It’s been … a lot… emotionally as well as workload-wise.  As well of course as we all know; approaching like an invisible tsunami from the other side of the globe was Covid-19; and none of us had any concept just how much the world was going to change in the following few months.  I really really appreciate that we are so extremely lucky here in Perth to be so isolated, that the situation here is far far less severe than in other countries, and that our government is right on top of things and has shut down the country in, hopefully, good time.

So yes, Cassie’s wedding did indeed go ahead; with good fortune the date was set for the very last weekend before restrictions started to really ramp up here in Perth, Western Australia.  When I say ramped up, well the number of people allowed at a gathering have been reduced, and reduced and reduced!  specifically, first it was 500, which went quite rapidly down to 100, then to 10, then 5, then 2!  At the time of the wedding, the number was 100.  Let me say; I’m not complaining, and I am most definitely very pro-lockdown to control the spread of the virus, but at the same time I have to admit to being so very retrospectively glad that the timing of our wedding meant we were able to go ahead as planned.  We were worrying right up until the night before, when we got the legal go ahead with very few adjustments needed.  We were fortunate that our numbers were already small, we had no guests that were coming in from out of the country or even the state, our venues were big enough to comply with the (at the time) 4 square metres per person rule, and we had already made preparations to protect our elderly relatives, like face masks and hand sanitiser – purchased at great expense! was available at each venue.  We also pro-actively made a no contact rule; absolutely no hand-shaking, hugging or kissing.  It is so so strange to lay out these guidelines for a wedding, but these are very strange and scary times and such rules helped put everyone’s mind at peace.  Everything went off as planned, and a couple of weeks later everyone is still healthy and well, for which we are so enormously relieved that I can hardly find the words for it.

It’s almost impossible for me to reconcile this time when we were fully allowed to gather together to celebrate our darling daughter’s wedding as a family; with now, a few weeks later, when we are not seeing anyone in our family AT ALL.

Anyway, that’s the story.  Small things to worry about really, at a terrible and terrifying time like this.  I sincerely hope everyone who reads this is safe and healthy, and continues to be so, and that you and your loved ones are able to access good health care if you should need it.

pinterestmail

delicious Delice

Hello!  I know I said wedding sewing would be the next thing I posted here but I’m not quite ready to write about that yet.  However yes, we had the wedding, it was wonderful and all is well.  In the meantime I’m just quickly jumping in with a new little something, a fun number I finished probably two to three weeks ago now but haven’t really worn it much because the weather has simply been too hot for it.

And now it’s not; et voila…

This pattern is the Delice dress/blouse pattern by Super Bison cousou main; a new-to-me pattern company, and can I just say right now, even apart from anything else like some really nice patterns the name of the company is practically irresistible!  Super Bison!  So cute!  I’m just getting this mental image of a bison with a cape zooming superman-like from out off the prairie grasses and into the sky and it’s giving me a much needed laugh…  🙂

no capes!

My fabric is beautiful, a purpley-chocolate/burnt-orange/raspberry-red/blue brushed cotton plaid… I LOVE the colours here.  I bought this fabric from the Fabric Store in Melbourne on a trip over there with Mum and Cassie, several years ago.

The pattern has three sleeve variations, and I did want to make the long sleeved version but in what is probably the story of my sewing life, I did not have enough fabric…  doh!  I made the sleeves as long as I possible could, and then I even managed to cut another strip to add onto the bottom to make it look like the sleeves have a sort of faux cuff extension too.  It’s a bit of a random feature but I really love it!

Ah plaids; of course I absolutely adore plaids but they come with their own plaid-specific issues and let’s just say it; there is very little plaid matching accomplished here, just the barest of essential areas like the side seams. I simply didn’t have enough fabric for such extravagance.  It’s funny actually kinda serendipitous; when I’d cut out the front bodice, to get all the pieces cut out the front plaid had to be off-centre.  I thought this would bother me but in the end I’m glad actually.  I think it turned out a better look than if everything was perfectly centred and lined up.

I absolutely love this little dress, it’s cosy and comfortable, quite fun to wear, and I think it looks pretty cute as well.   The colours are quite autumnally scrumptious! and in winter I’m going to try it with a long sleeved wooled T-shirt underneath too.

The one little downer sort of a thing is, it must be said, the sad absence of pockets.  I did attempt to put inseam pockets in the side seams but they just did not work actually, and I had to take them out and repair the side seams.  It’s ok, I haven’t quite given up all hope yet though… I still have the pocket bags and just enough fabric to fashion some welts for welt pockets.  I’m going to give it a crack pretty soon, but just wanted to write this blog post anyway; while the spirit was willing, so to speak.

I’m so glad to get this long-petted fabric out from the fabric room and into … um, well into a different room in the house?!  The wardrobe!  😀

Later edit; I added the pockets! so much better now  🙂

wearing it here with my me-made tights, raincoat, scarf and cardigan, and rtw boots


I’m really only including this next picture because of The Eye.

Details:

Dress; the Delice pattern by Super Bison cousin main, brushed cotton plaid from the Fabric Store in Melbourne
white shoes; designed and made by me, details here

pinterestmail

garden tea party hat

Short and sweet; I made a hat!!  Well, by “made”; more accurately; I compiled a hat.  I bunged a whole lot of pretty things onto a hat.   Oh I did make that little tea cup, so I guess I can lay claim to a little bit of it….

The green felt hat is a “St Patrick’s Day” hat from Spotlight and all the fake roses and ivy are also from Spotlight.  I made the little tea cup from modelling clay, also originally from Spotlight, and painted it using craft paints from…  guess where?!!  I used green Gutermann’s upholstery thread to stitch everything securely to the hat.

So my 3 nieces/Cassie’s bridesmaids had planned her kitchen tea/bridal shower to be a Mad Hatter’s Tea party, and we all had to wear some sort of over-the-top headgear.  I wasn’t quite sure how crazy to go, and genuinely thought my hat was going to be TOO much, but it ended up being quite subdued by comparison to many of the other fabulously lovely creations at the party!

The theme of the part was a surprise for Cassie, and the girls had made her hat for her, to both match hers and to be bridal at the same time.  Aren’t they the most gorgeous bunch of girls?!!

We had a low-key hat competition at the end, and Cassie won of course.  The funniest thing of all was the prize; a roll of toilet paper!  We all roared with laughter!

Let me explain… with the new corona virus scare currently going on; Australians have reacted predictably, by cleaning out the shops of any and all supplies of toilet paper.  I know, right?  So Australian… Seriously, the toilet roll shelves are empty, all of the time.  You have to get in fast to pick up one of the occasional restocks when they happen! and there are even rumours of people selling vastly inflated toilet paper on eBay.  I haven’t seen any ads myself, but that’s just an indication of the general level of panic.  And so normally, one of the games you’d have at a bridal shower is a toilet roll wedding dress competition.  And such a thing was obviously out of the question with the current toilet roll situation.   So my sister-in-law spared one toilet roll – ONE! which was awarded as first prize for the hat comp.  SO FUNNY!

Here are some of the other gorgeous hats at the party:

Mum made her stunning colourful hat of felt lined with old X-ray film…

Cassie’s friend E cleverly made a very chic and sculptural, royal hat/ruffled collar ensemble, using paper:

L looked super pretty in her floral/gumnut hat…

Arthur very briefly wore his yoda beanie; but he’s not a fan, poor little lad!  A man of discerning fashion taste!

Lots of gorgeous hats!!!

In closing; a few in-progress shots of making my hat… just because well, that’s what I do here.

I made four button-like holes in the bottom of the tea cup to make it easy to stitch onto the hat.  In fact, you could just think of it as a glorified button, to be honest!

Coming up soon… the wedding itself!!!!!  #eeeeeeeeeeeeekkkkk!!!!!!!!

pinterestmail

floral frikka with matching skirt

… so here are a few things I made earlier! like; along with everything else that’s been going on I can barely remember when I made them.  Honestly, I’m really missing writing for my blog lately, and “engaging” with other sewing folks on instagram – please note correct use of appropriate buzzword – with all the wedding sewing I’m doing it’s all I can do to keep up with just my daily outfit blog … and keep the pantry stocked … and some sort of food on the table each night… wait.  Actually that is rarely happening nowadays, whoops…

Also, a pre-warning, after the wedding there’s going to be a veritable avalanche of sewn items popping up here.  An avalanche I tell you!!

Anyway!! I’m just gonna go with stream of consciousness blogging again and see how we go.

This is the new Frikka hoodie pattern by Fibremood… funny thing; when the catalogue came out I immediately homed in on the Becky dress and was like, YES!  that’s the one for me!! at that point noticed that it was for child’s size 2-14 … womp womp.  So I chose the adult sized Frikka hoodie obviously.  As it turned out, I had just enough fabric to cut out a little matching skirt, and so I’m pretty chuffed I ended up with a sort- Becky look after all.  Win!

pseudo-Becky

My fabric is a surprisingly cosy cotton double gauze from Minerva.  Suprising, because you wouldn’t ordinarily think cotton gauze would be warm.  In my experience, it’s a lot warmer than you think!  And so soft and cuddly, mmm.

note to self; wearing the hoodie up with a pony tail looks, um weird….

Some sewing notes; I added a kangaroo pocket on the front…  #pocketho

I stitched the sleeve hem quite deep hem on the sleeves, a. because I really love a three quarter length sleeve, and b. so when cuffed/rolled up the right side of the fabric shows.

I didn’t have a matching cord on hand for a drawstring in the lower casing, and may not even bother actually.  I think it’s fine just the way it is.

I really like the hood construction on this thing.  It’s fully self-lined, in a very innovative (to me) yet intuitive and simple to construct way; with the two sides being cut on a fold, opening edge on the fold.  Very clean and easy.

With the matching skirt; I didn’t have enough fabric for the waistband as well, so cut one from an old pair of jeans.  The colour is a perfect match, and also denim is probably a better fabric for a waistband anyway.

I stitched on a, in retrospect rather insane daisy button, because it seemed appropriately fun and random at the time, but I may switch it out at some point.  The petals are really knobbly so it’s kinda tricky pushing it through the buttonhole…


I also fully lined the skirt with ivory/grey polyacetate lining fabric, because the gauze is naturally quite “sticky” and I do plan on wearing it in winter, with tights.


Note to self; 40 minutes for a blog post.. not too bad!  Now to get back to the wedding sewing!!


Details:

Hoodie; the Fibremood Frikka hoodie, made in this cotton double gauze
Skirt; kinda based upon Vogue 1247, except with no pockets or horizontal seams, same fabric, and lined
Poppy dress (only the skirt seen); Vogue 1351, poppy print silk chiffon, details here
Pink twist top; the Pattern Magic 1 twist top, thin pink stretch stuff, details here
Shoes; made by me and my own design, detail here

pinterestmail

cute little love hearts

So, I’m full on in the midst of a mad maelstrom of sewing for Cassie and D’s wedding right now, but managed to whip up another little something for myself… and this is the second of my nominated make-twelve fabrics that I want to sew up this year… yay!  Just quietly, I have also made up a third one too but that one is a secret and I’m not going to reveal it just yet, mwahahahaaaaa!

This is made using my fave underwear pattern of course, the Watson pattern by cloth habit… I always love whipping up a few of these! such a quick and enjoyable project and with no attendant guilt trip either, since it’s a basic essential wardrobe item that is incidentally filling a desperate need at the moment too … I really need to make a few more actually!

I bought the pretty heart printed pink cotton jersey in Spotlight during last year some time, washed it immediately and it has been sitting beside my machine wrapped around the elastic and all the bits and bobs for the bra for probably eight or nine months, haha.  I lined the bra with cream coloured poly stretch that I’ve had for yonks; using a method I developed so as to enclose the seams inside, details here.

Normally, I do not stitch the cup and its lining together along that central seam, haven’t found it necessary, but this time I decided to do it.  I used a hand pick-stitch, stitching in the ditch of the seam, and I really like how the stitches form  a series of very subtle spots along the seam.

Here is my updated make-nine twelve graphic for the year so far!

pinterestmail

rusty lace Cissy dress (Homer and Howells)

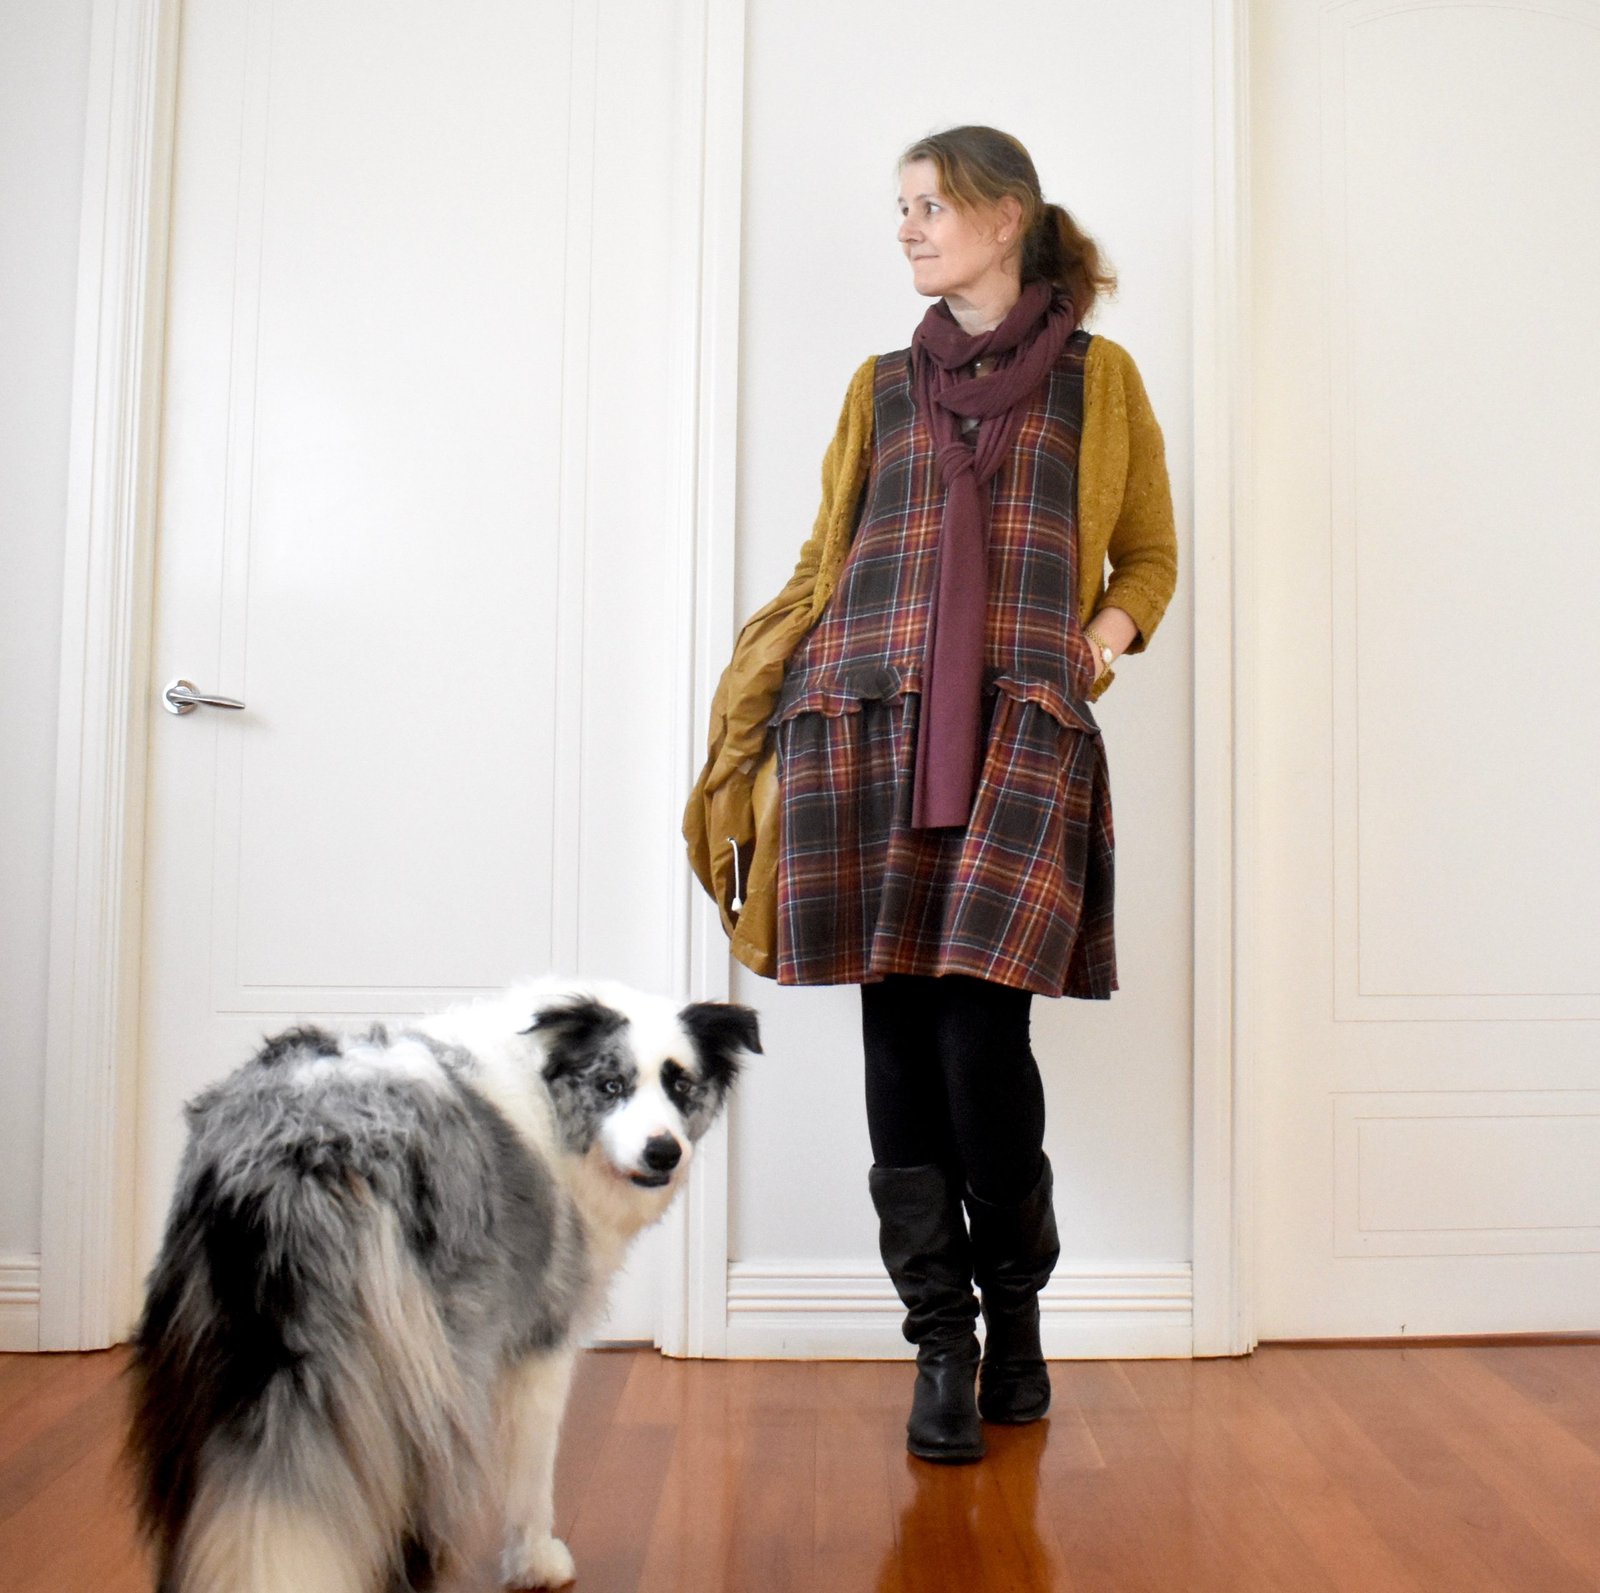
I’ve made this rather awesome new dress, if I say so myself!!   Paprika!!  Rust!!  Kinda… burnt orange/dark red/burgundy/wine!!!  It has a strongly autumnal-flavour in colour and feel, but actually it’s beautifully cool and breezy enough for summer too.  I wore it today and it was super comfortable in spite of the 38C heat.  Phew!

The pattern is the Cissy dress pattern by new company Homer and Howells; I discovered and started following them on instagram a few months ago and was thrilled when they asked if I would like to try out this particular design… because I knew it would make a lovely summer frock  🙂

I had this glorious richly-coloured lace that’s been languishing in my stash for hmmm goodness knows how long … I can barely remember its purchase!  I’m pretty sure I bought it at Tessuti’s in Melbourne on one of my holidays over there with Mum and Cassie.  Like about 95% sure.  #youknowthingsarebadwhen…  It’s one of those fabrics I’ve taken out and petted every now and then, even laid out pattern pieces on it before having second thoughts, but finally I felt this particular project was just the right thing.

The pattern is an exceptionally easy thing to make.  It does have pockets, beautiful great big pockets too, absolutely perfect; but in the spur of the moment I just couldn’t think of a way of inserting them nicely or invisibly enough into my underlined lace dress, so left them out this time.  Who even am III????!! but really.  I’m a little ashamed I didn’t think a bit harder, because right now I can think of two separate ways I could have made it work, hmmm.  But I’m feeling too stressed out to unpick all that overlocking to put some in right now.  Maybe later.  After the wedding…  🙂

Of course I needed to underline, because it’s lace, and therefore completely see-through.  I had a length of white cotton in my stash too, inherited from Mum’s stash; that was just the right sized piece, and I thought the white underneath would be really cool.

But you know what? it wasn’t … when the dress was finished, I decided the white cotton was actually really awful; just too harsh of a contrast.  So I dunked the completed dress into a dyepot of mixed orange/red/brown/hot pink dyes.  And now I think it’s lovely!  the underlining is almost the same colour now, just a shade lighter than the lace, and I think absolutely perfect.  I’m really going to enjoy wearing this chic thing!!

Notes; I shortened the sleeves by about 9cm, and the dress by about 17cm from the top edge.  At full length, the dress was just a little too “granny-ish”, and yes I know I AM now an actual granny! but there’s granny-chic which is cool; and then there’s just “granny” but not in a chic way.  The lace that I chose, combined with the long skirt tipped the original look into the latter but I do really love it at this slightly shorter length!  I actually do have fabric in mind for this pattern at the designed-for longer length, but that will probably not happen until after Cassie and D’s wedding… ha!  I have so much to do!!!  #notevenlaughing  #cryingjustabit #ineedaholiday

I managed to incorporate the natural scalloped lace edge into the hemline, which I think is super pretty! but sadly didn’t have enough lace do the same for the sleeves.  They’re just hemmed.

Details:

Dress; Homer & Howells Cissy dress pattern, lace with dyed cotton underlining
Shoes; caramel/ivory clogs are made by me, and my own design, all details here. White shoes are also made by me, at a shoe camaraderie workshop, all details here

pinterestmail

baby Arthur

Our new baby grandson is here!!!  We’re so excited and thrilled with him, he’s such a beautiful baby boy, speaking in a totally non-biased way, of course!!   note: so clearly above photo is NOT of new baby grandson…  sorry!  But thanks to R2D2 for modelling the new beanie!!

I just had to make a few new things to welcome our family’s new bubby…

Items one and two are my favourites, obviously!   I knitted a little yoda beanie, based upon this terrific free pattern by Shinah Chang on her FuzzyCloudDesigns blog.  I used the pattern for the ears, but adapted my own for the beanie itself, my yarn was completely different and with a completely different gauge from the recommended.  I think from memory I cast on 60 stitches? and for the crown I did the cast off in a 6 segment fashion. In other words, 1 per 10 stitches in the first cast-off row.

The yarn is from the big bag I picked up off a neighbour’s verge recently.  I cannot believe someone was throwing away so much great yarn!

I made the matching onesie using my current favourite onesie pattern, Burda 9434.  I made it using a scrap of cream coloured cotton jersey, and white plastic snaps, that I bought along with their matching tool from Spotlight.  I don’t know why I haven’t used these before! because they really are far superior to the metal versions…  I’m only sad that the white plastic did not take up the dye, like AT ALL.  Oh yes, I obviously dyed the cream onesie to make it motley brown, like Yoda’s robes.  I used dark brown thread so it would match the final colour.

I think it turned out super cute!

The other onesie is pretty plain, and in retrospect rather boring, it’s saving grace is that it’s for size 3 months, and I’m pretty sure Tim and Kelly have basically hardly anything in this size yet.  So it will come in handy  🙂

omigosh, he’s really so beautiful!! thanks Tim for giving me permission to post this!!  I’ll never ever tire of watching it…  🙂

In complete random and unrelated-to-sewing, life stuff; Dolly Parton- yes, THE Dolly Parton! – set the following challenge meme and I had great fun fulfilling it on behalf of Mischka.  Behold, the cuteness!!


pinterestmail
Switch to mobile version
↓