Tag Archives: Own Design

chunky two tone sandals

I’ve made my second pair of shoes! suede and vinyl, medium heeled, clog-like sandals.
I really like them stylistically.  In fact dare I say, I even love them a little bit!  My general criteria with my self-made stuff is: would I buy this if I saw it in a shop? and in this case: hmmm,well y’know I think I would be attracted enough to pick them up, at least!  Actually buying? well apart from the definite whiff of eau de homemade about them… 😉 My cobbling skills are low to non-existent but so far that doesn’t really bother me all that much.  I’m learning by doing.
I actually do love them, they feel solid, modern and somehow honest.  I am really going to enjoy wearing them  🙂
The how…

They have a wooden base, made of pine from Bunnings.  I cut and glued two layers together using interior/exterior PVA glue, then cut the basic shape of the shoes rather roughly using a bandsaw.

Further shaping, fine-tuning and sanding was done on a belt sander using 40, 80 and 120 grit sandpaper.  Once I was happy with the shape and had sanded it all nice and perfectly smooth, I applied three coats of varnish; exterior grade, satin finish.

By the way, I’ve gone back and added some extra “progress” pictures to my previous shoe-making post just in case that sort of thing is interesting… sewstylist commented that progress pictures would not be boring, and thank you for saying that! so I’ve put in a few more pictures this time too  🙂

The upper is made of caramel-brown suede (from Skindhuset, in Copenhagen) and pale grey vinyl (Spotlight).  The suede is eked out from the leftover scraps from my caramel suede jacket.  I cut backing pieces from old bed sheeting, which is a thick and very strong fabric, and glued the uppers and backing pieces together before topstitching all around the perimeter in matching threads.  These uppers were nailed to the wooden bases using 15 x 1.6mm blued tacks (Bunnings).  I chose these partly because I liked the rustic look of them, also because they were the only nail option in this size, but now the non-uniform appearance of the heads bothers me a bit.  I hammered matching copper-look snaps (Spotlight) to the straps that close around the back of my heel.

For the soles, I cut adhesive cork liner sheets (Spotlight) to size, glued them on and applied five coats of satin varnish to strengthen and harden the surface.

Things I would do different again: In the future, I would save time and brush-cleaning by applying the cork sole before doing any wood varnishing; and then just apply three coats of varnish to the wooden base and cork sole together.
Bed-sheeting, even though it has very desirable qualities of being very strong and inflexible, is probably not the most wonderful choice for backing the uppers.  It’s good but is a bit thin and “fabricky”, if that makes any sense.  I was worried that vinyl would be too thick for the job, but in retrospect I think it might work well.

Obviously, I have already started planning the next pair…  🙂

LATER EDIT!!
after three years of pretty solid wear, I’ve given my clogs a well-deserved update!  The white fake-leather part of the uppers was starting to pull badly around where it was nailed to the wooden soles.  
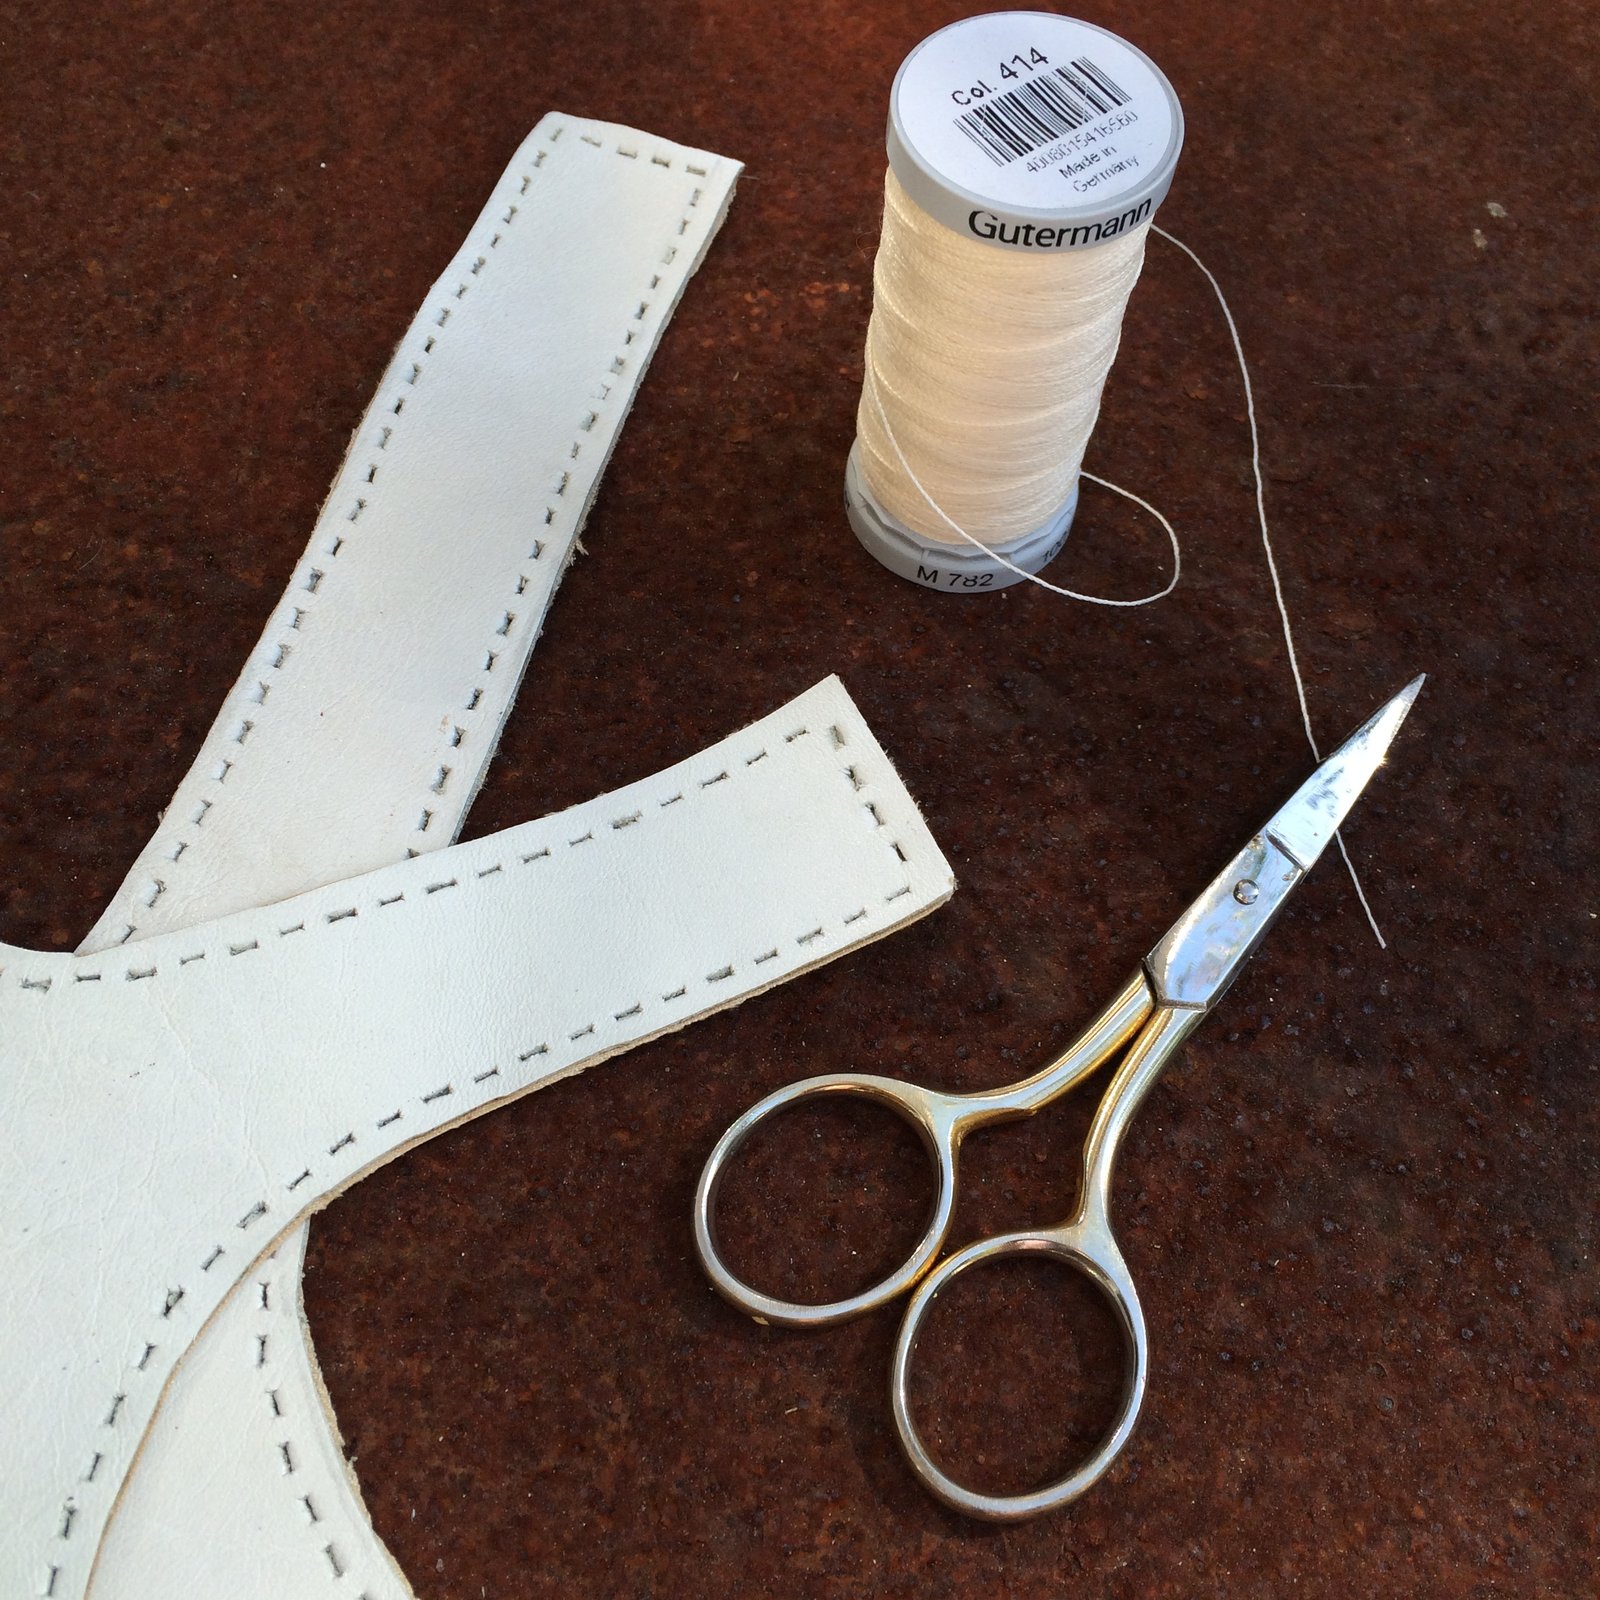
I dug out an old ivory leather clutch, that Mum had given me years ago “for the leather” and fortunately, using my old uppers as pattern pieces, I could juuuust manage to squeeze out some new uppers from the front and back of the clutch!  I lined the ivory leather with pale yellow suedette from Spotlight, punched new holes all around and stitched in an up-and-down double stitch using cream-coloured upholstery thread.  Then retailed the new uppers into the same holes…
Done!  Now my beloved clogs are super tough and sturdy, and I reckon the all leather uppers will last a lifetime!  🙂
pinterestmail

pink

I’ve rejigged these strawberry pink jeans into a skirt.  I made the jeans two years ago using an Au Bonheur des petites mains pattern courtesy of shams, thank you shams!  There’s lots of things I liked about the jeans; they were so comfortable and easy to wear, I loved the detailing on the pockets and seams but my little measuring stuff up re the positioning of the knee piece had always kinda bothered me whenever I happened to glance down and notice it.  So I hadn’t been wearing them, even though I lurrrve this delicious colour so much.

It’s pretty easy making a skirt from jeans, even avoiding like the plague those versions with the J-curve crotch portion of jeans top-stitched down on the front of a skirt and a big triangular insert plonked underneath.  No offence if you love that sort of thing, but I just do not.  I prefer for a skirt to look like a skirt.

I followed the same basic concept I did for my previous jeans to skirt refashion.  I cut out the offending knee patches and discarded them altogether; the 3D-ness of them made them too difficult to incorporate into a skirt, without looking uber-weird.  The front of the skirt is essentially straight from the hips down and the back has two flared sections in the centre lower part to give it a bit of a kick at the back.  And to enable me to stride in a brisk and purposeful manner, unfettered by a tight skirt.  
I like this shape, how the skirt appears very straight up and down from the front but has plenty of leg movement because of those flared bits. And I’m happy it’s got a new lease on life.  This colour!  It just screams spring, yes?  Yuuuum!

Details:
Top; from Pattern Magic 3, ivory cotton jersey, details here
Skirt; from au bonheur des petites mains jeans, strawberry cotton denim
Shoes; bensimon, from seed boutique

pinterestmail

Denim slides!

I’ve made some shoes!!!  This is my first foray into “proper” footwear.  Yeah, I made slippers recently, but I’m not counting those.  And technically these are slides, which are pretty basic things on the shoe scale, really.
But still.  They are real shoes!  Wooooooooooooooo!
ok, I’m sorry, calming down now.  I’m just a bit excited about them  🙂
So, for ages I’ve dreamt longingly about having a go at making my own shoes.  However cool stuff like shoe-making courses are just not on offer here in Perth.  Well that’s just that and it can’t be helped, but life is too short to not do stuff that you really want to do, right? so I just decided to GO FOR IT!  havva go, just DO it, whatever, even without a teacher or the tools or even the faintest idea of what I was doing.
The choice of denim; well every time, and I mean every time my friend J and I go out on girly shopping trips, as we head into our favourite shoe stores I say for the eleventy-billionth time; “ooh, I really would like a pair of denim- or denim-coloured shoes.”  I’ve often though they would be sooooo useful and would go with a lot of my wardrobe.  I mean, we all know denim jeans go with everything, right?  So, it stands to reason, denim shoes should go with everything too.  And; quick aside; honestly, why has that thought not occurred to shoe-makers yet?  Because so far my search for denim-y shoes has been one big, long, mournful FAIL.  It’s sad, but they are a non-existent beast.  Or should that be a pair of non-existent beasts, maybe?  I still wanted them though.
And now I have some!
Now; before I introduce my procedure for making these, obviously I am no expert and I have no idea what I’m doing.  I’m making it up as I go along with educated guesses, and I don’t have the proper equipment, like lasts or an industrial sewing machine.  I’m sure shoe-making experts would look at my efforts here and roll about, laughing helplessly at how awful they are.  It’s true, they are far from perfect.  Hopefully I can improve!

For the bases I used two balsa wood blocks from Bunnings; chosen mainly because I spotted them and it seemed like a good idea at the time.  I drew a template of each of my feet, overlaid/combined them to draw a single “master” template.  I used a coping saw to cut out the main chunks and get the right shape; and then three sheets of sandpaper to smooth and contour, ranging from super rough to light.  I used the roughest sandpaper to do most of the contouring for my foot pads and heel pads to sit in the base nice and snug and comfortable.
Shaping/contouring the wooden bases to be equal-sized and -shaped mirror images to each other and to fit my feet was the MOST time consuming part of the whole thing.  Really, ten progress photos slotted in here would be a fair and accurate representation of this step rather than just one; but that would be extremely boring, so just a few then…

I used an pair of old jeans for the denim.
I cut long strips for the side coverings, and topstitched the ends down using orange thread, to match the orange thread usually used in jeans topstitching.  Glued it in place using PVA exterior wood glue.  I chose this glue because it was not too quick-drying therefore easy to work with, and yet is still super hardwearing and durable and dries to a hard, water-resistant finish.  Not waterproof, mind you.  NOT that I’m planning to wear my shoes to slosh about in puddles or anything like that, aiyiyi perish the thought!
Clipped the curves etc, to minimise overlapping, so the edges would lie as flat as possible; and glued them down, upper and under.

Made a template for the top bits via the auditioning of a thousand “muslins”; well, not really, but it felt like it.  The winning design was cut so as to make a feature of the existing jeans’ side seam with the allowances double top-stitched down in that distinctive shade of Levi’s orange.  The tops are double layered; lined with plain denim, sewn right sides together then turned out and under-stitched.  The excess at the sides was trimmed to wrap right around underneath my foot then glued in place.

I made a padded insert by trimming a purchased foam shoe insert from Coles to fit, then stitching to a piece of denim around the edge using orange thread.  The ends were clipped, turned under and everything glued in place.

I covered the curved part of the sole with denim…

Finally, I cut thick rubber floor matting (Bunnings) to fit the soles using a stanley knife, and glued this in place.  This will be quite hard-wearing and will stand up to a lot of knocks, hopefully.

Making these was an interesting experiment, and a learning exercise in how not to do a few things.  Yes, a second pair of shoes is in the pipeline already.  My second pair will definitely be better, I think.  My first mistake; balsa wood does not hold nails, thus the need for lots of glue.  I’m definitely going for harder wood and nails in the future.
The big question for me is: am I going to dare to actually wear my shoes? outdoors? like, for a full day?  well today I almost did since I was meeting my same friend J for lunch, and I thought they went really nicely with my outfit… but then I chickened out!  Too many puddles around from the recent rain :S
Maybe I’ll just keep them exclusively for me-made May, haha!  😉
No, of course I’ll wear them, but it’s going to be hard to avoid babying them.  I’m ridiculously pleased with them.  Well so far, until I can make something better anyway!

pinterestmail

Dusting slippers

I’ve made something useful; slippers, that clean!
I pinned these mopping slippers a while ago, and have now got around to making my own.  See, we have no carpets in our house and lots of animals; meaning furry dust-bunnies appear on a daily basis to scurry and swirl across the floor like mini tumbleweeds across the desert.  Meaning I’m forever getting out my big floor dusting mop thing out from where it lives in the cupboard under the stairs and doing the sweep of the house.  Which is a chore.  Well, now I can do the same job just by performing graceful balletic sweeps with my dainty pointed toes into the corners of the room, as I glide about the house, doing whatever I’m already doing, without having to go and fetch the duster.  Hands-free.
Which is not a chore, but fun!
Well, that’s the theory, anyhow  🙂
Making them is a very simple procedure…

I bought a couple of  dusting pad refills; and also used some extra odds and sods from around the place; a thick cleaning sponge for padding so they are comfortable to walk around in on our hard floors, and an old towel for the straps and lining.  I also used a bit of an old bedsheet to “interface”, if you will; effectively it’s there to stabilise and hold all the lining and padding bits together.   The sponge I used for padding is actually a bit smaller than my feet but it still does provide a nice soft comfy padding when I’m walking around on them.  I already had these in my cleaning cupboard, which was lucky!  The sponge is very thick, so I cut it into three layers like you would a sponge cake.
I drew a template of my foot and cut out two generously sized versions out of the towelling and bedsheet lining, sandwiched a piece of the sponge between them and sewed the three layers together around the edge of the sponge.

Then cut the foot straps from the edges of the towelling, making use of the existing selvedge on one side and hemming the other edge.  Fitted it to my foot dimensions, making them nice and snug so they stay on my feet ok; but not so tight that I can’t slip my foot in easily in one go.

Finally cut the micro fibre dusting pad with a big fold over allowance all around the edges, and simply folded the edges over as I went along, top-stitching it down around the edge.

Dust bunnies; begone!
pinterestmail

Jim jams

Mundane, but oh so welcome and necessary.  I’ve been absolutely freezing!!! at night lately and my old winter jammies were as thin as! so this was highest of high on my list of priorities.  But it had to still sit waiting patiently in the wings for the all important Magicka robe to get made first, ahem.
Both top and bottom are made from nice and warm fluffy cotton flannel from Spotlight; the top is a modified version of pattern 121/122 from Burdastyle magazine 10/2009 and the bottoms are kinda self-drafted.

The top: actually I’ve been eyeing off this Burda magazine pattern for yonks and dreaming of making it up in a suedette and this new jammie top is sort of my “muslin”, if you like.   I loathe wasting fabric on muslins and nearly always prefer to make something hopefully wearable, even when testing out a new pattern for the first time.  So; this PJ top.  It was a little bit hideous in its first, unmodified state; I ended up shortening it by about 12cm; slanted off the front neckline to be a V-neck and sewed the slit together at three spots which were covered up with three little buttons.
All the seams are sort of a faux version of flat felled seams.  By this I mean I sewed all the seams normally, overlocked the raw edges cutting close to the seam stitching and then laid the seam allowances to one side and top-stitched them down 5mm (1/4″) away from the seam stitching.

at left, “looks” like a properly flat felled seam, but on the inside, o noes! it’s plain to see now that this is the cheat’s version…

I also added an interesting breast pocket; this was also a rough try-out for this pocket that I pinned a while ago.

The bottoms; standard regular baggy trouser bottoms with an elasticated waist.  I made them the same way I’ve been making my PJ bottoms for yonks now: namely years ago I saved an OK-fitting RTW pair that had had it, and cut it up for a pattern.  I’m saying “self-drafted” because I’ve made multiple minor modifications, in this case an added a faux fly front, narrowed the waist and raised the waist rise, made them wider in the leg and longer in the leg and added in-seam side pockets.  My advice, PJ bottoms are like the easiest thing in the entire world, so when you are looking for a good pattern, just cut up an old pair for a pattern and make your own little modifications, do whatever you like, it’s almost impossible to stuff up PJ bottoms.  Easy peasy, and you can spend that money saved on the fabric for your new pair instead!

Details:
Top, modified version of Burdastyle magazine 10/2009, 121-122, cotton flannelette,
Bottoms; self cobbled together, cotton flannelette
Socks; hand-knitted by me to a 60’s pattern, details here

pinterestmail

Little black polka-dots

I’ve made a dotty little cardigan  🙂  Yes, it seems like I’m turning out new stuff everyday, but the truth is that some of my recent items have been finished for up to a few weeks or more and it is just my photo-taking that has been lagging.  Not the pink lingerie, which I  really did only finish yesterday.  But certainly this cardigan and my yellow skirt.  I have me-made May to thank for kicking me into action, photo-wise  🙂
I bought this coffee and black polka-dot knit fabric in Tokyo while shopping there in January with Yoshimi and Cassie.  I can’t remember the name of the store but think it was Yoshimi’s favourite knit store?  The fabric came in several colour ways, each of which I loved!  at first sight!  with a passion!  and it was soooo hard to pick just one.  I spent ages and ages, dithering over the gold, the teal, the purple, the coffee.  Obviously coffee won in the end, but there was inner angst at leaving the others behind.  The store owner gave us each a pen and a lolly, just for shopping, or maybe to thank me for leaving at last  😉

I bought another absolutely divine burnt-chocolate knit at the same store, another hard-thought out decision.  Seriously, the fabric shopping in Tokyo is too fabulous for words.  I would so love to go every year!
So, I like polka dots, but I particularly like them if they are either :
A. a bit randomly placed 
B. irregularly sized and 
C. a bit splodgy and undefined in their outline
Yes, yes and yes.  This one ticked all the boxes!

The design is based roughly upon the shape of a favourite RTW cardigan with a few minor shaping modifications.  I sewed all seams on my machine then finished the raw edges on my overlocker, and stabilised the shoulder seams inside with Seams Great, a gift from velosewer, thank you Maria!

The neckline band is cut on grain because there is almost no stretch in that direction and I joined the pieces on the bias; a joining seam can just be seen in the top right section in the picture below.   I started joining band strips on the bias like this on my raglan-sleeved baseball tee, did it for all my Netties; and it’s become my new little “thing” to do because it greatly reduces seam allowance bulk in the band at that joining point and so makes for a much smoother and neater band.  I can write a little how-to if anyone is interested?  

I finished the hems and bands by hand because I wanted the finishes to be as invisible on the outside as possible.   I applied a strip of iron-on interfacing to the quarter of the front band strip that was going to be the outside bit to stabilise it; sewed the band onto the front edge by machine, turned under the outer seam allowance and hand-stitched it down inside.

The buttonholes are by machine though.  I practised a few buttonholes on scrap to make sure my machine wasn’t going to chew through the fabric before going at it for real.  I was pretty pleased that they actually worked out pretty good  🙂
The black buttons are from Fabulous Fabrics.

Details:
Cardigan; my own design, coffee with black dot knit with only a little widthwise stretch.
Tshirt; never blogged, it’s just a plain self-drafted thing in beige jersey
Skirt; Burda style magazine 10/2010-136, (the Karl Lagerfeld skirt) lengthened, black wool suiting, details and my review of this pattern here
Tights; self-drafted, black merino, details here and my tutorial for drafting your own custom fit tights here
Shoes; Django and Juliette, from Zomp shoes
Sunnies; RayBan

pinterestmail

Navy blue tights

I really really wanted some navy blue tights.  Basically I have two, yes, two! navy blue corduroy skirts for winter, and a coupla hand-knit cardigans including this one which are mainly midnight blue and which I want to dig out and wear more, quite a lot of other navy blue stuff too, ahem *blush* and so matching tights seems like a Plan.  Man, I’m getting so sensible lately.
Anyway…  *ten minutes of sewing later*   DONE!
Well, apart from the fact I had to go back to the fabric store twice, but I’m not counting that.  No, I’m not.  I had a small disaster wrt the fact that you really should check twice before laying the pattern piece down to really make sure as in beyond reasonable doubt that the degree of most stretch is going to be horizontally; or around your legs.  More importantly, around your hips.  Because if you get it wrong you might not be able to get your brand new freakin tights up over your freakin hips.  But let’s not dwell on that now.  The past is in the past and I’m moving on.
I have tights.
Fabric is a rayon/viscose from Fabulous Fabrics.  It’s fabulous, warm and with terrific recovery, and my second attempt is perfect.
Actually I do have several other new things to show here, but my photo-taking and documentation is dawdling.  I’m taking part in me-made May, which has become kind of like the unofficial Annual Seamsters’ Convention, albeit a virtual one.  I’m in the Flickr group, and I’m trying to spend a sensible amount of time on it all so blogging-wise I’m pacing myself.  New things to appear here very soon.
Later dudes!

Tights; my own custom fit pattern, details and my tutorial on how to make your own custom fit tights here
Skirt; Vogue 1247, navy blue corduroy (made from old jeans) details here
Top; loose draped top from drape drape by Hisako Sato, white crinkly jersey knit, details here
Cardigan; hand-knit by me using Patons 8ply wool, to a Patons pattern, details here
Shoes; Francesco Morichetti, from Zomp shoes

pinterestmail

Further Alabama Chanin-ing

Hello!  I am getting started on my next Alabama Chanin project.
Yes, an authentically executed Alabama Chanin creation is a big time commitment but I really enjoyed making my 3-piece set and it is nice to have a hand-held project to work on slowly, something easily transportable that doesn’t require much space or special equipment or a lot of thought but that you can just pick it up and get on with, a little bit at a time.
I’m using some hot pink jersey knit from my stash, bought in the Fabric Store in Melbourne during one of my trips over there with Mum and Cassie, I’ve forgotten which one now.  Probably the previous one, hmmm…  Actually, I had pulled this fabric out in the early planning stages of my recent SWAP and marked it as a definite; that was before eyeballing the rest of the long term stash residents that I was keen to sew up and realised that colour-wise, it didn’t fit in at all.
And it still didn’t.  Really, hot pink? I don’t know what I was thinking.  My current way of thinking wrt my wardrobe is to have it mostly subtly and/or autumnally shaded, and while in theory I like hot pink, in reality I was just like; ah, No.
So, step one; wash, soak and dye the fabric.  I used a small shake each of iDye in Brown, Yellow and Chestnut in the dye-pot.  Sounds hideous? well I did do a small sample first and thought it a huge improvement.  So that was a go.  My fabric was a slightly variegated hot pink and became a slightly variegated rusty-purply raspberry.

Cutting and Printing:  This is where things got tricky… I received an email recently from Carolyn in Florida, asking about the curl factor of jersey and how did it affect the Alabama Chanin technique.  Well, in the case of this particular fabric as can be seen in the photo above, the curl factor was extreme and the edges of my fabric curled up so badly And they just would not lie flat by themselves.  From a screen printing point of view this is disastrous.  I wanted to have my screen print go right up to the very edges of the fabric, and so the edges just had to lie as flat as possible.  So for a quick and easy fix-it I just used regular household sticky tape to tape just the very edge of the fabric down to my backing newspaper, just inside the seam allowance and immediately prior to printing.  Not a pretty or elegant solution, but it worked pretty well!

Printing the fabric seems to have tamed the curl quite a lot too!  The seam allowance for Alabama Chanin designs is small, like 5mm or so, so you do need to print right up close to the edge.  I’ve found from my first project that I prefer to have my embroidery right up to but preferably not within the seam allowances, though.

I will say; if your fabric does curl very badly I can see the case for printing then cutting out.  I do have my reasons for preferring to print after cutting out; reduces waste of expensive printing ink since you’re only printing what you are using: heckuvva lot easier when manipulating the smaller pieces to get a very good placement of print.  That last point is my primary reason for doing it this way, and I’m still glad I did cut out first.  I guess this is something that the individual will have to decide for themselves when embarking on a project like this  🙂

The Stencil:  This time I chose the Abbie’s Flower stencil from the book Alabama Chanin Studio + Design, by Natalie Chanin.  I enlarged it by approximately three times using the good ol’-fashioned method of drawing a grid on the design, then drawing a bigger grid on your paper in which you painstakingly copy each little square on the bigger scale.  Like we used to use in primary school; from back in the dark ages, before photocopiers.  Ha!

I thought the overall motif was still a bit small and my least favourite part of printing is placement of the screen for repeat printings.  I mean; if your motif is larger in area then you decrease the number of times you have to re-place the screen on your piece of fabric; and the less placement the better, imo.  So I ad-libbed putting more motifs from the Abby’s Flower stencil around about and added in a few random leaves and curlicues of my own too, until my stencil covered the maximum area I could get on my screen.

The embroidery technique I have chosen for this project requires keeping the printed motifs intact in the final garment, so I needed to print the motifs in proper fabric paint instead of the discardable house-paint that I used for my first project.  I used Permaset water based Textile Printing Ink from Jacksons, and mixed a deep oxblood red/brown colour using orange, crimson and a bit of green.
My green had a few chunky bits in it that didn’t mix in properly, and I really like the few areas of streaky green that showed up in the screen print.  It’s almost a pity that they will be mostly covered up by my embroidery!

My print placement was not perfect: note; it never is! and after I’d finished I noticed a few largish gaps that stood out visually in a not-good way.  So the next day I mixed up a teeny bit more paint, cut a new, very small paper stencil of two leaves and carefully printed in a few of these in the gap areas. The design looks quite irregular so I think it worked out very well.  They stand out like a sore thumb right now because they are a deeper colour but I’m thinking they’ll probably blend in OK once I get embroidering  🙂

pinterestmail
Switch to mobile version
↓