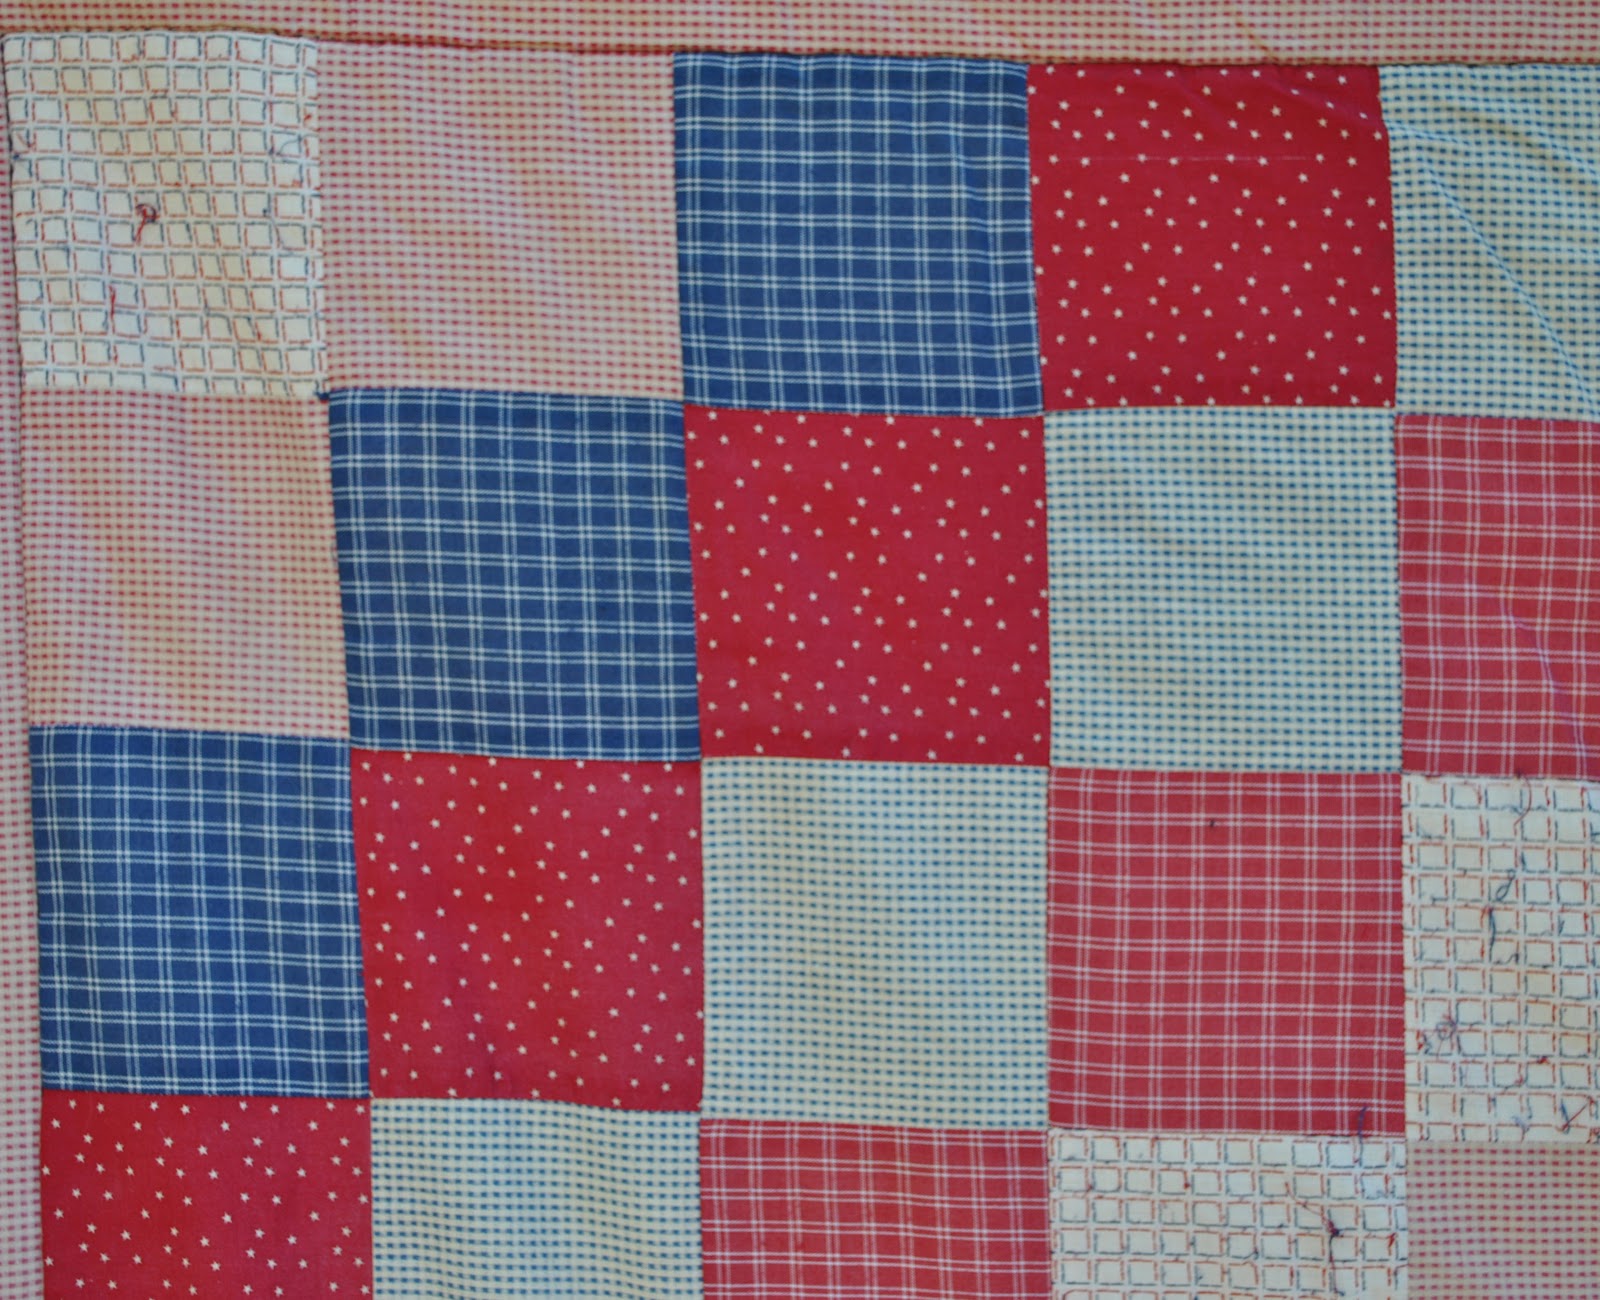
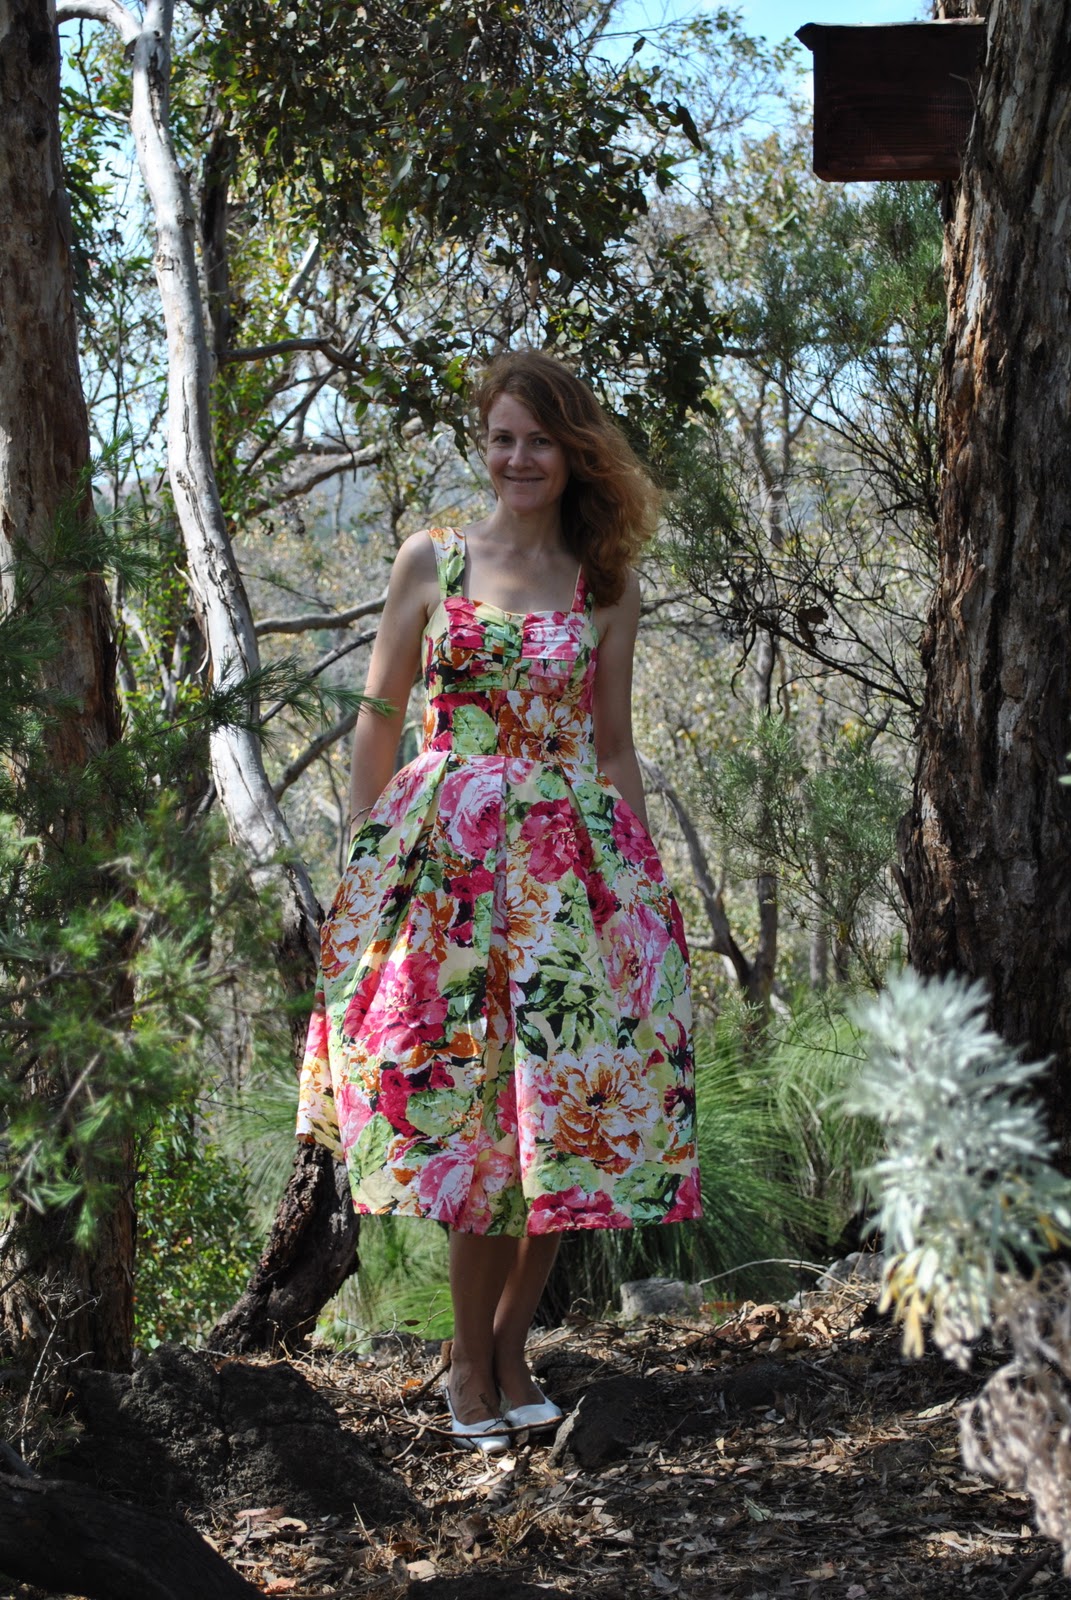
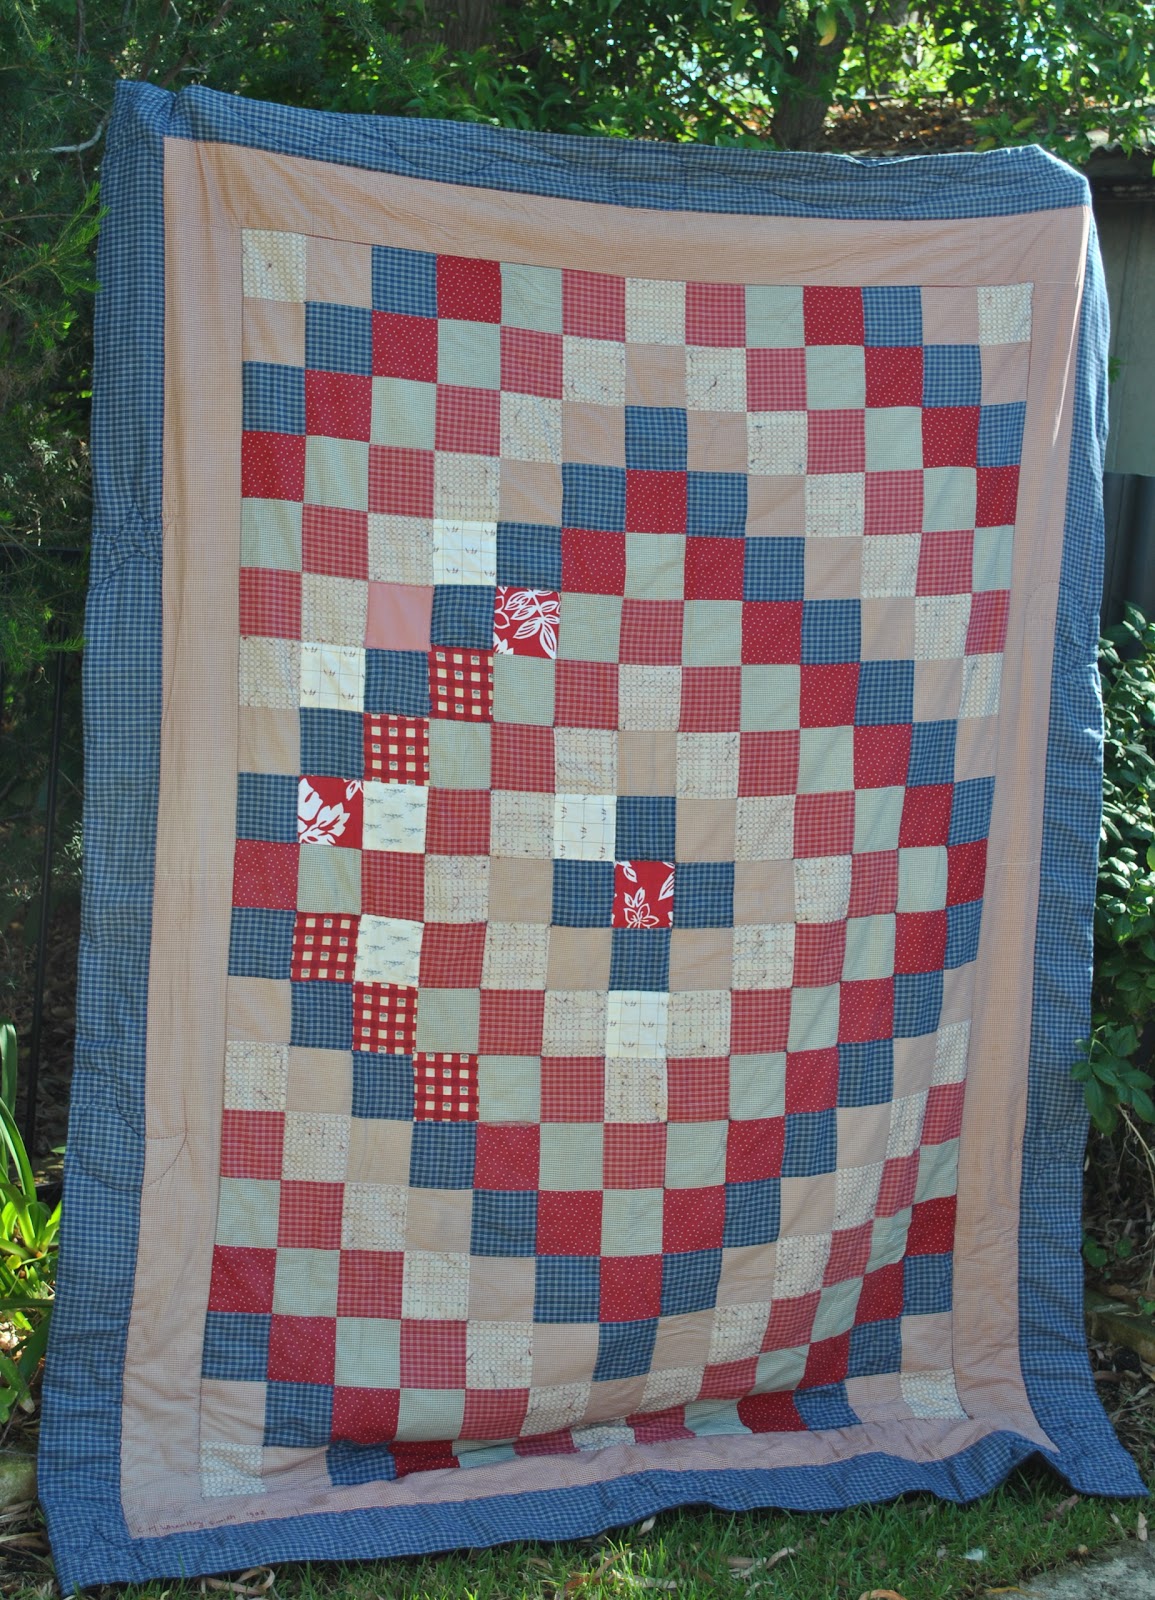
I’m a bit embarrassed putting a picture of this up here now, because it’s quite old and worn now and has really seen better days, but that is the nature of quilts, right? That they are supposed to age gracefully and naturally, like fine wine (and women) and take on a character and story all of their own with each little rip and patch?
And I did set out to document as much as I could, even things that have had a rough life…
This was my first effort at a full bed-sized quilt. I hadn’t really done any quilting prior to this, apart from a little baby floor quilt which was done totally on my machine, posted here.
So, in my usual way, I rocked up to Calico House (as it was called then, now Calico and Ivy), just bought a selection of boy-ish type of fabrics and went home to nut it out for myself. I can recall the ladies in the store were a bit scandalised that I wasn’t going to take any lessons, or even buy a book. How hard could it be, I reasoned? Patchwork and quilting is hardly rocket science. Me being a bit gung-ho, I inwardly scoffed at the idea of needing instructions… I just did up a rough mud map of what I wanted and then made some measurements of numbers of squares times dimensions, added all up, to work out how much fabric I would need. The backing is a single sized navy blue flat sheet.
It’s a very simple design. The edging is very amateurish, I turned under the edges and overstitched by hand all around the edge. I only quilted around the edges of the quilt; both in the ditch and a few stars, moons, suns and swirls in the border by hand, the middle part of the quilt is knotted at the corners of each square with surgeon’s knots. Right now I will confess that this is an inferior method to traditional quilting; it looked nice but did not make for a robust quilt. As a toddler Tim used to love to sit on the side of his bed and slide himself along with the quilt on to the floor… yeah… Activities like this, coupled with the flimsy knotting do make for a short life-span… and as you can tell, some of the fabrics in the middle have worn and ripped with use and been patched with other fabrics.
And, early in its life I used to carefully handwash in the bath tub, but nowadays I just toss it in the washing machine.
C’est la vie. I’m a big one for believing things should be used and loved on a daily basis and not tucked away preciously for special occasions, and this quilt has definitely been much loved and used, and still is to this day. That’s all that counts for me.
Tim’s quilt
A walk in the park
A day of colourlessness (ness, ness) is often followed by a more colourful day, in my world.
And today is a bad hair day, sorry. Thus the pony. I am getting my hair cut this afternoon, and I am so sorely tempted to wait until I am salon-coiffured all fabulously before taking a photo… but I am just too busy later on today. So a dog-walking photo with messy hair it had to be.
In sewing news, I am nearly finished another little floral floaty summer dress, and just needed some lining fabric so headed up to my favourite fabric shop. And they were having a massive pattern sale! So I just had to… Fired up with enthusiasm and a misguided optimism about my own time-management abilities, I bought three new dress patterns, below. I’ve got so many new patterns to try out… I’d better get cracking.
Details:
Dress; partly based on McCalls 4453, partly my own design, red/pink polyester chiffon, to see this dress styled in 6 different ways go here
Ballet top; Metalicus, found secondhand
Sandals; Vincenzo, from Soletta shoes
Sunnies; RayBan
Nail varnish; BYS Mint Condition
Scrap dress
You know how after a sewing project is finished you nearly always end up with scraps, sometimes of such a decent size you can’t toss them out… but not enough to do anything with on their own. So sometimes I try to actually cobble these scraps together to make some sort of wearable thing. This is a plan that meets with variable success…
In spite of which, I’ve made a simple little day dress, out of some of my most recently generated scraps. I think it will be OK for this summer. Basically it was a free dress. Oh, OK I did have to buy a zip, so technically it cost a couple of dollars.
I used New Look 6699 again, modified. I kind of winged the skirt, as I didn’t have enough fabric for anything. This one falls somewhere in between the two in the pattern; more A-line that the pencil version, but not as wide as the other. The lower tiers are all attached under the hem of the top skirt. I hemmed some but not all of the tiers, because I like the idea of the skirt getting a little raggedy and frayed, I think this look will accentuate the vaguely peasant-y vibes the dress has already.
I also altered the neckline of the bodice and put in a picture below of the bodice and pattern pieces, for the following reason: My sister-in-law and I were recently discussing a pattern which she had dismissed because it was a V neck, but of course the neckline of a bodice is the easiest thing to alter about a pattern. You don’t have to cut along the lines of the pattern, just cut out the one you prefer. Also this pattern has sun-dressy straps with buttons closure at the back while I wanted a one-piece back bodice, so I just pinned the two pieces together and cut out as illustrated below in the photo. One thing to keep in mind, if you do this you will need a longer zip… This fabric is the leftovers from Sam’s shirt.
This is a close-up of the shot cotton fabric I used for Craig’s shirt, the leftovers of which are the midriff and the lower tier of my new dress. Here you can see the bright blue warp and the neon yellow weft. Amazing to think such a subdued colour can come from these brights, no?
The bodice is lined with the leftovers of the primrose voile I used for the petticoat of my Christmas dress. The scraps of the Christmas dress itself have been used as one of the skirt tiers, and as bias binding on the neck and armhole edges. Actually I think this bright floral bias binding against the black and white check turned out to be my favourite feature of this dress.
The other blue skirt tier is from the very last leftovers from this shirt and this dress.
The skirt front and back is the leftovers from this dress.
Detail:
Dress; New Look 6699 with modifications, partly my own design, various cottons
Sandals; Mican by Joanne Mercer, from Hobbs shoes
Nail varnish; BYS Mint Condition
Cassie’s dress
This is the dress I made our daughter for her Christmas present this year. I know her tastes very well and could picture exactly the dress I wanted to make for her, but was quite anxious about how to go about it. Cassie is the most difficult one in the family for me to sew surprises for, for the following reasons:
1. In order for her to like it, it had to fit her perfectly; neither tight or clingy, or worse, saggy and baggy.
2. I wanted it to be a length that made both of us happy. Once upon a time, not too long ago, if you had drawn up as a simple Venn diagram of preferred dress/skirt lengths for Cassie, comprising two sets representing mine and Cassie’s preferences; the intersection of the two sets would have been quite a tiny one. Luckily she has grown up some and is aware that while barely bum-skimming skirts might be greatly appreciated by guys when a girl bends over to pick something up, that sight of publicly exposed knickers is often a moment of horrified self-awareness for that same girl’s friends. “OMG, don’t tell me I’ve ever looked like that?!!
3. She loves sewing herself, so is always super aware of what I am currently sewing. She also loves to go through the fabric stash, looking for something suitable for herself, and often wants to come with me if I go fabric shopping. This makes embarking on a secretive project an extreme challenge.
So, how to make her a secret Christmas dress, that fitted perfectly, and of a length that she would be happy with?
Well of course, it couldn’t really be much of a secret in the end. But she has a sense of humour and we managed a compromise… she stood in the laundry with her eyes shut while I did the fitting. Again with her eyes shut, a mutually satisfying length was decided on. The surprise for her was just the final look.
The stretch lace I used for this very simple Tshirt dress is of course see-through on its own, so I lined the dress completely with a soft silky like jersey matched in colour to the dress. The sleeves are unlined. I positioned the body and sleeve pieces on the length of fabric so the natural edging edges the sleeves and lower hem. The seams are all overlocked to finish on the inside. I didn’t finish the lower edge of the lining because it is that wonderful type of jersey that never frays.
I think she looks just beautiful in it.
And she loves it too, so I couldn’t ask for a more happy result!
A boxy little jacket; a refashion
I’m so pleased with this latest refashion that I finished just yesterday, that I just had wear it even though it’s really too hot for this time of year…
I took an old pair of too big, light cotton twill pants that my mother didn’t want anymore, and made for myself this loose unstructured jacket that I am now totally in love with…
I realise it may not be everyone’s cup of tea and I’m not sure Craig is very keen on it, but meh… I really like it!
I first got the idea after seeing some of the Desigual designs, using old jeans upside down as the bodice of dresses, see below from Desigual. I know, I know, mine doesn’t look much like this, but I’m just trying to illustrate where my original inspiration for this idea came from…
Dressing for a road trip
What to wear for a very long hot drive down into the country; joining the entire clan for a massive Christmas celebration en famille…? Exhibit A.
Comfortable.
Cool.
But vaguely halfway stylish and not tooooo casual; for the dropping off of a few prezzies and returning an overdue video on the way, and a short interval hopping out of the car at the halfway point petrol station, the only times the general public will view my person and possibly judge the book by its cover. Er, that’s me, the book, natch, being judged by my clothing by the way, in case you missed the tenuous reference…
Not that I had to worry, the standard of dress amongst drivers hanging out at the middle-of-nowhere petrol station today was… well, low, to be blunt. But I still like to make some effort. After all, I’m with my family, and I still care that they see I have some self respect, and make the effort to look nice. That matters.
I’m sure they will still love me all the same.
But that’s not to say I won’t be going all out tomorrow; steppin’ out in my new dress. Yaas, managed to finish it and I’m dying to show it off. Never too weary to get excited about a new party dress…
One sleep to go…
Details:
Top; my own design, refashioned from an old pair of linen pants, here
Shorts; Burda 7723, white linen
Thongs; Mountain Designs
New life for an old polo Tshirt
Dipping into the ol’ bag of toss-outs I took out an old polo Tshirt of my husband’s. He never wears it anymore, but the fabric is quite OK if not super duper beautiful or anything… It is made of a type of sport’s fabric which is really cool to wear in summer so I thought of turning it into a little summer dress.
First thing, it had an embroidered logo. Obviously that was not going to do…
So I unpicked the pocket and moved it up and over the logo to hide it. I also unpicked the neck facing and seam holding the collar in place and removed the collar, and cut off the sleeves.
Using an old favourite pattern Burda 8071, I cut out a dress body, keeping as much length as possible and keeping the original hemline intact to become the new hemline of the dress (hey, every bit helps). In lieu of the body darts stipulated in this pattern which would not have worked with this kind of stretchy jersey fabric, I simply removed a slice from each of the side edges that would have been the dart allowance…
I re-used the sleeves to cut out pocket pieces, constructed these and inserted them in the side seams.
Now as polo shirts button up at the centre front I was aiming to keep this feature and use it for the dress’s closure, rather than putting in a zip. With the very last leftovers from Craig’s striped shirt, I managed to get out the pieces for the bodice, cutting the back in one piece and the front with a button and buttonhole band for a centre front opening. I used a little scrap of piping cut on the bias to add some interest to the front opening. The lining was the last leftovers from my most recent white shirt…
The shoulder straps are just some cotton banding I had in my stash, and on the bodice I used little white shirt buttons matched in size to the navy blue buttons already on the polo shirt…
The inside seams of the dress are finished with overlocking, and the bodice lining is invisibly slipstitched in place.
Et voila! Not glamourous, but I think quite cute enough, and will be a very useful little knockabout dress for a hot working day around the house.
Which is what is on the agenda for today…
Details:
Dress; partly Burda 8071, partly my own design, refashioned from an old polo shirt and some scraps
Sandals; Micam by Joanne Mercer, Hobbs shoes


