Tag Archives: Top

Sandy top with gold bits

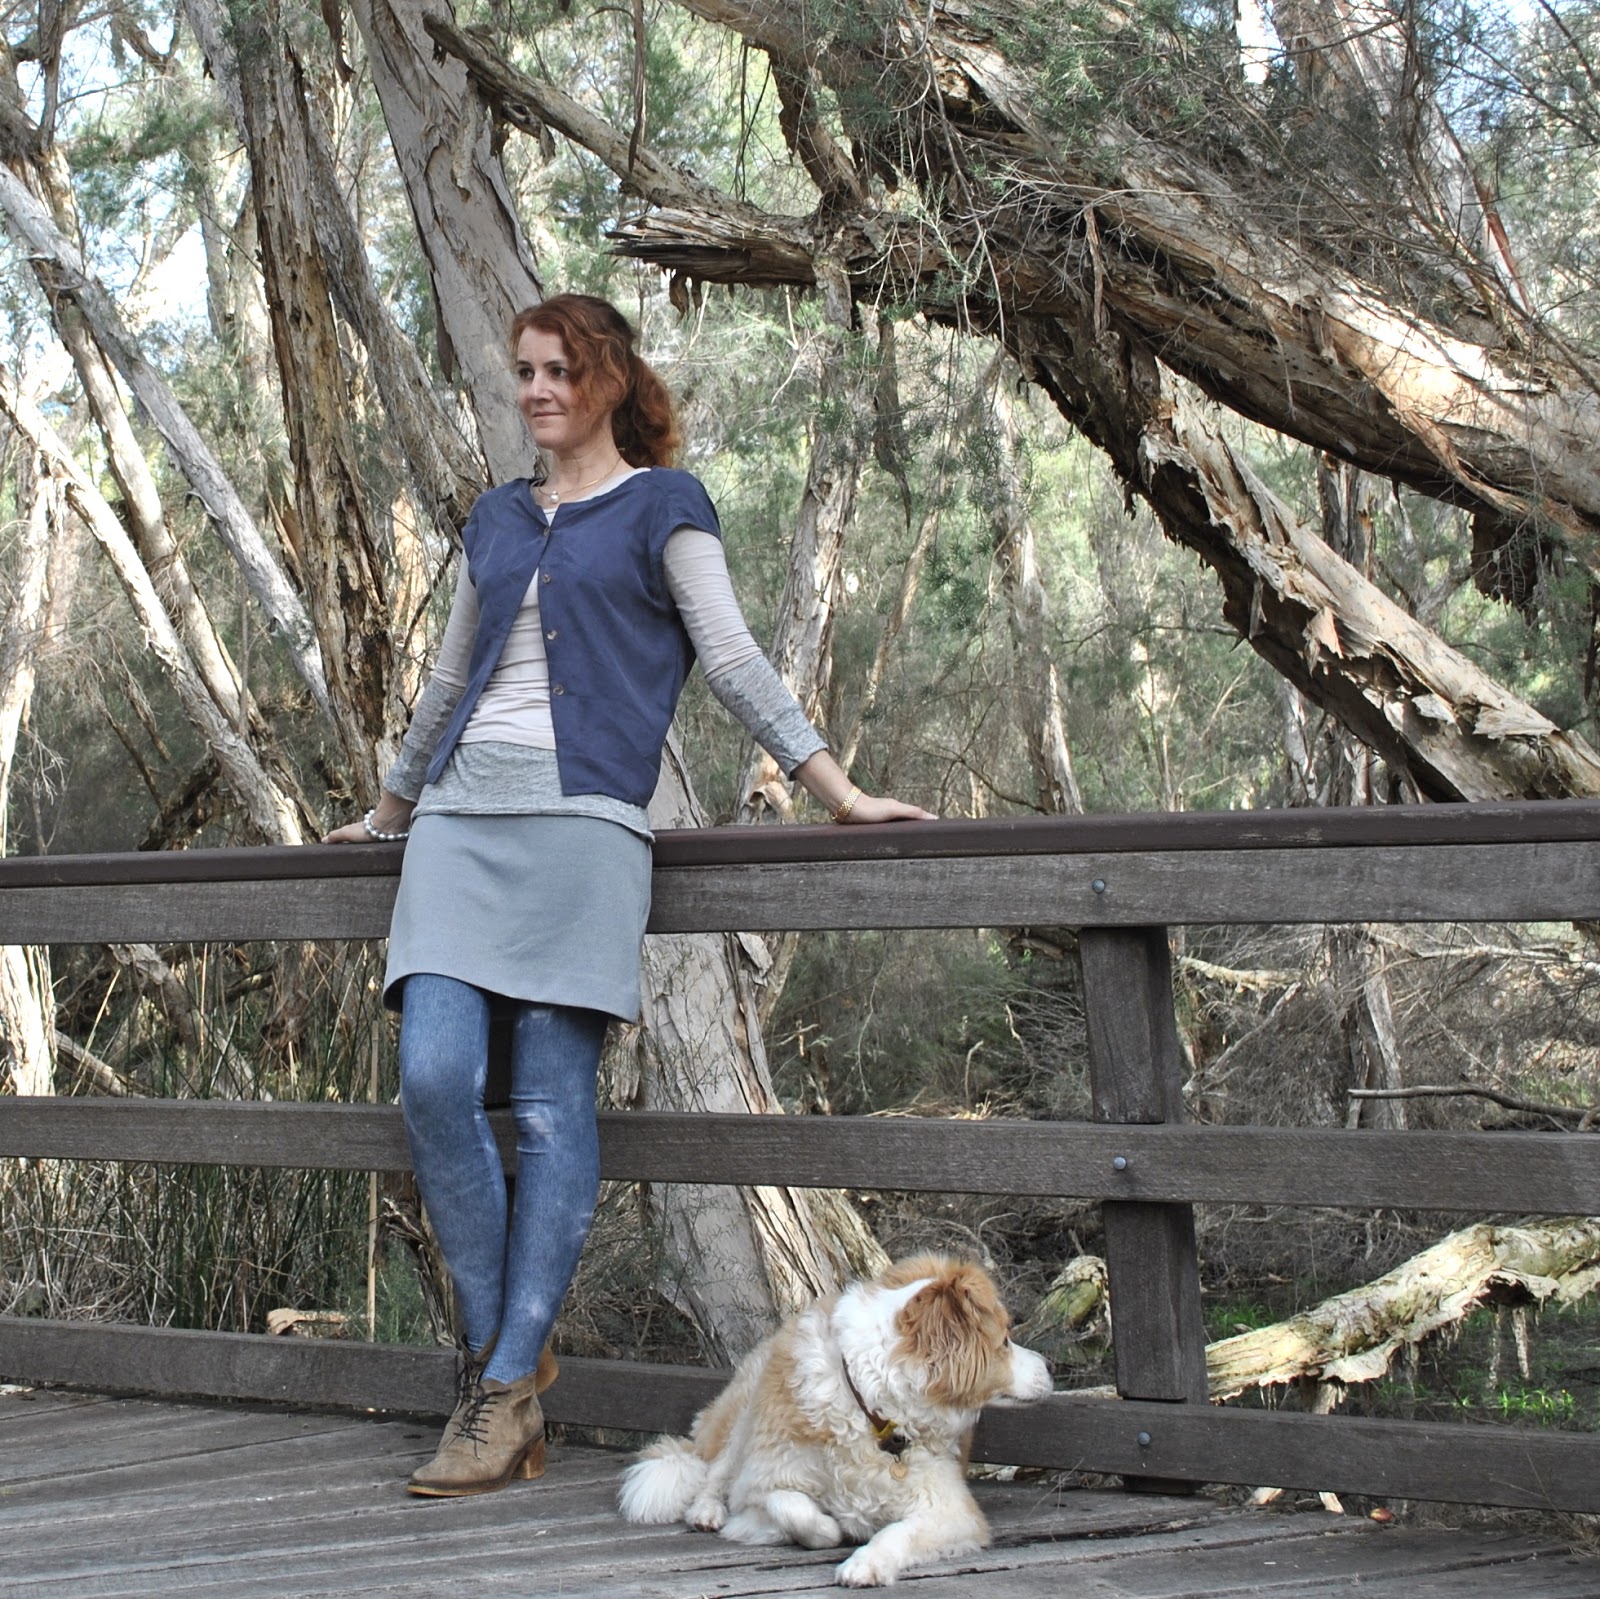
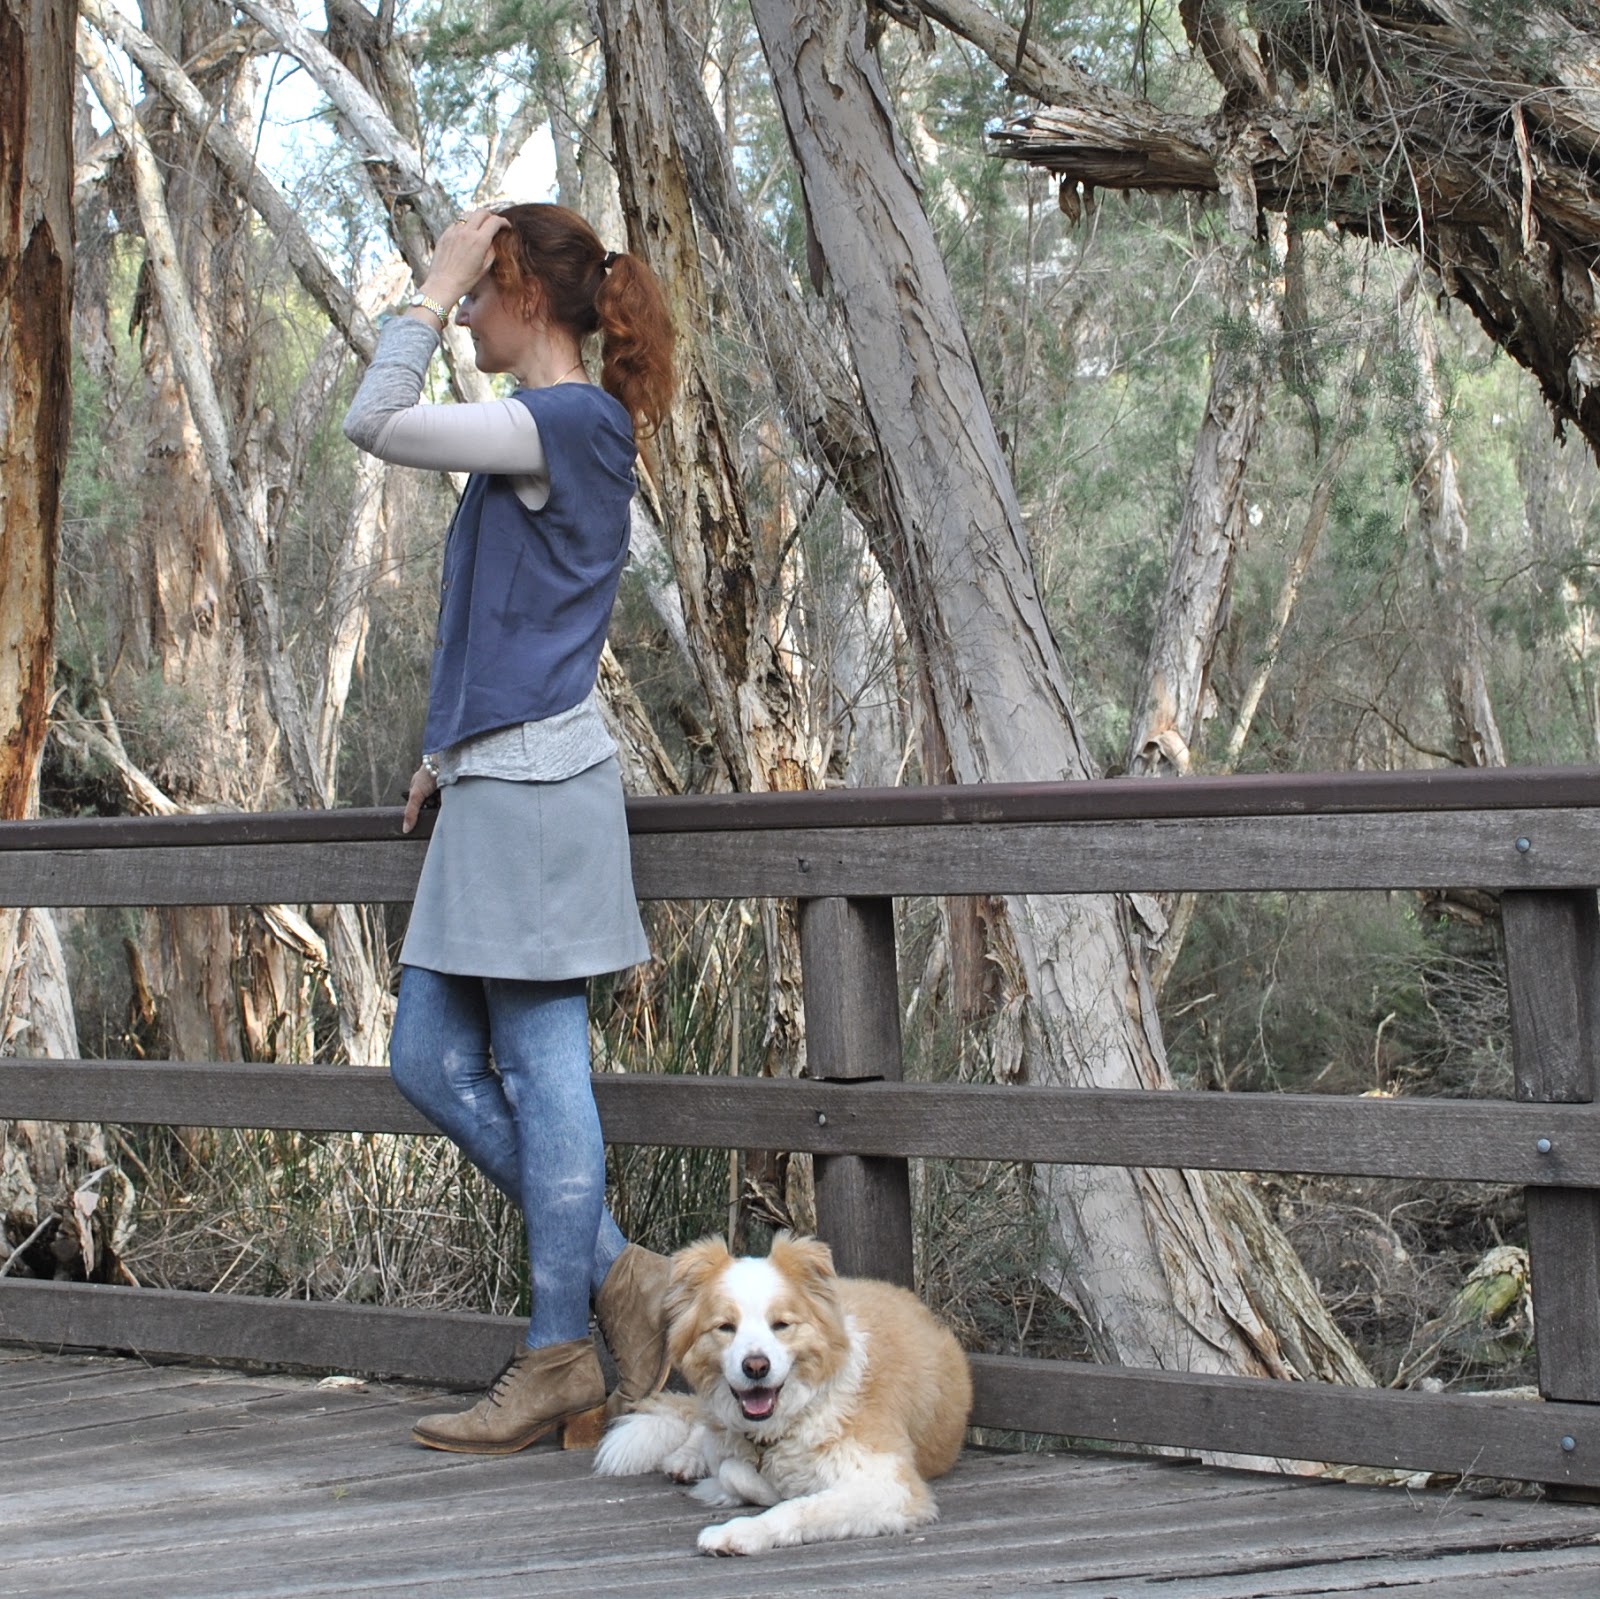
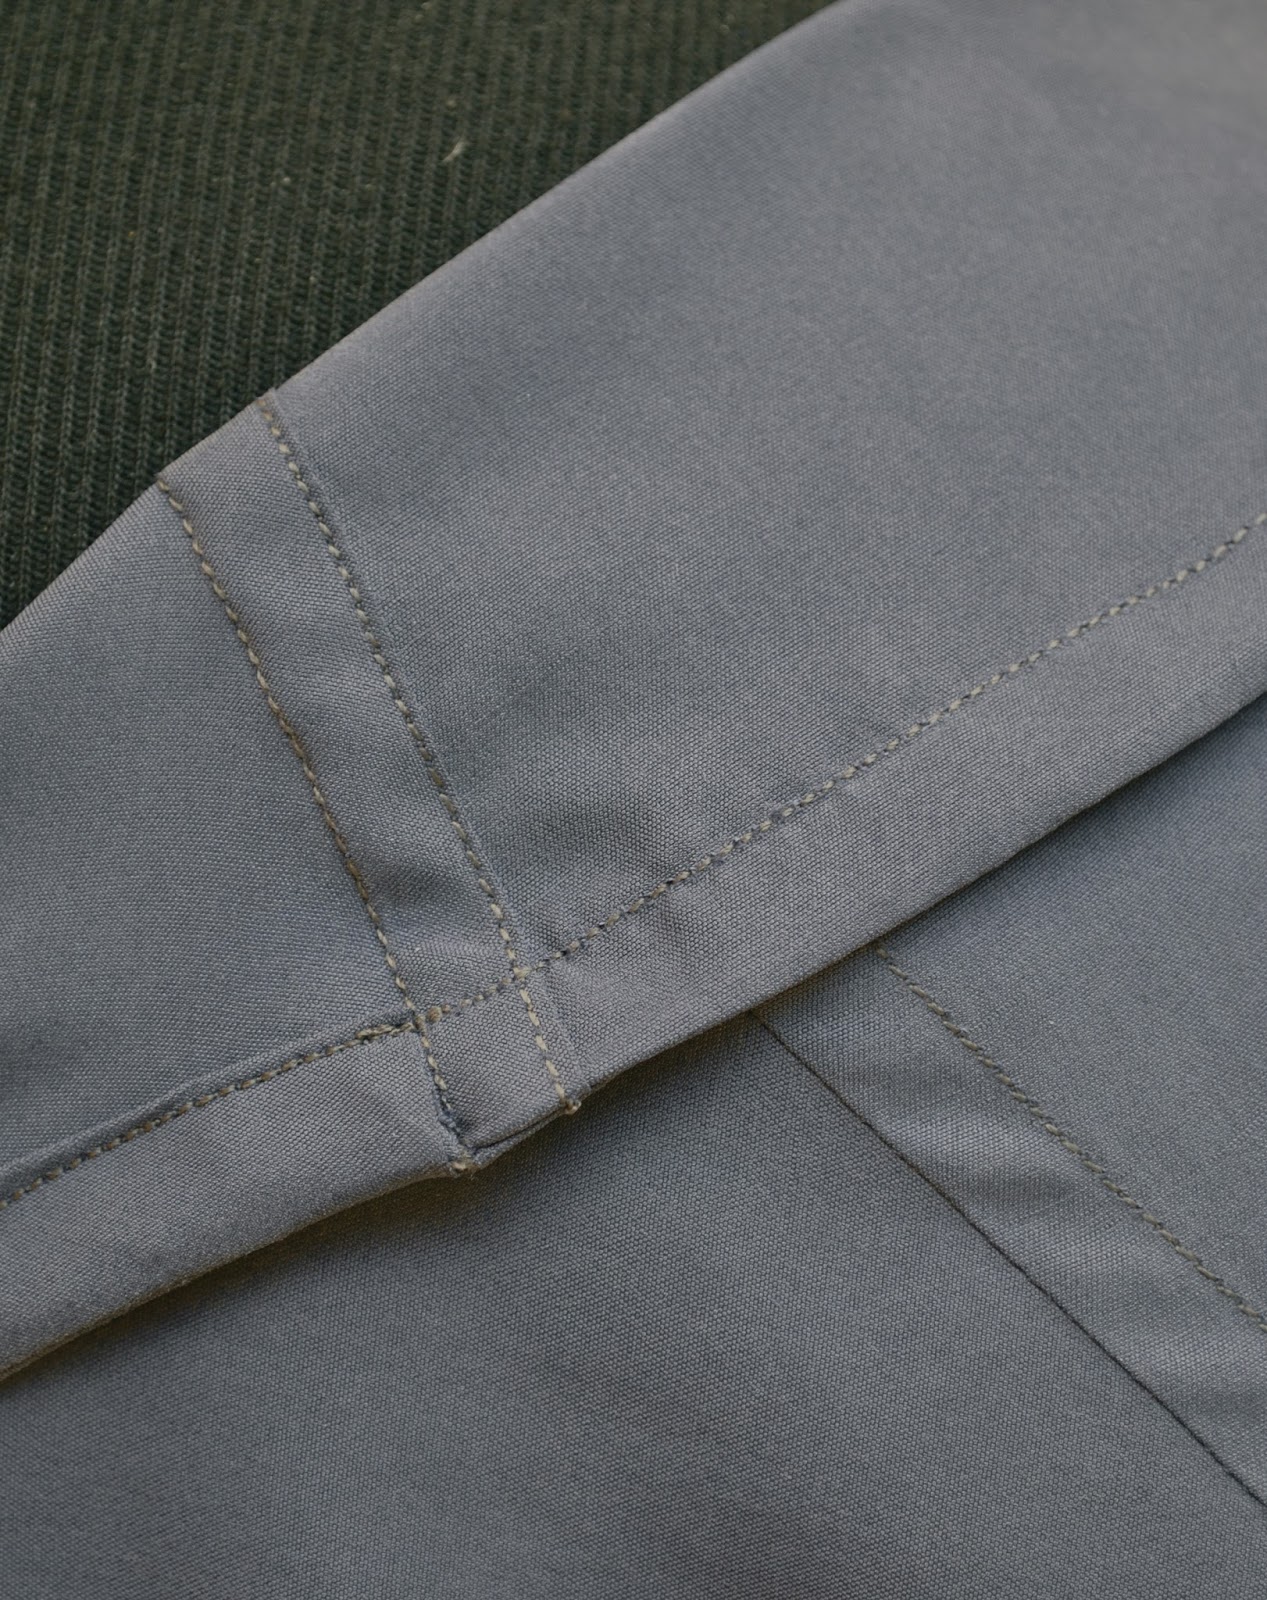
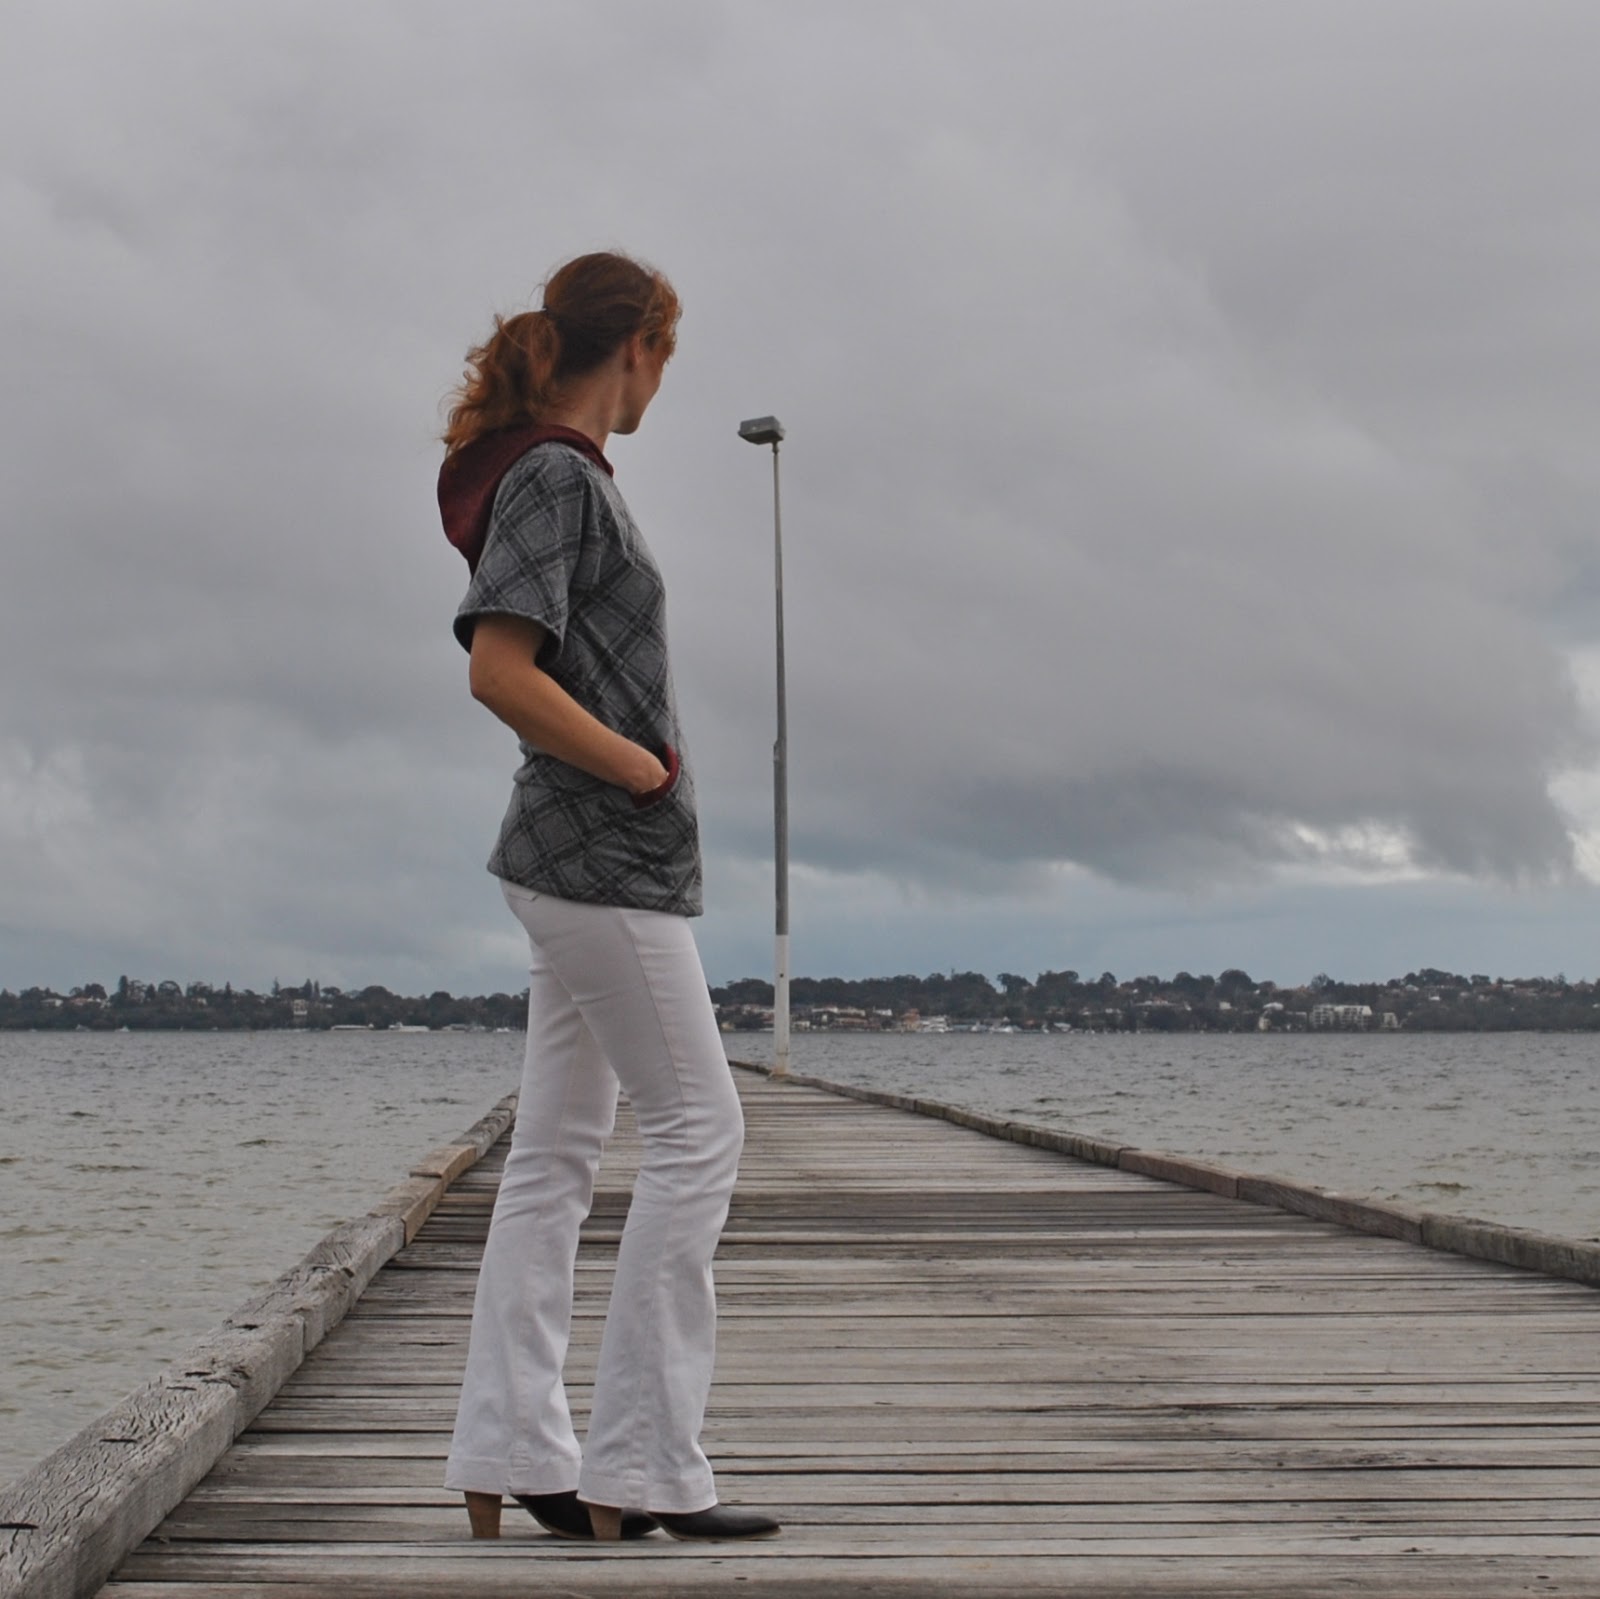
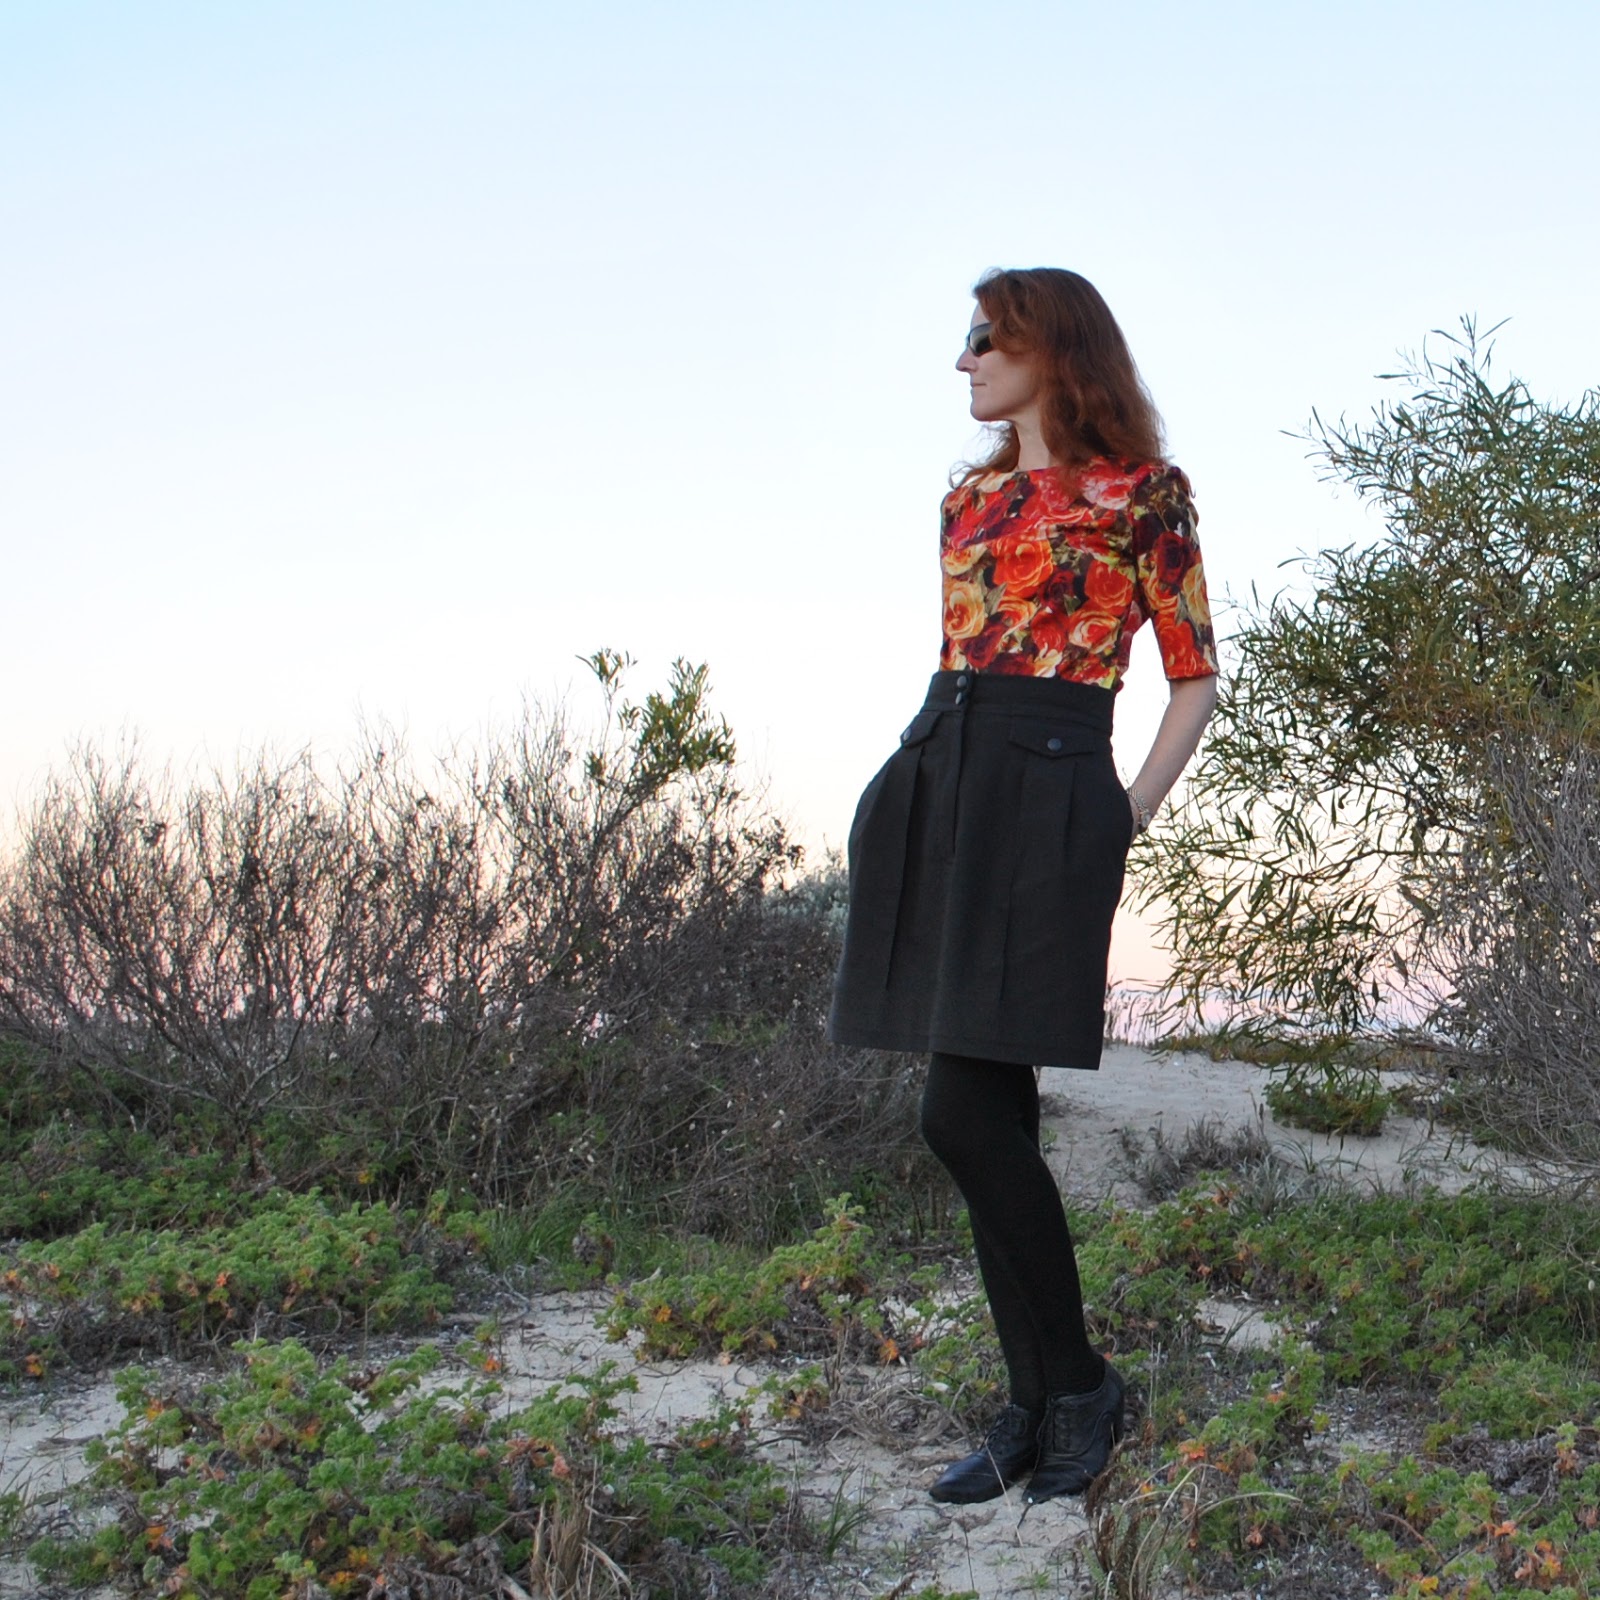
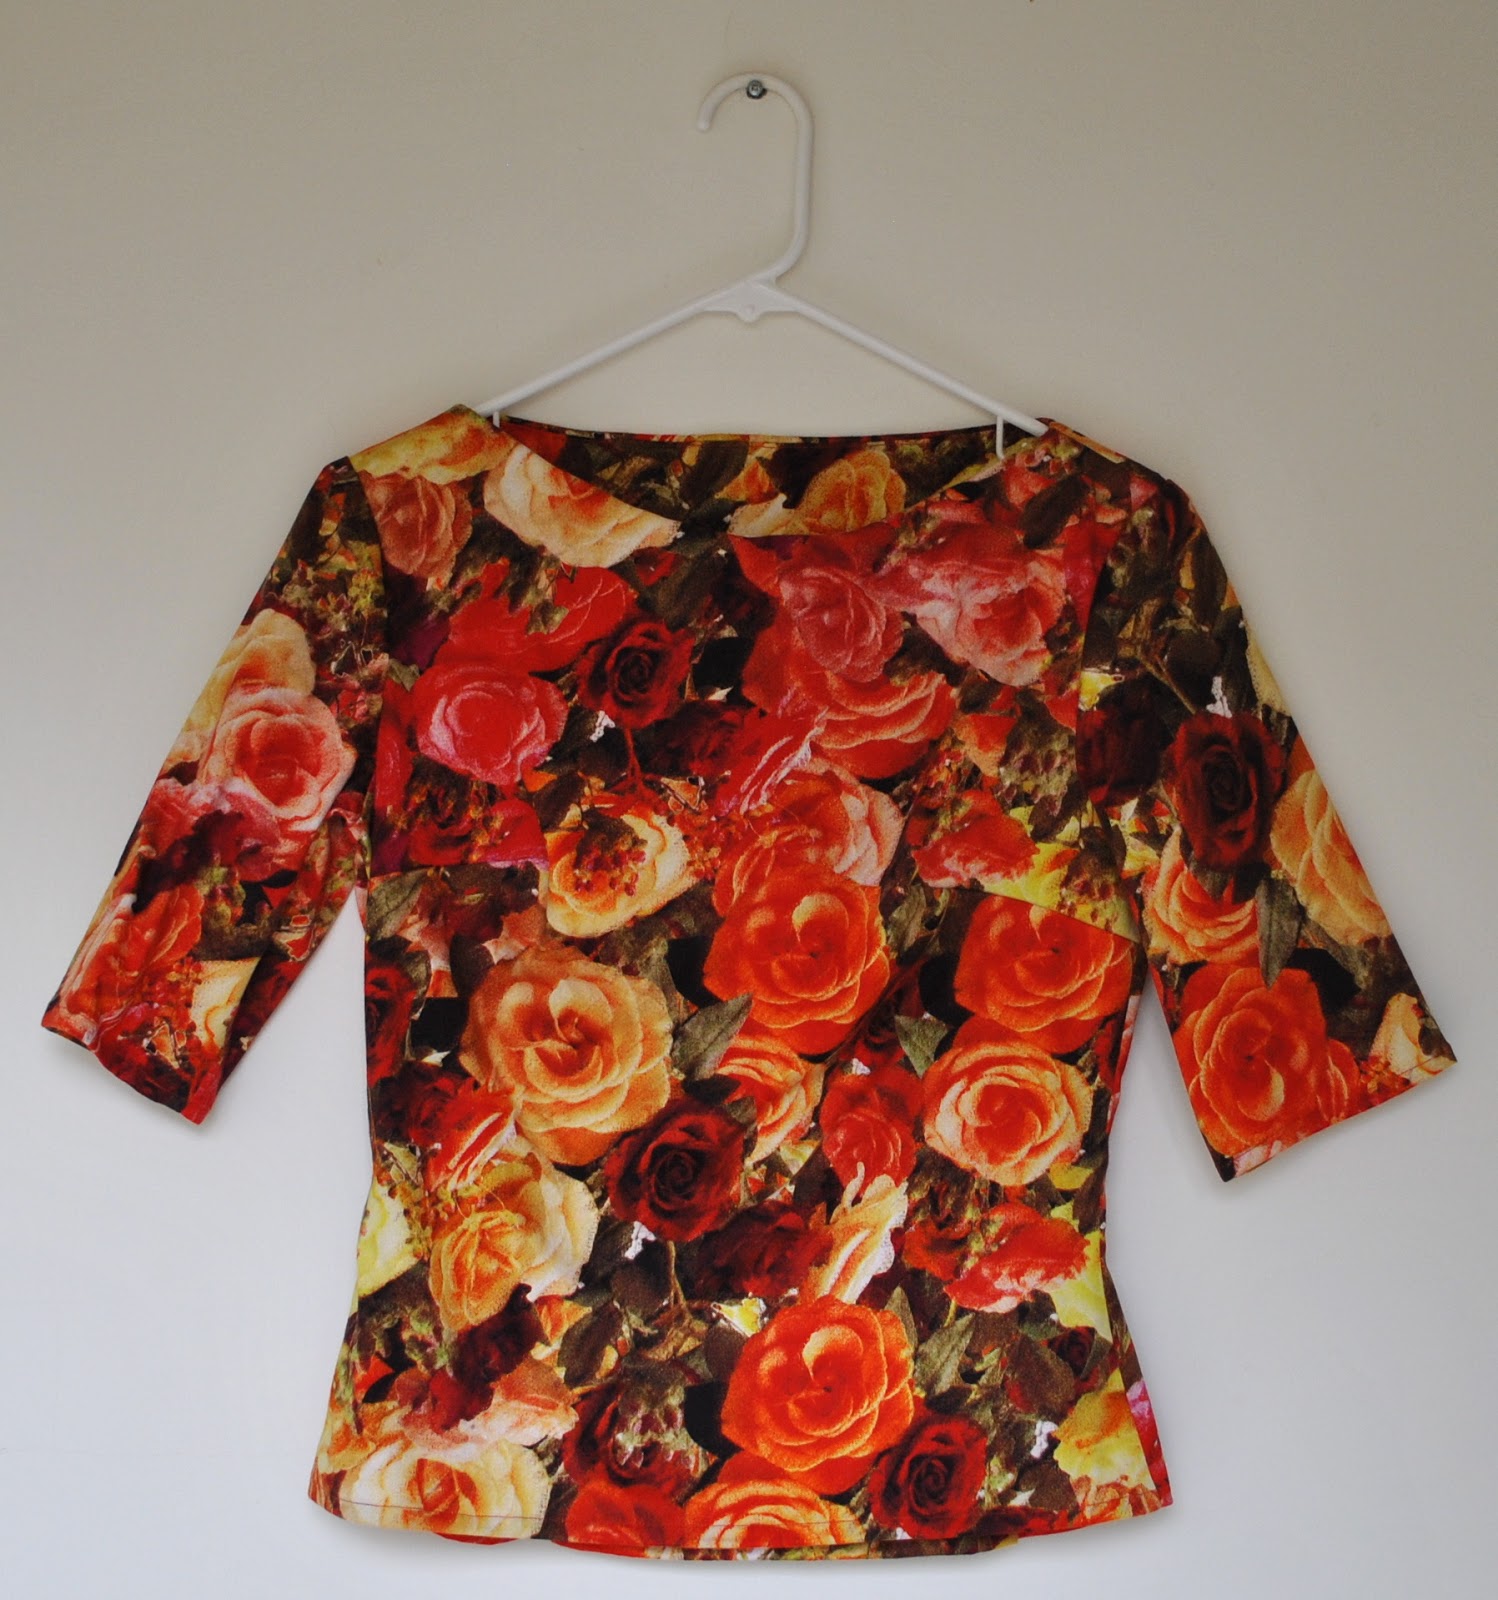
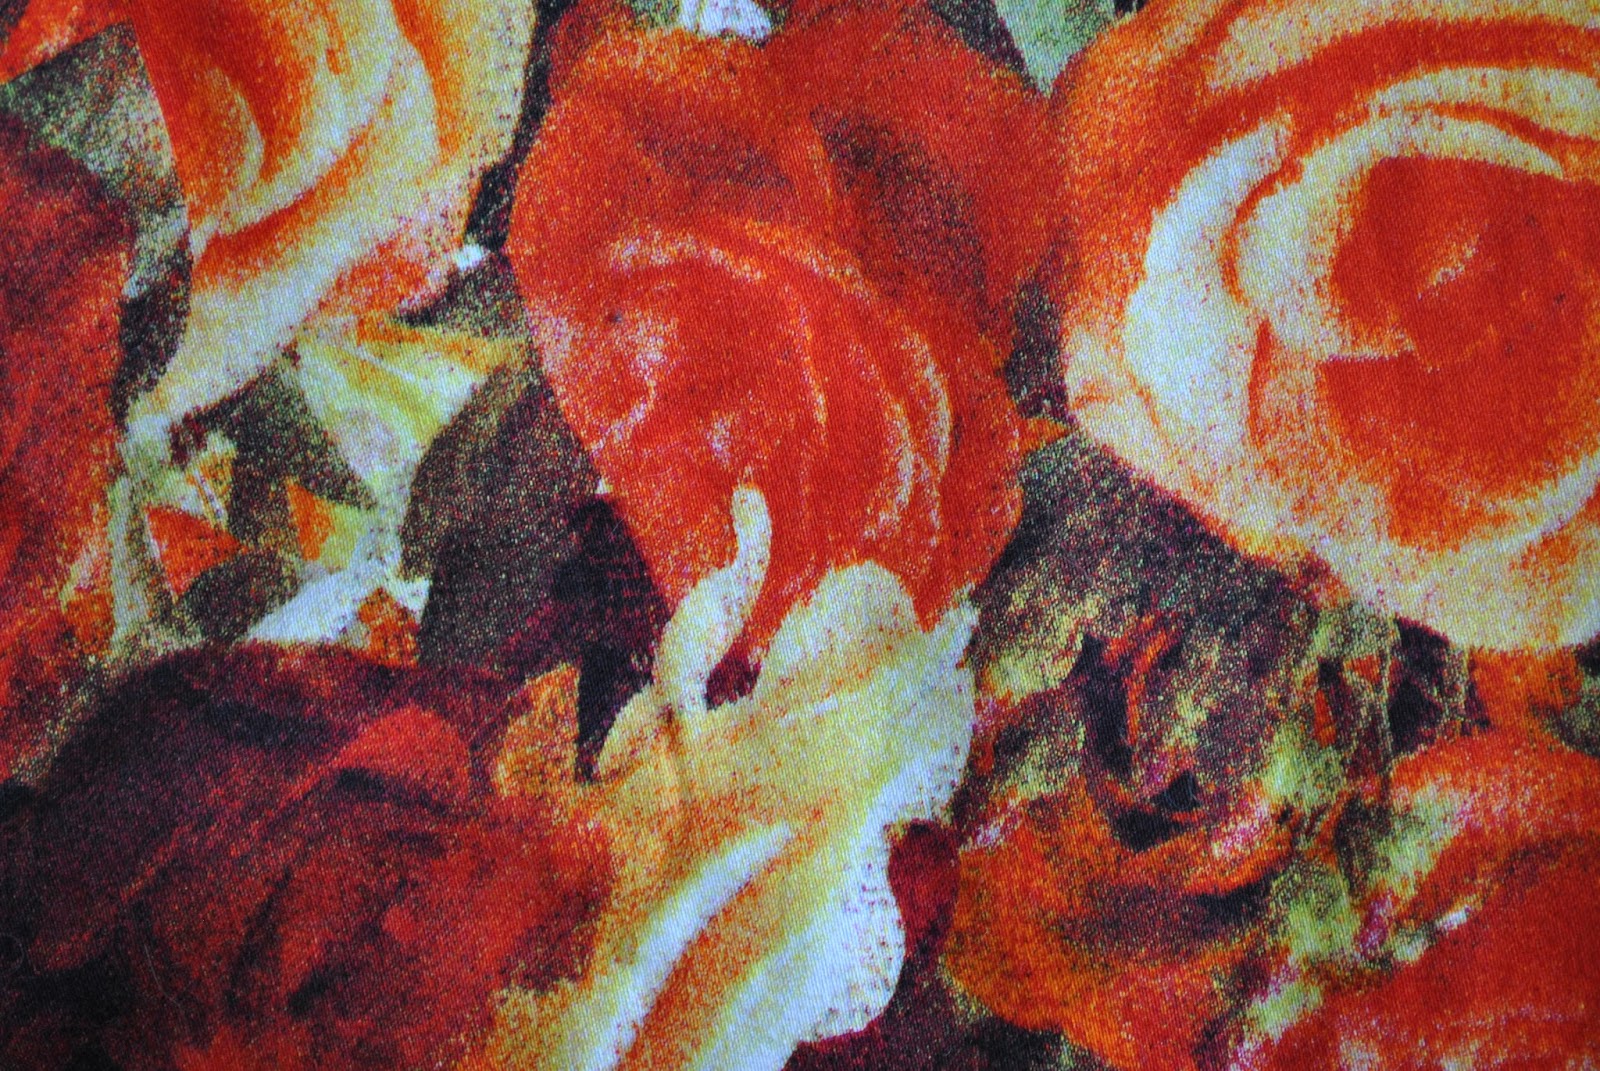
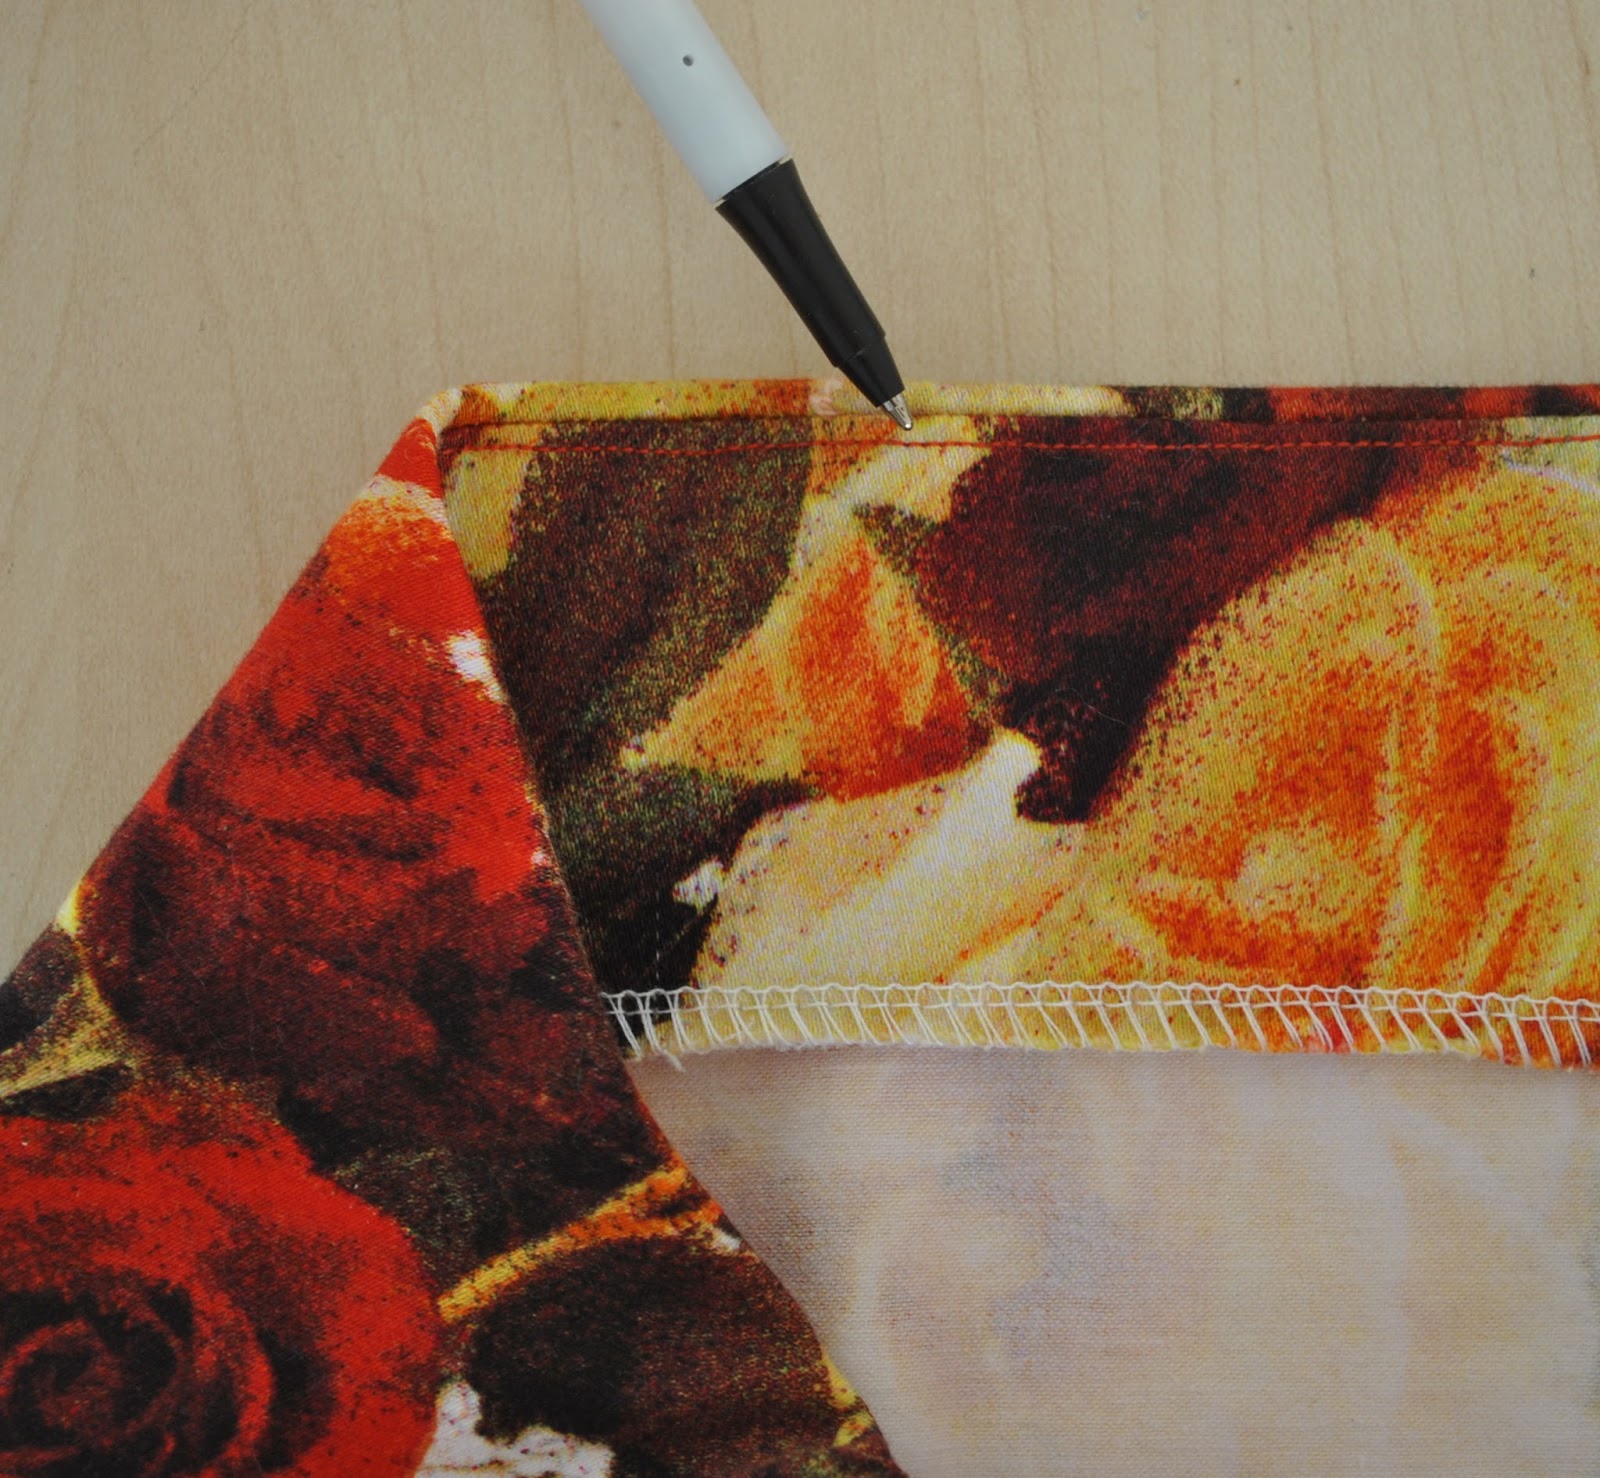
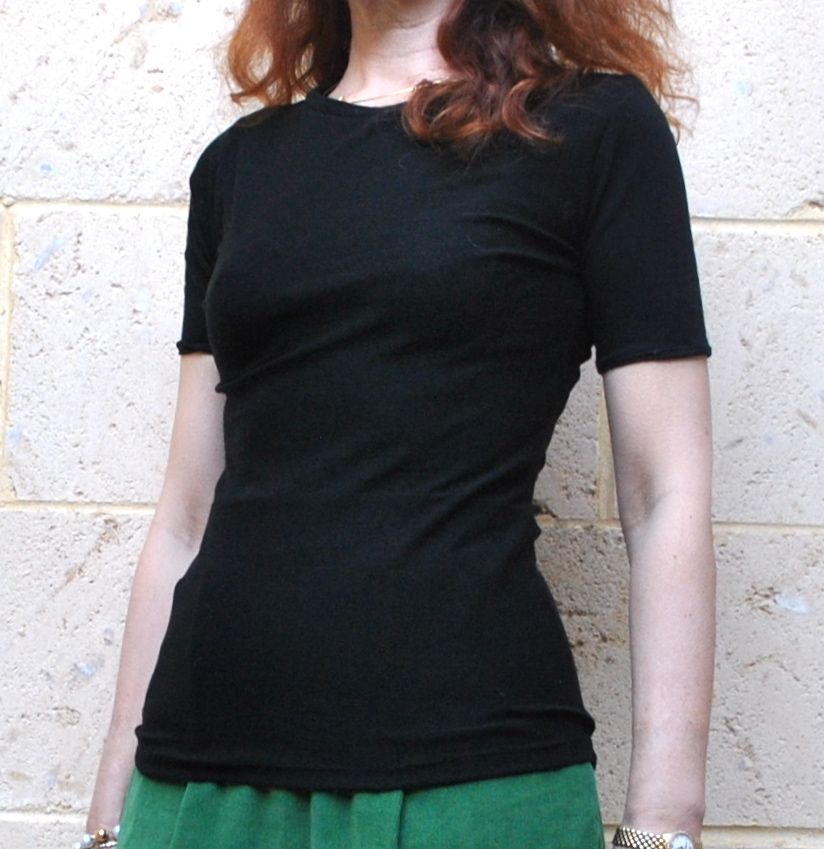
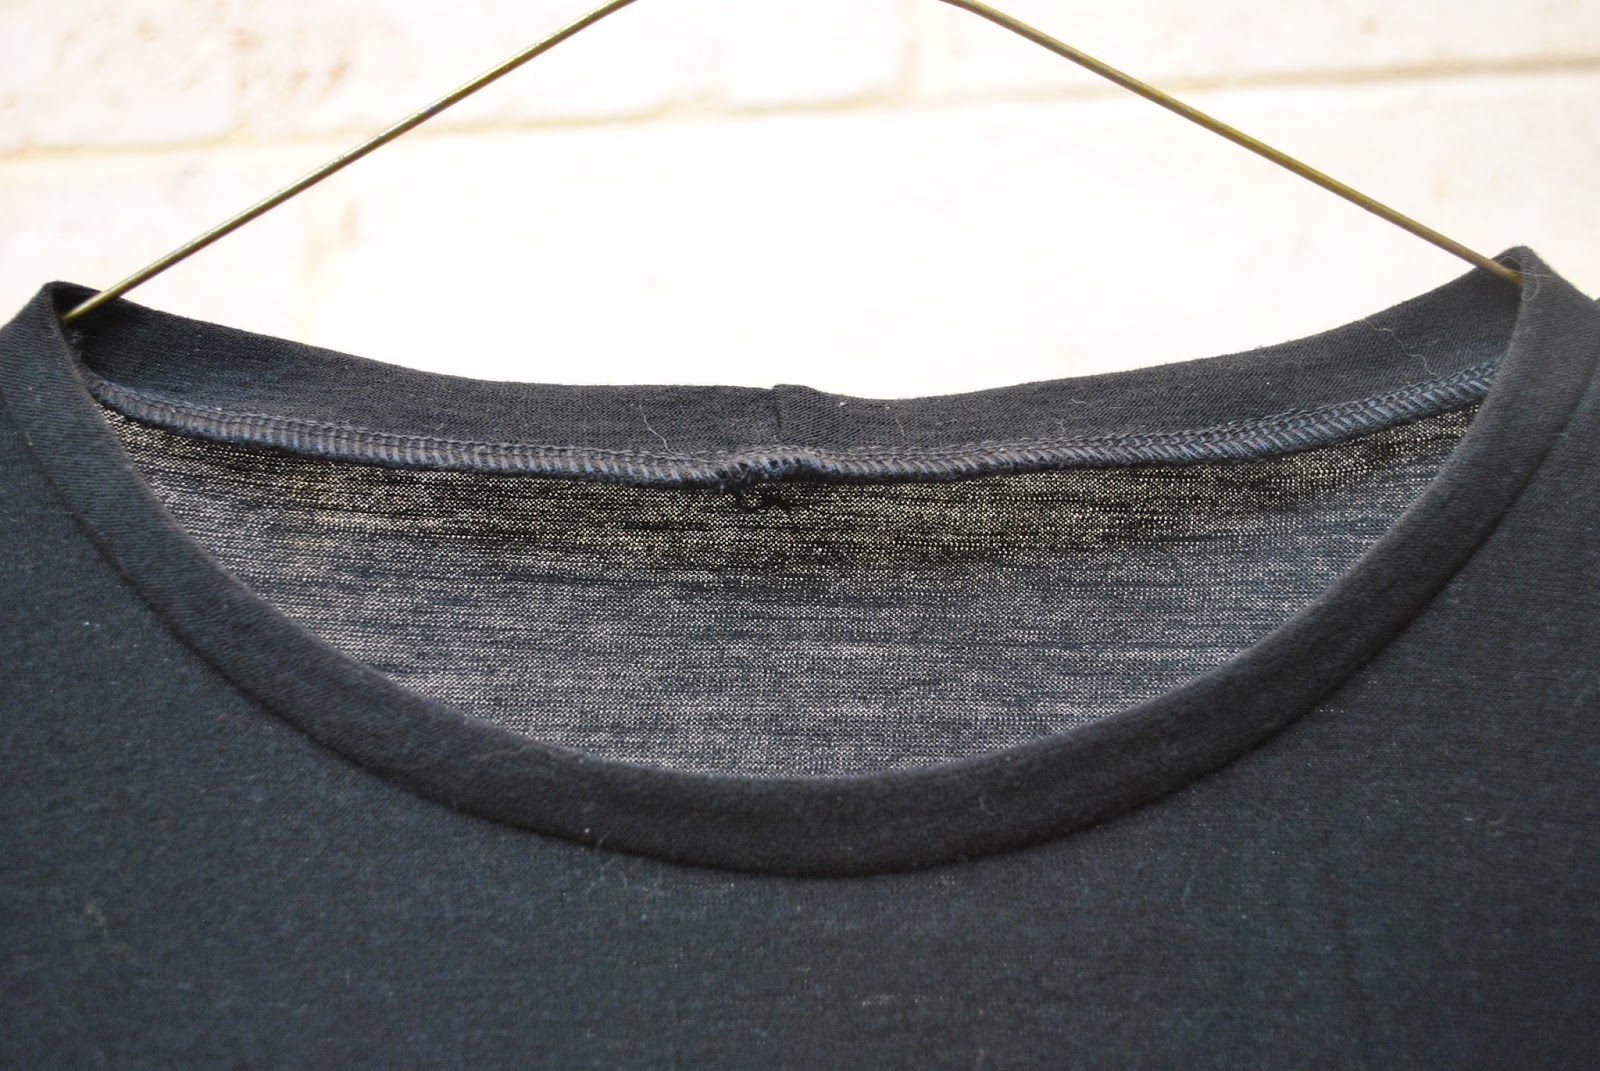
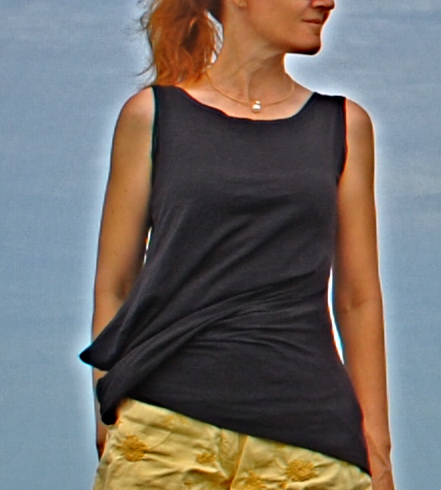
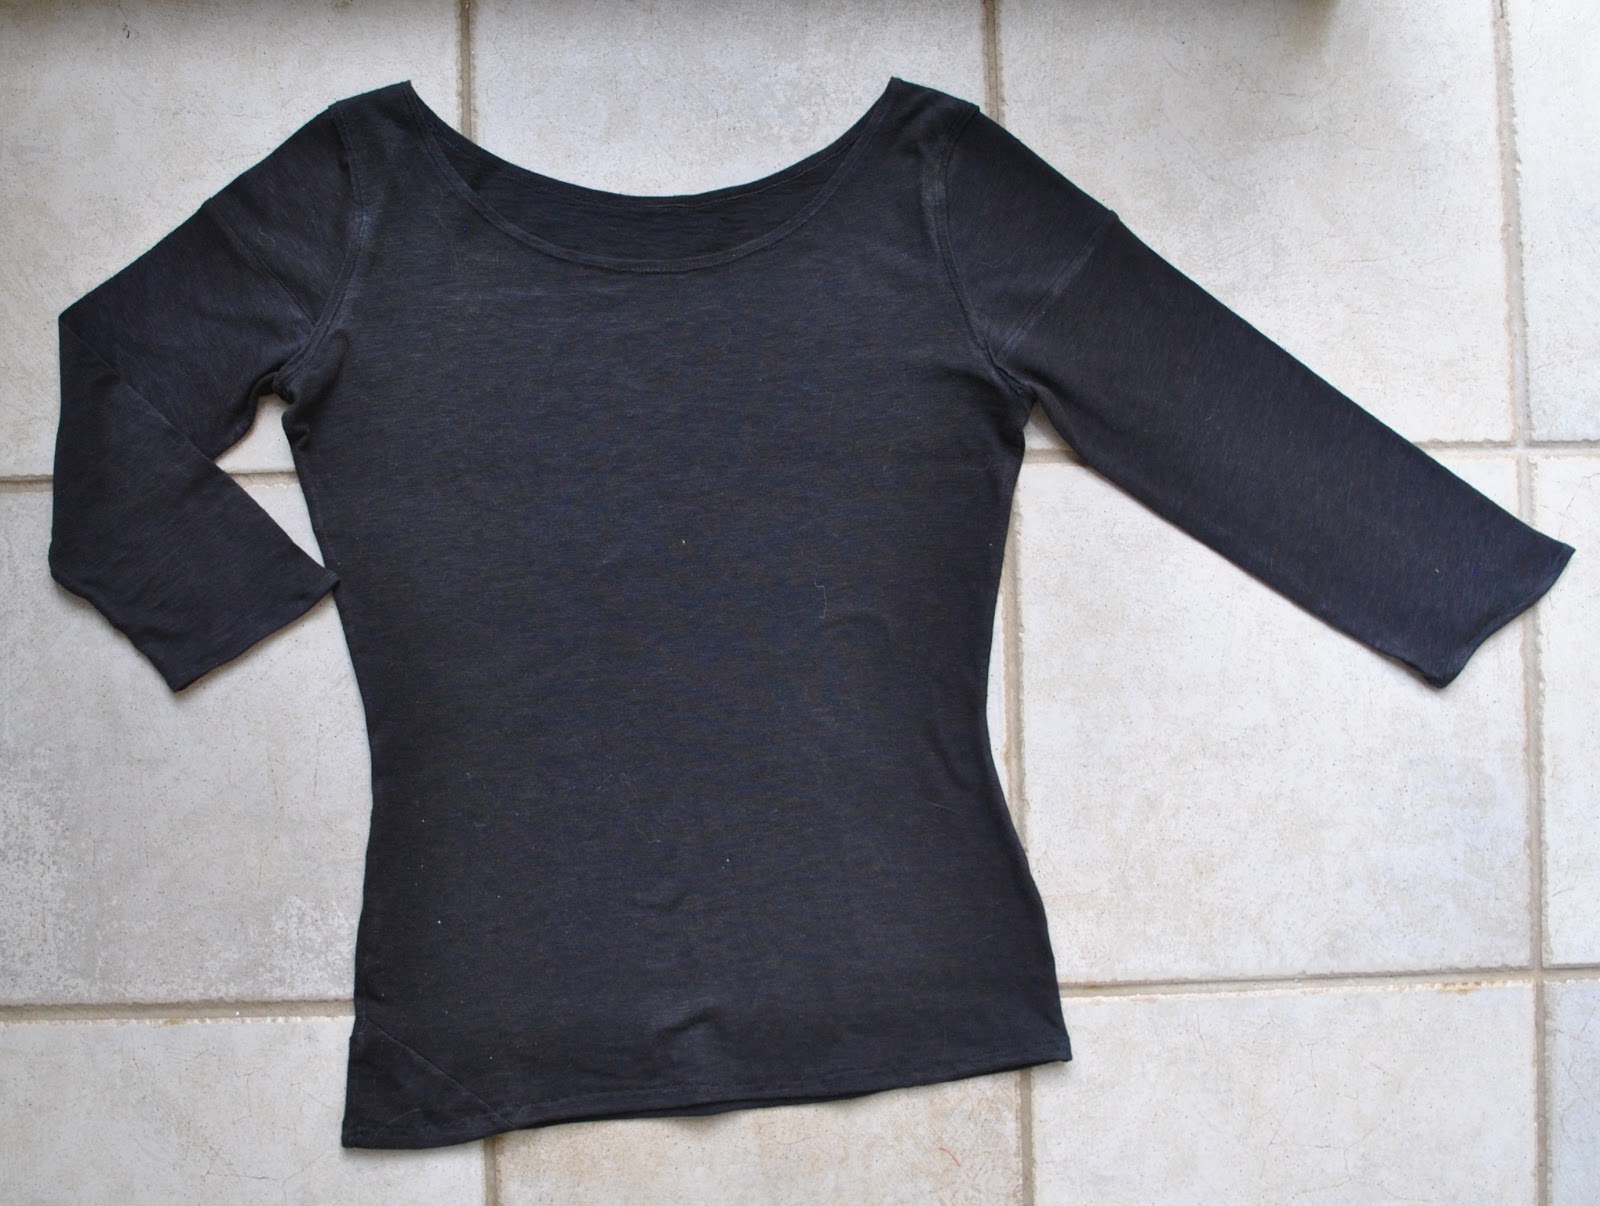
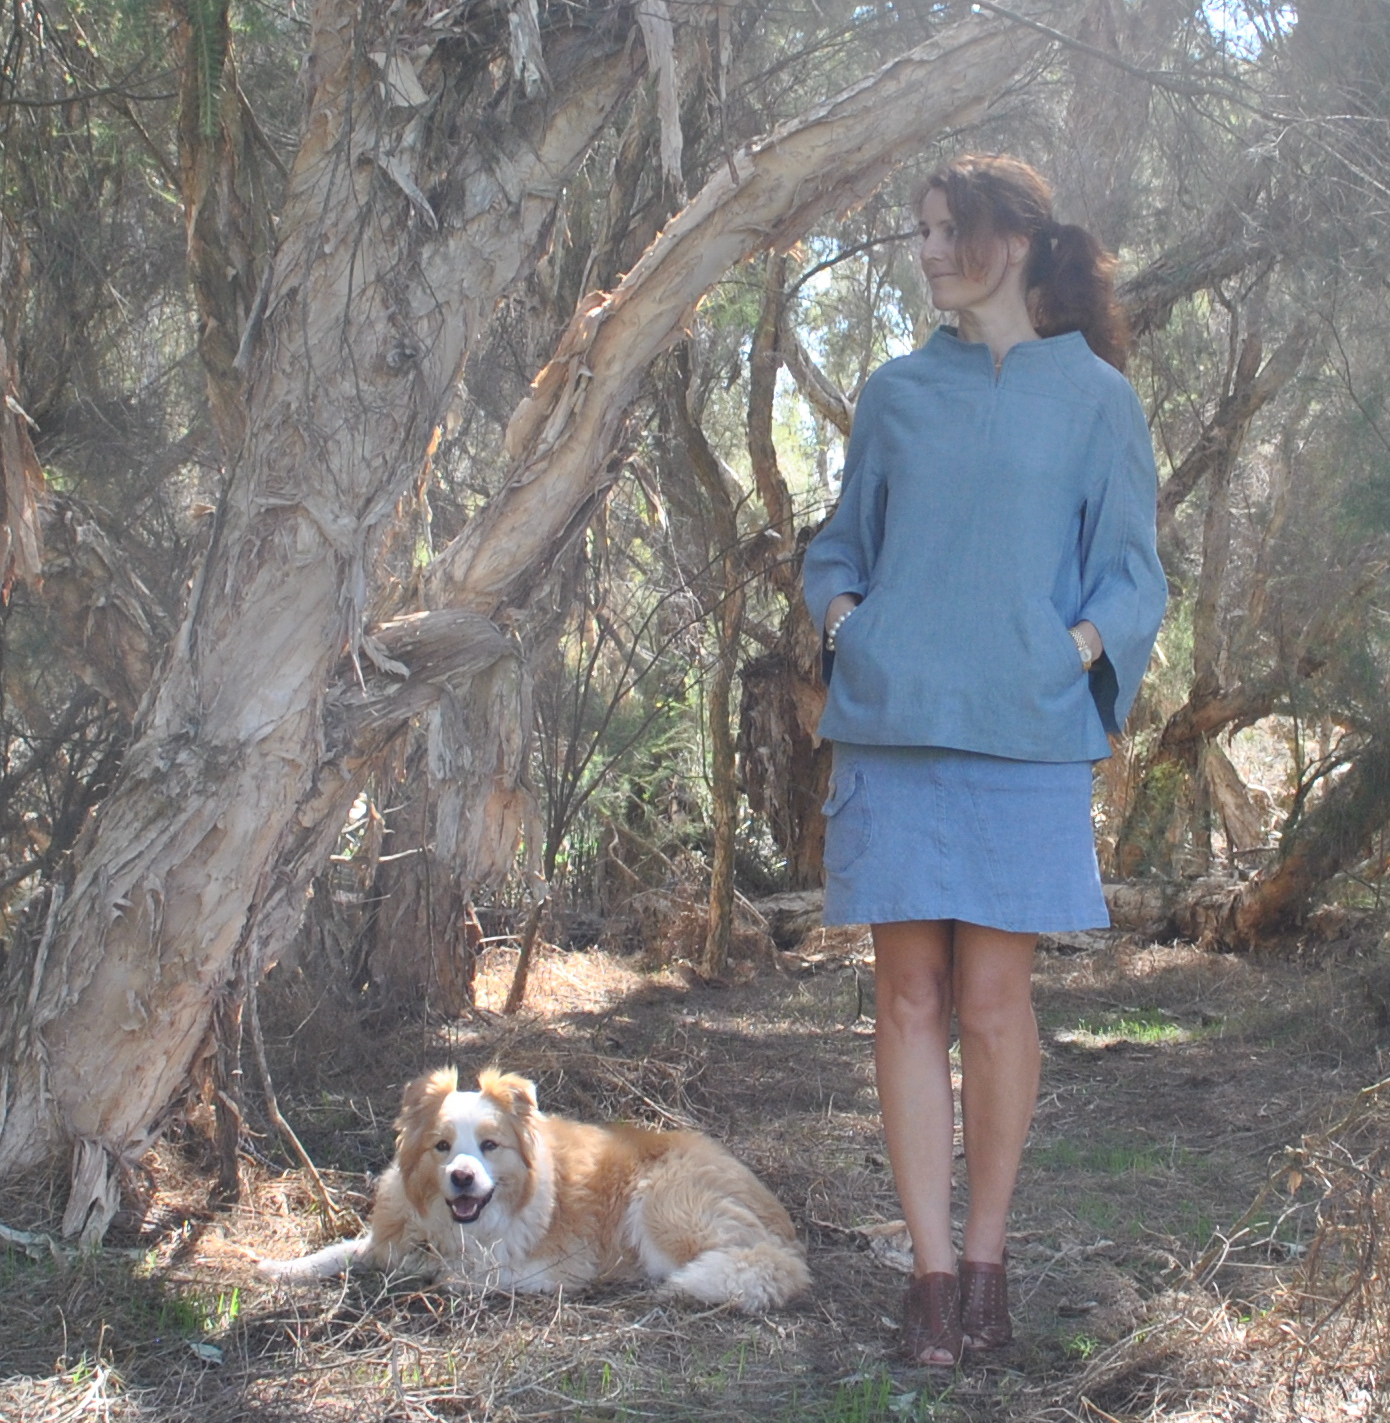
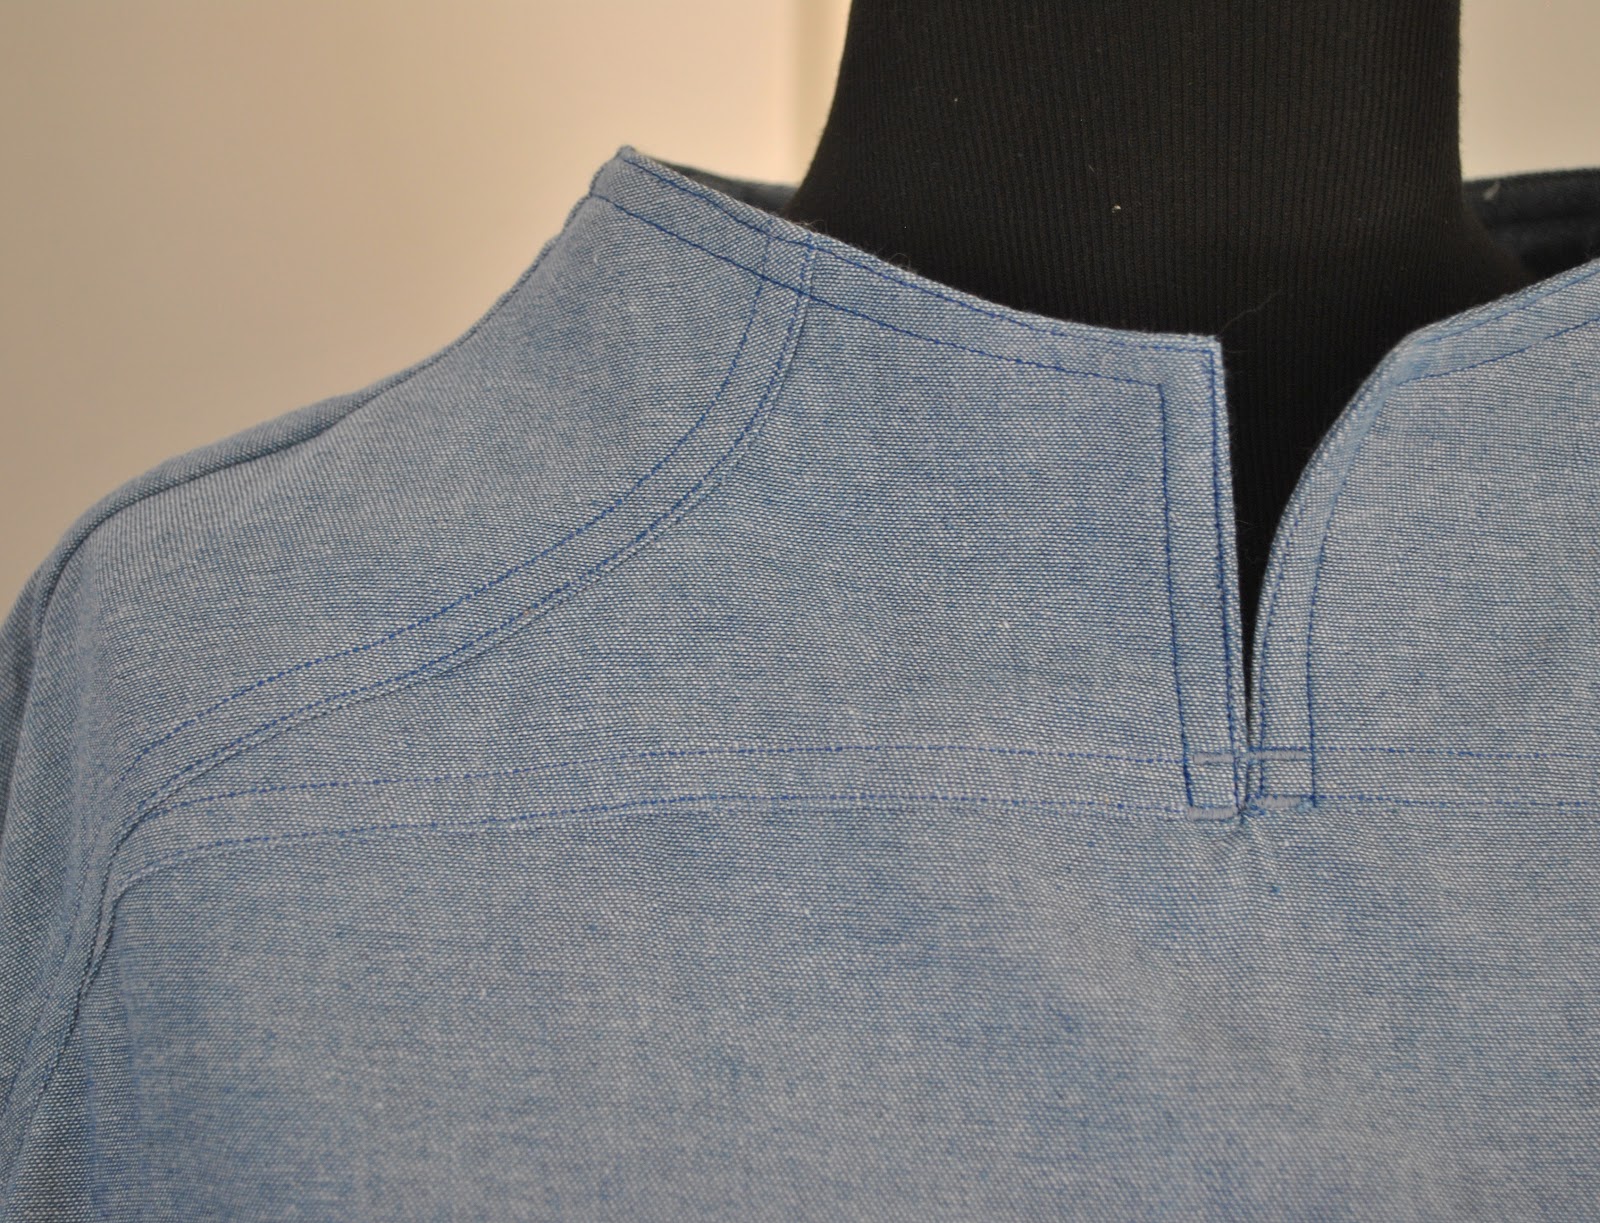
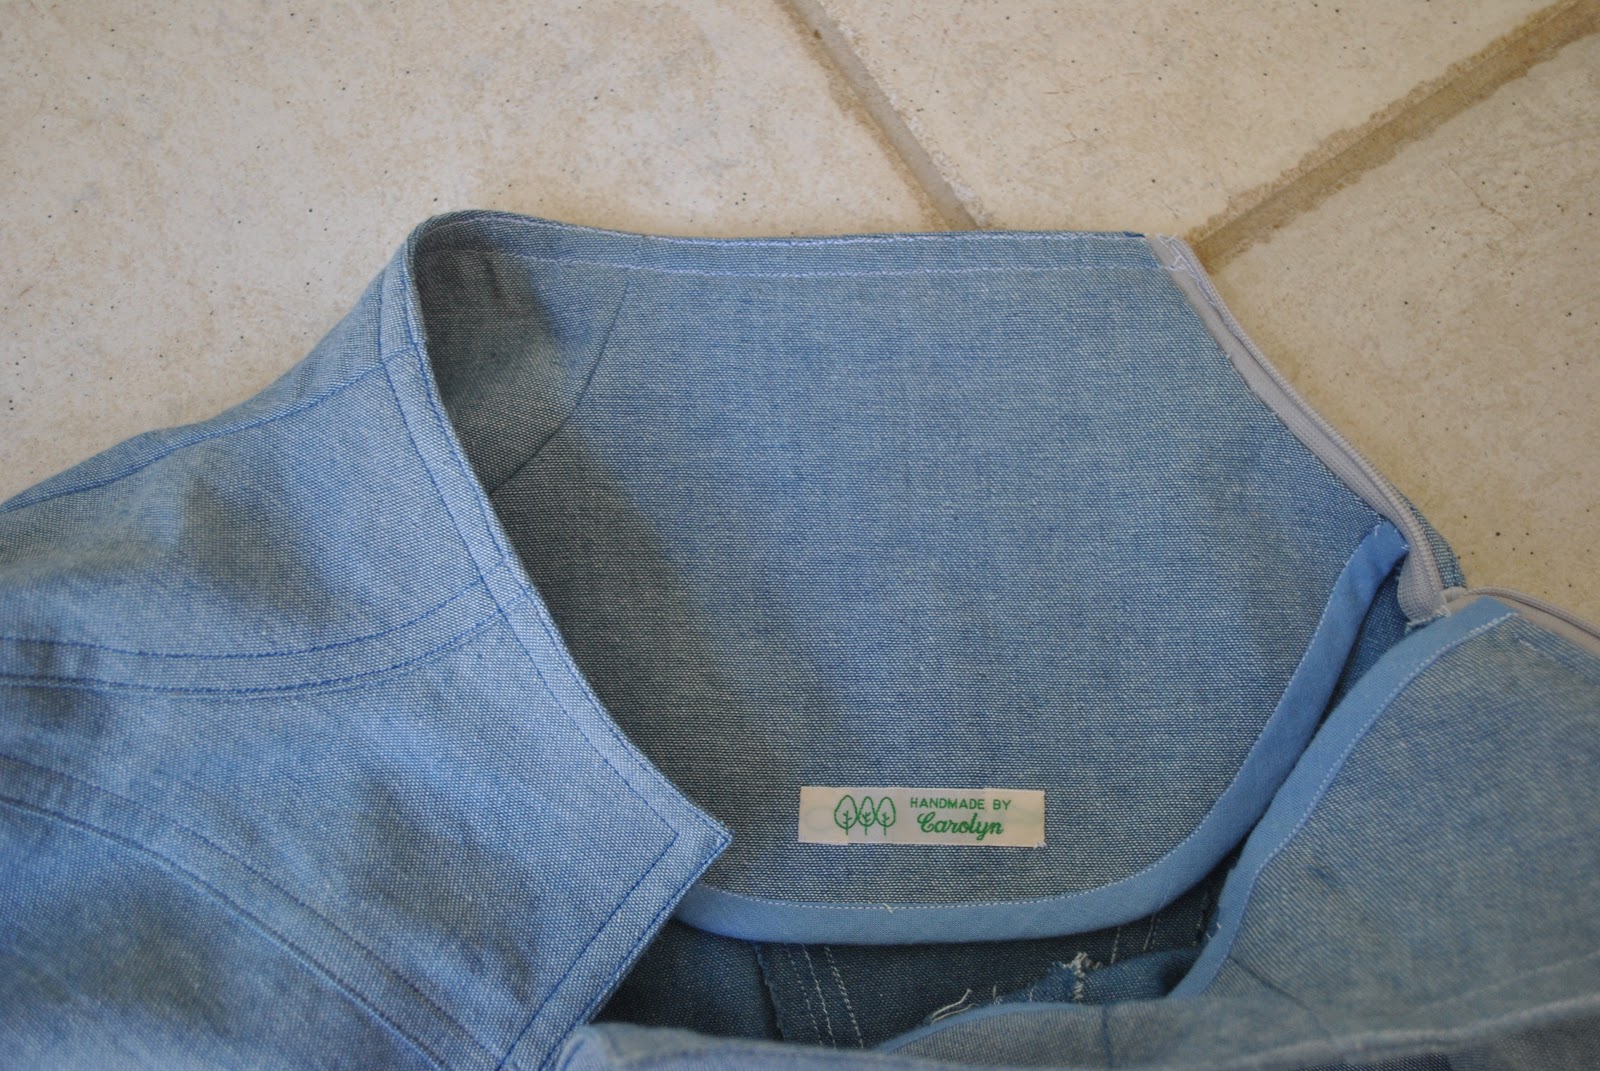
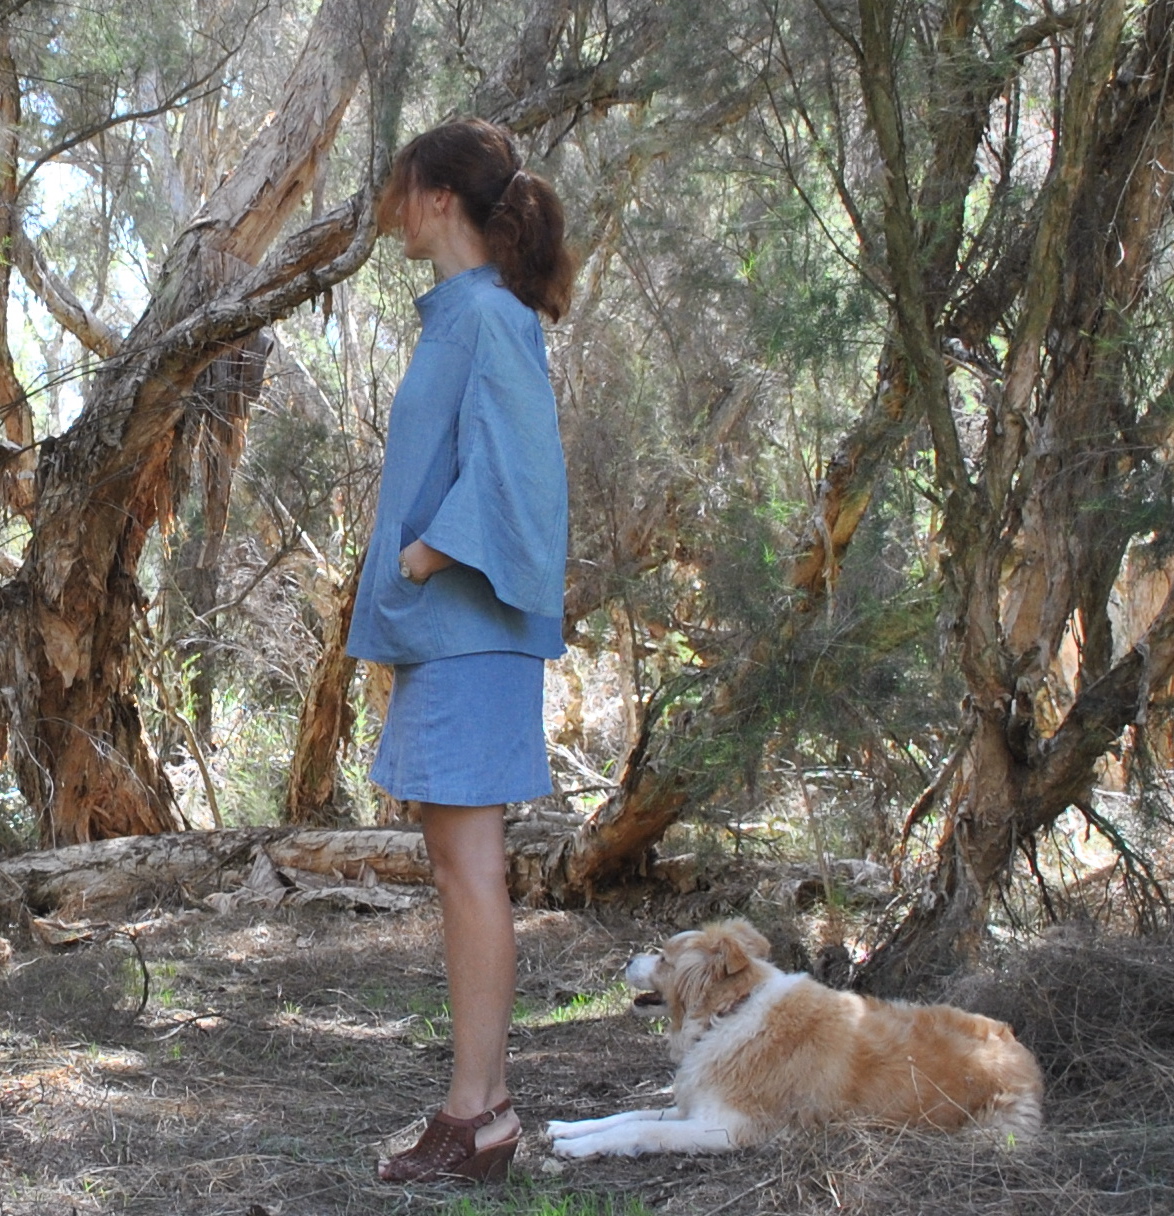
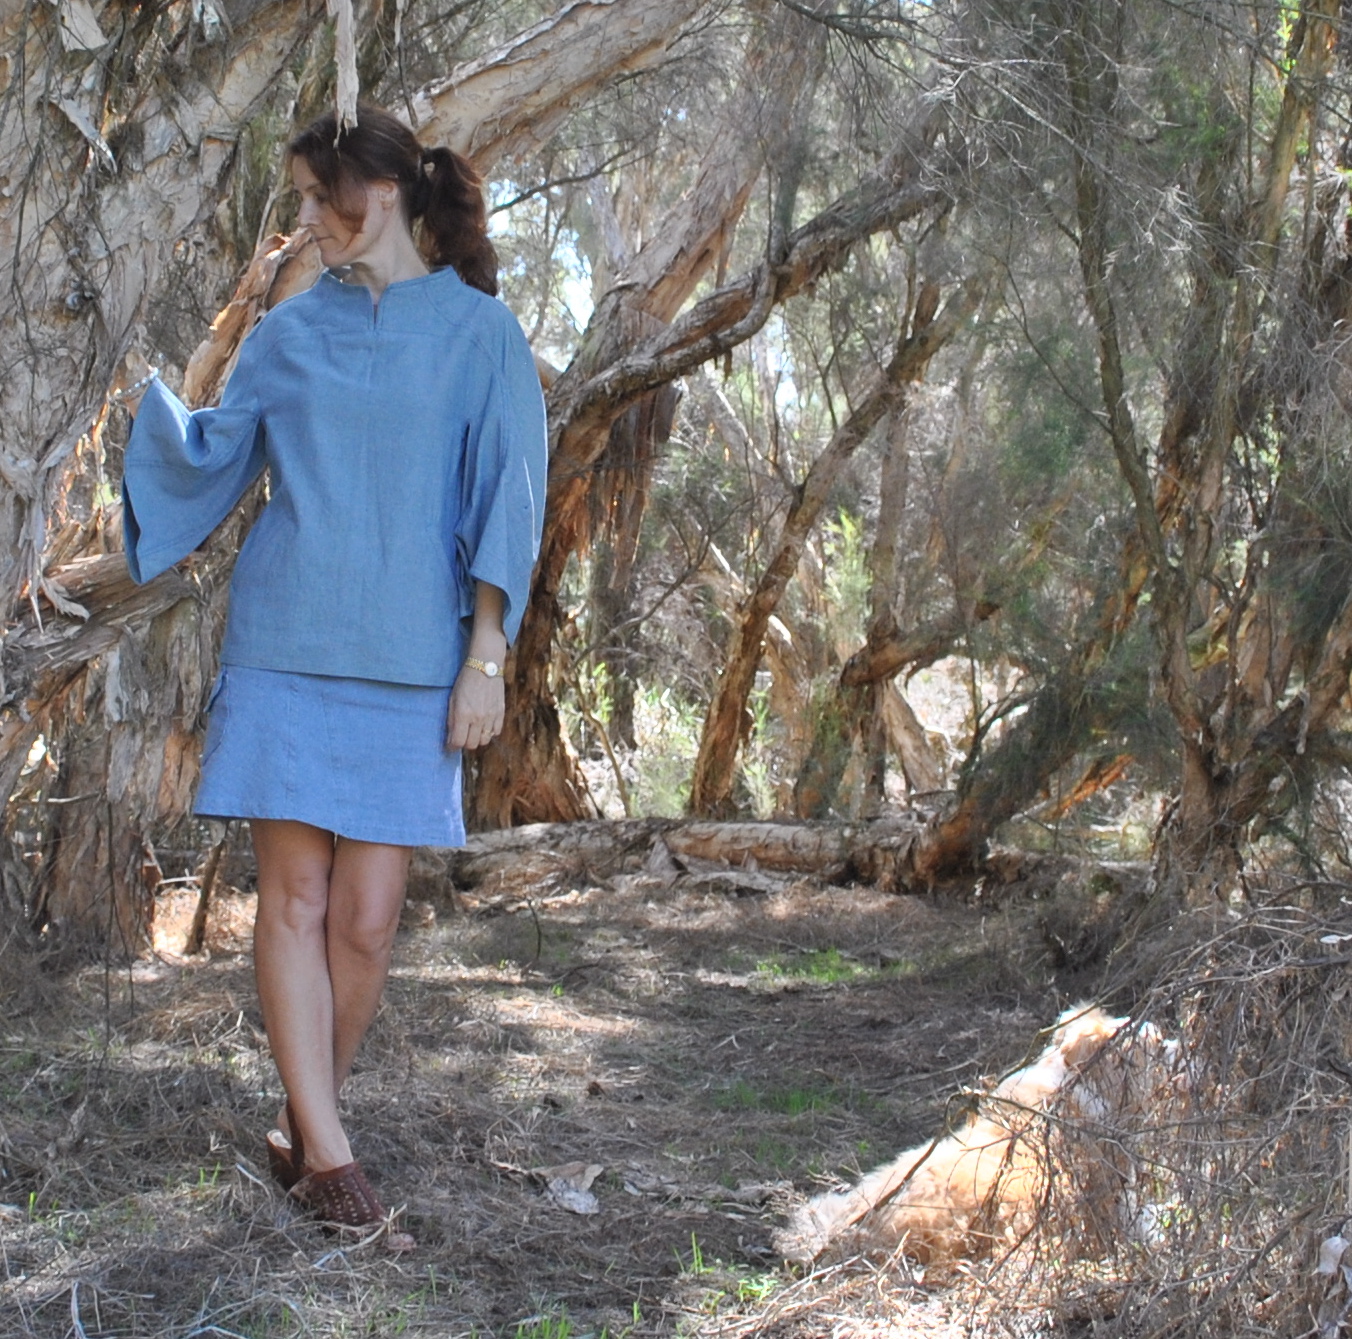
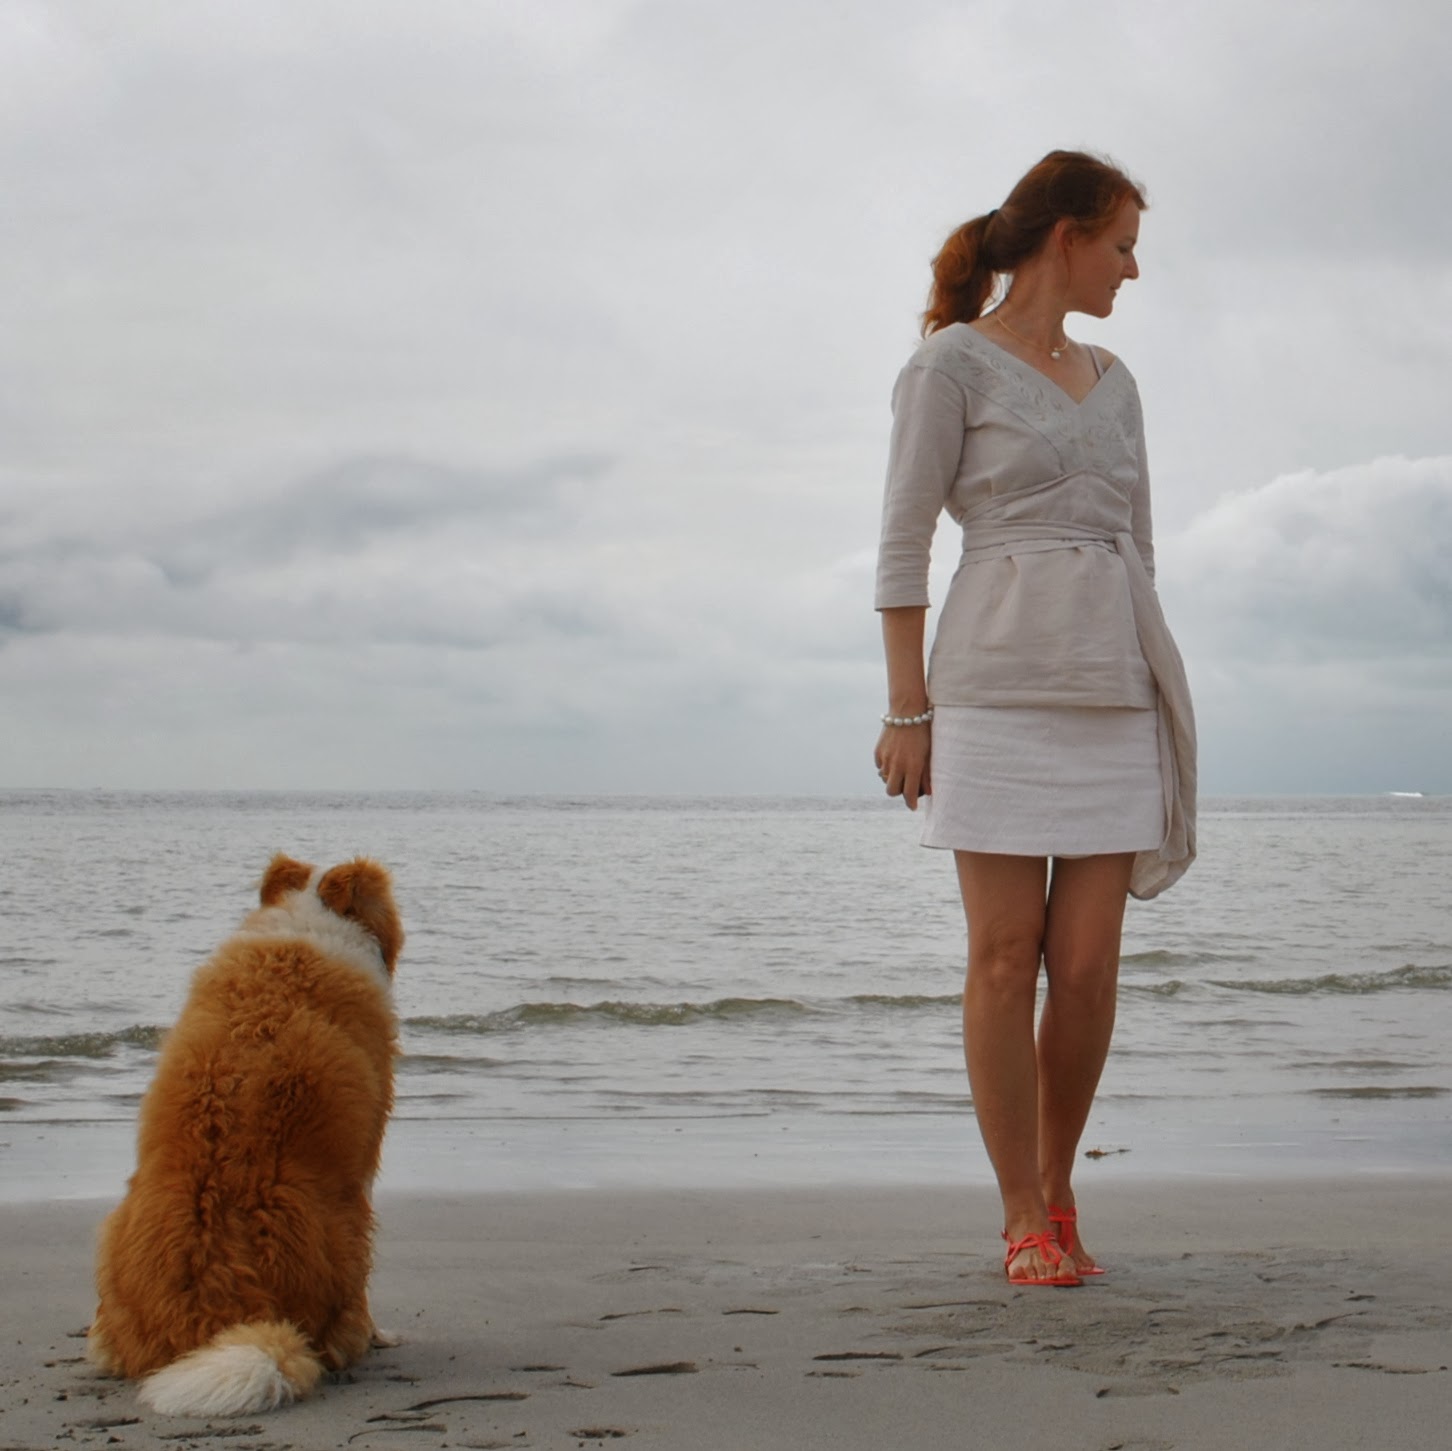
OK, so I’ve made a top.  Simple, fairly plain, unexciting even? but I’m totally happy with it anyway.  Hard to see in the photo above, but the front and back neckbands have little golden swirls, twirling and tumbling sinuously around it.  Screen-printed by me!
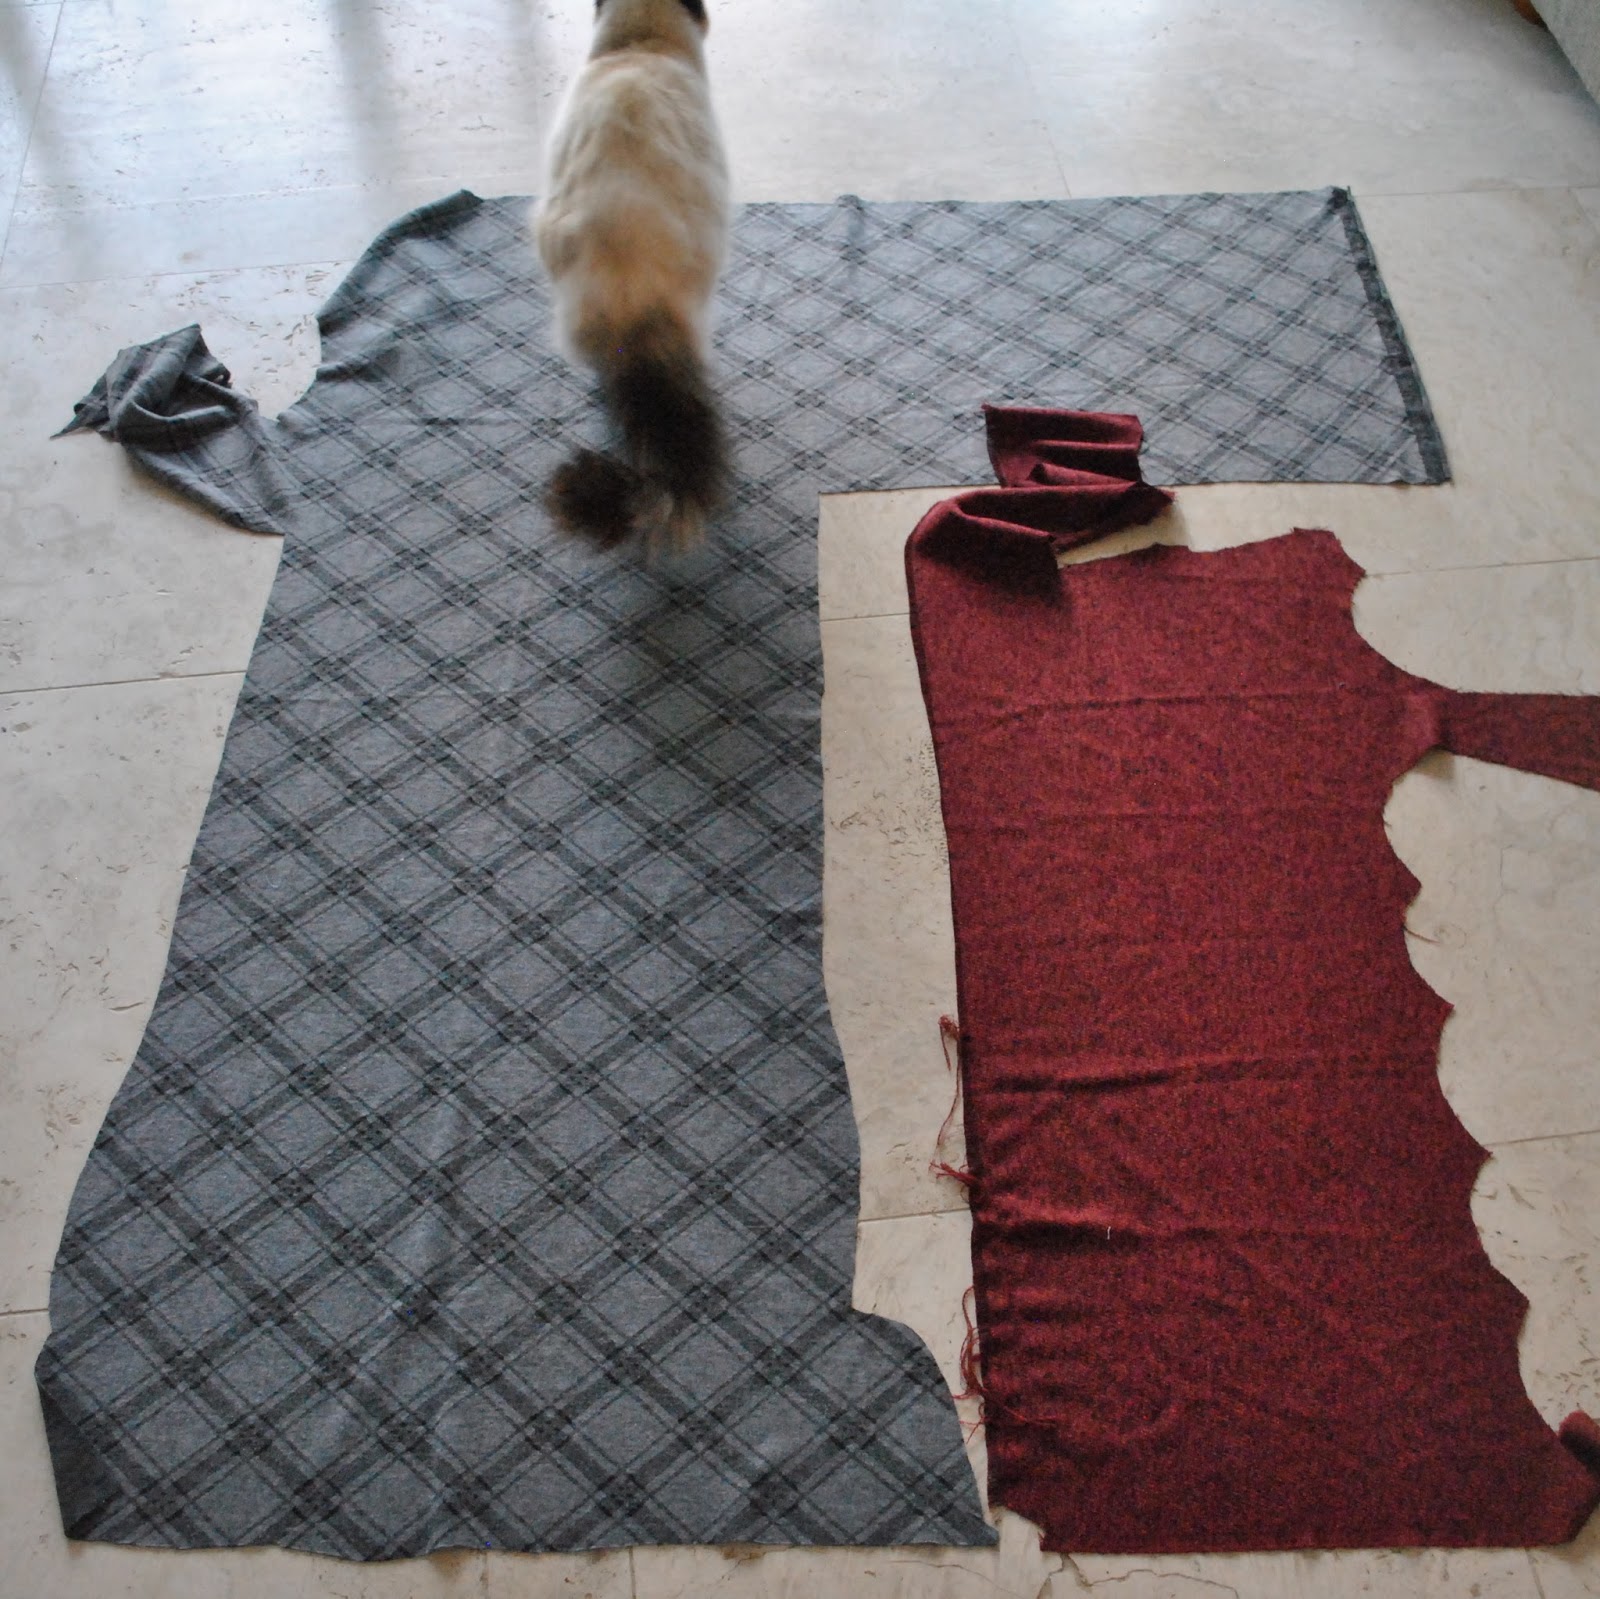
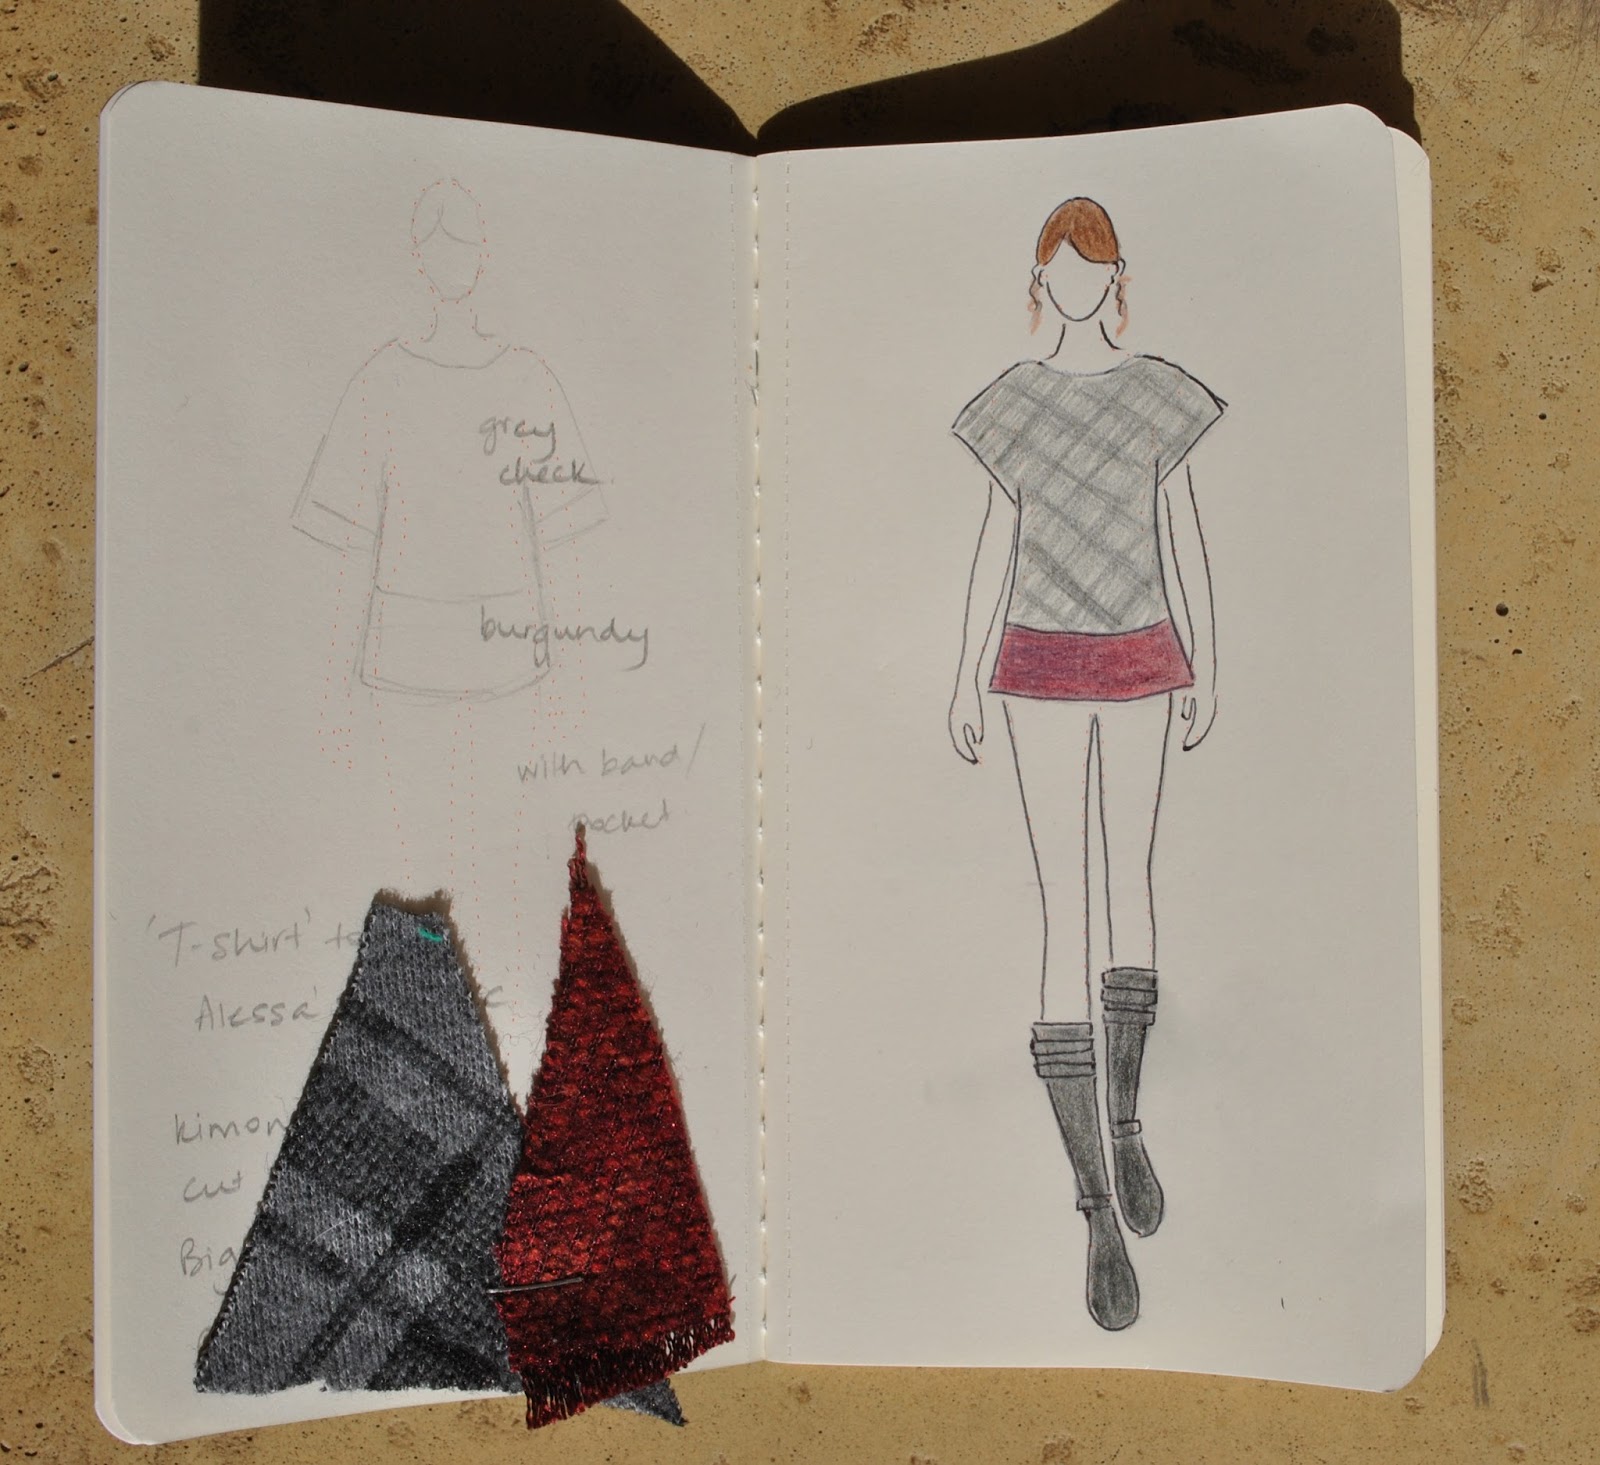
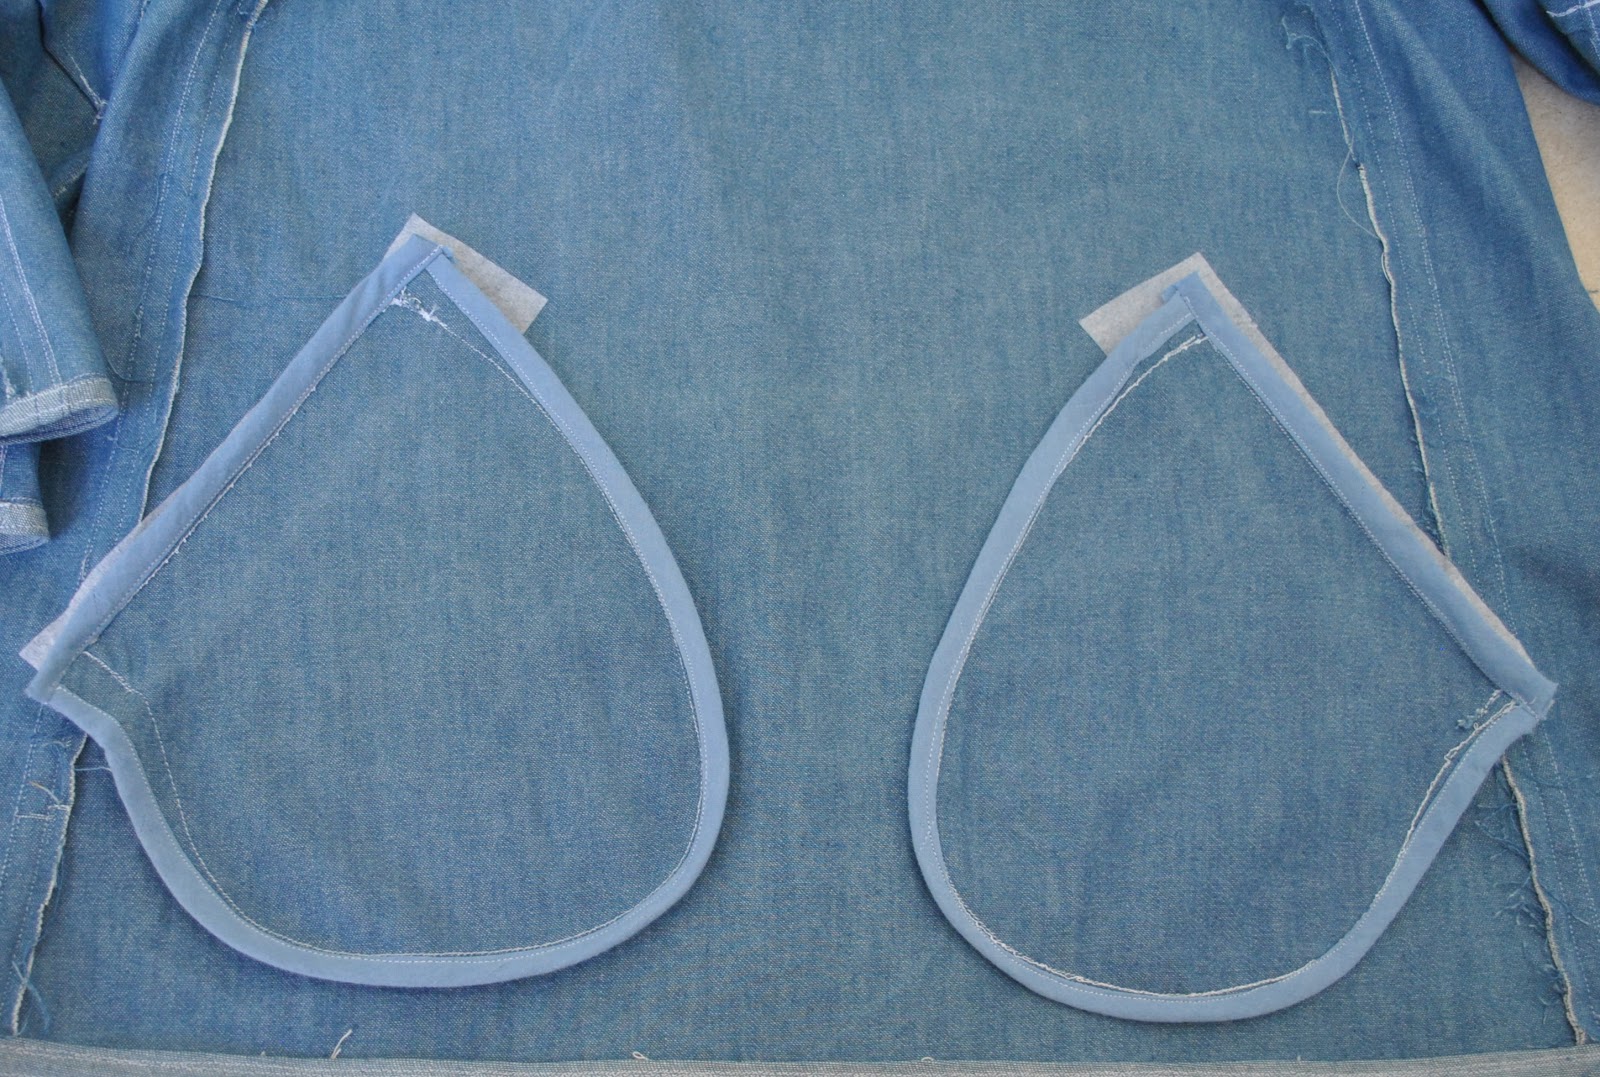
The neckbands are of pale grey silk/linen from Fabulous Fabrics, and the remainder of the top is made using a pale sand-coloured cotton-linen from Spotlight,  the leftovers from after I cut out the pieces for my giant polka-dot dress.
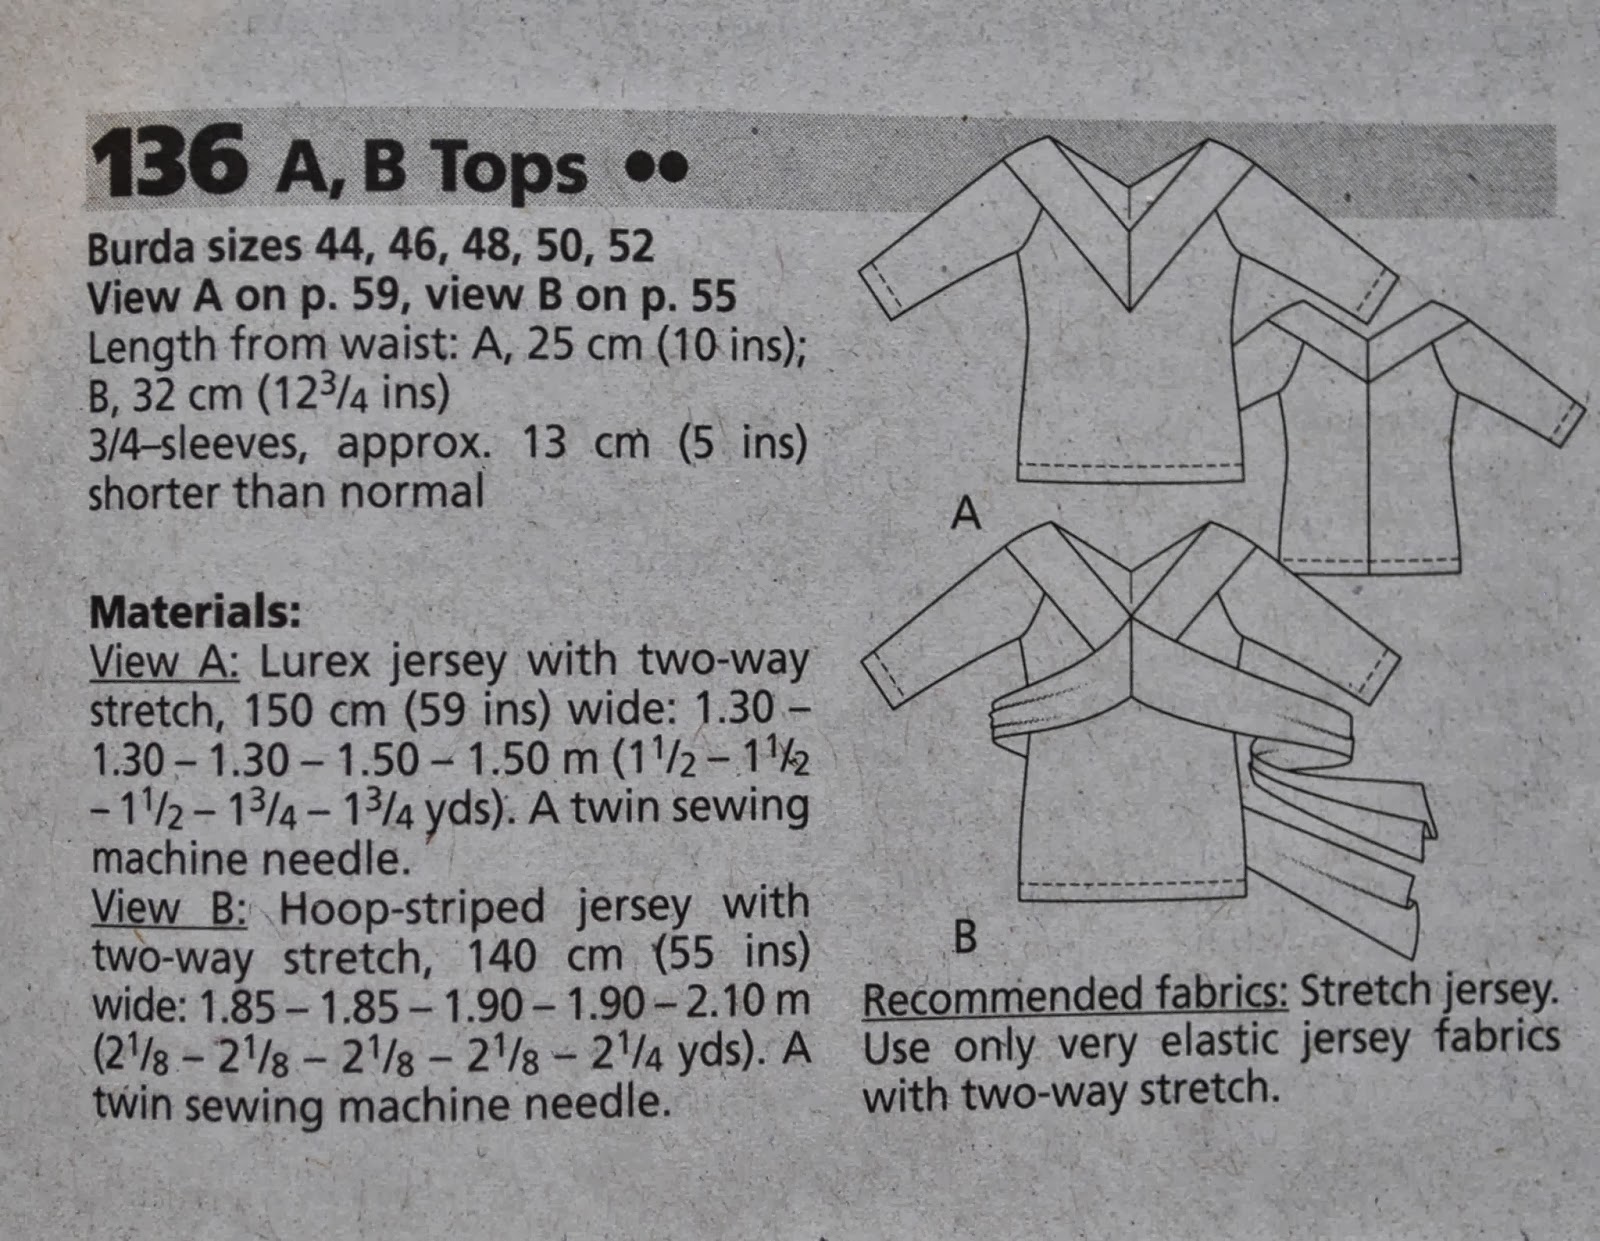
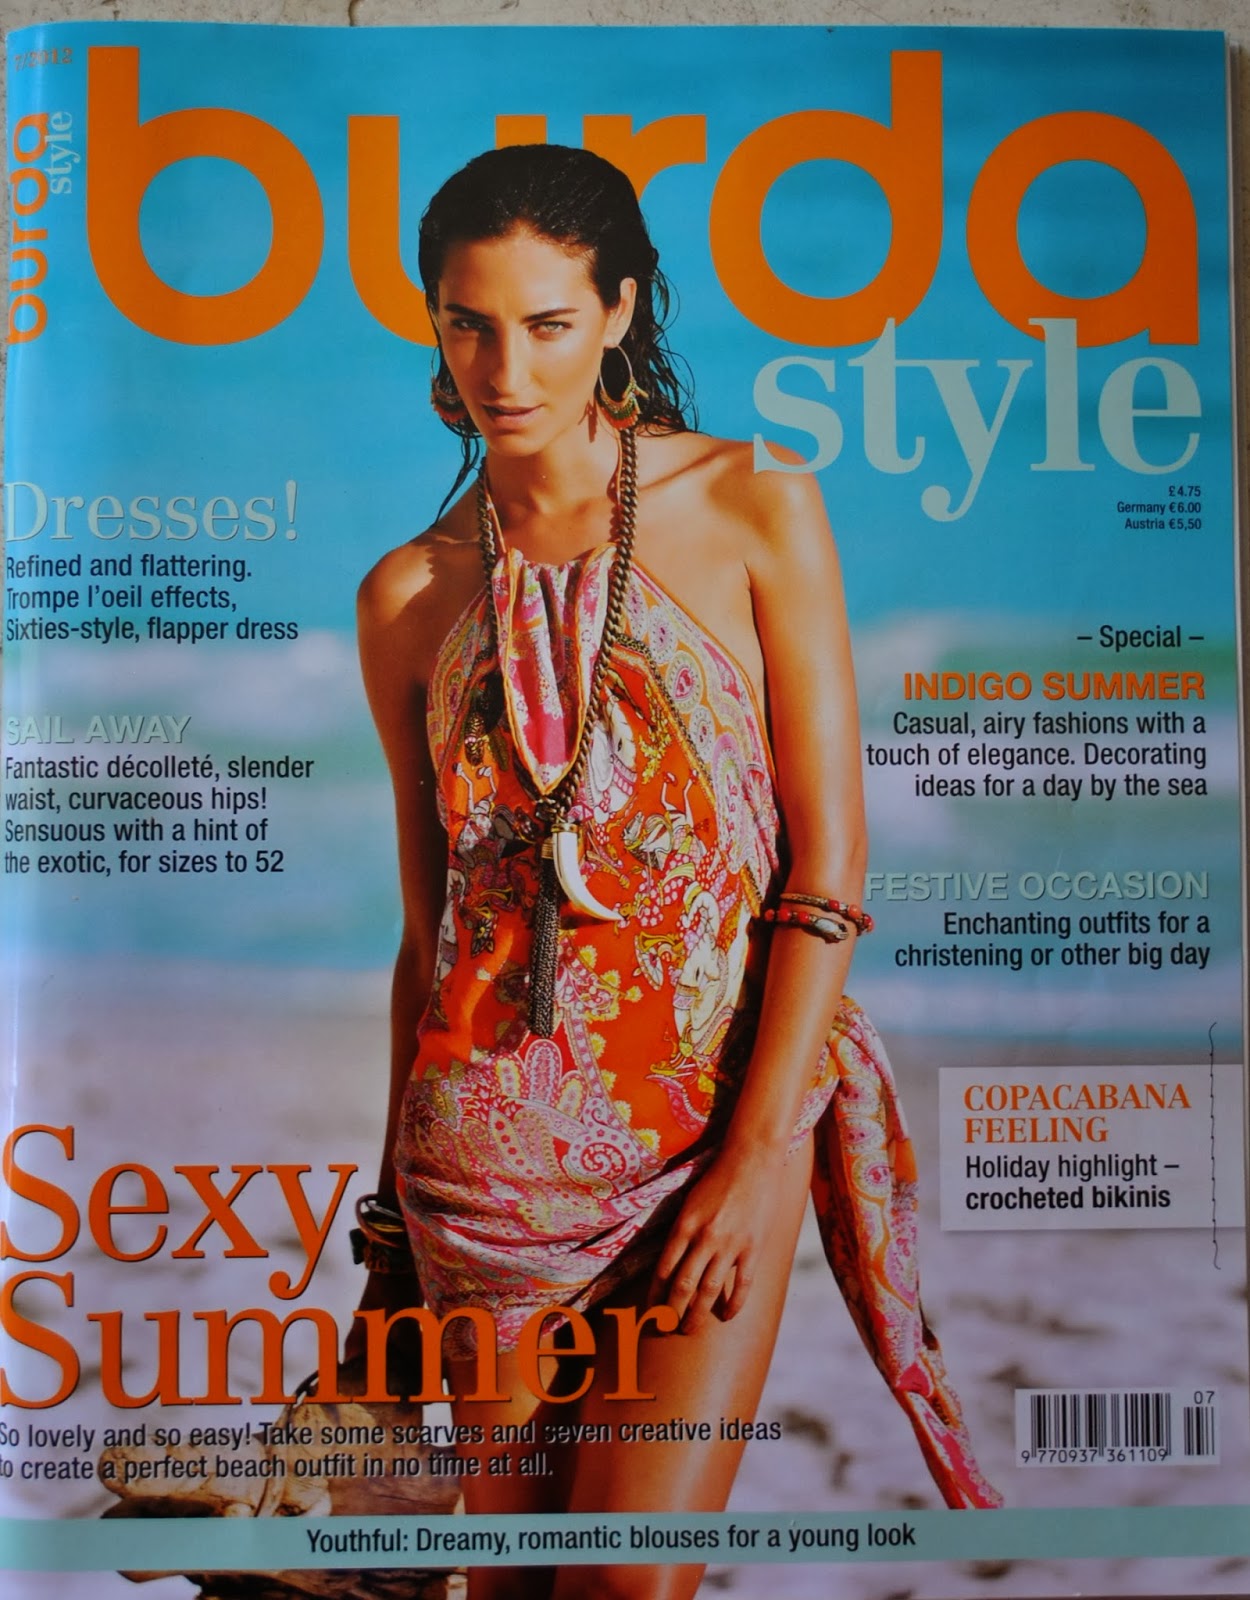
I used the pattern for top 136B from Burdastyle magazine 07/12.  Sam gave this mag to me for Christmas last year, but this is the very first thing I’ve made from it  (oops!)  No matter, I reckon Burdastyle patterns never really go outta style  🙂  When planning my top I knew exactly what I wanted; a pull-over loose top with a big wide neckband for screen-printing, and either a wrap-front or something to define the waist.  I searched through, only like every single one of my patterns, the lines of this one leapt out as pretty close to the vision I had in my head.

Technical blah-dy blah: I have to confess that while stylistically the design was perfect, technically it was far from a perfect fabric/pattern match: the pattern was designed to be tight for stretch knits and came graded for Plus sizes 44-52 only; and I wanted “loose” in a woven and I generally go with a 38.  But I reckoned it could work; those factors have the opposite effect to each other so it’s like they cancel each other out right?  It was worth a try, anyway.  I’ve never let fabric inappropriateness get in the way of my creative vision! and was pretty sure it would be OK.  
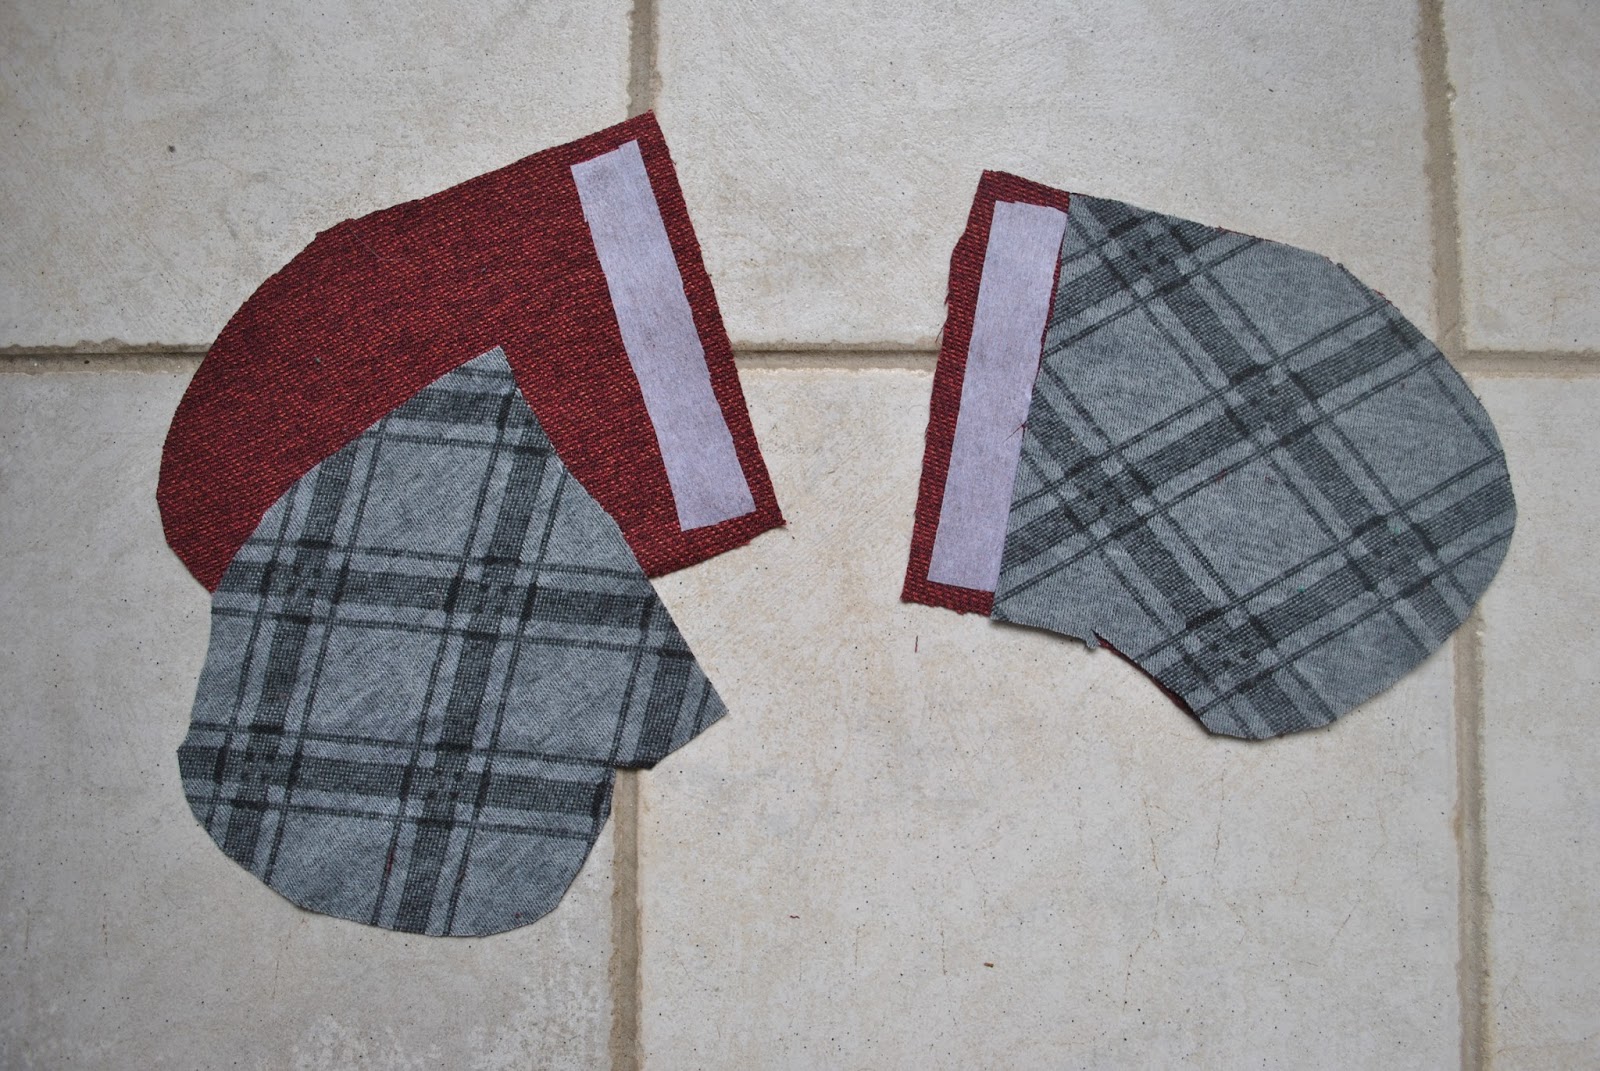
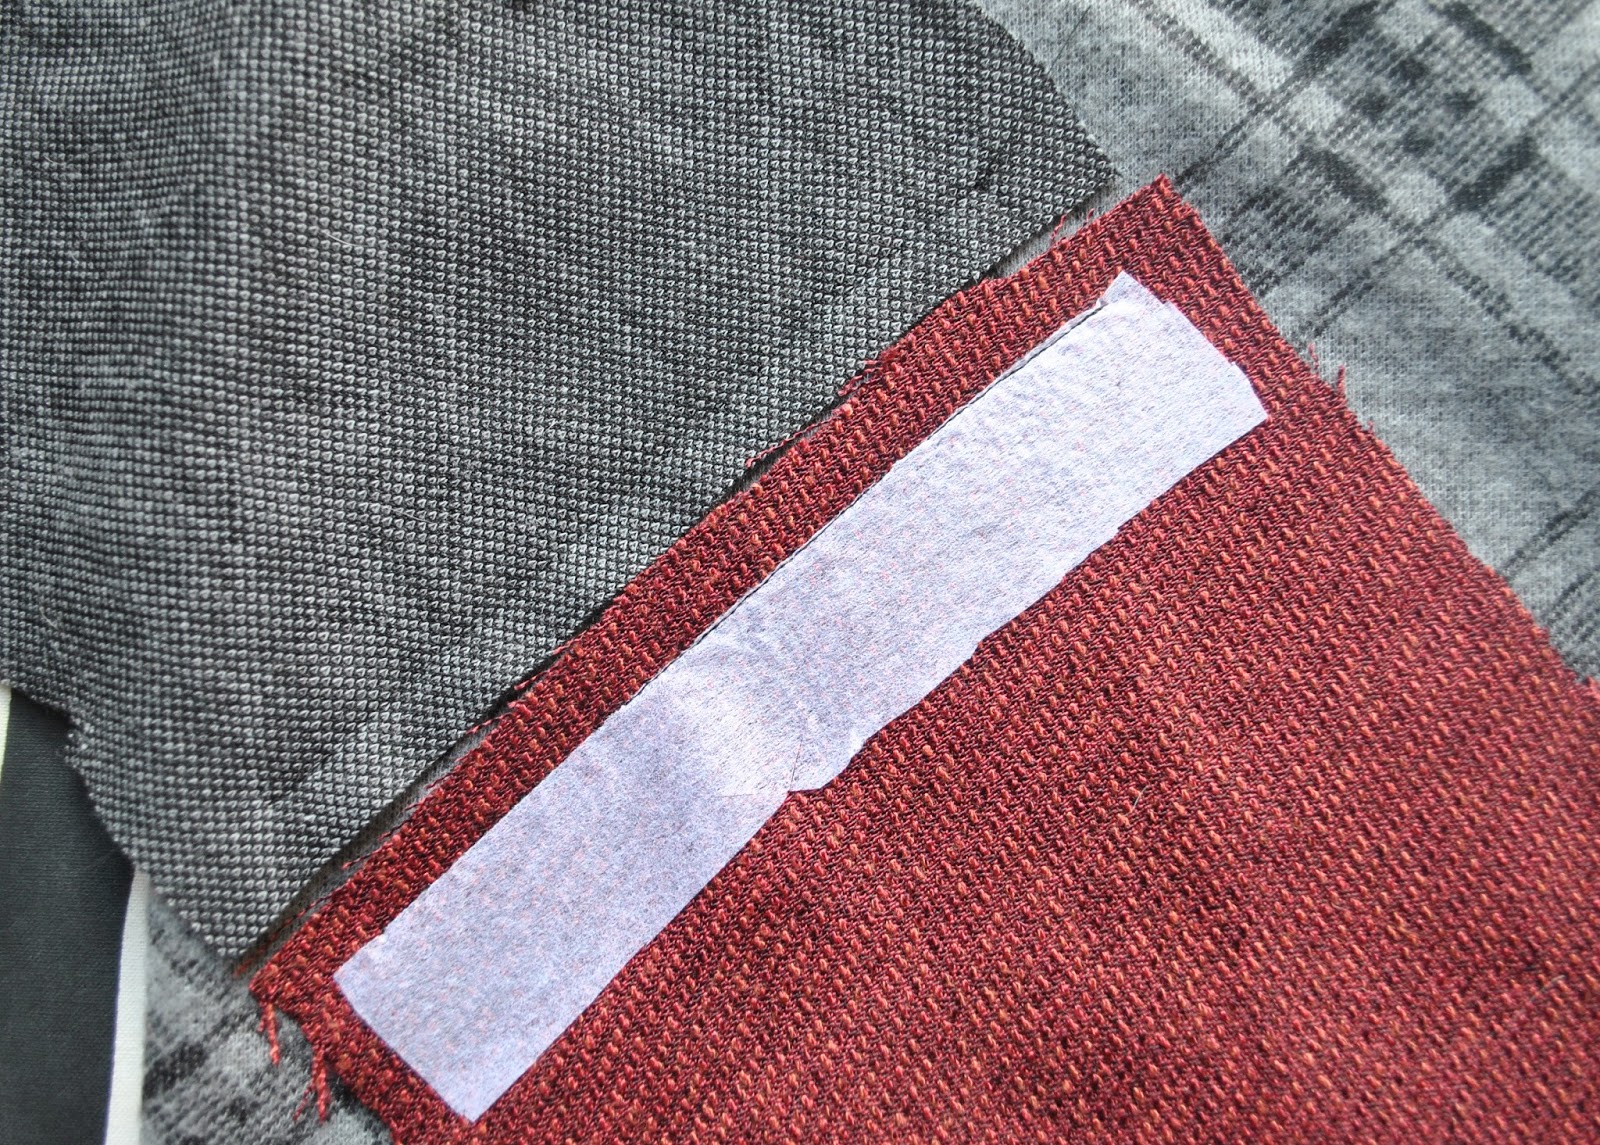
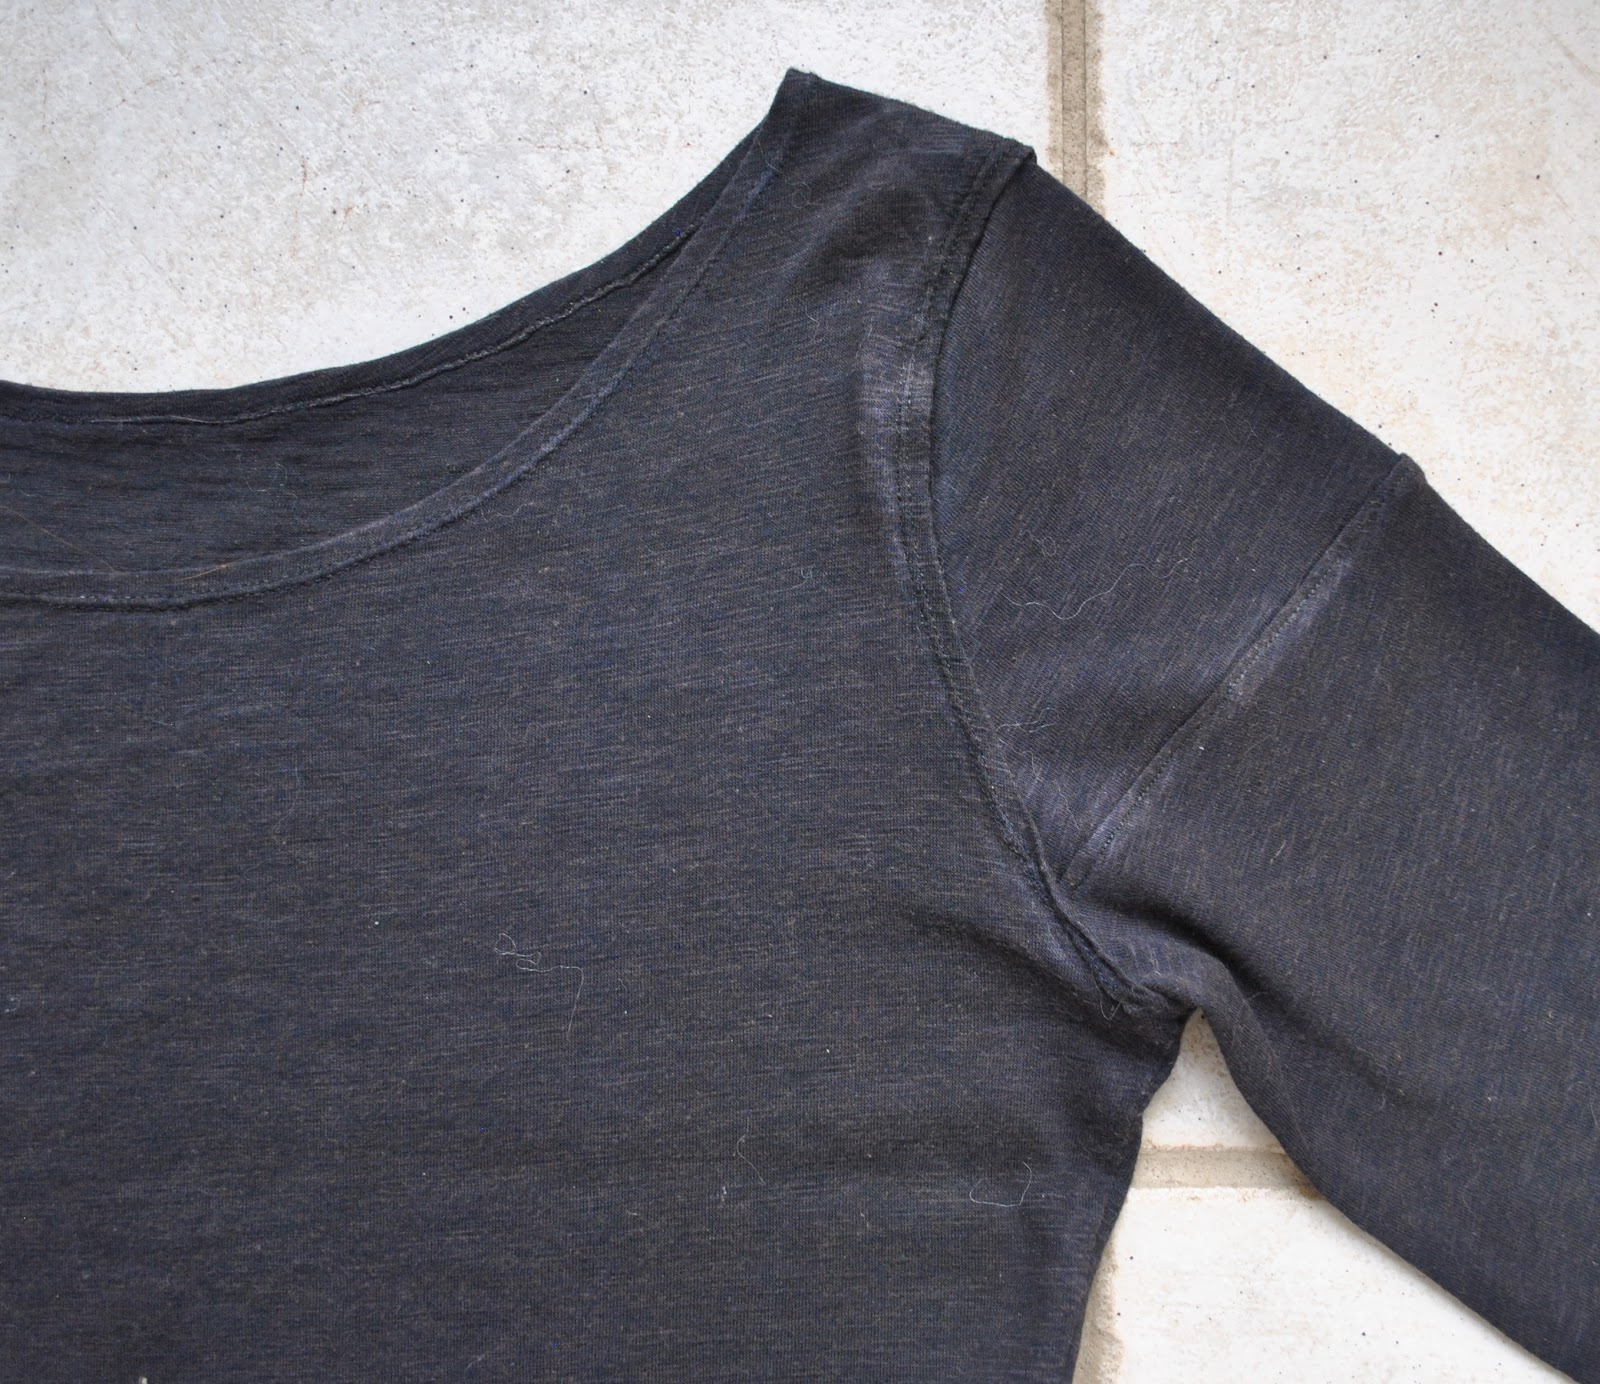
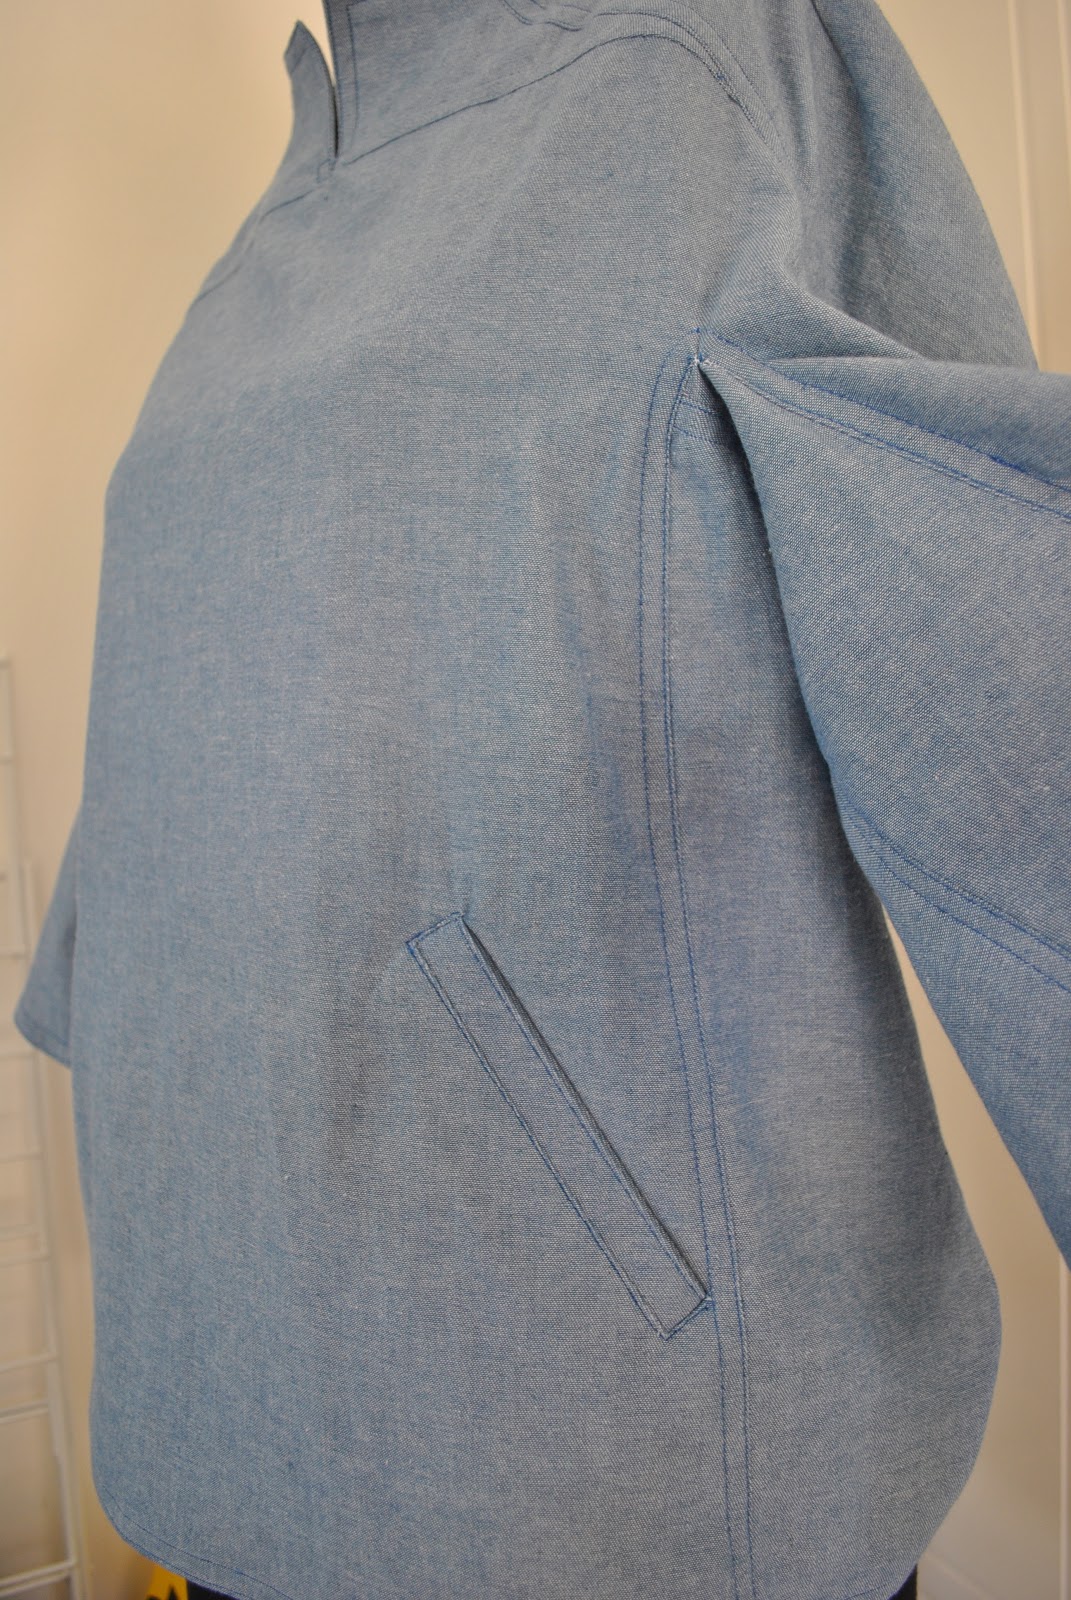
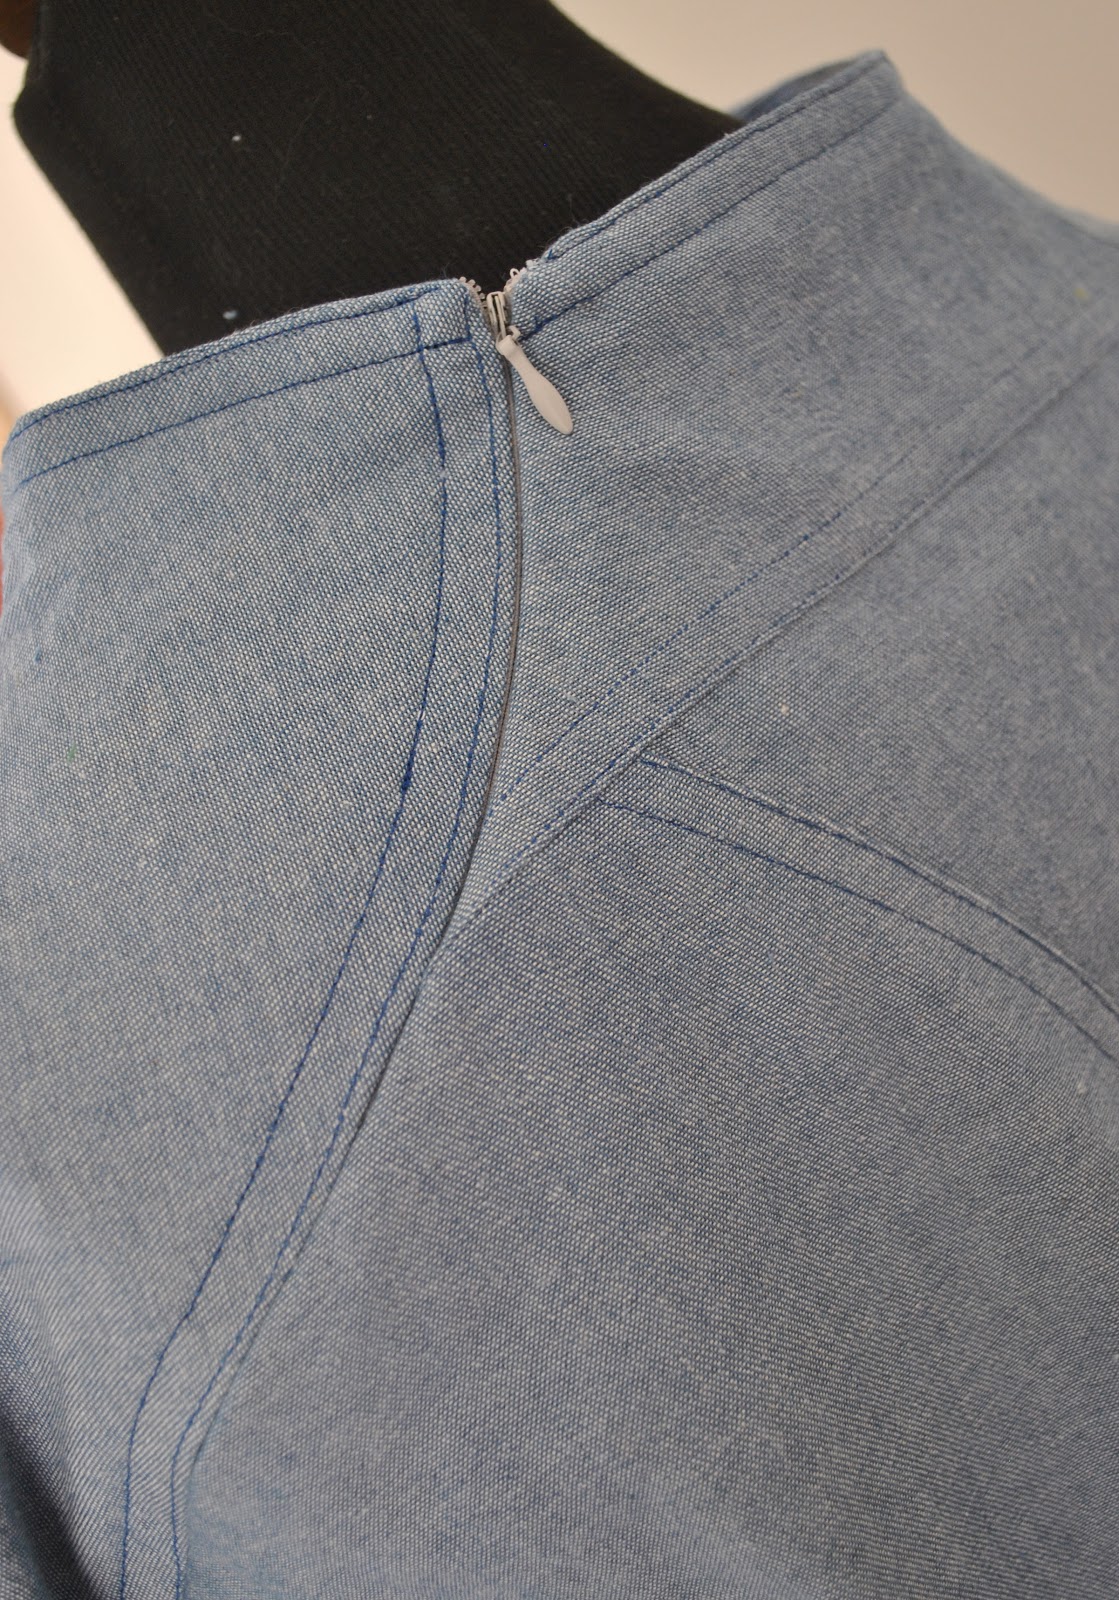
I traced a size 44 and just cut my pieces with quite big seams allowances, plus a touch extra at three areas just in case: the underarm points on the front and back, around the widest part of the sleeves, and with extra width at the hips; essentially, the places where you might expect extra ease would be required.  Basted the pieces together and tried it on, ensuring the raglan seams matched the notches on the neckband pieces as a set-in-stone point of reference and just made a few little adjustments in and out and here and there to some seams.  I reckon it turned out OK!
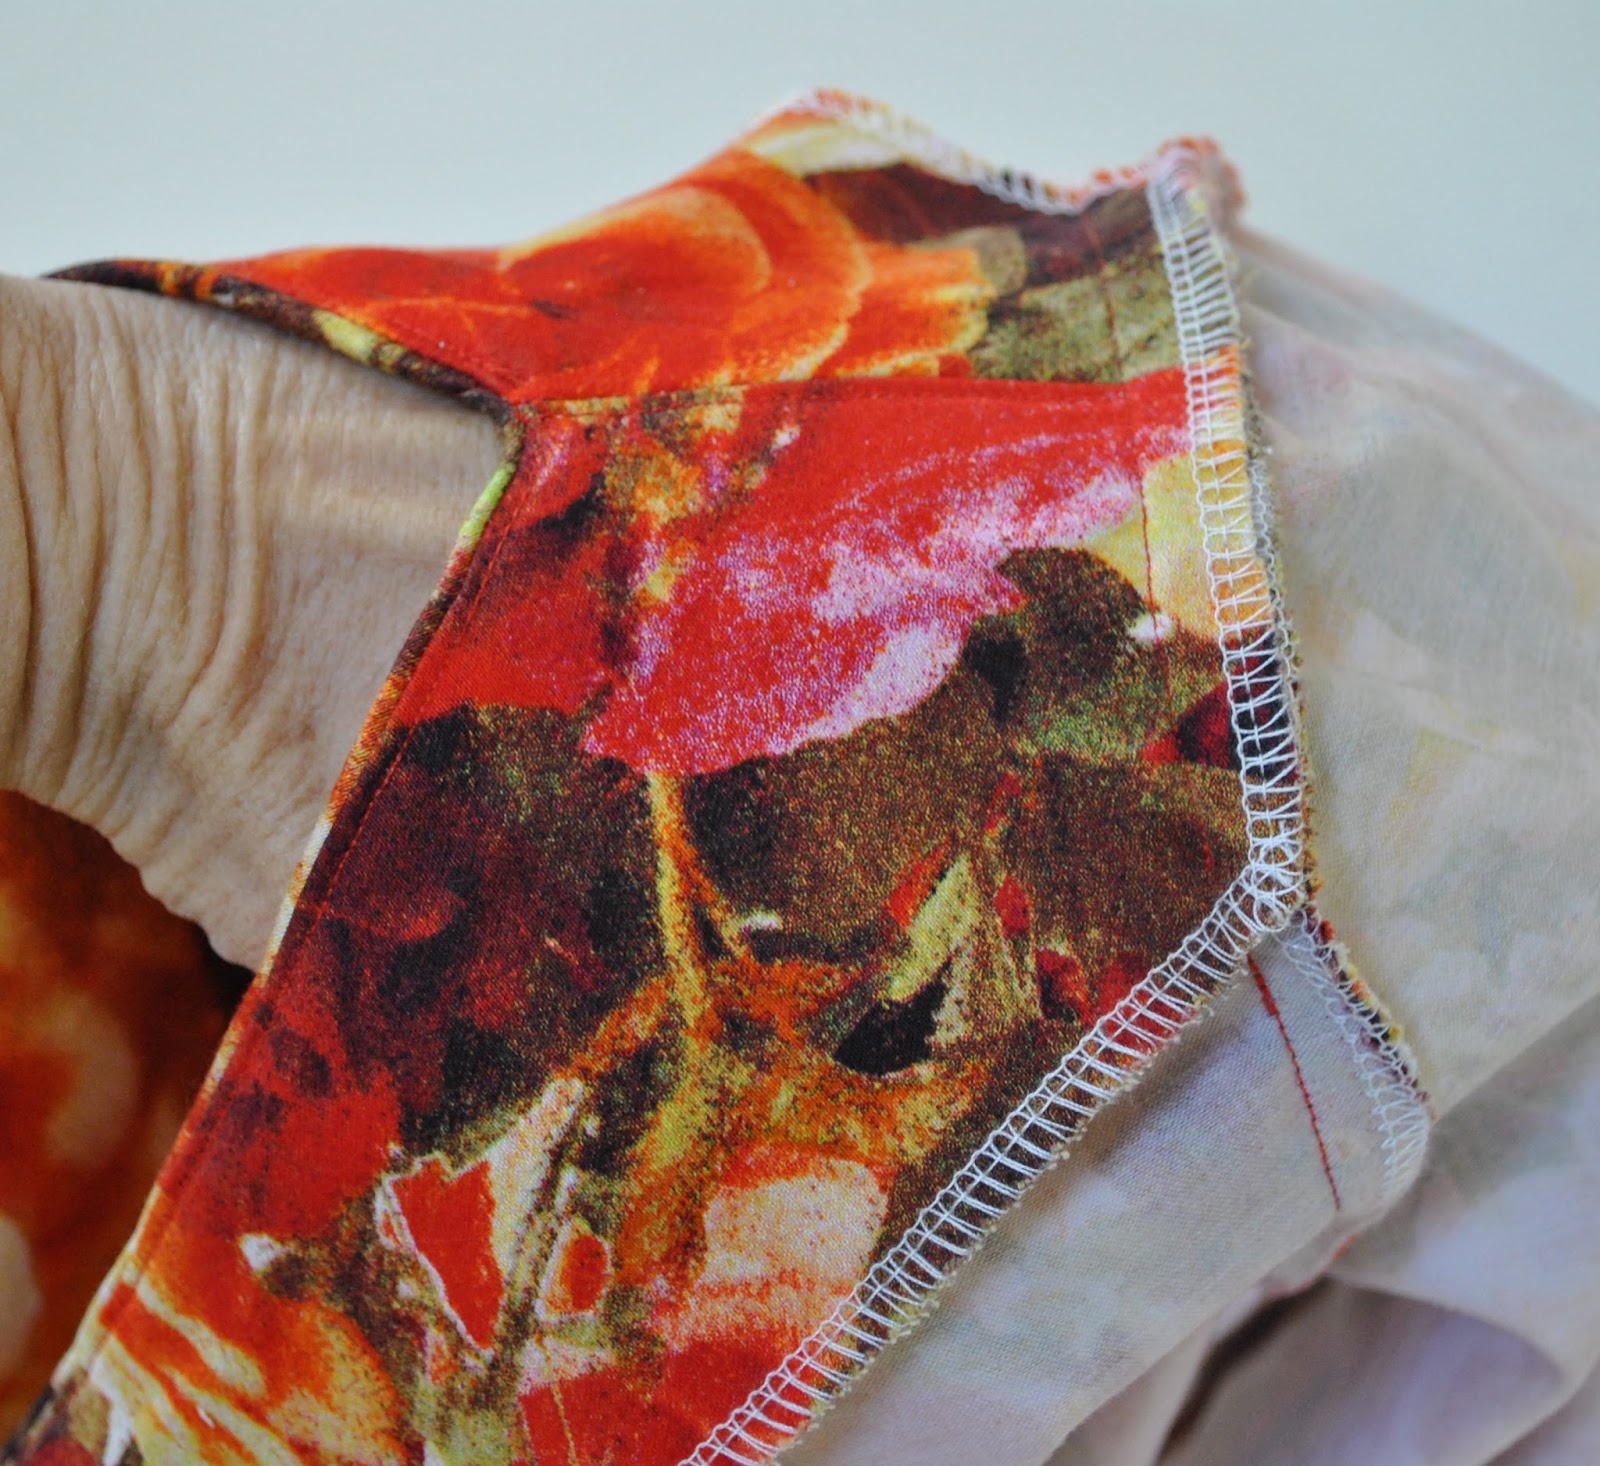
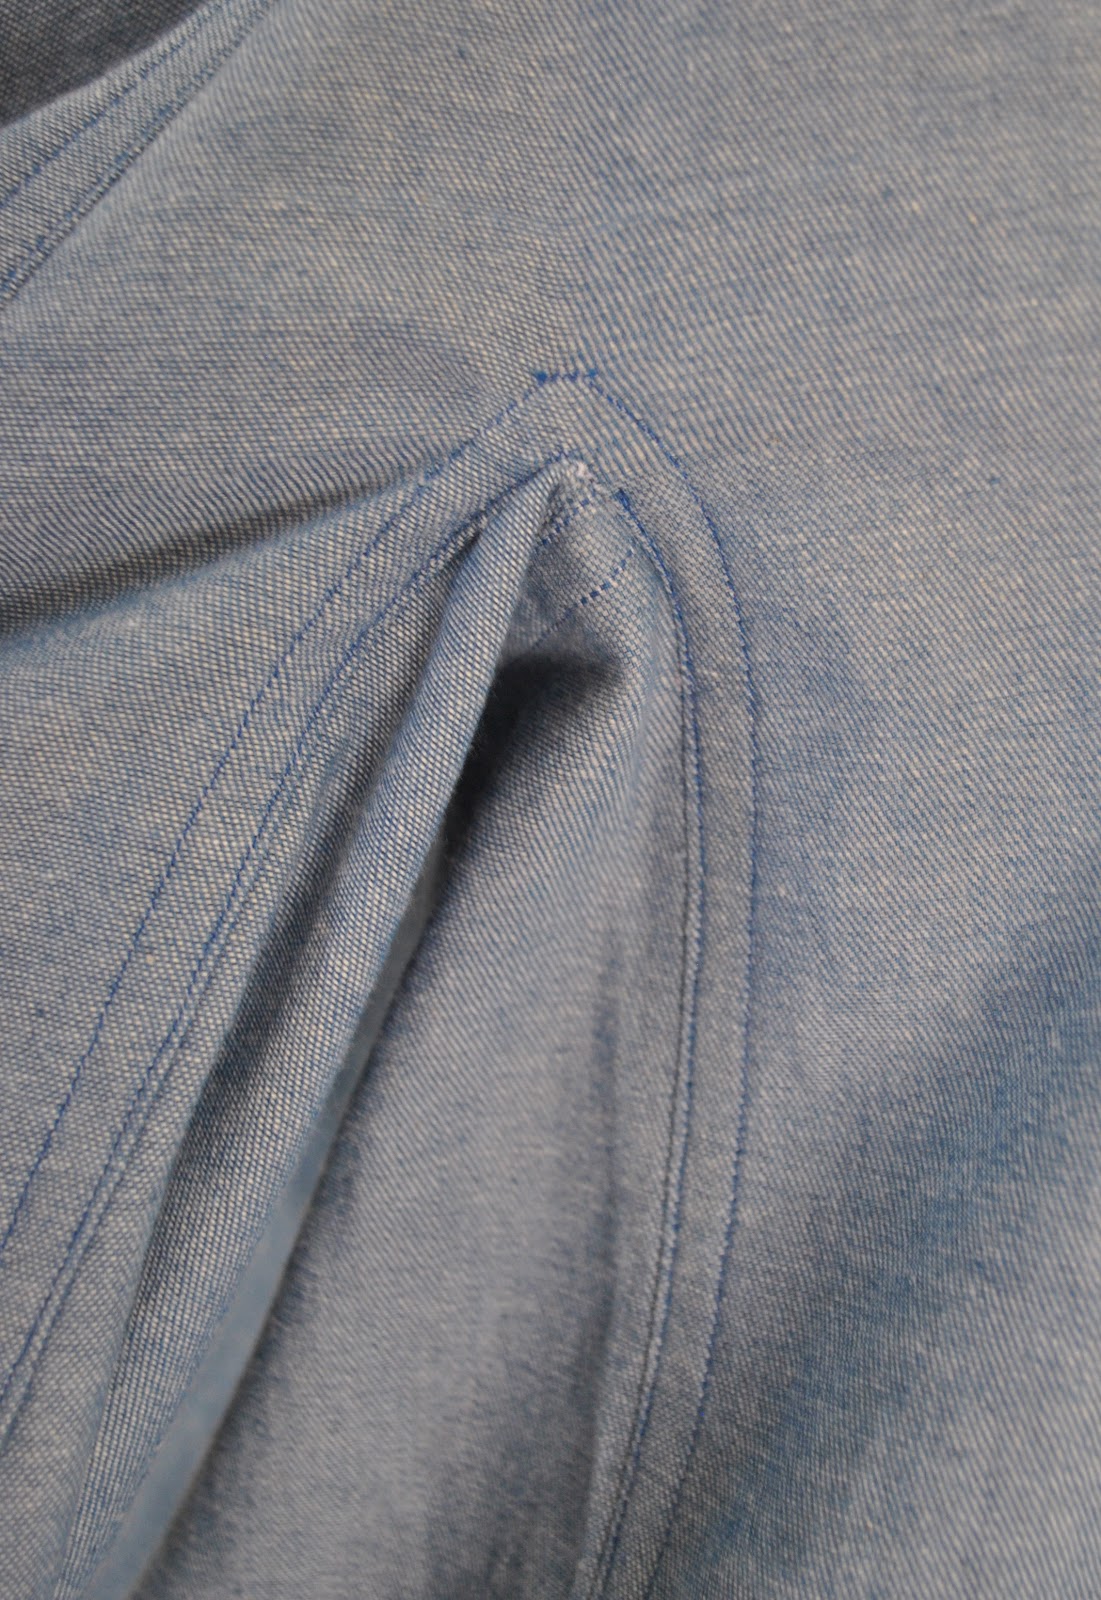
The waist ties are meant to be attached inside the centre neckband seam, from the top to the bottom of the seam, which means that not only would it have covered up part of my print, but when you wrap it around your waist it would have dragged the V-neck right down, thus rendering it a very cleavage-tastic top indeed.  How it is, is quite cleavage-y enough for me already, thanks!  Burdastyle’s coy description is “Impossible to ignore!”   Ahem, so I sewed mine on further down, only just covering the very lowest tip of the neckband.

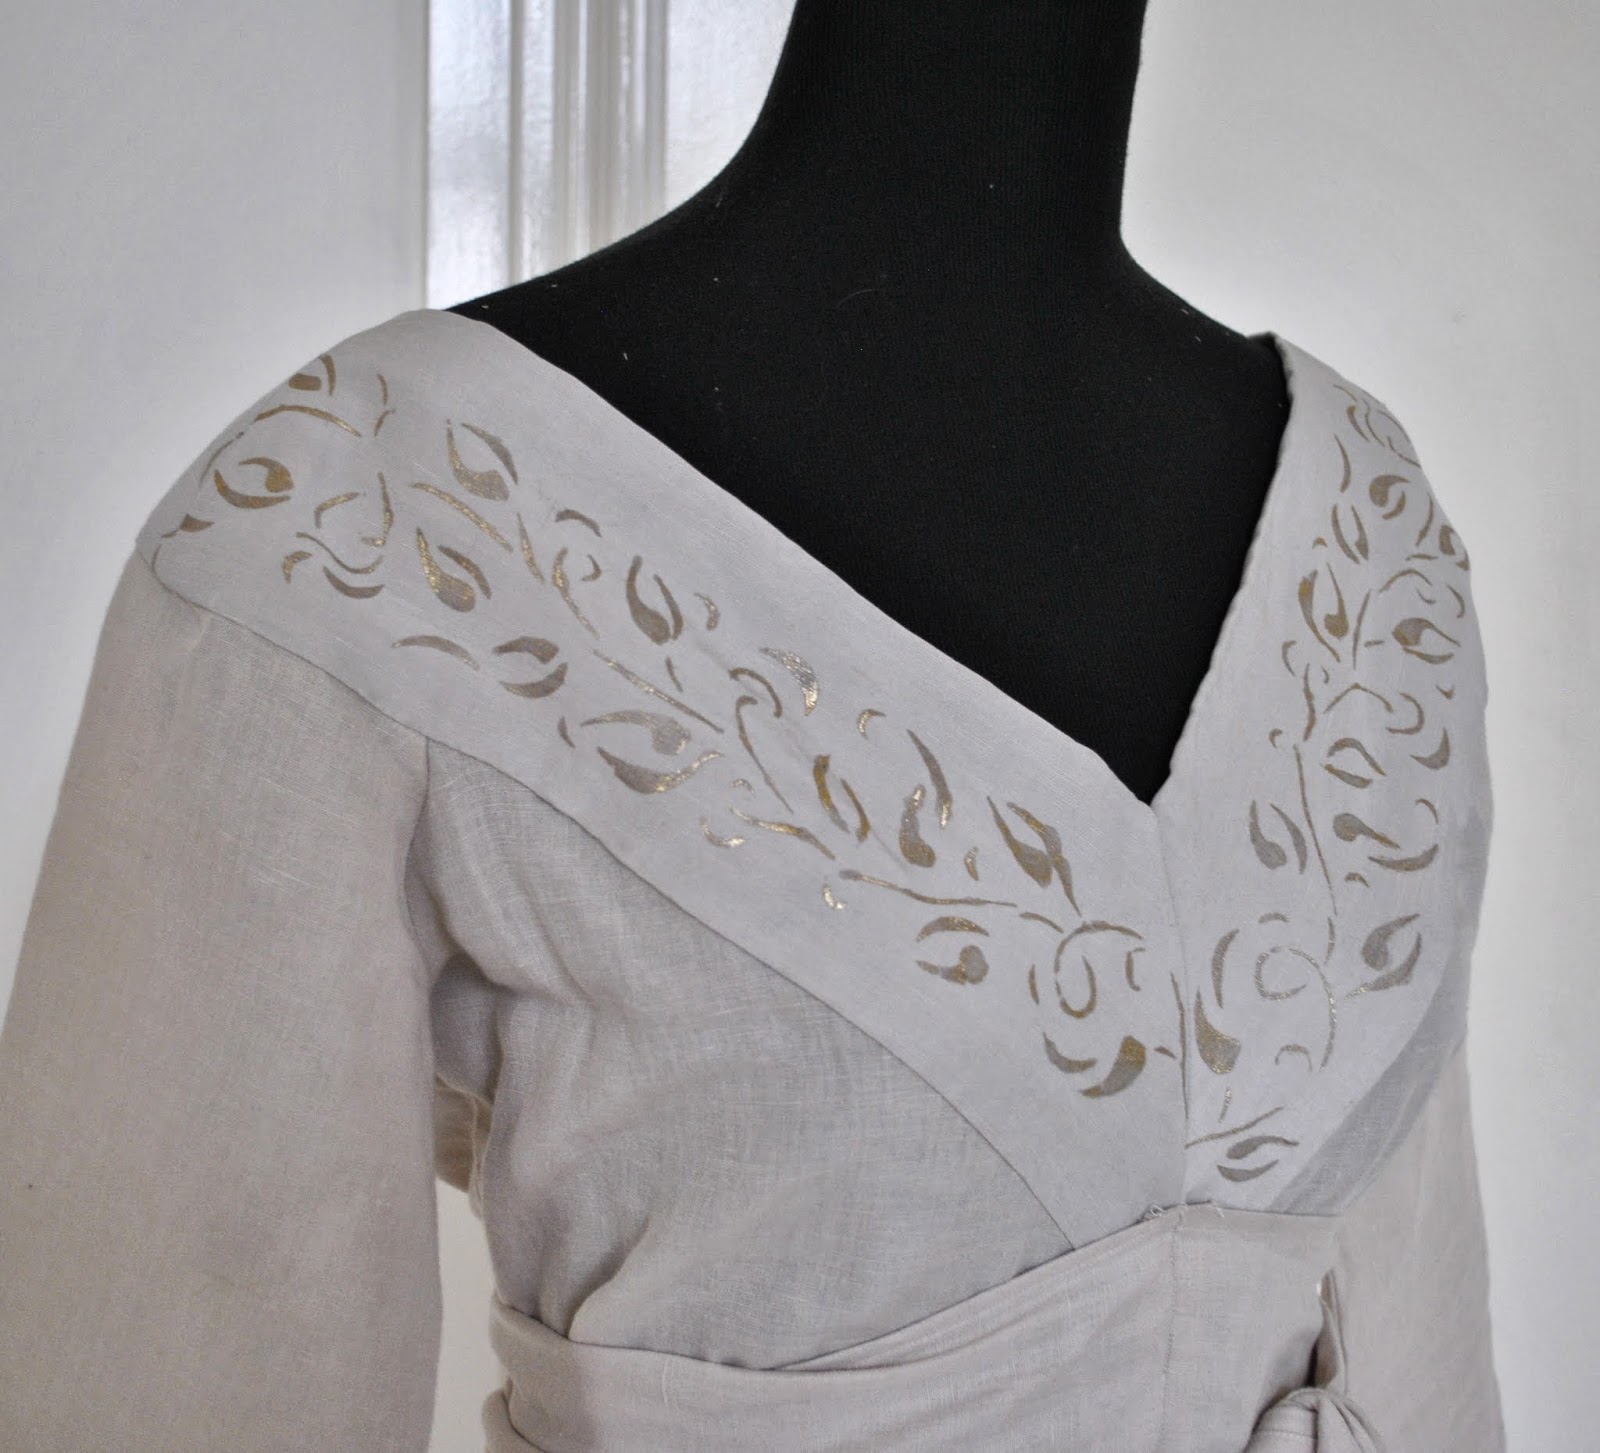
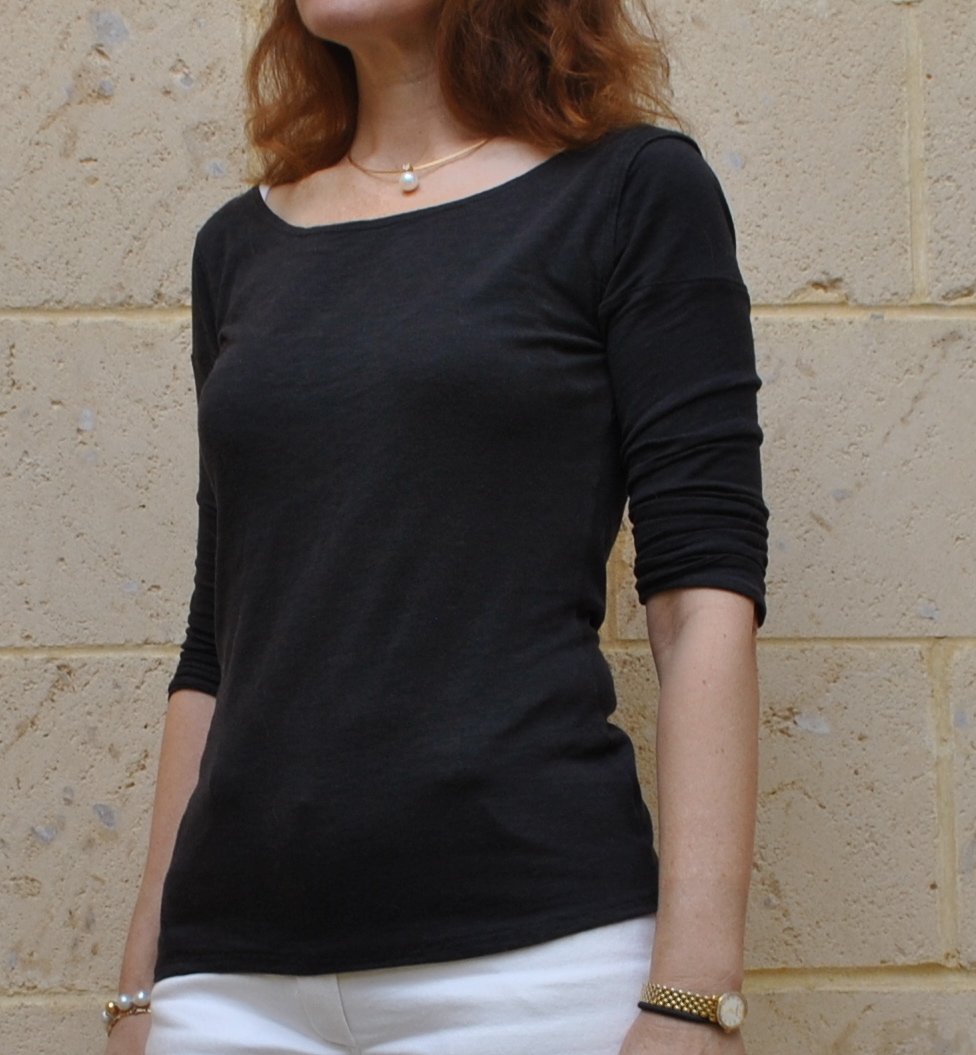
The neckline is a flatteringly wide portrait neckline, which means that my bra straps are showing.  But I’m cool with that, since I just happen to have a bra with straps that just about perfectly colour-match this top.  Now is that good wardrobe planning, or what?!  I reckon they just look like little camisole straps.

And; I have a pair of new flat sandals for summer!  these gorgeous cheerful bright coral sandals are going to pep up my wardrobe so nicely!  They are practically neon!

Details:
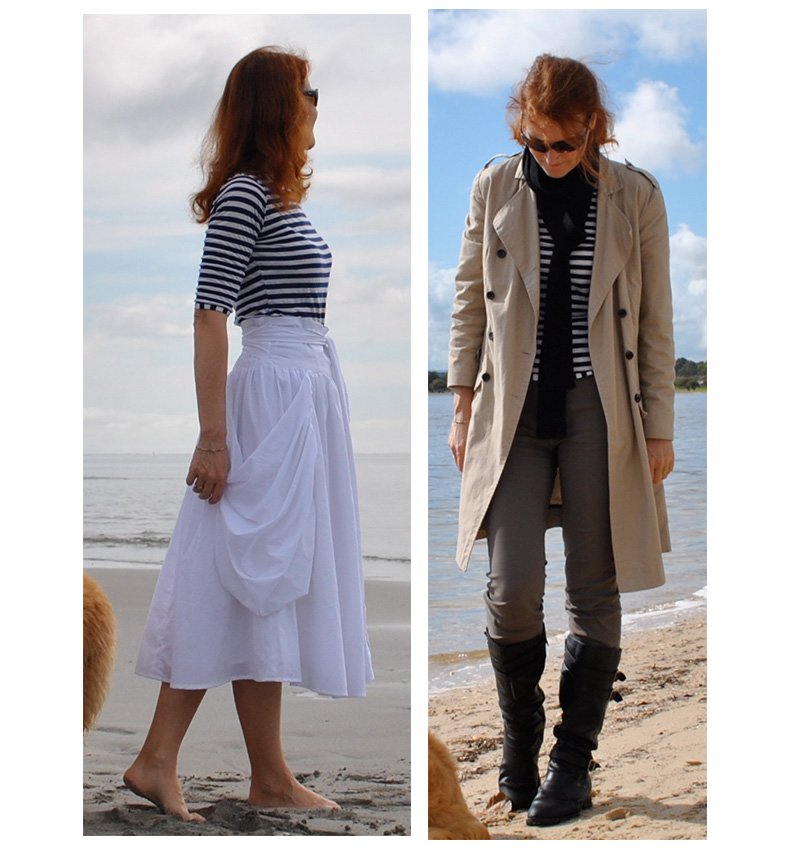
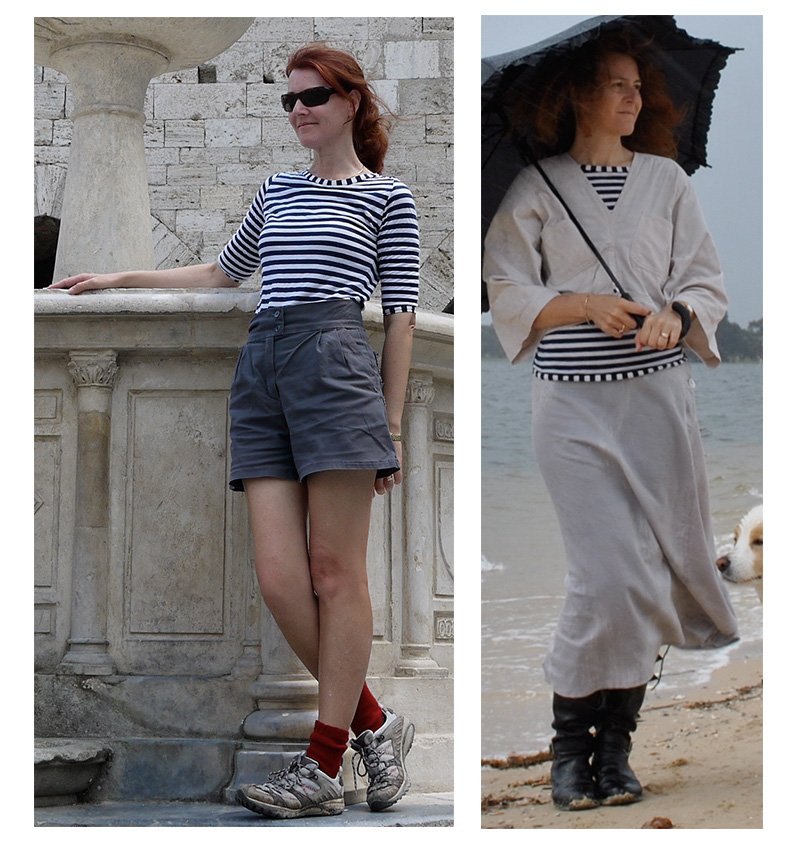
Top; Burdastyle magazine 07/2012, 136B modified, with neckband screen-printed by me here
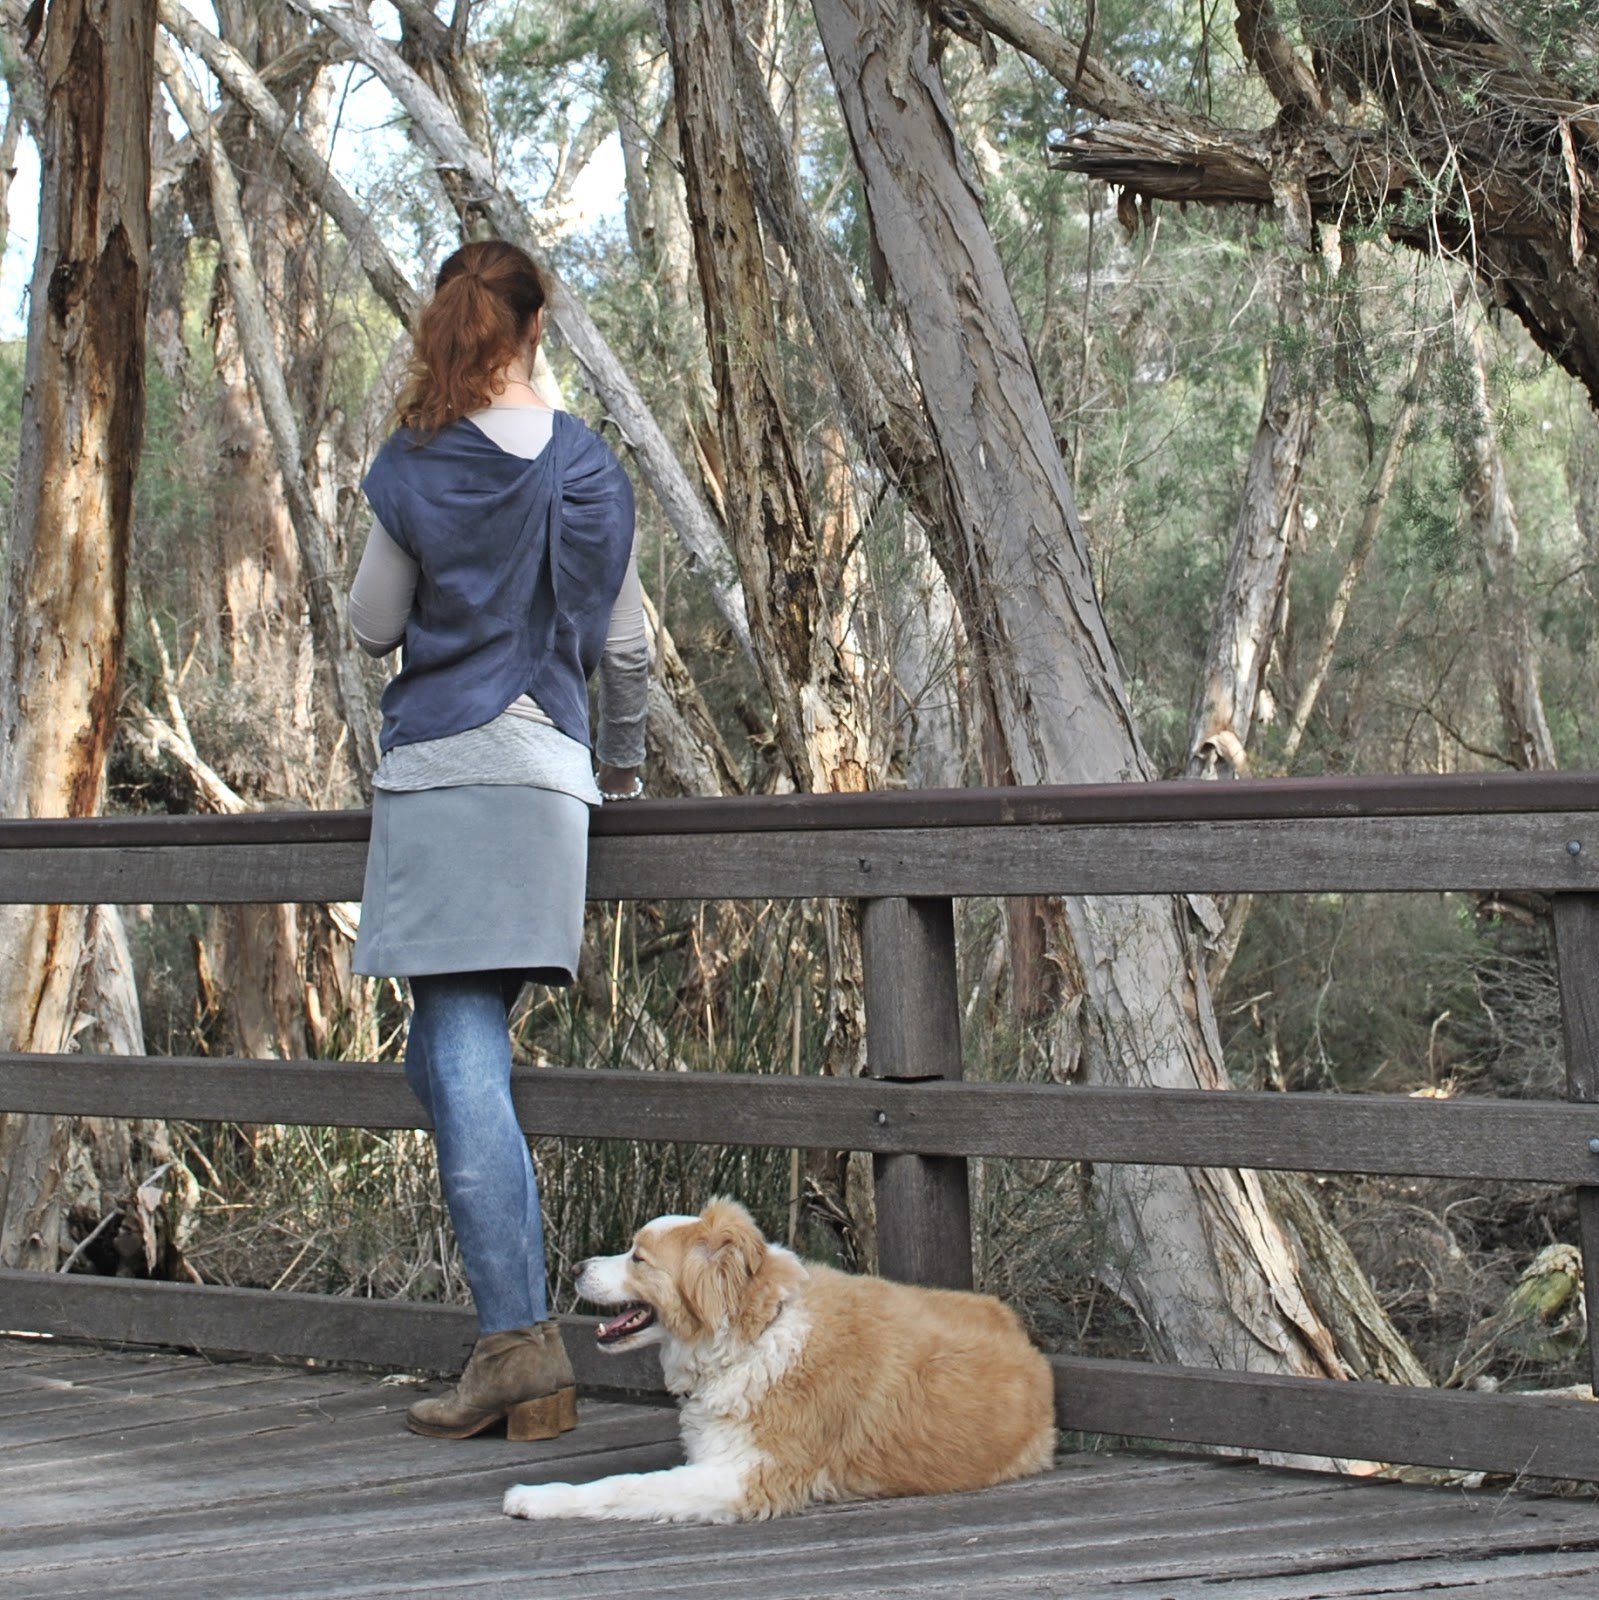
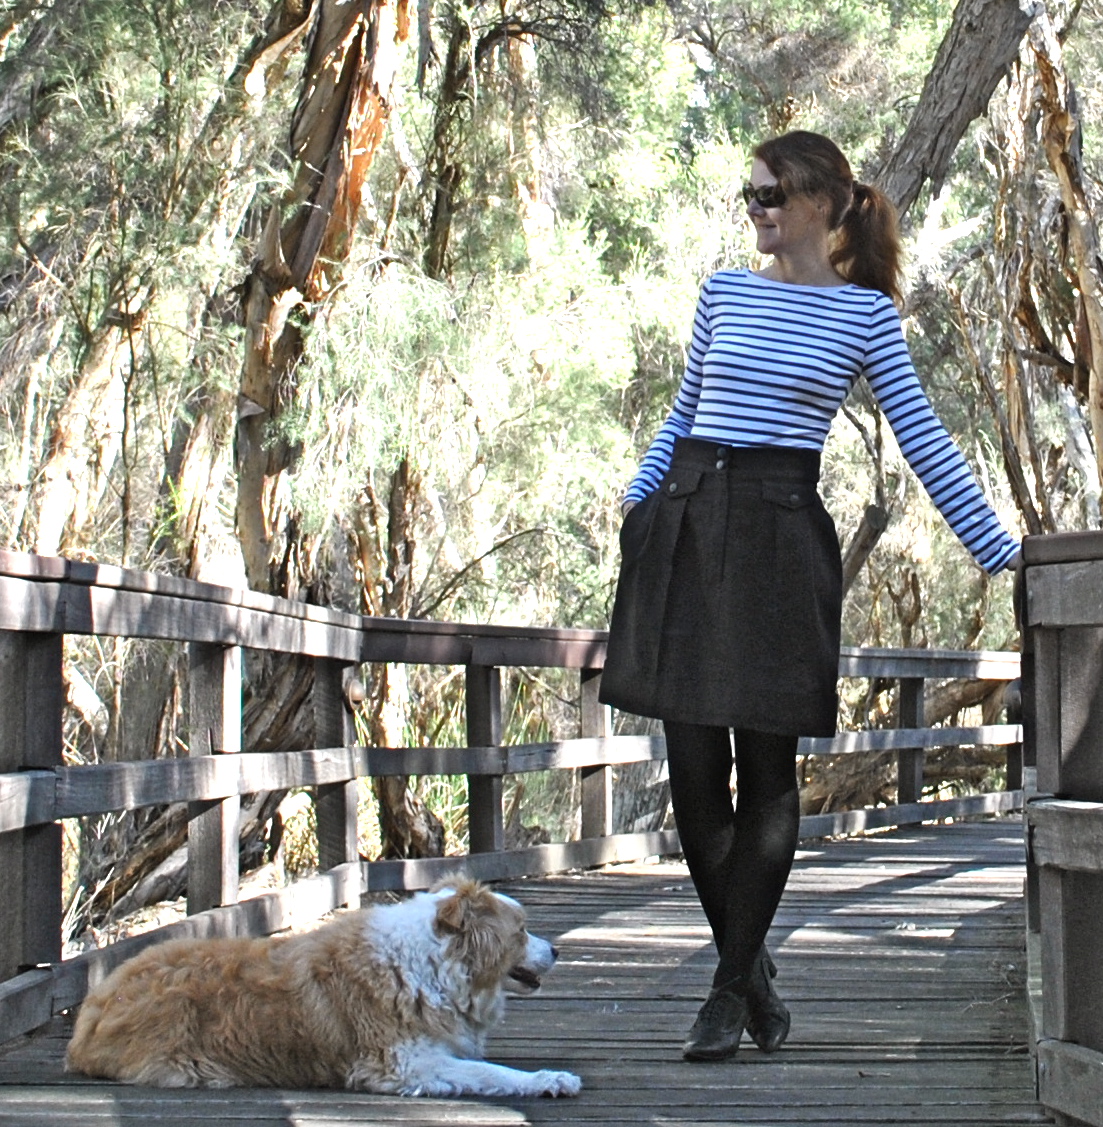
Skirt; Vogue 1247 modified, ivory curtaining fabric, details here and my review of this pattern here
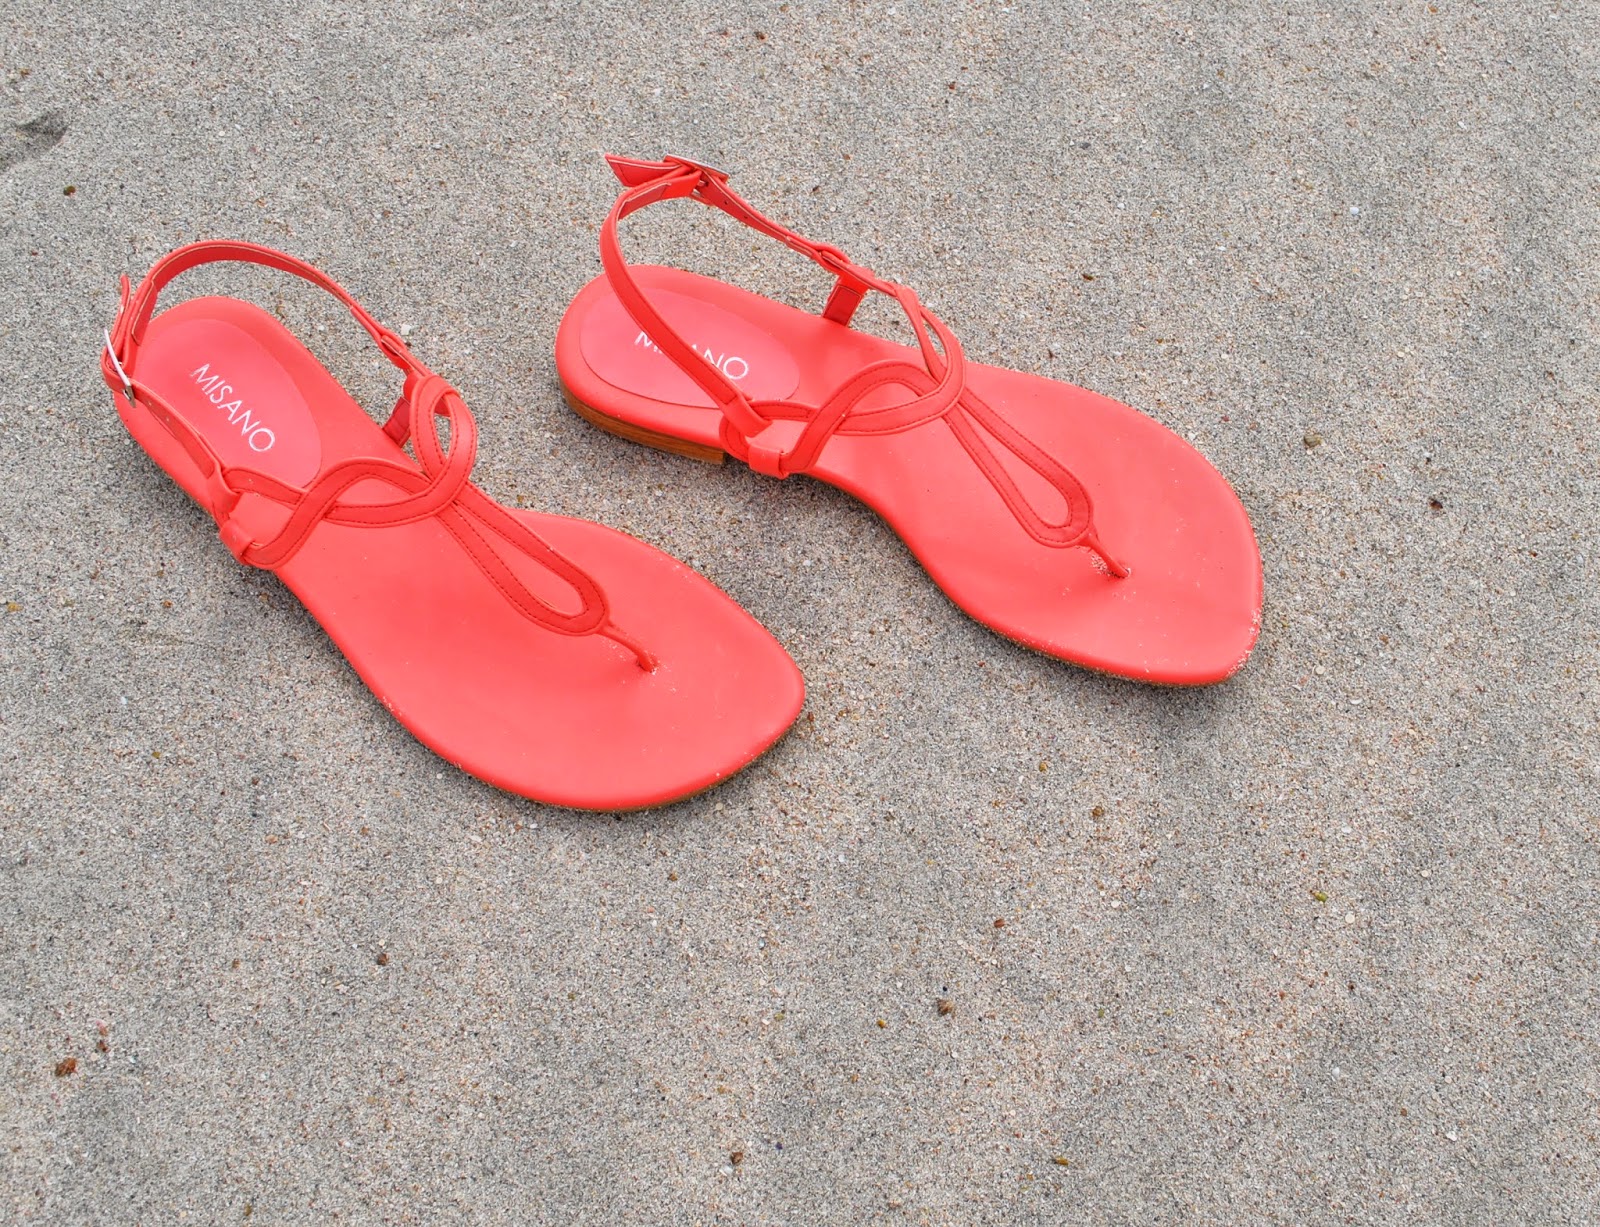
Sandals; c/o Misano

pinterestmail

Bruised blue top thingie

Hello  🙂
I have made this once before… this is top “p” from Shape Shape, (previously referred to on my blog as Unique Clothes Any Way You Like) by Natsuno Hiraiwa.  It’s a clever little design, like a cross between a little blouse and a draped wrap.
I really liked my first version, in a particularly delectable shade of creamy milk chocolate.  I had hammered snaps on for the front closure, which turned out to be a ginormously dumb choice since sometime last year I ripped a hole in the front placket when pulling the snaps apart…. (moment of stunned disbelief at own stupidity) Note to self: strong metal snaps plus delicate fabrics, equals a bad idea!

Version number two has much more sensible buttonholes and shell buttons, and is made in a lightweight drape-y silk with a suede-y, rather grabby texture to it, bought from the Fabric Store in Melbourne during my girly trip away with Mum and Cassie last year.  All the seams are flat-felled and the bias hemline swaps over from folding one way to folding the other way halfway along each top/bottom.  This is probably the only thing you have to think about making this otherwise very simple thing.  Oh, and the fact that the fabric you choose has to look the same both sides.

It’s not the kind of top you would wear every day, just an unusual and arty little thing to pop on over a plain ensemble to jazz it up.  Well that’s what I’m hoping, anyway!

Details:
Top; top “p” from shape shape by Natsuno Hiraiwa, dk blue silk
Skirt and two Tshirts; all self-drafted, skirt heregrey long-sleeved here, beige half-sleeved unblogged? I think?
Tights; self-drafted, of denim-look knit, details here
Boots; Francesco Morichetti, from Zomp shoes

pinterestmail

The Alessa hoodie

… so called because Alessa of Farbenfreude gave this fabric to me in a recent giveaway… thank you so much Alessa!
It is very nice fabric, a largish piece of soft fluffy charcoal grey non-stretchy knit stuff with a diagonally printed black check pattern, and a smaller piece of raspberry red woven fabric with an almost chenille-y quality to it.  They went so nicely together so I decided to combine the two in one garment.

The cat should give an idea of the scale here; there was not much fabric and I had to get creative to make the most of the small pieces.  And just to clarify; that is not a whinge… I LOVE sewing challenges like this!
I made a slightly A-line tunic with plain set-in sleeves, and I cut the neckline and hoodie piece using KwikSew 3667.  I’ve used this hood piece in several garments now, and this pattern was also given to me, by Mary of biblioblog a few years ago.  I am so lucky to have such nice blogging friends!

Um, the hoodie looks quite different from my initial plan, which wasn’t a hoodie at all.  This is a recurring phenomenon, I make plans but frequently change my mind once I get cutting.  Indecisive? maybe! … but at least something will get made.  And I’m very pleased with the contrasting hood and welt pockets.
Welted pockets … woot!  I had just barely enough fabric for these!  I used the pocket piece from Vogue 1115, and the contrasting welt is not a separate piece; to save fabric I cut the upper pocket piece with an interfaced extension at the opening, which folds back on itself to the inside becoming an integrated welt…  doing this skips a seam underneath, resulting in a little less fabric bulk.  I might just stick to this method from here on out!

All the raw seam allowance edges are overlocked together, and then I applied a cheat’s version of flat-felling because the fabric is quite “bouncy” and the seams didn’t press flat very satisfactorily.  This involved just laying the overlocked seam allowance down to one side and top-stitching them to the garment.

Details:
Hoodie; self-drafted, with the hood piece from KwikSew 3667
Jeans; Burda 7863 modified, ivory stretch denim, details here
Boots; nylon, from Zomp shoes

pinterestmail

Bright roses, tops n tights

Y’ello  🙂
I’ve been making stoof.  Please bear with me while my photo-taking catches up…
Firstly, my new top of stretchy cotton sateen.  I must be dreaming of spring already, I think!
This is a stash-busting success story.  I fell deeply in love with this autumnal gold/orange/scarlet/khaki rose-print fabric from Tessuti’s in Melbourne last year, and threw down my credit card with blithe abandon.  So my colours!  Close-up, the print has that slightly scratchy spotty appearance of an old polaroid.  Love it.
Difficulties arose when I got home and had to come to terms with the fact that for some dumb reason I had bought only 70cm.  I have no excuse for this insanity. Yes, I was an idiot.  I’m blaming that state of mad fabric drunkenness brought on by places like Tessuti’s.  Note to self:  get at least a metre from now on.
So I made a simple little pull-on Tshirt top because fortunately you don’t need much metrage for this style.  This is the bodice from a dress pattern, Burda style magazine 08/2009, 128; elongated a bit.  I have made this pattern up twice before, firstly as a dress and then as a top just like this one, so I already know how much I love this flattering boat-neck style.  It has bust darts in the front and two long vertical darts in the back for shaping.  No zip or closure is needed because the neck opening is wide enough so that you can just pull it on over your head.

I could not make the sleeves as long as the pattern intended, as in my previous two versions.  This is the very longest I could get from out of my meagre piece.  I would really prefer them to be about 12cm longer, but meh.  I can cope.

Details:

Top; Burdastyle magazine 08/2009; 128 modified to be a top, stretchy cotton sateen, my review of this pattern here
Skirt; Burdastyle 10/2010, 136 (the Karl Lagerfeld skirt) lengthened, black suiting gabardine, details and my review of this pattern here
Shoes; Django and Juliette, from Zomp shoes
Some notes on the finishing details for this top:

The neckband is finished with facings.  I always always under-stitch facings on a garment that I wish to look sorta dressy, or just not-so casual.  Top-stitching always makes things look a bit more “casual” imo, and often you want an edge that smoothly and cleanly rolls under to the inside, with no top-stitching or anything visible on the edge.  Under-stitching (the red stitching in both photos below) always provides a nice clean and minimal look on the outside; and safeguards against facings popping up and out.

After under-stitching, the facings are stitched to the sleeve cap seam allowances just inside the previous sleeve cap stitching, and stitched-in-the-ditch down to the shoulder from the right side of the garment, to hold them firmly in place.  

But wait, there’s more…

While I am really enjoying wearing my crazier leggings and tights, I guess we all agree that plain black tights are kinda the most useful type to have, and a must for winter, right?  So I made a second pair identical in every way to my previous pair.  I am wearing these in the photo above too.
And I have made two little Tshirts too, one for me, and one for my husband, both self-drafted and custom-fit, using the very last of my 100% merino wool stash, bought from the Fabric Store in Melbourne last year.  Now we have matching his-and-hers thermal tops, haha.  Quelle romantic, non?

Random picture of the neckband, constructed using this method.  Appearing here for no better reason than for me to feel good about the increasingly better finish I am achieving nowadays.  The centre back is still a wee bit bobbly thanks to the extra thickness of fabric in the joining seam there, but it’s getting there.  Practise is benefiting the quest for perfection!
pinterestmail

Navy and white striped Tshirt; 6 different ways

A striped Tshirt seems to be the wardrobe staple of a certain kind of girl, a very stylish and chic kind of girl, that I think is not very like me.  I mean, I like to think of myself as a non-conformist, but sometimes you find yourself latching on to a current trend almost without noticing!  The striped Tshirt is being touted as a “classic”, but I reckon it is a more accurately described as an ultra-fashionable item, that ipso facto will probably go out of fashion in a few years, like everything else.  Whichevs, for the moment it is IN.  And I found myself making one.  And wore it and wore it!
I looked back through my old photos to find these pictures of different outfits incorporating my navy and white striped Tshirt.  It has appeared in a supporting role in plenty of other outfits too, but these ones are all “new” to a 6 different ways post.  Five of these outfits are from previous me-made or self-stitched months; the first photo is a portion of one I used as my profile pic for a year!
Below: at left; the plain practical lines of the Tshirt play off well against the overblown silhouette of a pouffy white skirt, and at right; this is probably the “trendiest” out of all the outfits here…. worn with a beige trench coat, a long skinny knitted black scarf, and with khaki skinny jeans tucked into bikie boots.
stripe1a
Below at left; the Tshirt’s first appearance here on my blog, worn with greige corduroy jeans, a jersey scarf and hand-knitted socks, and at right; worn pinafore-style underneath my favourite charcoal grey pattern magic dress, with matching navy blue tights.
stripe2a
Below left; grunged down for a day of sweaty cross-country hiking with charcoal grey shorts and hand-knitted socks, at right, for a rainy winter’s day, the stripes stand out against the pale colours of a light grey longline skirt and a boxy little ivory jacket
stripe3a
It’s funny really that this Tshirt turned into such a favourite, since it was initially just an afterthought, thrown together using the leftovers of some rather low quality fabric.  My newer striped Tshirt is made with much nicer and meatier fabric, so I am hoping it lasts even longer, at least until the trend fades away!  🙂
pinterestmail

Boring black Tshirt

The penultimate day of me-made May, and I have a post planned to spew out some vitriol reflect on my experiences.  Only kidding there.  I have no vitriol, of course.  Well, very very little  😉 hehe, but seriously, I am going to be throwing a party that it’s finished!!
But ahem, my outfit.  I am wearing another sorta new, but not actually new thing, today.  I sorted through my Tshirt drawer.  And found this batty Pattern Magic top sitting there, sad and unloved and in need of a makeover.  I made it a year ago, using bright blue cotton jersey, dyed brown.  The resulting colour is a great colour for me, a very dark and quite rich chocolate brown that is almost purple in a certain light.

before

Great colour.
Not such a great top, though.
I wore it a couple of times and each time felt just a bit too… weird in it.  The pokey-out bits required pulling into place and arranging just so in order for them to not look Very Weird.  Mind you, I’ve nothing against “weird”, but there’s weird and there’s weird, if you know what I mean.  There’s interesting, avant-garde, attractive weird, and then there is just plain weird.  Don’t worry if you don’t see the difference there, I know what I mean.  
But hmm, still a great colour.  And there was a fair bit of fabric in it…

after

I half winged it, using my custom-fit Tshirt pattern.  I had to piece a new bit in the lower edge of one side, and angled the hem a bit to encompass this, a smaller, pieced-in bit would have looked too bitsy.  It’s still a bit bitsy probably, but this was the best I could do!  And I do really like that slightly angled hemline.  I hemmed the lower edge using the blind hem stitch, only on the outside; so it’s decorative close-up.

The sleeves also had to be pieced to get any length to them, and were stitched inside and underneath the existing narrow hem of the top’s armscye.  It has the effect almost of a tank with a little cap sleeve underneath, and then with a longer sleeve underneath that.  The sleeve hems are angled too; shorter at the underarm seam than on the outer arm.

Sorry if it’s boring now, compared to the before.  The good news is that I will actually wear it now, being no longer, you know, weird.

min 6C, max 17C  do not let that sunny blue sky deceive you, it is blinkin’ freezing! and we had heaps of rain this morning!

Details:
Jeans; Burda 7863 modified, ivory stretch denim, details here
Top; my own design, blue cotton jersey dyed brown
Jacket; Vogue 7975, thick woven wool, with silk lining and black braid edging, details here
Socks; handknit by me to a 60’s pattern, details here
Boots; nylon, from Zomp shoes

my family mmm13, Craig is wearing this shirt, Cassie is wearing these handknit socks, and Sam is wearing this hoodie

Craig’s shirt; Burda 7767 modified, green cotton, details here
Cassie’s socks; handknit by me to a 60’s pattern, 2ply yarn, details here
Sam’s hoodie; self-drafted, blue/grey jersey, details here

pinterestmail

Black tights and striped Tshirt

So yesterday I mentioned I would need some black tights to see me through winter… well I made some, tout de suite.  Nothing like striking while the iron is hot! 
I used some lovely fine-knit black merino wool fabric, bought from the Fabric Store in Melbourne during our last visit, and my own self-drafted pattern.  Yah, nothing else to say about these really.  There’s no doubt I will wear them tonnes and tonnes.  I’m making a promise to myself that I will still wear my more colourful and interesting tights at least as frequently.

I also made a new striped Tshirt too; since my old navy and white striped Tshirt has been worn so much it’s had it and is now my PJ top.  I decided that a striped Tshirt, like the black tights, is another “need” for my wardrobe.  A must-have.  I know I know *cringe* must-have lists are a dime a dozen and sometimes appear to encompass everything under the sun: but I believe it takes time and trial and error to work out what really constitutes a must-have for an individual.  I think that these two pieces are both must-haves in the wardrobe, for me  🙂
I used my custom fit Tshirt pattern, (the pattern that used to be Burdastyle magazine 06/2011, 120, altered completely beyond recognition), and a white and grey striped cotton jersey from Fabulous Fabrics.   I stabilised the shoulder seams with Seams Great, many thanks to velosewer for this  :).  The raw edges of the sleeve and lower are overlocked, then folded under once and stitched with a twin needle, taking care to have the stitching inside and out appearing within the white stripe.  

For the neckband; instead of a vertical or bias striped band, this time I decided I wanted the clean look of a plain white band.  So carefully cut the strip and folded and basted it so the band is the exact width of the white stripe.  The thinner grey stripe appears just inside the fold.
I attached the neckband using this method, and topstitched the seam allowance down to the body of the garment afterwards.

min 9C, max 20C, sun, cloud and a smidge of rain today!

Details:
Tshirt; self-drafted, khaki and white striped cotton jersey
Skirt; Burda style magazine 10/2010, 136 modified, (the Karl Lagerfeld skirt) black suiting mix, details and my review of this pattern here
Tights; self-drafted, black merino wool knit: my tutorial for drafting your own custom fit tights pattern is here
Shoes; Django and Juliette, from Zomp shoes

in my family’s mmm13 today; Sam is wearing this hoodie, and Cassie is wearing these handknit socks.

Sam’s hoodie; self-drafted, blue/grey cotton jersey, details here
Cassie’s socks; handknit by me to a 60’s pattern, 2ply wool, details here

pinterestmail

Blue-bell sleeves

Hello  🙂
I’ve made a new top.  Actually I made this a little while ago, and I’ve suddenly came to the glorious realisation that hey! the autumnal weather is here and it’s actually beautiful enough to wear it.  I love this time of the year!
This is made using Vogue 1115 with the body lengthened by about 2.5cm, and used a piece of thin blue woven cotton denim-y stuff.  I chose to use the fabric wrong side out, since I preferred the muted, slightly undefined, yellow-y tone of the blue of the wrong side.  The right side is a stronger blue, which I didn’t think did wonders for my complexion.
I’ve written a pattern review below for anyone interested, but there really is one important thing to know about this pattern, it is rated Advanced/Plus Difficile, and yes, that is a well deserved rating.  The undersleeve/side piece when joined together is pretty tricky to insert neatly; and sewing down the seam allowances of said sleeve gusset with a double row of topstitching? … seriously tricky.

Most of the topstitching I used a deeper blue thread which was painstakingly colour matched to the blue in the fabric weave.  Haha, kidding; actually it is just leftover thread that I already had in my stash  🙂 the fact that it matched is fortuitous!  I used a lighter shade of blue for the bar tacks.

Installing that invisible zip, another seriously tricky procedure.. since I prefer to insert the zip before sewing up the seam below it; and since the seam allowance has to be finished with a double row of top-stitching to stylistically match all the other seams on the garment; this is an area that needed a bit of nutting out.  I’m pretty pleased with the nice even finish I got in the end  🙂

Look at those blissfully deep, welted inner pockets (satisfied sigh)  I made them a smidge deeper and bigger, and the edges are finished with HongKong seaming.

The graceful curve of those pieces in the back is so elegant and stylish.  I just love the seaming lines here!  I also like how the slit at the lower back stylistically matches the slit at the upper front neckline.  imo, it’s the little details like this that set the designer patterns apart from the others.

Those wide bell sleeves… I wasn’t absolutely certain that I would adore these, but they’ve grown on me.  They are certainly comfortable and feel nice to wear, no constrictions whatsoever! and I think they look quite designer-y and interesting.  I worried that the size of them would make them annoying, that they would get in the way of my daily activities, but I’ve worn my new top all day and barely noticed the sleeves.  No worries there!


Details:
Top; Vogue 1115, blue cotton denim
Skirt; based on Vogue 1247, refashioned from another skirt, originally Vogue 8561, details here
Sandals; c/o Misano

Pattern
Description:
Loose-fitting,
hip length, pull-over top has wide funnel neckline with slit, front and back
armhole gusset seaming, bell sleeves, welt pockets, back  inset, slit, side back zip and flat
fell seams.
Pattern
Sizing:
American
sizes 6-12; I cut the size 10
Did
it look like the photo/drawing on the pattern envelope once you had finished
sewing it?
Yes.
Were
the instructions easy to follow?
In my
opinion the instructions are straightforward but this pattern is rated
Advanced/Plus Difficile for a reason!
What
did you particularly like or dislike about the pattern?
Well
I do so love a sewing challenge, and there are a few in this pattern… this is
not a top that can be whipped up in one day, no sirreee!  I dug down deep into my reserves of
patience and only allowed myself to work on the tricky bits when I was feeling
fresh and not tired!  For example:
stitching those double rows of topstitching to the undersleeve and side / front
and back seams was tricky, and also attaching
the neckline facing neatly to the top curved edges of the zip tape quite
tricky.
Fortunately,
I really love the final product!
Fabric
Used:
Lightweight cotton
denim
Pattern
alterations or any design changes you made:
I
lengthened the body pieces by 2.5cm at the hem, and cut the pockets to be 1.5cm
deeper…
Step
16, I chose to reinforce underneath the single layer of fabric with a small
bias cut square of interfaced cloth before stitching the bar-tacks.
Step
35; I prefer to insert the invisible zip before
sewing together the seam underneath, I think you can get a much neater finish
Step
49; I think it is supposed to read “with right sides together” but in any case
I didn’t stitch the welt together like this, just folded it wrong sides
together and continued with step 51 with the edges raw and unstitched, and then
in step 56, slipped them between the pocket and triangular ends, stitching them
in place in the pocket seam, a more elegant and less bulky way of finishing the
welt considering the raw edges are bound with HongKong seaming in step 57.
I didn’t do the following, but if I was
making this again I would…!
Step
3 and step 20 have you slash the underarm/sleeve between stay-stitching… I
recommend instead that you leave the actual slashing until just before step 45, when you pin
and attach the undersleeve and side. 
There’s no need to make the cuts so early, and if your fabric is subject
to fraying then I think it’s best to leave it until the last minute,
particularly since you are cutting so close to the stay-stitching and into the
armhole corner.
Would
you sew it again? Would you recommend it to others?
I do
recommend this pattern to the advanced seamster, and I think I will sew this one up again.  And,
ahem, I can get the top on and off without having to even use that
difficult-to-insert zip as long as I don’t mind my hair getting a bit
messy.  Which I don’t.  So, maybe I have a tiny head but
looking at the pattern envelope I think the model probably could do the
same.  The next time I might not
even bother with that zip. 
Conclusion:
I’m very happy with my new top, and I think it is a great
designer take on comfortable and
chic.  I was a bit worried about
those wide bell-sleeves before I started, that they would get in the way of daily activities, and/or look awkward and
stand out stiffly in a difficult-to-wear way but I needn’t have been; the sleeves feel great and look quite cool, and are very comfy in this loose floppy fabric.

pinterestmail
Switch to mobile version
↓