
Hello! I’ve got a small handful of new stuff to show off present … four things to be precise!
 Firstly, two sage green/pale coffee, checked tweed skirts. I inherited this beautiful quality piece of wool tweed from my grandmother’s stash after she passed away. Although I earmarked it straight away as two skirts for Cassie and myself I just hadn’t got around to it and have sat on it all this time. It was one of those fabrics I couldn’t bring myself to cut into… you know, inherited from Granny, plus exceptionally good quality, equals inevitable thoughts of sewing tragedy followed by eternal self-damnation…. but I’m making myself get over that nonsense nowadays. Make it! Enjoy it! Live dangerously! So, finally… it helps too that I think Cassie has now grown into fabric of this calibre 😉 not that she didn’t deserve high quality fabrics before, but you know what I mean! it’s very much a grown-up fabric and makes a very smart little work skirt for her now that she has a serious and professional career. The fabric really is beautiful stuff… fine and evenly woven, and there are flecks of all sorts of colours in with the sage green/coffee check… blue, red and gold, caramel brown, forest green, and a hint of purple and black. It has no identifier on it but it wouldn’t surprise me if it was a fully English tweed. My grandmother was very much into that sort of thing 🙂
Also, this is possibly the first time that my fabulously neutral garage wall has failed me in showing up a garment nicely!! it blends in way too much here! Maybe the gorgeous fabric shows up better in Cassie’s picture, below. Here, she is wearing her skirt with this caramel coloured merino tee that I made for her previously.


Both skirts are pretty much identical, apart from the size, of course!! Both made using Vogue 8363; the waistbands and pocket linings are cut from cotton calico, and the lining is a beige polyacetate. Ivory/beige invisible zips in both skirts, closure by a wide hook and eye, and I cut the linings big and eased the extra fullness into the waistband with big pleats, for some wearing ease. As always, I like to hand-stitch the waistband facings and lining down on the inside, much neater I think and the fabric deserved a really nice finish 🙂


Next up, a little top for Cassie! we bought this ivory/grey cotton French terry while we were in Japan recently… and can I just say… OmigawdthisfabricisthemostGORGEOUSstuff and I would sob with pitiful happiness if only I knew I could go back to Japan again… *sigh* When Cas sie moved out of home she left this fabric behind and I almost started to factor it into my own plans mwahahahahaha… but of course she hadn’t forgotten it, o no! The reason she had deviously left it behind was so that I could make something for her with it! HA! She chose the wings top from Pattern Magic 3, modified so as to have the wings gone; I’ve made this for myself once previously too, and I like Cassie’s new one so much I’m now wondering why I threw mine away! I left the lower edge raw so it curls up nicely, and the sleeve edges and neckline I overlocked the raw edge, turned it under once and did a nice discreet little zig-zag to finish it. It looks quite nice, I think.

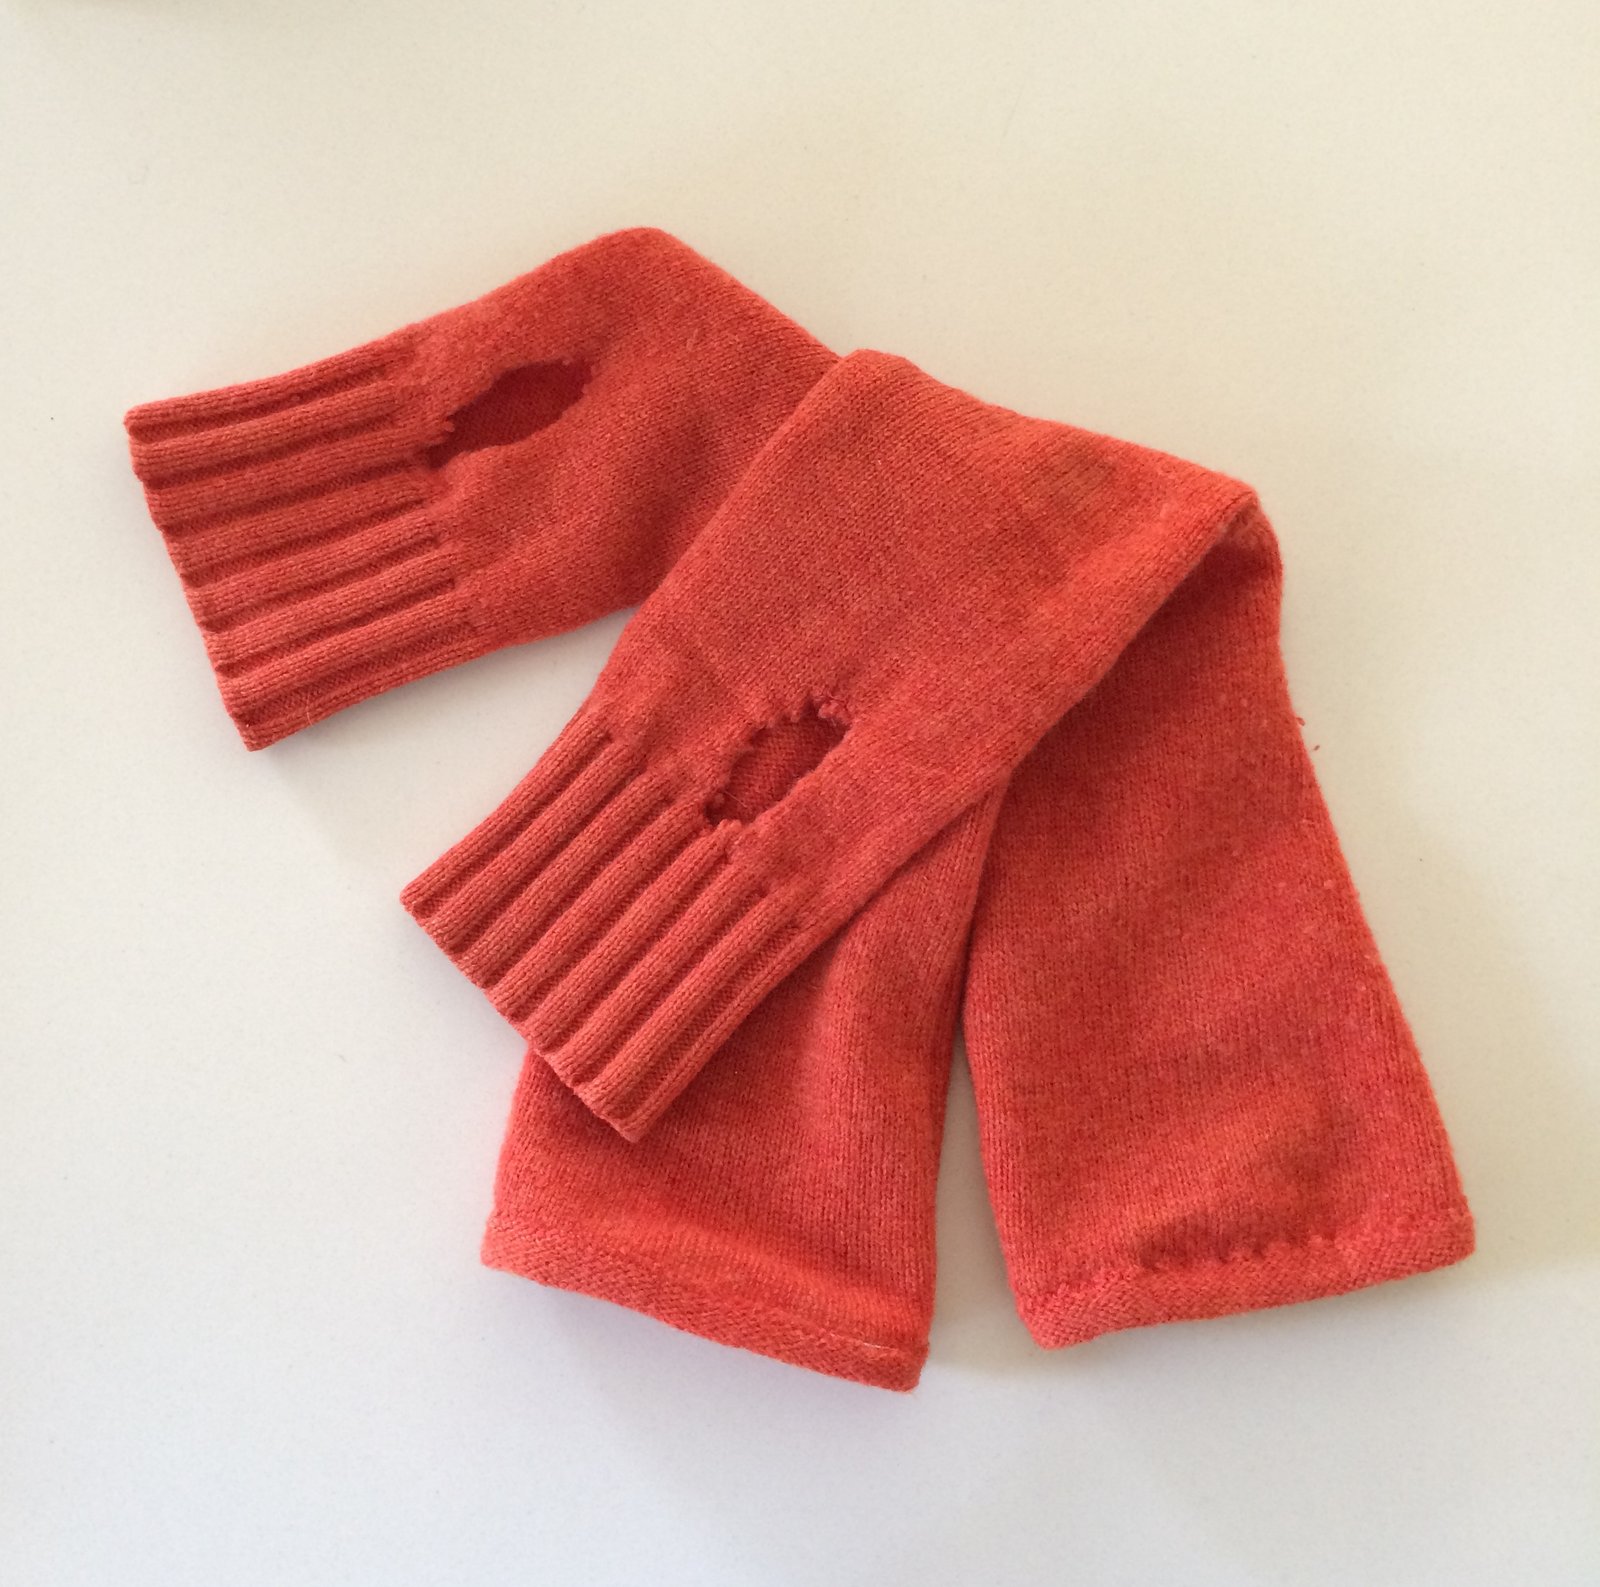
Item number four, and actually this is nothing to write home about really… I refashioned the fabric from an old woollen jumper of Craig’s into cosy new hand warmers for me. I have my nice sheen green knitted hand warmers, that I’ve been wearing all winter, but! It’s still cold, I’m bored to tears with all my winter clothes and I just really fancied a new colour. And the jumper was such a divinely rich tangerine-y colour and going begging because it had developed a large moth hole in the front. Also, it had felted and shrunk a little bit when some careless person had accidentally tossed it in with too hot of a wash, tut tut *whistles innocently* and I have NO IDEA who that could have been, hum de hum!!! Anyway!! I cut open the whole jumper, assessed for holes, and cut out two rectangles, carefully avoiding said holes and a few stains. I kept the ribbing intact for the bottom edge, and cut holes for my thumbs, overstitched those all nice and secure, and sewed the long side up. I put them so the seams are on the outside because I liked the bobbly look of them, then sewed a little casing in the top edge and inserted a ring of elastic so they stay up my arm. Bam! and bob’s your uncle. New hand warmers, and making use of an old thing that would have otherwise been tossed out. WIN!
 Details:
Item 1)
Top; Burdastyle 04/2014-111, white bobbly stuff, details here
Skirt; Vogue 8363, sage green/coffee check wool tweed
Tights; my own pattern, black stretch stuff, details here and my tute for making your own custom-fit tights pattern is here
Boots; made by me, my own design, details here
item 2)
Top; drafted by me, caramel coloured merino wool, details here
Skirt; Vogue 8363, sage green/coffee check wool tweed
item 3)
Top; the wings top from Pattern Magic 3, ivory French terry cotton knit
item 4)
Handwarmers: made from an old jumper
Tshirt; self-drafted, dyed black cotton jersey, details here
Skirt; Vogue 1247, dyed purple denim, details and my review of this pattern here
Cardigan; Miette knitted by me, details here
Cowl; knitted by me to my own design, details and my original pattern is here
Tights; my own pattern, black stretch stuff, details here and my tute for making your own custom-fit tights pattern is here
Boots; made by me, my own design, details here


 what’s with the ballet pose? I have no idea. Anyway… I have a

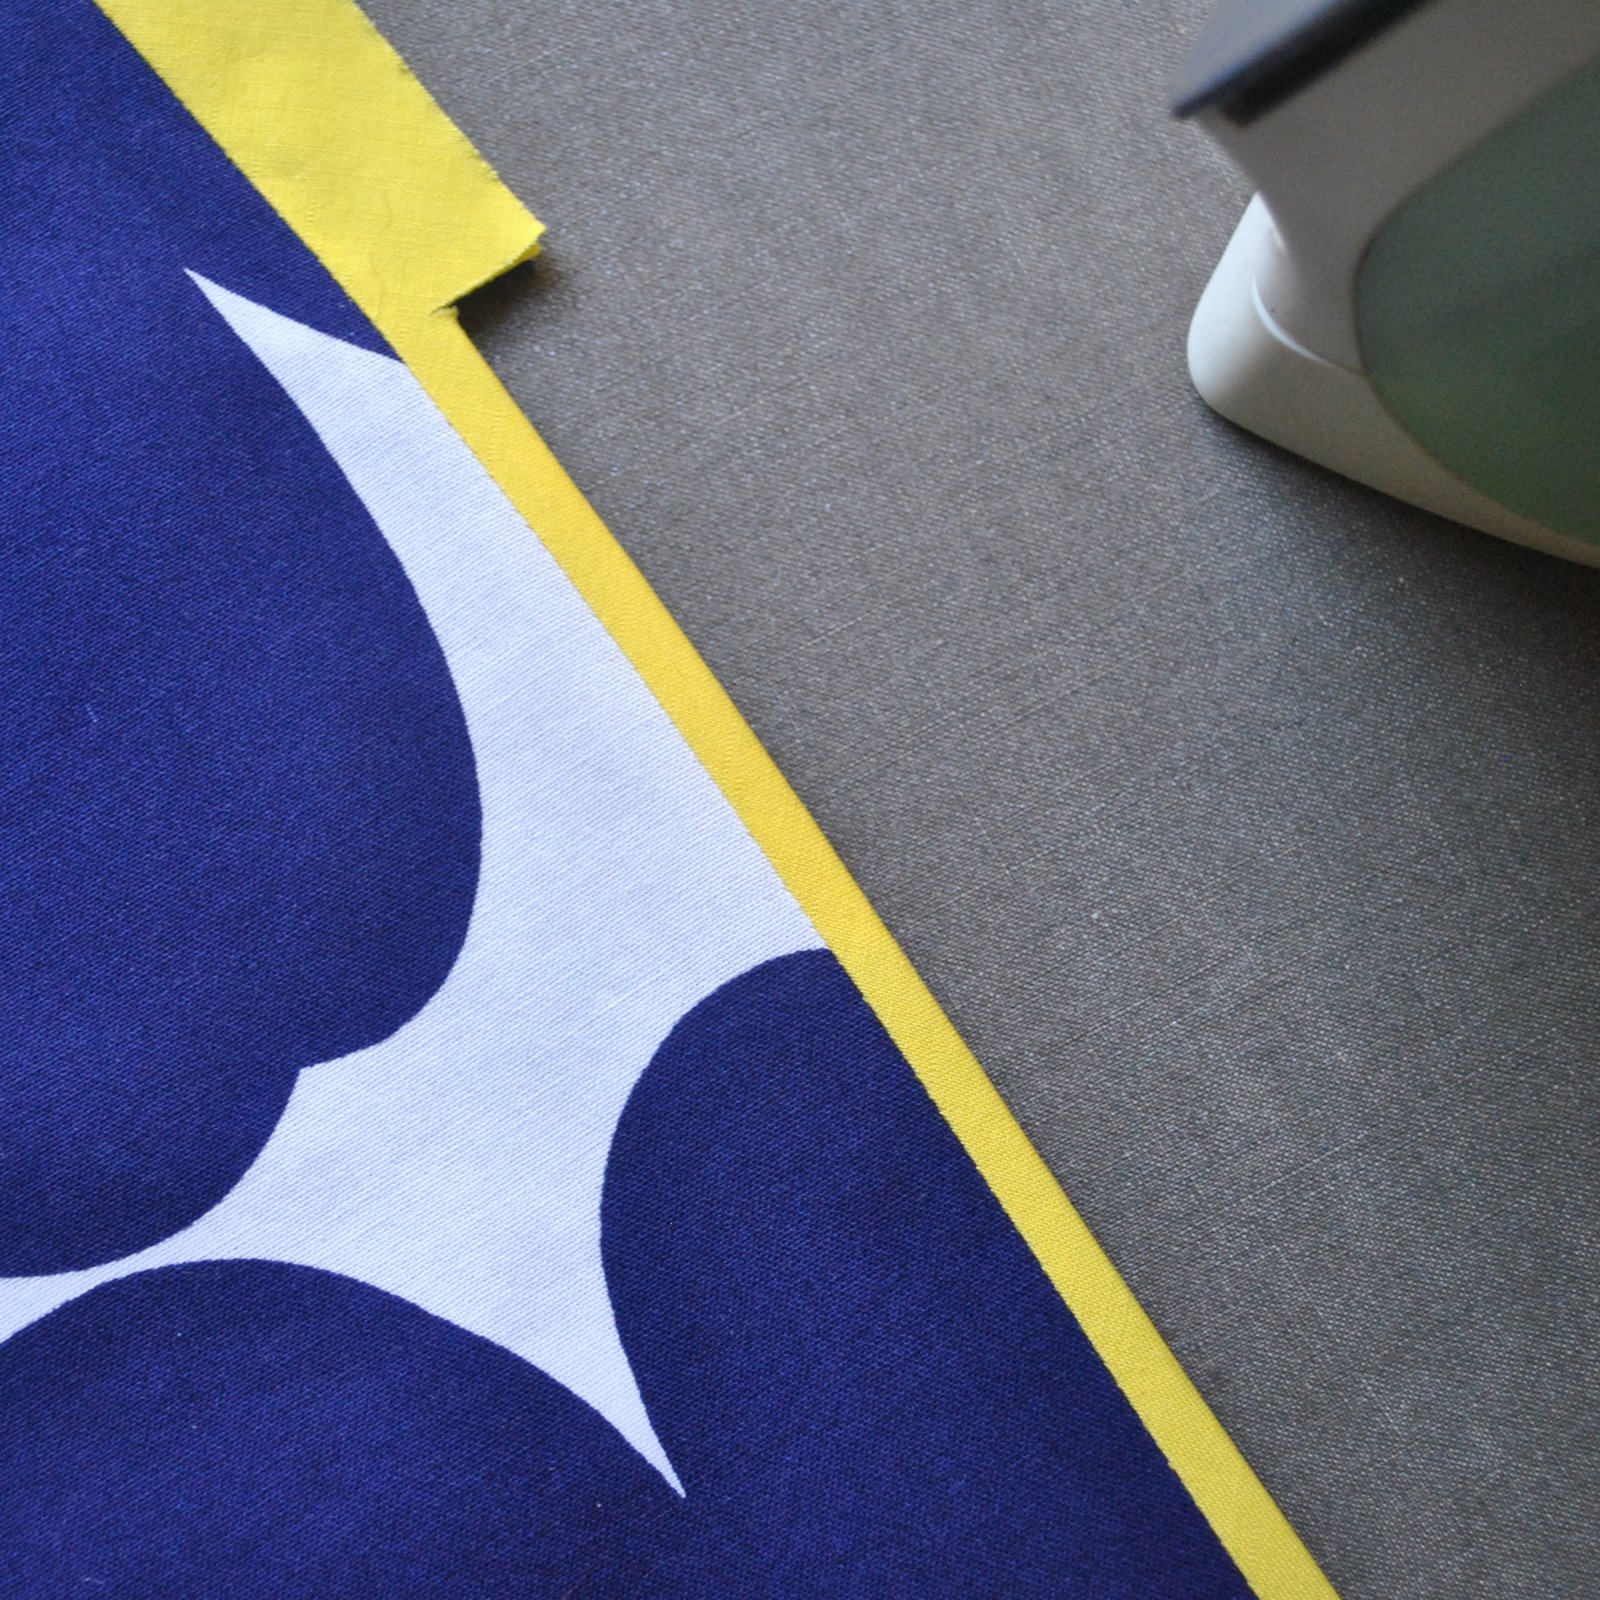
 I’ve kept the selvedge from off the fabric, and have sewn these inside one of the pockets! just because I love information like this… namely: this design is by prominent Finnish designer Maija Isola, and was created in 1964! out by a year but definitely still of my era, haha. “Pieni unikko” translates literally to “little poppy” I’m not sure what KI 2009 means yet, but I’m investigating…. Also, how cool is it that the laundering info is printed on the selvedge?! so classy and very considerate really, it’s been along long time since I’ve seen such consideration in a fabric. That information’s the kind of thing I usually forget the very minute I swan out of the shop with my new fabric tucked under my wing.


 The loose front pieces also allows you to have these big loose comfortable pockets that you can shove your hands in, while still maintaing quite a slimline dress overall. As a result, the pattern uses very little fabric. I managed to squeeze my pattern pieces out of 1.5m, which is not too bad, not too bad at all, I think *preens oneself on an exceptionally economic layout* I had the merest of scraps left after cutting out my pieces, scraps, I tell you! The pattern has you line the dress, and after a bit of um-ing and aah-ing, I decided to not. Reason? summers here are very hot and I think the breeziness of this lovely cotton fabric is going to be perfect just as it is.


 Press the pocket lining out, then turn it under the front piece and press, forming the 1/4″ (6mm) wide bound edge of the pocket.


 from the right side (with some irrelevant (white) basting along the side edge… not really necessary for this method)


 I’ve made some new shoes… 🙂
 So I set out to make a pair of ersatz “little white sandshoes” And this is the result! Hmmm, maybe, not all that close to the typical things you think of when you think “sandshoes” but a pretty ok substitute I reckon. I really love them, so I’m happy!
 The inner soles are covered with some beige checked cotton flannelette. It’s some of the leftovers from


 I’ve made a new dress using a bunch of my kids’ old jeans that I have
  been saving for this very purpose… and please note; yes, I am wearing
 Materials; obviously, all blue denim jeans. I used three pairs of children’s jeans, one pair of child’s long shorts and one pair of adult jeans. The adult jeans turned out to be necessary when I realised that the full-length panels at the back would look pretty terrible if pieced at the waist; it’s a very much piecemeal kind of a design anyway, and to have that nice long smooth length of fabric at the back is just a nice visual anchor in amongst all that busy patchworking, in my opinion. I decided it would be best to retain it; fortunately I had one pair of Craig’s old jeans in my refashioning bag and could cut the long back pieces from those.
 My vision for this dress has always been to have lots of the existing jeans’ details retained in it, like the pockets with their decorative top-stitching, the coin pockets and belt loops and so forth; HOWEVER when it came down to it I retained very little of all that! The design was just so… busy; I ended up removing a lot of the little details I was going to put in. There’s still plenty of the jeans bits and pieces left in, I reckon just the right amount to keep that definite “jeans flavour” to it. There are a few original topstitched seams here and there, and the portion of a pocket left on the bodice. I also added tonnes of new topstitching in terracotta upholstery thread, in fact every seam is topstitched down in some cases doubly so.
 Something I’ve managed to forget to blog about each time I’ve written about this dress… like all Vogue patterns, for a fitted design it’s a little blouse-y in the boob-al region for my figure; however the princess seamed bodice makes this a very easy fix. I simply pin and stitch to shave a bit off the inner curve of the central bodice piece (above), and this solves the problem for me. A very very easy small bust adjustment, and one I usually end up using for pretty much every fitted Vogue bodice with princess-seaming. I don’t have the same issues with Burda, but always with Vogue. I guess their “blocks” are a little different.

 One pair of jeans, the very pale blue pair, was practically threadbare in places, but I still really wanted to have that pale blue as part of the lovely indigo-y mix… these pieces I reinforced with lightweight iron-on interfacing to the back to stabilise and strengthen these areas (below). Don’t want my new dress ripping in its first wear now, do I?!


 Hello! just a few quick items for today… I’ve actually been sewing a few things for other people! Scary stuff, huh. I mean, it’s one thing that I can see all my own flaws in things I make for myself, and on a daily basis! but that’s kinda the rough with the smooth, you accept that because it’s all your own doing, all your own fault and you can tell yourself you’re “learning” and going to do better next time haha…. but to subject another person to those flaws … well that’s really exposing yourself. ok, you know what I mean…
 Sure, they’re all near identical, but still. What’s not to love about that.
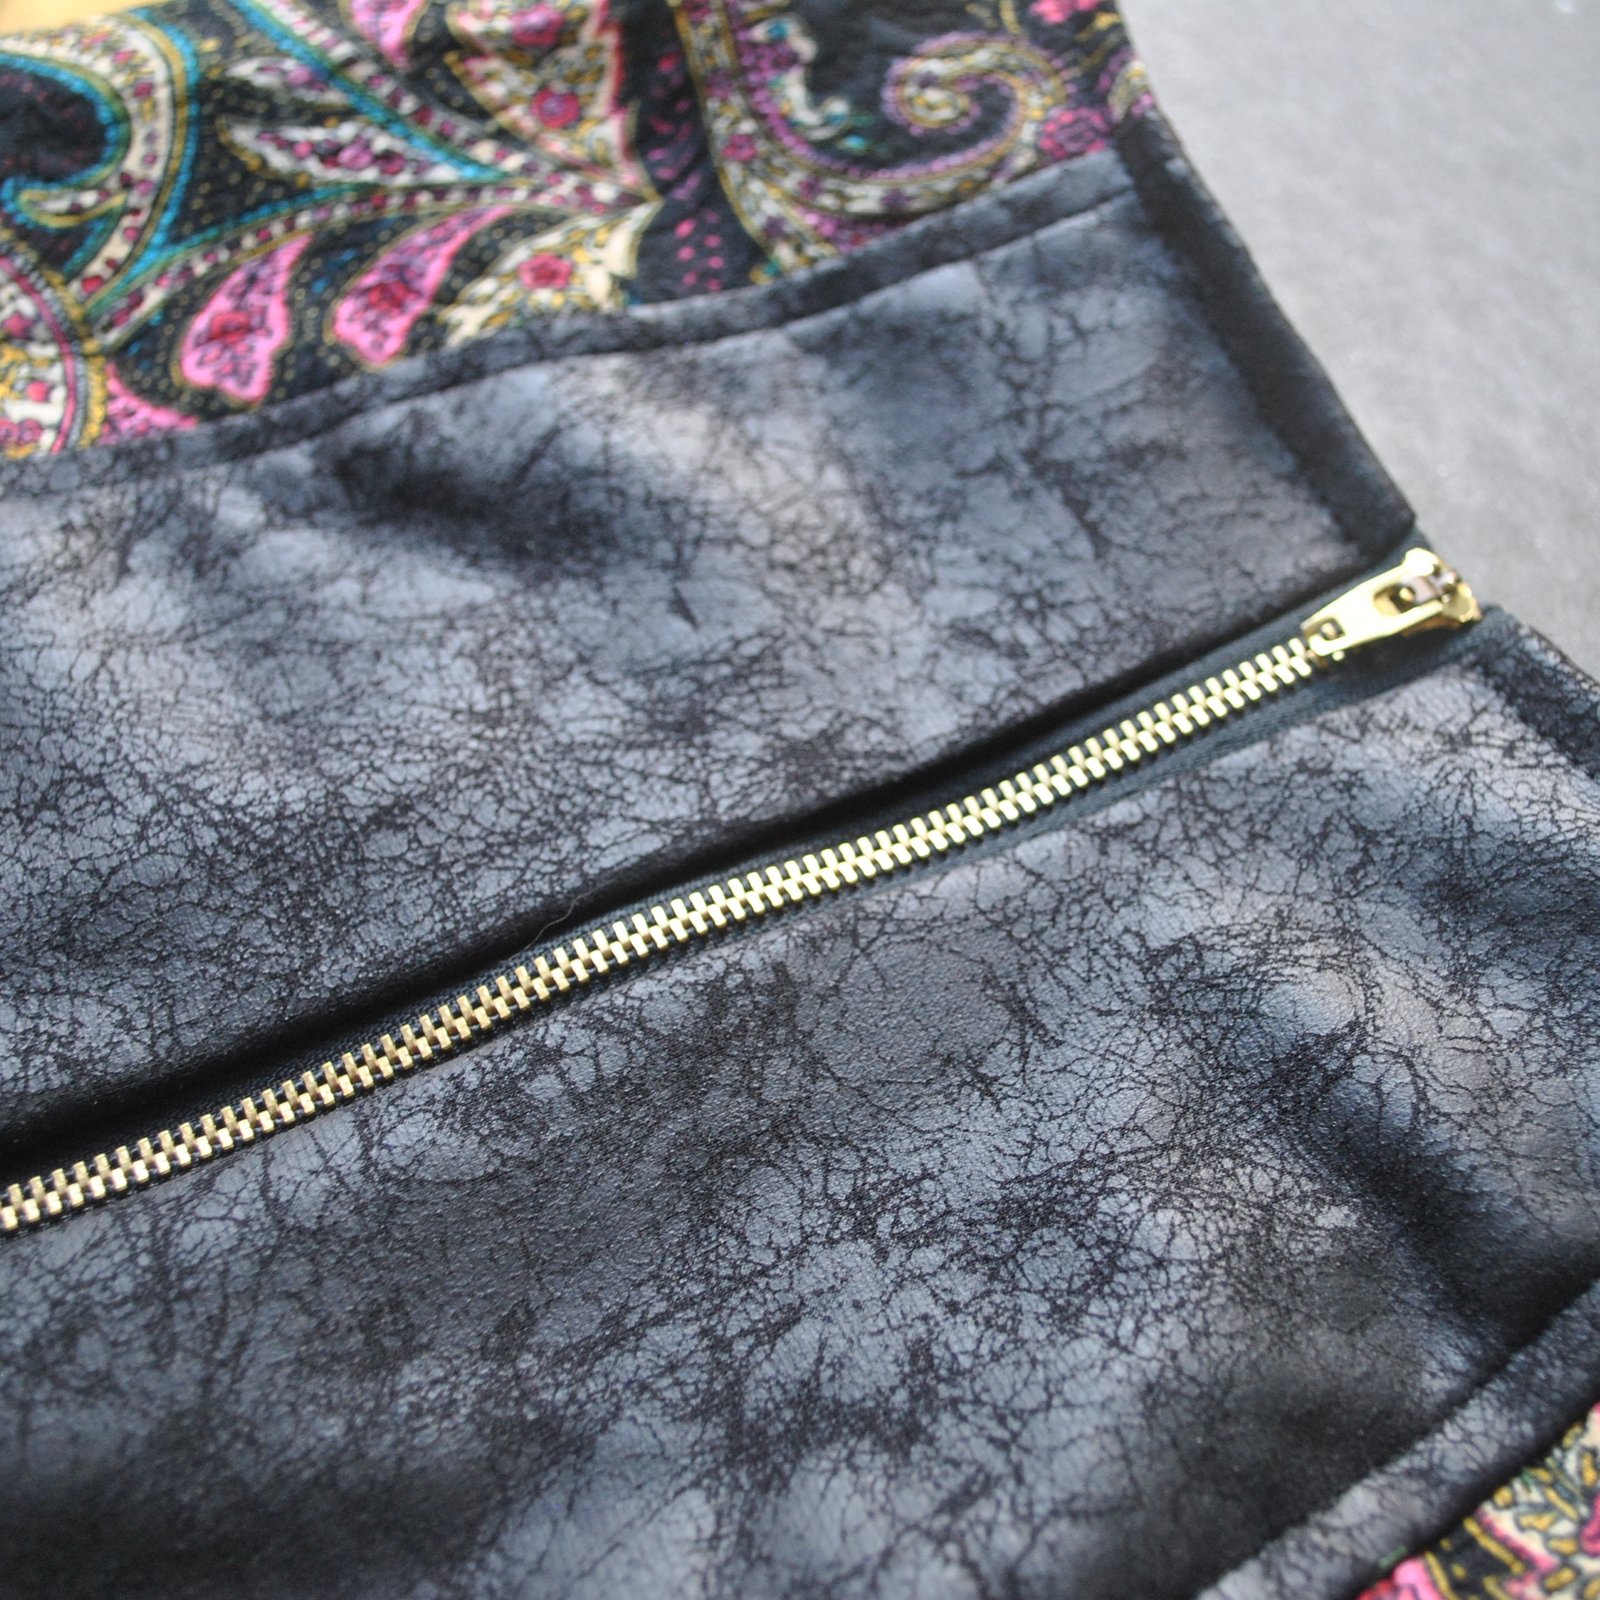 This is the first time I’ve put an exposed zip in a skirt with lining, and wasn’t totally sure how to do it; I put the zip in similarly to how you’d do a welt pocket, and then hand-stitched the lining to the zip tape on the inside. I cut the bottom edge of the pleather clean and straight with my rotary cutter and left it unhemmed; and hemmed the paisley portions in a deep 4cm hem by hand. The skirt is fully lined with raspberry polyacetate, itself a leftover from

 Item number two; a hoodie for my son’s girlfriend. I had made


