Yearly Archives: 2016

You are browsing the site archives by year.

the year of handmade, 4

yoh4

gday howzit going, yeah good thanks.  (Aussie terms of great endearment)

So, I’ve been going for four months now wearing 100% made-by-myself clothing and shoes, yay! I’m a third of the way through!  Only eight months to go!!!  Oh dear, that’s slightly depressing.  I do not want to look at it in that way at all!  8 months, eeek!

Above is a selection of some favourite outfits for the past month, the entire shebang so far can be viewed in my Year of Handmade Flickr album here

Do I have anything new to report? well the making of my winter boots felt like a mini game changer, I just love those things so much and feel like they go really well with my preferred winter uniform of a little skirt or short dress with tights.  When wearing them my feet are perfectly warm, and I feel comfy and confident and dare I say it, awesomely shod!  Yes, I dare!  I love them THAT much.  So please excuse a bit of preen-y, prideful boastfulness, ahem.

Everything is chooffing along just fine.  My yellow tape shoes are wearable, but I’ve worn them in the country, in the rain, and in the dirt and so they’re embarrassingly dirty and a wee bit revolting now.  That’s ok, I don’t mind having a pair of hard-knock shoes! so I haven’t tossed them out or anything.  I’m also using my black taped derbies for walking Sienna in the mornings too.  At least the dirt doesn’t show up on the black!

Something (obvious) I have learnt: DIRT AND WATER ARE THE ROOT OF ALL EVIL  SHOE DAMAGE  Seriously.  Dirt is bad, water is bad, dirt and water combined? well good luck to your poor old shoes surviving that!!  Walking on the beach, or through fully wet and muddy grass is like the worst things you can do to the life of your shoes.  Yes, I did say it was obvious.

I’ve had to perform minor repairs to several pairs of shoes during the last month, however I’m pretty confident that they’re hanging in there alright and that each time I’m repairing something I’m learning more about how to improve them at the same time so the same little issues won’t happen again.

Also; I avoid mud and puddles like the plague now! or at least, immersing my shoes in those things… 😉

So, maybe this is a good time to talk specifics; my ongoing shoe issues are all bound up with identifying and then obtaining high quality glue and soling materials here.  It’s not so much that good gluing and soling materials are not out there, obviously good supplies are out there, since plenty of shoemakers are making awesome shoes.  Let’s just say, it’s more a case of; the information is in obscure and often out-of-date places, and even when someone is using a particular product and you can and do get hold of it for yourself; there is scant information on the correct application, and then almost nothing by way of review, telling you whether it actually worked for that person long-term, or not!  This has made it quite frustrating at times.  Those of us delving into making shoes have to play this game of trial and error and sort it out of ourselves.

Soling: I’m still using rubber sheeting from Bunnings, which is fine really, considering there’s nothing else in Perth.  Trust, me, I’ve looked!  However, after much umm-ing and aah-ing  I have taken the plunge and bought a sheet of crepe soling from the US, at heinous expense.  Fairly excited to see how it’s going to measure up, and perform.  Results to appear here, in due course.

Glue: I’m currently using Parfix Gel Bond Contact Adhesive.  Advice from a local shoe repairer was to get hold of Bostik Gel Contact Adhesive, which is apparently available in Bunnings.  However it has not been in stock in either of the three Bunnings stores I have visited which is why I bought this brand instead.  This has been pretty good, but I’ve learnt a few valuable lessons on getting the maximum performance from it.

boots8

Here for posterity are my current findings; and please note: I am far from an expert, and it could be that a proper trained shoemaker disagrees with the following and I am actually doing something else completely wrong that I just haven’t worked out yet.  However, adhering (hehe) to these guidelines has ensured me a pretty well problem-free experience since.

Better results are obtained in a slightly warm environment… say 20C and above.  If it’s a very cold day, I’ve found it’s better to warm up the rubber in front of a heater.  My experience is that rubber moulds to the bottom of the shoe far better when it’s a bit warm.

Thoroughly “rough up” all surfaces before use by giving them a good solid sanding down.  Use high grit sandpaper, or even start off with a rasp or metal file.

Wipe off surfaces with a dry cloth to remove all “bits”, and then follow manufacturer’s instructions for application and wait time.  When putting the two layers together I use a hammer to gently hammer all over; in the case of the shoe sole, I apply the hammer pretty liberally and firmly.

Can I just say, the hammering bit is enormously satisfying  *evil chuckle*

You can leave the tin of adhesive open for a while and even leave the brush perched on top and unwashed for up to, say, three quarters of an hour with no problems.  Any longer and it’s better to wash the brush; soak and swoosh and dab it around in turps, and then remove the adhesive pretty promptly.  It’s actually quite easy to pluck and roll the adhesive out from the bristles after a good “turps”-ing; it becomes quite rubber-y and not particularly sticky and can be pulled out without much fear of it gluing together your fingers.  If you want to do some more adhering, use a fresh brush, or wait until the first brush is fully and completely dry of turps.  Do not let the adhesive get turps in it, because it seems to slightly spoil it, and it becomes just a little bit less effective the next time you use it.

OK, my year of handmade report deviated somewhat into shoe-talk.. whoops, sorry about that!  Well, I guess it was inevitable that the “challenge” for me in my Year of Handmade was always going to be all about the shoes!

pinterestmail

sophie swimsuit

grey sophie frontccf sophieI was thrilled when Heather of Closet Case Files asked me to test her fabulous new swimsuit pattern, the Sophie swimsuit, named after the elegant and tres creative Sophie, of Ada Spragg. Thanks so much Heather!  I’m pretty chuffed that she continues to even notice an old hag like me.

The Sophie swimsuit is a structured bikini top optionally underwired and paired with high-waisted bottoms, or alternatively the same structured cup top as part of a one piece, boy-legged suit.  I think it’s classy, with a modest retro-style chic, and it’s a beautifully designed and drafted pattern.

I’m also enormously impressed, not merely with the Sophie pattern although that in itself is pretty damn fantastic effort because it’s quite a complex pattern…  in addition to that Heather is offering a package deal;  the pattern, swimsuit kits with fabric, lining and all the bits and bobs you need to put it together, AND an online workshop; all designed to take the legwork out of tracking down all those bits and pieces you need, and to ease newcomers to swimwear-sewing painlessly into the whole process. It’s an absolutely brilliant effort.

Anyway, so this is me, modelling my two new bikinis on the delightfully sunny beaches of south-western Australia…  HA!  Obviously it’s the middle of winter here, and while it really was a beautifully sunny day and was actually quite pleasant out of the wind in the shelter of the rocks, where I am in the top picture; on the beach itself it was just a tad chilly mind you, just a teeny tiny tad… (read; utterly freezing)

sophie swimsuit backDid I dive right into that invitingly turquoise water for a frolicsome dip?  NO!!!!  Since I’m the wussiest wuss that ever wussed I just got my pictures super fast and then threw on my jeans and thick woollen cardi again pretty quick!    You can see that turbulent water and my crazy hair, it was blowing a freaking gale and the waves were booming and thundering onto the sand like the proverbial white stallions.  I do love the beach in any and all weather, including wintery and wild; I love the sparkle of sunlight on the water, the swirling foamy shallows, and the crashing of the surf.   Well, perhaps more so when I’m warmly rugged up snug as a bug in a rug, of course.  Sienna loves the beach too, but it’s alright for her, in her thick fur coat!  hehe, the things we do…

Anyway, on to the SophieS; yup, I’ve made two… both bikinis.  It’s been an awfully long time since I’ve worn a bikini, eeek!  but I chose view B because I’m still more of a two-piece bathers person than a one-piece-r.    There’s the charcoal version at top, and also the pink/black colour blocked version, which was made first.  Tester driven feedback called for a change in the shape of the cup so the second, charcoal, one is closer to the final version of the pattern.

Also; I should mention that in the final version of the pattern, the bikini bottoms have a slightly higher rise than mine do here, sitting just at/slightly above the natural waist.

sophie topsIt’s funny; when I finished the pink/black one I almost immediately took a violent dislike to the colours I’d chosen…   It seemed a bit… I dunno, young and sporty? or something.  Then I made the charcoal version.  Which I really adore.  When I took out the pink/black one again, to take photos in it, of course, you know the story, it didn’t look quite so hideous after all.  I actually took quite a shine to it again.  The pink seemed a bit warmer and less Barbie than I’d remembered it.  I decided I might even like it better than the charcoal one.  I don’t know.  Oooh, I’m torn!  Either way, I expect both are going to get worn this summer  🙂

sophieHeather has introduced her own sizing chart for the pattern, which I think is a pretty good idea.  You know, when you’re making something and you sometimes get too lazy or too cold  to disrobe for proper measurements, and go with the same size you always take, or worse; what you think you are.  I do find that when faced with an unfamiliar sizing chart, you’re more inclined to get out the tape measure and do a properly slow and careful remeasure, to determine your correct size.  Which I did.  So saying that, how do I feel the cups fit?  well they both fit pretty good.  Though I do feel like the cup on my charcoal one, while it fits me;  is just a smidge on the scant side for my tastes, if that makes any sense.  I believe Heather has upsized them on the final version, which I reckon is a good call.  I am small up top but I still kinda like to have lots of coverage there, for personal preference.  I might remake the charcoal bikini top, following the new sizing of the final version of the pattern.  But maybe not ’til summer!

grey sophie backFabrics and bits and bobs: the fabrics are from Fabulous Fabrics; who do get some very nice swimwear fabrics in stock during the season.  I bought all these fabrics in previous summers, stocking up during sales.  Stashing strategically, as you do  😉  Other supplies from my fast dwindling MakeBra basic kits; the underwires, under wiring channeling and the foam for the cups.  The swimwear elastic, plastic swimwear hooks for the straps and back closures are from Spotlight.

sophie swimsuit

pinterestmail

film noir (lingerie)

film noirLately the smalls drawer is just looking the epitome of prettiness!  I’m totally enamoured with this new set… ivory bobbin lace on a deep blue-y charcoal background, with delicate little black ribbon bows.  A little old Hollywood, scraps from the cutting room floor…

film

source

Patterns; bra is my favourite MakeBra 2610, and I’ve made two pairs of different knickers to match.

makebra2610watson

Below: cloth habit Watson briefs.

watson

And further below is pictured the the MakeBra free hipster pattern, free to download here from their site.  How do the knickers patterns compare?  Well, I admit those hipsters do initially look like awfully big granny-knickers lain flat like that, but they’re actually rather cute on! believe it or not!  Boy leg style, and medium rise, sitting right at mid-hip.  I like them, a lot; even though my wearing preference lies with the more high cut bikini style of brief, like my old fave McCalls 2772, and the Watson.  I love the Watson briefs, and they’ve become my knicker of choice, with the proviso of always modifying by eliminating that awful horizontal seam in front of the crotch. Sorry, but I just really do not like that seam! and don’t see the advantage of it.  I prefer to cut the front in one piece, splicing the front and crotch pattern pieces together, and sewing the crotch lining in the same method as outlined in my McCalls 2772 pattern, my other go-to knickers pattern.

hipsterActually, I did the exact same thing with the MakeBra hipster briefs, which also has that same horizontal front crotch seam.  grrr.  Both panty liners are of plain ivory cotton jersey.

detailsFabrics and other bits and bobs; charcoal stretch bought from Fabulous Fabrics, eons ago.  I used this for my Pattern Magic spiral leggings, and still have quite a bit of leftovers.  The ivory cotton bobbin lace trim is something that I’ve had for, like, ever.  Underwires are recycled from older, also self-made bras that have worn out. I used several different types of elastics, all smaller leftover bits from the stash.  Knicker leg elastic on both is a rather nice lacy elastic from Fabulous Fabrics, waist elastic is the plain picot lingerie elastic from Spotlight, bra elastics from variously the black and the ivory MakeBra basic kits.  Actually, the entire set was put together entirely from my stash, I didn’t have to buy a single new thing.  Awesome, no?  #youknowyoumakealotoflingeriewhen

I feel so efficient and so damn scrap-busteringly virtuous.  And I happen to have made something needed and useful and rather lovely too, imo.  Triple win!

makebra

pinterestmail

the incredible raspberry woman…

superhero

Haha!   I lolled pretty hard at this outfit above, but decided to share anyway.  I look like some kind of burgeoning superhero or something yeah?  All I need is the cape.  “NO CAPES!!” *  (Edna Mode, of course)

Fear not, fellow fashion victims, I will not be wearing my new top and tights together like the above example, well maybe for fancy dress.  Or, if facing the general, unsuspecting and innocent public, then not without a lot more garments layered over here and there to break up the expanse of raspberry pink anyway, woof.

raspberry set

aaaa, oh  dear, calming down now.  See here’s the thing… I wanted to make some more coloured tights.  I really enjoyed my bright paprika tights, when I had them, even did a 6-different ways post on those things once!  I wear black tights a TONNE, like everyone else, but have found it’s absolutely terrific to have a bit o’ variety in the tights department, to have some more colours for layering in my winter wardrobe.  I’m embracing a small pink and plum trend in my wardrobe lately, so bought this piece of poly knit during Fabulous Fabrics recent sale with a view to some Intentional Wardrobe Matching and Planning… oooo so organised!  Not like me at all  😉

yesterday’s outfit, wearing the tights

raspberry tights

I laid down my custom-fit tights pattern and then of course discovered, as you do; that I had enough around the sides that I could probably squeeze a t-shirt out of it as well.  Waste not want not!

For the tee; I used my Closet Case patterns Nettie, which I’ve also made tonnes of times  I’ve fine tuned the fit over and over so much it’s barely the same pattern anymore.  You could call it a vestigial Nettie.

So, the tights are fabulous, and I’m happy, yay! however the top is a so-so thing that I’m a teeny bit meh about.  Stretch poly is excellent stuff for tights, but actually pretty horrendous for a top.  It’s slightly thick and beefy, doesn’t press at all, and is that ultra slippery slinky stuff, that slips and slides over itself, and the whole two metres of it will slither right off the table in an avalanche of fabric if so much as a small corner starts to slide over the edge.    grrr.  I made up the tights, easy peasy.  When it came to the top, oh god, horror story stuff.  I’ve re-done that bottom edge three times… THREE TIMES.  The fabric just wouldn’t take anything.  Attempt number one; ye olde trusty twin needle.  Except, no.  It kept skipping stitches something awful.. so I gave up and moved to attempt number two, a small discreet zig-zag.  It stretched out and looked disgusting, so I unpicked that with much muttering and growling under my breath. Attempt number three was to turn under twice and hand stitch it, which is usually a failsafe for me.  I think this will be ok.  If not, I’m going to move onto plan four, which will be a folded band all around the bottom edge, same as I’ve done to lengthen and finish the sleeves.

Essentially a extra-long, folded cuff.

sleeve cuff

Anyway, it’s done.  I kinda regret not using the excess fabric for underwear now.  I actually think it would have worked a lot better for lingerie, than as a Tshirt.  Well, we live and learn!

Details:

pattern magicpaprika jade skirtwinter boots

1) above

Top; Pattern Magic twist top in charcoal ponte, details here Skirt; Paprika Patterns Jade skirt, in wine silk/cotton knit, details here Tights; own design, my tutorial for making your own custom-fit tights pattern is here
Boots, made by me, details here

2) below

nettievogue1247winter boots

Green top; Closet Case patterns Nettie, in green cotton mix stretch, details and my review of this pattern here
Paprika cardigan; my own modifications on the Closet Case patterns Nettie, details here
Raspberry top; Closet Case patterns Nettie, with sleeve and neckline modifications
Skirt; Vogue 1247, blue corduroy, details here
Tights; black poly, own design, my tutorial for making your own custom-fit tights pattern is here
Boots; made by me, details here

today’s outfit, wearing the Tshirt

raspberry top

pinterestmail

some tops, and a collar pattern

ivory nettie 2 
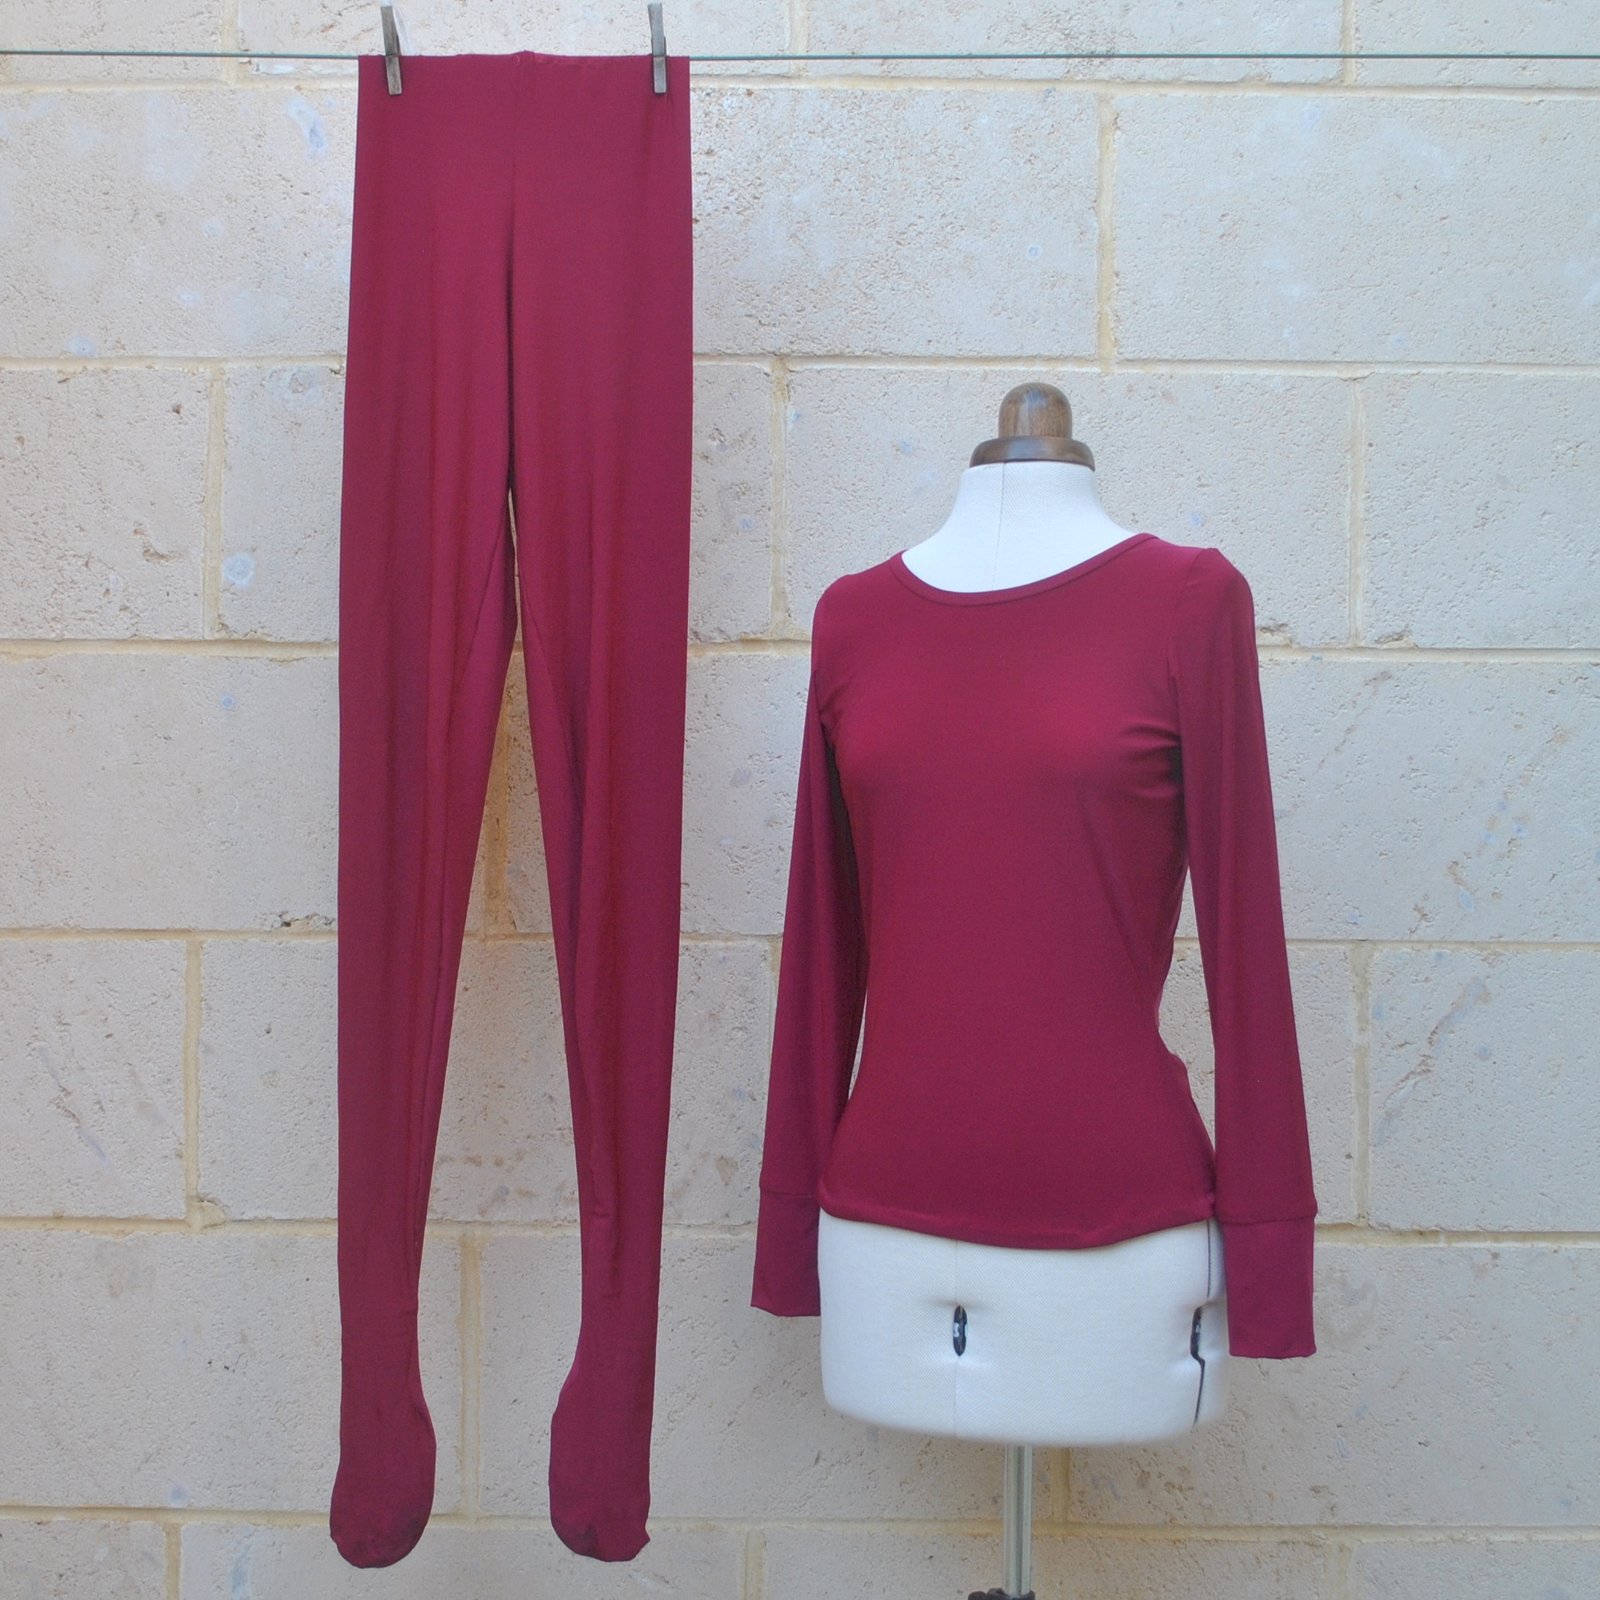
I’ve been busy making a few tops…

nettieSO!  Exhibits A and B; two Nettie tops,both made in a really gorgeous, pale cream knit from Fabulous Fabrics, given to me by Mum.  Now, I know I’ve said a gazillion times before that I have SO MANY white tops I should never ever need to make another one, but you see; a full-sleeve-length ivory Tshirt was one of my most worn wardrobe items last year.   So, I’m pretty confident that these two boring things are probably going to be two of the most worn things in my winter wardrobe this year too! #ivorytopaddict.  I managed to squeeze two tops from out of my piece of fabric, yes! *air fist punch*

I’ve fine tuned my Nettie pattern now for my own figure, but I still have to sorta “start from scratch” with fitting when I’m cutting out a fabric with a different stretch factor than those I’ve used previously with this pattern; and this fabric has quite a low stretch.  So to be cautious I upsized quite a bit, cutting approximately and roughly a size 20, and then pinned the sides in to fit me.  Also; my fabric was just big enough for the two Netties, but only-just-and-not-quite-perfectly-enough!! you know how it is… you MAKE IT WORK.  They both have long sleeves coming right down to my wrists, but I had to cut Nettie B (below) just a little shorter at the hemline, so that I could get the two tops from my one piece of fabric.  It sits at my high hip; Nettie A (above) is longer, plainer, with a high crew neck, finished with a grainline-cut band, applied as for this method here.

DSC_0007DSC_0002Along the back edge only, I topstitched the seam allowance down to the top, just inside the seam line.  In both cases, the raw edges of sleeve and lower edge are finished with the overlocker, than turned under once and invisibly hand-slipstitched in place.

Nettie B, below, is slightly cropped and has a wide, boatneck collar.

ivory nettie 2

I had some interest for this collar/neckline on instagram, so I’ve drawn up a pattern for it… it’s kinda rough-looking and I do plan to improve the presentation but just wanted to get it up here for now.  It does however, work! and so I hope it does prove useful for someone!

neckline:collar

ivory nettie 1 collarThe method is as follows:

This is a collar/neckline designed for a close-fitting Tshirt in stretch knit fabric; the collar is a standup folded collar, and the neckline is wide and shallow. The idea is that you use your tried and true Tshirt pattern just ignoring the given neckline and substituting this neckline/collar for the one in your pattern.  I used the Nettie pattern by Closet Case patterns, although any Tshirt pattern would do.  Align the pattern pieces so the line of the shoulder seams and the centre front/back lines of this pattern are correctly aligned with the shoulder seams and front and back centre folds of your Tshirt pattern, and cut the neckline accordingly.  Seam allowances are 1cm (3/8″), so if the Tshirt pattern you are using has a different seam allowance, align shoulder stitching lines (dotted lines) lines of the shoulder seam, rather than the cutting lines.

Cut the neckband/collar, with the short edges on the grain line.  Sew the collar short edges together, right sides together.  Fold the resulting “ring”of fabric in half lengthwise, wrong sides together, aligning raw edges… pin to the Tshirt neckline right sides together; distributing the length of the collar evenly around the neckline.  Stitch using a 1cm seam allowance, and finish the raw edges with overlocking or zig-zag, as desired.

If you use this pattern, then please do leave me a comment and let me know how it goes.  I’m always thrilled to get feedback  🙂

Now for some more tops, hoodies…!  Smug self back-patting for unselfish sewing commences right here, since neither of these are for me

sams hoodie

Exhibit C; I made a grey hoodie for Sam, to fulfil his birthday request… this is the same self-drafted pattern I’ve used previously for hooodies for each of my boys; and the seventh and eighth time I’ve used the pattern.  The best thing about these hoodies in my opinion is the rather nice combined collar/hood, and I’ve previously written a tutorial on how to make this collar, here.  Sam wanted grey, and the addition of a bit of red was my idea.  I just liked the idea of some little contrast and the red seemed cheerful and fun for winter, and a bit more interesting than if it had just been plain grey.  The rather gorgeous warm, grey terry fleece is from Spotlight, and the red is cut from an old Tshirt from my refashioning bag.

sam hoodie pocketsam hoodie

rayman

aaaaand Exhibit D; a Rayman Hoodie for Sam to wear to ComicCon.  The same pattern, and again to fulfil his specific request!  I bought some warm purple Tshirt ribbing from Spotlight, simply because it was the perfect colour.  The white circle and the red hoodie bit were both cut from two old Tshirts from my refashioning bag.

And that’s it!… well; for now, mwahahahahahahaaaaaaa. *she twirls her cape and dramatically sweeps off to the sewing lair, maniacal laughter radiating in her wake*

Details of all clothing in this post:

1)

nettievogue1247josharp garter jacket

Top; modified Nettie by Closet Case patterns
Skirt; Vogue 1247, yellow corduroy dyed caramel, details here
Tights; self drafted, details here and my tutorial for making your own tights pattern is here
Boots; made by me, details here
Cardigan; hand-knitted by me in Jo Sharp yarn, details here,
Cowl; my own design, mustard yarn, details and pattern here

2)

nettiepaprika jade skirt

Top; modified Nettie by Closet Case patterns
Skirt; Jade by Paprika patterns, details here

3) and 4)

Hoodie; self drafted pattern, my tutorial for making the combined collar/hood is here

pinterestmail

little yellow skirt; 6 different ways

yellowskirt1I found this post in my drafts, and came thisclose to deleting it but then hesitated…  see, I stopped writing these 6 different ways posts because I started to worry they were boringvogue1247 to anyone reading my blog.  But then I just thought that was silly.  Because you know what? I just kinda like them.  I like looking back on my old daily outfits, seeing my old favourites, what worked and what didn’t… and this little yellow skirt was a goodie that I got a lot of wear out of before I dyed it a different colour.  And I think I might even compile a second 6-different ways post in the future for its new caramel incarnation because it’s been equally fab as a caramel skirt too!
yellow skirt2I made this skirt in yellow corduroy using Vogue 1247 and posted it here; and then proceeded to wear it A LOT, it seemed to work really well with a lot of stuff.  These outfits are ranged from summeriest for the first picture through to winteriest for the last.  It was better as a winter skirt, being corduroy, but was ok on cooler spring/autumn days too, when it made a nice sunshiny splash on a nice sunshiny day.  I’m almost wondering why I dyed it!! but I just remember being a bit sick of it and since it turns out that I love it even more as a caramel skirt then I don’t regret dyeing it at all, of course!  Although maybe, just maybe I need another yellow skirt in my life…  *wink*

yellowskirt4
Most of these pictures are from a time before I was making my own shoes, however one outfit, the top right one with the orange top and blue denim shoes is an entirely 100% self-made outfit; since I did make those shoes!  All items of clothing are made by me…  I haven’t put in any links but any questions as to individual items seen in these pictures please ask in the comments and I will supply pattern information as required  🙂

pinterestmail

winter boots

winter bootsI MADE THESE!!!

OK, maybe I’m a bit biased here, but to my eyes these are just about the most beautiful things in the world right now!!

So I finally did it! and I’m even extremely happy with them to boot (haha!) and after a month or so of mental anguish and metaphorical hair-pulling even I can find almost no fault with my (eventual) finish.  It’s true there were some struggles along the way yes; but I’m so happy now, and those dark moments have faded away in the happy, warm fuzzy pink glow in which surrounds me right now.  I even dressed today to match it  😉

winter boots1So, the process…

boot pattern

Pattern; self-drafted.  I did buy some long black zips, but eventually decided upon a design which I could just pull on, no zip required, and drafted a pattern to accommodate this…    Before starting, I padded my lasts with a couple of pairs of thick winter socks so as to give my foot a decent amount of wearing ease and allow enough room for my own feet to be well sock-ed too! and taped them down firmly with masking tape, to protect them from the boot-making process, and made my pattern to fit the padded last, obviously.

padded lasts

Materials; the upper is black vinyl, from Clark Rubber,  this comes in two types and I spent a bit extra and bought the UV resistant kind that is highly resistant to whatever the weather may throw at it; sun or rain.  Well, since I plan to be wearing them outside most of the time, and given the amount of work you put into making a pair of boots, the small extra cost is completely justified, in my opinion!

winter boots lining
The boots are fully lined in faux chocolate-brown suedette (above), bought originally in the Fabric Store in Melbourne, and which I have used to line nearly all my shoes so far.  It’s the same stuff I used for my chocolate suedette top, here.

For the soles and heels, I used rubber matting from Bunnings. I cut these to size, and sanded each surface well before glueing them together using contact gel adhesive, also from Bunnings. Inside the boot, I also glued an insole cut from cork matting, and then over that, is laid a foam inner sole (Coles) which I’ve covered with the chocolate brown suedette, to match the interior. Not that you can see it easily, down in the dark innards of the boot, but still

winter boots buckle

Decorative details: I had “finished” the boots, and they were kinda plain, and I decided they really desperately wanted some hardware, and maybe some straps.  I then planned on some “belts” around each boot with buckles… but unfortunately cool buckles are pretty much impossible to find around about here.  Everything I saw was either diamante or leopard print plastic and without exception totally hideous.  In the end, I compromised with these nickel finished swivel clips to close the “belts” and you know what? I love them SO MUCH and am actually super-happy I couldn’t find the buckles I originally wanted after all!  I bought these from Homecraft Textiles.  The three “belts” were all sewn on by hand, after the boots were finished.   And before you ask; yes, this was pretty difficult.  But I reckon it was worth it!  Also, I became acquainted at this stage with how very warm the boots were going to be, even before wearing them, since my hands just about broiled while shoved down in the boots, doing this sewing.

Making the boots…

winter boots half done
I made the lower part of the boots first, like sort of ankle boots, and did all the lasting and constructing the toe puffs and heels counters using stiff cotton denim with some stretch to it, and PVA glue, just exactly the same way as previously described in the making of my paprika desert boots here.

winter boots innards

My vintage wooden lasts are wonderful things, but because they have a metal plate on the bottom it means you can’t nail into them.  So, I pulled in the well-glued up (PVA glue) sides in under the shoe by stitching it all in, in like a cobweb of back and forward stitching, using thick strong Gutermann’s upholstery thread (above).  You have to do this reasonably quickly, before the glue hardens and dries too much, but it’s not actually difficult.  Then I left it all to dry thoroughly, before skiving and trimming much of the bulky folds away underneath.  After this, I glued the sole underneath with contact gel adhesive, and glued and nailed the heel into position, just as for all my previous shoes

Once this was finished, I had two completed ankle boots (above), and it was time to add the “calf-tubes”.  Yes, I expect there is some proper name for those, but that is how I thought of them!  I found it was impossible to machine stitch anything beyond this stage, with my little home sewing machine, and don’t have access to a shoe-maker’s sewing machine, so all the rest of the construction I sewed by hand.  I sewed the lining and outer tubes around the top of the “ankle boots” in a way as to enclose the seam within the two layers, then  hand stitched the tubes up the centre back seam using a leather needle and tough Gutermann’s upholstery thread.  I used back-stitch for the calf-tube to the ankle boot seam, and ladder stitch for up the centre back seam for this.

winter boots sewing

half sewn up…

winter boots sewing 1

Oh, I did manage to sew the upper “hem” by machine! although this was not particularly easy, what with the thick fabric and the boot and all.  I cut the lining to sit neatly underneath the hem, glued the layers together as best as I could, then glued the upper vinyl hem down, and stitched it.  It’s doesn’t look like it would be hard to sew the top hem by machine but just trust me, a boot is a far from manoeuvrable thing to sew.  The final sewing step was to add those three decorative “belts” per boot, as described above.

winter boots heel sandedwinter boots heel1

Then for the finishing off!  I’d cut my heels carefully, but they were still a bit uneven.  In previous pairs of shoes I’ve sometimes left the unevenness, because I kinda liked the randomness, but in this case I wanted a more smart finish… I sanded the heels till they were all beautifully smooth, and then “blacked” the heels and the sole edges (above).  This also camouflaged some stray small blobs of glue that were here and there, that I hadn’t managed to get off with turps.  The very final step was to varnish the heels and soles,  so they’re all nice and shiny and clean and, dare I say it? almost rtw looking?!

winter boots 4

And done!!

winter boots 2
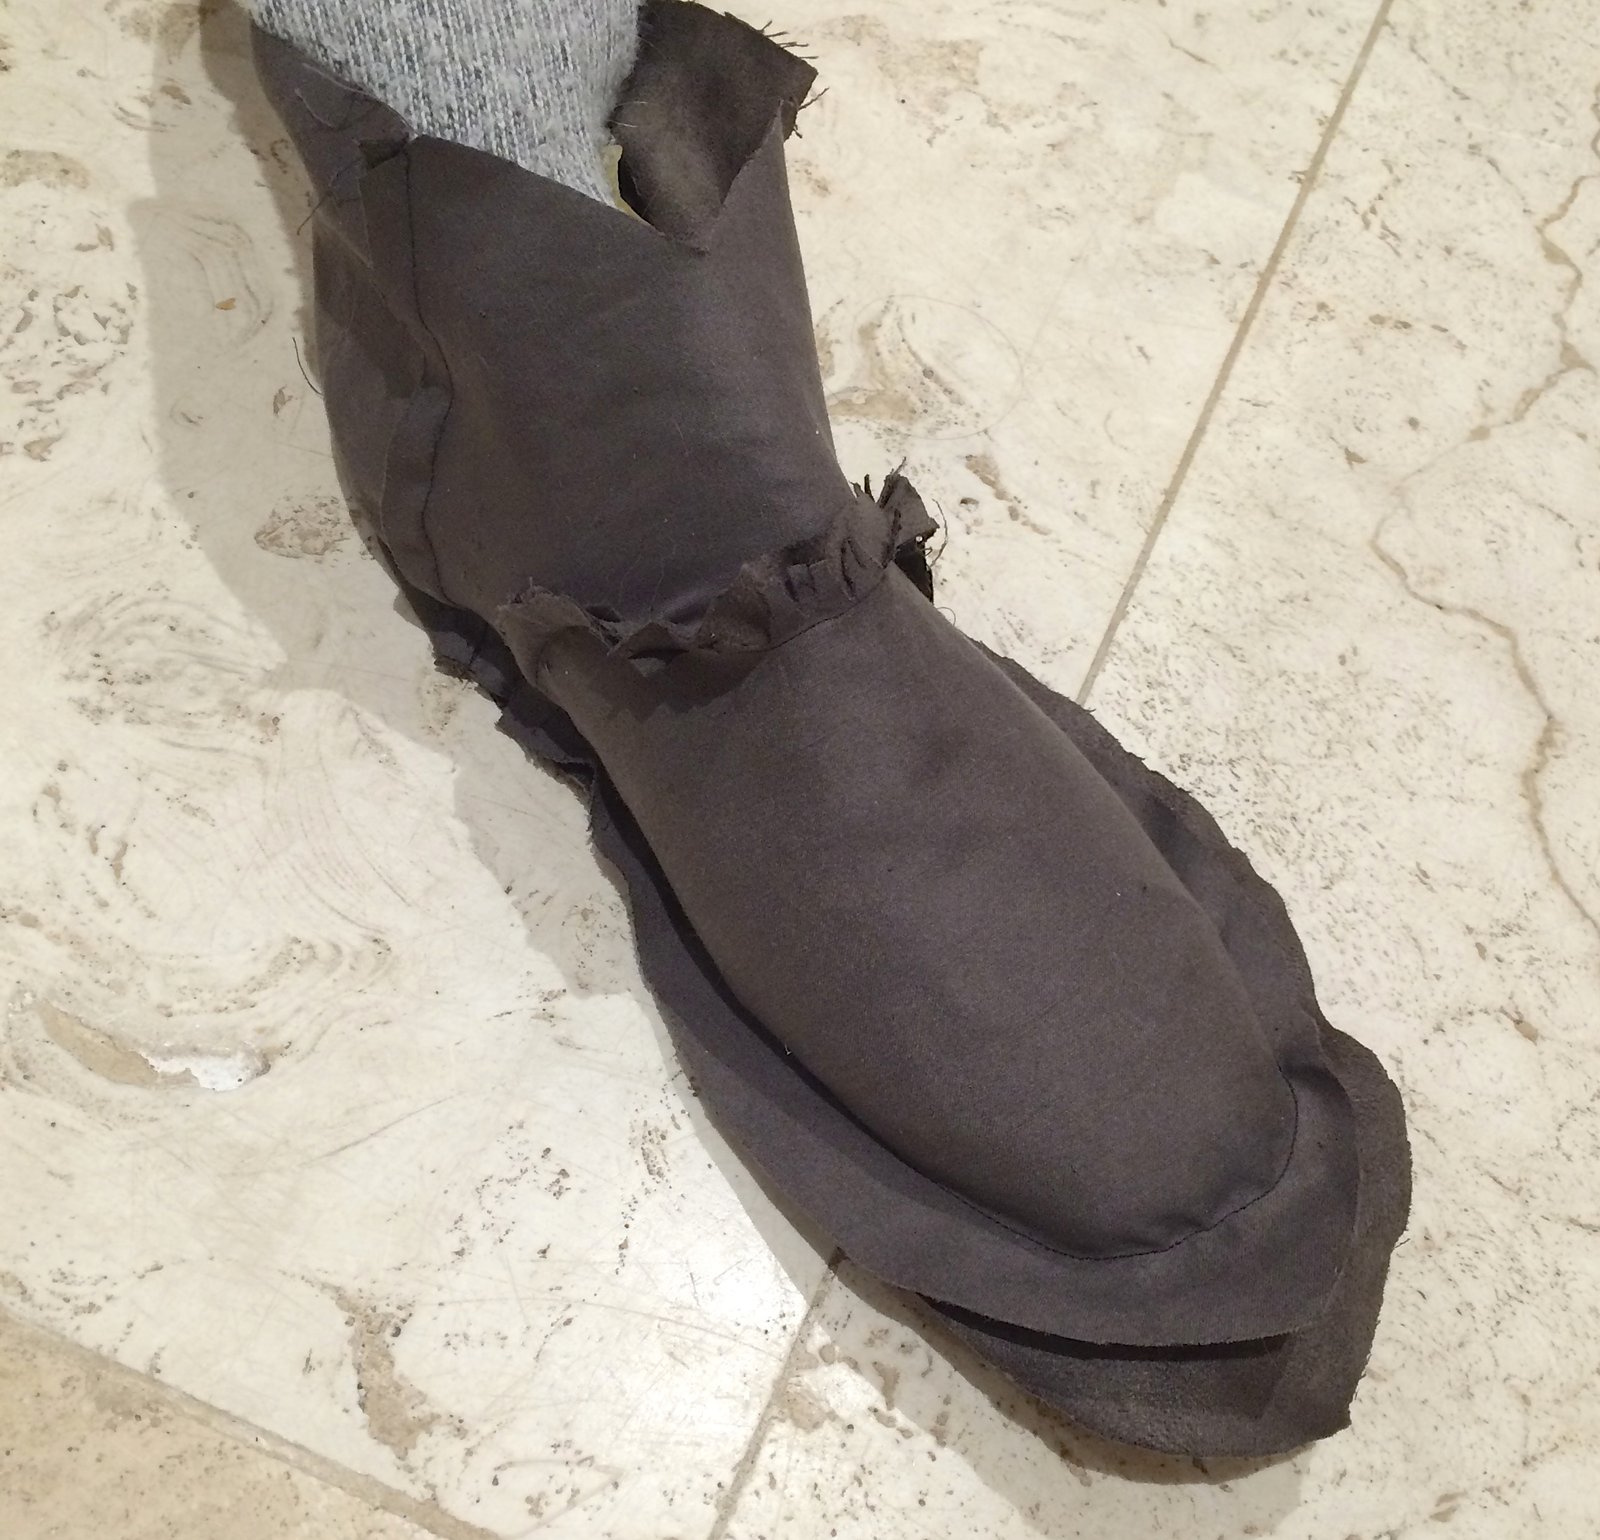
sorry for the picture overload, but honestly; I’m so proud of those boots I could burst!

winter boots 3

Details:

Boots; MADE BY ME!!!!!!!!
Jumper; Jo Sharp design and mohair, knitted by me, all details here
Skirt, Paprika patterns Jade skirt, in burgundy silk/cotton knit, details here
Tights; self-drafted, black poly stretch, details here, and my tutorial for making your own custom-fit tights pattern is here

Sienna is thrilled with my boots too; you can tell, yes?  😉

winter boots ootd

pinterestmail

Petrol blue/apricot lingerie set

petrol blue and pink setFulfilling a need.  Plus, I’ve been making some winter boots and it has been such a freaking marathon, cue Munchen scream here, although I am over the difficult bit and on the home straight now, weeeee!  anyway I just wanted to whip up something quick and pretty and girly and fun and frivolous.  Lingerie! of course!  Something to lighten the mental load.

And happily coinciding with measure twice cut once “everyone deserves pretty lingerie”  Actually, I did a recce and clean out of the old smalls drawer recently, and things are looking a bit grim in there.  I definitely need more than just this one set.  Need.  MORE!
makebra2610watson
Patterns; bra is makeBra 2610, now discontinued I think (sob) but very very similar in style to the bra pattern DL03.  I say “similar” but I would even hazard a very non-informed guesstimate as “near-identical”.  The undies are both the Watson briefs; although I see makeBra has a free hipster knickers pattern on their site now… I’ve printed it for myself but not actually made it up yet.  Next time!

petrol blue and pink set 2 Fabric and materials: I bought the pretty floral cotton-mix jersey and the lace-y knicker elastic from Fabulous Fabrics during their recent 20% off sale, and the deep teal/navy blue shoulder strap elastic and ribbon are from Homecraft Textiles.  I’ve always loved the colour combination of deep blues and teals when mixed with pinks of any variety; such a pleasing colour combination.  This set is pretty plain really, all the excitement is in the print.  In a rather busy print like this, I prefer for it to do the talking and power down on any lace or decoration or any frippery bits and bobs to distract from it.  That print is plenty!!

Gloating about my topstitching here… and can I just say, NO PINS!!  that’s all thanks to the brilliant makeBra instructional youtube video, which demystifies bra making and was a life-changing moment for me.  Seriously!

petrol blue andpink set 1All the other innards and bits; the foam, hook and eye closure, rings and sliders, underwire casing and underwires are from my rapidly dwindling basic lingerie kits that I bought from makeBra.  Those kits are pretty brilliant, I totally need to order another one…. ASAP.

Woot!  Smalls drawer; levelled up!!!

petrol bue and pink bra

pinterestmail
Switch to mobile version
↓