 O hey!
What am I doing? not much, just hanging around in my new jean jacket that until very recently was actually a few pairs of ancient old jeans!!! OHYEAH!
 A jeans-to-jean-jacket project has been a long-term “thing” in my little bucket list of refashions that I have in my head. and one of the reasons I’ve been collecting my children’s old jeans for only like, forever… recently I was asked to speak at the 20th anniversary celebrations of Australian Sewing Guild, a huge honour! and in the general chit-chat heard mention of their Castaway to Couture competition… where you take some cruddy cast-off clothing and transform it into something new and spectacular of course; obviously my ears pricked up … I LOVE wardrobe refashioning!! I really the challenge and the FUN of repurposing old unwanted fabrics into something new, and I love the good self-backpatty feeling you get from being economical and not wasteful, in both the money sense as well as in the planetary resources sense as well. I’ve done quite a lot of it in my time but not for a while… I mentioned my intention to participate in the comp on IG back on the 2nd May, and knew straight away I would finally get on with my “bucket list” jeans-to-jacket. The only things I bought for this were the buttons!
before…

after…

I used the Named patterns Maisa denim jacket pattern, and three pairs of my children’s old jeans, above. Actually, technically I used only two and a half pairs of jeans, which I feel pretty good about! I picked out the most similarly coloured ones, for a cohesive look, and the widest legged one in my stash; pretty sure these were all Tim’s, he used to rock the wide legged style A LOT! I needed the wide legs so I could cut out the widest pattern pieces such as those upper sleeves. A few pieces, like the hem bands, the collar, and the back yoke were too wide, so I had to cut these laying up and down the leg.. i.e. cutting across the grain, rather than on grain.
 While I lurve a patchy aesthetic to my clothing, and of course the beauty of a thing like a jean jacket is that it’s supposed to look a bit beat up and NOT a work of beautifully tailored perfection… I still wanted it to look at least a little bit intentional and not too bunged together. There was plenty of colour variation even within each single pair of jeans as well as fashionable distressing effects everywhere too, so I carefully cut so as to make sure the colour variations were matched symmetrically all over the jacket, for example; the upper arms are cut from the same area of one pair, the side fronts also both from the same area of another pair, ditto the two side backs, etc etc, so as much as I possibly could the lighter blue areas are balanced out nicely and symmetrically with the darker blue areas on the jacket.

I think this resulted in a fairly cohesive look, one that hopefully doesn’t scream “MADE FROM CRUDDY OLD JEANS” anyway.

I only kept ONE thing that even vaguely hints that this is a recycled product; for one of the cuff facings I unpicked a rear pocket from one pair of jeans and cut the facing for a cuff from this area… it’s just facing, so it’s on the inside and can’t be seen unless I roll up the cuffs. But I like that it’s secretly tucked away in there 🙂

For near total re-cycling, I even re-used the pocket lining of one of the pair of jeans for the new pocket lining of my jacket! well, it was a rather nice blue plaid and after unpicking the coin pocket there was just enough for my own new pockets.

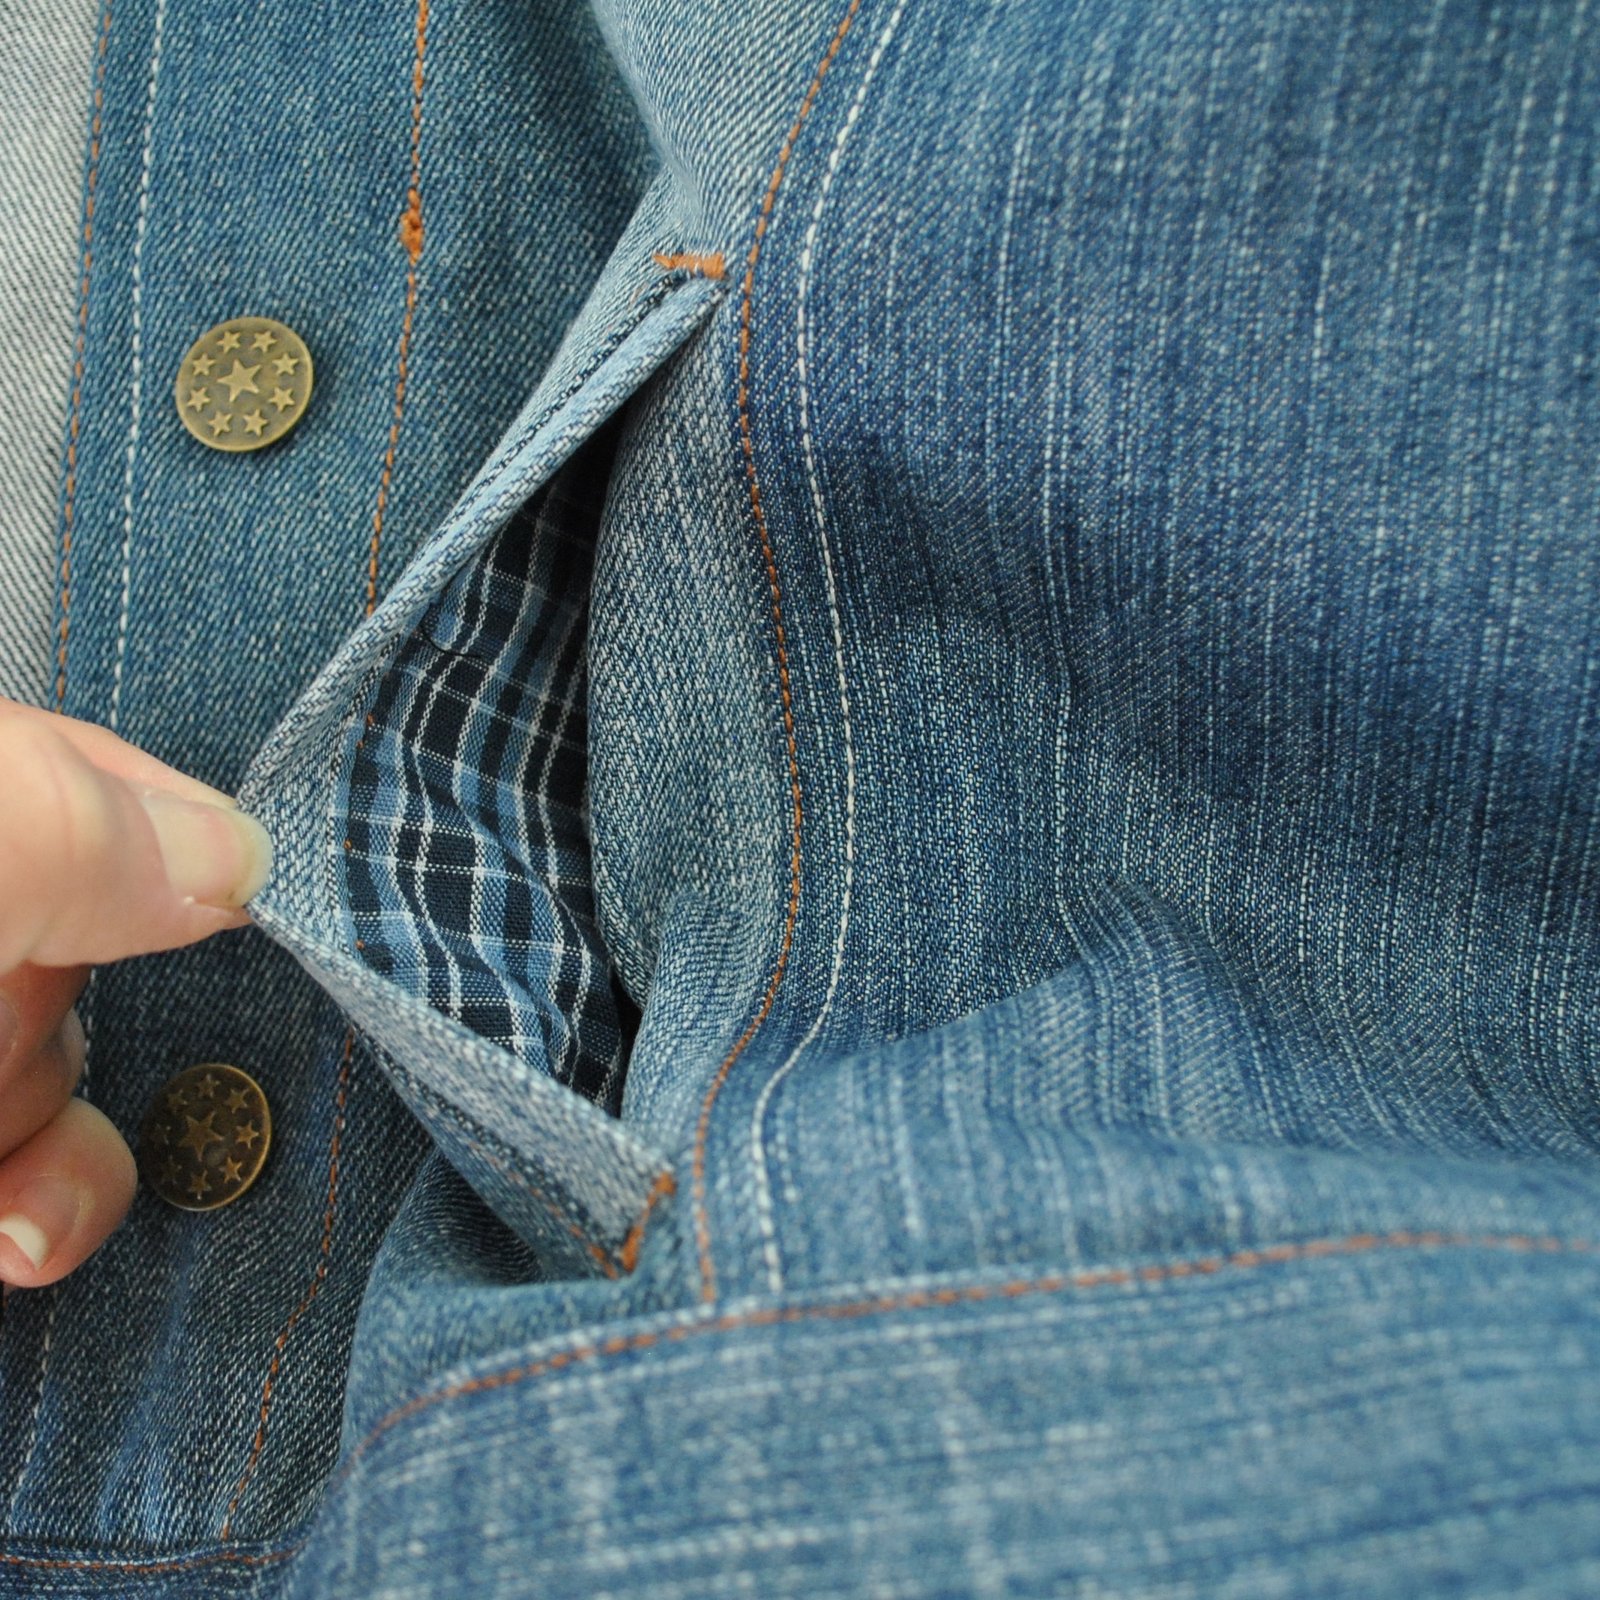
Oh, yes, pockets! The Maisa doesn’t come with pockets like this; it does have two breast pockets but funnily enough I really prefer pockets that you can actually put things in and also take them out easily… so I decided to see if I could wrangle some hip pockets in there somehow. And I did!

I made two little welt pockets situated in the front/side front seams. On the inside, the bottoms of the pockets are sandwiched inside the button bands, for a neat look on the inside. They do work… however they’re not perfect by any means! because they do happen to have a button and a buttonhole respectively at the bottom edge of each one! hmmm, yes well… that was unavoidable. Maybe, just maybe a bit of a hacking fail, however I’m really really glad still that I’ve got them. I knew it was a risk since the cutting lines in the front of the jacket are very close to the centre front, and a pocket like this would work better if the seams were situated further out towards the side seams OR if the front closed with an open ended zip instead. Both criteria would have given a better result… BUT well, we live and learn… at the very least I can put a little bit of stuff in them, so not a complete and utter fail! I’m ok with them, and they do work! 🙂
 Thoughts on the pattern: description says a classic, unlined, button-down denim jacket with collar; short and loose-fitting design with flap pockets at the front; sleeve vents and wide button cuffs, wide band at the hem. Well, hmmm, I’m not going to start ranting about my pet hate; the incorrect use of the term “button-down”. Noooo, I’m not. Apart from that! everything else about the pattern is pretty awesome. A slight negative; it is a bit more loose-fitting than I anticipated. Not 80’s loose, but still pretty loose. I’m ok with it really… I will certainly wear it anyway! it’s so comfy and feels absolutely fantastic on! plus I’m only wearing it over a thin little Tshirt here and of course a bit of oversizedness is a good thing when I’ll want to wear it over cardigans or long-sleeved woolly tops in the winter. I think when I get a little time I might have a go at re-jigging the pattern to be a little more form-fitting, for the future. I still have plenty of pairs of jeans that need refashioning, so a second, differently styled jean jacket might even happen. One which even has bigger and better functioning hip pockets!

Design decisions: all the raw edges are finished with overlocking in dark blue thread, and I double top-stitched all seam allowances down with two different colours of thread; a coppery brown, and a creamy ivory. These are both Gutermann upholstery thread, I actually prefer this to topstitching thread because A) it is tougher and B) it is less prone to fraying, so is easier to thread a needle with it. I’ve used it for all my previous jeans, as well as for all my Alabama Chanin projects too, of course. I decided to go with the two different colours, because it’s a detail I’ve noticed in some rtw jeans that I like a lot.

For the breast pockets: I originally double topstitched these in the two differently coloured threads too, however it just didn’t look very nice. To be honest, something about the curved edge; cup-shaped pocket shapes topstitched onto the front just suggested “topstitched boobs”, to me. Maybe that’s just me being weird… but I couldn’t stand it and unpicked the ivory and restitched the second line in the same copper brown as the first, as above. It’s less obtrusive now and I think looks better. Sorry, if that all sounds super weird, but just saying….

Some purely gratuitous details shots…
cuff topstitching and bar tack…

collar …
topstitching …

breast pocket…
waistband…
Details:
Jacket; Named patterns Maisa jacket, made from old pairs of jeans
Skirt; Vogue 1247, details here
Tshirt; Closet Case patterns Nettie bodysuit, white jersey, details here
Shoes; made by me and my own design, details here


location: the sundial at Cottesloe beach, Western Australia


 Seems like aaaages since I was at the beach for these photos! and I can remember it was a glorious 30C that day. Right now it’s still sunny but getting pretty nippy here in Perth; and joyously frolicking in the surf in a tiny little dress is kinda out of the question. SO GLAD I was super-organised and pre-did my little photo shoot! Anyway, here is this cute and very summery little dress I made a few months ago.


 Details:

 I’ve made this new dress! every year my dear friends give me a Fabulous Fabrics voucher for my birthday… it’s taken me a little while but I finally got around to spending it and making my birthday dress!
 Pattern; Vogue 1351, this is my third version of this pattern,


 I wore it for the first time today! along with my scarlet Miette cardigan, to show it to my lovely girlfriends who had given me the voucher… 🙂


 Oh hello, fellow needle-wielders!


 Olá!
Olá!


 My pattern is very loosely the epaulette top from She Has a Mannish style, cut to flare out more in the body and sleeves… the lining is cut straighter in the sides. The shell and lining have separate side seams, but are sewn together at the shoulders and armscye. I pinned and stitched a square neckline, cut and overlocked the edge, and then stitched a length of white cotton bobbin lace around to edge it, part of a large stash that I’ve had for many, many (many, many) years. It’s funny, I kind of threw this together just for the costume, but you know what?? I actually love it and will definitely be wearing this again, in real life!

 his costume inspiration… we’d bought red, blue, green and yellow feather boas from Spotlight to customise the black pants and black shirt that he already had in his wardrobe.. we also bought yellow satin for a sash and a yellow velour fedora from Spotlight too…


 Pattern; the Sudley by Megan Nielsen patterns, I gathered up the sleeve hems with skinny elastic, like I had done for






































