
Hey! I’ve made this new skirt. Actually I’ve made lots of new things lately and just haven’t yet blogged them… oops! Getting onto that, asap! Hehe, actually a good thing about me-made May is that it kinda forces me to blog as yet unblogged things that I want to wear that day. Well it means I hav e to, otherwise… what would I link to?? *horrified gasp* O, the shame of having nothing to link to!
Pattern: the Megan Nielsen Axel skirt. I bought this pattern a few months ago, on one of the several occasions I’ve wandered into Potters Textiles in fruitless search of the Dove blouse pattern. The Dove seems to be a pattern that is perpetually sold out… yes, I could have bought a pdf but I kinda had my heart set on a paper pattern. Mostly because I adore Megan’s illustrations that she does for the envelope. Aren’t these adorable? I also have another, different Megan Nielsen pattern that I have recently finished too… but that shall wait until another day and its own separate blog post…. 😉

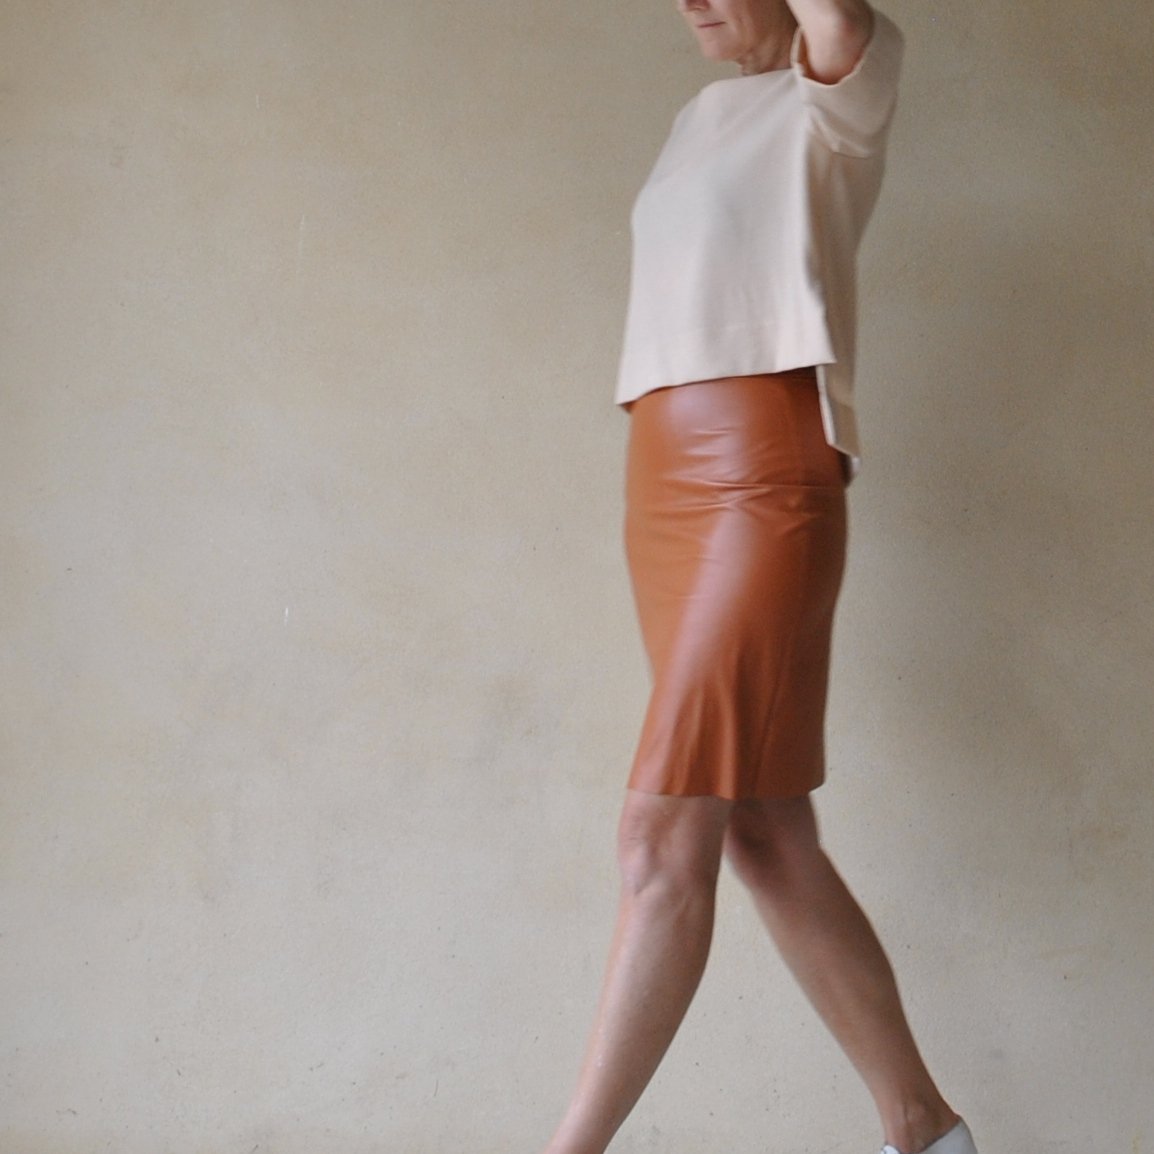
I made the short, straight version 2 only without the waist ties because this one is actually just my trial version of the pattern… I was toying with the idea of using it for one of my Melbourne fabrics and just wanted to test it out for fit first. This is a pattern designed for firm fabrics with some stretch, because it is a tight, form-fitting pattern, but in quite a nice way I think. The style actually reminds me a LOT of the figure-hugging little pencil skirts we used to wear to high school in the 80’s. Btw, and going off on a random tangent… if you want to see a daggy homemade mockup of my old school uniform; I put this one together for a school reunion a few years ago…

Fabric: a stretch polyurethane laminate “pleather” from Spotlight. I’d originally bought several metres of this stuff on superDUPER special; I had the thought of making either shoes or a raincoat… then I went off it and shoved it away and out of sight. As you do! I’ve made quite a lot of things out of this stuff in the past, here, here, here, here and here! Some have been more successful than others and so I have a bit of a love-hate relationship with the stuff 😉 When I was searching for something to run up a muslin/trial thing I thought “oh what the heck this’ll do”, made it up, and you know what?! I’m actually liking how it turned out, like, A LOT! It’s like an old-fashioned love story; fabric and pattern met, eyes locked across the room, hearts went a-pitter-pat, the stars aligned, fireworks exploded, champagne corks opped, they rode off into the sunset together and are bound to live happily ever after.
Some details: I cut the front on the fold so as to eliminate that unnecessary centre front seam; also, to accommodate my ahem, pear shape; I pro-actively graded out from an S waist out to an M at the hips. And I’m pretty happy with the fit. See, this is why we sew! Style-wise; it’s an extremely simple, no-fuss, zero-drama design, with absolutely no closures; just the simplest of bands for a waistband that you pull up over your hips. Not even kidding, this took me like a few minutes to whip up, tops.
simple stretch waistband

I’ve learnt in the past that this pleather doesn’t hem well… so I just cut a sharp clean edge using my rotary cutter, and angled the seam allowances inside the skirt so there’s no danger of them peeping out under the lower edge. 
Also, it’s tricky to press, but does look about a thousand times better if you do… it’s best to press on the underside and use scrap fabric when you’re going over the seams, the plastic right side of the fabric will soften and melt ever so slightly and I found I had to peeeeel off the pressing scrap after pressing. So it’s best to be quick and not let the iron linger on for too long! Some more of my tips for sewing with leatherette or pleather are here and here


Details:
Skirt; MN 2207 (Megan Nielsen Axel), terracotta polyurethane laminate “pleather”
Top; own design variations on the Epaulette cut & sewn from the Japanese pattern book “she has a mannish style”, also called “she wears the pants” by Yuko Takada, apricot crepe, details here
Shoes; designed and made by me, details here
Location: along the South Perth foreshore


 The design is beautifully breezy and very comfortably roomy… I love the cute little cut-on sleeves with a simple cuff, the petite collar has prettily feminine proportions, and the exaggerated lower hemline looks quite dramatic and really cool, imo. That one big box pleat in the back is fabulous, and a pretty dramatic feature too, yes? love how the folds balloon out and down to that gently shaped back hemline. In fact I love all the features and the shape of the dress, full stop. It’s like the perfect little summer shirt-dress. I’m going to wear this one a tonne, for sure, and and probably going to make a tonne more too!


 Partly because I stingily didn’t buy much of the print, and also partly for the same visual grounding reason as having a belt: I cut the pocket bags in a thick chocolate brushed twill, a small bit of leftover fabric harvested from Craig’s old pair of chocolate moleskins and which I used to make
 Above, I spaced it to turn up the hem exactly between two horizontal stripes in the print. The lower edge of the skirt is finished in bias cut black cotton, the same as for the inner waistband and pocket facings. See that little tiny row of mustard stitches along the top? I initially started hemming with black thread to match the bias; but quickly realised that even though I made my stitches as tiny as tiny could be, that row of minuscule black dots did show up on the right side of the skirt if you looked closely enough, and I didn’t like it!! So I switched to the same mustard thread that I’d used in other seams, which disappears nicely into the print.. so they’re pretty much invisible on the right side, which is the main thing!


 OH! I forgot to blog about this before, in fact I just checked and I made this back in February! bad blogger! but I also made another little work dress for Cassie, another Named patterns Inari tee dress. This is my fifth Inari made, my third for Cassie, she loves the style just as much as I do! Also it’s like a perfect little design for work, plus being easy and comfortable to wear, and quick to run one up. I incorporated the same


 I cut the neckline and all pieces as is, and diddled about with the lengths to get the look I wanted… as follows:


 Hello! I’ve finally finished these black leather clogs; that have been on the go for nearly a whole year now…. eeeeek!!
 The last time I went down to visit Mum and Dad: Dad had some pinewood he’d cut himself from a “weed” pine on their block… and he very kindly helped me to shape the blocks on his bandsaw, and have the use of his sander to do some further shaping while I was down there… I’m so lucky that Dad has all the perfect equipment for this!
 Once I got home, I sanded down the soles even further, stuck some cork to the bottom and the heels, and applied five coats of satin varnish. Ohhh, wait, getting ahead of myself… before that, I’d fancied the idea of a nice deep, chocolate brown wood, I thought it would play off nicely against my chosen black leather. So I bought some walnut stain and gave them a coat. They looked um, not good, but I persisted (“maybe they just need MORE of it” famous last words) and did a few more coats. Then they looked DREADFUL. A day or so of deep depression later, and I’d regained the energy to set up the sander again and sand it all off. THEN I did the soling/ varnishing thing to my clean, new soles. *sigh* Lesson learned; wood looks better in its natural colour.


