Tag Archives: Megan Nielsen

pretty little maternity dress

No, I’m not pregnant, obviously, but I do currently have a pregnant daughter … She is wearing the things I’ve already made for her constantly, AND I’ve also lent to her my rusty lace Cissy dress for however long she needs it – and boy do I miss it!  Even so she is in desperate need of more options.  Well, how could I not do something to help out?

I’m modelling it here though, because she and D have moved into their new, own home and she is now a half an hour’s drive away (sob)  I still can’t get used to her being so far away!!

While I was wearing it I was reminded how much I love this cute style.  The pattern is the Megan Nielsen Sudley dress, one I’ve made for myself once previously here, and once as a dress for Cassie here.  I really like the oversized, comfy skirt and three quarter sleeves, which I have gathered up with a loop of skinny elastic inserted in the casing; and the keyhole neckline with spaghetti tie is really pretty.  Otherwise, the style is quite similar actually to the aforementioned Cissy dress in many ways, with a few key design point differences of course! but the style and feel make them very much sister designs, I think.

The fabric is this, very pretty, rayon crepe from Minerva… isn’t it lovely?  I think it’s really sweet and “granny’s wallpaper”, in a pretty old-fashioned sort of a way.

Now I have a confession, I initially cut out a different thing from this fabric, and … well it was terrible.  There’s no sugar-coating it.  I was quite depressed about it actually, had bought the pattern with great expectations and excitement, and it didn’t take long before I realised it had … issues.  I won’t name and shame it, well, not just yet! but I think I’ll give it a revisit at some point and work out a re-jig.  I already have plans.. but more on that at a future date!  I managed to cut out the Sudley pattern from the pieces, and miraculously I’m fairly confident I have enough small pieces leftover that I think I can cobble together for a thing for me too.  I just need to get around to it!!

… crazy Spiderman picture inspired by a Vogue magazine shoot…

pinterestmail

an exciting need for maternity gear!

so, I have some very exciting news!  I’m going to be a granny again!  Well of course I’m already a granny to darling little Arthur, but I am going to be granny to TWO.  That’s cause for celebration, I think!  Especially if by celebration, I mean celebratory sewing … which is specifically the kind of celebration this blog recognises, hehe.

Cassie is quite early on in her pregnancy but is already uncomfortable and in need of maternity clothes. Kelly passed on to her one or two of the things I made for her last year, but they are different sizes and so Cassie needed some things of her own, too.

Exhibit A!

I printed out another Closet Core patterns Ebony pattern to cut out Cassie’s size… now I know it’s not technically maternity, but in my opinion this makes a really good maternity option!  And there are so few! Honestly, you  go and check out the maternity range around at the moment and it’s quite shocking how few there are on offer.  Quite disgraceful, to be honest!  There used to be lots of options back when I was sewing for my own pregnancies, but those options seem to have sadly dwindled…  today’s pregnant ladies who sew for themselves have to be resourceful because there is practically nothing at all being designed specifically for the expectant figure.  And even less that’s very interesting.

Anyway.

The first thing I made is the above cotton jersey floral dress for Cassie… she absolutely loves it, which is great because I was initially not a fan of the fabric she chose!  However, once I’d made it and she put it on I could see she looks lovely in these fresh, bright, pretty springy colours.  She wanted something that could work for just about everything, casual and comfortable for both at home and out, she can wear it to work, and even to a formal event if she wants with the appropriate shoes.  Specifically, she has a friend’s wedding coming up, to which she is planning to wear this; and with her high heeled black booties I think it’s going to be lovely.  Plus, it’s stretchy fabric, so it’s very comfortable too, she can curl up on the couch in it just fine.  Pretty? and comfortable too?!!  win win!

I used the aforementioned Ebony pattern, of course, with the set-in sleeve.  The swing of the skirt is a little less than the pattern, because the fabric I had wasn’t as wide as needed.

Exhibits B! and C!

This top is another Ebony, naturally, in the tunic length and with the raglan sleeves.  This spotty cotton jersey is absolutely lovely! such a pretty print.  Oh, both of these fabrics, the spots, and the green, plus the previous blue/pink floral, were all from Spotlight.

please excuse the lumpy look, there’s a cushion doing baby stand-in duties in there and it’s not doing a very good job…

The skirt is Burda 7023, one I made several times previously for Kelly, so we know it’s a fantastic little pattern.  Thanks again to my lovely reader Graca, who very kindly sent this to me!  xx

I did the same thing I did before for Kelly’s skirts, with a self-drawstring in the front band coming out through little eyelets on the inside, so she can tie the front up tighter during these earlier days before she’s very big.

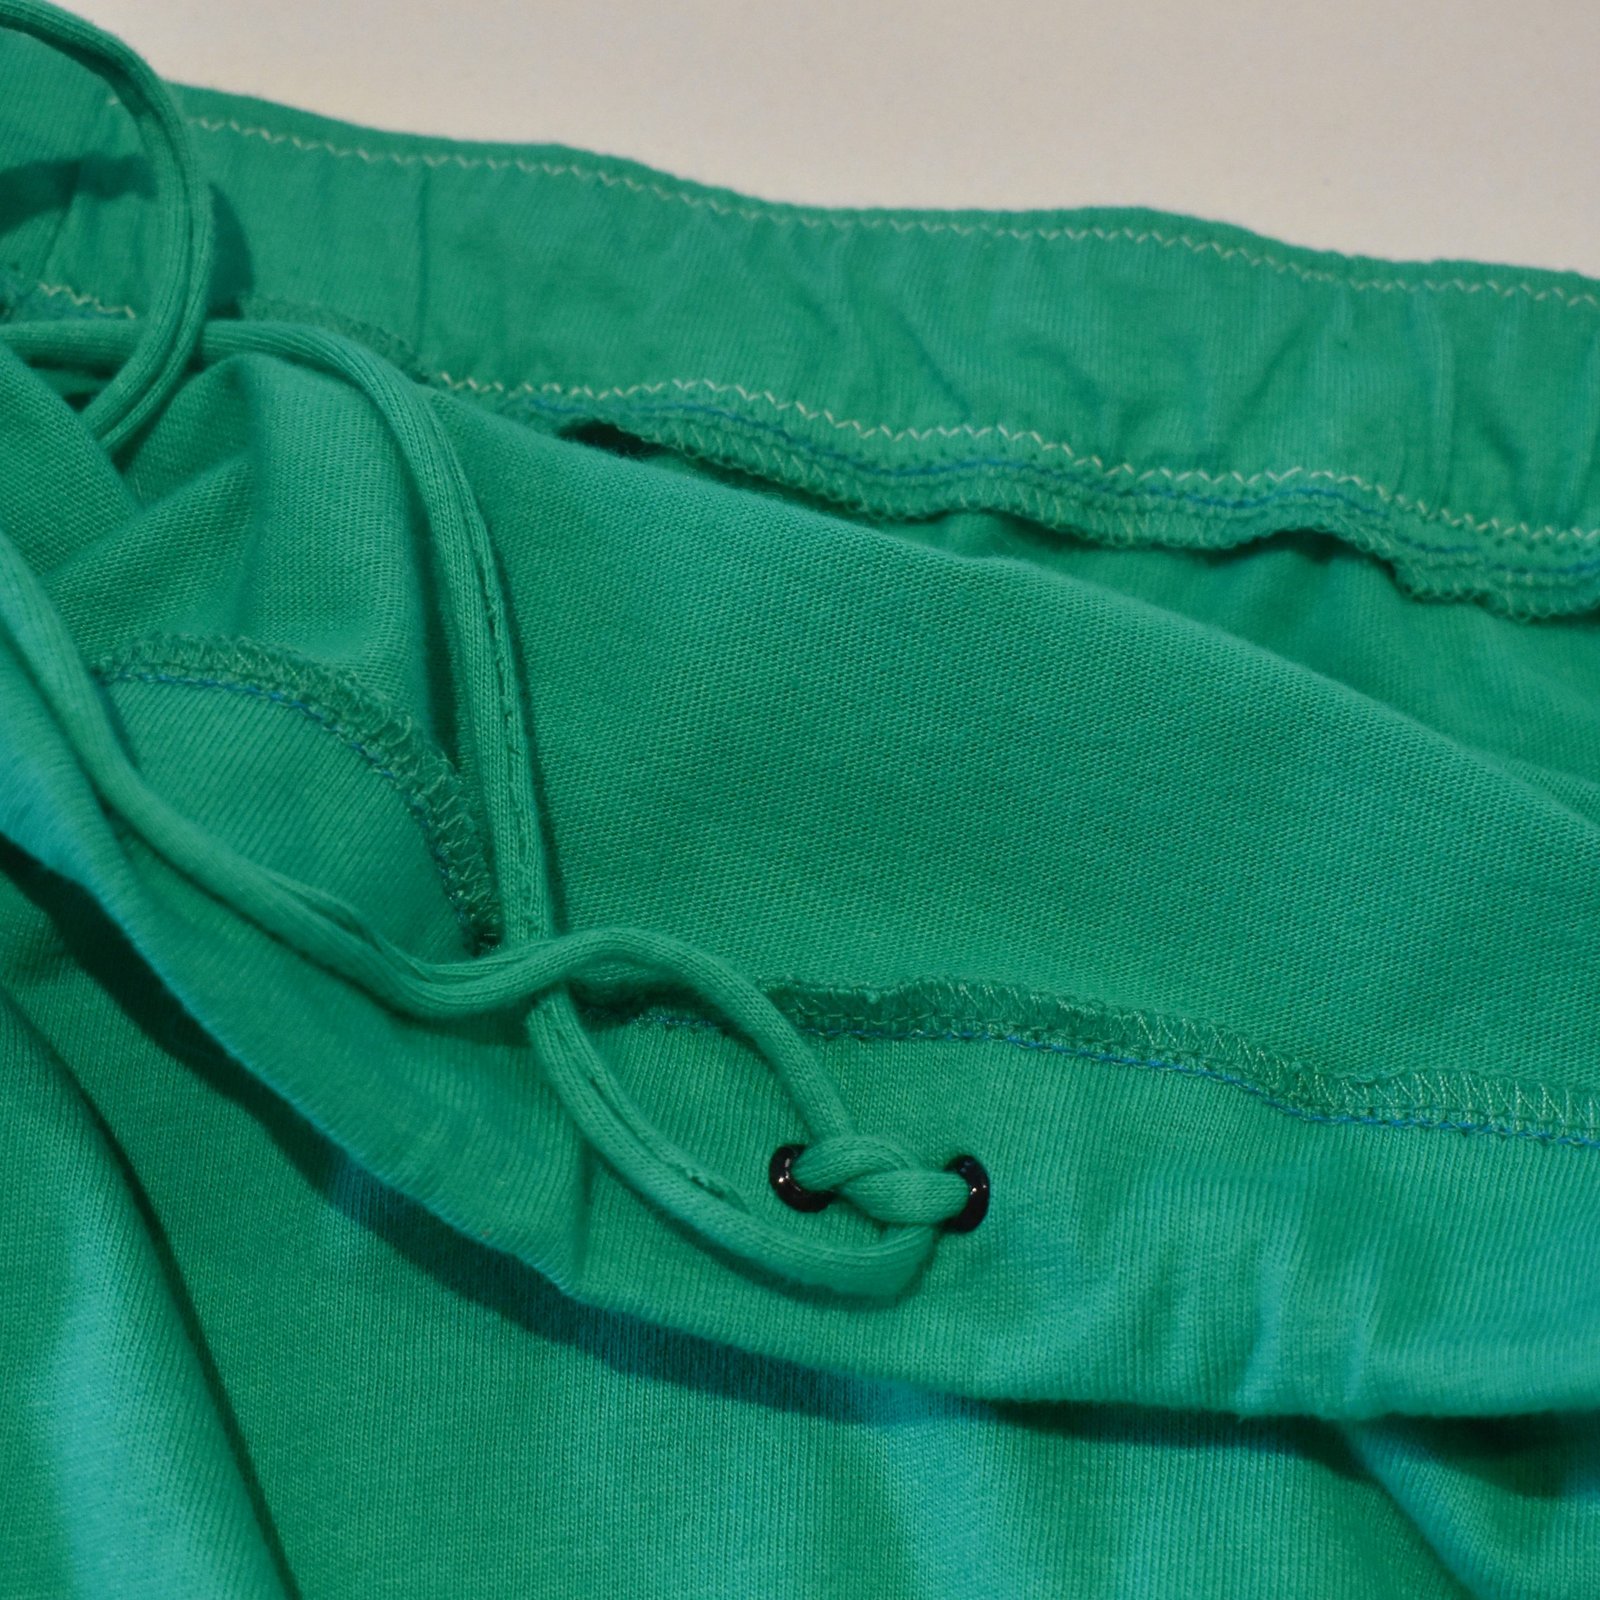
Exhibit D! and sorta E? though I’ve shown this little top here before so it shouldn’t really count actually.  Cassie made the skirt herself, using the Megan Nielsen Axel skirt pattern, and a pretty embroidered and pleated organza that she bought from Megan Nielsen store too actually.  It has a stretch jersey waistband, and is lined with lightweight cotton jersey too.  The little top is one I made for Kelly, and is a streamlined Closet Core patterns Ebony, first blogged here.  I made it using the same oatmeal-coloured, lightweight cotton jersey Cassie used for the waistband and lining of her skirt…  I originally bought this gorgeous stuff at Homecraft Textiles.


I just wanted to add pictures here of two other me-made clothes that Cassie is finding very useful in her pregnancy, a sort of pregnancy-appropriate, pattern round-up, if you like.  Both these dresses are getting worn a LOT.

Exhibit F: this Megan Nielsen patterns Sudley dress that I made for her in 2017, in a gorgeous spotty rayon from Spotlight, originally blogged here.

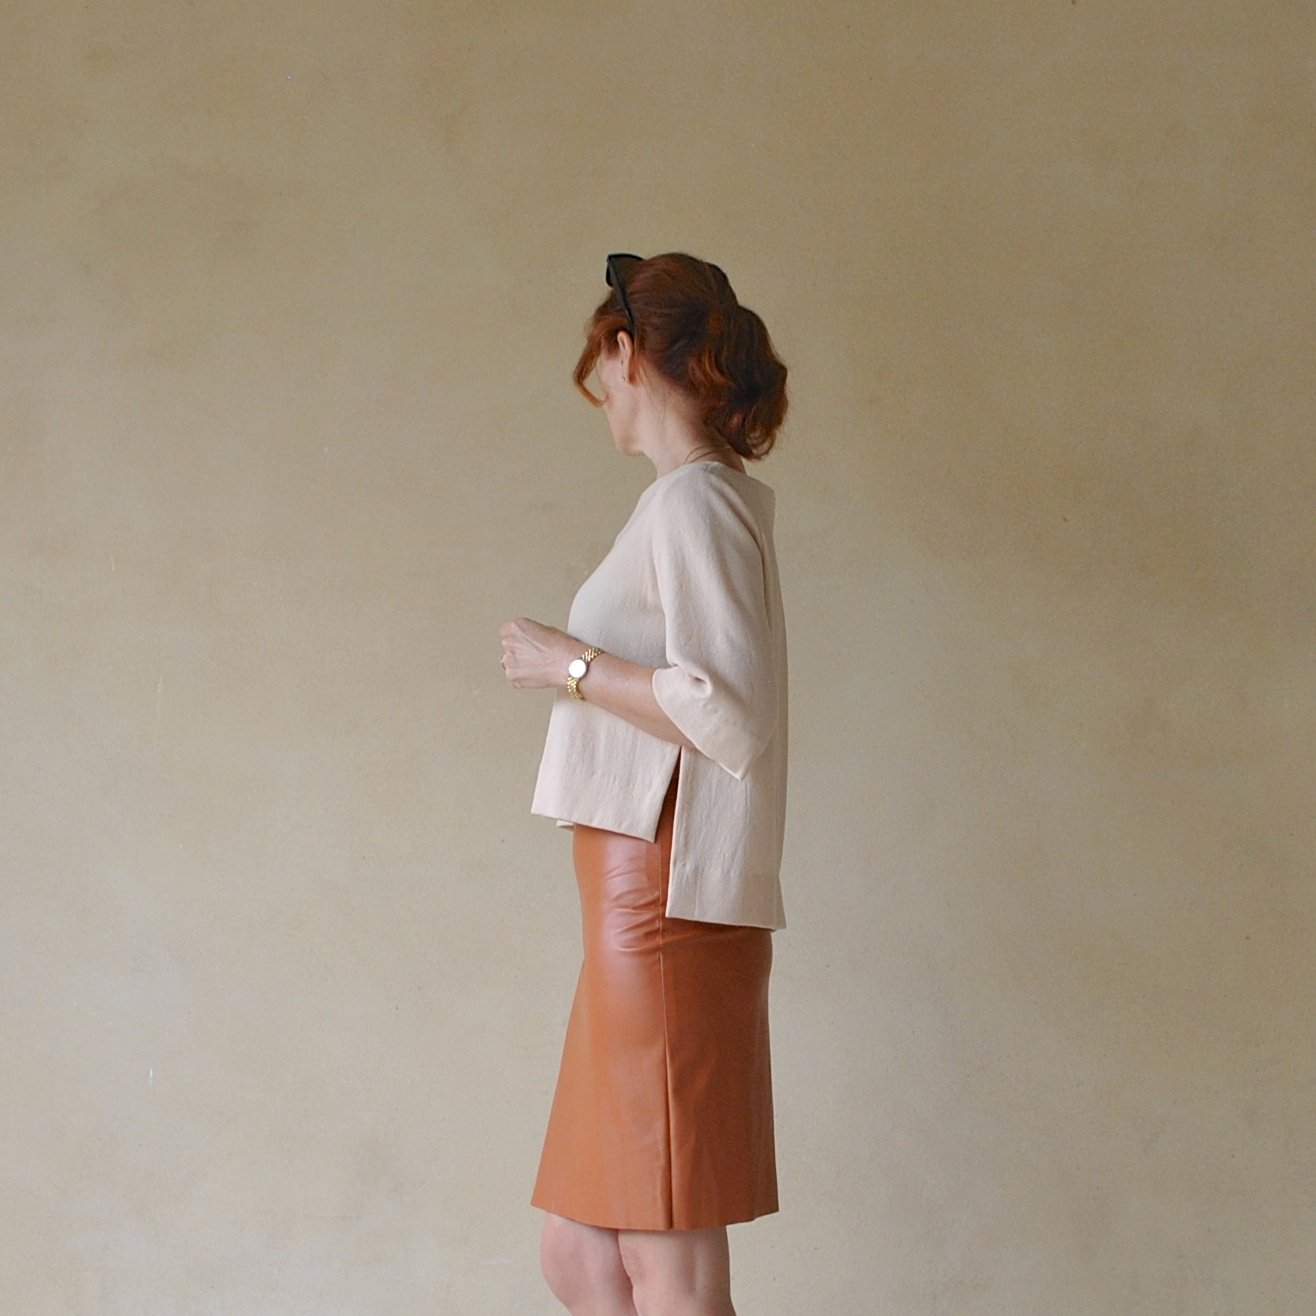
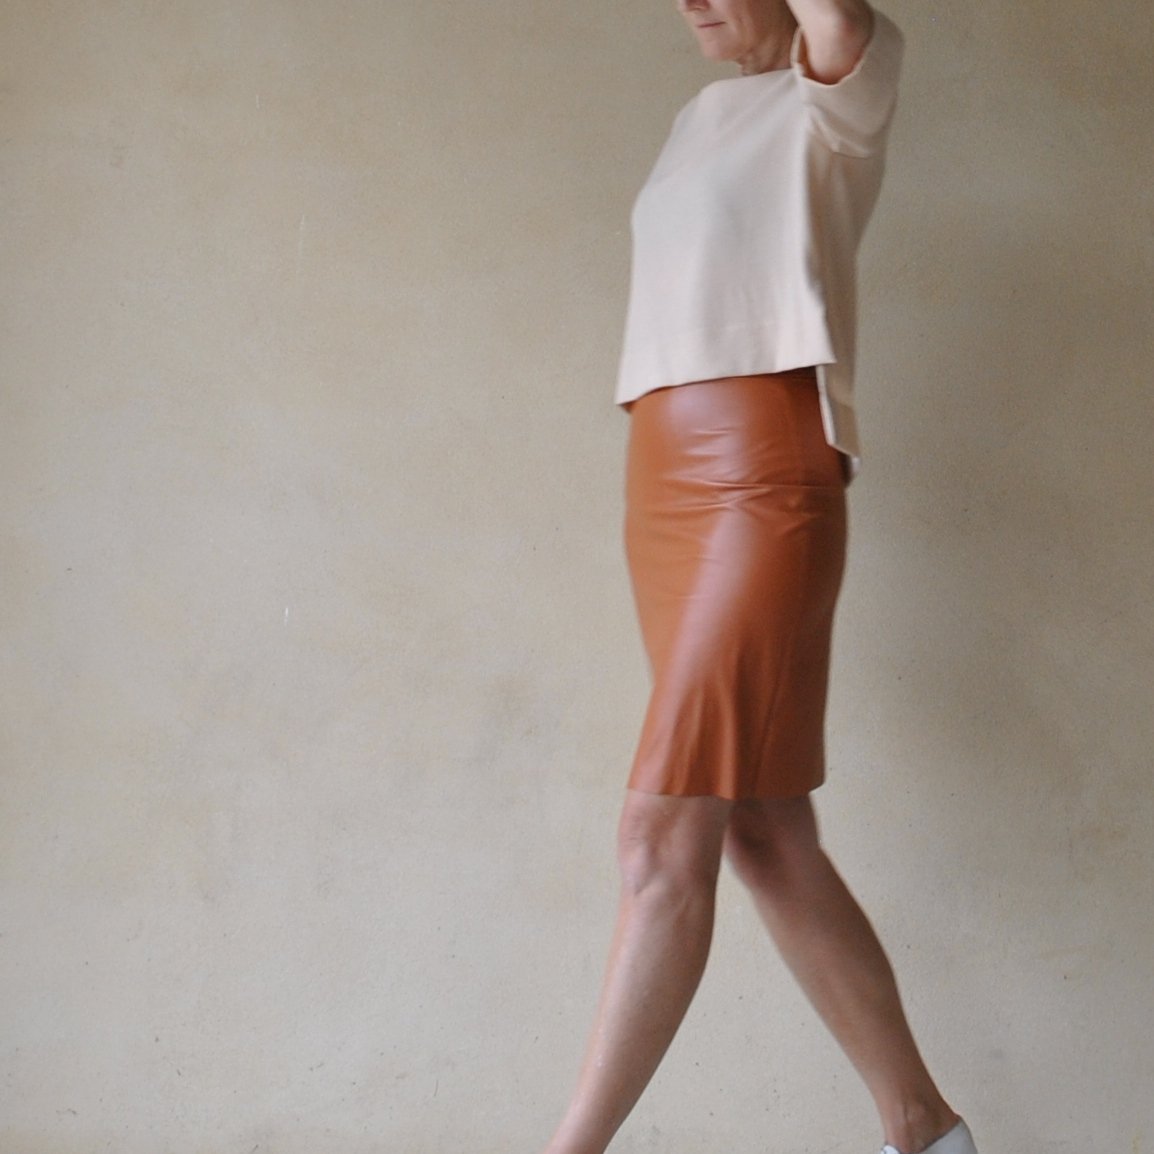
and also Exhibit G: this Burda dress also from a few years ago, made using a really beautiful, Amalfi coast printed crepe from Fabulous Fabrics, and Burda 02/2015/107, and originally blogged here.  This was my Christmas present to her from 2015, so I’m thrilled she’s got so many years of great wear out of it!

pinterestmail

terracotta skirt; 6 different ways

I’ve loved this skirt so much! but it’s been worn and worn and worn and the placky-dack fabric got so crazed and brittle in places towards the end there, I’ve finally been forced, forced I say! to bid it adieu; because my husband was like, that skirt is AWFUL.   And I had to sadly admit; dear, thou speaketh the truth.

I made it two years ago, using a plastic-fantastic polyacetate/vinyl stuff from Spotlight, and the Megan Nielsen Axel skirt pattern.   It most definitely got its magic number of 30 wears… just.  It was fairly shredded towards the end of its life, but it got there!   I’m giving this awesome little terracotta workhorse a little salutary send-off by reminiscing about some of my favourite outfits in which it featured…  Six outfits, to be precise… and everything else I’ve made in the outfits here is linked to its original construction post.

Above; at left; ok, being real here; this is not the most awesome “outfit”, per se; but this OOTD pictures holds a special place in my heart because it was Clara’s first feature on my OOTD blog… LOOK AT THAT LITTLE SCRAP OF PURE CUTENESS!!  SO TINYYYYYYY!! sigh.  If only they could stay so little and cute like that.  But without the puppy-insanity, thanks….  I’m wearing the skirt here with my leather sleeved/wool/silk top, my trusty homemade tights (as always) and my heeled black booties…

At right; I really love this outfit, and wore my caramel suede cardigan with the skirt quite frequently… also with my pink Pattern Magic twist top, ye olde homemade black tights, and my favourite motorcycle boots that I wear practically all winter long…

Both these outfits above were from my spring 10×10 challenge from two years ago, during which the skirt proved its workhorse-ness to me most satisfactorily!  At left; worn with my mustard silk crepe blouse, itself another of my creations using a Megan Nielsen pattern, the Sudley…. and also my own handmade white oxford shoes.

At right; worn with my blue-check hoodie from a Burda pattern, my navy edged white Nettie tee, my black tights and, yet again, the favourite boots….

Above, at left; I love the colour combination of this outfit, so much!! wearing the skirt with my teal-blue Nettie tee, my paprika tie-front cardigan, my mustard raincoat, the homemade black tights and my KronKron shoes that I bought during our holiday in Iceland…

At right; I discovered this outfit combo quite late in the skirt’s life, sadly, because I absolutely love it so much I definitely would have worn it over and over again if the skirt had lived a bit longer!  My wonky apricot striped T-shirt from a Burda pattern, and my olive suede tunic-tee, from another Burda pattern.  Same old black tights, and the little suede booties Craig gave me for my last birthday.  Love these !!

Sooooo, this skirt has been pretty great, so I’m a little sad it died, but you know what? Time to cultivate a new favourite.  What will take its place in my little skirt-loving heart, I wonder?  I can hardly wait to find out  🙂

pinterestmail

a shirt for David and a dress for Cassie

hey bro!

Woooh!  I’m so excited to finally hand this over!  My brother has had/is having a big BIG birthday… and my sister-in-law made the brilliant suggestion that he would like a shirt made by me for his birthday.  Well, oh my goodness, I don’t know why I didn’t think of it myself!!  So I dutifully and sisterly-lovingly spent LOADS of time and care into making this as perfect as I possibly could, and it pretty much is.  Ta da!

looks like a kinda cool dress when Bessie is wearing it, yes?  Gotta admit, I WAS a little tempted to steal it …

I know what you’re thinking… don’t I pour loads of love and care into making shirts for my husband and two sons too? well of course I do.  Buuuut, see…  my brother’s shirt is going to be handled, worn, laundered, ironed and generally available for up close and personal inspection by someone other than me… and I quaked with fear at the thought   * imagines to oneself, my brother and sister-in-law with a magnifying glass going over each and every stitch*   Ha!

And yeah, this really is a VIB (Very Important Birthday).  and so I just really wanted for this shirt to this to be really really lovely for my really really lovely brother.

Pattern: I used my new mens’ shirt pattern Burda 6874, graded to fit David, plus I made his extra long as per the shirt whose size I was going off.  My sister-in-law had secretly given me a well-fitting shirt of his that I could measure off to custom-fit his shirt … David is a 6’4″ champion swimmer, and built like one too… did I ever mention he has swum the Rottnest Channel swim solo?!   Yep!!  Meaning that I needed to substantially re-grade my pattern to fit his physique.  I didn’t have David himself to check the fit off of, just that one shirt; so I was pretty terrified how mine was going to go.  Luckily the fit turned out to be absolutely spot on!  *pheeeew!!!

Fabric; a really nice deep indigo cotton/linen with a permanently scrunchy texture to it, I went big guns and bought this from Calico House, because well, it IS a special birthday.  The red buttons are from Fabulous Fabrics.

But enough boring chit-chat…  how about some gratuitous detail shots  #shirtporn #oooyouknowyouwantit

buttondown collar

it took me three goes to get the second of these buttonholes looking exactly the same as the first!

sleeve placket.  contrasting red cotton for the cuff and yoke facings, topstitched in a way that a tiny sliver peeked out on the right side


fully flat-felled seams throughout

sorry for collar picture overload.. I was just so thrilled at how nice it turned out!

I was once asked what the inside of these side seam gusset/insert thingies looks like …  Folding the inner edges all around made them pretty bulky so I cut away all seam allowances of “hidden” edges ie. those of the underside of the gusset and the turned under edge of the shirt hem, tucked them inside the upper gusset edge and topstitched them all down… thus considerably reducing bulk here

As soon as he opened it, he put it on.. obviously this made me SO HAPPY to see him wearing it!

Also… recently I mentioned that I had made a dress for Cassie?  well here ’tis!

Pattern; the Sudley by Megan Nielsen patterns,  I gathered up the sleeve hems with skinny elastic, like I had done for my own Sudley blouse, at her request.  All seams are French seams, dress is fully lined with the lining cut as an extended bodice.  The fabric is a very realistic silk-like poly from Spotlight, lining also from Spotlight.


To be honest, halfway through making it I felt pretty down about it, like this was a dress that couldn’t possibly be saved… but fortunately once it was on her it suddenly looked adorable. And she loves it!  Despite that very serious facial expression!

No no no!  I’m not about to be a granny yet… this is just a pose that made us both roar with laughter!  Demonstrating the… um, capacity of this design.

SaveSave

pinterestmail

deep teal, suedette dove blouse

Hey!

I’ve made a new blouse.  It’s the Dove blouse by Megan Nielsen patterns, in an lightweight but warm, faux suede from Spotlight.  So, the recommended fabrics for this pattern are shirt-weight stuff like voile and crepe de chine and chambray and linen… not a wintery fabric like this.  However, when have I ever taken any notice of fabric recommendations? Pretty much NEVER, haha.

And I love it.  Very very happy.  Look at those sleeves.  Oooo yeah.

this is a blouse that demands at least one dramatic arm pose

Now, remember how I mentioned pretty recently that I was looking out for this pattern??  Well, Evie, of Indie Stitches very kindly emailed me to let me know that she had one in stock… and offered to send it to me… thank you so much, Evie!  Indie Stitches is an online pattern store with a very nice range of both paper and digital patterns, obviously as the name suggests specialising in small and independent pattern makers like Closet Case Files, Grainline, Sewaholic, Jennifer Lauren Vintage, Papercut, By Hand London, Tilly and the Buttons, Waffle patterns, Megan Nielsen and would you believe this is just a selection?! There are many many more!  If you love supporting small independent pattern companies then I highly recommend heading over to the Indie Stitches pattern store and having a browse, at least.

Please note; I did receive this pattern gratis, however there are no affiliate links in this post.  I will always notify my readers if there is an affiliate link in my posts.  Also on a tangential yet related note, I read somewhere that people think bloggers are raking in the money through affiliate links, well! that may be true for some types of bloggers, like maybe fashion bloggers?  but sewing bloggers…  NO.

For the sleeves you do a triple-stitched skinny hem… it’s a hem finish I have used a few times before that gives a neat little baby hem but with no rippling or “lettuce-leaf” curling that you usually get with a single-stitched or machine-rolled hem… I think I read about it first years ago in an issue of Threads.  I wasn’t sure how it would work out with the slightly thickish suedette, but it did beautifully! and I had a request from my daughter and also from sewnewbee in IG as to how exactly is it done so I did a little sample and took a few pictures for a short tute…

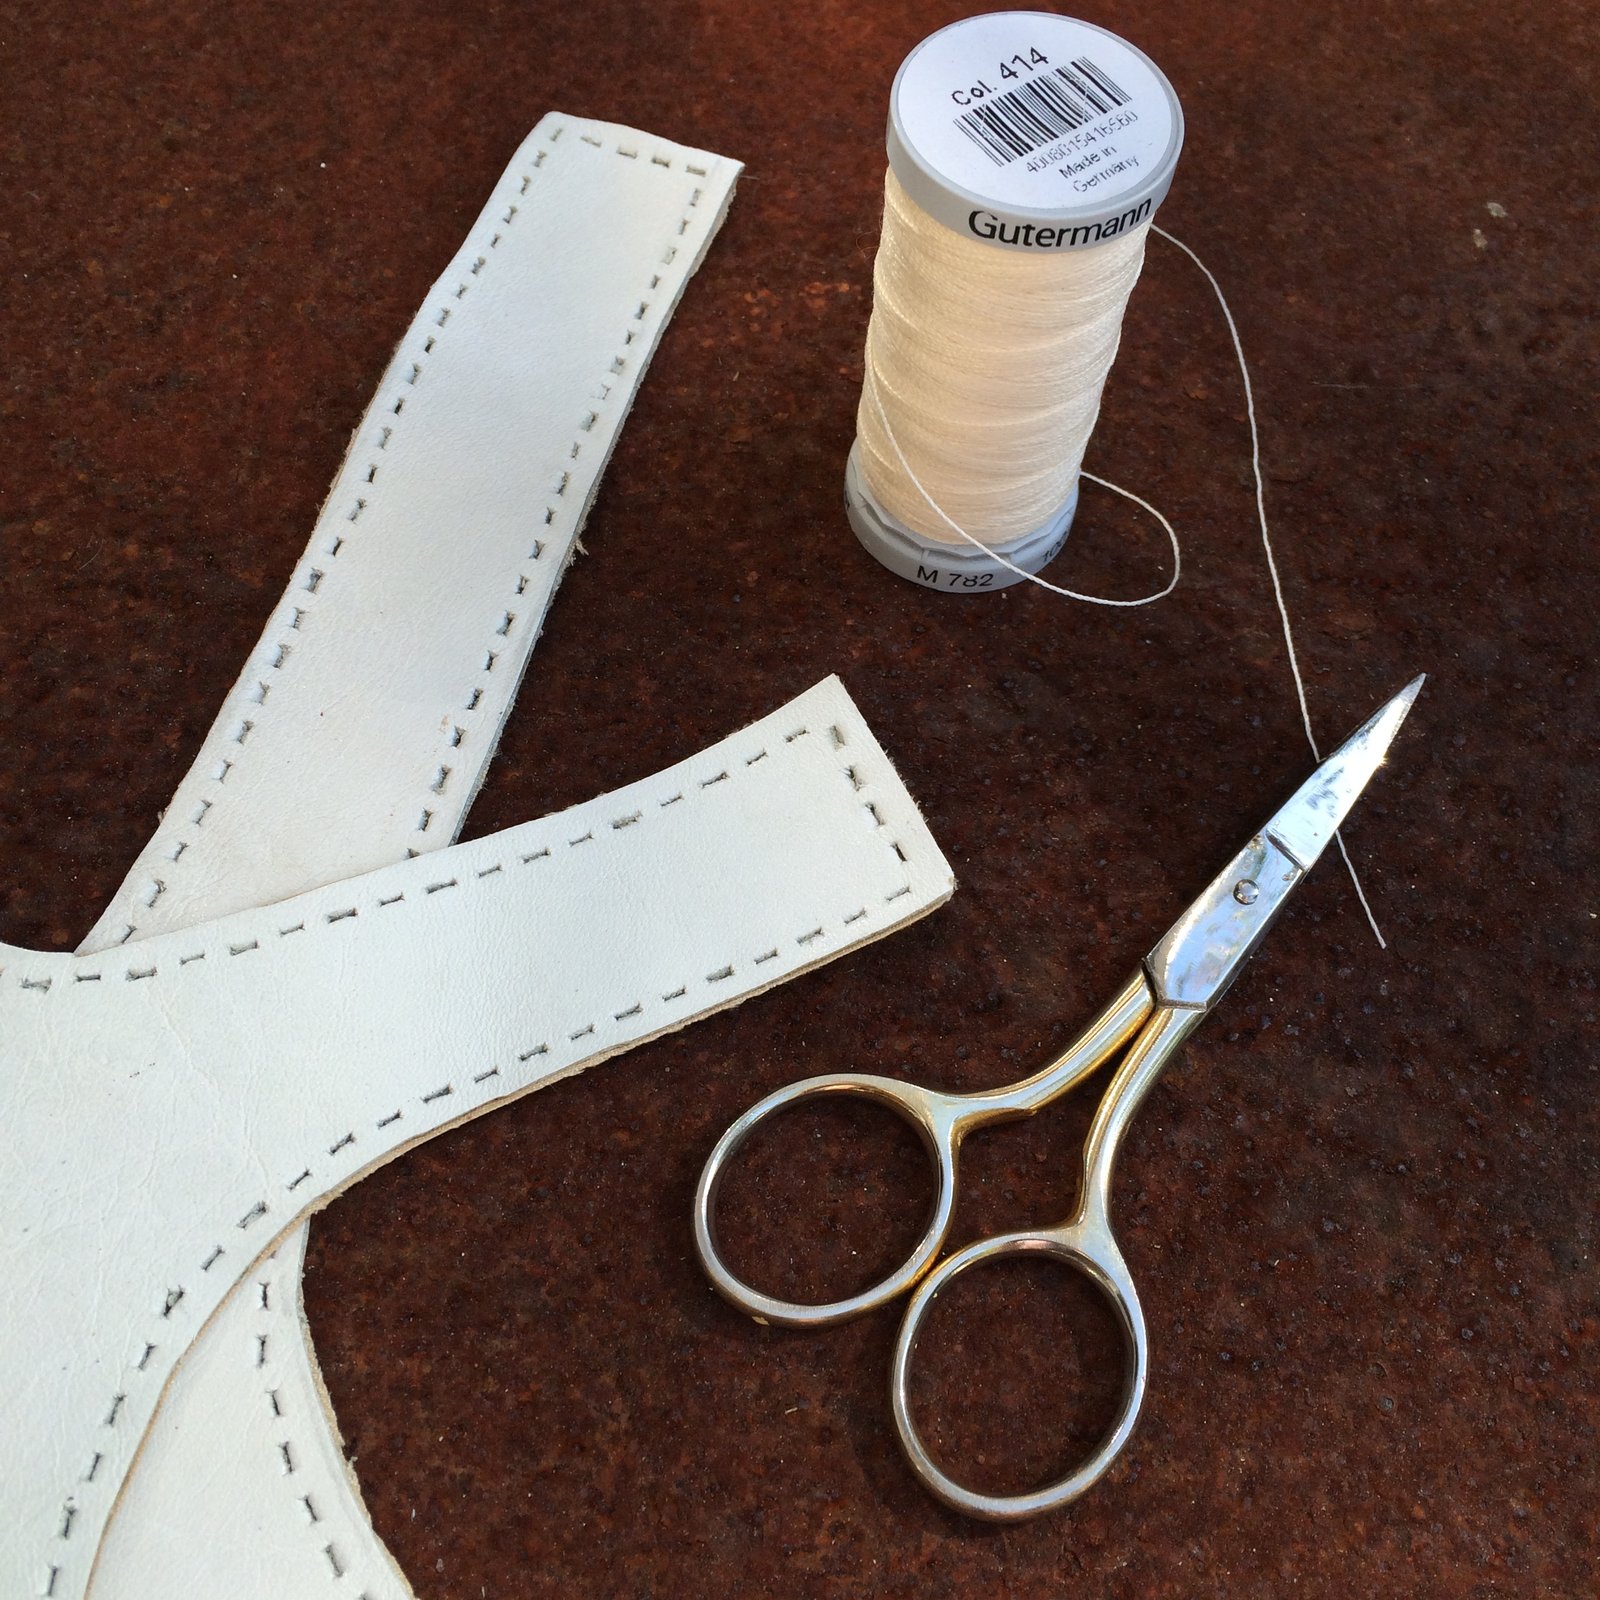
I used a contrasting white thread here because I found you could barely make out a single thing in my pictures with the matching thread!  anyway:

First; stay-stitch at a distance of 6mm (1/4″) inside the raw edge, being super careful NOT to stretch out the edge while doing so.  This is the 1st row of stitching.

Turn the raw edge to the underside just outside the previous stitching, so the stitching sits just inside the pressed edge, and press.

Stitch again (the 2nd stitching) at a distance of 2-3mm  (1/8″) inside the pressed edge, and give it another quick press…

Trim away the raw edge as close to the 2nd stitching as you can.

Turn under this now extremely skinny, double stitched edge and stitch again (3rd stitching) right over the visible (2nd) row of stitching.  The first two lines of stitching help keep the hem from stretching out as you sew, so your edge will be nice and flat and with minimal “lettuce-leaf” curl along the edge.

Inside: looks almost like one row of stitching, but it is actually two; one over the top of the other

Right side has only one row of stitching… plus a very skinny, nicely non-curly edge achieved in a difficult to hem fabric  🙂

excuse me ma’am, your remote is showing

Details:

Blouse; Megan Nielsen Dove blouse MN2105, version 2, in petrol blue suedette
Skirt; Vogue 1247, yellow corduroy dyed brown, details here and my review of this pattern here
Tights; self-drafted, black polyester stretch, details here and my tutorial for making your own custom-fit tights pattern is here
Boots; made by me, and my own design, details here

location: South Perth foreshore, Western Australia

pinterestmail

golden brown


hello!  I’ve made this new blouse…  I was having trouble thinking of a way to describe the colour, since the only thing coming to my mind was those white puffball fungi that upon “puffing” send forth a little cloud of smelly spores that are just about exactly this colour.  Then Craig came to the rescue, suggesting “golden brown”  Oh, yes, that is SO much nicer!  Why is my brain sooo….? um, weird and mundane and lacking in poetic nuance?!


Fabric; a silk crepe from Tessuti fabrics in Melbourne, bought during a previous years’ trip over there with Mum and Cassie.  I’ve had it marinating in the stash all this time, awaiting the perfect blouse pattern.  I think this was happily, and accidentally, IT!

obligatory back view… 


Pattern; the Sudley by Megan Nielsen patterns. Tim and Sam gave it to me for Christmas, after I had requested the Dove blouse pattern.  Did I mention already that the Dove is perpetually sold out?? yes I believe I did.  Clearly my boys encountered the same issue that I have had …. timing, it seems, is everything!!  However, the Sudle is a nice little pattern, very simple, and I think I will use it a lot too.

This is actually the second Sudley I have made.  I also made a dress that has now been assigned to Cassie when I realised it was just going to be a little too, er, young for me.  I expect it’ll show up on ye olde blog here sometime…


Alterations:  The Sudley is a very young-at-heart style whereas I am more of a hoary-old-beast-at-heart; so I made a few minor design alterations to “old” it up a bit.   I opted for the plain neckline, and jazzed up the plain sleeves by running a loop of skinny elastic through the sleeve hems to gather them softly up, and made a separate bias rouleau loop “bow” which is purely decorative and just sewn on to the hem with a few firm stitches through all layers.

I also cut the lower hemline to have a curved “shirttail” line to it.  The hems and the neckline are all finished by hand, because I really wanted to have a smooth clean stitch-free expanse of fabric with absolutely no visible topstitching anywhere.  This is about as invisible as I could get.

Oh; one thing I did, which I would recommend for this type of neckline; you stay-stitch all around the neckline and the keyhole opening, obviously to stabilise it, however! to further help keep the neckline straight and true I kept a little bridge of fabric intact at the top front edges of the keyhole where the ties were to be attached, and maintained it throughout most of the blouse’s construction, and only cut through it at the very last minute, when turning and hand-stitching the bias binding down on the inside.  I think this simple precaution really helped to keep everything true.

All seams throughout are French seams, except for the armscye seams which I just ran through the overlocker to finish.  Picking my battles here!  This silk, while absolutely divine and a dream to wear, was actually not much fun to sew!  However!  The puffball spore, I mean, lovely golden-brown is a perfect colour for autumnal me, also I think this style of blouse suits me and I’m going to enjoy wearing it a lot.  It’s going to go with TONNES of my other clothes.


Details:

Top; MN2004 the Sudley blouse by Megan Nielsen patterns with minor modifications, silk crepe
Skirt; Vogue 1247, ivory curtaining fabric, details here and my review of this pattern here
Shoes; made by me, my own design, details here

Skirt below; Vogue 8363, canvas, details here

Location: Eagle Bay, Western Australia

Wearing it out to dinner recently, with my “bookshelf” skirt.  I think they go together quite nicely!

And my clogs have received a much-needed makeover!  The ivory pleather part of the upper has got so worn and was starting to pull badly around where it was nailed to the soles…. I’d already fixed it once but finally acknowledged that if I wanted them to last a lifetime, and I think they can! then it was time for action.  One thing I’ve learnt about making my own shoes is that if something needs a little mending or attention then it REALLY pays to get onto it very quickly.  Mum had given me an ivory leather clutch years ago “for shoes” and it was juuuuuust big enough so I could cut out new pieces.  I used my punch that I bought in Copenhagen, and upholstery thread in ivory to sew up and down all around, and hammered on the new uppers.

Now they’re as good as new!! in fact; I reckon BETTER!

pinterestmail

terracotta axel skirt

Hey!  I’ve made this new skirt.  Actually I’ve made lots of new things lately and just haven’t yet blogged them… oops!  Getting onto that, asap!  Hehe, actually a good thing about me-made May is that it kinda forces me to blog as yet unblogged things that I want to wear that day.  Well it means I have to, otherwise… what would I link to??  *horrified gasp*  O, the shame of having nothing to link to!


Pattern: the Megan Nielsen Axel skirt.  I bought this pattern a few months ago, on one of the several occasions I’ve wandered into Potters Textiles in fruitless search of the Dove blouse pattern.  The Dove seems to be a pattern that is perpetually sold out… yes, I could have bought a pdf but I kinda had my heart set on a paper pattern.  Mostly because I adore Megan’s illustrations that she does for the envelope.  Aren’t these adorable?   I also have another, different Megan Nielsen pattern that I have recently finished too… but that shall wait until another day and its own separate blog post…. 😉

I made the short, straight version 2 only without the waist ties because this one is actually just my trial version of the pattern…  I was toying with the idea of using it for one of my Melbourne fabrics and just wanted to test it out for fit first.  This is a pattern designed for firm fabrics with some stretch, because it is a tight, form-fitting pattern, but in quite a nice way I think.  The style actually reminds me a LOT of the figure-hugging little pencil skirts we used to wear to high school in the 80’s.  Btw, and going off on a random tangent… if you want to see a daggy homemade mockup of my old school uniform; I put this one together for a school reunion a few years ago…

Fabric: a stretch polyurethane laminate “pleather” from Spotlight.  I’d originally bought several metres of this stuff on superDUPER special; I had the thought of making either shoes or a raincoat… then I went off it and shoved it away and out of sight.  As you do!  I’ve made quite a lot of things out of this stuff in the past, here, here, here, here and here!  Some have been more successful than others and so I have a bit of a love-hate relationship with the stuff  😉  When I was searching for something to run up a muslin/trial thing I thought “oh what the heck this’ll do”, made it up, and you know what?!  I’m actually liking how it turned out, like, A LOT!  It’s like an old-fashioned love story; fabric and pattern met, eyes locked across the room, hearts went a-pitter-pat, the stars aligned, fireworks exploded, champagne corks opped, they rode off into the sunset together and are bound to live happily ever after.


Some details: I cut the front on the fold so as to eliminate that unnecessary centre front seam; also, to accommodate my ahem, pear shape; I pro-actively graded out from an S waist out to an M at the hips.  And I’m pretty happy with the fit. See, this is why we sew!  Style-wise; it’s an extremely simple, no-fuss, zero-drama design, with absolutely no closures; just the simplest of bands for a waistband that you pull up over your hips.  Not even kidding, this took me like a few minutes to whip up, tops.

simple stretch waistband


I’ve learnt in the past that this pleather doesn’t hem well… so I just cut a sharp clean edge using my rotary cutter, and angled the seam allowances inside the skirt so there’s no danger of them peeping out under the lower edge.
Also, it’s tricky to press, but does look about a thousand times better if you do… it’s best to press on the underside and use scrap fabric when you’re going over the seams, the plastic right side of the fabric will soften and melt ever so slightly and I found I had to peeeeel off the pressing scrap after pressing.  So it’s best to be quick and not let the iron linger on for too long!  Some more of my tips for sewing with leatherette or pleather are here and here


Details:

Skirt; MN 2207 (Megan Nielsen Axel), terracotta polyurethane laminate “pleather”
Top; own design variations on the Epaulette cut & sewn from the Japanese pattern book “she has a mannish style”, also called “she wears the pants” by Yuko Takada, apricot crepe, details here
Shoes; designed and made by me, details here

Location: along the South Perth foreshore

pinterestmail
Switch to mobile version
↓