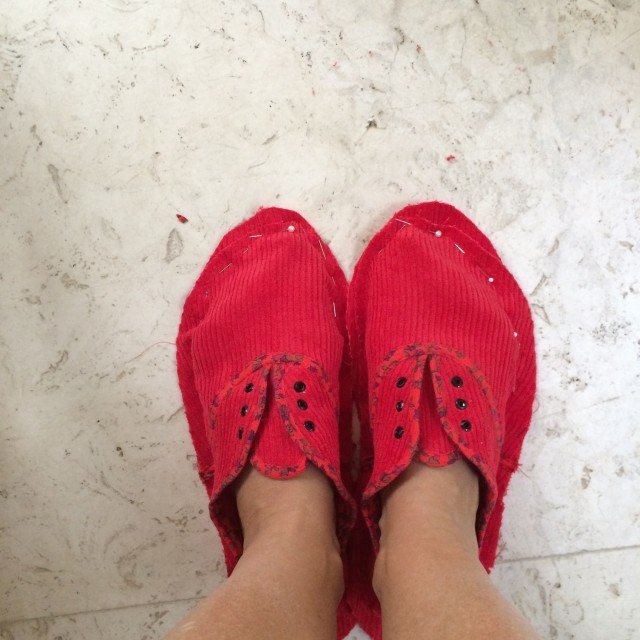
I’ve made another pair of shoes. They’re a bit shonky, dodgy and clutsy, and clearly home-made, particularly those rough n’ ready heels, but y’know what? I LOVE THEM!!!
Pattern; classic Oxford shoe style, drafted by myself; my tutorial for drafting your own shoe pattern is here.
Fabric; black faux leather from Spotlight, lined completely with very dark navy cotton denim from Spotlight, the two layers are lightly glued together with PVA fabric glue. Rubber soles and heels cut from black rubber matting from Bunnings, two layers of cork inner sole linings from an old set of placemats, black eyelets from Spotlight, black shoelaces and foam inner soles from Coles.
Details: I whimsically pinked various pieces of the shoe, not sure if this looks cool or just emphasises the homemade quality, not in a good way, mind you, but meh, it’s done. Actually there’s a little bit of a pinked theme throughout the shoe and the detailing…

Pinked edges to the vamps and upper edges, and below, the little bit of pleather that covers the centre back seam has a pinked edge too.

Inside; pinking to the edges of that half-circle of denim at the back of the shoe… this contains the counters, which are bits of stiffening to keep the back of the shoe stiff and standing up straight. 
Confession time, I cut my counters from milk bottles… yep, household rubbish; whoops! am I going to be booted out of the cobbling club now?! 😀
Well, our milk bottles here are made of a strong, sturdy plastic that I thought is totally perfect for this purpose… it is stiff, strong, pliable, can be cut very easily, coaxed into a new shape fairly easily and holds the new shape well too. And of course; free! since it’s rubbish. What’s not to love?

I covered the inner soles completely with the same denim so they match and blend in with the interior nicely. The inner soles are removable, ie. not glued down inside of the shoe. Inside the shoe you can see the long nails that I used to secure the shoe to the sole and heel… Not seen, but between shoe and sole there are also three shorter tacks holding the sole to the heel along the straight edge of the heel. I did this because I knew this heel/sole joint would be the weakest point in the shoe most prone to coming apart under pressure. Sizing; they are moulded to my own feet, so obviously the sizing is good on me. They are sized to fit my just-slightly-larger right foot. My feet are a touch wide compared to the average so the shoes look a little wider than most you see in the shop; actually I was so worried about making them too tight I think I overcompensated and made them just a touch loose… ! This is ok though, since I’ll need to fit warm winter socks in there at some point and at least they are very comfy and totally not tight!

How do they go with socks? Phew, they still fit. Yes, I knitted these socks too…

Technique and finish-wise; far far far from perfect but I’m still pretty happy. Actually, all was going swimmingly in the beginning and I was very happy with them, then ran into difficulties and self-doubt, decided they were crap, almost threw them in the bin a few times; realised that, contrary to what it says in my book on shoe-making, shoe lasts are actually INDISPENSIBLE to shoe-making… then things started to look up and I got a bit optimistic they might even work out ok. Limped in to the finish line in the end, in spite of a little glue splodging mishap on my nice black binding which downgraded my happiness factor considerably. *sad violin* and resulted in a decision to use my “failed” stacked heels rather than my good ones. Those, I’m saving for the next pair.
heels a bit nasty… but trying not to beat myself up over it
 Yes, there is a next pair in the works, sneaky-peeked here on IG; I’ve constructed the uppers already and have found and ordered a pair of shoe lasts. We’re all just in a state of suspended animation, patiently waiting, waiting, waiting; just for those lasts to arrive.
HURRY UP, LASTS!!!
Final thoughts: pretty bad really, but they’re quite tough and totally wearable, even though not pretty. Let’s just say, I’m embracing the homemade look, ok?! 😀
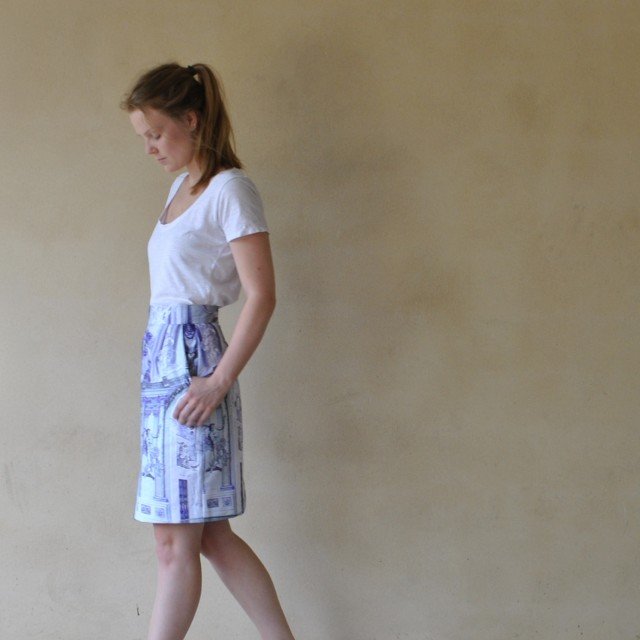
I’m anticipating that these ones will be hardwearing workhorses during winter; everyday things that I can just chuck on for day-to-day everything. I think they could even look quite cute with tights and my little winter mini-skirts, a go-to winter uniform for me 🙂 At least I’m starting to get some confidence that I may just actually have a small range of wearable winter shoes for my Year of Handmade. Woot!


 Woa, crack out the sunnies! So, my second pair of sneakers. Bit bright, eh?!


 Hello! I’ve made some more shoes! floral sneakers.


 n, I’m so happy with it!! It turned out just exactly how I hoped, and was the most wonderfully cuddliest, comfiest thing to have with me in our recent visit to Japan; I loved bundling up in it each day in Tokyo and used it as a snuggly rug while on the plane… without a doubt the warmest coat I’ve ever made formyself, evah. Like wrapping myself in a fluffy blanket, and I was perfectly snug enough even in the subzero temperatures of Hokkaido.

 wrt this one; well I’ve wanted to make a shearling jacket for oh, about ten years now. Ever since the first time I clapped eyes upon one belonging to our friend S; a colleague of my husband’s who is always super suave and cool and has a slightly alternative, very hip and happening taste in clothing. He owns a beautifully thick, oversized shearling jacket that he’s had for years and years and trots it out every winter once or twice. Every single time I see it I’m struck all over again by how awesome it is and have harboured a secret desire for one of my own…


 I made the sleeves extra long, so I could turn them up and have a woolly “cuff” on the sleeve ends, and also made wrist strips. These are sewn to the sleeve, then wrapped around and buttoned to themselves. The seam allowance of the cuffs are topstitched down for a neat look when they are turned back, and then I stitched-in-the-ditch of the sleeve seam down to the sleeve so the cuffs stay folded up permanently.


 When making my shearing jacket I came up to the important matter of buttonholes… what to have? I’d googled and pinned a few shearling jackets when planning the details and features that I wanted to have in my new jacket, but it’s not always easy to make out the finer construction details of the nitty gritty like buttonholes in far-away, full-length pictures on the net. As usual, it came down to knuckling down and working out how to do it myself.


 Hello!
 That’s it, really!


 And also, don’t you just hate it when people boast smugly about their perfect pattern matching?