Tag Archives: Own Design

Further Alabama Chanin-ing

Hello!  I am getting started on my next Alabama Chanin project.
Yes, an authentically executed Alabama Chanin creation is a big time commitment but I really enjoyed making my 3-piece set and it is nice to have a hand-held project to work on slowly, something easily transportable that doesn’t require much space or special equipment or a lot of thought but that you can just pick it up and get on with, a little bit at a time.
I’m using some hot pink jersey knit from my stash, bought in the Fabric Store in Melbourne during one of my trips over there with Mum and Cassie, I’ve forgotten which one now.  Probably the previous one, hmmm…  Actually, I had pulled this fabric out in the early planning stages of my recent SWAP and marked it as a definite; that was before eyeballing the rest of the long term stash residents that I was keen to sew up and realised that colour-wise, it didn’t fit in at all.
And it still didn’t.  Really, hot pink? I don’t know what I was thinking.  My current way of thinking wrt my wardrobe is to have it mostly subtly and/or autumnally shaded, and while in theory I like hot pink, in reality I was just like; ah, No.
So, step one; wash, soak and dye the fabric.  I used a small shake each of iDye in Brown, Yellow and Chestnut in the dye-pot.  Sounds hideous? well I did do a small sample first and thought it a huge improvement.  So that was a go.  My fabric was a slightly variegated hot pink and became a slightly variegated rusty-purply raspberry.

Cutting and Printing:  This is where things got tricky… I received an email recently from Carolyn in Florida, asking about the curl factor of jersey and how did it affect the Alabama Chanin technique.  Well, in the case of this particular fabric as can be seen in the photo above, the curl factor was extreme and the edges of my fabric curled up so badly And they just would not lie flat by themselves.  From a screen printing point of view this is disastrous.  I wanted to have my screen print go right up to the very edges of the fabric, and so the edges just had to lie as flat as possible.  So for a quick and easy fix-it I just used regular household sticky tape to tape just the very edge of the fabric down to my backing newspaper, just inside the seam allowance and immediately prior to printing.  Not a pretty or elegant solution, but it worked pretty well!

Printing the fabric seems to have tamed the curl quite a lot too!  The seam allowance for Alabama Chanin designs is small, like 5mm or so, so you do need to print right up close to the edge.  I’ve found from my first project that I prefer to have my embroidery right up to but preferably not within the seam allowances, though.

I will say; if your fabric does curl very badly I can see the case for printing then cutting out.  I do have my reasons for preferring to print after cutting out; reduces waste of expensive printing ink since you’re only printing what you are using: heckuvva lot easier when manipulating the smaller pieces to get a very good placement of print.  That last point is my primary reason for doing it this way, and I’m still glad I did cut out first.  I guess this is something that the individual will have to decide for themselves when embarking on a project like this  ๐Ÿ™‚

The Stencil:  This time I chose the Abbie’s Flower stencil from the book Alabama Chanin Studio + Design, by Natalie Chanin.  I enlarged it by approximately three times using the good ol’-fashioned method of drawing a grid on the design, then drawing a bigger grid on your paper in which you painstakingly copy each little square on the bigger scale.  Like we used to use in primary school; from back in the dark ages, before photocopiers.  Ha!

I thought the overall motif was still a bit small and my least favourite part of printing is placement of the screen for repeat printings.  I mean; if your motif is larger in area then you decrease the number of times you have to re-place the screen on your piece of fabric; and the less placement the better, imo.  So I ad-libbed putting more motifs from the Abby’s Flower stencil around about and added in a few random leaves and curlicues of my own too, until my stencil covered the maximum area I could get on my screen.

The embroidery technique I have chosen for this project requires keeping the printed motifs intact in the final garment, so I needed to print the motifs in proper fabric paint instead of the discardable house-paint that I used for my first project.  I used Permaset water based Textile Printing Ink from Jacksons, and mixed a deep oxblood red/brown colour using orange, crimson and a bit of green.
My green had a few chunky bits in it that didn’t mix in properly, and I really like the few areas of streaky green that showed up in the screen print.  It’s almost a pity that they will be mostly covered up by my embroidery!

My print placement was not perfect: note; it never is! and after I’d finished I noticed a few largish gaps that stood out visually in a not-good way.  So the next day I mixed up a teeny bit more paint, cut a new, very small paper stencil of two leaves and carefully printed in a few of these in the gap areas. The design looks quite irregular so I think it worked out very well.  They stand out like a sore thumb right now because they are a deeper colour but I’m thinking they’ll probably blend in OK once I get embroidering  ๐Ÿ™‚

pinterestmail

Olive Frankenstein skirt

I am notoriously bad at tossing out old scraps of fabric. Particularly if I really really like the colour.  
And I really really like olive.
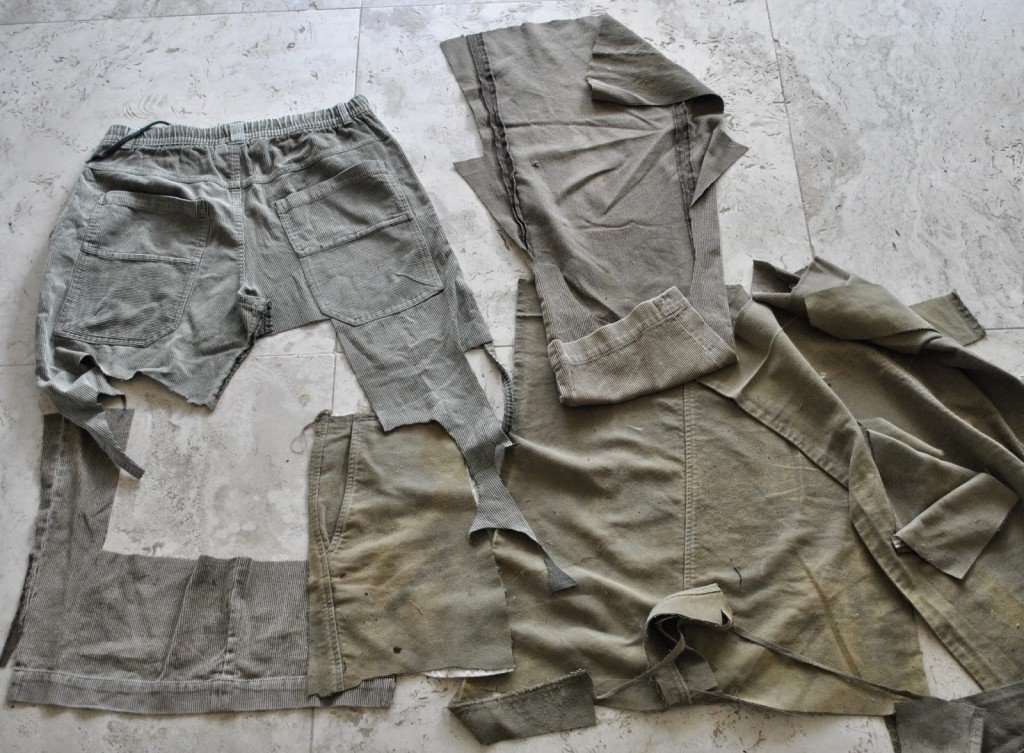
So; after finishing my patched pockets skirt I still had some promisingly largish pieces of grey-green corduroy and olive-green moleskin leftover, and I unearthed from my “useful scraps” bag the remains of a different pair of grey-green corduroy pants that both my boys had worn at the age of eight to ten or thereabouts.  Yeah, I keep stuff a long time.  The knee areas were a bit thin in them all but there was still some nice sturdy fabric to be had there.  And the colour!

oh ok I agree, doesn’t look very promising…

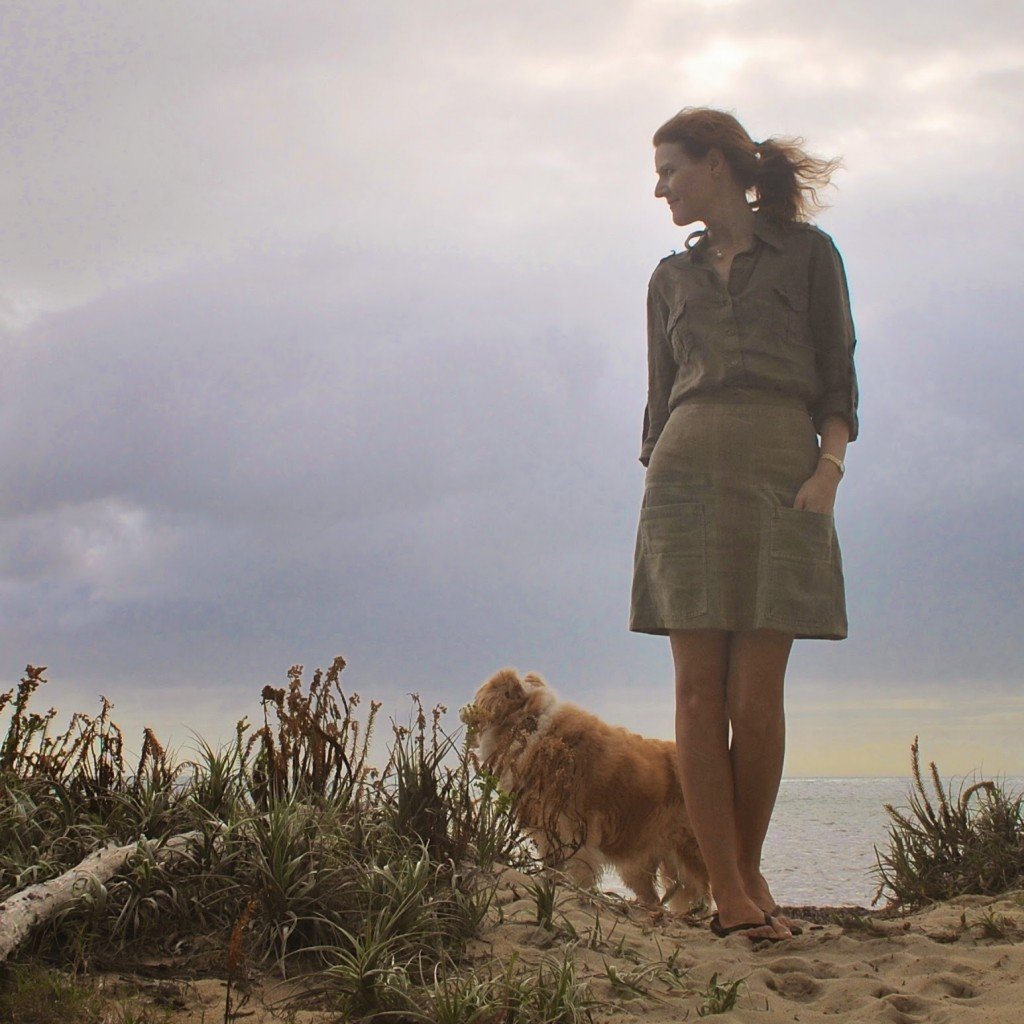
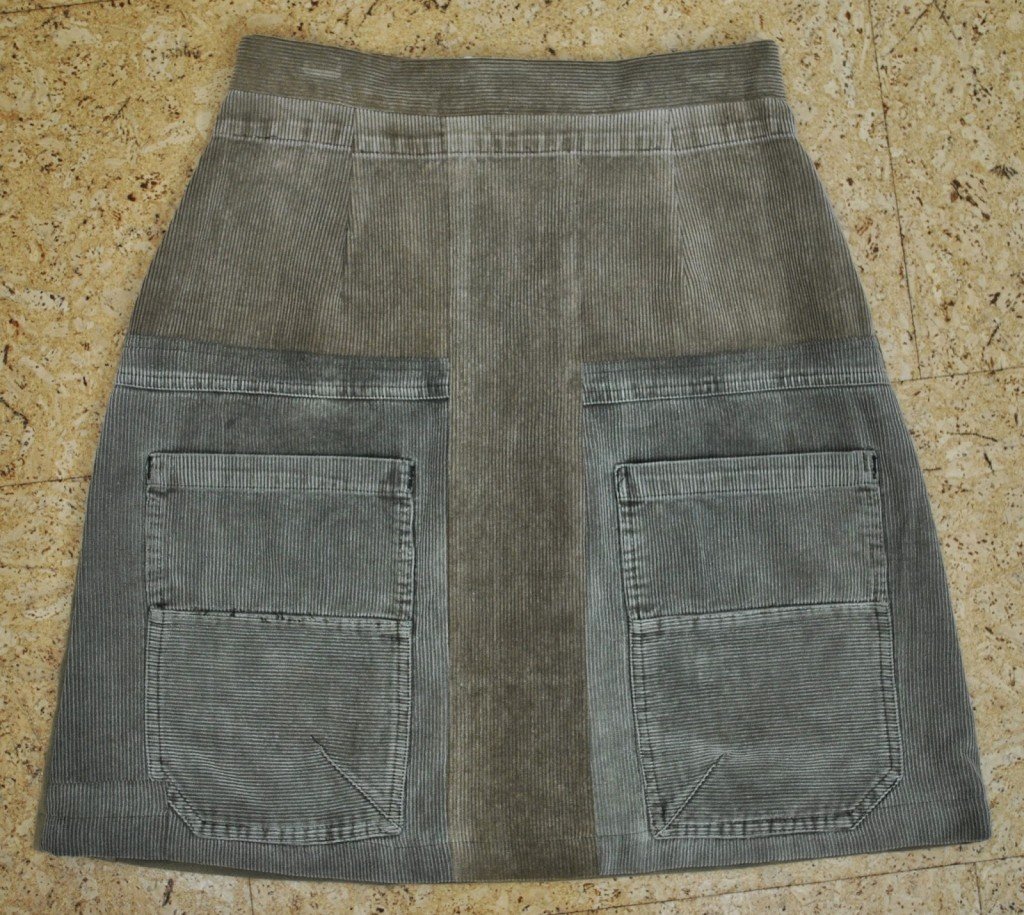
So I’ve made a little skirt; just a casual knock around kinda of a thing.  It is patched together from three different fabrics but it still looks quite plain I think since the colours are so similar to each other.  I’m pretty chuffed with it!  Of the pluses of working with old unwanted textiles; it’s green, it’s economical, you can sew to your heart’s content unfettered by fear of failure.  If you’re reworking with the constraints of an old garment it exercises the ol’ brain cells a bit.  And so a successful outcome feels like a mega bonus!

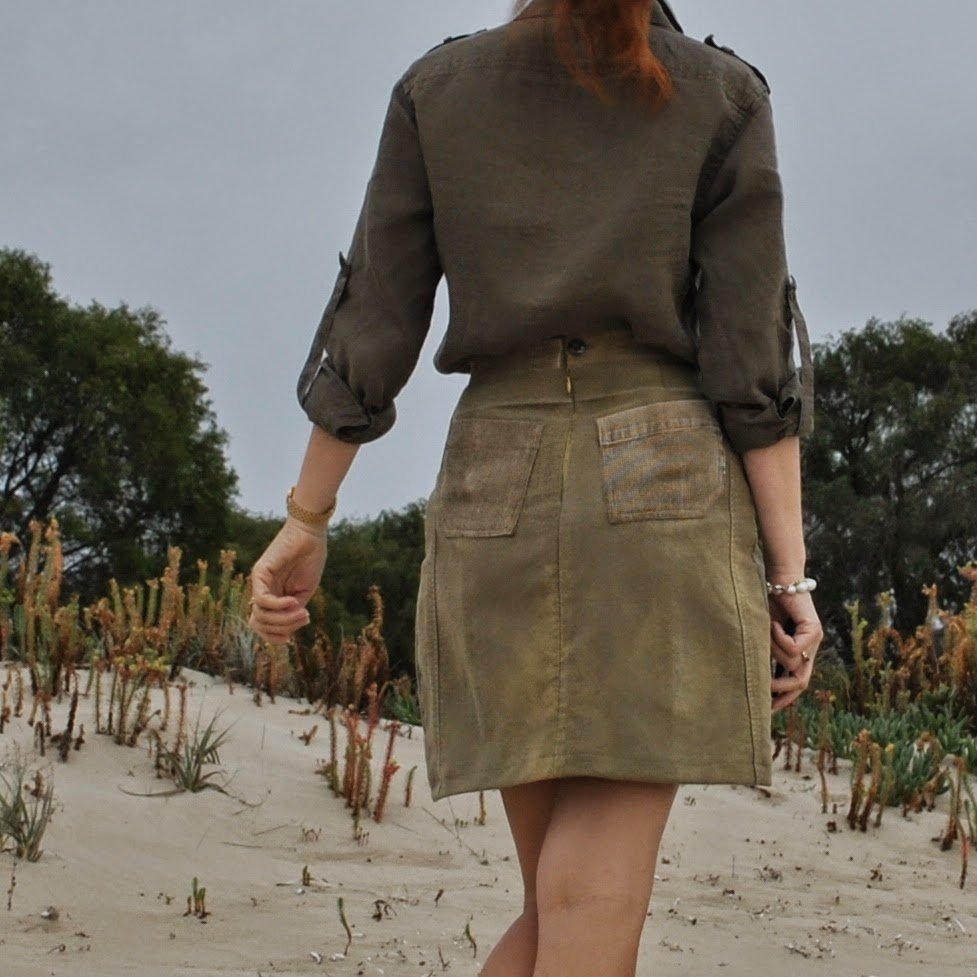
The boys’ old cords had kinda cool, oversized patch pockets on them that I’ve always liked and kept because I thought they might come in handy one day.  I used these pieces with the pockets still in situ.  Some of the leg fabric of these pants had previously gone into making the Green parliament, here.  I also added some oddly shaped patch pockets to the back of my new skirt too, just because the back was a bit boring-looking without them.

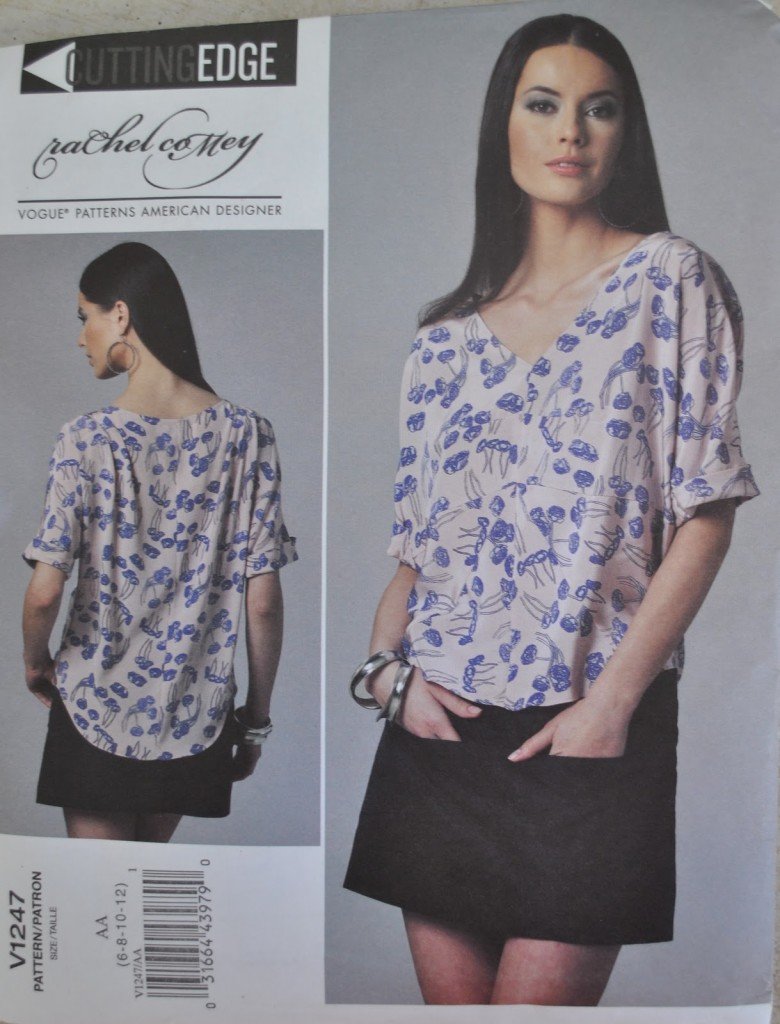
Technically speaking; I used the upper skirt pattern pieces of Vogue 1247 to cut the waist to hips part with the waist-shaping darts but the overall shape of my skirt is more A-line than the pattern.  This is pretty much my favourite “little skirt” silhouette at the moment.
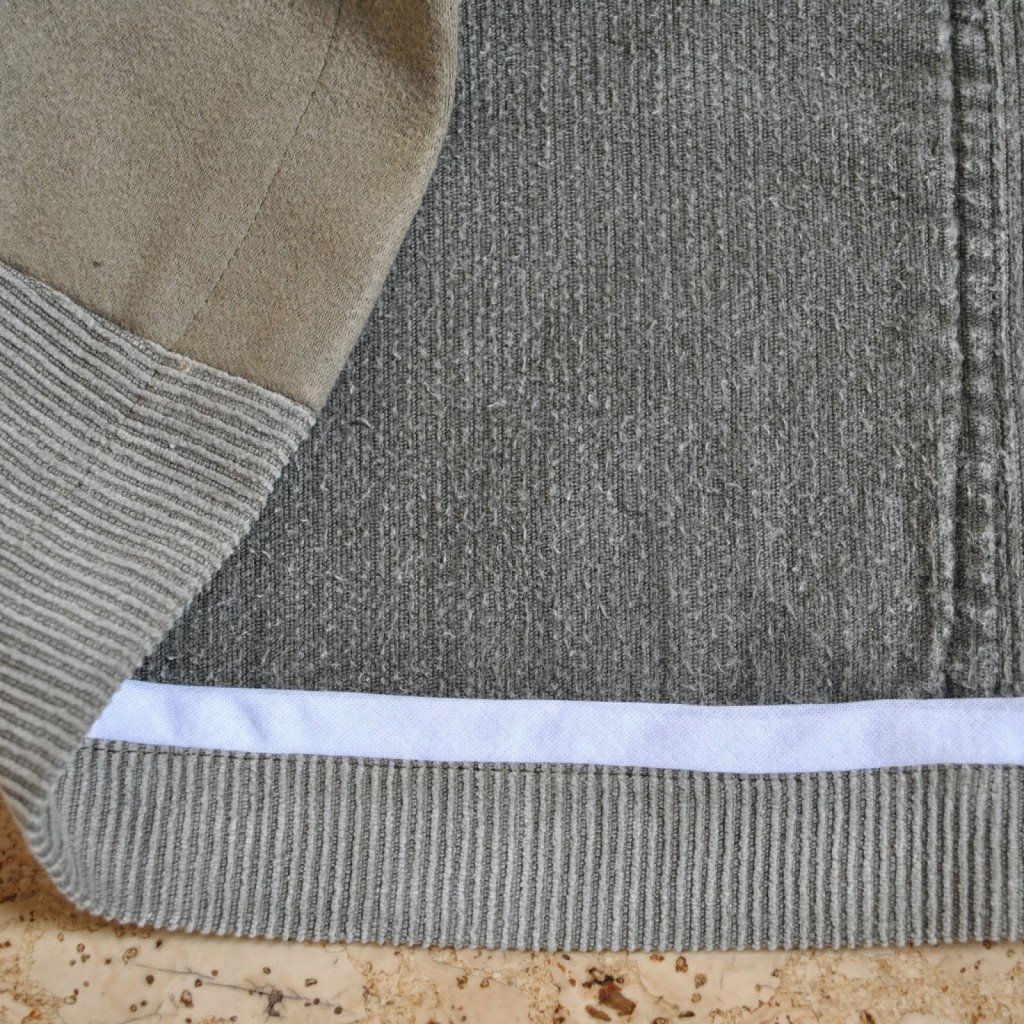
I used an invisible zip in the back, an old button harvested from something else long forgotten, long ago, and plain white cotton to face the waistband,  I made a bias strip of the same plain white cotton to finish the lower raw edge, turned up the lower edge once and stitched in the ditch by machine to hem.  I reckon this is the best hemming method for thick fabric since bulk is minimised by only turning up once and a bias strip looks a lot neater and prettier than overlocking. Also if you are short on fabric you can still get a nice deep hem without losing length off the skirt. . 

Details:
Skirt; my own design based upon Vogue 1247, made from three old pairs of jeans
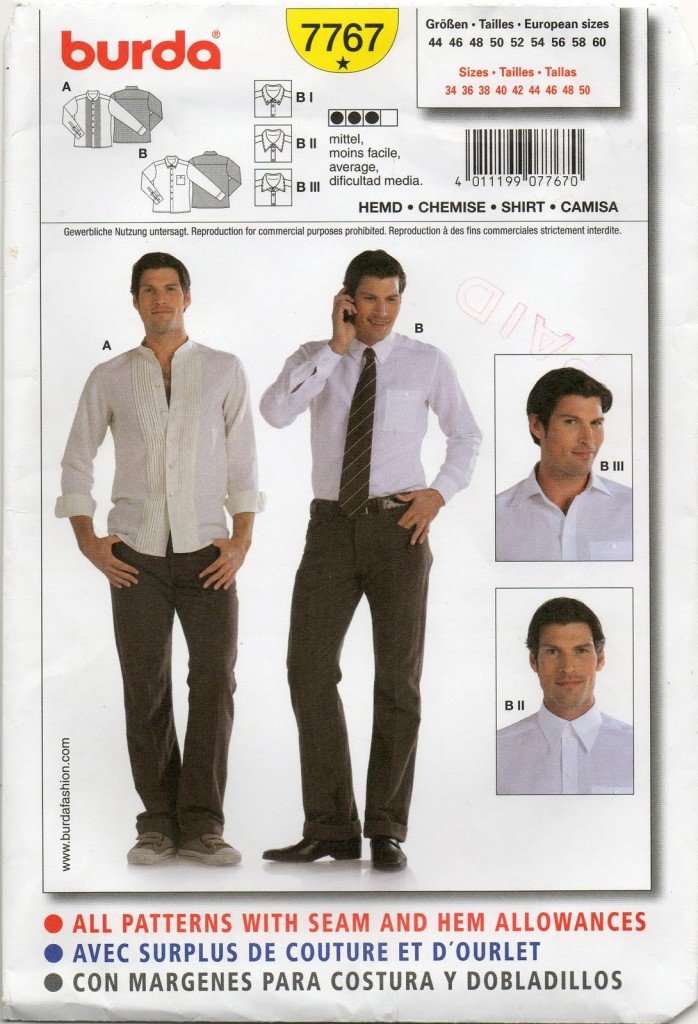
Shirt; my own design variations upon Burda 7767, deep olive linen, details here
Thongs; Mountain Designs

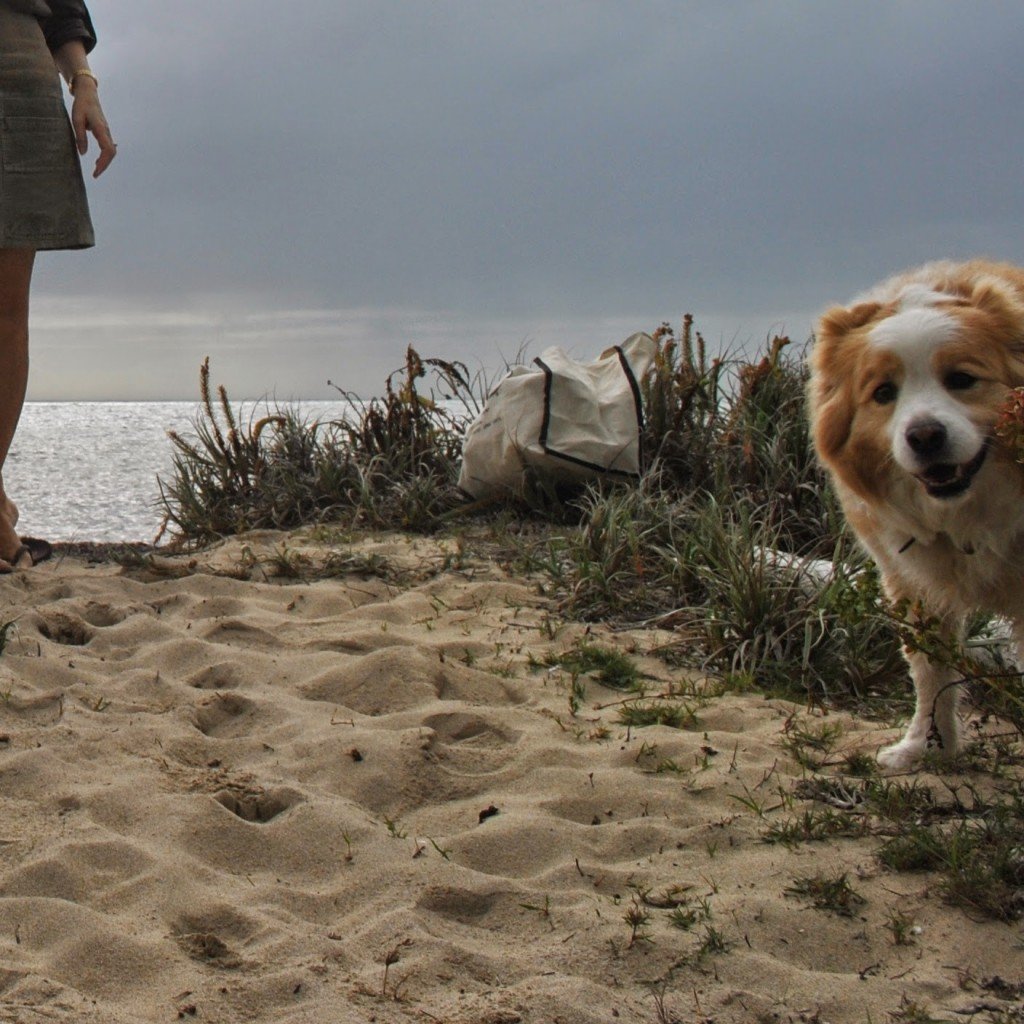
this picture just because it made me laugh… o well hello there!
pinterestmail

“Baseball” skirt and tee

This is just a bit of silliness really; remember I said I had some idiotic plans for my leftover off-white leatherette? well I just hopped straight into it.  This is a new skirt, leatherette with red stitching to delineate the seam lines, baseball-like.  Yeah I know, kinda weird; and I’m still wondering if I ruined the skirt with that stitching! but it’s just a bit of fun really.  I figure if I absolutely hate it down the track I can always pull out the baseball stitching  ๐Ÿ™‚

I used this picture to help me

The pattern is Vogue 1170; my fourth iteration of this pattern.  I chose it because it had lots of seam lines! and I lengthened it as much as I possibly could given my small piece of leatherette.  Actually, this is a good skirt for a smallish odds and ends of fabric; surprisingly good considering its flippiness.  It’s only the two large front-and-back pieces that take up the most fabric; the smaller pieces can be cut out of edges and corners and other off-cuts.  I left off the pockets and fully lined the skirt with cream polyacetate lining fabric; and I cut the waistband a lot narrower and on a curve to follow the curve of the skirt top.  This resulted in a much better fitting waistband than the original straight one, imo.  Also, I’ve learnt my lesson from my previous leatherette skirt where I found the leatherette waist facing kinda icky worn against the skin; and cut the waistband facing in white linen.  Much nicer!

The stitching is in red silk thread, which I’ve had for years… er, 21 *blush* but who’s counting!  ๐Ÿ˜€ a leftover from knotting Tim’s quilt; and a small portion in matching red topstitching thread, which I ended up having to buy new (grrr!) when I didn’t have just quite enough of the silk.  Don’t you hate that!!
I did the stitching in two passes, first time you do alternate halves of the “wings”, and the second pass you finish off the other side of each one.

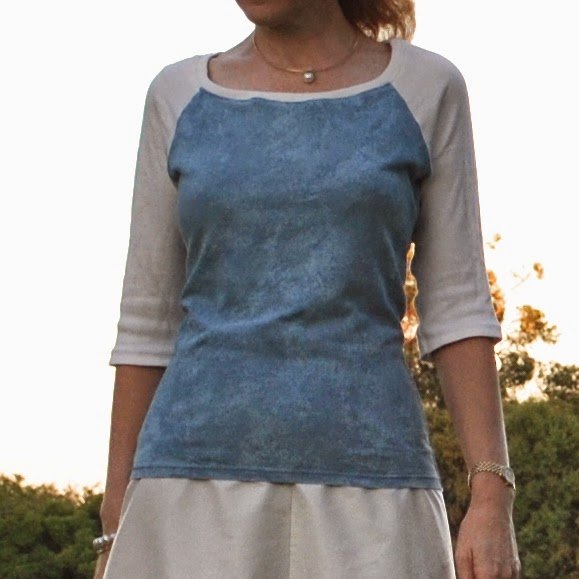
And because a baseball skirt needs a baseball tee, I made one; just because  ๐Ÿ™‚   I used two old Tshirts from my refashioning bag.

OK, I thought that this is what a baseball tee looks like; but imagine my disappointment when I googled images of baseball players to see that they actually don’t wear this sort of two-coloured raglan-sleeved tee at all! but instead have a big baggy short-sleeved top, sometimes with a close-fitting long-sleeve top underneath.  NO raglans to be seen.  Confused!   So; why is a tee like this known as a baseball Tshirt, when actually it is not?!  I would love to be enlightened.  Anyhoo; I made it from from my own custom pattern, using an old raglan sleeve tee to help get me started and then fiddling and fine-tuning to fit me.  The embroidered motif on the front of the blue Tshirt, I positioned on the back of the new Tshirt.  It was either that or cut it in half, and even though my new tee is a cobble-together job, doesn’t mean it has to look like one!

With the neckline binding; I cut strips from the sleeves of the cream tee and joined them to get one long enough to do the neckline.  And this time I cut the strips with a bias joining edge: you can just barely make out the join in this picture.  This gave such a vastly superior finish to my usual method of joining on a straight seam!  and I can’t believe it has taken me sooooo long to work out this might be a better thing to do.  Up until now I’ve used a straight joining seam, and the bulkiness of all the layers in that bit make for a slightly bubbly and bumpy bit at that spot on the neckline.  So I hide this by positioning it at the back of the neck somewhere; but if the seam is on the diagonal, like here, then there is less bulk and very little bump issues.  Don’t know why it’s taken this long for the lightbulb to go off, but better late than never  ๐Ÿ™‚

Details:
Skirt; Vogue 1170 with minor modifications, off-white leatherette with red decorative top-stitching; my review of this pattern here and my tips for working with leatherette here
Tshirt; self-drafted, made from two old Tshirts
Shoes; Bronx, from Zomp shoes

pinterestmail

Patched pockets

Just to provide further proof of my predilection for unusual clothing … please allow me to present my new skirt.
This skirt is the love-child of four old pairs of jeans.   They were a bit battered but in favourite colours, and had fabric in some areas still in pretty good knick.  Charcoal denim (Cassie’s), olive green corduroy, olive green moleskin and chocolate moleskin (Craig’s).  The chocolate moleskins had previously been nibbled away at to produce the Brown parliament.

The skirt pattern is another offspring of Vogue 8363; yes, the very same as my previous big baggy pockets skirtQuite different, yes?!  That’s the beauty of a well-drafted good basic pattern like this one, you aren’t limited to the plain unadorned versions, which obviously have their place in any well-rounded wardrobe too! but my point is that you are only limited by your imagination  ๐Ÿ™‚
I thoroughly enjoyed making this.  For a start it’s re-using old unwanted textiles, always an activity dear to my heart.  I am in the fortunate position that when my family is tossing out cruddy old clothes they tend to lob them my way first.
And I love puzzles, and making this skirt was a fun puzzle.  This was a joyful and totally engrossing project where I happily zoomed along, cutting out on the laundry floor, up and down, rushing to the sewing machine, the iron; slicing and piecing away without any thought to time passing.  Bliss…

I used the pattern variation that allowed for front slanted pockets, and made whole skirt front and whole skirt back pattern pieces from newspaper, re-drawing the side seams on both front and back to be just slightly more flared and A-line than the pencil lines of the pattern although not quite as pronounced as for my big baggy pockets skirt.  

I unpicked and re-used the waistband from the charcoal jeans and made use of its resident buttonhole although I sewed on a new flat button that won’t dig into the small of my back when I’m sitting back in a chair.  I also re-used the waistband of the chocolate jeans to finish the lower hem, putting its button and buttonhole at the front.  It wasn’t long enough to do the full hemline of the skirt, so I made a filler piece and a few extra belt loops and repositioned all the belt loops to distribute them evenly and hide the joining seams.   I also saved the fly front off the olive green moleskins and re-used it for the skirt closure at the centre back, although retrospectively I’m not in love with this.  It’s quite a bulky fly with a heavy duty jeans zip, but I guess the look of it is in keeping with the whole cobbled together, rough-and-ready look of the skirt.

I cut the patches so as to keep lots of pockets from the various jeans.  The skirt actually has eight pockets in total!… in addition to the two regular slanted front hip pockets that I sewed as part of the pattern; there are two patch pockets, three welt pockets and one curved side pocket in it.  I only did this for fun, for the aesthetics of them, but they are all still functional.

It’s just a bit of silliness really, but I like off-beat random patchwork-y stuff like this  ๐Ÿ™‚
Inspiration?  Well, I’ve pinned like a tonne of this sort of thing…  this Isabel Marant dress, this mystery jacket, and also Yoshimi’s jeans from a few years ago.  Also, while I was busy laying down patches and switching around different shapes and sizes, this cottage kept popping into my head.   Now a cottage probably seems like an off-the-wall (ha!) inspiration for a skirt, but let me explain; superficially, the re-cycled nature of the materials is an obvious commonality between the cottage and my skirt, as well as artistically, in the random and irregular grid of their design.  And in purpose, pockets in clothing have a correlation to windows in architecture.   Pockets and windows are a visual feature of a thing, but also a functional component of that thing; specifically as an opening to/in their respective objects but not the entry point to that object.  
So in that vein; can one consider a pocketless garment to be like a window-less building; and are zips and button-bands akin to the doors/gates of a building?  
Discuss in one thousand words or less and submit by the end of class.  
(only joking)
Sometimes I think it would be lots of fun to have a group to discuss and dissect clothing and fashion theory; like a book club, only far more frivolous.
(sigh) A pipe dream…
This skirt is another swap item.

Details:
Top; top “a” from shape shape by Natsuno Hiraiwa, white cotton, details here
Skirt; Vogue 8363 modified, made from 4 old pairs of jeans, my review of this pattern here

pinterestmail

some tops

Iโ€™ve made a couple of new tops lately  ๐Ÿ™‚

I’ve made this design once before  so I knew I’d like this new one too. It is a modified version of the
loose draped top from drape drape, by Hisako Sato.  Modified in that A; I removing a
wedge of the width in the neckline drape both front and back, so I could fit both pattern pieces
onto my small-ish piece of fabric, and B; this time I made it as a double layered top, since my fabric is so thin it’s thisclose to sheer.  This was a rayon/linen remnant bought from the
Morrisonโ€™s fabric sale, a grey-ish ivory/bone colour with a very subtle, paler, knitted-in stripe which barely shows up at all in the pictures!
It’s a basic; but I think it will be quite good with all three of the busy, feature-laden skirts I have made for my autumn/winter swap.  The thing I’m most pleased with is that I got all the seams of the top enclosed inside the two layers; and only had to hand-stitch one short bit of the hemline closed after turning it all through, right
side out.
Iโ€™d made Cassie’s Christmas dress the same way only a few months ago, but I still had to stop and
think step by step, how to do the double-layering! so I took pictures and am writing a little how-to on my method so I don’t forget for next time.  Appearing here soon  ๐Ÿ™‚

 lingerie straps; essential in this design

The next top above: I’m very meh about this one.   It’s amazingly boring and unprepossessing  given that making it has been a freakin’ saga and a half.  This is version two; I first made it as a very big and very loose tunic-y style top.  Valuable time and energy and a piece of fabric was dedicated to making a rather hideous top.  So I fixed it.  And re-made it into a marginally less hideous top.  Yay!
this is the least revolting “before” picture … 

I think it’s that the fabric, a knit remnant from Potter’s Textiles was just not suited to an oversized silhouette, being both heavy and weirdly clingy at the same time.  The combination as a whole was instantly frumpifying, like a hospital gown; or looking like you had to borrow your man’s ratty Tshirt from his gym bag in the car because you’ve ruined your dress, or something.  The exact opposite of chic.   

In anticipation that some kind people might express approval of the “before” version, please know that these are the very least offensive pictures, and let me point out that any vestiges of appeal are probably due to the fact that my hand is in a pocket/on my waist, giving it an appearance of shape that it did not have.  Other photos where it’s hanging straight and loose had the hospital gown/grotty man’s gym Tshirt vibe.  
So I cut out of it my much more fitted, regular tried-and-true custom fit Tshirt.  It’s still pretty blah but least I don’t unequivocally hate it now.
I’m thinking it will be ok for warmth or whatever during winter.  Heck, another layer’s another layer.  We’ll see how it goes!


Details:
Ivory top; the loose drape top, from the Japanese pattern book drape drape by Hisako Sato, ivory rayon/linen
Chocolate top; ultimately, my custom fit Tshirt pattern, chocolate jersey knit
Shorts; Burda 7723, charcoal stretch gabardine, details here and my review of this pattern here

pinterestmail

Big baggy pockets…

… with bonus skirt.
It is an unusual skirt, admittedly.  That’s OK.  One description could focus on the fact that it is softly creamy in shade, ever-so-slightly crinkly in texture, interestingly layered in construction, and easily breezily comfortably summery as a whole.  Another could point out that it is made of flippin’ curtaining off-cuts for crying out loud, and features ginormous flappy saddlebag things.  Well let’s not over-romanticise, hmmm?  But I like it, nonetheless.  And I don’t mind curtaining fabric; in fact, one of my most useful and reliable favourites is another curtaining skirt..
I started out with Vogue 8363, a plain, waist-banded pencil skirt with simple variations; and altered it to make it a bit more A-line, cutting the side edges like so; both front and back.  And then added my little added designer-y flight of fancy in the form of those big wrap-around bags.

They are basically sacks; like envelopes or pillowslips, that are sewn within long long extensions of the narrow waistband.  These cross over at the centre back, wrap around my hips and tie loosely at the front.  The skirt closure is the regular kind, by invisible zip in the centre back seam.  
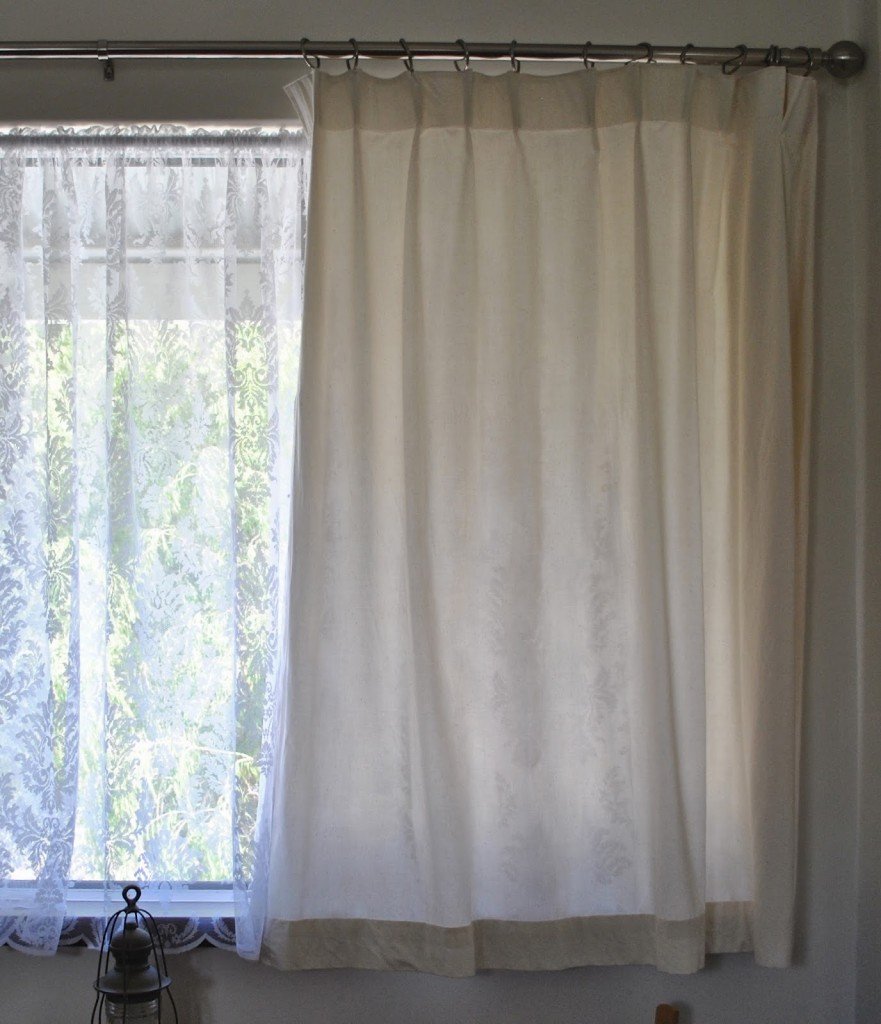
I was inspired by this skirt.  Does anyone else have a go at actually doing something with their pins?  I have pinned LOTS of things, but have only followed through on nutting out making a few.  I have big BIG plans for making tonnes of things from my random unbridled pinnings; but the same ol’ story; so much inspiration, so little time.  And there’s only so many clothes that one can in all good conscience add to one’s wardrobe.  Striking a balance is key, my friends, striking a balance.  However I do feel pretty good about this particular skirt since it’s pretty much a freebie; made from the off-cuts of Cassie’s curtains.  I’d found the absolutely perfect thick calico curtains on super special in Spotlight.  Correction; the fabric was perfect but the top had been made as pencil pleat curtains, which I loathe and detest with a fiery passion.  So I bought them too long and cut off the tops, keeping the hemline intact, and re-sewed the top edge with my preferred triple pleat curtain tape, so they match nearly all the other curtains I’ve made for our house.  And was rewarded with a few pieces of leftover fabric… which I have now put to good use  ๐Ÿ˜‰  Double, no… triple win!

Details:
Skirt; a modification of Vogue 8363, thick calico curtaining fabric, my review of this pattern here
Top; the loose drape top slightly modified, from drape drape by Hisako Sato, white crinkly cotton jersey, all details here
Sandals; Franco Burrone, from Marie Claire boutique

pinterestmail

Sheen green hand-warmers

Obviously I’m not in Australia hereโ€ฆ.  ๐Ÿ˜€  we’ve been visiting Japan, and have thoroughly enjoyed seeing my friend Yoshimi again.  Thank you Yoshimi, it was so lovely to spend time with you and to meet your gorgeous family too.  It was lots of fun!
Sorry for my silly photos here. Snow is still such a huge novelty to me, you see.  I can’t stop marvelling at it.  It seems like such amazing and magical stuff! and maybe it puts me in a kinda loopy mood  ๐Ÿ˜‰  I never even saw snow until I was in my late 20’s, and first put on a pair of skis at the age of 36.  Meaning, I’ll never be anything more than a really slow and cautious skiier, but I still love it!  My quads are killing me, but!!
Now for the point of this post: hand-warmers.  Bright ones!  Highlighter hand-warmers!  These are brand new, fresh off the 2mm bamboo dpn’s.   I lost my ultramarine blue arm-warmers last year, I’ve searched and searched and searched, in vain (massive sad-face).  No time for moping but; I needed some more, pronto!  These were cast off in the nick of time to be pressed into immediate serviceโ€ฆ.  ๐Ÿ™‚  
They are basic tubes knitted in the round with a gap for my thumbs, using Morris and Sons 4ply merino wool.  The colourway, Sheen (col419)  is kind of a whoa! in-your-face colour, like a hi-vis construction worker vest.  In my present surroundings though, I’m considering that to be a plus.  If I get stuck and incapacitated in a snowdrift I can just stick my arm up, and the arm-warmers will be like a beacon for the rescue crew.  In-built safety feature!

Ahem; and now, a silly little haikuโ€ฆ

Neon hand-warmers
on tatami mat.  Empty,
Momentarily.

Hmmm, okaaaay thenโ€ฆ.  Poetry has never been my forte ๐Ÿ˜‰

Details:
Hand-warmers; knitted by me
Beanie; knitted by me, details here
Thermal top; Kathmandu, neckwarmer; Kaos (both old items I’ve had for years)
Ski pants and boots; hired

pinterestmail

Cassie in burnt orange

I made a little tank dress with a matching top for Cassie… I’m hoping these will be very useful and versatile items in both her working and her weekend wardrobe.  The two pieces can be worn together as a smart/casual ensemble; also either the tank dress OR the loose top can be worn with a pencil skirt and cardigan to work; the tank dress can be worn alone or as a tunic with with jeans as a casual weekend option, or as a petticoat underneath a sheer dress; and the top can be worn with shorts or whatever.  And imho the colour is absolutely glorious with her strawberry blond hair!!

I bought the rich orange cotton-poly mesh from Tessuti’s in Melbourne during our weekend away together, and both pieces are self-drafted.  The tank dress is a pretty simple silhouette; but sewing it together was like an exercise in spatial thinking.  The fabric is completely sheer so I made it double-layered, both layers are completely sewn together before the whole dress was finally pulled right side through a gap in the lower hemline, which was hand slip-stitched closed as the very last thing.  Meaning, all the seams are enclosed between the two dress layers.  I was so pleased when it worked out successfully!  The fabric was lightweight enough that the whole thing could be bunched up and pulled through a 10cm gap quite easily.  The outer layer is 6cm longer than the inner layer, so the joining seam sits on the inside of the dress, 3cm from the lower fold.

below right; the finished dress was pulled right side out through the short gap in the hemline joining seam at lower right, now hand slip-stitched closed,

The top is also self-drafted, and loosely based upon the shape of the pieces in a very simple top that I’ve had for years, designed by a Melbourne company, tutte which seems to be no longer around.  Basically, the front and back panels are straight rectangles, and the side panels and sleeves are cut as one piece each, on the fold at the top of the sleeve/shoulder: like capital T’s with the downstroke as the sleeve.  

I cut the neckline as a gracefully curved scoop, extending and joining the front and back panels at the shoulder, and added double thickness “flaps” at the lower edge of the front and back that enclose the raw edges.  I hand-stitched the side panel lower edges and and sleeve hems in a narrow rolled edge, and finished the neckline with a long strip, stitched on the right side, turned under and hand-stitched around the inside.

Details:
Top and dress; self-drafted, in slightly stretchy cotton-poly mesh.  I think it could be this stuff

pinterestmail
Switch to mobile version
↓