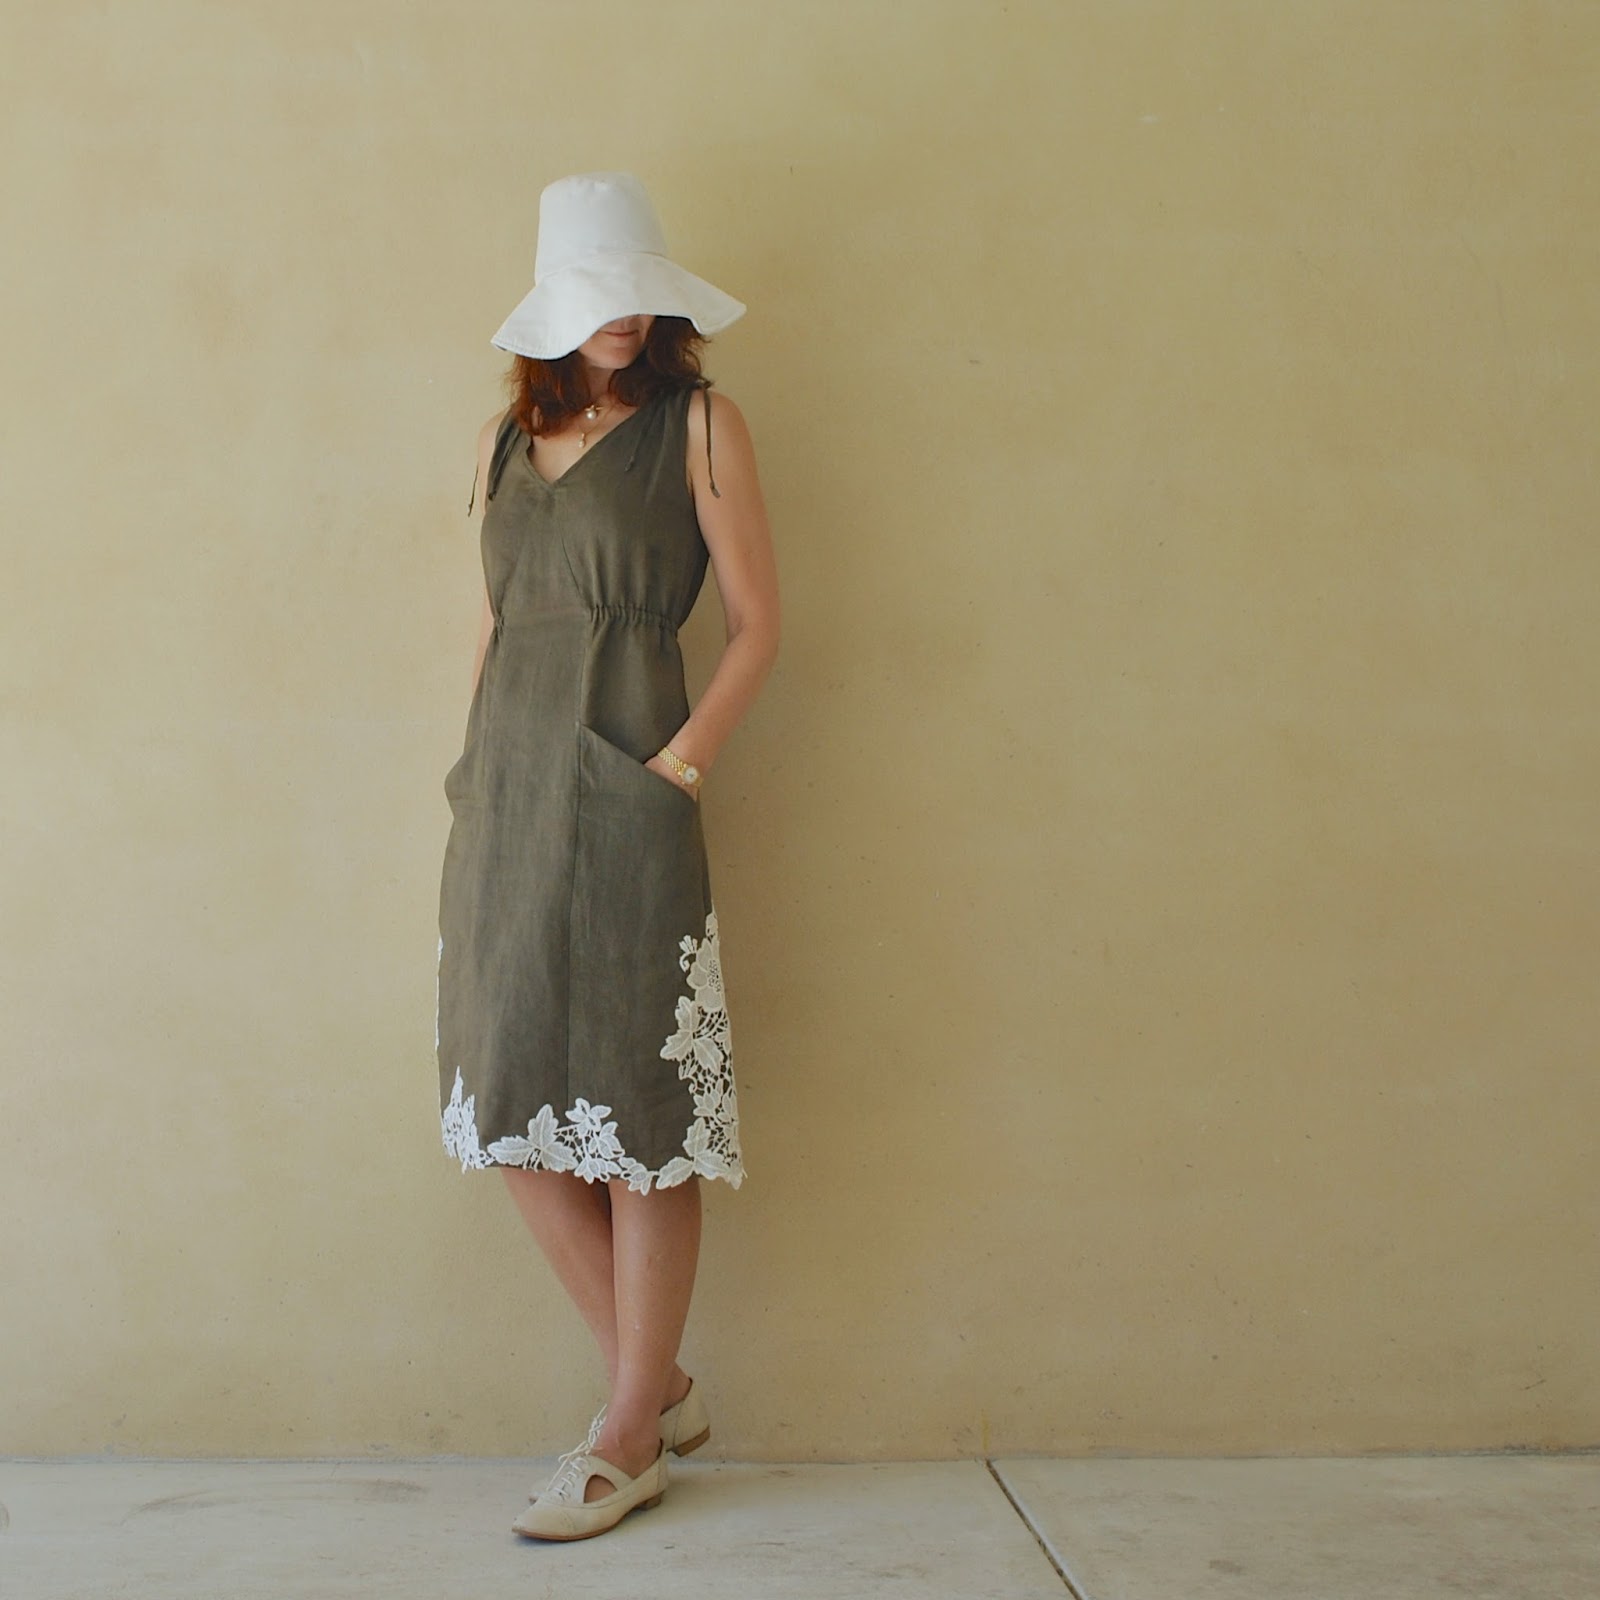
Tag Archives: Pocket

Mississippi Avenue

I’ve made a little sundress for myself  ðŸ™‚ in very fine, light handkerchief-grade linen from Fabulous Fabrics, deep browny/olive green.  I asked my husband how to describe the colour and he replied immediately “Sherman tank”, haha.  Hmmm!
I’ve been told a zillion million times that I should wear drab colours, but I struggled with them for years.  My teenage self desperately loved pretty feminine colours, hey it was the 80’s; and I thought muddy sombre colours like this were horrible and ugly, like the exact opposite of pretty.  *sigh*  Anyway.  I’ve learnt to embrace couleur de Sherman tank.
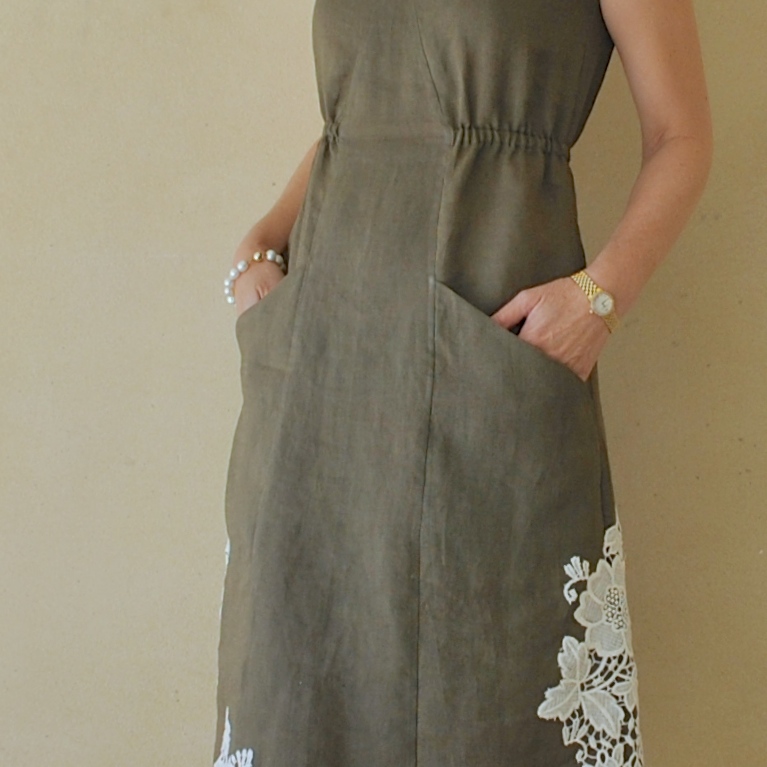
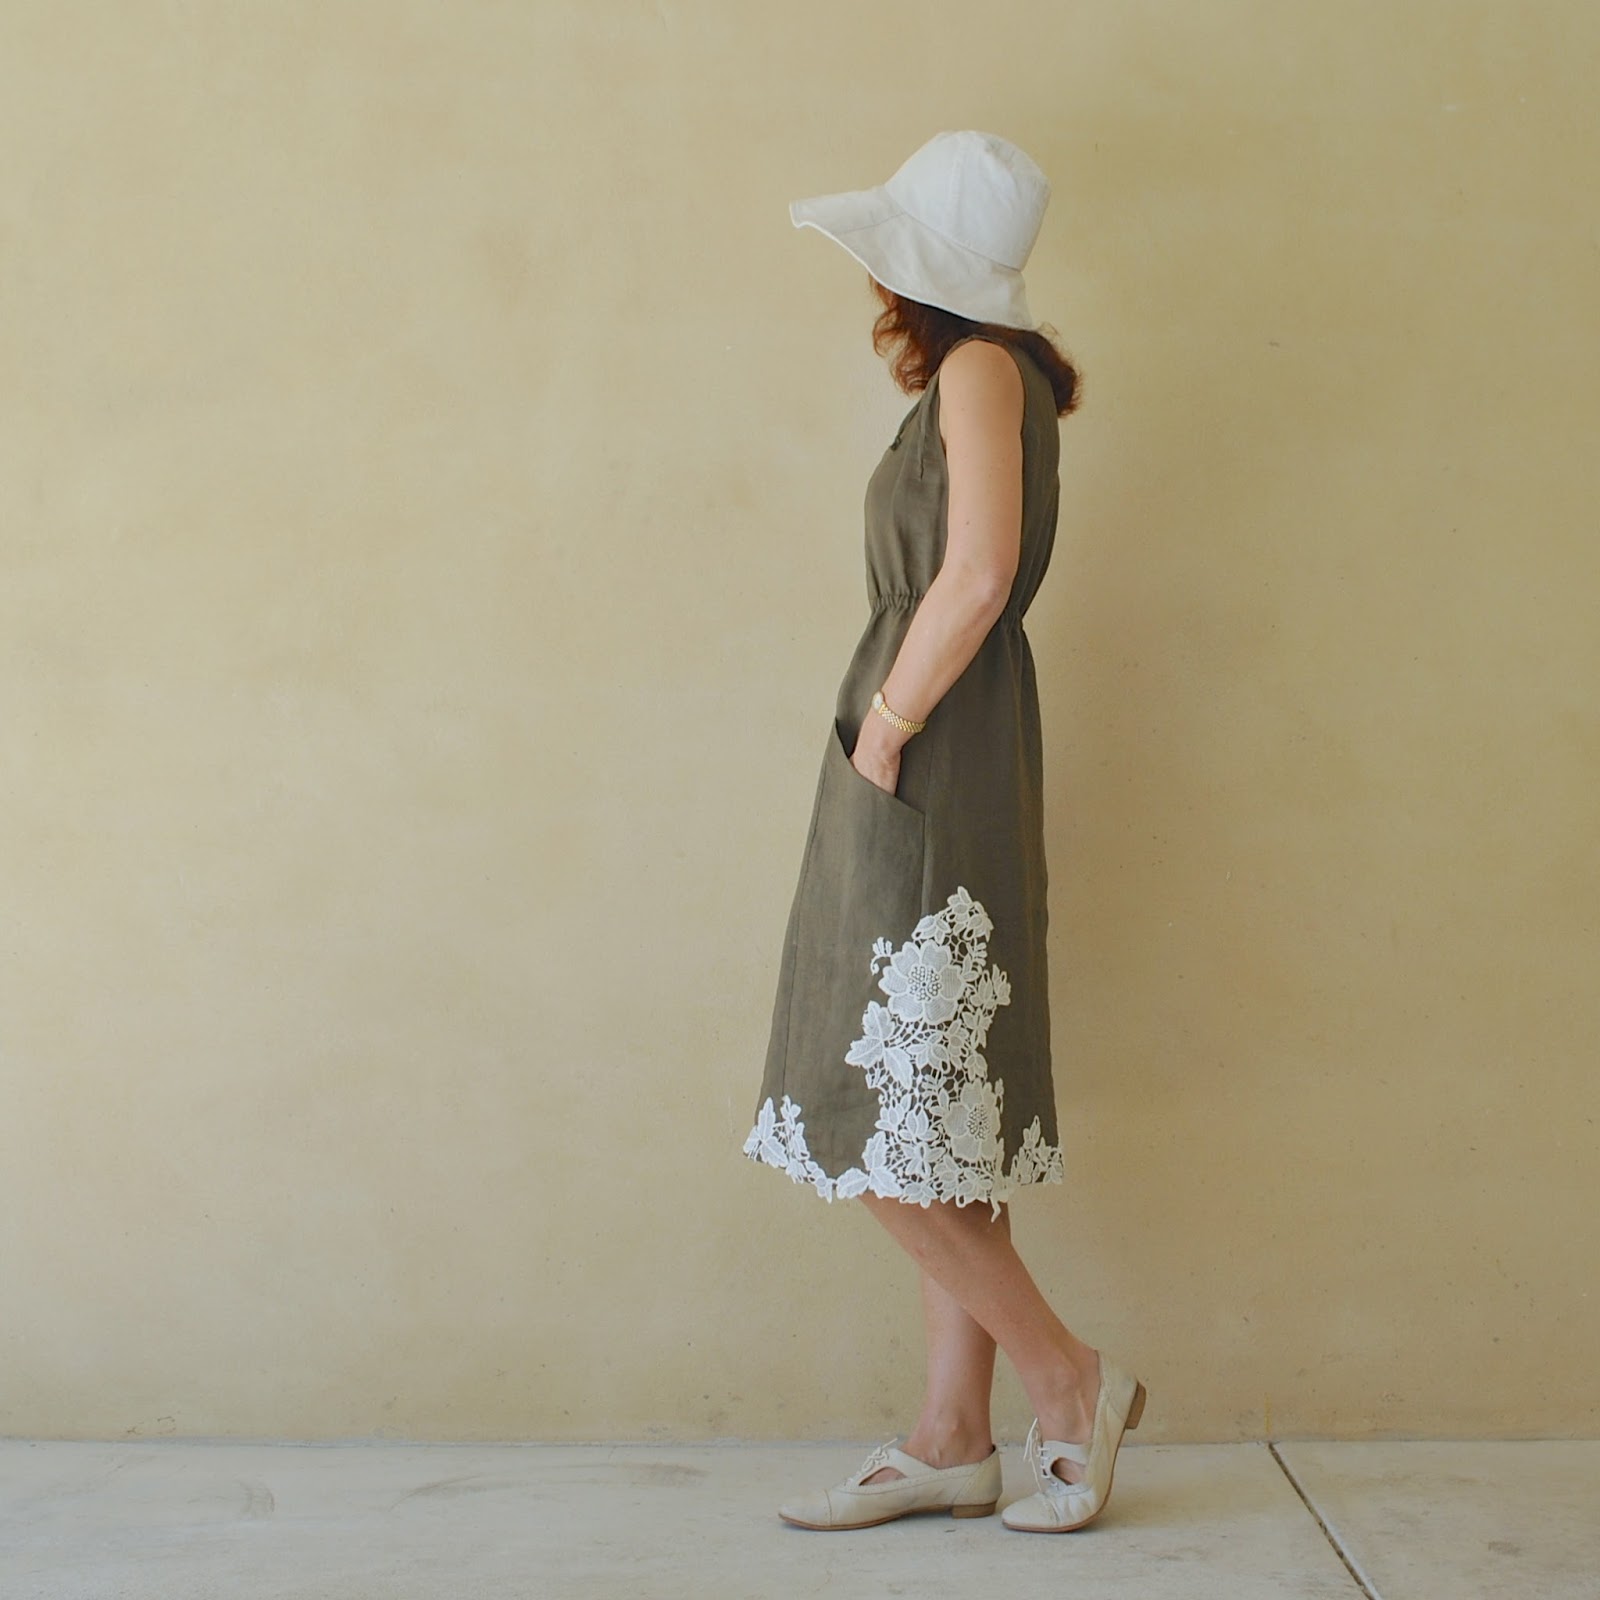
I added a little bit of pretty in the form of some cream lace-y motifs appliquéd around the lower hem edge.  I cut the motifs from a quite thickish, lace-y fabric and hand-stitched them on to look kinda random and rambling and lending some semblance of froth and frivolity… I think the lace was maybe from Spotlight originally, but honestly I’ve actually forgotten where it came from exactly.

I sewed all seams throughout as French seams

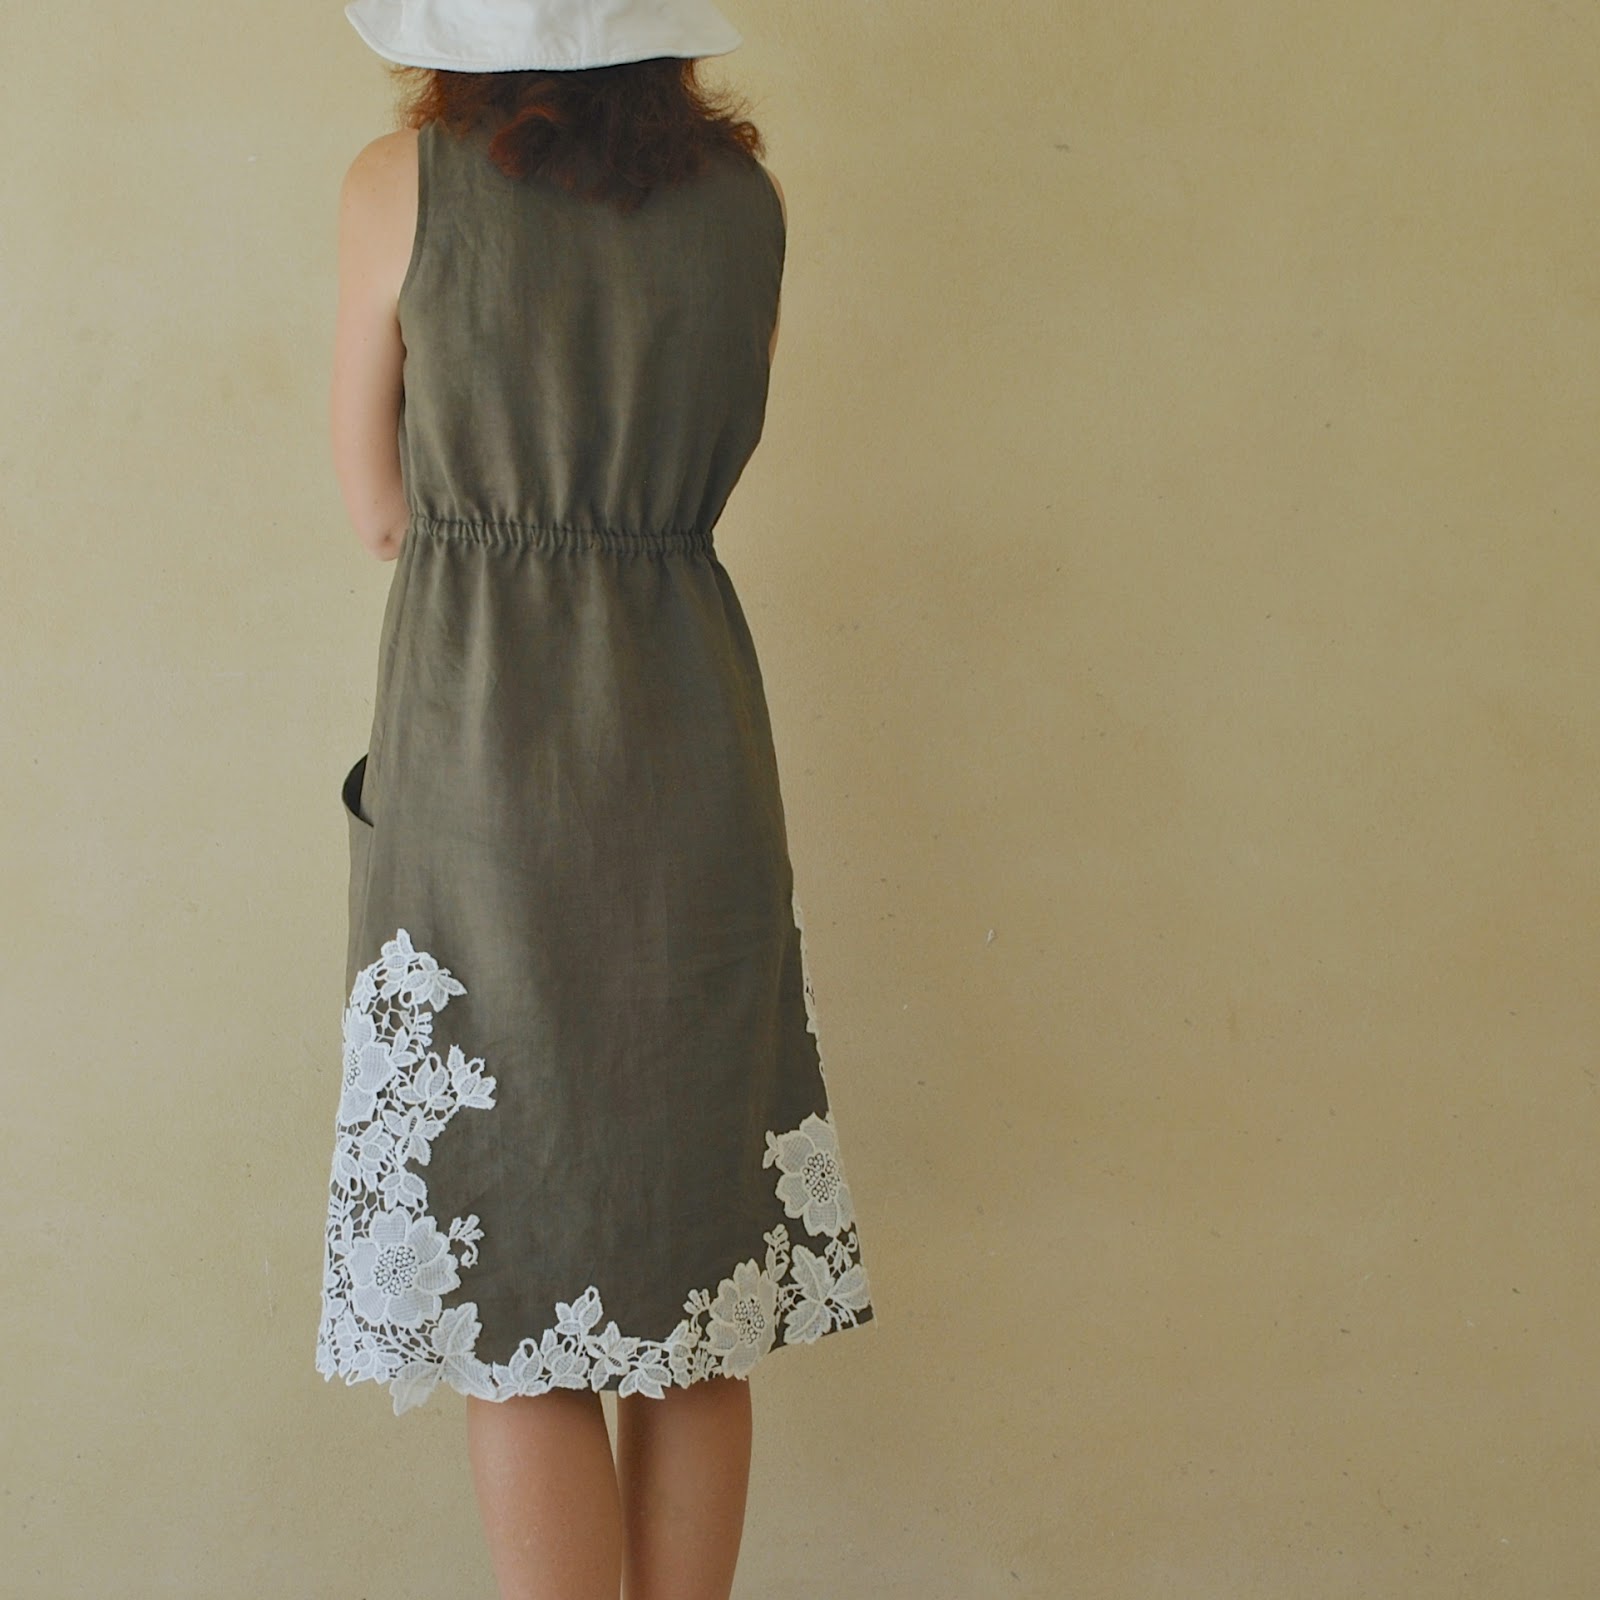
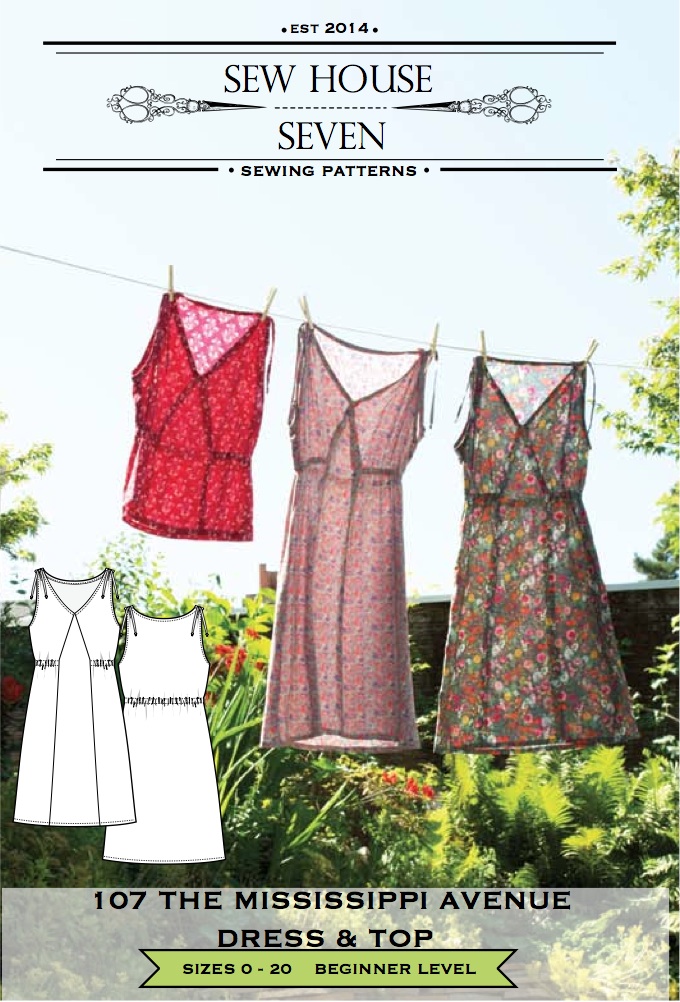
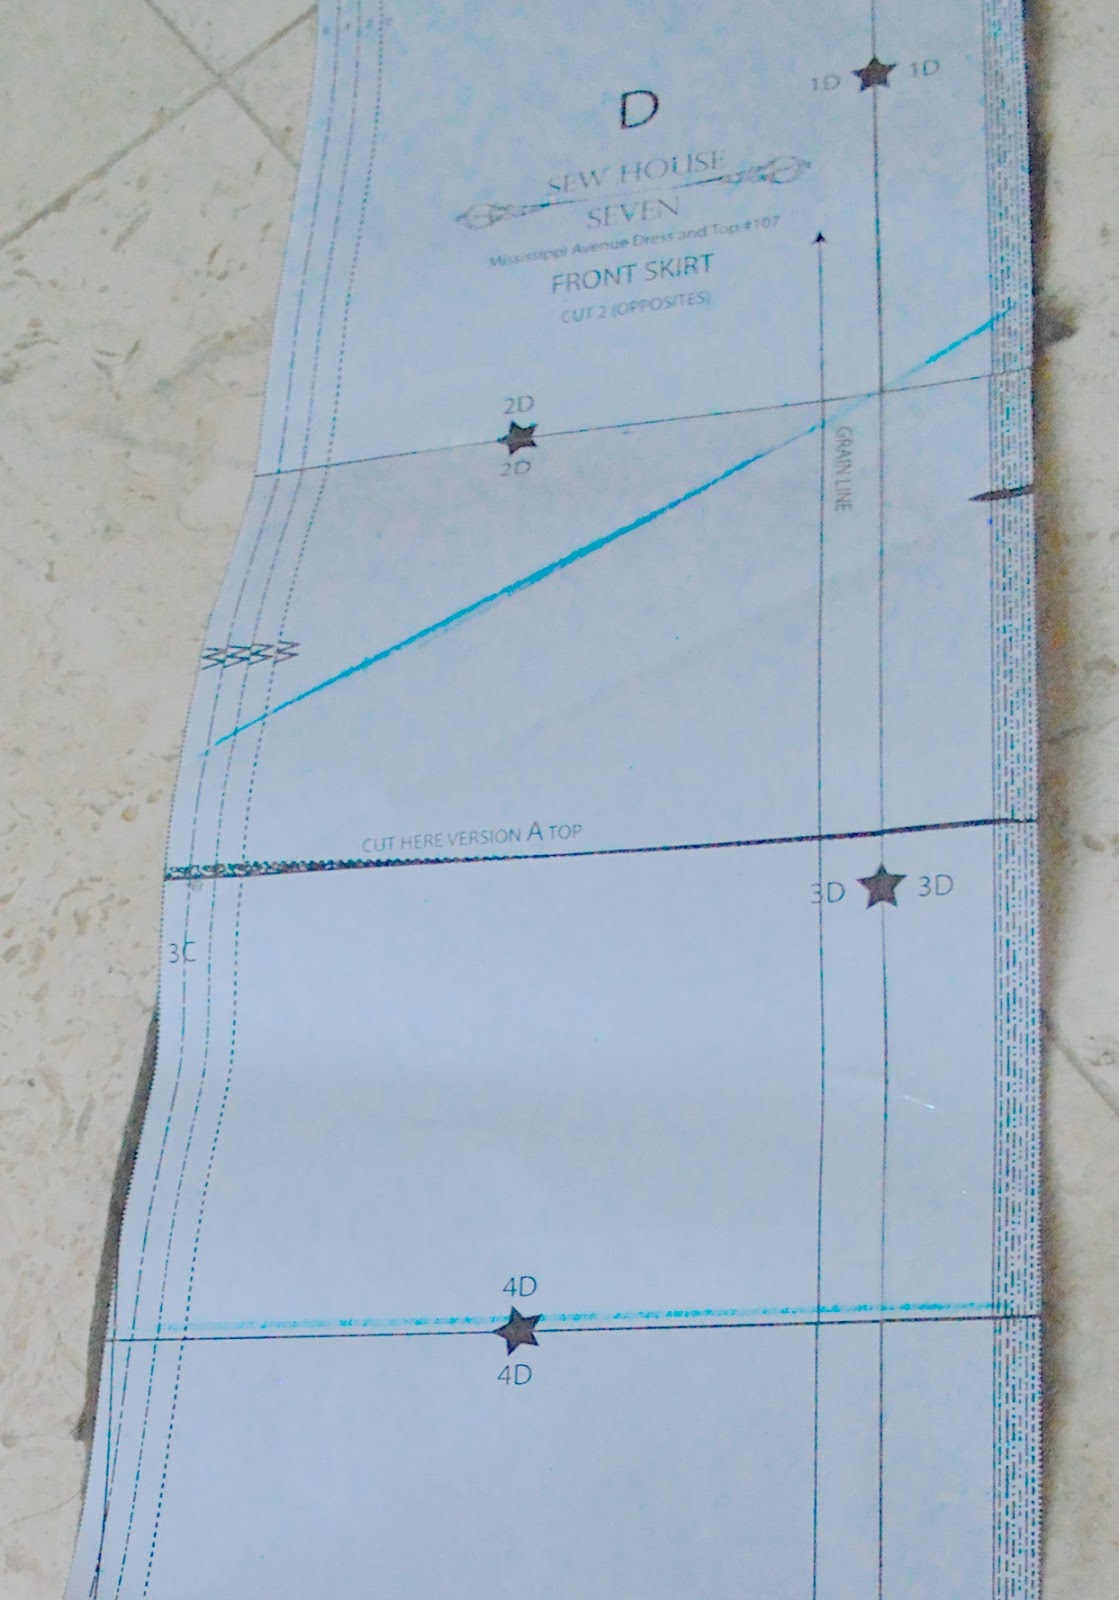
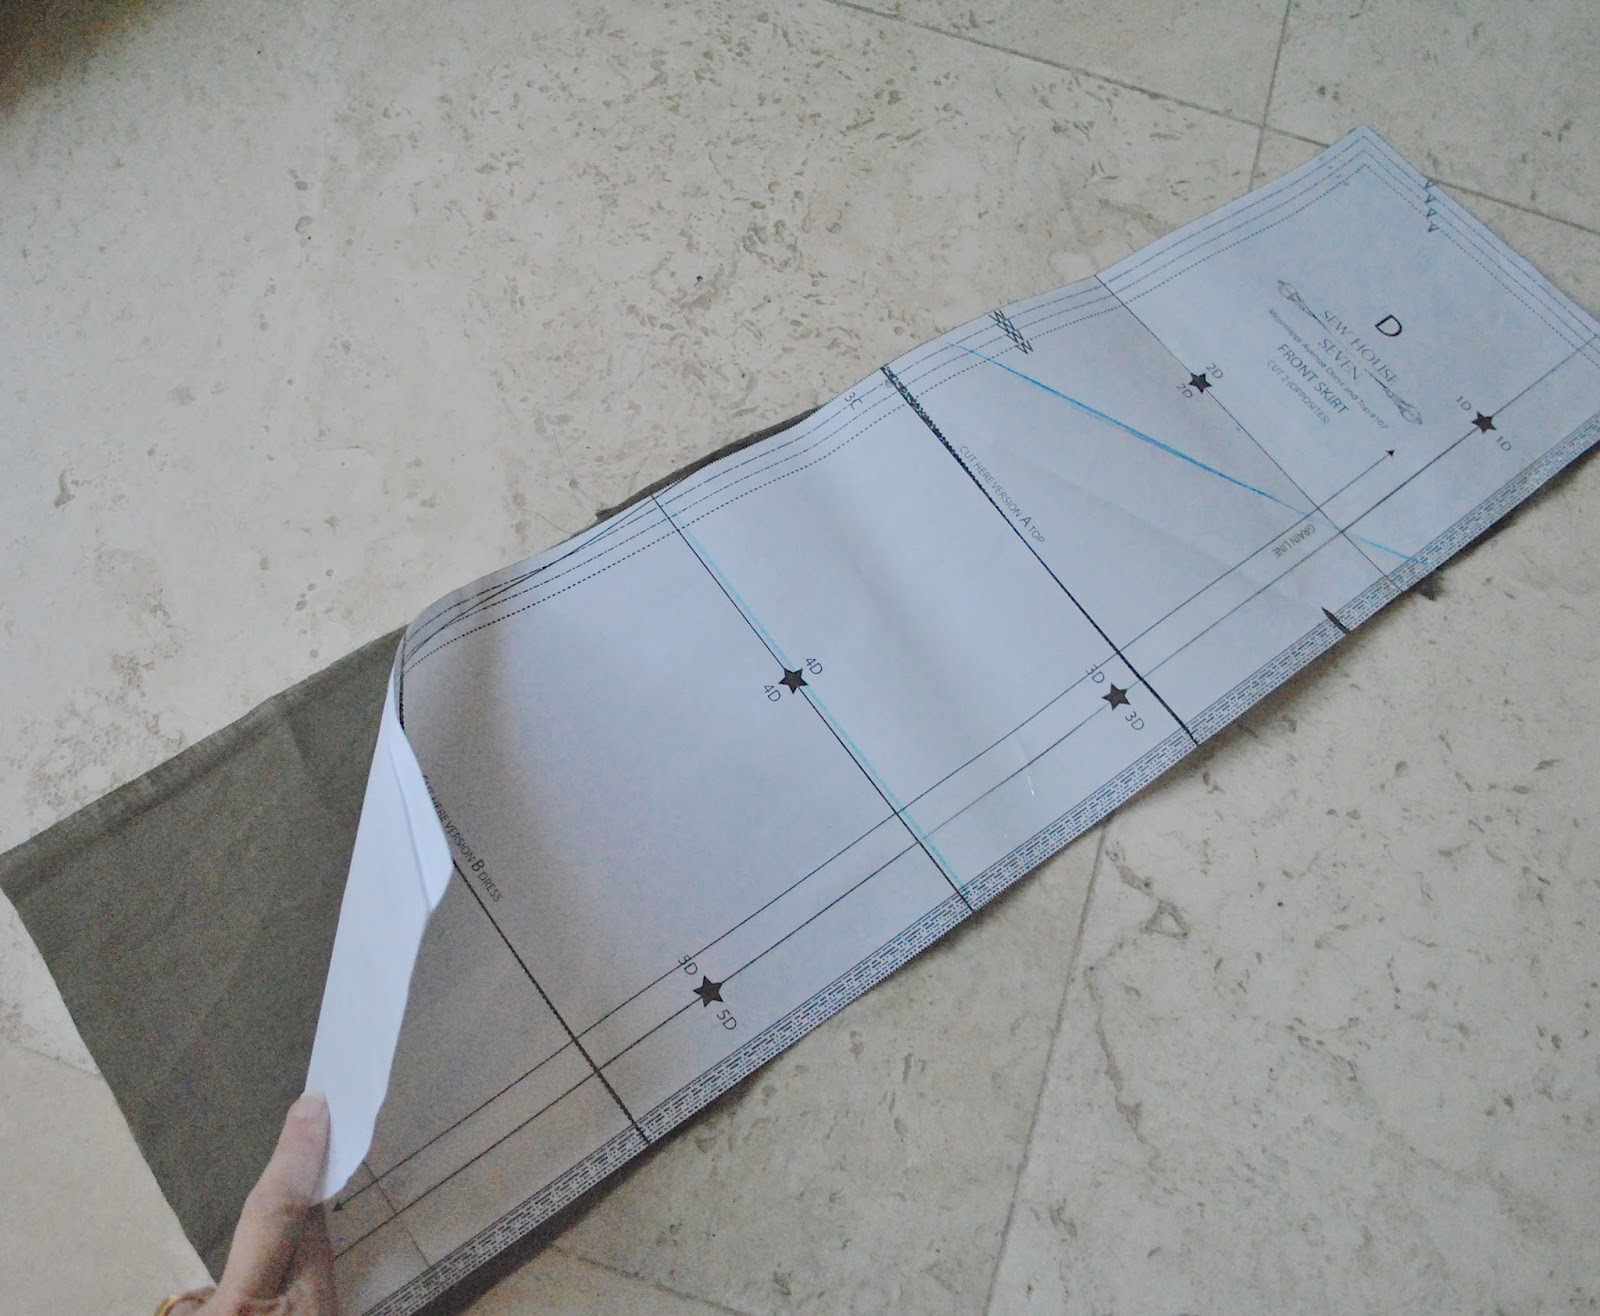
The pattern is the Mississippi Avenue top/dress by Sew House Seven, a pretty, easy-to-wear little number with a modest V-neckline and skinny ties gathering the shoulders up.  It’s a satisfyingly quick and simple project that goes together easily, and I think it’s all of sweet, cool, casual and flattering.  The very thorough and helpful instructions are aimed at the beginner. 
And it is included in the bundle of patterns to be sold as a set for Sew Indie Month.  
What is Sew Indie Month? do I hear you ask? well it is in September this year and has a charitable component, yes, we all joke about sewing selfishly and this is seamsters trying to give a little bit back!  The lowdown…

  • The idea behind Sew Indie Month is to create a global community sewing event, sort of like a big, online sewing workshop, if you like, while simultaneously supporting small women-owned businesses and raising money for charity.  During the month of September, pattern designers are collaborating on the Sew Independent site to put together blog posts and informative tutorials; and a terrific bonus is a sewalong contest with prizes!   Sew Indie Month is co-ordinated this year by Mari from Seamster Sewing Patterns
  • The pattern bundle is available to buy here, and the sale will run from Monday 3rd August to Wednesday 12th August.
  • 20% of bundle proceeds will be donated to the International Folk Art Alliance, which provides education and exhibition opportunities to folk artists from around the world. Just a few examples of what the International Folk Art Alliance has been able to accomplish by helping artists create stable, year-round livelihoods includes helping shelter women from domestic violence in Ecuador, building a school for children in Pakistan, empowering women in repressive cultures around the world, and feeding villages in Niger.
  • You can check out all the details and information on participating patterns and the pricing options, here; on the Sew Independent site

My fellow participating seamsters who will be making their own lovely and unique creations using one or more of the patterns are:

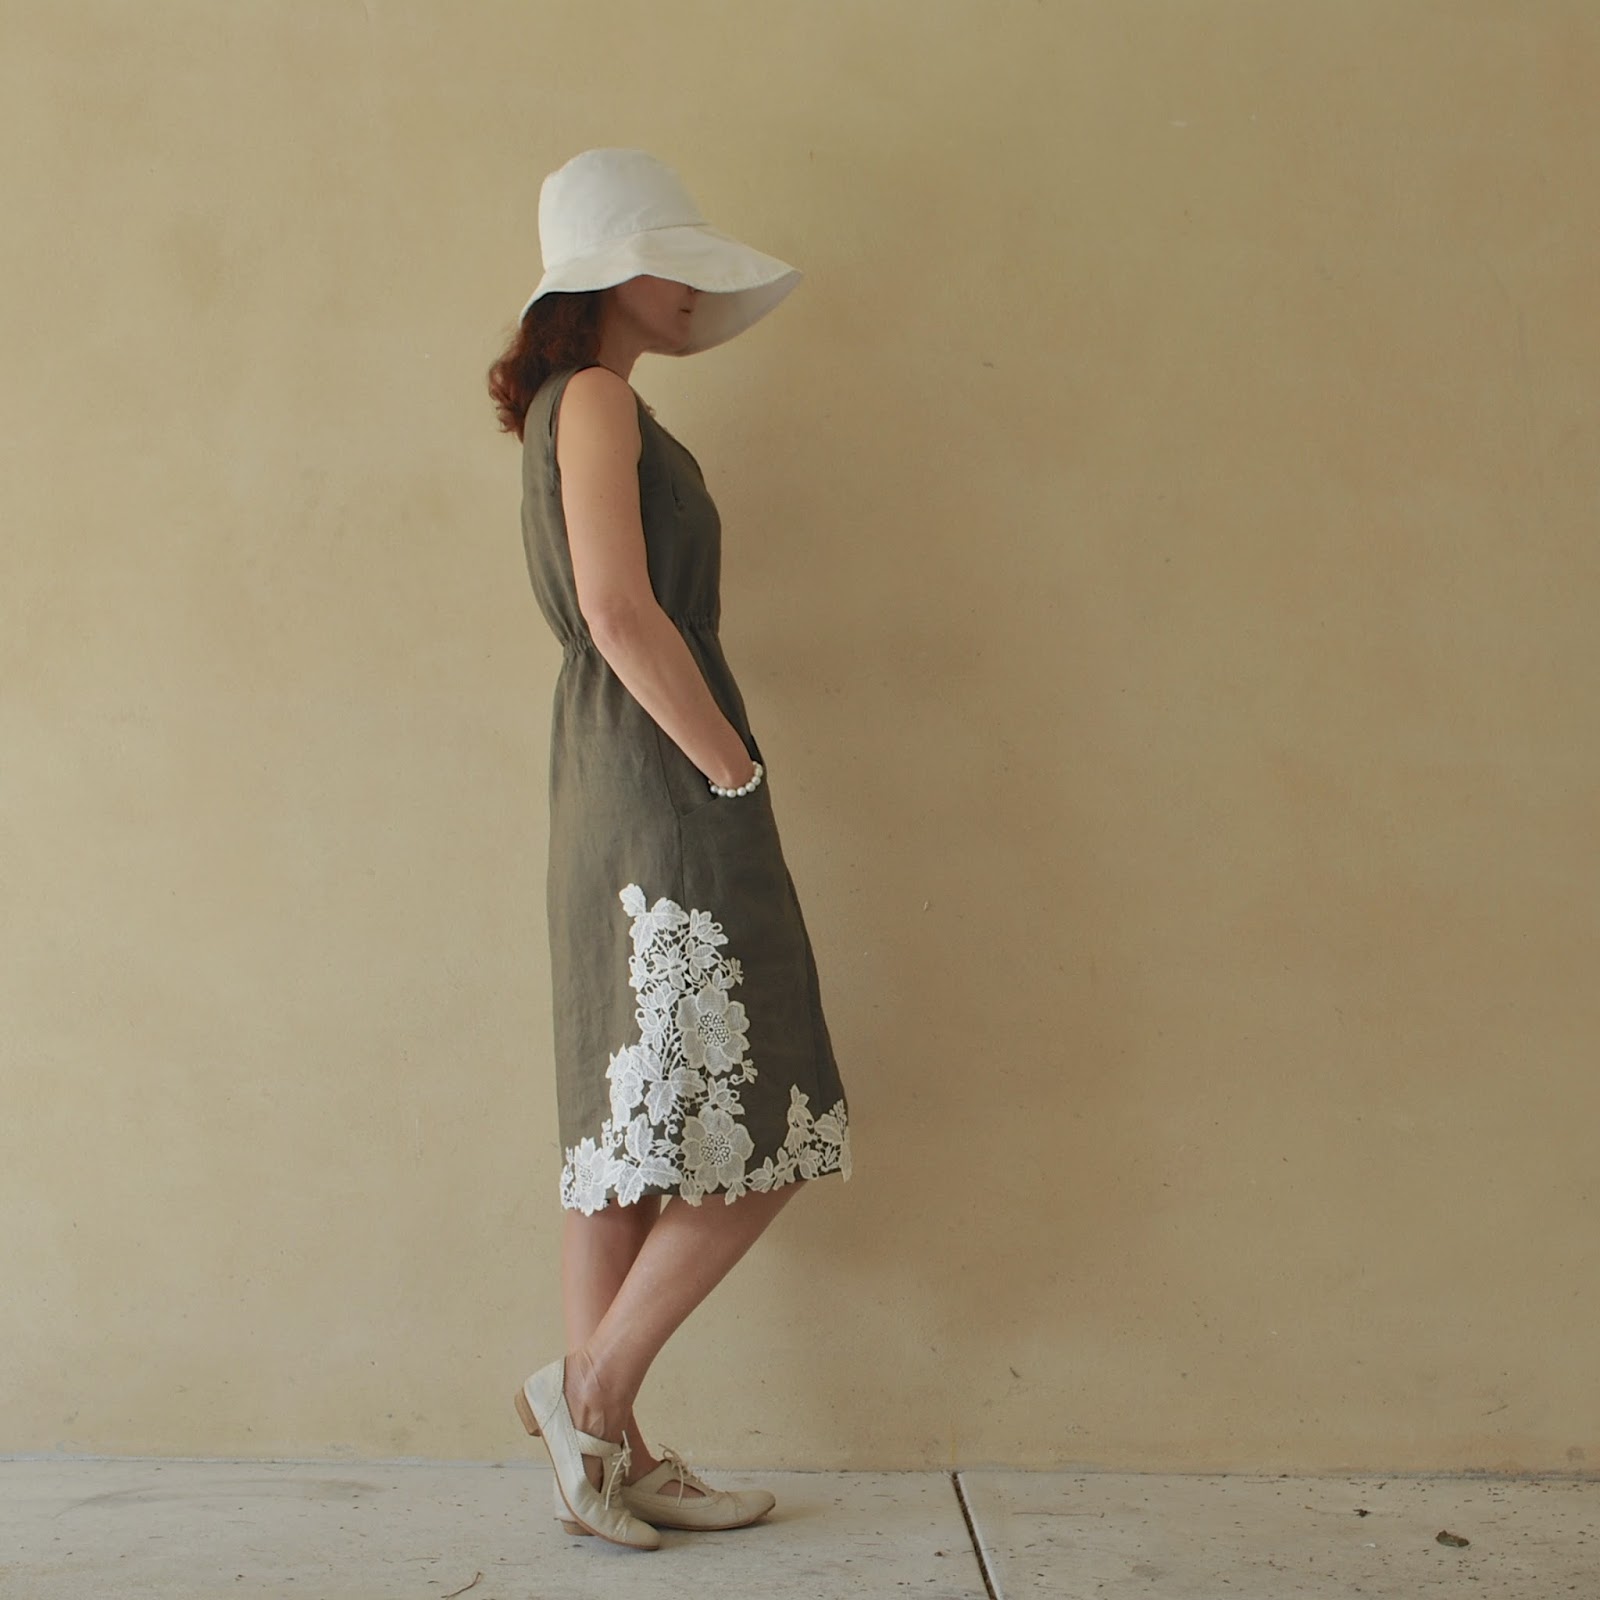
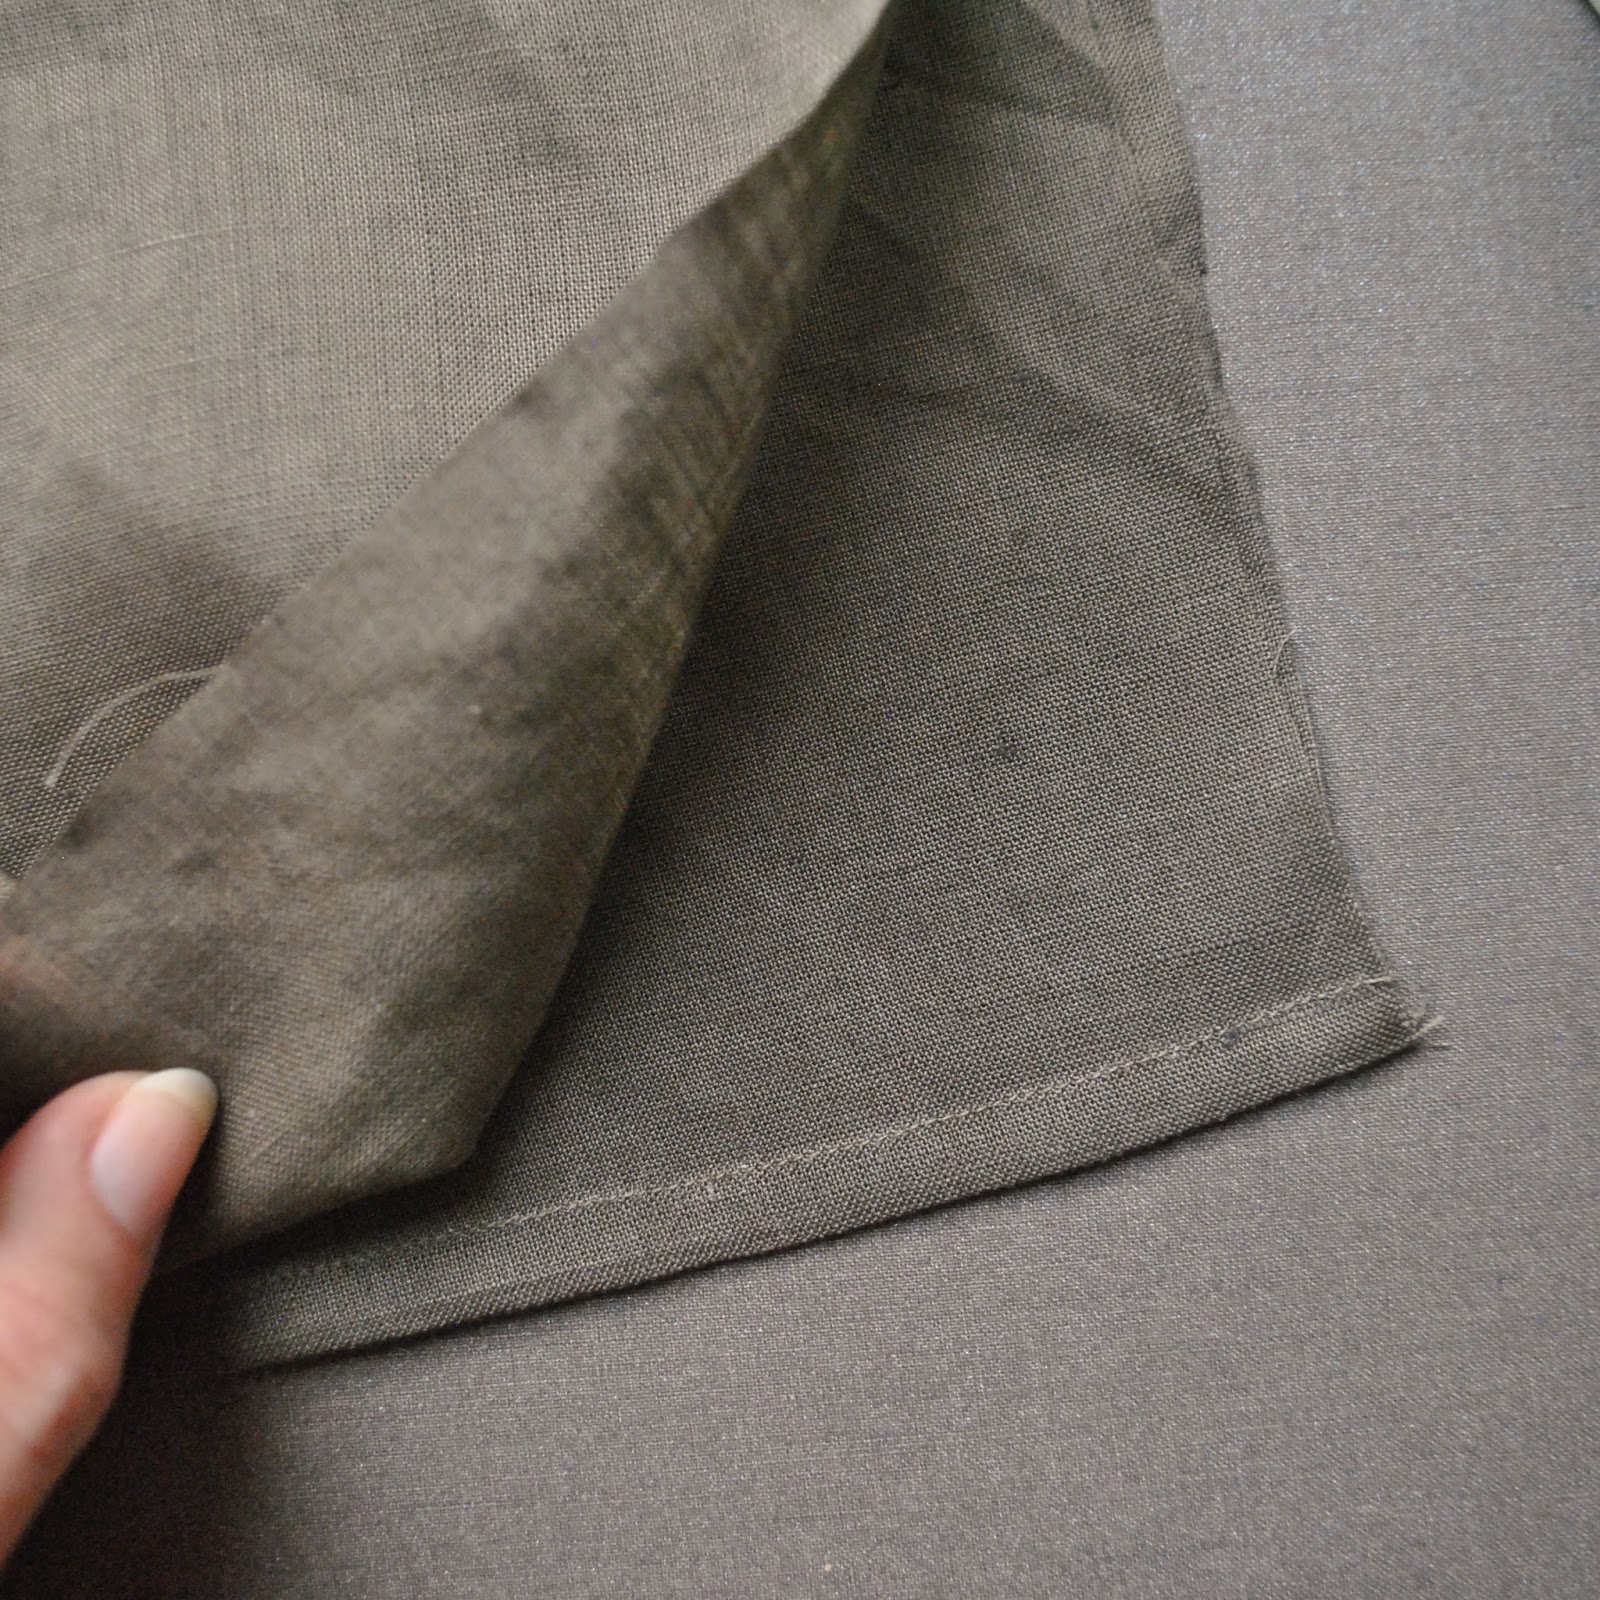
I also added slanted front pockets to my dress… because, well, pockets.  Where there’s a will there’s a way, mwahaha.  I did these same sort of pockets for my blocky sundress, and it’s an easy feature to add when the front is already in 3-panels like this.  For this reason, my method could also work in a princess seamed dress.  I took a few piccies this time to illustrate how I put them in…

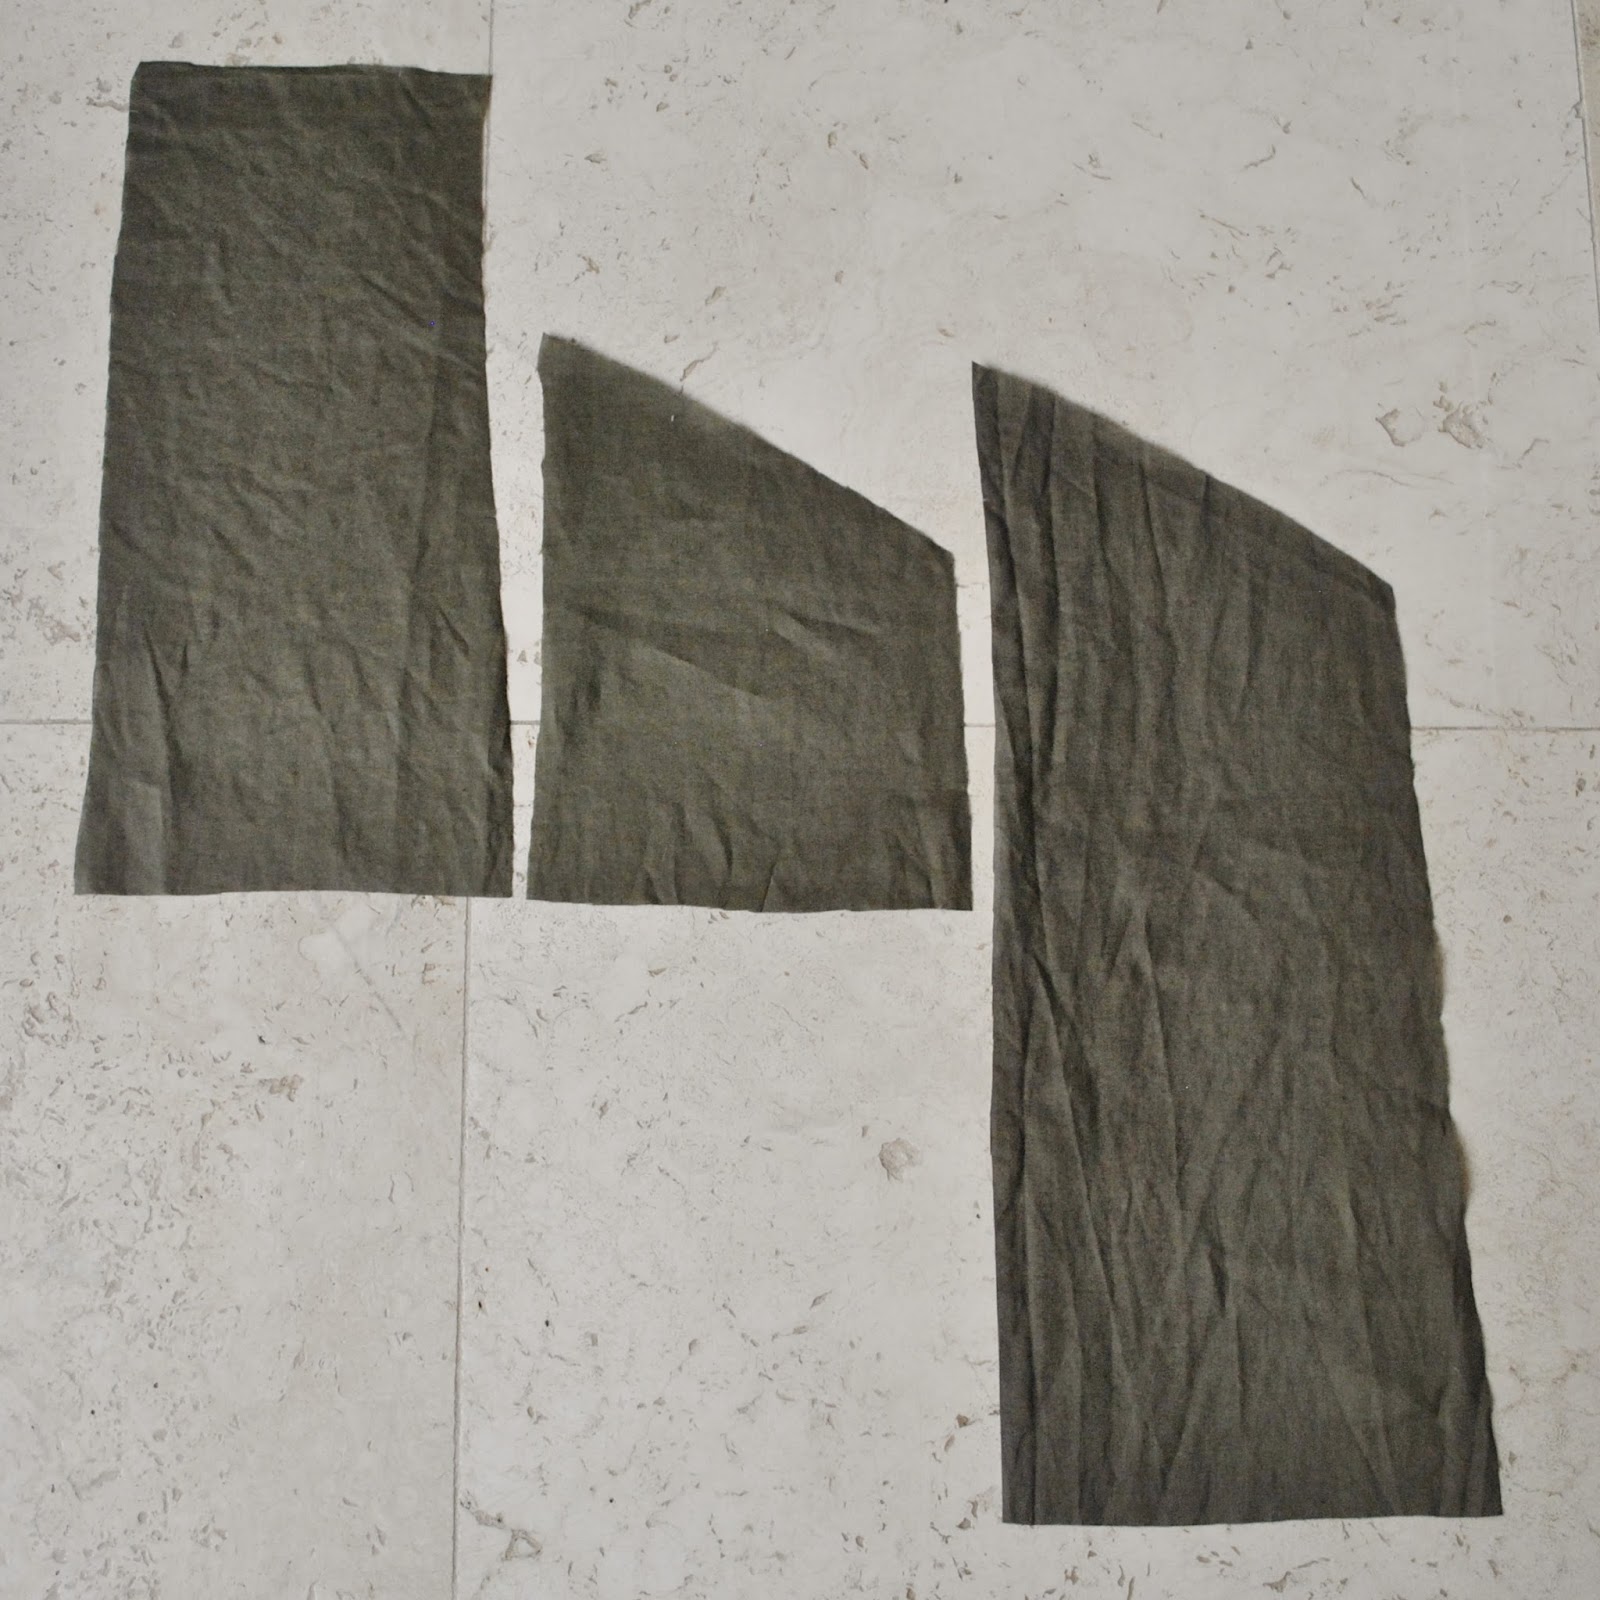
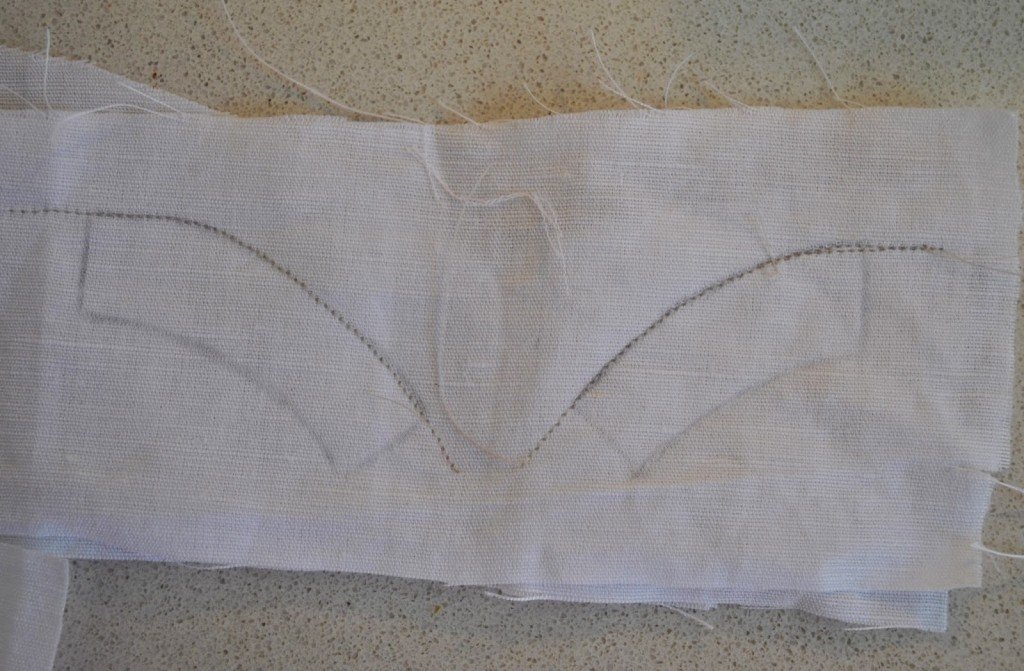
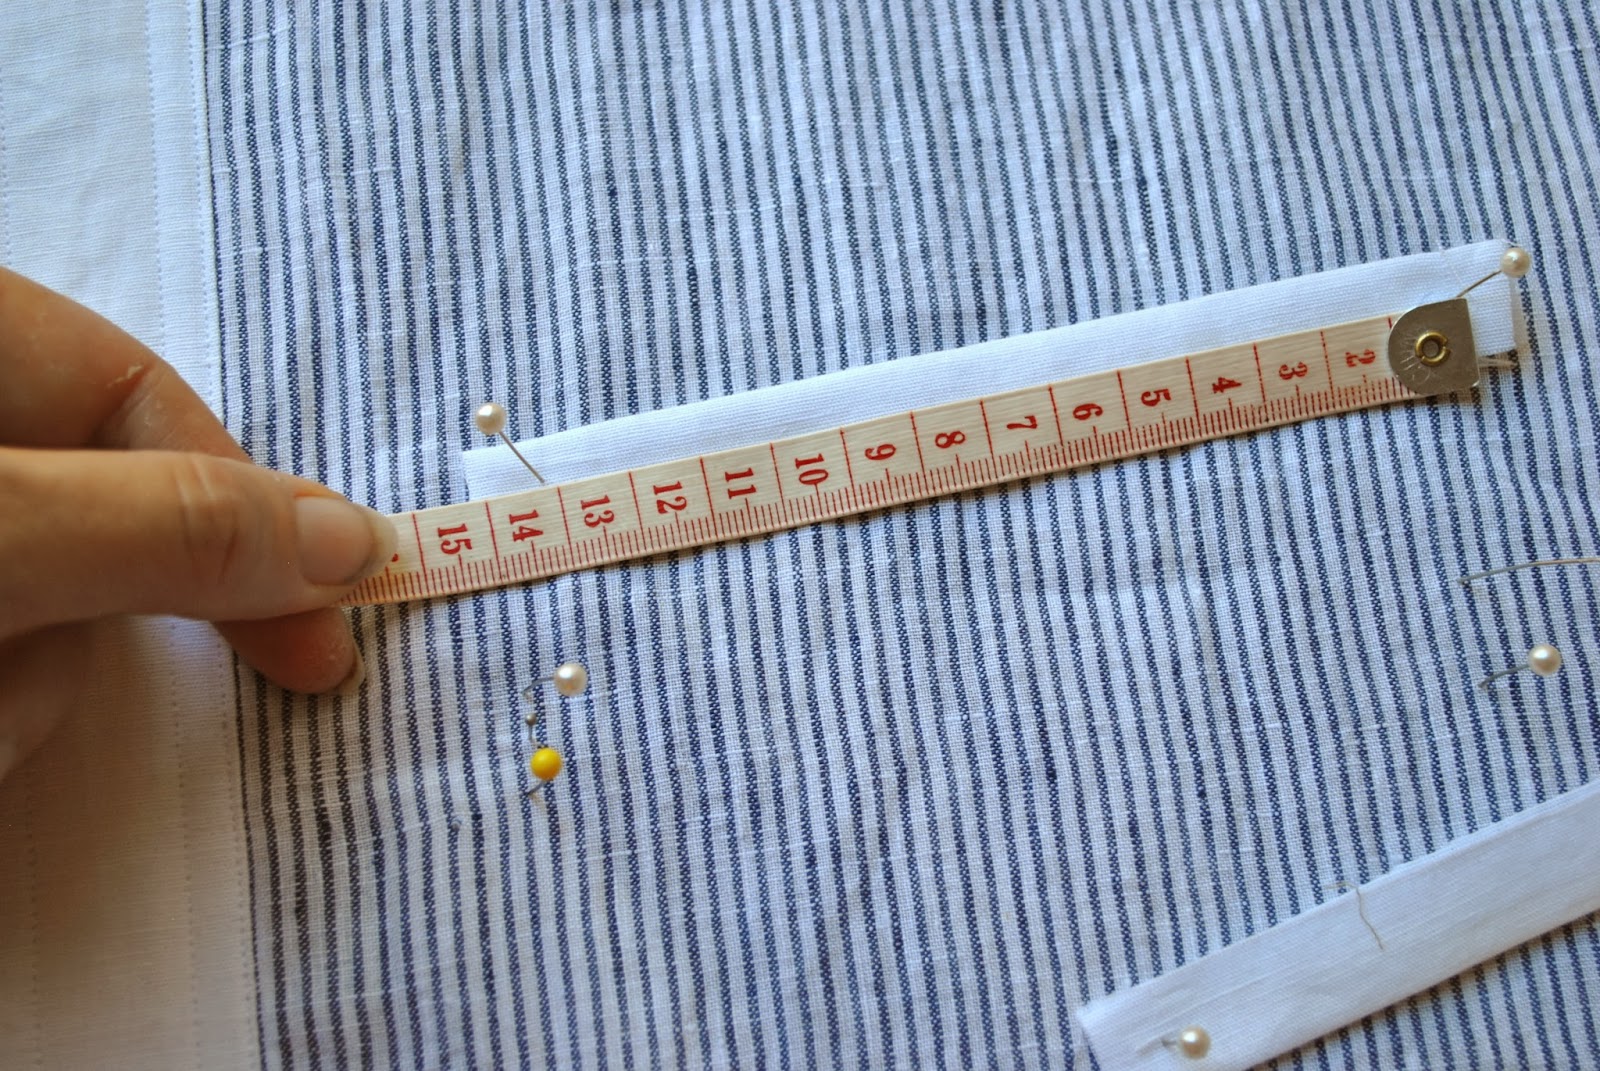
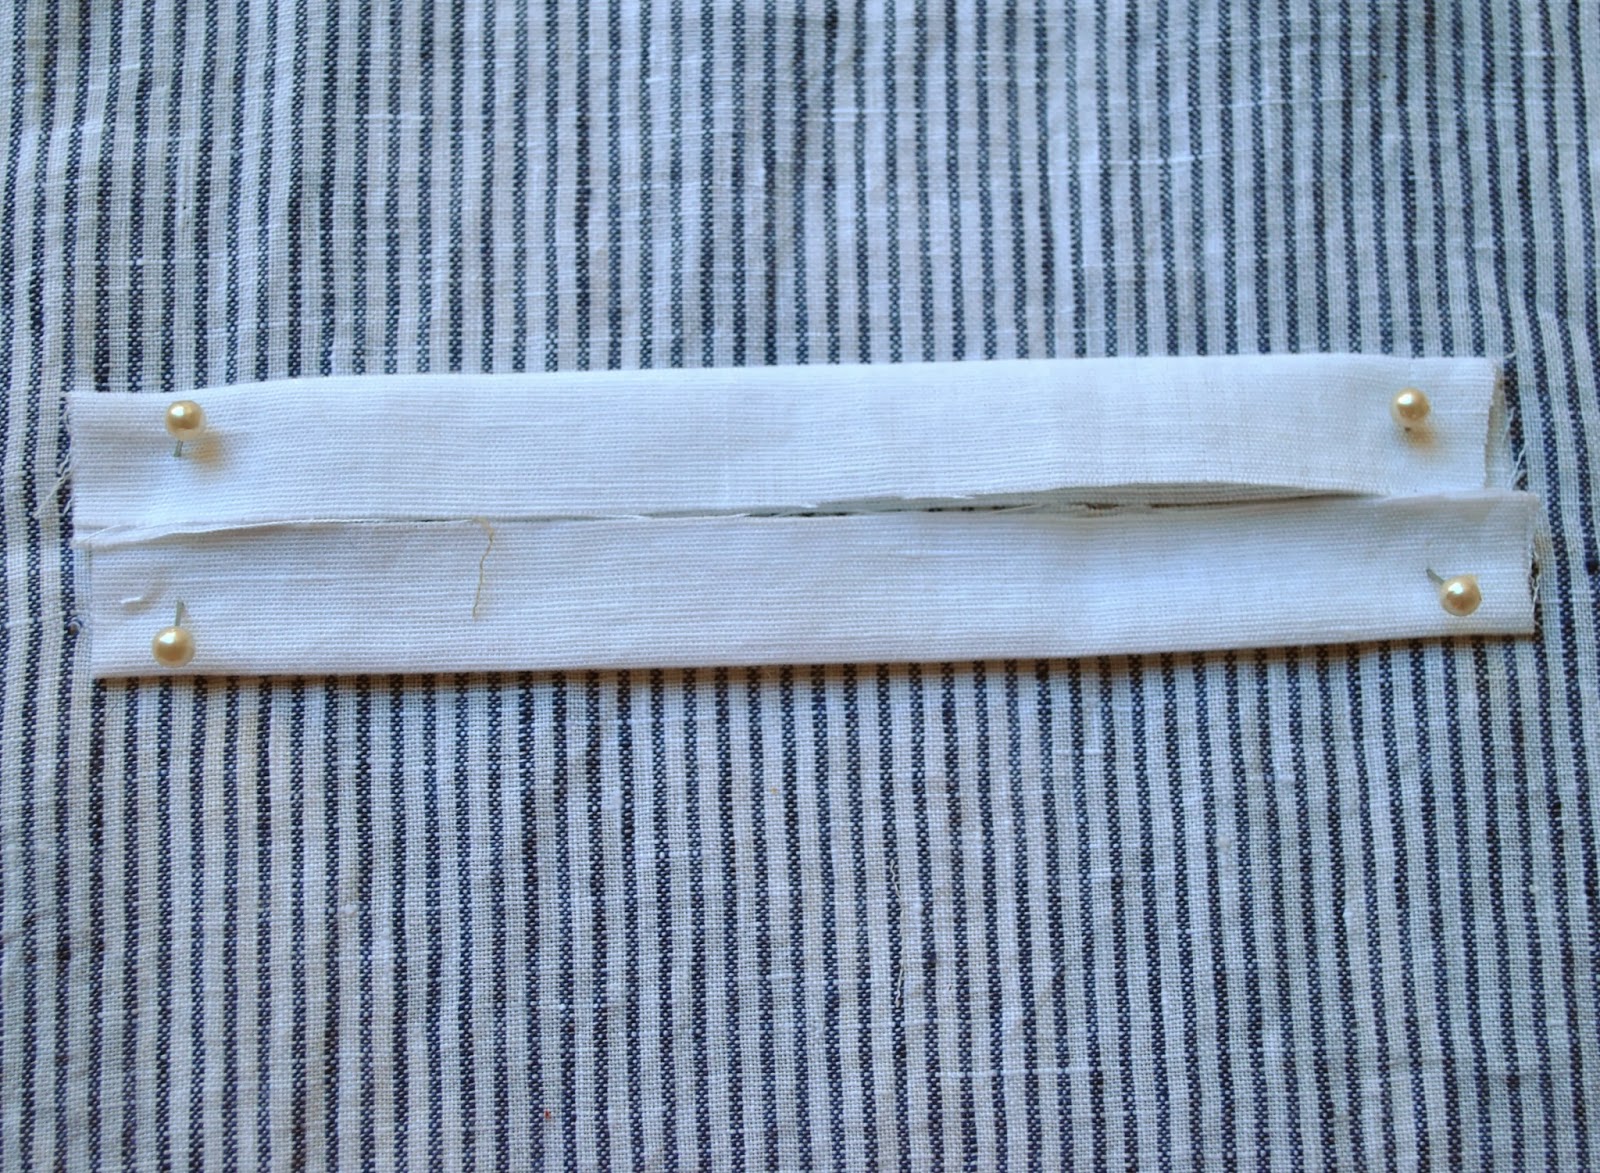
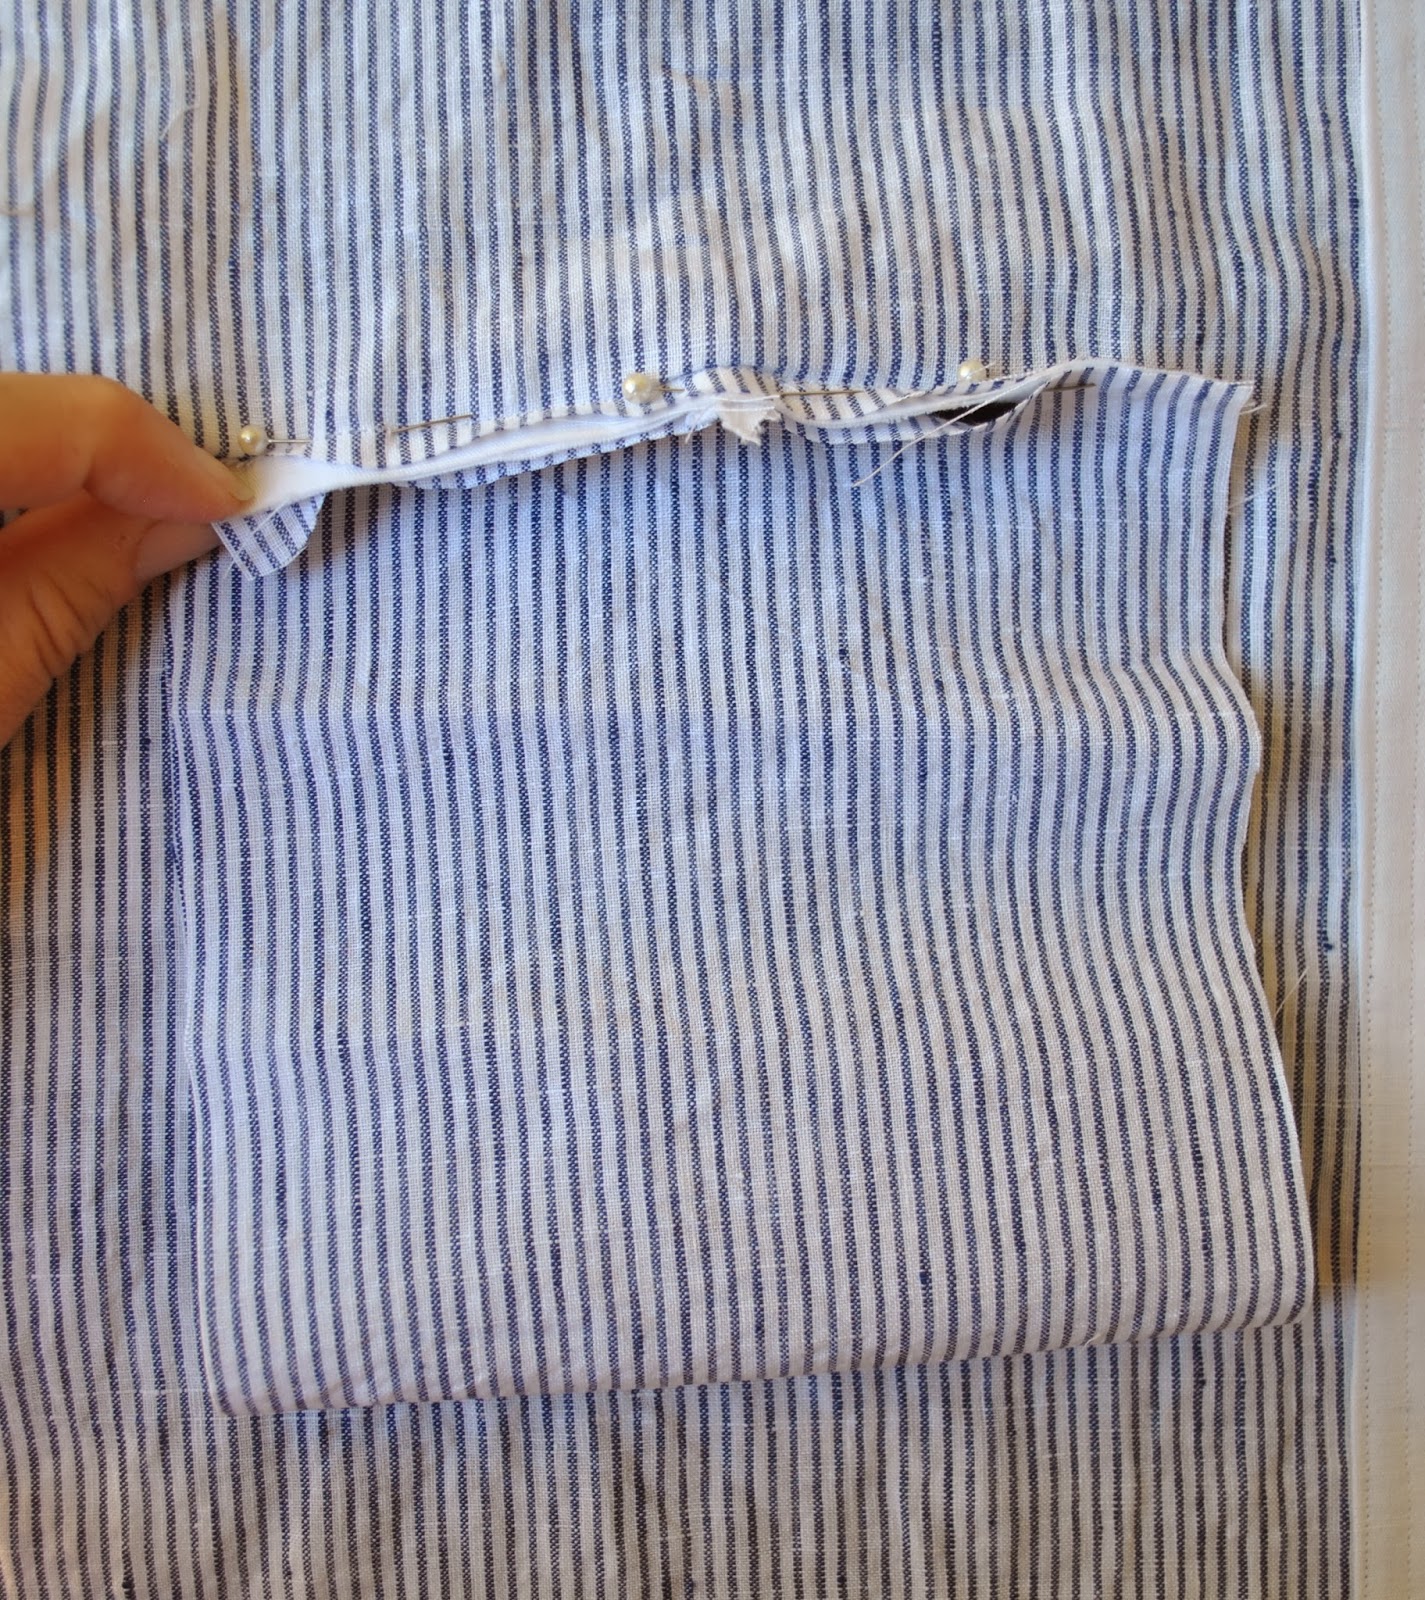
Mark on the pattern piece a slanted line where you want the top of your pocket to sit, and another horizontal line to mark the bottom of the pocket edge.  Instead of cutting the side front as one piece, cut three pieces: 
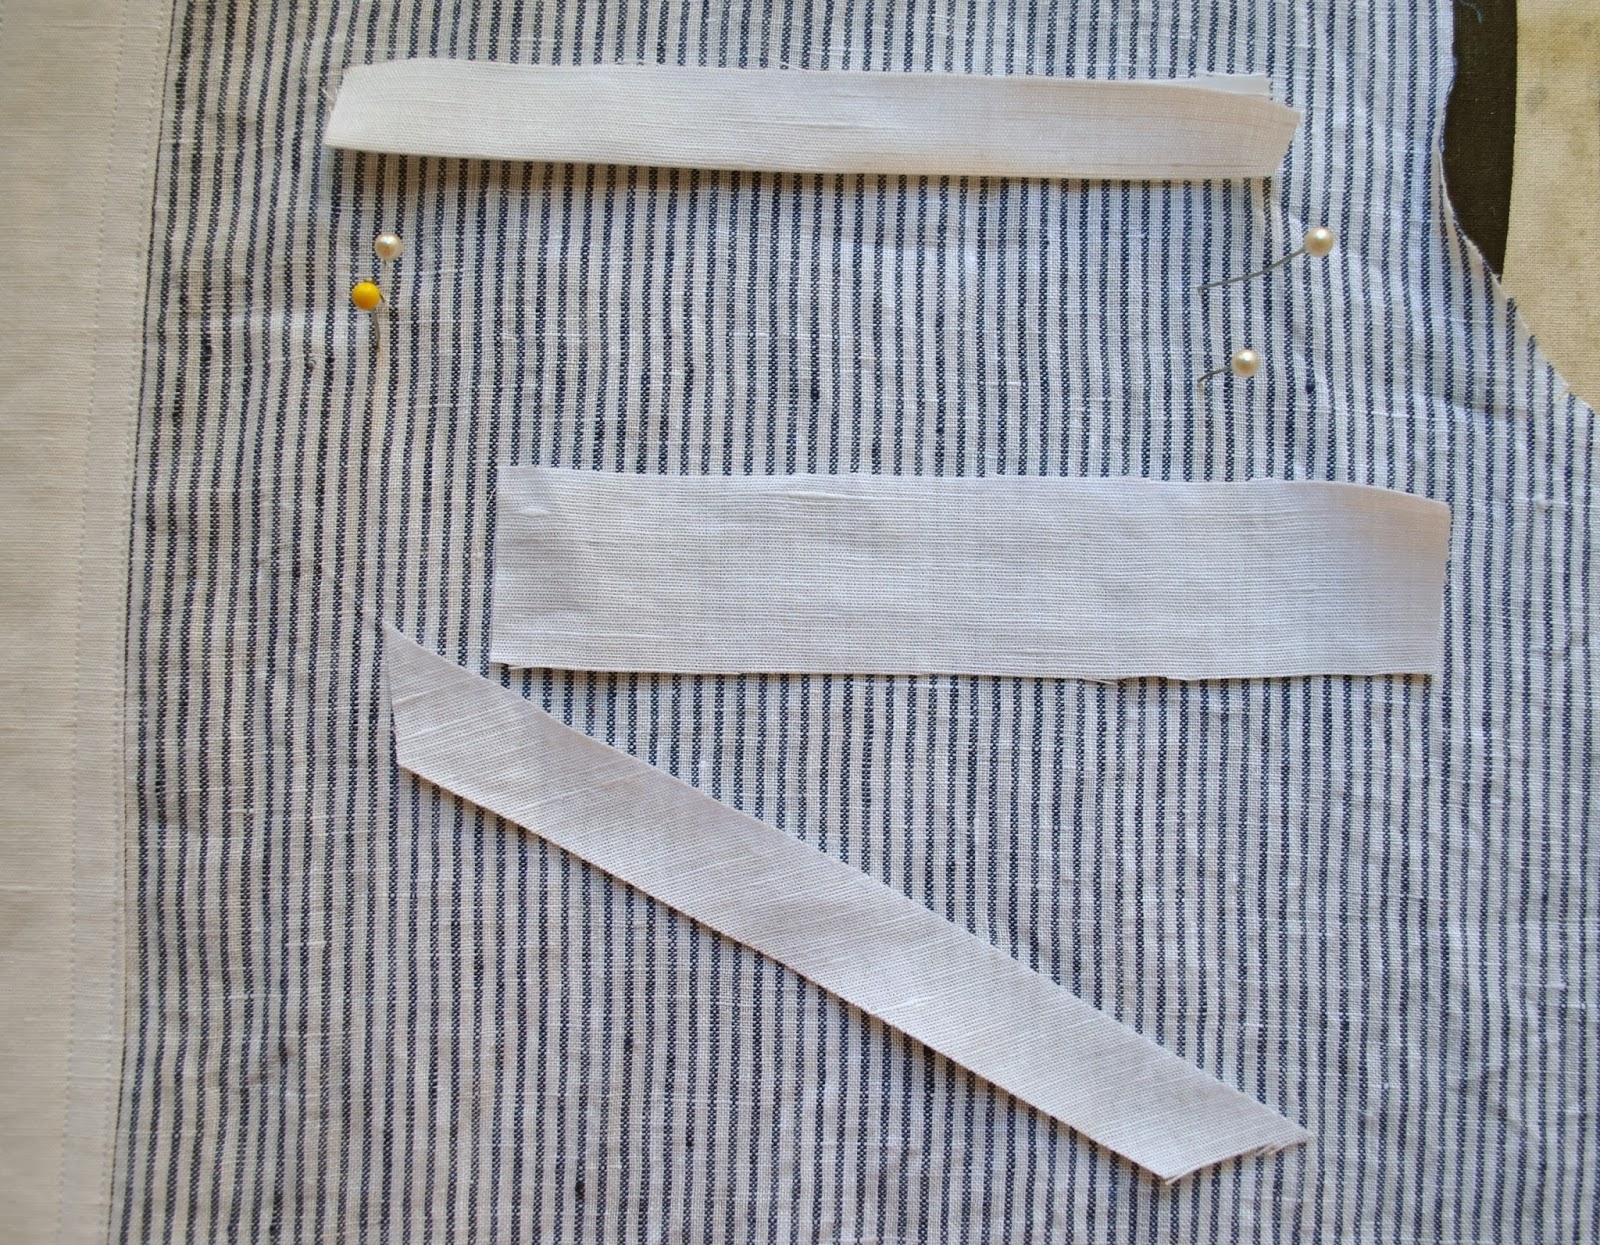
1. piece at left, upper S (side) front, from the top edge of the pattern piece to the bottom edge of the marked pocket allowance, plus seam allowance,
2. middle piece, pocket; from the top edge of the slanted pocket line to the lower edge of the pocket allowance, plus seam allowances top and bottom.
3. piece at right; lower S front; from the slanted pocket line plus seam allowance, to the lower edge of the pattern piece.  It’s a good idea to add an extra, say, 4-5cm in length to the lower edge to allow for possible boo-boos in seaming, just in case.
Transfer all notches and new marks to all pieces.

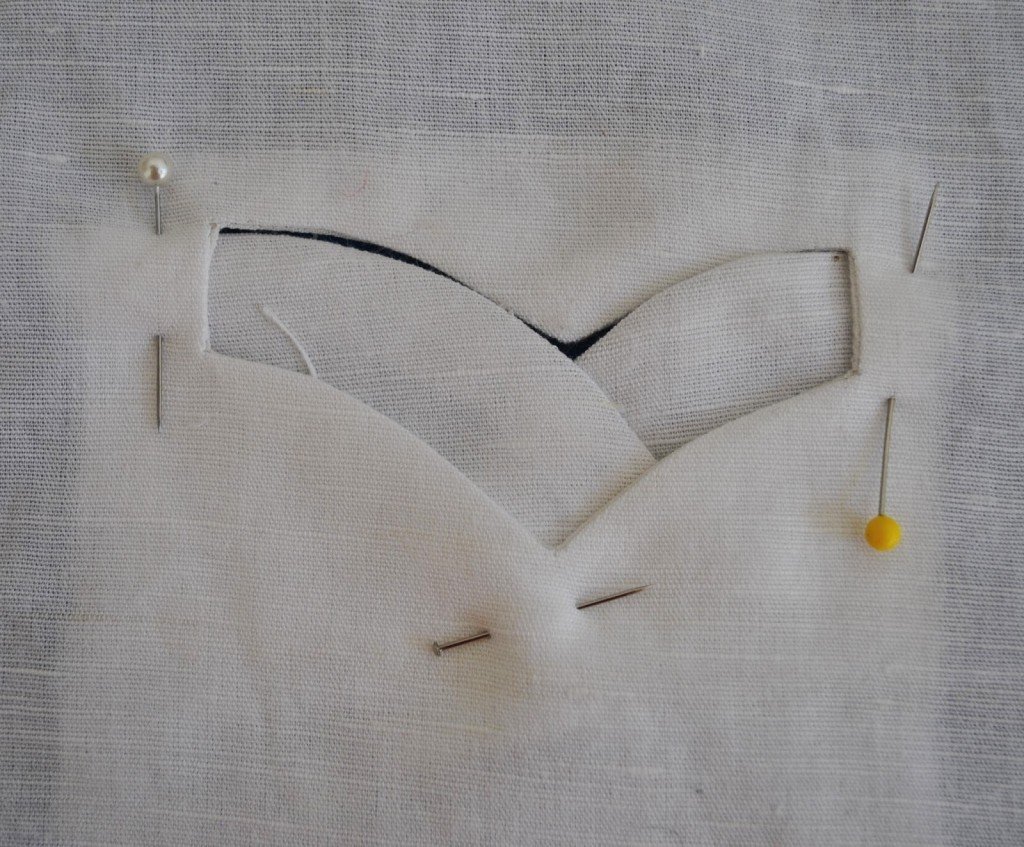
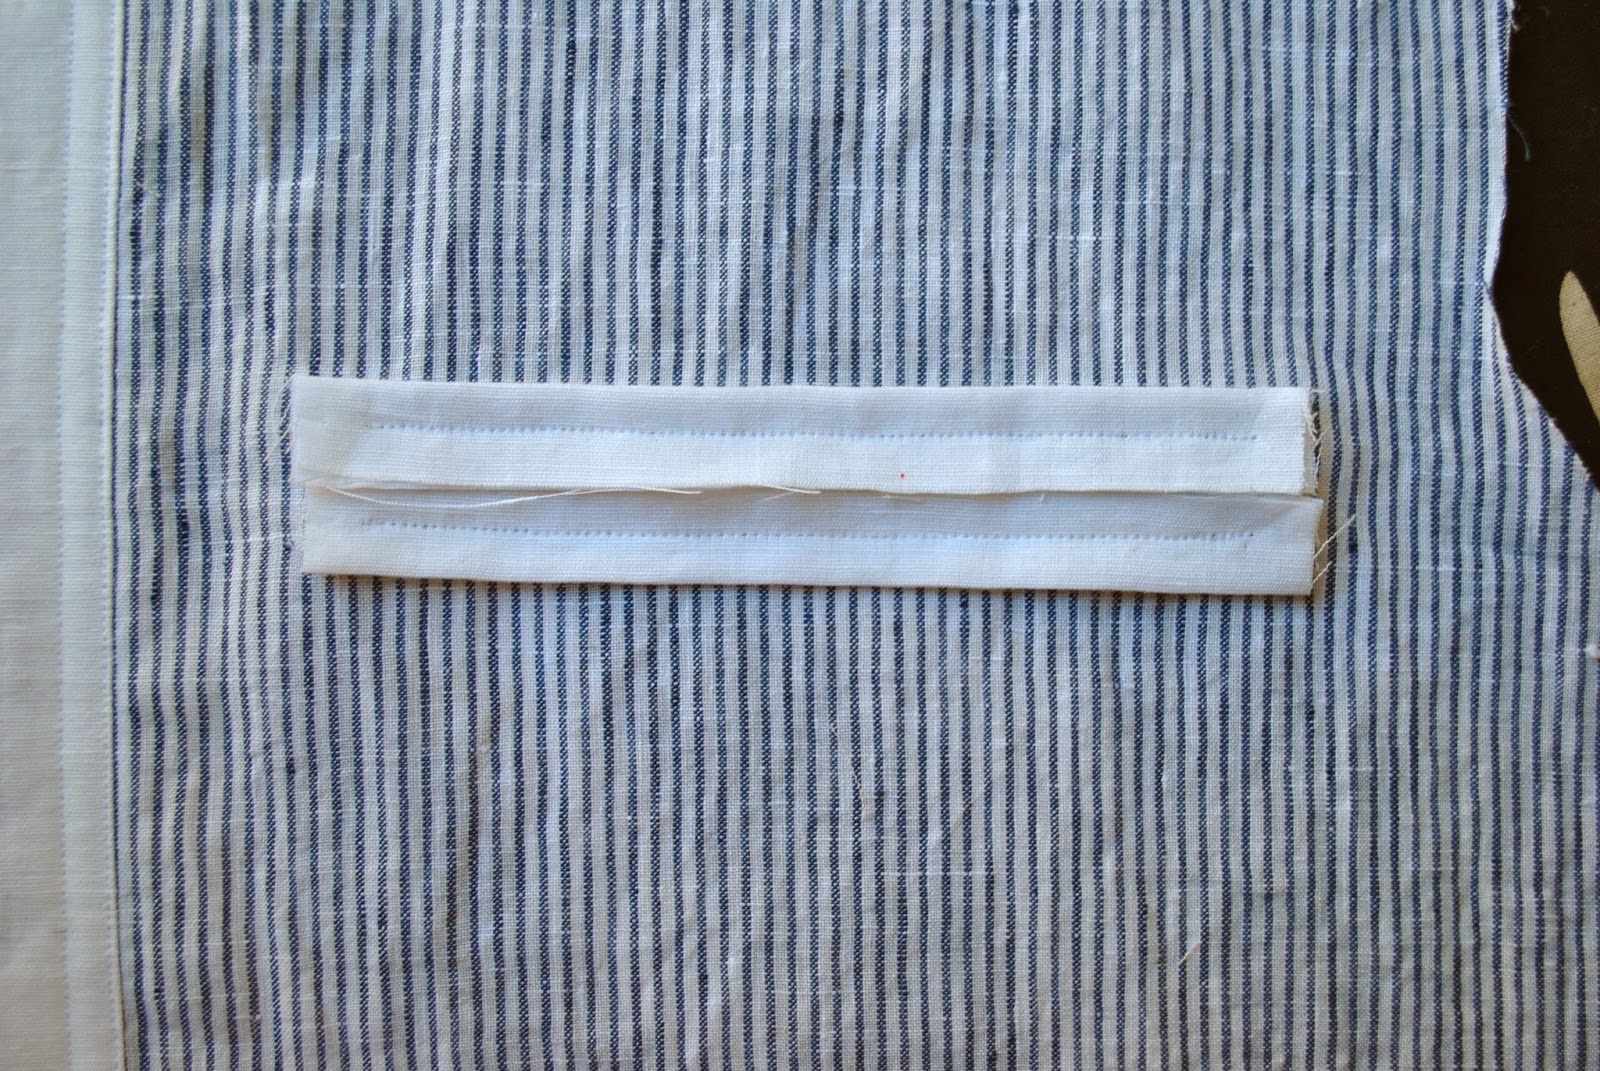
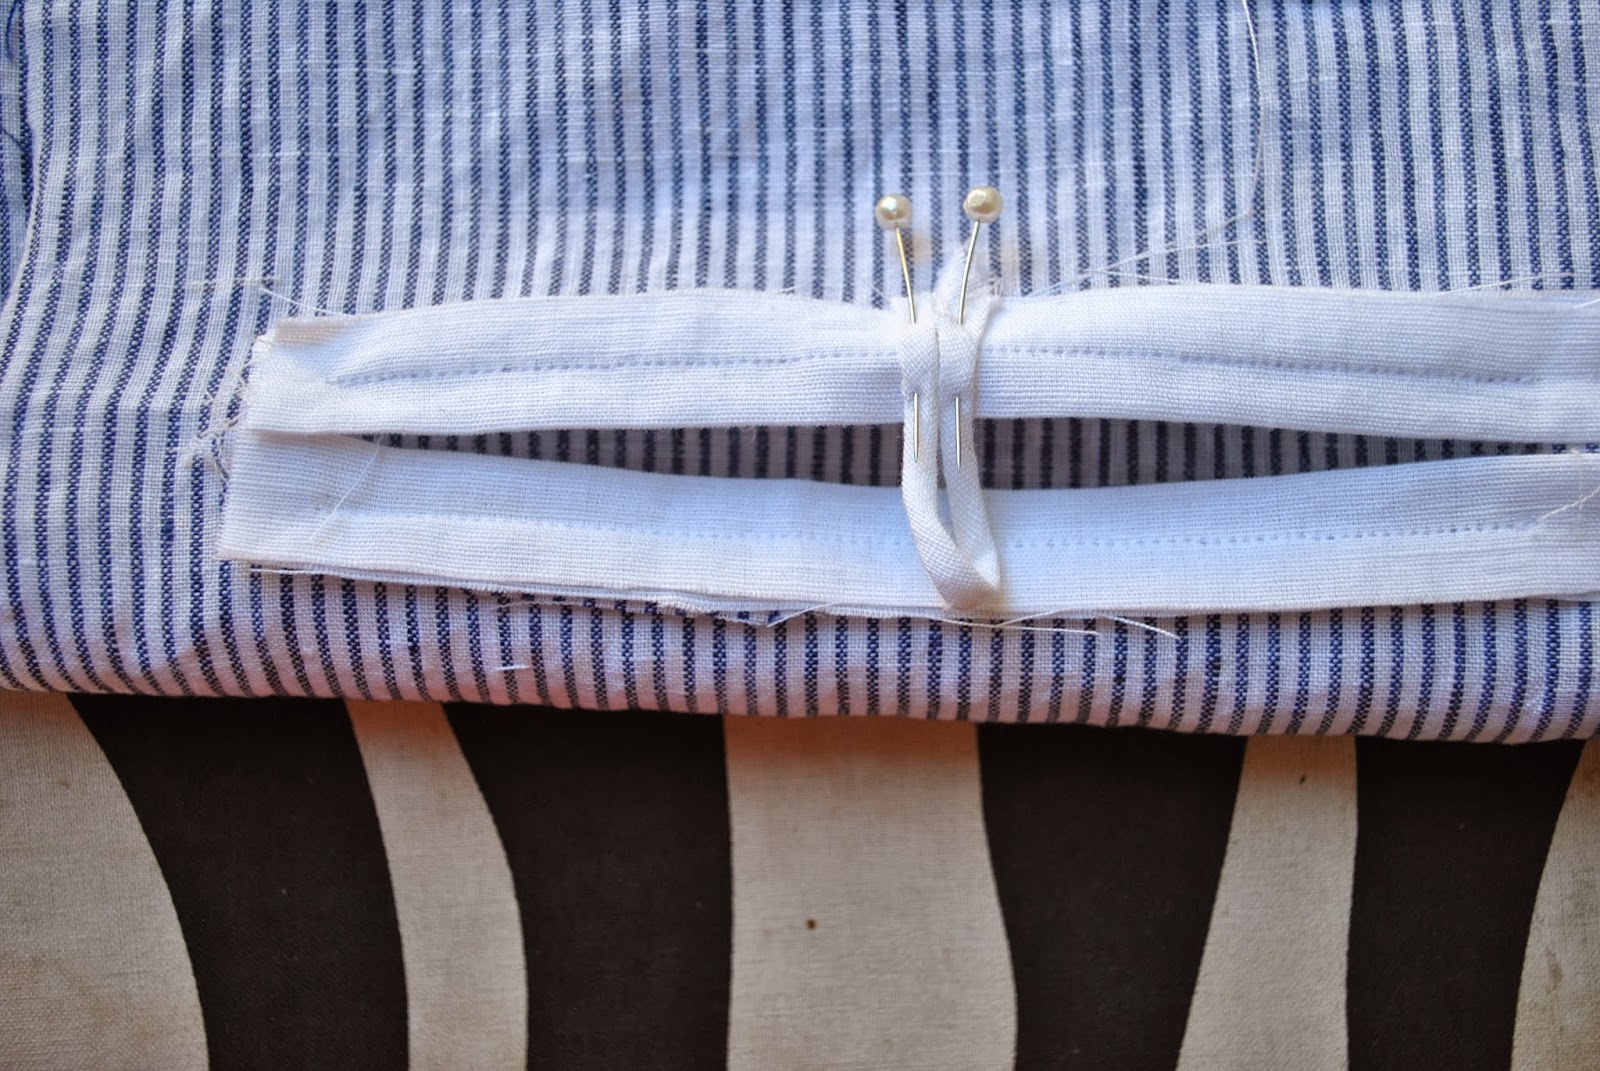
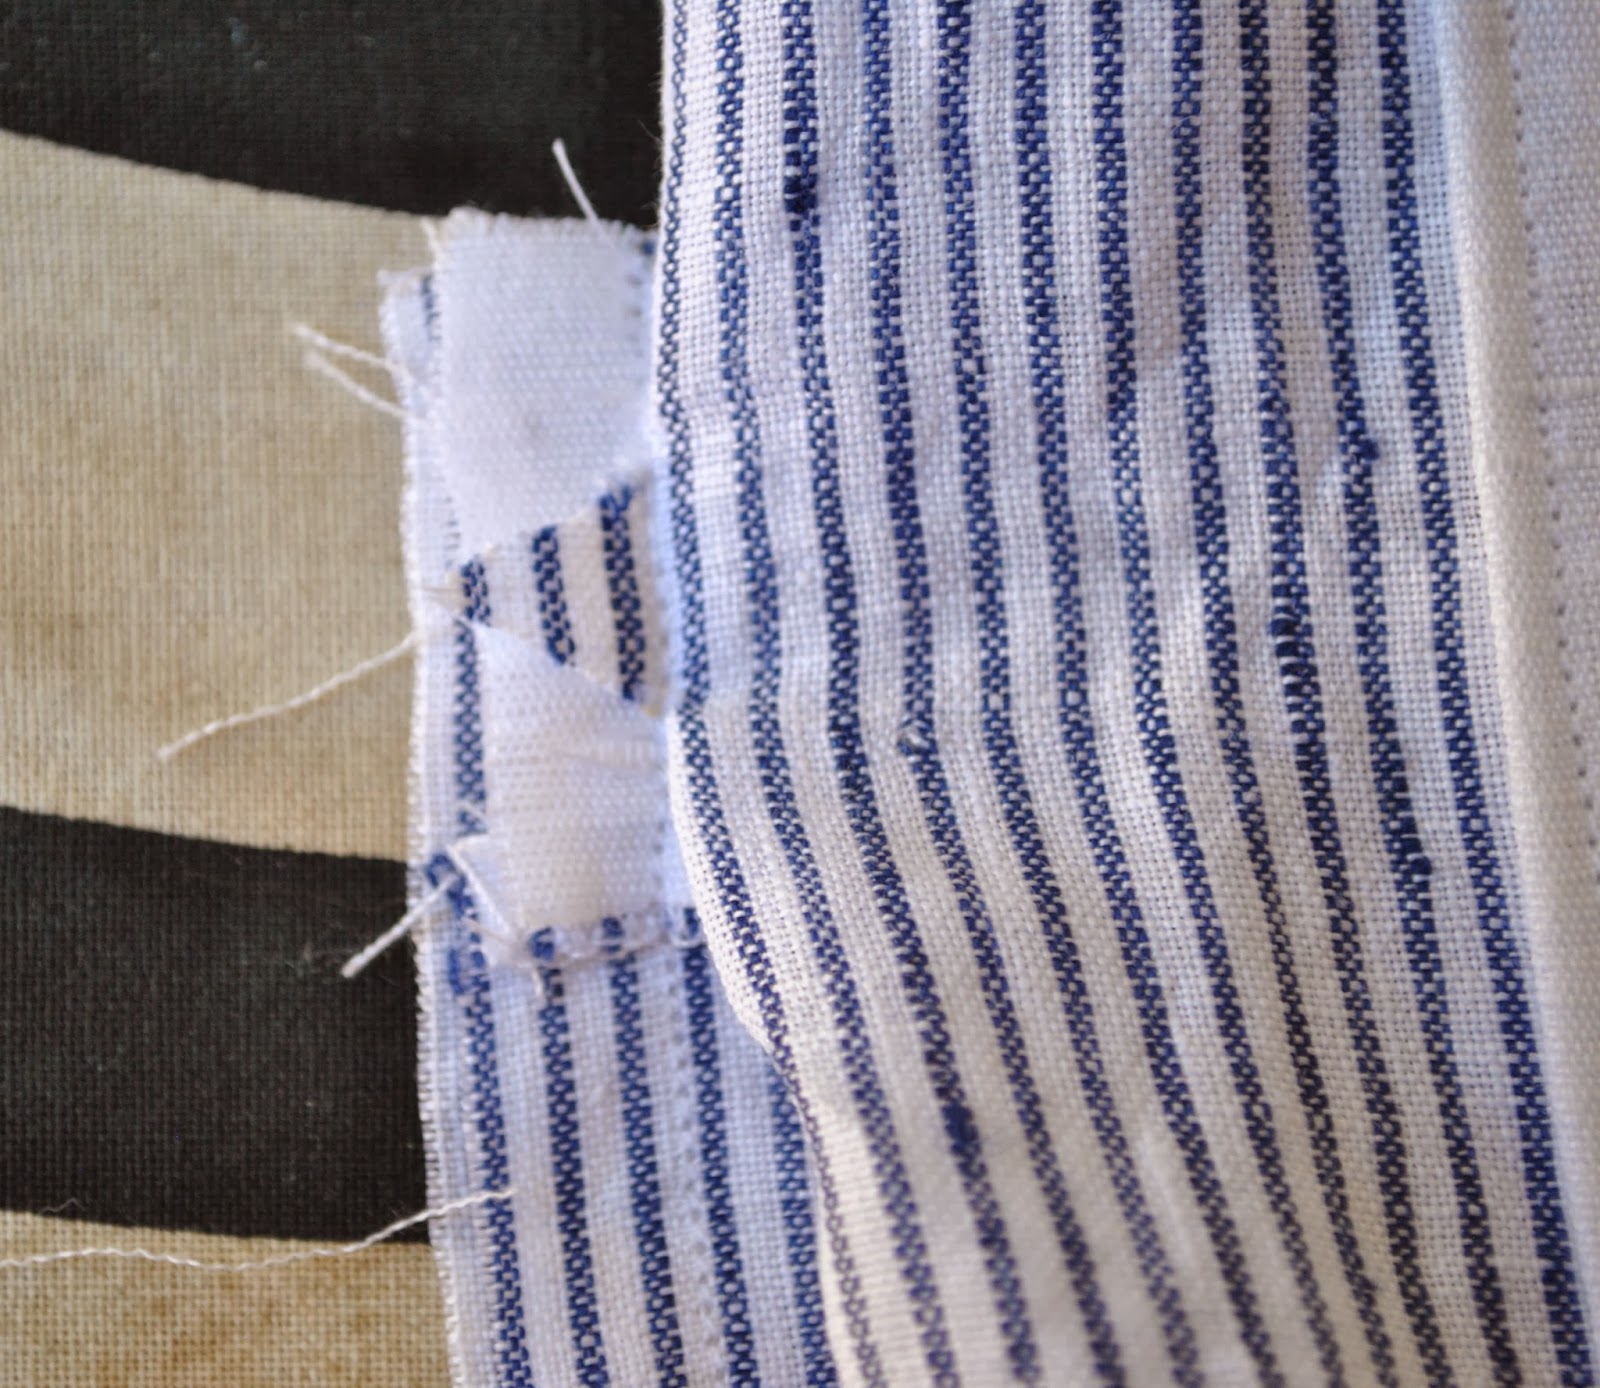
Stay stitch the slanted edges, and then stitch the pocket piece to the lower S front piece, right sides together, along that top, slanted edge.  Press seam open, turn out, under stitch inside the pocket.

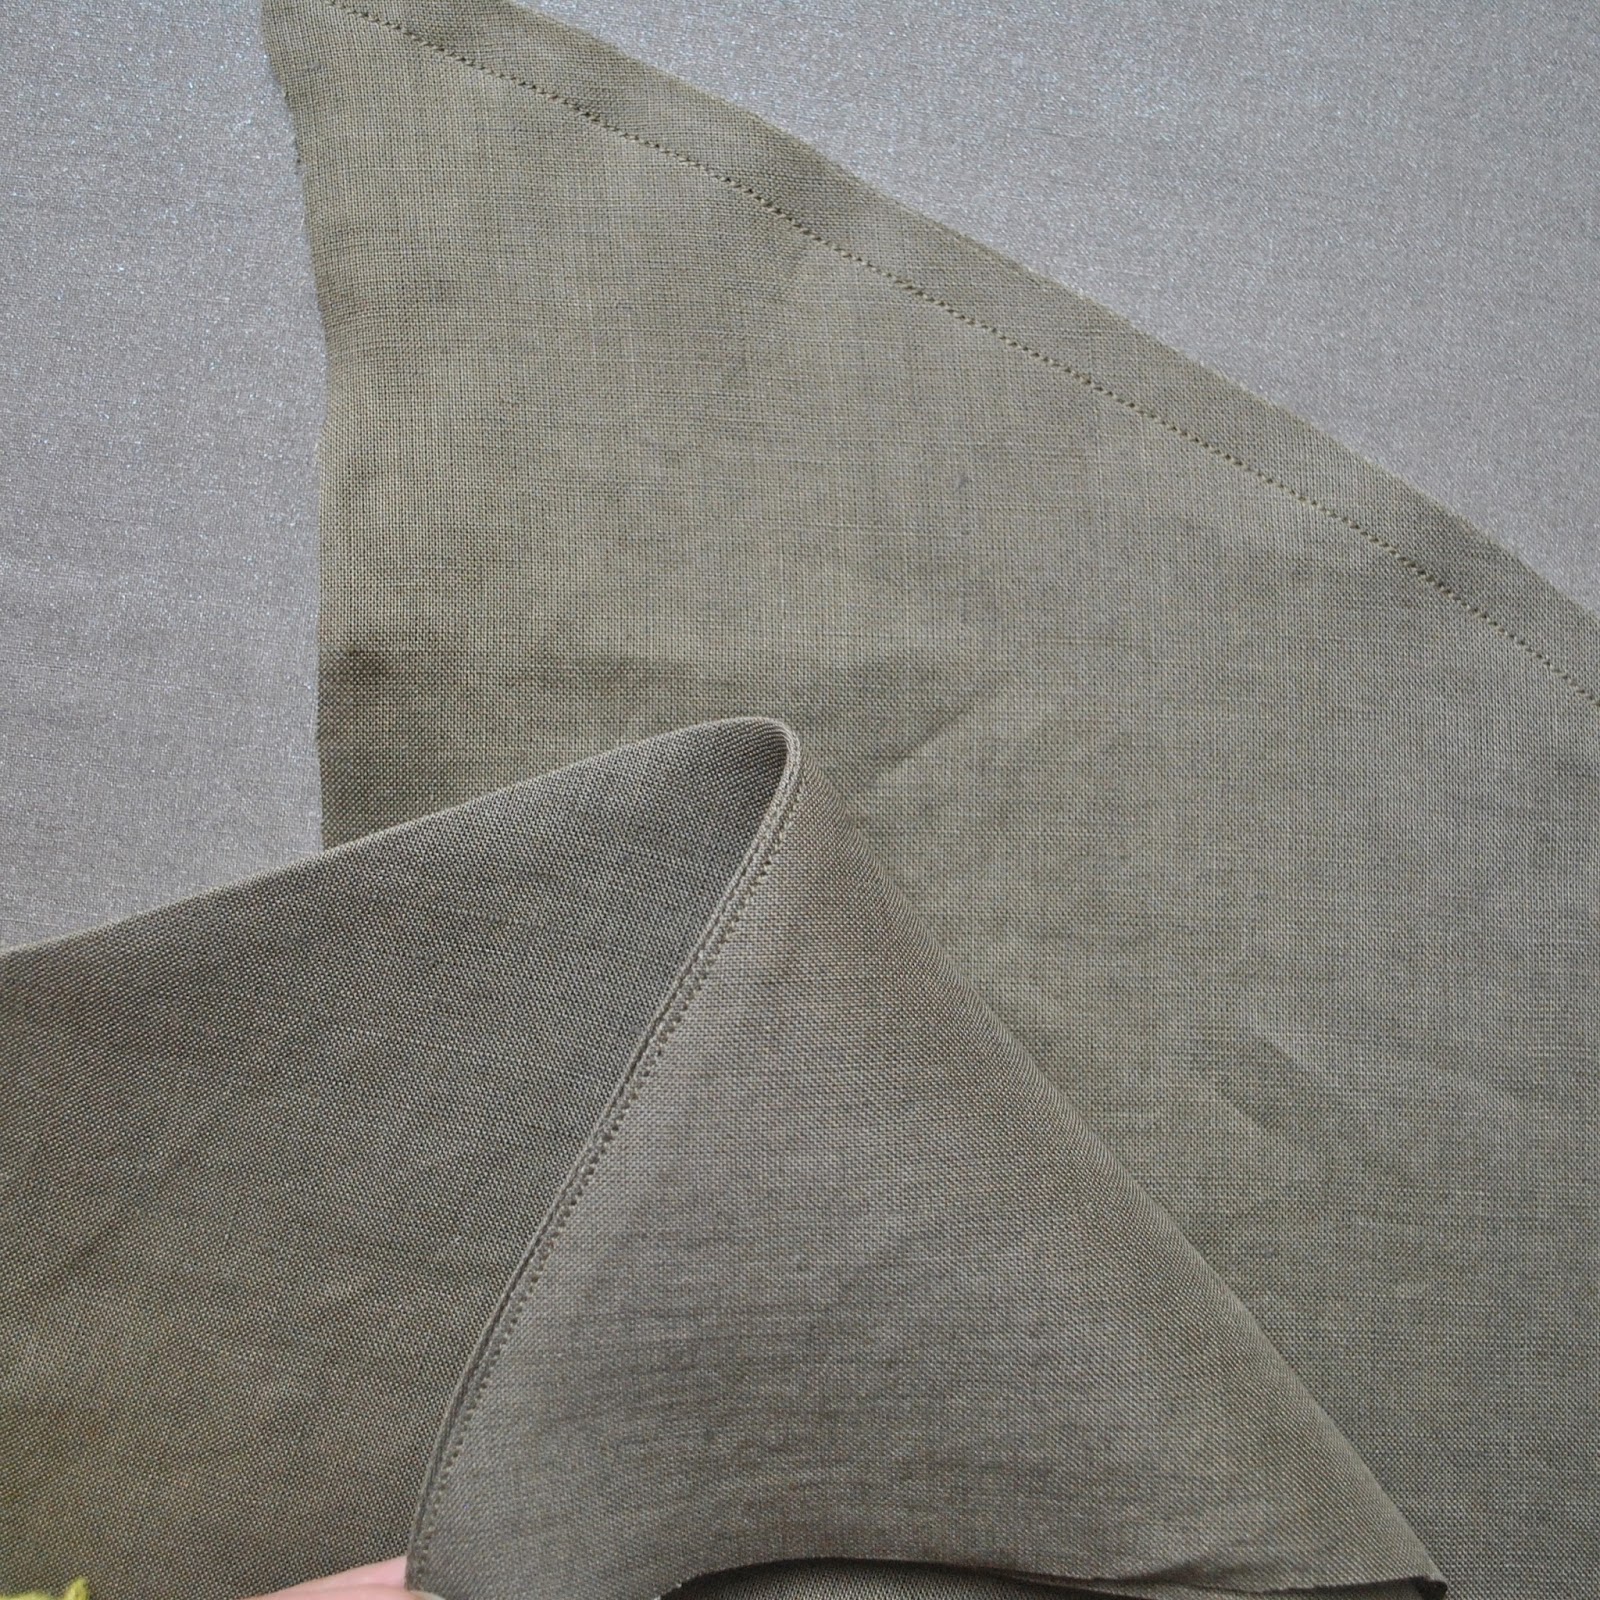
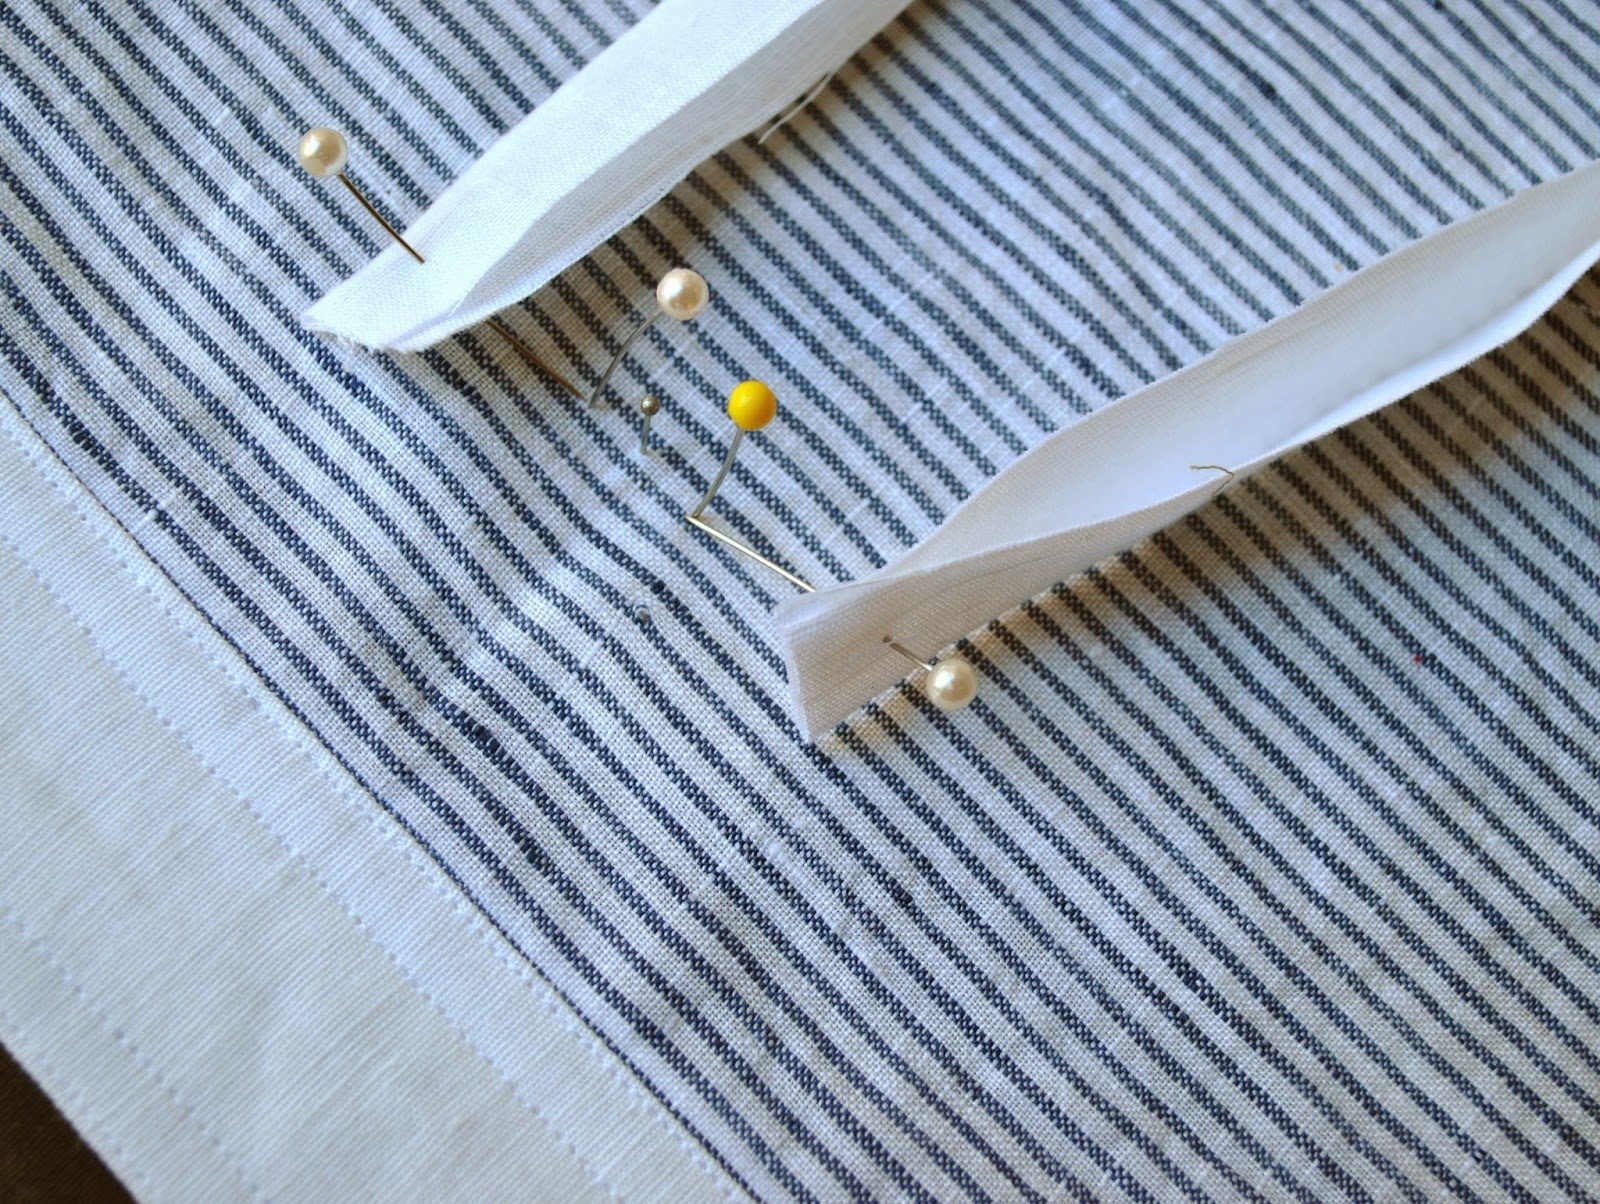
 Lay lower S front/pocket piece over upper S front piece, aligning notches, pin along side edges.  

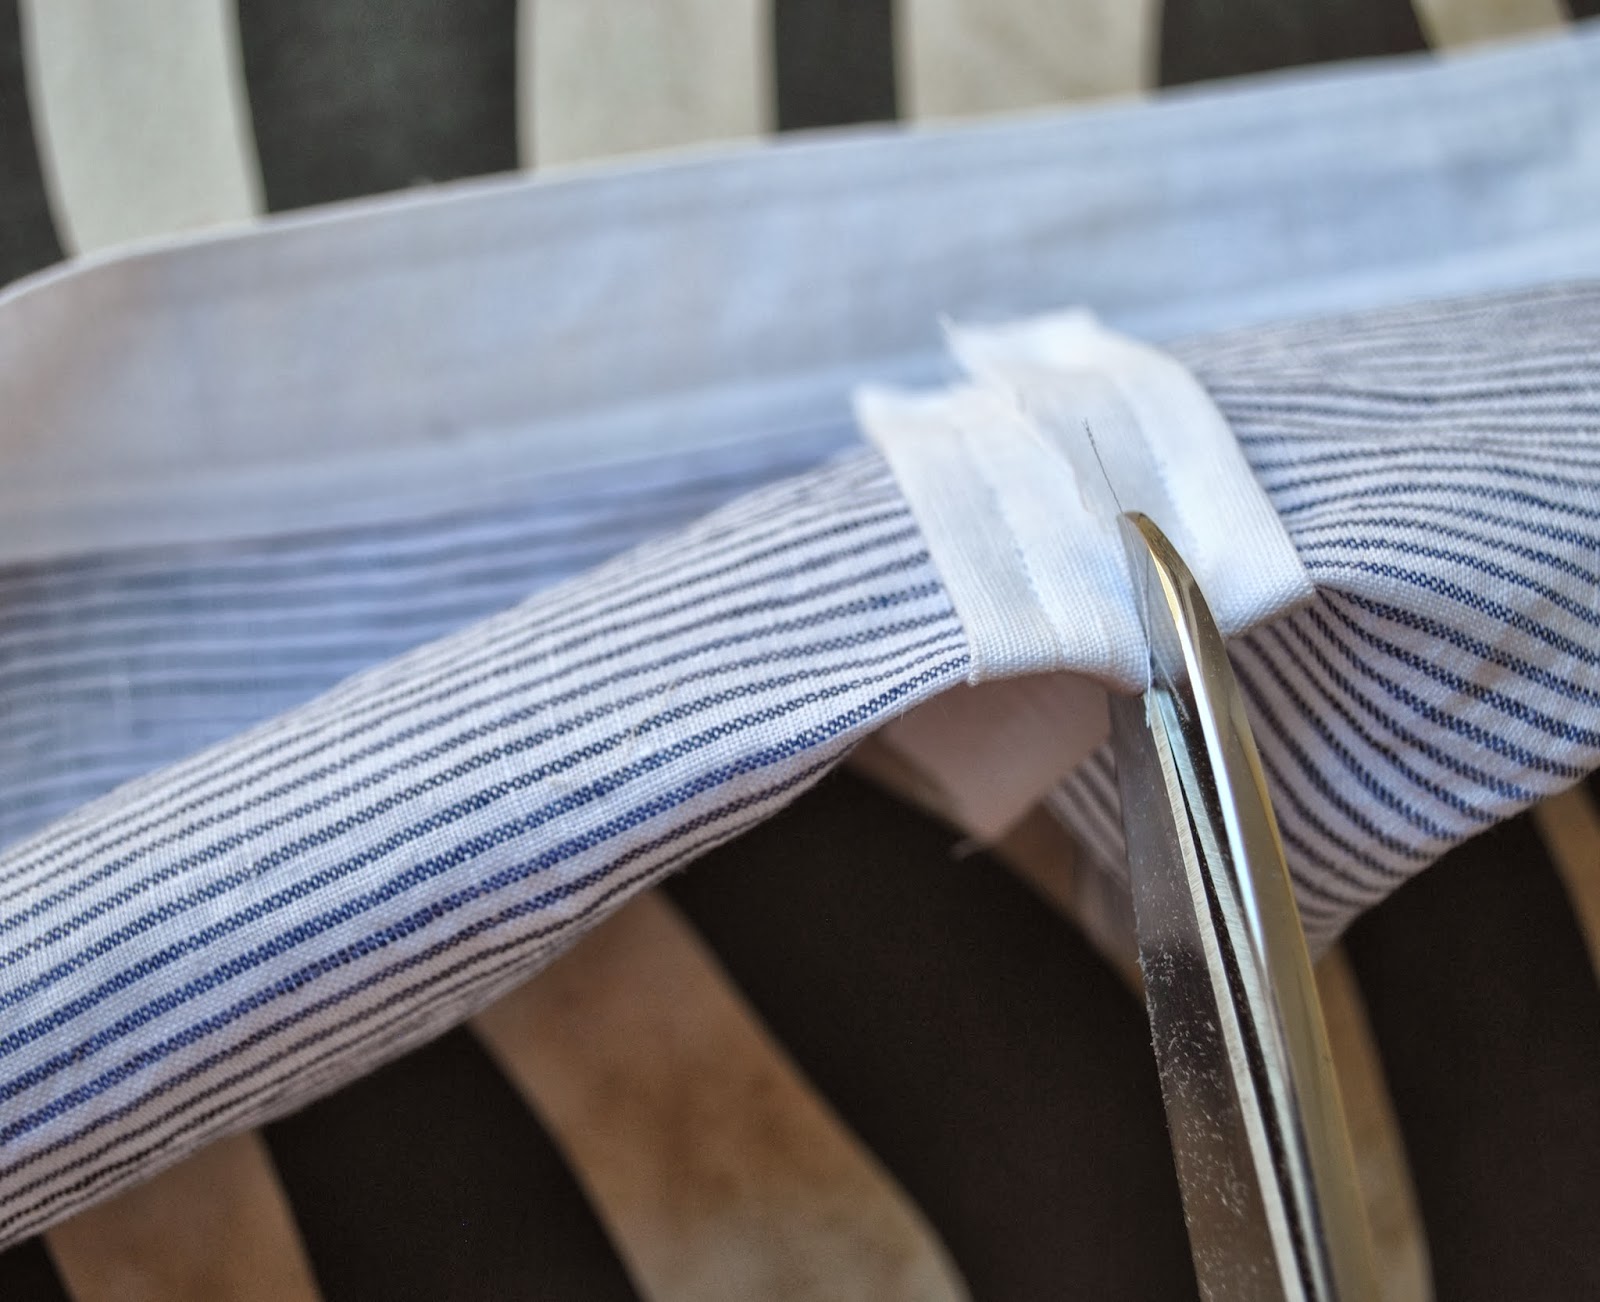
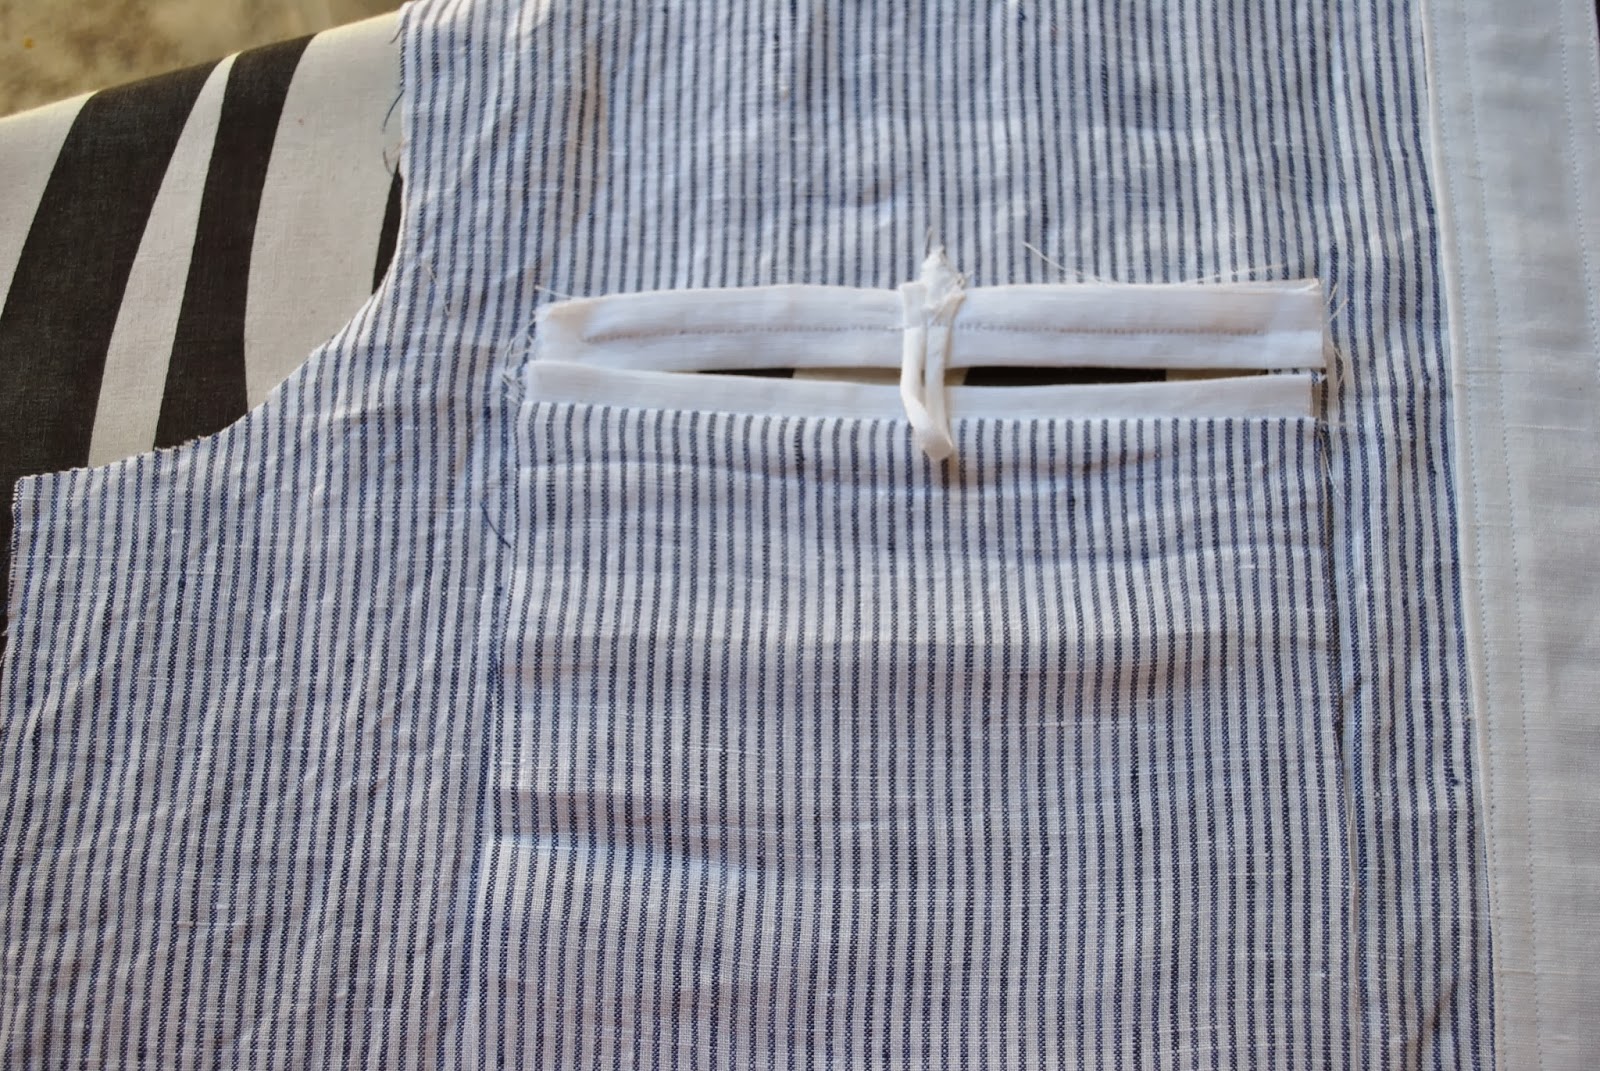
Lift aside the lower S front piece and check how well the lower edge of the pocket aligns to the lower edge of the upper S front piece.  If they differ, trim them to match each other.

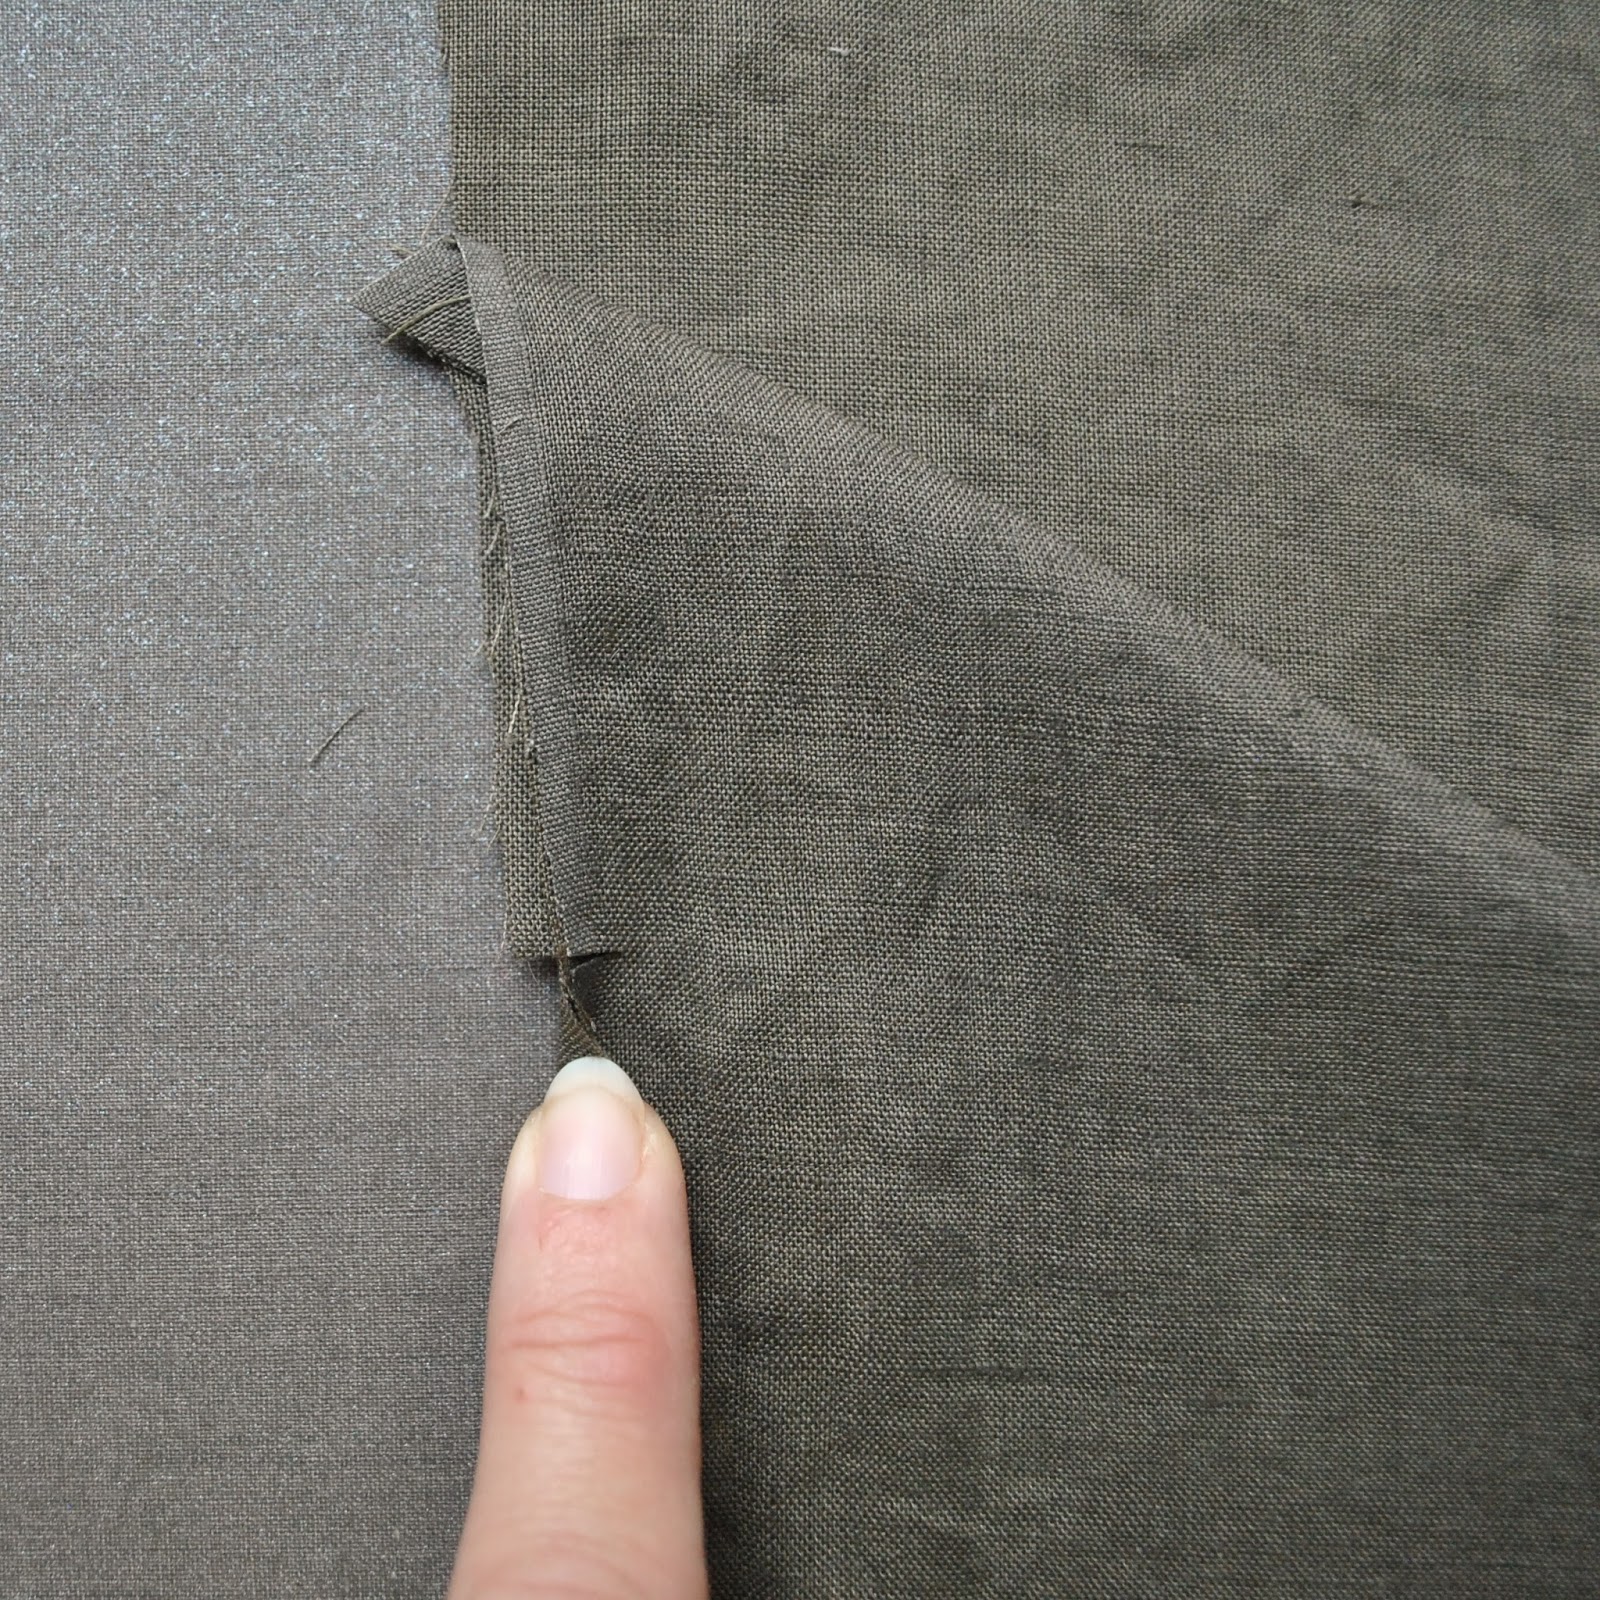
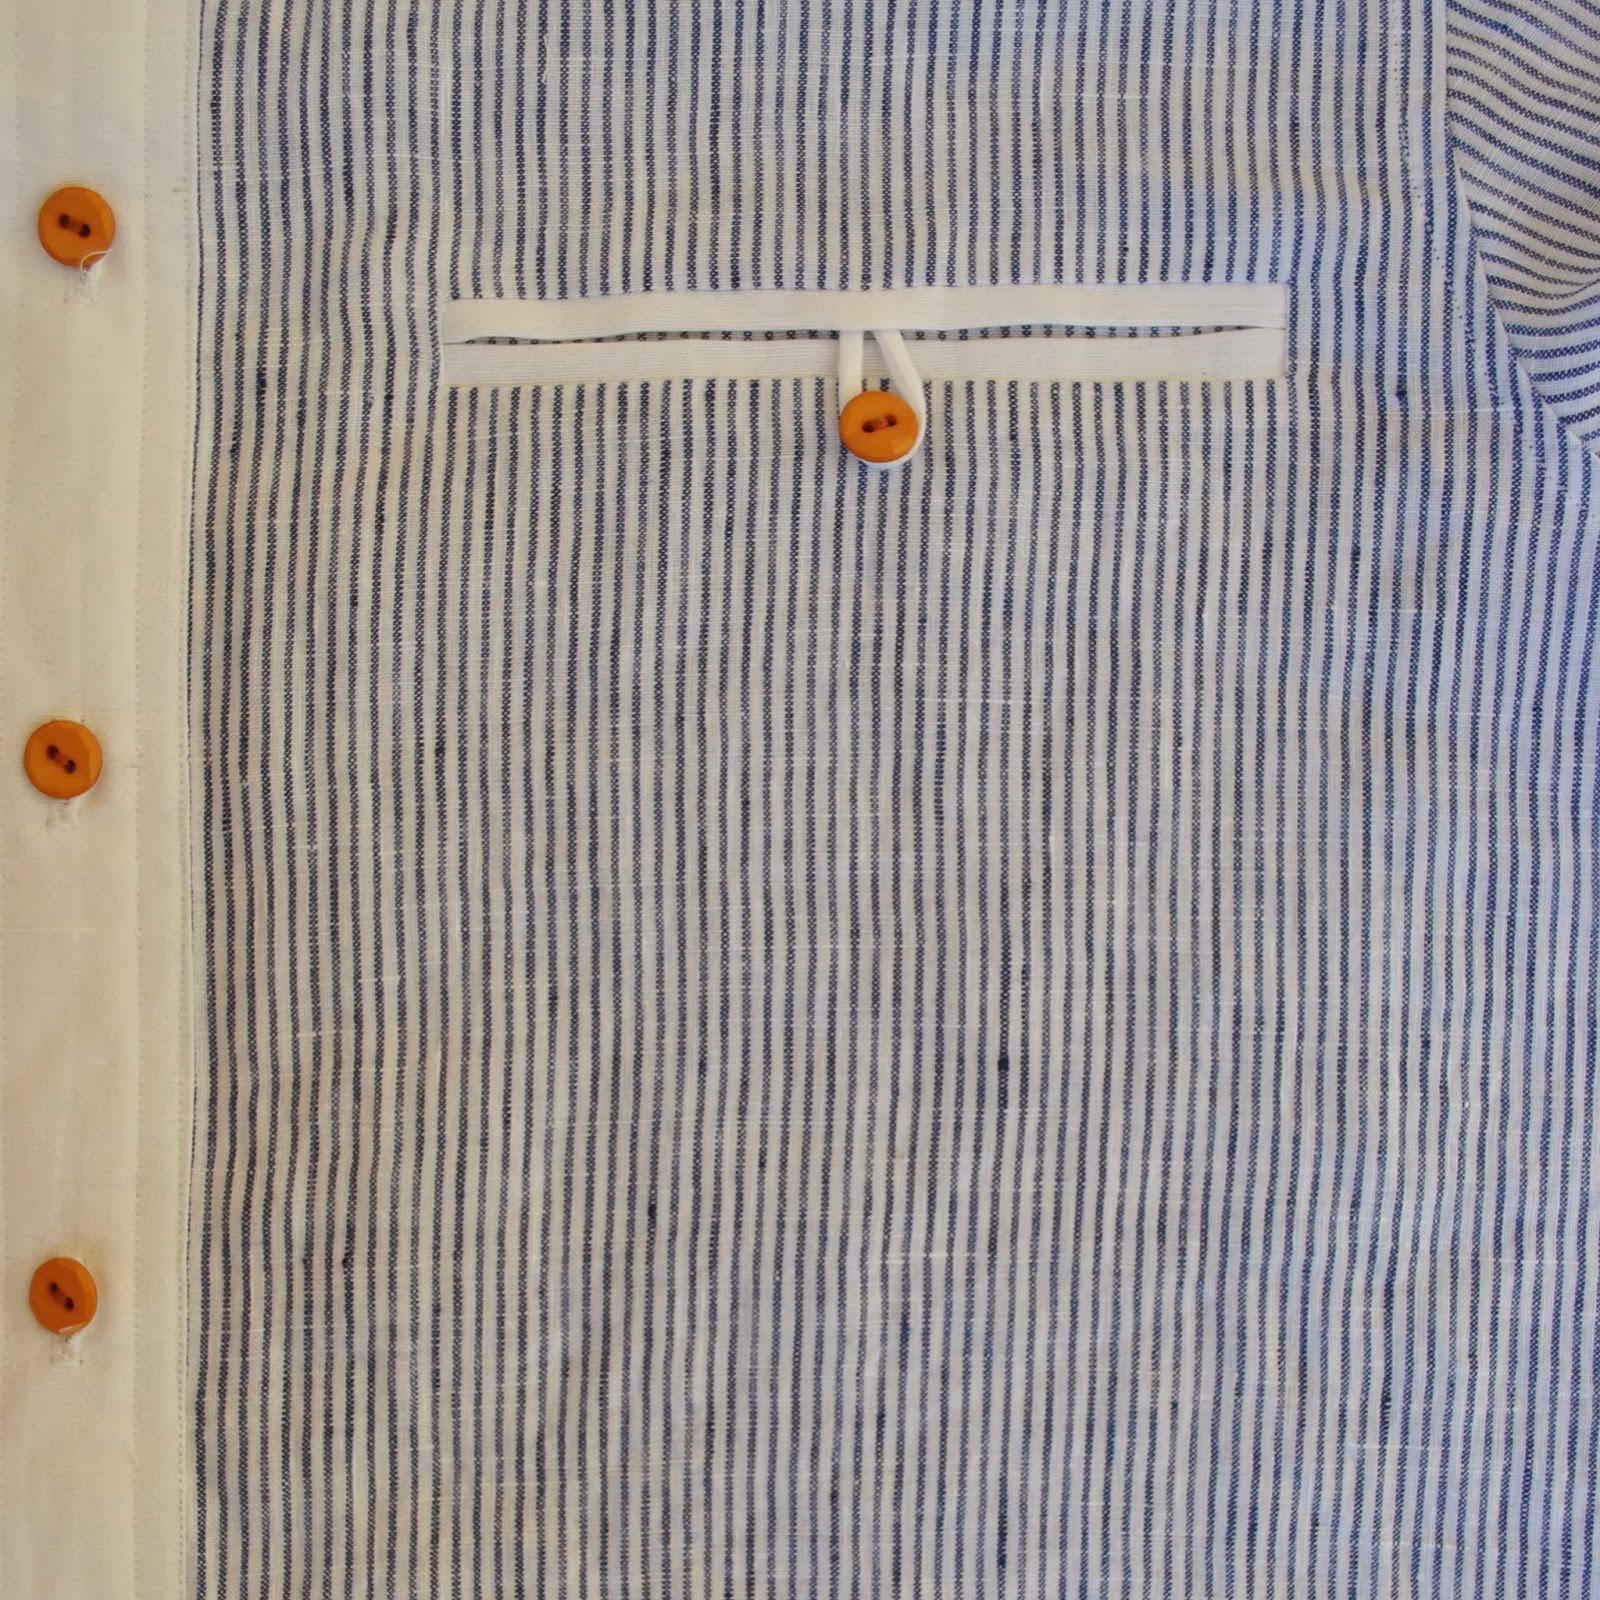
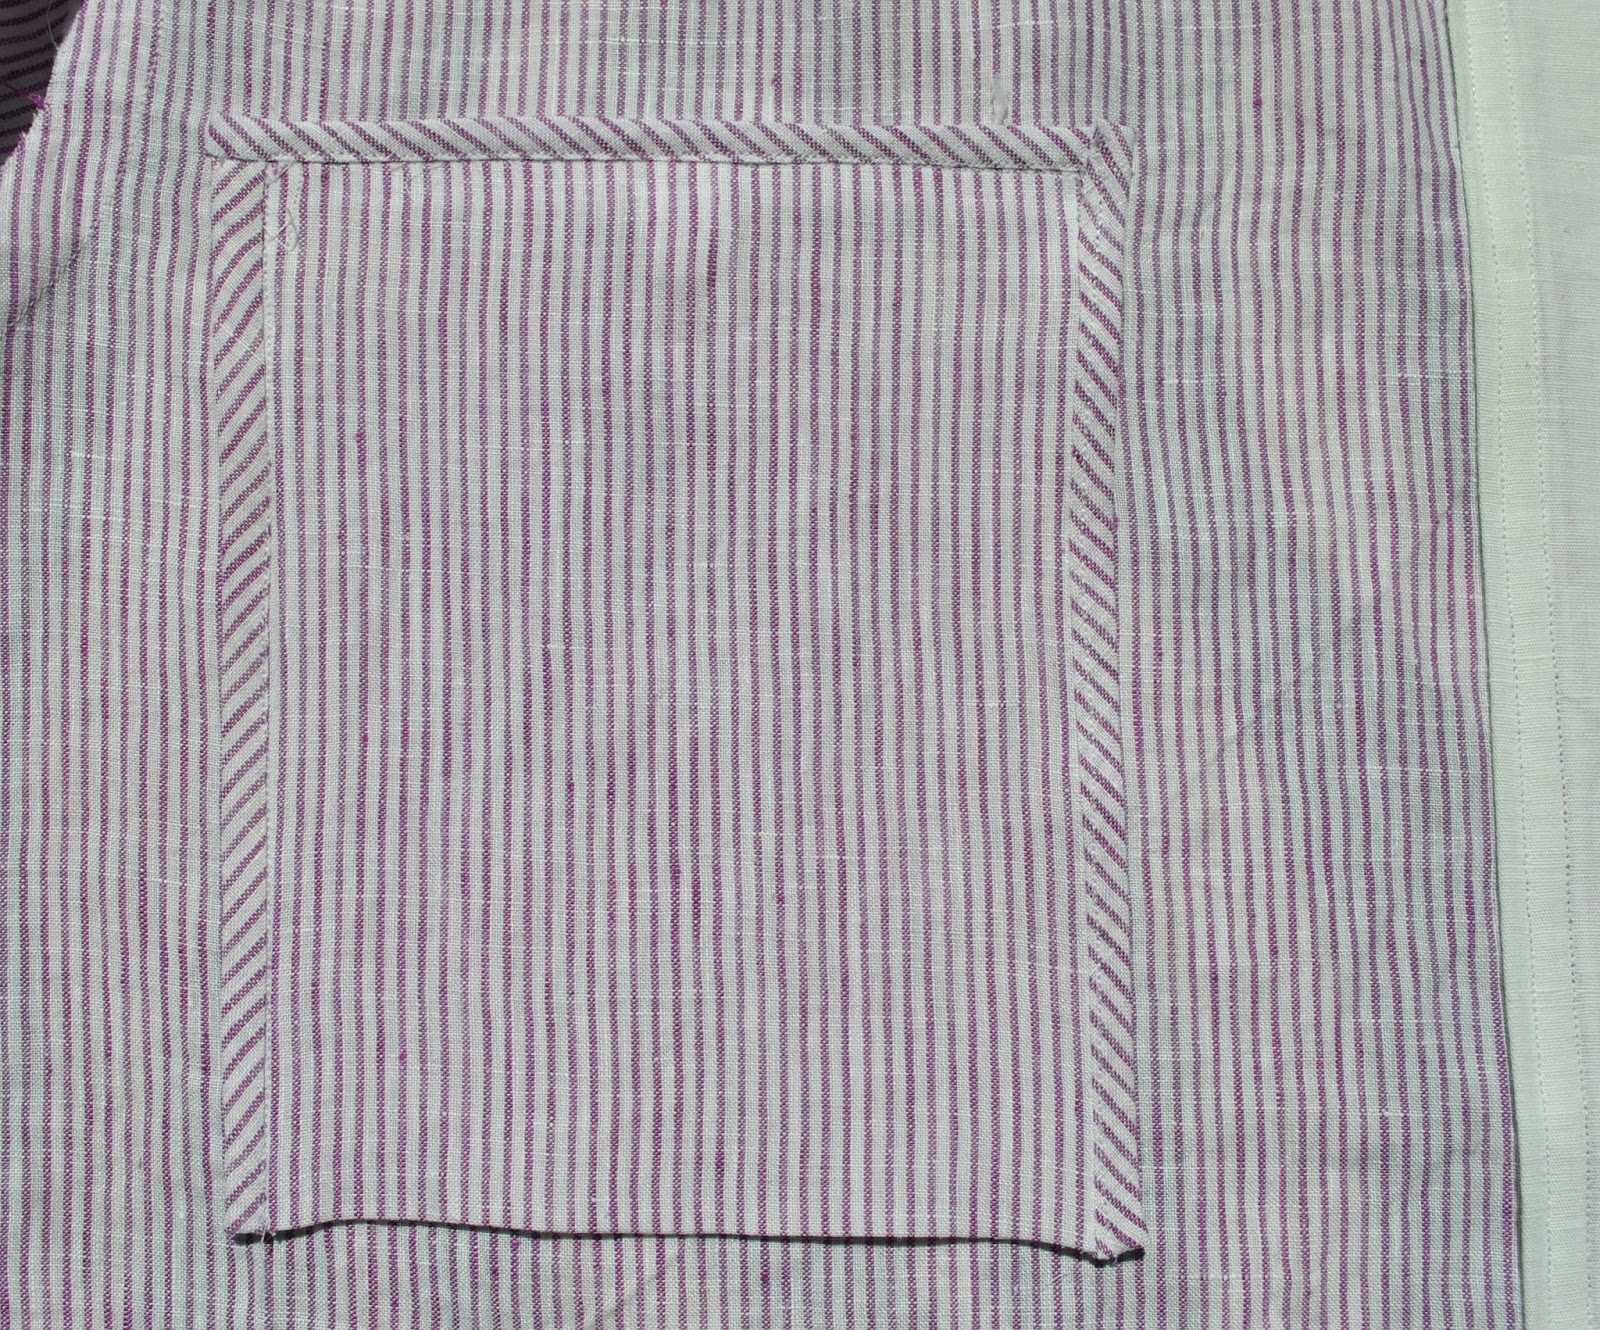
 Stitch lower edges of pocket and upper S front piece together in a French seam.

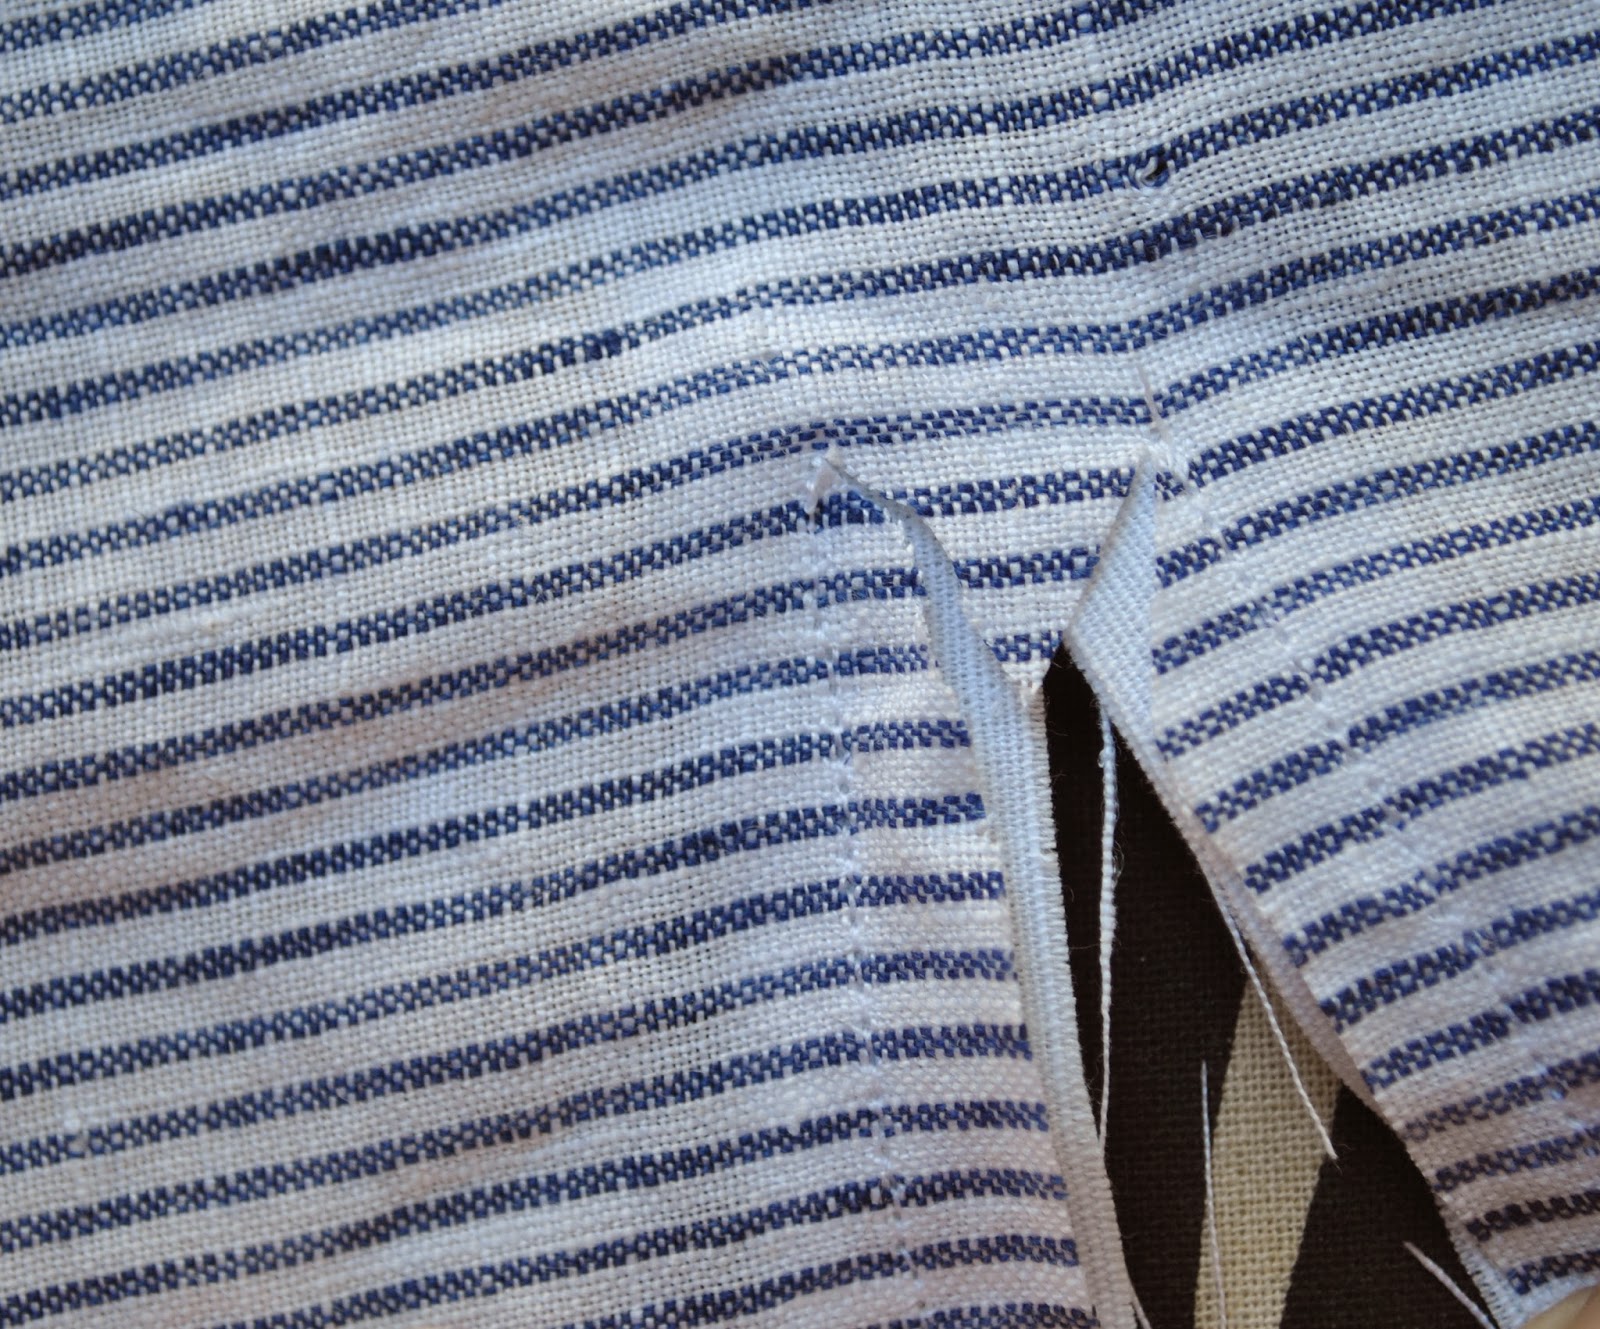
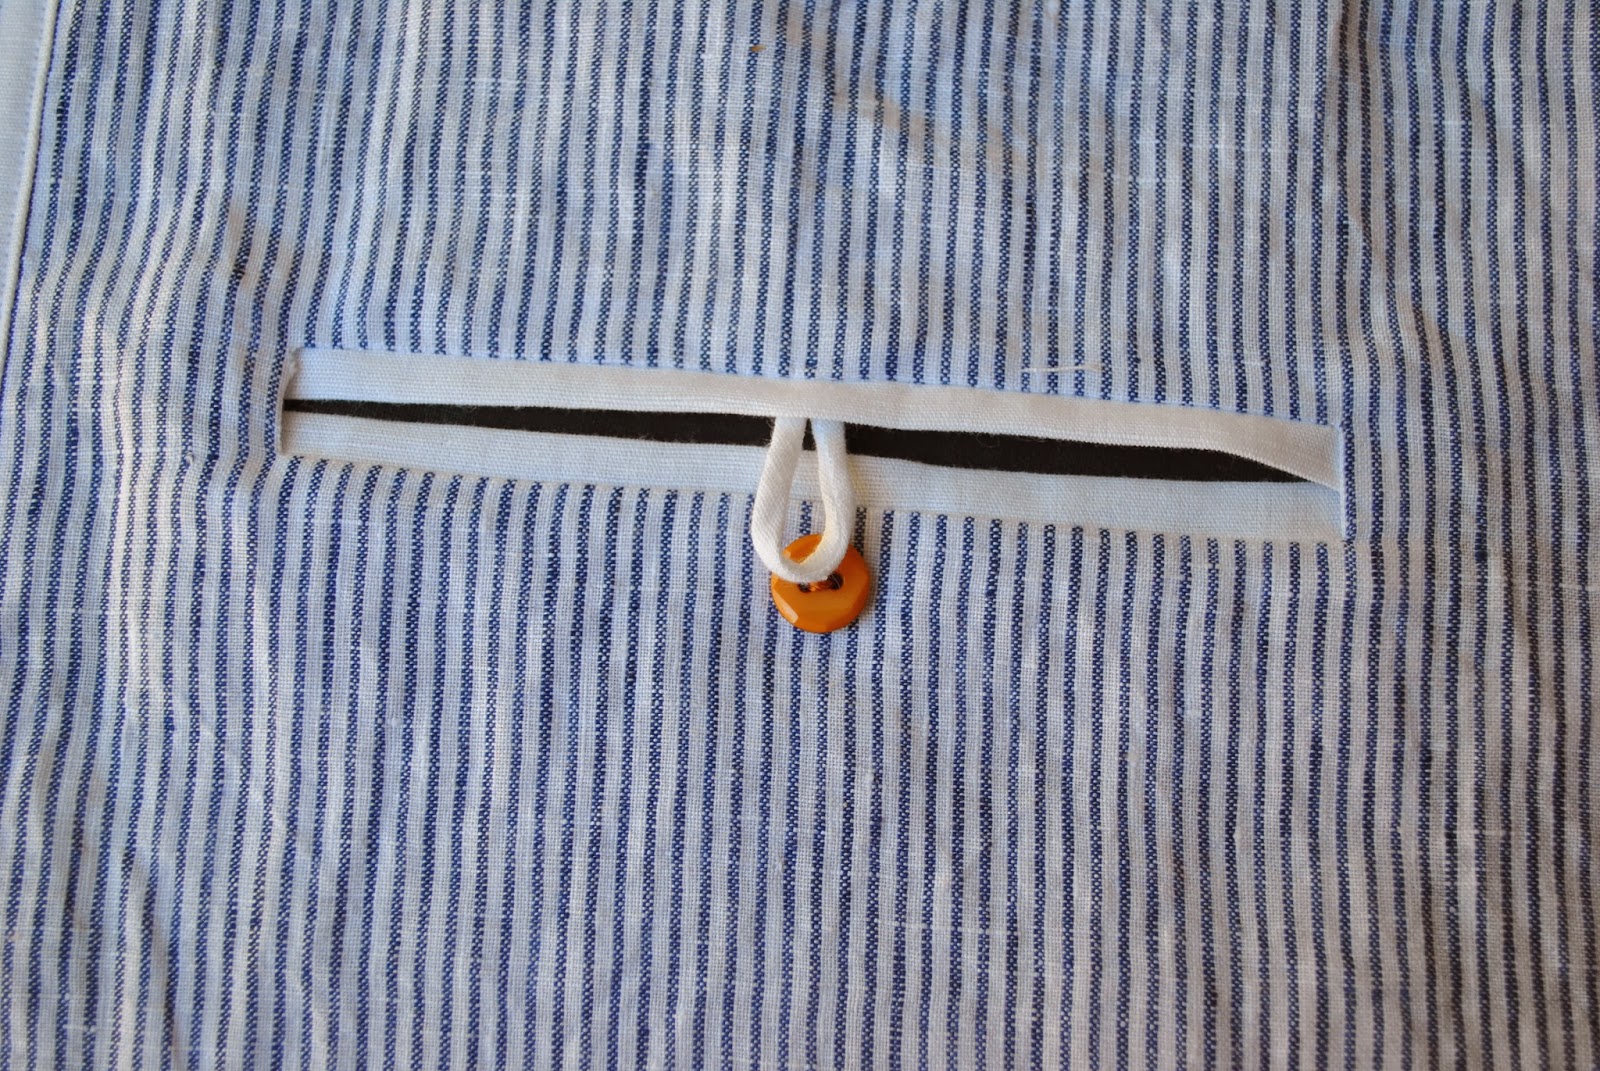
 Pin the three layers of upper S front, pocket, lower S front together at side edges, baste.

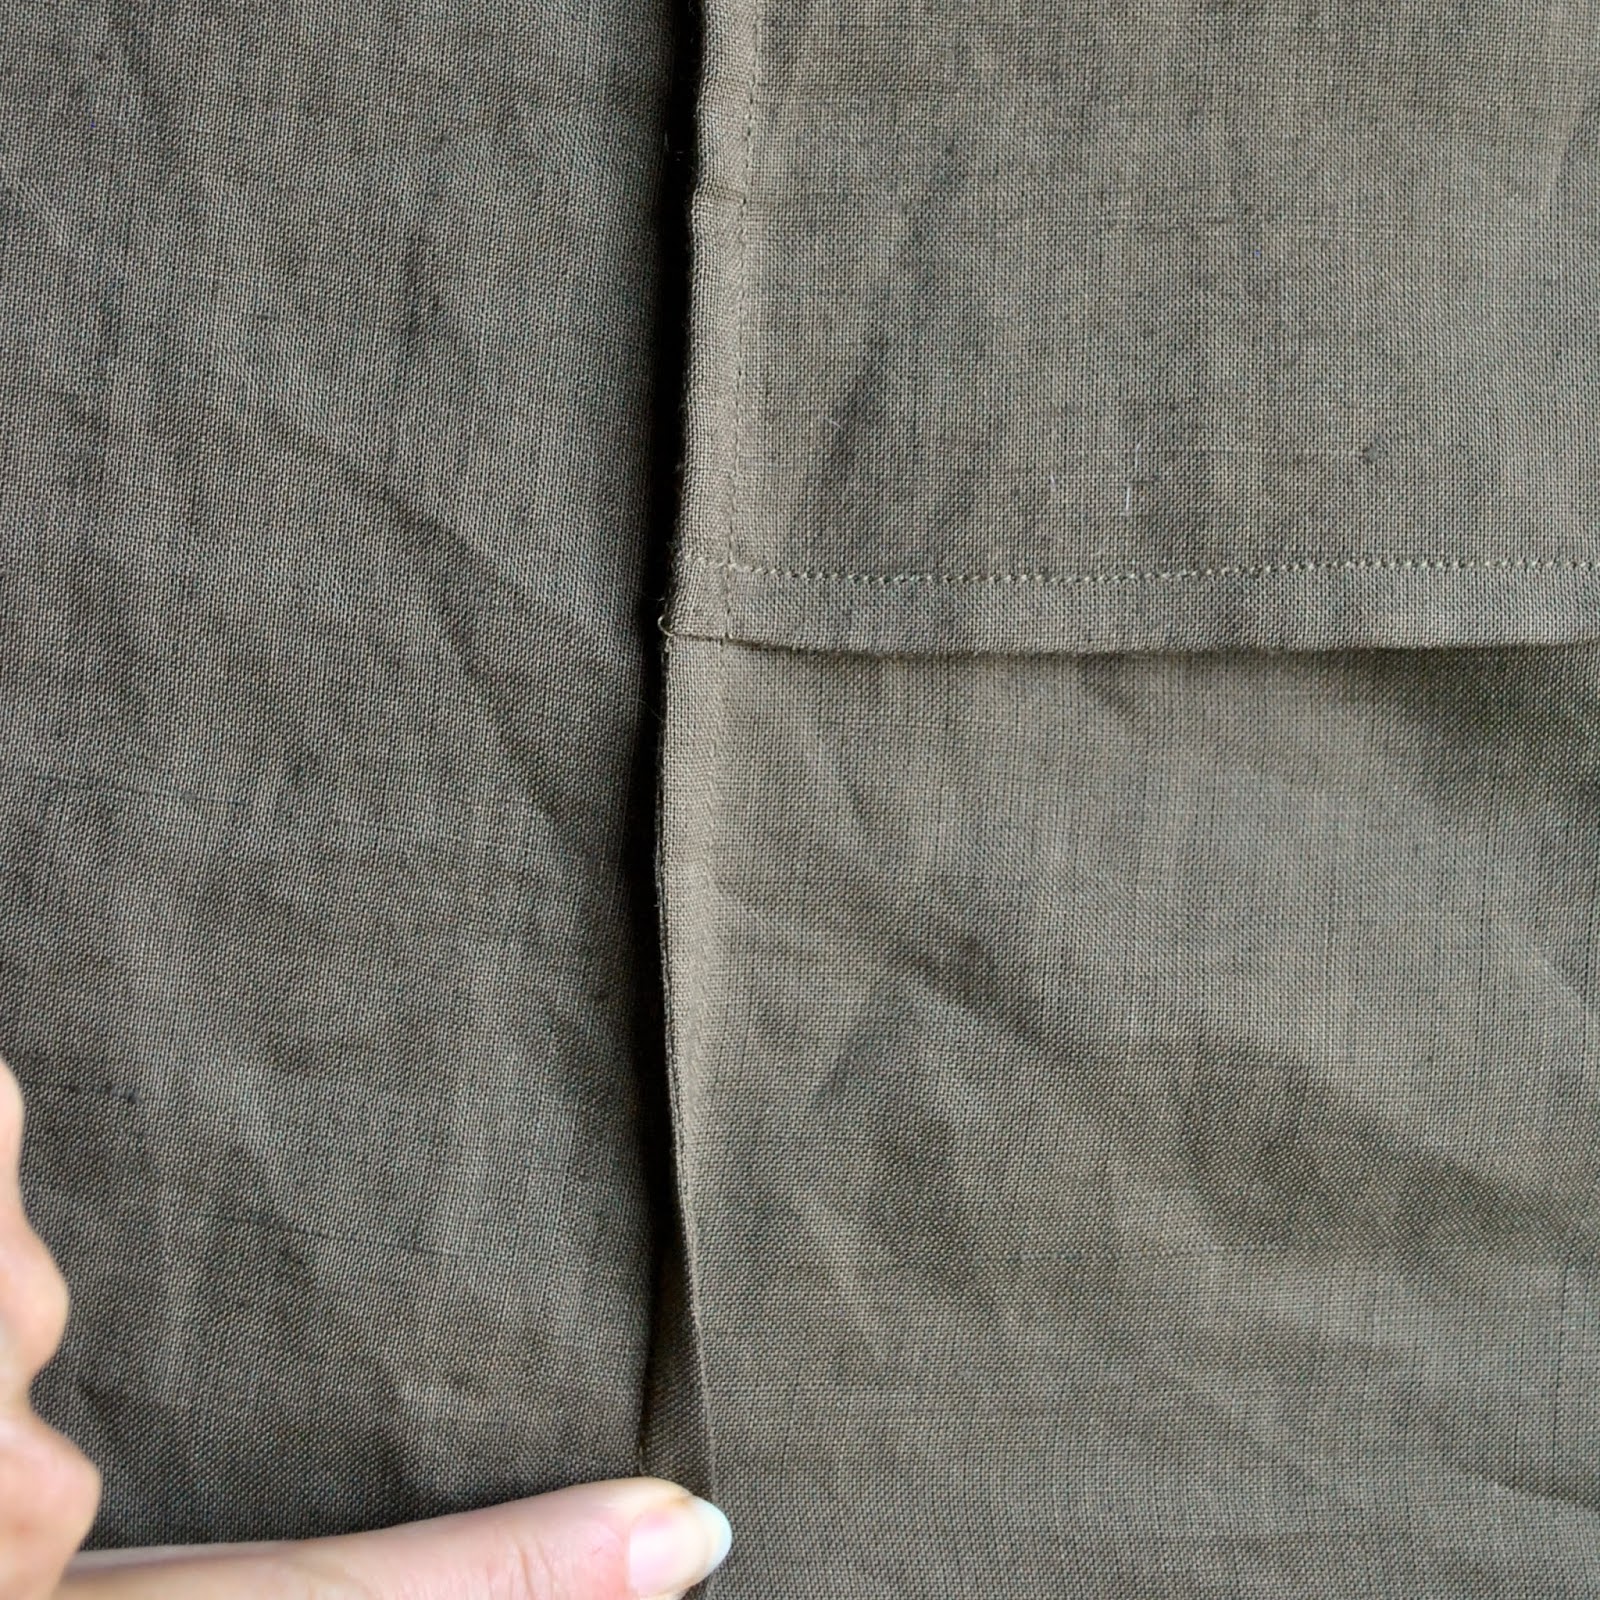
 Lay the original side front pattern piece over and trim any excess length off the lower edge.  From now on just keep on putting the dress together just as normal.

Voila! slanted front pockets!

btw; please know that, as always, there are no affiliate links on my blog and never will be.  I received the patterns free, for me to make an item to help spread the word, and I chose to use the Mississippi dress pattern 🙂

Details:
Dress; the Mississippi Avenue dress by Sew House Seven; in deep olive linen with cream lace appliqué
Hat; Vogue 8844, cream cotton corduroy, details and my review of this pattern here
Shoes; Bronx, from Zomp shoes

pinterestmail

purple skirt, with “tulip” pockets

I’ve made a new skirt.  This new skirt is un-noteworthy except that I gave it some rather unusual little side pockets.  They sit down at the hem, inserted in off-set side seams.  They’re not very big pockets, just a nice size to hold my fitbit and maybe my phone at a stretch.  Really, I was playing; got the idea to put them in a skirt and went for it.
The pockets are based on those in this picture, which ?I think? is from a vintage design.  To accommodate them in this otherwise very plain little skirt I drafted for myself a 4-panelled skirt pattern using an old favourite Vogue 1247, a straight skirt with waistband, as a starting point.  I treated the pattern like a “block”, and spliced, cut and spread and sliced and rotated to eliminate darts etc to make a 4-panelled pattern with a narrow front and back and two, even narrower, waist-to-hem side panels which host the pockets.  
Fabrics; outer and lining fabrics are both from Fabulous Fabrics, a greyish purple silk hessian for the outer shell from the remnants table and burgundy polyacetate for the lining fabric.  I only had 60cm of the silk hessian, barely big enough for anything at all!  Extreme laying-out skillz were employed, hehe.

lining was cut using spliced-together Vogue 1247 straight, with the waist darts simply pleated into the waistband.
The grey cotton jersey edging on those pocket panels is harvested from off of an old Tshirt of Tim’s, and lack of fabric forced me to use it for the waistband facing too.
front view is kinda boring
So…  skirts.  I’ve been having some deep thoughts.  Well, about as deep as can be expected on the subject of skirts, which is approximately puddle-depth in the scheme of things … but still.
Keeping tabs of my wardrobe over the past few years has not been totally fluff n’ puff with no substance, believe it or not some actual useful conclusions have been reached.  *gasp!* 
Into Mind writes about finding your “uniform” and I find I tend to favour two quite distinct and different kinds of skirts; plain and straight “little” skirts like my new one here and then longer, three-quarter length ones that can be a bit more visually interesting, more pfouffy with layering and/or detailing. 
During winter, well I could happily and comfortably live in the former, plain, straight, little skirts, all winter long.  I like to wear jeans every now and then, but really, if I’m being honest, skirts are just far more “me”.  
It’s nice to have some skirt-and-top “outfits”, that go together so well they don’t need to go with anything else, ie. my Alabama Chanin ensemble; but obviously solid-coloured separates are the absolute best workhorses for mixing and matching the sometimes disparate elements of my wardrobe.  Colourwise, I have seasonal favourites and basics and neutrals, sure, and I also like to have some odd colours, “outliers” in my wardrobe to choose from too, to suit whatever changing mood I’m in.  And, I don’t know if it’s because I pluck them from my wardrobe more frequently, or because of their straight shape, or both; but all my “little” skirts always seem to bag out and die more quickly too.  
Sadness ensues.  Cue tiny violins.
Anyway, just some random thoughts.  Ergo, I’m stocking up on some little skirts in a few different colours.  So sensible!  It’s early to judge it yet, but I think this sludgy purply-grey colour might be a totally excellent one in my winter wardrobe.  It’s not obviously a neutral, nor a colour, but manages to be a bit of both, if that makes any sense at all.  We shall see, we shall see…  ðŸ™‚
 back view, also kinda boring

Details:
Skirt; my own design, derived from Vogue 1247 as a “block”, deep purple silk hessian
Top; the loose drape top, modified, from drape drape by Hisako Sato, white cotton jersey, details here
Shoes; Zomp, from Zomp shoe boutique
pinterestmail

Inseam arrow welt pockets

My example shows a skirt pocket with a 16cm length opening edge bordered by 1cm width welts, although obviously all measurements can easily be altered to give any width of welt or pocket desired.

Apply a strip of iron-on interfacing to the wrong side of the garment, where welt pockets are to be situated.

Fold bias cut welt strips wrong sides together and press, pin to the stitching line of the garment edge; with folded edges to the outside.  Mark the upper and lower points of the long edge stitching line.  It is essential that the upper and lower markings on each welt be as square as possible and give exactly the same length on each side; in this example, the stitching lines are 14cm long.

Stitch, starting from exactly the upper marking on each welt and finishing exactly at the lower marking.  It is most important that your stitching be an even width from the outer folded edge of the welt, rather than the cut edges.

Snip the seam allowances of the garment from the raw edge in to the first and last stitches of the previous stitching, taking care to not cut into the welt.
Turn the seam allowances of the welt inside the garment and press.

Mark on the folded edge of the welt the upper and lower tips of the arrowhead, in this example 1cm out from each stitching line for a 16cm finished pocket opening.

Turn out the garment over the welt again, with the snipped seam allowance splayed over the welt and raw edges squared.  Pin through from the previous marking to determine where the short seam will end, secure seam allowance to welt with another pin.

Stitch from the snip point diagonally out to the marked top point.

Turn welt back out, press; stitch the remainder of the garment seam from the upper/lower points of the welt out; press open.

Pocket pieces; in this case I pieced the wider pocket piece with a strip of the self-fabric at the opening edge; this is the under pocket piece that will sit under my hand in situ.  

From inside; open out the welt again and pin the relevant pocket pieces right sides together to the seam allowances of the welts.  Stitch pocket pieces to the welt SA from underneath the welts ie. with interfacing uppermost.  This is to ensure that your stitching goes directly and exactly over the previous welt stitching line.

Stitch the pocket pieces together and finish edges.

From the right side of the garment, stitch in the ditch through all layers along the two short diagonal edges of the arrowhead.

And, ta da! finished!

pinterestmail

studio faro pocket dress

New dress, with interesting pockets.
While browsing Pinterest, as you do, I came across a line drawing of a very elegant dress on and I immediately knew I wanted to have a go at drafting it for myself.  It is the pocket drape dress designed by Anita, of studio faro.  Subsequently I discovered her absolutely fantastic blog well-suited, where she very generously shares her considerable expertise in understanding how designs actually work.    If you’re interested in exploring and understanding pattern making then Anita’s blog is totally brilliant; sure to inspire and motivate.
I’d previously measured and made a custom-fit darted sheath dress sloper for myself during my early explorations of Pattern Magic and I used this to draft my pattern, following Anita’s guidelines pretty closely.  I made a first test version using an old sheet.  It worked, but well, ahem.  I have to admit I looked less than chic in that thing.  I think my drape was a bit of an epic fail.
However I decided I really did love the pocket, so I went with having the pocket on both sides.  Also I fiddled about with the crossover neckline, put in a few random folds and made it asymmetrical.

The deep side pockets have flap openings that are an extension of the bodice side panels.  They are fully functional pockets, but their positioning with the opening sitting up high at the waist makes them not really conducive to shoving your hands in.  So, not as practical as they are decorative.  Well, I could put a few small things in there that I don’t need to get out in a hurry.  The pockets are perfectly useable pockets, but just for things, and not hands.  But still…  a very cool design, and I reckon they look really interesting  🙂

The pockets are kinda hard to explain… they are inset into the side of the dress and have an extra piece which is part of but also sitting over the pocket, that extends into a flap hanging loose and free past the bottom of the pocket.  
Working out how to construct the pockets was quite an enjoyable puzzle, and I really enjoyed the process of nutting out a way to put it together neatly!  I don’t know if my way is the way Anita intended for it to be made, but it worked out OK for me.  I think  ðŸ™‚
I’ve written my instructions at the end of this post, mostly for myself, if I ever want to make these pockets up again.  Please be warned that they will probably not make sense to anyone not making up the pockets…

the pocket detail; underneath is a fully functional, 2-layer inset pocket

In the muslining stage I found that the pocket sagged down on the inside, pulling down on the pocket flap; and so decided it would be better to add a lining to the front and back side panels above the pocket, and to “tether” the top edge of the pocket to the side panel lining, by sewing the panel lining lower SA to the upper SA of the pocket bags.  Having a lining added some much needed hidden support and keeps it all holding up and together, nice and stable.
Subsequently I decided to go the whole hog and properly line the whole dress in the same creamy polyacetate.  I used the same pattern for the lining pieces.

inside view; lining of side panel and inset pocket

The fabric is a rich cream, silk dupion, slightly slubby yet still with a subtly glossy sheen, and a decadently crinkly texture.  I bought it at Fabulous Fabrics forever ago and it’s been living quietly in my stash, patiently awaiting its turn.  It had gone slightly yellow but I gave it a good wash and it came up lovely and fresh, seemingly as good as new.
So I like my dress.  Well, it’s OK.  It was not easy, ahem! and I’ve decided my self-drafting skills are kinda rubbish.  And even though I thought my muslin looked dreadful I have a sinking suspicion that maybe it was more interesting that way.  I think maybe I could’ve stuck with the drape, hmmm.   *sigh*
But I do love how the pockets look and I very much love that I have a nice fresh off-white dress to pop on for summer.  So I will wear it very happily.
And now all I want to do is just leap onto some commercial pattern, already drafted up for me, ready to go, easy peasy, no thought required, neat and tidy like.  Yeah.

The Pocket: feel free to skip this bit if you want.
So, you have the pocket detail, the pocket bag, the pocket bag lining and the pocket flap facing.  Also the back side panel, front side panel and their lining pieces, which have the pocket flap facing allowance  removed …
Sew pocket detail and pocket bag R sides tog at top edge, turn, understitch.
Sew pocket bag lining  to pocket bag, R sides tog at bottom edge.
Sew pocket flap facing to pocket bag lining R sides tog, press pocket flap facing up.
Sew back side panel and front side panel R sides tog at side seam, press open, repeat for panel lining pieces.
Sew lower edge of joined panels to pocket flap facing R sides tog, trim, clip side panel pieces into corners, turn pocket flap out, press.
Align and layer 3 pocket pieces together and baste tog at sides, clip into the SA of pocket detail at junction with pocket bag lower edge.

For the side panel lining; and this is where it gets a little more complicated…
the dress pieces need to be assembled except for the shoulder seams and keeping the lower part of the pocket detail free, and the dress lining assembled likewise, leaving out the pocket lining which is attached to the dress already, meaning there is a “hole” in the dress lining where the pocket lining should be.
 Sew the dress to its lining pieces together at the underarm and neckline seams, understitch the lining as far as possible, turn; then the side panel lining pieces can be sewn to the upper pocket bag seam allowances on the inside, W side to R side.  Clip into the corners, then the SA around the three remaining sides of the dress lining “hole” can then be stitched to the pocket lining seam allowances inside, R side to W side, between the dress and its lining.
The lower pocket detail edges are turned under and invisibly hemmed by hand.

All that might seem a bit convoluted, but trust me, if you are putting together the pocket it does work!

pinterestmail

blue ray

Winter is officially over here, so right on target I’ve finished a wintery little dress.  ðŸ™‚ 
I spent some quality time with my dyepot, dyeing bright blue corduroy in four different moody blues for the colour blocking.    This is my second version of Vogue 1316; I’ve dreamed up several different plans for this great pattern which I want to explore, including this one…  
One of the things about a colourblock design is that I think it’s more effective if the fabrics are all the same type and weight etc.  As well as the colours blending in and going together nicely somehow.  And it’s hard enough to find great fabric that you love, in great colours that you love too, let alone a single fabric in four great colours that you love, and that go together harmoniously.  Impossible!  So I made my own nicely co-ordinating set of coloured corduroys  ðŸ™‚
My originally bright blue cotton corduroy is from Spotlight.
I divided the pattern pieces up into their colour batches and laid them out on my fabric, leaving a good margin around each piece to allow for a little error, just in case, then cut the colour batches apart for dyeing.  Before dyeing them I overlocked all raw edges to decrease the risk of distorting or stretching out the pieces during the dyeing process.  

I labelled each piece and was super careful to keep each label with its piece throughout the process and not get them mixed up!
my tutorial for basic dyeing here

I used iDye in various strengths of Black, Crimson and Chestnut; to get, from left:
-deep inky navy, from a biggish dose of Black, 
-royal purple; from a medium biggish dose of Crimson
-deep teal/aqua; from a medium dose of Chestnut, 
and finally the rightmost batch was soaked overnight in the leftover bath of Chestnut just to take the edge off that brightness, tone it down and dirty it up a bit.  The piece on the right is a small scrap of the original colour saved for comparison.

I took my own advice and put in pockets that sit underneath those long curved hip bands again, as described here.  Yes Vogue, I improved your pattern.

The dress is fully lined with navy blue polyacetate and I used a long, navy blue invisible zip.  As previously, I re-shaped the dress to be a little less boxy and bit more hourglass-y by re-fitting through those long back seams that run almost the full length of the dress.  A useful feature!

I’m so happy with this dress! it’s funny; I’m rarely 100% happy with things I’ve made but this project is pretty close to being completely satisfactory for me.   I’ve made another highly satisfying thing recently too, which I am yet to photograph and blog about.  The weather needs to warm up a touch first, but I’m so excited about that one too! I have to say, making two things in a row that I’m super happy with, in quick succession, has put me on SUCH a high. Honestly, I wish I could bottle this feeling.

Details:
Dress; Vogue 1316, blue corduroy dyed in 4 different shades using various iDye dyes, my review of this pattern here.
Tights; self-drafted, navy blue stretchy stuff, details here
Boots; Roberto del Carlo, from Zomp shoes

pinterestmail

Jim jams

Mundane, but oh so welcome and necessary.  I’ve been absolutely freezing!!! at night lately and my old winter jammies were as thin as! so this was highest of high on my list of priorities.  But it had to still sit waiting patiently in the wings for the all important Magicka robe to get made first, ahem.
Both top and bottom are made from nice and warm fluffy cotton flannel from Spotlight; the top is a modified version of pattern 121/122 from Burdastyle magazine 10/2009 and the bottoms are kinda self-drafted.

The top: actually I’ve been eyeing off this Burda magazine pattern for yonks and dreaming of making it up in a suedette and this new jammie top is sort of my “muslin”, if you like.   I loathe wasting fabric on muslins and nearly always prefer to make something hopefully wearable, even when testing out a new pattern for the first time.  So; this PJ top.  It was a little bit hideous in its first, unmodified state; I ended up shortening it by about 12cm; slanted off the front neckline to be a V-neck and sewed the slit together at three spots which were covered up with three little buttons.
All the seams are sort of a faux version of flat felled seams.  By this I mean I sewed all the seams normally, overlocked the raw edges cutting close to the seam stitching and then laid the seam allowances to one side and top-stitched them down 5mm (1/4″) away from the seam stitching.

at left, “looks” like a properly flat felled seam, but on the inside, o noes! it’s plain to see now that this is the cheat’s version…

I also added an interesting breast pocket; this was also a rough try-out for this pocket that I pinned a while ago.

The bottoms; standard regular baggy trouser bottoms with an elasticated waist.  I made them the same way I’ve been making my PJ bottoms for yonks now: namely years ago I saved an OK-fitting RTW pair that had had it, and cut it up for a pattern.  I’m saying “self-drafted” because I’ve made multiple minor modifications, in this case an added a faux fly front, narrowed the waist and raised the waist rise, made them wider in the leg and longer in the leg and added in-seam side pockets.  My advice, PJ bottoms are like the easiest thing in the entire world, so when you are looking for a good pattern, just cut up an old pair for a pattern and make your own little modifications, do whatever you like, it’s almost impossible to stuff up PJ bottoms.  Easy peasy, and you can spend that money saved on the fabric for your new pair instead!

Details:
Top, modified version of Burdastyle magazine 10/2009, 121-122, cotton flannelette,
Bottoms; self cobbled together, cotton flannelette
Socks; hand-knitted by me to a 60’s pattern, details here

pinterestmail

“swoosh” welt pocket

To those who showed an interest in the swoosh welt pocket on my Tao blouse; thank you 🙂 and it was my take on this welt pocket for which Patty wrote a very in-depth tutorial.  The fabric I used for my blouse is quite light-weight; allowing me to devise a simplified method  as follows  …
Sketch the shape of the welt.  Then accurately trace the two halves onto a small piece of the fashion fabric with plenty of room around each,  and including the overlap on both sub-sections.  You could also just trace the shape in entirety, making it as a one-piece welt.  With hindsight that would be a bit easier; but anyway it does look kinda cool as a two-piece welt…
Lay another scrap of fabric under the traced sections and stitch along the top curve, extending the stitching well past the pencilled lines to allow for seam allowances.

Trim, grade and clip seam allowances outside the stitching, turn out, finger press the curves out, and press flat.

Using the original sketch to check for placement, pin the left-hand welt into position over the right-hand welt.  Open out the left-hand half and stitch it into place onto the other half; exactly over the previous stitching.

Determine where the welt pocket is to be sewn on the garment; mark its position.  Cut a strip of iron-on interfacing big enough to cover the area of the welt, and apply this to the wrong side of the garment to stabilise.

Cut a rectangular piece of fabric for the pocket lining and trace onto it the welt shape, using the sketch from the first step.  Position over the stabilised section of fabric where previously marked, and stitch garment and pocket lining together, following the perimeter of the traced welt.

Snip along inside the centre of the stitching, and out into the corners and turning points, grade and clip curves.  Turn the pocket lining through to the inside of the garment, finger press out along the stitched curves, and press flat.

Pin the welt in position behind the pocket opening, and top-stitch along the short sides and along the lower curved edge.

Inside, trim the lower edge of the welt.  Being careful to keep the garment free, pin the pocket backing piece to the pocket lining.  Stitch around the edge, finish the edge either with overlocking, zig-zag stitching or pinking.

Last step, from the right side of the garment, top-stitch through all layers along the upper curved edge of the welt.

C’est fini  ðŸ™‚
pinterestmail

Double welt pocket with looped button closure

I wrote this tute just before Christmas then completely forgot about it …! anyhow 

This is a pocket often used as the back pocket on mens’ trousers although of course you can add one to whatever garment you wish… in this case I have used for the breast pocket on a mens’ tailored shirt.

Measure and mark the position of the welt pocket.  My welt pocket measures 13cm x 1.5 cm  (5 1/8″ x 5/8″).  Cut two strips of fabric equal in length to the length of the welt pocket plus two seam allowances, and equal in width to twice the height of the double welt; in this case my strips measure 15cm x 3cm.  Also cut a strip of fabric on the bias for the loop closure.  

Stitch the bias strip, and cut the stitching threads leaving a long length, at lease as long as the bias strip itself.  Thread the long end through a needle, and with blunt end leading, pass it through inside the strip.  Turn the strip right side out.

Press the welt strips in half lengthwise, wrong sides together, and place pins in each to mark the length and width of each welt.  In this case, a length of 13cm and a width of 7.5mm.

With the pressed folds of the welt strips facing out and the open raw edges towards the middle; put these pins in exactly the same pinholes as those previously made to mark the welt position.  Arrange the welts to lie smooth, flat and straight.

Stitch the long edges of the welt, in an exactly 13cm long line, positioned exactly 7.5mm in from the folded (outer) edge of the welt.  Note; the folded edge is the visible and therefore the important one here; the accuracy and precision of your stitching MUST be relative to that outer edge).

Fold to snip into the centre of the welt. and cut to about 1cm in from the start and finish of the stitching. From this point, snip outwards in an inverted arrow shape into the very corners of the welt.

Turn welts to the inside and pin the loop closure in position to the seam allowance of the upper welt, at the centrepoint.  Stitch.

Pin the pocket piece to the lower welt seam allowance, and stitch exactly over the previous stitching.  Press down.

Stitch a button through both thickness of fabric; the shirt layer and the pocket layer, for stability, using the loop closure to determine the position of the button.

Fold up the pocket piece and pin to the seam allowance of the upper welt.  Stitch exactly over the previous stitching and press.

Complete the box of stitching around the welt by catching down the little triangles at the outer edges.  Continue stitching down the sides seams of the pocket.

Finish raw edges by overlocking or zig-zagging.  You can also finish by binding with bias binding; I tried doing this for the pocket of one shirt, the purple pin-stripe pictured below.  It looks real nice but it made the pocket feel kinda bulky and stiff.  I would probably  just stick with the overlocker in future.

pinterestmail
Switch to mobile version
↓