Tag Archives: Tutorial

Flat-felled seaming

Flat-felled seaming is a good finish for a seam where there might be some strain and so where a bit of extra strength is a good thing, such as shoulder seams.  You see it on jeans too… Also where double topstitching a seam allowance down is indicated, such as the armscye seam allowance on a tailored shirt, or the princess seams on a tailored ladies’ shirt.  I used flat-felled seaming in the latter way on my little triple-collared sleeveless shirt made last month, and took a few photos to illustrate…
Sew the seam and press the stitching, as normal…

Press the seam allowance to the side that it is to lie permanently…

Carefully snip the underneath seam allowance to just less than half its width, taking care to NOT snip the upper seam allowance…

Fold the upper seam allowance over the lower narrower one, encasing it inside, and press… This is pretty easy to get nice and even if you are sewing a relatively straight seam, such as a shoulder seam.  It takes more careful pressing to get this bit nice and even if you are flat-felling a slightly curved seam, such as a princess or an armscye seam.  If the fabric was not pliable and the edge was very curved I would even consider running a gathering thread along that upper seam allowance to help it fold in and sit flat, but we’re talking extreme couture stuff there!  Something for another tutorial… 

Stitch down…

Finished! and doesn’t it look nice from both the inside (at left) and the outside? 
It might seem like a bit of extra work, but it is only a leetle bit of extra work, really!  Increasingly, I’m aiming for my clothes to look just as good on the inside.  I think well finished garments are such a joy to wear, to launder and to, well, just to have.
Sounds so dorky, but I do get such a buzz if I feel something is truly the best I could make it…

pinterestmail

Knot buttons; a tutorial

I made knotted buttons of self fabric for my Kelly-green cardi; and Gail asked for a how-to… well I had taken a few photos while I was making them but had sorta decided against posting a lengthy series of pictures in that post because I thought people might find it not interesting; so thank you Gail, for asking!
I saw this knot in a Vogue pattern (1107) and even though the Vogue instruction sheet has a nice computer-drawn set of diagrams, a lot cleaner and neater than my efforts here; I have re-drawn them because I’m not sure whether for me to photograph even one step from the Vogue pattern instruction sheet and put it here is trampling copyright (does anyone know??)  But just in case I am not going to even go there….!!  But I can’t see how a knot is “owned” by anyone so I did my own drawings and instructions and I hope they are clear enough.  It is not a particularly difficult knot.
Firstly I made two long spaghetti tubes of the fabric.  You make these by folding a 2.5cm (1″) x (roughly) 25cm (10″) long rectangle right sides together and sewing along one long edge in a narrow 6mm (1/4″) seam, cutting the two machine threads to be nice and long long long.  Trim the seam allowances of the tube and thread those long tail threads into a needle; and feed back through the tube to turn right side out (with the blunt end of the needle leading, for obvious reasons!)  to make a long narrow cord for knotting.

Now for the knot…
(Note: in each step; the new instruction is in bright green, with the previously executed steps in grey.)
Firstly hold the cord with your left hand with a short tail and loop the end over itself and to the right…

Then loop the long end back over the first loop again and under the first junction…

Thirdly; take that long end and weave it through the four loops of cord created in the first two steps; first over, then under, then over, and finally under and out…

Gradually tease closed and tighten the loops of the knot together to be a nice, firmly and evenly arranged knot.

One at a time, cut the ends, turn under and slipstitch the ends neatly and invisibly on the underneath of the knot.

Voila! C’est fini!

pinterestmail

Wave-y welts; a how-to

Some mistakenly thought my wave-y welts were ric-rac; well they’re not!  I made them myself!… although if you do have access to such a thing as giant ric-rac (I have never come across any such thing! but then Perth is a small place) then I suppose you could use it for these welts if you want…   As it happens I did take a few photos during the process of making these… partly so I could have a record myself of how I did it since I was doing this on the fly, but also  just in case anyone was interested in making their own shaped welts for a pocket… and some were, so thank you so much for asking!!   😀  
I had laid down my hand and drawn around it to get a pocket piece; and based the length of my welt on the length of the opening edge of this piece… and then drew out the shape I wanted for my welts on paper… this is a sine wave…  (that’s my geeky side coming out for you there, yup, I am a fully paid up member of nerds anonymous) Note; that although my shape is a sinuous curve; the four outermost corners of the design still form an exact rectangle…  having this will make it easier!  I also cut out four large-enough rectangles of my fabric and applied iron-on interfacing to two of them.

Draw the design onto the interfaced piece, do the second one as a mirror image.  Pin an interfaced piece to a non-interfaced piece, right sides together, and sew as slowly and as accurately as possible along your marked curves.

Trim and clip along the curved edges and turn right side out.  Press; with your finger inside to ease out those curves to sit smooth and even.  Voila; welts!  Well; potential welts… hehe, hang in there  ðŸ™‚

Now I tried on my dress and pinned the welts onto the outside of my dress where I wanted them to sit; so they were in a comfortable position for my hands.  This is an individual thing… for me it is at about hip-bone height, but it is also a toss-up as to where you want the welts to sit aesthetically, to be in a visually good spot on the dress.  I find a comfortable spot for my hands is quite wide-set, but I still wanted for both the welts to be quite visible at the same time from the front view of the dress…

Mark the corner points of the welt design onto your dress with pins, and check to make sure that your two marked rectangles (which are your welt positions) have the exact same dimensions as each other, and as your paper piece… also that your two welt positions are exactly equal distance from the side seams, have the same “angle” and are exactly level to each other on your dress (sorry if I am stating the obvious, but it is best to say it than not…they are a pretty stand-out feature and wouldn’t it be awful if after all your hard work one was “off’!)  I reckon it is also a good idea to double check on the inside, where it is easier to tell inaccuracies since the visual distraction of the actual welt is not there.

Carefully snip (the dress fabric only; be careful not to snip into your welt!) down the middle line of the marked rectangle, and in shallow angles  out to the corner points.  The shallowness of the angle cuts to the corners should be dictated by whether of not you have a sharp inner curve of the welt at the corner; cut the corner angle accordingly to be hidden by this…  Join one pocket piece to the inner cut edge of the slit. I joined mine in a French seam, but that is only because I am sometimes obsessive about raw edges…. this is not strictly necessary… then pin the inner edge of this seam to the underside of the welt.

Now for the other pocket piece; at this point I realised it needed an “extension” for it to fit properly inside the welt and onto the the other pocket piece, so I cut a rectangle of fabric for the second pocket piece and joined them in a French seam, then laid down the extended pocket piece onto the first pocket piece, aligning those French seams and the raw pocket edges…  

Turn in a narrow fold on the other long cut edge of the slit, and press.

Lay the extension on the second pocket piece over this fold, to be nice and flat and even; and pin the top single layer of that new fold together with the extension piece of the pocket… sew together in the ditch of the pressed fold.

I trimmed down that long free edge of the extension piece and tucked in the raw edge and folded the extension piece over and enclosing this seam allowance, and pressed and topstitched it down in the ditch of the previous seam, thus enclosing all raw edges.  Yeah, basically a flat-felled seam…  ðŸ™‚

Finally laid those two pocket pieces together, pinned and sewed together around the long curved edge.

On the outside; turned under the small snipped triangular top and bottom edges, and pinned and finger pressed them into place…

On the inside; carefully transferred the pins to the finger-pressed folds and stitched the short raw triangular ends to the welt allowances, keeping everything else free.

On the inside; invisibly fell-stitch the inner (unextended) pocket piece to the inside of the welt piece

On the outside, and using matching thread, invisibly fell-stitch the outer edge of the welt to the dress.

On the inside, trim the welt edges even with the pocket seam allowances, and enclose the seam in a HongKong seam.  Not essential, but it does look so much nicer and well finished, doesn’t it?

Finished!

pinterestmail

Turning old jeans into a skirt…

…  I decided it was high time for another refashion since I still have a small mountain of perfectly good fabric in the form of old clothing sitting in my stash.  eep!  Do you remember these jeans?   They had got a bit saggy and baggy about the crotch and seat area, thanks to me using almost-stretchless fabric.  Thus I learnt jeans really are so much better with a bit of stretch in them… anyhoo so I could barely stand to see myself in them as jeans anymore but the corduroy was still in pretty good knick overall, and I still absolutely looooove the colour.  It’s the perfect “white” for me, a sort of warm shade of grey-white that I love.  Oyster white, to get all referentially descriptive, if you like that sort of thing.  Yeah, I do too  ðŸ™‚
So.  I’ve seen dozens of jeans-to-skirt refashions on the net but none of them have ever ever appealed to me.  Why?  People can’t get past dealing with that big curved crotch seam, and will just leave it there, sew it down boom onto the front of their new skirt as is, and I just can’t bear that look.  When I do a refashion I want it to actually look like a skirt, thanks, and not for people to look at it and go, “oh, she obviously converted her old jeans into a skirt, yeah.  Hmmm.  Okaaaaay…  No attempt to do anything at all about that crotch seam….  And what about the rest of the fabric from the legs?  Why not make use of that somehow?”
So I gave it some thought and came up with this refashion (details below), that actually used up nearly all of the fabric from my old jeans.  The whole top bit, with the waistband, fly, side pockets, coin pocket and rear patch pockets is still there completely intact too.  I think it ended up looking quite fun and flippy, and almost sporty too, don’t you?

Details:
Skirt; my own design, a refashion of an old pair of off-white corduroy jeans (originally made by me too, using Burda 7863 here)
Blouse; Butterick 4985, ivory eyelet cheesecloth with lace trim
Cardigan; Country Road
Scarf; Missoni
Shoes; Bronx, from Zomp shoes

It was a pretty simple refashion…. firstly I cut off the top bit, and unpicked the curved part of that offending crotch seam.  

Pinned and resewed centre front and centre back respectively into a straight front and back seam… aaah; already, things are looking a lot more skirt-like here, right?   I also re-double-topstitched that centre back seam down again to match how it was originally…

Now for the legs bit…
Measuring and allowing for an equal depth hem cut each two leg pieces in almost-half horizontally.  

I wanted to keep the original hem down at the bottom of the legs intact, and so just unpicked a small area of hem near the outside leg seam… so I could unpick that long outside leg seam.  I chose the outside leg seam for unpicking like this since I had originally double-topstitched the inside leg seam down, and so the outer leg seam was a far easier option here…!!  And those double topstitched seams makes a nice random feature on the final skirt too.This gave me four largish pieces of leg, in pairs of two mirror images.  I used the lower leg pieces (with the hem mostly intact) for the skirt front and the upper leg pieces (which as yet have no hem) for the skirt back, and checking to make sure the nap of the corduroy is all the same way as each other and the top of the skirt, sewed up the side seams, and centre front and back seams.

The  next step was to arrange the excess fabric in the lower skirt piece into folds so that it fitted the upper skirt piece.  This was just a matter of measuring and arranging the folds to be as near as perfect mirror images of each other, front and back, and checking every now and again to see that it was fitting into the top section.  

Once the folds were all evenly in place I basted them all and then sewed the skirt top and skirt bottom together.  I top-stitched each fold down in place by about 5cm vertically, some single- and some of them double-topstitching.  Then hemmed the skirt back, to match the hem of the skirt front (which is already in place, and only required the centre front bit of the hem to be sewn into place…)

Voila!  A new skirt, and with very little waste!  The only waste fabric was from the crotch area, plus I ended up shaving a few inches off the top of the lower skirt section also to get a length that pleased me.  Note, I took length off the top of the skirt, not the bottom, since I was keeping that existing lower hem in place.  When re-fashioning a garment it is well worth incorporating those existing hems into your new garment somehow, since years of washing and wearing creates a permanent and very visible line of wear into the fabric, and a fold that will never ever iron out … thus removing length from that top area (that will just be disappearing into the joining seam anyway) is definitely the way to go here.

Better, yes?
pinterestmail

HongKong seaming

(OK, so I wrote this post a while back, during self-stitched September, and then just got caught up in the whole outfit-documenting side of things and forgot about it… ! so it may seem a bit out of date since I made this skirt about a month ago, hehe.  But HongKong seaming is still something that is always relevant, never out of style right?  So, here goes…)

It may sound silly but I often like for the insides of my wardrobe to look as well constructed and as well finished as the outsides, like those of the upper end designer clothes that inspire me.  Beautiful finishes give me a lot of pleasure whenever I lay eyes upon them.  And it makes good common sense to give both your fabric as well as your own time invested in your handiwork the respect they deserve by finishing off as well as possible.  Why?  Because your time is valuable, and you’re worth it!
HongKong seaming is a finish I sometimes like to add to the internal raw edges of unlined coats and jackets, and to those of my better skirts.  It is an especially good finish for high-fraying fabrics that are kinda special; such as silks, wools and blends of these; ie, fabrics that are worth it.  You know what I mean, right?
HongKong seaming may seem like too much hard work, but it is not really that much effort, honestly!  Big pluses; it only requires a very little fabric, looks pretty, and is the best way, bar none, to finish off the raw edges of thickish fabrics that fray easily. 
To finish off the seams of an ordinary little skirt plus enough for a wider bias binding strip to finish the hem, you only need about 40cm of a light or medium-weight woven fabric, ideally cotton or a polycotton.  Actually I only needed this much because I was cutting the pocket linings from the same fabric, you could easily get away with a lot less.  You can just use scraps if need be, no probs.  You can go with a matching fabric or a contrasting fabric for fun.  In the case of this burnt orange skirt I chose a contrasting burgundy for both the seaming and lining fabric.  (Yup, I know that no one but me will ever see the yumminess of these rich autumnal shades together, but this hidden colour punch still pleases me nonetheless!)  Wash a coupla times to remove the sizing and deal with all that pesky shrinkage.  Then cut a few strips on the bias; approximately 3.5cm (1 3/8 inch) in width.  I also measure the length of the lower skirt/jacket edge and cut a wider bias strip (approx width of 5cm, or 2 inch) for the hem binding.

Join together end on end like so, to get a continuous strip of bias binding…

Press the seam allowances open.

Lay against the raw edge of your fabric, and sew together in a narrow 6mm (1/4 inch) seam.

Fold the bias strip back over the seam and press the seam binding back over itself…  
Now fold the fabric back over underneath the seam allowances to enclose the raw edges within the bias strip.  I don’t press at this stage, but just stitch in the ditch of the first stitching. holding the bias strip in place and smoothing it down as I sew.  Being bias cut; it should settle into place well, moulding itself smoothly around curves with the need for any ease stitching. (this is the inside pocket edge, and the pocket lining of the same fabric can be seen underneath)

For the hem binding, the raw edges are sewn in a narrow 6mm seam allowance the same way.  Probably the most difficult bit out of this whole procedure here is joining the two ends together in a perfect bias seam to meet up exactly at the stop/start sewing point.

The bias strip is pressed up, and a narrow 6mm seam allowance pressed down on the upper edge.  This pressed edge is simply slipstitched down invisibly in place.

Voila!  Now how easy was that?  No real biggie, right… once you’ve tried HongKong seaming I promise it is something you will want to incorporate into special projects again and again.

pinterestmail

Arrowhead tabs; or, Ways to fancy up your shirt

One of the easiest ways to add a little something extra to a plain man’s button-up shirt is to put on a few arrowhead button tabs.  My husband is a very classic dresser and prefers his shirts without embellishments such as these, but for my two boys a few tabs are just about mandatory!  A very plain casual shirt is tres frumpy, boring and old-fashioned from a young man’s point of view, so it is worth going to the small effort of putting a few on your shirts if you want your guys to love them.  I have to admit to being partial to the look of them on the men’s shirts I have made for me too, because I think that to overplay the masculinity of a menswear shirt that I am wearing myself will paradoxically enhance my own femininity.  Makes sense?  Well, I think so…
Another plus is that you are using up scrappy little offcuts that would otherwise be thrown away.
In my lazy and/or more hurried projects I have been known to wing the arrowhead tabs and hope for the best, but obviously the best results are gained from careful measurement.   Cut both tabs together to ensure they are identical in size, and apply interfacing.  (Later edit:  In this case, I have folded the tabs right sides together, and the fold forms one of the long sides of the tab.)  Then measure and mark out the arrowhead part as exactly as possible with pins…

Start by manually inserting the needle right into that first pin mark.  Secure the end by going forward and back one or two stitches and then carefully sew in a straight line to the second pin.  Ensure the needle ends up exactly in second pin position; it may take lifting the presser foot and moving the tab slightly to really make sure the needle goes down in exactly the position you have marked…

With the needle at its lowest point (to ensure that it has picked up the bobbin thread down below, and so that the stitch is completed) lift the presser foot and reorient the tab so you will be stitching down to the third pin position.  Lower the presser foot and stitch down to the third pin, again ensuring that you are finishing as exactly as possible into the third pinhole.  Secure the end by one or two careful backwards and forwards stitching.

Now sew the long straight edge. (Later edit: That long lower edge with no stitching is the fold…)

Clip the seam allowances, as close to the corners as possible, but obviously without cutting through your stitching!

Turn the tabs right side out through that short open end.  I know there are proper tools for turning (which probably cost a bomb) but I use a not-too-sharp pencil for this job, and wiggle it carefully into the corners teasing them out, but not allowing it to burst through the stitches!

Press and topstitch the tabs.  Sometimes when one is topstitching close to the edge of a tab and you turn a corner, your feed dogs may have trouble “catching” the tab and getting started on the next straight bit.  This will be because you are stitching so close to the edge that there is no fabric underneath the presser foot, making contact with the feed dogs.  In this case I find it handy to use the second tab and just slip it behind the tab you are topstitching; over the feed dogs.  Just its presence there will allow your tab to slide smoothly along, no matter how close to the edge you are stitching.


On my army shirt I added a decorative strip to hold down the shoulder tabs, this was just zig-zagged firmly into position on the double thickness yoke area.  If your shirt pattern has only a single yoke piece you will need to reinforce this area underneath with a little strip of bias cut fabric; and also for the tab’s button when you sew it on.  In fact, if your pattern only stipulates a single thickness of fabric for the yoke I recommend you cut out two and sew them on together for more stability; as this area is subject to a lot of fabric strain in a man’s shirt.

For the sleeve tabs; you can make your tabs as long or as short as you please, this is an individual preference and depends on how long you want your sleeves to sit when rolled or pushed up.  Whatever you choose, the tab is sewn, wrong sides together to the inside of the sleeve. Obviously it is easier to do this before you sew up the sleeve seam!  I like to sew a nice firm little cross within a square for a stable strong base to sew the button on.

pinterestmail

French seaming…

I am making a blouse for myself using a fabric that is a smidge on the sheer side, and when one is using light or sheer fabrics the seam allowances inside your garment can be very visible from the outside.  French seaming might seem like a lot of extra work, but it’s not so much really… if you plan to overlock your seams to finish then you are still running over each seam twice anyway so French seaming is the same amount of sewing time…  and you want your handmade garment to look as nice as possible, right?  

When sewing a French seam, the fabrics are firstly laid wrong sides together, and the raw edge sewn together in a narrow 5mm (1/4″) seam.  I know, I know, it seems all wrong wrong wrong to sew the fabric wrong sides together, goes against everything we’ve ever done as seamstresses before… but bear with me here… it all comes right in the end.

Press the sewn seam nice and flat.

Trim the raw edges to an even 3mm.  It is a good idea to do this step, even if your fabric edge is perfectly cut and not fraying at all, although if you are anything like me, you’ve cut out your fabric maybe a few days before and it is already starting to fray a little just sitting there making this step an absolute essential.  Trim them anyway… and as straight as possible.

Open the fabric pieces out and press your new mini seam open…

Now turn the fabric over, fold with the right sides of the fabric together (and all is right with the sewing world again…) and fold flat along the new seam edge.  Try to get that sewn edge of the seam right slap bang on the fold, and press in as sharp a knife edge as possible…

So with the right sides of the fabric now together, and treating the fold you have just pressed as your new “edge” of fabric, sew a new seam 1cm (3/8″) in from the fold.

Press the sewn seam.

Open out the fabric and press the new French seam to one side.  Exactly which side you press it to depends on which seam within the garment you are sewing…  I have a roughly blanket guide to myself of pressing seams towards either down or towards the back of my garment, whichever is more applicable, but I’m sure everyone has their own preference here…

There you have it!  From the outside your seam looks like an even width 1cm line.  This is a neat and tidy finish with no bit-sy ratty threads showing, and (if immaculate insides are your thing) as beautiful on the inside as on the outside. 

pinterestmail

Yellow silk Tie

Oh boy.  I’m not sure if I have done it right, but I’ve just created my first pattern and put it onto Burdastyle as a free downloadable pattern!

If you want you can download the pattern here… you have to click on “print pattern at home” to get the instructions, which form part of the pdf…
So OK, it’s just for a tie (baby steps, here), but it still took me … er, hours.  Actually far far longer to draw and write up the darn pattern than to make up the tie…!
Obviously, please let me know if there are any problems with it and I will sort them out as best I can  🙂
Anyhoo…

So, during the month of June we had Tim’s birthday party, and he asked me if I could make him a tie to wear.  Tim has very firm ideas on his apparel, and always has to look sharp.  Hmmm, where did he get that one from, I wonder…

He had his heart set on a definite colour, and since I had mentioned oh-so casually once upon a time how a tie would be laughably easy to make, and a darn sight cheaper to make your own than the $60 odd you get charged for RTW, even polyester, he put in his request.
So, I have taken apart one or two ties in my time (the last time to make this), and they are pretty easy to make, but I took a few progress shots to show here, so if you haven’t made one before you don’t have to take apart your own tie natch, to find out…
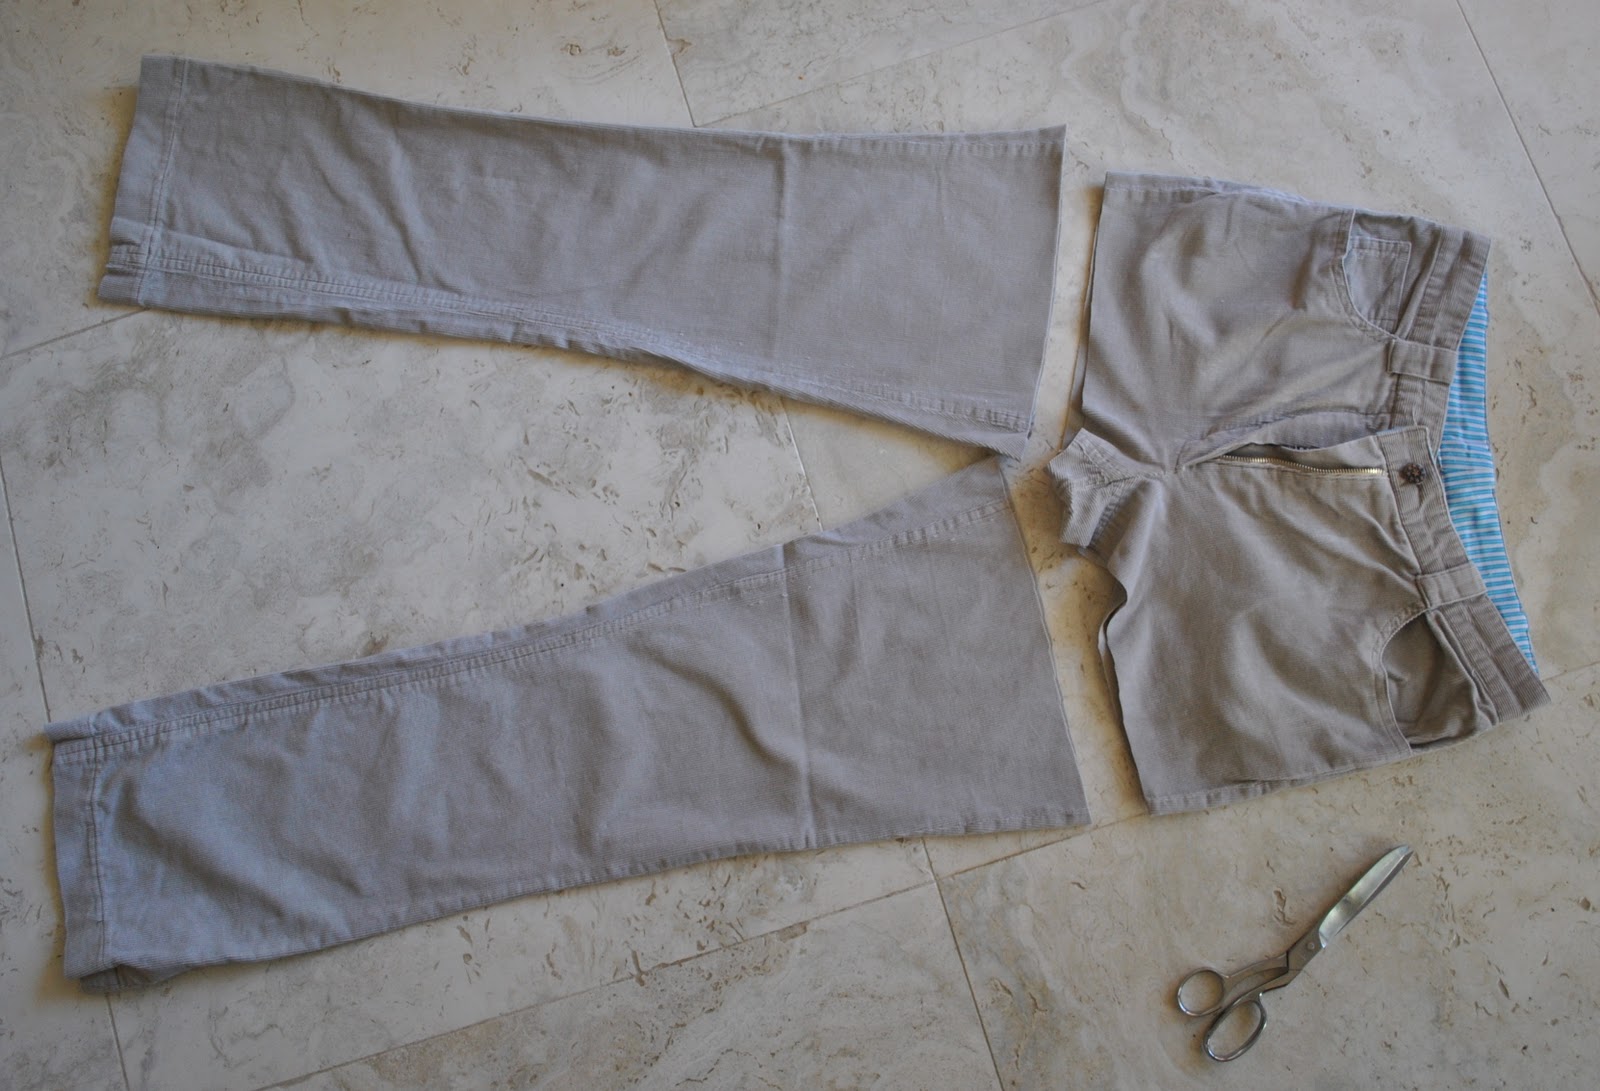
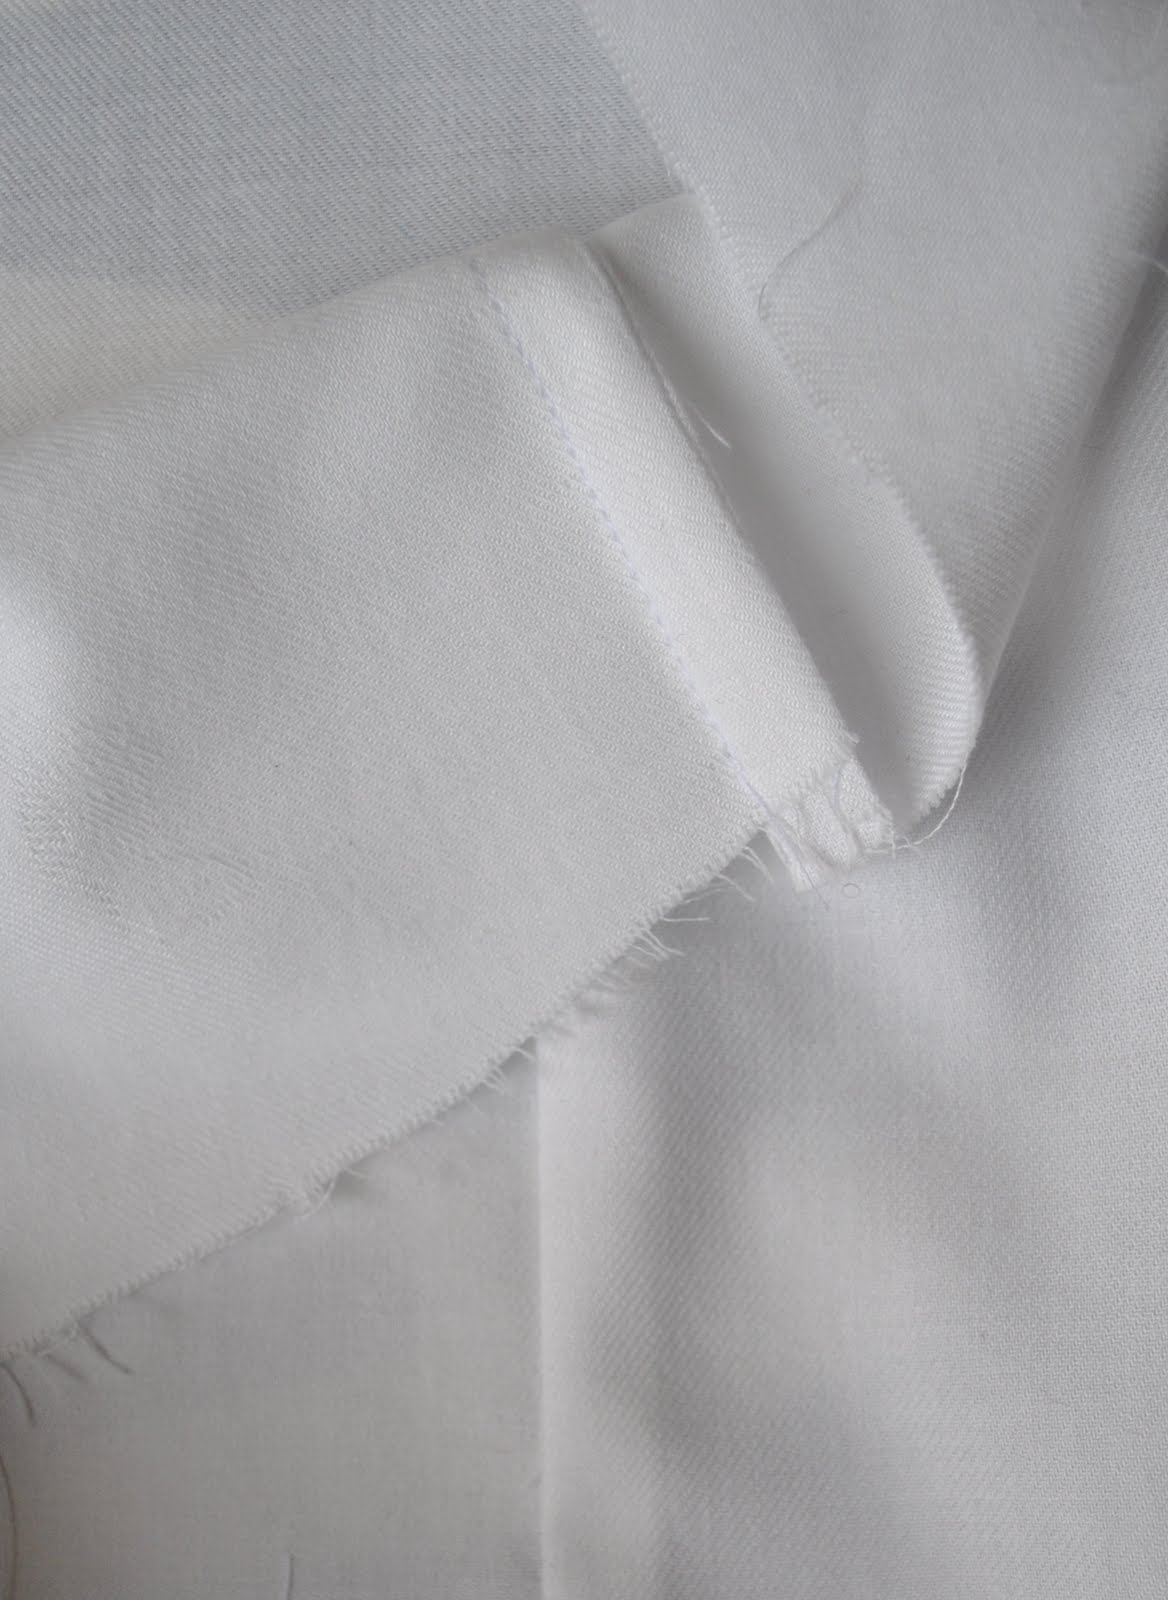
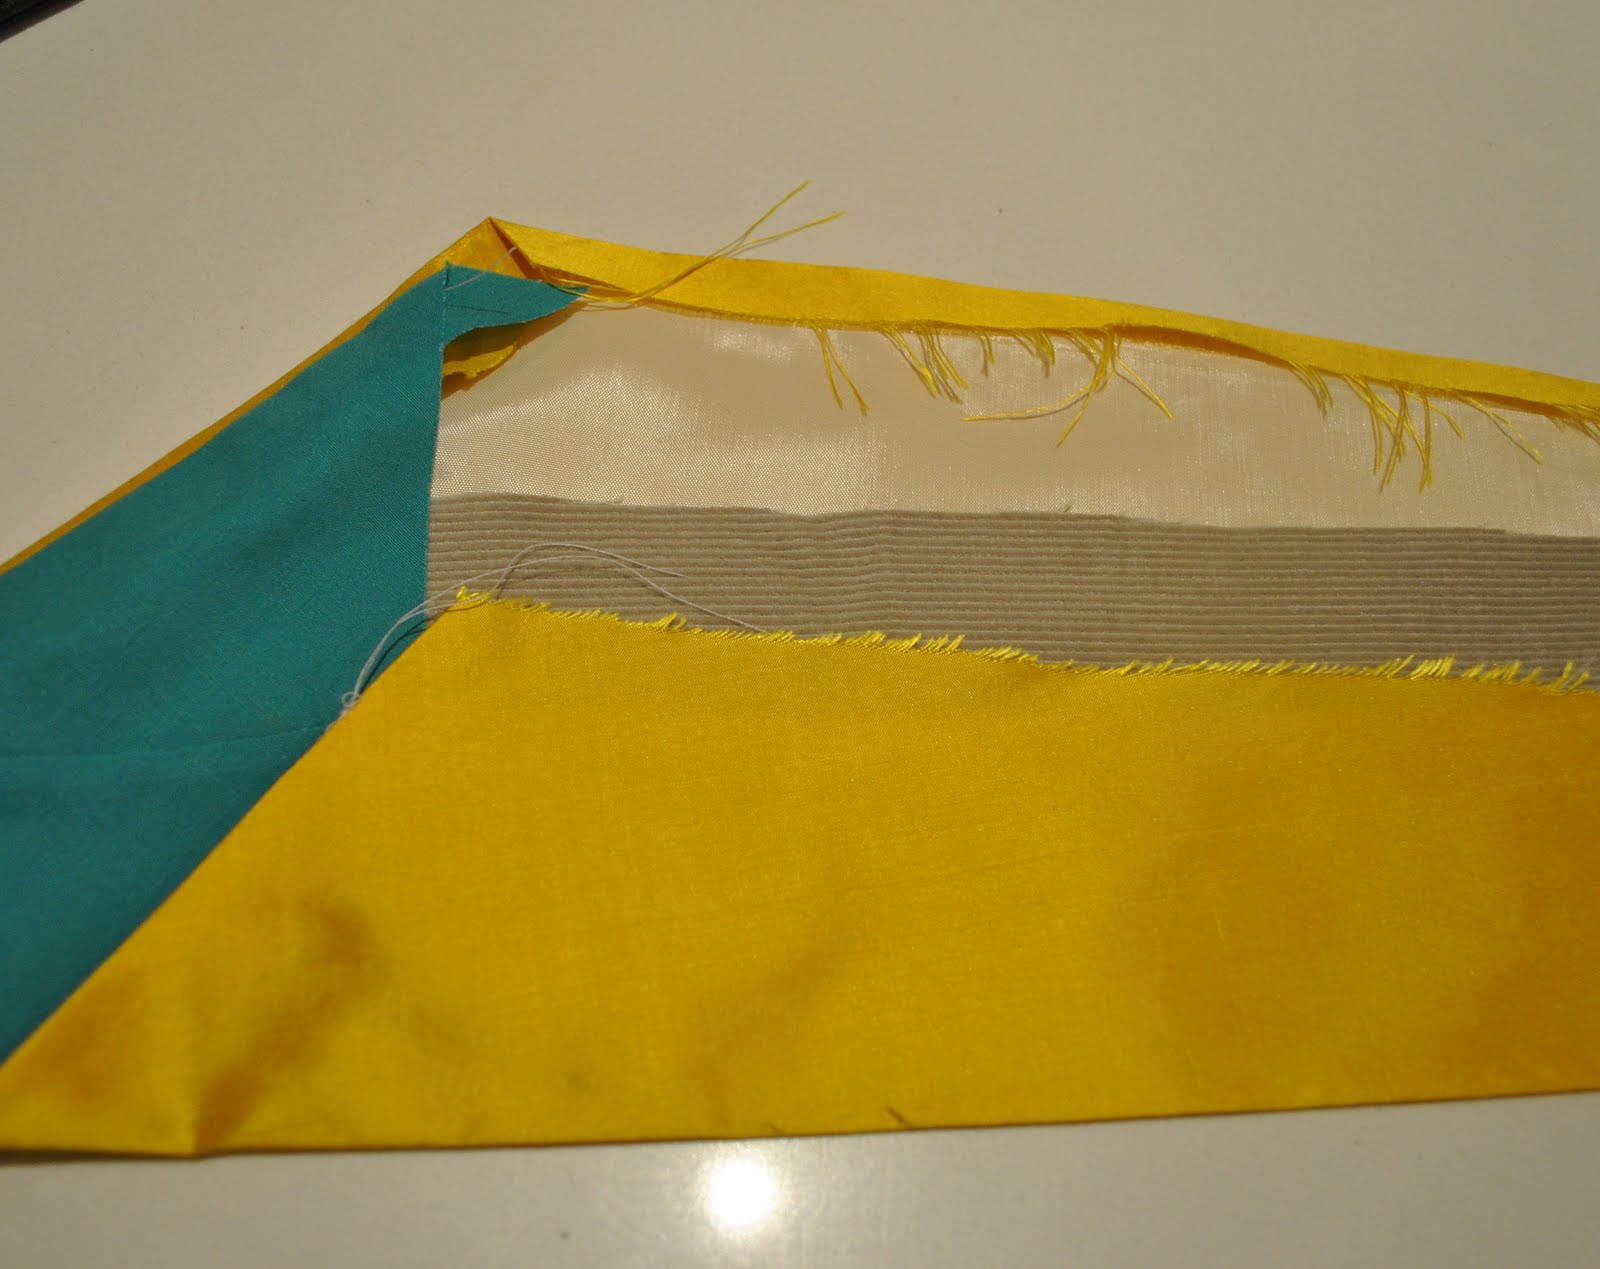
Firstly, a tie has four different fabric components, the outer fashion fabric, lining fabric, padding fabric, and a section of very lightweight underlining fabric.
I used:
For the fashion fabric the lovely rich egg-yolk yellow silk dupion Tim had chosen
scraps of lightweight turquoise cotton for the lining
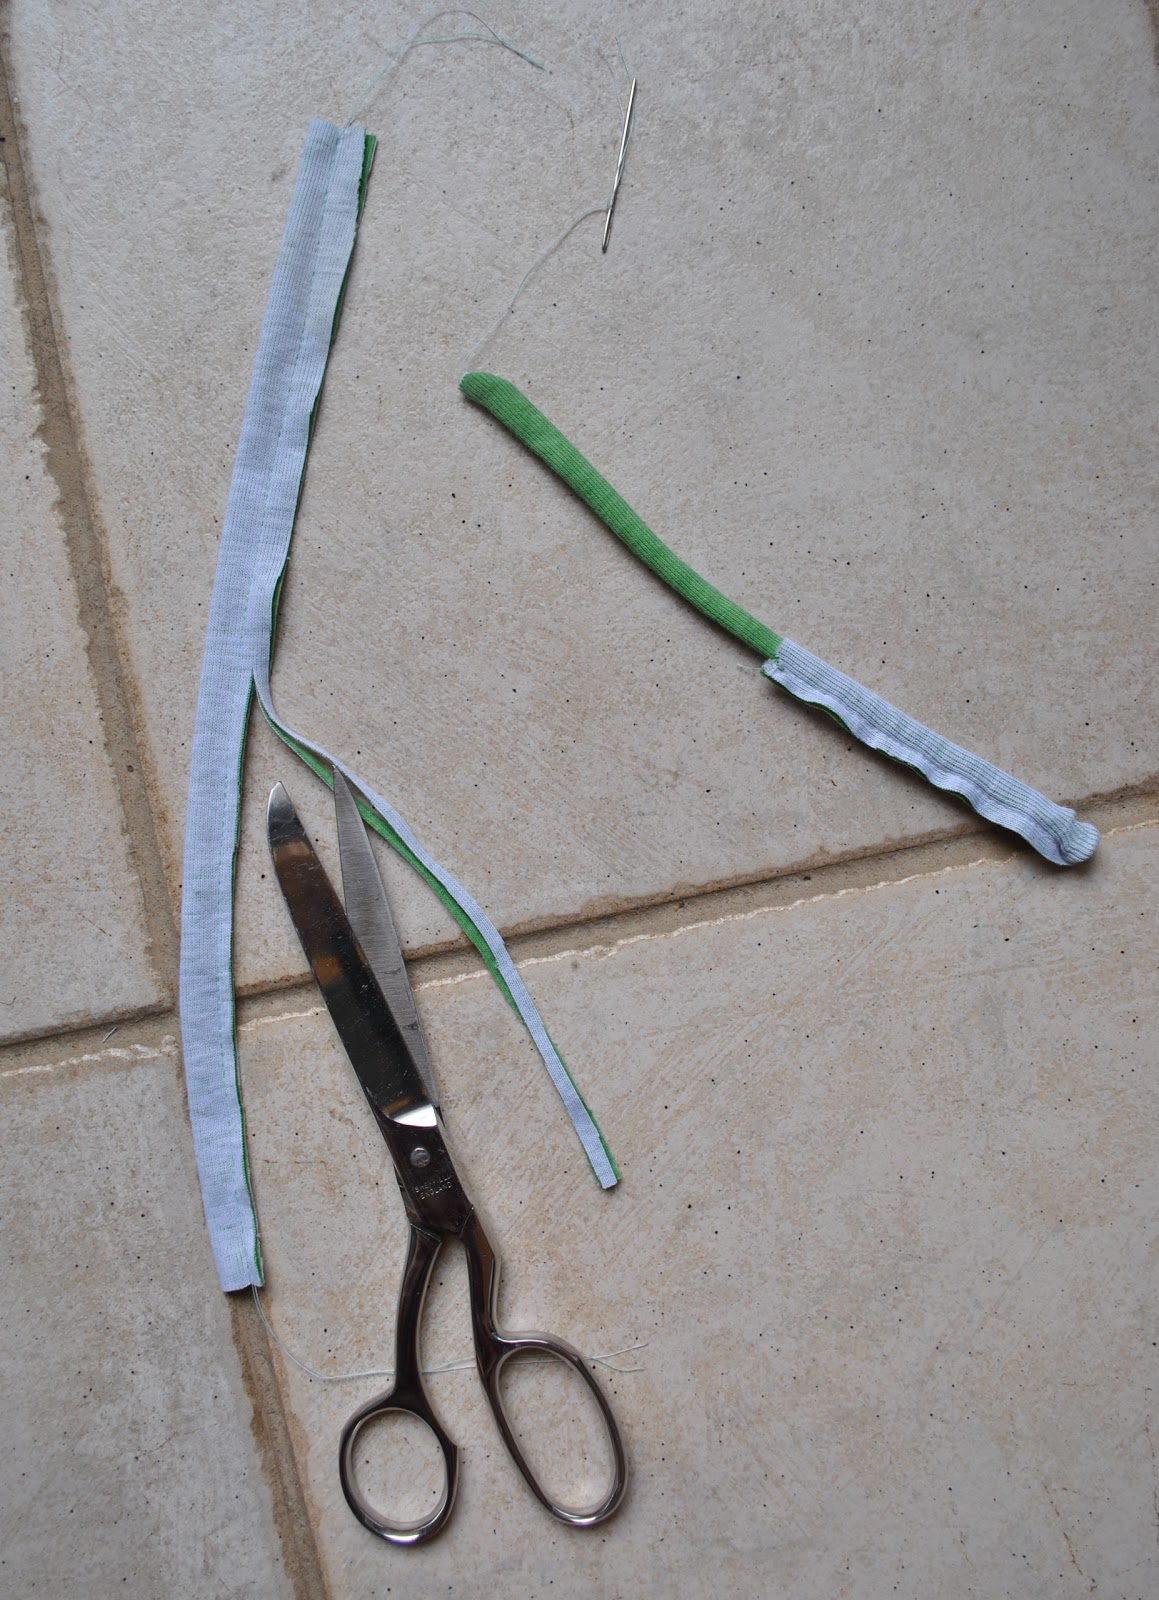
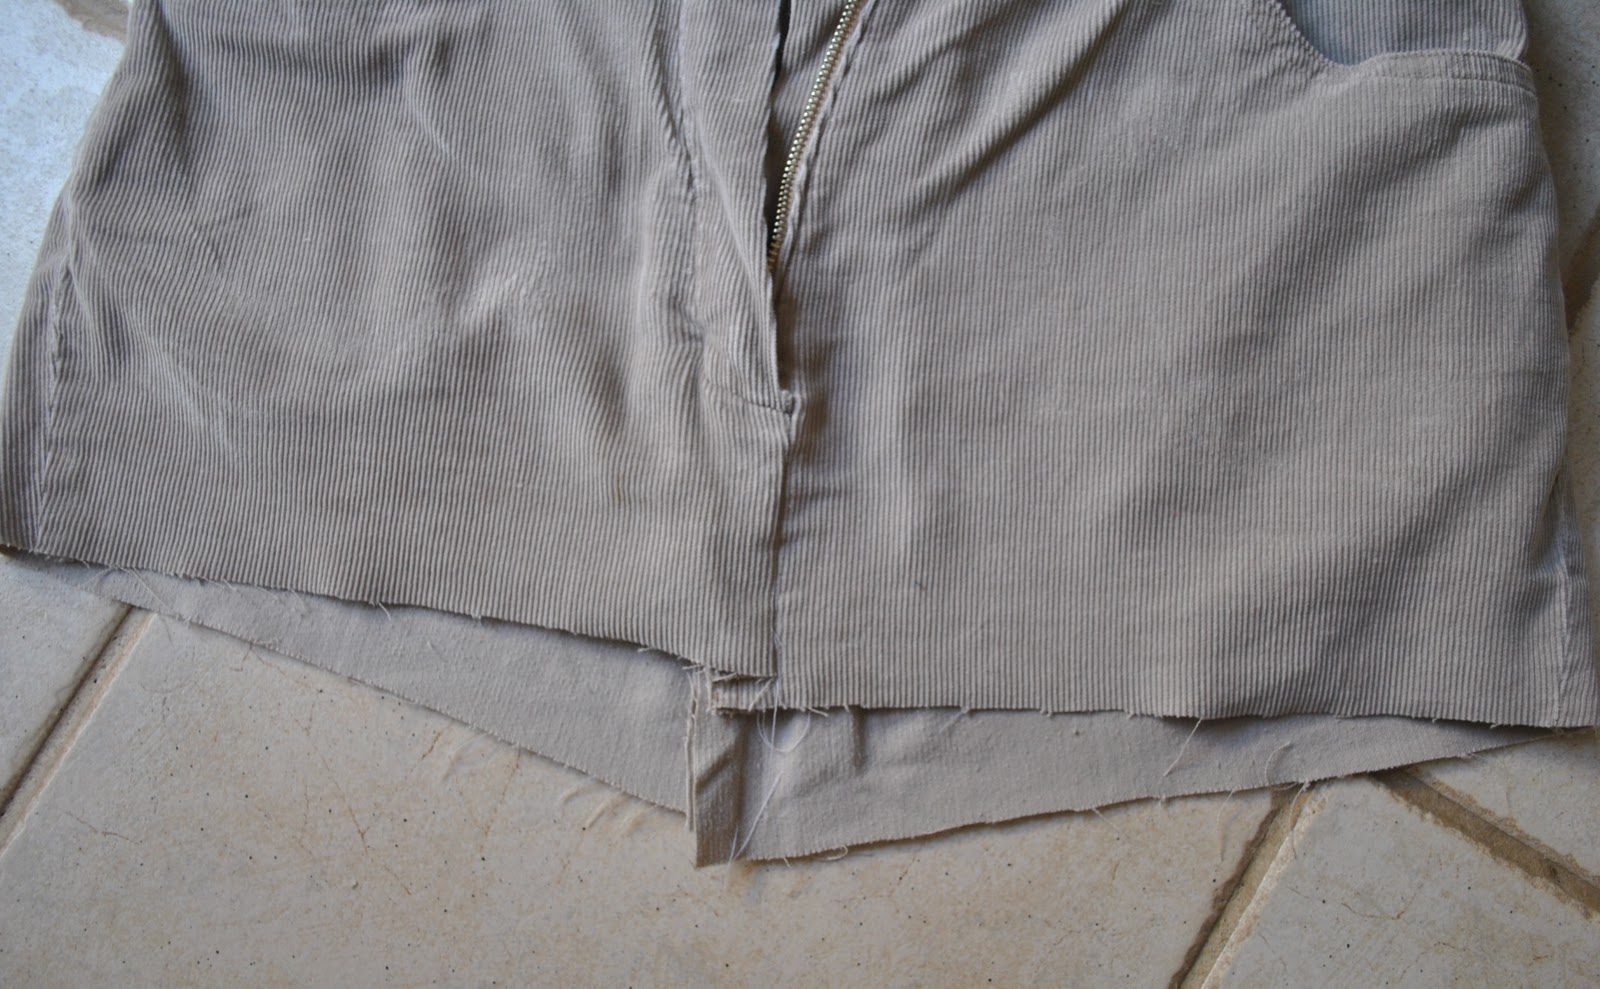
A strip of corduroy for the padding
scrap of organza for the underlining
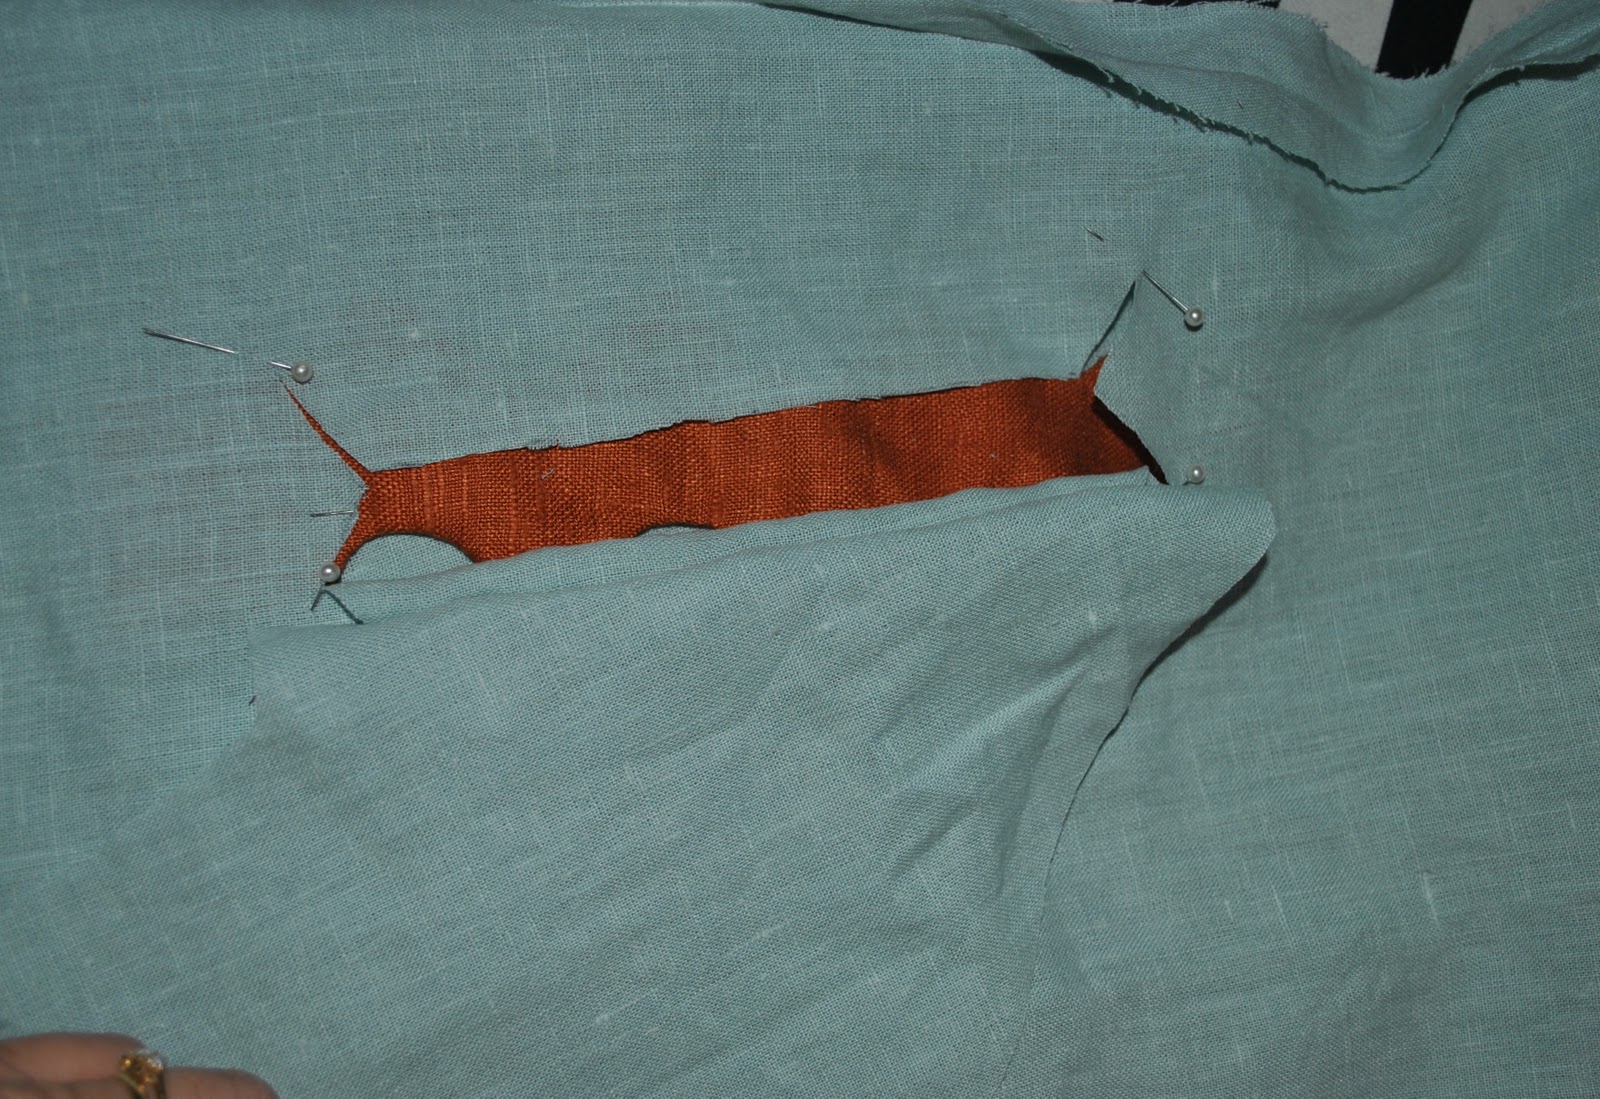
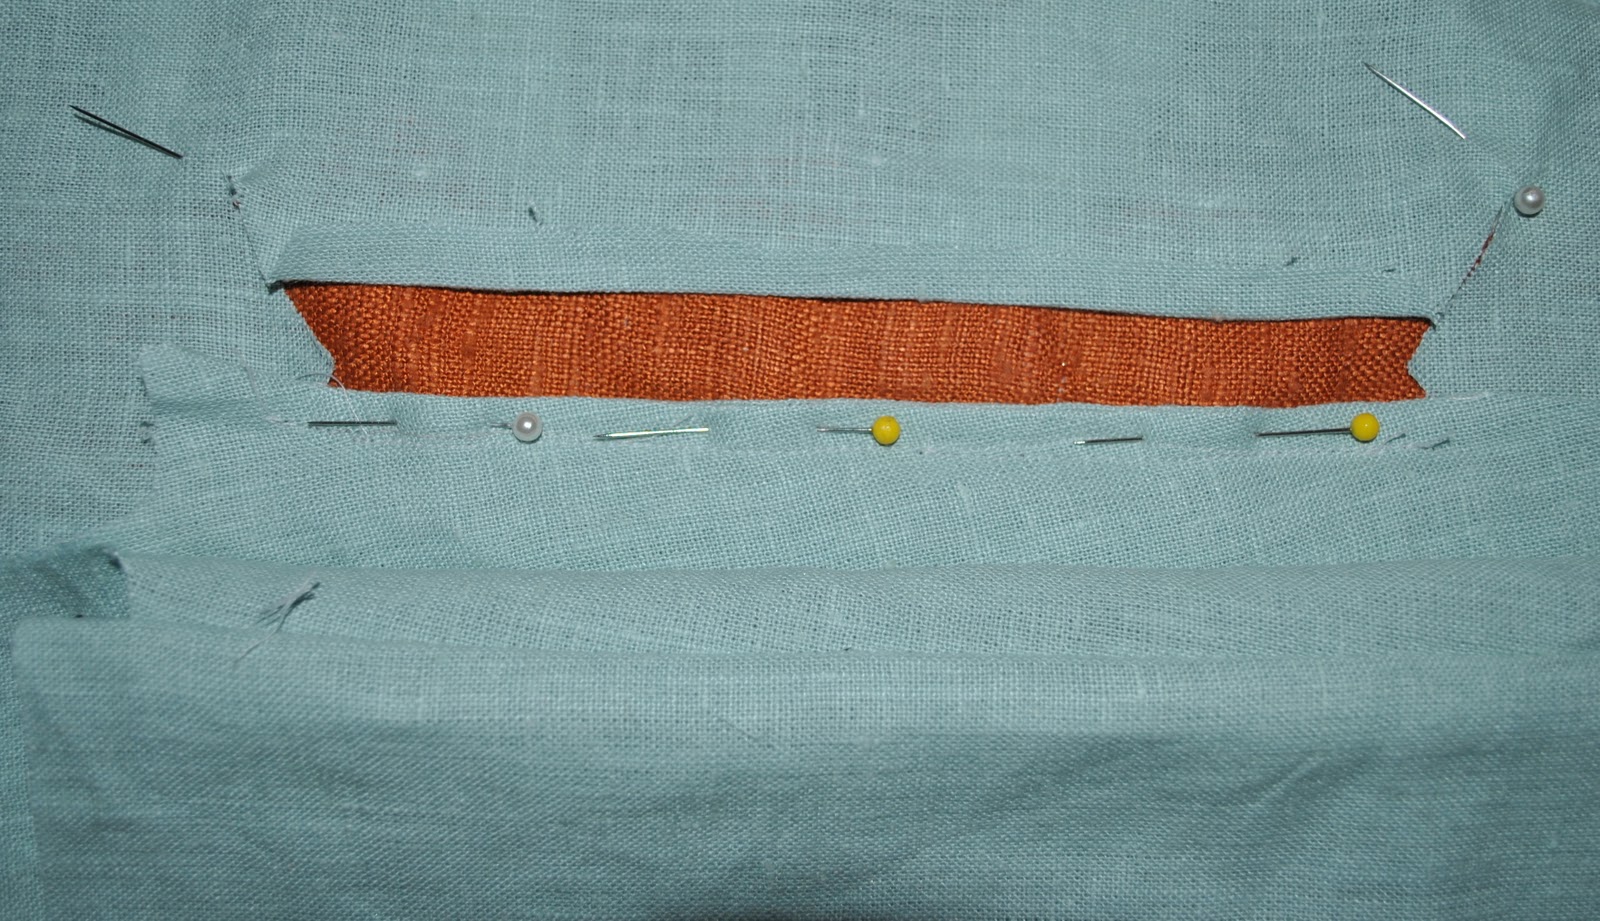
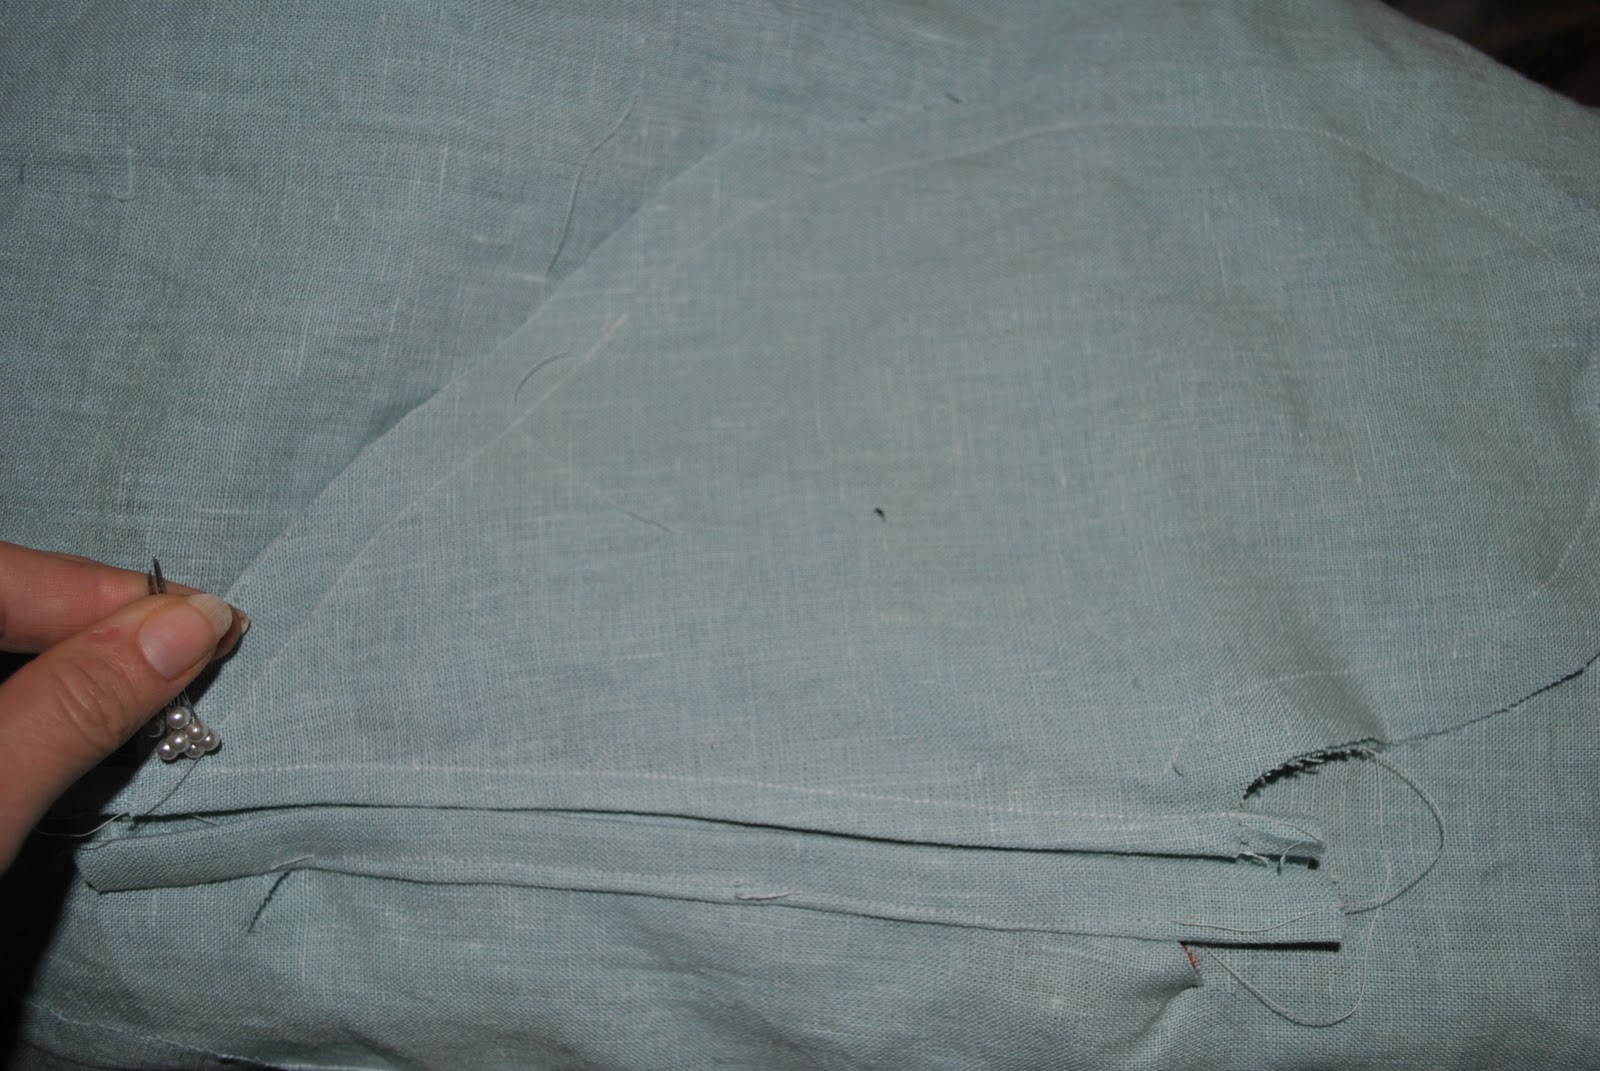
The underlining is pinned in place onto the wrong side of the tie, this is presumably to avoid stitching lines appearing on the outside of the tie.
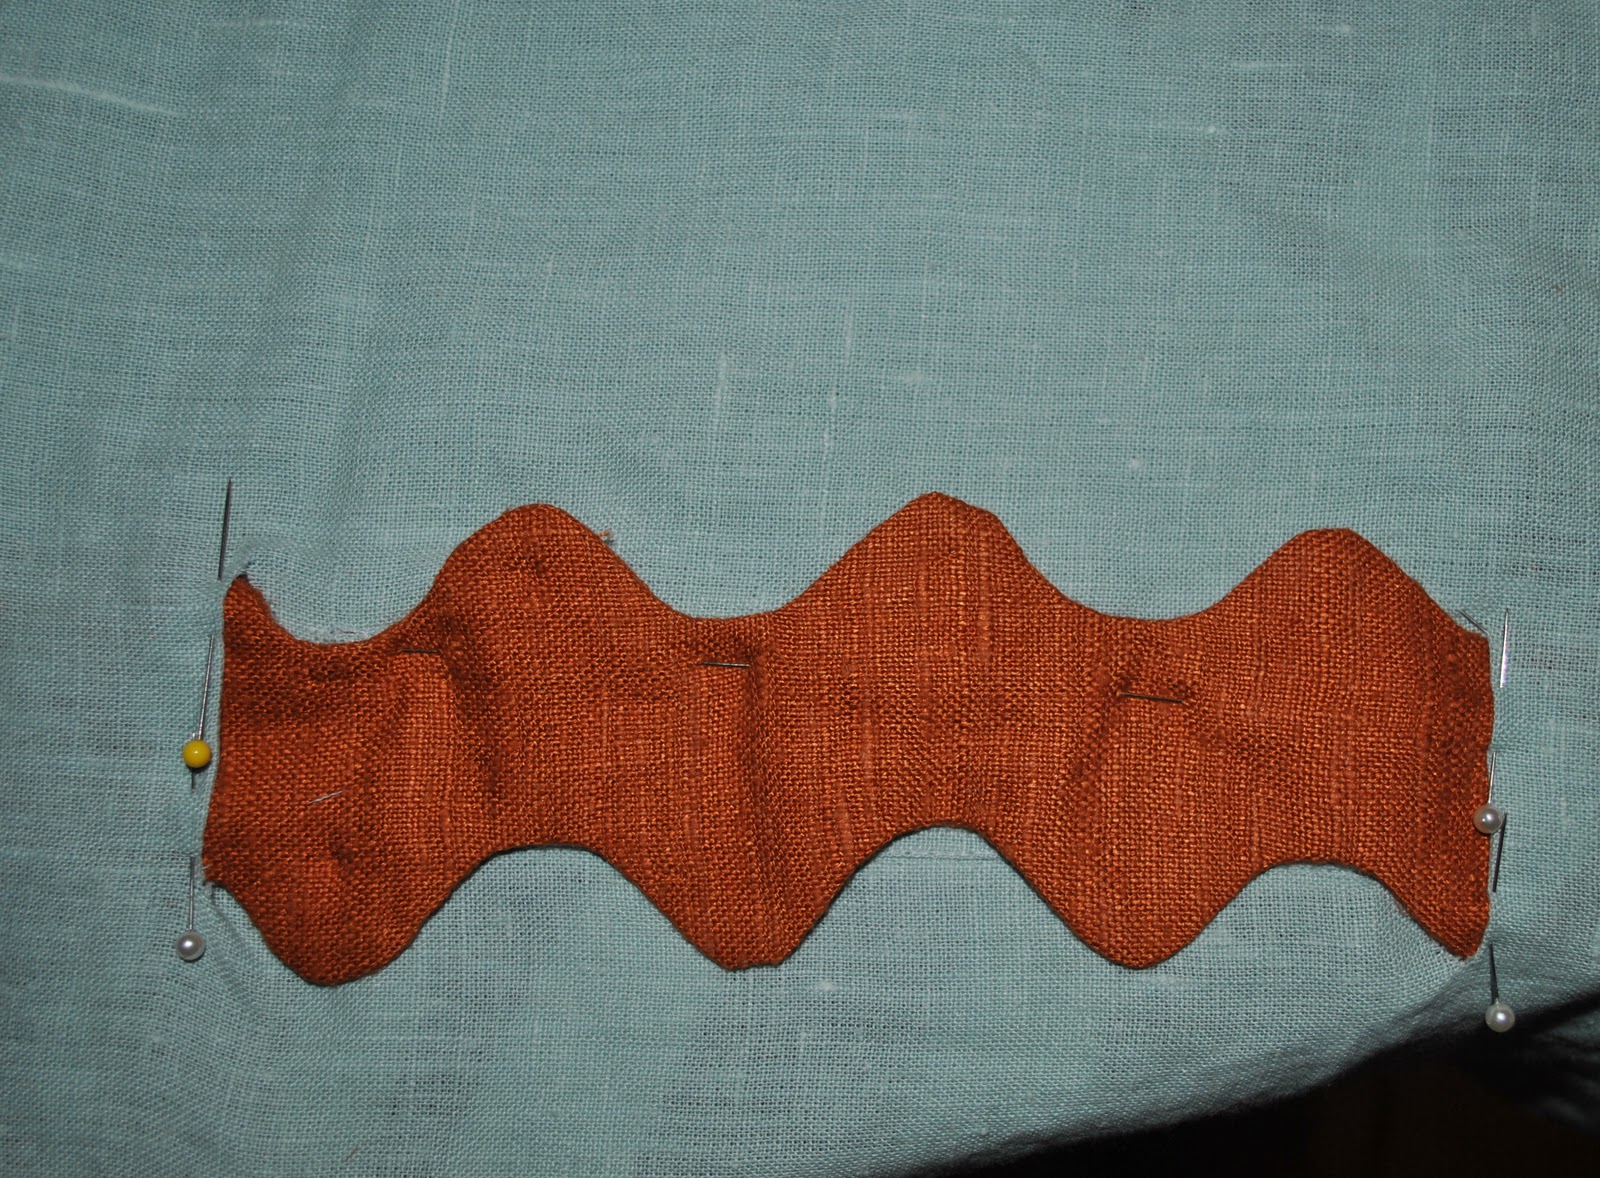
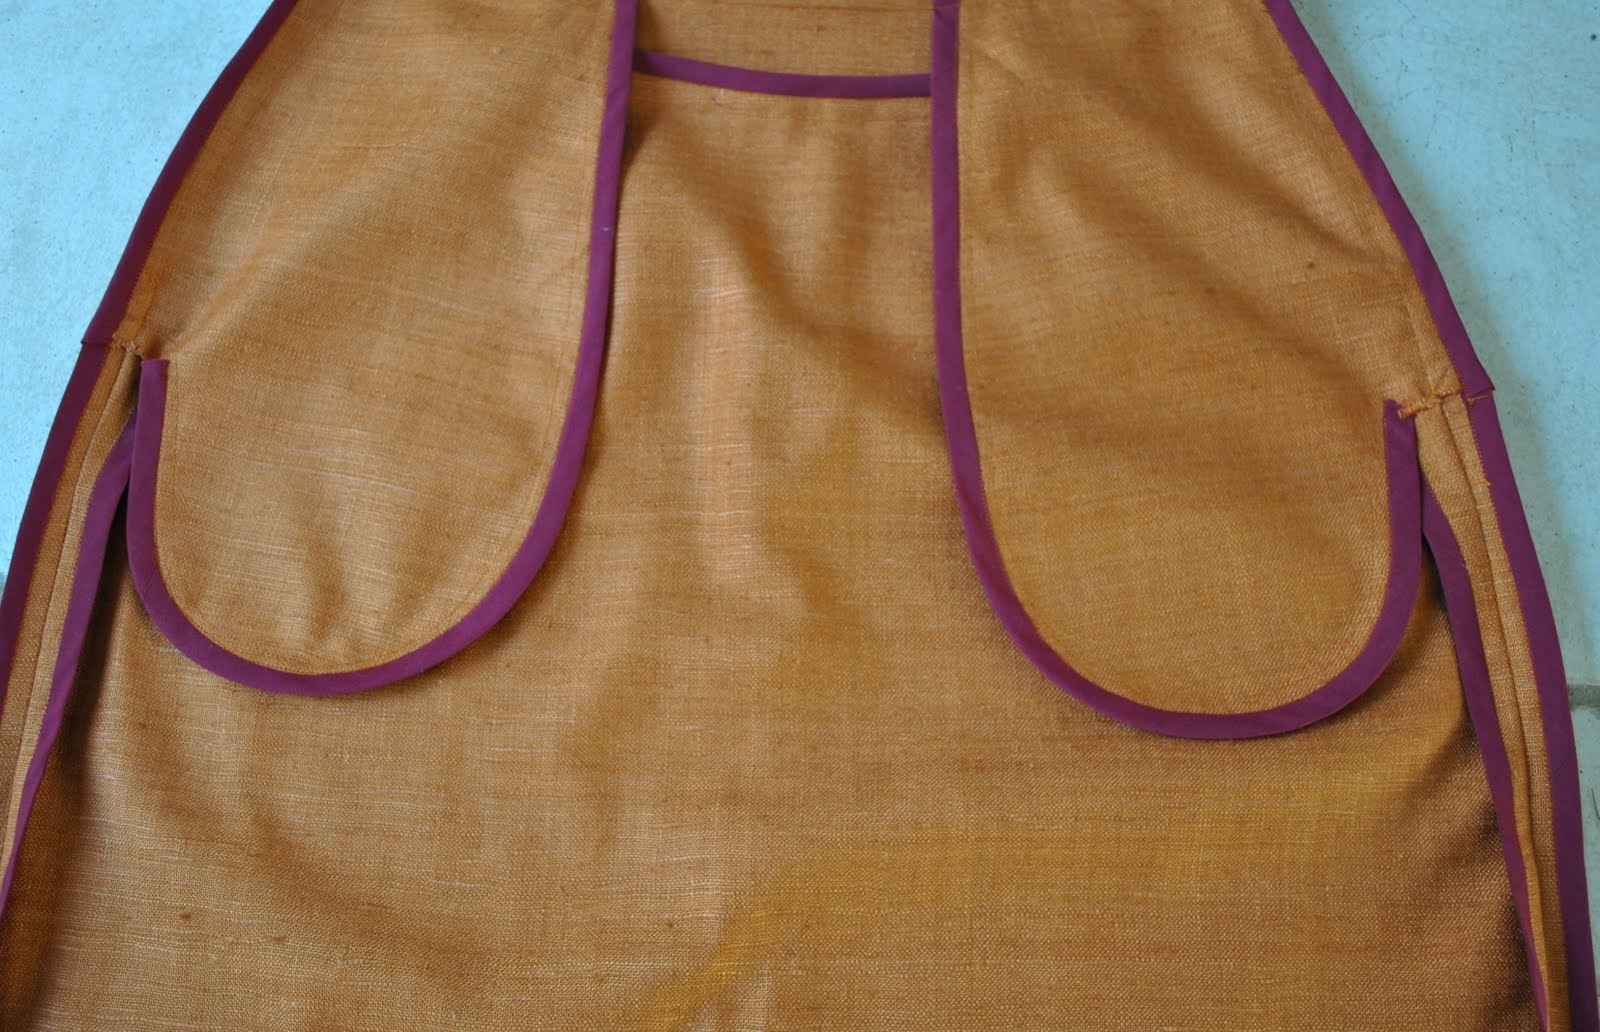
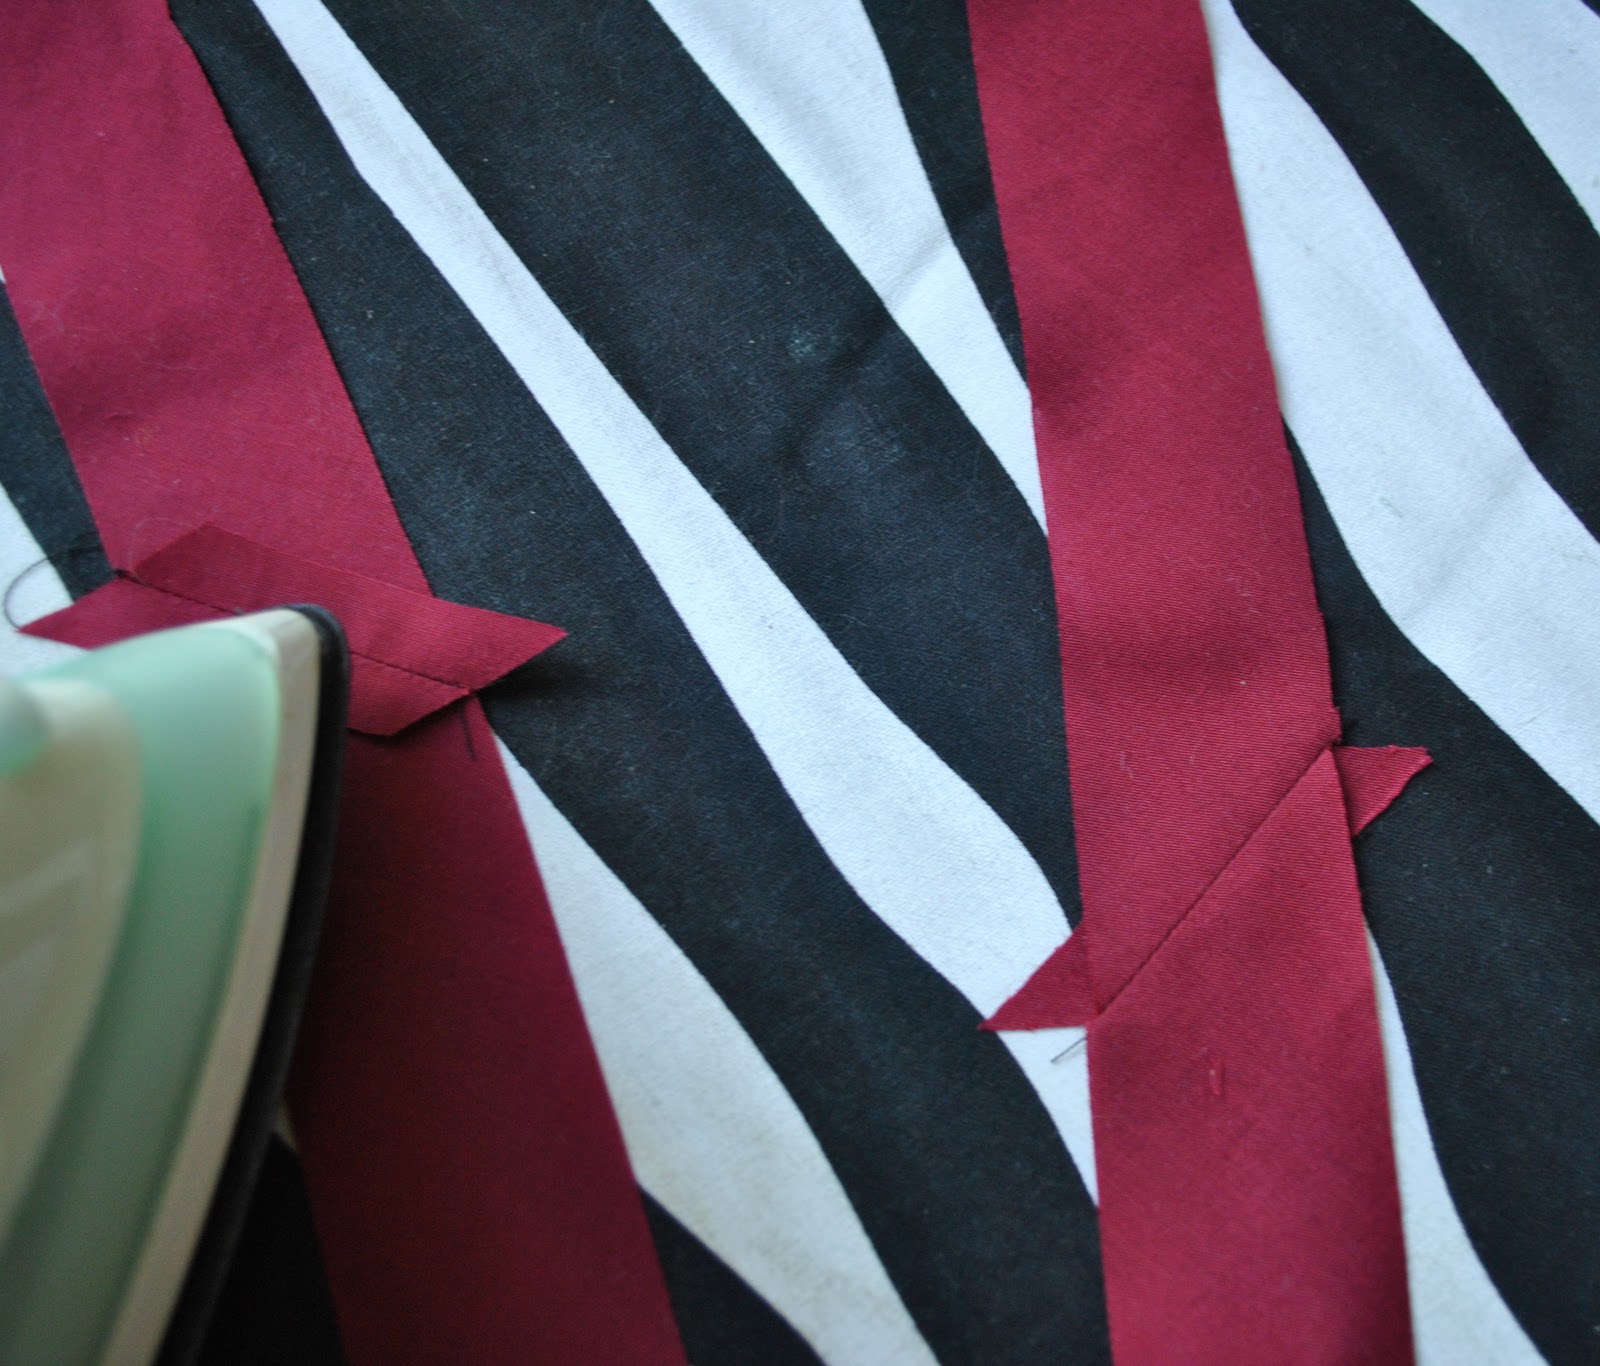
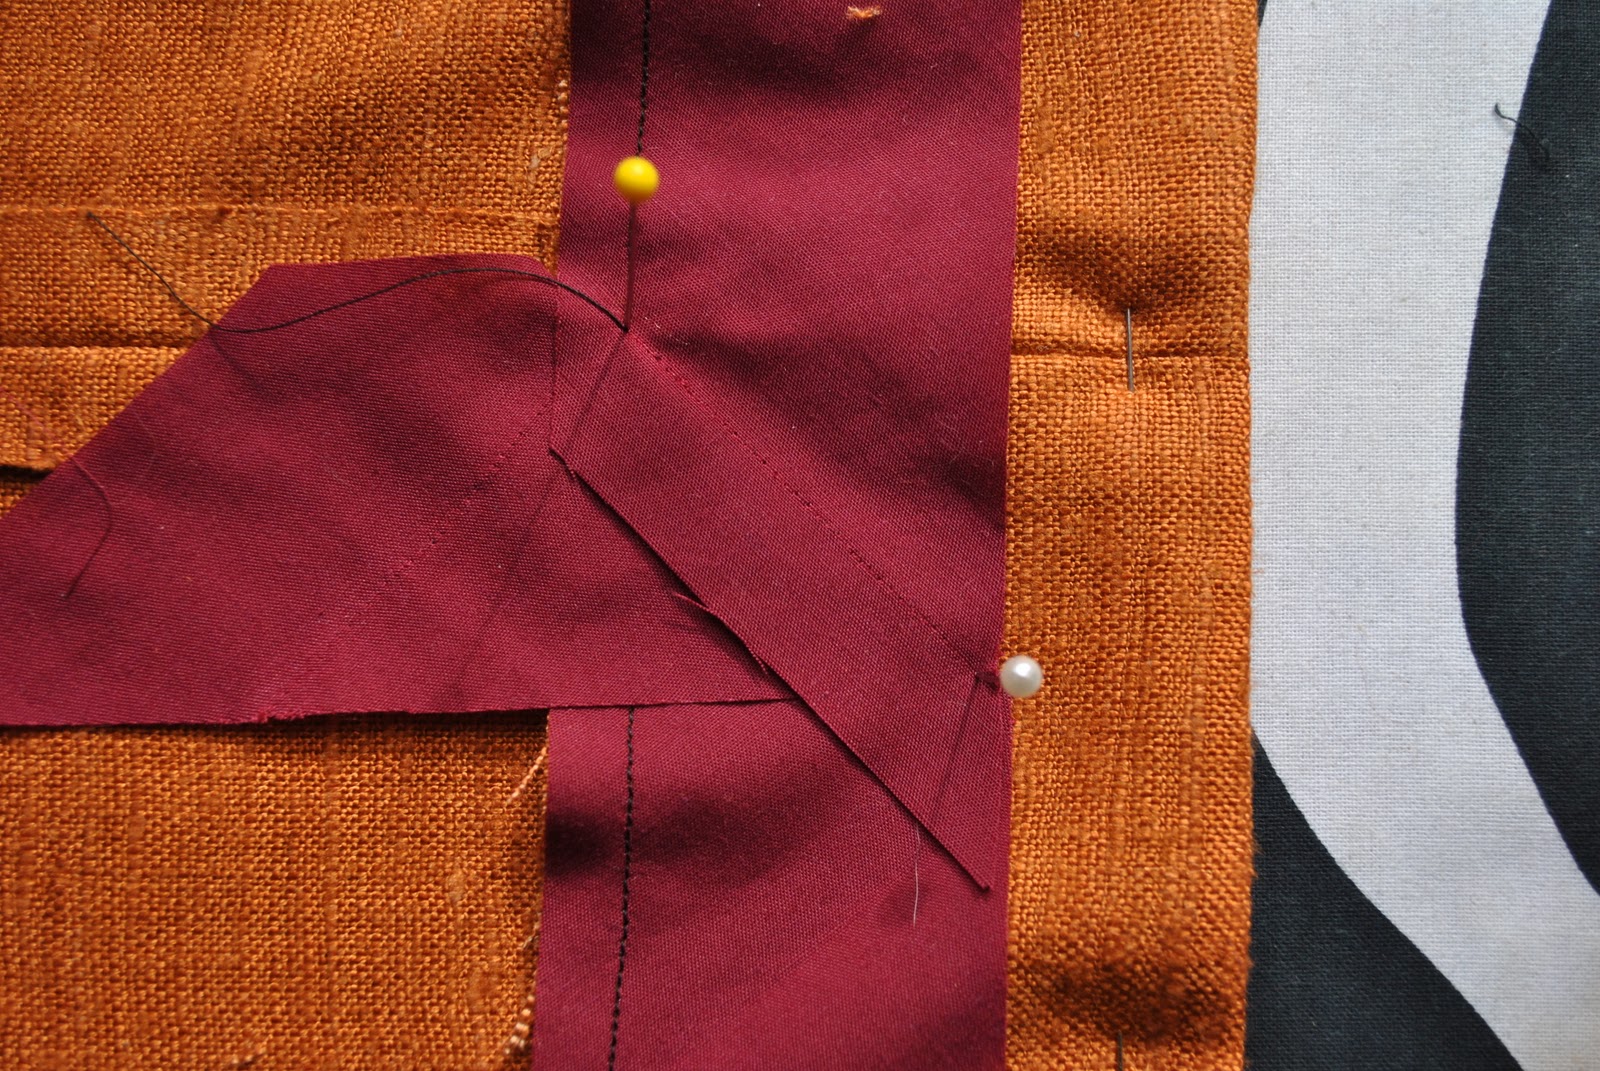
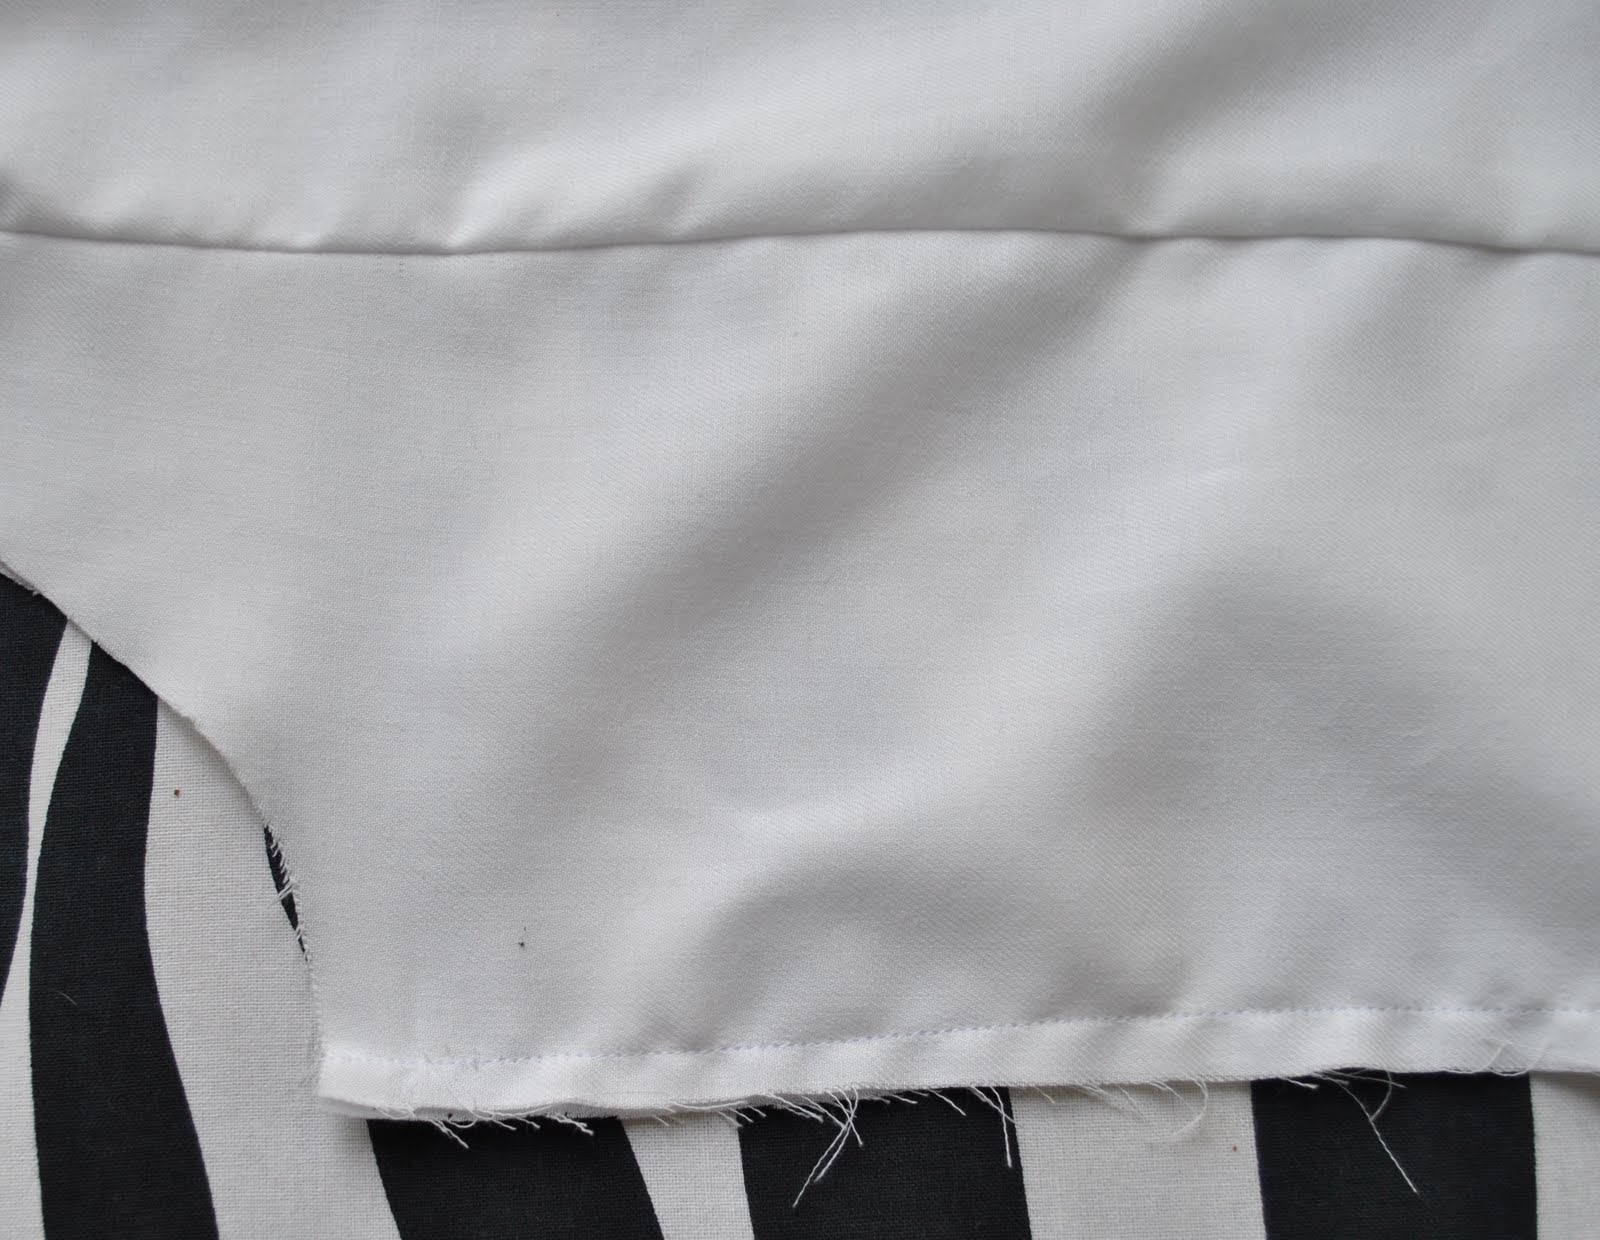
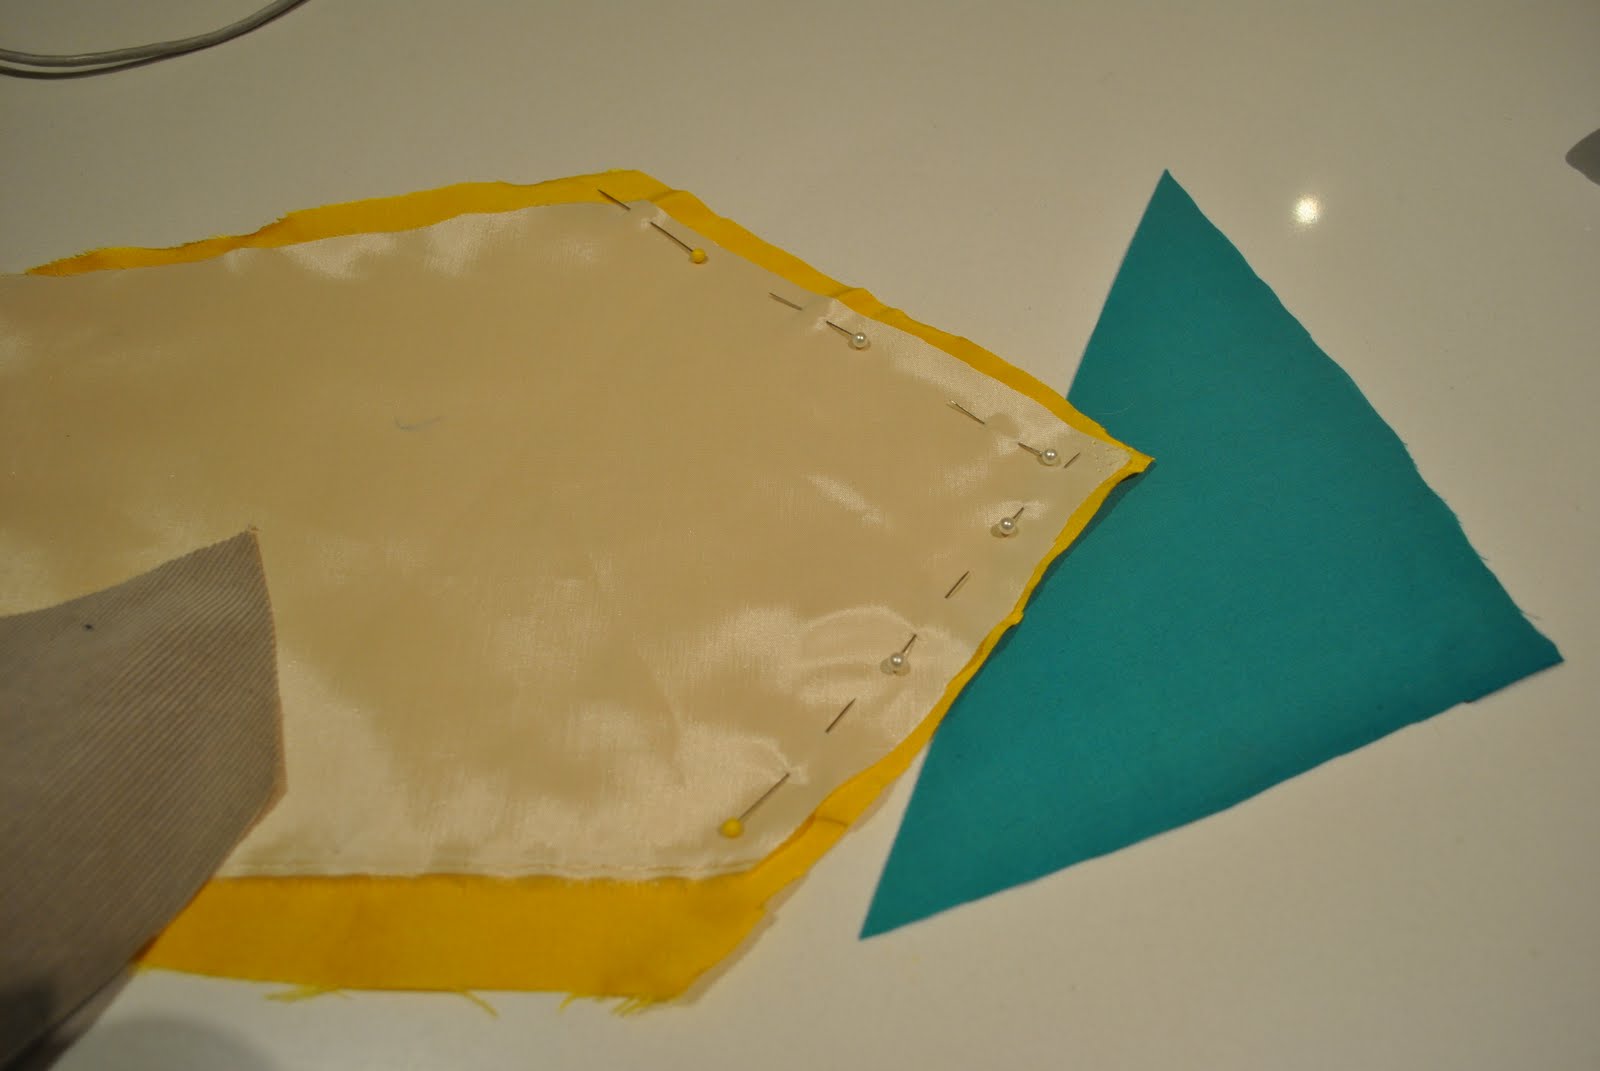
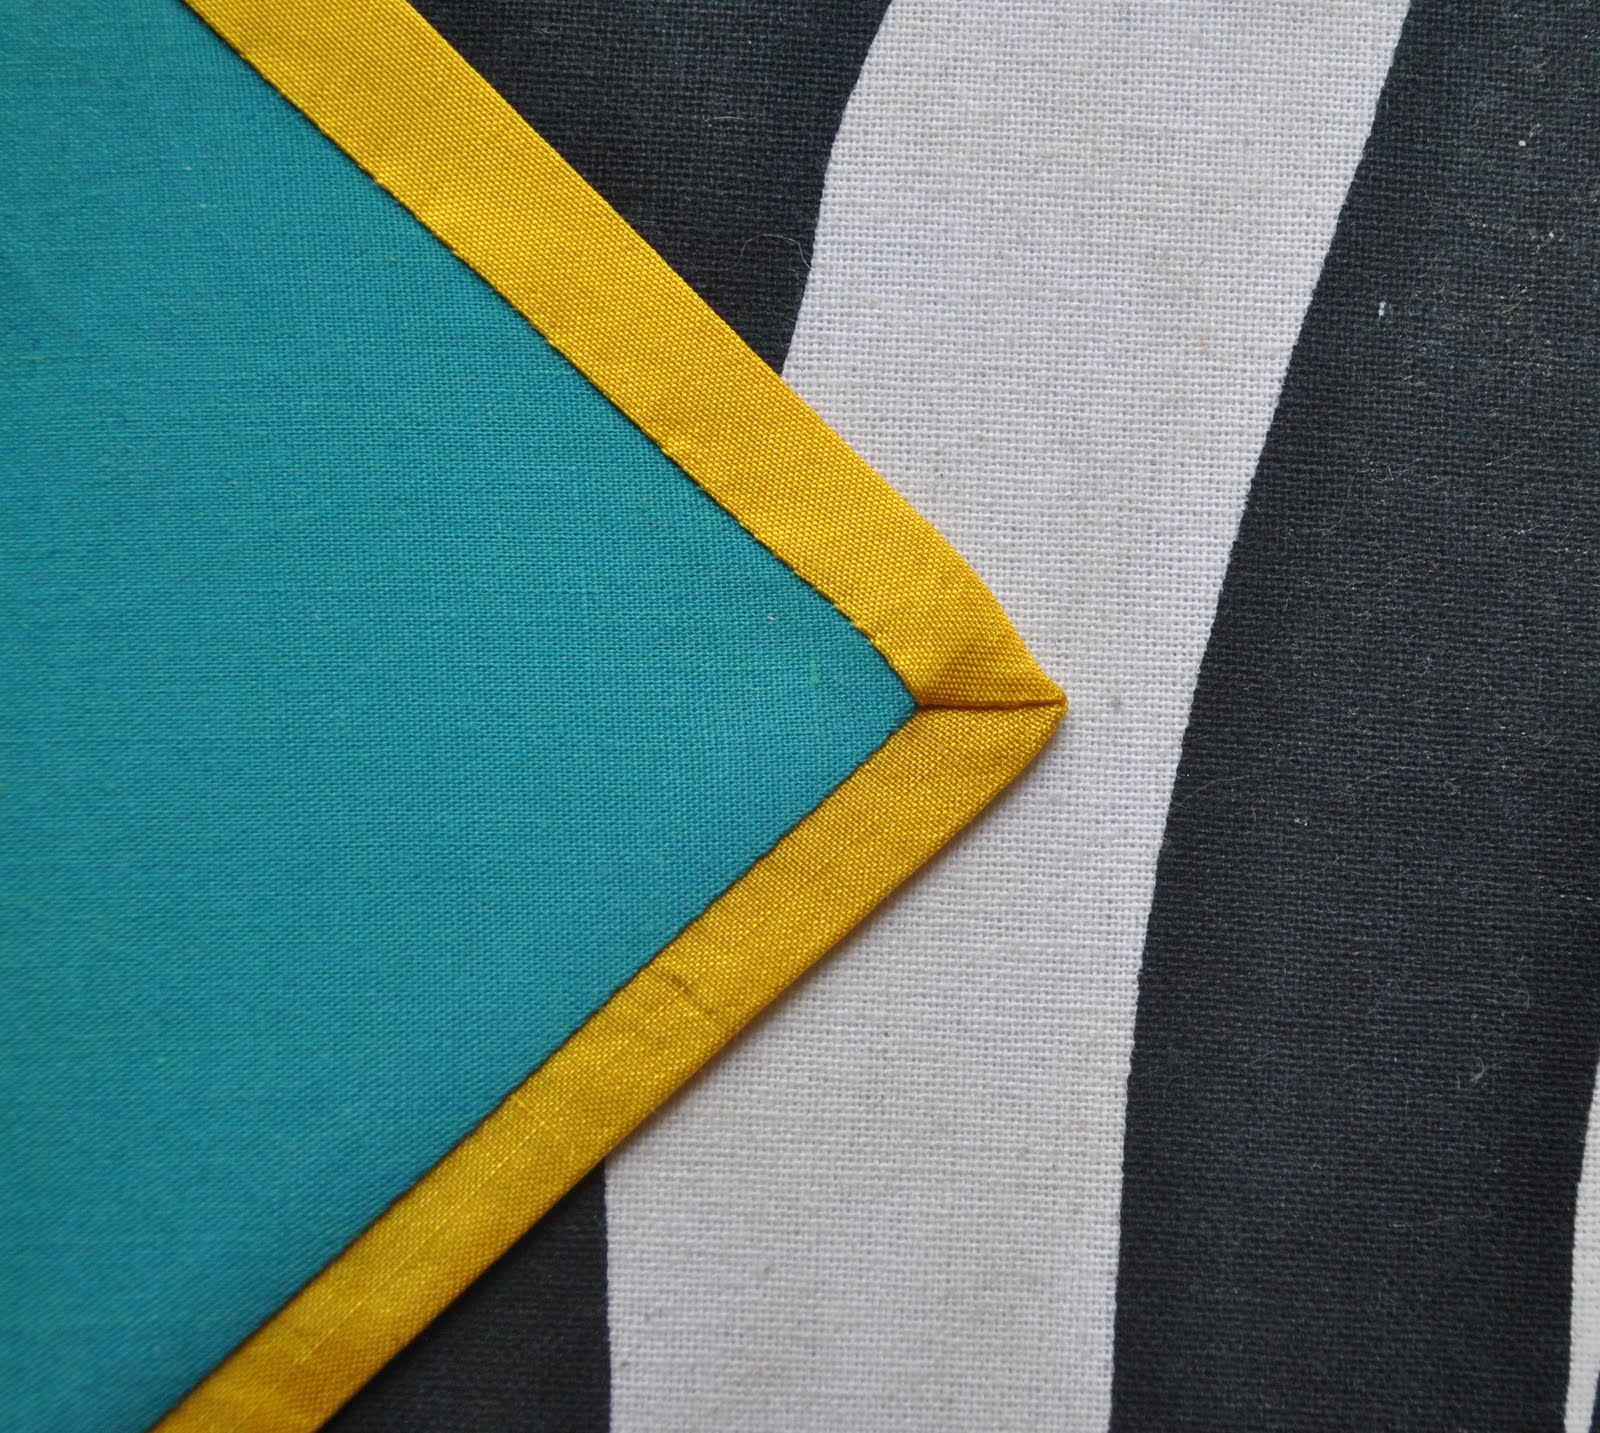
To get the nice mitred top and bottom edges of the tie, which is a nice finish ensuring that the lining fabric will not peep out from around the edges of your finished tie; I sewed the triangular lining pieces on as follows…
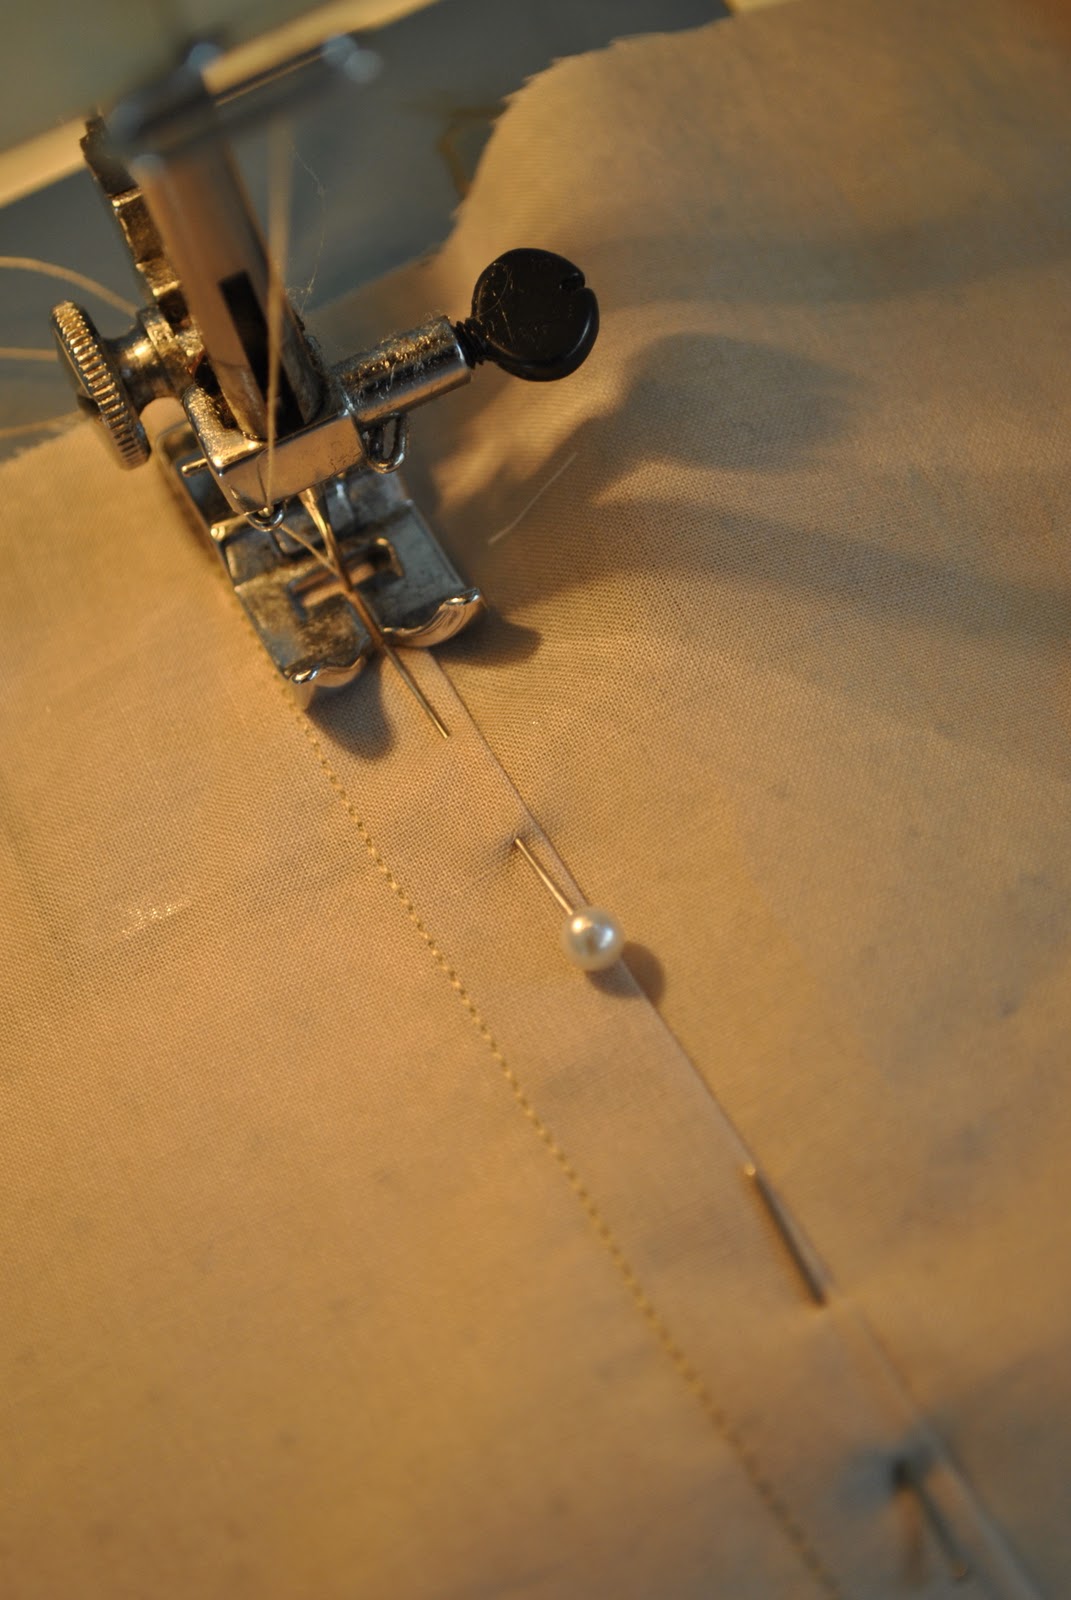
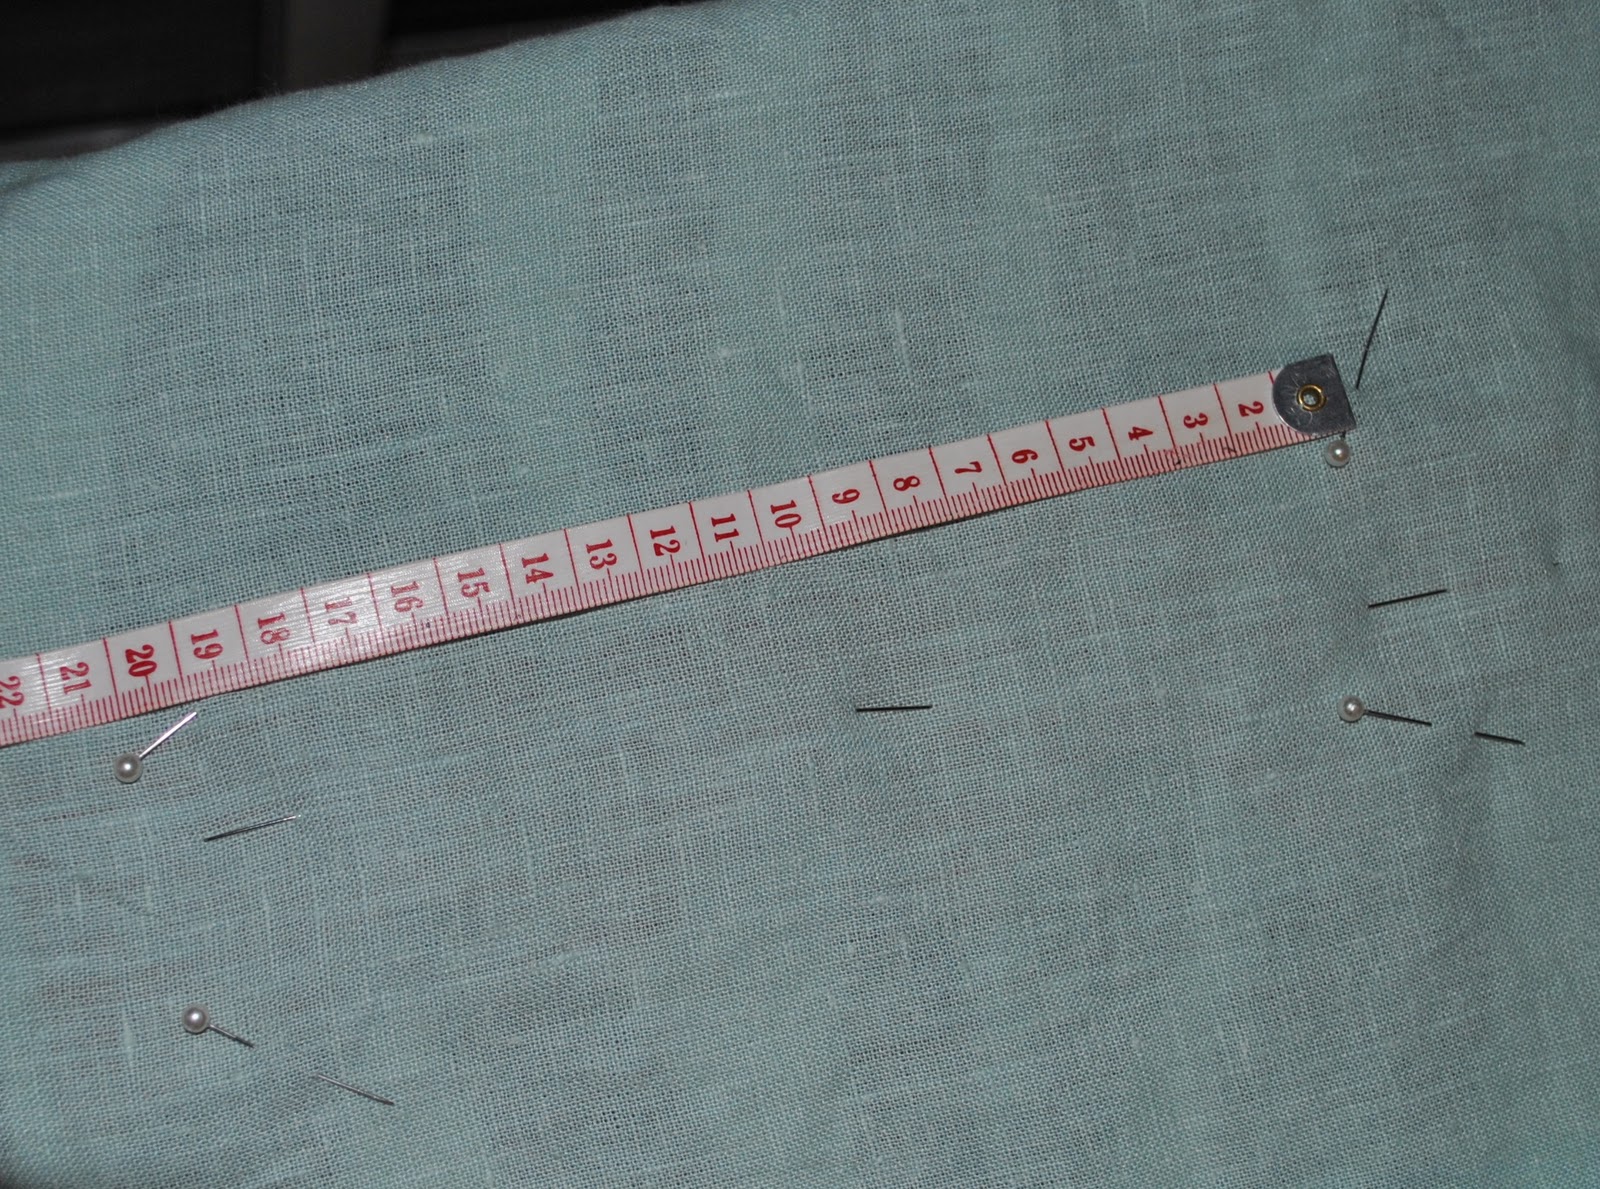
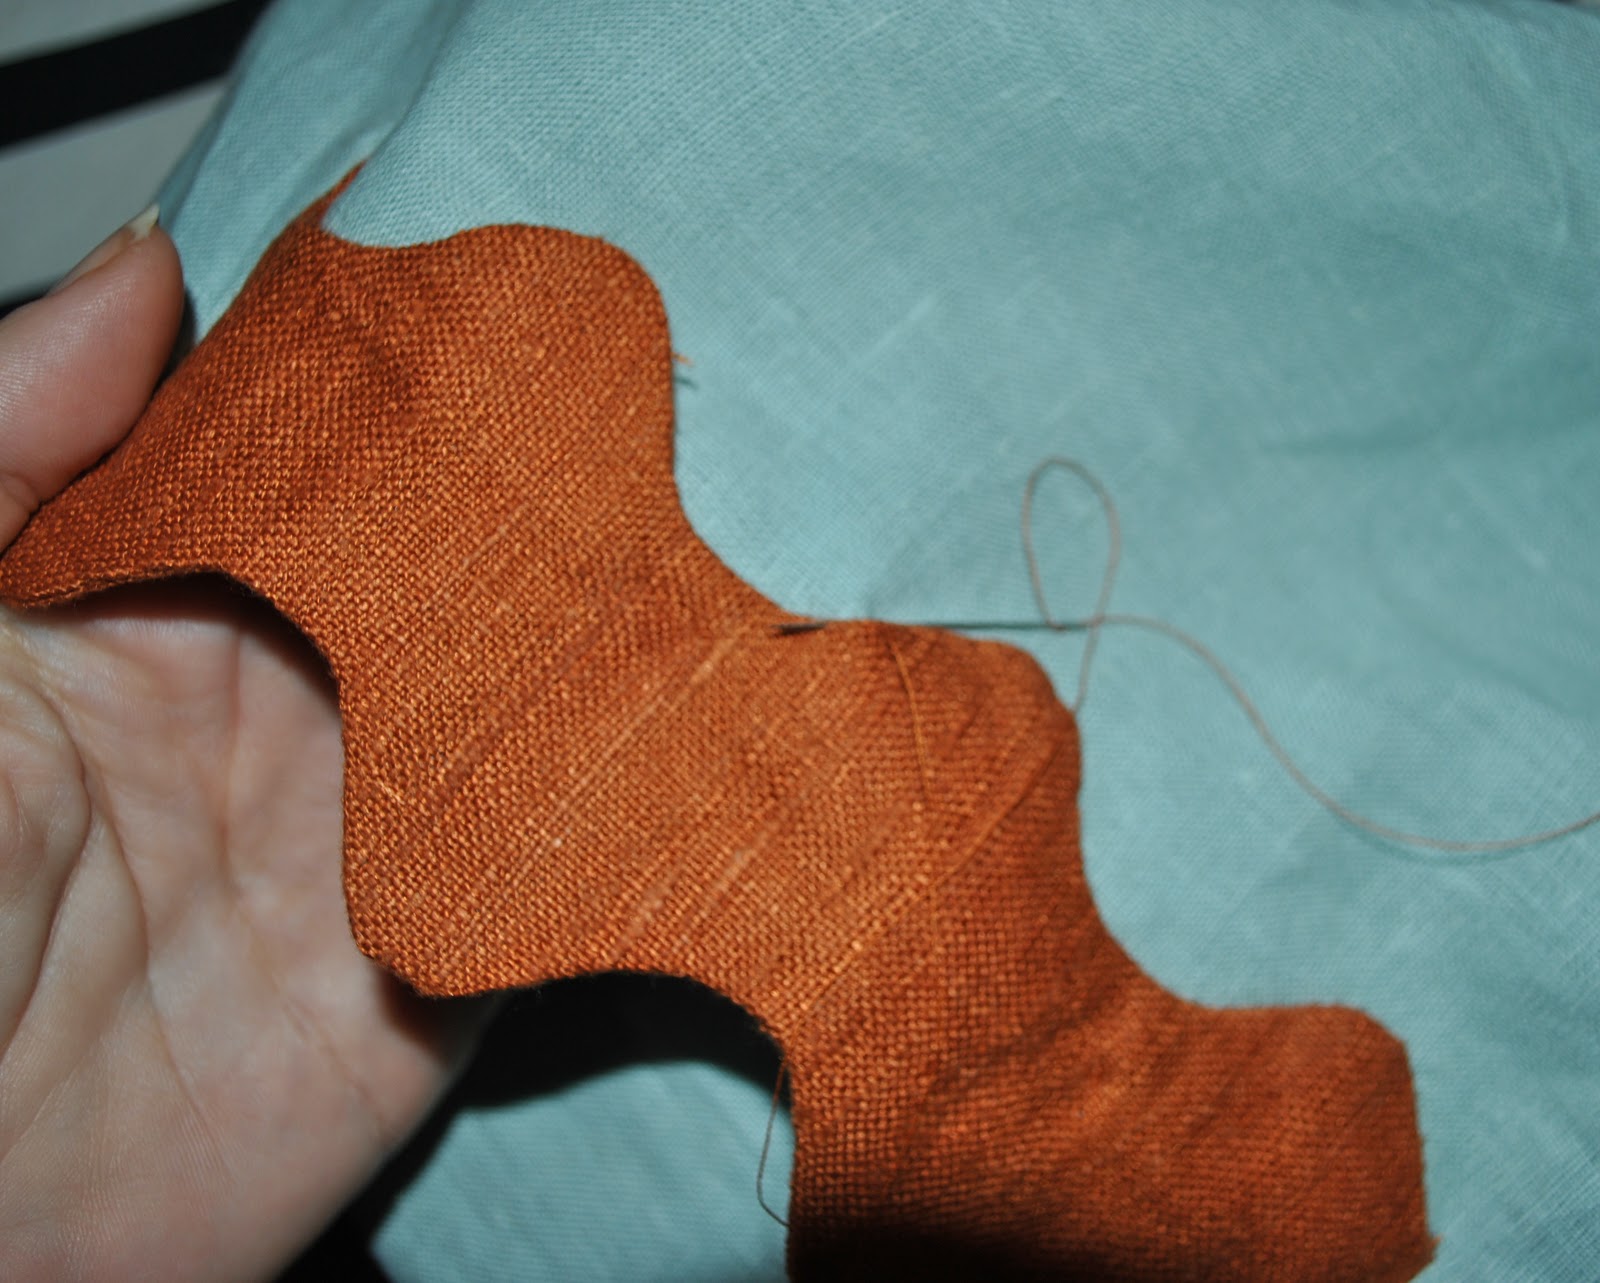
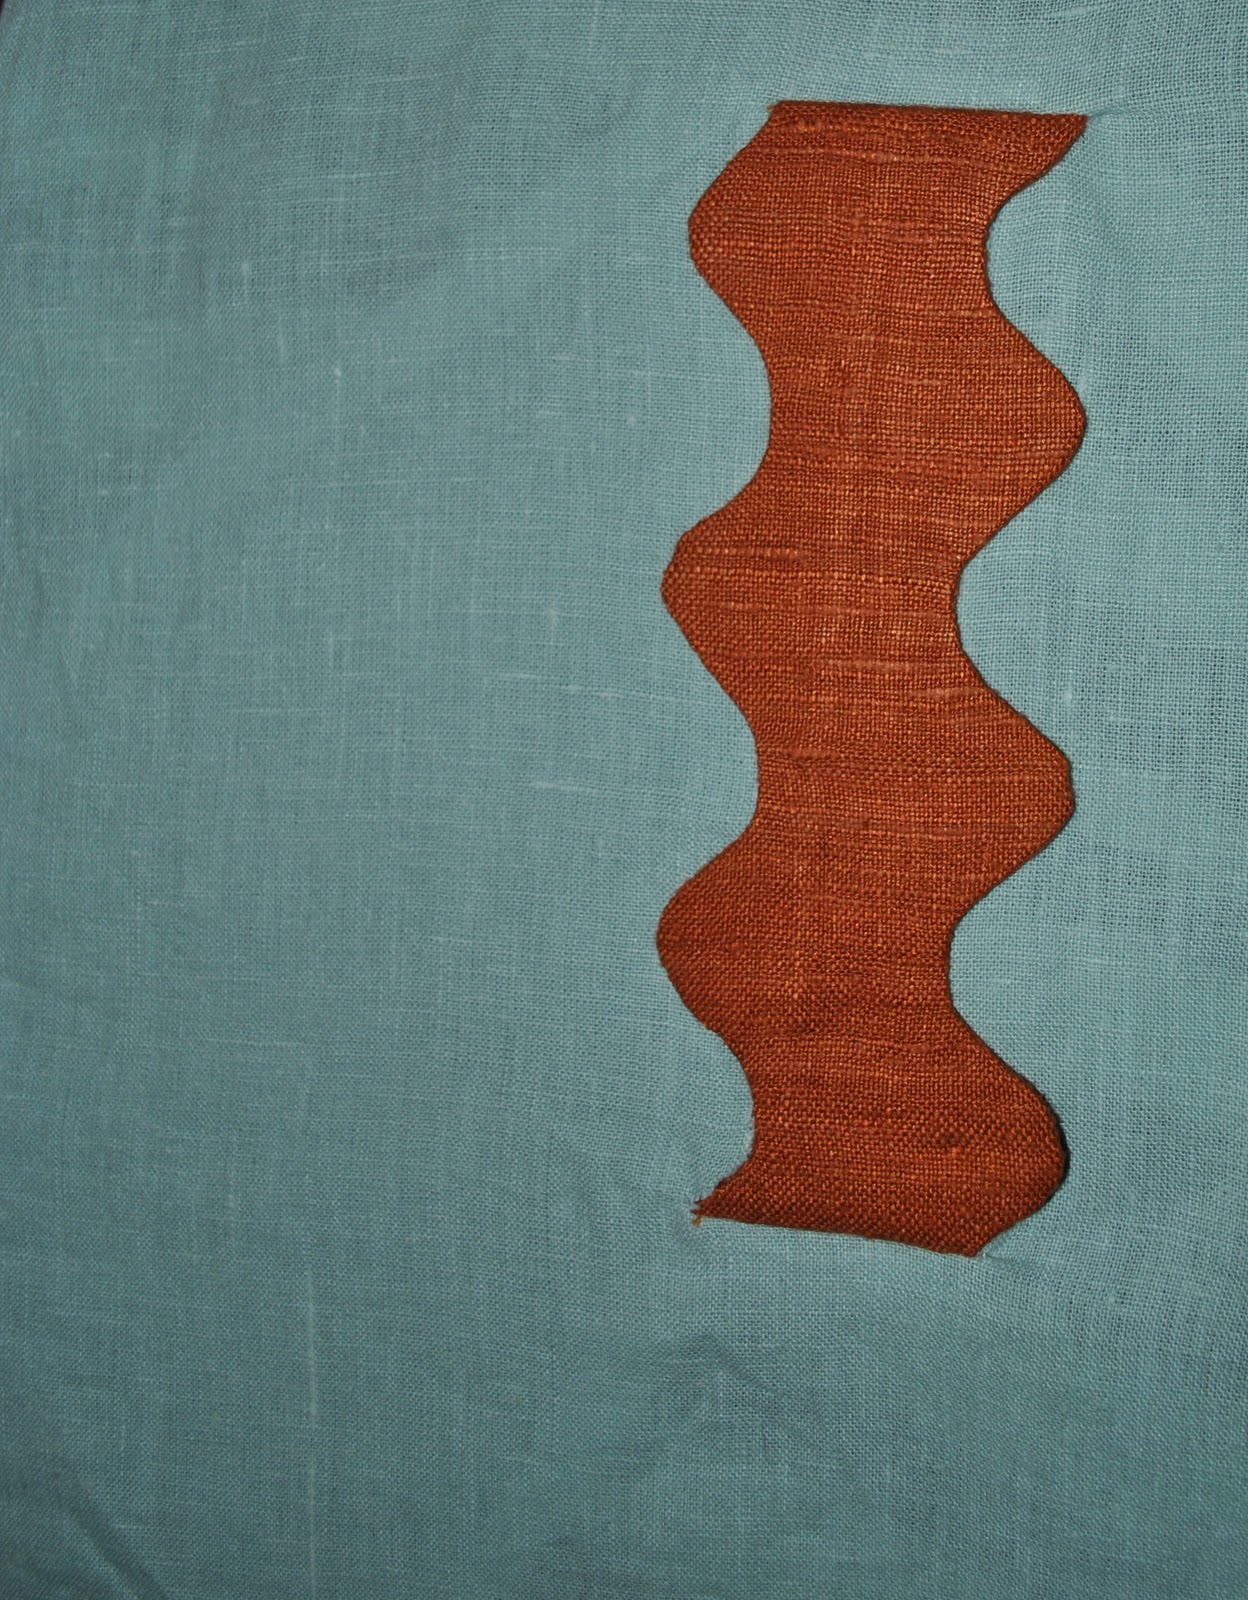
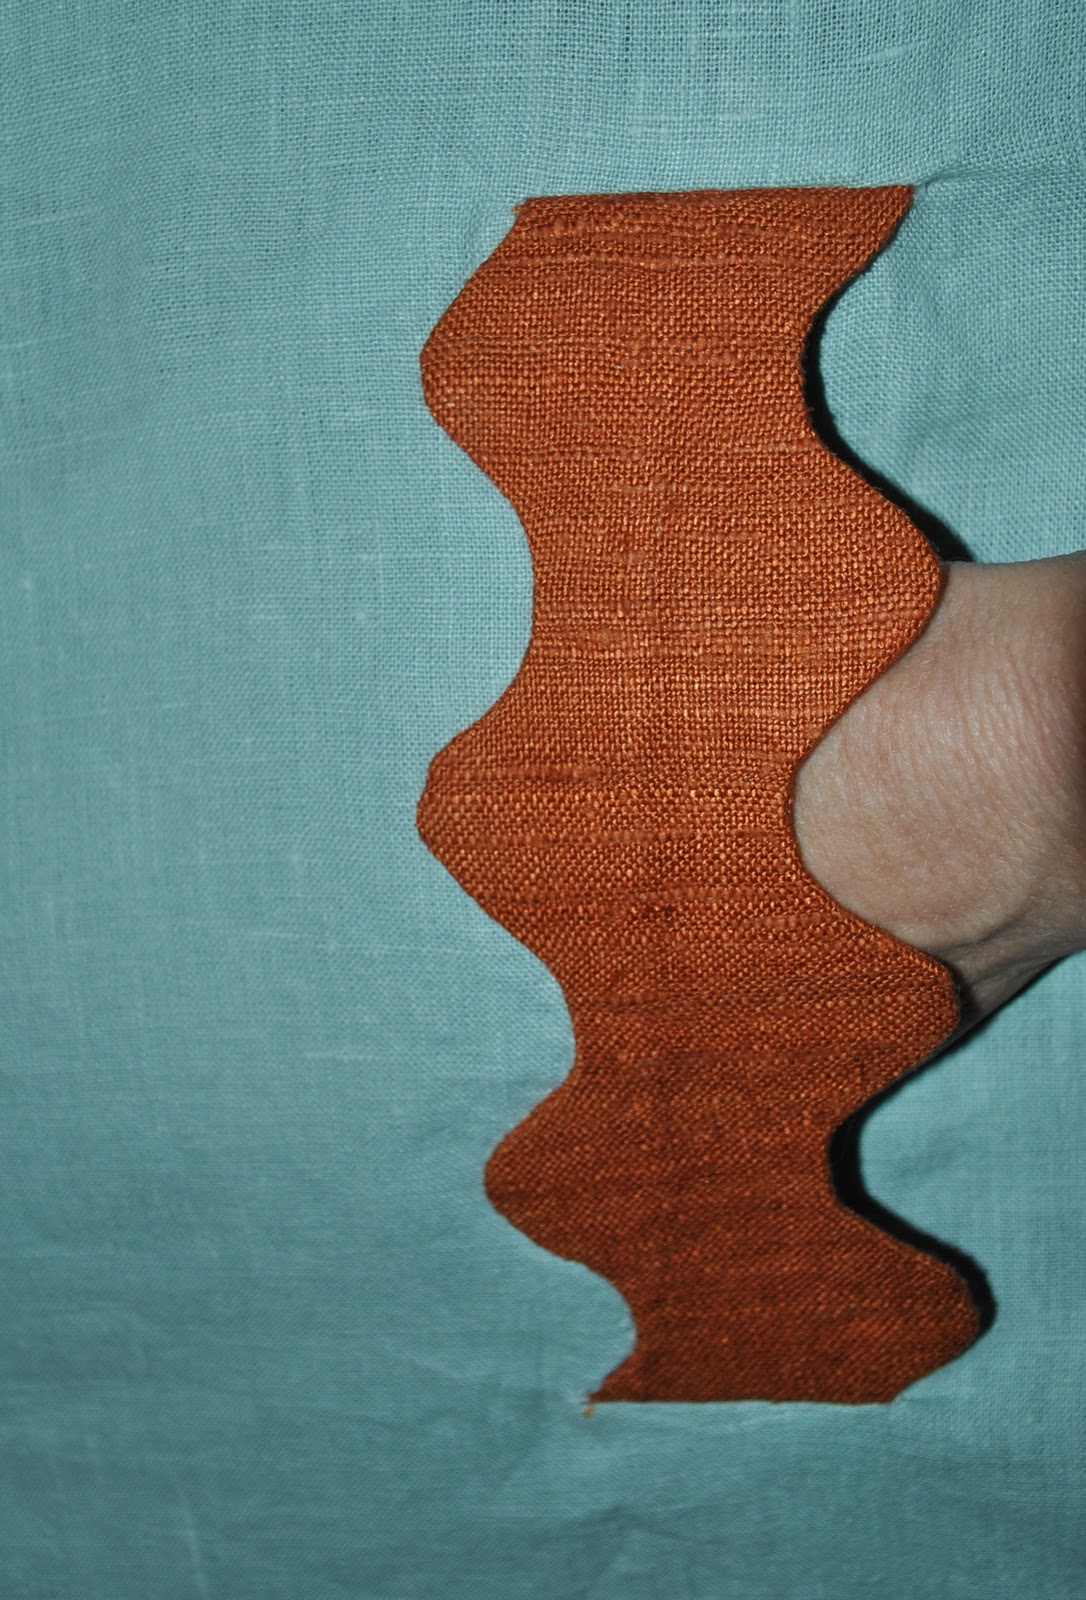
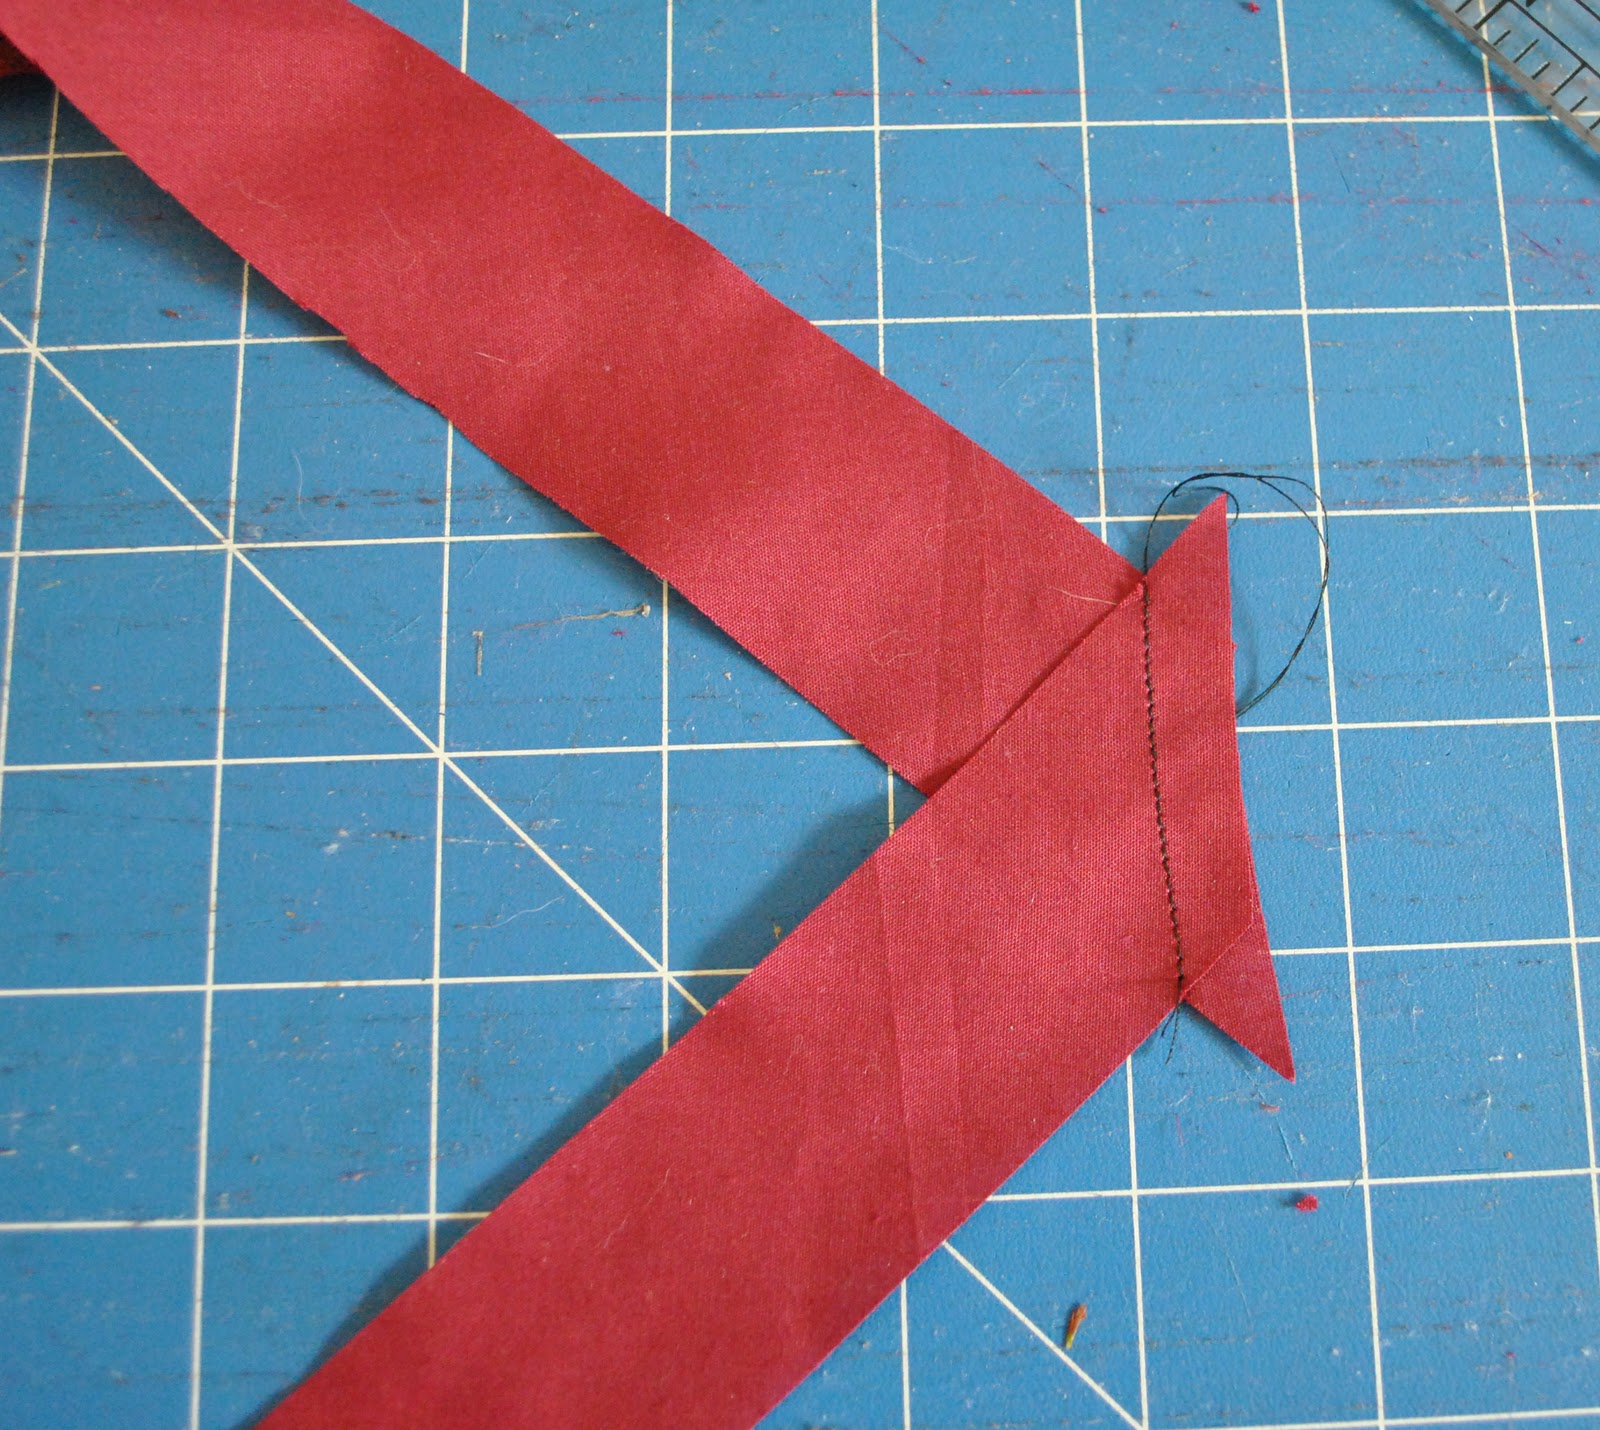
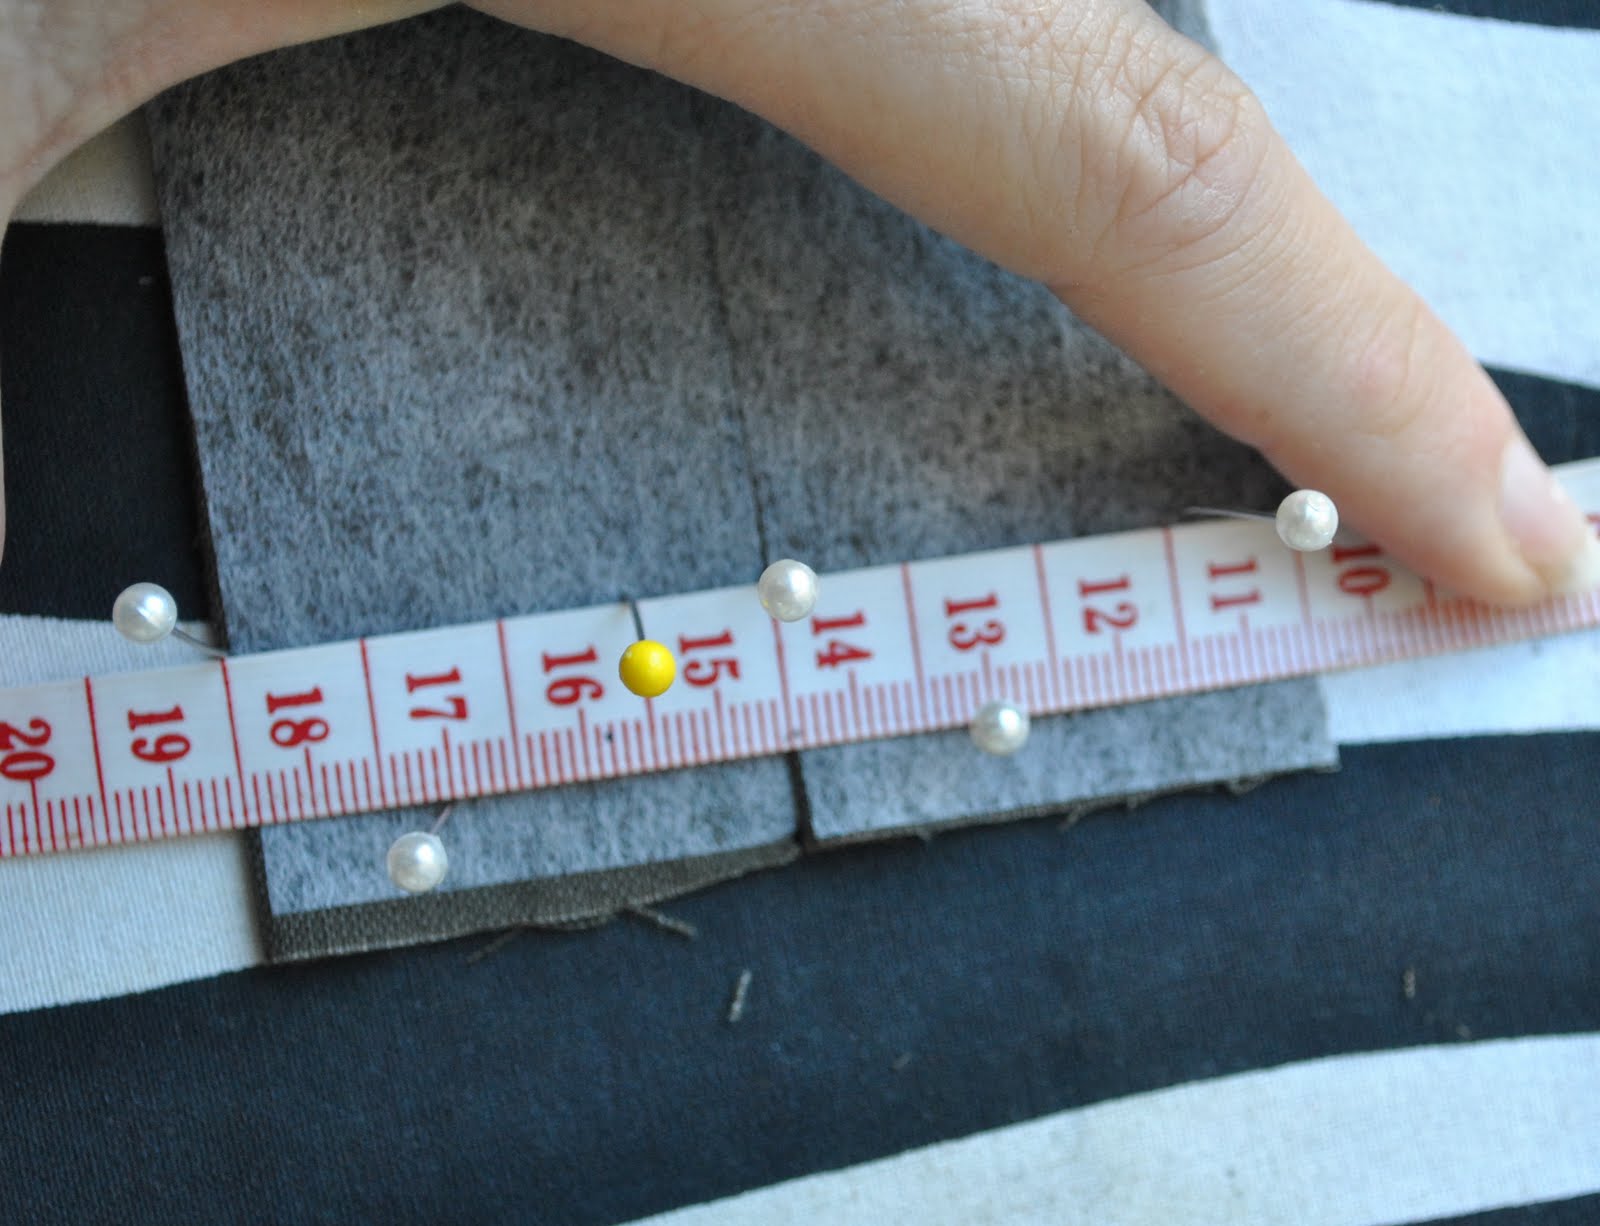
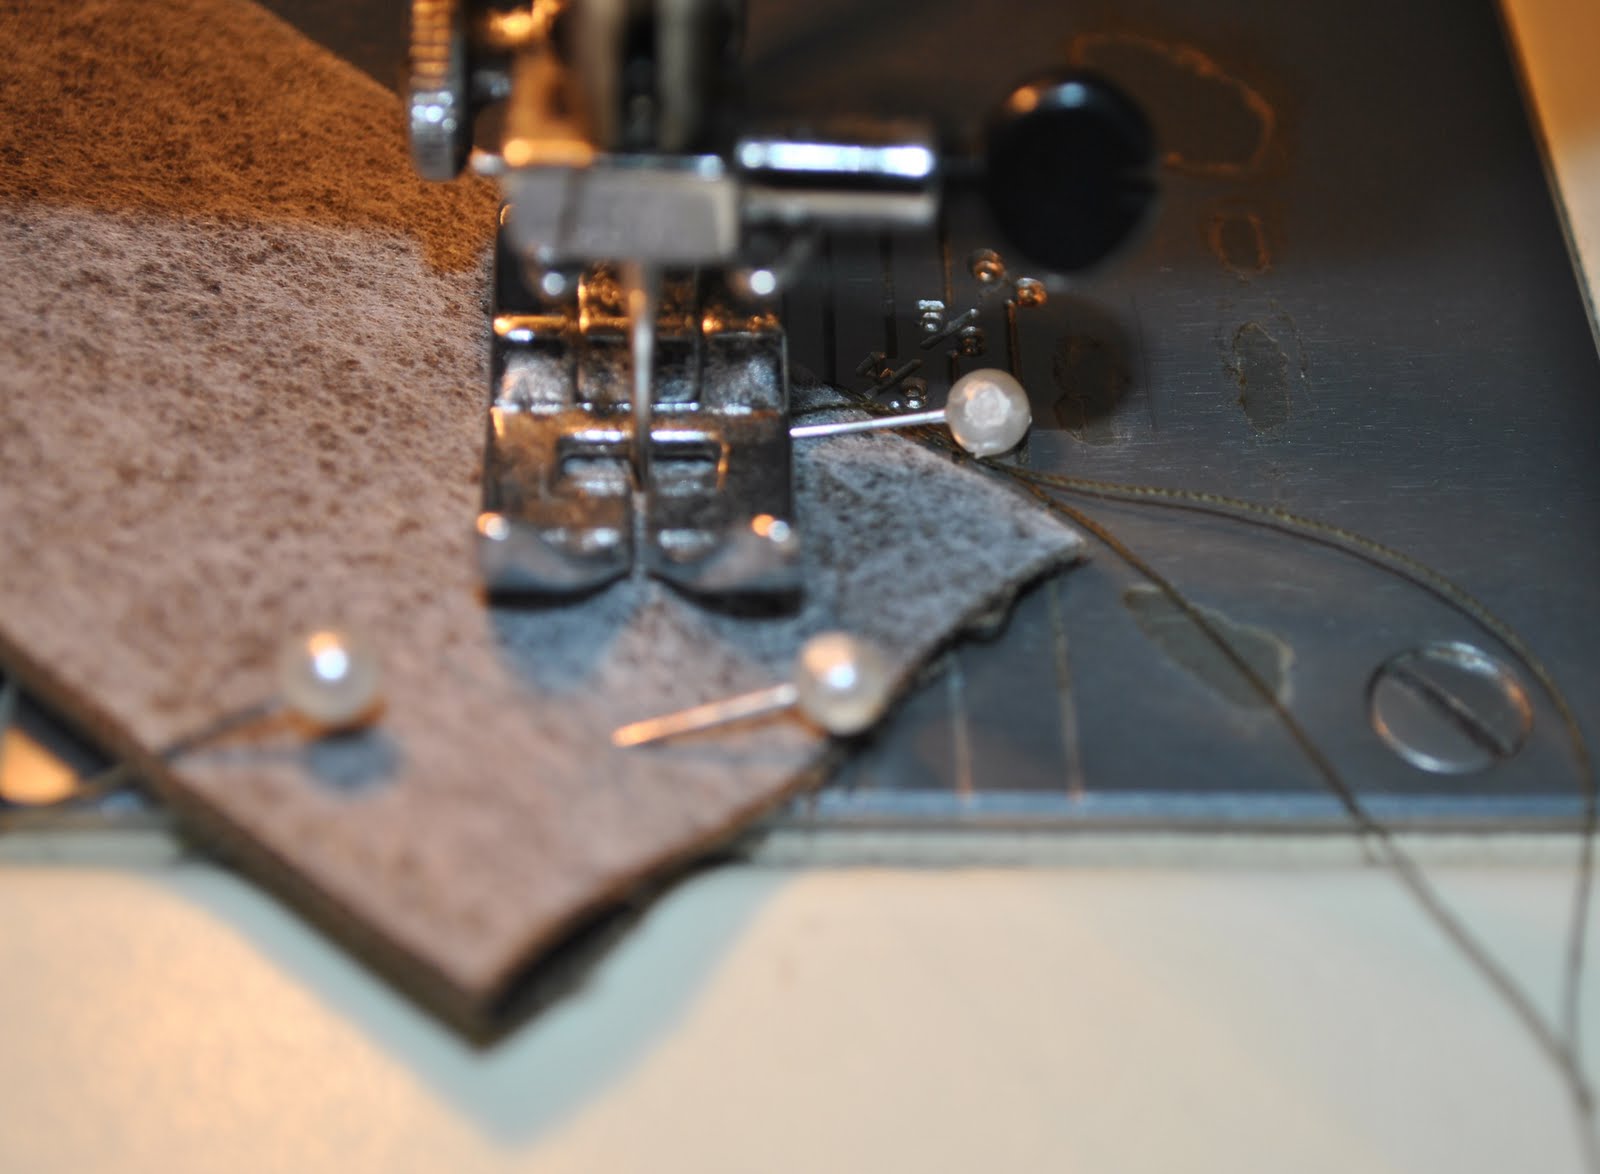
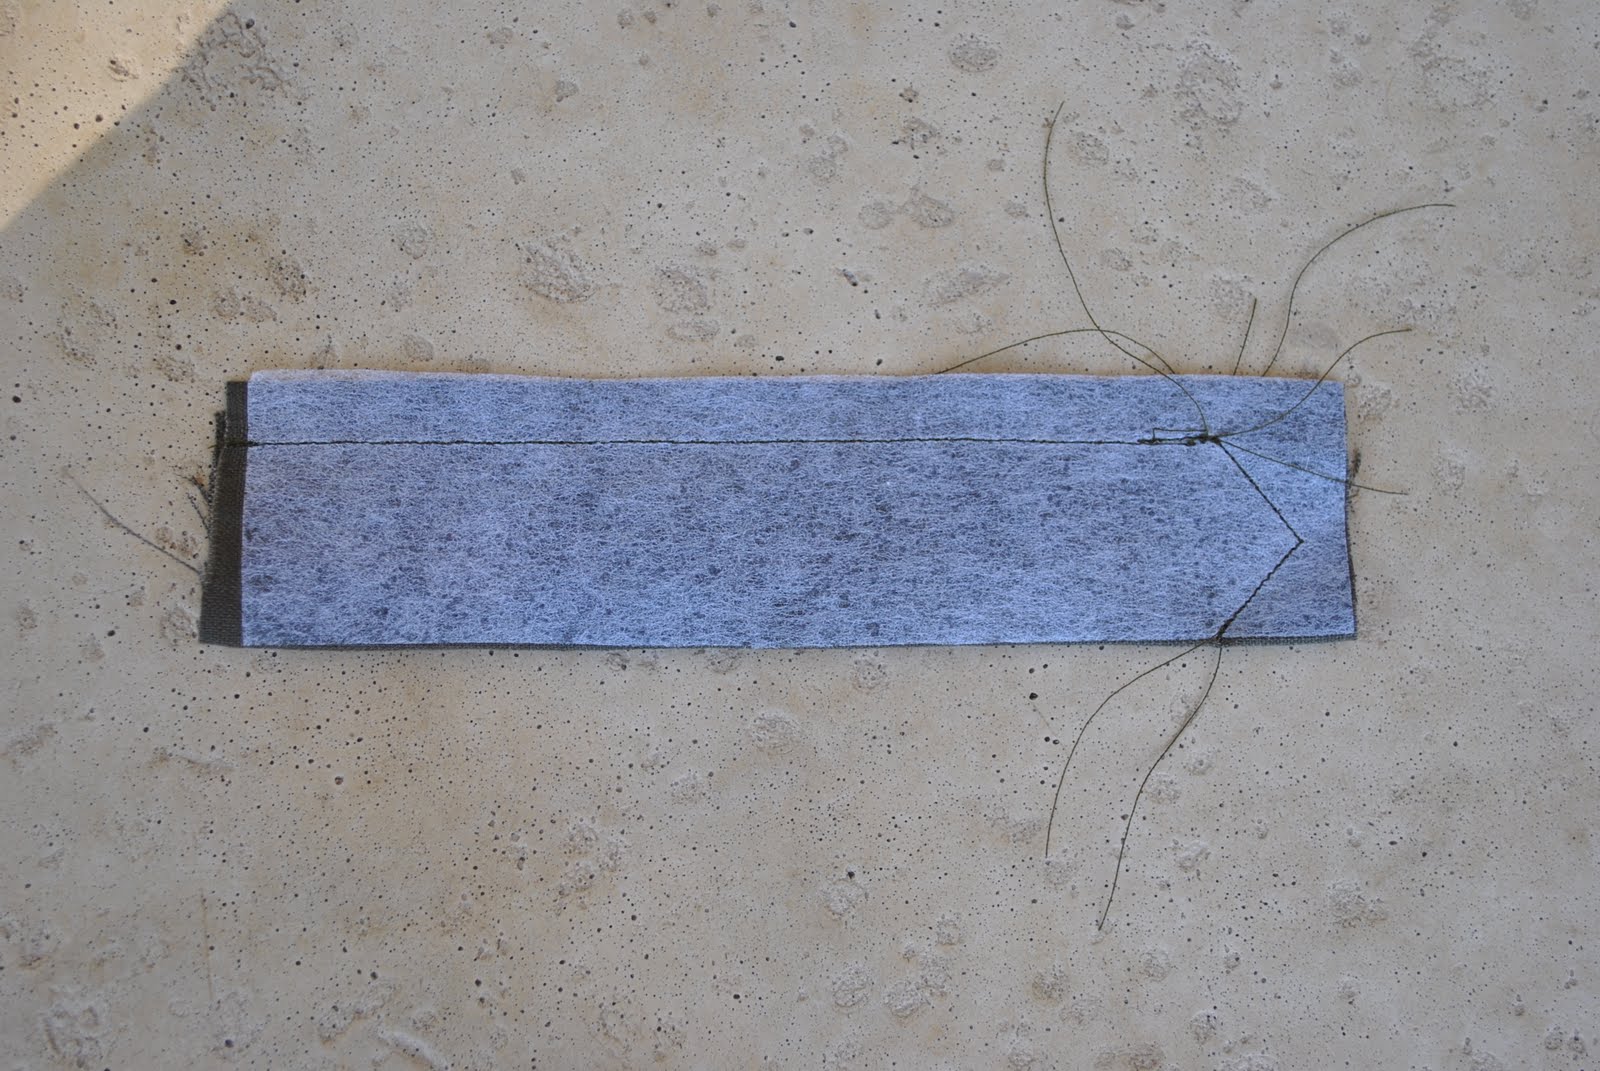
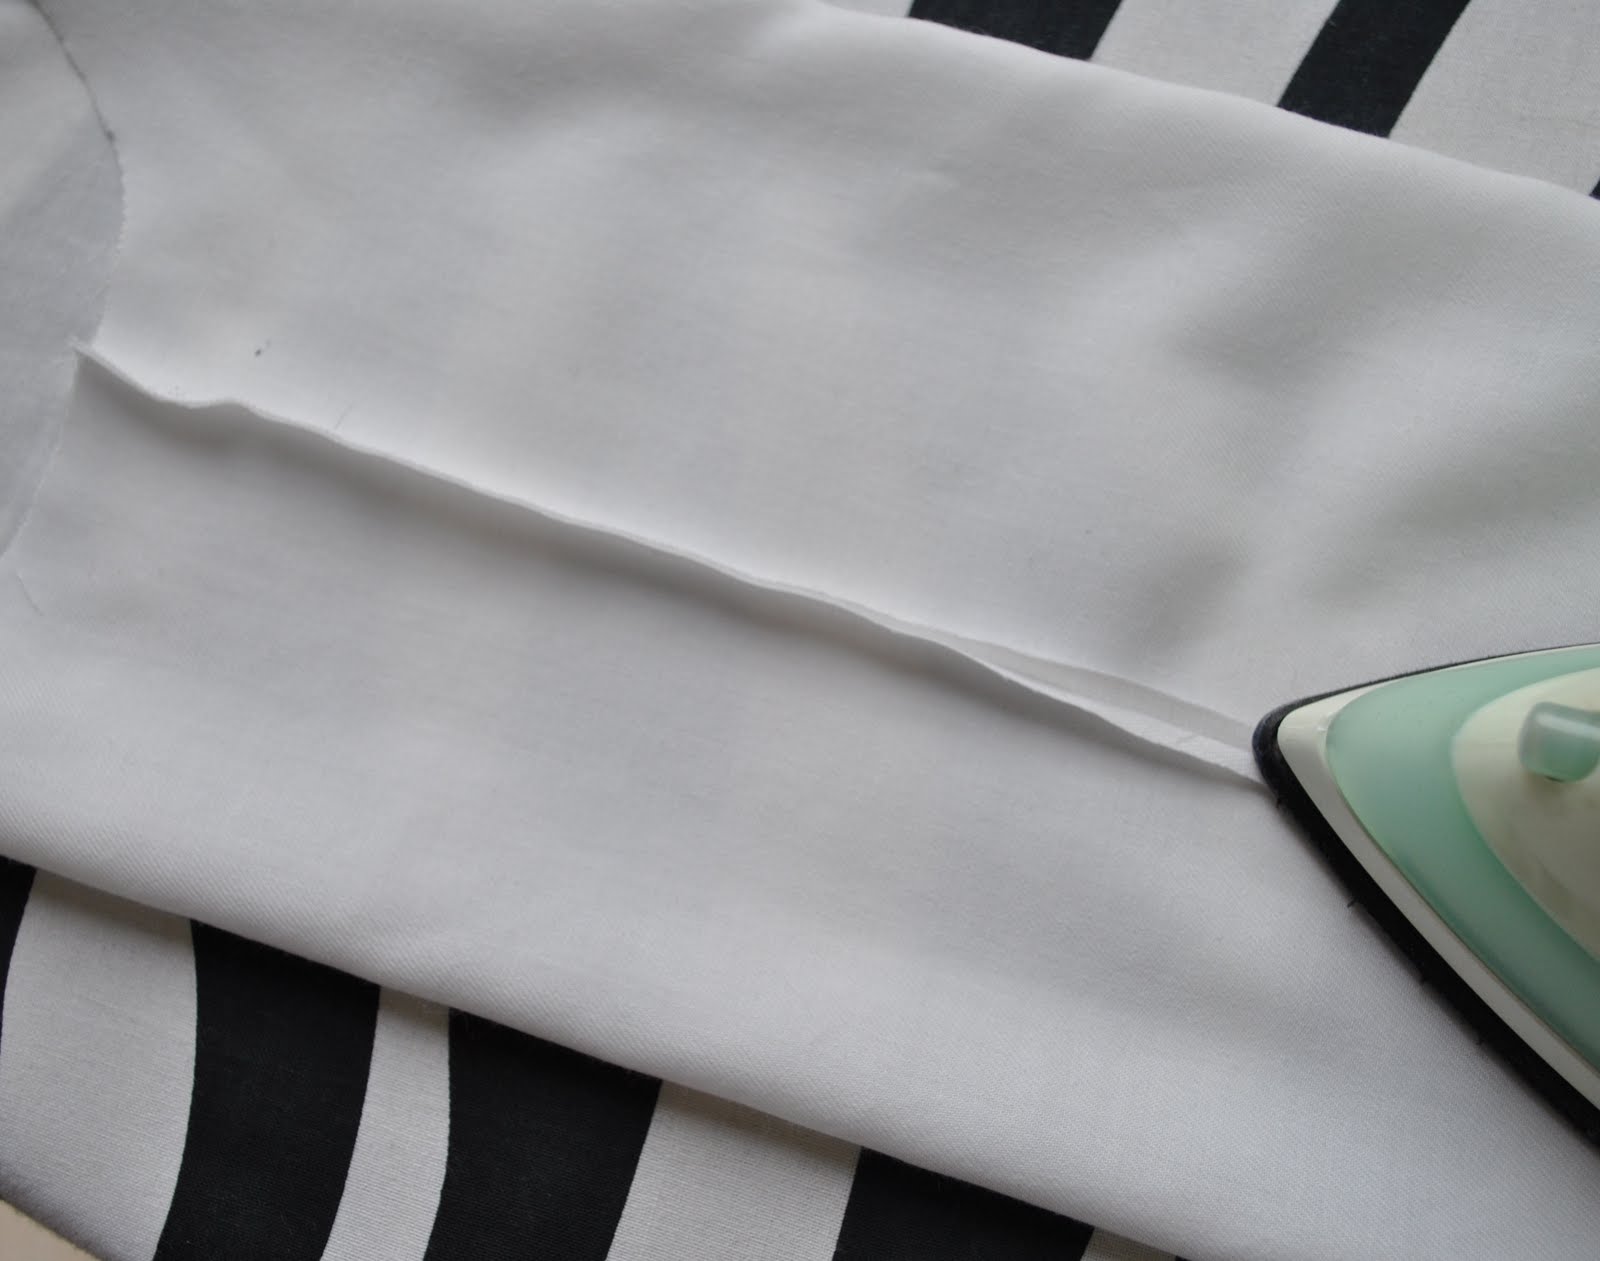
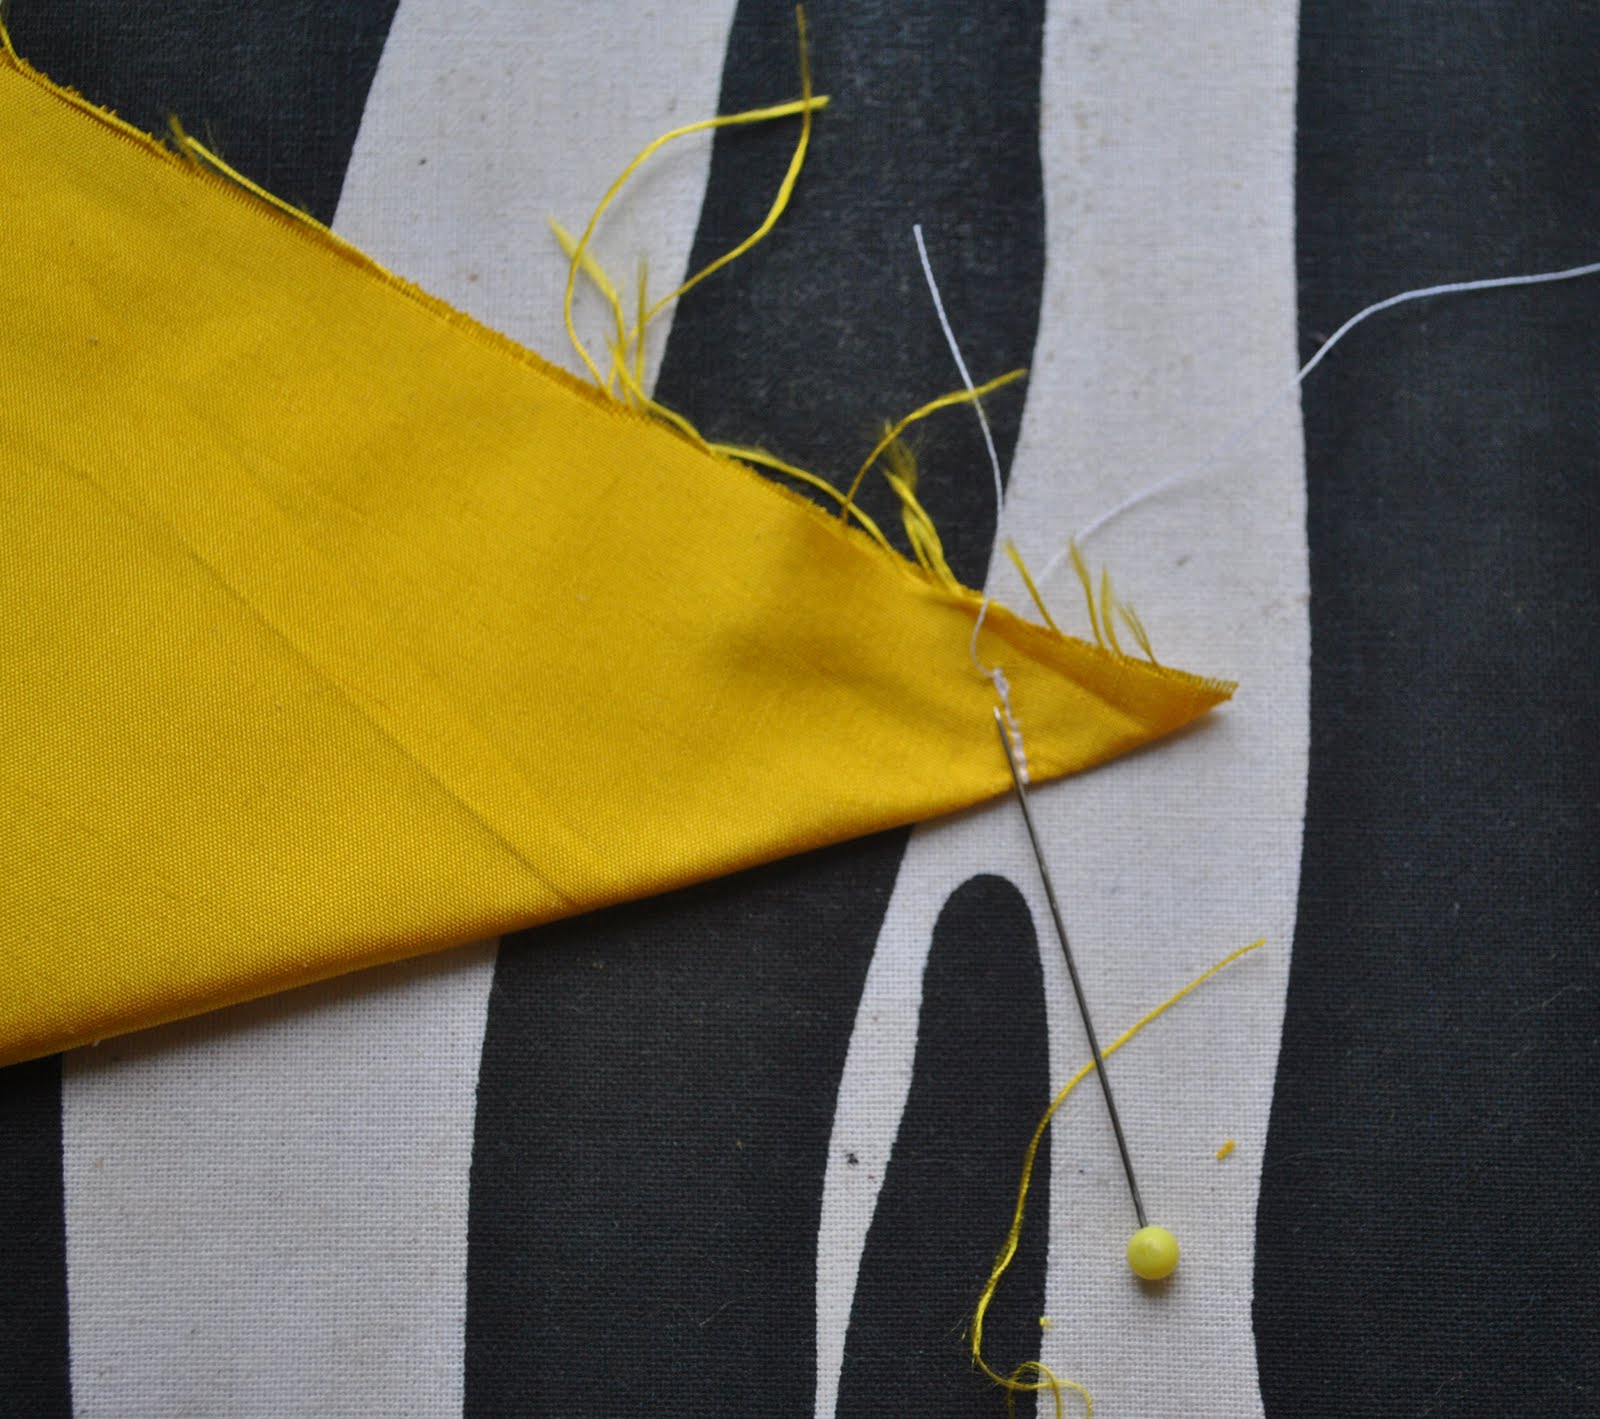
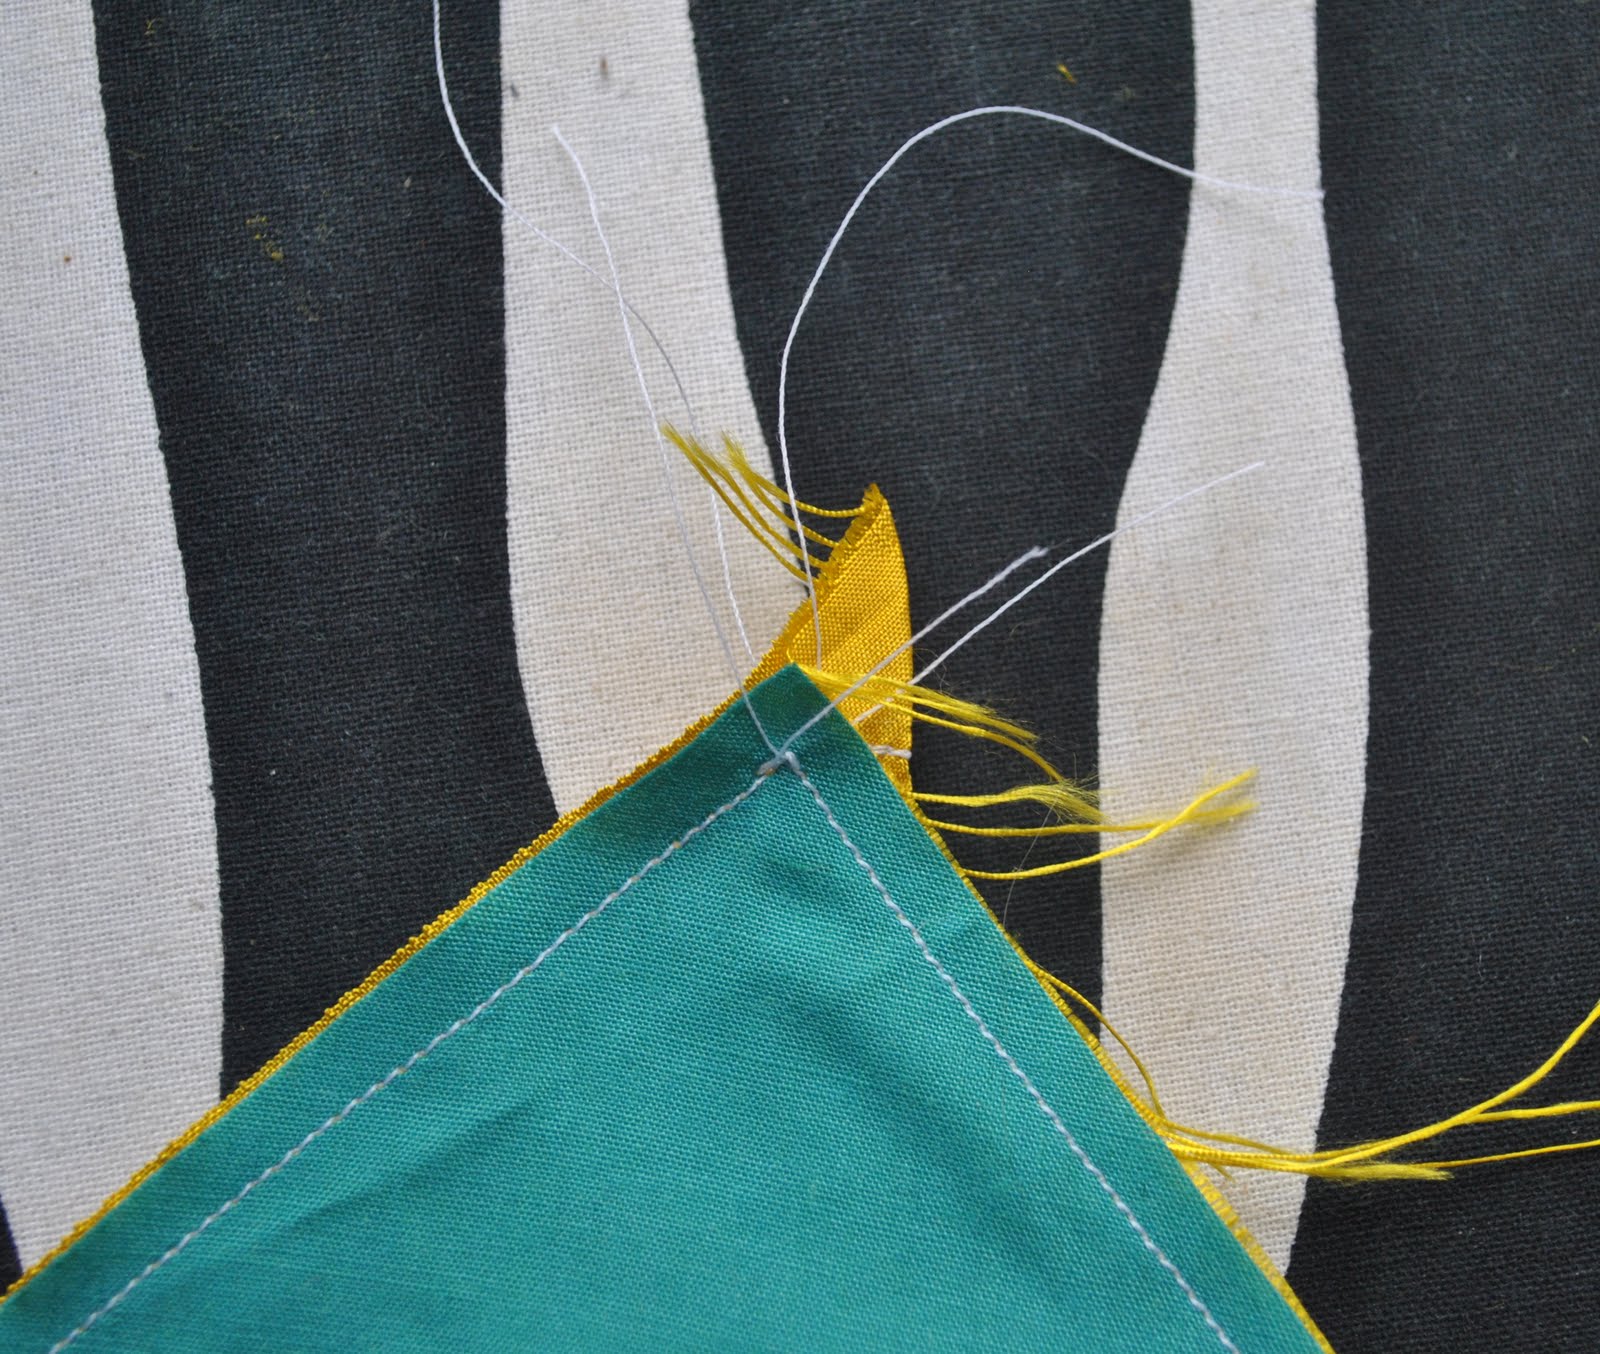
Firstly, fold the tie lengthwise in half, and sew a short line of stitching, perpendicular to the centre fold of the tie… starting at the centre fold and finishing at about 5mm from the raw edges.   The pin is laid in place alongside the white stitching line.
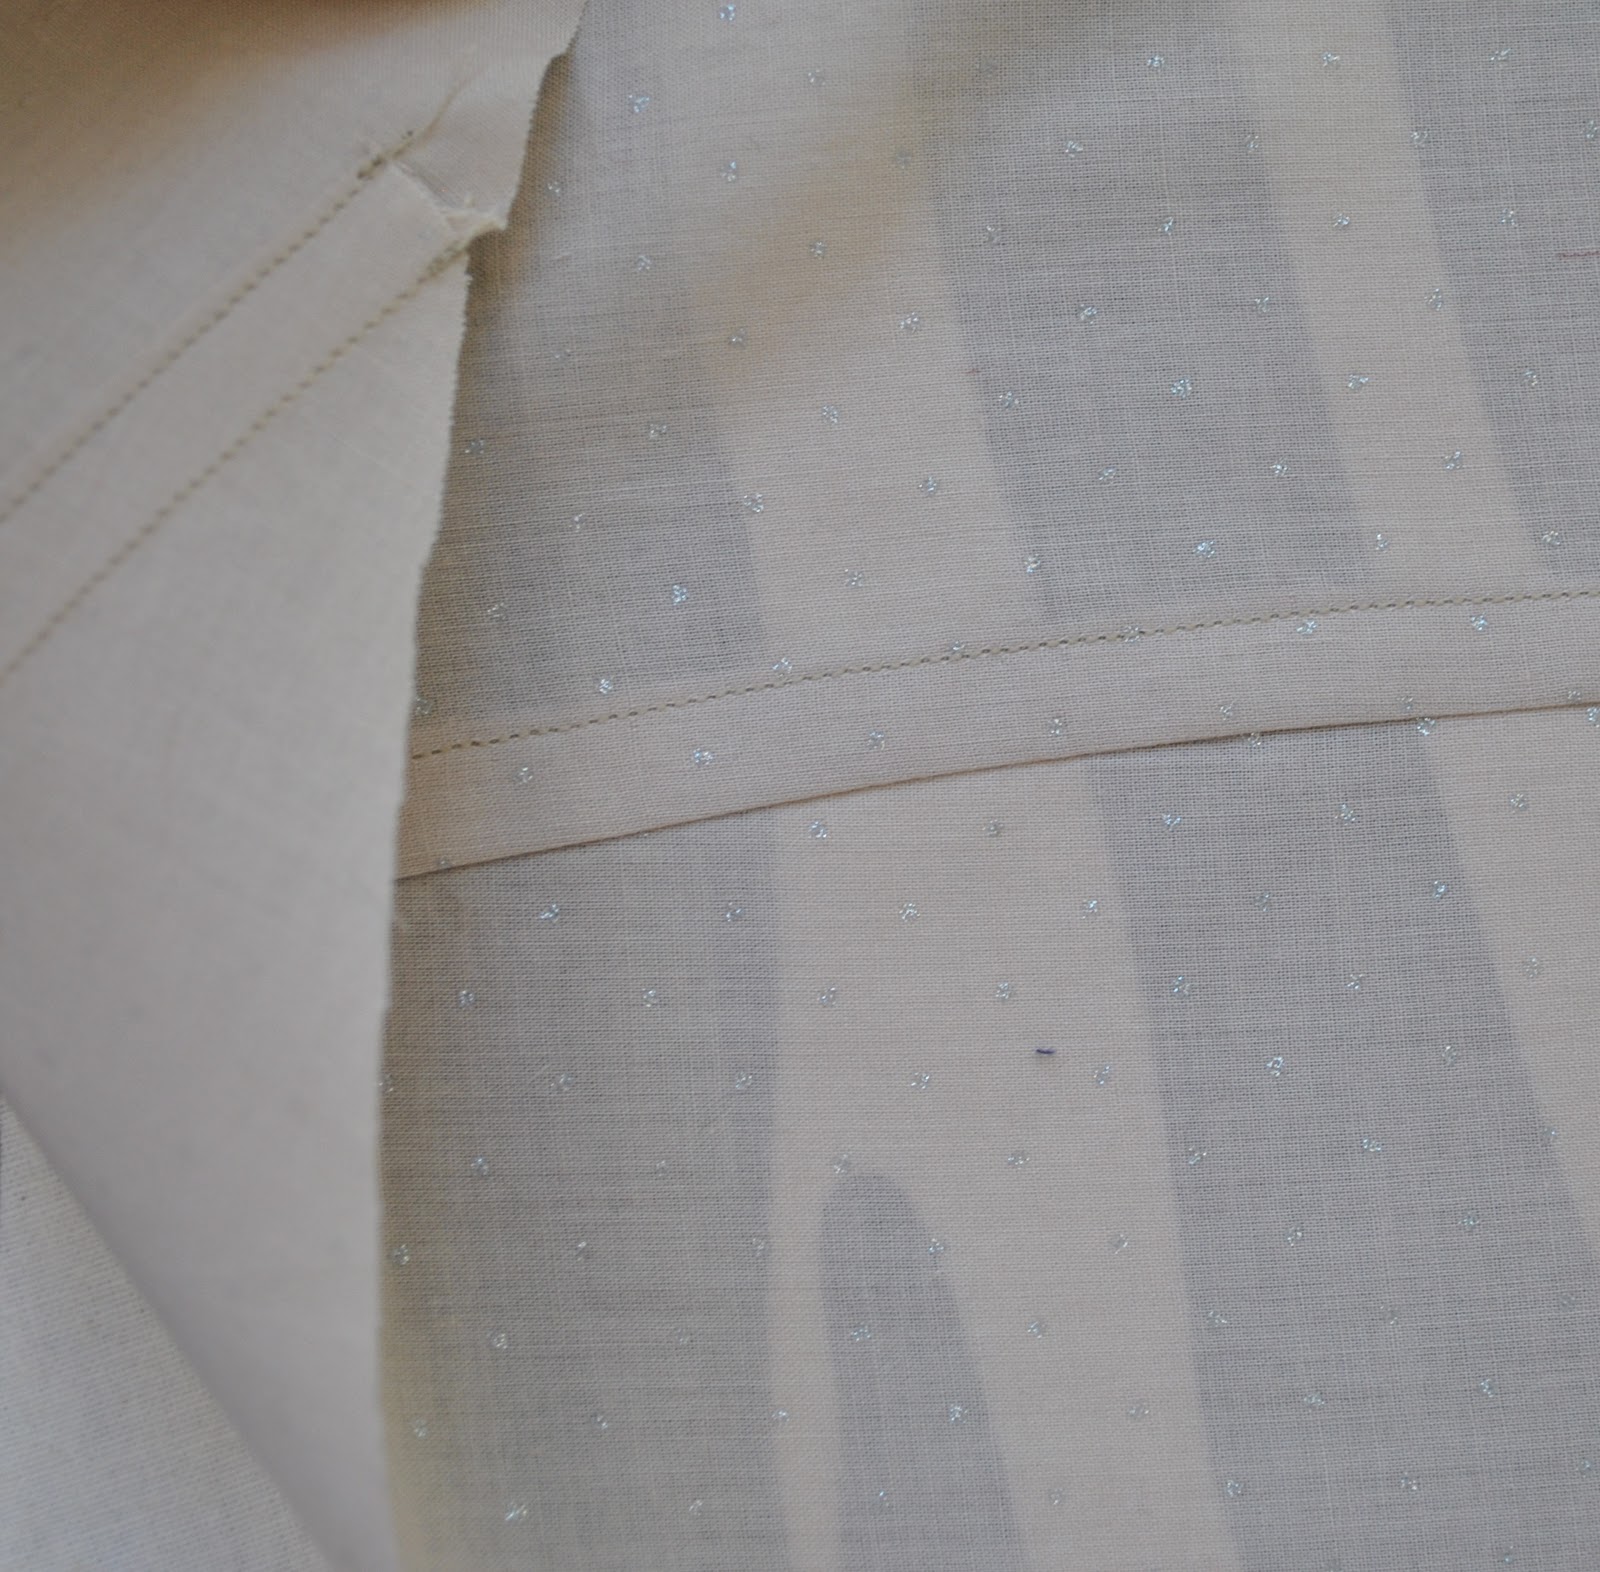
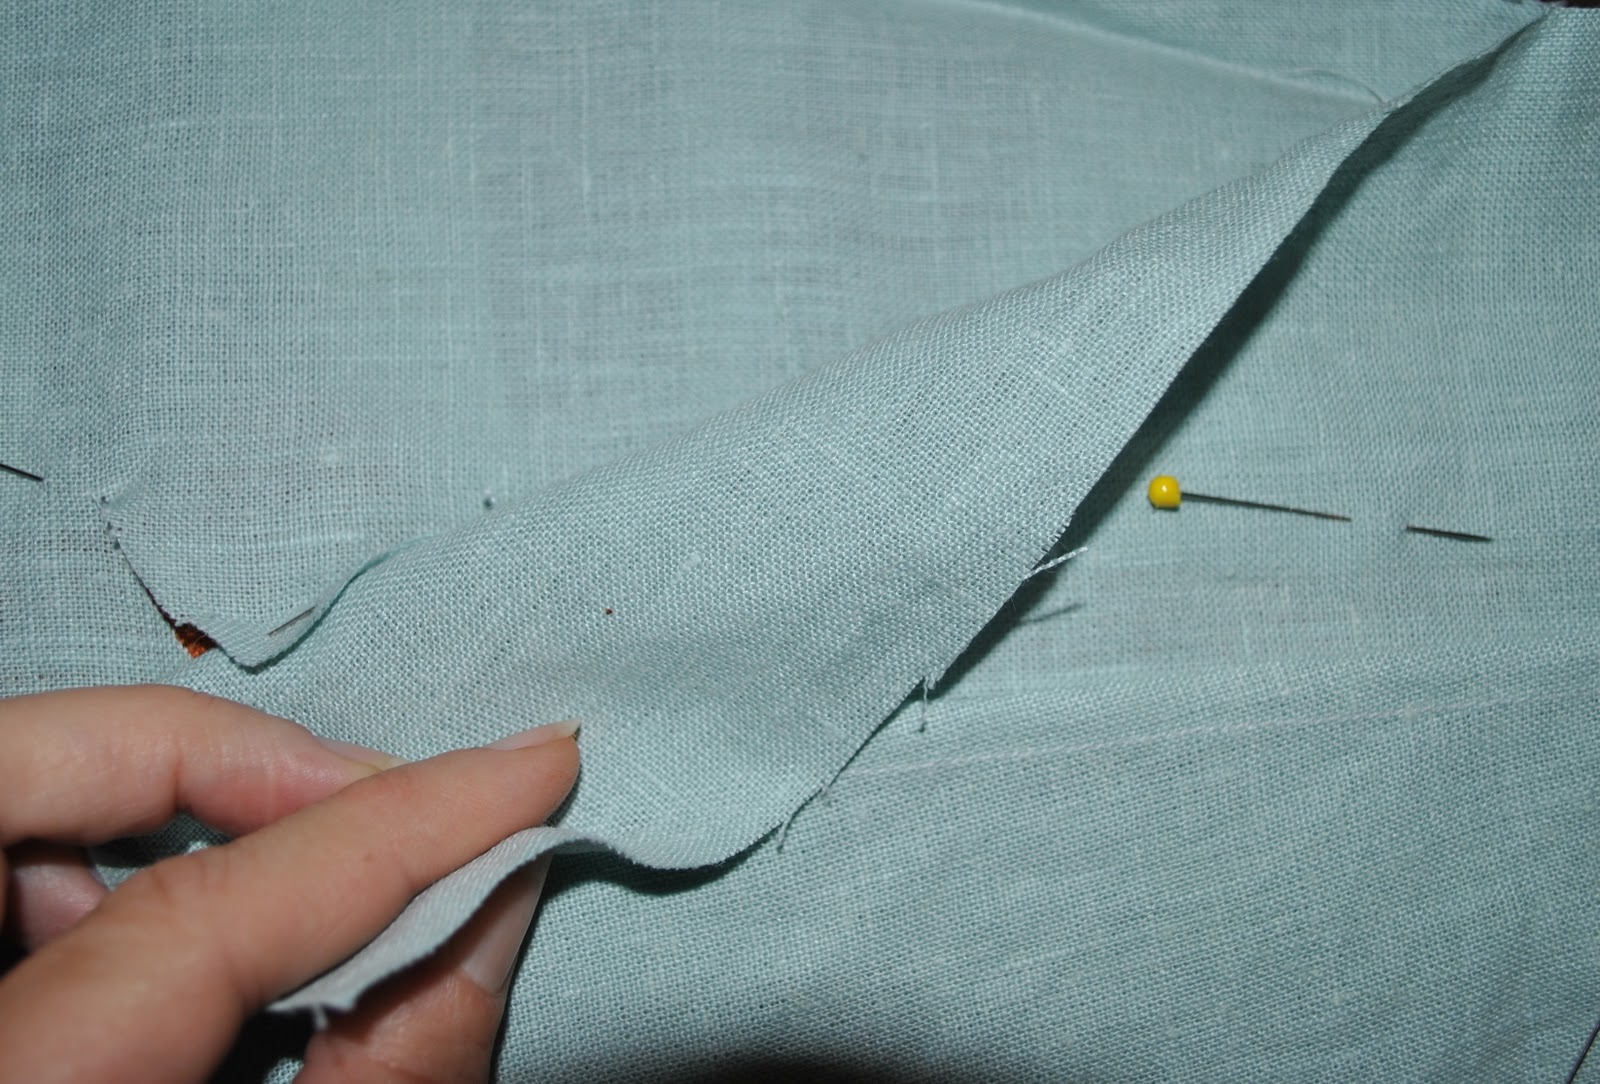
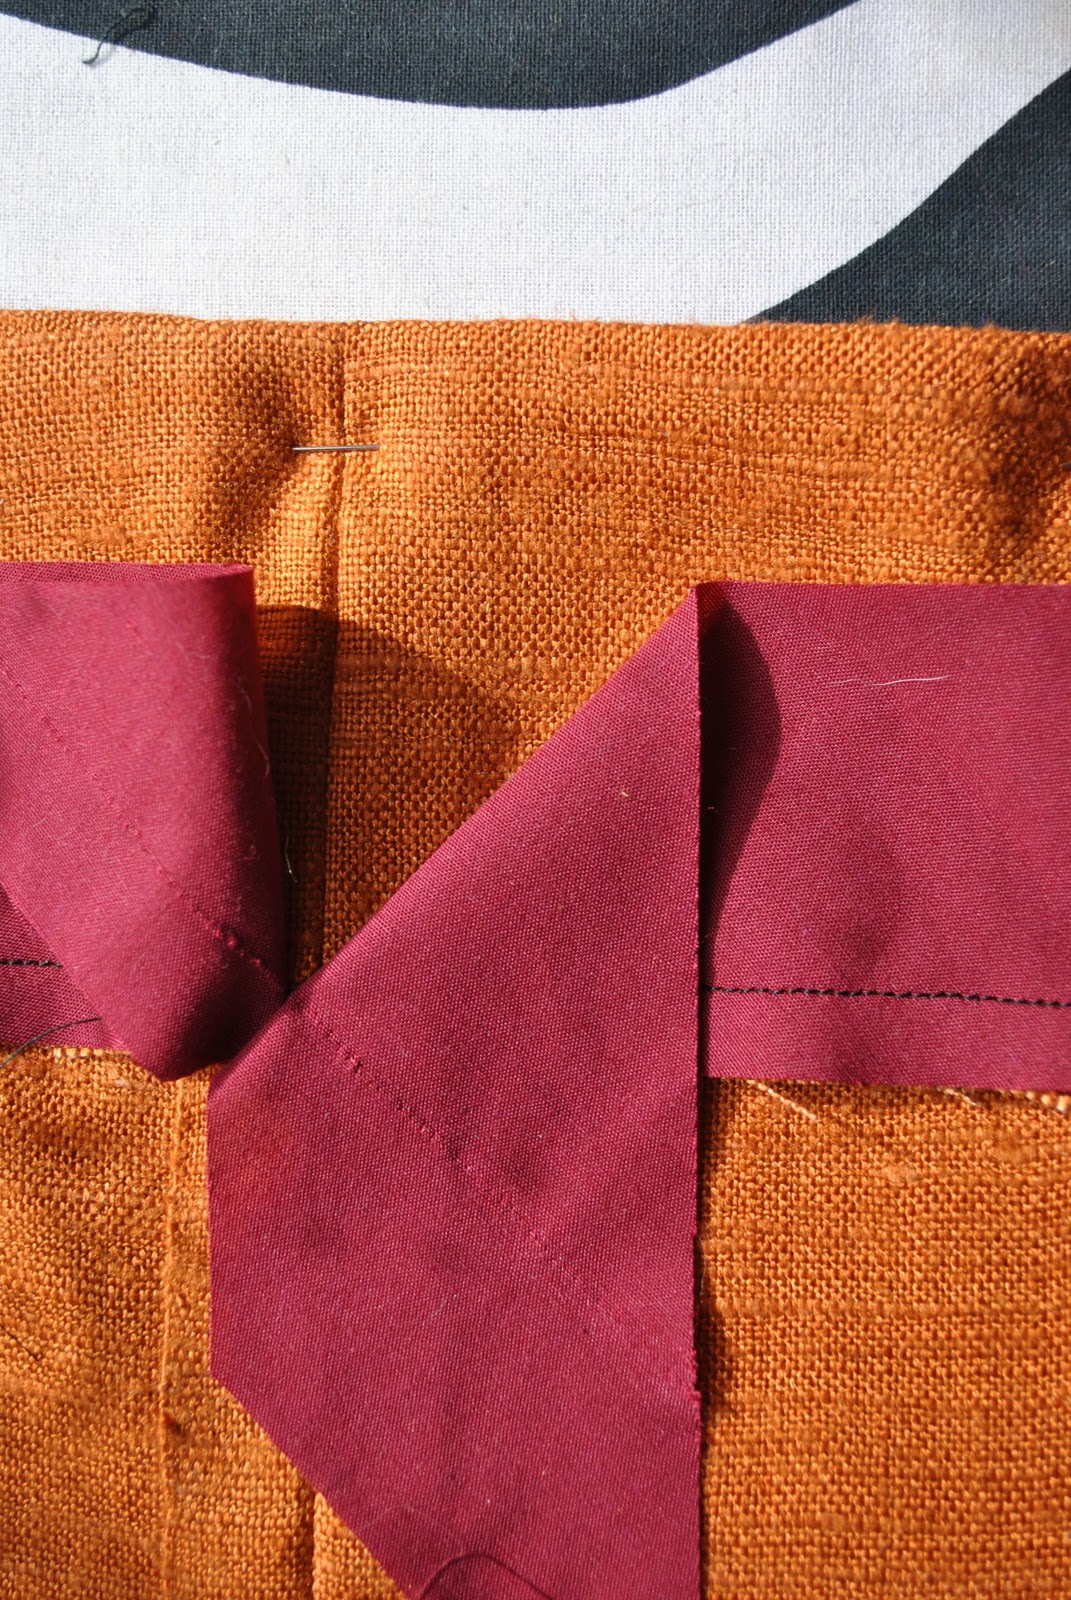
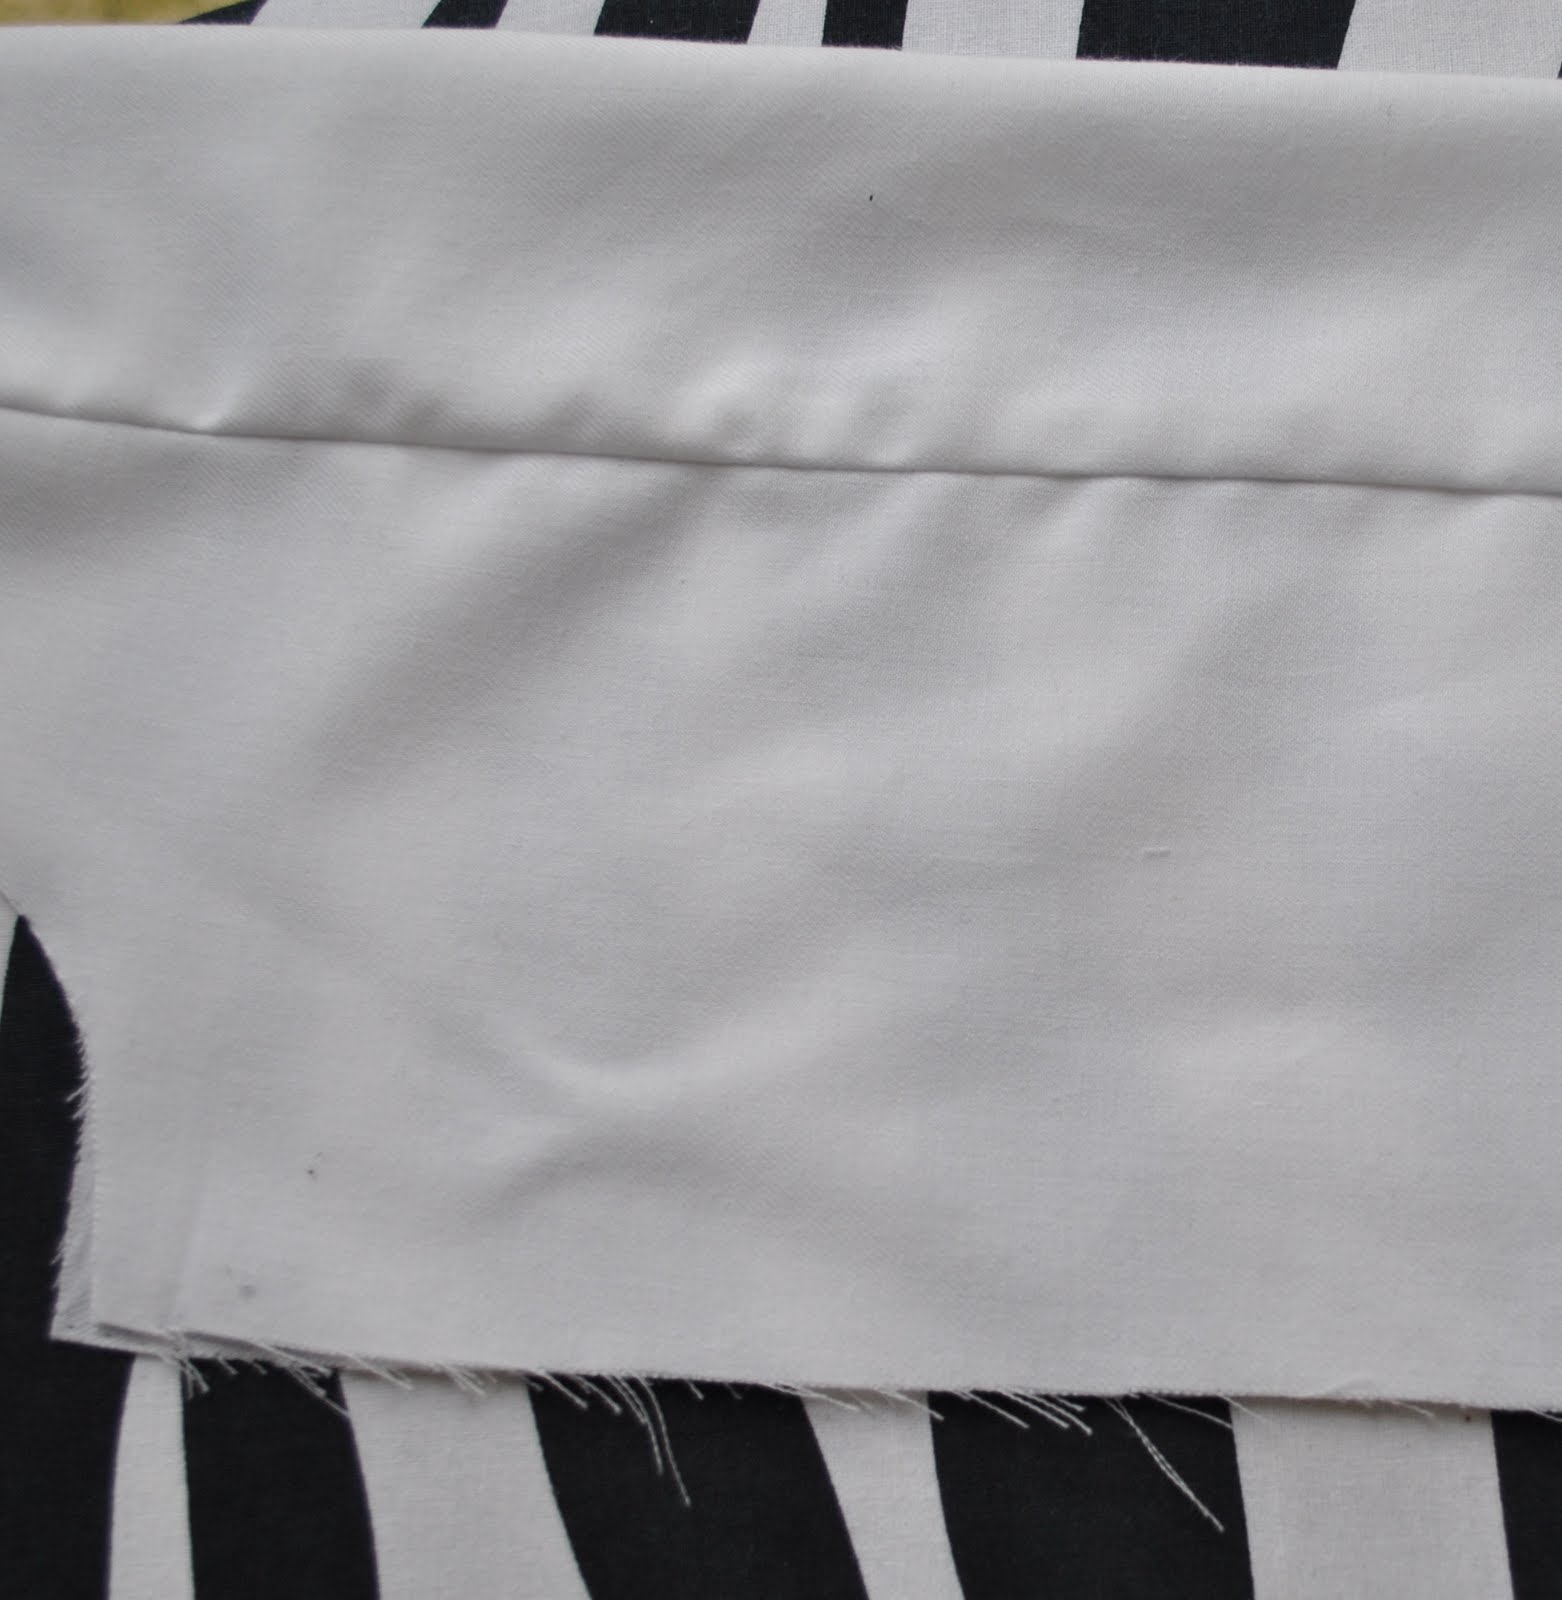
Note: this is a demo scrap that I sewed up later to show up that stitching line properly, really your underlining fabric should be in place wrapped around on the outside of this fold.  I did take a photo with the underlining in place, but my white thread didn’t show up very well against the white underlining fabric, so took these mock-up photos separately, without the underlining.
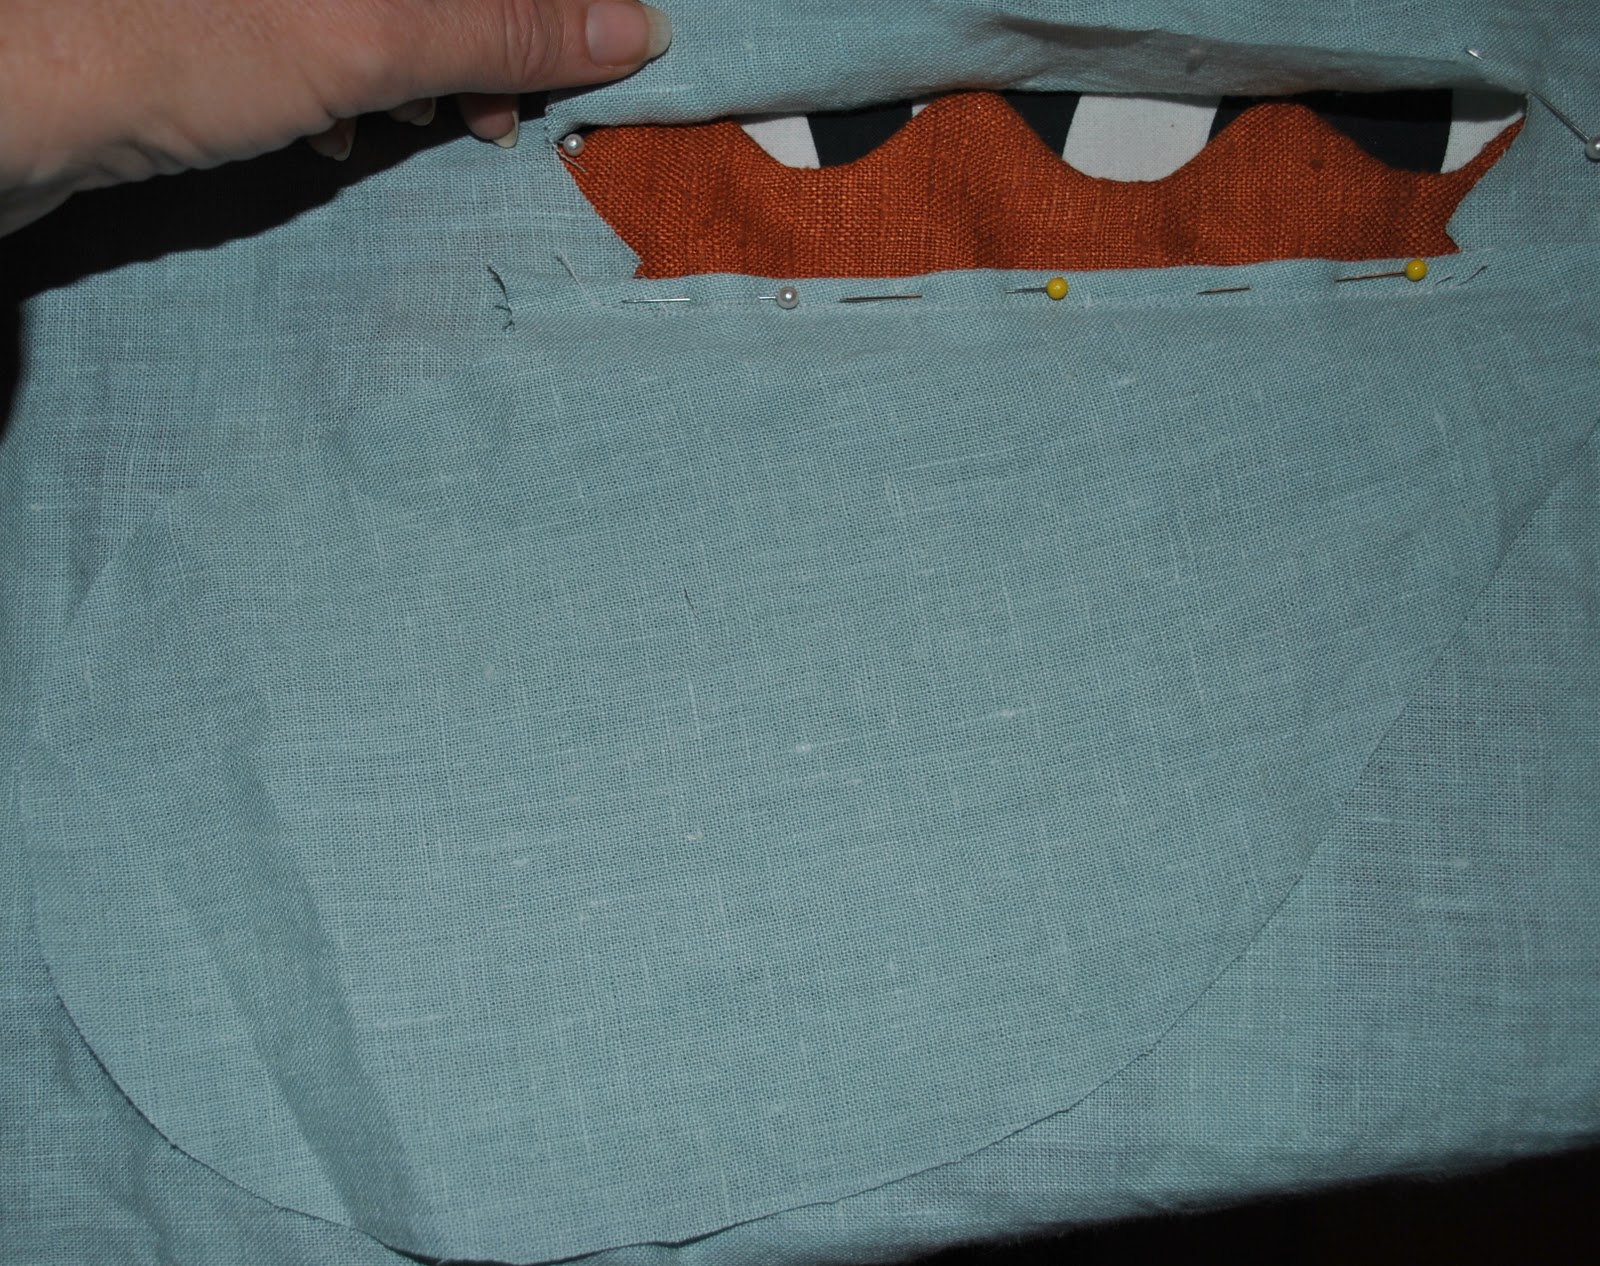
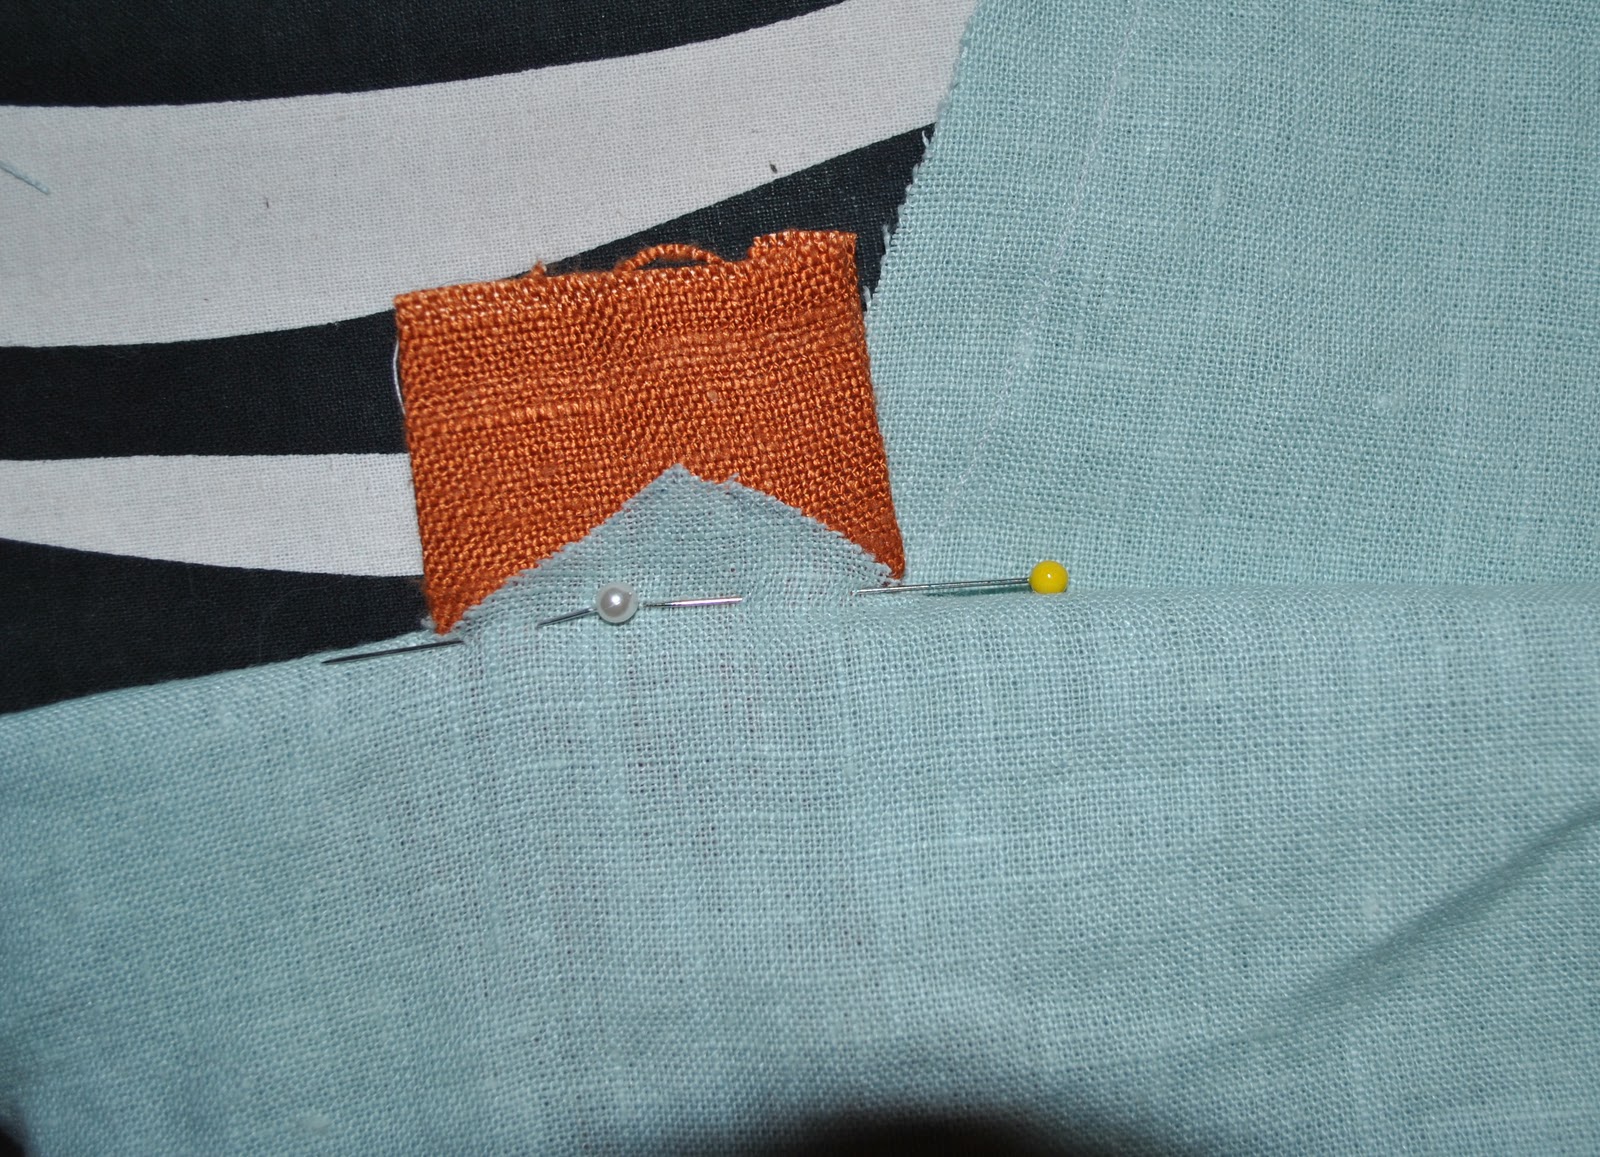
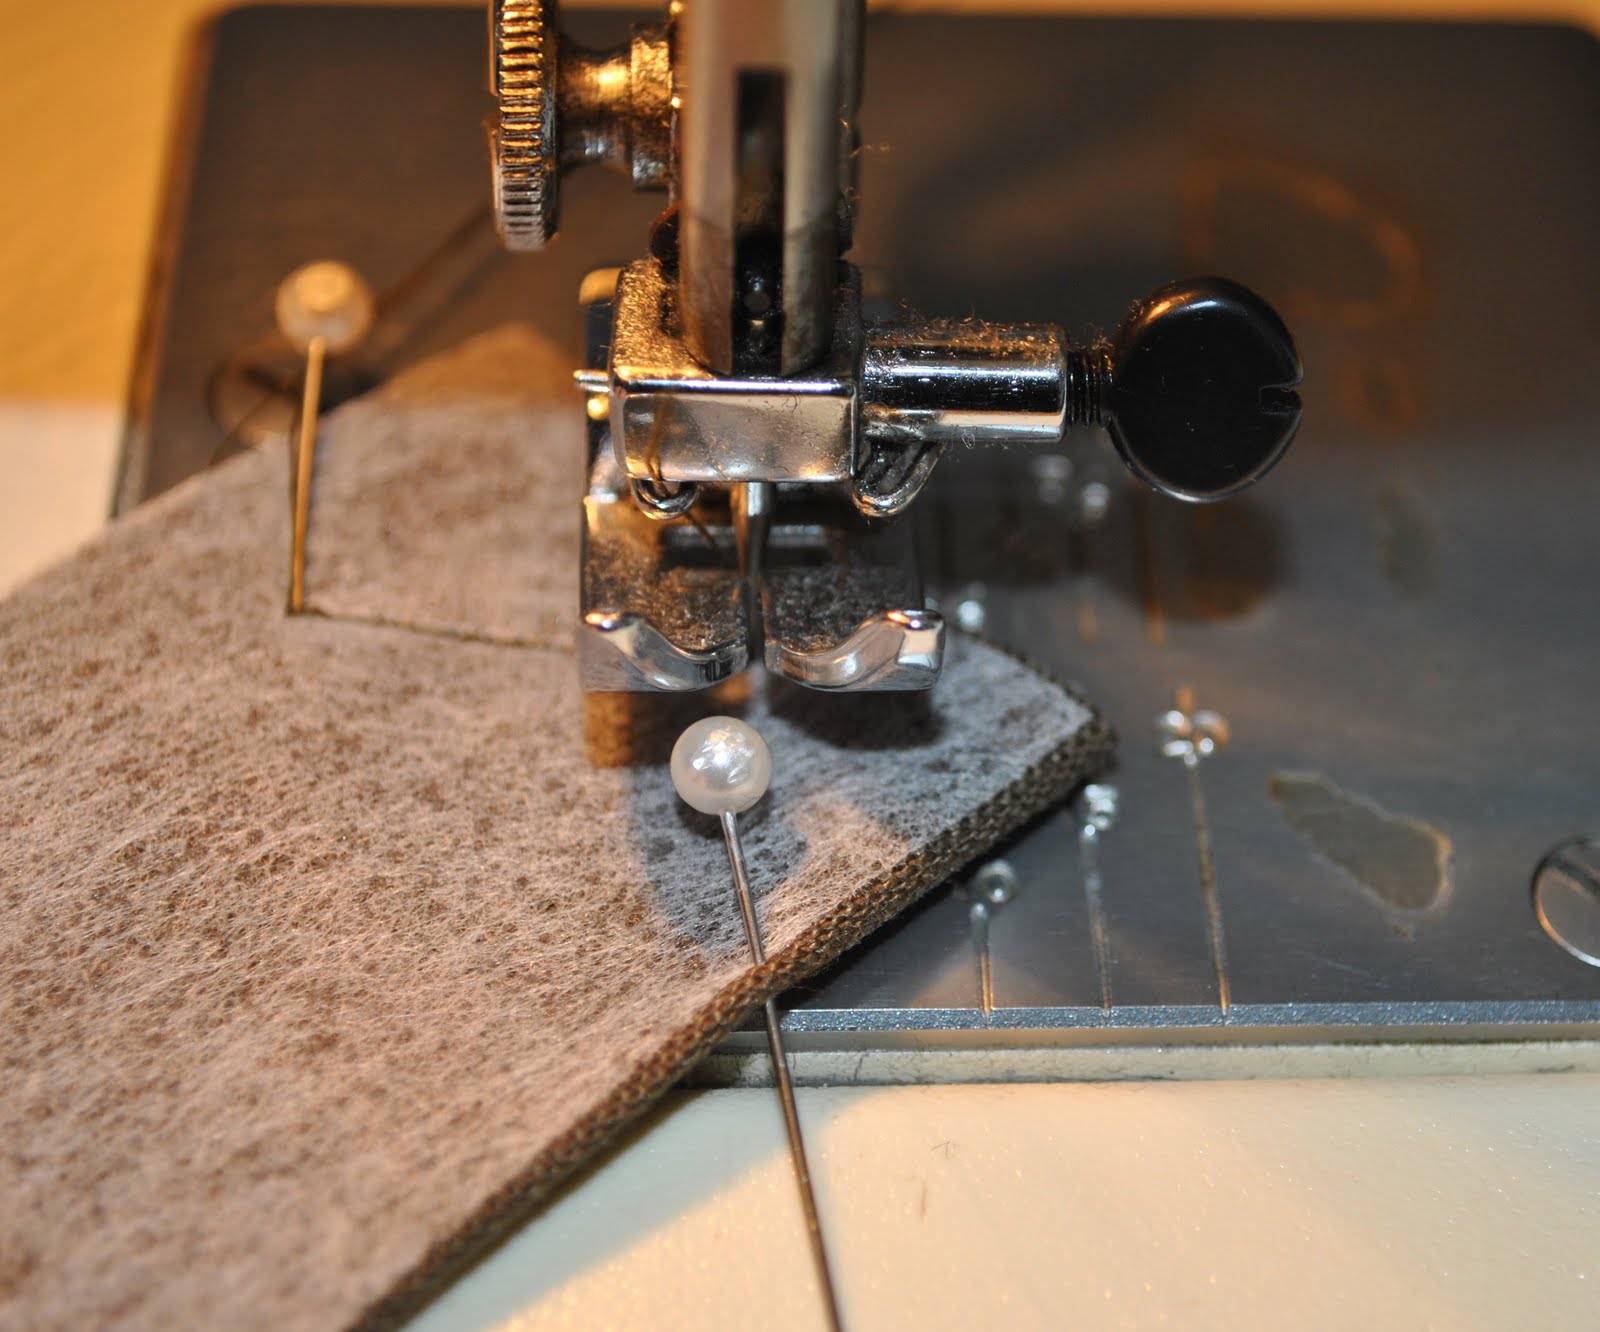
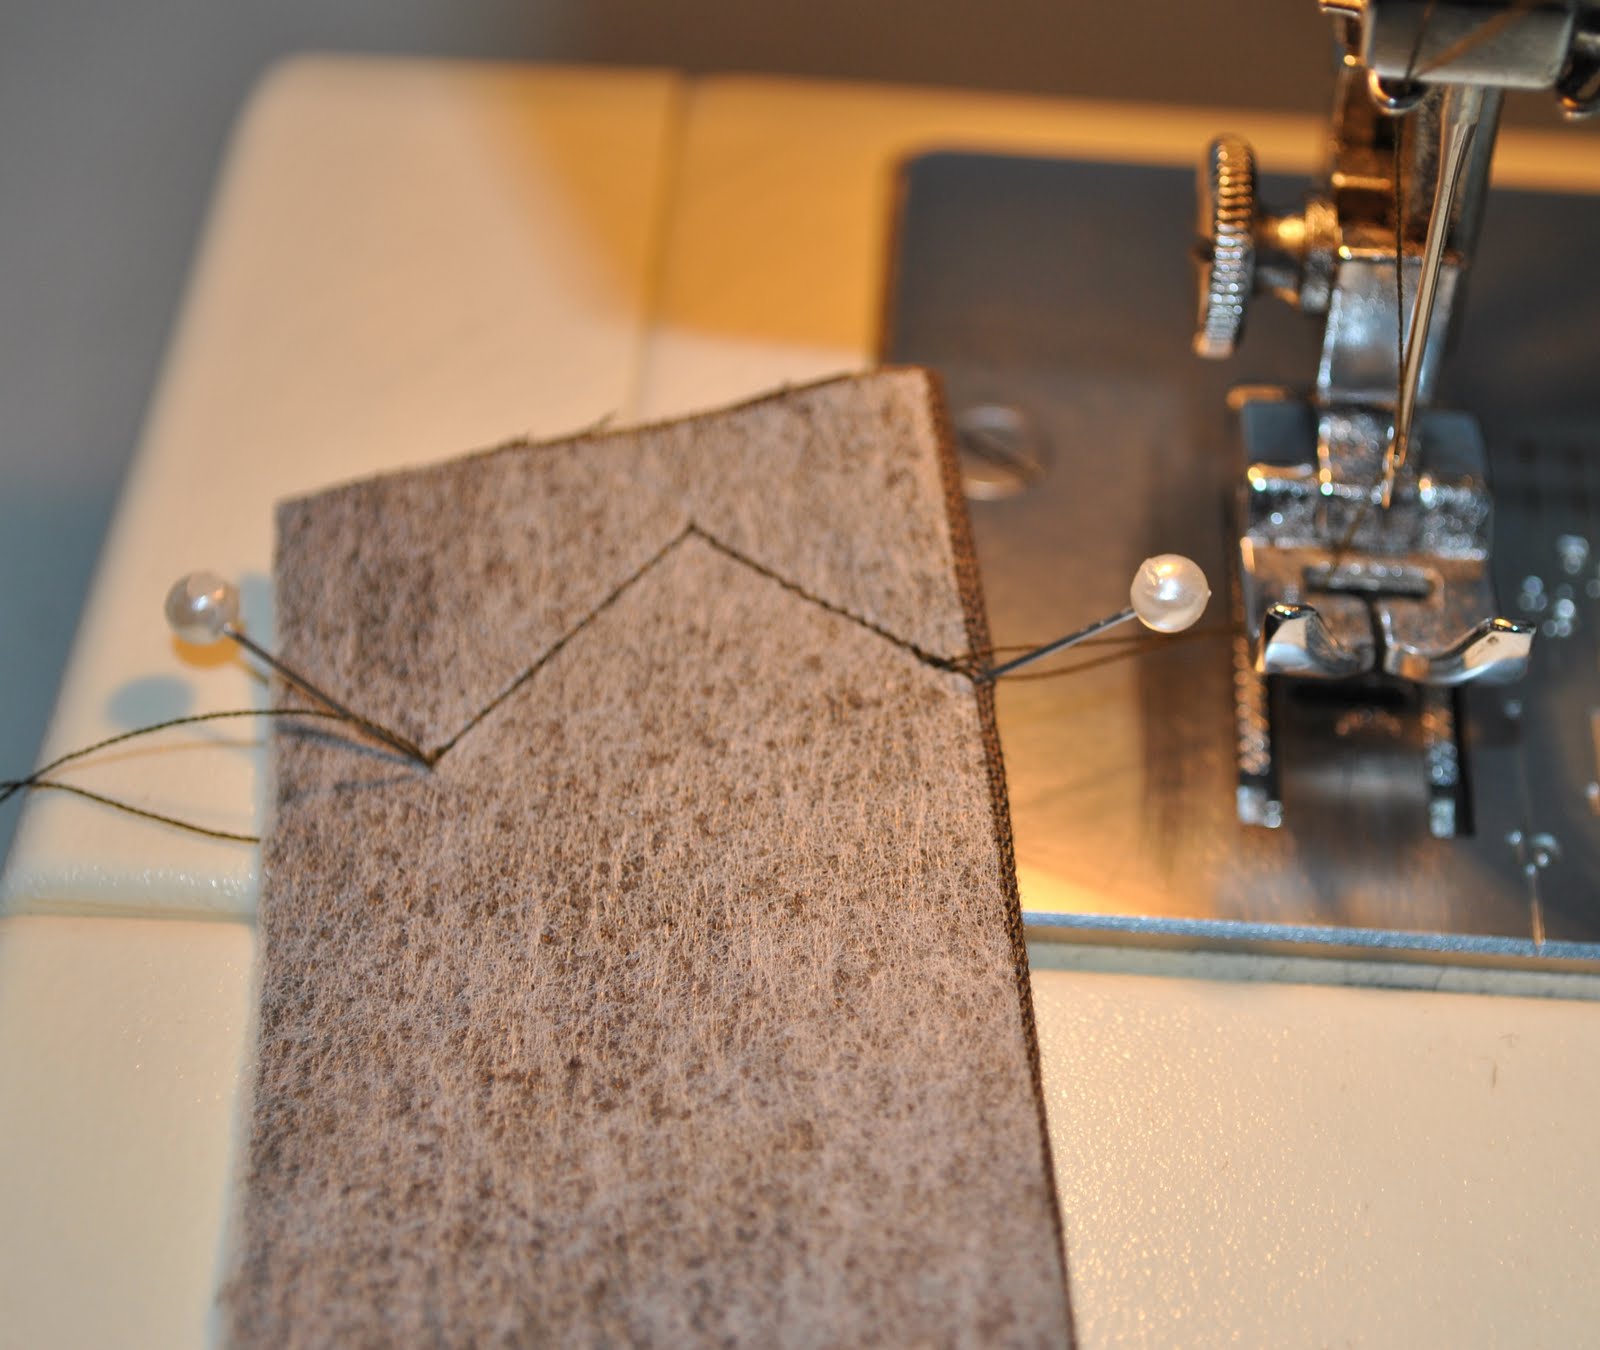
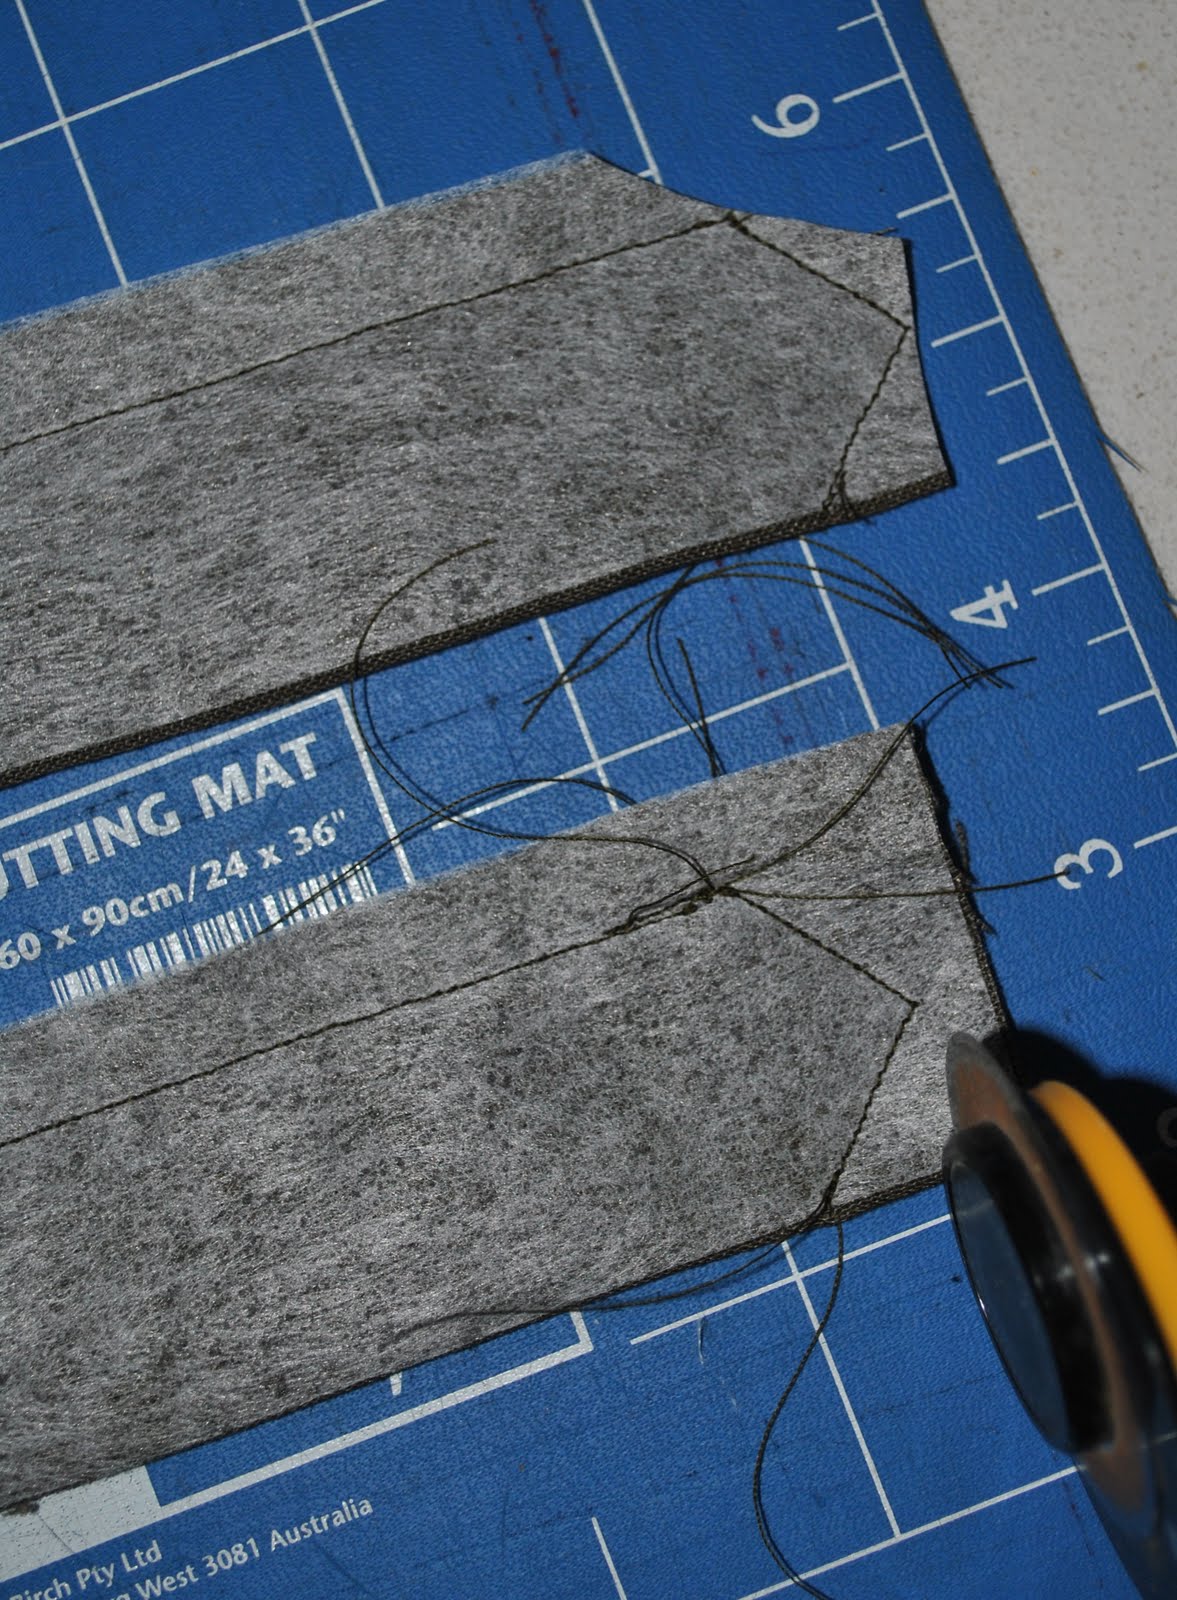
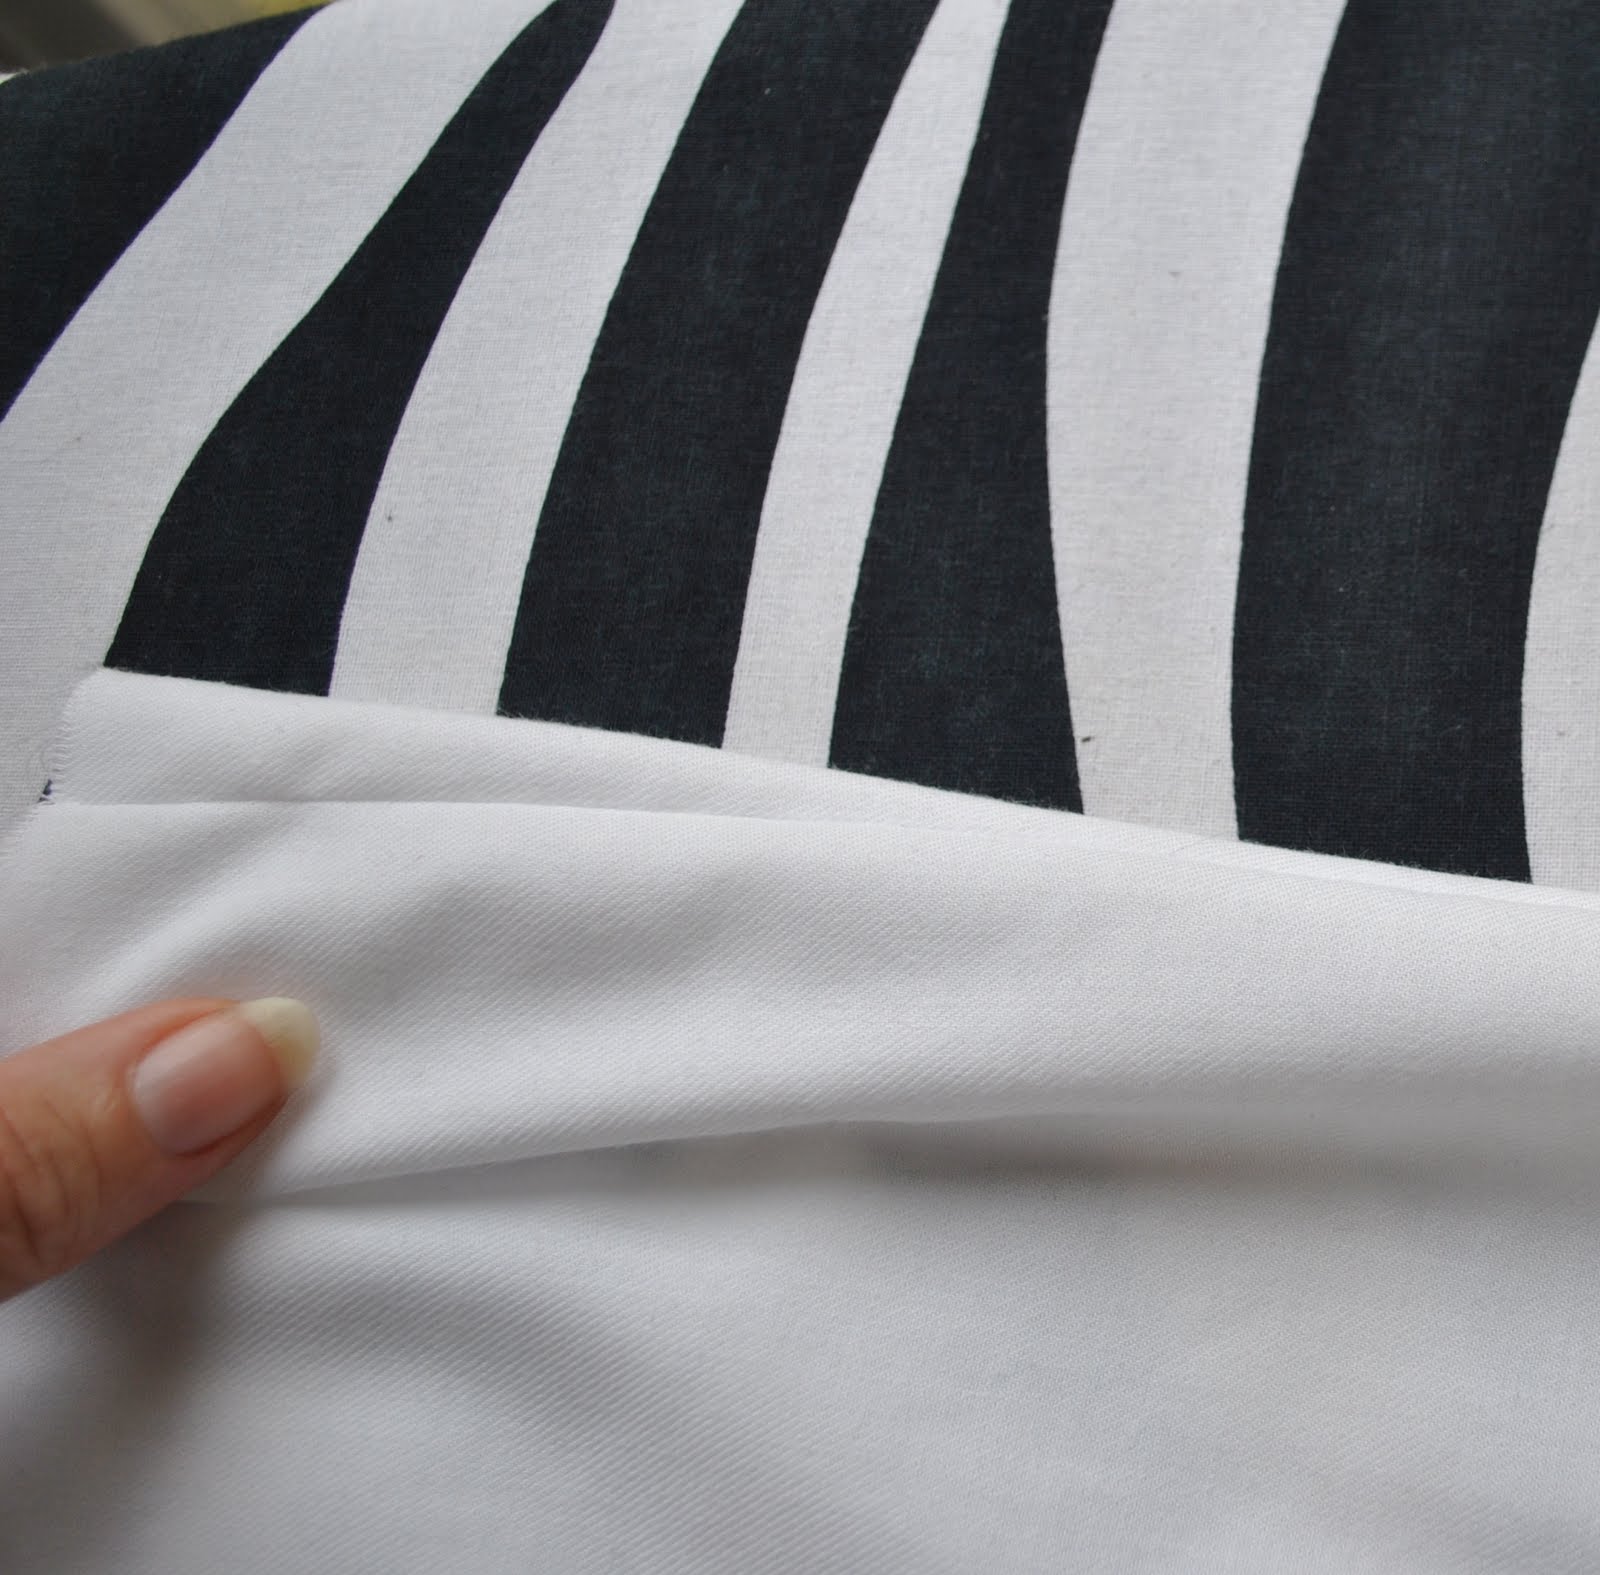
Lay the triangular lining piece over and stitch to the fashion fabric, each line of stitching ending right at the end of your short stitching line, that you did in the previous step.
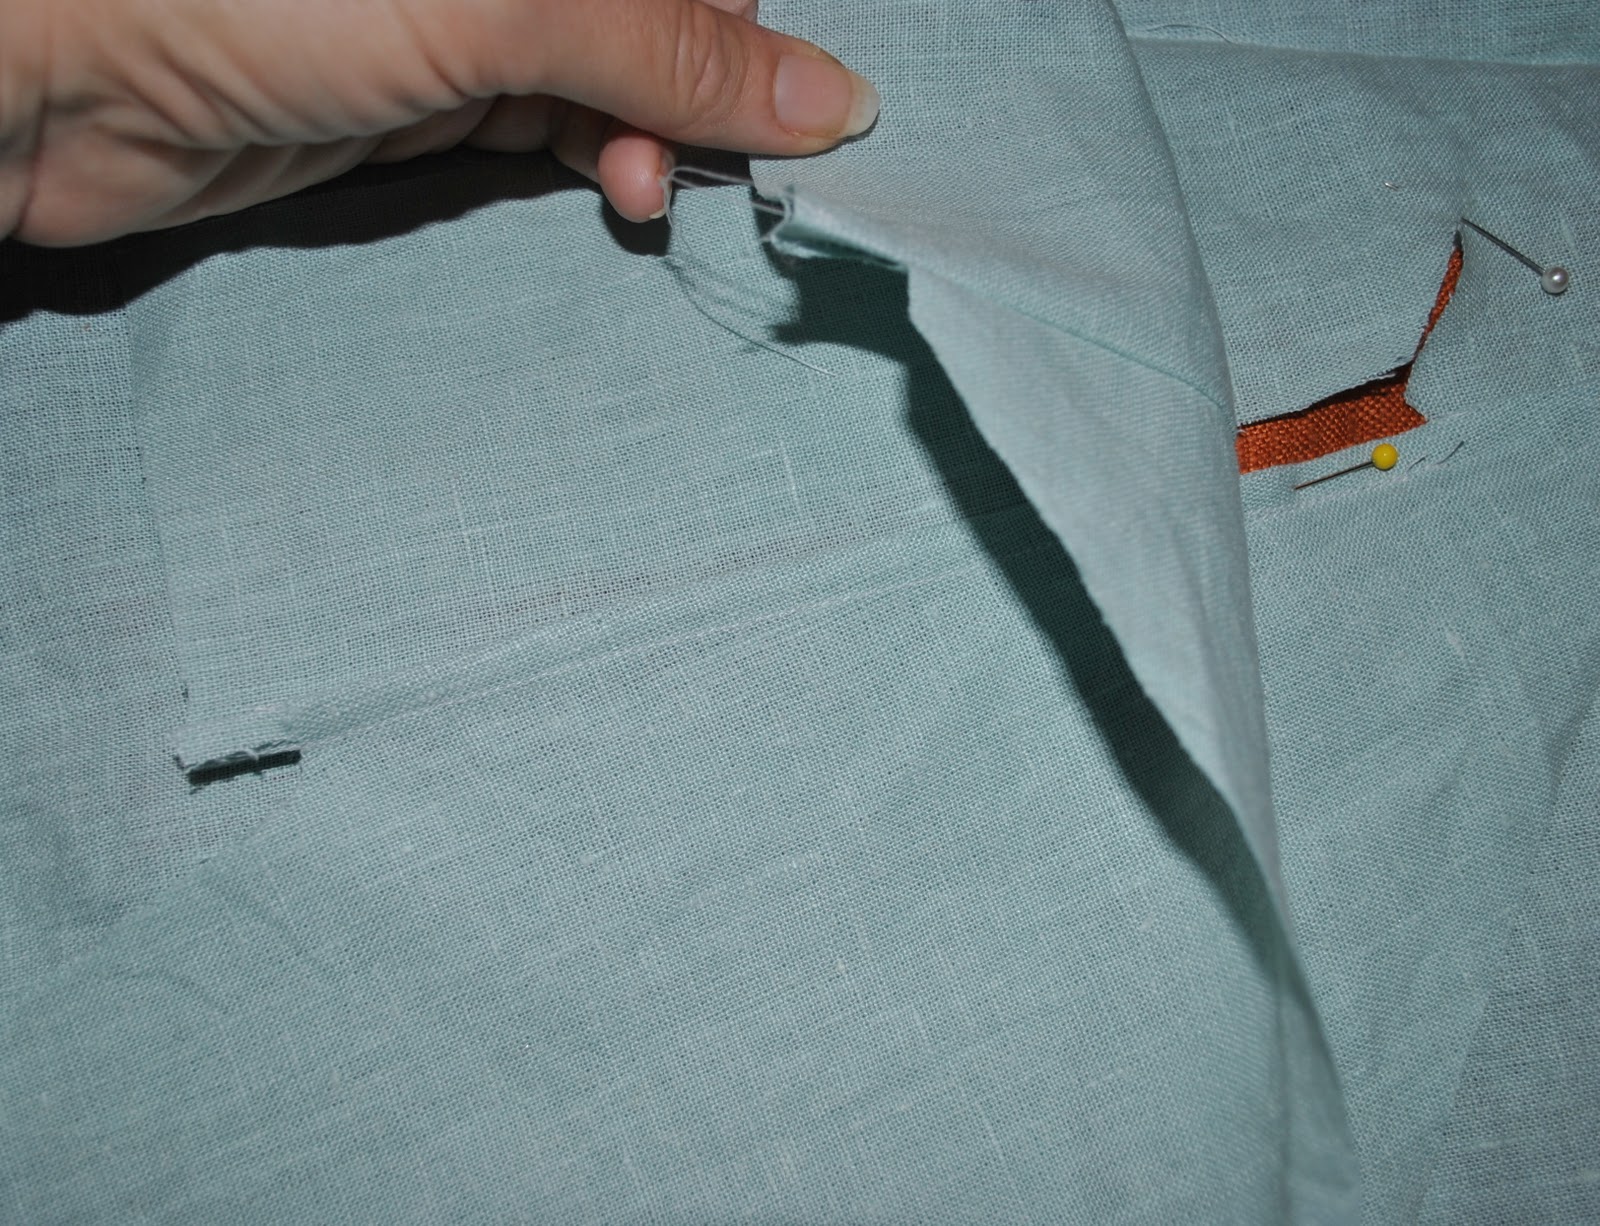
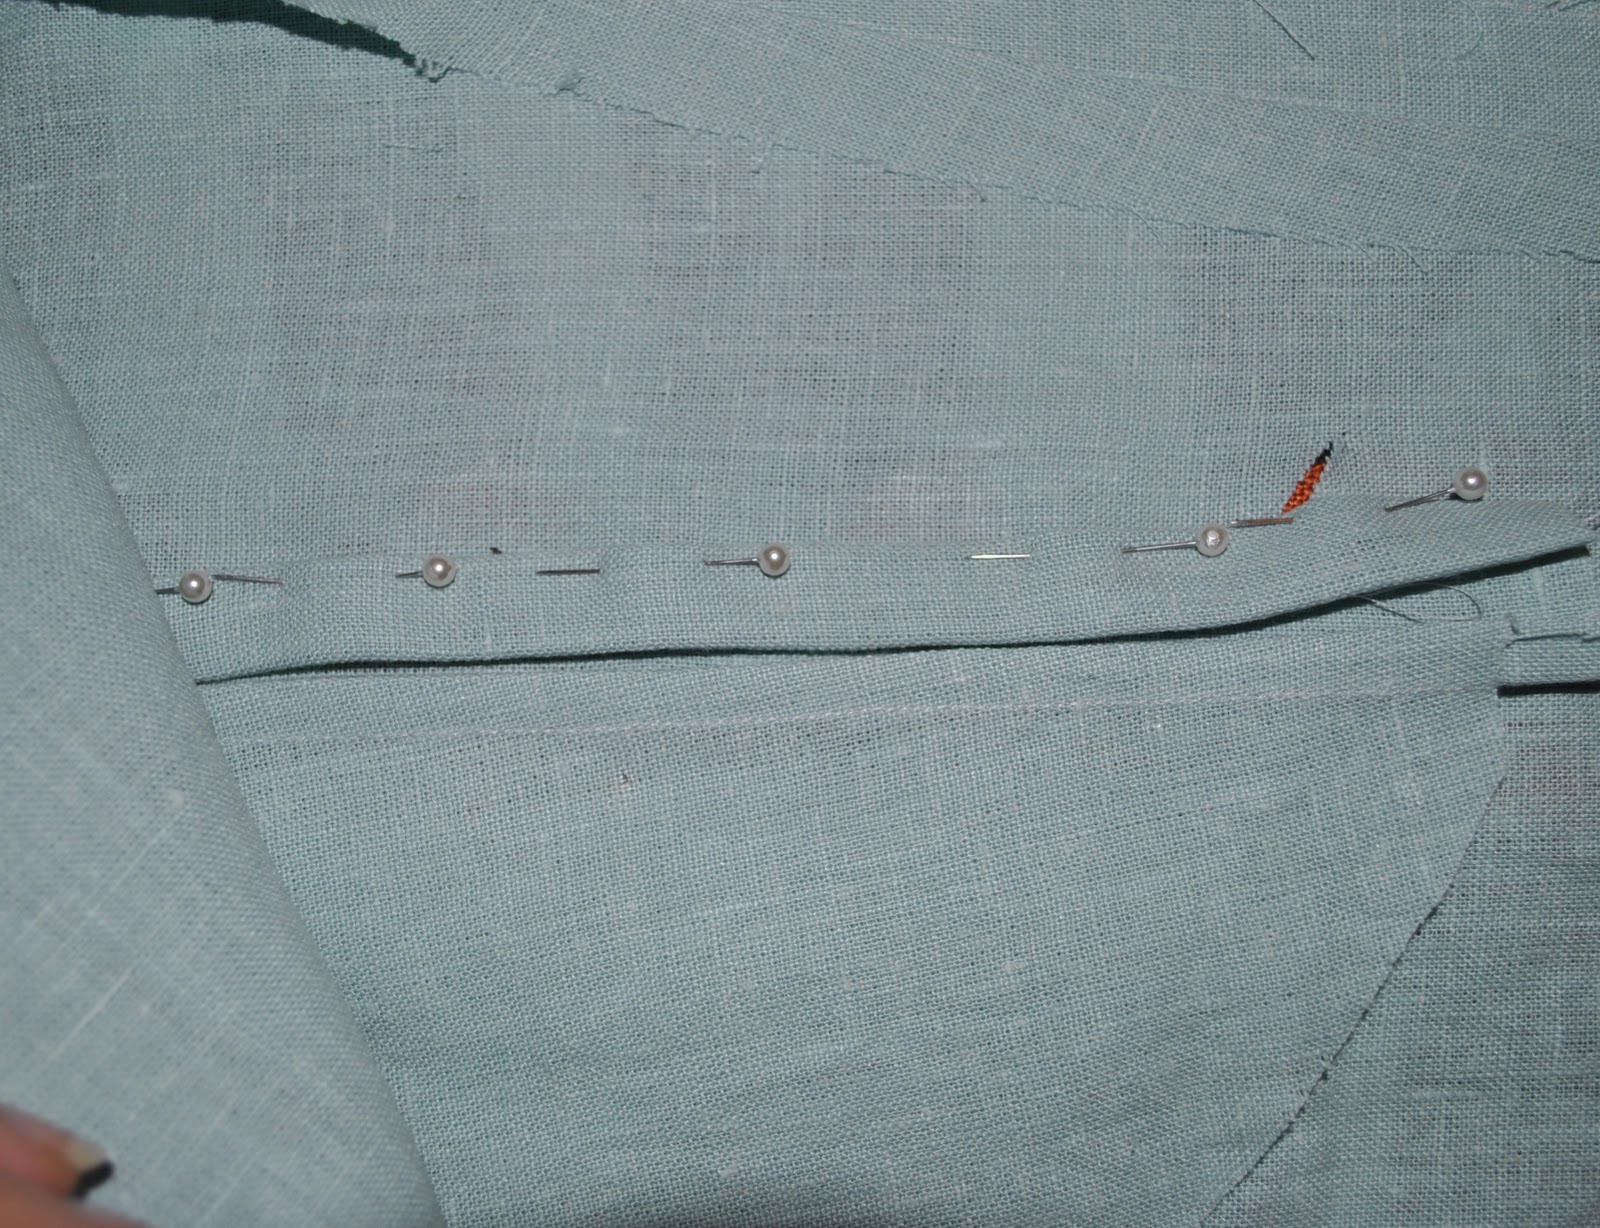
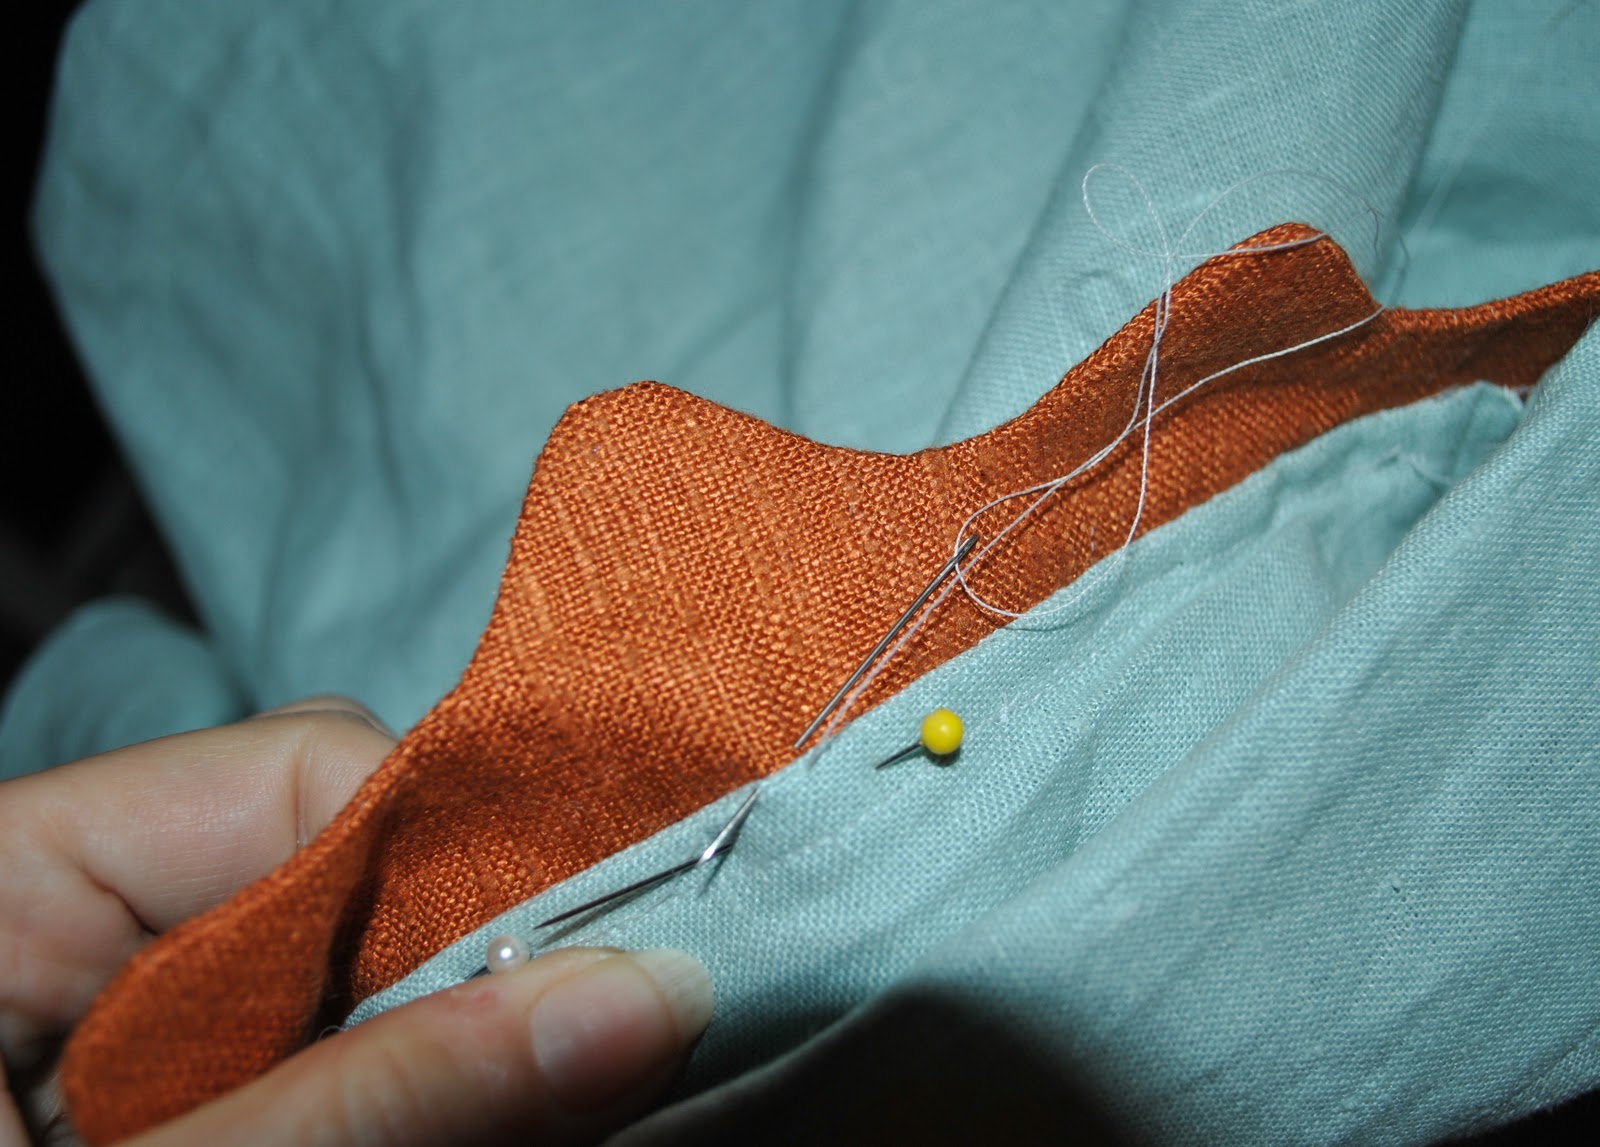
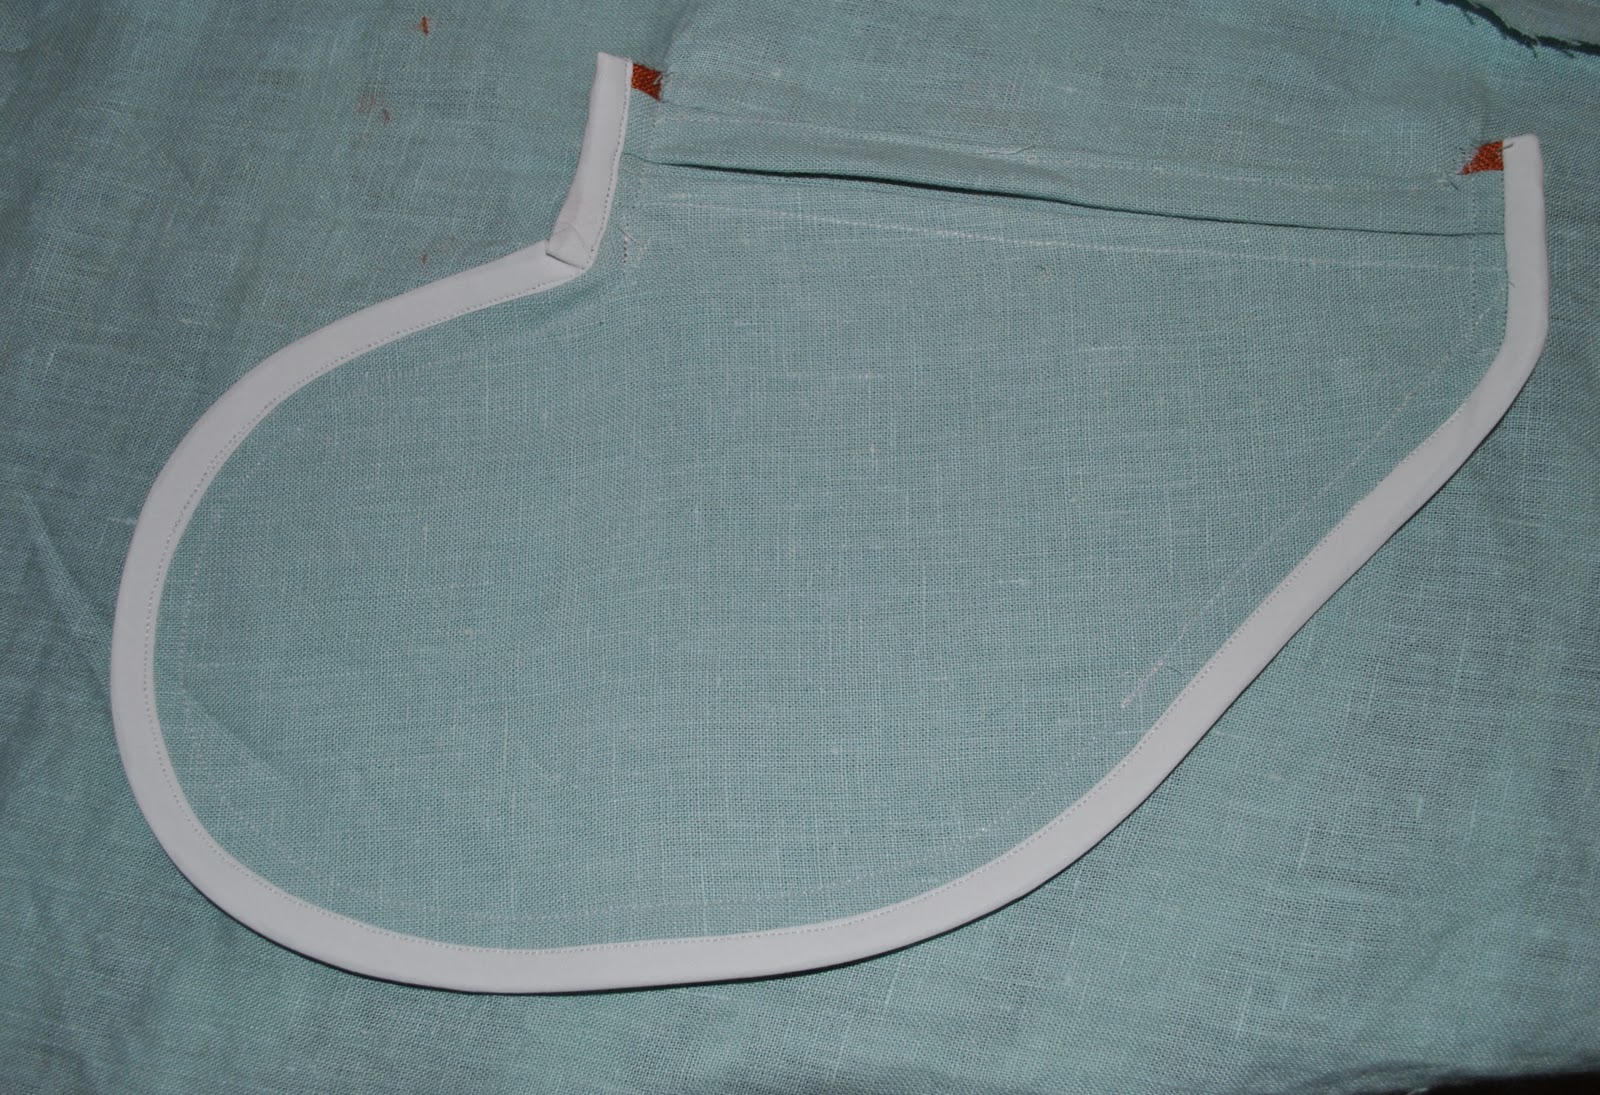
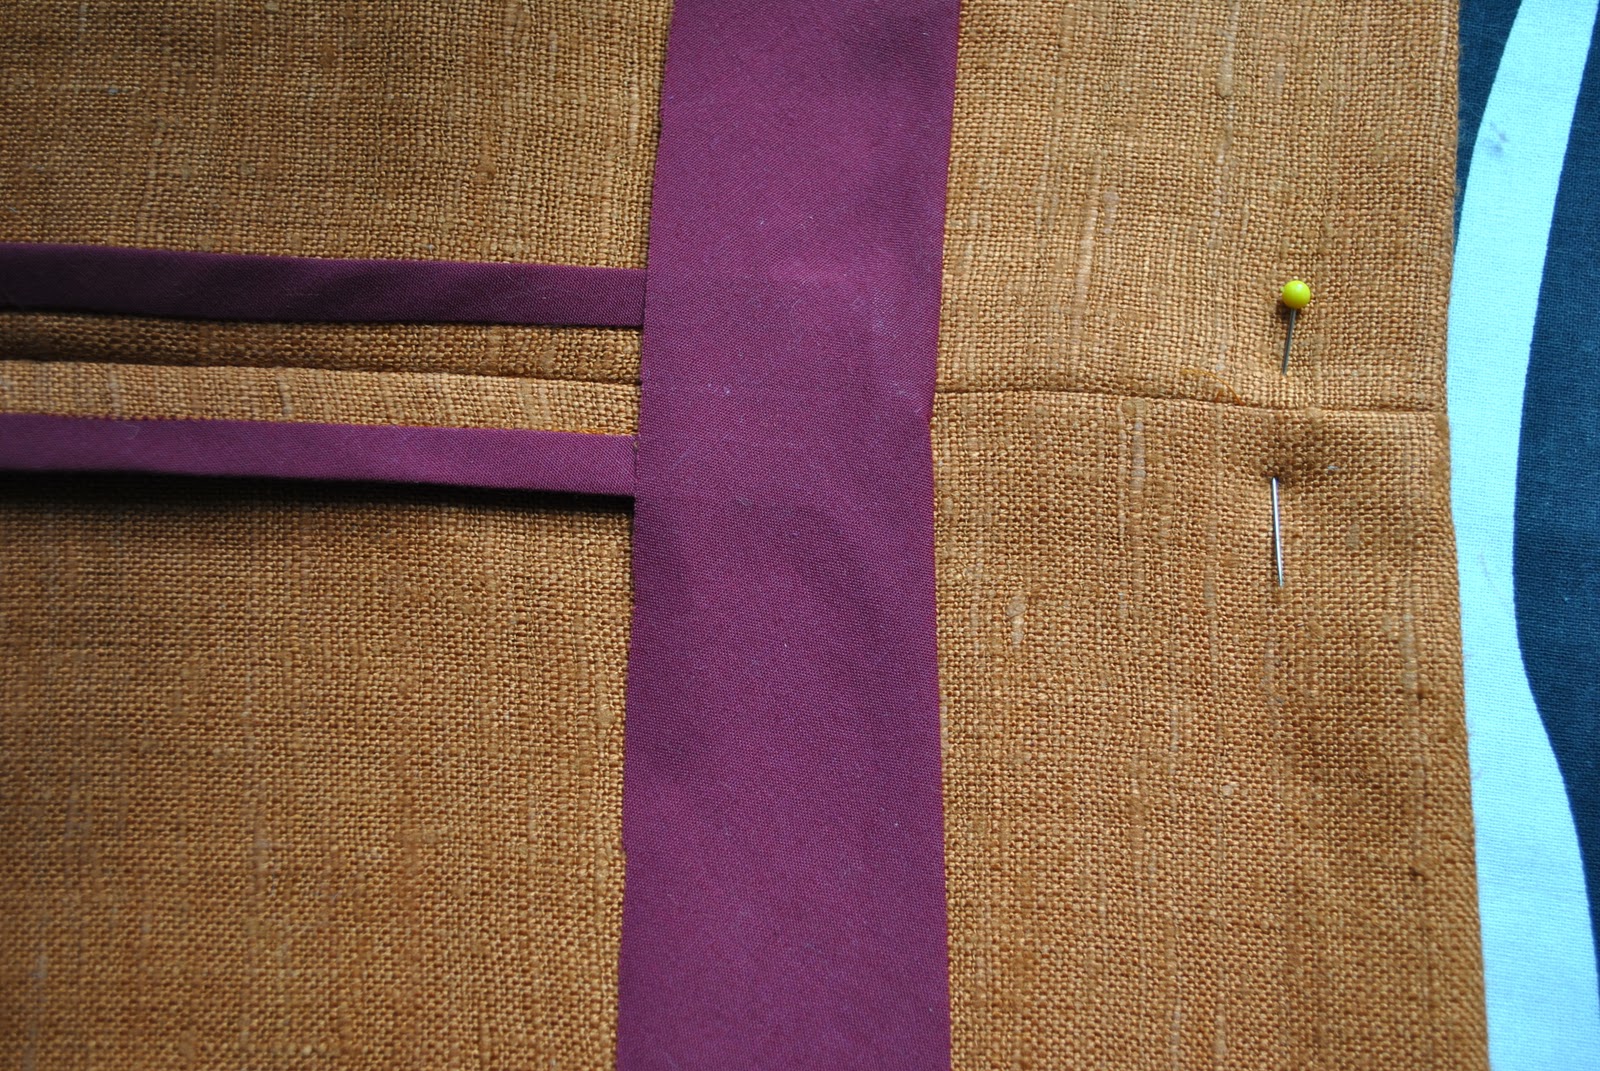
Turn out, and you have a nice mitred corner.  Do both the top and bottom of the tie in the same way…
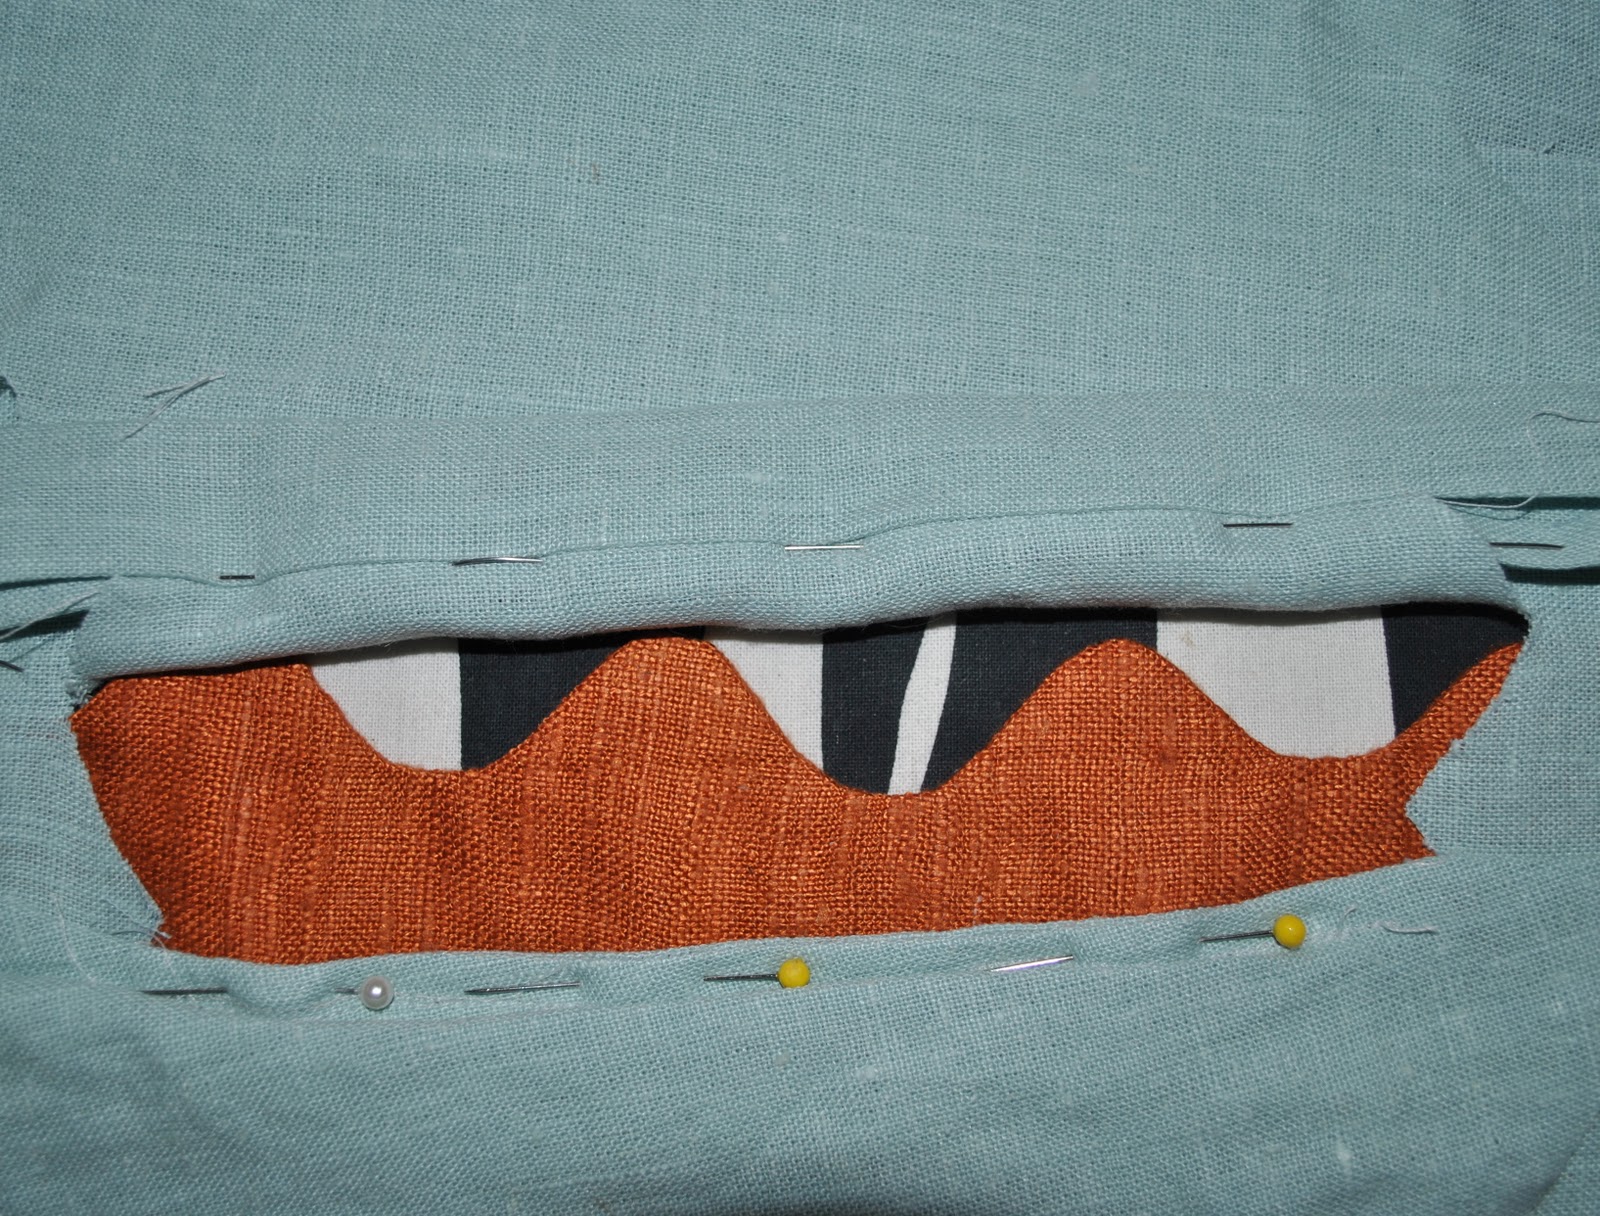
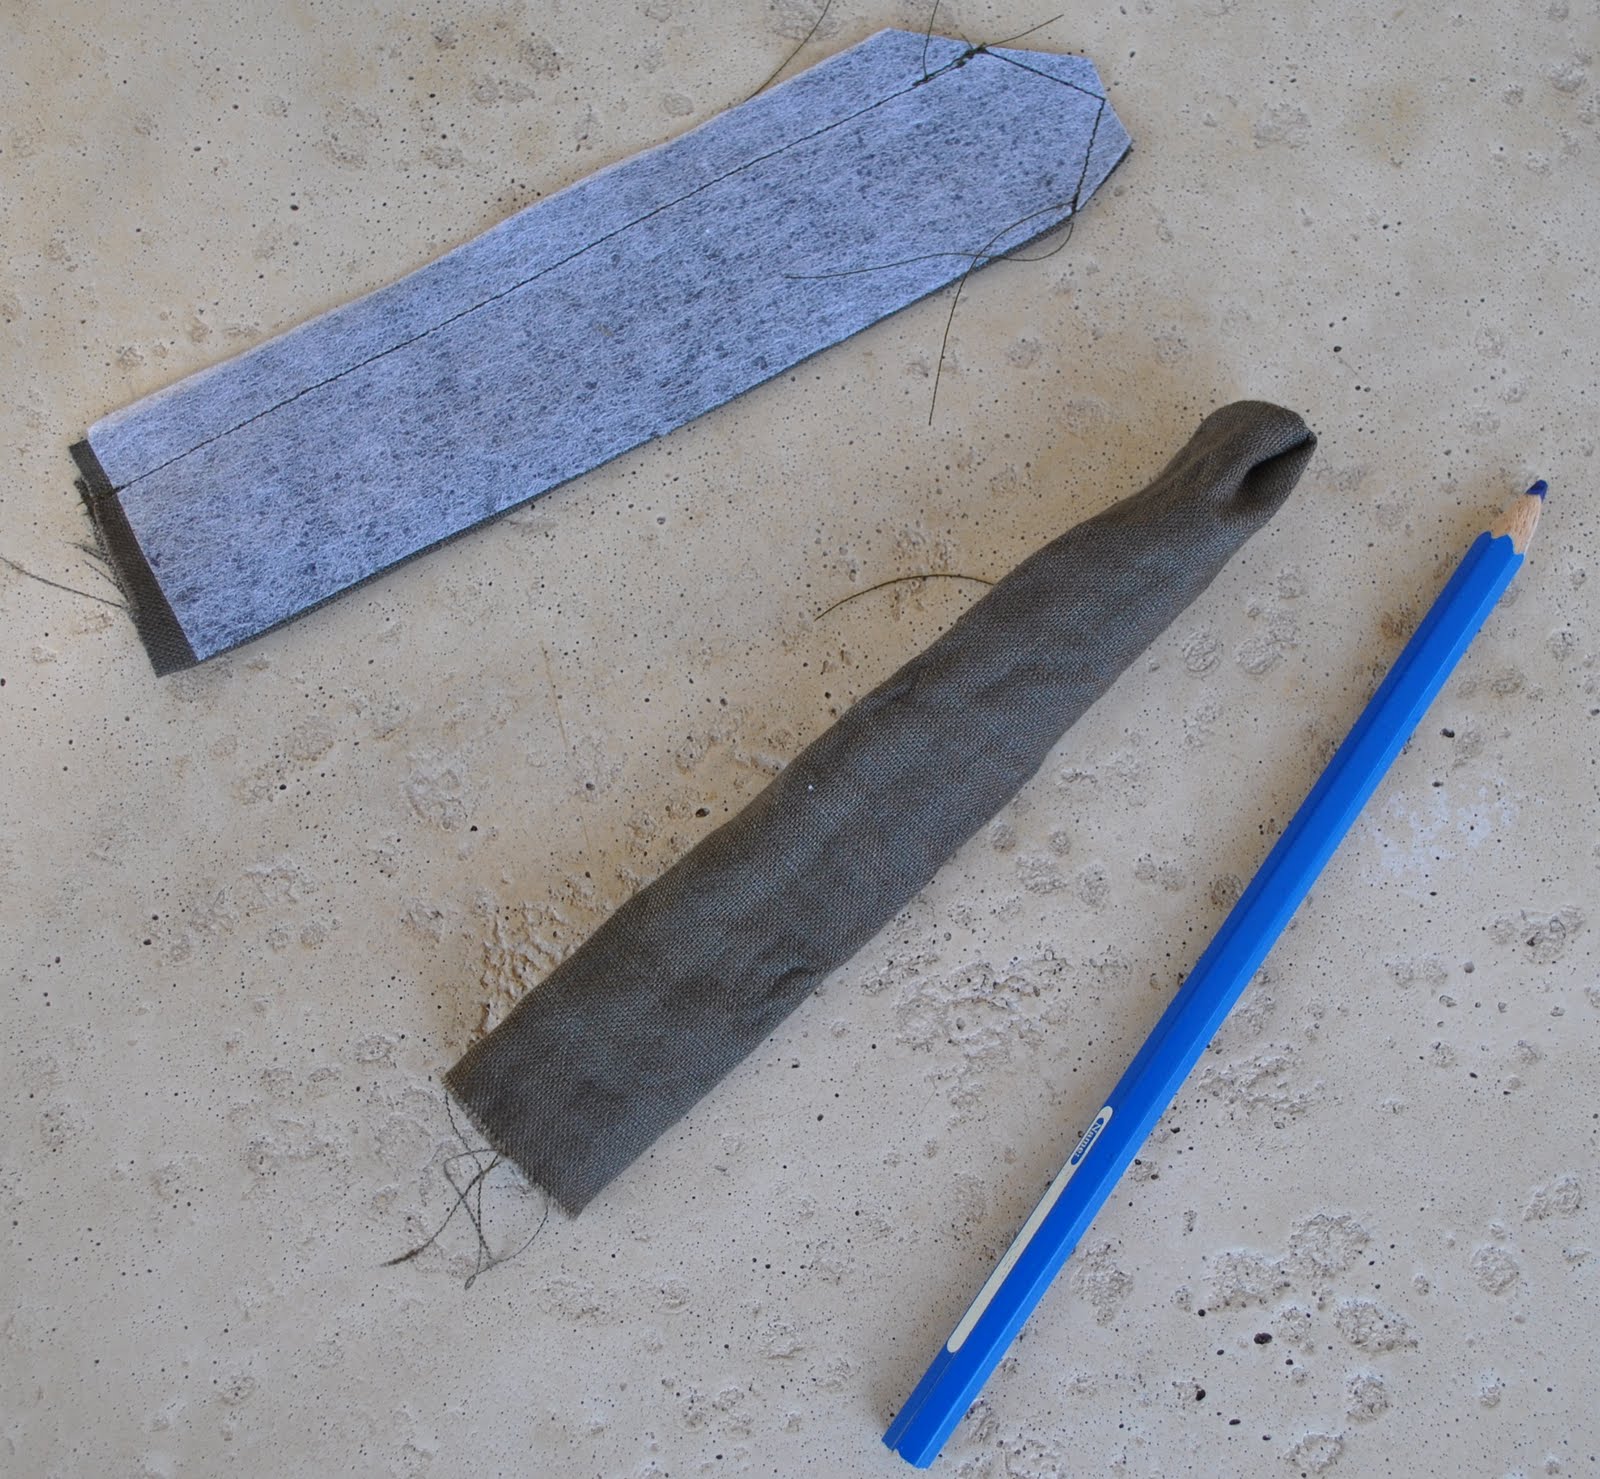
Now insert the padding into the points of the tie.  This requires some gentle stuffing and poking the padding point up cleanly and firmly into the corner; I know there are proper tools for this job that proper seamsters use but I usually use a slightly blunted pencil (hehe, oops!) I had cut my padding a tad long, just in case, and so there was some trimming required here to get it all sitting in nice and flat.
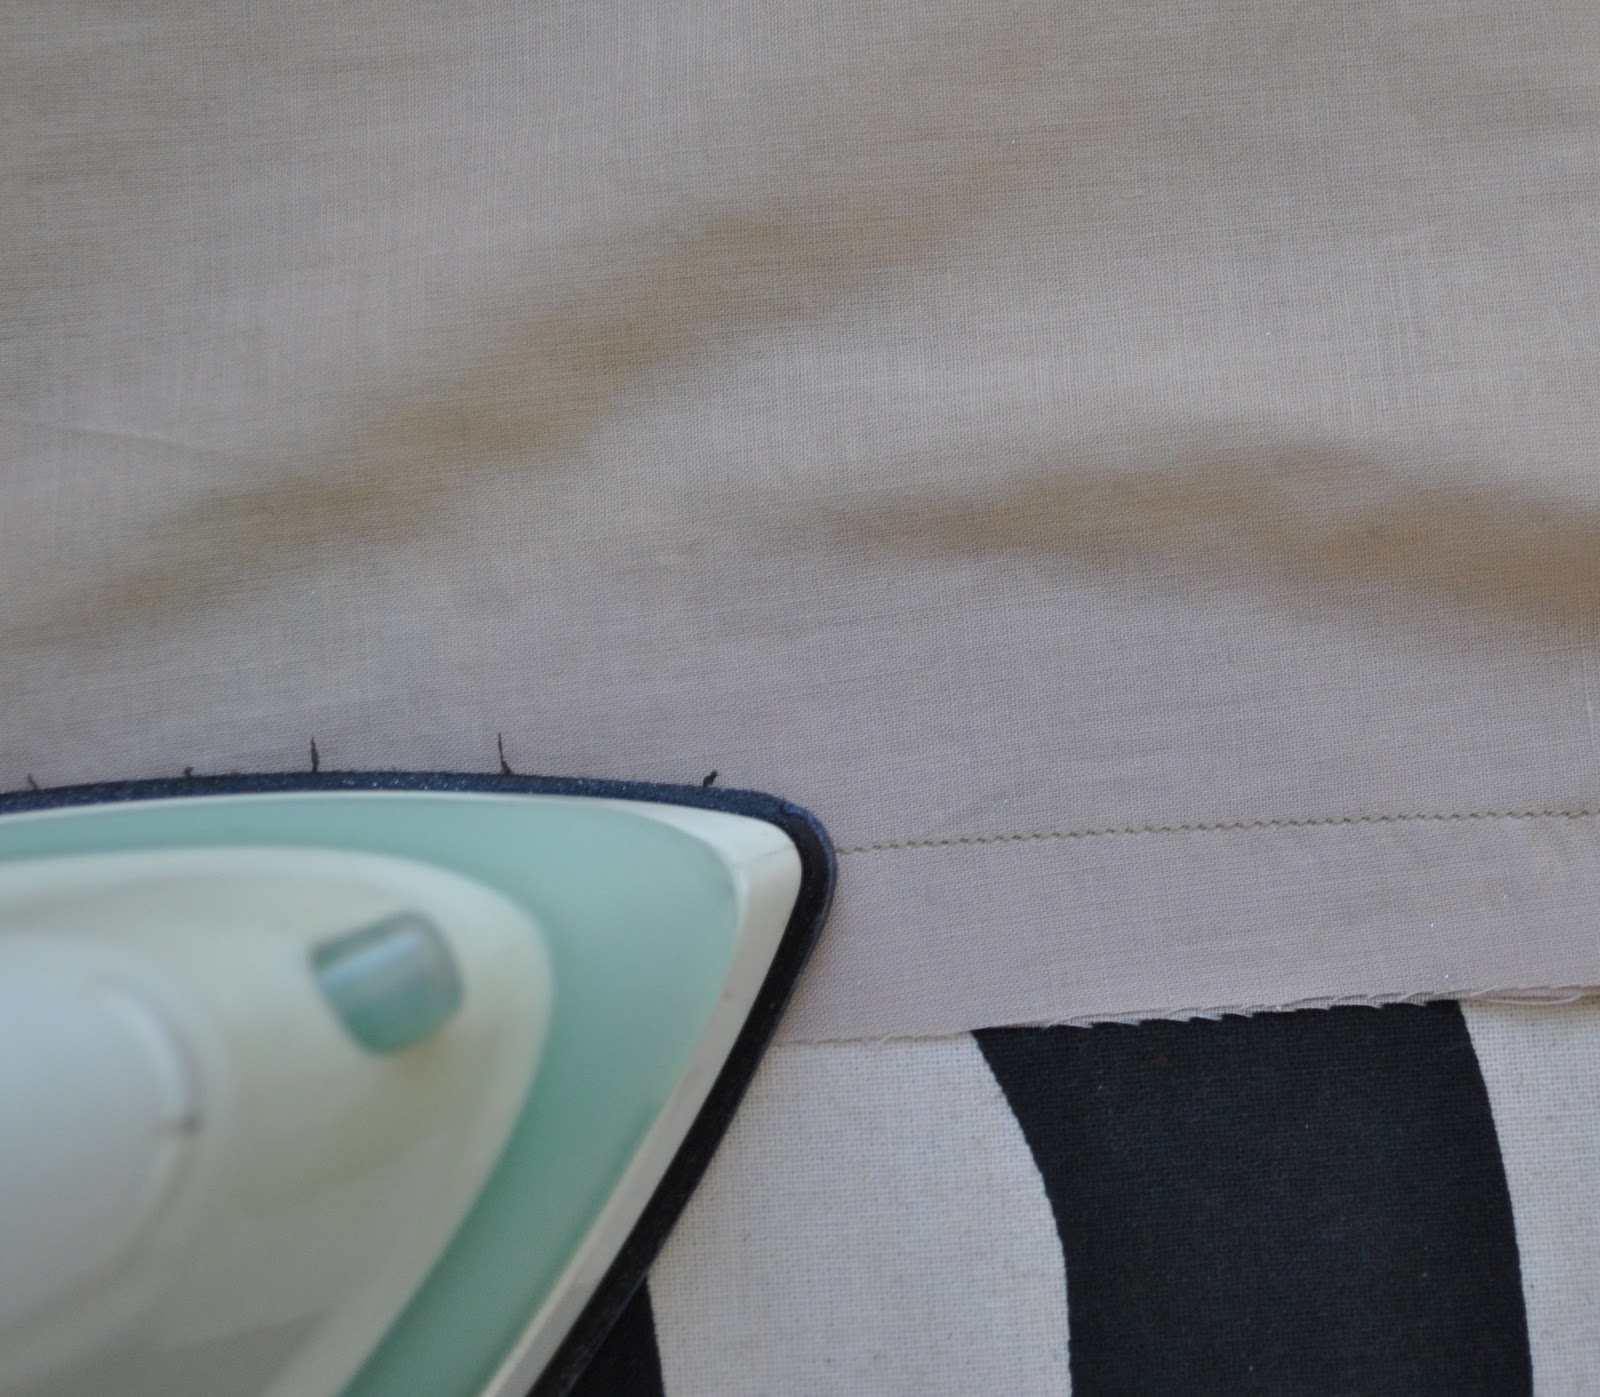
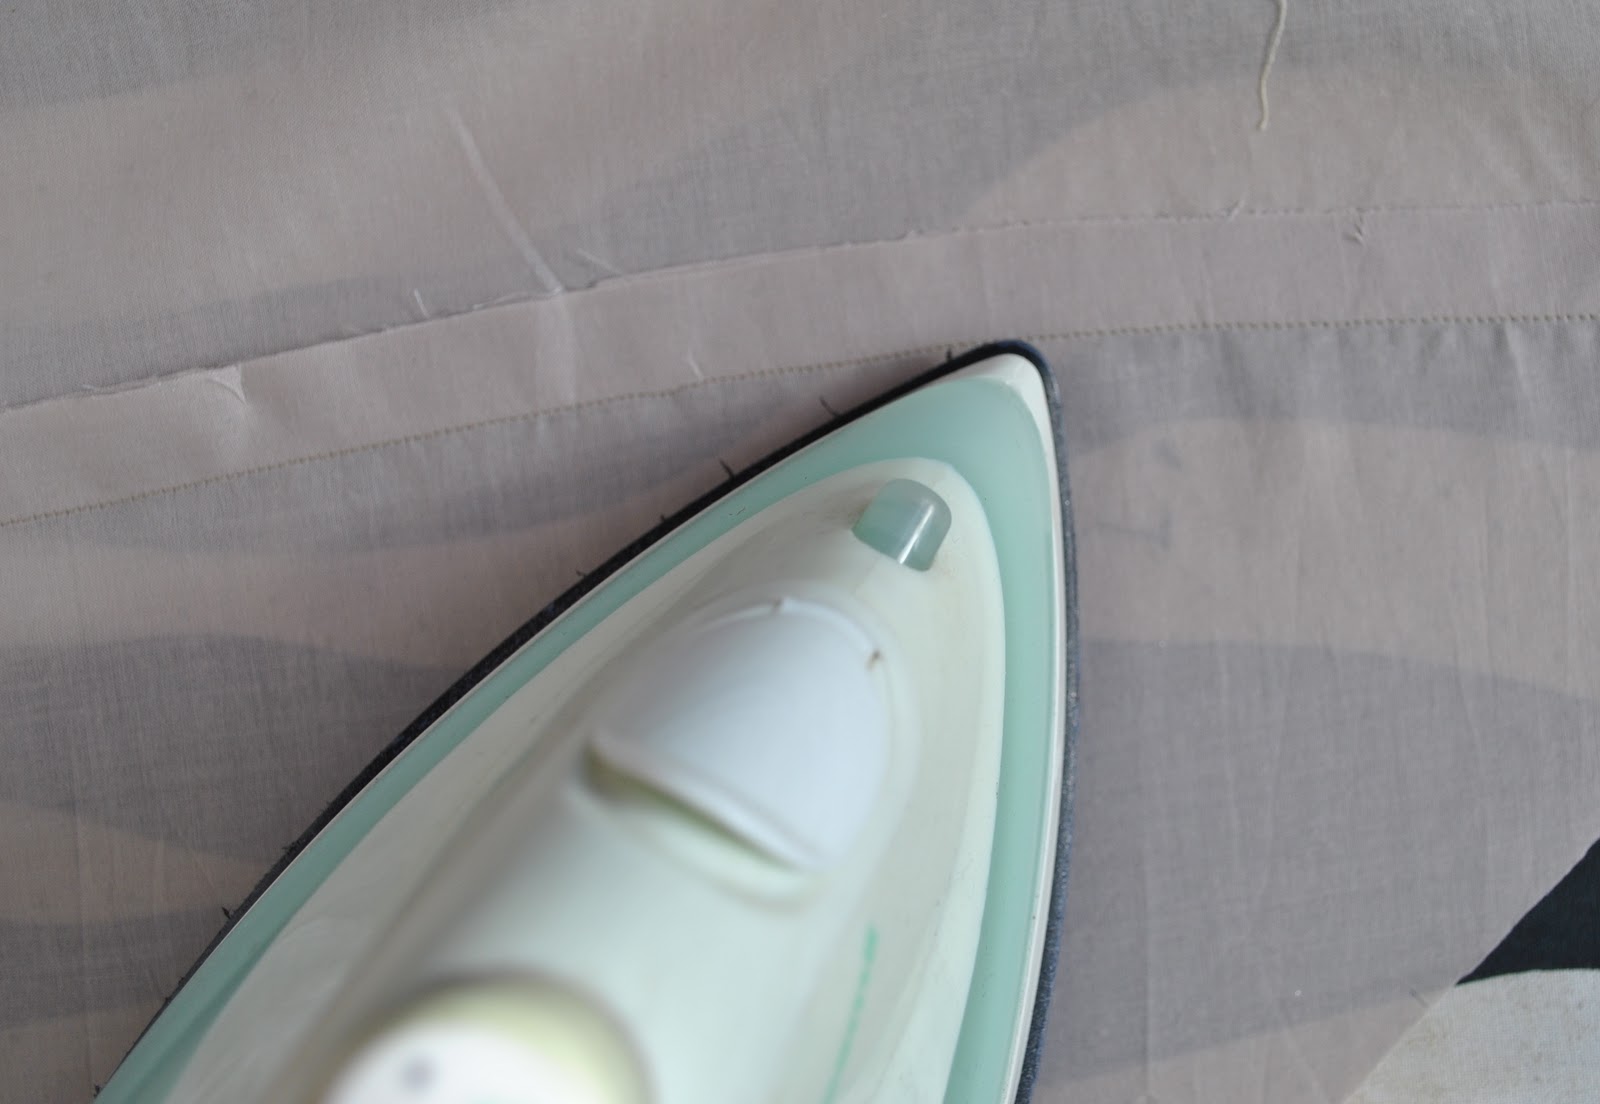
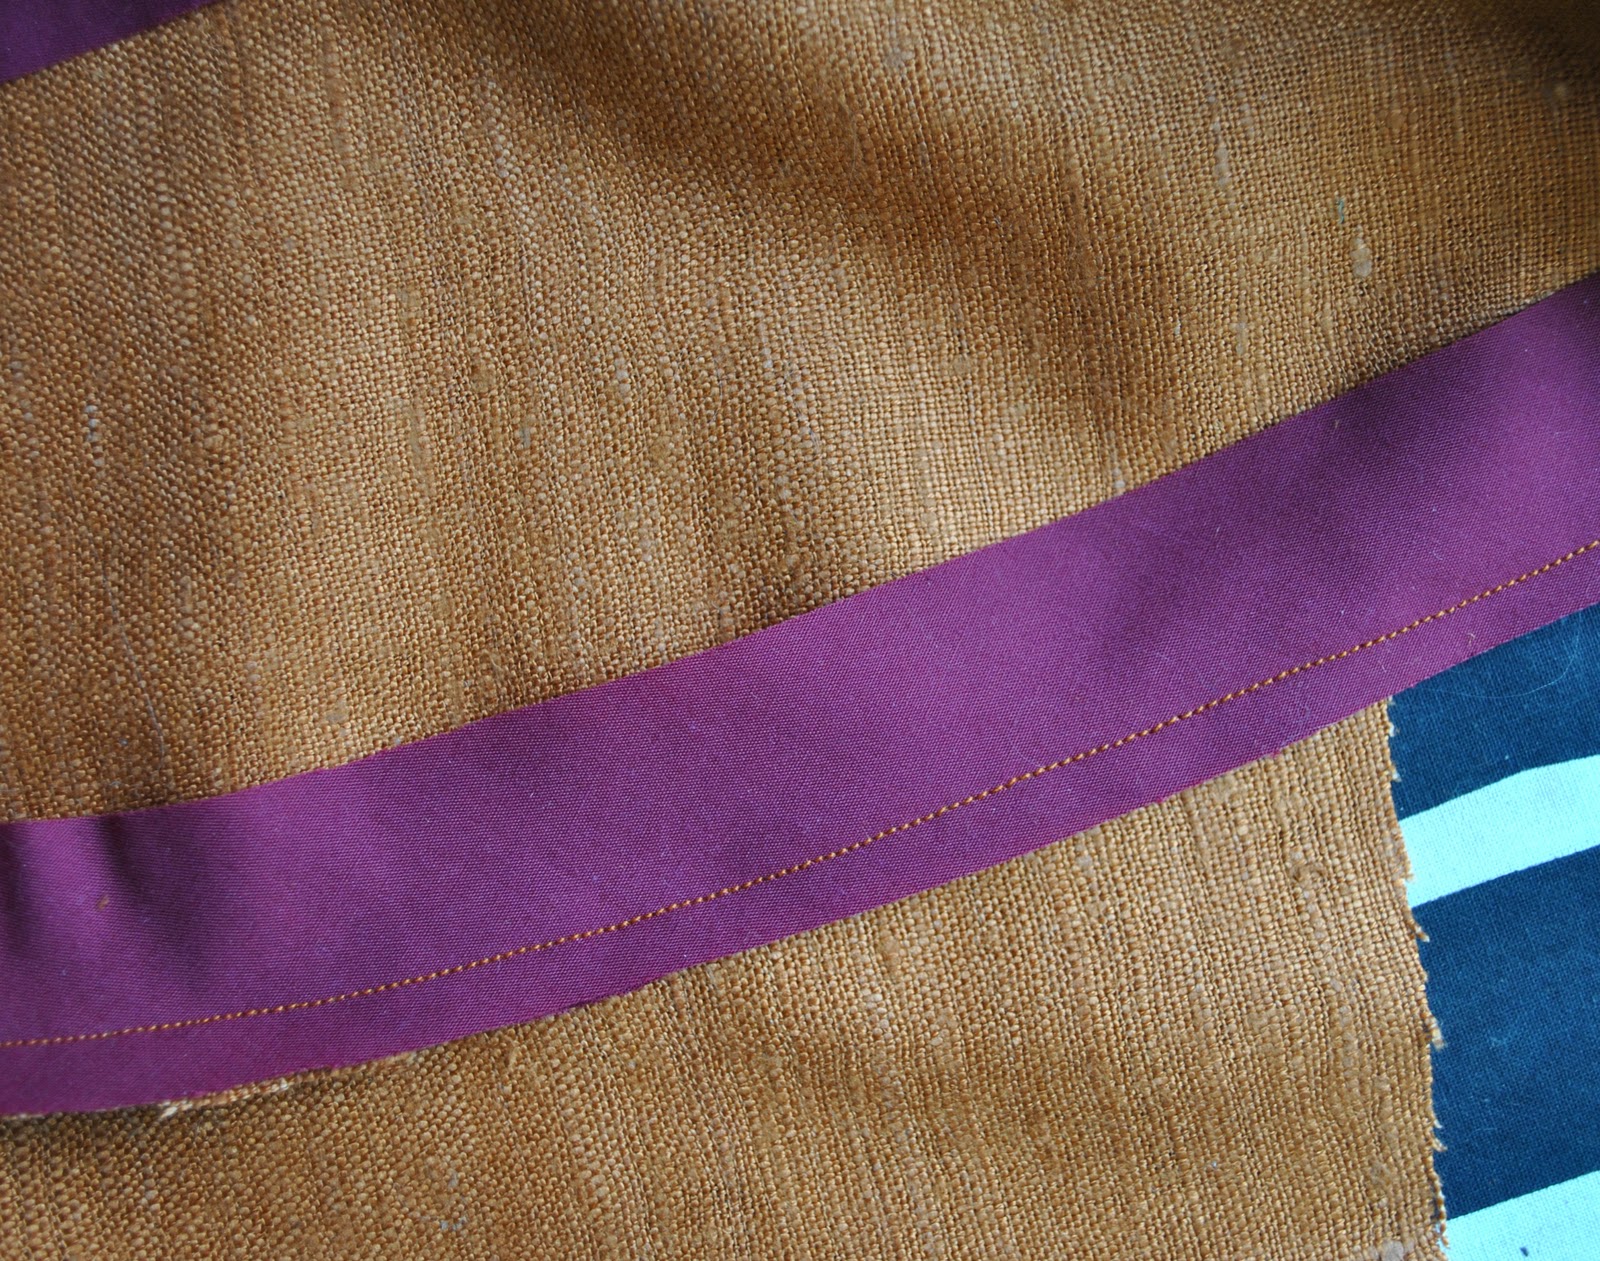
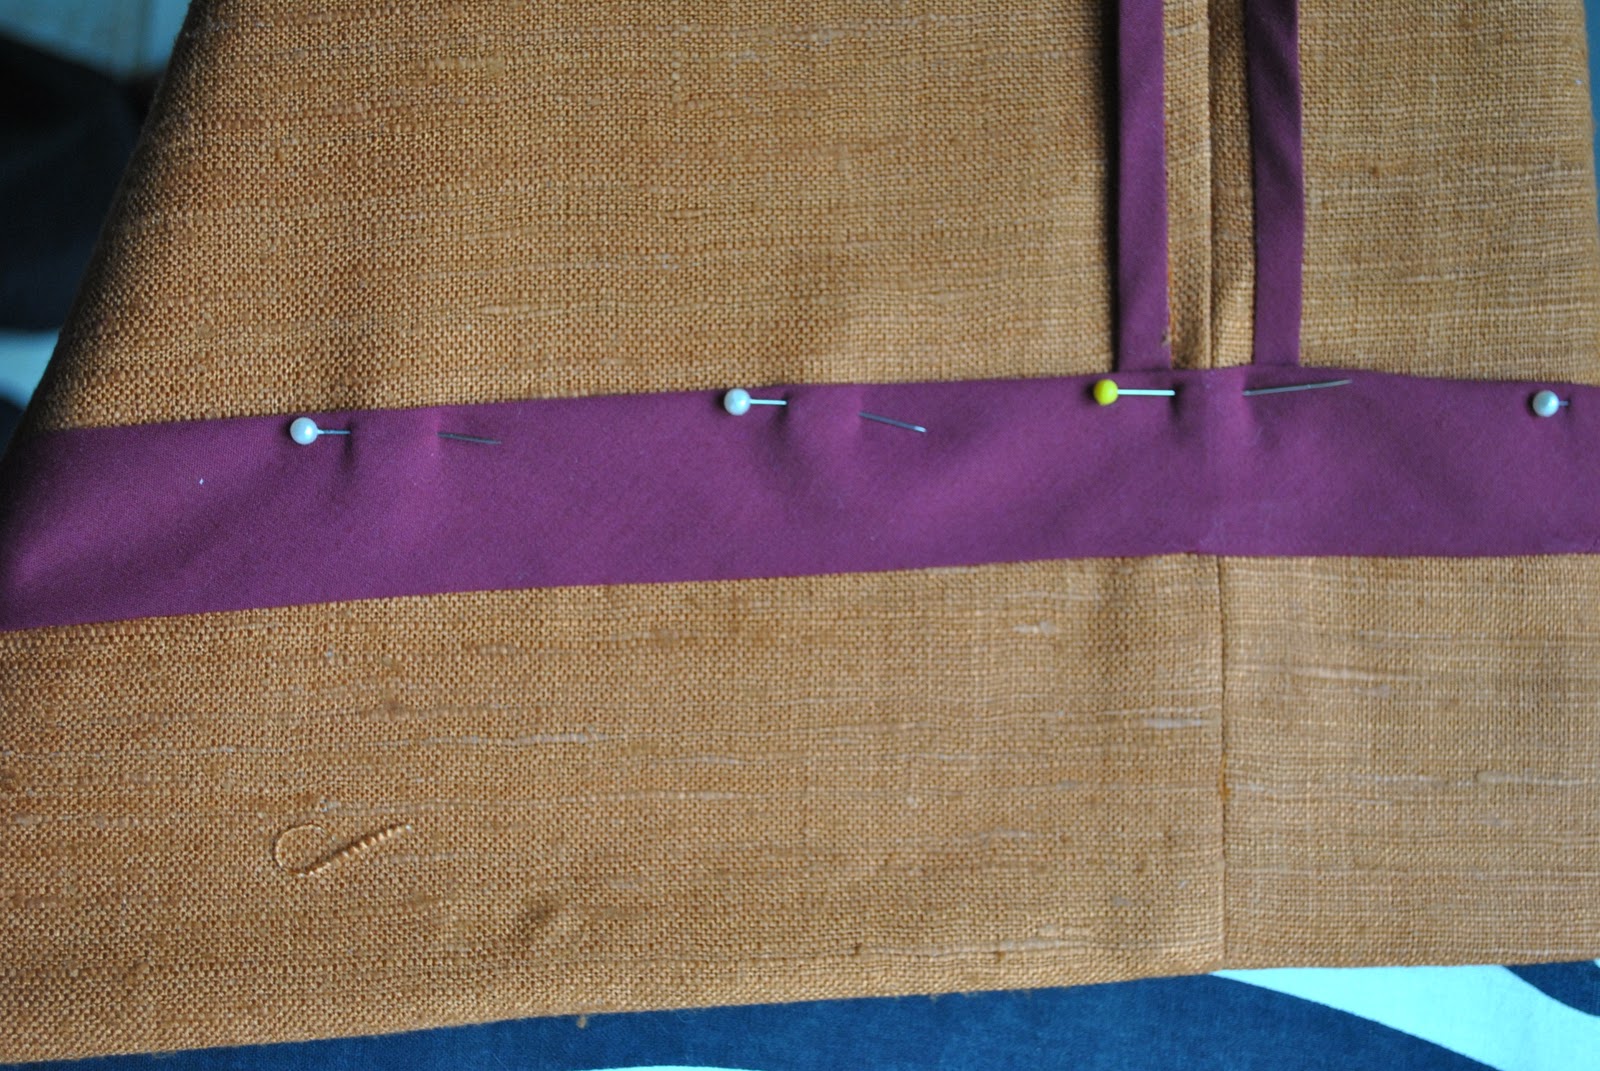
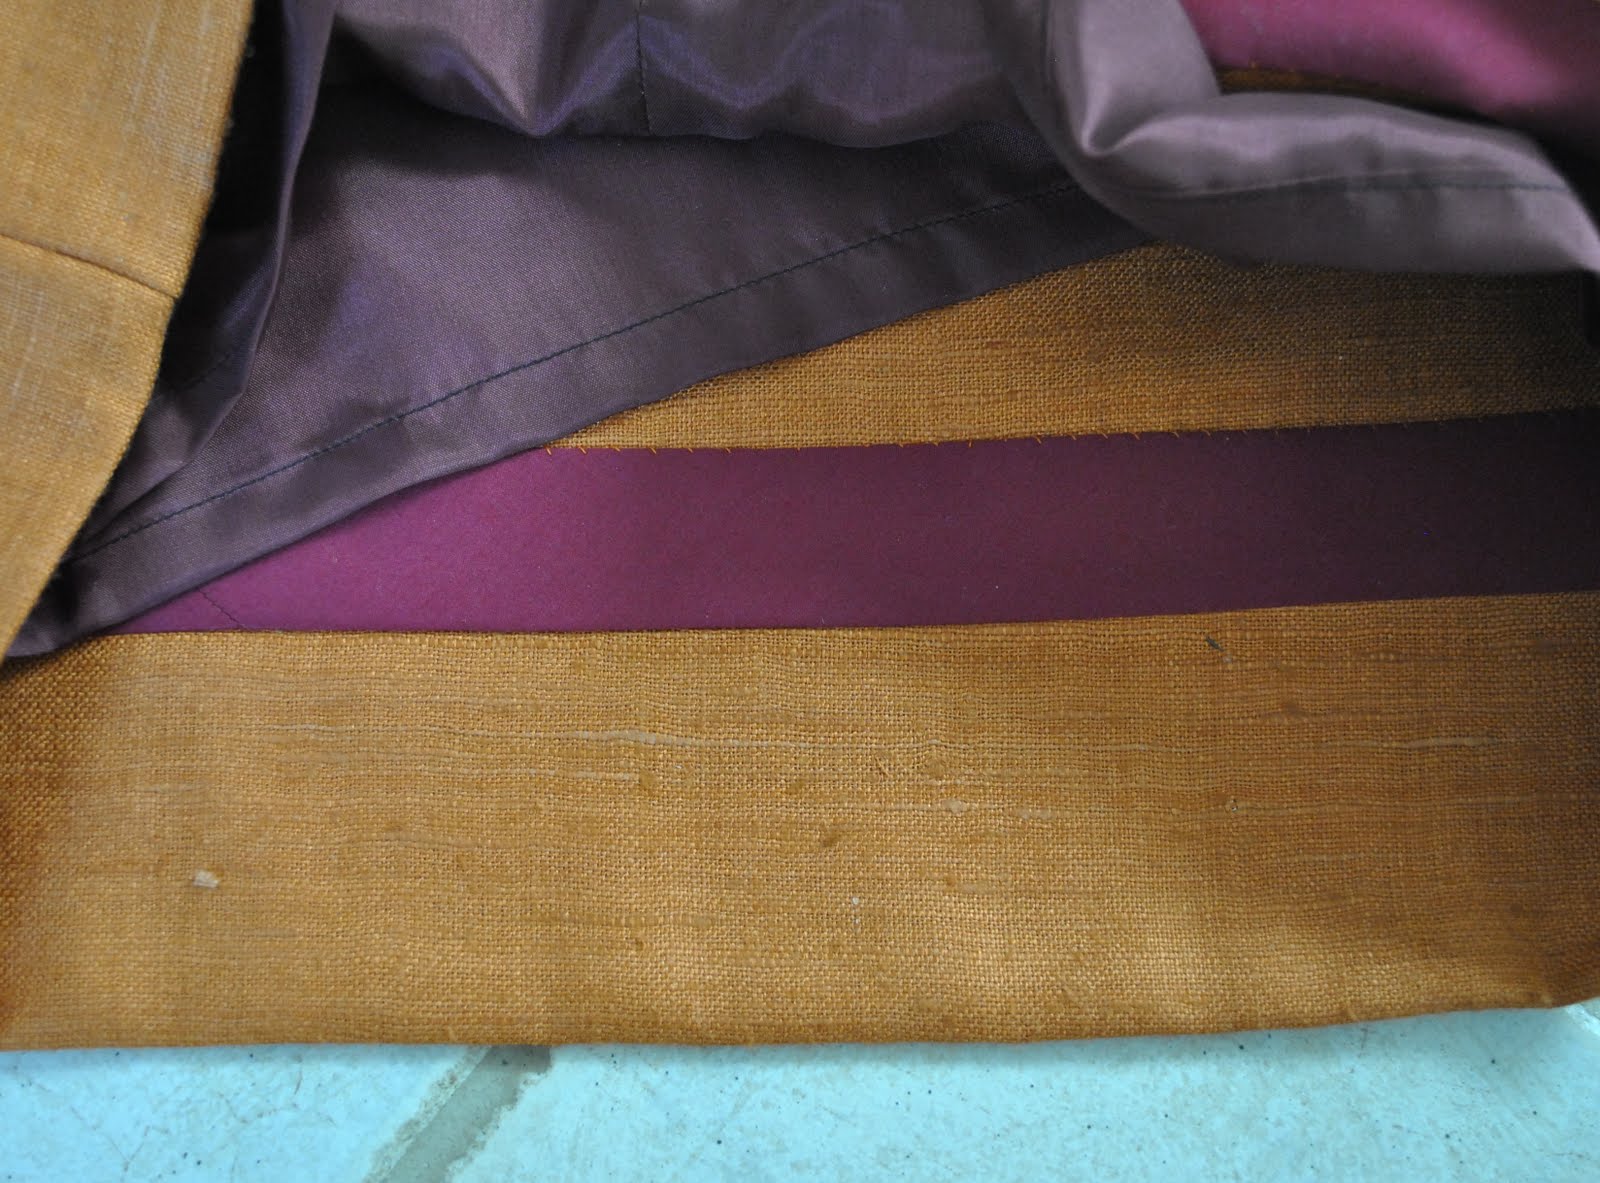
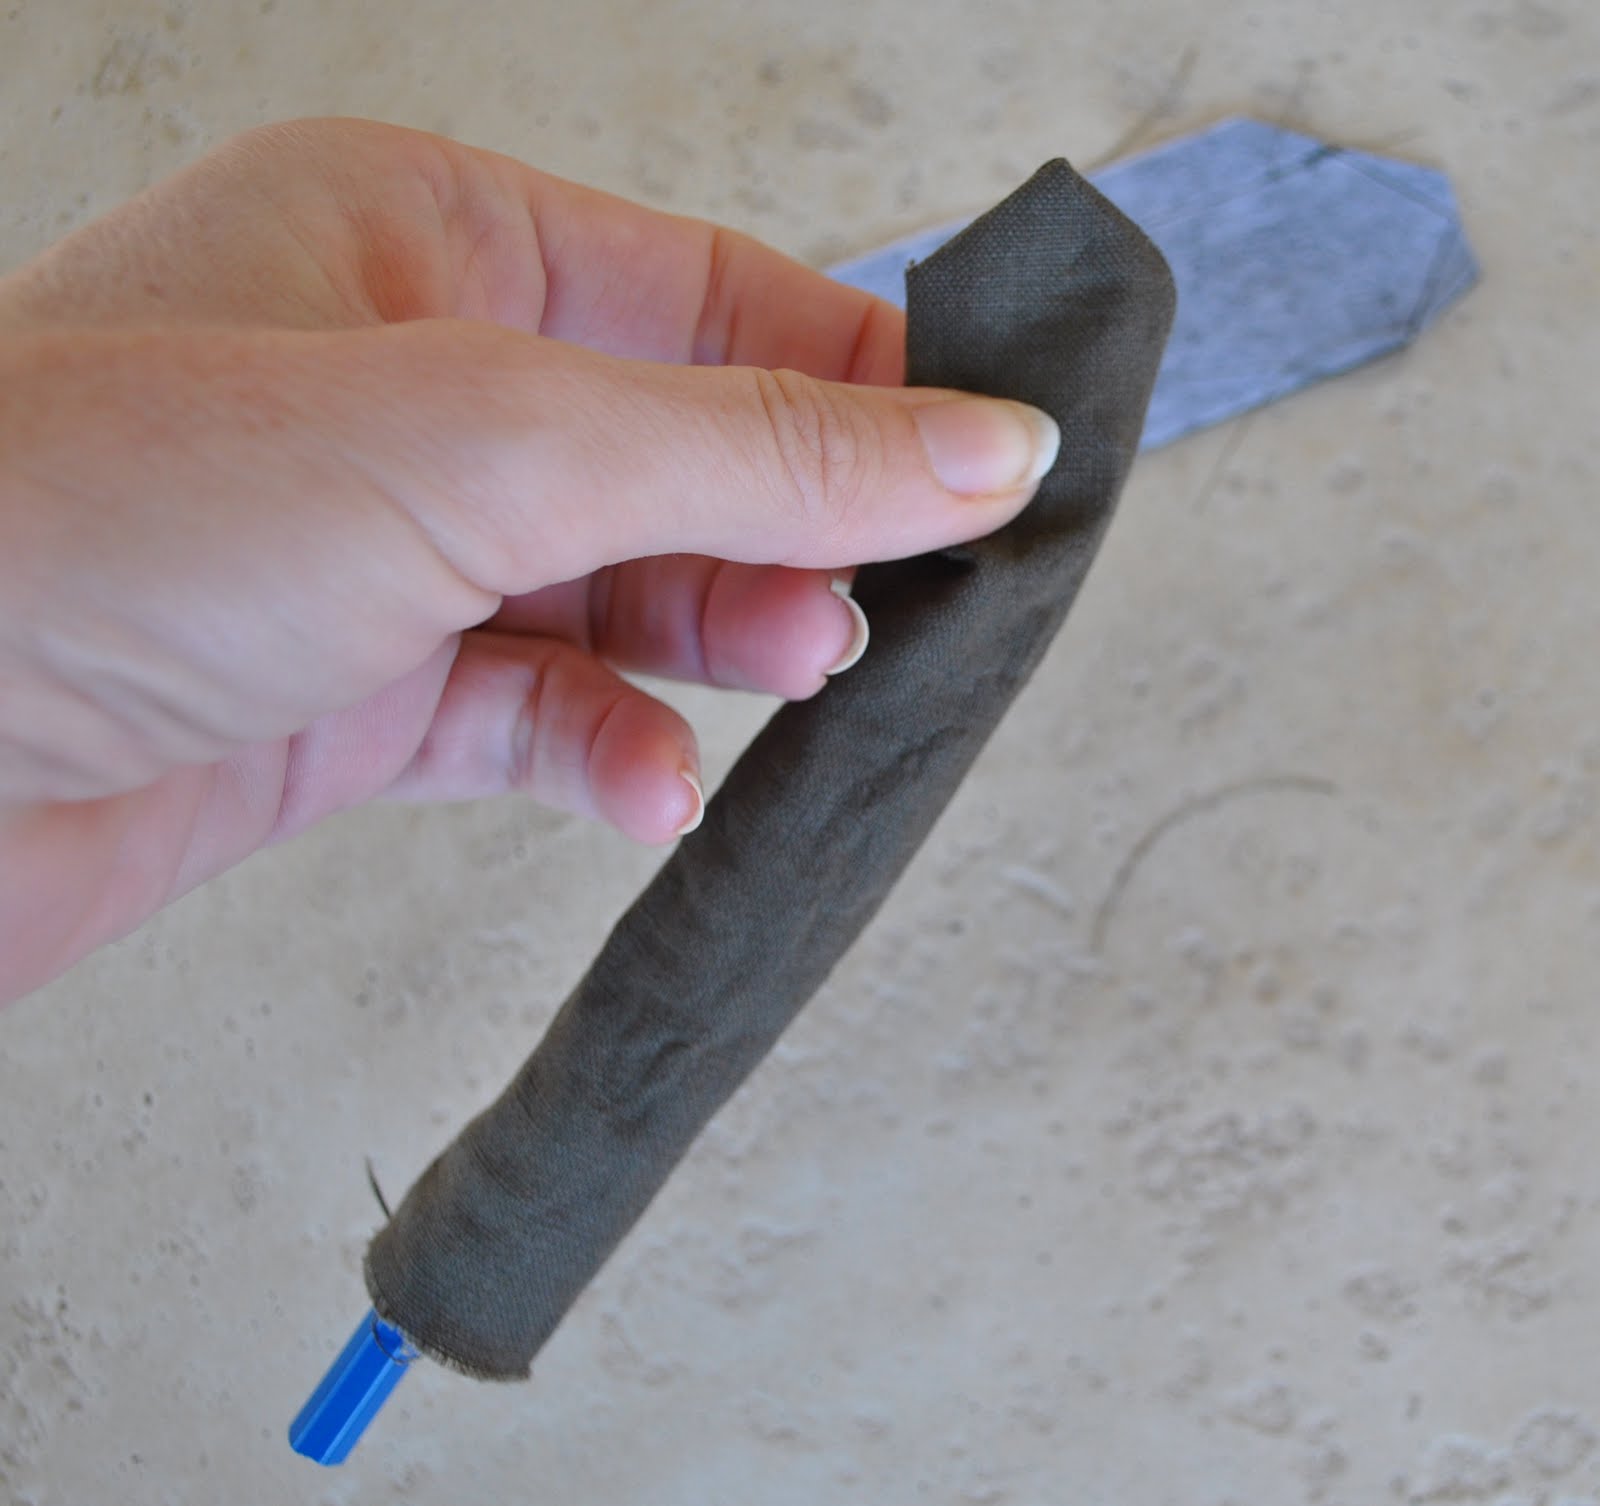
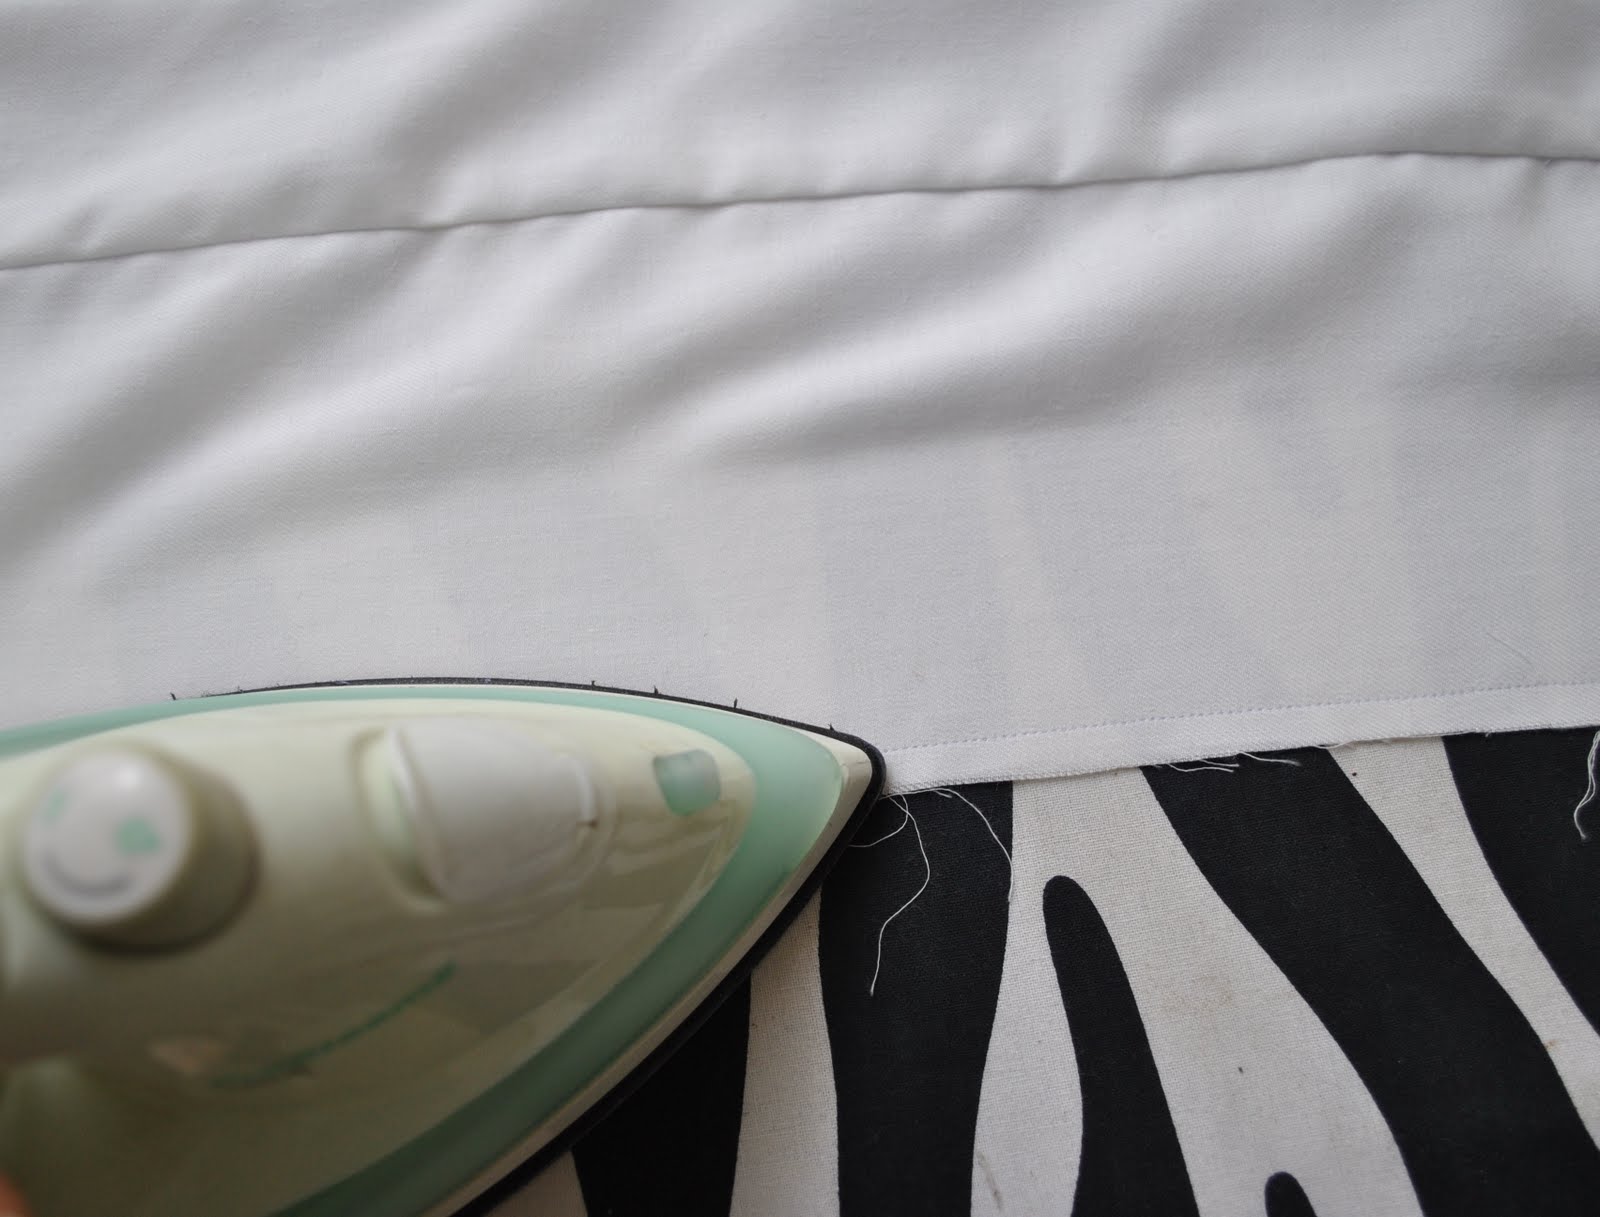
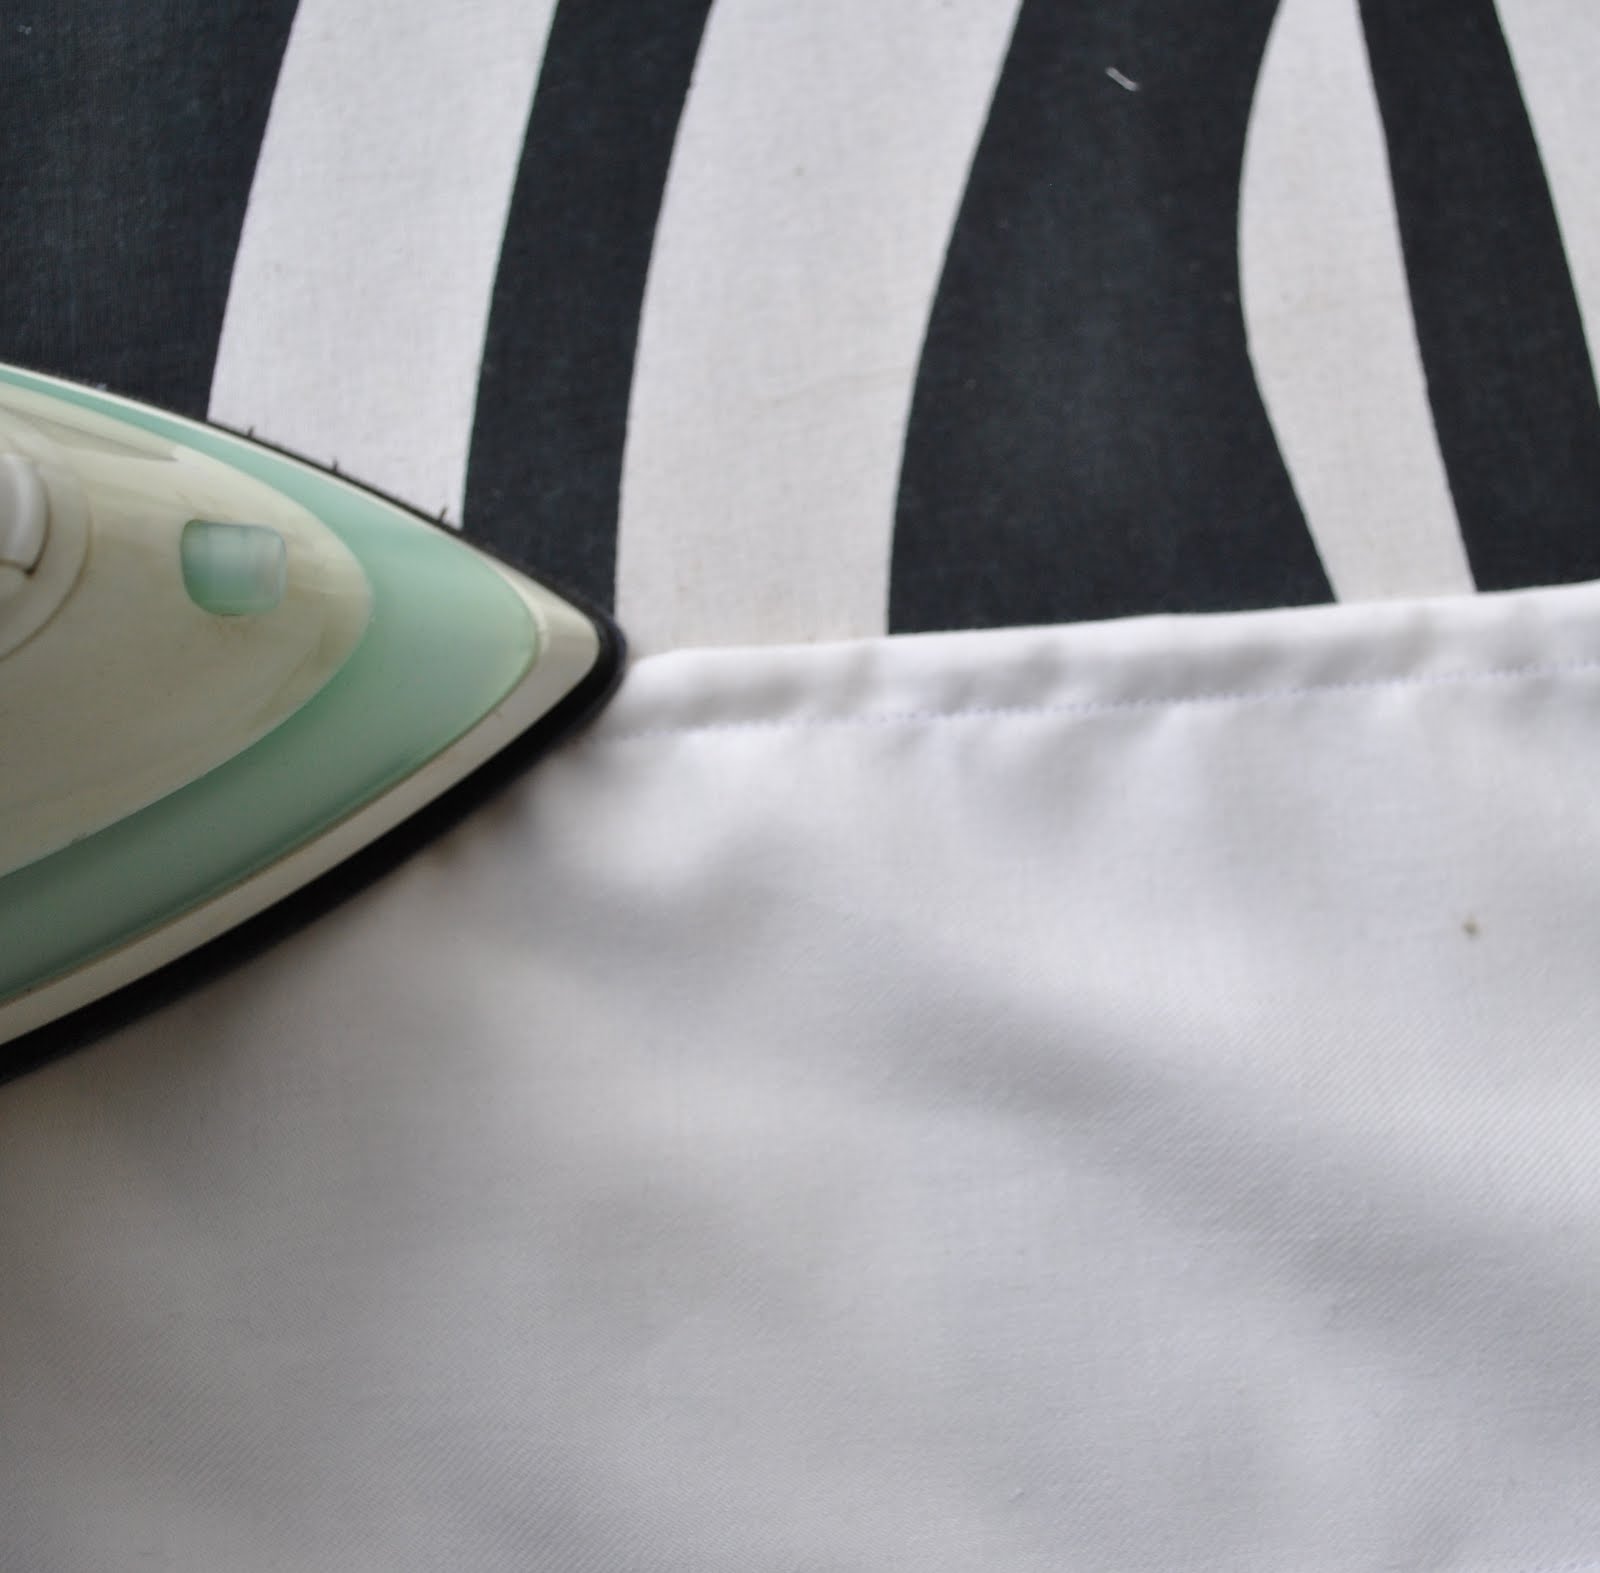
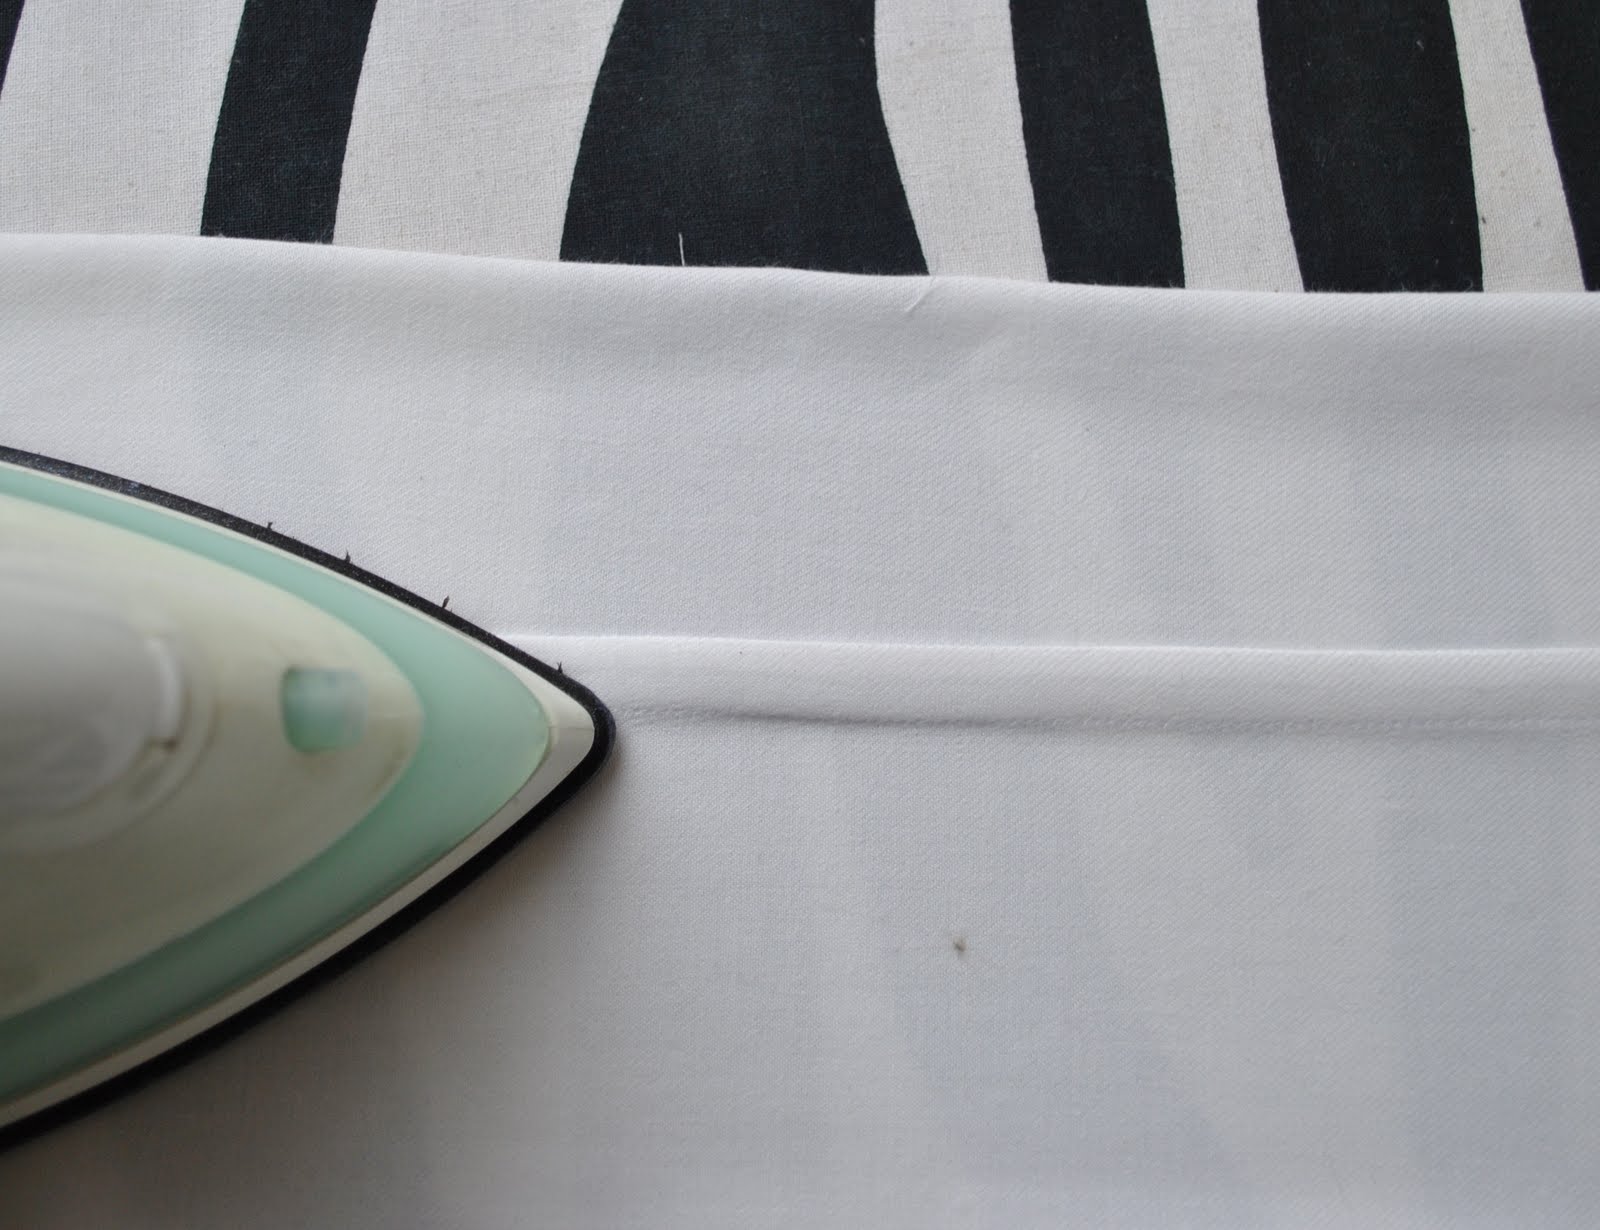
Then just fold one long edge in and press firmly in place the length of the tie.
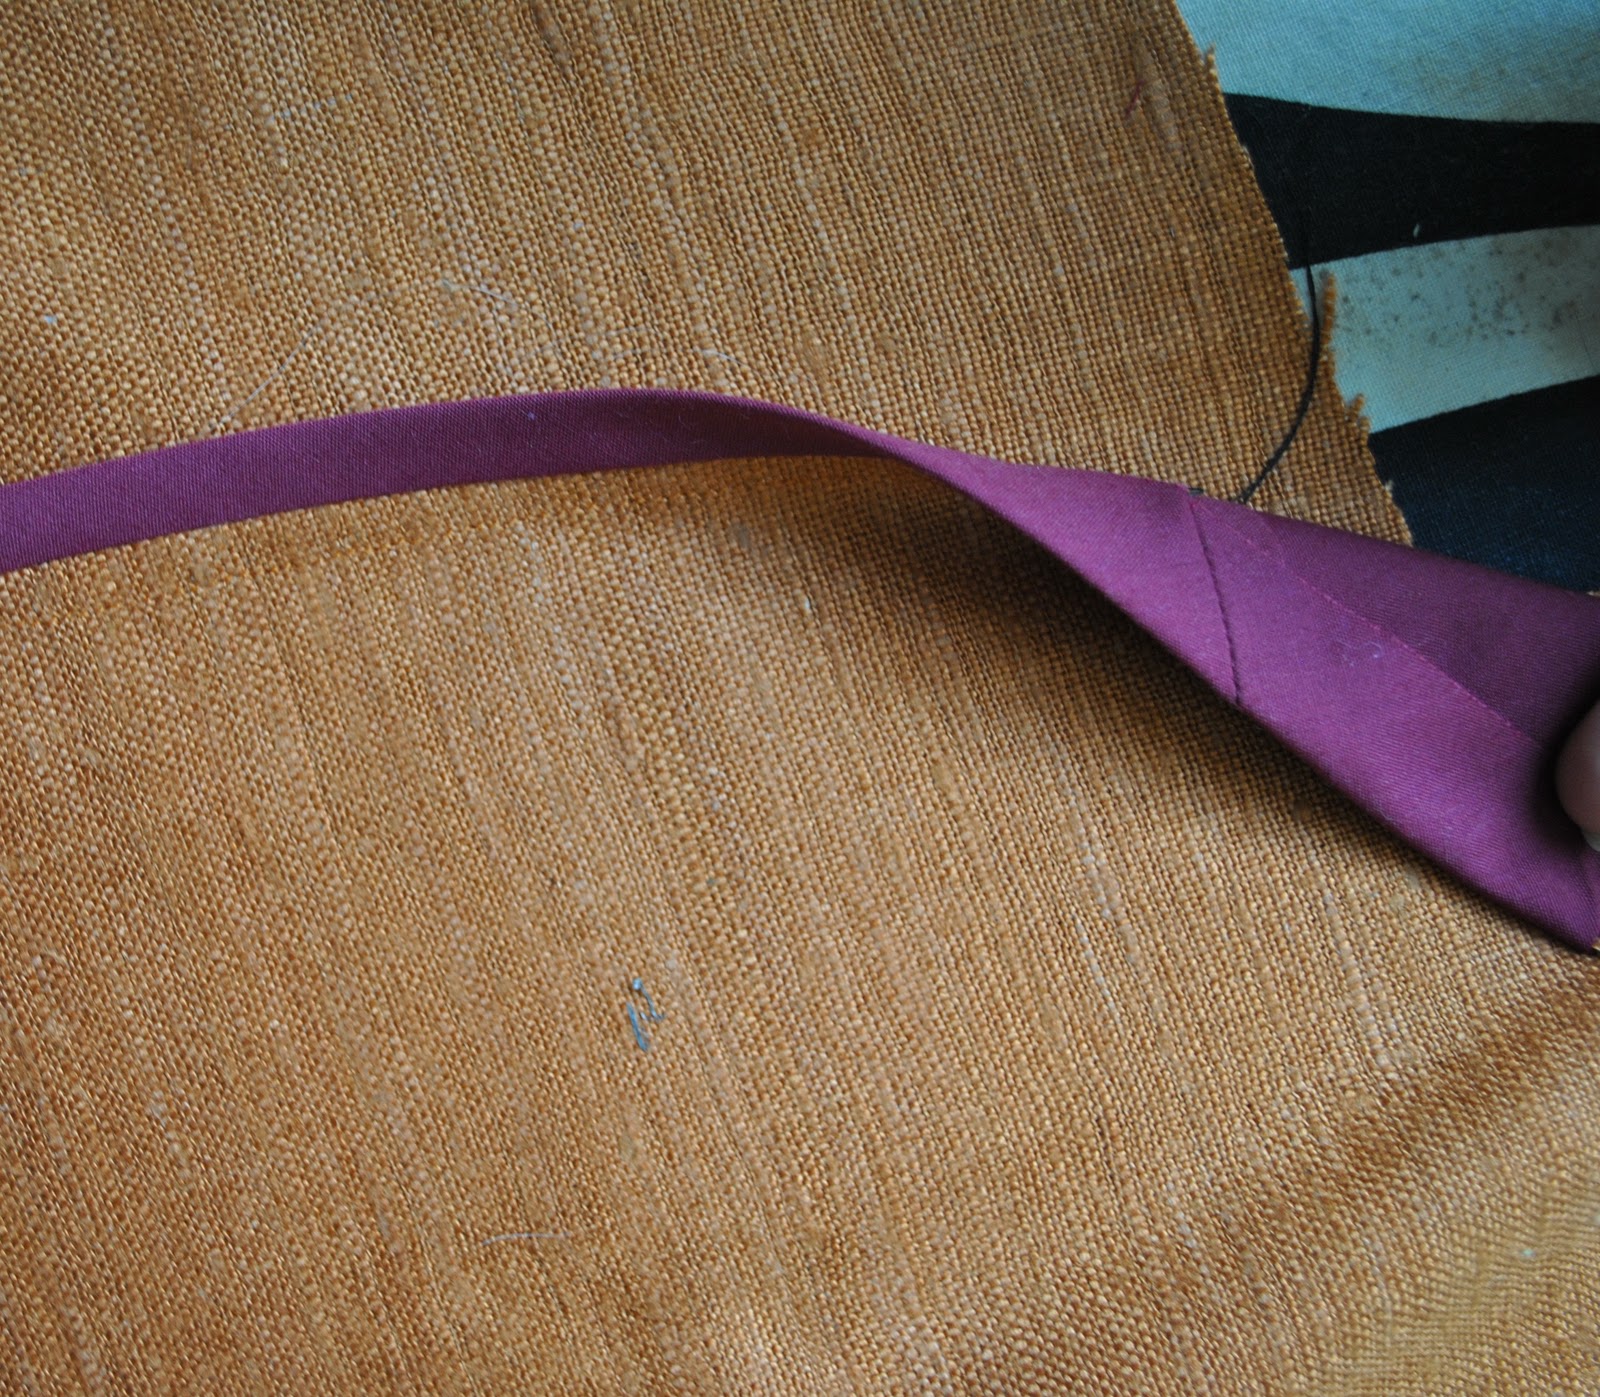
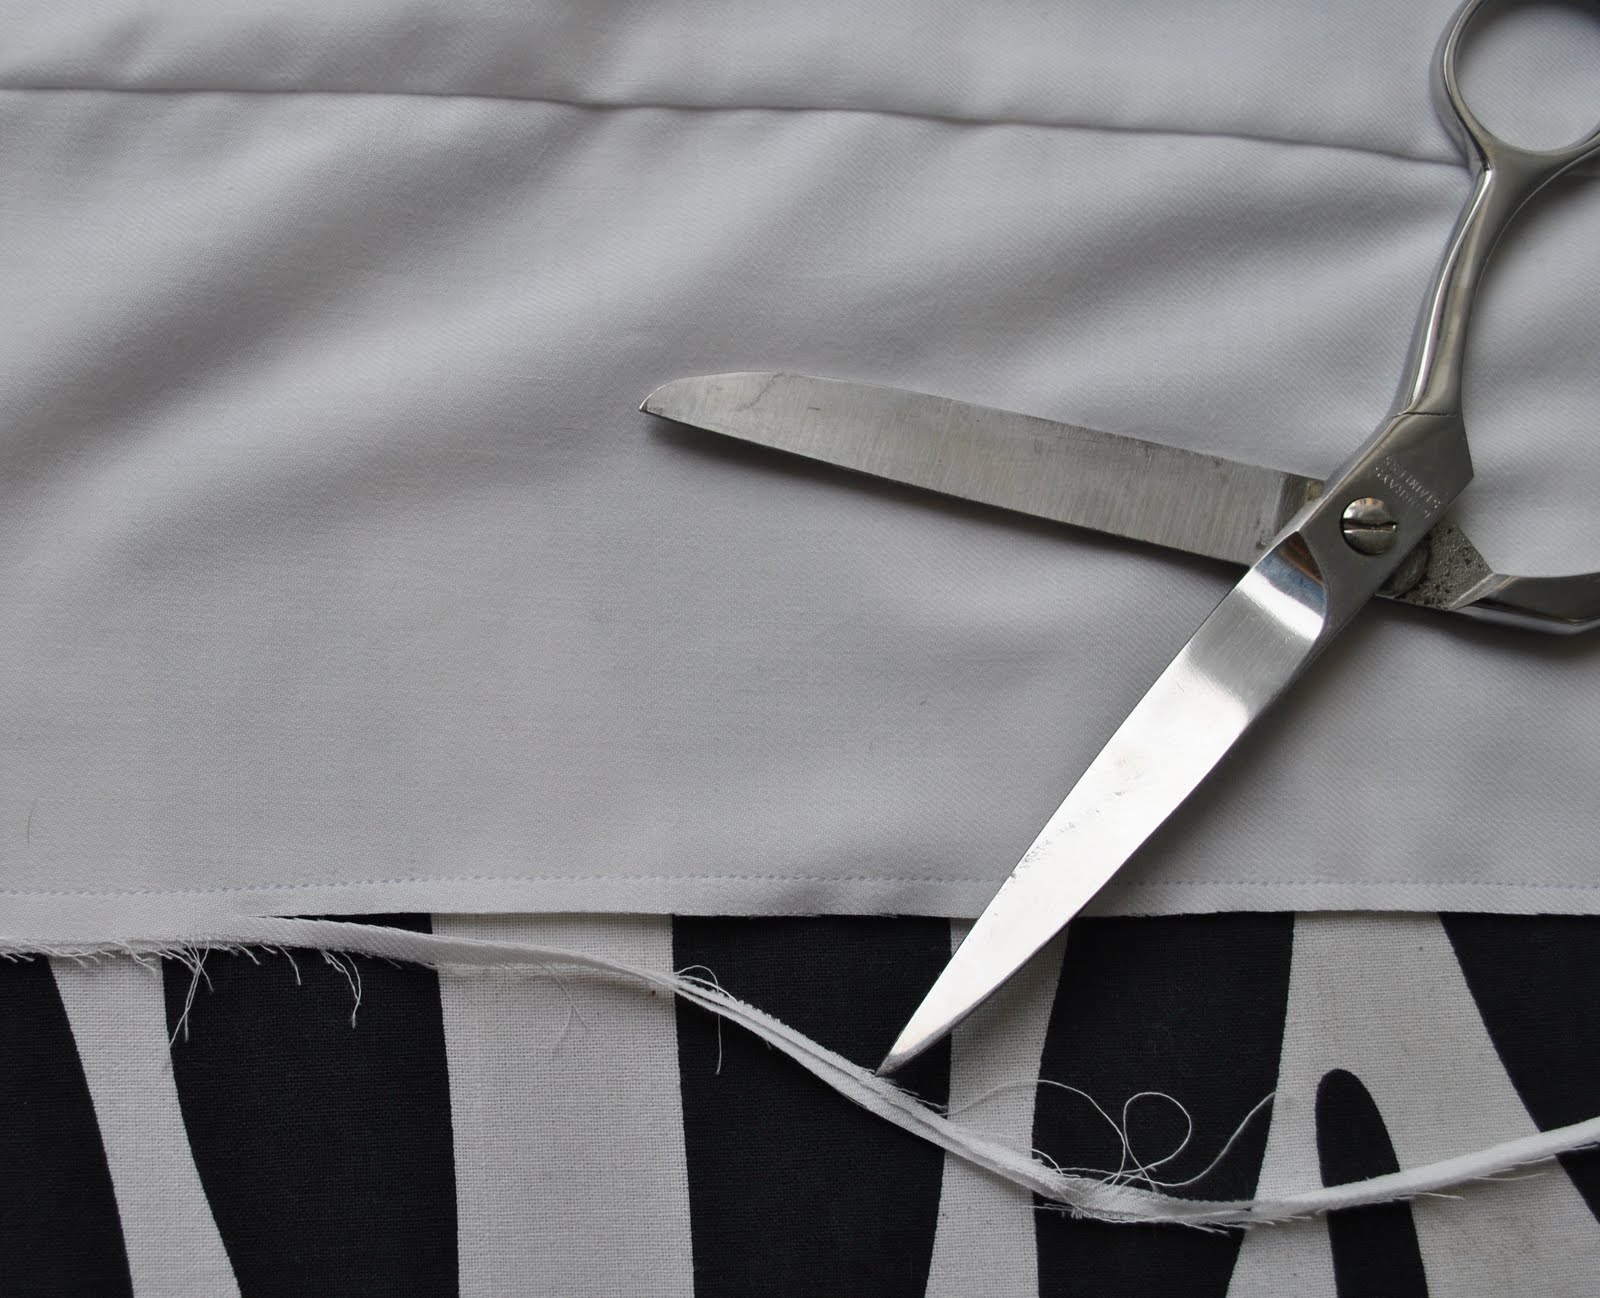
The last open edge, fold in the seam allowance, then fold over the centre of the tie and press.
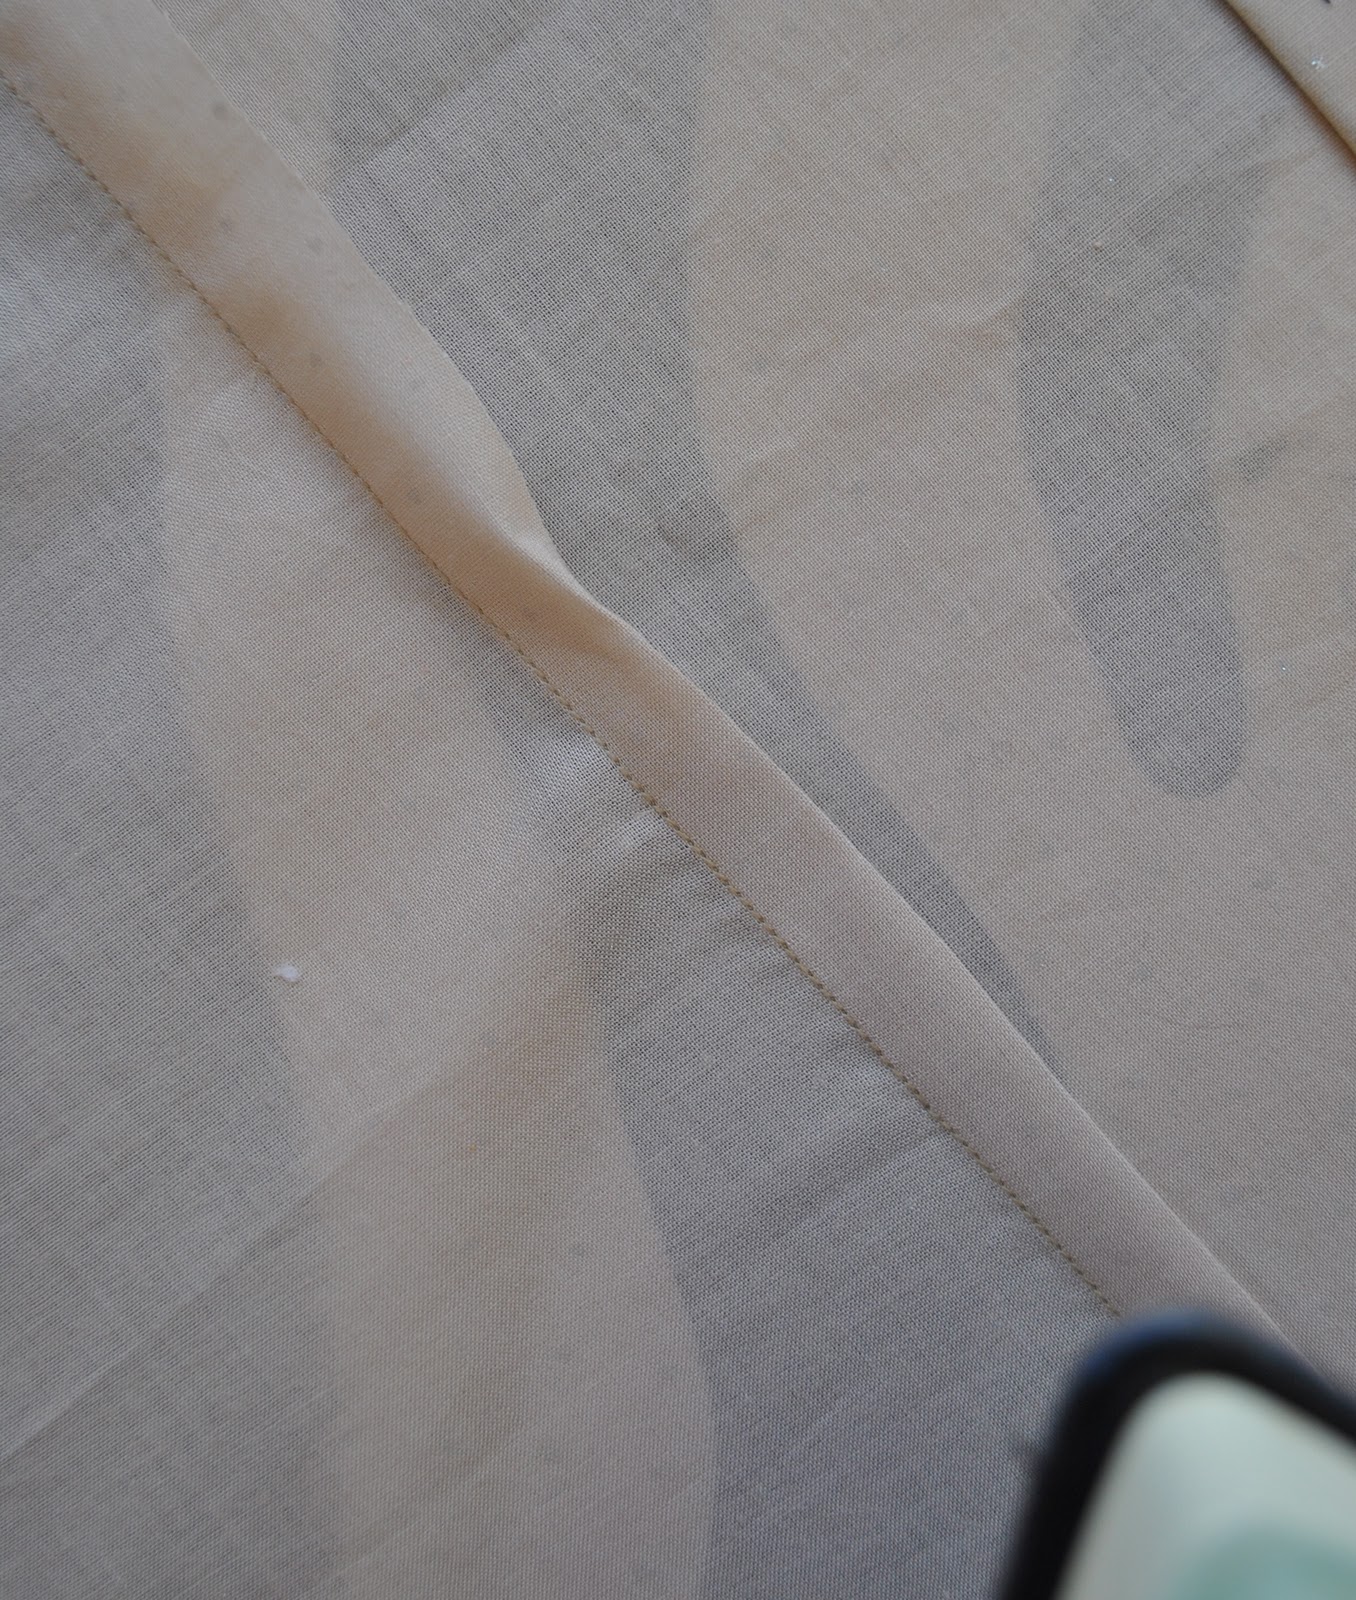
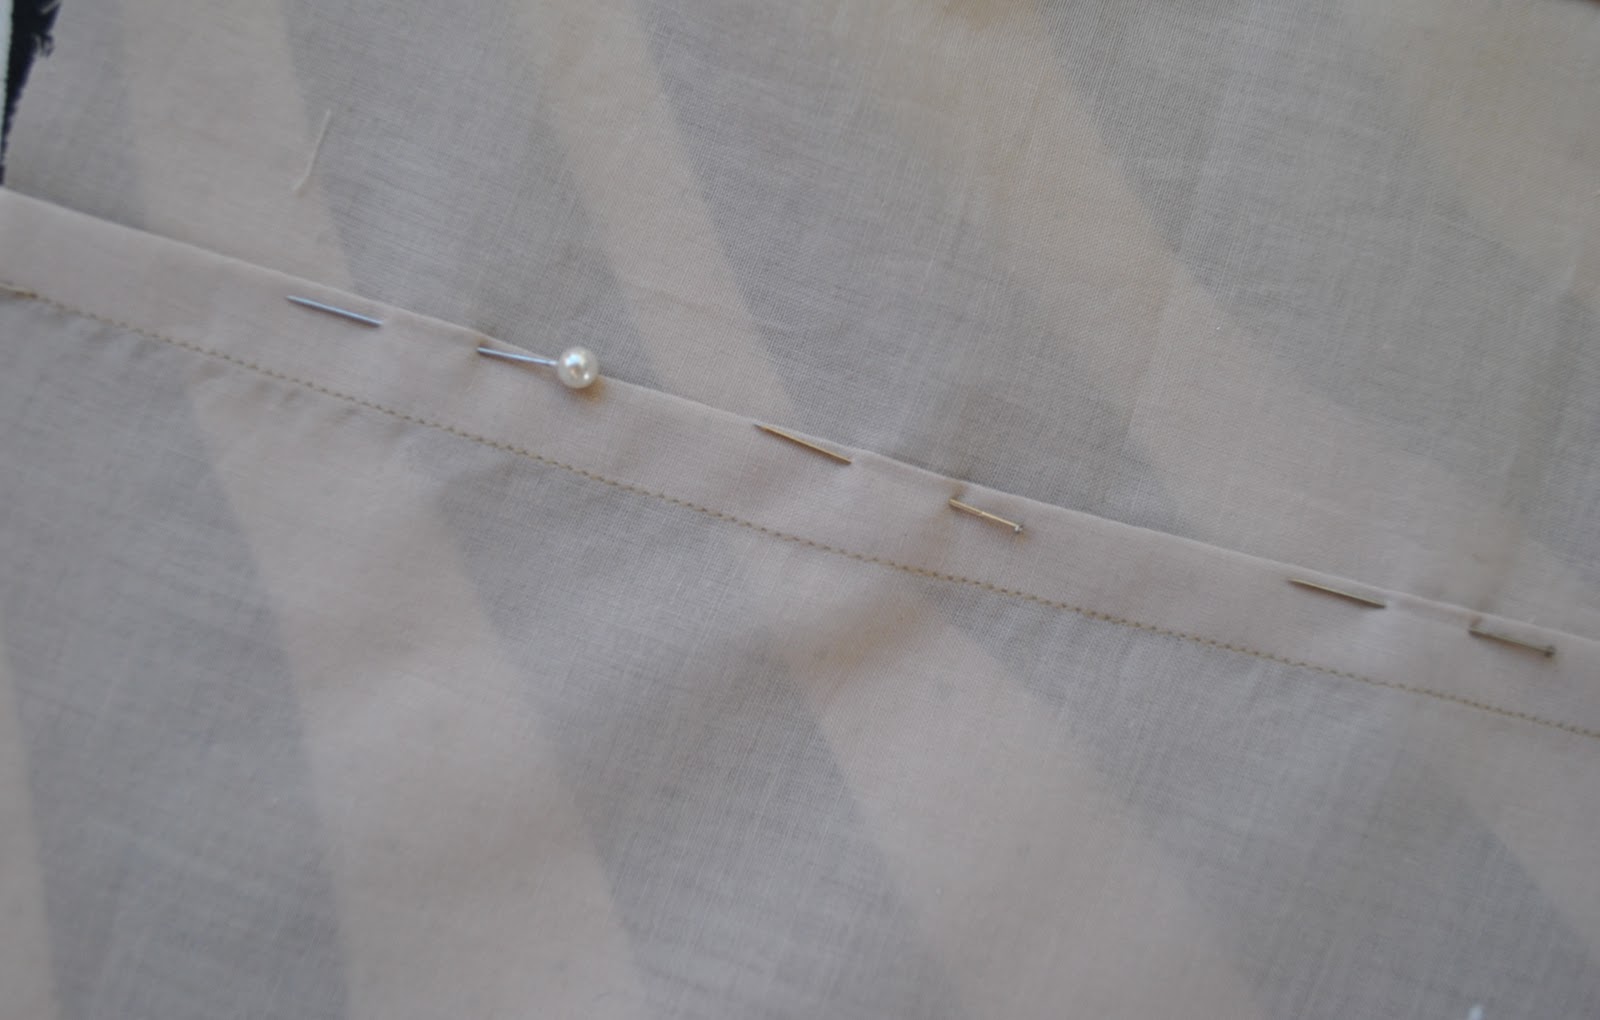
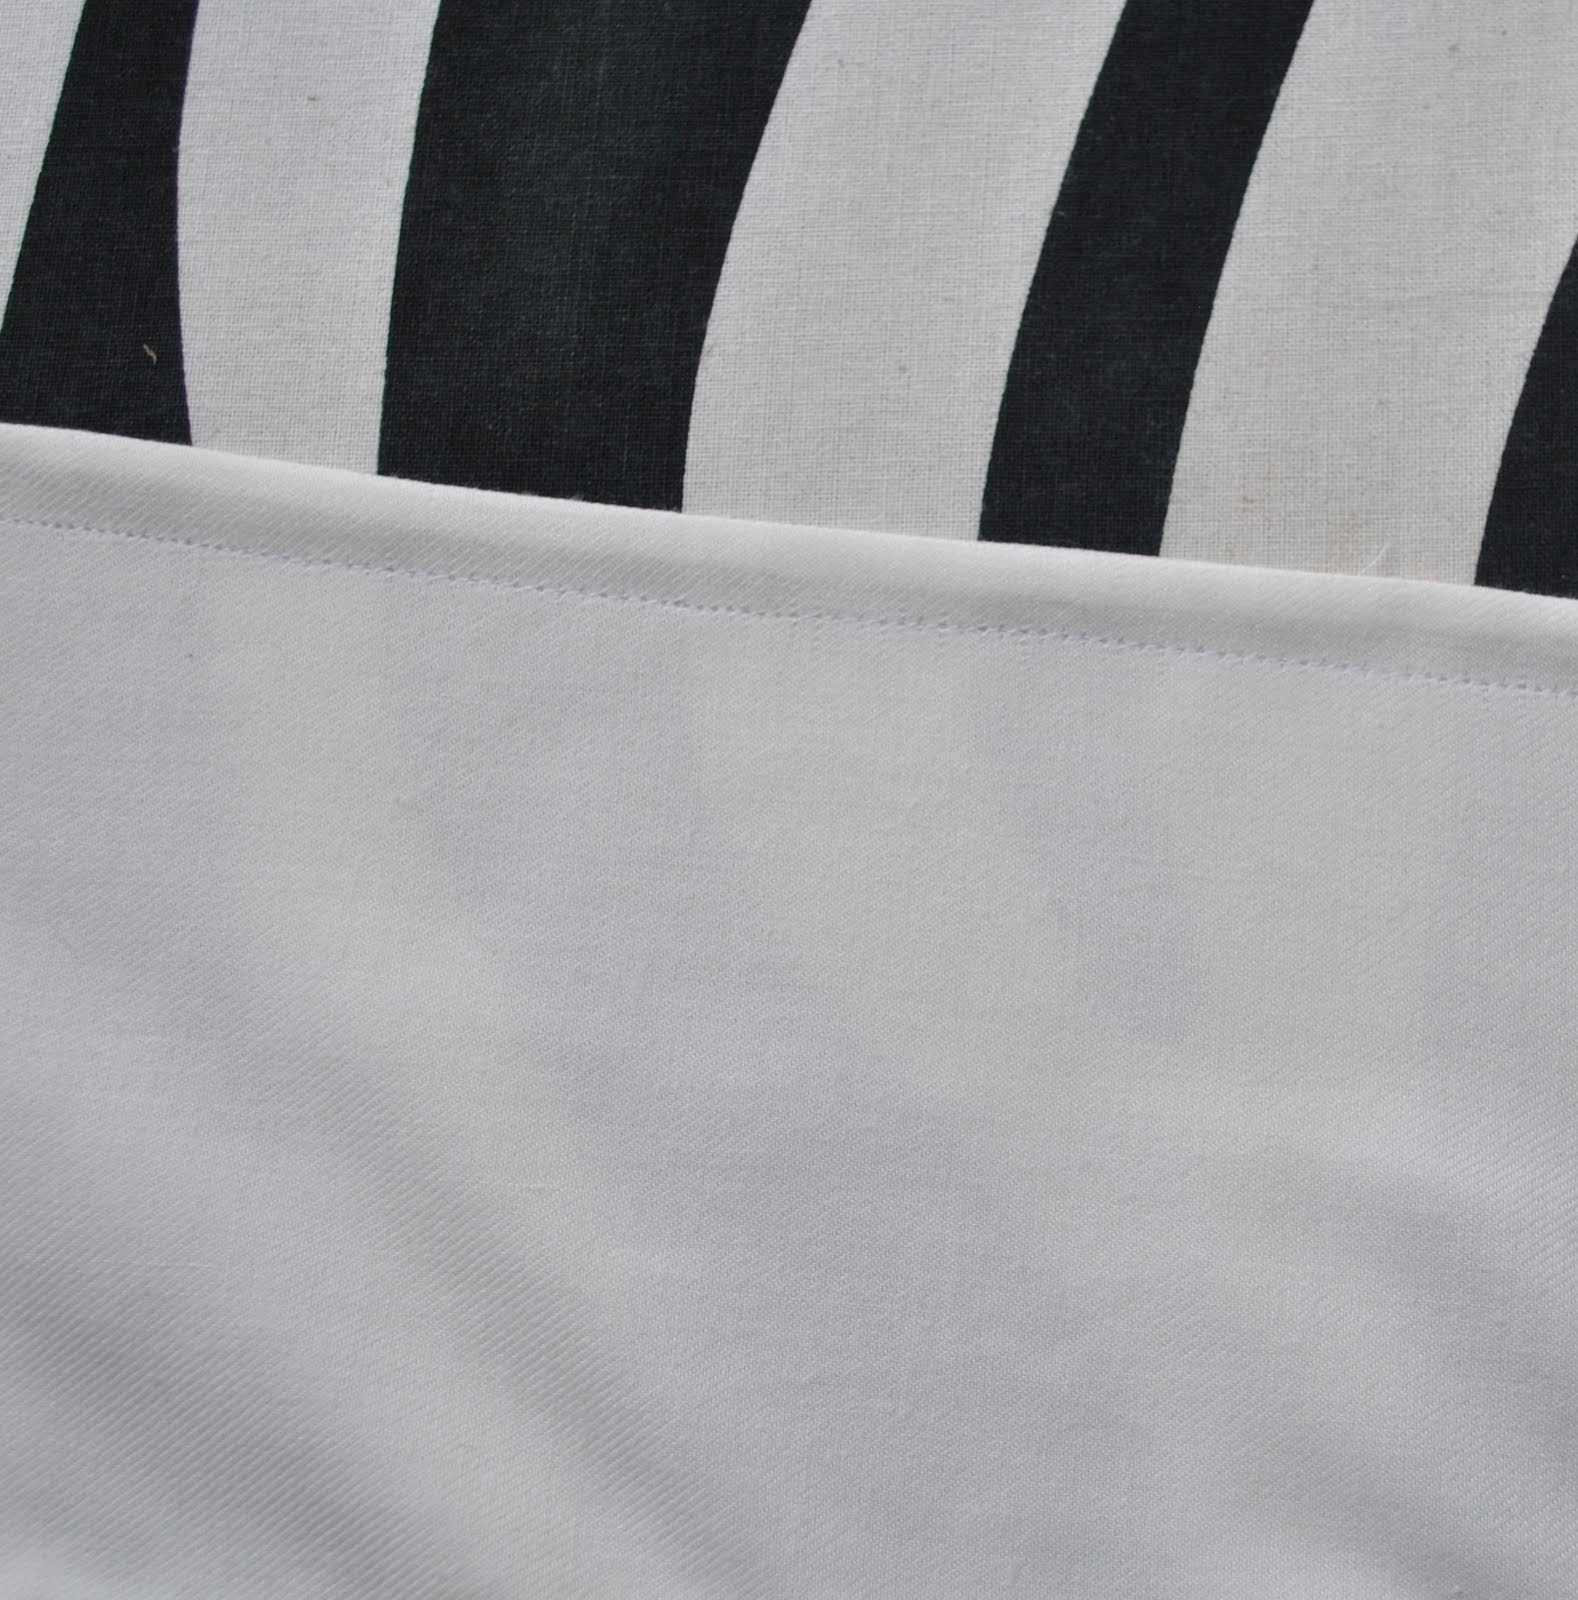
Slip stitch that long folded edge in place, and down those short slanted edges onto the lining.
Voila!
pinterestmail
Switch to mobile version
↓