French seaming…

I am making a blouse for myself using a fabric that is a smidge on the sheer side, and when one is using light or sheer fabrics the seam allowances inside your garment can be very visible from the outside.  French seaming might seem like a lot of extra work, but it’s not so much really… if you plan to overlock your seams to finish then you are still running over each seam twice anyway so French seaming is the same amount of sewing time…  and you want your handmade garment to look as nice as possible, right?  

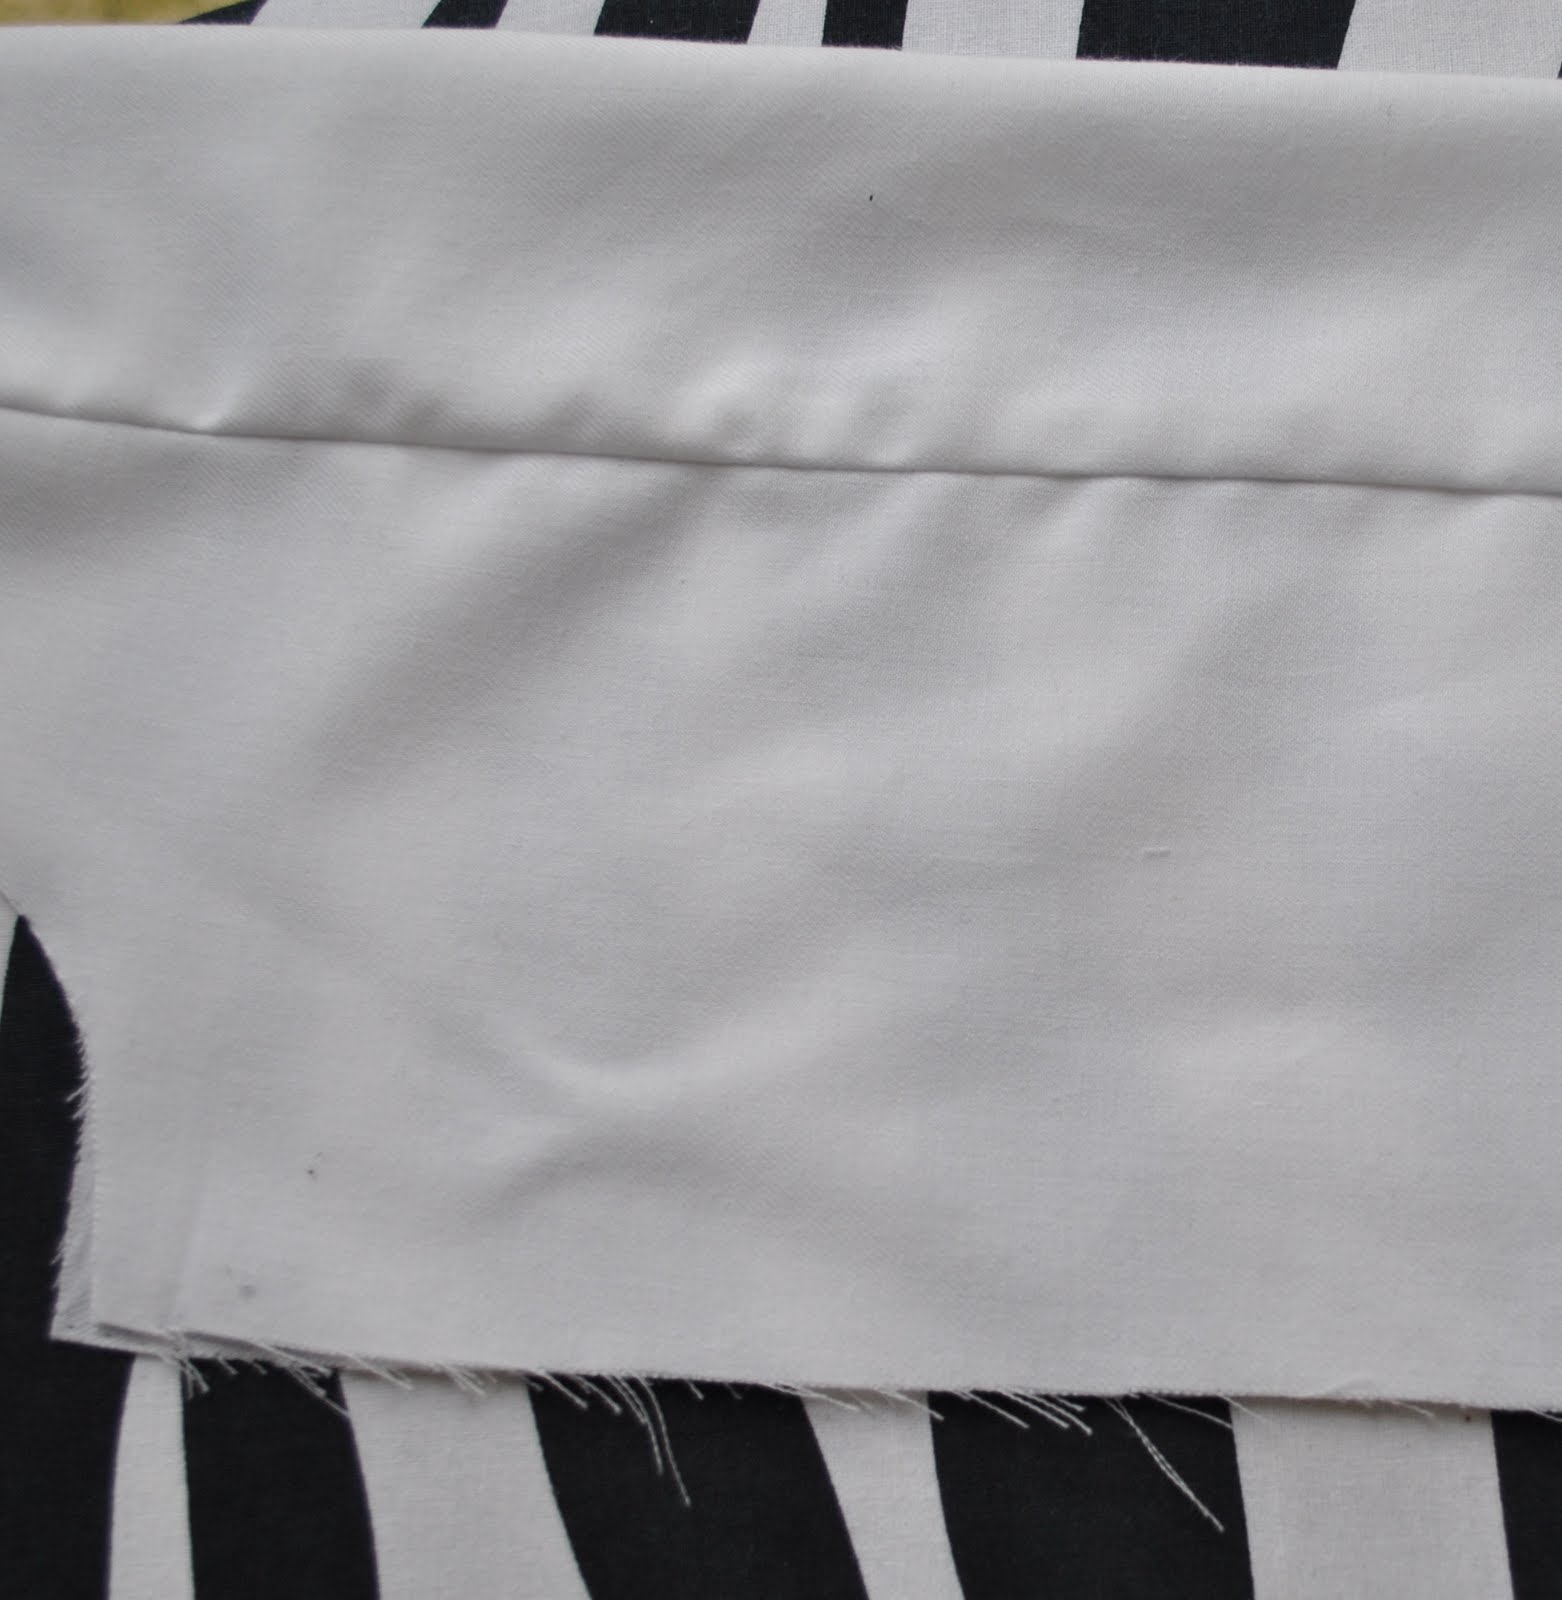
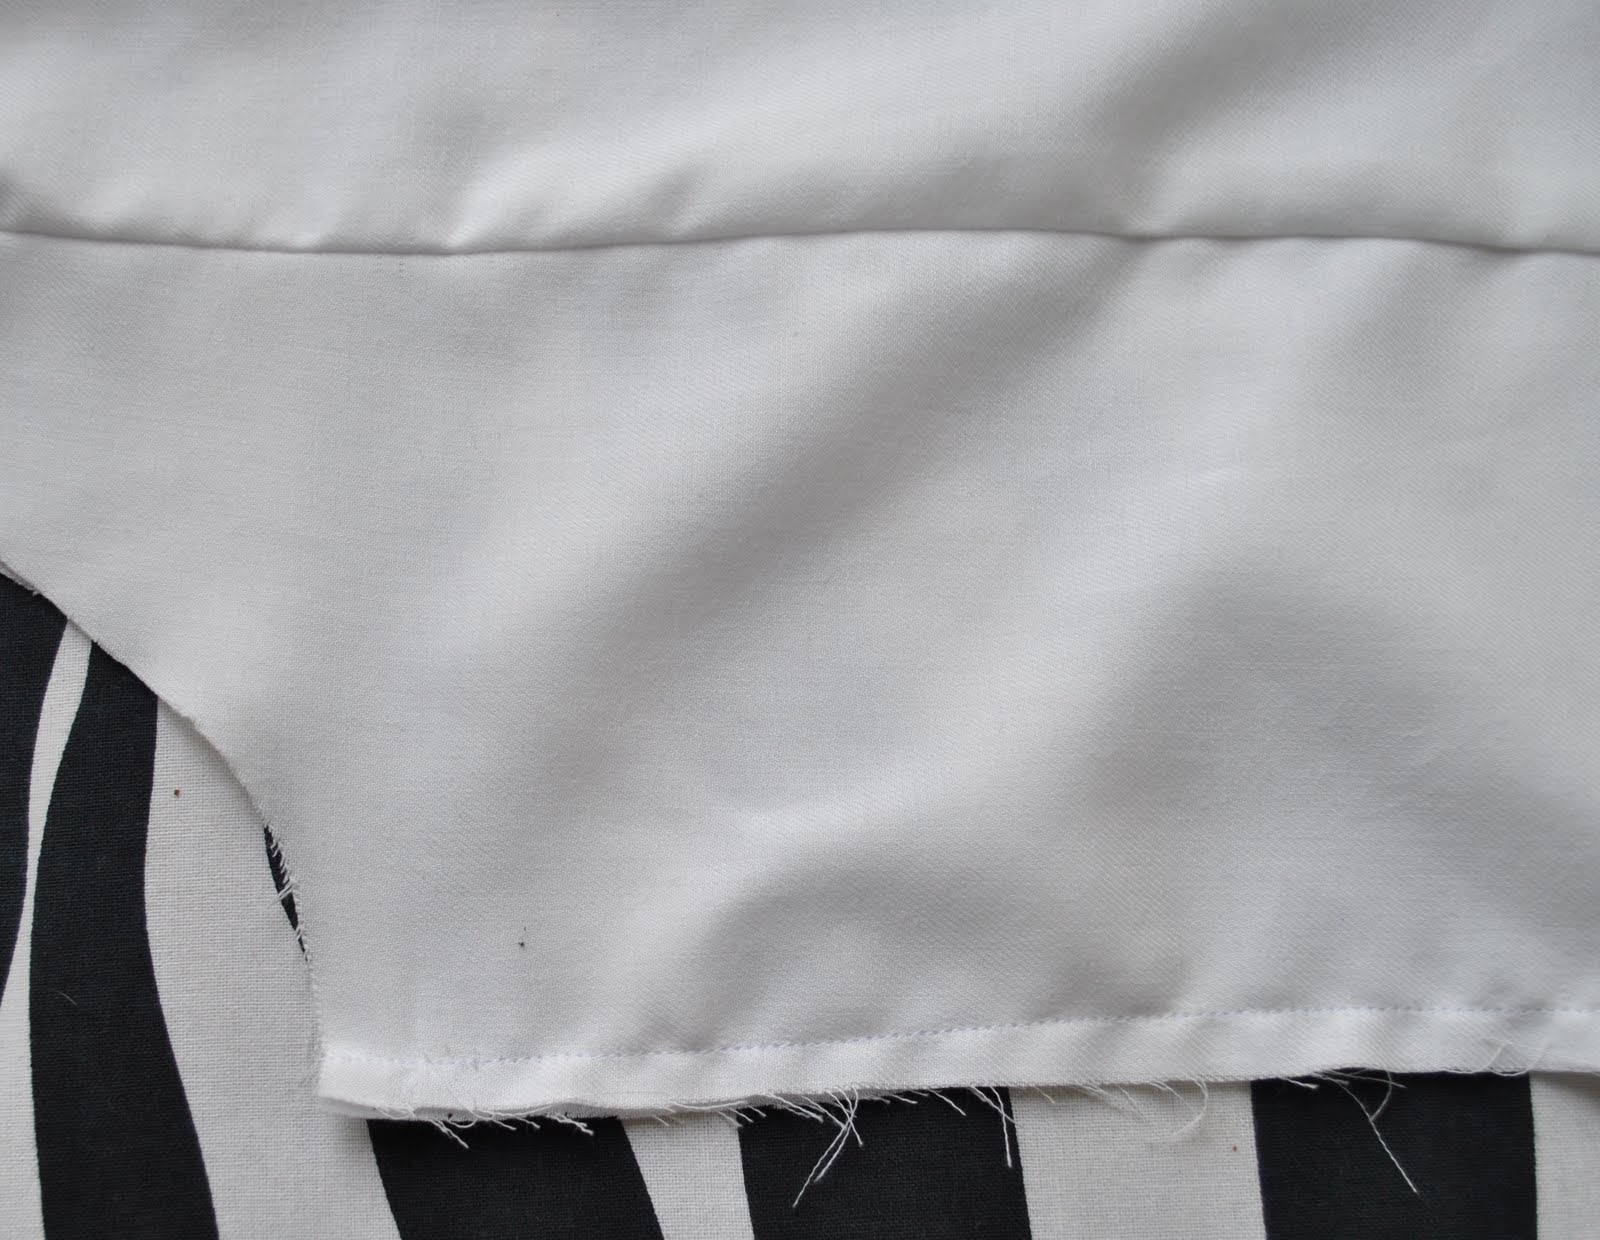
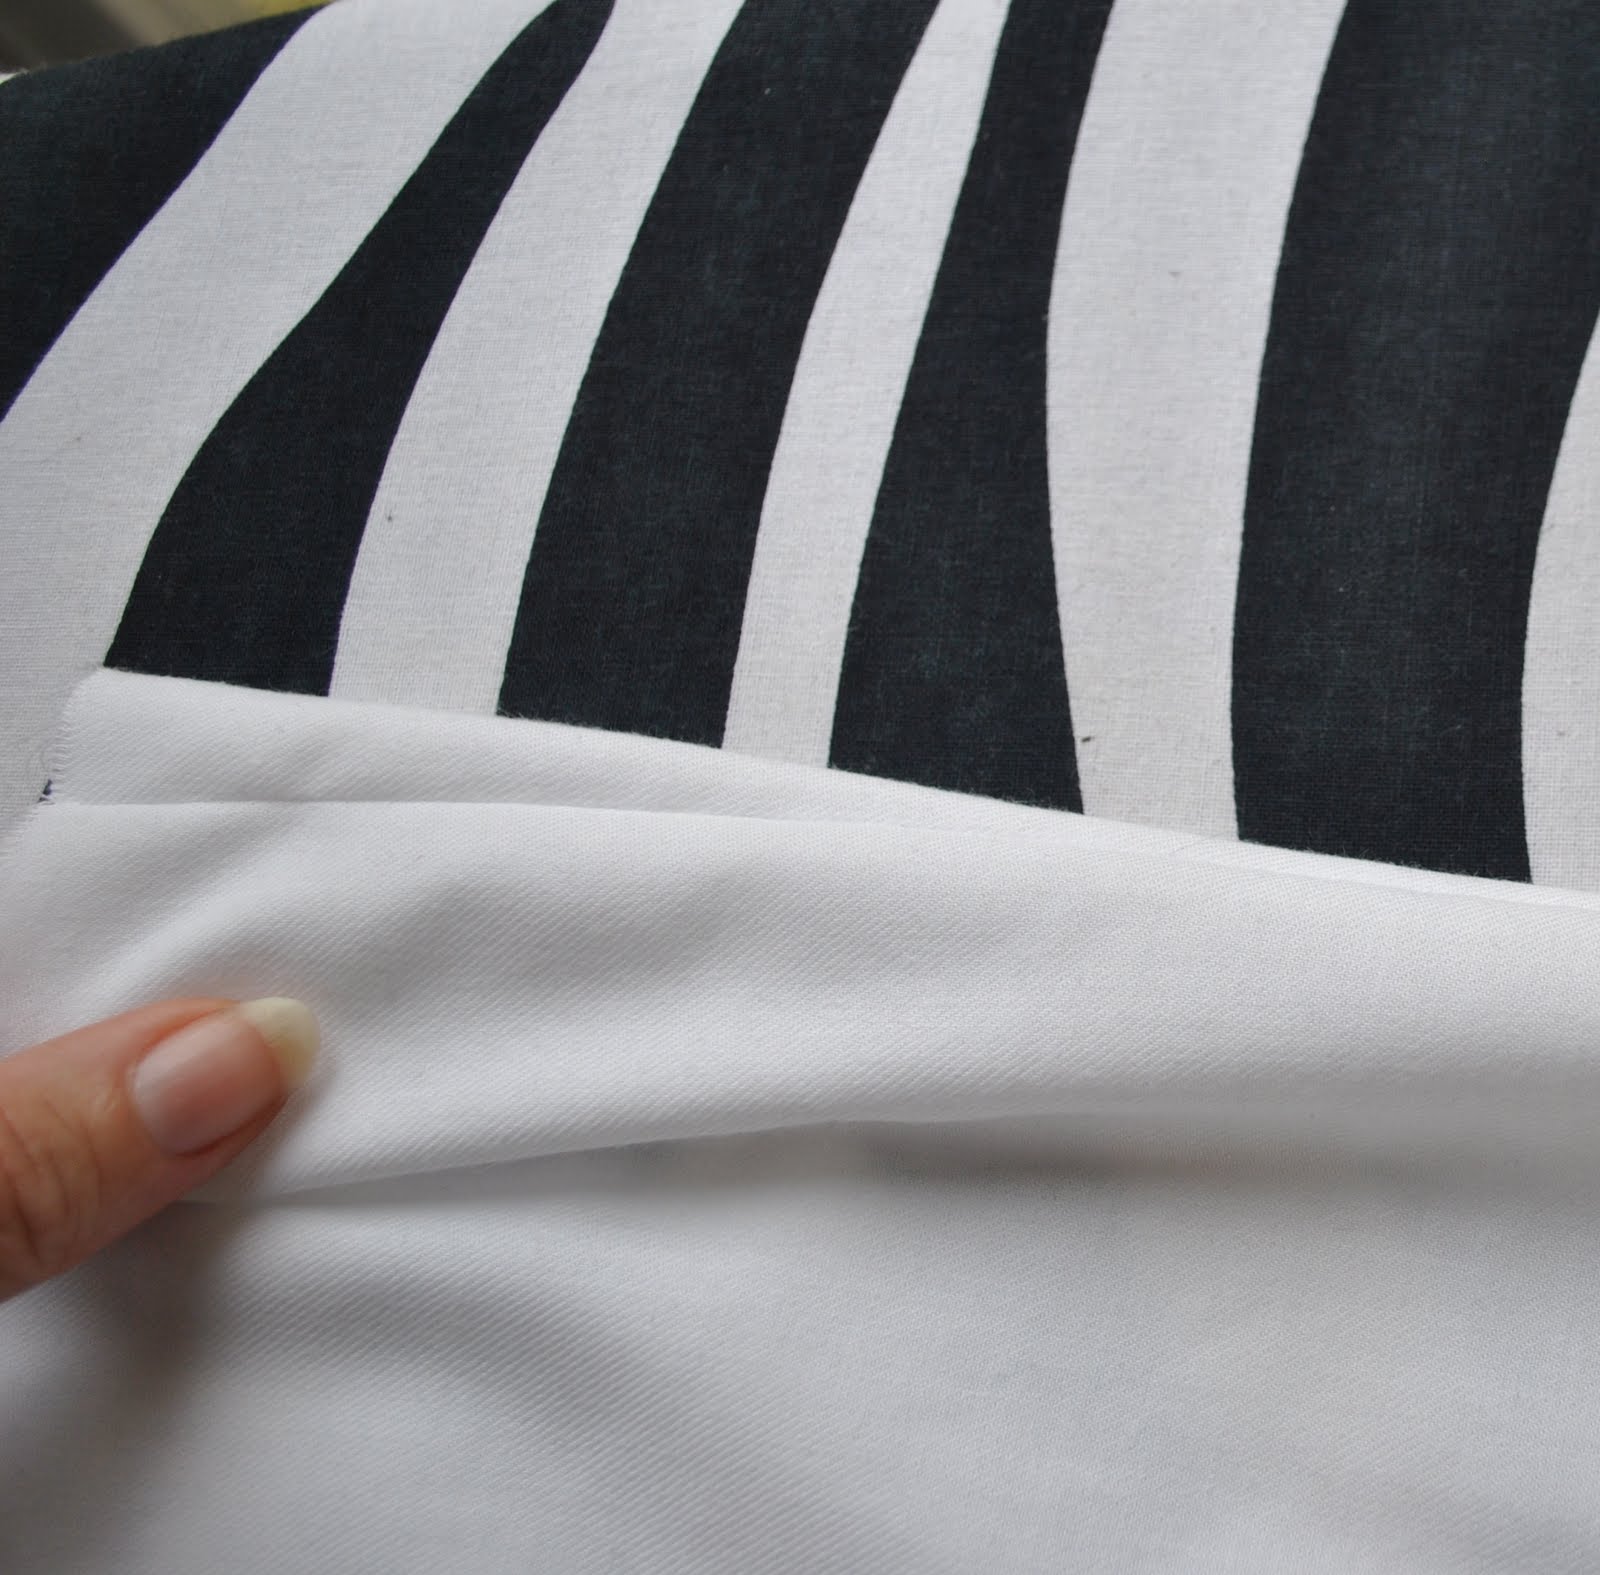
When sewing a French seam, the fabrics are firstly laid wrong sides together, and the raw edge sewn together in a narrow 5mm (1/4″) seam.  I know, I know, it seems all wrong wrong wrong to sew the fabric wrong sides together, goes against everything we’ve ever done as seamstresses before… but bear with me here… it all comes right in the end.

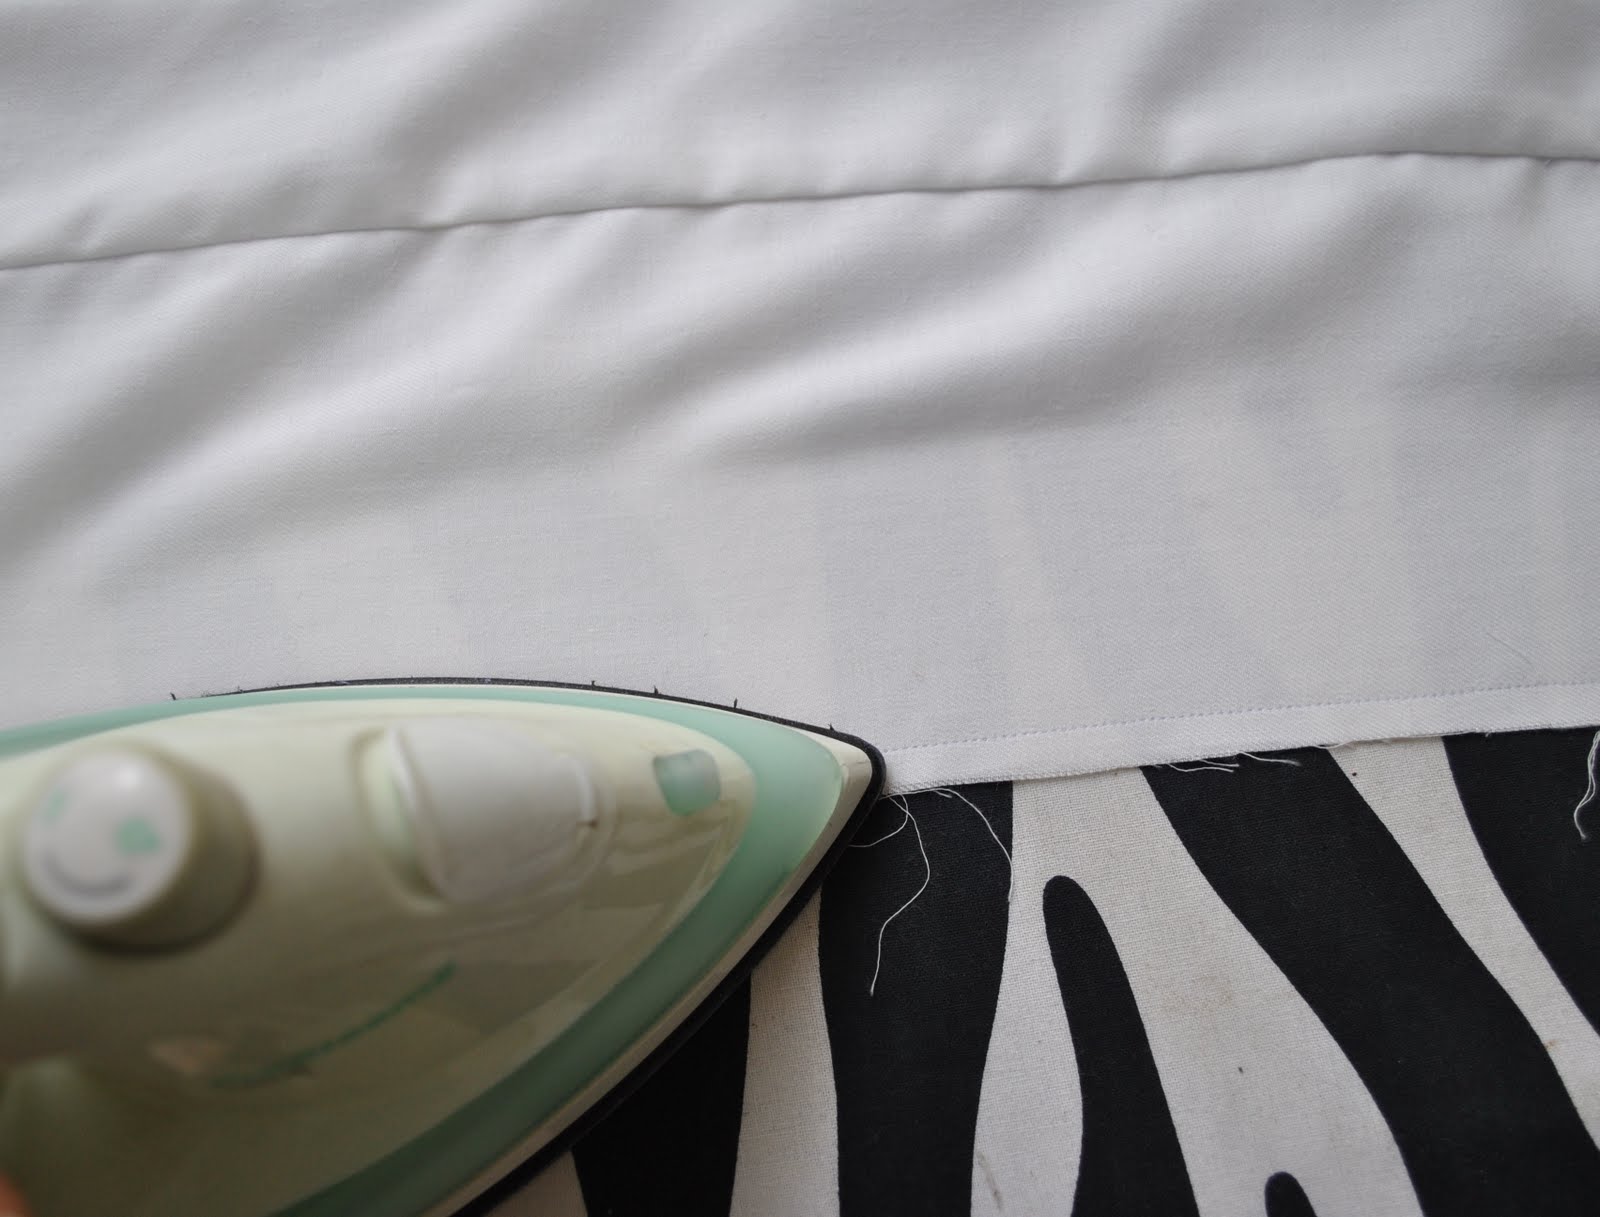
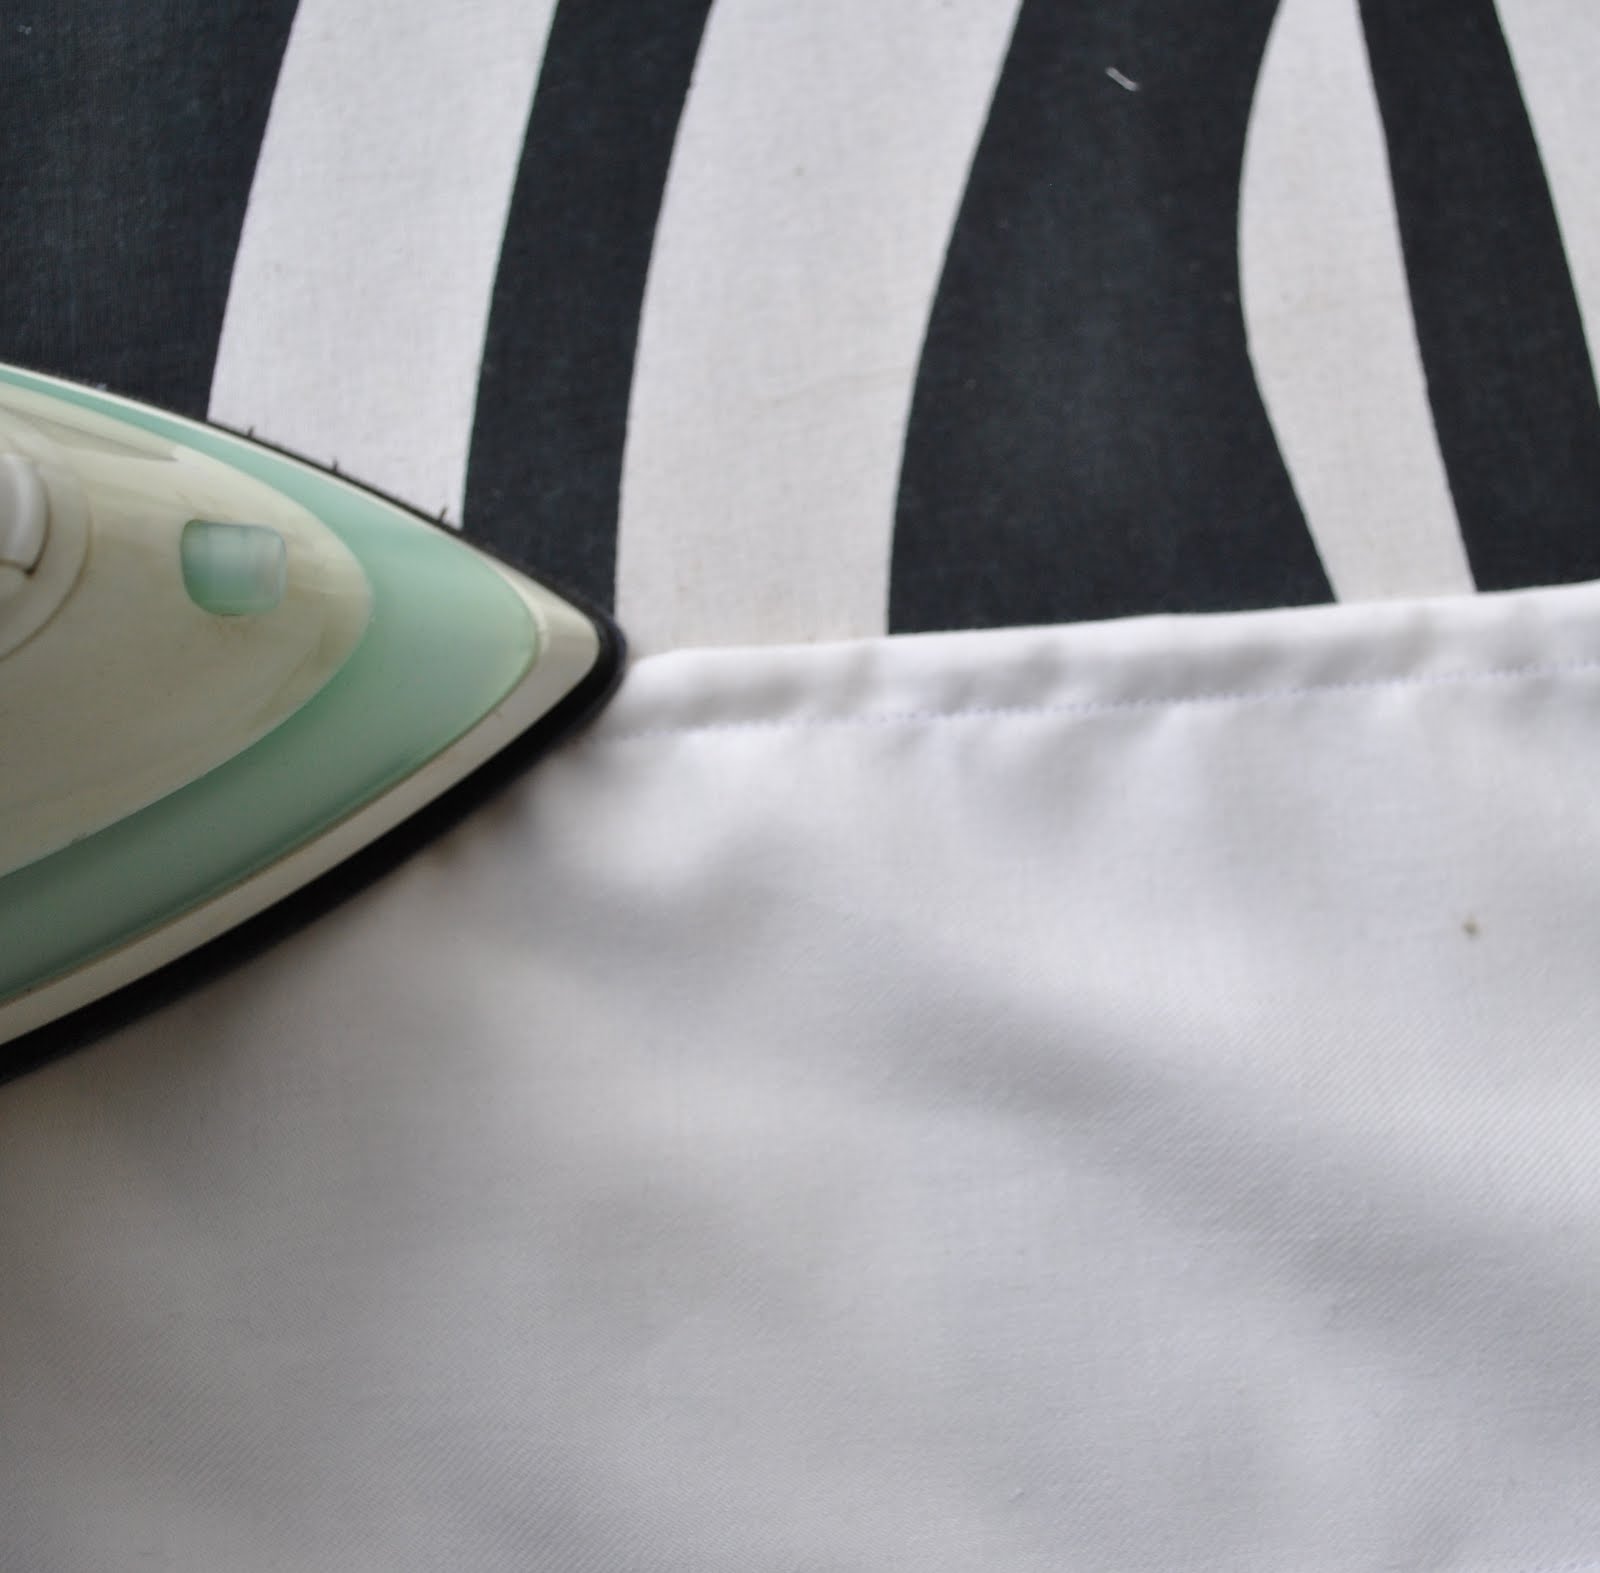
Press the sewn seam nice and flat.

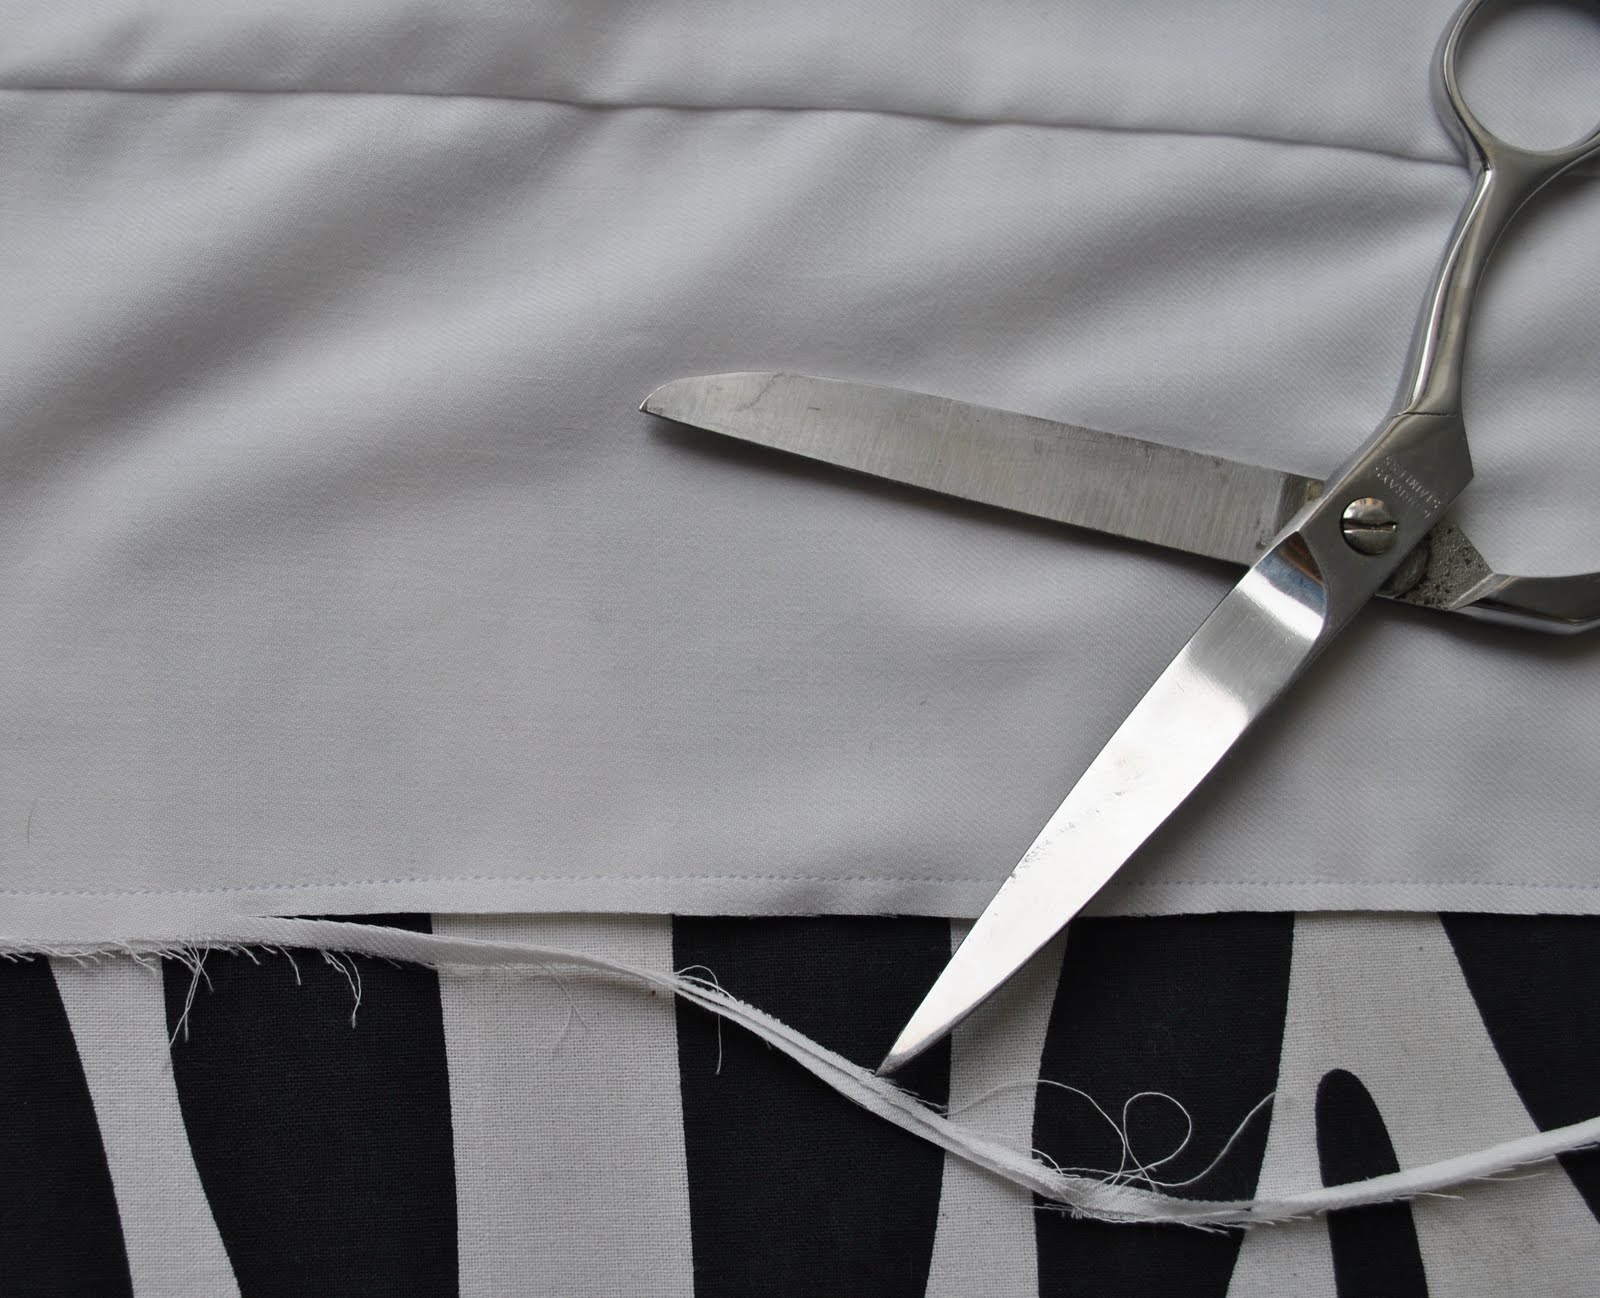
Trim the raw edges to an even 3mm.  It is a good idea to do this step, even if your fabric edge is perfectly cut and not fraying at all, although if you are anything like me, you’ve cut out your fabric maybe a few days before and it is already starting to fray a little just sitting there making this step an absolute essential.  Trim them anyway… and as straight as possible.

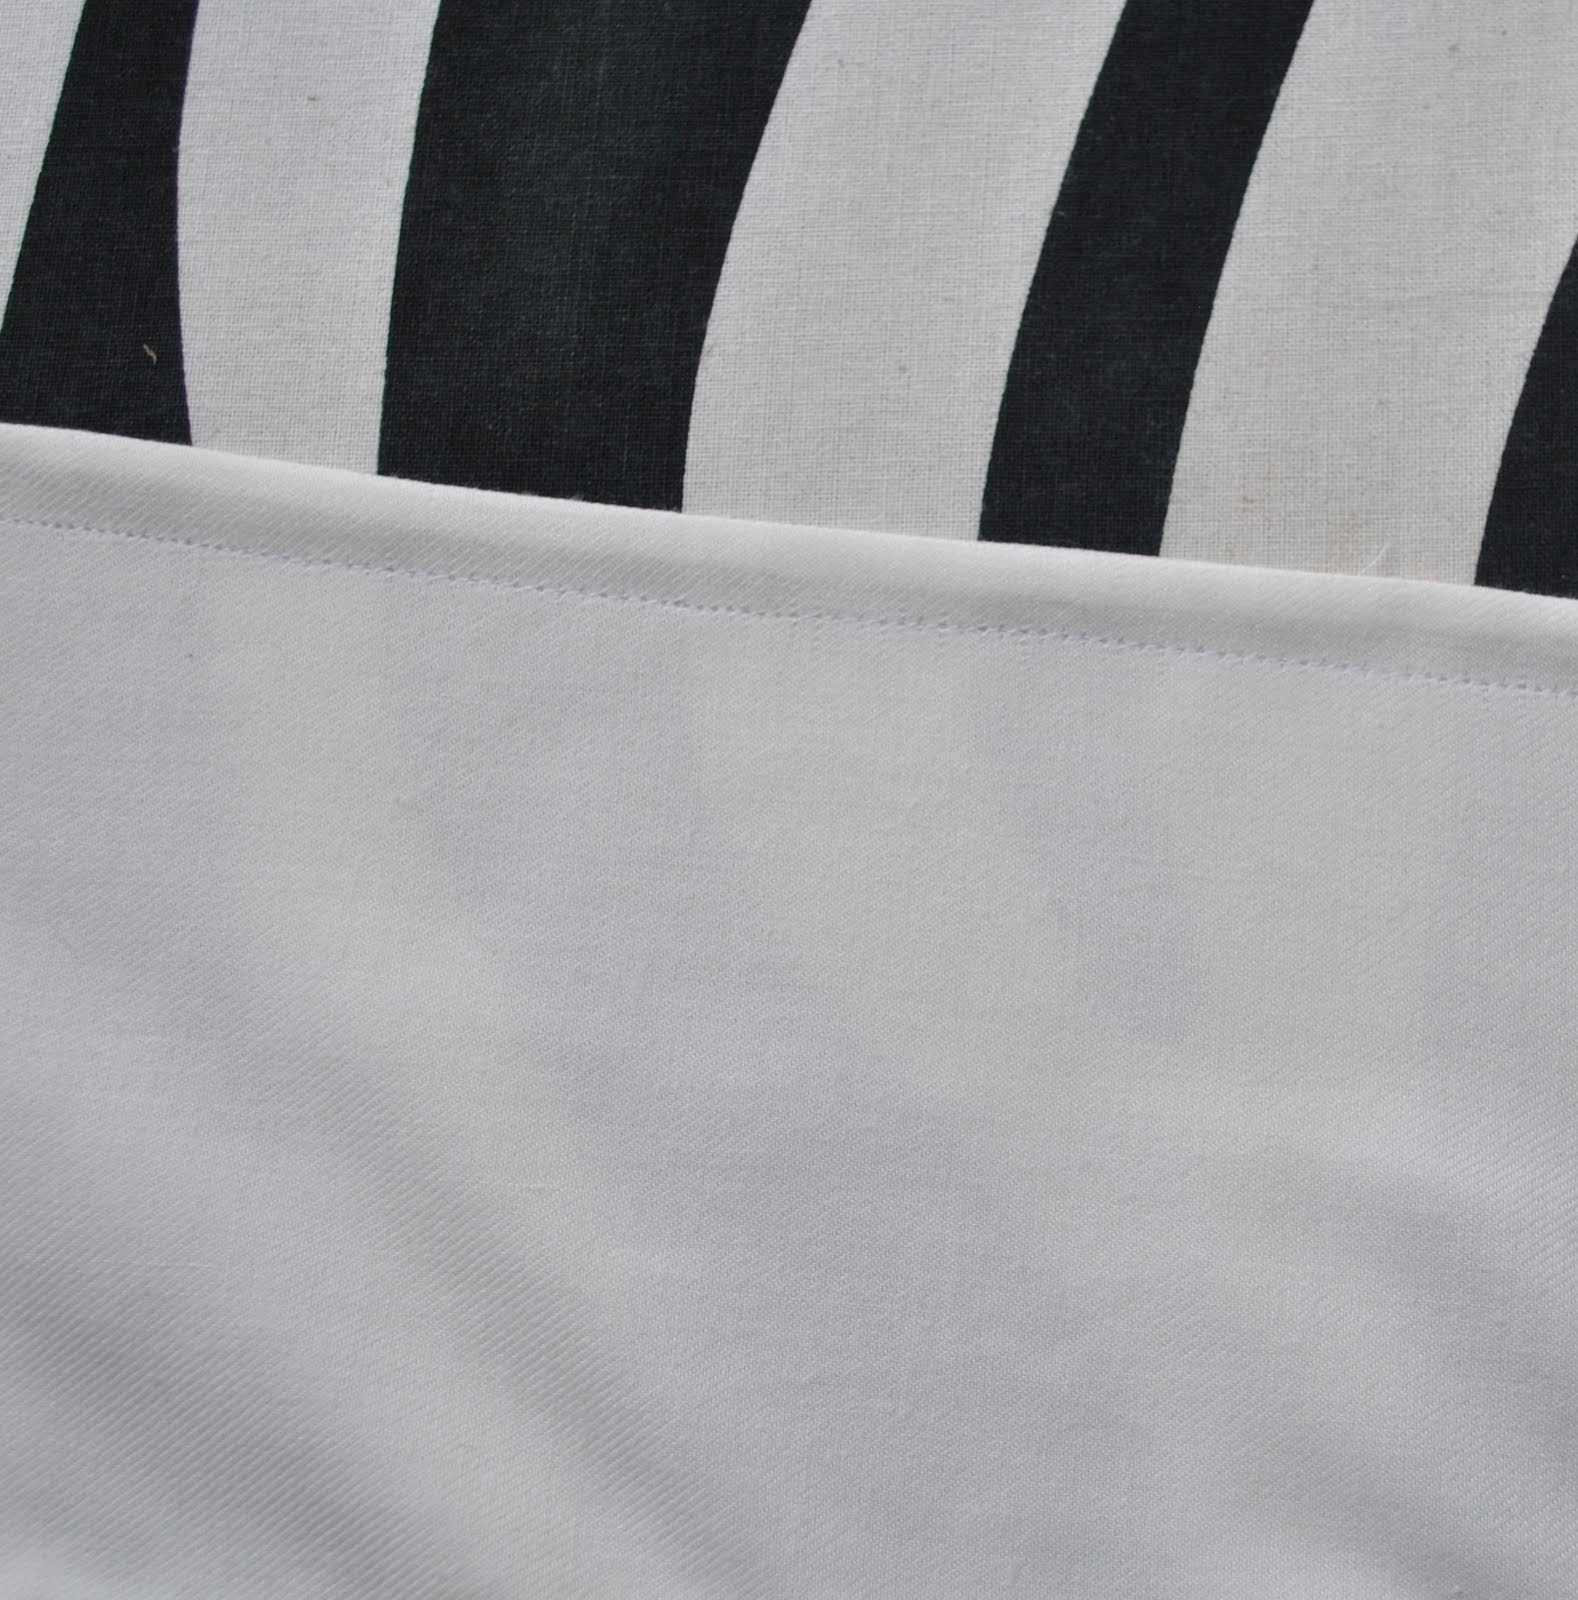
Open the fabric pieces out and press your new mini seam open…

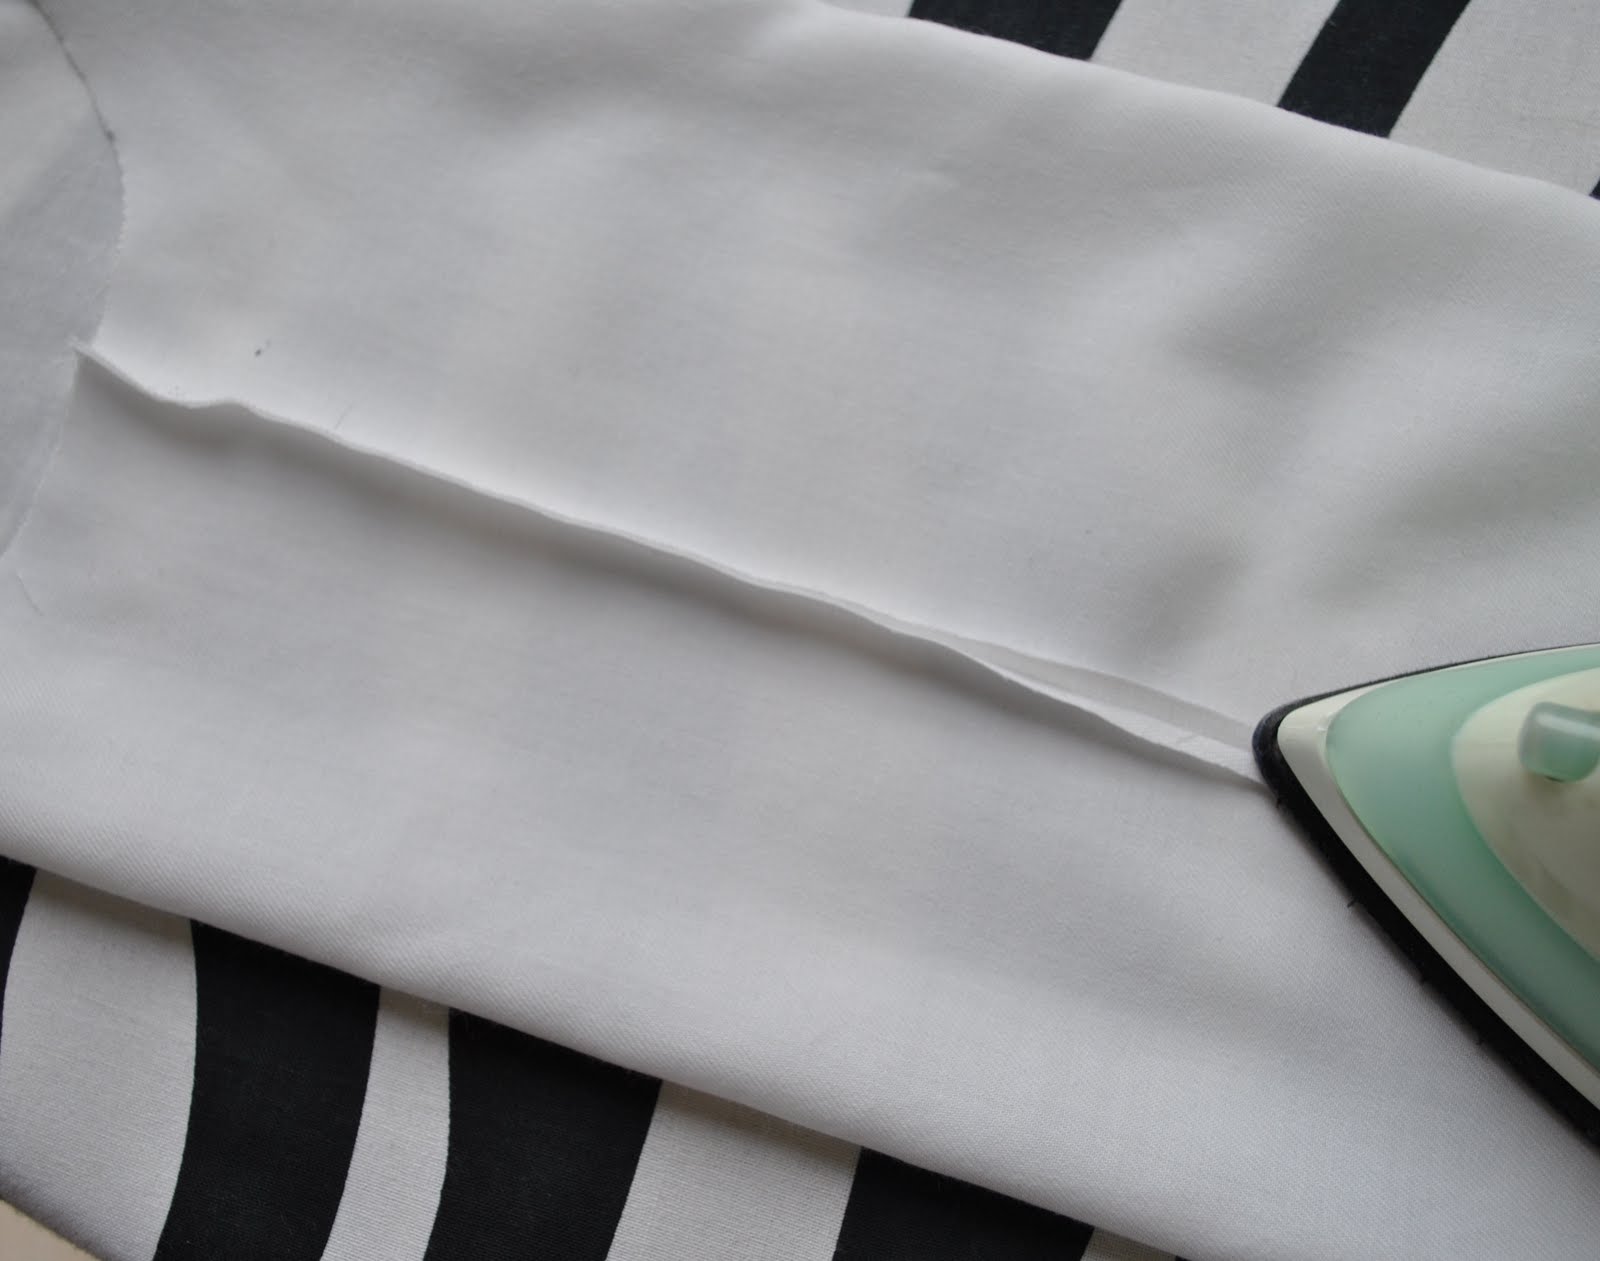
Now turn the fabric over, fold with the right sides of the fabric together (and all is right with the sewing world again…) and fold flat along the new seam edge.  Try to get that sewn edge of the seam right slap bang on the fold, and press in as sharp a knife edge as possible…

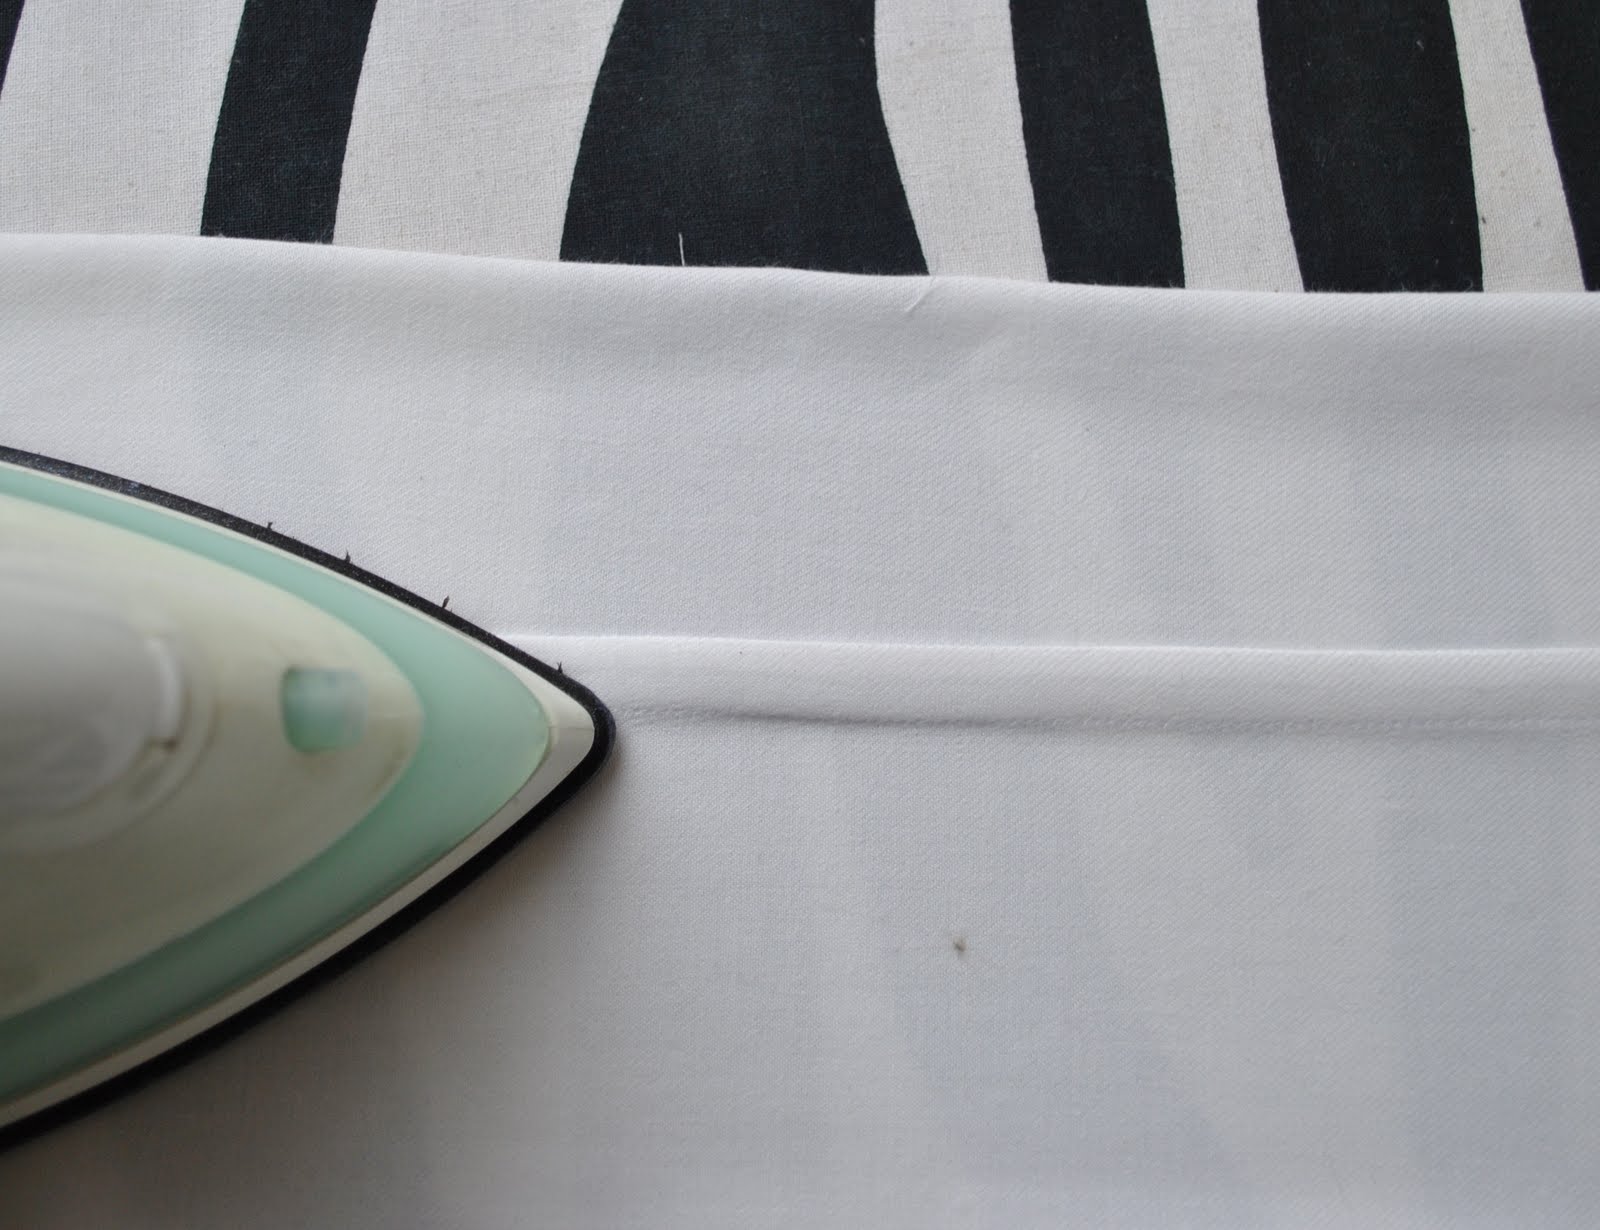
So with the right sides of the fabric now together, and treating the fold you have just pressed as your new “edge” of fabric, sew a new seam 1cm (3/8″) in from the fold.

Press the sewn seam.

Open out the fabric and press the new French seam to one side.  Exactly which side you press it to depends on which seam within the garment you are sewing…  I have a roughly blanket guide to myself of pressing seams towards either down or towards the back of my garment, whichever is more applicable, but I’m sure everyone has their own preference here…

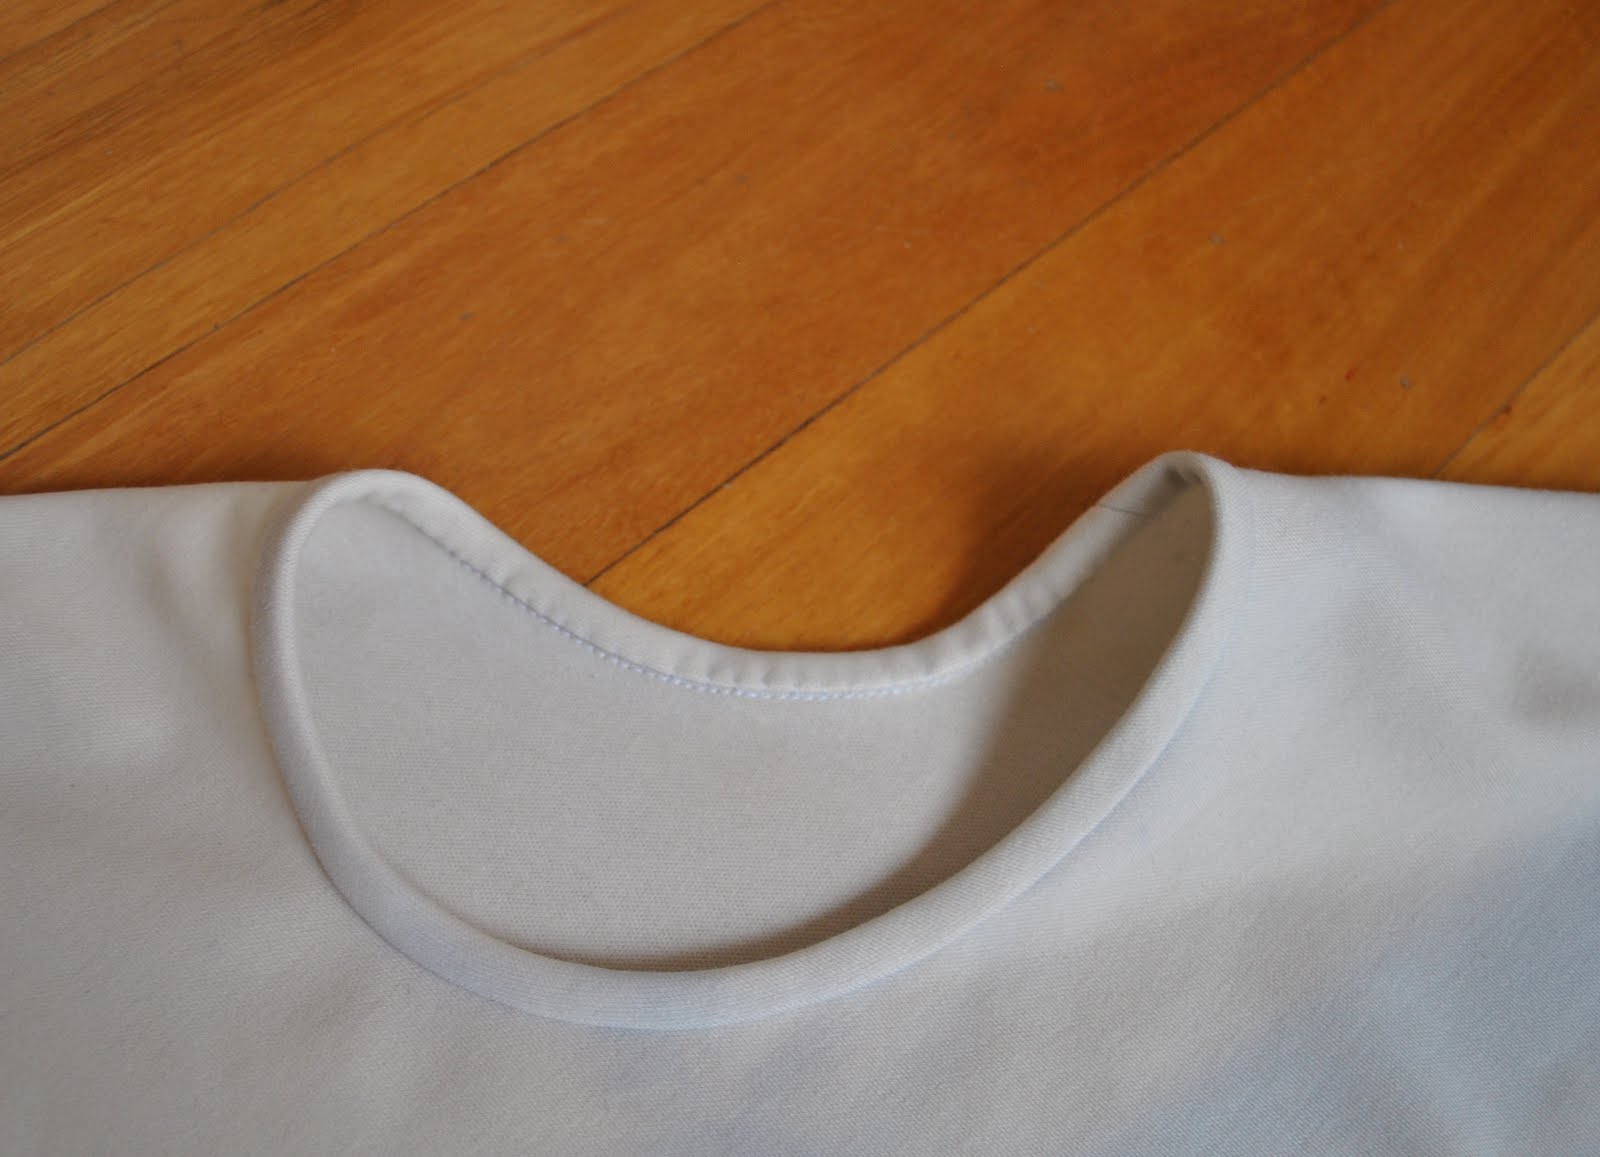
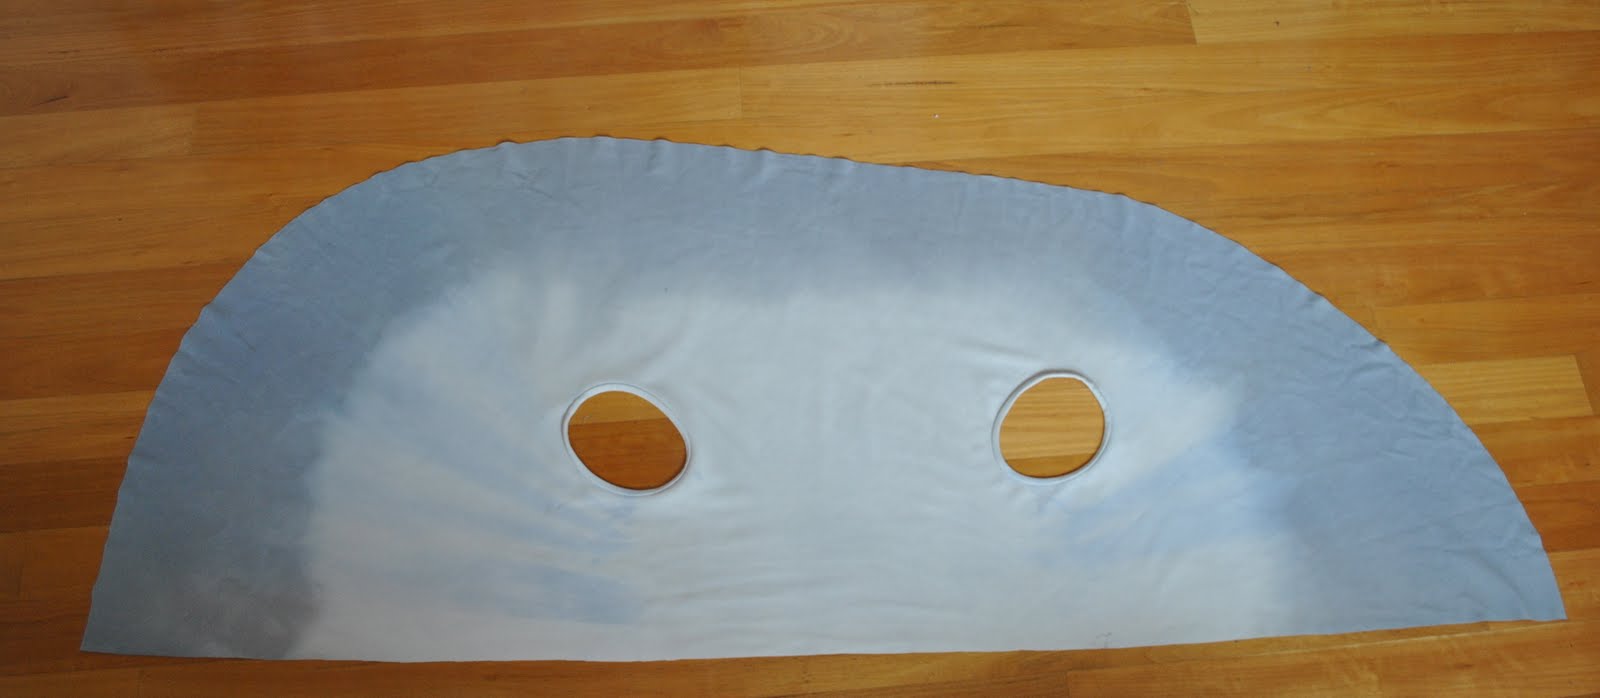
There you have it!  From the outside your seam looks like an even width 1cm line.  This is a neat and tidy finish with no bit-sy ratty threads showing, and (if immaculate insides are your thing) as beautiful on the inside as on the outside. 

pinterestmail

Dip-dyed wrap “f”

While I had the dye-pot filled with blue dye, I took the opportunity to do another little dyeing experiment I’ve been dying to try out  (hehe, little play on words there, see, see?)
I made this wrap top “f” from the Japanese pattern book Unique Clothes Any Way You Like, by Natsuno Hiraiwa, using the piece of creamy coloured knit stuff leftover from after I had made this top.  This is a very very easy pattern btw, simply a flat asymmetrical half ellipse, with two armholes cut out in the middle.  I edged the armholes with bias strips of the same fabric as recommended, for strength and some extra stability in the armholes, but didn’t hem as this fabric doesn’t fray.  Also it is quite thick and substantial, and I thought a hem would have been too bulky and spoilt the smooth ripply effect of the fall of cloth.
Couldn’t be easier!

Now for the dyeing bit of it….
Now the most significant part of the dyeing phase is the first few seconds, when you first immerse your fabric.  That is why whenever I’ve read about people’s dyeing experiments on the internet and they pause to take a few photos of their fabric partway dunked into the dye bath, you just know they are going to end up with a blotchy dye job…  The best way to get an nice evenly distributed colour is to have your fabric thoroughly soaked through, and then dunk it in the dye bath firmly and decisively in one quick movement, then to swirl and whoosh it (technical terms there) around as thoroughly as possible for the first minute or so.  This is when the majority of the dye will take.  So, since I had dyed my skirt in this for the requisite thirty minutes already, I knew the dye wouldn’t have much oomph left in it (another highly technical term there).  But I was OK with a lighter blue outcome.  For a bit of a smudgy colour (yet more techno-jargon) I decided to add a bit of coffee to the colour mix.  No, not coffee-coloured dye, but some actual genuine coffee.  Although my husband doesn’t view this as real coffee at all, but let’s not get into that debate!… I added half a jar of this instant coffee to the dye bath, and away we went.

Fully soaked fabric,

into the dye bath.

I stood holding it half dunked in like this, slowly moving it further down into the pot over a few minutes time, and trying to separate and move the folds about, both as thoroughly as I dared and as gently as I could to get the fabric reasonably evenly immersed and not to allow any folded bits to stay stuck together.  Then I moved the whole shebang (‘nother technical term, hehe, I’m going all out today!) over to the table where I had set up this arrangement.  I took this photo later after everything was washed and cleaned up; I had other stuff to do and forgot to take a photo during, but this is just how it looked…)

After a good thirty minutes like this I rinsed it out and hung it flat as I could out on the line to air dry.
Now, obviously this dye pot with its small surface area presentation is not the ideal way to dip-dye, or this fabric has particularly good capillary qualities, because in the two areas where the fabric was bunched and folded in front of the armholes you can just see where the blue dye crept up up and up by itself separately from the brown coffee component while it was sitting half in the dye bath.  You might not be able to see it very well it is quite subtle… BUT it is there.
That, my friends, is known as capillary action, and is the basis of chromatography.  Little science lesson for you there… I used to work with different chromatography systems every day when I was an analytical chemist.  Ancient history now, hehe.  
So there it is.  I’m happy, and love the smudgy subtle colour I got here.  I’m extremely pleased with the graduation of colour from dark to light, it is way better than I could have hoped for!  The little bit of chromatography up in front of the armholes is slightly disappointing, but I can live with it as it is pretty unobtrusive, and is covered up with the folded collar when I’m wearing it.
(Later edit: I tossed the wrap in the washing machine, and the “chromatography” effect has disappeared!  My wrap is now just as I wanted! SCORE!!)

Details:
Wrap; “f” from Unique Clothes Any Way You Like by Natsuno Hiraiwa, cream coloured knit stuff, dip-dyed in iDye Poly in Blue and coffee
Top; Ezibuy
Skirt; skirt “d” from Unique Clothes Any Way You Like, but Natsuno Hiraiwa, details here, and to see this skirt styled in 6 different ways go here
Boots; Andrea and Joen, from Uggies in Dunsborough

pinterestmail

Blue-black basic

A new skirt… I’ve been casting a critical eye over some of my older skirts, and much as I still love them I can see some are sadly looking a wee bit on the shabby side.  So with the warmer weather just around the corner (thinking positively here) I’m looking to replace some of them.  I had a shortish length of charcoal fabric sitting in my fabric pile, leftover after Cassie had made herself a skirt.  Only about 65cm, and when I have leftovers of this measly size the standby option is often my old trusty faithful skirt pattern Vogue 7303.  So I made it up; lined with black acetate lining fabric, and hemmed with a bias strip of black cotton.  The inner raw edges are overlocked to finish.
But the colour was deeply uninspiring.  I hung it up in my wardrobe and it actually sat there for over a week with no desire on my part to wear it even once…  and really I do have a perfectly good little charcoal skirt already, and a newish black skirt too.  The fabric is a marle, woven in a drill-like weave similar to a denim, and had a distinct white fleck amongst the predominant charcoal grey, so I thought the white fleck-y parts of it would take up a strong coloured dye OK to give it a sheen of some colour.
So two days ago the brand new skirt was plunged recklessly into the murky depths of the dye-pot…
(before)

Do you like my dyeing stick; for stirring, poking and prodding?  I found it in the garden, and it has a perfectly placed twist in it to enable it to sit stably against the edge of the pot.  Pretty good, huh?
 I used iDye Poly in Blue and am pretty happy with this new deeply intense navy-blue colour.  The fabric doesn’t look like suiting any more, but now looks in close-up a bit like a soft woollen denim.  Quite interesting, and more inspiring than the rather predictable “before” skirt.  

Oh OK; I agree it’s still not a super exciting skirt but I think it will turn out to be a very useful little basic, as seemingly boring garments often are.
And it sure does feel gooooood to get rid of those leftovers from the stash!  In the past few months I’ve managed to use up several smaller amounts of fabric and gained useful garments in the process, so I’m feeling pretty virtuous right now.  Virtuous enough to offset just a little of the guilt from three new pieces of fabric recently added to my collection, anyway… hehehe.

Details:
Skirt; Vogue 7303 with modifications, charcoal marle fabric dyed with iDye Poly in Blue
Top; Veronika Maine
Cardigan and tights; Metalicus
Scarf; made by me with a jersey offcut, details here
Shoes; Django and Juliette, from Zomp shoes

pinterestmail

Another trip down memory lane…

…  Remember when I said I had only once before made Cassie and myself matching clothes? Well this is Cassie’s dress, that was made from the leftover scraps of a dress I had made myself.  Her little dress, made using a TopKids pattern, has a white Peter Pan collar, and a miniature faux man’s tie in turquoise fabric, itself the leftovers from these shorts (so you can see how long I hang onto scraps…!)  I’m sorry it’s not a very good picture, and what’s more I have no pics of my own dress in this fabric; but imagine this maroon, deep turquoise and red large-scale plaid in one of those 90’s style shirt-dresses with a high small collar, long sleeves and a big full gathered skirt.  Something like the red version of this pattern at right… yes, very very very 90’s.  I hope I haven’t shattered any delusions of myself as a style maven now!  At least I never liked shoulder pads so never used them.
So I’ve got that going for me…    (Can anyone recognise that quote?)

Tim is wearing here a little jumper here that I knitted for him using scraps of wool from other projects… rather cleverly eked out if I say so myself, so that the front, back and both sleeves had the same colours and in the same proportions!  Knitters will know this is not necessarily a simple thing to achieve when you are working with scraps…  It went from the dark shades of purple, blue and green at the bottom through grey, then pale blue then the palest yellow and back to navy blue at the top, and the colours were not in defined stripes but faded together in an ombre effect.  I did this by knitting two colours together per row in the fair-isle knitting method.

In this picture, Tim is wearing another jumper I knitted, and I can’t recall now if it was from a pattern or if I took the embroidered teddy bear design from a cross stitch and just transposed it to a knitwear graph… yup, memory not what it used to be!  Again using scraps for the teddies.  Cassie is wearing a little dress I made for her using a TopKids pattern.  It was in two different white and navy blue prints, one a polka dot and the other a floral.  The fabric was slightly fluffy, brushed cotton, and I sewed in white piping around the collar, sleeve cuffs, the single curved breast pocket and around the dropped waistline where the buttoned-up blouse joined the skirt part of the dress.  It was quite cute, no? and a nice and warm little number for winter!

And the quote?  From that great 90’s cinema classic, Caddyshack.

pinterestmail

Crocheted granny squares

I know there is a phrase to describe occurrences like this but I can’t think what it is…
This morning I dug out this crochet scarf and put it on, thinking again how much I like it and its beautifully swampy, underwater-y, murky combinations of colours! but especially it got me thinking about crochet granny squares.  This scarf is simply a sewn-together row of large-scale mohair crochet granny squares, and I was thinking idly about how much I would like to make a scarf or something out of the original type of crochet granny squares; those ones that were all kinds of colourful but always black-edged.
So I took the above photo this morning  (I’ve still been taking photos occasionally but not always putting them here), and afterwards, Cassie and I were going along to meet with my mother in the Jo Sharp knit shop, which is a tiny little shop but like a wonderful Aladdin’s Cave stuffed full of divinely colourful balls of woolly goodness…  Of course you guessed it, we walked in and what should I see but straight away!, and that is this rather funky little skirt below, made entirely out of exactly the crochet granny squares I had been daydreaming about.  Bizarre coincidence; magical thinking? that I should select this vaguely granny-squarish scarf and be thinking about granny squares, and then immediately find this rather cool new-age take on granny-scarf couture??  (cue Twilight Zone music)
(image of the Hexagon skirt below from Jo Sharp)

Don’t you just love it?  Old fashioned, unusual, quaint, reminiscent of those awful old op shop blankets like you always saw flung over Rosanne’s couch on the 80’s sitcom?  Goodness, that thing was so daggy as to eventually become quite cool, yes?  No?  Am I on my own on this one?  Well, I guess to my 80’s-addled consciousness the ol’ granny square blanket did assume an aura of grungy chicness anyway….!

So Mum and Cassie did a bit of enabling, and I did not walk out of the knit shop empty handed…   I just bought a few colours to get going along with some blacks for the edging, but I can always go back for more if I need to…  I’m still undecided as to whether to just go for a scarf as per my original thoughts, or to go for the full-on skirt… what do you think?

Details:
Skirt; Vogue 7303 with modifications, green cotton velveteen, details here
Scarf; crocheted by me, details here
Tights; my own design, denim print jersey, details and a tutorial on drafting your own tights here
Top and cardi; Metalicus
Shoes; Francesco Morichetti, from Zomp shoes

pinterestmail

Layered rusty-red wool skirt

So, using the leftover bit of fabric from my rusty-red wool skirt, combined with the cut-off from when I decided to make my long skirt shorter, I made Cassie a little layered skirt.  Using the same pattern as I did for my own skirt, Vogue 8363.  I even managed to reuse the cut-off lining as well for the lining for this skirt, and covered a button the same way… and now I really have used all of this gorgeous Japanese wool/silk fabric!
I only had tiny scraps of suitably coloured thin cotton left; so not all of the seams in this skirt are Hong Kong bound, but the most visible ones are.  I really debated whether or not to even go this extra step, for my daughter, being a typical teenager, is still learning respect for her clothes.  I can almost guarantee that this skirt will be discarded in a little puddled heap on the floor of her room unless I am there to explode and guilt-trip her into picking it up immediamente!  However, I eventually decided that the fabric was indeed worth the small time and effort put into finishing off the seams properly, and that it was high time she experienced a bit of sartorial classiness in her apparel.  Plus it might inspire tidiness and respect.  Plus it might inspire her to try doing this in her own sewing creations.  Plus I could use the practise…
So anyhoo, I went there, and finished off most of the inner seams.
She has shown her approval by wearing it out with her friends already; high praise.  So I’m happy!

Now I’m sure the thought has occurred, are matching mother/daughter outfits a common occurrence in this household?  Well, actually no.  I’m not that sort of a Mum that needs to have a mini-me…  this is only the second time in her life I have made us matching garments, and this has been for the same reason each time, a largish bit of leftover fabric that was of too good quality to leave.
I think we will probably both take good care to not wear our skirts at the same time!
Oh, and on a sewing note I have gone back to edit my review to include the following… another reason I really like this new Vogue skirt pattern.
The skirt front has four darts, two each side of the centreline, and each skirt back has two darts each also, making eight hip-to-waist darts into the waistband overall.  For somebody with mine (and Cassie’s) figure type. a small waist compared to our hip measurement, or pear-shaped; this is a very helpful feature for getting a good fit.  I sewed in an extra 3mm off the waist-end of each dart, which left only about 1.5cm extra to be taken in off each side seam at the waist.  With my usual Vogue 7303, which has only four darts overall, each dart has to be much more drastically taken in, and the side seams also.  Having those four extra darts meant for a much more even distribution in removing the excess.
To illustrate: below is my skirt; not Cassie’s that is pictured above, but hers is very similar… the hemline with the bias finishing is at the left of the picture and the waist band is at the right underneath the lining which has been pulled up to reveal that side seam.  See how much excess width is taken in off each of those side seams from the hips to the waist?  Well, about twice that is usually required when the pattern has less darts on the fronts and backs.  Yes, I could just measure out and put in some extra darts myself, but I’m an extremely lazy seamstress in many ways, and have always just gone for removing the extra width off the darts and seams already there!  Having this pattern, with the extra darts marked in, all evenly spaced out ready for me is a much more attractive option to me!  And yes, I sometimes do opt to leave that excess seam allowance there like this, and not cut it off.  Especially in the case of a special skirt like this that I intend to last most of my life anyway.  Just in case I ever do need to let the skirt out.

pinterestmail

Thankyou

I just wanted to say a big heartfelt Thank You to all you kind people who left nice comments on my last post… as your kind words proved; the online sewing and fashion community is such a beautifully supportive and helpful community, isn’t it? 
And just want to reassure you that the real life (not internet) “porky” insult levelled at me by my “friend” didn’t hurt me so much for its content, as I do have many many faults for sure, but “porky” didn’t really strike me at my heart all that deeply!  It was just the fact of being singled out for disdain that hurt.  Plus that I felt a wee bit humiliated, as you do.  This particular girl has said rude things before and obviously has a, shall we say, slight deficiency in etiquette, but is still part of a group I meet up with, so can’t be avoided.  I’m sure everybody has experienced such people in their lives and understands what I mean.  I try to think of people like this as a little fly in the soup of life; a bit yucky when you come across them, but not bad enough to spoil the rest of the bowl.
 I wish I could gather us all together in one spot where we could sip tea, chat, and check out each others creations for real!  Wouldn’t that be nice?

pinterestmail

Thinking positive…

Yesterday Yoshimi who is both a beautiful lady and an accomplished seamstress, wrote a post about a negative comment, and its effect on her.  Of course I rushed to support her because she is my friend, and friends are supportive in times we are feeling low.  But it made me think not for the first time about how just a small amount of negativity really brings you disproportionately down, and even in the face of overwhelming positivity and supportiveness even those of us who appear to be quite self-assured and strong can suffer after one mean comment.
When we blog we really put ourselves out there.  We may feel we are documenting a personal journey, but of course even though we may be sitting quietly in our own homes, by ourselves, tapping away on our own keyboards; the “privacy” is an illusion.  Anything on the internet is very very public, and trolls are free to judge us and say whatever they like.
I have received negative comments.  Actually, I count myself to be extremely lucky to be part of the sewing/fashion community, which on the whole is a very supportive group, and I feel I have some real friends out there who I would get along with very well if we met in real life.  But barbed, and sometimes outright rude comments creep in every now and again, and it is a huge downer.
Even one’s real life “friends” might be having a bad day, and say something off that sticks with you… when I posted about my new little red wool skirt on Monday, I had worn it out that morning to a tea and feeling quite proud of myself; and somebody obliquely referred to me as “porky”.   There were some raised eyebrows and horrified giggles within the group because it was not said in jest, and no explanation or apology came forth.  It is ridiculous I know because it was obviously her bad day and not mine and should have stayed that way; but her remark transferred it into my bad day too.  I felt attacked, and very down for the rest of the day.
Why are we so fragile?  I feel I should be mature enough that I am above such petty things as a flippant comment here or there, and I shouldn’t need validation to be happy about myself.  But I just do.  I guess it is basic human nature to need approval.  It makes us feel like we are accepted.  The need to connect and belong is built in as part of our survival mechanism, and approval is part of that acceptance.  Disapproval puts me into panic mode.

I am still defining my own personal style, but I do know a few things about it.  I treat all drab colours as neutrals and love to wear them, but I also like to be occasionally colourful.  I like clothes that have a twist, or something unusual about them.  I like skirts to be either quite short or quite long, but not usually in-between.  I think I am vaguely sporty or outdoors-y.  I am emphatically not vintage or retro, nor am I particularly girly or dressy.  I think today sits in that comfort zone.

Details:
Dress; the “gathered hole” dress from Pattern Magic by Tomoko Nakamichi, charcoal wool mix, details here
Top; Ezibuy
Tights; Metalicus
Scarf; d/lux, from Uggies in Dunsborough
Shoes; Francesco Morichetti, from Zomp shoes

pinterestmail
Switch to mobile version
↓