Christmas mignardises


IMG_7565

So, every year I make something small to give to close friends and family for Christmas, sometimes a Christmas ornament, sometimes a sweet treat to eat.   This year, I decided on eatables; mini Christmas-pudding mignardises.  Cute, non?

The idea and the details are probably not new but I did adapt from several sources, so I thought I’d compile here my method for making them…

First up, the Christmas cake

My standard fruit cake recipe,  given to me by my old friend V yonks ago, I’ve been using it ever since.  It’s a nice boiled fruitcake, very moist, so a good choice for making the cake-balls.  I doubled up the ingredients to make two fruit cakes, and this plus one quantity of rum buttercream icing should make approximately 140 bite-sized balls, if you don’t eat any in the meantime  😉

IMG_7525

Pineapple boiled fruit cake:  (these quantities are for one cake, double this quantity is required for the remainder of the method)

Tip the following ingredients into a saucepan:

450g can crushed pineapple, drained but reserving a little of its juice just in case
125g butter
375g mixed fruit
1 cup sugar
1 tsp mixed spice
1 tsp bicarb f soda
pinch salt (optional)

Boil, stirring, for 10 min, if it starts to stick stir in just a splash of reserved juice.  Allow to cool, then add:

1 cup self-raising four
1 cup plain flour
2 eggs

Mix in well.  Again, if it seems too thick, add a dash of reserved juice.
21cm square cake tin, 160C for about 40 min or until cooked, leave for 5min in tin, remove to cool completely

As mentioned, this quantity makes just one cake, for this method double up to make two.  Once the cakes are cooled completely it’s time to make the balls…

Now; you’re forming the cake into balls using buttercream icing as the binding agent… I found my basic recipe on taste.com but to impart a festive Christmas-sy flavoured air to them I substituted a large dollop of rum in lieu of some of the milk.  If you don’t want the alcohol just use all milk and no rum, or just a dash of rum essence, for the flavour.  I found this quantity to be enough for the two cakes, so halve this quantity if you’ve only made one cake.

IMG_7526

Rum buttercream icing:

125g butter
500g icing sugar
4 tblsp rum + 2 tblsp milk

Cream butter until smooth.  Stir in about 1 cup of sifted icing sugar.  Add rum + milk and mix.  Stir in the remainder of the sifted icing sugar, beating well until smooth.

It starts to dry out straightaway, so use immediately!

IMG_7529
I rolled the balls, half a cake at a time,because it’s kinda messy work and this was all I can handle, but whatever works for the individual of course.  Anyway, break off a sizeable piece of cake that you can handle and crumble into a large pan.  The pieces should be fairly small and crumb-y, but obviously there are going to be some chunky fruity bits, don’t worry too much about a very superfine consistency.  To half a cake worth of cake crumbs, add a quarter of the rum buttercream icing and knead and mix it in thoroughly with your hands, then take about a tablespoon at a time, or bite-sized pieces, roll the mixture into balls.  No doubt about it, this is messy work, best not pick a day you’ve just had a manicure; although I will say that the butter etc all over your hands impart beautifully soft skin afterwards!  When rolled, push them into the bench ever so gently so they have a little flat base, so they can stand upright without toppling over.

IMG_7530

Decorating:
I found this quantity of cake to require:

650g white chocolate
400g glace cherries

Melt chocolate in three of four batches for ease of handling, and either dip the balls or drizzle over the cakes, so as to look like custard or brandy sauce as it’s poured over Christmas pudding.  Push half a glace cherry on the top or use other glace fruit, if preferred.

Done!  Keep them in the fridge until required.  They can go individually in mini-patty pans to give away, or not, because I think they look pretty cute all by themselves!

IMG_7576

Festive and delicious! good for an after-dinner treat and they go very nicely with a morning cuppa too, ahem.  I hope the family enjoys them!  🙂

IMG_7570

pinterestmail

a Japanese indigo dress

DSC_2668
 I’ve made another Yoshimi dress  🙂
Pattern: Vogue 2900.  This pattern will always be in my head the
vogue2900“Yoshimi dress” since her versions are all very inspiring to me, and as well, the lovely Yoshimi herself personally recommended it for me, so there you go.
DSC_2670
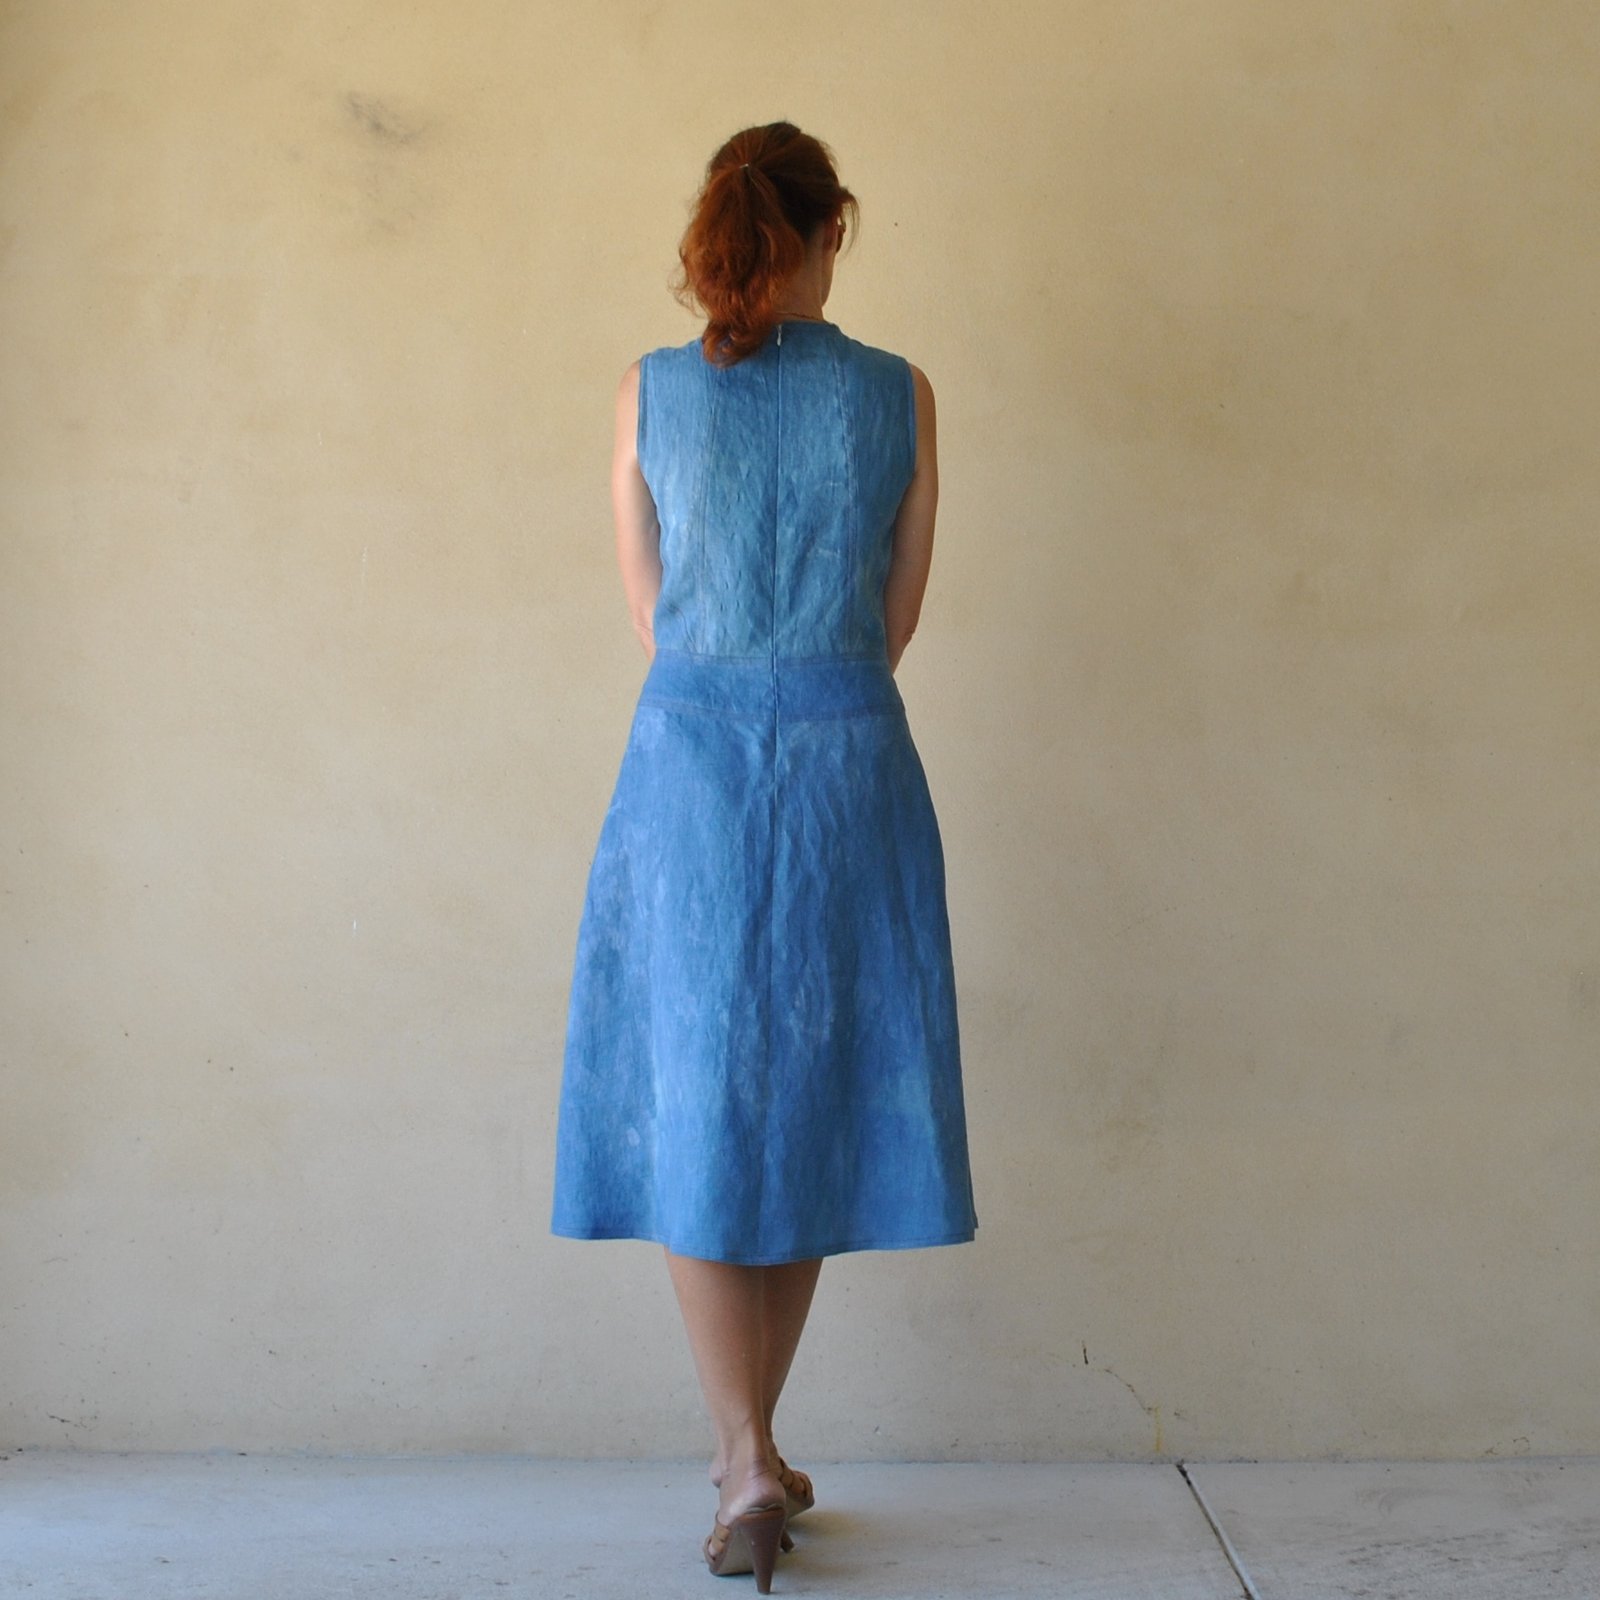
Fabric; linen, which I bought as plain white from Potters Textiles and then dyed real indigo, by which I mean using a real live, actual Japanese indigo plant-based dye pot!  Yup, how awesome is that? I feel so very fortunate to have been given the chance to use Japanese indigo dye, since it’s quite a rare beast in WA.  Growing the plant itself is very difficult here, and yes, I have tried and experienced a personal fail myself in that area… *represses sob*
Anyway, a few months ago, Nicki got together a group of us Perth girlies to go on a fun day out… and what constitutes a fun day out for the likes of us self-dressmakers more that a sartorially related, hands-on, “doing” thing!  And what’s more hands-on than dyeing your own fabric in a real indigo dye vat?!  This dye-vat is the work of the ultra talented and creative Trudi Pollard of Pollard Design Studio.  Visiting Trudi’s studio in Bedfordale and viewing her many amazing creations is quite the inspiring and very humbling experience.  Some of her exquisite textile art can be viewed at the studio’s site here.
IMG_6372 IMG_3735
 I pre-washed my linen twice before the day but was hoping/aiming for just a touch-but-not-too-much blotchiness/unevenness; that lovely natural patina, you know.  It worked out just spot-on how I wanted!
Construction notes: the seam lines in this pattern are lovely and interesting to my eyes and I wanted to highlight them somehow… the first time I made it up I made black cotton edging strips and this time I wanted to do something a bit different, to differentiate it from that dress in my wardrobe.  Now, what does one think of when you think of indigo cotton? well for me Levi jeans are pretty high on the list.  And Levi jeans have that very distinctive double orange topstitching allover, so I went with that as inspiration.  It’s a lot more visually subtle than the black edging, but it’s there, and I really like it!
I had a look online to learn more about the origin of that orange topstitching, and interestingly enough, the reason for it was to go with the copper rivets that were used to strengthen jeans!  Hmmm no copper rivets on my dress, whoops.  Oh well!
I took great care to make sure those diagonal seam lines ended on the exact point and also put in a few little orange bar tacks on other random sewing junctions, for fun.  I know, you can barely see them on the far-away pictures, but up close and personal I think they add a bit of interest to the dress.
IMG_7310DSC_2626
The invisible zip saga… to sum it up, there was not a colour match even halfway acceptable!  I chose a light blue and after inserting, just very carefully touched up the more visible bits of the zip tape with a felt-tip pen.  This may or may not wash out over time, in which case I can always just touch it up again.
IMG_7421
Then the pale blue zip pull was still too glaringly pale for my liking too; so I painted it coppery-orange with nail varnish, custom mixed using a few different colours from the small army of nail varnish bottles that live in my bathroom drawer.  I knew all those funny colours would come in handy again some day!
DSC_2638DSC_2635
Insides; all raw edges were overlocked with white thread, and I used white thread in the bobbin too, for continuity.  I know; it’s not like anyone will ever see inside the dress, but to have it all looking cohesive is still a very satisfying sight to me.
indigofb
So, that’s it, done and dusted!  Now to continue with the small mountain of Christmas-related tasks I’ve lined up for myself and been busily and secretively working away on like a squirrel.  I feel like I’ve been racing around like a crazy scatterbrained whirlwind lately.  Crisis point not yet reached, but getting there…
Later dudes!
 DSC_2655
Details:
Dress; Vogue 2900, in indigo dyed linen, with orange top-stitching
Sandals; from the oppie, yonks ago
Sunnies; ma RayBan wayfarers
 in twirlerrific actionDSC_2672
pinterestmail

Follow my blog with Bloglovin

pinterestmail

palest grey/green set

A new lingerie set…
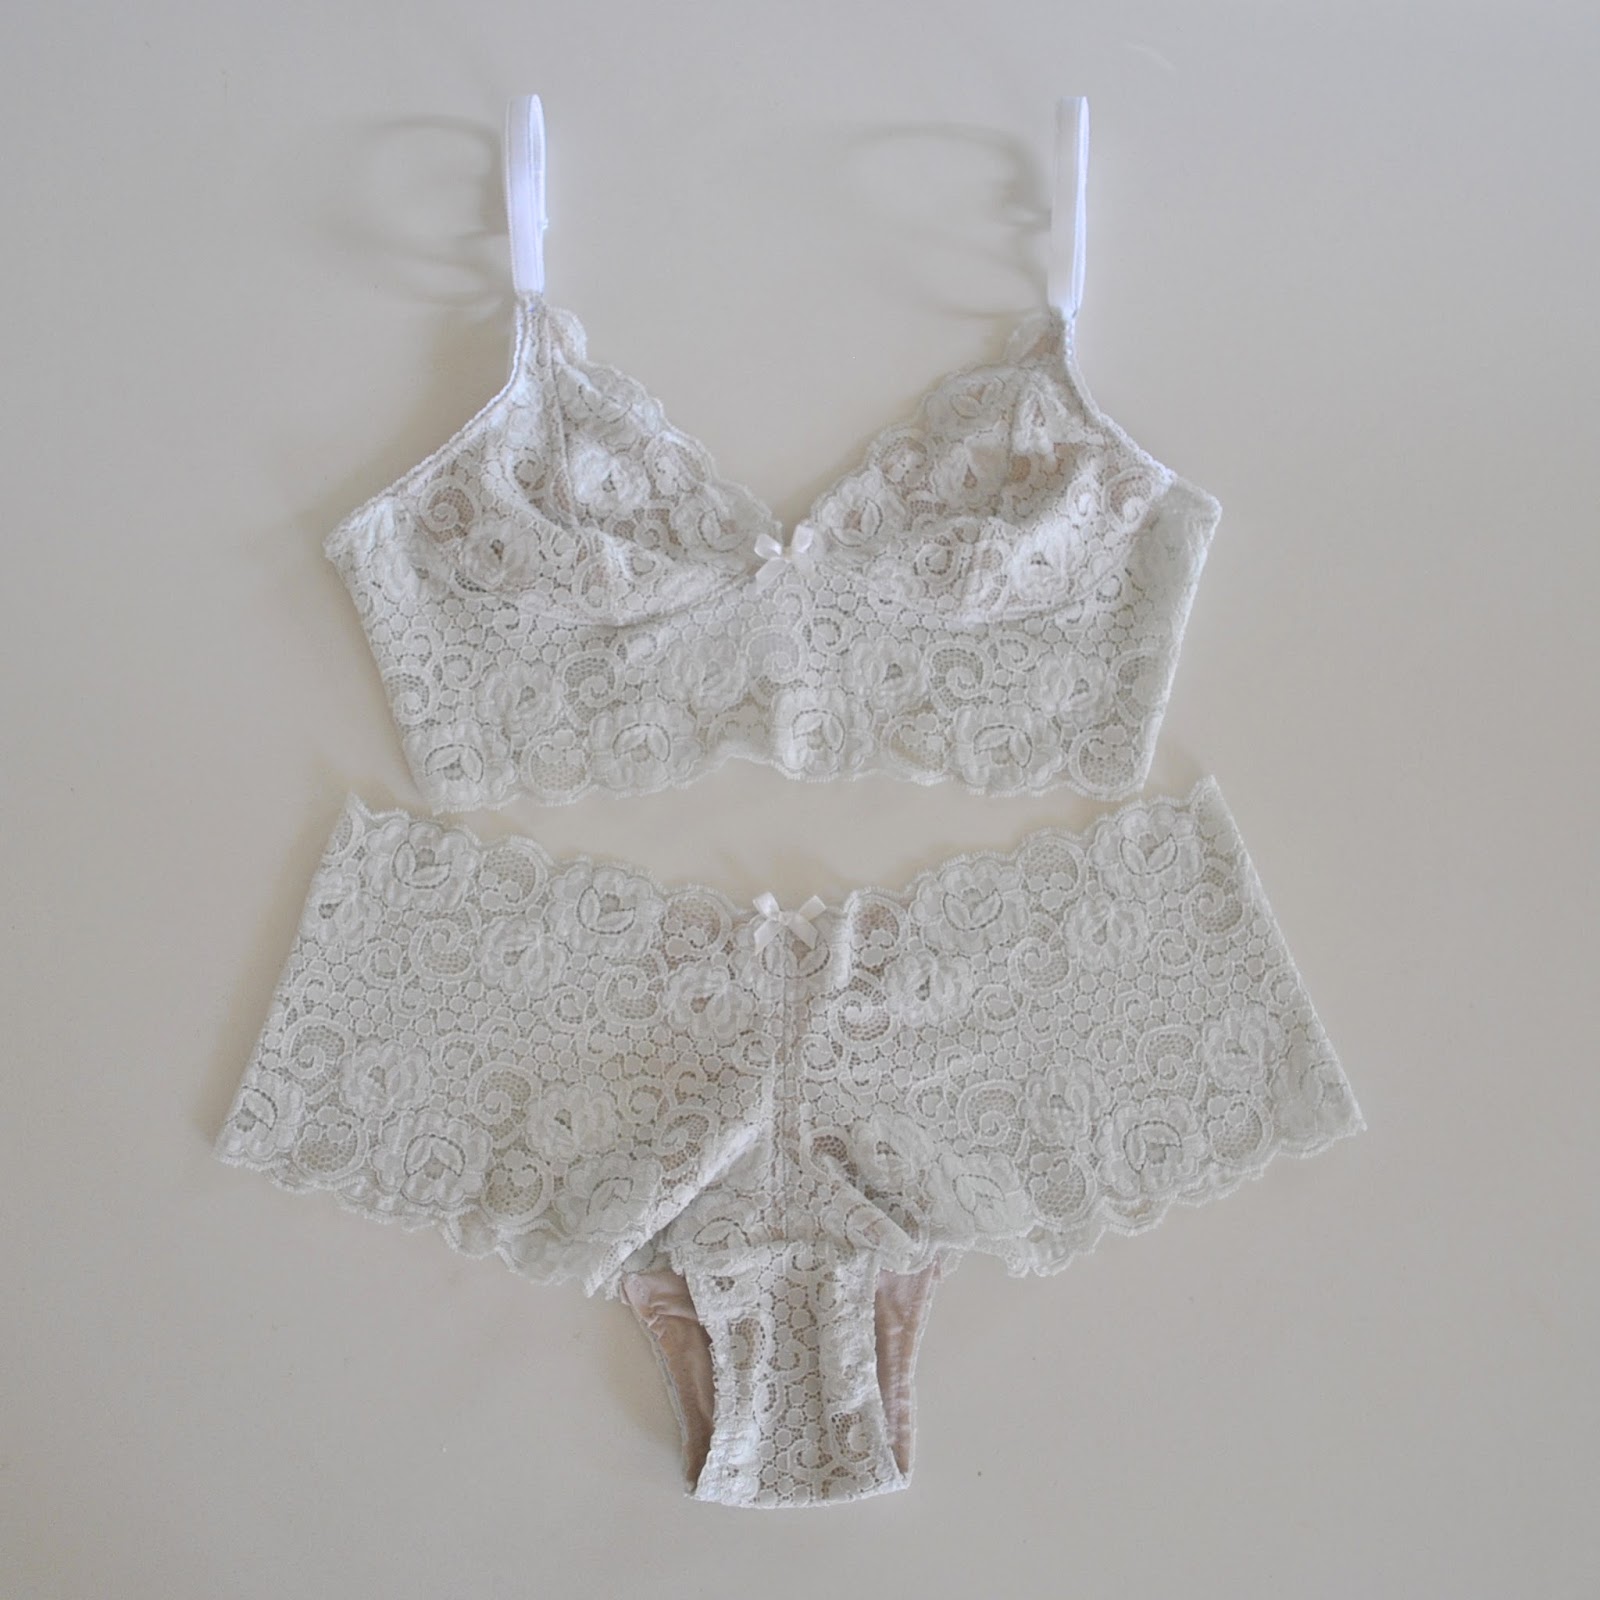
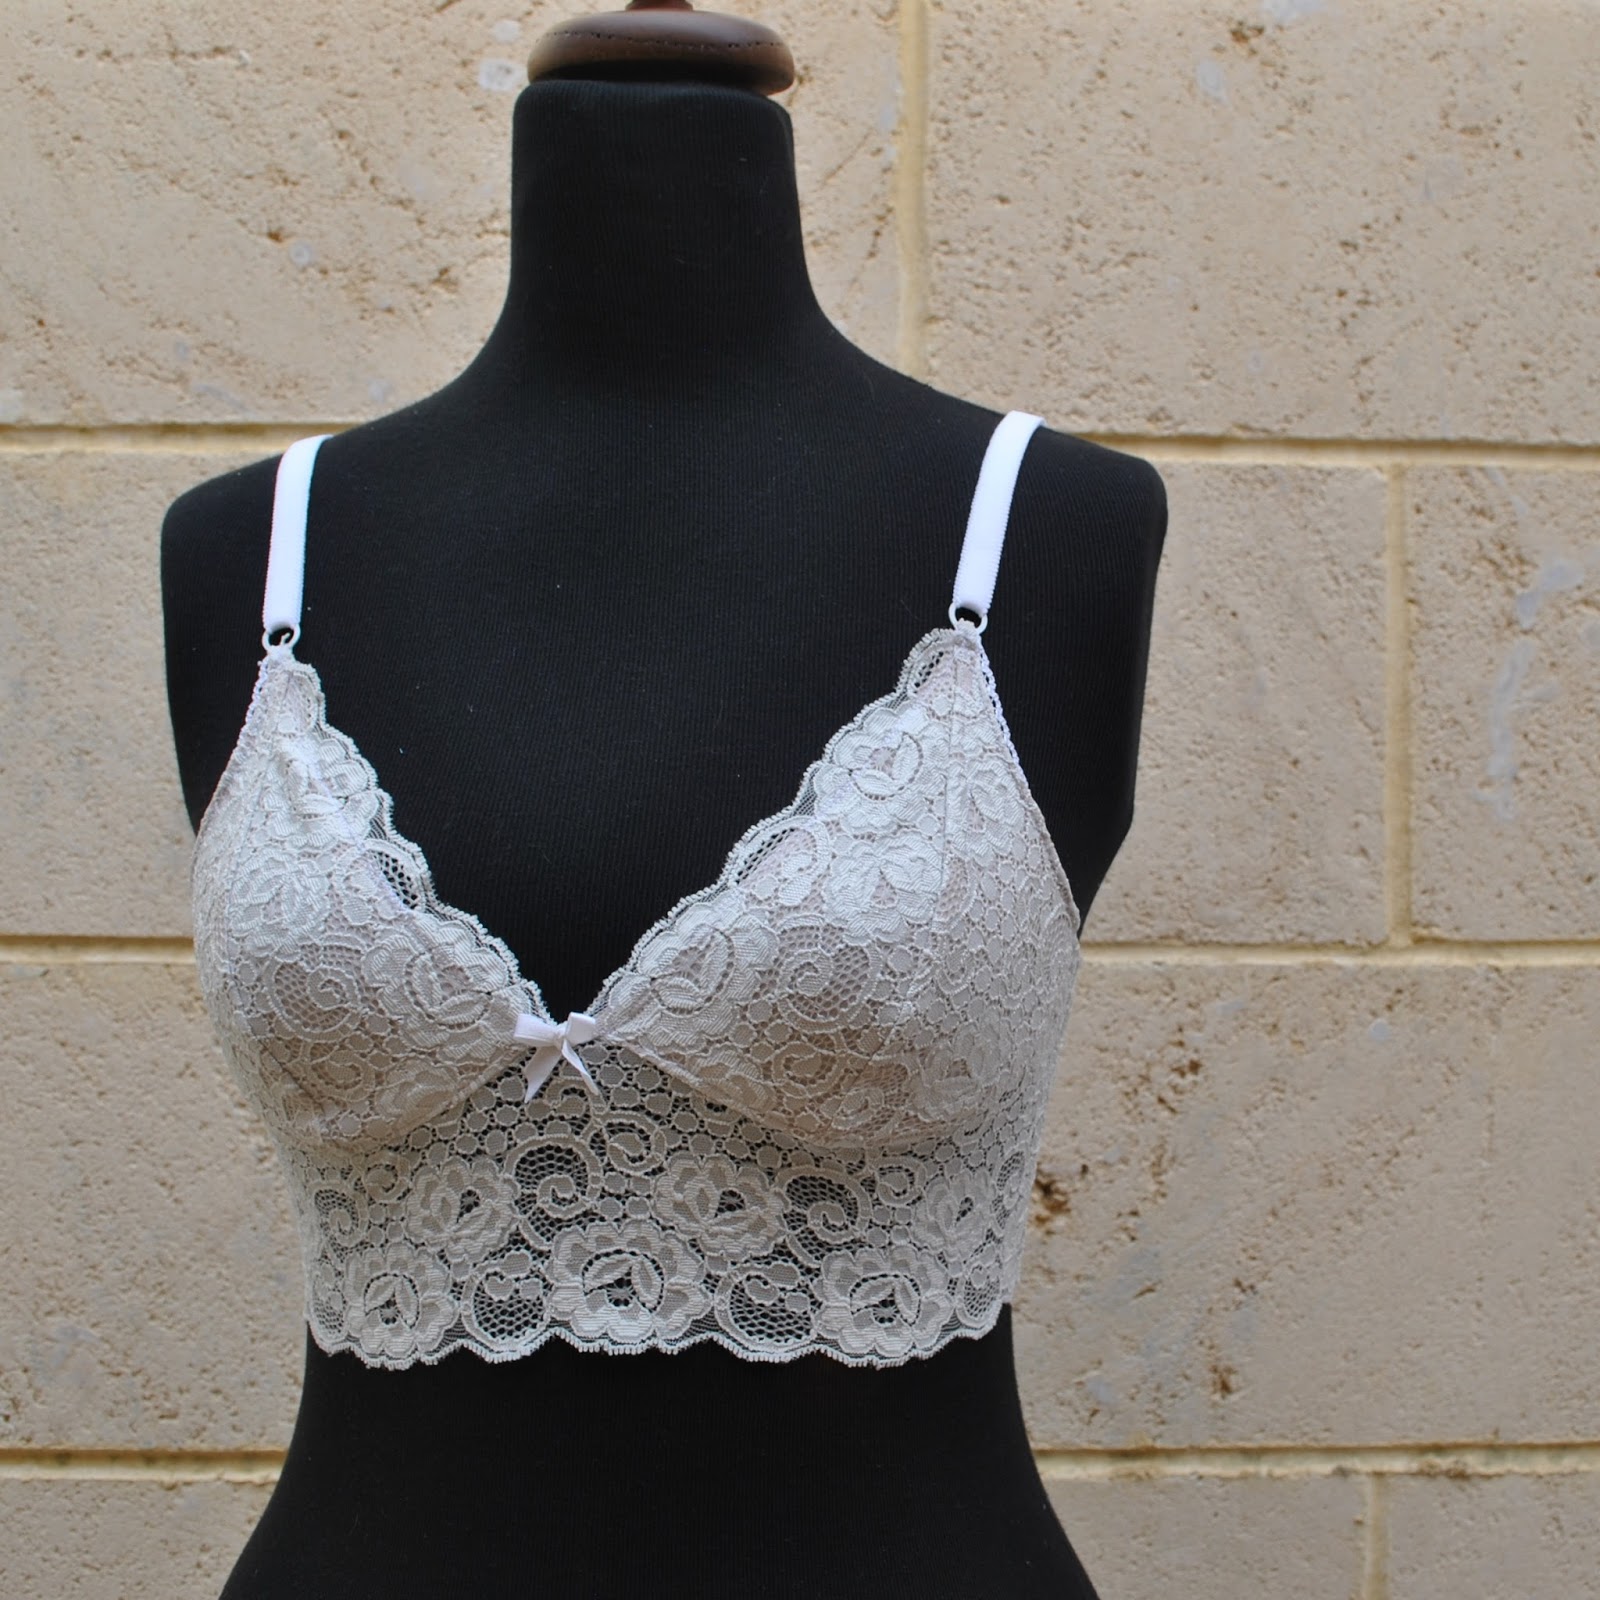
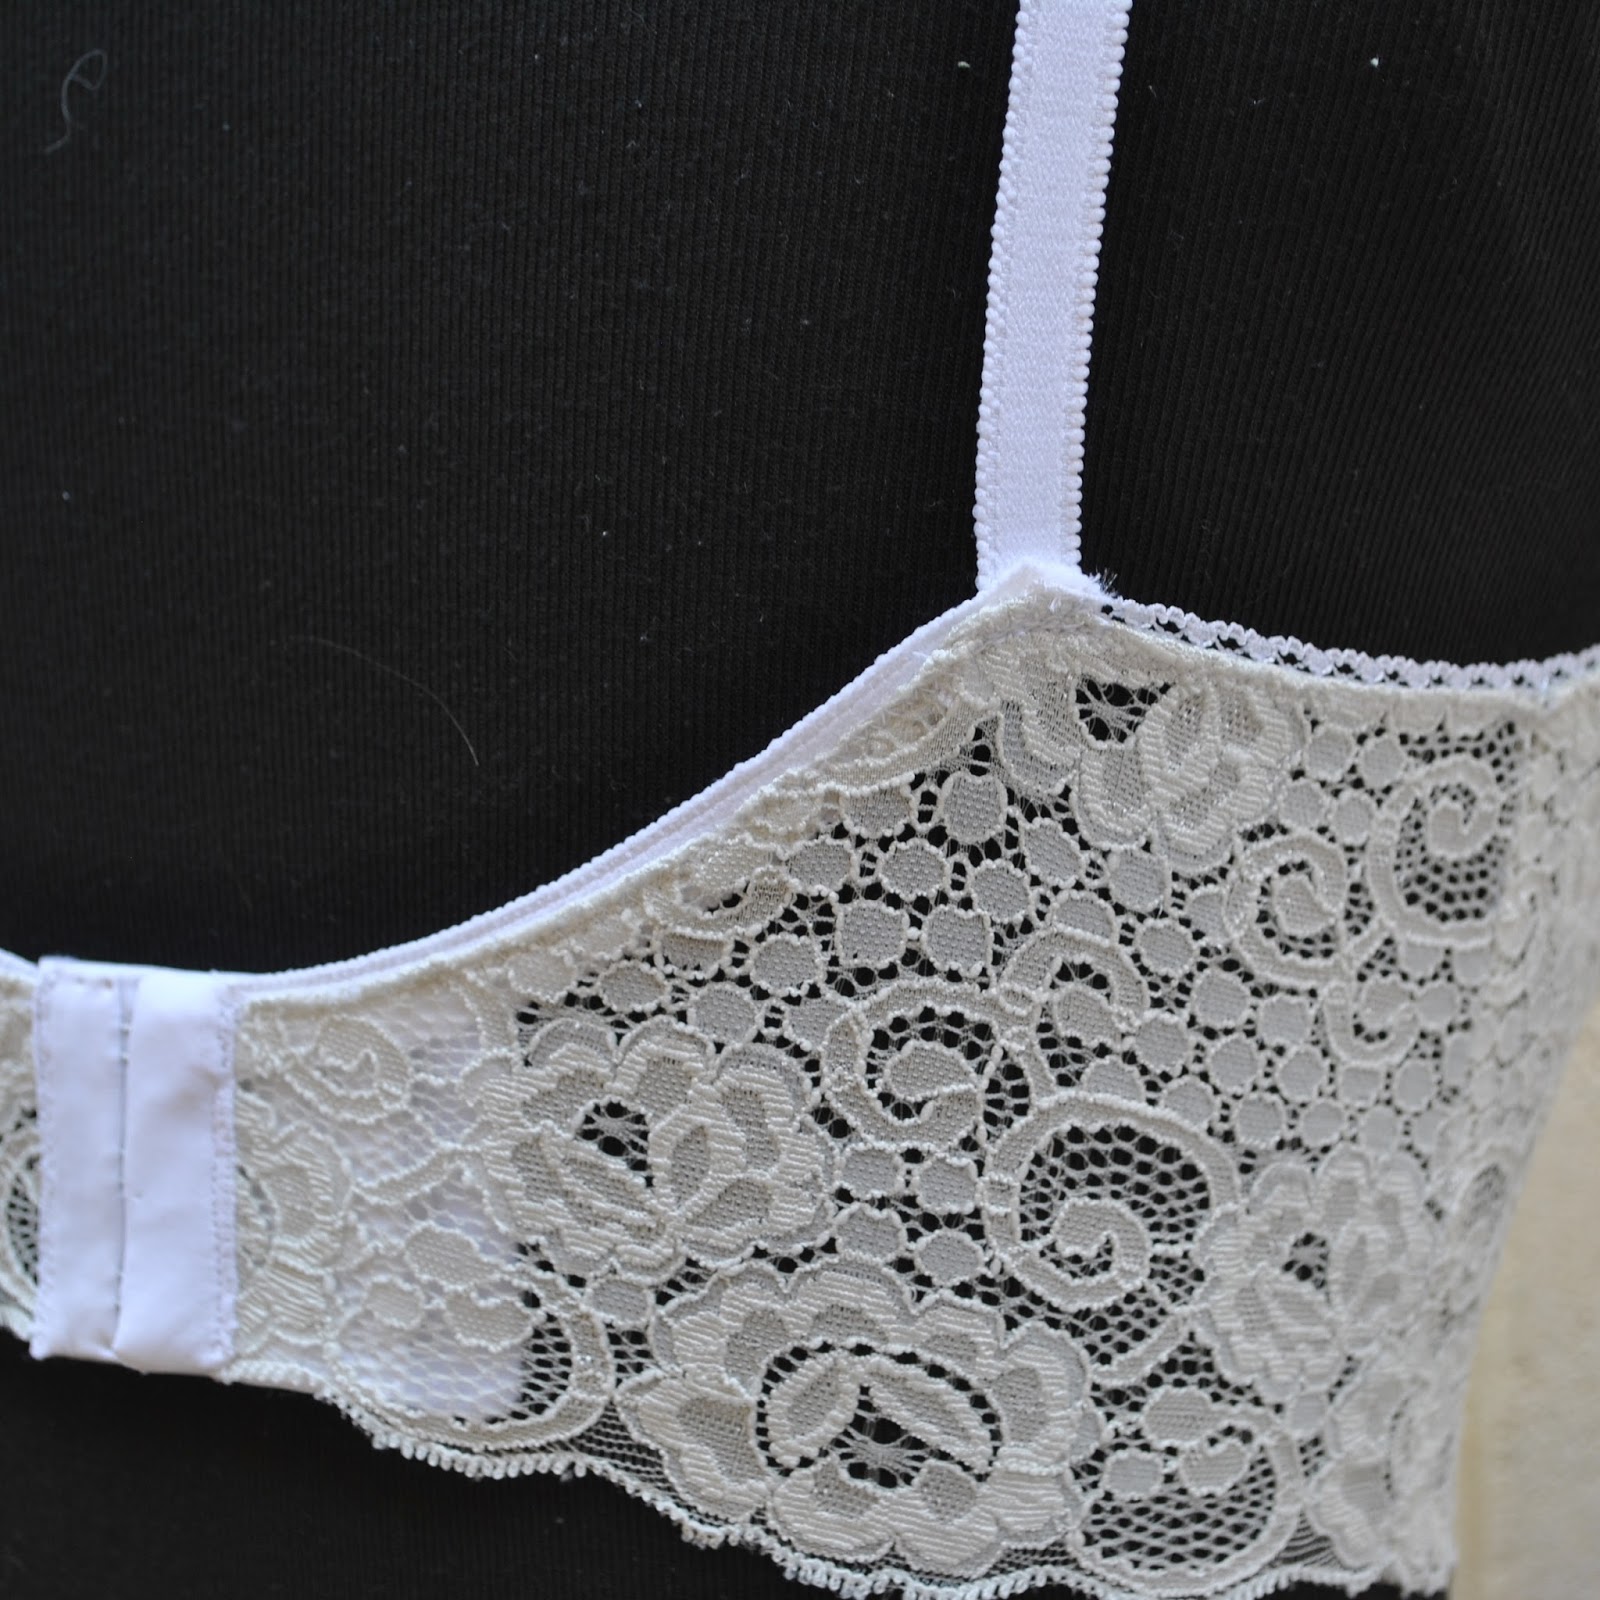
Patterns; bra is the Watson, by cloth habit; the longline version, and the ultra-cute knickers; which appear superficially like ginormous granny-knickers on the flat but seriously, they’re adorable on! are Tanga, a free pattern downloadable from Burda.
Fabrics; I’ve wanted an all-lace set and bought this lovely green lace aaaaaages ago, gathered all the bits and bobs and cut out the pieces; and then we were going away, I shoved the whole shebang in a bag and forgot about it.  Doh!  Imagine my delight when recently I found it again…  woot! I got cracking and finished it off.
Palest of the pale, grey/green lace, white shoulder strap elastic, rings and sliders; Homecraft Textiles.  Picot elastic, beige jersey lining; Fabulous Fabrics.  Satin ribbon; scraps found in stash, as old as the hills.

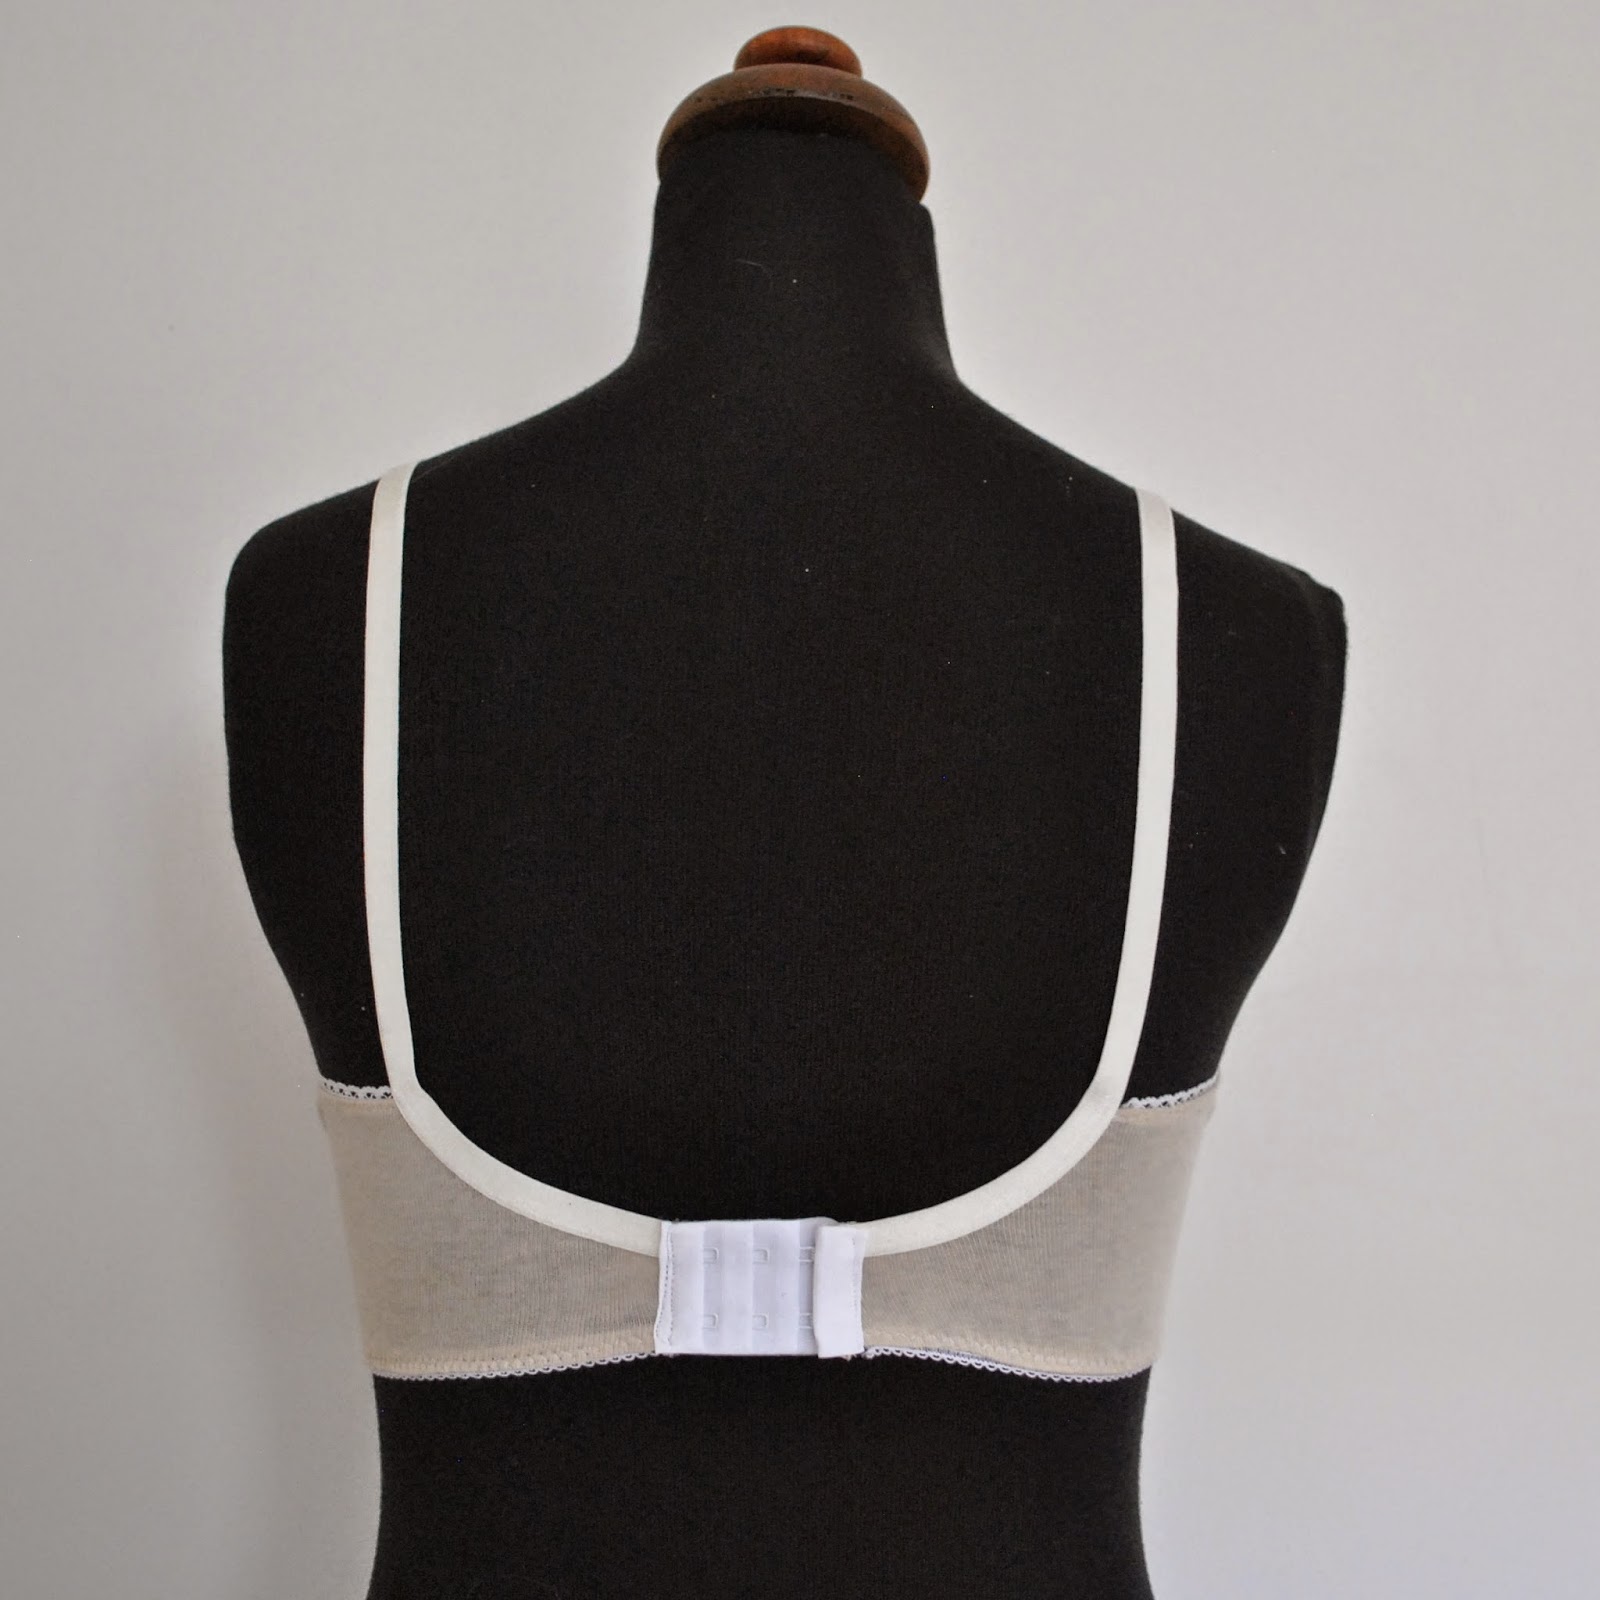
Thoughts; so this is my second Watson bra, the first longline … I LOVE the look of it, well duh, LAAAACE!!!  so that’s a plus.  A surprise downside is the much wider hook and eye closure is SO MUCH HARDER for me to do up and undo.  I didn’t expect that! but probably should have… the thing is; I’ve only ever used a two hook closure up until now, meaning that it’s second nature to me and my hands automatically operate the 2-hooks easily and breezily.  A 3-hook is like a whole new brain pattern which my hands have never learned and I’m fumbling away, almost like I’ve never worn a bra before in my life… well, you know what they say about old dogs and new tricks.  I’m tempted to think that for a soft, longline style like this I might even prefer my funny, basic little pull-on camisole bralette, simple and easy, save myself the trouble and expense of the hook and eye closure and the style still works perfectly fine for my likes and meagre needs.
I’m still going to wear this new set to bits obviously! just an observation.

previous Watson bra

Also, the back elastics; with the Watson you’re supposed to commence sewing them horizontally along the back from the centre back and they continue on, curving up and over the shoulders to become the shoulder straps, as pictured above.  Now I don’t know if anyone else has come up with this problem too; but when I’m wearing it, the elastic does not sit flat against your body, but instead “folds” around the corner and so forms a little lumpy bump as it does so.  These bumps can just be seen in the above picture, at the sharpest point of the curve where it starts being a strap.  It’s a small thing but a little annoying nonetheless.  SO, for this version I cut and sewed the back elastic and shoulder strap elastic on as two separate pieces.  Not quite as smart looking, but the bump problem is solved so I’m not stressing over it.

The last time I made Tanga undies I discovered what a bad bad bad idea it was to situate a longitudinal seam in the crotch area … worst design concept, evah! anyway, I wrote about how I fixed that first pair by cutting out a new, seamless crotch using the liner piece.  SO MUCH BETTER, and I did the same for this pair too.  I cut two lengths of 5mm elastic to be 10% shorter than the side edges and zig-zagged it along the edges, between the lace and beige jersey liner.  I know from experience that this is about 1000000 times more comfortable than to do it like the pattern tells you.

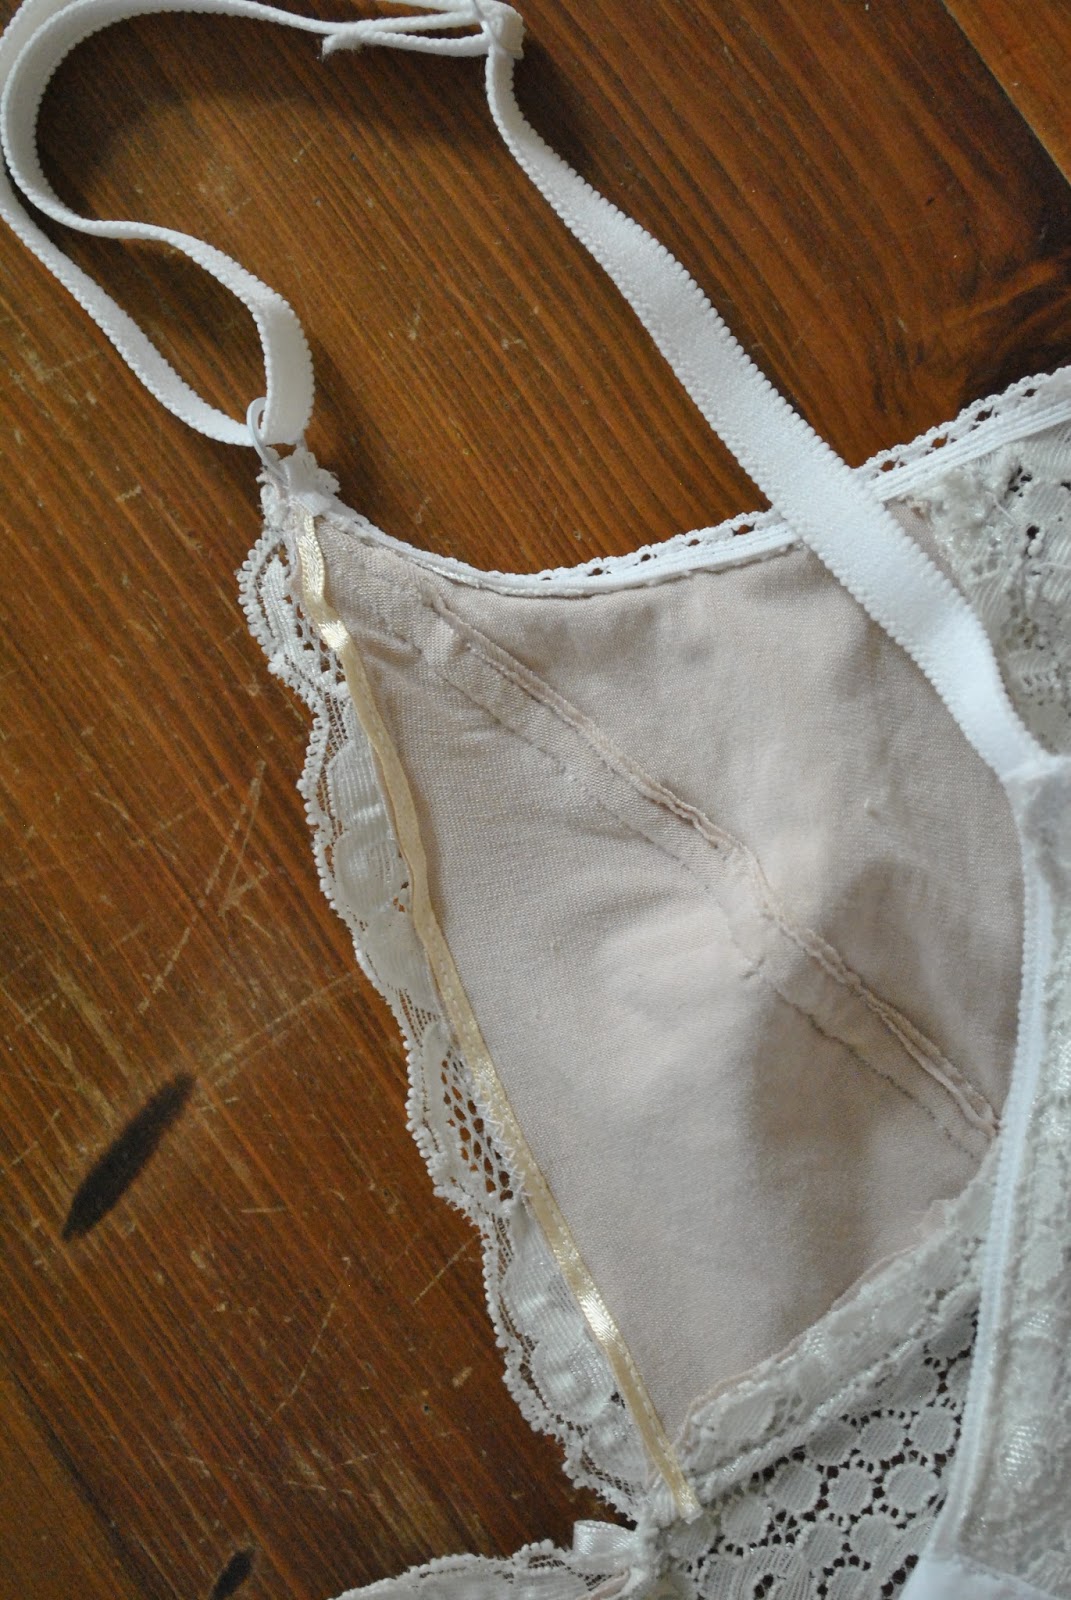
I used beige jersey to line the bra cups and knickers liner as well as to partially line inside the front of the knickers.  This was cut using my rotary cutter to achieve sharp and clean-cut edges, and is simply zig-zagged down inside the lace.  This stuff is a very good match to my skin colour so it was such a great find!  Note to self; remember to keep checking Fabulous Fabrics to see if they get any more in stock…
Having a lining also helps to hide the seams, because I treated it like an underlining; the lace/linings seams are inside the garments and not between the layers.   I LOVE having the neatest insides possible but sometimes you just have to sacrifice the insides for the outsides, haha.
I know, weird, right?  Who even does that?!!

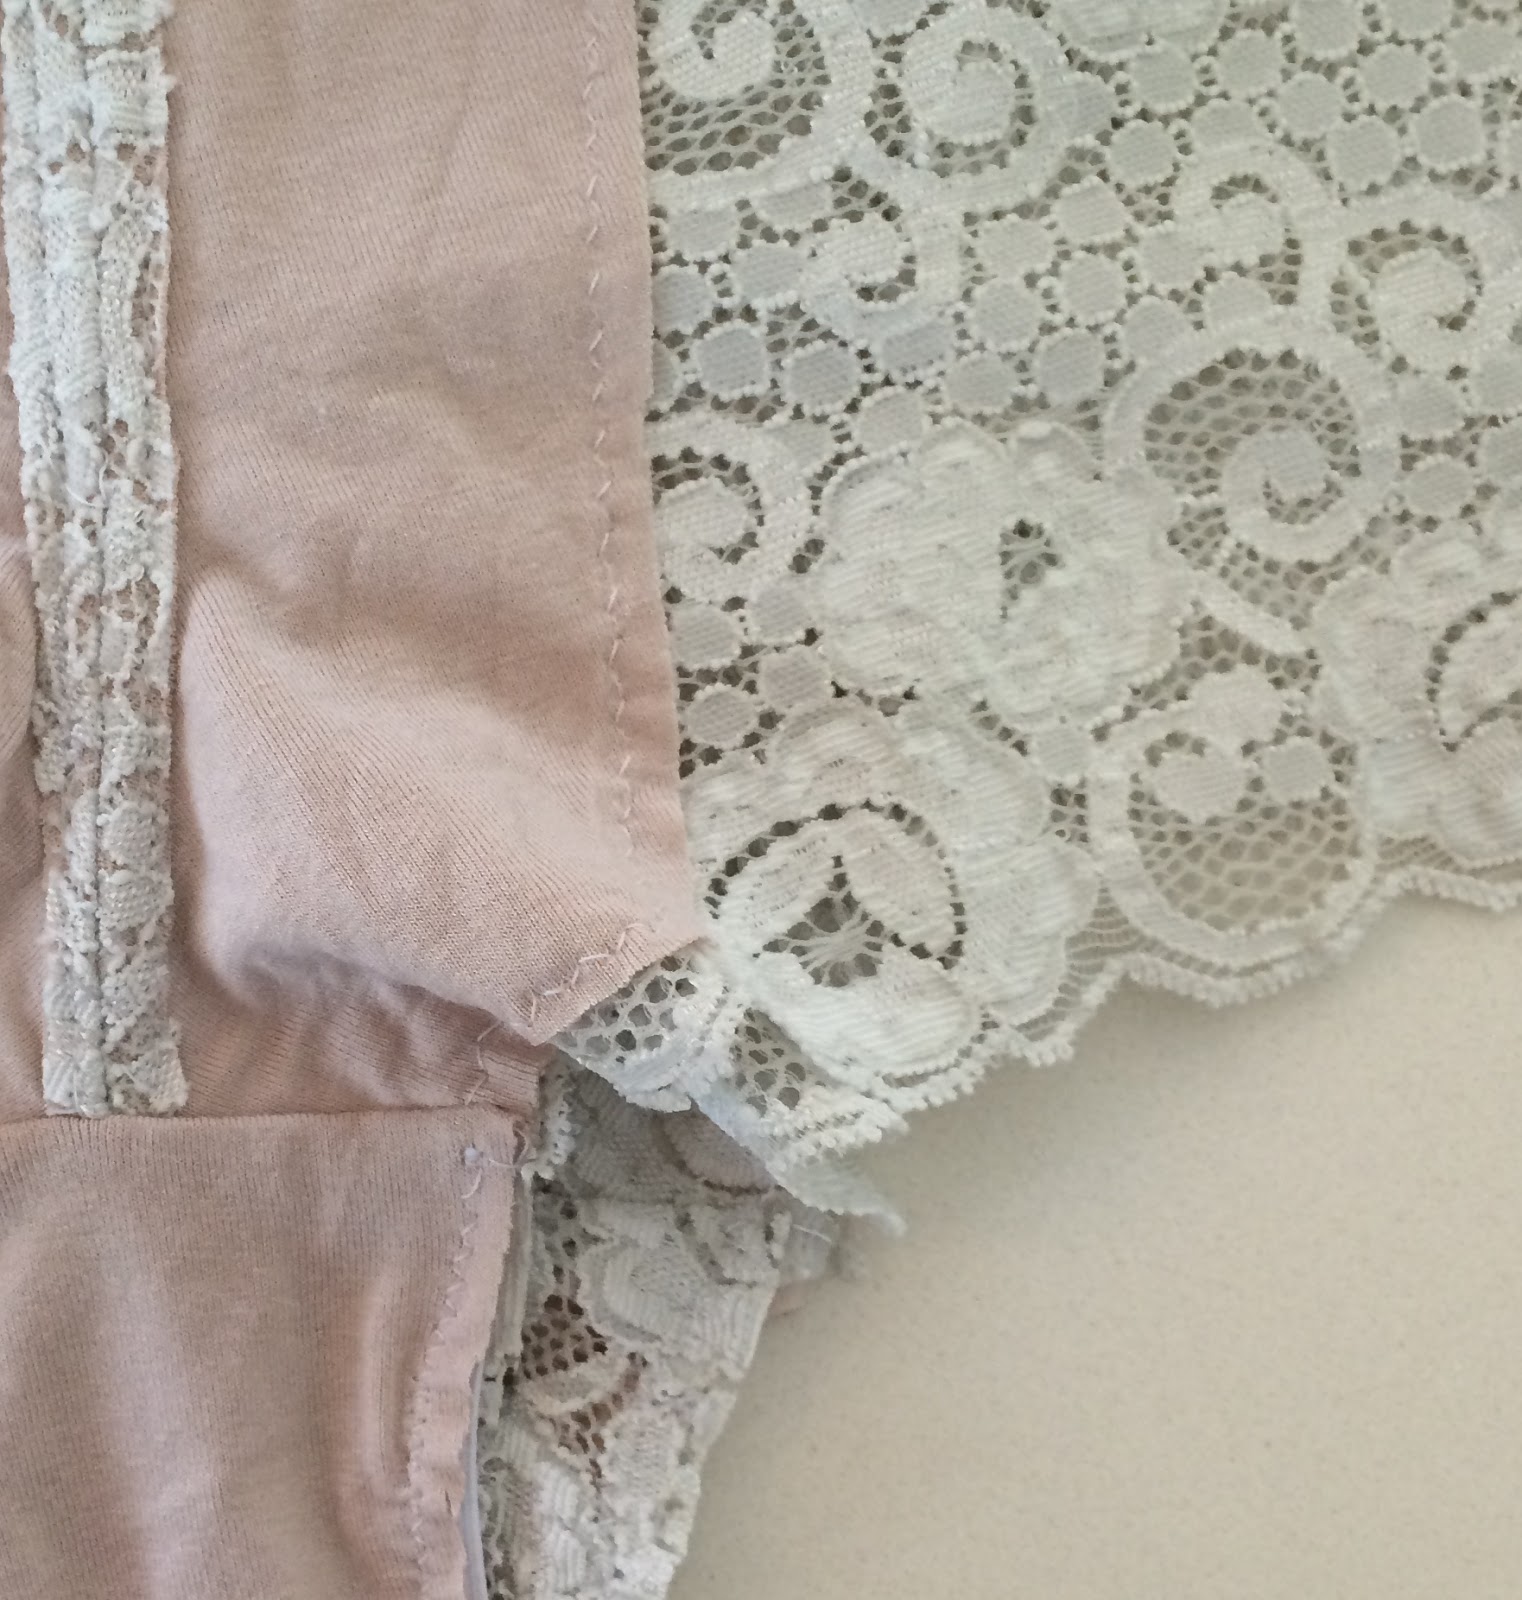
felled seams inside (L) undies and (R) bra cups

I faux-felled all the seams on the inside, by stitching them down lightly and trimming the raw edges close to the stitching.  This is not as neat overall than if they were sandwiched between the layers but looks much better from the right side, with no seam allowances visible through the holes of the lace.
To stabilise the cup edges, I stitched short lengths of satin ribbon along the jersey edge inside.


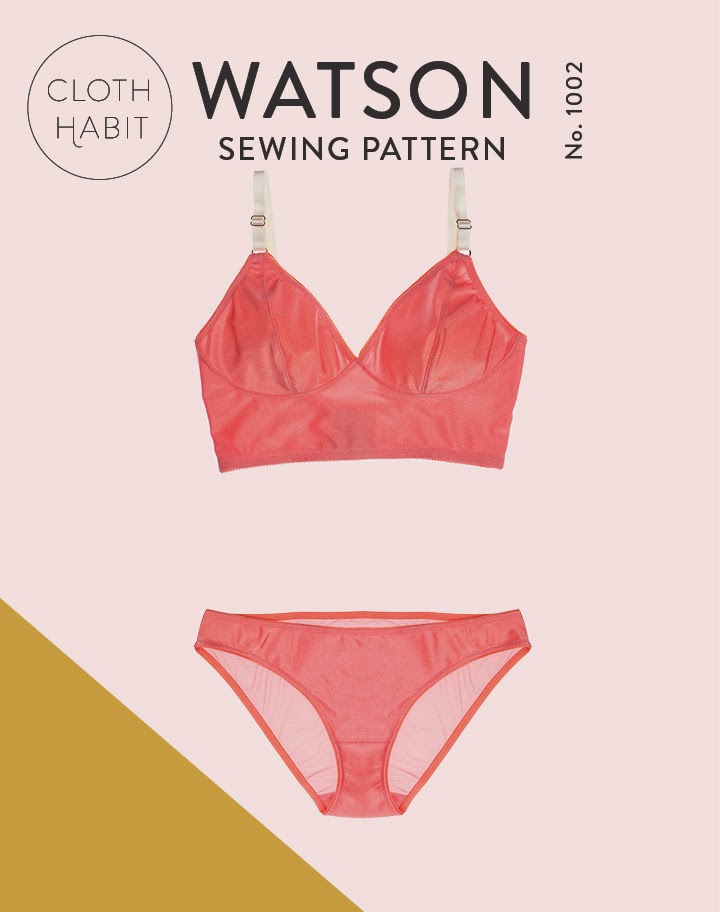
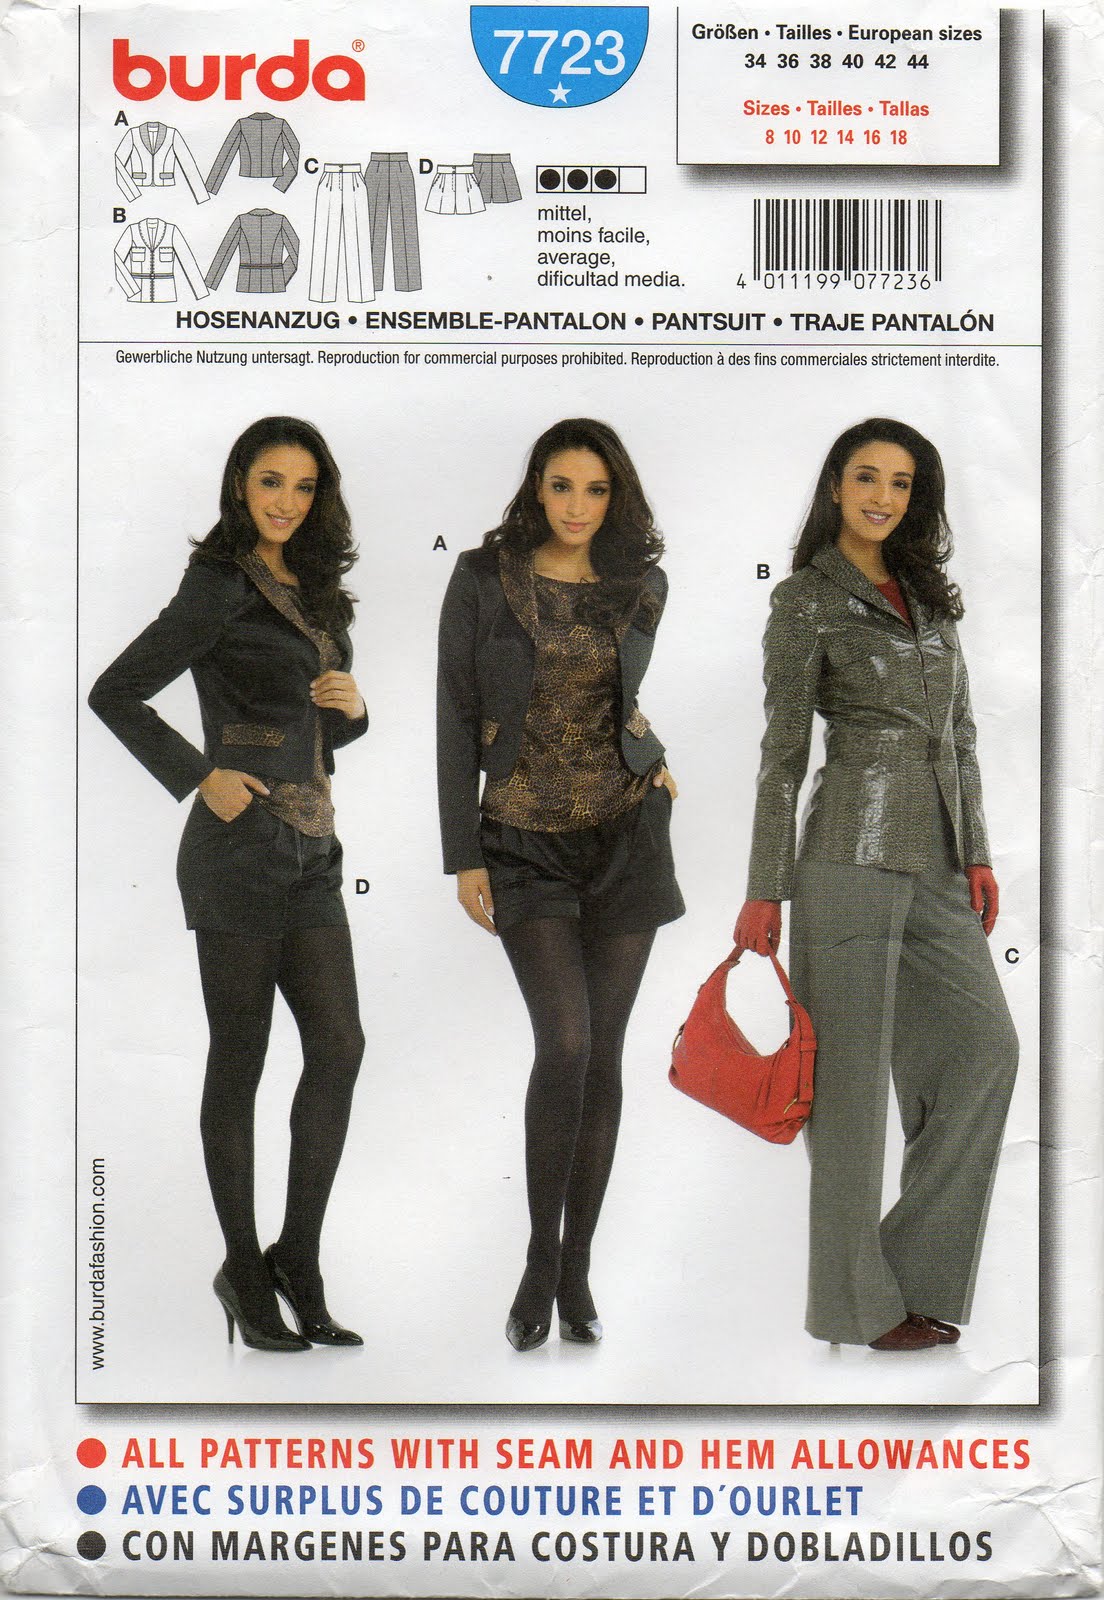
btw; that is the stock picture of the Tanga knickers above right.  It makes me slightly anxious every time I look at it… however don’t let the non-pattern matching distract you, this is a cute pattern which is free and available to all; and that’s the important thing here!

Now for some housekeeping… dk’s wife, could you please email me regarding the hedgehog pattern? thanks.  🙂
Also, I’ve received lots of emails from kind readers letting me know that commenting is working only rarely on my blog… I’m so sorry!  🙁  Like everyone, I love comments! so please know, I am working on a site update to fix the problem.  It may take a short while though since I’m a complete computer dummy, but I am on it!

pinterestmail

jingle bells

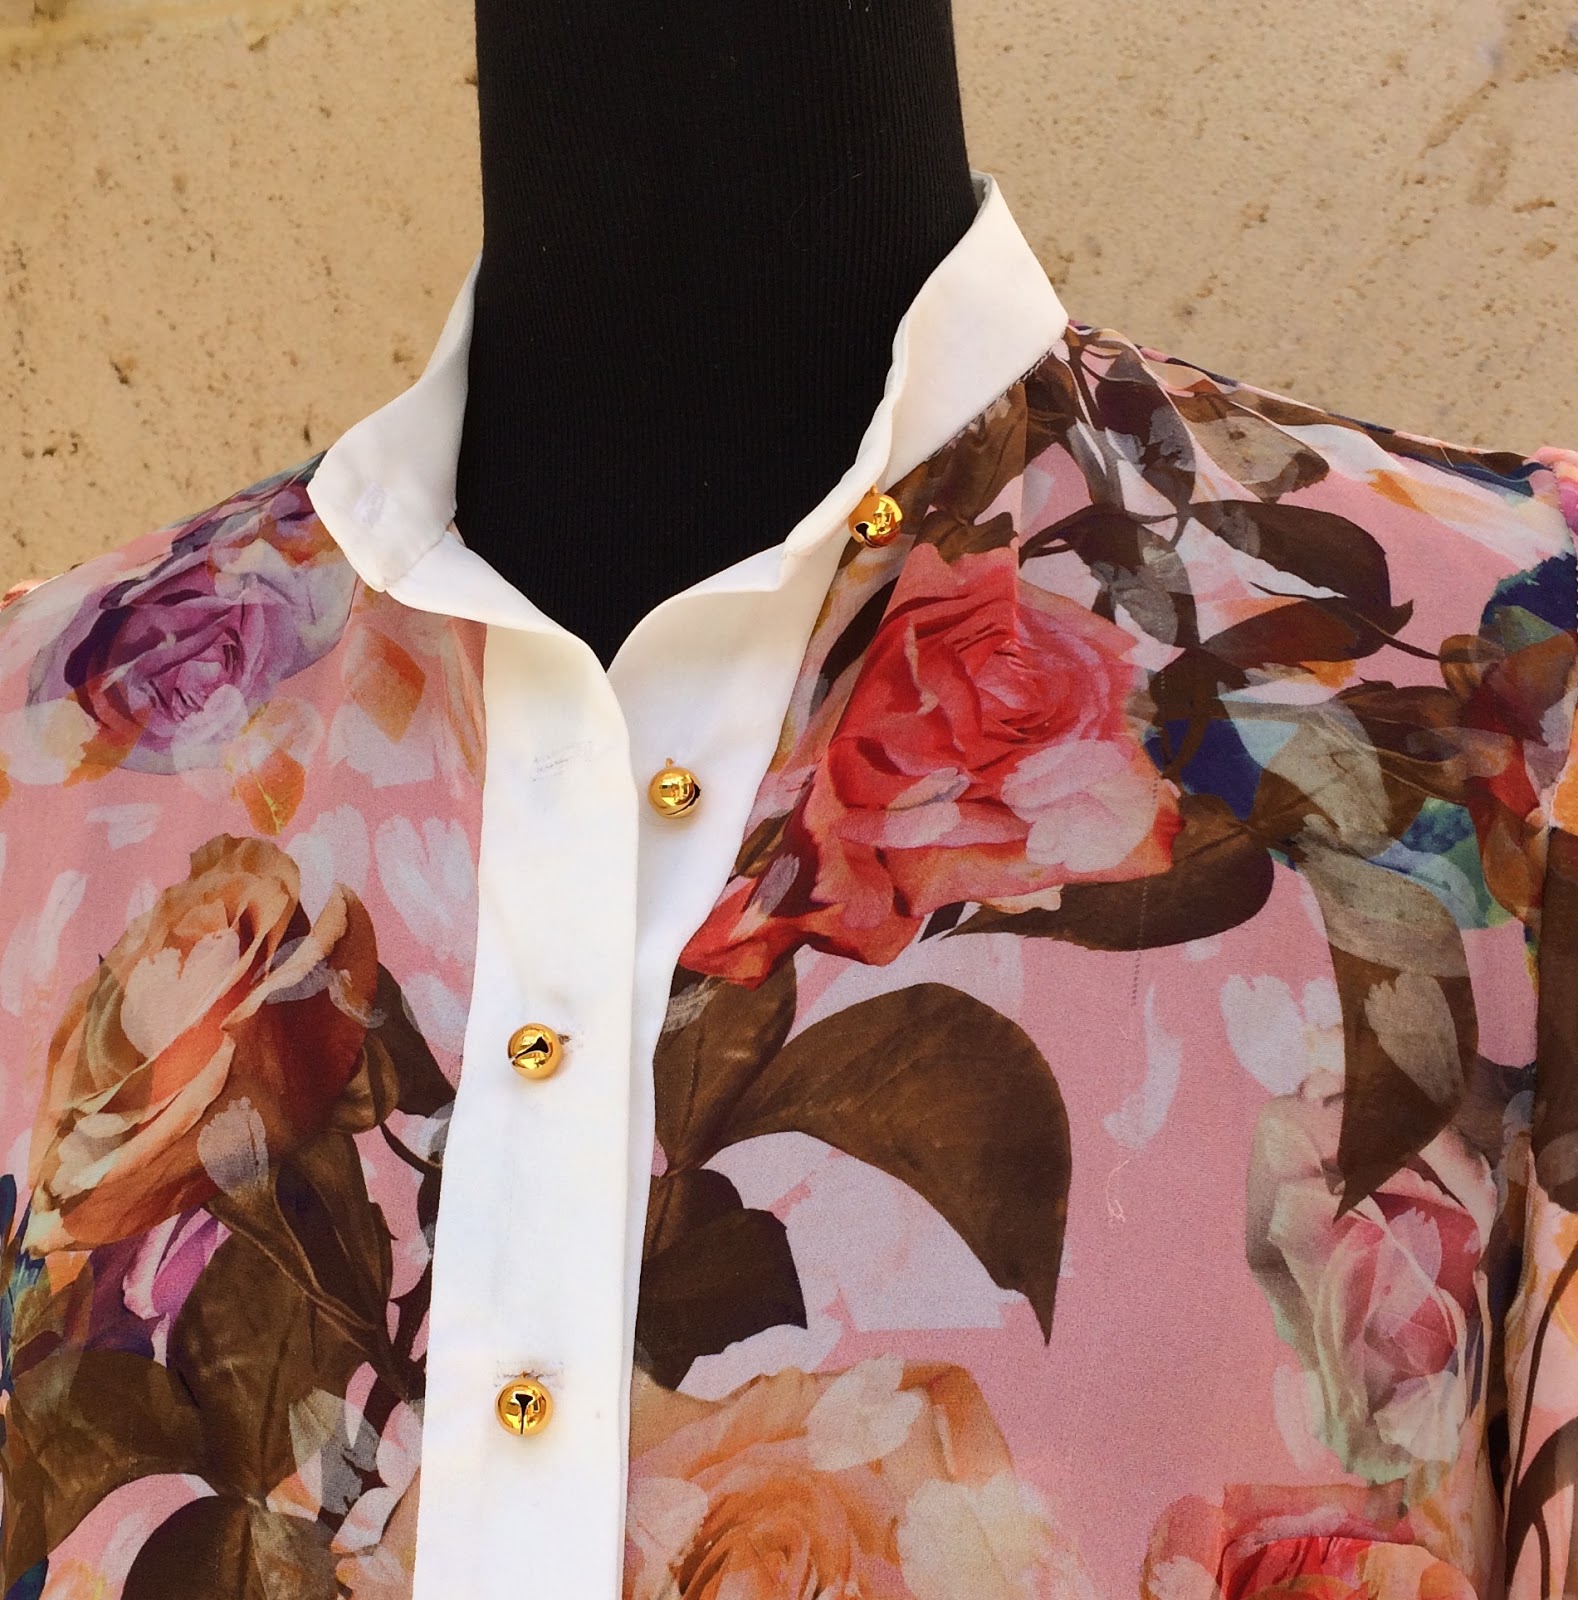
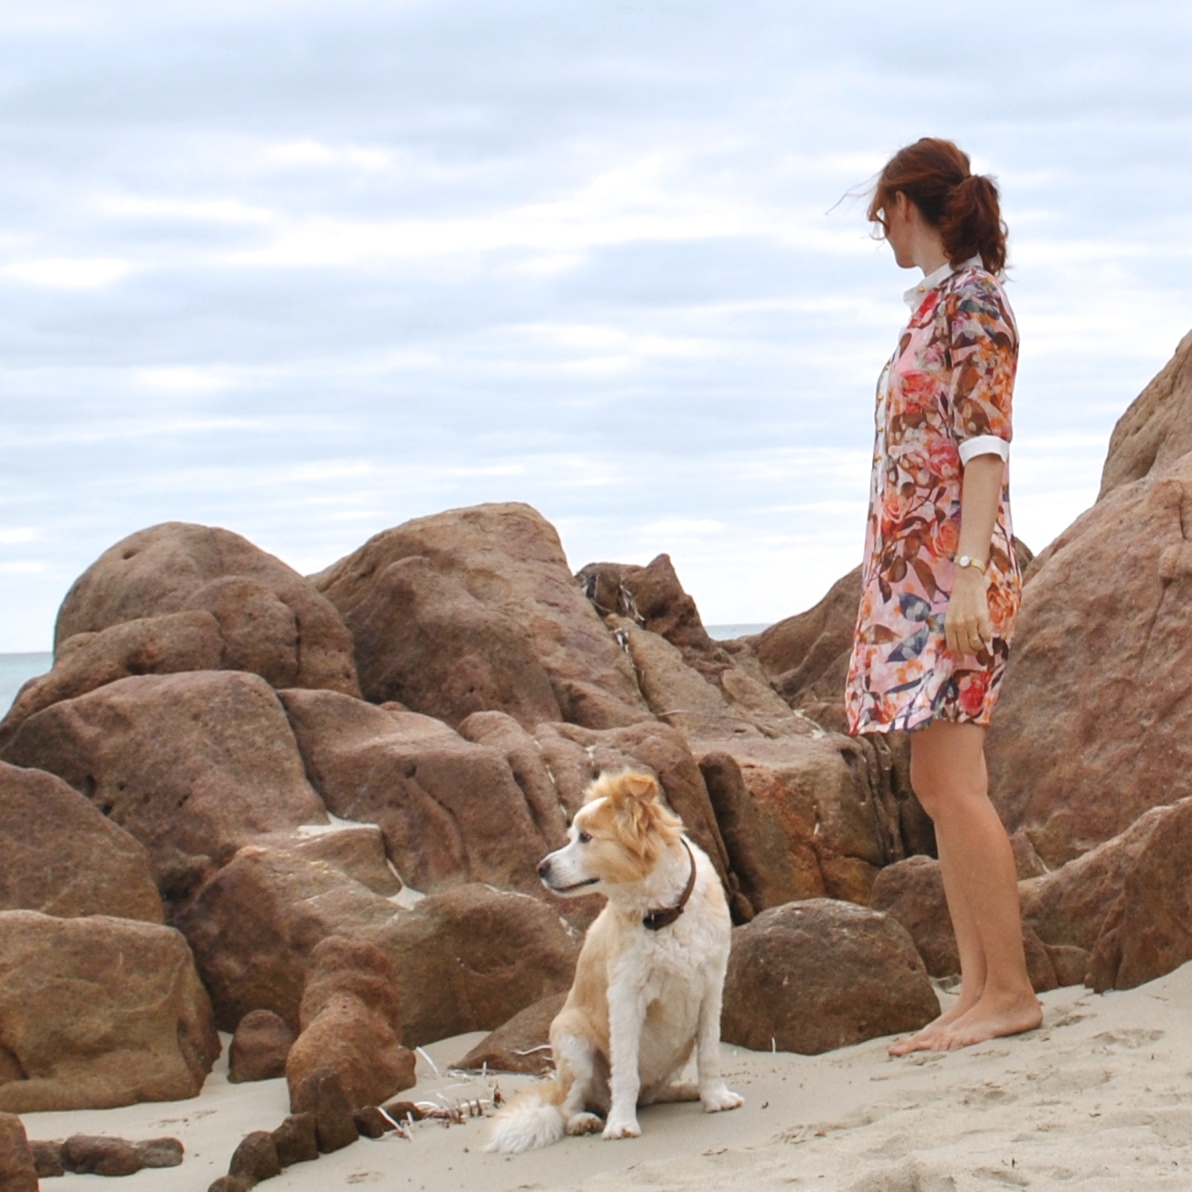
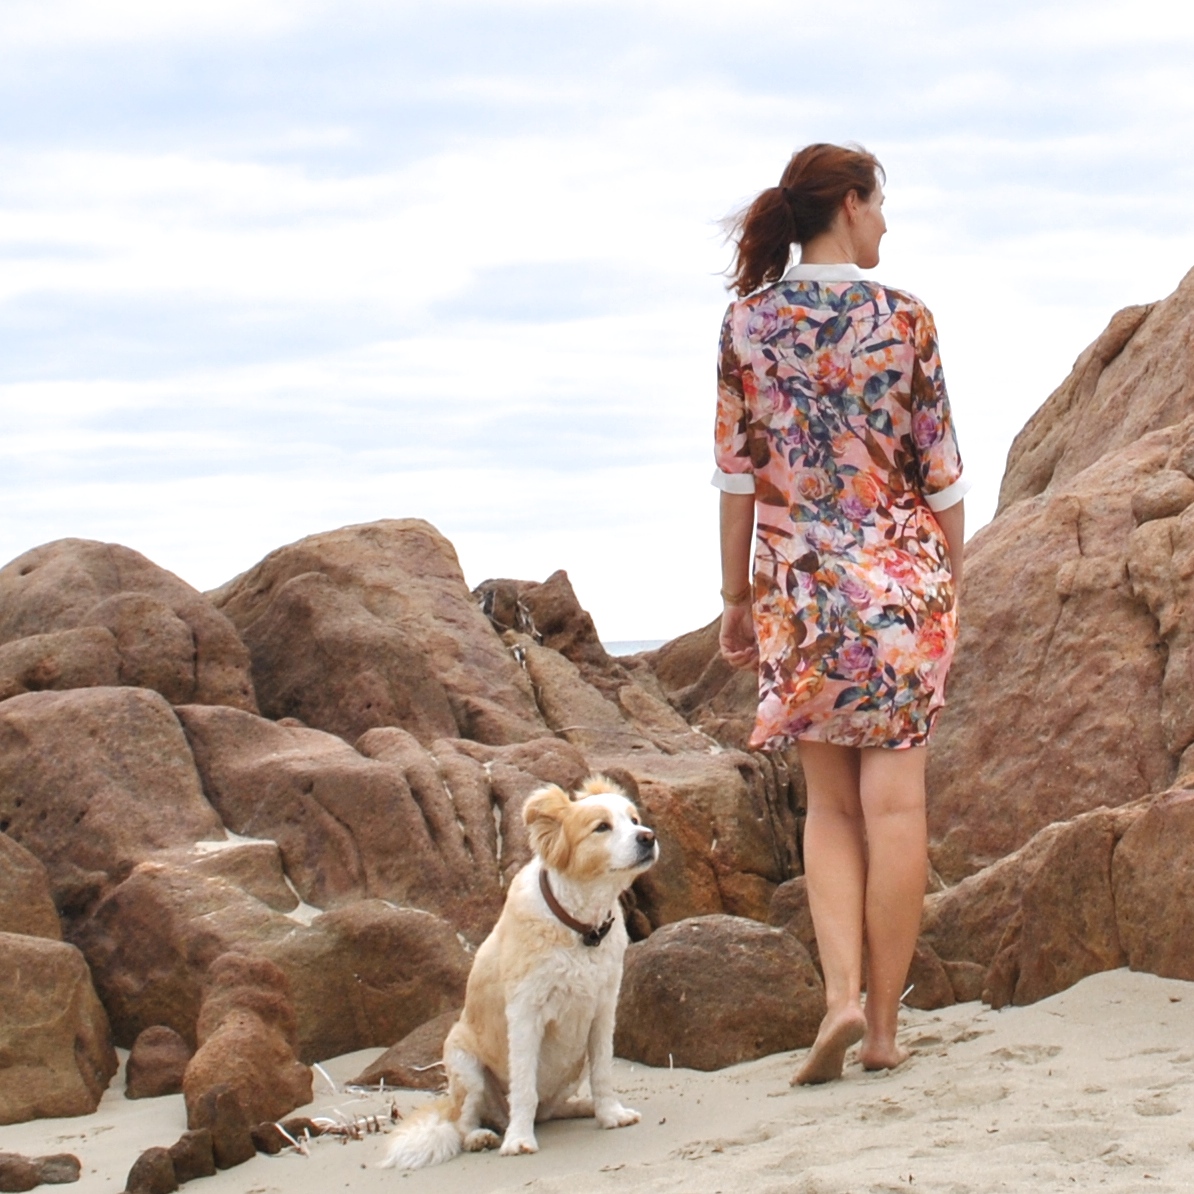
Yes, my new shirtdress literally does have bells on it.  The gold buttons are mini jingle bells, the type you put on cutesie wootsie Christmas decorations.  Whimsical and impractical although many of my sewing/knitting choices may be though, jingle-bells are just kinda… hmmm well the jury’s still out.  See, I just had my heart absolutely set on small rounded gold buttons and this was pretty much it.  I love the festivity of them and am clearly all set up to do Christmas Day with fabulous, jingly panache, but have fears that the relentlessly cheerful chirpy tingalingalinging will become a tad annoying in the interim, and not just to me but to the long-suffering souls who move in and about in my everyday orbit.  So I have not at this stage ruled out carefully injecting a blob of superglue into the opening of each jingle bell, to anchor the ringer thingie to the inside and restore peace and tranquility unto the world.
Glue is on standby and at the ready…

but pretty, non?

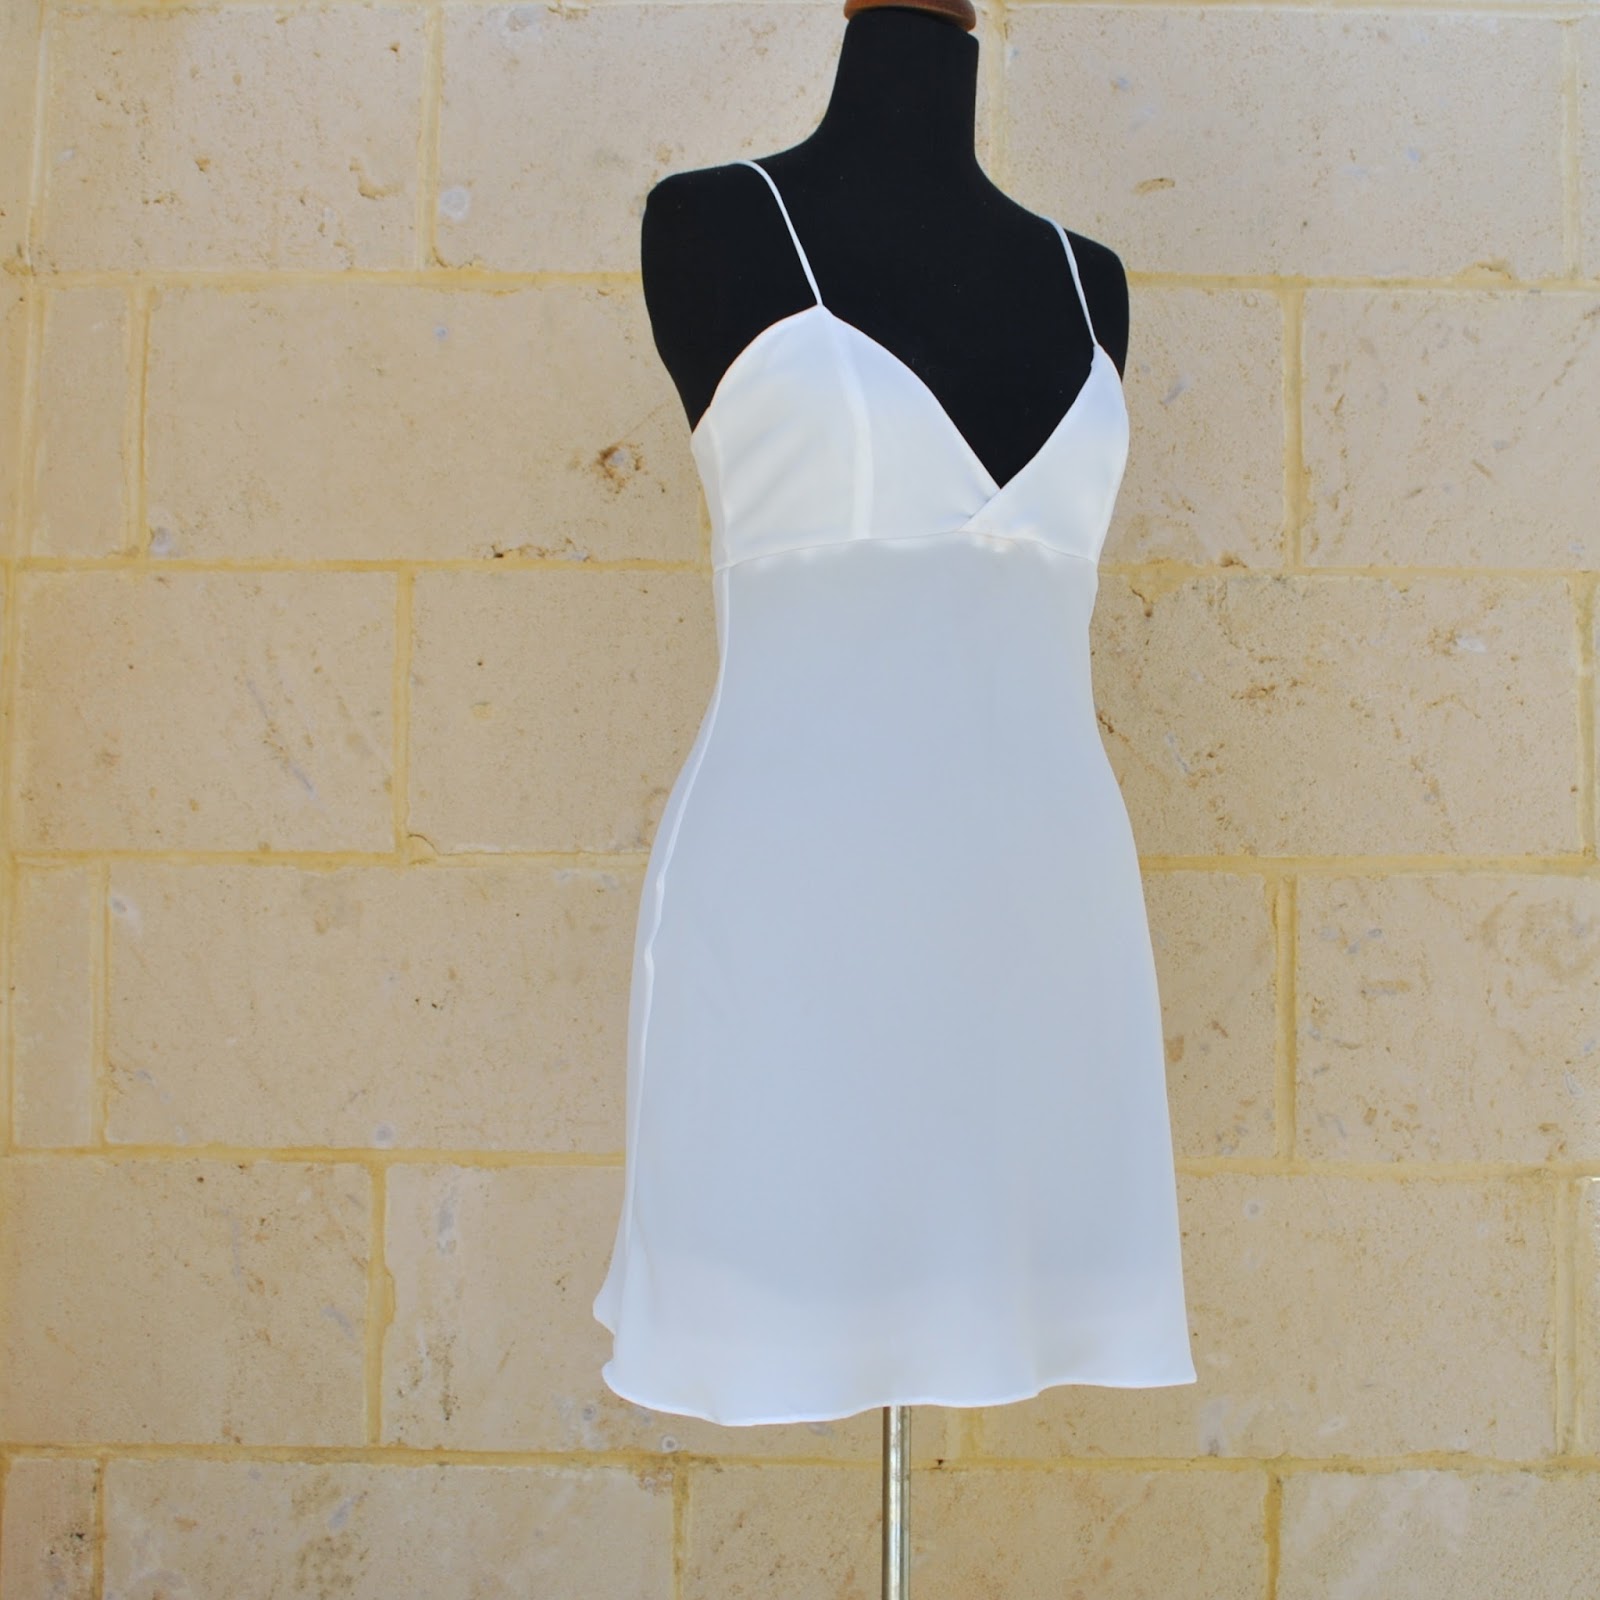
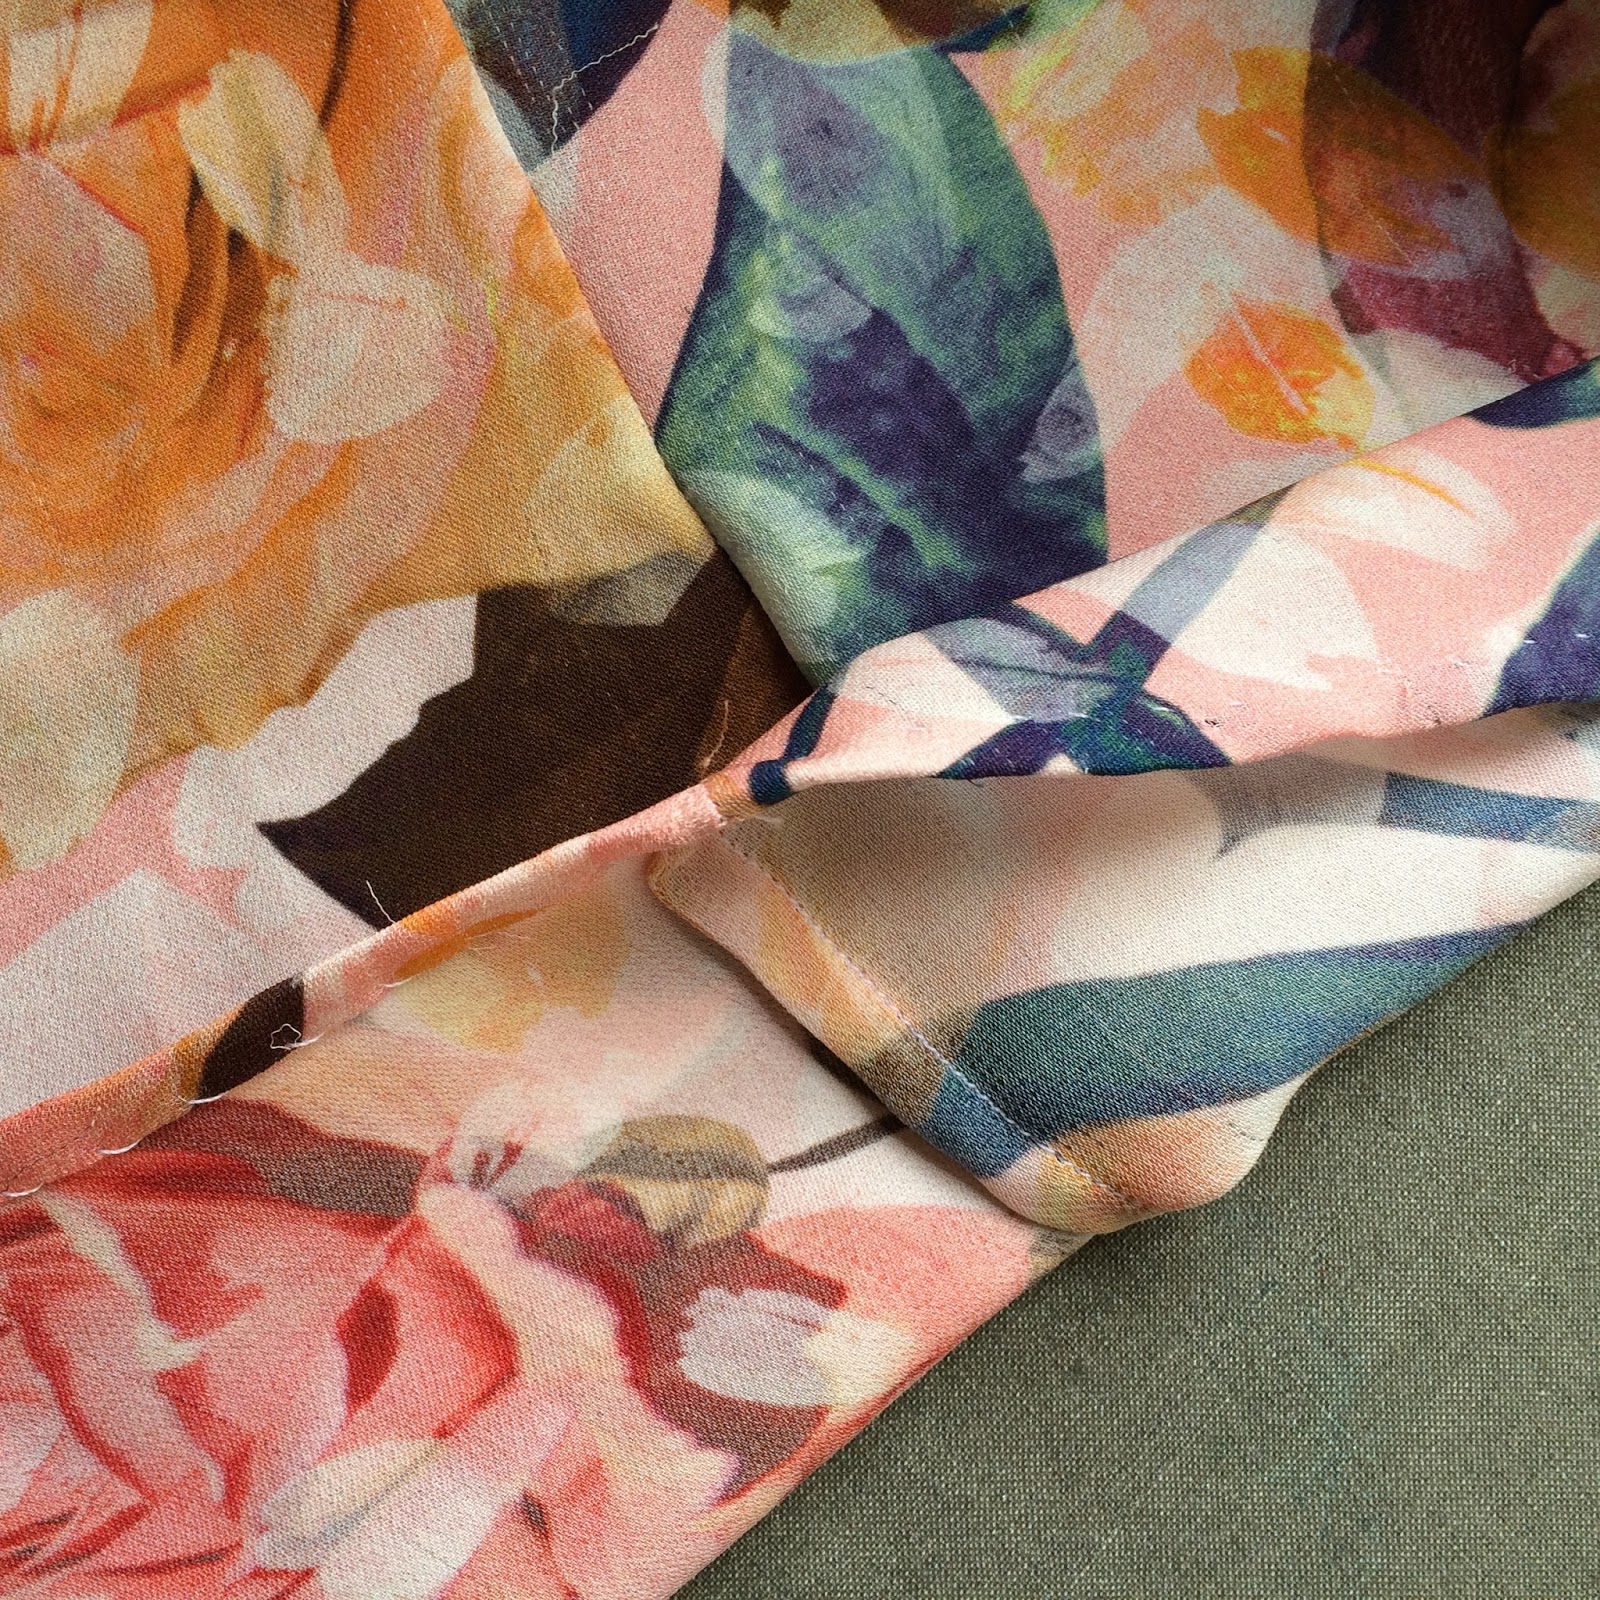
Fabric: a very fine coral floral silk georgette from Fabulous Fabric, the very last on the roll.  I bought it using a voucher given to me for my birthday by my dear friends; whom I’ve been meeting every week since our children were in the early school years…  They know my strange predilection for self-dressmaking so very well!  I also bought some ivory crepe; with which I made the slip to go under this dress, and which I also used for the button placket, the cuffs and the collar stand.  Jingle bells were also from Fabulous Fabrics.
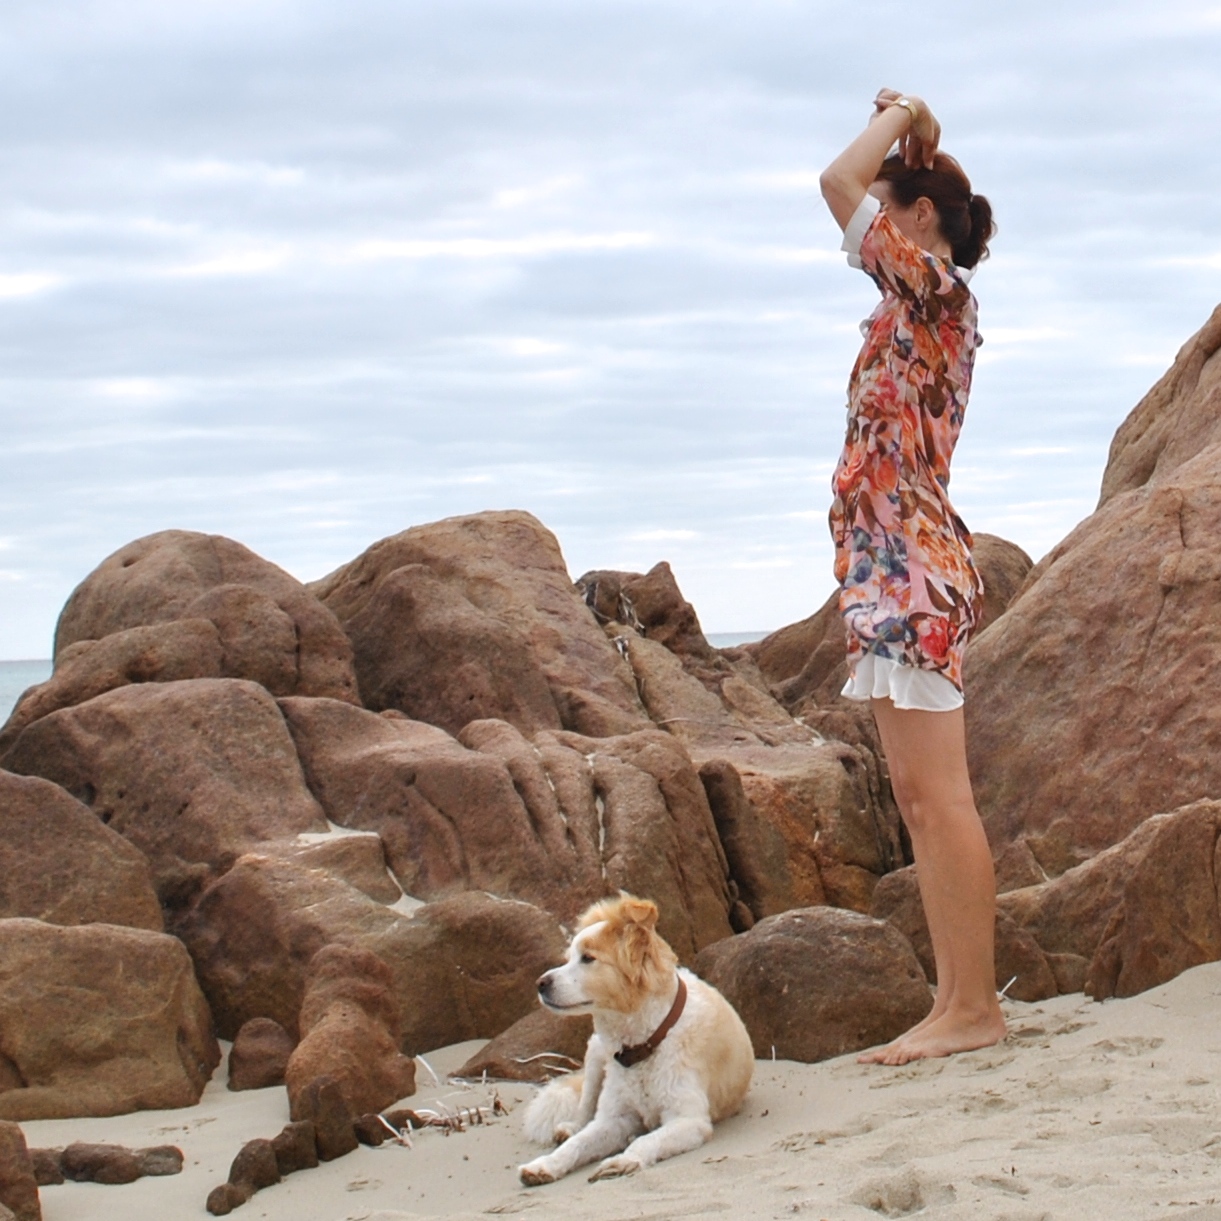
I’m so relieved I had the foresight to make a separate slip to wear under this sheer dress, rather than an attached lining… why? because when I go to hang the clothes on the clothesline I’ve found this to happen…

Hmmm, see; the slip, being sleeveless, does not ride up when you lift your arms up over your head, of course.  Just yet another reason to keep a healthy collection of nice slips and petticoats handy in the lingerie drawer.  I have about four hardworking slips currently in rotation and just lately I’m seriously considering increasing the population, particularly since some of the oldies are getting… well, old.  Maybe even double that number wouldn’t be too many.  Slips, seems such a quaint and old-fashioned thing, yeah? the kind of ladylike frippery my grandmother loved and would buy for my birthdays etc and that seemed unnecessary and even rather fuddyduddy-ish to my much younger, more foolish self.  Now I am wearing them.  Am I getting old?  Hmmm, no need to answer that!
arms in regular position, all is well

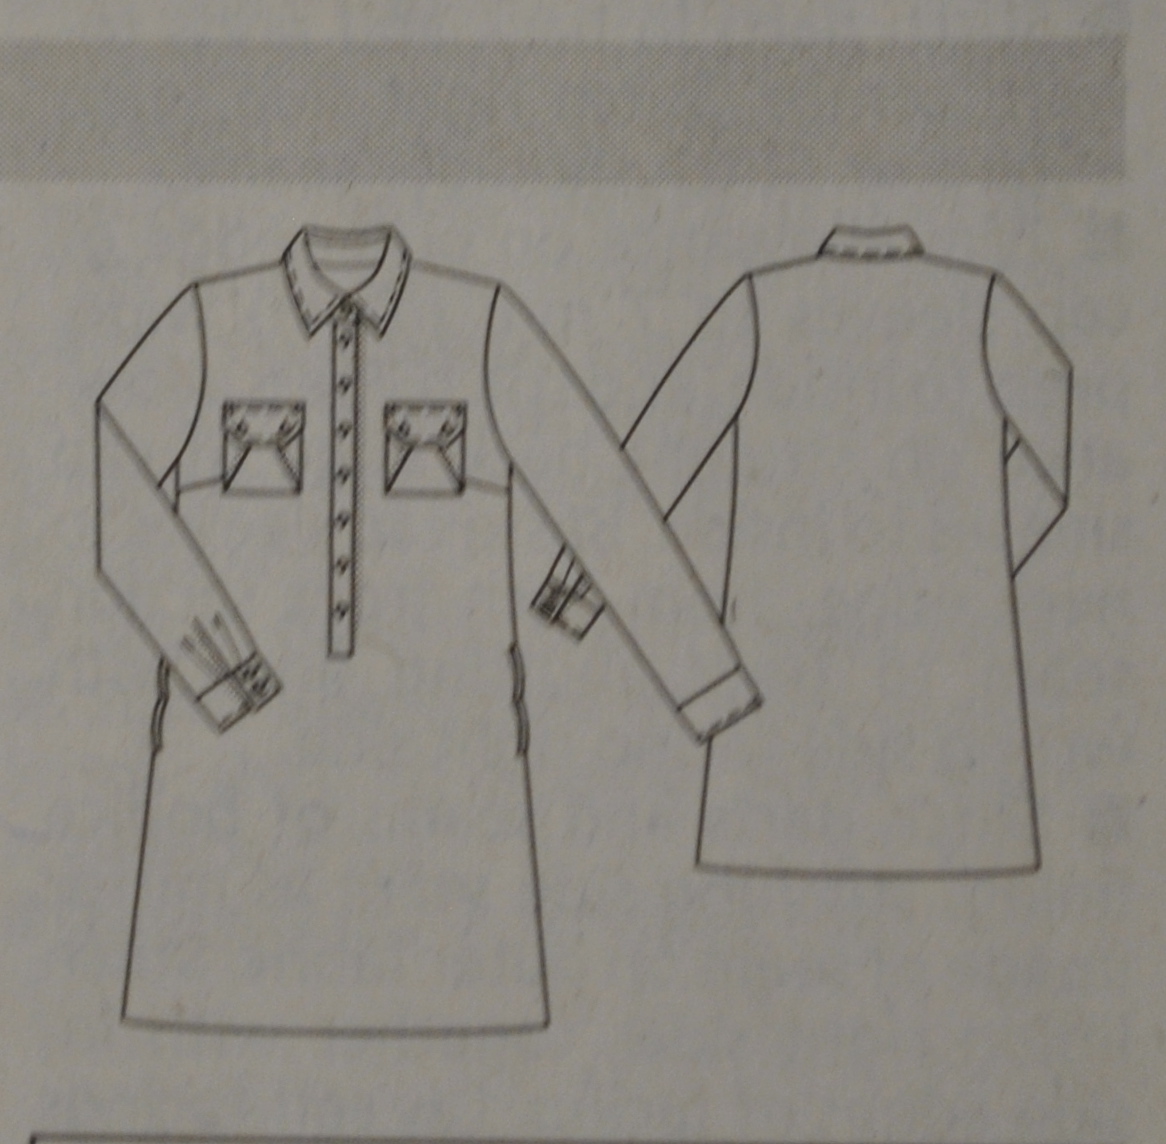
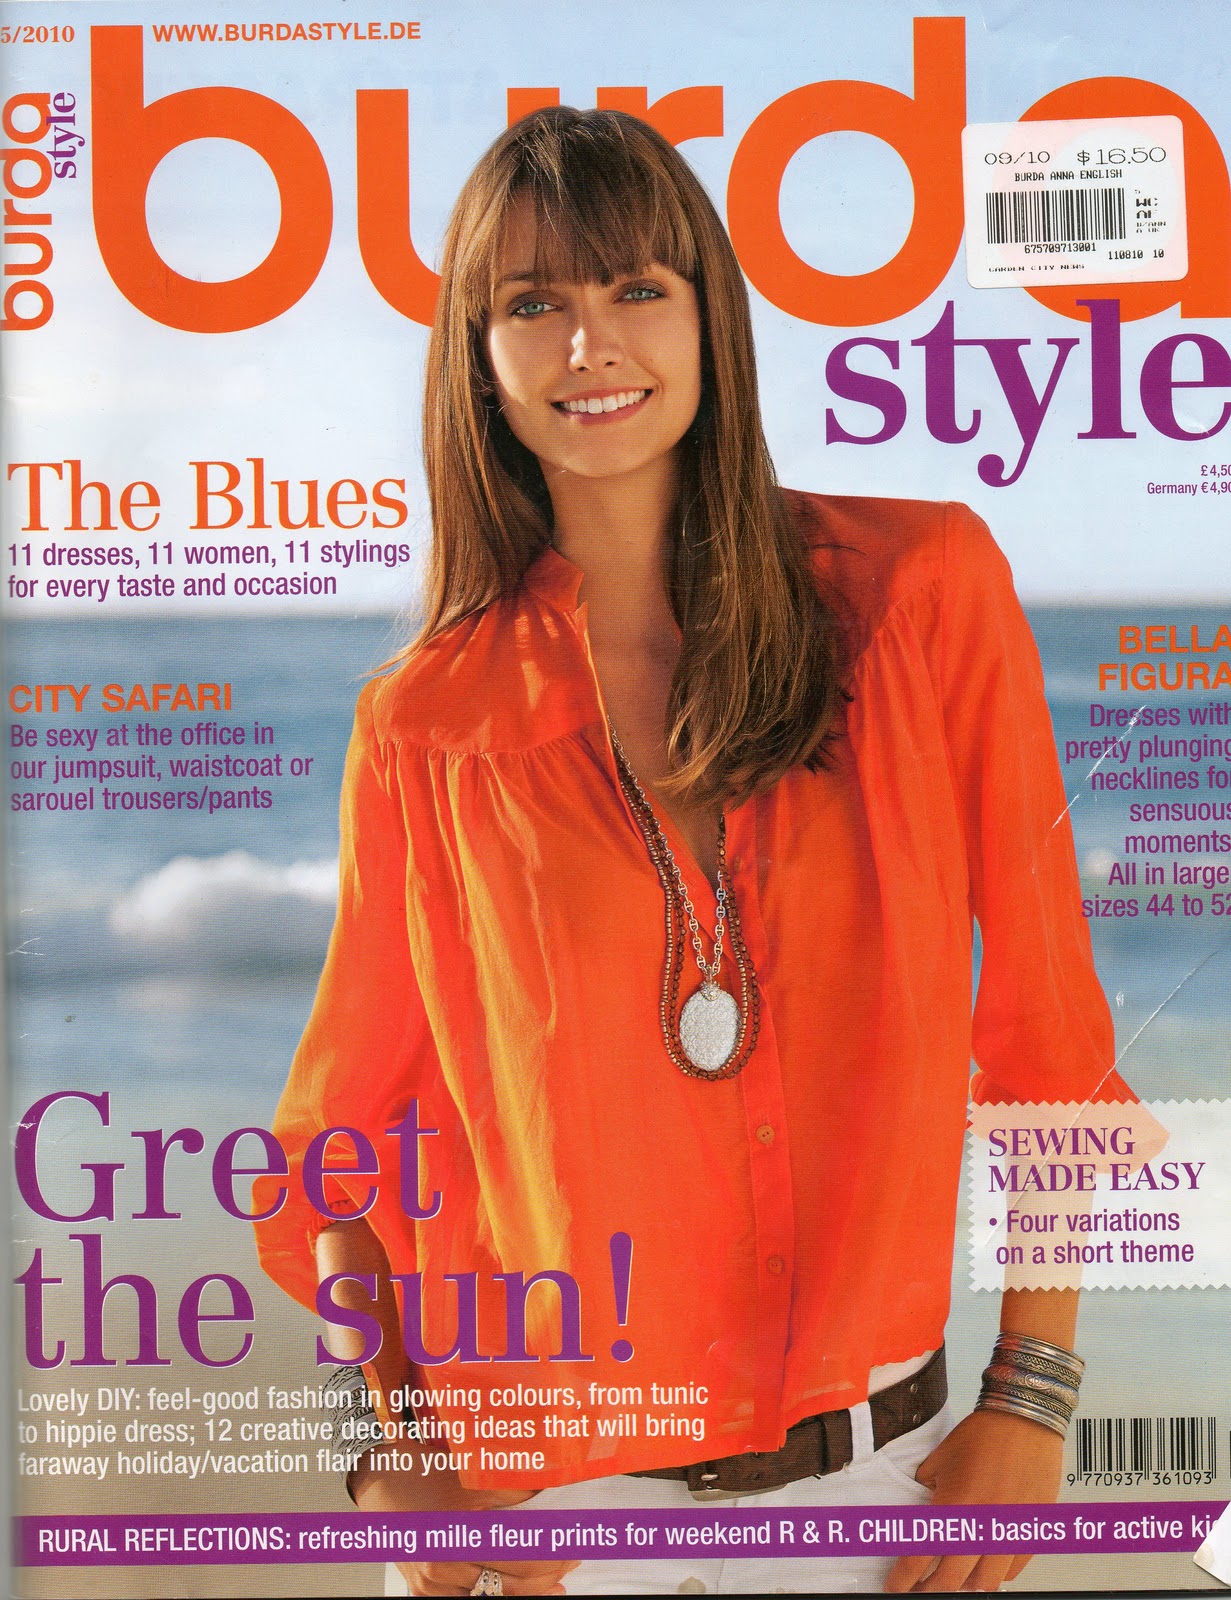
Pattern: Burda 05/2010;111, a shirtdress pattern I’ve used twice before, a plaid shirtdress and a lace version; with sleeves adapted from another Burda pattern, 05-2010-101.  I’ve used this same sleeve pattern also twice before on different, other Burda patterns; my black Pirate shirt and my pale blue silk shirt.  This is that same sleeve but cut shorter and with a shorter cuff to compensate for being a shorter sleeve.
I chose to leave off the pockets, and the collar and just have the collar stand, I felt this lends a slightly more feminine look to a shirt, goes better with all that girly pink floral explosion that’s already going on in there.

Construction notes: I went with all French seams throughout of course, silk georgette kinda demands those sorts of standards! being sheer and all high quality and all.  Only the armscye seams I overlocked the raw edges to finish.  In a shirting cotton or linen I would flat fell the armscye seam like so, but silk georgette just does not lend itself to that level of tailoring.
Collar, button placket and cuff facing were hand fell-stitched to secure them; I wished for no top-stitching to sully that clean-finished, pristine crepe!  In my opinion, topstitching makes a shirt look a lot more casual and maybe a little masculine? whereas absence of top-stitching keeps a thing looking polished and, somehow feminine.  I know, that’s kinda irrational and I cannot logically explain why I have that masculine/feminine impressions of topstitching, but there it is.
The hem is hand-rolled and stitched, and I did the same technique as I did for my slip, with stay-stitching.  I hemmed this before I hemmed the matching slip, to get the right length for both, but it’s taken me this long to finish all the other little details and get out and take photographs of it.
And I also wanted to wait for its first outing to be a day on which I would be meeting all my friends to show it to them, and simultaneously an appropriately weather-ed day, nice enough to wear it! it’s taken a while for those two things to coincide.  Today was that day! hurrah!

Details:
Dress; Burda 05-2010-111, Burda 05-2010-101 sleeves, floral silk georgette with ivory crepe detailing, my original review of this pattern here
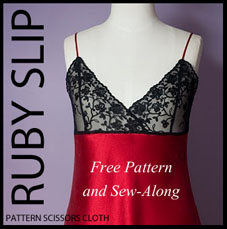
Slip (under); the Ruby slip, pattern by pattern scissors cloth, ivory crepe, details here

pinterestmail

outfits for small boys

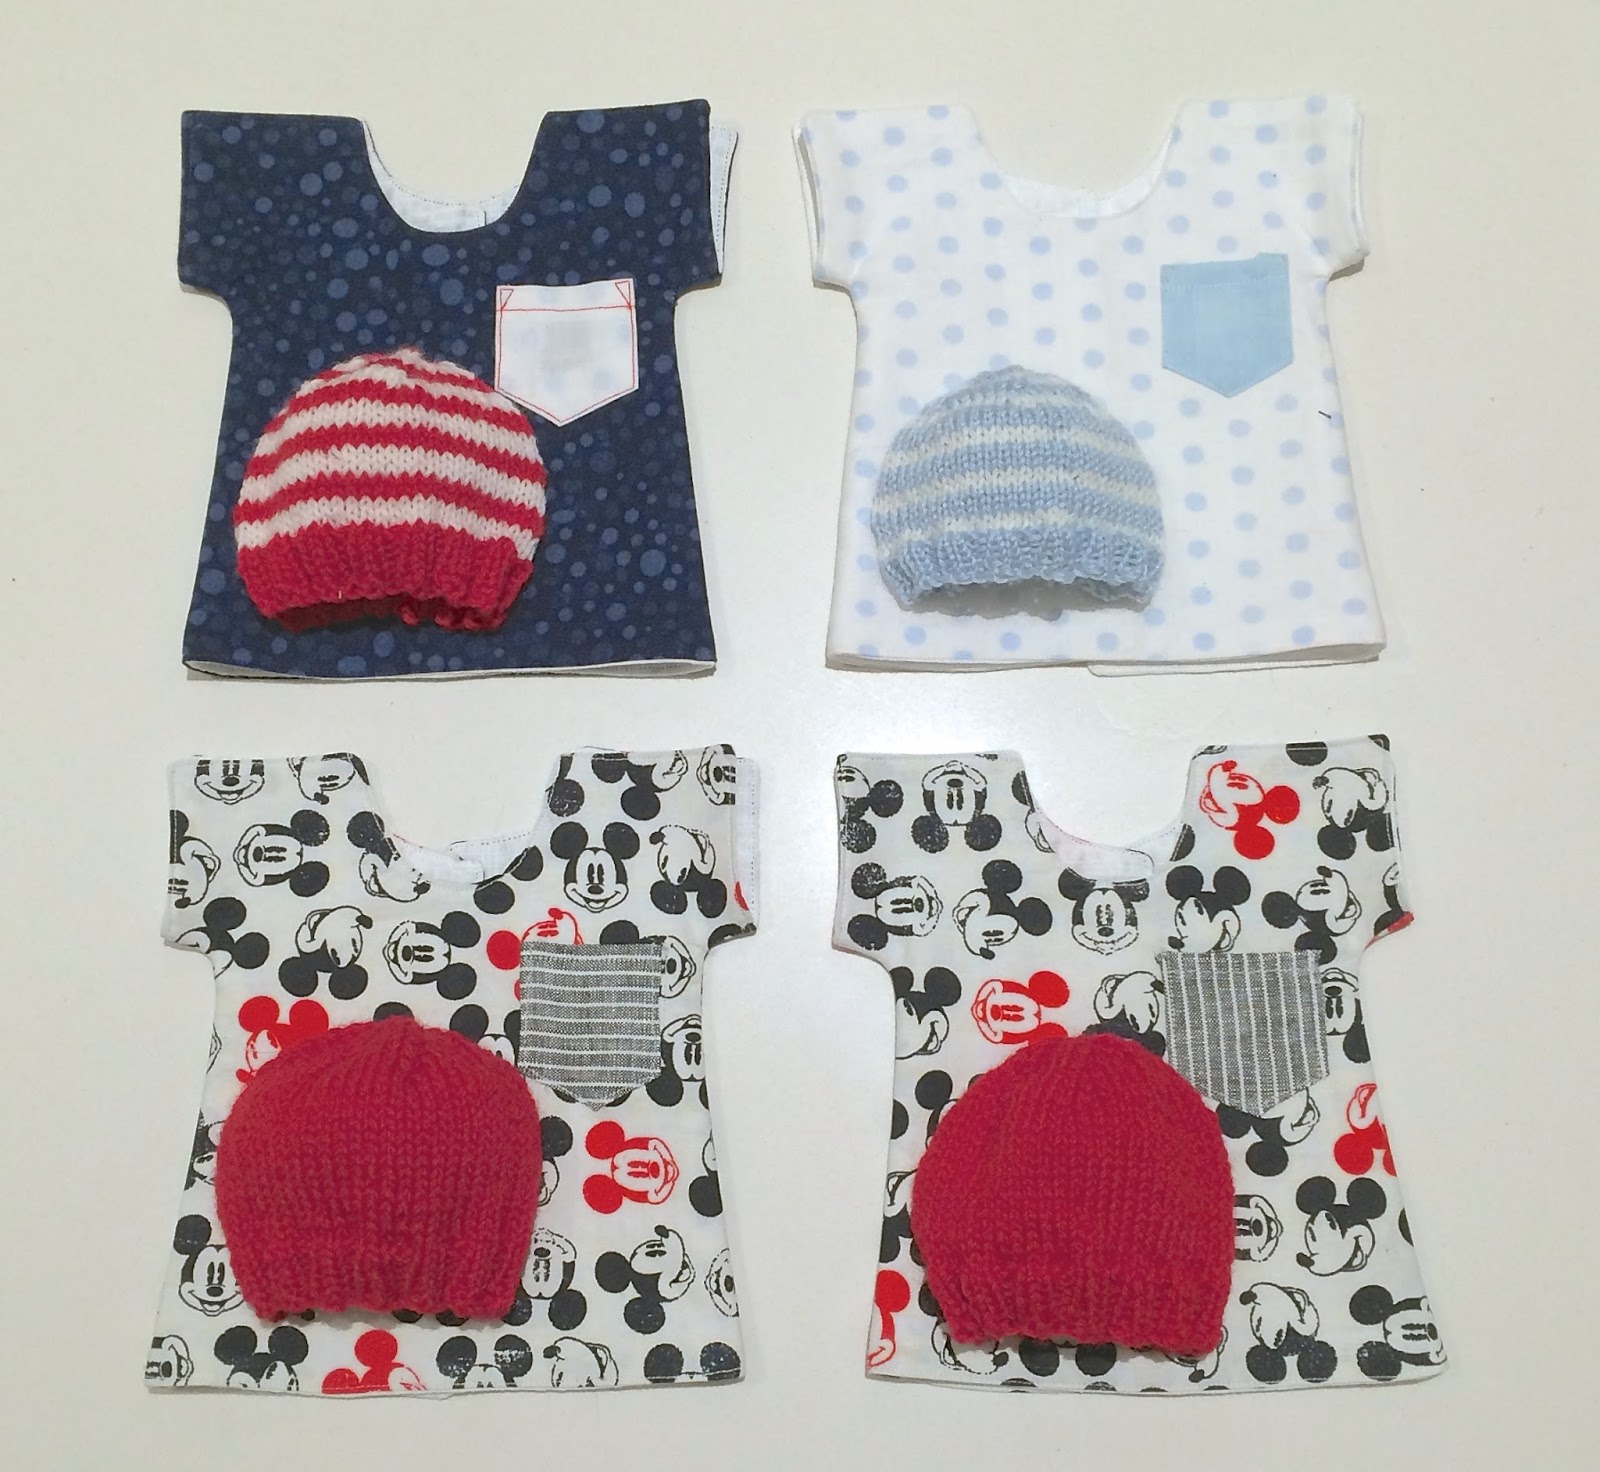
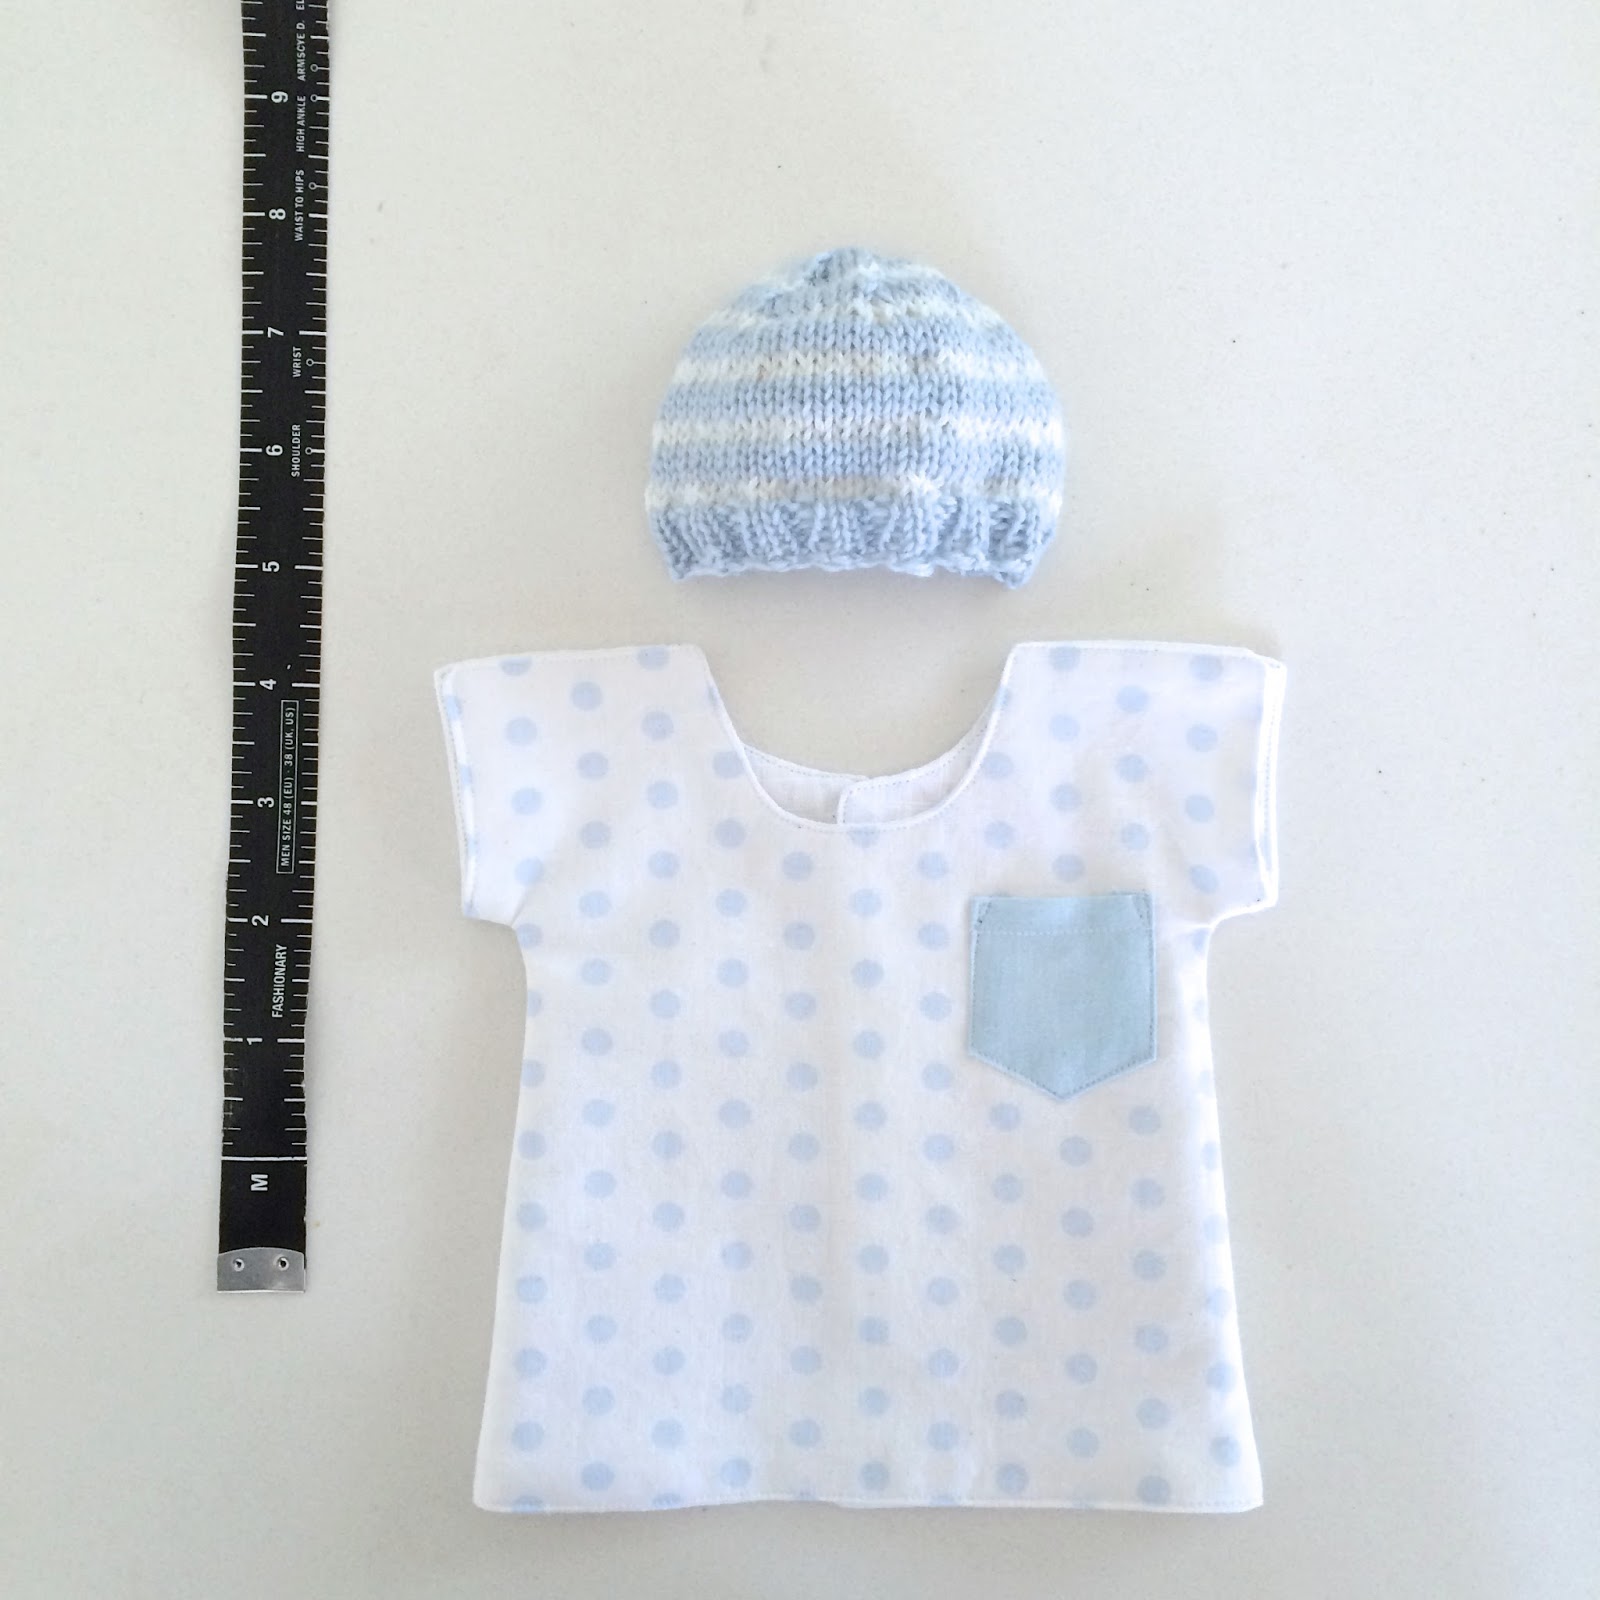
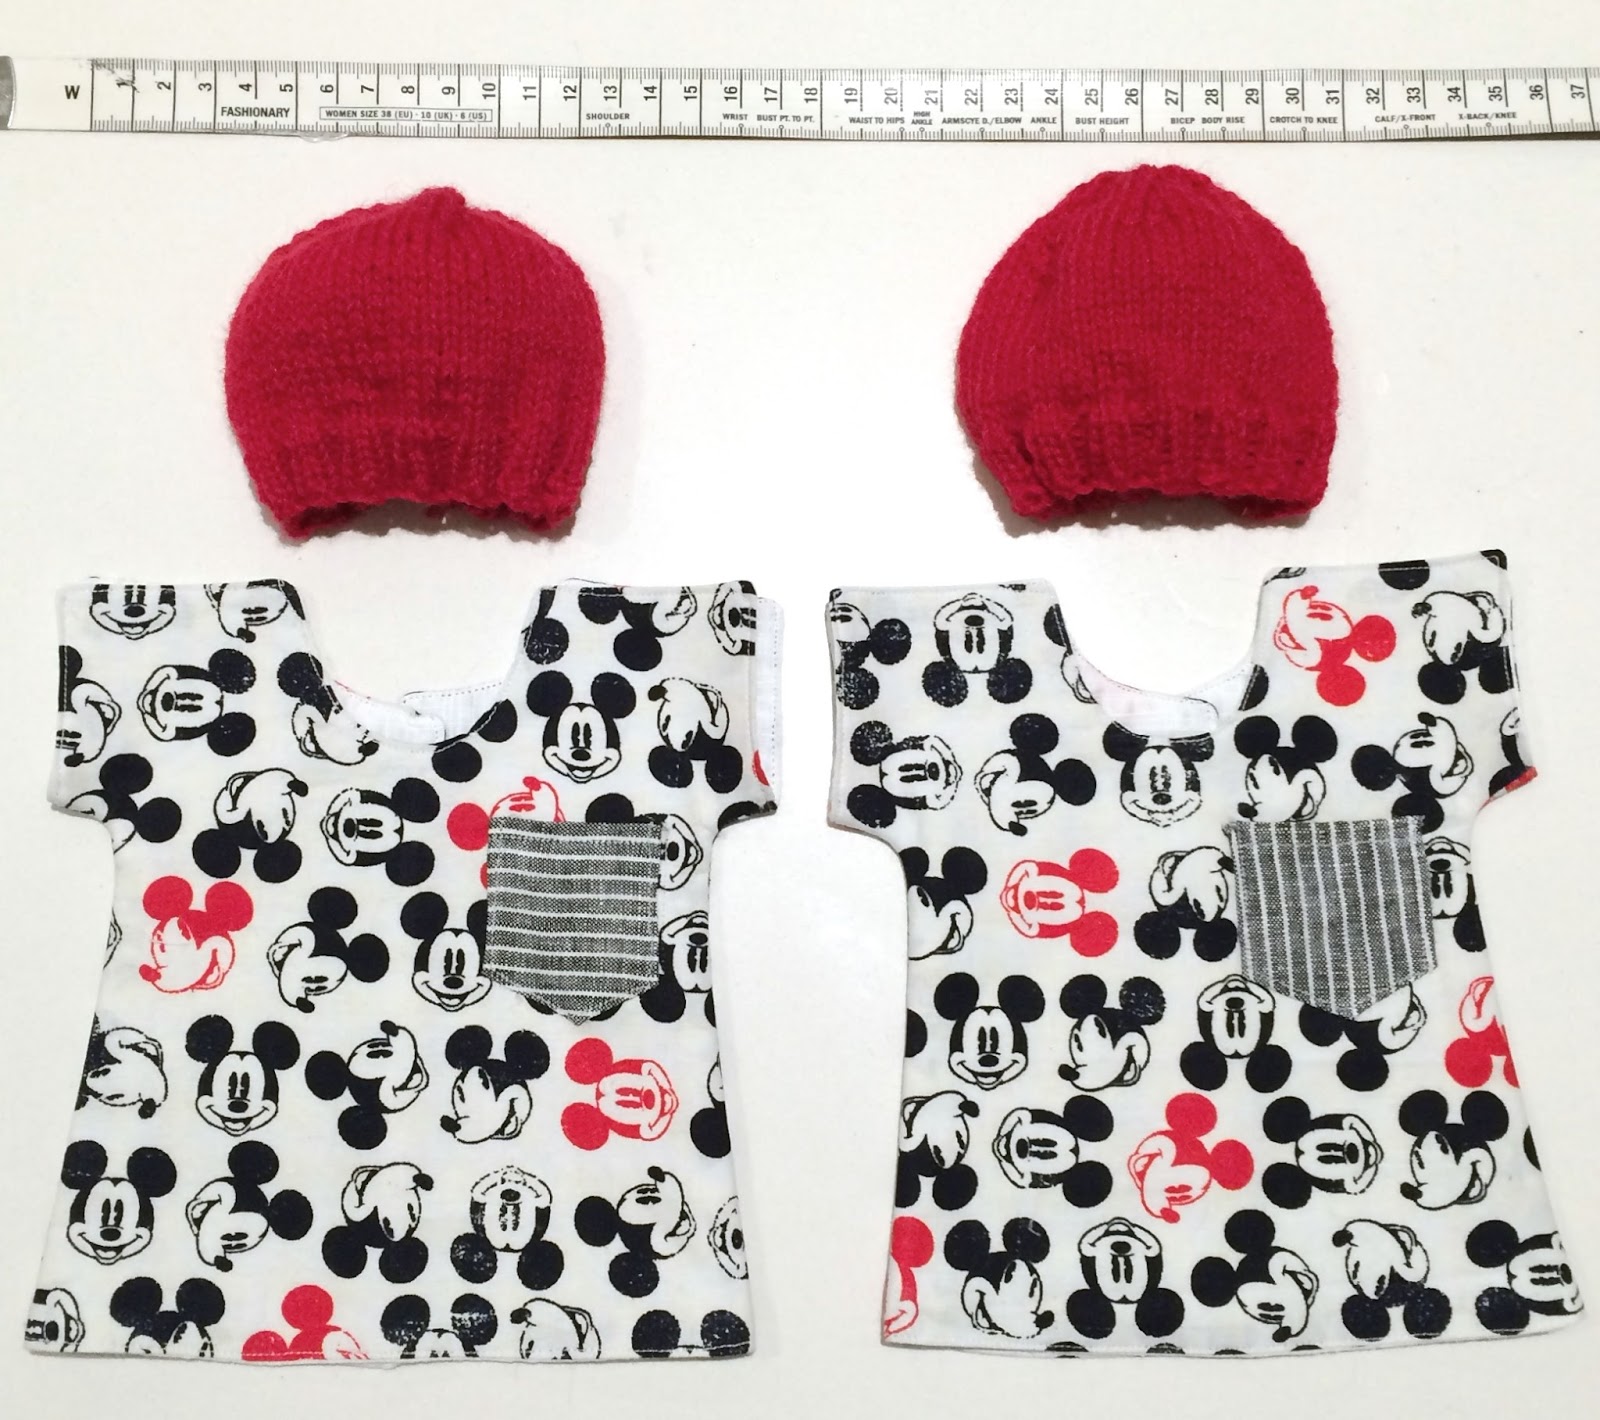
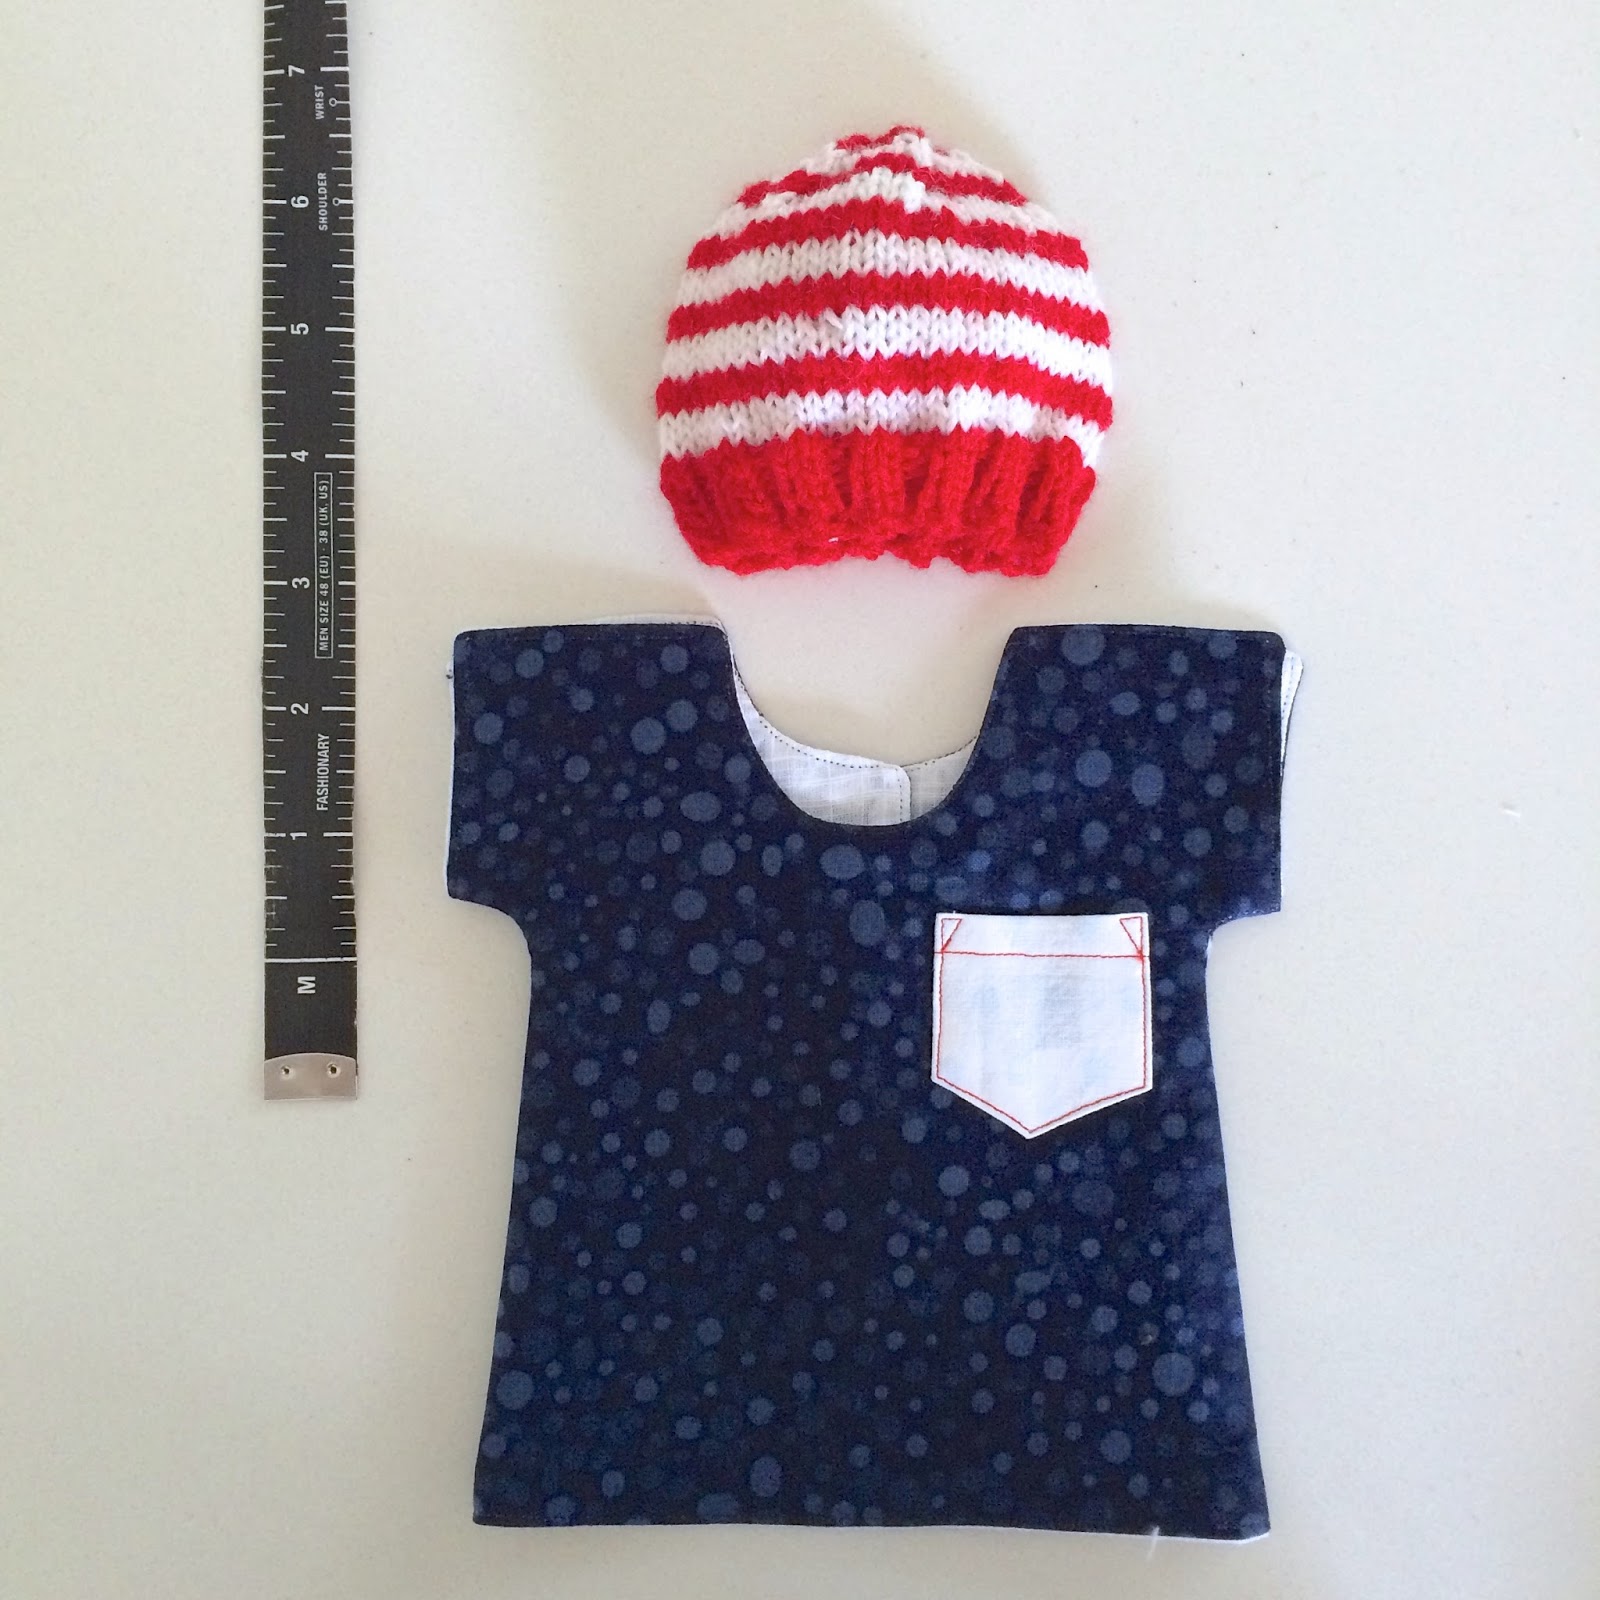
As promised to myself; I’ve made four more tiny little outfits, this time for four little baby boys.  Tomorrow I’ll be sending these off to Tiny Sparks and they will be available to parents of sick and/or premature babies upon leaving the hospital.
Cassie had kindly taken in the four girls’ outfits I’d made previously, and I’d asked her if she could please get any feedback.  She reported back that apparently outfits for twins were particularly needed.  I wasn’t sure whether this was a hint that the outfits be identical, or just matching?? anyway I took a punt on making an identical set.  Well, I should say more accurately, near identical.  I’m personally quite big on having things matching without being exactly the same … so I made the tiniest little difference in my twin-set.  Can you see it??  🙂

Haha, no, it’s not that hard, obviously!
For these boys’ sets I went to Spotlight for the fabrics…. and oh man, yuck.  The selection of cottons in my local Spotlight at the mo is just awful, unfortunately, and I just had to do the very best I could.  I agonised to find something boyish that I even halfway liked.  Actually, I’ve always found it a lot harder to find good boys’ prints, even back when my own two boys were tiny tots and I was sewing stuff for them.  Anyway, I tried to pick prints and colours that I would have chosen for Tim and Sam.  I used to like dressing them in red and blue, and so that’s how it’s going on here!

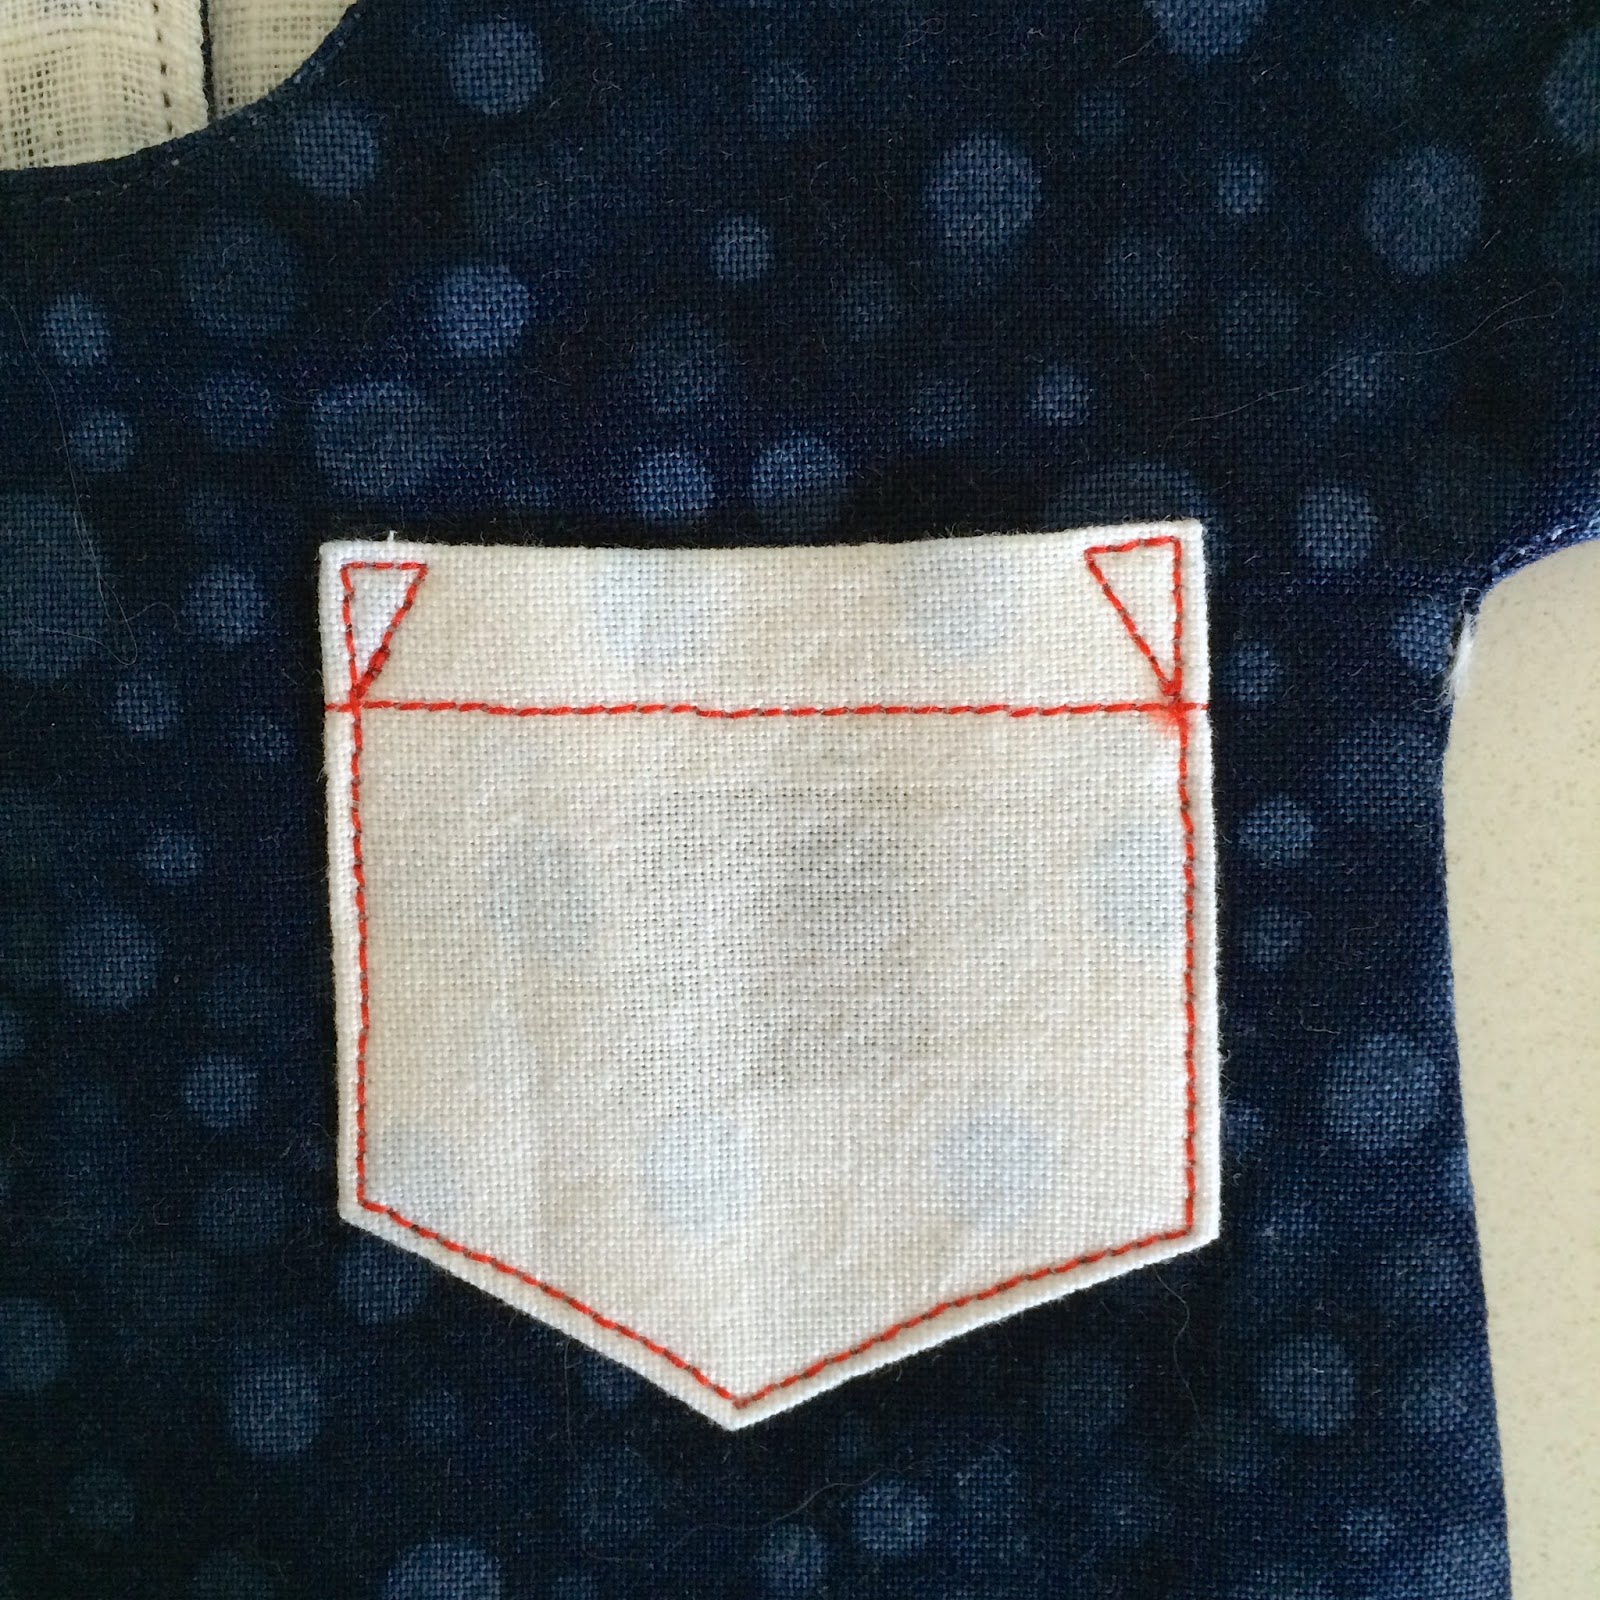
It’s funny, but this is my favourite so far, and one of my favourite-est things about it is the red topstitching on that tiny little pocket.  I know it’s a silly little thing to have as a favourite feature, but I just really like it, I think it somehow just pulls the whole set together.
Details!

Patterns for both shirts and beanies are the free ones supplied by Tiny Sparks on their website.  All outfits are for babies sized up to 1.6kg… the size that is currently listed as being low in stock.

pinterestmail

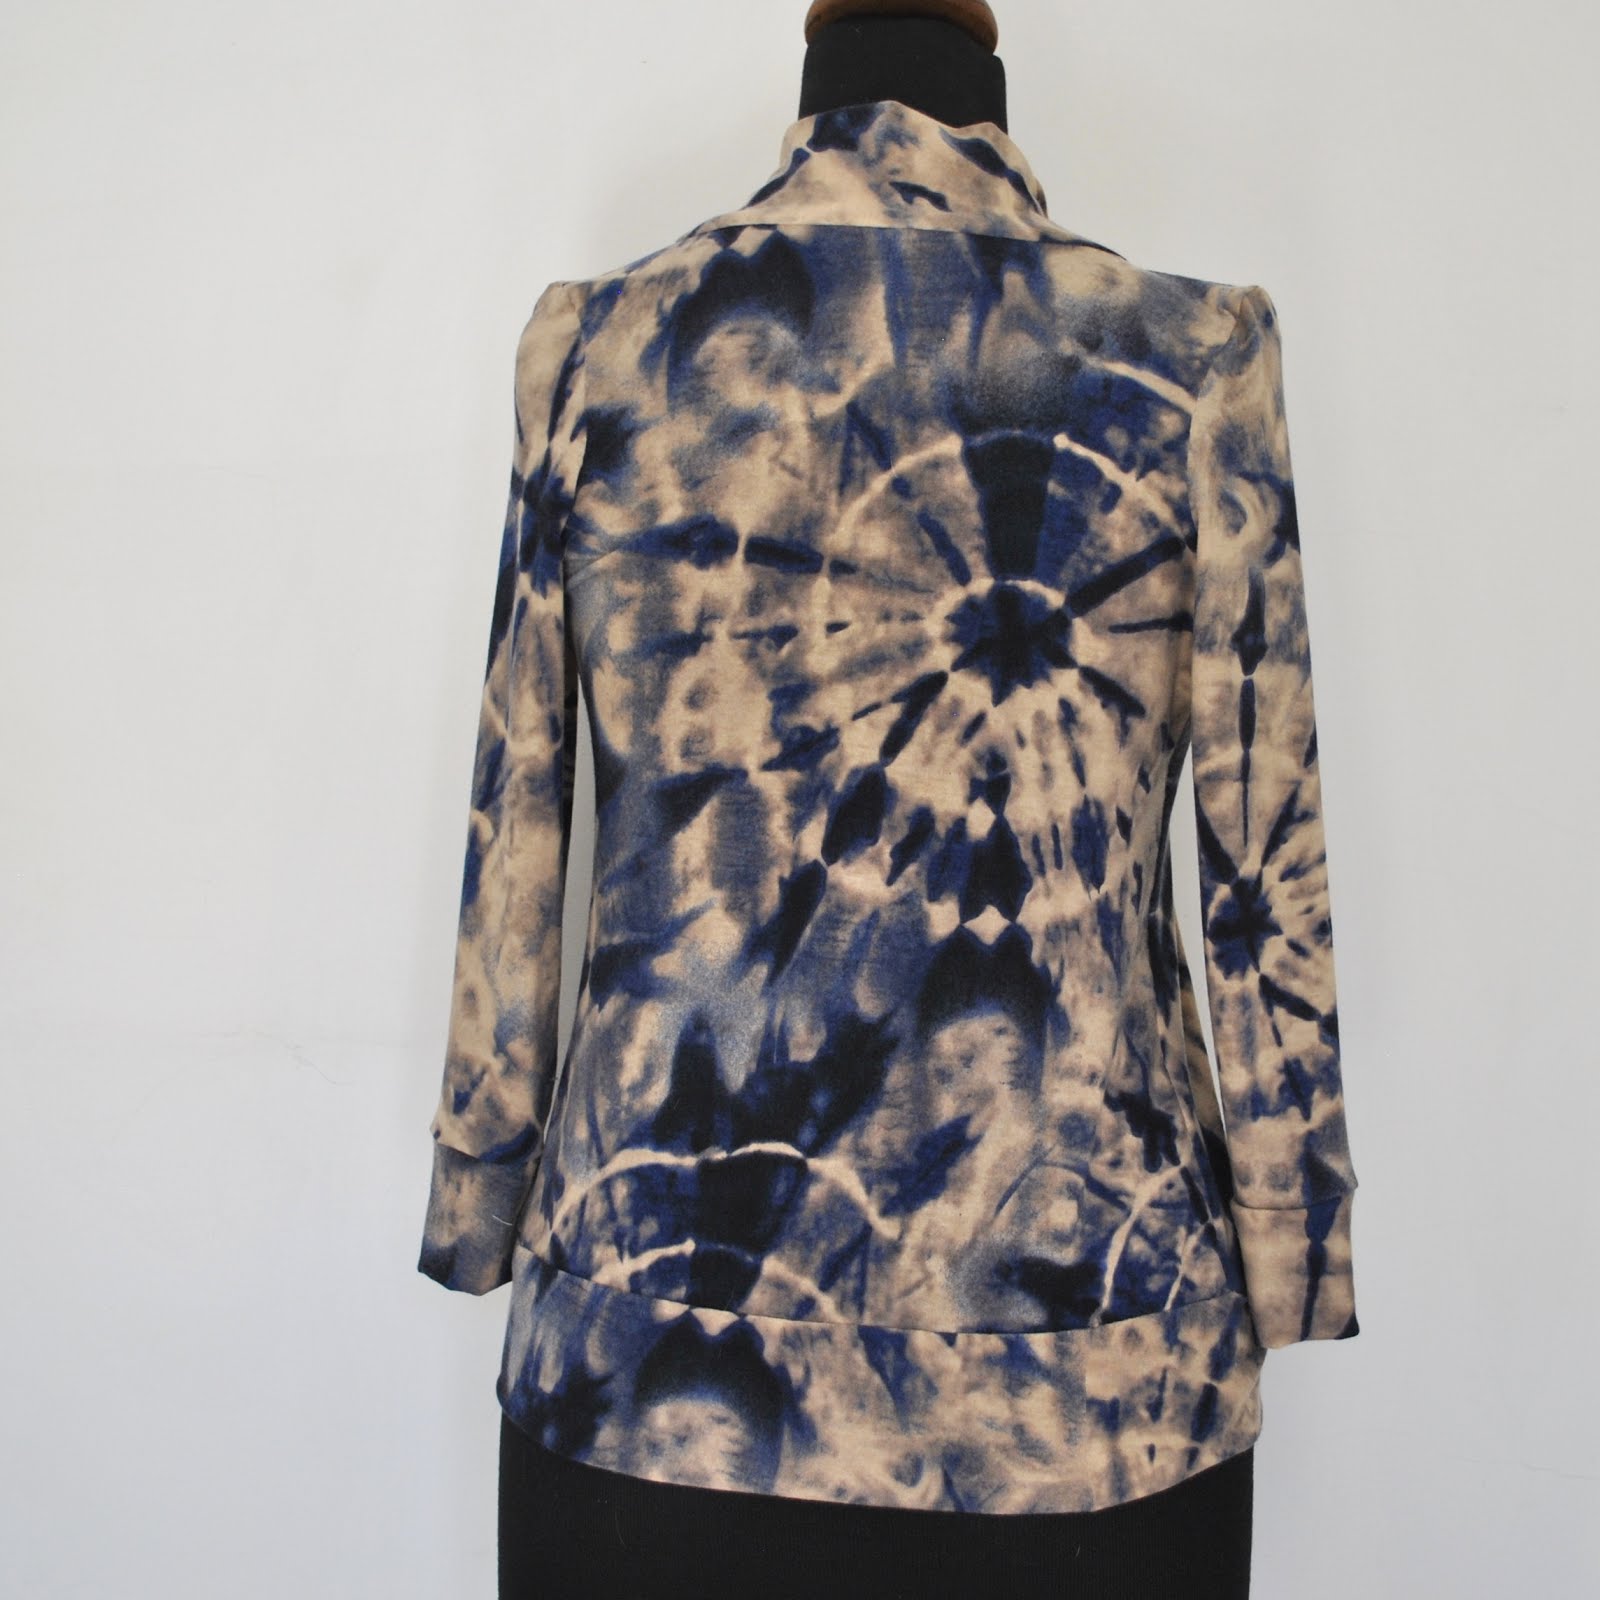
tie-dye cardigan

I’ve made another little cardigan… the last, I promise! for at least a little while! 
I didn’t really need another one but I said I’d thought of yet another little way the construction of this design could be improved? naturally I just had to try it out…
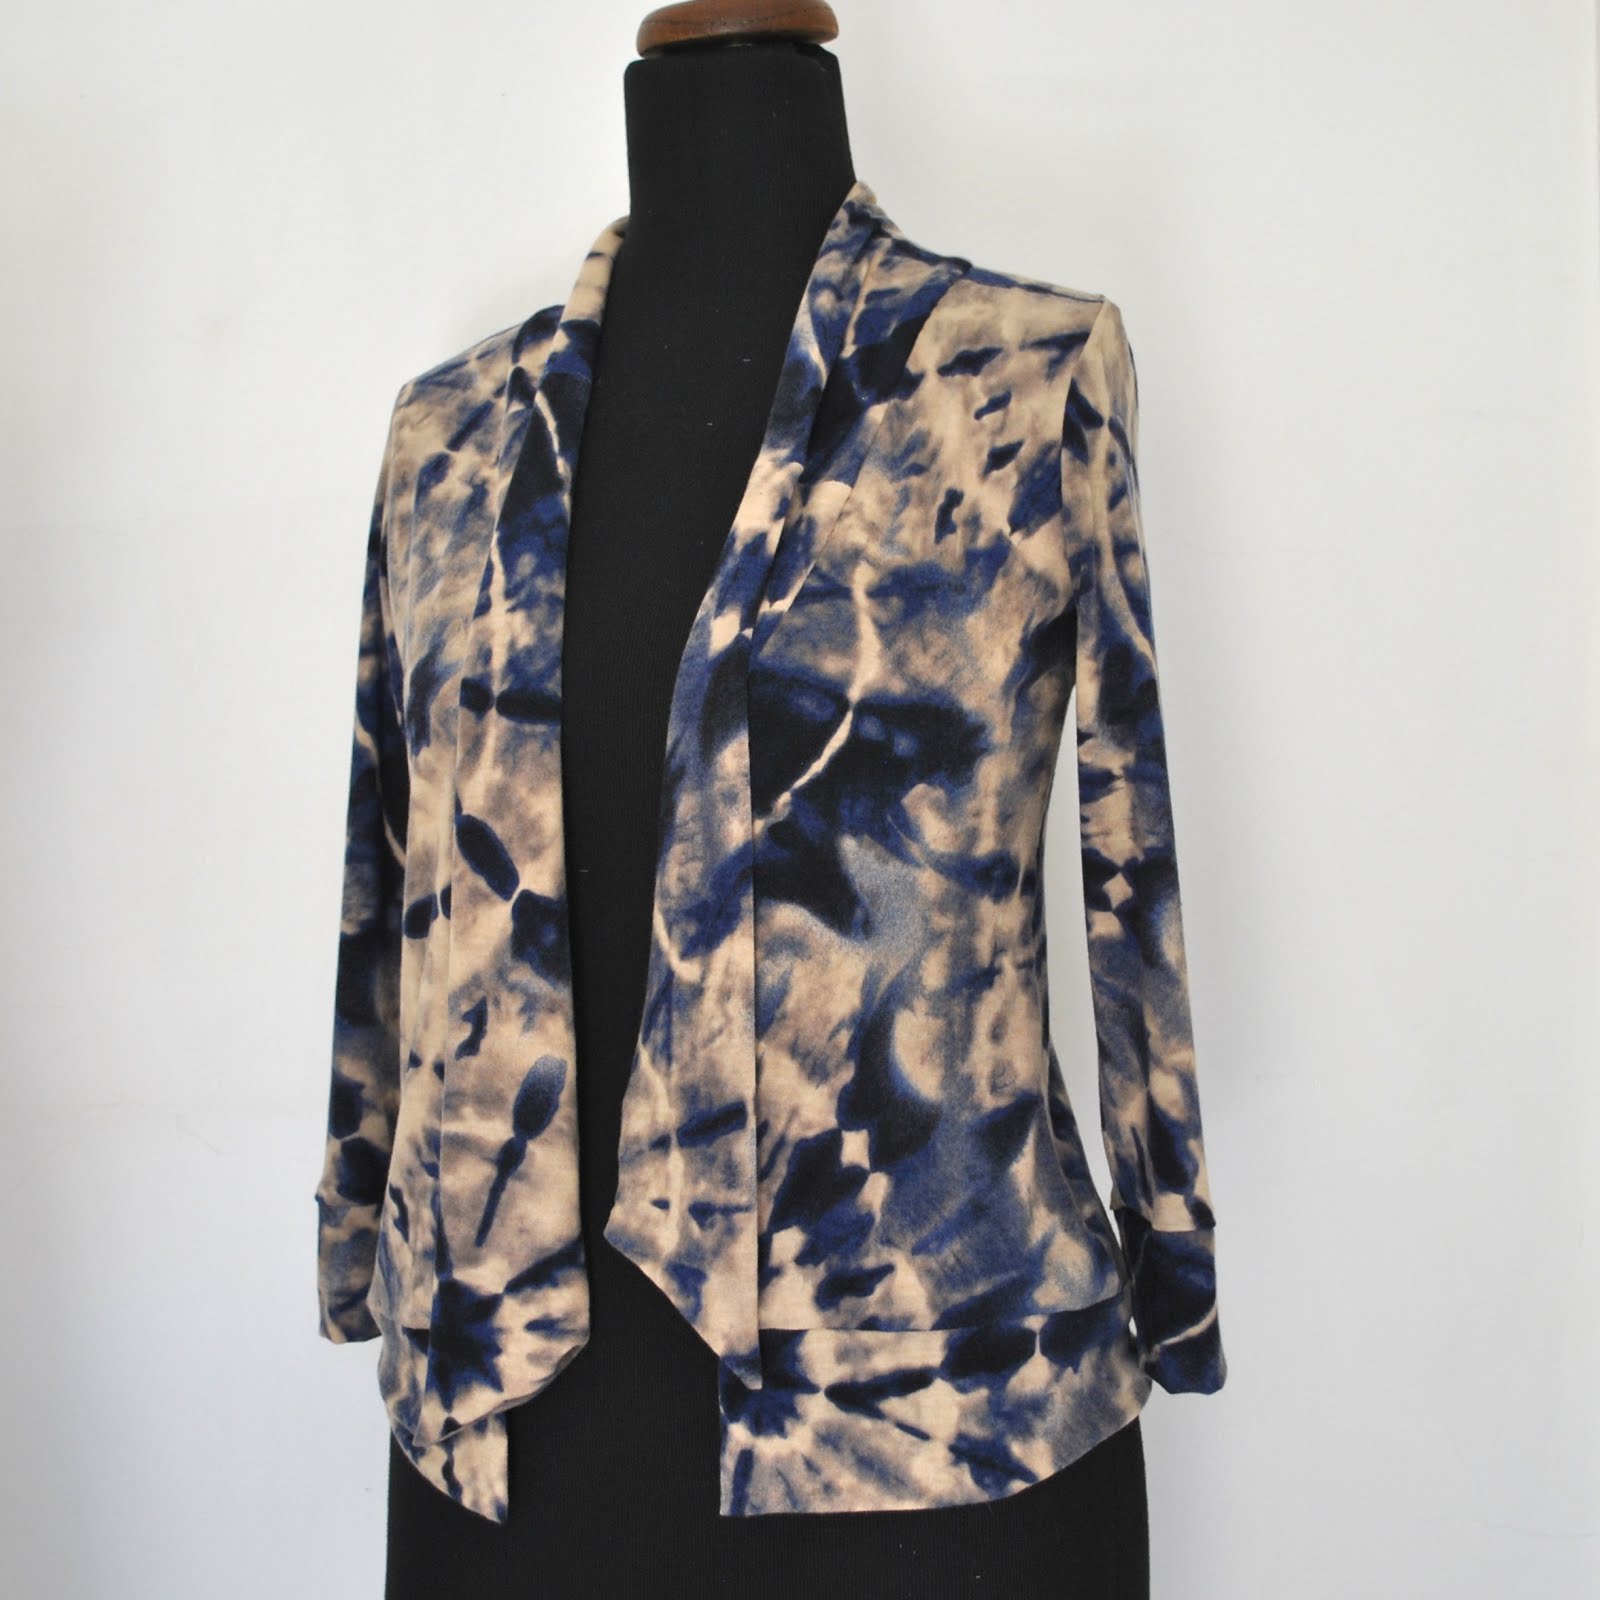
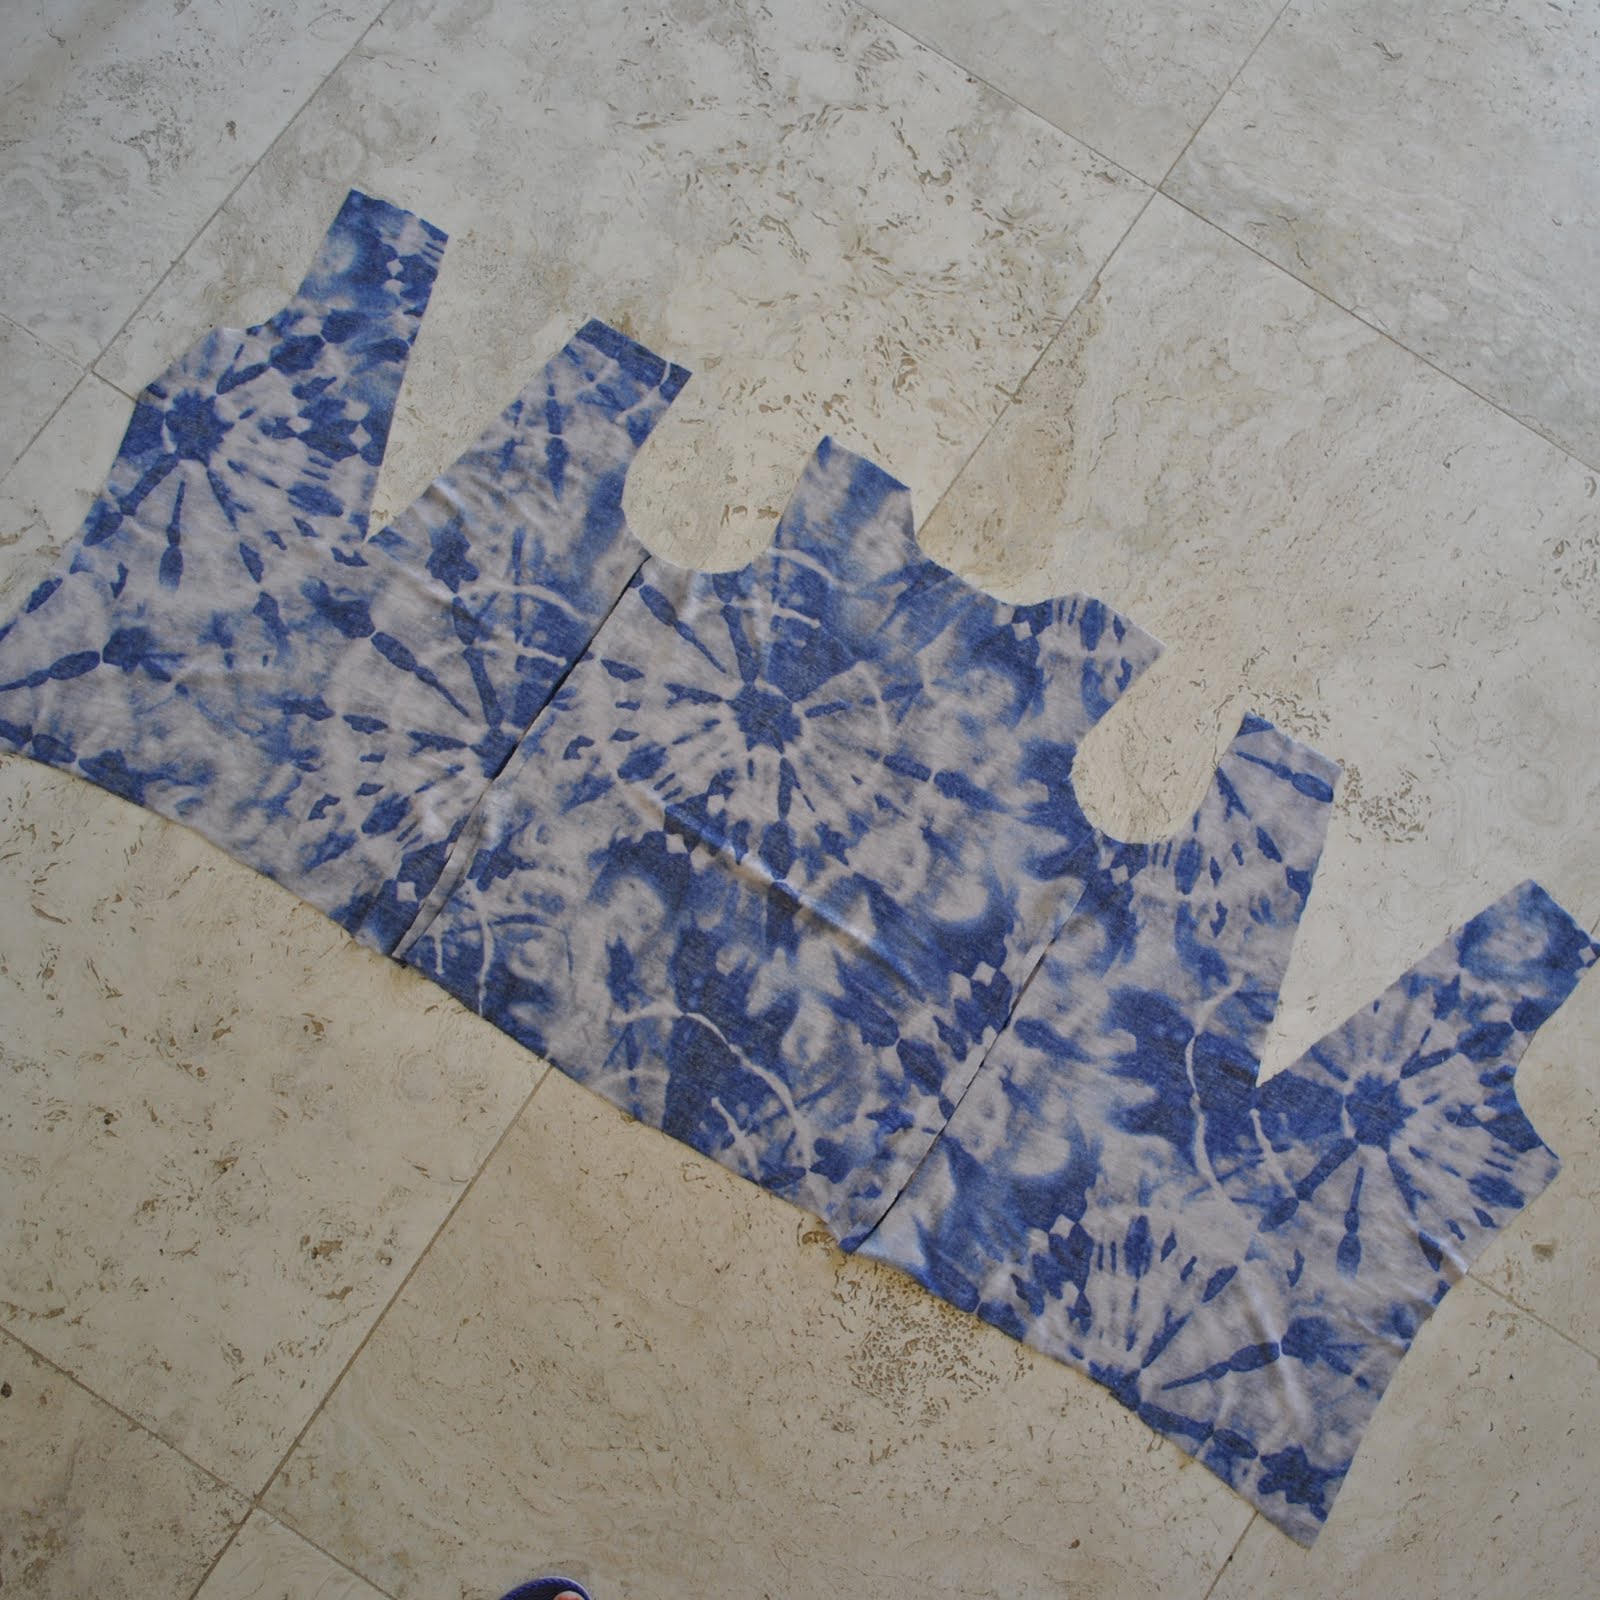
Fabric; a toss-out from Mum, a cotton or something or another jersey, original provenance unknown.  I barely had enough for the cardigan but just managed to squeak out the pieces; the tie is a little on the short side and is pieced in several places but no biggie, I still got it out! and the joins are lost in the print.  I rather like the tie-dye print and my only concern was to avoid situating a bulls-eye in the boob-al region when cutting out.  Mission accomplished!

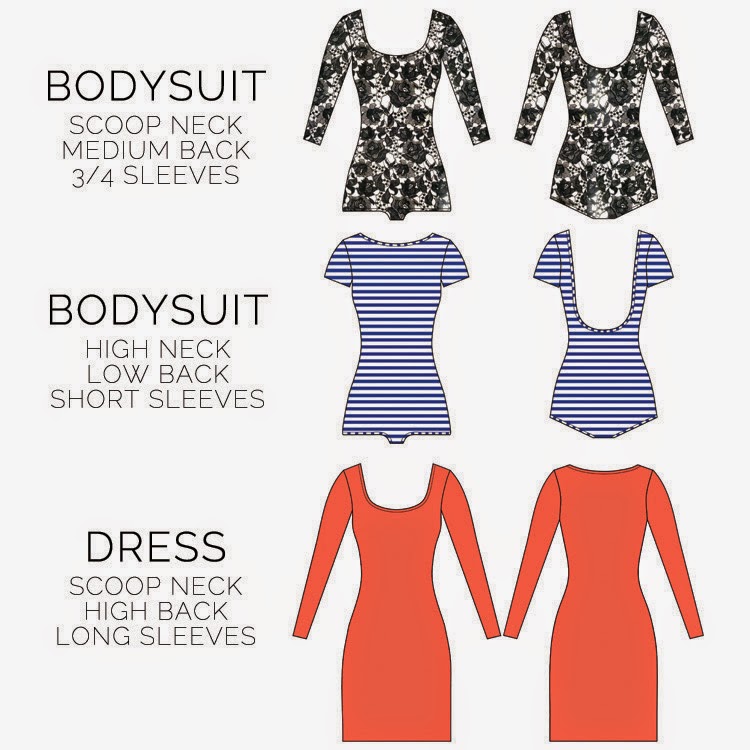
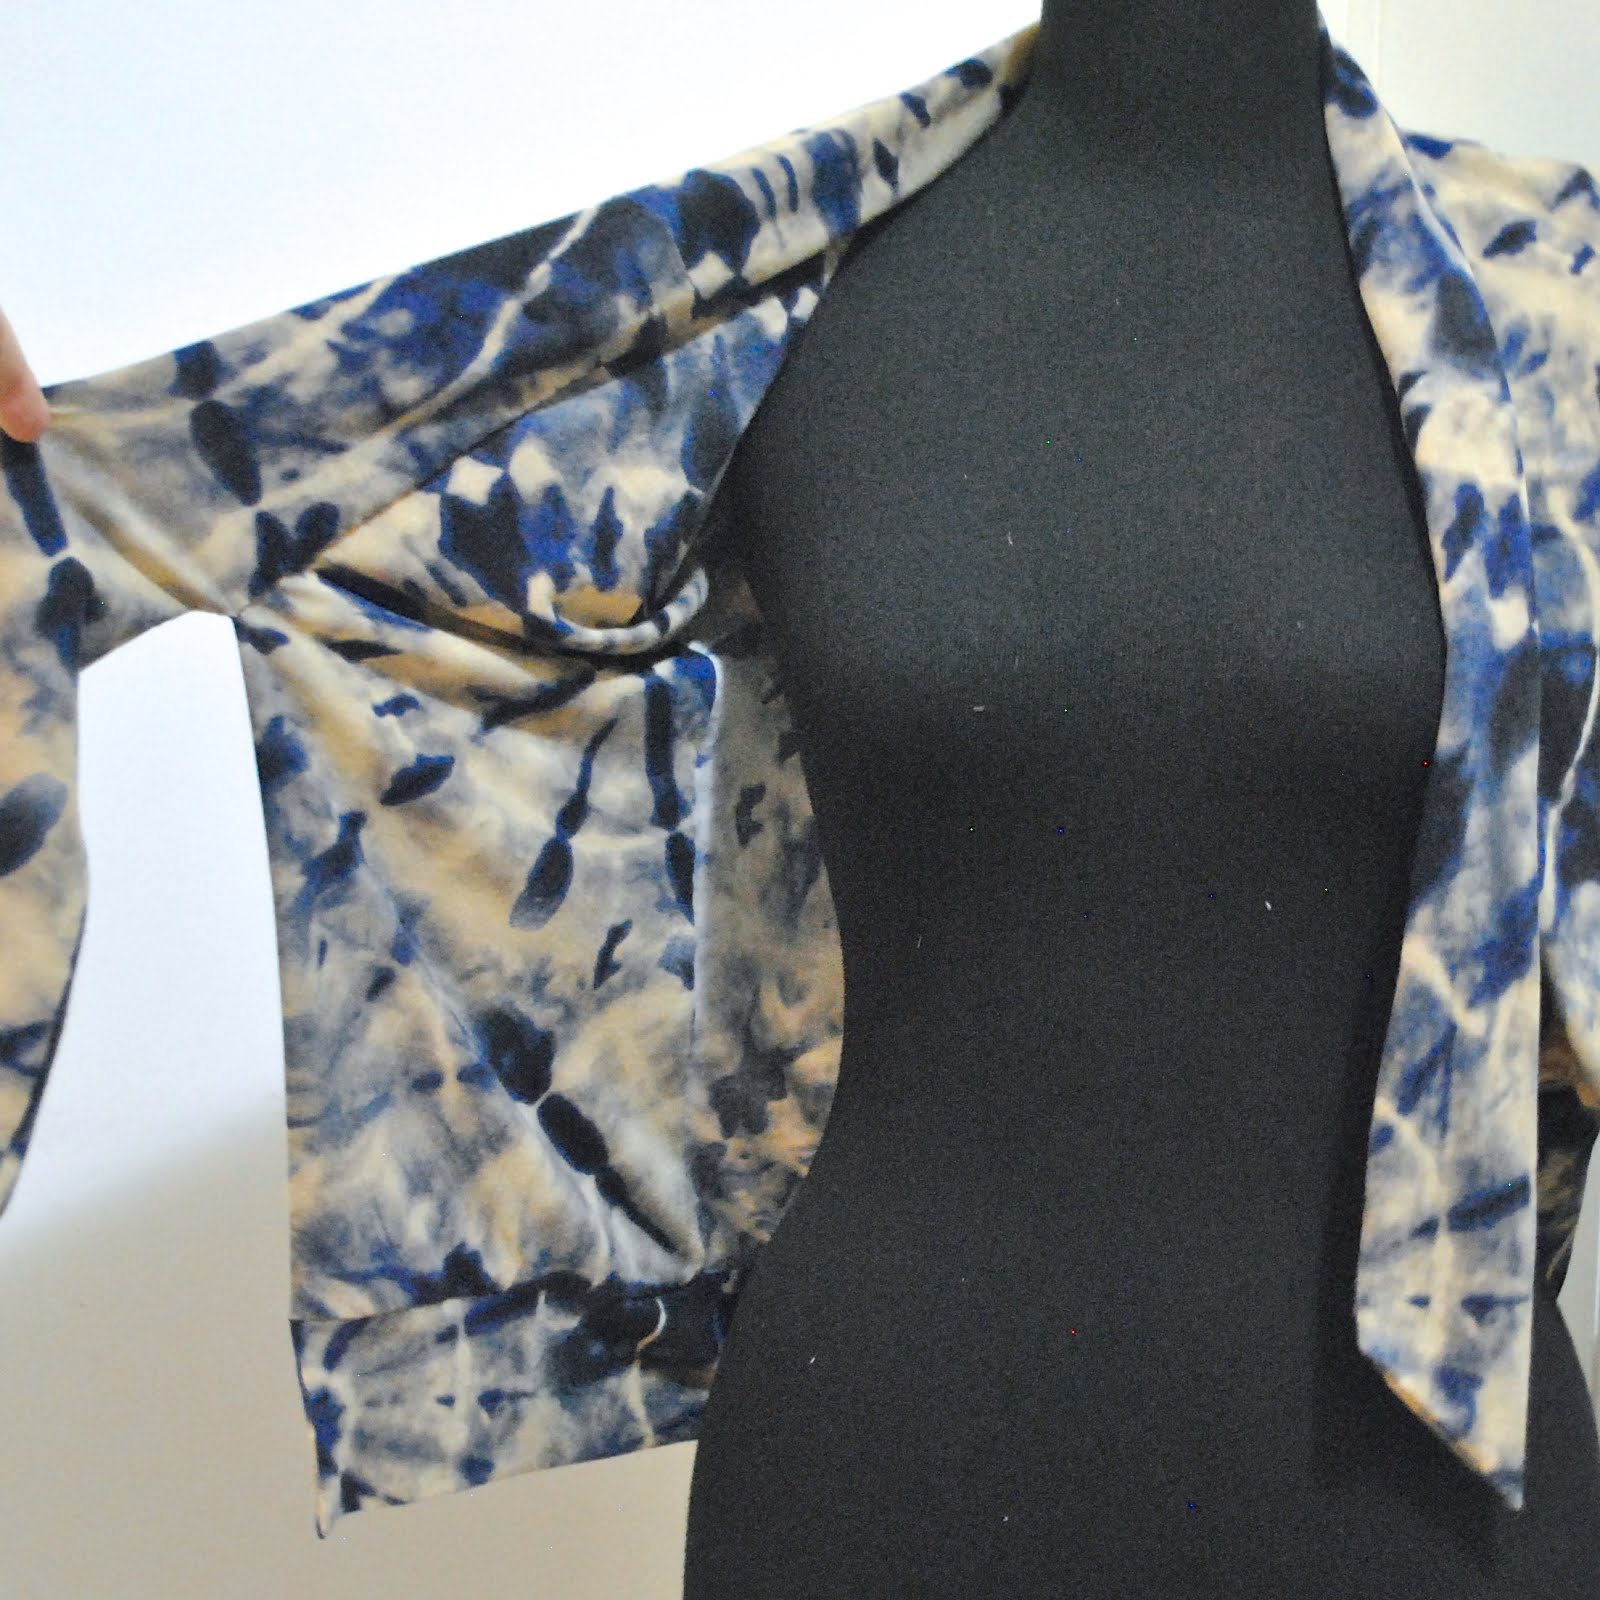
Pattern; the Nettie, by Closet Case patterns, modified to be a cardigan with a loose extended neckband that hangs down in a shawl-y type of a way.  The neck band on this, third, version of the design is a little short to be tied in the front like the last two iterations, so I’m planning to only wear them hanging loose like this.

My desire for a super-clean finish is finally satisfied with the insides on this last version… they are super neat and tidy! with no exposed seams or stitching, barring inside the sleeve/armhole.  *happy sigh*

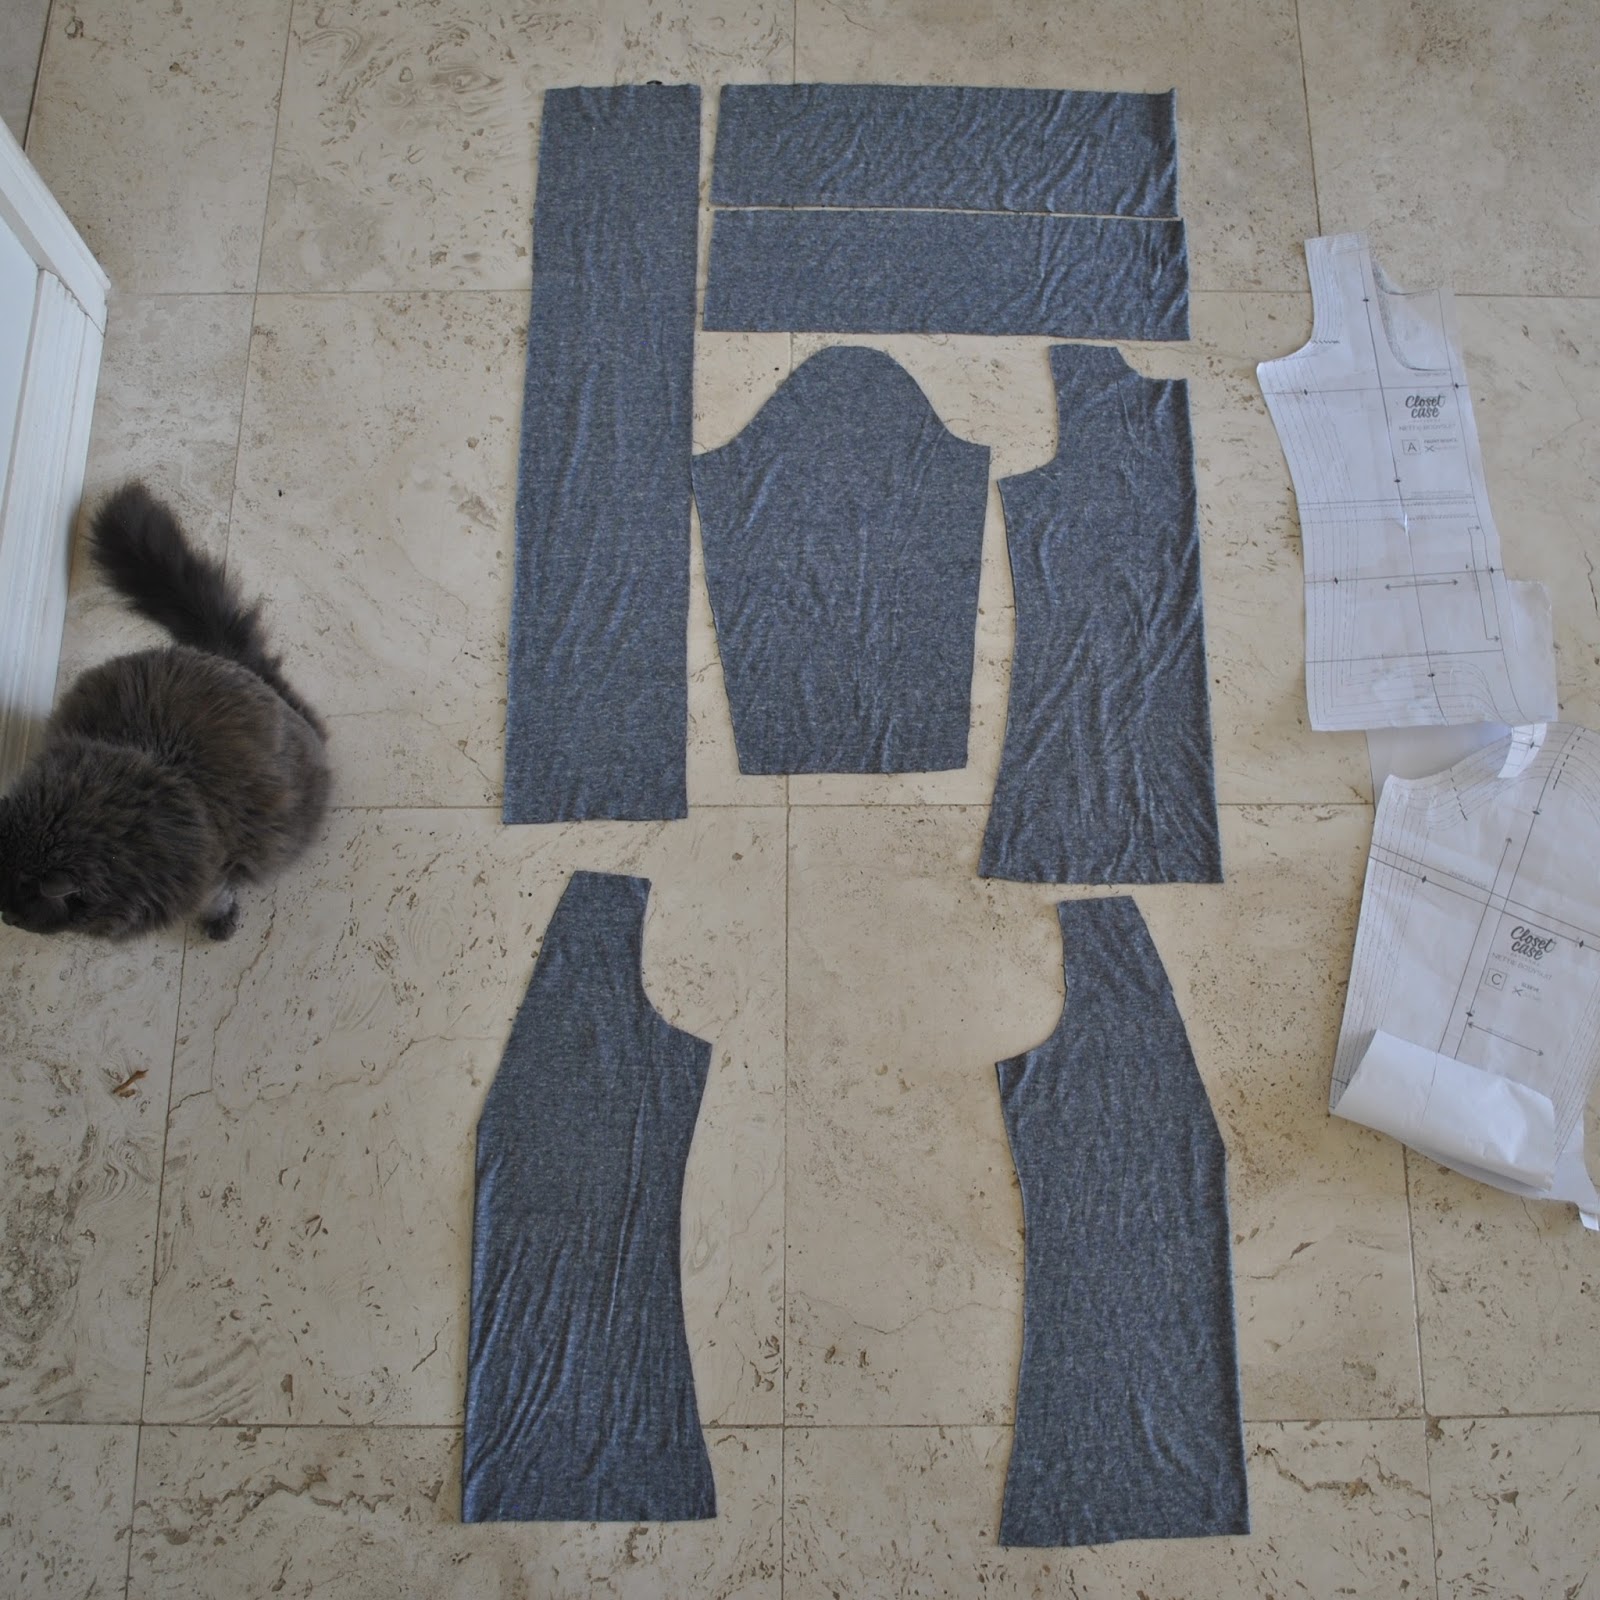
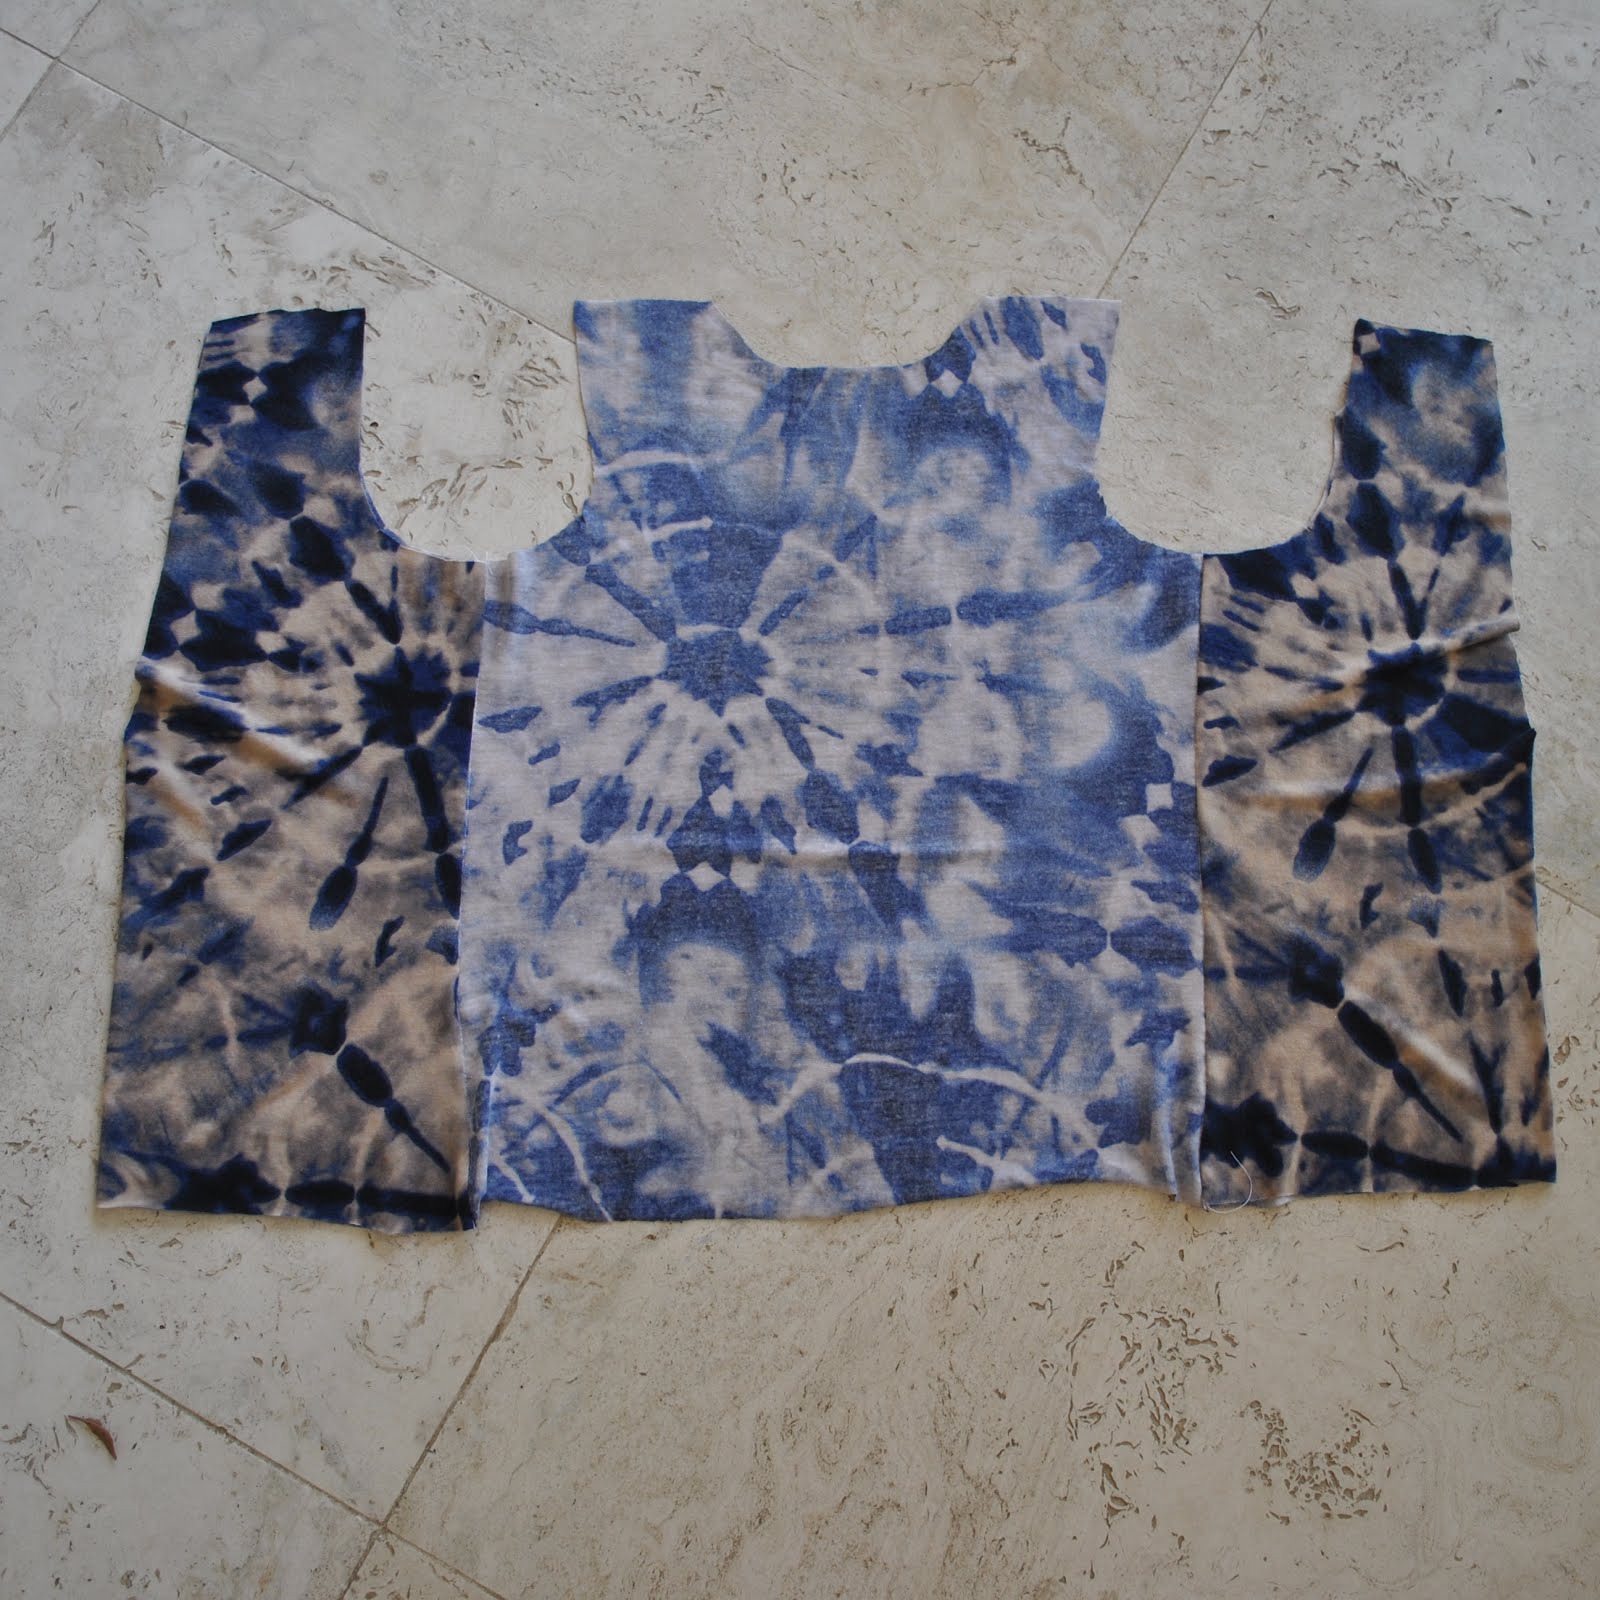
I’ve written my order of construction to illustrate how it all went together…  it’s a little more fiddly than the previous methods but perfectly doable.

Cutting; cut the fronts on a centre fold so they are double layered.  Same picture as the previous cardigan because it’s identical.  I sized up a couple of sizes to get that looser cardigan fit, rather than the tight bodysuit-fit that the pattern is designed for.
NOW; the first step is to sew fronts to the back at the side seams, right sides together.

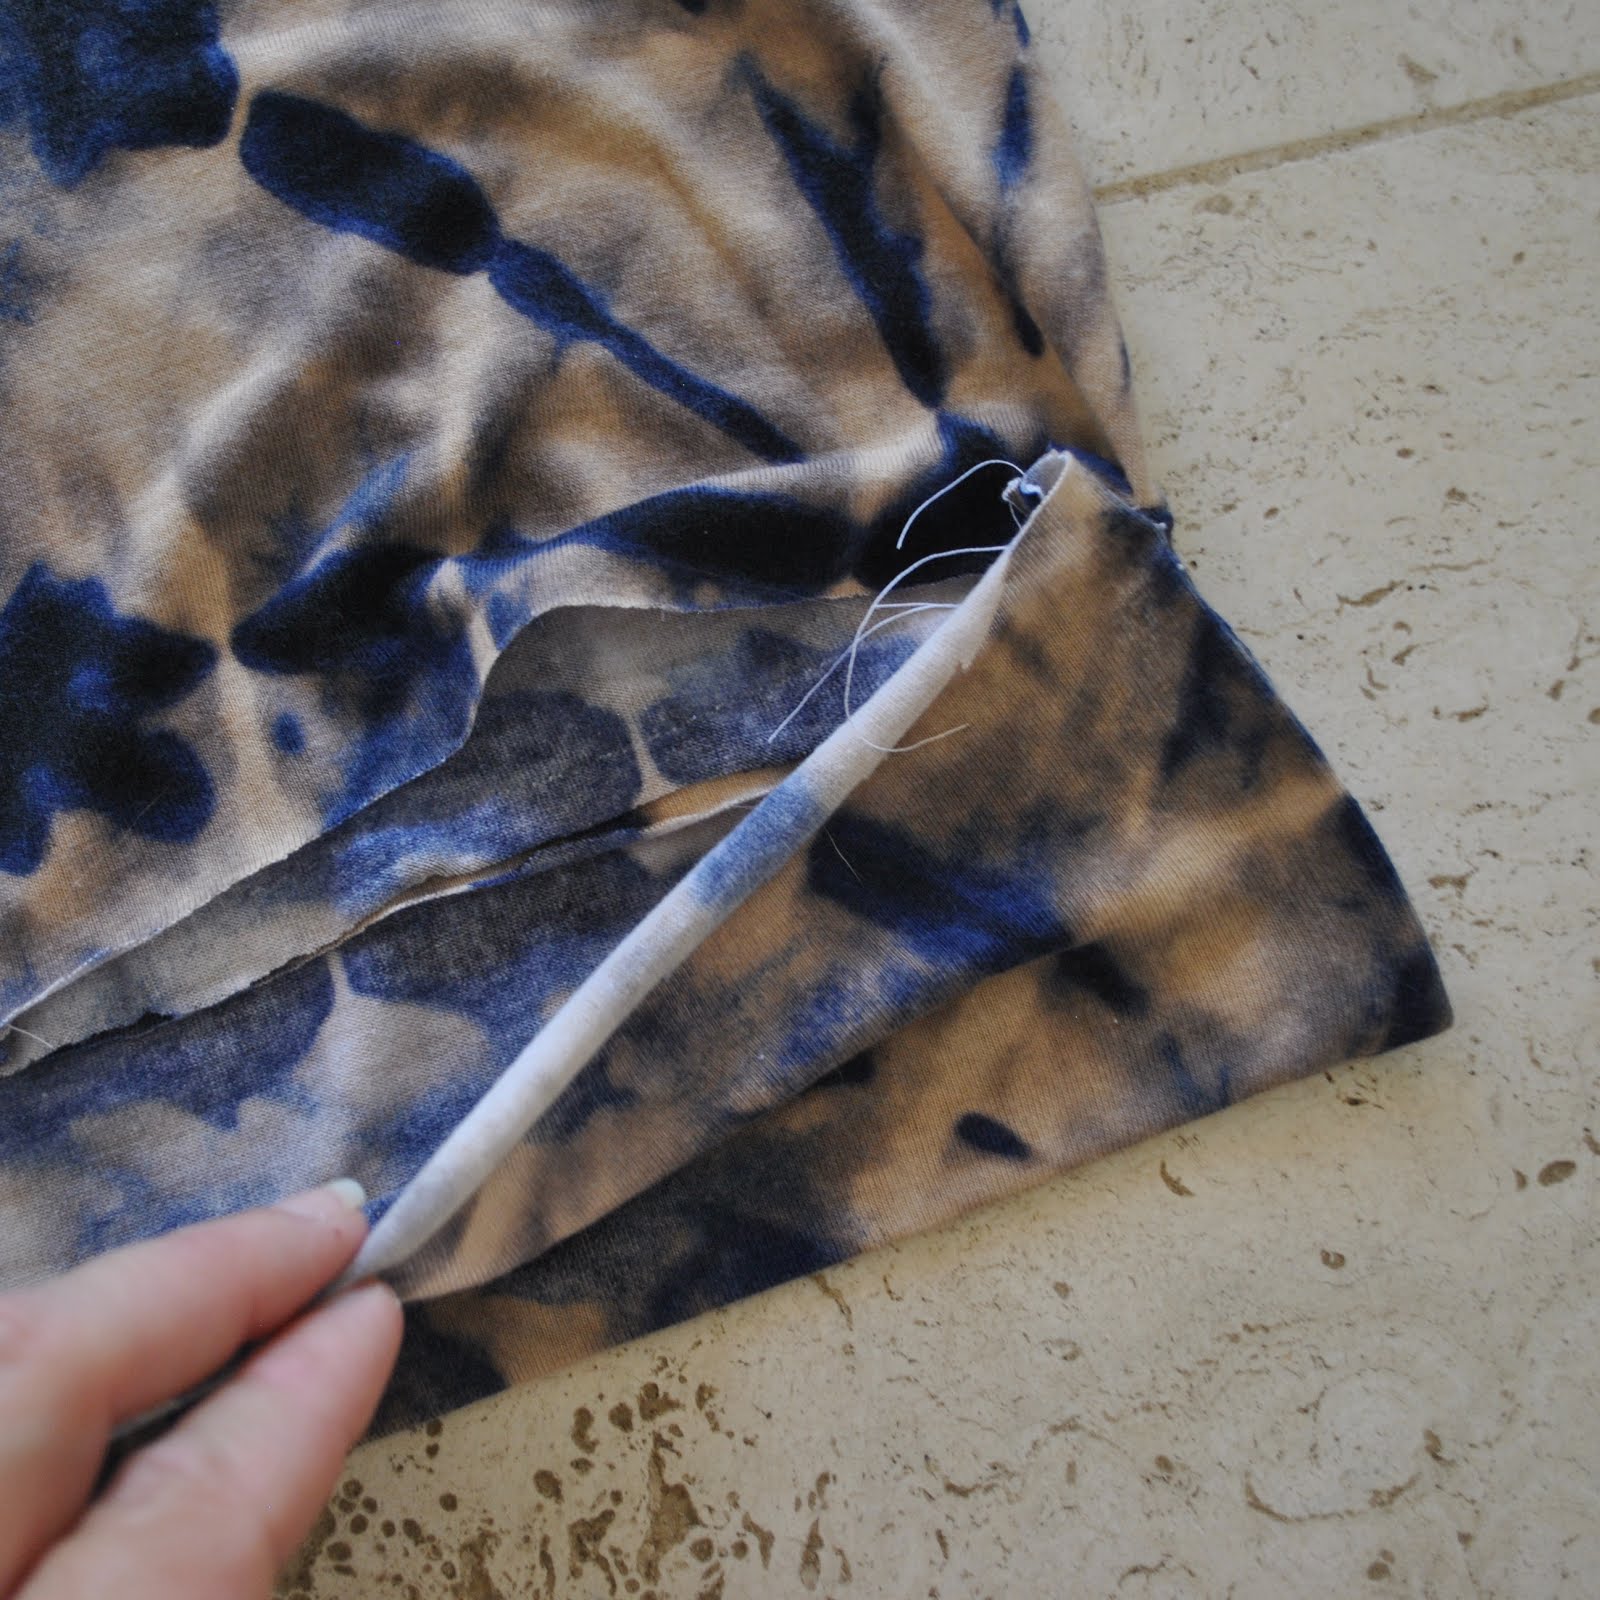
Now, fold the fronts in half, right sides together, and stitch the front facing to the back at the side seam over the previous stitching, enclosing the seam allowances within the front and front facing.  You will need to pull the pieces inside out a little to make this step possible, basically you are sewing the front piece in a tube with the back piece encased between the two side edges.  Grade seam allowances, turn out and press.

Cut the lower band to fit and stitch to the lower edge, keeping front facings free.  You will need to stitch each front section and the back section of this seam separately to each other, stopping and starting at the side seams; fiddly? yes, but worth it in the end.  Press open then down onto band.

Fold the band in half lengthwise and stitch the short edges, right sides together; trim and grade seam allowances, turn right sides out.

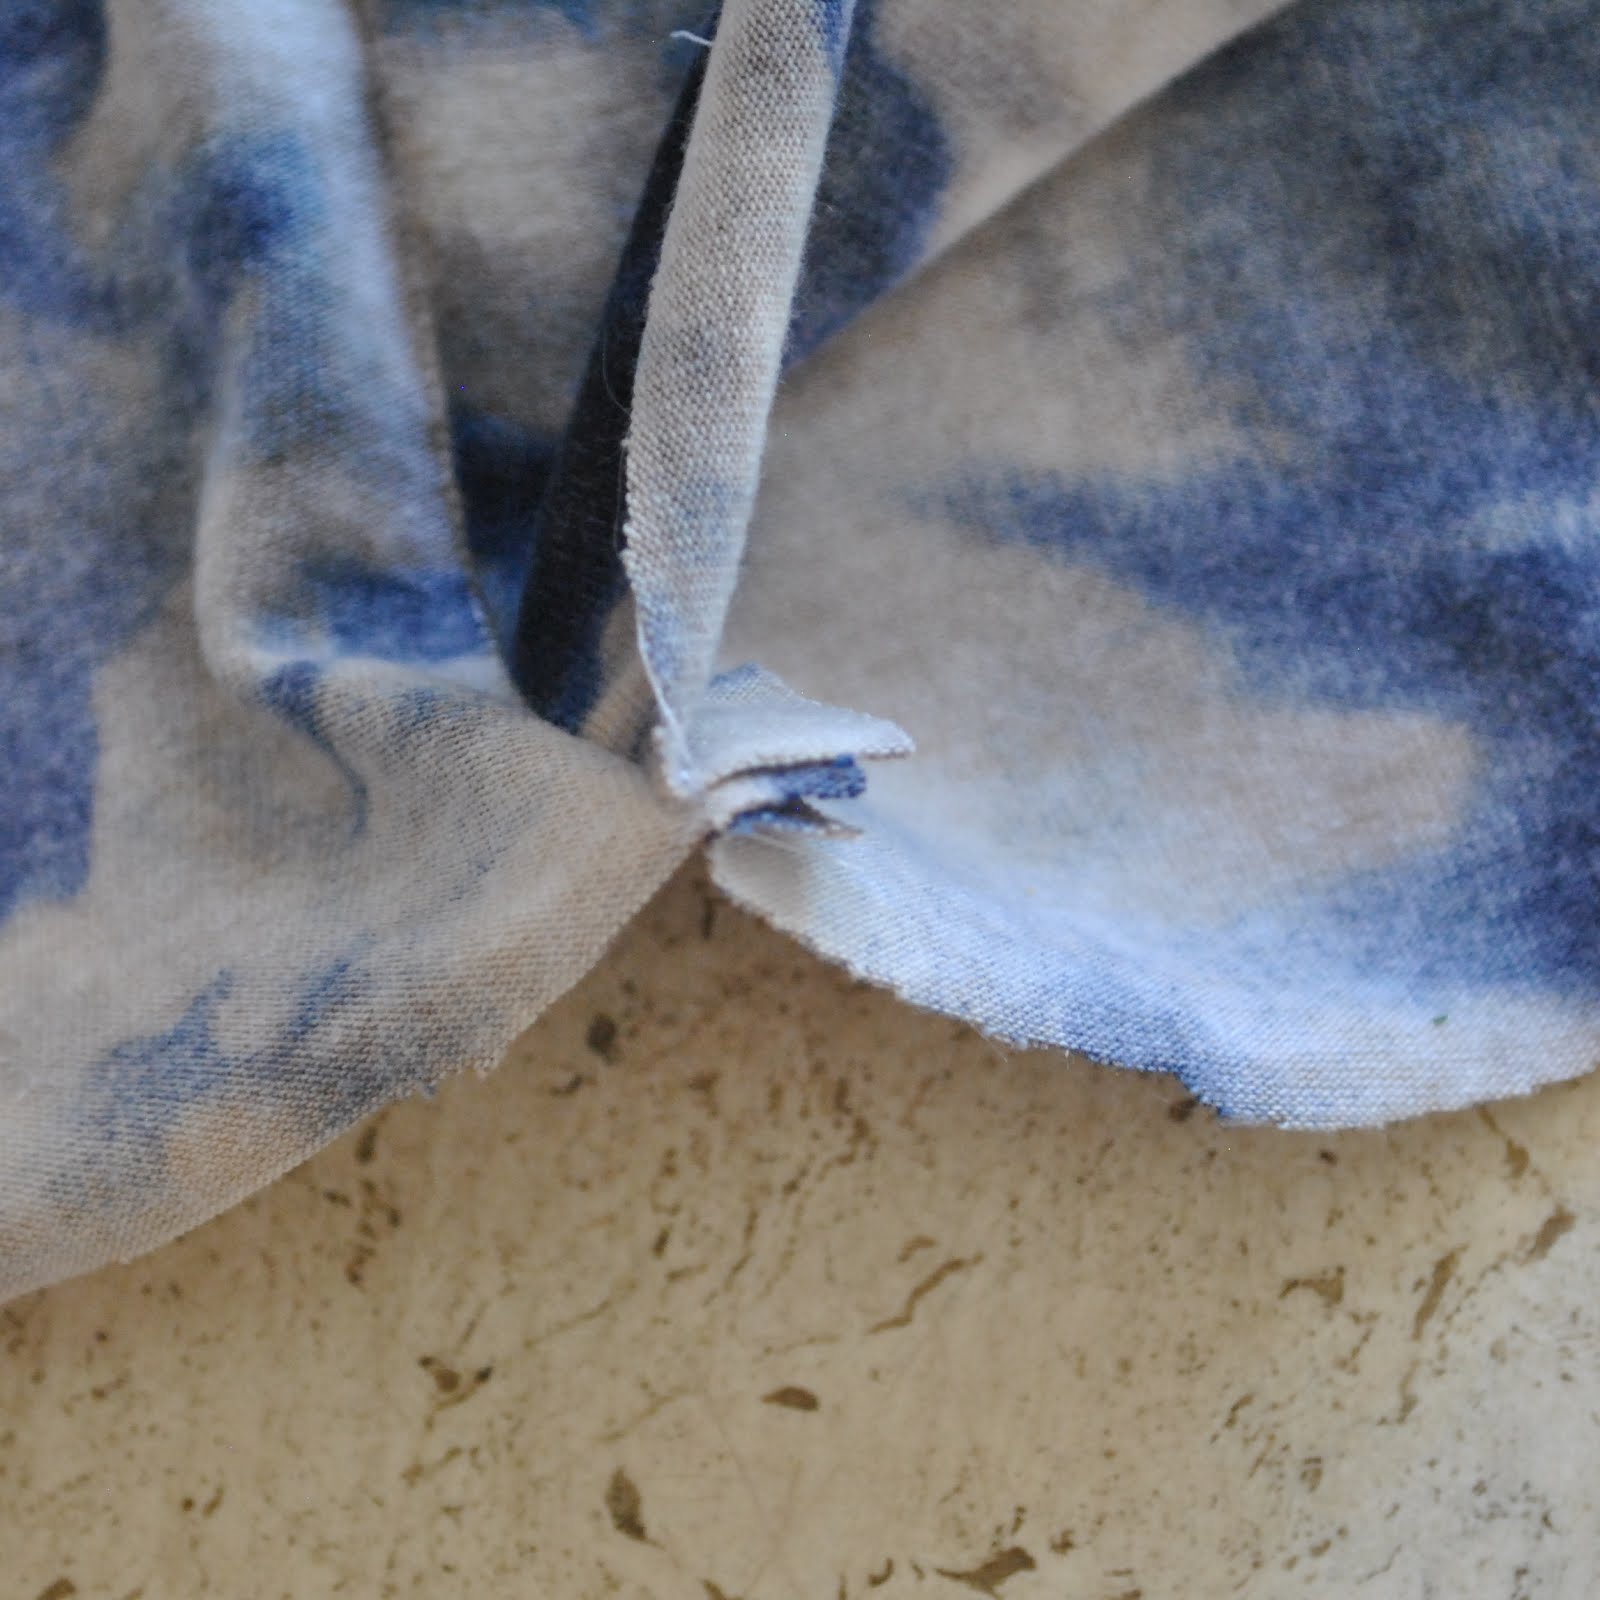
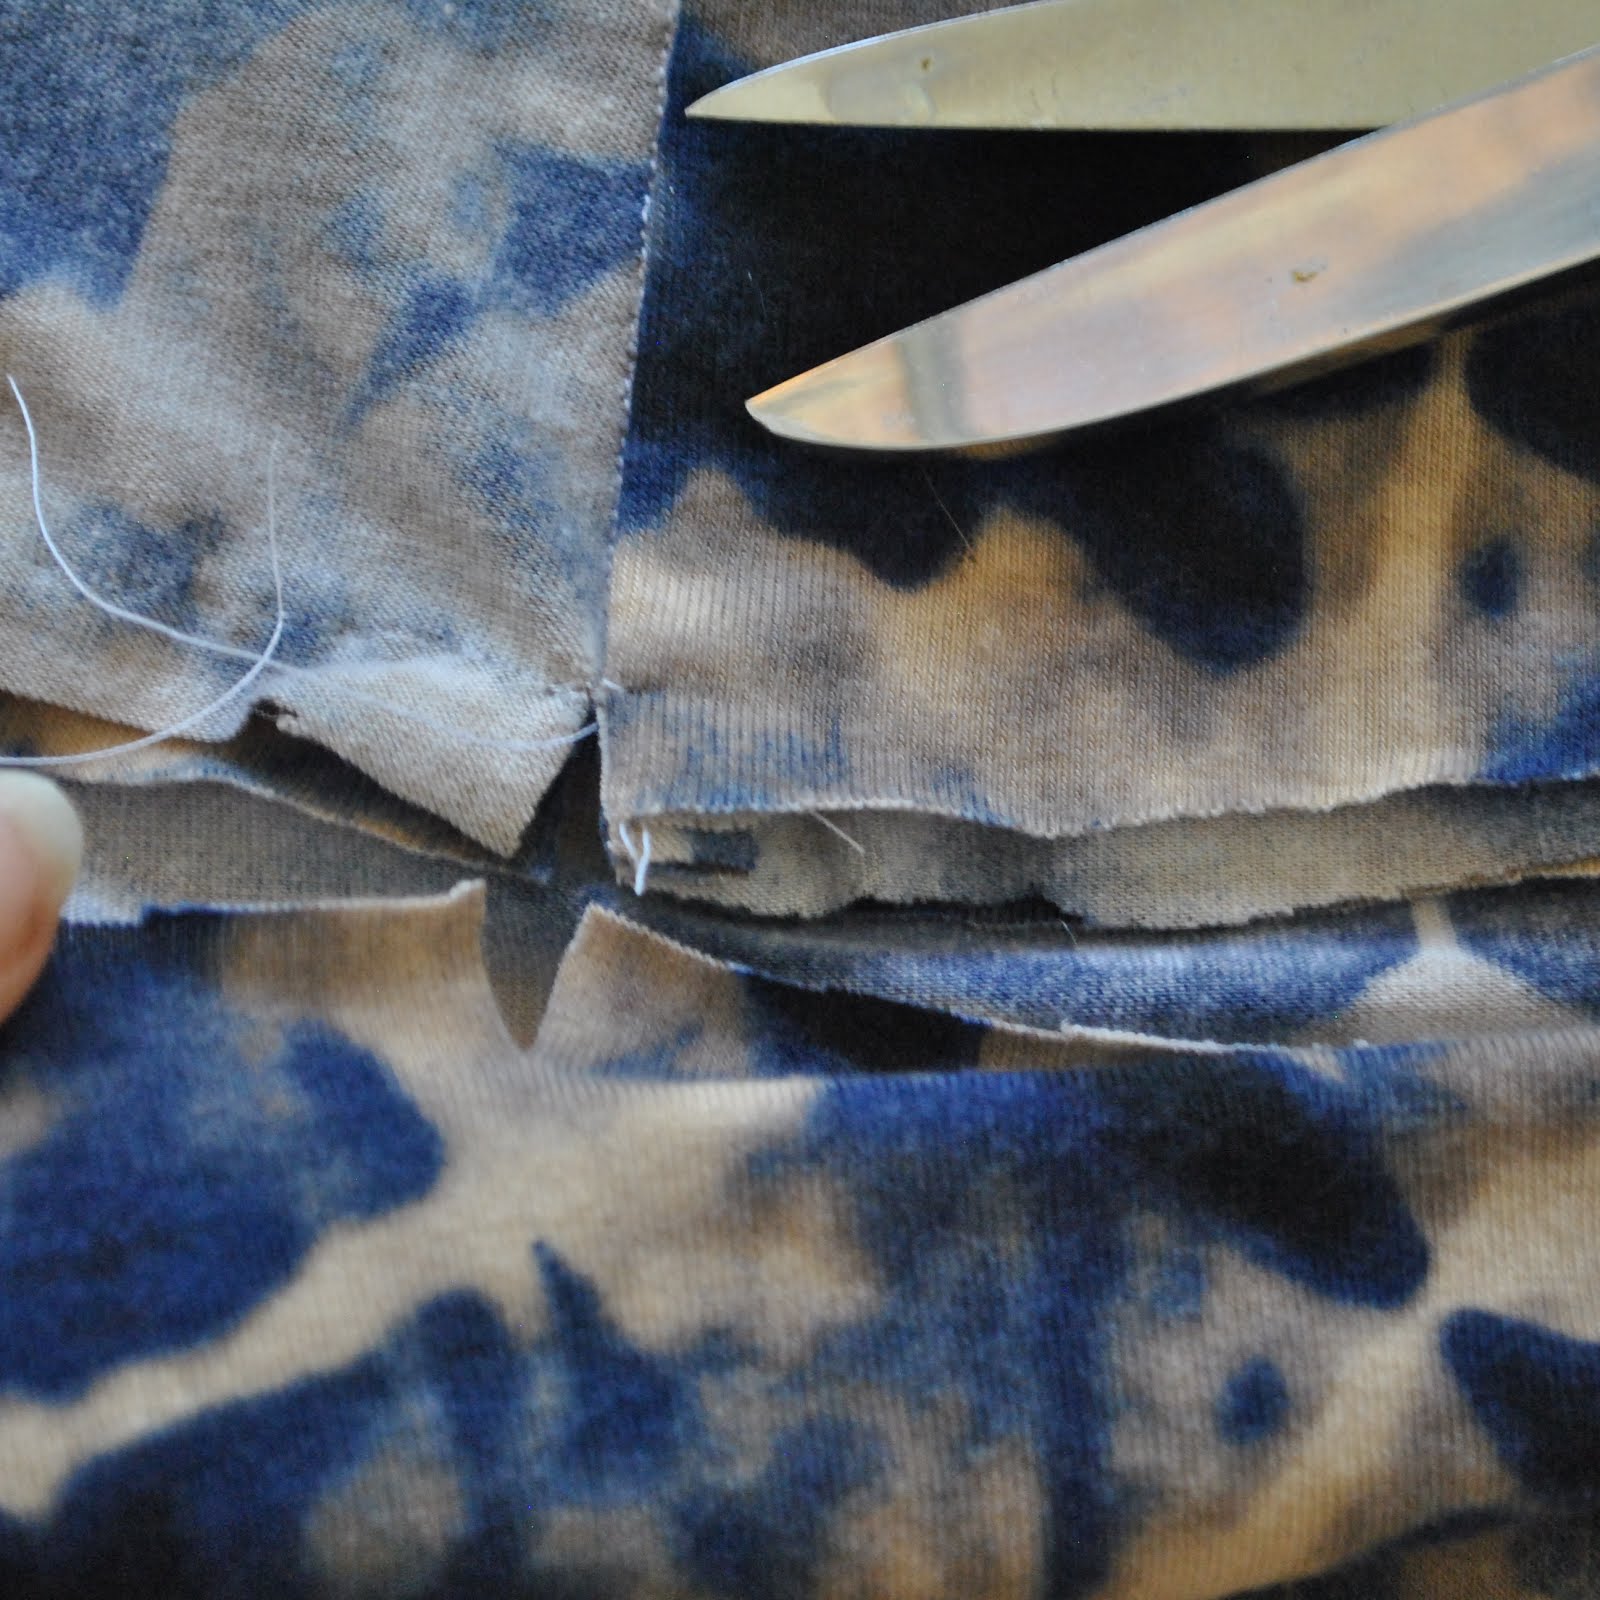
Snip all layers of the band seam allowances at the side seams, and also the lower band facing seam allowance at the same point.

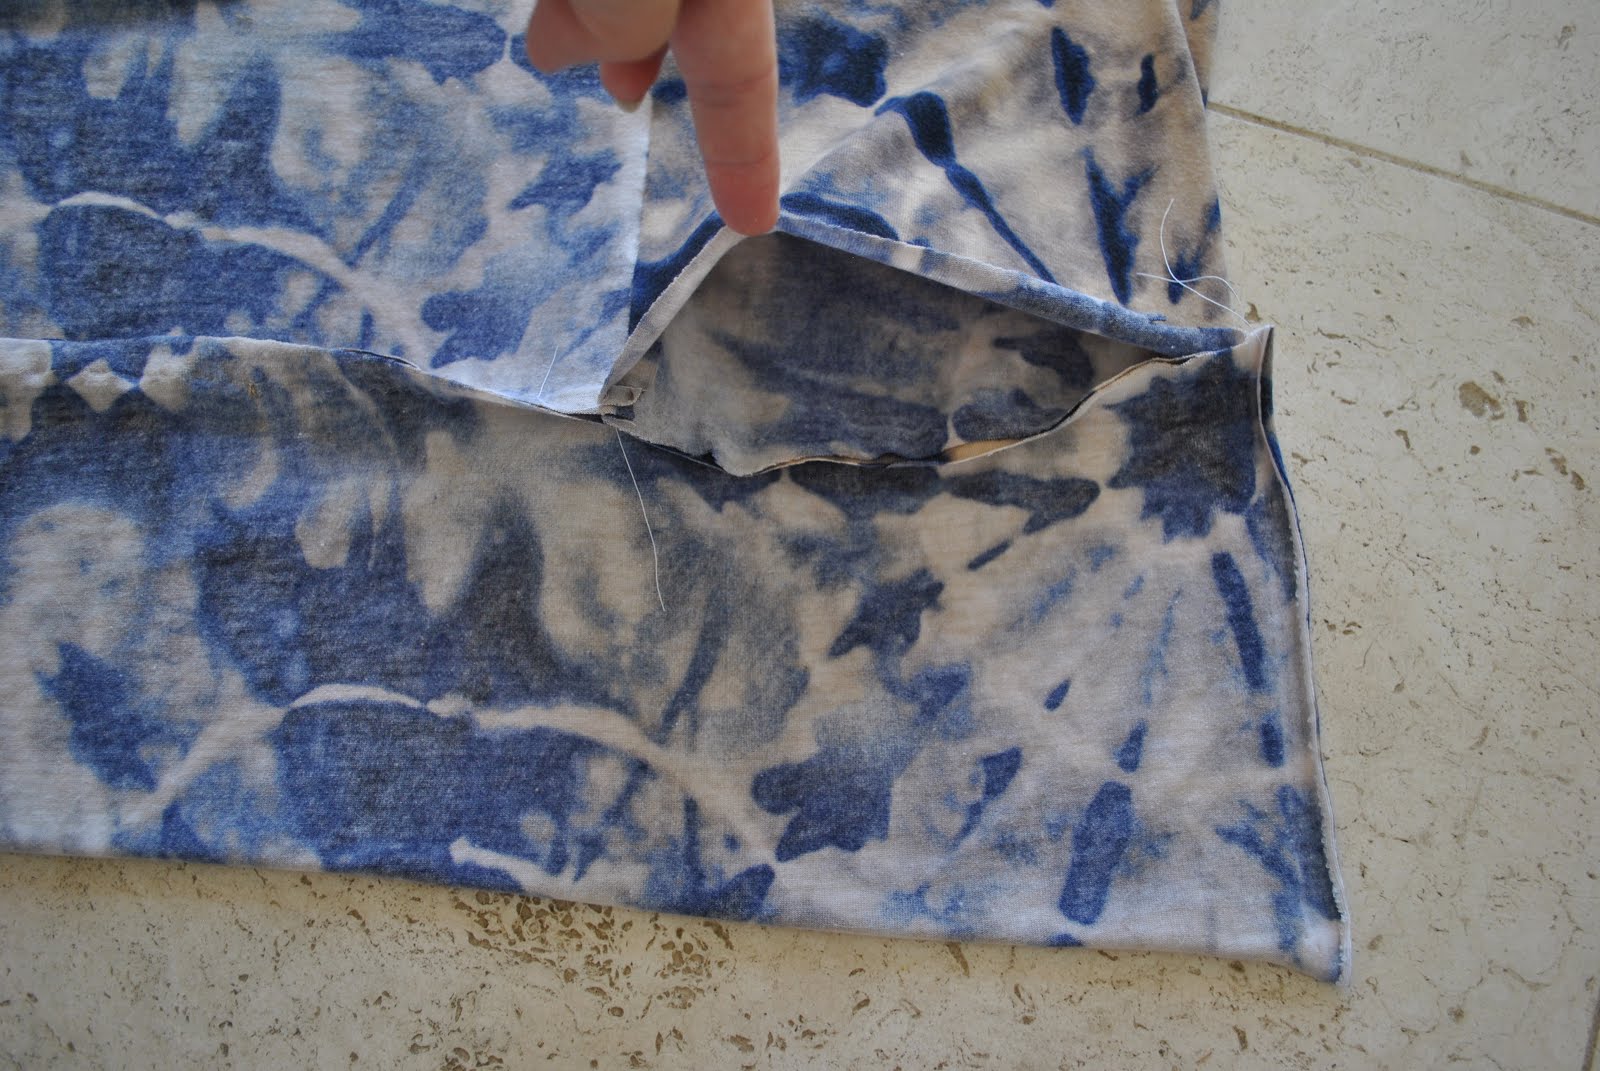
Now, from the shoulders/top; reach inside the front/front facing “tube” and pull the lower edge where it’s stitched to the lower band through along with the loose facing edge and band facing edges.  Align all raw edges, taking care to make sure corners are sitting tight and accurately together because with a stretchy fabric it can be all too easy to stretch them out of place! and stitch the whole shebang together in one seam.  Trim corners, grade seam allowances, pull it all right sides out and press.

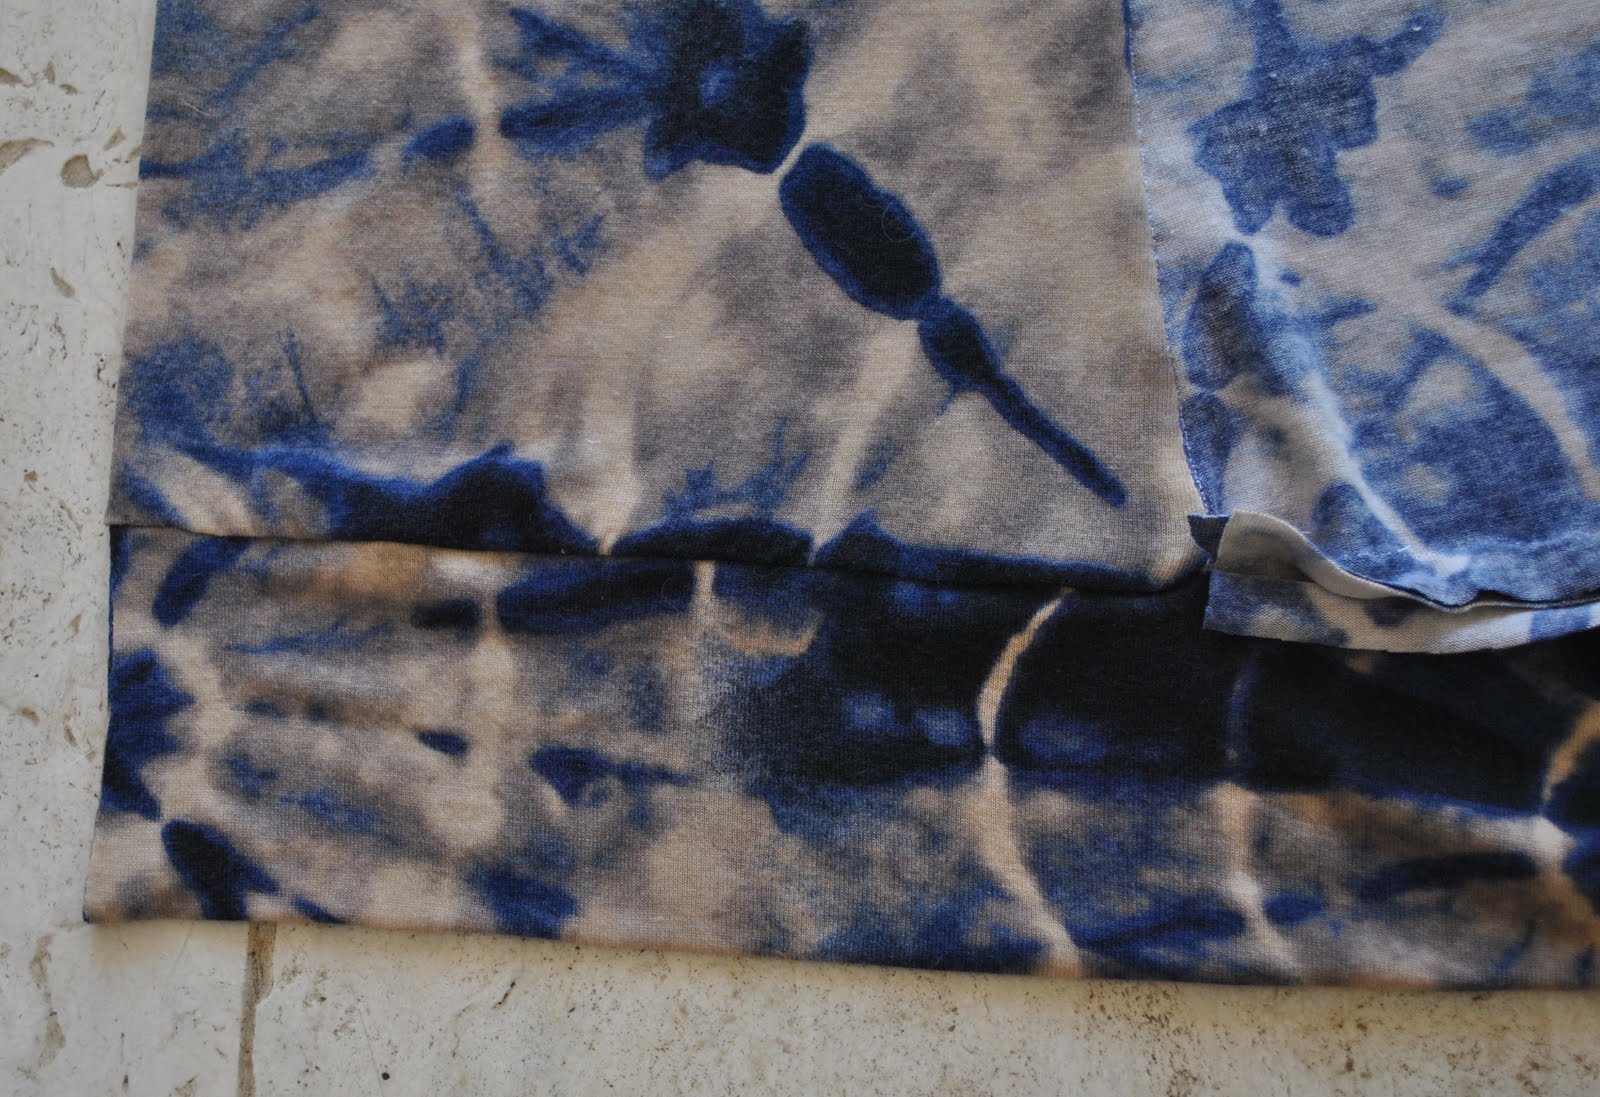
Voila!  yes it is a fiddly business but it look at that lovely absence of exposed seams on the fronts!

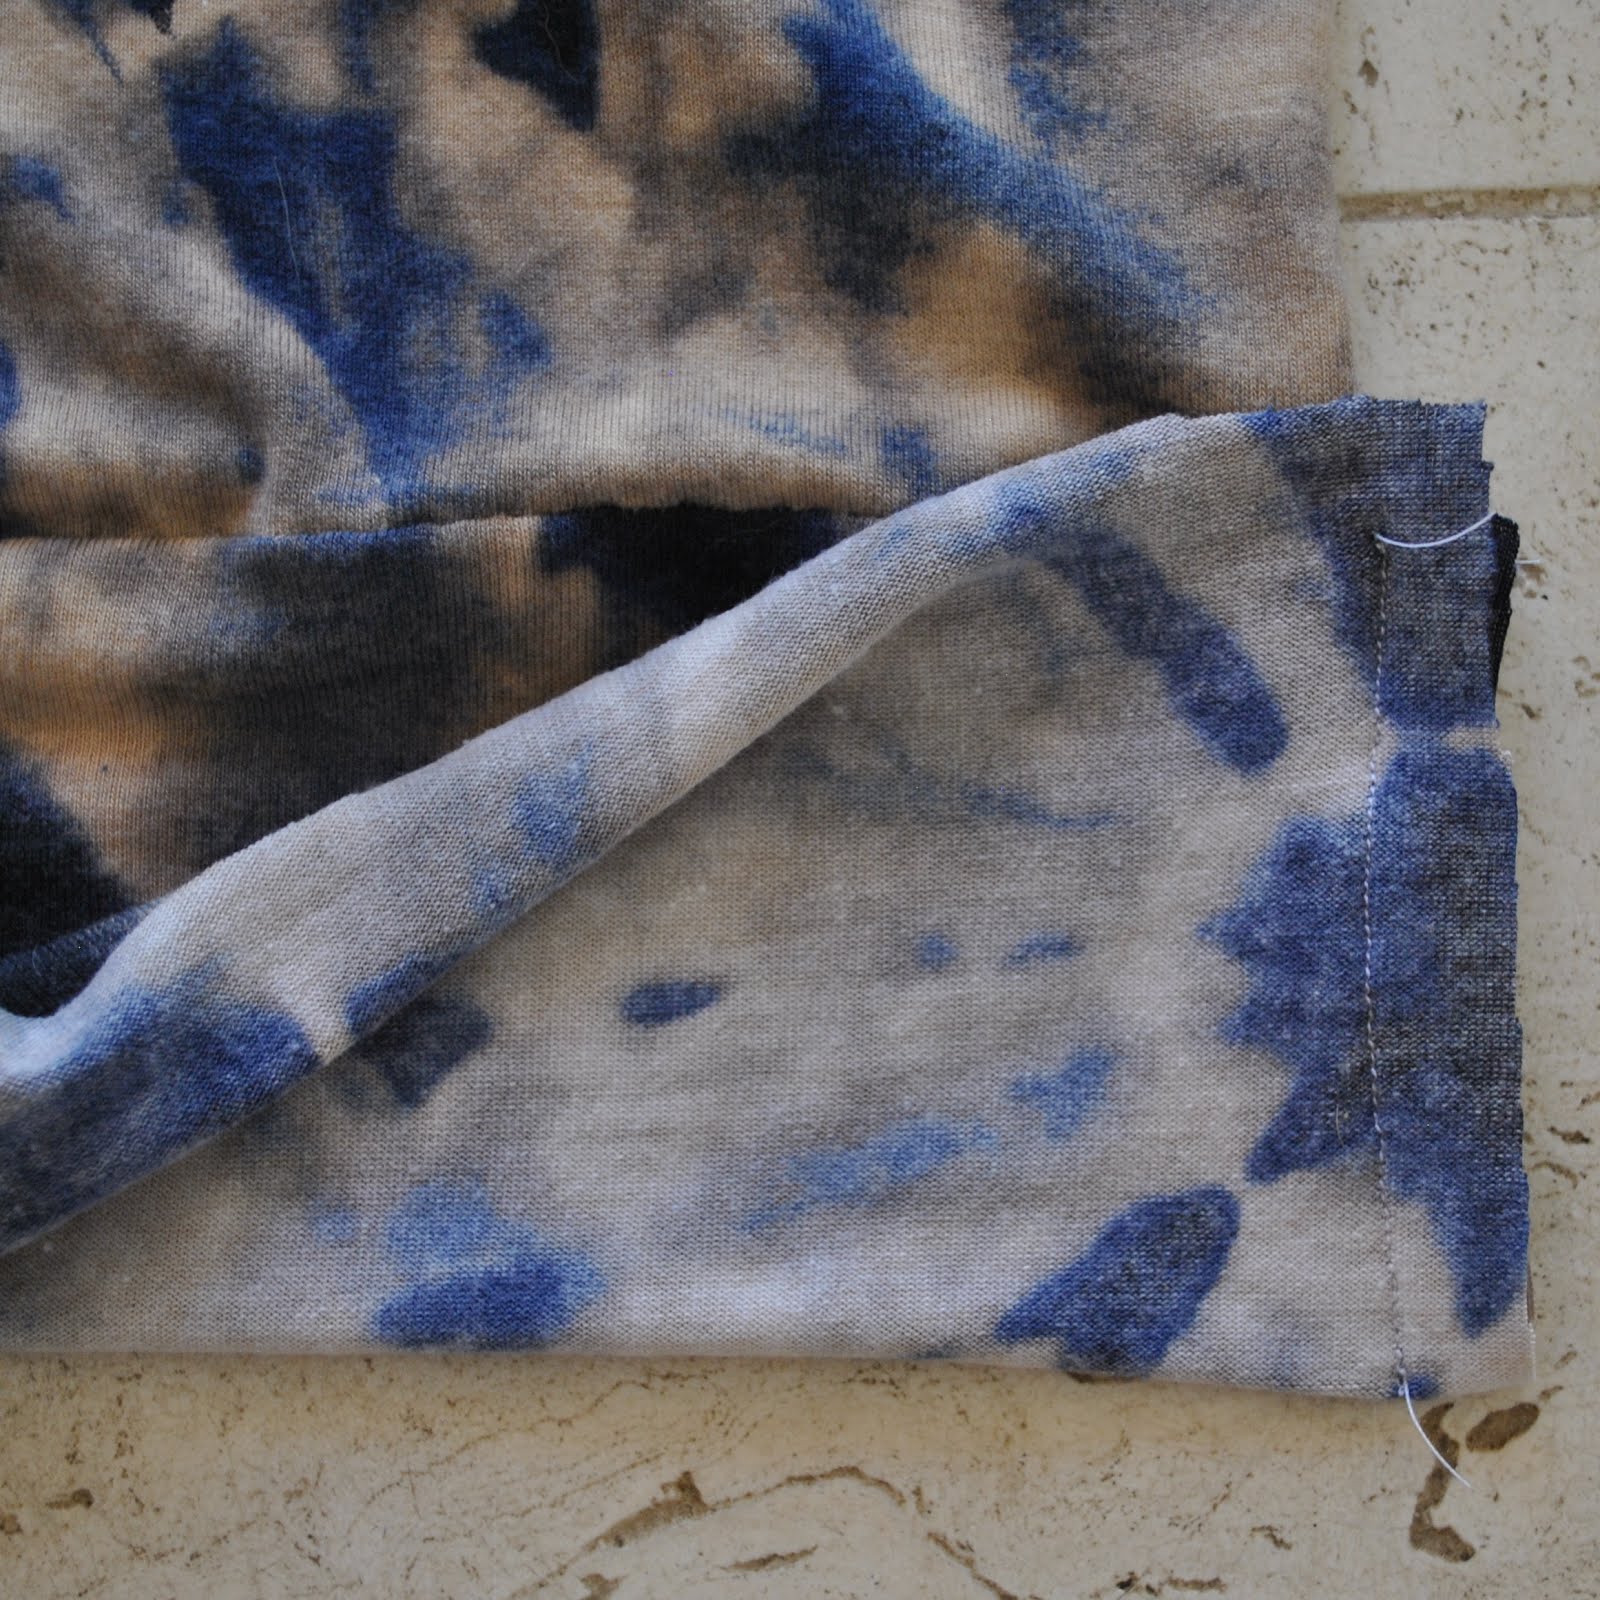
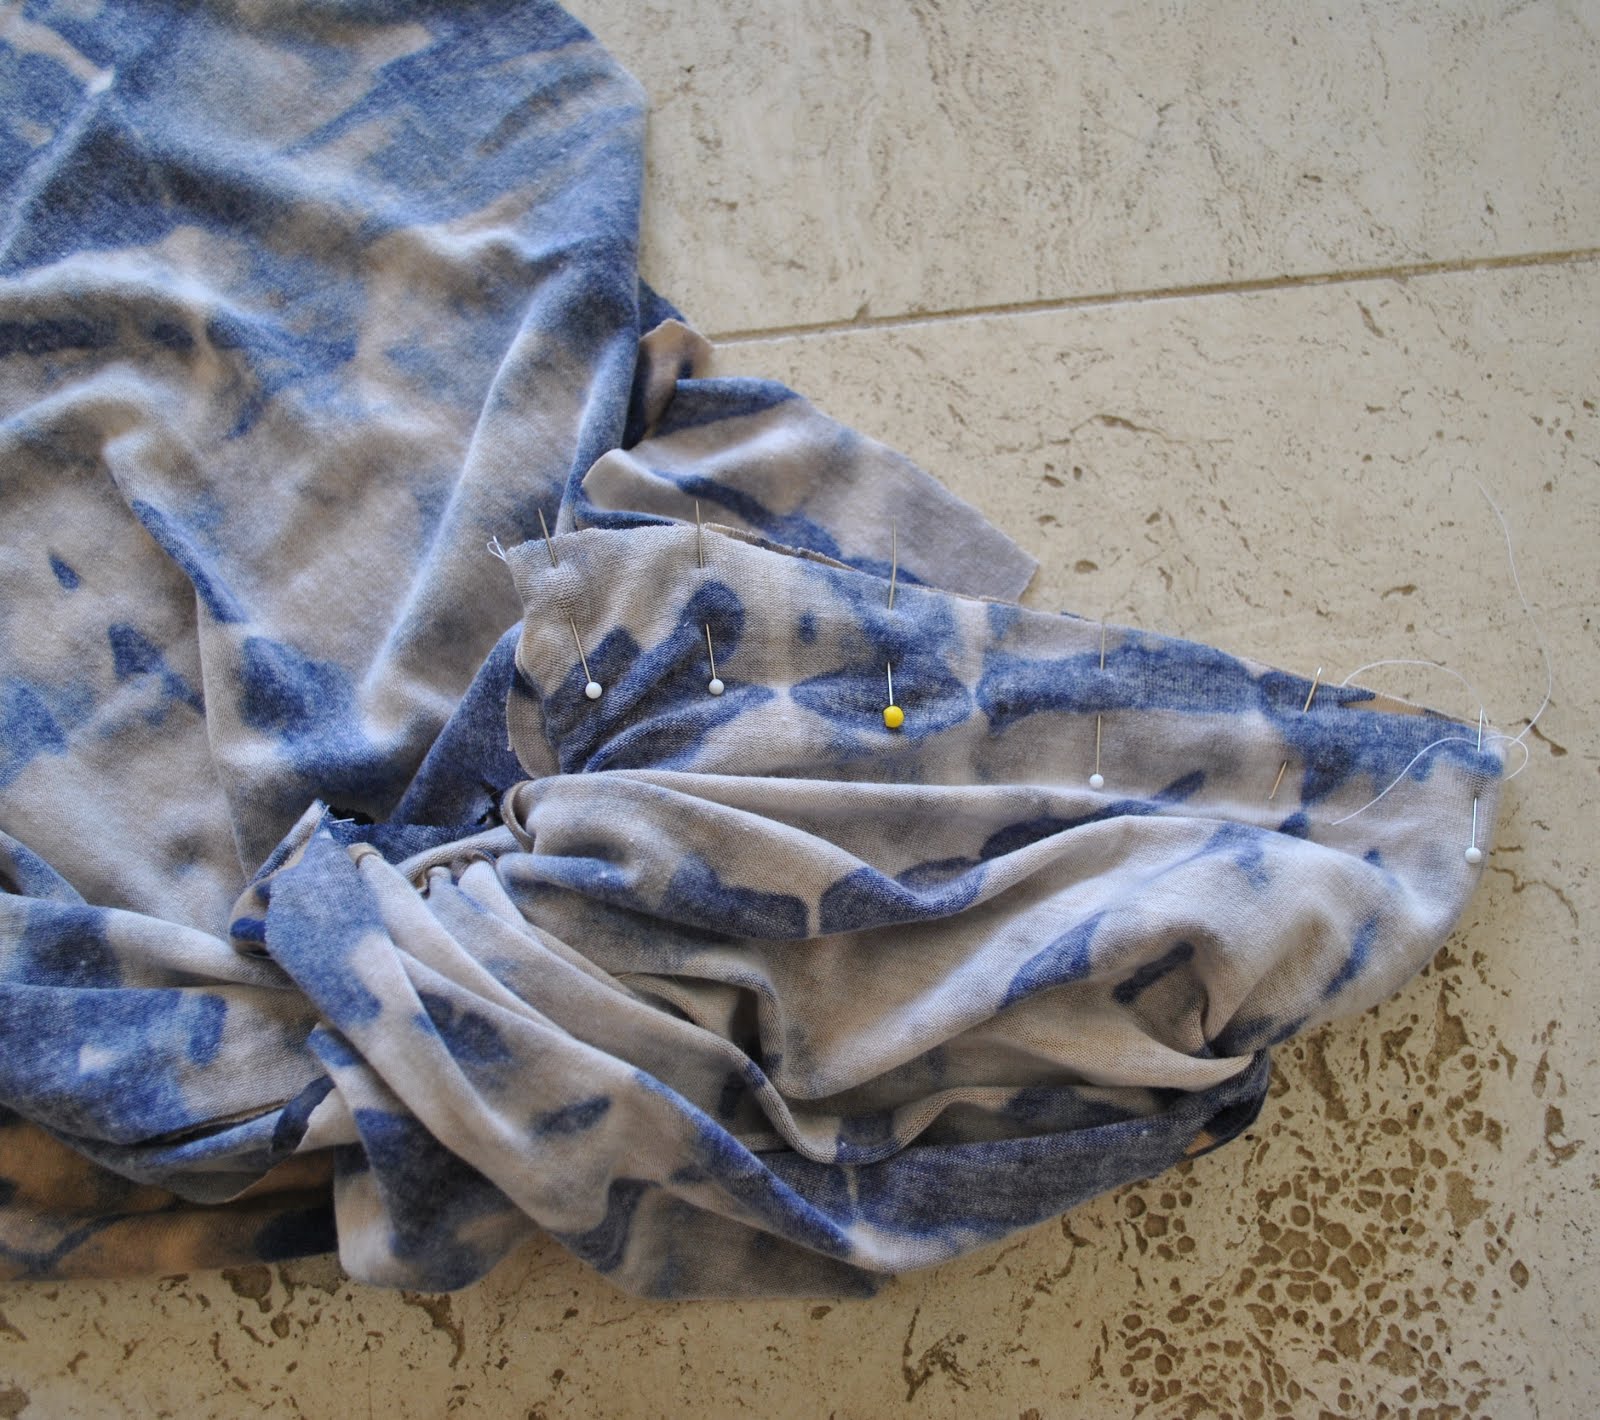
That last remainder of the lower band facing is turned under, pinned and hand-slipstitched in place.  Hiding those seam allowances, too  🙂

Now stitch the shoulder seams, front to back, enclosing the back between the two fronts as for the previous version of this cardigan, here, in fact the remainder of construction is exactly the same… stitch sleeve seams, finish; set in sleeves, finish likewise; sleeve cuffs, as per this method; neckband, as per this method described for my previous cardigan.

Details:
Cardigan; the Nettie by Closet Case Patterns, modified as stated
Tshirt under; another Nettie, white jersey, details here
Shorts; Burda 7723, details here
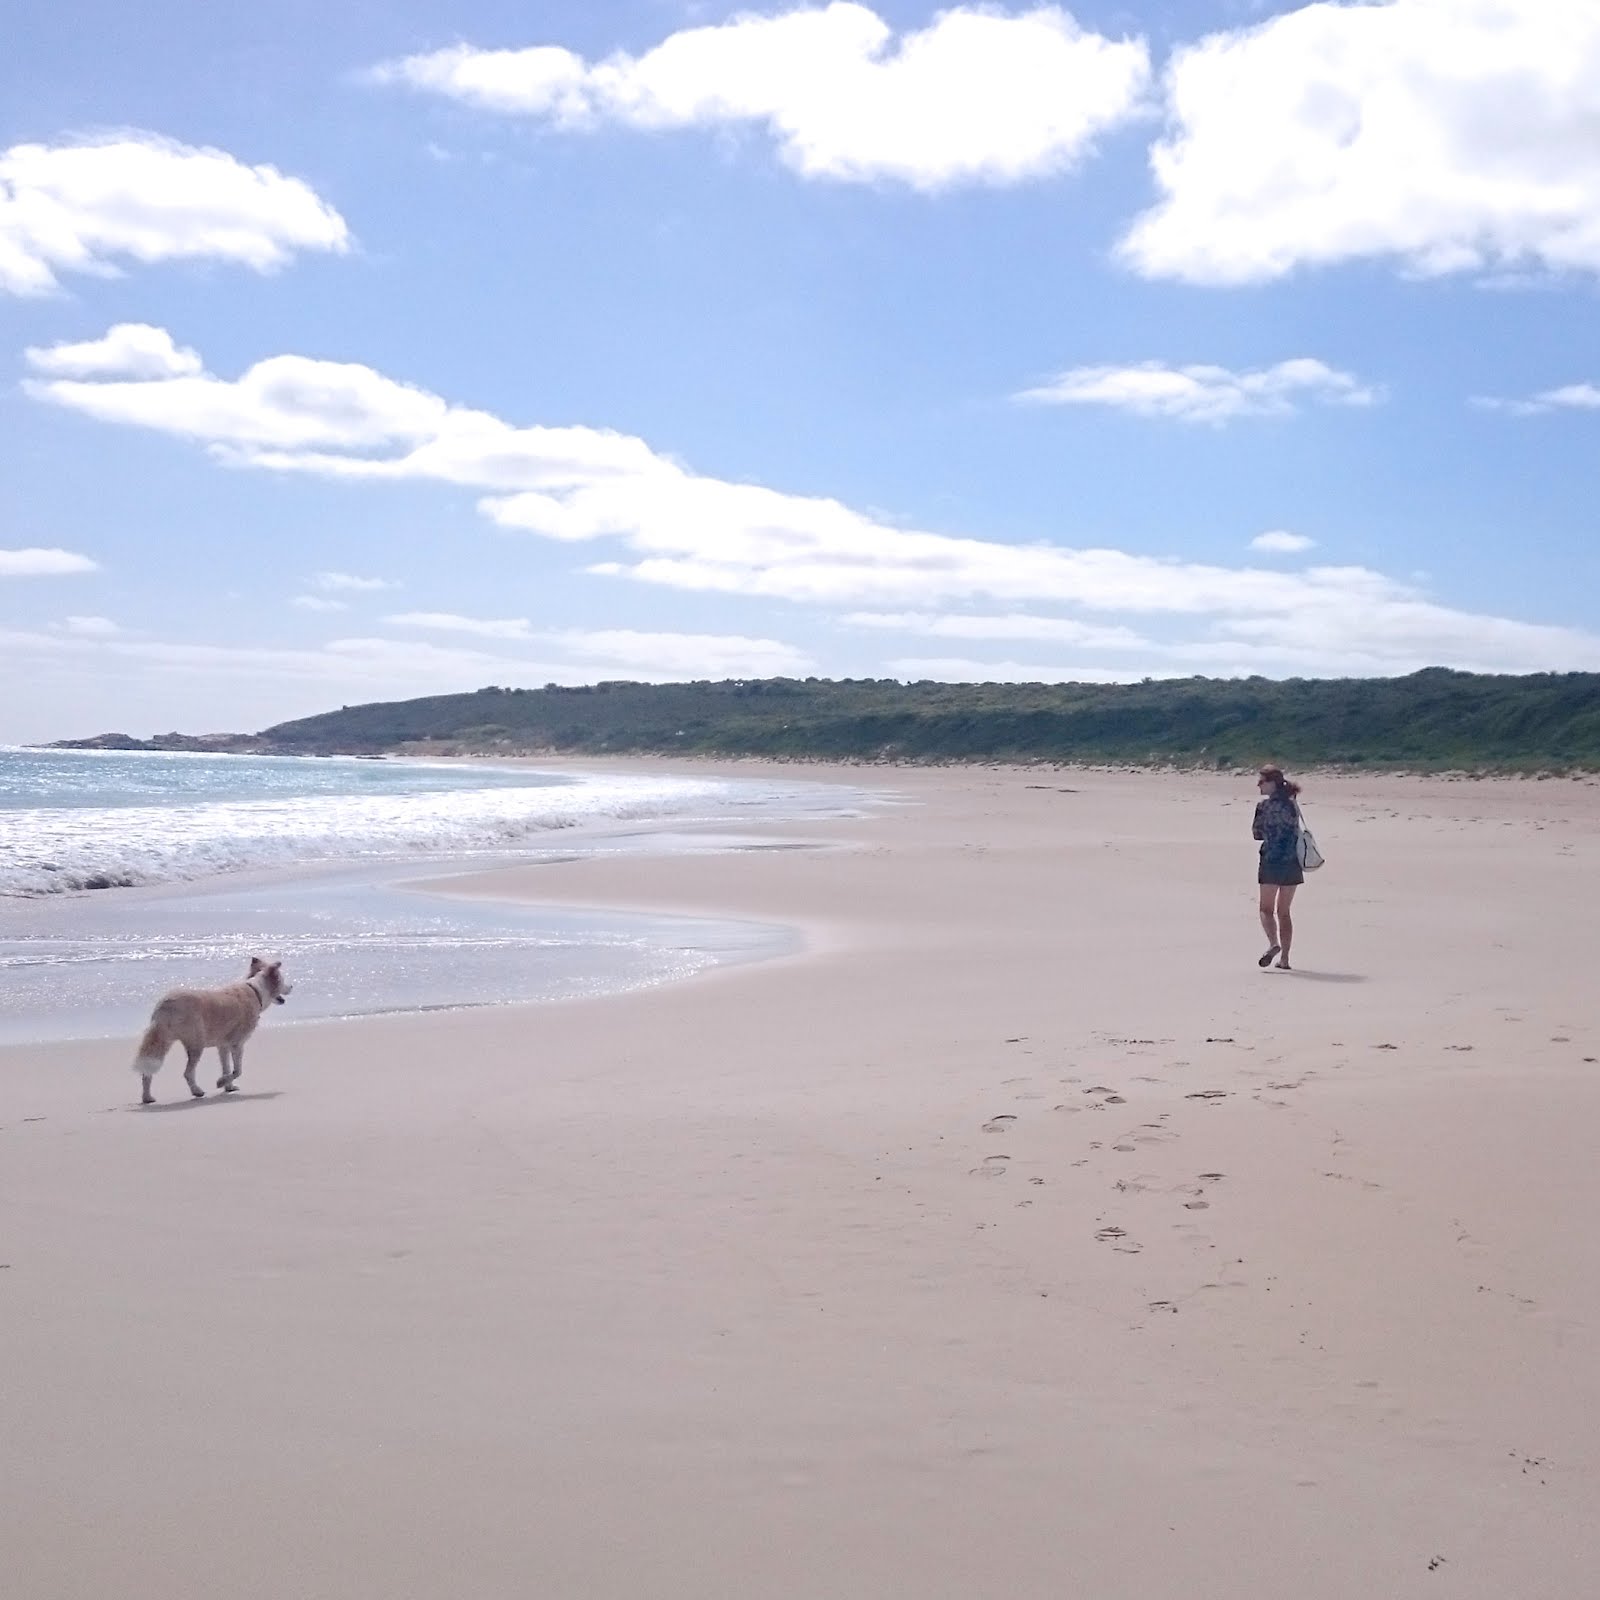
Location; Bunker Bay, Dunsborough… we had it completely to ourselves!  so lucky

photos courtesy of Craig
pinterestmail

Stash Box, plus miniature clothing for tiny people

Recently I was asked by Two Blue Birdies; a Melbourne based, online fabric and haberdashery store to review their Stash Box.  What is the Stash Box, you might ask?  Well, it is like a little mystery box of  fabric and haberdashery goodies.  Once a month, the girls at Two Blue Birdies select a colour co-ordinated range of crafty things from their range of fabrics, felt, patterns and haberdashery and send it out to you.
The box I received contained the following bits and bobs;
a pattern for a stuffed toy hedgehog, 4 pieces of fabric, 2 squares of felt, two spools of thread, 4 buttons, a soluble marking pen, and a length of mini pompom trim.  This last is ultra cute; I’ve not come across this before and it is cute!

It was fun waiting for and receiving the box, and opening it to see what was inside!  I took it along to my local craft group to get their opinion and they all agreed that it is a pretty cute and fun way to get a new little range of goodies to play with.  If you do crafty things with your children/grandchildren; and/or if you yourself love crafting and fiddling about making cute little bits and bobs then this is a terrific way to get a new boost to the craft supply box each month.
The deal sounds pretty flexible; if you don’t need a box that month you can easily opt out of the subscription as long as you get in touch with Two Blue Birdies before the date of postage.  And conversely, if you don’t have or don’t want a subscription but really like the look of the stash box that month, you can buy just a box at a time, supplies permitting and with no need to lock yourself into a subscription.

What did I make with the contents of my stash box?  well, since Two Blue Birdies were so generous as to send me the box for free, and I’m all about paying it forward… I really wanted to do something good with it.  By that I mean, something unselfish, for once!  I know, we seamsters all joke about sewing selfishly, myself included! and heaven knows I sew plenty for myself.

So I hunted about for a local charity and almost immediately found Tiny Sparks WA.
Tiny Sparks is devoted to helping women experiencing a high-risk pregnancy and babies born sick or premature.  Obviously donations are welcome, and one way to get involved is to be a part of the knitting and sewing community that work to provide a gift of special clothes for the babies for when they leave hospital and go to their own homes.  You can read more about the charity and how to get involved on their website here, and the site is regularly updated to notify items that are particularly low in stock, and currently required.  Importantly, the site also has the free patterns for the particular clothing and beanies that fit the babies and their requirements.  These four little outfits here are all for size up to 1.6kg.  I know, so tiny!!!!!  This isn’t even the smallest size!

Initially I thought to make two boys’ outfits and two girls’ outfits; however the fabrics, while they were sorta unisex in colour, seemed to my eye to be quite feminine in style, so I ended up making four girls’ outfits.  However! of course I do not want the boys to miss out! so pretty soon I will be making some boys’ outfits, to make up for the imbalance.  Because I will be doing this again.  In fact, I enjoyed making these so much that I will probably make this a regular project, as long as there is a demand.
I bought baby yarn from Spotlight to knit the matching beanies.  The Tiny Sparks website outlines quite specific requirements regarding fabrics; all fabrics must be new, soft, lightweight cotton; and beanies are to be knitted from new, machine-washable yarn preferably the acrylic/wool mix OR 100% acrylic, that is specifically designed for babies’ knitwear.  I bought a ball each in white and red, so as to make each one different.  The white has a chevron design and the red one is moss stitch.  The two-colour ones are plain stocking stitch, one with a Where’s Wally like stripe and the other with a few rows of simple fair isle, of alternating one red stitch, one white stitch.

The dresses do not have closures on them yet, because they require specialised plastic snaps; I’m not familiar with it so didn’t want to risk putting the wrong thing on.  In any case, Tiny Sparks encourages you to send in the clothing sans closure so they can finish that bit themselves.
So there you have it: four teeny tiny little baby outfits!  I’ve already sent them off… and although I will probably never know, I certainly hope that a parent likes a set enough to choose it for their baby; absolutely nothing would make me happier than for that to happen!
Thank you so much to Two Blue Birdies, for giving me the impetus to get on and do something for a very worthwhile cause  🙂


Also! courtesy of Two Blue Birdies, I am offering up the pattern for the cute little Hollie Hedgehog for a giveaway!  If you would like this pattern, maybe to make some little Christmas pressies then please either leave a comment below stating so, OR send me an email; before this Friday, 4th December. and I will randomly select a recipient.  I’ve received lots of emails telling me that comments are for some annoying reason not going through on my blog; trust me, I’m working on it!  So, if you are unable to comment, then please do contact me by email instead and I’ll still put you in the draw.  My email address can be found by clicking on the mid blue “envelope” button, up there with my media icons, at top right  🙂
Obviously, if you don’t want to enter the draw for the pattern but still would like to comment, then by all means, do so.  Like everyone, I love comments!

LATER EDIT: Dk’s wife; the pattern is yours, could you please email me with you shipping address? thanks  🙂

Please note; as always there are no affiliate links on my blog

SaveSave

pinterestmail
Switch to mobile version
↓