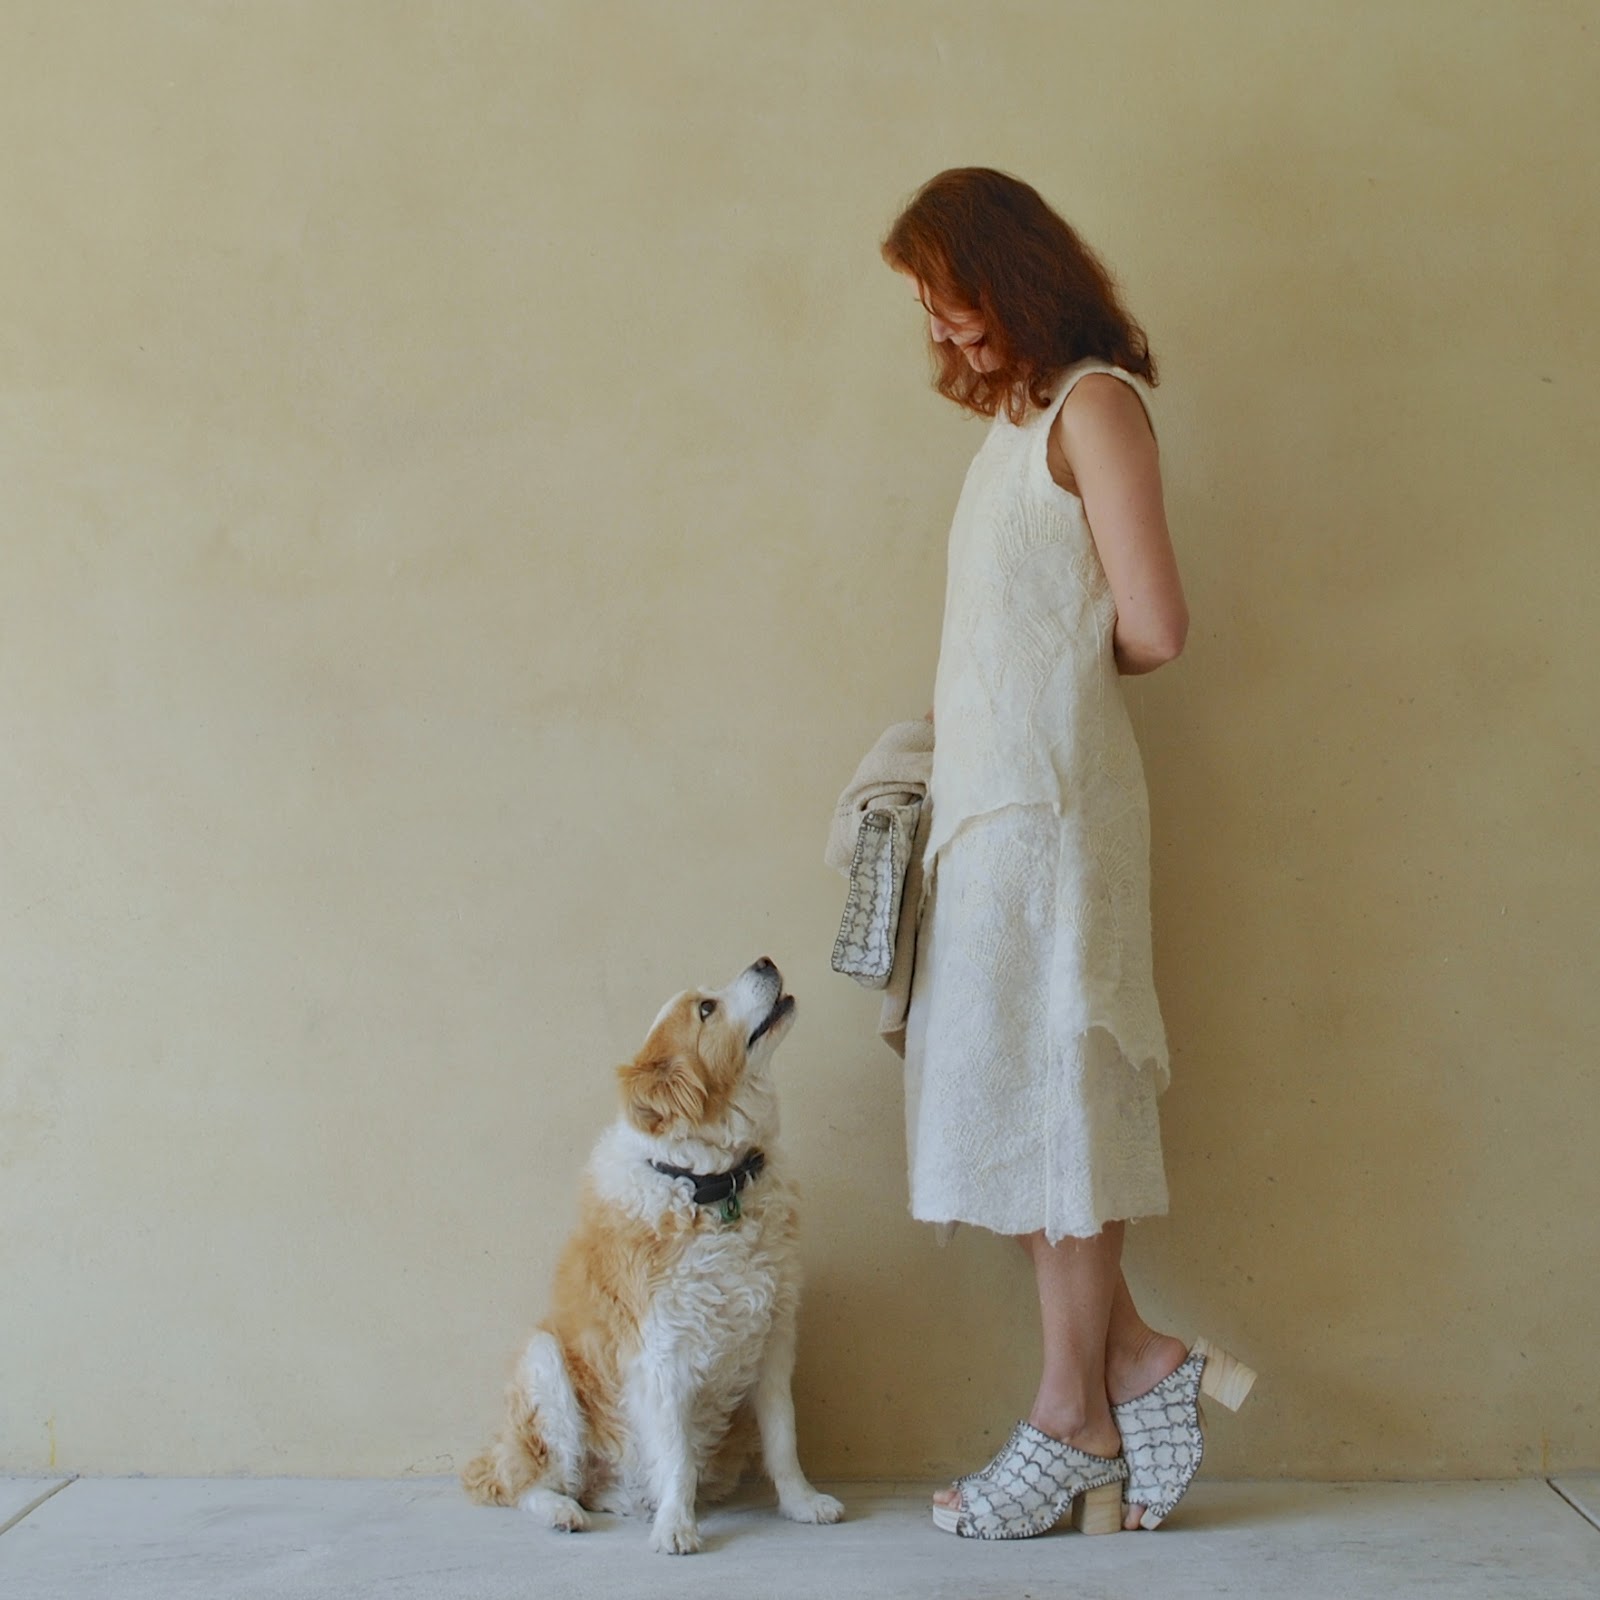
world, meet Sally. Sally; world.

DSC_2629Hello there.  I’m Sally  🙂

Well, it’s been a long time since I’ve indulged in making something like a doll and doll’s clothes but omigosh, this was SO MUCH FUN.  Honestly I think I’m just about to explode with the exquisite fun-ness of it all!  I’m still on a bit of a high.  All those cute teeny little bits and pieces.  Quick as a snap, with barely any fussy finishing details.  My inner child has been squealing fit to burst, here.

DSC_2650So, my Mum took me to to Calico and Ivy for my belated birthday present; and we chose this book The Making of a Rag Doll, by Jess Brown, and a little stack of fat quarters.  I know, right? I’m so lucky:  FABULOUS birthday present!  This was on Thursday and I finished this lot last night, so obviously I just could not wait to immediately get stuck into making my doll.

IMG_8786

LOOK HOW CUTE OMG I CAN’T STAND IT

DSC_2651 2

So I’ve named her Sally, and she has a complete summer and winter wardrobe.  I’ve made for her everything from the book, bar the patchwork quilt.  I might make the patchwork quilt too, well… everyone needs a little bed on which to rest our weary red head, non?!!!  but in the meantime I want to do something else with the leftover pieces of fat quarters and I’ll wait until I’ve finished that before assessing my scraps for the quilt.

WARNING: NSFW, the following picture depicts nudity, do not proceed if a naked body causes offence to your eyes… bwahahahaha!  I’ve always wanted to say that in a blog post! gawd so juvenile. *eyeroll at self*


IMG_8777

I made my doll as per the book, but did my own face and hair design.  I liked the face in the book but Craig reckoned it was a bit creepy … apologies to Jess Brown!  Anyway I tried to make a face as sweet as possible, a fairly unsophisticated and simple design.  I left her hair until last because I thought it would be the hardest bit and I was a little unsure about how to do it.  The book has you just sew a piece of felt along the top, but I knew I wanted really thick woolly hair.  As it turned out, doing the hair was lots of fun too, and I enjoyed every minute!  I sewed strands of wool, two at a time, all over her scalp, so there is actually complete coverage of her scalp.  I know from when I played with dolls as a child, my favourite dolls had complete hair coverage so that I could leave out or put up into pigtails or a pony tail, or do plaits… whatever I wanted.  Even though I’m probably past the age of wanting to do my doll’s hair – or maybe NOT?!  Anyway I still wanted proper hair.  I absolutely love her wild shaggy mane of hair and decided to leave it untrimmed and just as is.

this first picture is the closest match to her actual hair colour

IMG_8771 DSC_2630

She has:

a summer wardrobe, comprising knickerbockers, a sundress, a pompom necklace, and a newspaper hat,

and; a winter wardrobe, comprising a long sleeved dress, an overcoat and a beanie.  She also has an apron, for housework, and a little tote bag.  A tote bag!  eeeee the cuteness!

DSC_2639


This whole project was heaps of fun.  I know I keep repeating that, but honestly, the whole time I was playing about with this I just kept thinking “Omigod, so. Much. Fun!” you know, one of those projects where you cannot bear to put it down but you just want to keep doing a little bit more.  Then a little bit more.  Some, if not most of her clothes took a mere handful of minutes each; SO zippy and super super easy.  And fun.  Did I mention it was fun?

yup, she’s standing in a soup ladle.  She has trouble standing up by herself

DSC_2665

My materials; Sally herself is unbleached calico, stuffed with Australian-made Hobby-fill from Spotlight, pom pom for her necklace also from Spotlight.  Hair is Morris Empire Superwash merino 4ply, in colour 441, Rust Twist, from my sock wool stash.  Fabric for clothing; a bundle of fat quarters from Calico and Ivy, the ribbon for the tote bag handle was cut from the ribbon holding the fat quarters together.  Also some scrap ribbons, yarn, embroidery thread, button, and other small bits and bobs from my stash.

DSC_2659

My only slight regret is that the ends of the embroidery yarns show up a little bit behind her face… I tried to hide them in the stuffing as I went but evidently my calico is wide-weave and a little see-through, and as I stuffed her head, compressing the stuffing has forced the thread ends forward a bit.  Well, we live and learn, I’ll know to be more careful about this next time.

don’t want to wear your beanie, Sally? Just stuff it in your TOTE BAG!

DSC_2663Quickie review:

The Making of a Rag Doll, Jess Brown

Hardcover book, 136 pages, high quality paper, beautifully photographed and all over a very attractive presentation.  Would be equally nice as a coffee table book actually!

The book contains patterns and full instructions for making the 41cm doll, plus clothing and accessories; knickerbockers, a sundress, overcoat, long-sleeved dress, beanie, apron, tote bag, quilt and a newspaper hat.

The patterns are full size, printed on both sides of two sheets of sturdy thick brown paper, kept in a slotted page in the back of the book, and are clear and easy to trace.

Contents; introduction is a nice summary of the author’s journey in doll making, then the next 20 pages or so are devoted to explanation of basic sewing terms and notes on sourcing supplies of fabric, haberdashery and sewing tools. All the explanations are extremely detailed, starting from the absolute basics and aimed at the complete beginner to sewing.  As in this could be an excellent first sewing gift for a child.  Instructions are exhaustively thorough, well laid out, and most are also accompanied by simple illustrations.  All measurements are helpfully given in both imperial and metric.

Summary; excellent for a beginner to sewing, but really anyone could enjoy this book too, I certainly did!  I was initially attracted to it because of the cuteness of the doll and her clothes and found it all to be a super easy as well as an incredibly fun project.  Highly recommended!

pinterestmail

a townhouse dress

DSC_2712

This new dress is the latest step in my current project to add some architectural whimsy to Cassie’s work wardrobe …. and it was barely off the machine when she wanted to wear it to work straight away, like the next day, meaning today!   I took these pictures before she popped off this morning, looking exactly like this…

I consider that the hugest compliment  🙂

DSC_2700That townhouse print though; it did cause me a wee bit of angst…   how on earth to make it into something that was going to look cute and fun and funky and stylish?  You know with some prints the subject material is absolutely perfect for a person, but the print itself is kinda messy and busy and so has the potential to be disastrous?  It’s one of those prima donna prints, I felt it would look overpowering in a dress with a sleeve, also I knew it would not play nicely with many other colours/prints; likewise any design details like draping or … well anything at all, was OUT.  At first I thought about making a very simple plain sleeveless shift, but still worried that it would look a little naf.

When the idea of a white raglan sleeve occurred to me was an instant kapowww! that this could work out quite cute after all.  The white raglan sleeve lends it that little bit of a fun and sporty vibe and just takes the right amount of edge off the messy print. The sleeve fabric came from an old puffed hem dress *shudder*  which Cassie tossed out.  I’ve kept it because it has a mass of lovely soft ivory jersey fabric in it.

DSC_2724Once the raglan lightbulb had popped up it was all super easy from there… I used my own raglan sleeve Tshirtpattern, that I’d worked out years ago from laying down and drawing around an old Tshirt … in a time when patterns for raglan sleeve Tshirt were non-existent!   Yes, it’s hard to believe now there are tonnes of patterns available everywhere, but for a long time and until quite recently some design features were very difficult to get hold of.  We had to hunt for them, and be creative and innovative and sometimes very devious in order to get what we wanted.  The elusive Raglan Sleeve tee was one such rare beastie.  I think it was often assumed that patterns for basics were something you either had already, or could work it out yourself with no pattern by cutting up an old one.

IMG_8643Collar band, simple folded band done using this method; sleeve and lower edges overlocked, turned up once and stitched on the machine with a twin needle.  All seams stitched and overlocked inside to finish.

Details:

Dress; elongated raglan sleeve tee, body custom fitted to Cassie.  No pattern, townhouse print fabric from Fabulous Fabrics, ivory jersey harvested from an old dress
Shoes; MelissaDSC_2713


pinterestmail

village dress, for Cassie

DSC_2731It’s taken a while but I’ve finally taken pictures of Cassie wearing the dress I made for her for Christmas!IMG_7763

The fabric is a crepe printed with Cinqueterre-like, or Amalfi-coast-like villages, and we both loved it upon first sight.  I knew at once it would be perfect for her, and make a fun little dress for her to wear to work.  See, she works in an office, but it is a creative field, and apparently most of her female colleagues dress quite fun and funky, more arty than corporate.  And previously she had mentioned in a slightly wistful tone that she was the most conservative dresser in her office.
My Christmas pressie radar immediately perked up.

O reaaaaaally!!!

Fortunately for her, she has a mother who will pick up on even the vaguest of  vague-hints, well, when they’re sewing related that is, not so much other stuff that is.. um, less sewing-related ahem.   Anyway, I’m launching the fun-and-funky-wardrobe goal right here and now.   I sneakily snuck back to Fabulous Fabrics on my own and deviously bought some of the village print… mwahahaha.

DSC_2703btw, it’s faaaaaaar harder to hide Christmas sewing from Cassie than it is the boys! who pay precisely zero attention to whatever I’m mucking about with in the laundry… Cassie is a high probability to go snooping around the stash to periodically pet the fabrics and select stuff for herself.  I had to be SUPER devious to get this made without her twigging as to what was going on… and she was completely surprised!  Yay!!!

IMG_7762

For a pattern, I chose Burdastyle magazine 02/2015, number 107, a little loose, raglan-sleeved, gathered into the neckline, tunic style of dress.  It has inseam side pockets and an elasticised waist that sits up on the hips, allowing extra length above to loosely blouse out over it.  The dress looks adorable when worn by a person, but unfortunately I think it comes across as kind of dumpy on a dummy and, dare I say it, positively heinous on the hanger… prime reason why I decided to wait until she could model it for me herself!  In the meantime it has been a great success; having been washed and worn enthusiastically to work several times already.  There is no greater compliment…!

IMG_7761IMG_7769

The print was aligned crosswise and I laid down the pieces that way too, to have the houses “upright” in the dress.  I found 2m of 150cm wide fabric to be sufficient.  My fabric is quite see-through, so I lined it with ivory poly-crepe, the same fabric I used for my ivory Ruby slip… and I made the necktie in ivory as well.  Actually I first made the necktie in the village-y print but it looked way too busy and a little overpowering so I made another one in ivory and it looks about a thousand times better.  I suggested getting black fabric and making it in black instead but she likes the ivory.

IMG_7772IMG_7760

I have some thoughts on the pattern construction too… skip this bit if you’re not making the pattern since it’s not going to make any sense otherwise…

DSC_2630Although it looks short on the model in the magazine, it didn’t look that short when made up so I removed about 9cm off the bottom to get the same look.   Sleeves are about 2cm shorter.

The way they’re written; the instructions are a touch confusing  since for much of it you’re bouncing back and forth between different construction notes, for style 105 and 106, and to complicate things the neckband of style 105 is very different from that of 107, since it has a collar whereas 107 is collar-less!  and there’s zero mention of the collar-less version in the instructions…  so you sort of have to work it out alone.  I attached the folded neckband to the neckline in one pass, gathered it up inside the seam allowance a little, then overlocked the raw edges along the gathering inside.  This helps pull the neckline in a little tighter, and the necktie does the rest of the work in gathering up that wide neckline.

With the pockets, the instructions have you stitch up the side seams, THEN insert the pockets… well I always do it the other way around, so it was kind of a whaaat? moment for me.  Anyway, gave it a whirl.  It works fine, of course… just thought I’d mention it because it was different…  🙂

I made a size 36, Cassie’s usual size, but in the course of making it I tried it on a  few times, just to check various bits and pieces, and found it worked perfectly well on me too, a size 38. Something to keep in mind if you’re a larger size but only have enough fabric for a smaller size!

Anyway whatever; she loves it, I love it on her I think she looks adorable in it, so the final verdict; a great success!

DSC_2705

Details:

Dress; Burdastyle magazine 02/2015-107 also available here, crepe
Sandals; Sportscraft, mine! I’ve had these for about 10 years or so

DSC_2740

pinterestmail

welt pocket in a shearling coat

IMG_8284SO!  I’m currently making a shearling jacket to take to our much anticipated trip to snowier climes, coming up v v soon… eeeeeeeeeeeeeee! I can’t wait!!

Anyway, I’ve put a couple of welt-like pockets in, and found it necessary to devise a method just a tiny bit different from the usual.  So, I took a few pictures to show how I did it…

First, cut two pocket pieces in the shearling, two pocket pieces in a lining fabric, and two welts in shearling.  Cut the pieces biggish, at least a little bigger than you think you will need, just in case.  Remember the golden rule, you can always trim a little extra away, but you can never ever add it!  For the pocket lining I used an ivory cotton denim from the leftovers of my favourite flared jeans.

IMG_8242IMG_8243

Try on the coat and determine the position of the pockets, mark with pins.  Lay the two fronts together to transfer markings to the other front piece, and measure several times to ensure the markings are symmetrical.

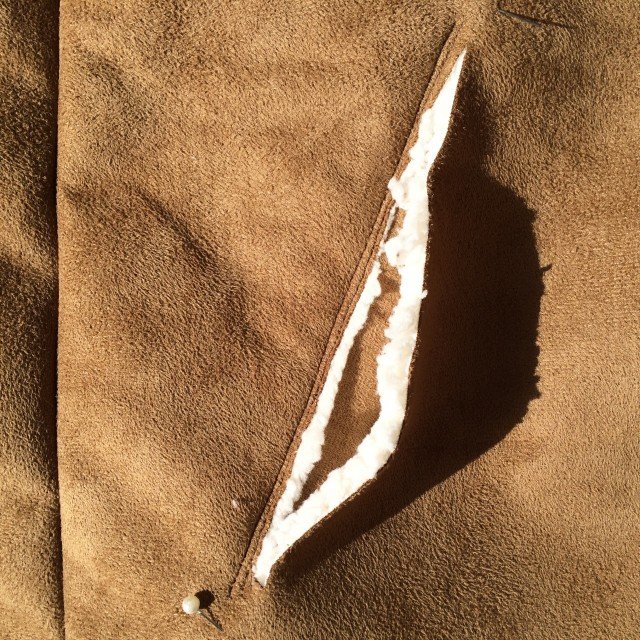
Cut pocket opening between the marks, no less than 3cm shorter than the welt piece.  To give an idea of lengths; my welt is 20cm long and my pocket opening is 16.5cm… but my hands are pretty big and a small handed person may not need quite so big an opening  🙂

IMG_8244

Lay the shearling pocket piece underneath the top edge of the pocket opening, pinning the pieces together with an overlap of 1cm (below L).  Stitch from the top side, in a a double row of closely-spaced stitching. (below R)

IMG_8246IMG_8248

Finish the raw top edge of the pocket lining with overlocking stitch, then lay over the shearling pocket piece, aligning all raw edges and pinning the pieces roughly together near the top (below L).  From the outside of the coat, turn in the top edge of the pocket lining piece and pin to the pocket opening edge (below R).  From the outside of the coat and keeping the shearling pocket piece free, topstitch in a double row of closely spaced stitching

IMG_8249IMG_8250

Now stitch a few backward/forward passes of stitching along the two short edges of the pocket opening through all thicknesses.(below)


IMG_8254

Unpin pocket pieces from each other, and lay shearling pocket piece away from the welt, pin it up well out of the way… likewise, pin the pocket lining piece in position to the coat (below L).  Lay the welt piece, right sides together to the coat, underneath the pocket opening and pin; stitch together catching the pocket lining piece in underneath  (below R)   Note; it’s better to lay the welt closer to the pocket opening edge than pictured below right, as in with the welt raw edge hard up against the pocket opening… but I neglected to take a picture in the correct position, sorry!)

IMG_8256IMG_8257

Turn up the welt, pin in position, and again keeping the shearling pocket piece free but the pocket lining piece pinned in position; topstitch 6mm outside the previous stitching (below L)  Unpin the shearling pocket piece and lay it back against the pocket lining.  Now is the time to determine the finished, desired size of the pocket… try the coat on, measure and trim pocket pieces as desired; finish the raw edge of the pocket lining with overlocking stitch, and stitch pocket and pocket lining pieces together, right sides together.  (below R)

IMG_8262IMG_8263

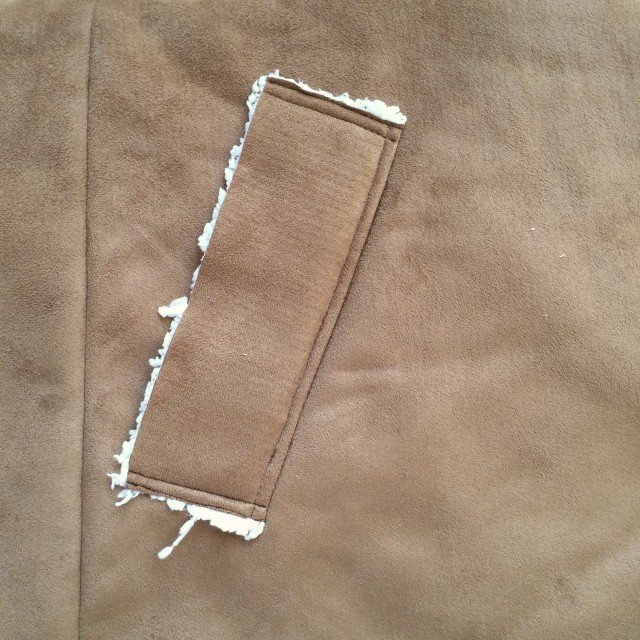
Pin the welt up into position.  At this point, determine if it needs trimming or neatening up; I eyeballed mine and decided to trim 1cm off the long free edge; a purely aesthetic choice.  Once you’re satisfied with its proportions, topstitch it in position along both short edges with two evenly spaced rows of topstitching.

IMG_8264

And… pocket done!  At this point, I actually decided the pocket itself was still a little too big, and trimmed and re-stitched the curved edges… no biggie, it’s pretty easy to do this, even at this late stage since it’s tucked away inside the coat.  That’s a personal choice!  Also, technically this is not a pure welt pocket but a sort of faux-welt pocket really… maybe you could call it a sort of patch cover over a welt-less pocket?!  😀

I hope this tutorial is useful to someone, please do leave me a comment to let me know if you have found it helpful.  Like everyone, I do love comments!

IMG_8266

pinterestmail

2015; a retrospective

The last day of the year! now for some riveting (haha) navel-gazing upon the creation and wearing of my clothing.  Kicking off with my favourite outfit pictures from each month.

January

DSC_2605
DSC_2645 - Version 2
IMG_6807
SO:
What have I made: Quantitatively, 72 things, including 22 things for others.  This number is counting each underwear set of bra with two matching undies as one thing even though technically it’s three things! as well I made some beanie/dress/shirt outfits for preemies, and counted each set as one thing.
Knitted garments: 18

From existing stash: 19

What am I wearing: I keep my daily outfit blog updated pretty faithfully and really do analyse it…  I tot up the numbers last day of the month, and update an excel spreadsheet on the last day of the year; but won’t subject you to that.. you’re welcome #statsfreak #whatcanisayilovenumbers
This year, 93.8% of clothing I wore was made by myself; this number includes underwear, socks and tights but not shoes.  Qualitatively, things I wear that are not made by me are my Metalicus tops, that I’ve had for years and years and have no intention of throwing out just to appease my insane me-made sensibility, and scarves that have been given to me as gifts by family.  Not throwing those out either, obviously!

I have not bought any ready to wear clothing for SIX years now!

My most worn items of clothing this year can pretty much be summed up in the following pics:
DSC_2662 DSC_2582 DSC_2583
DSC_2757 - Version 2 DSC_259723dec

and also my cream infinity scarf and my raincoat got a lot of use


 I took part in the vintage pattern pledge for the first time, and managed to make six things…
 vintage pattern pledge 15
Favourite creations of the year: well, obviously I’m pretty pleased with my 1yr1outfit efforts! although I might not wear them super-frequently I am very proud I managed to fulfil the challenge successfully.
 As far as wearability and suiting my lifestyle; my favourite creations for the year are probably my watercolour silk dress (pictured above), my recently finished Japanese indigo-dyed dress, also my pleather/wool moto jacket rates pretty highly in the satisfaction stakes.

A huge honour was when Heather of Closet Case Patterns named her new pyjama pattern for me!  *pinches self*  pictured in March, above

Fails:  I tried to grow indigo for a home-dyeing experiment… FAIL.  Not a single seed even germinated  *sob*  I’m still getting over that one…   I let my blue sea change top go.  Lesson learnt: panne velvet is awful stuff and good for… well,  practically nothing, actually.    My purple silk tulip skirt was shaping up to be real goodie but got chewed up in the washing machine when it somehow snuck in with a load of denim jeans *sob* like your hand knit lace shawl versus a new puppy, obviously that’s not going to end well.  I discovered lingerie made from old recycled tights does not last nearly as long as lingerie made with new fabric SURPRISE….. NOT!  and also my recurring epiphany that pleather/leather skirts are kinda stupid things and not comfortable at all.  I don’t know why I keep on torturing myself by adding them to my wardrobe really, just a dumb glutton for punishment, I suppose.  Not quite ready to give up on my chocolate one just yet though, I’m going to give it another chance to prove itself next winter….

But anyway; overall, as far as my sewing/wardrobing efforts go I’m pretty happy with the year.

Most importantly of all!  I’d like to take this opportunity to thank everyone who reads my blog and takes the time to leave a comment, every kind word is very much appreciated.  *mwah*  I love that the sewing community are such a busy and happy bunch; creating like mad, inspiring and supporting each other always, wearing our creations happily and proudly, and sharing freely, openly and generously with each other.

Thank you so much! big hugs all round  🙂 and here’s to a wonderful 2016!
pinterestmail

3 hoodies

DSC_2629

In other Christmas “making” I also made hoodies for my three menfolk; Craig, and for Tim and Sam.  For the last few years I’ve made summer shirts for them, but this year I wanted to do something different.  And all of them love wearing hoodies! so bam! easy decision really.

Hmmm, yes, I had to get Bessie to model them, who is shaped very differently from each of my guys, of course!! but I took these pictures before I wrapped them up to pop under the tree and haven’t had the opportunity to get the boys to model them for pictures.  Not to mention that it’s been 30C+ every day… phew! so no one wants to wear them just yet! Pictures with them actually IN their new Christmas stuff will have to wait for a little while…

I used my pattern taken from an old hoodie of Craig’s, that had a really cool style of hood/collar combined; it sits really nicely and looks a bit more stylish than the regular two-piece no-frills hood.  If anyone’s interested I once wrote a tutorial on this collar/hood, with pictures of the pieces if you’d like to have a go at it.

DSC_2623Over the years since I first drew the pattern out I’ve had to slightly alter it and custom fit to each of my boys each time I’ve made it.  They keep doing annoying things like working out and growing taller with longer arms and gaining a bit here, losing a bit there as time goes on.  So it’s always a bit more of an exercise than just whipping out a pattern and zooming it up with the greatest of ease…. NOT!

Anyway, I’m not complaining.  I love making stuff for my family  🙂

I went to Spotlight and bought up big on stripe-y, fluffy jerseys in a winter weight.  And the beanies in the previous post? I chose the colours to match so that each man’s hoodie/beanie is a nicely toning ensemble in their colours.

Sam’s hoodie, at top; is light grey and white, with a grey beanie to match, because I think he looks great in grey.  I bought some pale grey marled lightweight jersey to do the hood and the kangaroo pockets, because I feared it would look a little too pyjama-y, or sort of juvenile or something.  I don’t know what it is about the pale grey stripe that made me worry about this, because… it’s funny, can’t logically explain why I have this thought, but I reckon you get away with a full hoodie in a blue stripe whereas in pale grey not so much, looks bit cheap or something.  Can’t explain it.  In any case I just intuited having a contrast in this particular colour would be a good decision and I’m glad I did it.

For Craig, I chose a muted air-force blue, with a small white pin-stripe.  And with a red beanie for him, because he likes red and blue in winter and tends to wear them together a lot.

DSC_2628The air force blue looked pretty cool and right up his alley and it’s a very nice weight, I loved it upon first sight.  However, after washing it and hanging it out to dry, then laying it out for cutting, I discovered to my amazement that the “stripe” actually was more of a gentle, slight “wave” of stripes across the fabric looking like this ” ~ “, NOT a straight horizontal stripe.  AAAAUGH!!  and being “slight” of course, means it really comes across like a bit of a boo-boo, rather than look like an intentional wave, which I could work into the design somehow.  Nope, this just looked OFF.

Grrr.  Anyway, I did my absolute best with it, pulled it into shape in some places, cut out a wee bit dodgily in other places where it didn’t matter, like the kangaroo pocket.  I know the pocket appears to be not drastically far off straight in the picture but trust me, that’s an optical illusion created by clever cutting and placement!!  Also the side seam stripes don’t match, the most obvious area where the fault can be seen.  He really likes it though, so I’m putting aside my dumb perfectionist tendencies and just enjoying that he enjoys it  🙂

For Tim, I chose a navy blue with ivory stripe and his beanie is the matching navy blue.  This fabric was the thickest of the lot, slightly ribbed, and is toasty warm.  For the drawstring in the hood, the fabric was too thick to work and so I used a strip of Craig’s hoodie fabric, folded outwards so the solid coloured blue is on the outside.

DSC_2630Oh, the hoodie strings… in each case I made a self-fabric drawstring for the hoodies, bar Tim’s, as explained.  To make a drawstring in the jersey, I cut a 1-2cm strip of fabric across the grain.  Most jerseys have a natural tendency to roll or curl up across the grain, and you can use this to full advantage while making your drawstring.

IMG_7459IMG_7460

Just allow the fabric to curl up just like it wants to, and stitch it with a zig-zag stitch in a width set to just under the width of your finished strip.  Start from the centre, because it looks neater that way with the central start/stop point hidden inside the hood casing, and finish at each end.  IMG_7461IMG_7467

Thread the flat drawstring through a wool needle and pull it through the hood casing; cut both ends equally to size, then tie off in a simple knot, so they won’t slip back through the eyelet at all.  Easy peasy, and colourwise looks like it was tailor-made to go with the hoodie perfectly, which it was, of course, haha.  Well, by that I mean that we all know how difficult, if not impossible it can be to get drawstrings to colour-match our fabrics perfectly?  mm hmmm.

Problem solved!

IMG_7468

The first three hoodies that I made from this pattern can be seen here, here and here; hoodie tutorial here

pinterestmail

a bevy of beanies

IMG_7626

A bounty of beanies!  Buckets of beanies!  Beanies galore!  Beanies beanies beanies!  Beanies! Beeeeeeeeanies…DSC_2625

So, I might have beanies on the freaking brain lately.  I’ve been on a beanie making bendahhh!  A beanie-a-thon.  Makin’ some beanehhhhs!  Yeah..  DSC_2638

And I got my recent new man-about-the-house, Mr ‘Ed to model the newest creations.  Over to you, Mr ‘Ed!DSC_2627Well, hello thair! I’m Mr ‘Ed, but you can just call me Mr ‘Ed.  Soooo frightfully pleased to meet you.  My, but you have ze most beautiful eyes… shining with ze brightness of a thousand stars.  May I buy you a drink?DSC_2628

Oh, sorry ’bout that.   He looks like the strong silent type but actually he’s the worst sort of flirt.

OK, so the beanies…  with a trip away to snowier climes coming up pretty soon I conceived the brilliant idea of knitting a new beanie for everyone in the family.  Fired up with enthusiasm I immediately bought a small mountain of yarn.  Madness.  I did something right though in that a lot of it was that one-ply chunky yarn, the sort that is like a skinny hank of fleece, barely spun at all. I know this stuff gets a bit of a bad rap but in its defence though, it sure knits up pretty quick and does makes a lovely warm beanie.  I’ve made seven beanies, seven! and I may have given myself self-induced tennis elbow now, or should that be, knitters’ elbow? but anyway, it’s done.

DSC_2631

All beanies, apart from the blue one are knitted in the flat and then stitched up the side.  Generally  I prefer to knit beanies in the round but in this case I didn’t happen to have the right size needles, so in the flat it was:

I’ve written out my three, very simple patterns, and they are all available as free downloadable pdf patterns here

mid grey, black charcoal, burgundy red beanies:   Baggy beanie

(aran-weight)  blue  beanie: Baggy beanie 2

raspberry (at top) and cream (below) cabled beanies with pom-pom: Cabled beanie

Yarns, all from Spotlight:

(raspberry, at top) Moda Vera Jester in Fuchsia, modelled with my mossy green scarf
(mid grey) Moda Vera Mawson, with my mustard cowl
(black) Moda Vera Shiver in Black, modelled with my cream infinity scarf, 
(burgundy red); Moda Vera Shiver in Burgundy, with my mossy green scarf
(flecked charcoal) Heartland in Black Canyon, with my cream infinity scarf
(navy blue) Patons Inca in col 7047, with my mustard cowl
(cream) Moda Vera Jester in Cream, with my plaid scarf, which is just a hemmed piece of slightly fluffy woolly plaid
DSC_2648

Also; here’s how I make an easy cheat’s pom-pom.  Otherwise known as, the pom-pom to make when you don’t have time to make a pom-pom!

The secret is in the yarn, big thick chunky “bulky” yarn.  This’ll take about five minutes, max!

So: start with something like a small book, or a stiff card, or pamphlet or something.  Wind yarn around it, over and over, until a nice thickish wadge of windings has been built up.

IMG_7773Cut through all thicknesses, top and bottom.
IMG_7774IMG_7775

Take a piece of thinner yarn, wrap it once around the middle bit and tie it in a nice, very tight knot.  Wound it back around to the other side and tie another knot.  Wind it around just a few more times, again; tie a knot.  Super tight.  No such thing as too tight.

IMG_7776IMG_7778

Fluff it out, and done!  Any strandy, uneven bits can be trimmed off neatly, or you can just leave it as a bit, messy, floppy thing. Which is pretty cute too, I reckon  😉

IMG_7781

Use the tails of yarn to tie it on to the top of the beanie

IMG_7780IMG_7782

Later edit: I managed to get some photos of my recipients, modelling their beanies  🙂

pinterestmail

Christmas mignardises


IMG_7565

So, every year I make something small to give to close friends and family for Christmas, sometimes a Christmas ornament, sometimes a sweet treat to eat.   This year, I decided on eatables; mini Christmas-pudding mignardises.  Cute, non?

The idea and the details are probably not new but I did adapt from several sources, so I thought I’d compile here my method for making them…

First up, the Christmas cake

My standard fruit cake recipe,  given to me by my old friend V yonks ago, I’ve been using it ever since.  It’s a nice boiled fruitcake, very moist, so a good choice for making the cake-balls.  I doubled up the ingredients to make two fruit cakes, and this plus one quantity of rum buttercream icing should make approximately 140 bite-sized balls, if you don’t eat any in the meantime  😉

IMG_7525

Pineapple boiled fruit cake:  (these quantities are for one cake, double this quantity is required for the remainder of the method)

Tip the following ingredients into a saucepan:

450g can crushed pineapple, drained but reserving a little of its juice just in case
125g butter
375g mixed fruit
1 cup sugar
1 tsp mixed spice
1 tsp bicarb f soda
pinch salt (optional)

Boil, stirring, for 10 min, if it starts to stick stir in just a splash of reserved juice.  Allow to cool, then add:

1 cup self-raising four
1 cup plain flour
2 eggs

Mix in well.  Again, if it seems too thick, add a dash of reserved juice.
21cm square cake tin, 160C for about 40 min or until cooked, leave for 5min in tin, remove to cool completely

As mentioned, this quantity makes just one cake, for this method double up to make two.  Once the cakes are cooled completely it’s time to make the balls…

Now; you’re forming the cake into balls using buttercream icing as the binding agent… I found my basic recipe on taste.com but to impart a festive Christmas-sy flavoured air to them I substituted a large dollop of rum in lieu of some of the milk.  If you don’t want the alcohol just use all milk and no rum, or just a dash of rum essence, for the flavour.  I found this quantity to be enough for the two cakes, so halve this quantity if you’ve only made one cake.

IMG_7526

Rum buttercream icing:

125g butter
500g icing sugar
4 tblsp rum + 2 tblsp milk

Cream butter until smooth.  Stir in about 1 cup of sifted icing sugar.  Add rum + milk and mix.  Stir in the remainder of the sifted icing sugar, beating well until smooth.

It starts to dry out straightaway, so use immediately!

IMG_7529
I rolled the balls, half a cake at a time,because it’s kinda messy work and this was all I can handle, but whatever works for the individual of course.  Anyway, break off a sizeable piece of cake that you can handle and crumble into a large pan.  The pieces should be fairly small and crumb-y, but obviously there are going to be some chunky fruity bits, don’t worry too much about a very superfine consistency.  To half a cake worth of cake crumbs, add a quarter of the rum buttercream icing and knead and mix it in thoroughly with your hands, then take about a tablespoon at a time, or bite-sized pieces, roll the mixture into balls.  No doubt about it, this is messy work, best not pick a day you’ve just had a manicure; although I will say that the butter etc all over your hands impart beautifully soft skin afterwards!  When rolled, push them into the bench ever so gently so they have a little flat base, so they can stand upright without toppling over.

IMG_7530

Decorating:
I found this quantity of cake to require:

650g white chocolate
400g glace cherries

Melt chocolate in three of four batches for ease of handling, and either dip the balls or drizzle over the cakes, so as to look like custard or brandy sauce as it’s poured over Christmas pudding.  Push half a glace cherry on the top or use other glace fruit, if preferred.


Done!  Keep them in the fridge until required.  They can go individually in mini-patty pans to give away, or not, because I think they look pretty cute all by themselves!

IMG_7576

Festive and delicious! good for an after-dinner treat and they go very nicely with a morning cuppa too, ahem.  I hope the family enjoys them!  🙂

IMG_7570

pinterestmail
Switch to mobile version
↓