Tag Archives: Dyeing

a toasty autumn-y dress

autumny dress front

vogue1316I’ve made another dress.  Just right now, I’m fully into dress/skirt wearing, tending to pluck them from the wardrobe with barely scant regard to the several nice pairs of jeans in there.  I dunno why, since it’s winter, and you’d think I would want to be wearing jeans, but that’s just the way it is.  Of course I reserve the right to become a jeans fanatic again without notice, anytime down the track.
I have a perfectly good reason for a new winter dress… I’m meeting with a bunch of sewing ladies this Friday and you know what that means…. YES!  must sew something new to wear.  Can’t just wear any old thing, hmmmm?  Aaah, the pressure!  Sewing meet ups nearly always require new clothing, yes?  No worries, I’m totally on to it.  Note to self; need lots more sewing meet ups  #kidding  #kindof

autumny dress pocket

The pattern is Vogue 1316, a favourite which I have made twice before, each time with the addition of deep pockets (above) hidden under that long diagonal front curved band. (see my advice for adding pockets to the design illustrated here).  I seem to be in the habit of making a new one every year! but that’s not totally a surprise since I’ve unequivocally loved the design from the very first version.  I also seem to be in the habit of always making it in corduroy! which is kinda funny since I actually have plans for several different experiments using this pattern, none of which involve corduroy at all.  I should get onto those, tout de suite.  Maybe I should realise another one, and there’ll be two new Vogue 1316’s this year? Oh, I think so; yes, I do think so…

autumny dress back

This one is all wide-wale cotton corduroy from Spotlight, with an invisible zip from Spotlight, and the dress is fully lined in burgundy polyacetate lining fabric found in my stash, originally from Fabulous Fabrics.

autumny dress liningWell, for now I’m just going to enjoy mixing and matching this new one into the current wardrobe repertoire.  The warm toasty colours are going to go with lots of things I currently have, I think.

the colours in sunlight

colours
Ok, seeya!  soon I’m off to meet sewing ladies!  and to look at fabric!  and wool!  and eat yummy stuff!  #it’satoughlifecloseup

Wooot

Details:

Dress; Vogue 1316, cotton corduroy, my review of this pattern here
Tights; self-drafted, black stretch stuff, details here and my tutorial for making your own custom fit tights pattern is here
Boots; made by me, details here

autumny dress side

LATER EDIT: 3 years later and the dress got a facelift! a rejuvenating dunk into a crimson dye bath…  I’d been feeling like that apricot in particular was a bit in-your-face in a colour-clashing sort of a way and a crimson dye-bath has united the colours so they meld in together so much more nicely now.  Feels like a new dress!

pinterestmail

totally local, natural dyeing

naturallydyed wool

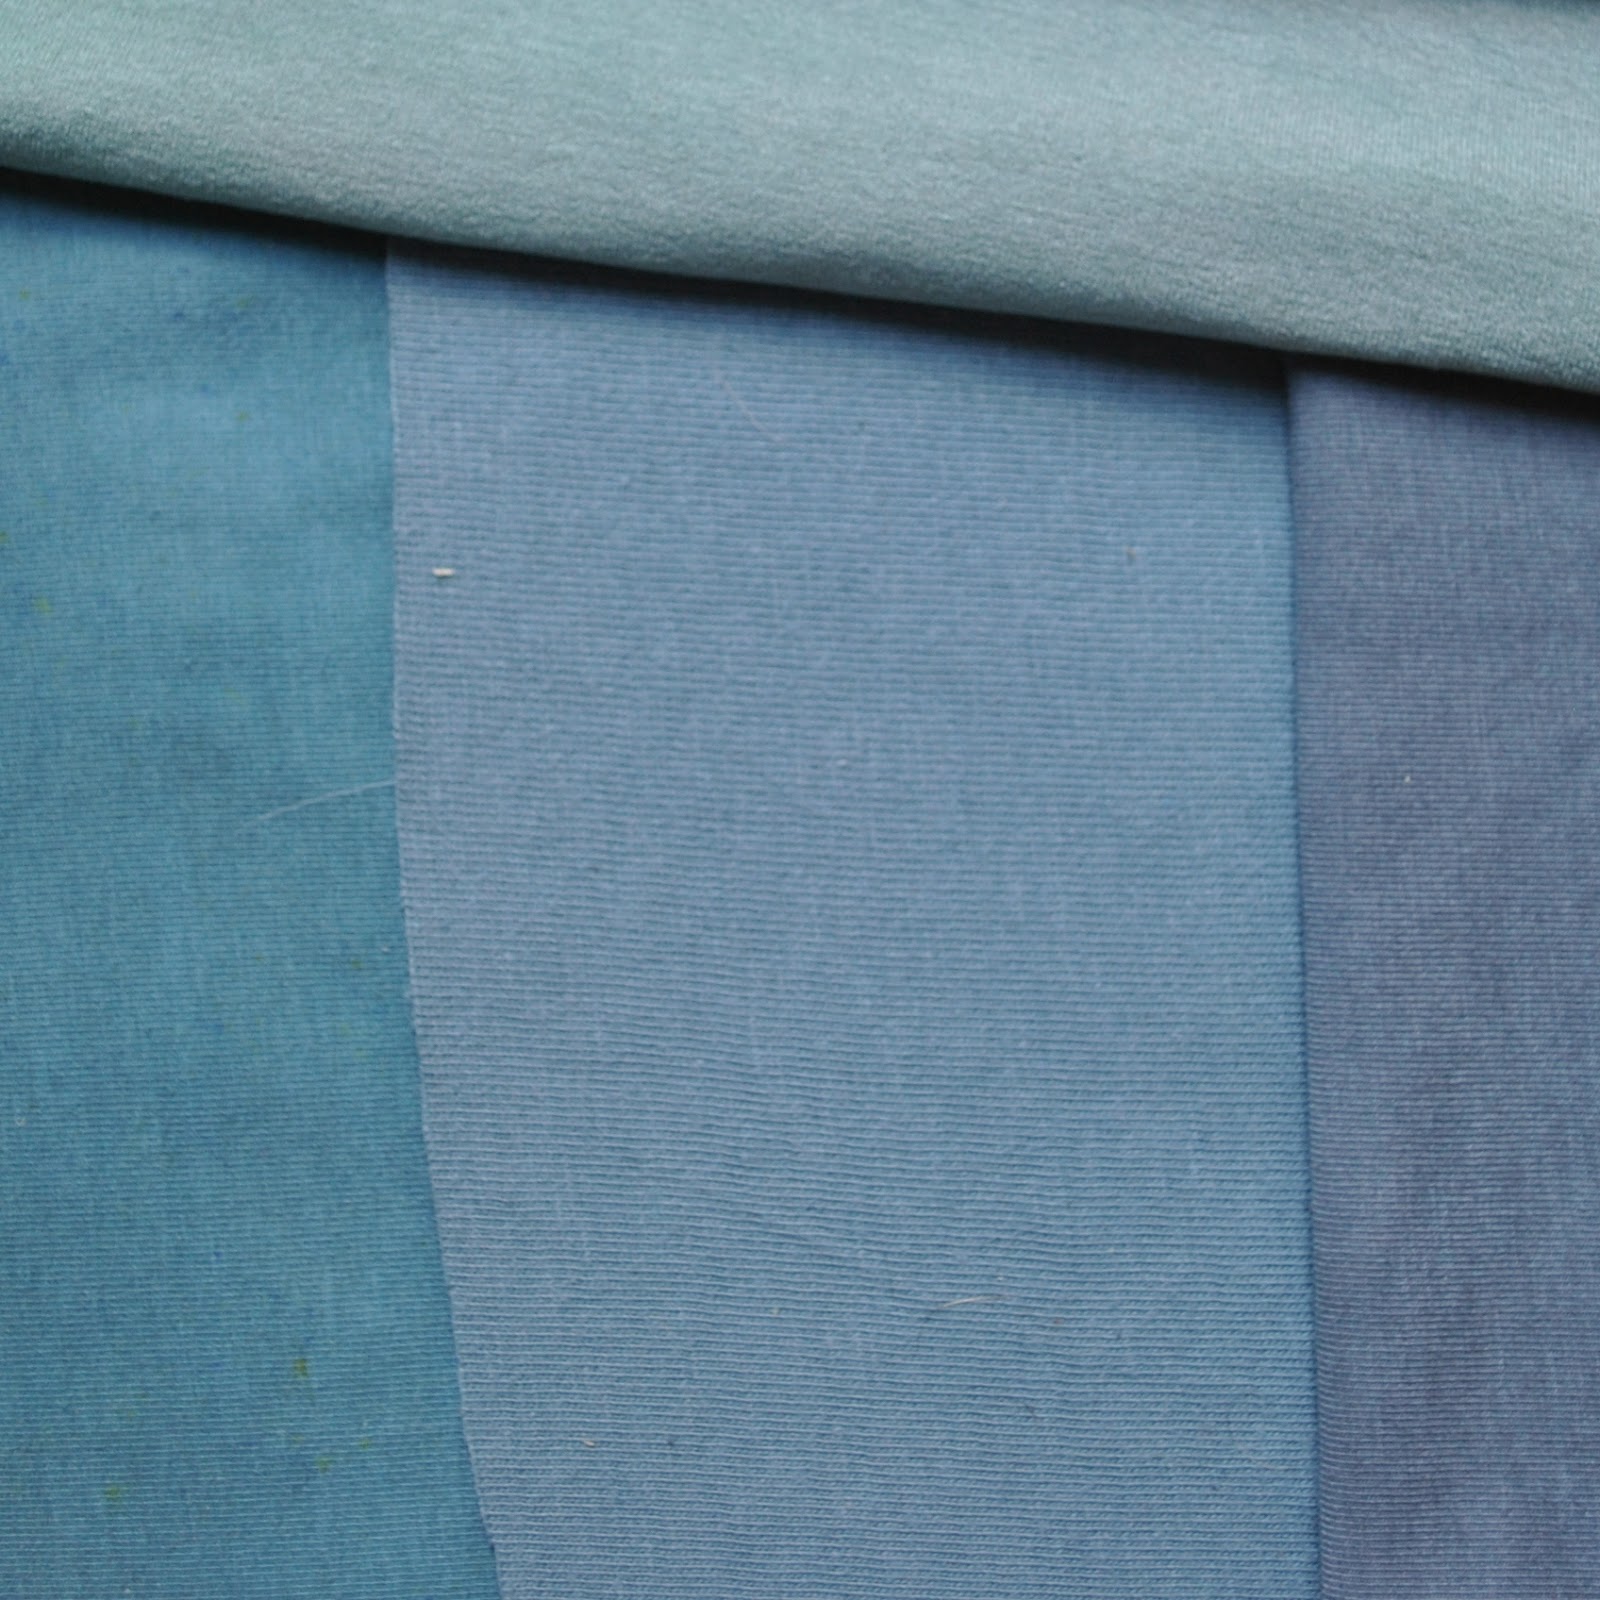
Above: top row L to R; indigo, avocado skin, bracken, lower row L to R; coreopsis, chopped avocado pits, whole avocado pits

Progress report.  I’ve been fiddling about with natural dyeing for my Totally Local outfit… this is the new name for the challenge known last year as 1 year 1 outfit; where we make an outfit for ourselves using ONLY locally sourced materials and absolutely nothing NOT!!!  Yep, for us that rules out zips, thread, and even fabric!  making it quite a challenge. That’s ok, I love a challenge.  The “totally local” is the brainchild of Nicki, of this is moonlight.  I enjoyed myself so much last year I wanted to do it again, and have been brainstorming ideas and hatching plans for my outfit for this year, mwahahahaha.

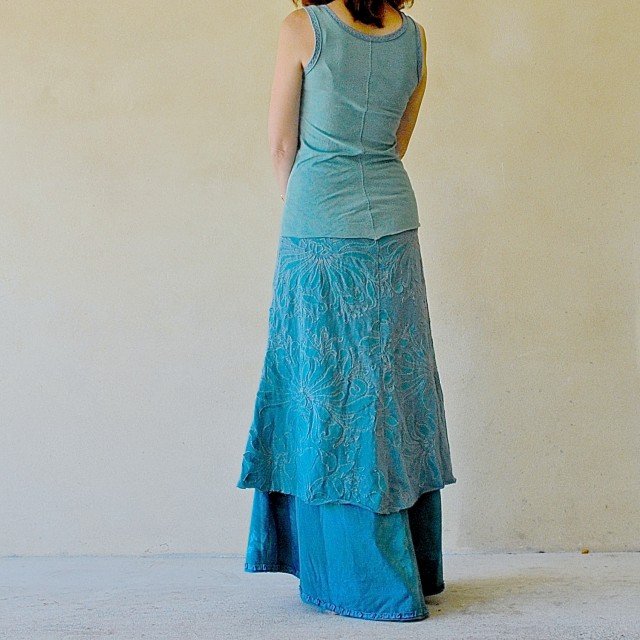
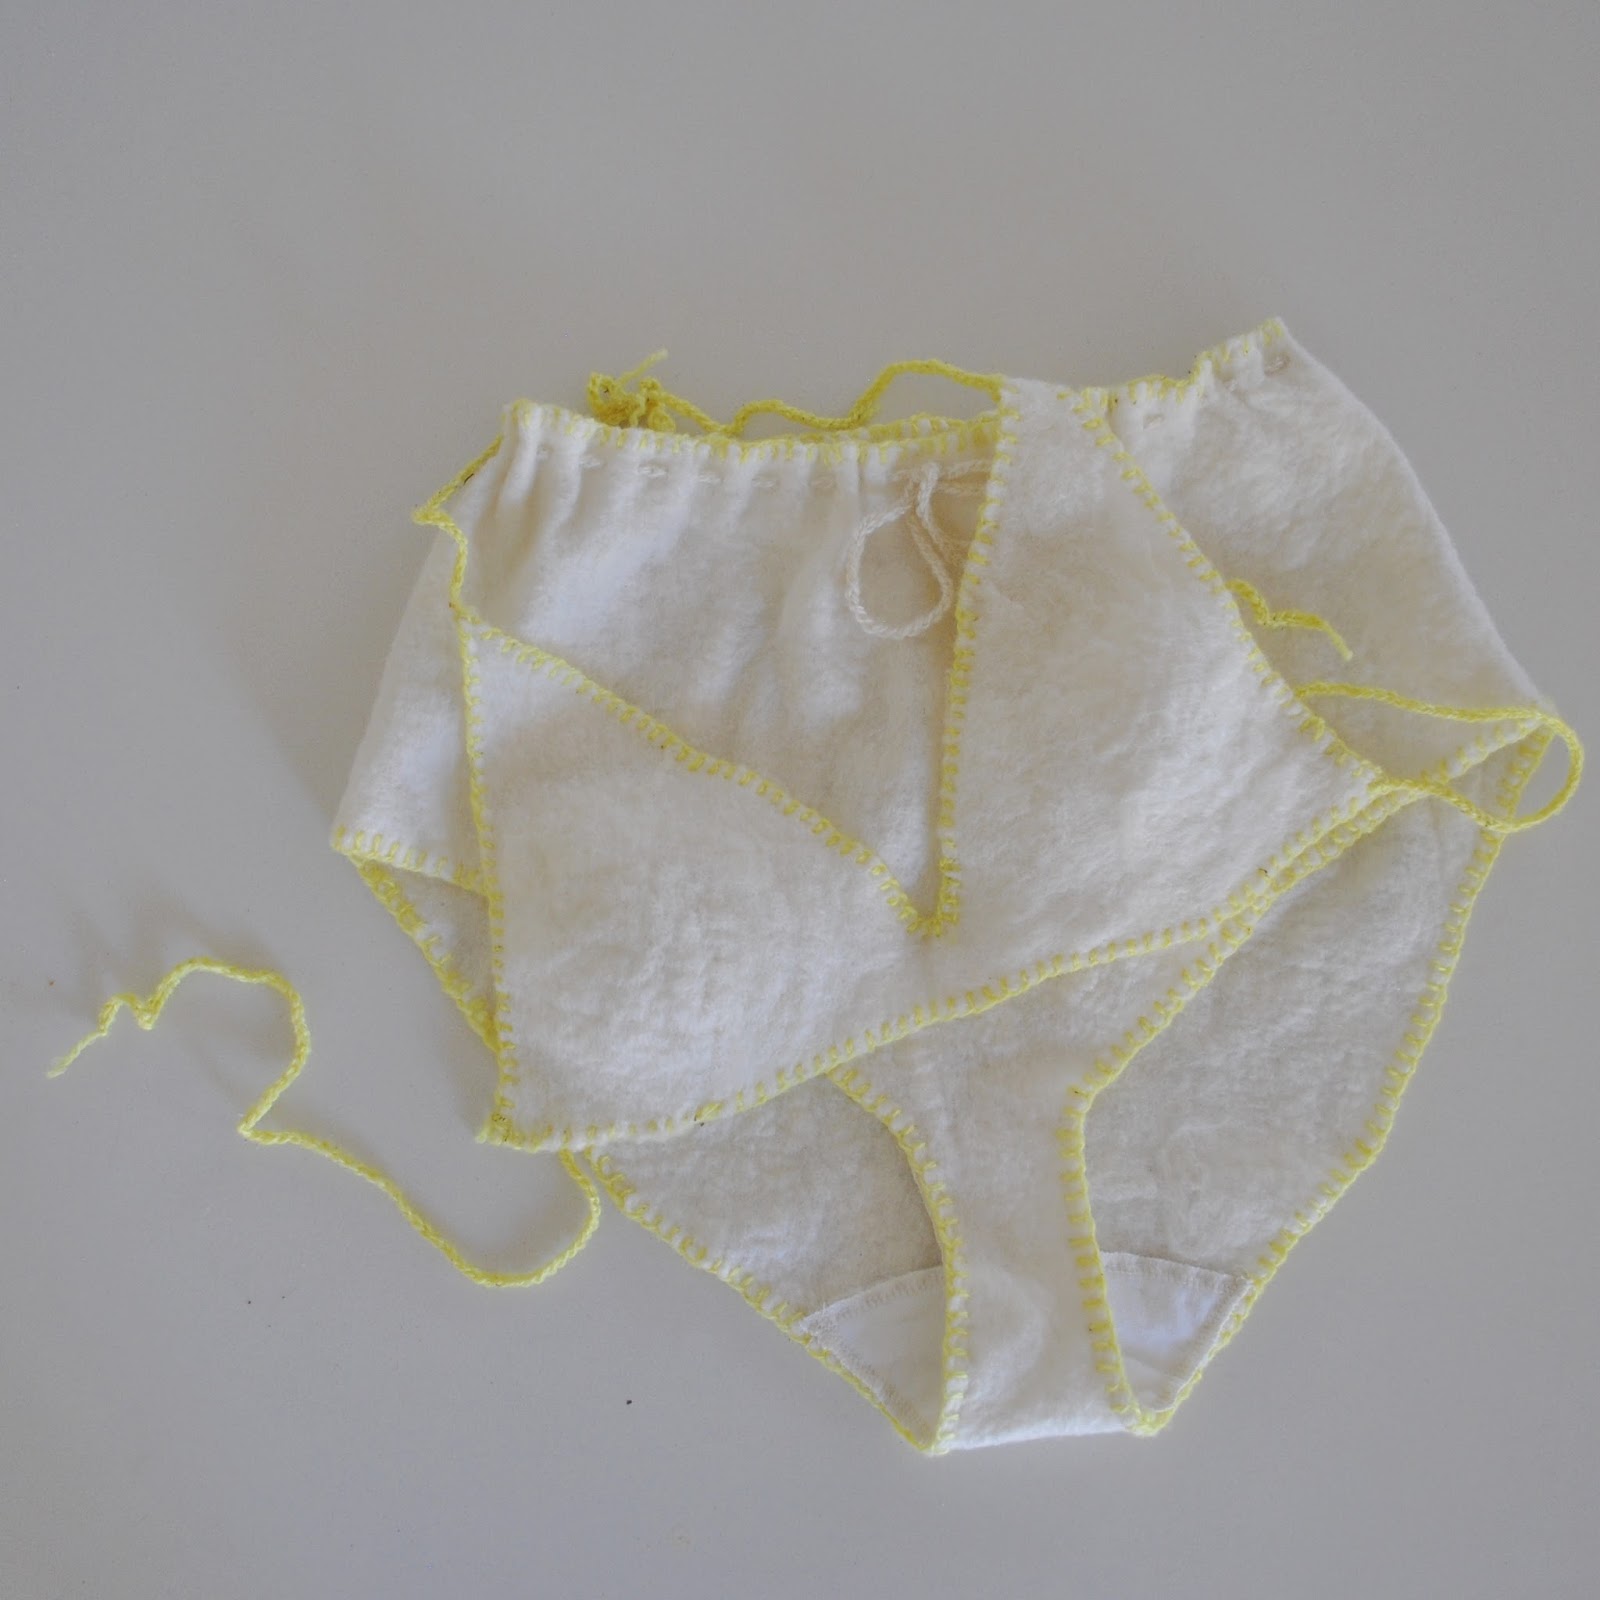
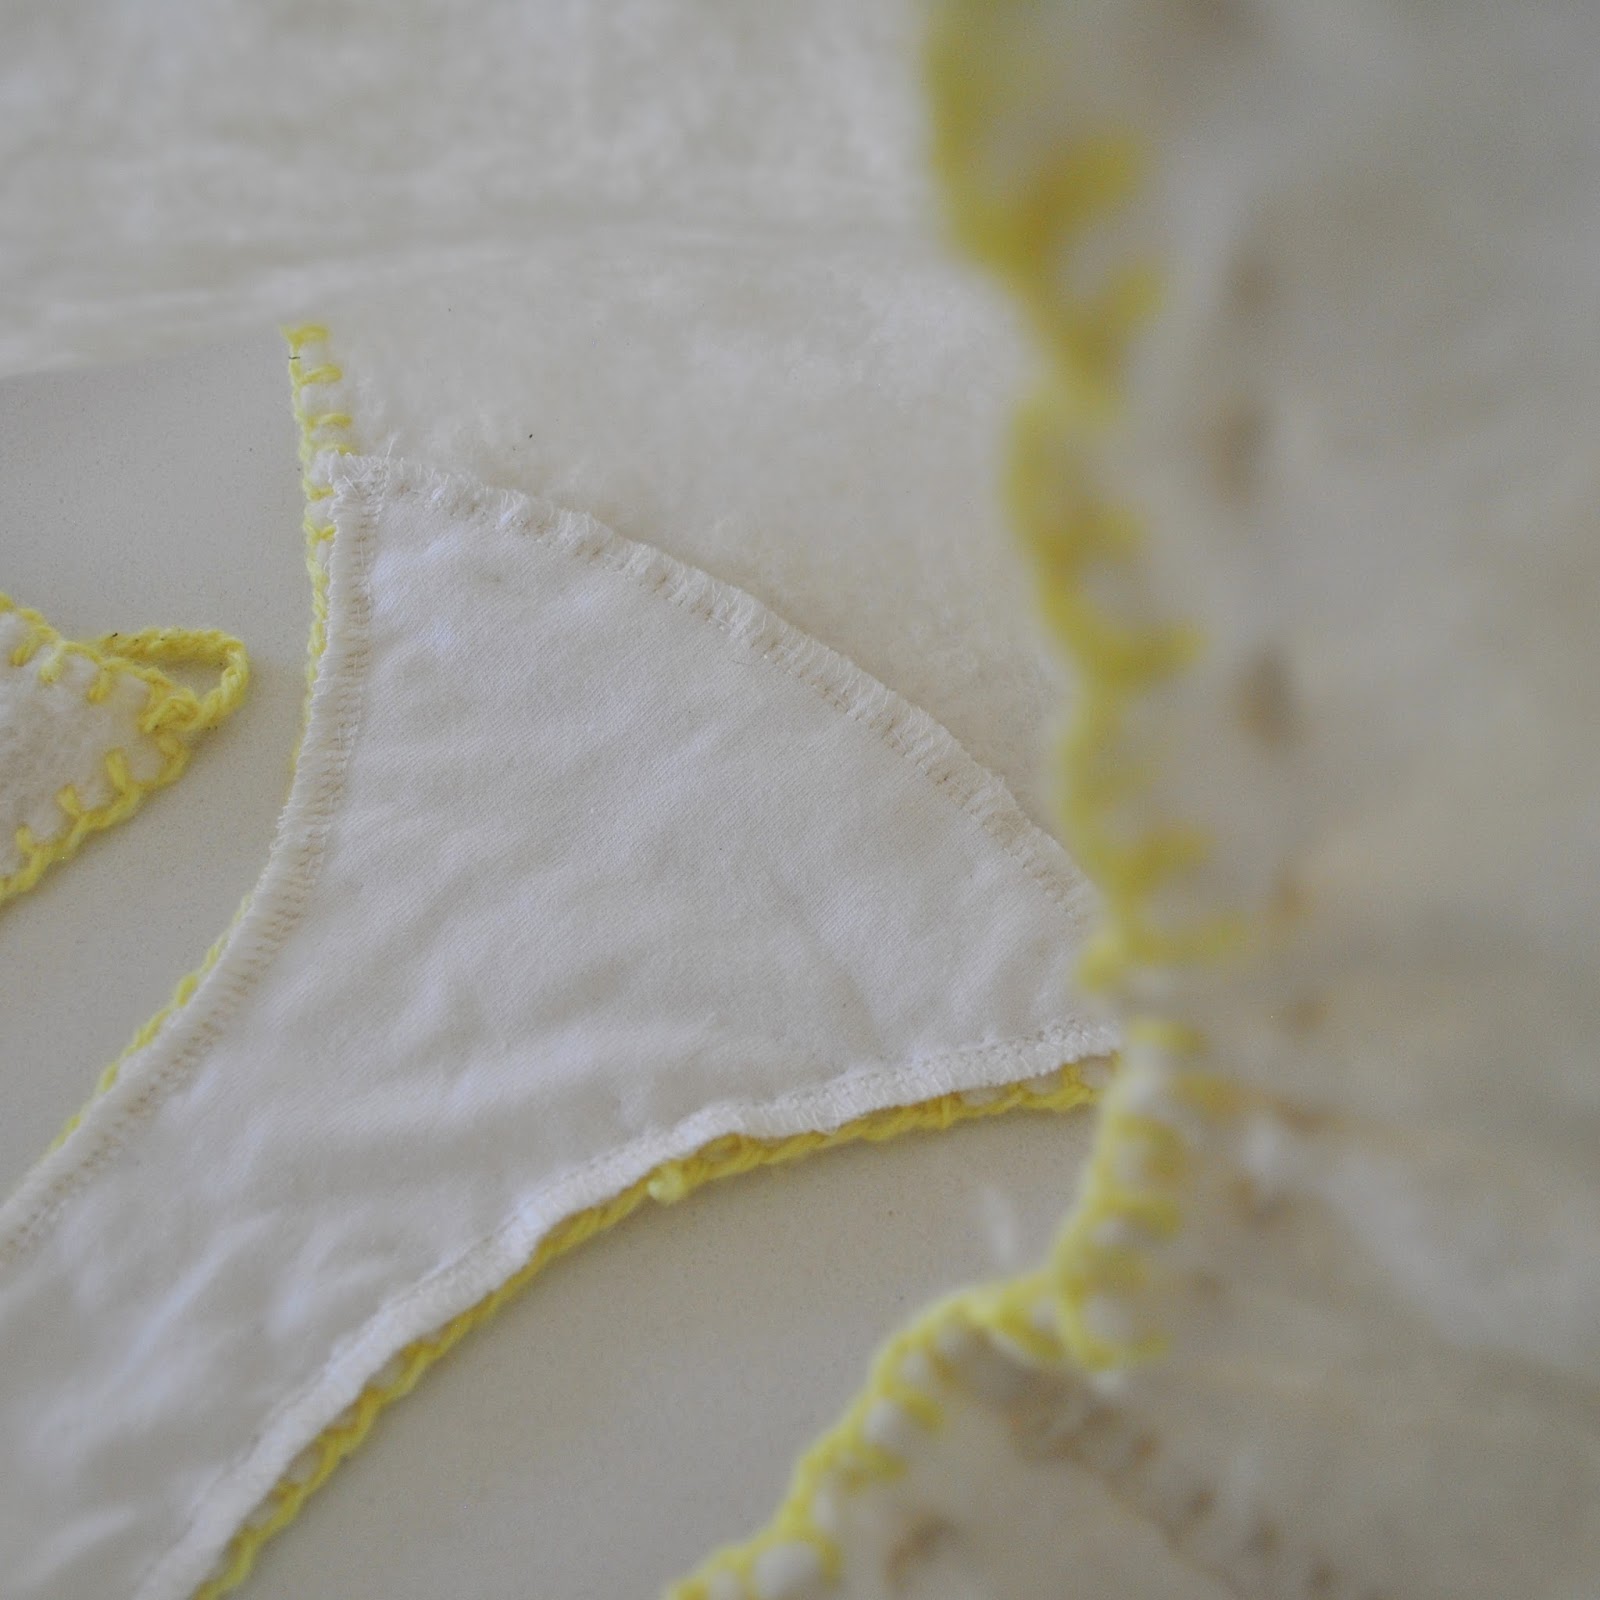
My outfit from last year is here… and it’s all very…  colourless?  isn’t it?  That’s because I opted to use just the natural undyed merino and alpaca wool for my outfit, which is all white or off-white by default.  The only one shot of colour in my ensemble is the brilliant chartreuse sour-grass dyed crochet border on my underwear, which is hidden away!  Yeah that was a bit silly, wasn’t it?!  Anyway, this year I am aiming for a bit more colour in my ensemble, and so have been gathering lots of materials and bits and bobs to make some pretty COLOURS!

So here’s the run-down…

I’ve been buying skeins of handspun, naturally white merino wool from Bilby Yarns.  This merino is 100% Western Australian, grown, sheared and, well, everything locally.  The fleece was spun by two lovely local ladies, Beverley and Gwen.  Literally, nothing about this wool has ever stepped foot outside of the south west of Western Australia, so it qualifies for the challenge perfectly!

You might remember that last year I used naturally white merino yarn that had been handspun by Beverley, for the kangaroo paw embroidery and sewing-together of my felted dress.  I still had some of that yarn left over and simply bought some more, as Beverley spun more.  In some cases, I bought  it still wet from its wash!

Now on to les couleurs…

indigo

Blue:  I owe this beautiful shade of indigo blue to Nicki from this is moonlight, thank you, Nicki! Nicki sourced and nurtured a pot of local indigo… I think it was with the assistance of Trudi Pollard? (not sure, maybe Nicki can correct me if she reads this!) and then, when she learnt she would be going over to the eastern states and would not be taking her indigo pot with her, generously offered to share it with a few others of us local girls who are doing the project, .  Thank you so much, Nicki!  we had a great fun day, dyeing with various locally sourced dyes that Nicki had built up.  I personally only had eyes for that enormously difficult to obtain BLUE.  I soaked a few of my skeins, gently wrung them out and bought them home unwashed and still full of the dye, to “steep”.  Those skeins turned out intensely blue… practically navy!  So, at home, after a few weeks of sitting, I soaked those skeins with some fresh, new, white merino, and the washings gave me this lighter shade of mid-blue above.  I’m planning to keep and use those deeper blue skeins, probably next year, because for this year, I really wanted these more washed-out shades.

My blue wool above is pictured here with some of my own indigo plants, that I am careful nurturing and trying real hard not to kill.  I do hope to use these for dyeing… one day.  Obviously that is not about to happen anytime soon, though.

IMG_1590

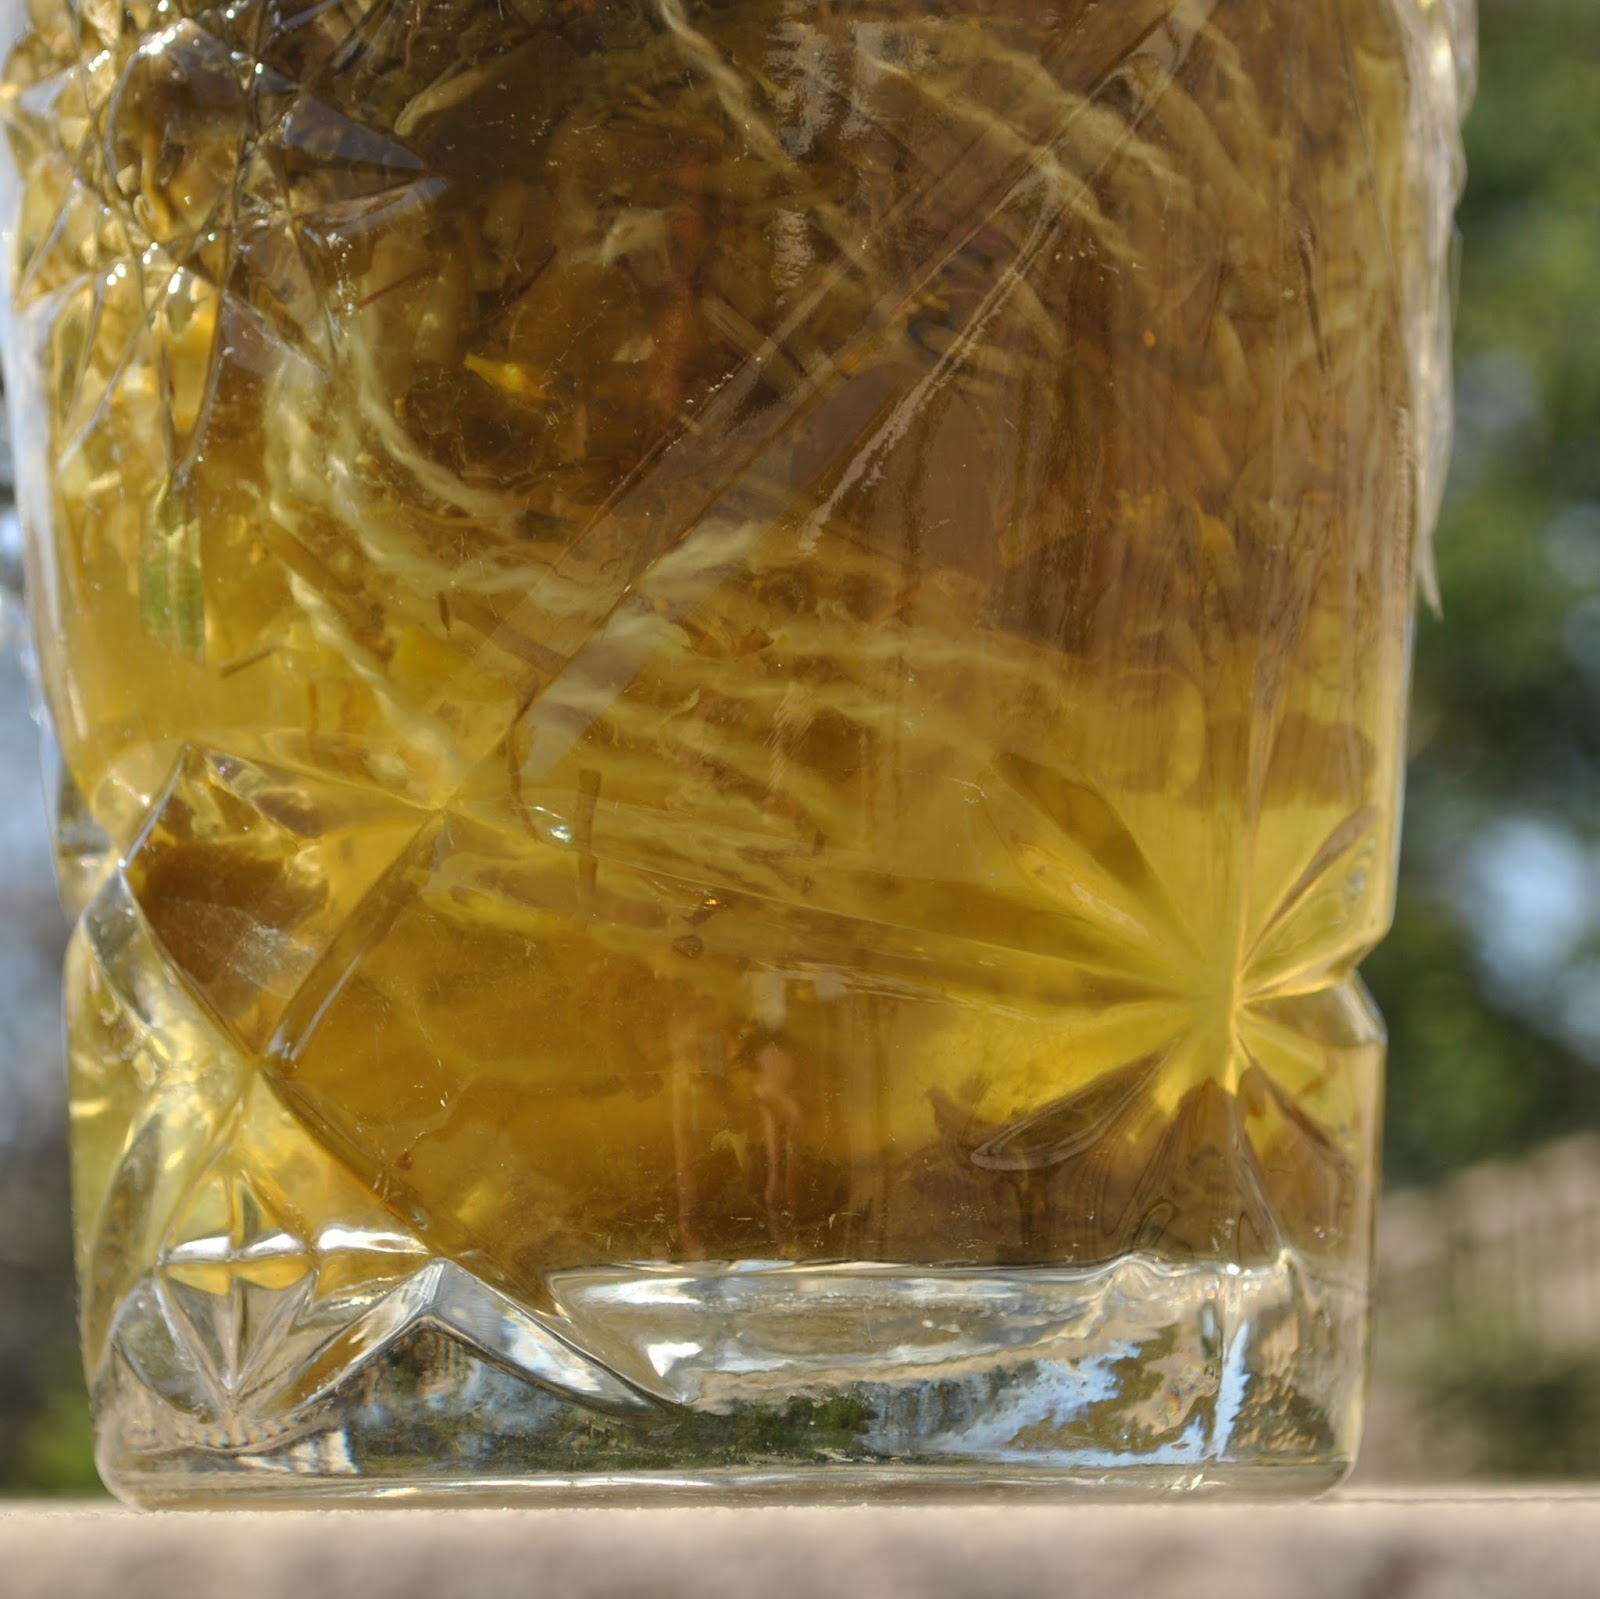
Pink; from avocado pits, merino pre-mordanted with alum.  My avocados were grown on a market garden in Wanneroo, and I bought them from Scutti’s, my local greengrocer.  Basically, I bought them while in season and have been hoarding and freezing the pits and skins all summer!  Once I had enough pits to play with, I gently brought my wool to the boil with some unbroken pits as described in this method here, and left it to cool in the dye and then to soak for a further four days, as the colour of the pot deepened.  I was seriously blown away by how beautiful the colour turned out! so I’ve been collecting more avocado pits and will probably do some more wool this exact same shade.  I LOVE IT.

IMG_1595

Apricot; this is the result of dyeing with chopped up avocado pits, plus skins; merino pre-mordanted with alum.  Again, boiled gently for half and hour or so, topping up with boiling water as needed, then left to cool and then soak in the solution for four more days.  I quite like this colour, and may do some more of it.

IMG_2040

Light sage green;  this is the result of dyeing with avocado skins with some avocado flesh left on them… same method as above.  This colour is alright, quite soft, a barely there grey/green.  Green seems to be another one of those elusive shades that is quite difficult to obtain from our local resources.  I may or may not overdye this one  a touch… just waiting and seeing for a bit …

IMG_2042

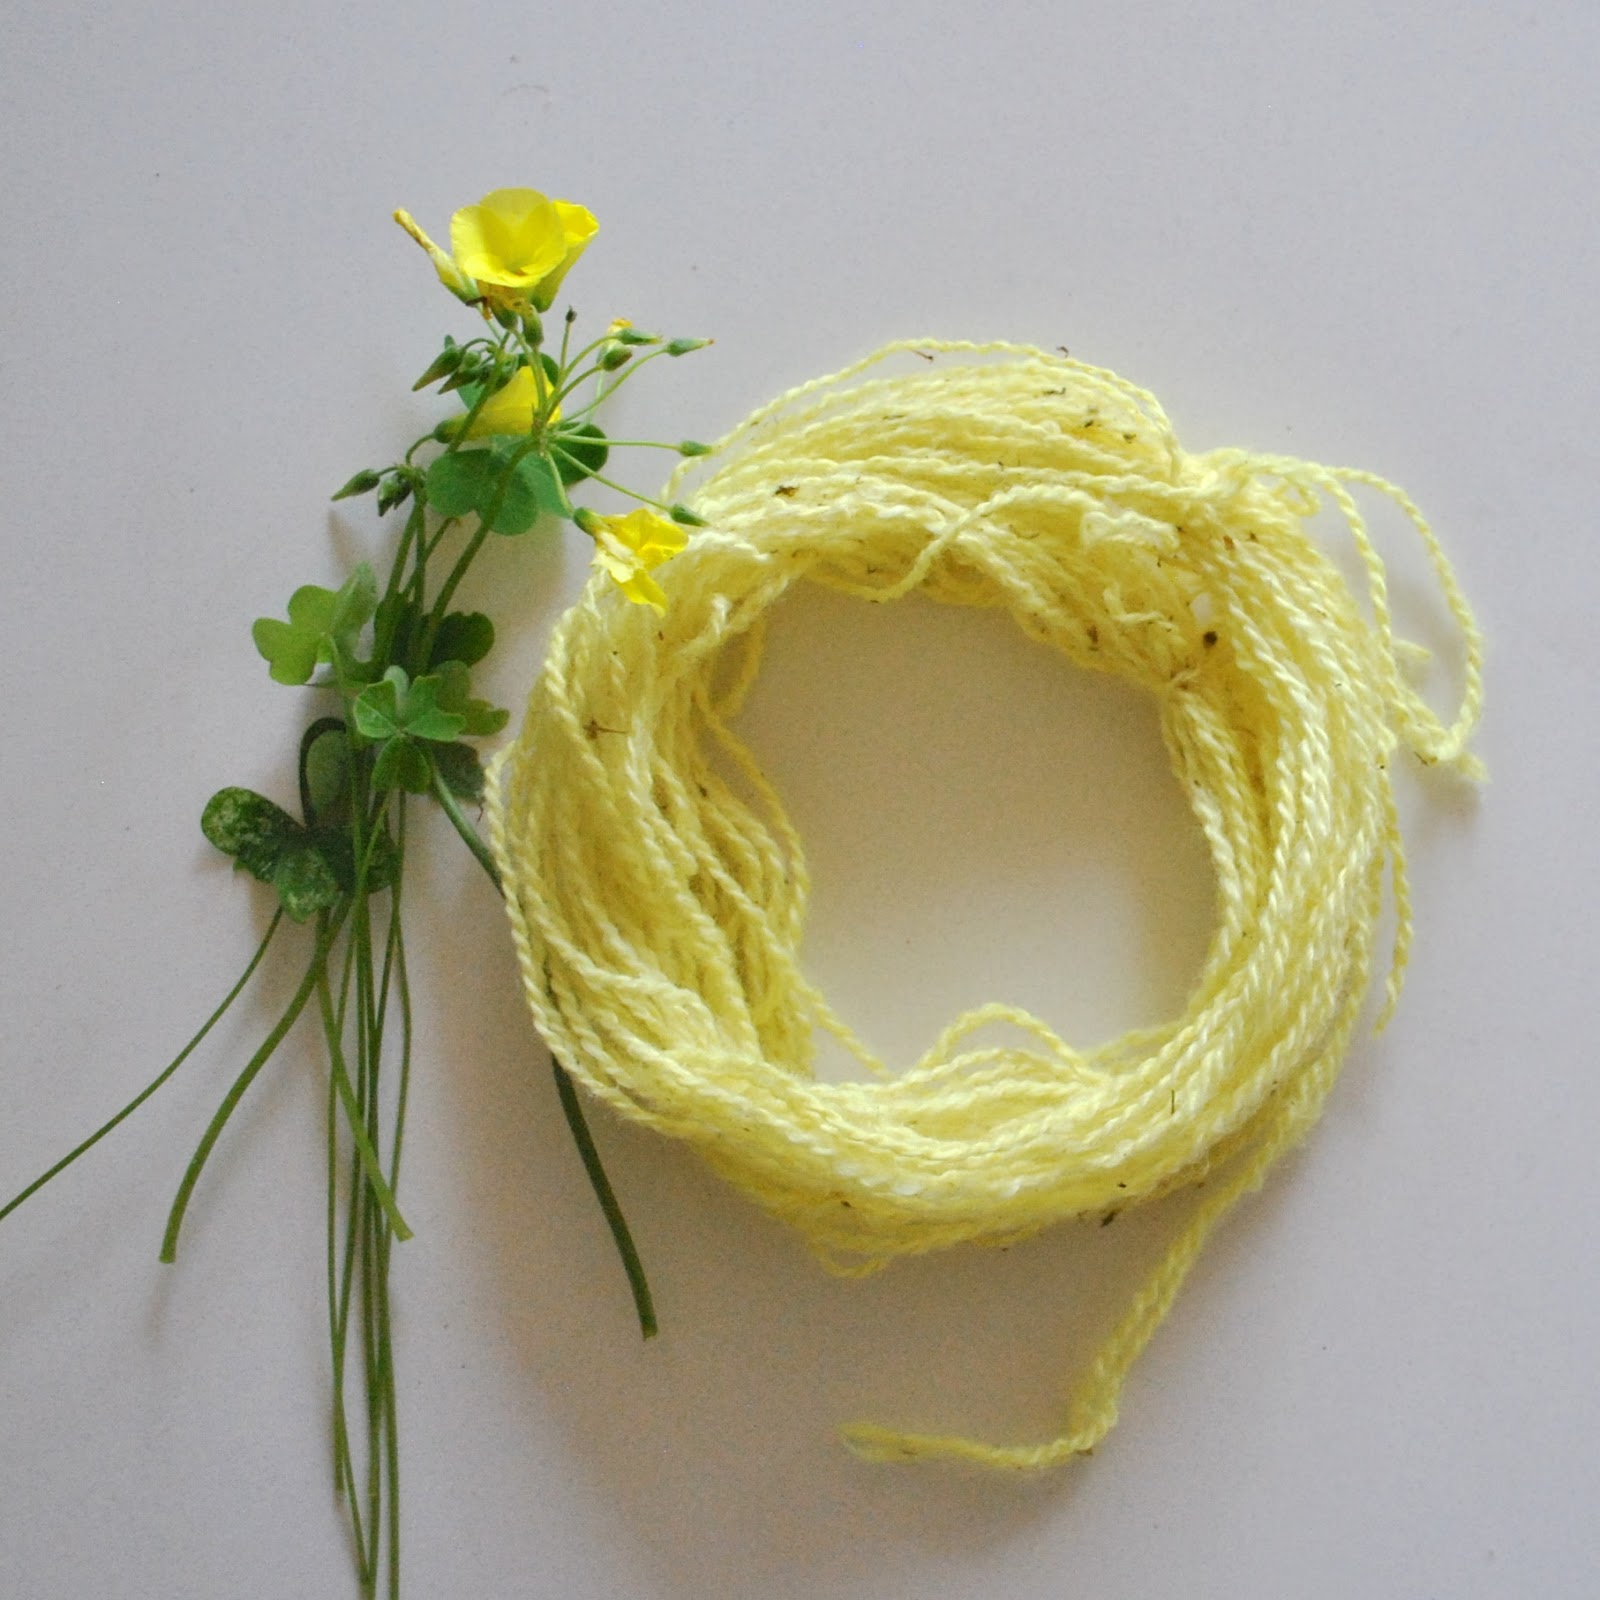
Yellow-y apricot; just a few coreopsis flowers, on merino pre-mordanted with alum. The coreopsis flowers are grown in a garden in Willagee, harvested and dried by the owner, and are available through Bilby Yarns.  To get this soft colour, you really do only need just a few flowers.  For my first experiments, I used lots.  Haha, the joke’s on me, because that first batch turned out brilliant, BRIGHT orange.  For this shade I kept a close eye on it; taking it out to check and rinsing a few times, dipping for just a bit longer until I reached this nice soft shade.

IMG_2047

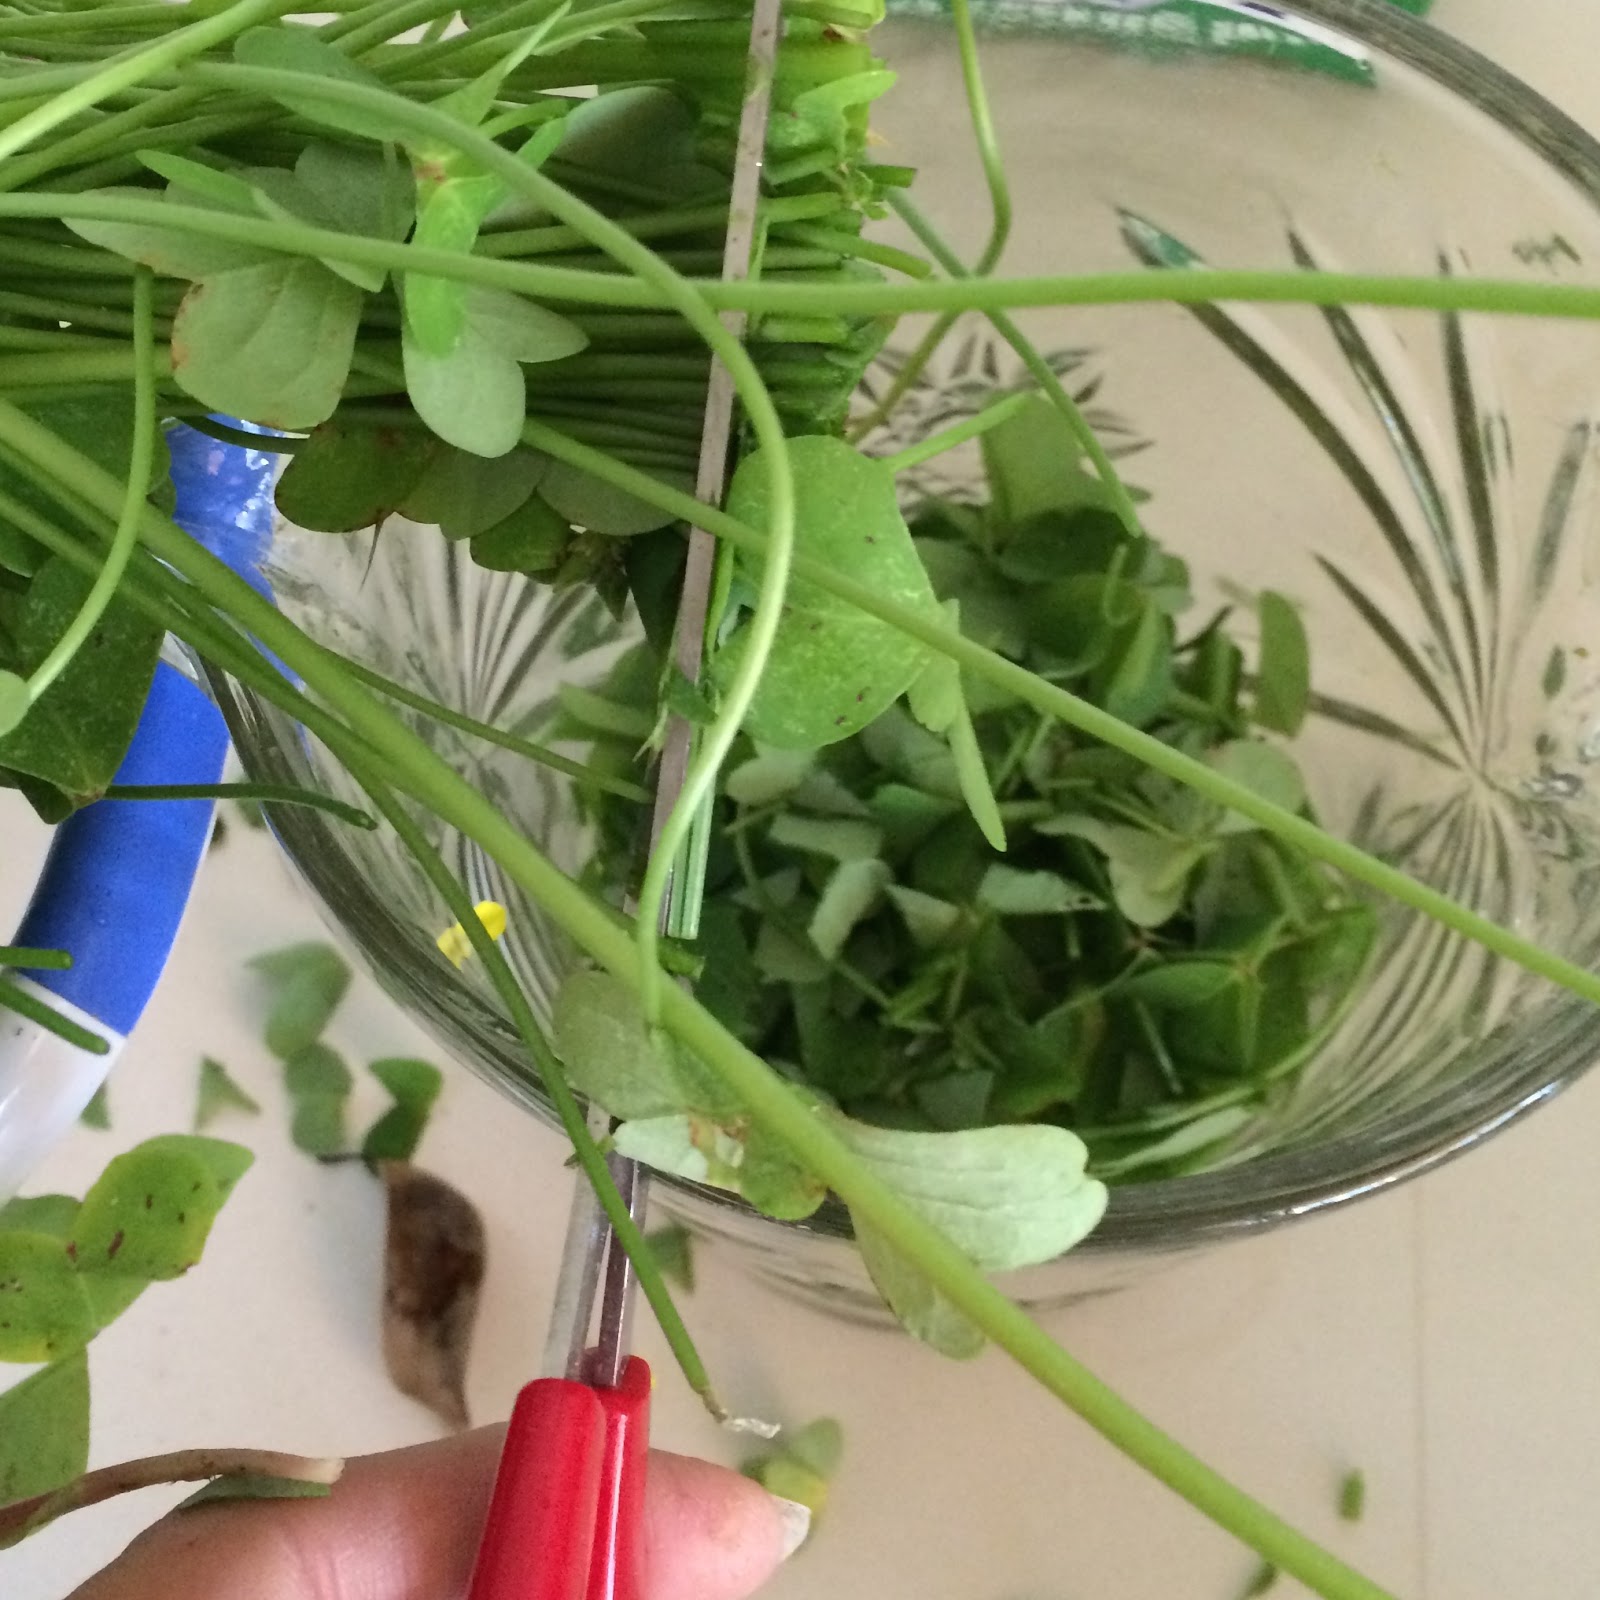
Pale, rusty pink; this is bracken, on merino pre-mordanted in alum.  I gathered the bracken from my parents’ place.  Hehe, funny, story, I half-jokingly asked Mum… “would it be alright if I picked some bracken for a dyeing project?”  After a short incredulous pause Mum says, “Carolyn, pick as much as you like!!!”  To explain, Mum and Dad have a large property, with loads and LOADS of bracken, and Mum HATES it with a deep fiery passion.  It is a native plant so she lets it be for the most part; but when we first got the block it was overgrowing the paddock quite severely and Mum wanted to put in an orchard.  I have memories of my Dad driving all around the paddock with a log chained to the back of his land rover, dragging it across the bracken, trying to clear it away.  It’s such tenacious stuff, it grew back over and over and over again!  Year after year it kept popping up all over the place.  Mum eventually got enough cleared for her orchard… but it was a massive effort.

That frond in the picture above is dead and brown… obviously, since I’d just boiled the living daylights out of it for dyeing!!  I did pick and use quite a big bunch but forgot to keep just one little frond aside for a demonstrative picture with my wool… but if you can imagine, it is actually quite a strong, bright green in colour, so this beautiful, port-wine/pink shade it gave was a lovely surprise to me.

I love all those beautifully soft pastelly shades, and am so happy how they blend together so tonally and gently.  In the process of dyeing I did get a few other stronger shades, that while I like them very well in their own right I’m still undecided as to whether to use them for this particular project… as follows:

From left:

dyeing

Bright orange: from a large number of coreopsis flowers.  It’s lovely, but maybe not a good match with all my pastels…

Moss green; a result of one dip in indigo, plus a dip in the coreopsis bath.  I really love this colour, but again, quite strong and vivid …

and deep navy blue, from Nicki’s dye-pot.  I’m not sure how I managed to get such a deep shade from the pot!  I’m wondering if it got caught up in some indigo sludge at the bottom or something… but this is a very strong colour for a single dip in natural indigo!

mustard

Mustard: I seriously adore this mustard, the result of one dip in coreopsis and then a further dip in avocado skin dye.  It does go so nicely with all the other colours! but is one of the “strong” ones, so I’m still um-ing and ah-ing over this one too…

So that’s it!  to summarise; I’m pretty excited about all the lovely colours you can get dyeing with local plants.  The only one that I would describe as difficult to obtain locally is the indigo, of course… if we did not know someone who had nurtured and cultivated a special dye-pot then blue would not have happened for me this time, so I am so glad and grateful that Nicki got one!  Blue is the hardest of colours to come by naturally.  The other plant sources; the coreopsis, avocado and bracken; are all plants that are grown right here in Western Australia for some reason or another.    Also, of course don’t forget sour grass! this is a rampant weed around these parts, and last year I picked some from my own garden and got this bright acidic yellow colour, as described here.  I’m currently carefully nurturing some more weeds precious sour grass, with a view to getting some more wool in this colour too…

sourgrass

Look at this divine array of colours!!  I’ve got some colour decisions to make, designs to design  😉  in short, I’m getting pretty hyped to continue on with the next stage of my totally local outfit!

from top to bottom: coreopsis (light), chopped avocado pits, bracken, whole avocado pits, avocado skins, indigo (light), indigo (dark), indigo + coreopsis, coreopsis (dark), coreopsis + avocado skins, sour grass
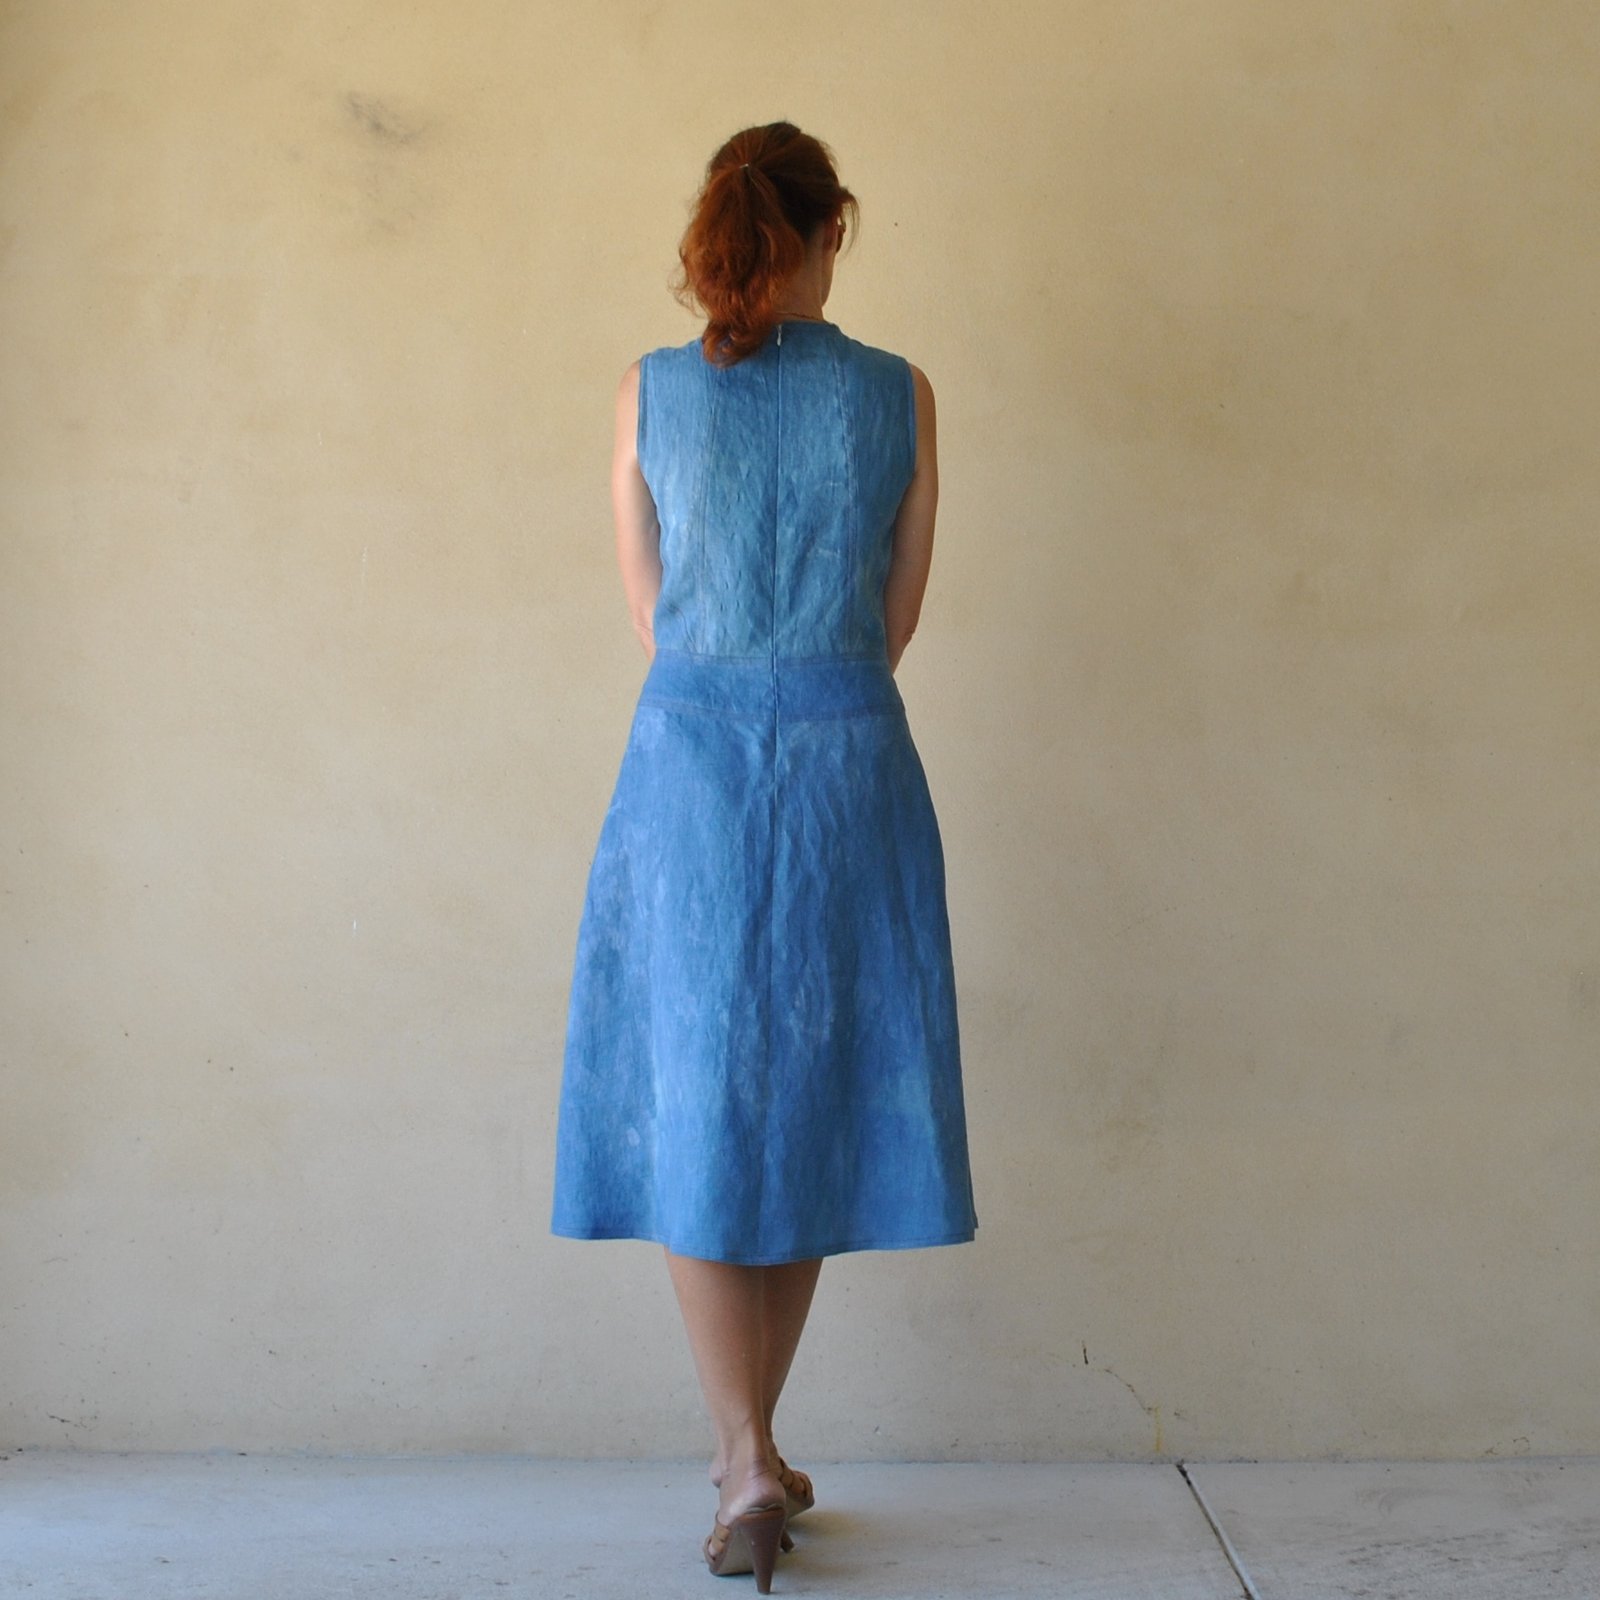
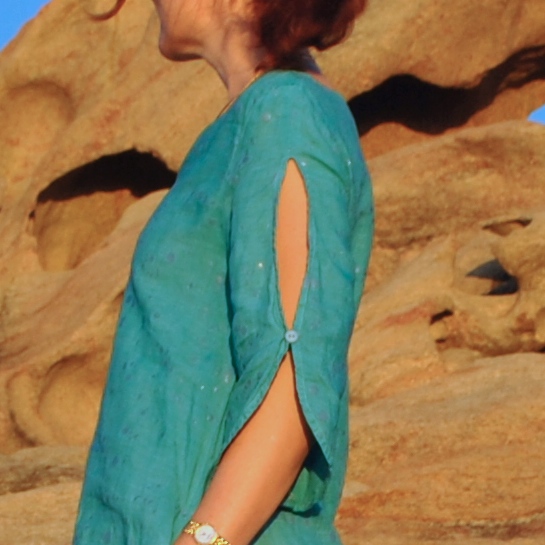
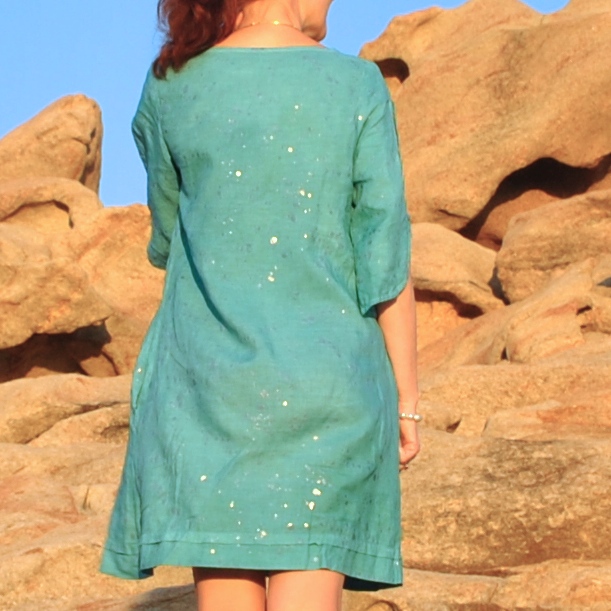
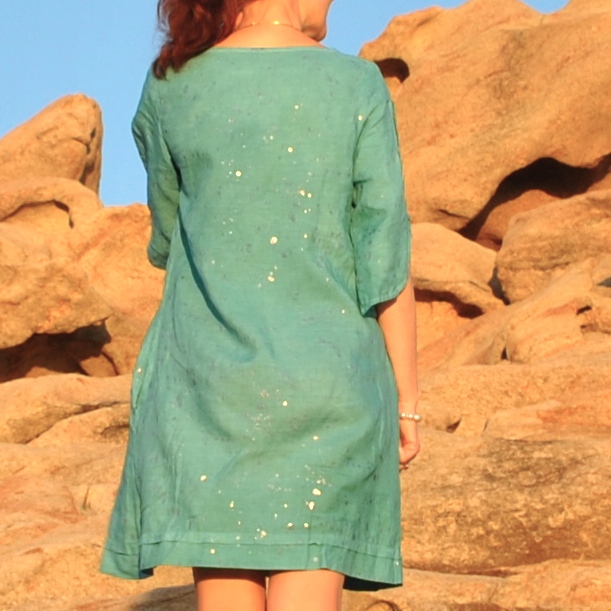
IMG_2097

pinterestmail

Magdalena Dusk; an Alabama Chanin project

alabamachanin2alabamachaninstudiobook

Finally! my Alabama Chanin outfit! It’s finished, and now done and dusted!  Yay!  I may look all cool, calm and collected on the outside here but on the inside I’m cheering like a madman.

ac1

Phew. This project has been quite an undertaking… quite an undertaking, to say the least. I had received a length of beautiful Alabama Chanin cotton jersey in colour Dusk from the lovely Lisa, of Lisa’s Carolina, and I really wanted to do the fabric justice, to honour its Alabama origins and make something worthy and not to do things by halves. I decided I just had to go the whole nine yards and make another full-on ensemble. The Full Monty Alabama Chanin. Obviously!

There was enough of the blue to make one skirt and a few bindings, so I needed to make some more colours…. I bought some plain white cotton jersey from Spotlight, cut some scraps and played about with dyeing; experimenting with greys, greens, greeny-blues, blue-y greens, blue-y greys and greeny-greys, plus I’d also had some pink cotton that I dyed blue, to get some purple-y blue into the mix too.

candidates!

dyeing

Ultimately I rejected my purple- and grey-toned experiments and settled upon greens; shades of teal and sea green, which I thought subtly highlighted and championed the dusky blue the absolute best, toning it without drowning it amongst other shades of blue. I think; if you’re trying to showcase a colour in an ensemble/design, then it’s best for that colour to be the only one of its shade, and for the contrasting colours to be all a different shade and variations of each other, not of the showcase colour. As clear as mud? Yep, I thought so! Sorry, maybe that’s not making much sense, but at least I know what I’m talking about.

acdetail

Pattern; all patterns are from the book Alabama Studio Sewing + Design, by Natalie Chanin. I made a full-length skirt, a fully-embroidered mid-length skirt and a fitted tank.  Every single component is sewn by hand, in the Alabama Chanin way  🙂

alabamachanin1

So: the mid-length skirt! Which is the biggie in my ensemble, taking a few months to embroider the pieces! The skirt itself is my precious Dusk Alabama Chanin cotton jersey, and the motifs I’d dyed some white cotton jersey from Spotlight to be a teal/sea-green and to purposely be a little variegated with strong tones paling to lighter tones appearing shaded in an ombre kind of a way across the piece. All the details of the stencilling and early preparations pre-embroidery, are fully described in this post here.  This part actually took aaaaages, or it felt like it at the time. Obviously, once I got embroidering then that was the bit that REALLY took ages! I had decided upon blanket stitch embroidery to attach the motifs, using light tan Gutermann’s upholstery thread. I liked the colour and the look of the embroidery, but this particular stitch was probably not the ideal choice.  It is an enormously time-consuming stitch and I found myself questioning my own sanity/stupidity in choosing it, many a time. I’m glad I did persevere now though, since I really do love how it looks.  Although it did take a lot of time, it wasn’t too bad, since our trip to Japan involved several plane, train and bus rides with hours and hours and hours of enforced sitting, so I got plenty of embroidery done during those times… I had completed two whole skirt panels by the time we got home! YAY!  I then would have finished pretty quickly if I had then not dropped the ball for the next few weeks… oops.  But once I put my mind to it and got going again I finished the embroidery pretty soon; and with the embroidery done the whole ensemble felt practically home and hosed!

IMG_9852

I joined the pieces, hand-felling the seams using the same light tan upholstery thread as the embroidery;and I found a light yellow/beige fold-over elastic at Spotlight that looked quite nice for the waistband binding.. not that you’re ever likely to see that bit! It’s actually button elastic, for waistbands, and has buttonholes in it along the fold, but that’s ok. The colour is great, and since fold over elastic is a rare beast in Perth, in any colour, I counted myself pretty lucky to have found it!

acwaistbands

The full length underskirt: originally white cotton jersey from Spotlight, and I dyed it to be just slightly variegated, strong teal-y/sea-green. I wanted it to be a little bit uneven in its shade, so as to fit in with the whole handmade, rustic aesthetic of Alabama Chanin. The underskirt is entirely handsewn with emerald green upholstery thread, with felled seams, and a single strip of randomly hand-ruched/ruffled cotton jersey around the lower edge. I’d originally stitched on three evenly spaced strips of ruffled cotton, but removed the upper two, because three rows didn’t look as nice as I’d hoped. The upper edge of the petticoat is finished with teal elastic, handstitched on with herringbone embroidery stitch. This was the first piece to be finished in this ensemble, believe it or not!

btw, I’ve had some feedback already that some think the underskirt is too long… opinions?

acpetticoat

Tank top; white cotton jersey from Spotlight, dyed in the lightest shade of eau-de-nil green, and with armhole and neckline binding in the Dusk blue Alabama Chanin cotton jersey. The tank top is handsewn with light tan upholstery cotton, the same as the skirt embroidery, with felled seams and herringbone embroidery to attach the neckline and armhole binding.

All the details, summed up succinctly in just one pic:

magdalena dusk

So that’s it re the outfit…

And now for a little story about that weird and bizarre, modern-day phenomenon, the blog photo shoot…

ac3

I’d delayed posting this because I wanted to take some really nice pictures with a pretty background, something better than just these ones taken in our boring old garage… so I pick an absolutely beautiful location at my parents’ house … and a hopefully beautiful time of day … dusk would be an appropriately poetic time of day, yes? because the colour of my Alabama Chanin fabric is named “dusk” Ok, perfect! However turns out dusk is actually a terrible time to take pictures, … all my first batch of pictures were a giant fail… everything very dark and you can hardly see a thing, ha! So I disconsolately packed up to go back to the house; to try again the next day.

And did I mention my chosen photo shoot location is a paddock quite a long walk from the house? Honestly, the things we do… I walked down in jeans, disrobed, re-robed, in the paddock, as you do…. TWICE, on two consecutive days… all under the bemused and intensely interested gaze of a mob of kangaroos.  Well obviously, they must have been admiring my Alabama Chanin finery? hmmm?

hey guys!

roos

The second day I timed my arrival to be just before sunset, with that lovely pre-dusk golden glow … and wasn’t til I’d got all set up and going with my pictures I realised I’d left my sunnies back at the house and so I’m squinting in Every Single Picture… (groan)

And in the end I felt like the “boring” garage photos weren’t really all that bad and actually the details show up pretty well against that quiet blank background, so I’m posting a few of those too.   Sorry for the picture overload.

Moral of the story; blog photo shoots can verge on the ludicrous

Anyway!! it’s done…  Thank you so much to my friend Lisa, of Lisa’s Carolina, for the gift of the Alabama Chanin cotton. It’s such a gorgeous colour and I hope I managed to make something that is worthy of the fabric 🙂

alabamachanin6Details:

alabamachaninstudiobookTank top, skirt, underskirt; all patterns from the Alabama Studio Sewing + Design by Natalie Chanin. Blue cotton jersey is from Alabama Chanin, other fabrics from hand-dyed by me. Embroidery design, half of the Magdalena design by Alabama Chain, embroidered in blanket stitch.

ac3

pinterestmail

a Japanese indigo dress

DSC_2668
 I’ve made another Yoshimi dress  🙂
Pattern: Vogue 2900.  This pattern will always be in my head the
vogue2900
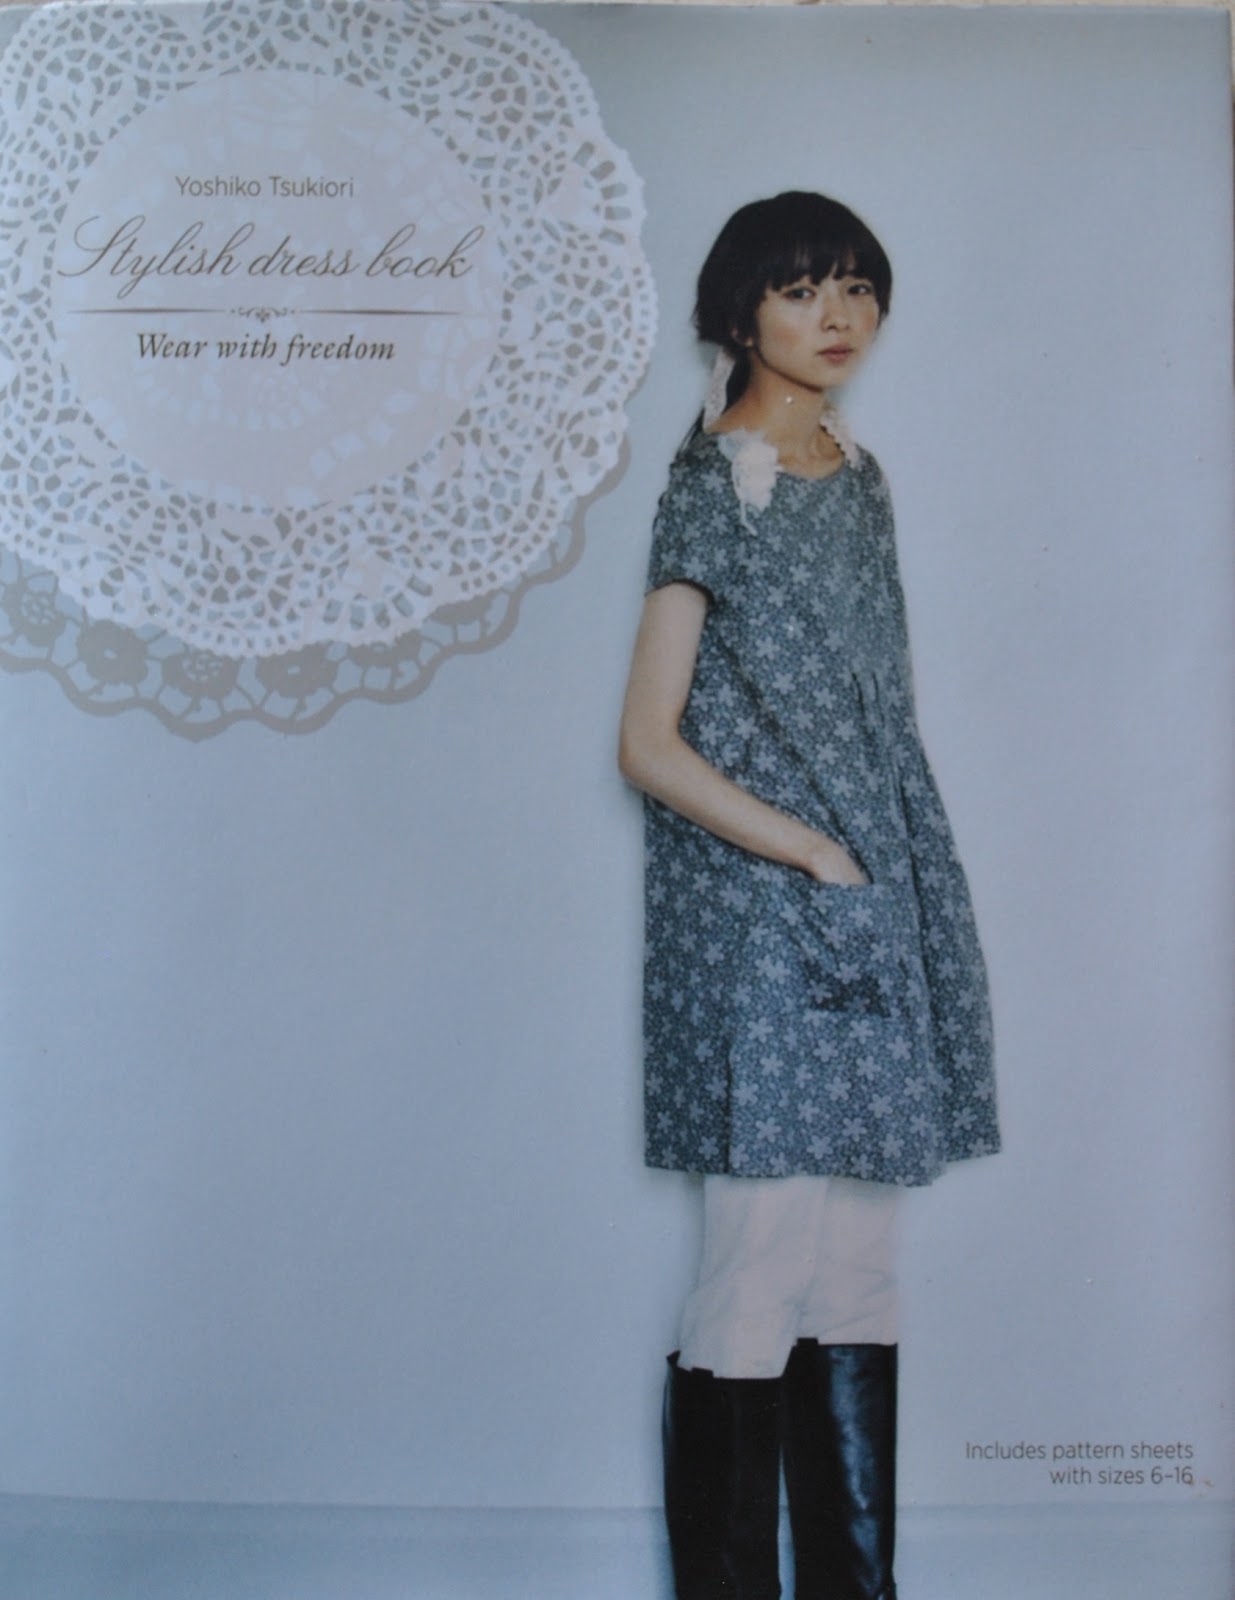
“Yoshimi dress” since her versions are all very inspiring to me, and as well, the lovely Yoshimi herself personally recommended it for me, so there you go.
DSC_2670
Fabric; linen, which I bought as plain white from Potters Textiles and then dyed real indigo, by which I mean using a real live, actual Japanese indigo plant-based dye pot!  Yup, how awesome is that? I feel so very fortunate to have been given the chance to use Japanese indigo dye, since it’s quite a rare beast in WA.  Growing the plant itself is very difficult here, and yes, I have tried and experienced a personal fail myself in that area… *represses sob*
Anyway, a few months ago, Nicki got together a group of us Perth girlies to go on a fun day out… and what constitutes a fun day out for the likes of us self-dressmakers more that a sartorially related, hands-on, “doing” thing!  And what’s more hands-on than dyeing your own fabric in a real indigo dye vat?!  This dye-vat is the work of the ultra talented and creative Trudi Pollard of Pollard Design Studio.  Visiting Trudi’s studio in Bedfordale and viewing her many amazing creations is quite the inspiring and very humbling experience.  Some of her exquisite textile art can be viewed at the studio’s site here.
IMG_6372 IMG_3735
 I pre-washed my linen twice before the day but was hoping/aiming for just a touch-but-not-too-much blotchiness/unevenness; that lovely natural patina, you know.  It worked out just spot-on how I wanted!
Construction notes: the seam lines in this pattern are lovely and interesting to my eyes and I wanted to highlight them somehow… the first time I made it up I made black cotton edging strips and this time I wanted to do something a bit different, to differentiate it from that dress in my wardrobe.  Now, what does one think of when you think of indigo cotton? well for me Levi jeans are pretty high on the list.  And Levi jeans have that very distinctive double orange topstitching allover, so I went with that as inspiration.  It’s a lot more visually subtle than the black edging, but it’s there, and I really like it!
I had a look online to learn more about the origin of that orange topstitching, and interestingly enough, the reason for it was to go with the copper rivets that were used to strengthen jeans!  Hmmm no copper rivets on my dress, whoops.  Oh well!
I took great care to make sure those diagonal seam lines ended on the exact point and also put in a few little orange bar tacks on other random sewing junctions, for fun.  I know, you can barely see them on the far-away pictures, but up close and personal I think they add a bit of interest to the dress.
IMG_7310DSC_2626
The invisible zip saga… to sum it up, there was not a colour match even halfway acceptable!  I chose a light blue and after inserting, just very carefully touched up the more visible bits of the zip tape with a felt-tip pen.  This may or may not wash out over time, in which case I can always just touch it up again.
IMG_7421
Then the pale blue zip pull was still too glaringly pale for my liking too; so I painted it coppery-orange with nail varnish, custom mixed using a few different colours from the small army of nail varnish bottles that live in my bathroom drawer.  I knew all those funny colours would come in handy again some day!
DSC_2638DSC_2635
Insides; all raw edges were overlocked with white thread, and I used white thread in the bobbin too, for continuity.  I know; it’s not like anyone will ever see inside the dress, but to have it all looking cohesive is still a very satisfying sight to me.
indigofb
So, that’s it, done and dusted!  Now to continue with the small mountain of Christmas-related tasks I’ve lined up for myself and been busily and secretively working away on like a squirrel.  I feel like I’ve been racing around like a crazy scatterbrained whirlwind lately.  Crisis point not yet reached, but getting there…
Later dudes!
 DSC_2655
Details:
Dress; Vogue 2900, in indigo dyed linen, with orange top-stitching
Sandals; from the oppie, yonks ago
Sunnies; ma RayBan wayfarers
 in twirlerrific actionDSC_2672
pinterestmail

teal dress

New dress!
Well actually it’s not really  new at all, in fact I made it barely a year ago…  it just feels like a brand spanking new thing somehow just because it’s a brand spanking new colour.

I thought some of the dye batches I’d made up for my Alabama Chanin project still had some oomph in them, and of course I am incapable of throwing out something that still has a use.  I absolutely have to scrounge around to find a further use for it first.  I selected this dress as a suitable victim, ahem candidate for an update.   Its original pale baby blue was never really very good for me, really.   I liked and have worn this dress a lot, but I had to admit the colour didn’t really like me back.  It washed me right out. 
But I still love the fabric; it has an unusual and very charming thing about it, some sort of hard translucent plastic has been “splattered” all over it that sparkle in the sun rather prettily, like random sequins or something.   I only bought the fabric in the first place because I fell in love with those sparkly splatter-dots. 
Anyway; I soaked it, plunged it into an old, cold bath of various mixed up dyes; iDye in Royal Blue, Golden Yellow and small amount of Brown, and left it overnight.  The dye had so much staying power…  the colour came out incredibly strong!  

The buttons on the sleeves were white plastic and I was prepared to change them if the white stood out glaringly hideous afterwards.   However the dye had SO much further oomph left in it that it actually stained the buttons teal as well.  Win!  
Another little happy side effect is that I think the darker colour makes my beloved sparkly splatter-dots stand out even MORE than they did before. 

Moral of the story; you love something but its colour doesn’t love you back?  Dye is most definitely your friend, and well worth a shot  🙂
Do not be afraid of The Dye!
Details:
Dress; dress “f”, from the Stylish Dress Book, by Yoshiko Tsukiori, dyed linen, first appearing in its original, powder blue form here.
Thongs; Havaianas
Location: Canal Rocks, Dunsborough
pinterestmail

an Alabama Chanin project; “Magdalena Dusk”

The very lovely Lisa, of Lisa’s Carolina Handmade very kindly sent to me some really beautiful and special fabric; some 100% organic cotton jersey from the Alabama Chanin store in the United States.  How sweet is that?!!!  I’m so grateful to Lisa… and so excited about what I could do with this very precious stuff.  Obviously only an Alabama Chanin project would do.  SO I’ve been busy planning, plotting and generally scheming as to what could do the fabric justice.  
The colour is Dusk, which is a kind of blue-y/greeny/grey with a mostly blue-ish bent to it, if that makes any sense.  I had enough for a skirt and also to fully bind and appliqué a tank top.  I liked the idea of another allover, fully embellished Alabama Chanin project since I reeeeeeeeally love my first ensemble; so I bought some plain white cotton jersey from Spotlight, broke out the dyes and got cracking.  My aim was to make some colours to blend in nicely with the Dusk.  Since the dusk is a mostly blue with green/grey tinge, I was going for some mostly green with blue/grey tinge, and also some mostly grey with a blue/green tinge; meaning they will hopefully blend in really nicely with each other.  Several days of dyeing and some more dyeing and then some over-dyeing to fine-tune some of the colours; and I have a nice range of blue/green/grey shades to go nicely with my Dusk..

Dusk is the middle one in the lower row

I used iDye for natural fabrics in a mix of colours; mostly Royal Blue, Golden Yellow and Brown.  I really liked the shades of grey I was getting with the iDye Brown to “dirty” the various teals, but the “grey” wasn’t quite grey enough, so over dyed those pieces further with just a touch of iDye in Black.  This turned out just close enough to perfect!  The colours are a little blotchy and swirly and I am very happy with that, since the Alabama Chanin jersey has a veeeery subtly motley tone to it too.  I really like the contrasts and variations in tones of the fabrics.

The next thing was to choose a stencil design.  I toyed with the idea of going with Anna’s Garden again, like with my first Alabama Chanin project and also the project I stencilled for Mum.  I really LOVE that design!  But of course I eventually decided I should go with something new.  I finally chose Magdalena from the Alabama Chanin website, available here.  I resized it slightly, traced it onto drafting film from Jacksons art supplies, cut out the stencil.  I’d nearly finished tracing before it dawned on me that the upper part of the design is actually identical to the lower part, just on a smaller scale! *light bulb*

At that point I had started to realise that smaller part of the design might be too small a scale for what I wanted to do, so I’ve pretty much decided to just use the lower, larger scale part for my project.  I haven’t ruled out using the entire design on a future project but for this one I’m just going for the one size motif, repeated all over.  🙂
I bought some spray paint from Bunnings; White Knight “Squirts”, colour Flat Black, to stencil the design to the back of the upper fabric.  A few experimental “sprays” onto newspaper made me realise this was intense stuff!  So I cut a piece of silk organza, the type used for making silk screens and laid it over the stencil. 
 This lightened the spray considerably, the resultant coverage is satisfactorily sheer and shadowy, and not so much of an intense thick solid coat of paint on my fabric like it would have been otherwise.
At this point I decided that I quite liked the look of it printed just like this actually! and gave serious thought to dyeing more fabric, printing it like this and making it up as the finished thing; boom done.   Hmmm, do I really need two of the same print in my wardrobe?
Maybe not…  damn.
I’ve started cutting out my motifs and just lightly sticking them in place to the base fabric.  For this I use acrylic glue from Bunnings and just applied the lightest of thin coats of glue to the motifs. I did this using the cut-off finger of an old rubber glove, dipped it with glue, which I then dabbed sparingly onto the back of each motif.  It’s not a very secure attachment but it’s not meant to be permanent, just enough to hold them in place, rolled up, until I can get everything stitched on securely.
And then it’s on to the process of stitching and appliquéing!  This could take some time, but with a bit of luck dedication and application and doing just a little bit at a time, frequently; my outfit could even be ready for next autumn.
In fact; yes, I think I can do it.  I’m better with a deadline and having a definite concrete goal to work towards keeps me on track… soooo I’m making the pledge now!
I AM going to finish this by the end of March, next year.
Now I just have to keep my promise to myself…. fingers crossed!
pinterestmail

a strange lingerie set

I fully admit it; this could very well be the weirdest, most bizarre thing I’ve ever made! I had toyed with the idea of making a lingerie set to complete my one year one outfit… er… outfit; but rejected the idea as being impractical and unwearable; then re-embraced the idea, then rejected it again. And found myself pondering it again… and then dismissed it again.  Finally I just decided to have a go, although this part of my project was in danger of never ever getting blogged!
So; lingerie, made using ONLY locally sourced materials; quite a challenge, quite a challenge.  My set is very very simple; a string bikini top and high waisted knickers cinched in at the top with a drawstring.  
As per the criteria of the challenge, I could not use anything not made here in Western Australia … which ruled out elastic, findings, thread and even FABRIC!  Hmmm, yes, quite a challenge…   Like every other part of my outfit for this challenge, I had to make my own fabric.  Fortunately I had some pieces of merino felt leftover from my dress, and I made another small piece to complete the knickers, so my set is mostly made from scraps, yay!  The yellow blanket stitch edging is in locally handspun merino yarn from Bilby Yarns, that I dyed myself using sour grass from our garden; here.  The bikini strings and the drawstring are a single crochet chain. 
In my early planning stages, I had contemplated knitting some knickers and bra from my handspun Western Australian merino yarn, and actually found a free pattern for a knitted bra too! but rejected that idea… why? well to be perfectly honest, this set is probably not going to get a hekkuvva lot of wear! if any! and so I really wanted to minimise the use of my beautiful handspun yarn.  I felt OK about using my leftover felt though, since that was made from my own labour.
The bra is self-drafted, if you can call two, felted-together, darted triangles a self-drafted pattern, ahem.  I gave them a gentle cupped shape by cutting darts from the lower edge and felting them closed with my felting needle, just like I did the darts in my dress, so the darts are seamless; and felted them together at centre front the same way.
The knickers are loosely based on the Tried & True knickers pattern, by the Makers Journal, an undies pattern designed for non-stretch wovens.  This design is a little on the low-rise side which I modified slightly by making it a higher rise design with a drawstring to pull them in at high hip level, also the crotch and leg holes have also been cut away significantly with a deeper curve to the crotch and straighter front leg-line; I did this because the fabric was a tad on the bunchy side around this area otherwise.  When they’re on the knickers look like tap pants, flaring out a little from the waist and away from the hips, and are actually quite cute, believe it or not!

I made a little cotton jersey lining for the knickers, and have loosely tacked it in with running stitch  This small piece of fabric is the only part of the set that does not fit the criteria of my one year one outfit challenge; but I’m sorry, I just consider a liner to be an absolutely essential thing to have in a pair of knickers.  I’ve done my absolute best to eliminate non-local elements in all of the components in my one year one outfit, but you can only go so far for this challenge! and I’m drawing a line at unlined knickers.
While making them I was reminded of Sheldon fashioning historically accurate undergarments from linen just to wear to the Renaissance fair… so funny!… meaning, yes; I’m fully aware that this is just about the silliest set of lingerie ever, but I made them mostly from my leftovers and using my “experimentally” dyed yarn so I don’t consider making them to be too much of a waste of resources.  I think I made them just for fun, really!  Think of it as wearable art!

pinterestmail

Natural dyeing; sour grass on merino wool

Inspired by Nicki of this is moonlight, I’ve been having a go at solar dyeing.  What is solar dyeing…?  well, it’s basically just chucking fabric and chopped up organic material into a glass jar and leaving it outside for a while until your fabric has changed colour.
Boom yeah: blog post done!
Hmmm, well maybe just one or two more details would be helpful…
So I was just weeding my garden, I mean; harvesting my carefully nurtured dye-plant crop! of course! and spontaneously decided to experiment.  This plant is Oxalis stricta or common yellow wood sorrel; more commonly known around here as sour grass.  I have fond memories of sitting with my fellow primary school friends on the school oval at lunchtime, munching on this stuff … ah, memories!  It grows like mad around these parts, you can find it everywhere and it’s considered a weed.  But a useful weed!

This was just a little play to see if I like the effect; so I used about a dozen flowering plants, and 20g natural merino wool.  My wool happens to be 100% Western Australian merino, handspun locally and bought in Bilby yarns.
I snipped the whole plant minus the bottom third of the stalks, roots and root ball into small pieces, straight into a large glass pitcher along with 1/2 cup salt, half filled the pitcher with water, and stirred it around pretty vigorously to dissolve the salt.  Then added my yarn, which I’d loosely tied in a skein to guard against knots.

Once the yarn was in, I swooshed it around very gently to immerse it in the plant material, covered the pitcher with glad wrap, then popped it outside in the sun.  I left it for five days; moving the whole kit’n’caboodle around during the day, following the sun, and would always bring it in each night.  Basically, did not stir again.

After five days, the wool seemed to have picked up a nice amount of colour, so I gave it a very thorough rinse in cold water and picked off as much organic material as possible.
And, ta da!

This could not have been any easier! and I’m very happy with that bright yet delicate chartreuse shade of my wool.  Not to mention the non-toxicity of the whole process too.  I will definitely be doing this again;on a bigger scale with more yarn and more plants and leaving it for longer next time  🙂
Notes for next time; picking out the organic material takes ages and is a bit of a pain.  I’m toying with how to keep the plant matter and fibre separate next time, so as to avoid a gazzilion squishy rotting bits of plant muck stuck tight to my wool everywhere.  Maybe with a very loose-weave synthetic gauze “bag” for the plant matter.  I’m not sure if this would reduce the effectiveness of the dye though… but will give it some thought and a shot.
This is not going to be my only experiment with natural dyeing either; I’ve bought some indigo seeds and am raring to see that experiment come to fruition as well…

pinterestmail
Switch to mobile version
↓