Tag Archives: Dyeing

a bit of re-colouration

I’ve just been updating a few bits and bobs in my wardrobe…
when I get bored or dissatisfied with a particular item but it’s still in perfectly good nick or I still kinda like it because of a good shape/style or I put a dangload of effort into finishing it off particularly well or whatever; I will not toss it out.  Instead I ‘avvago at re-vamping it somehow. 
And this often includes dragging out ye olde dyepot and potions, aka dyes, eeeeeeeEEE heheheheheheheeeeee!!  That was an evil witch’s cackle there, just in case my written word did not adequately translate to the spoken word, ahem.

So, revamp-eroonie; DONE. 

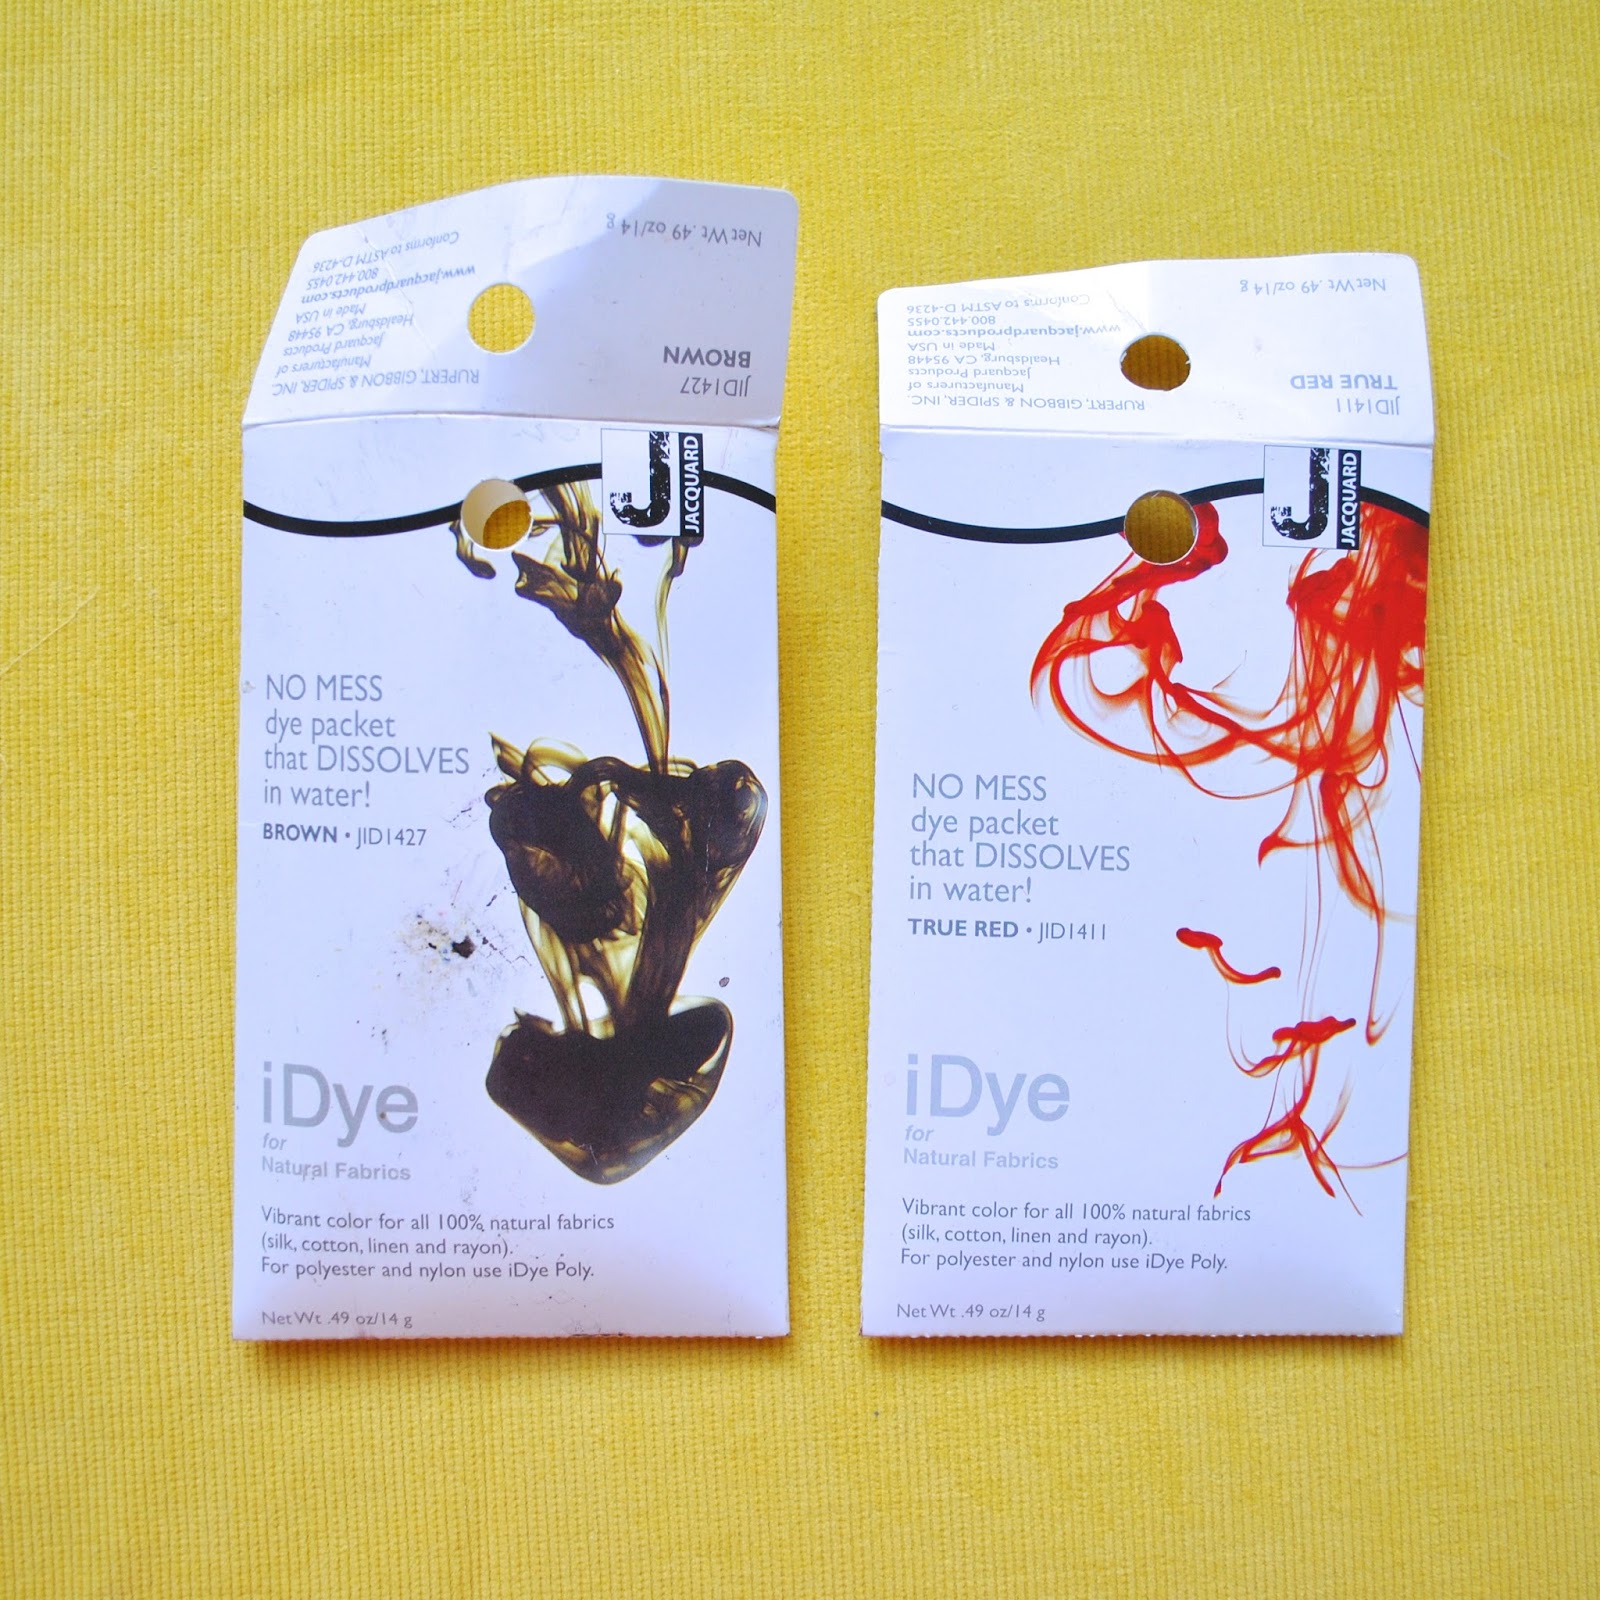
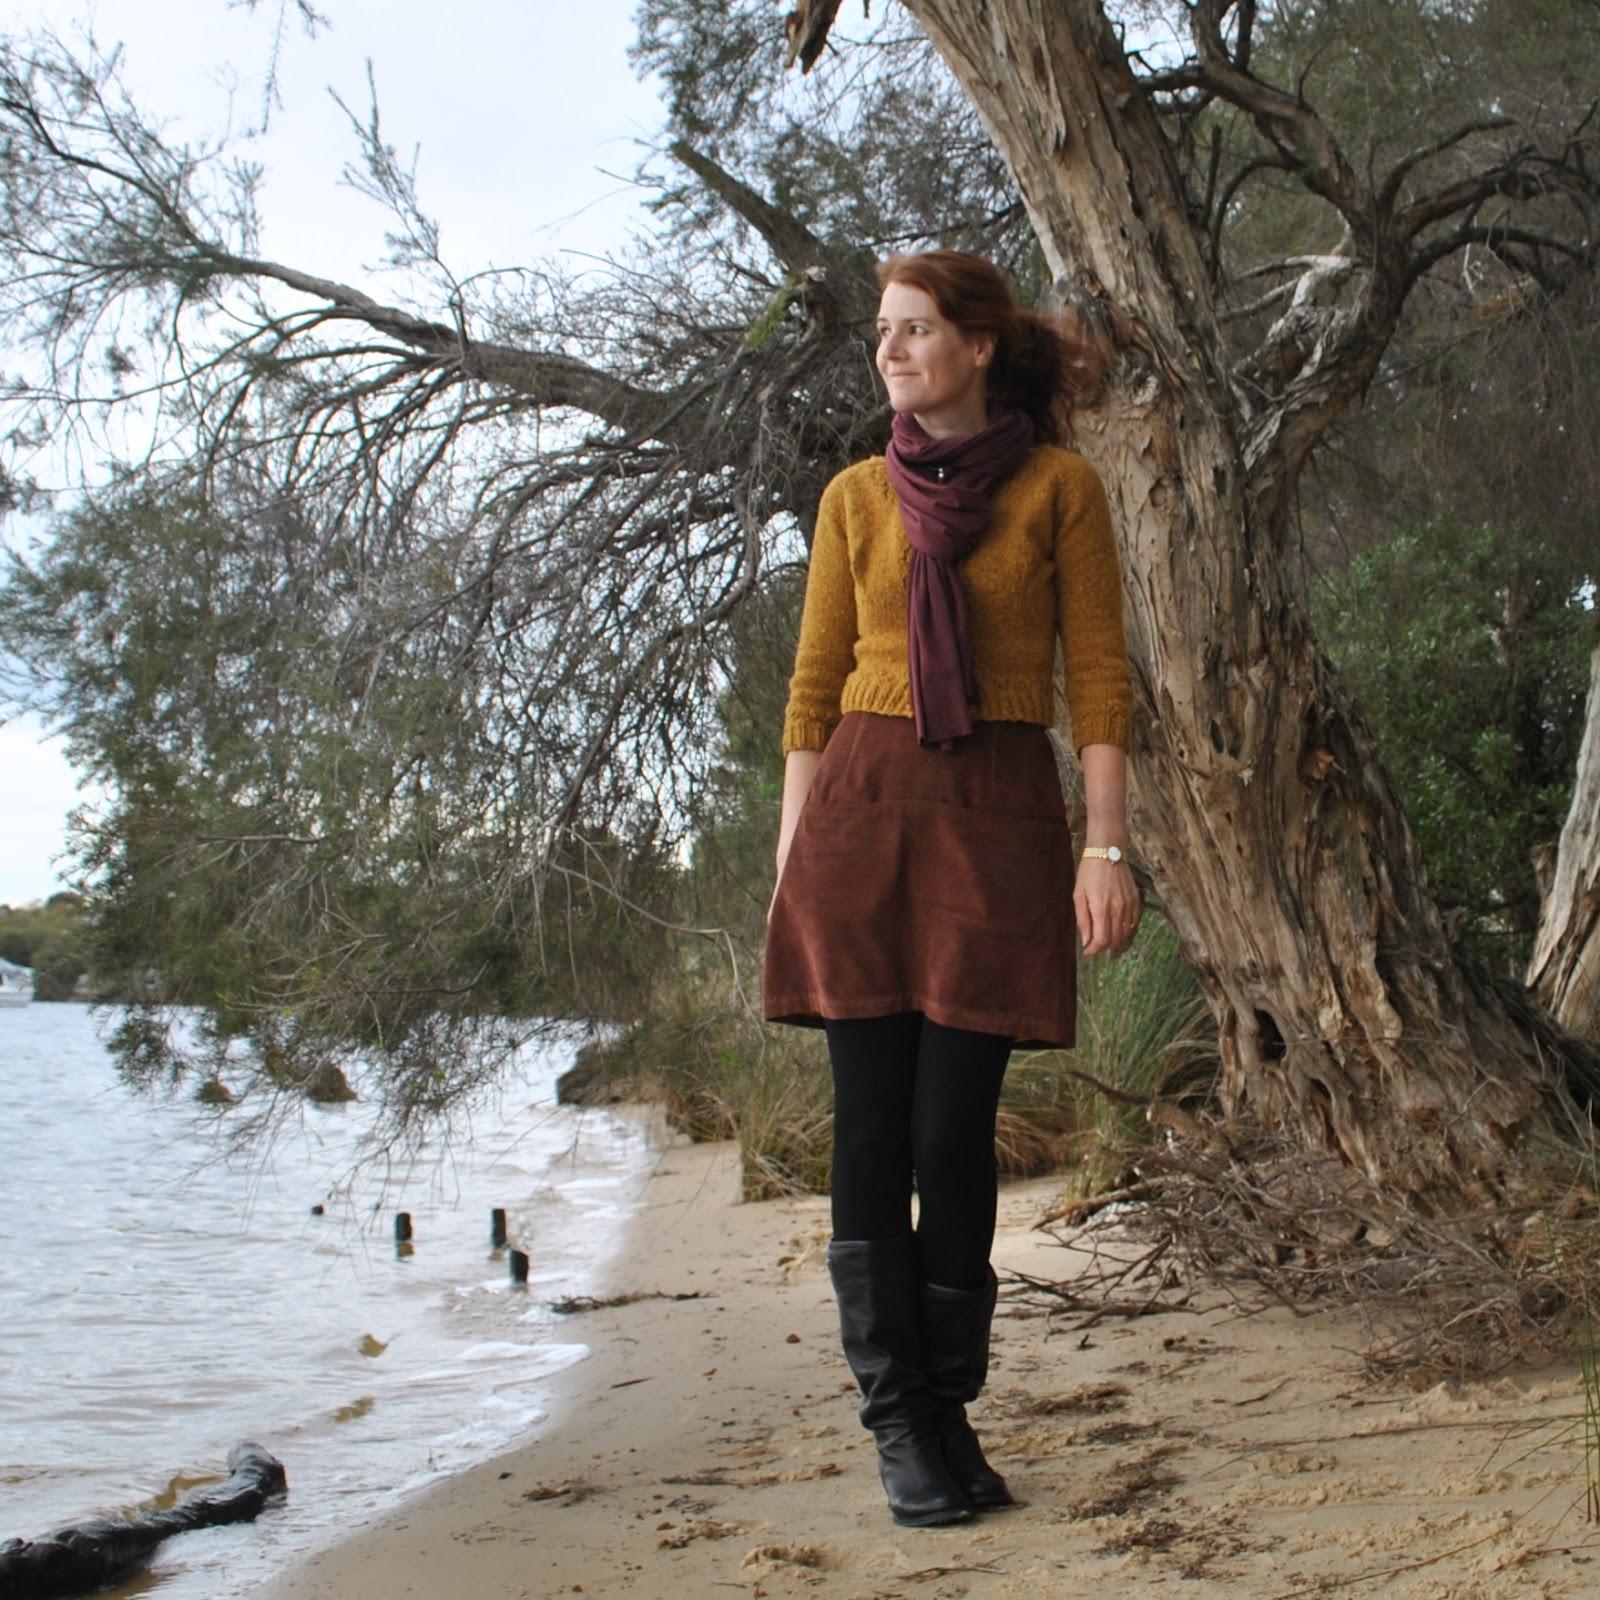
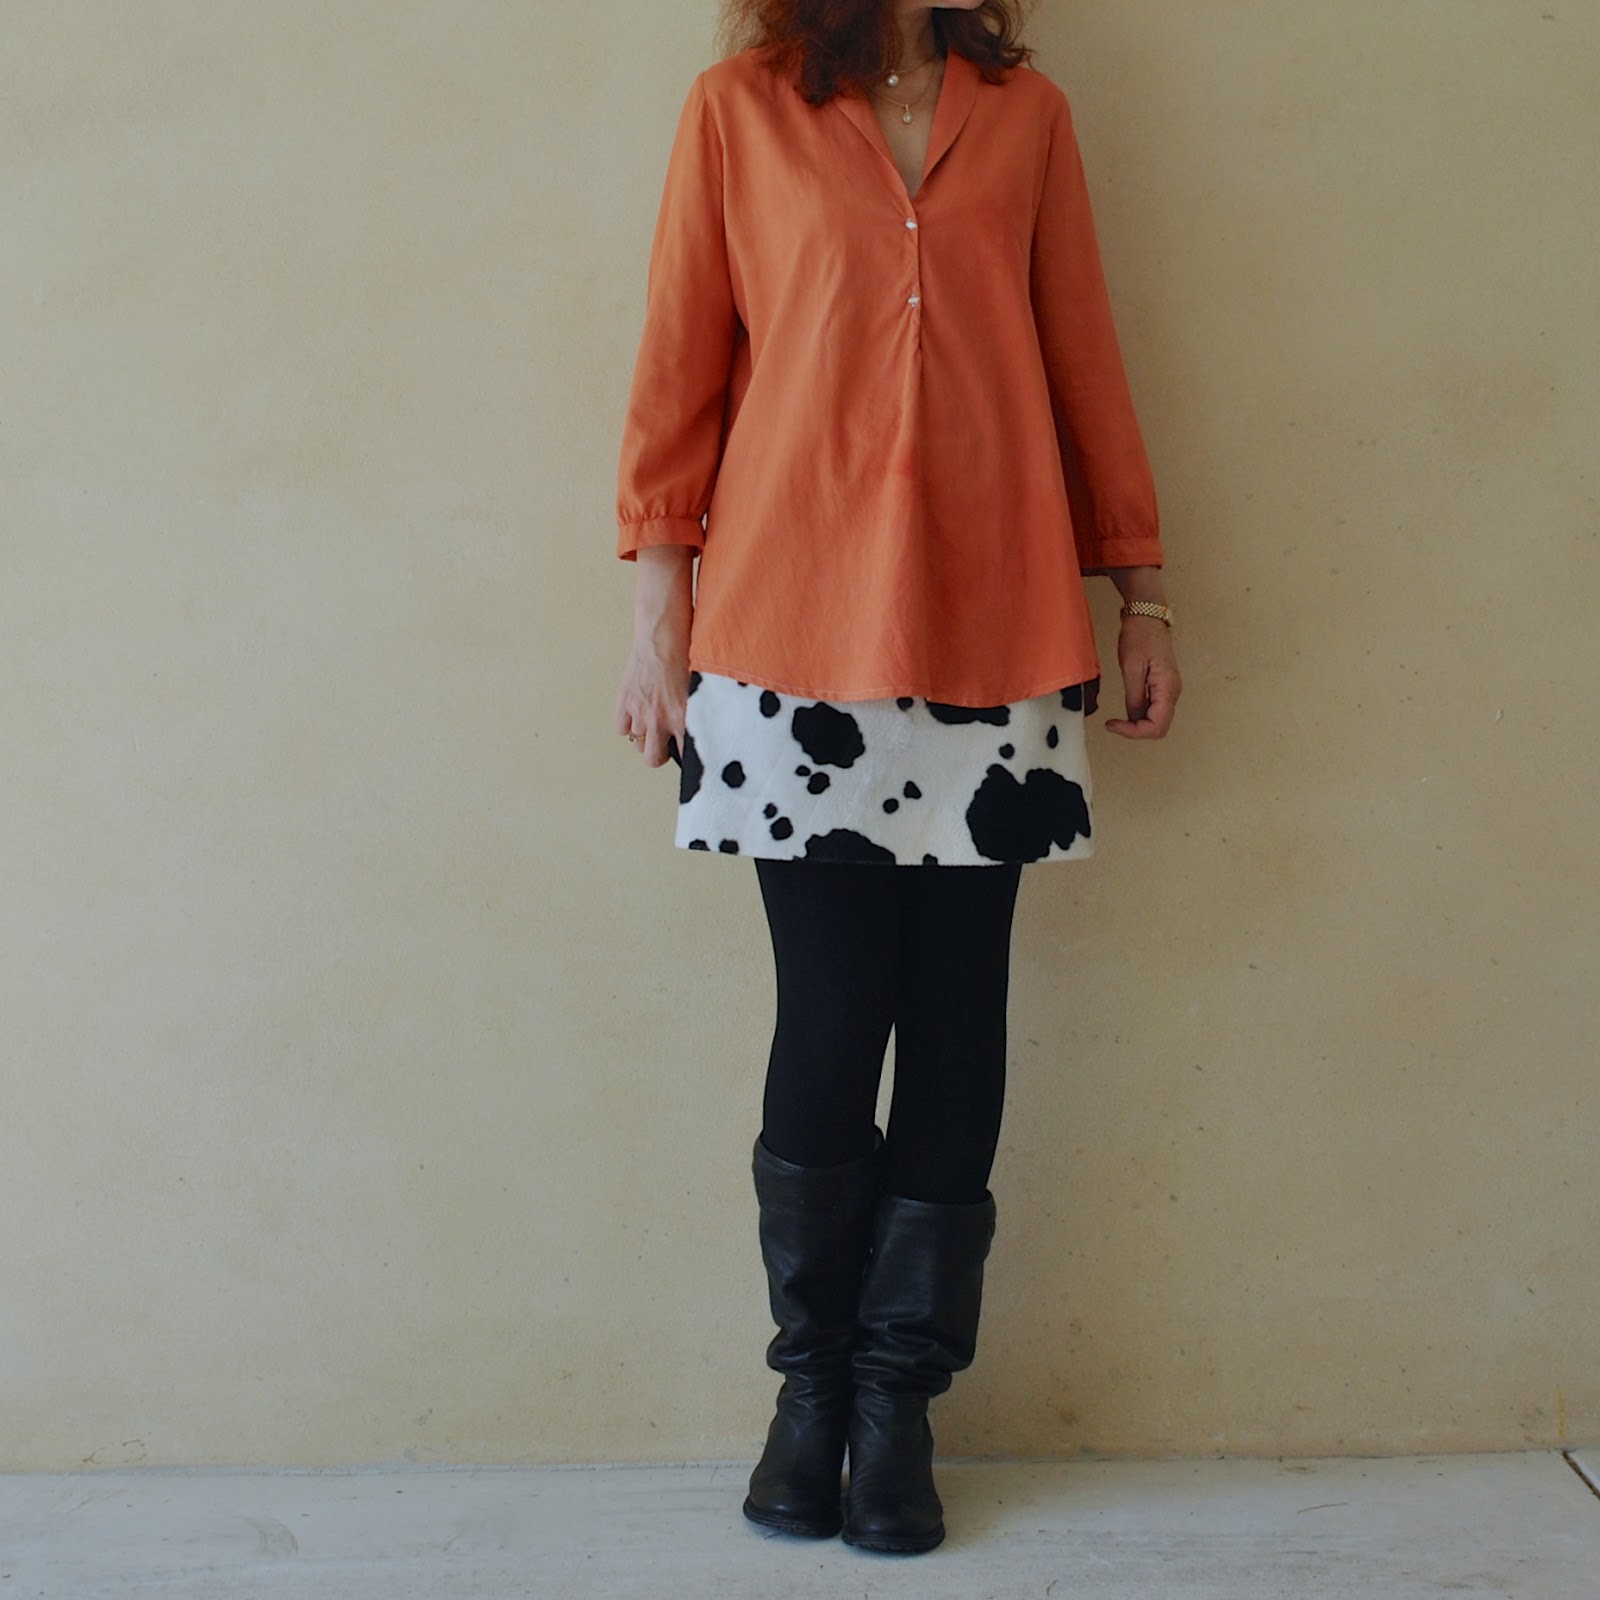
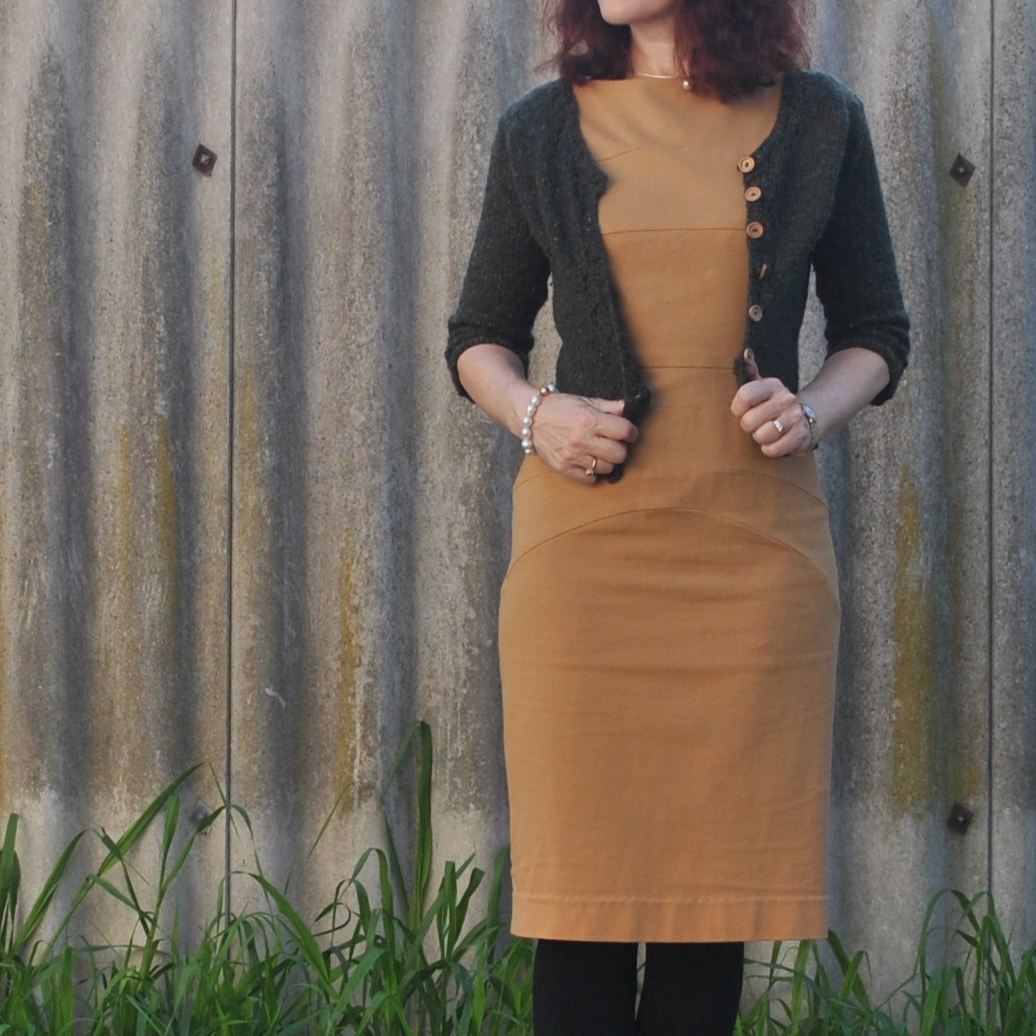
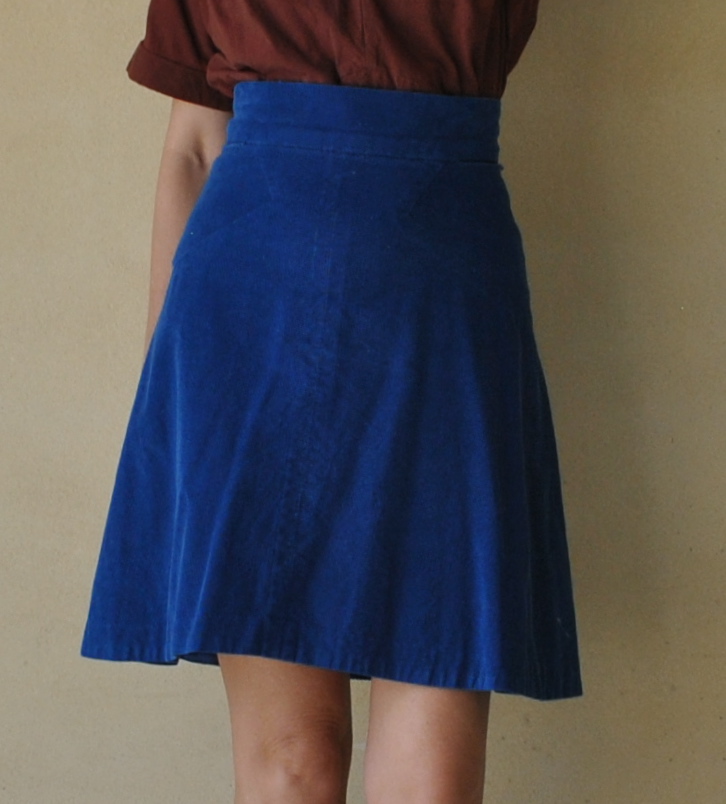
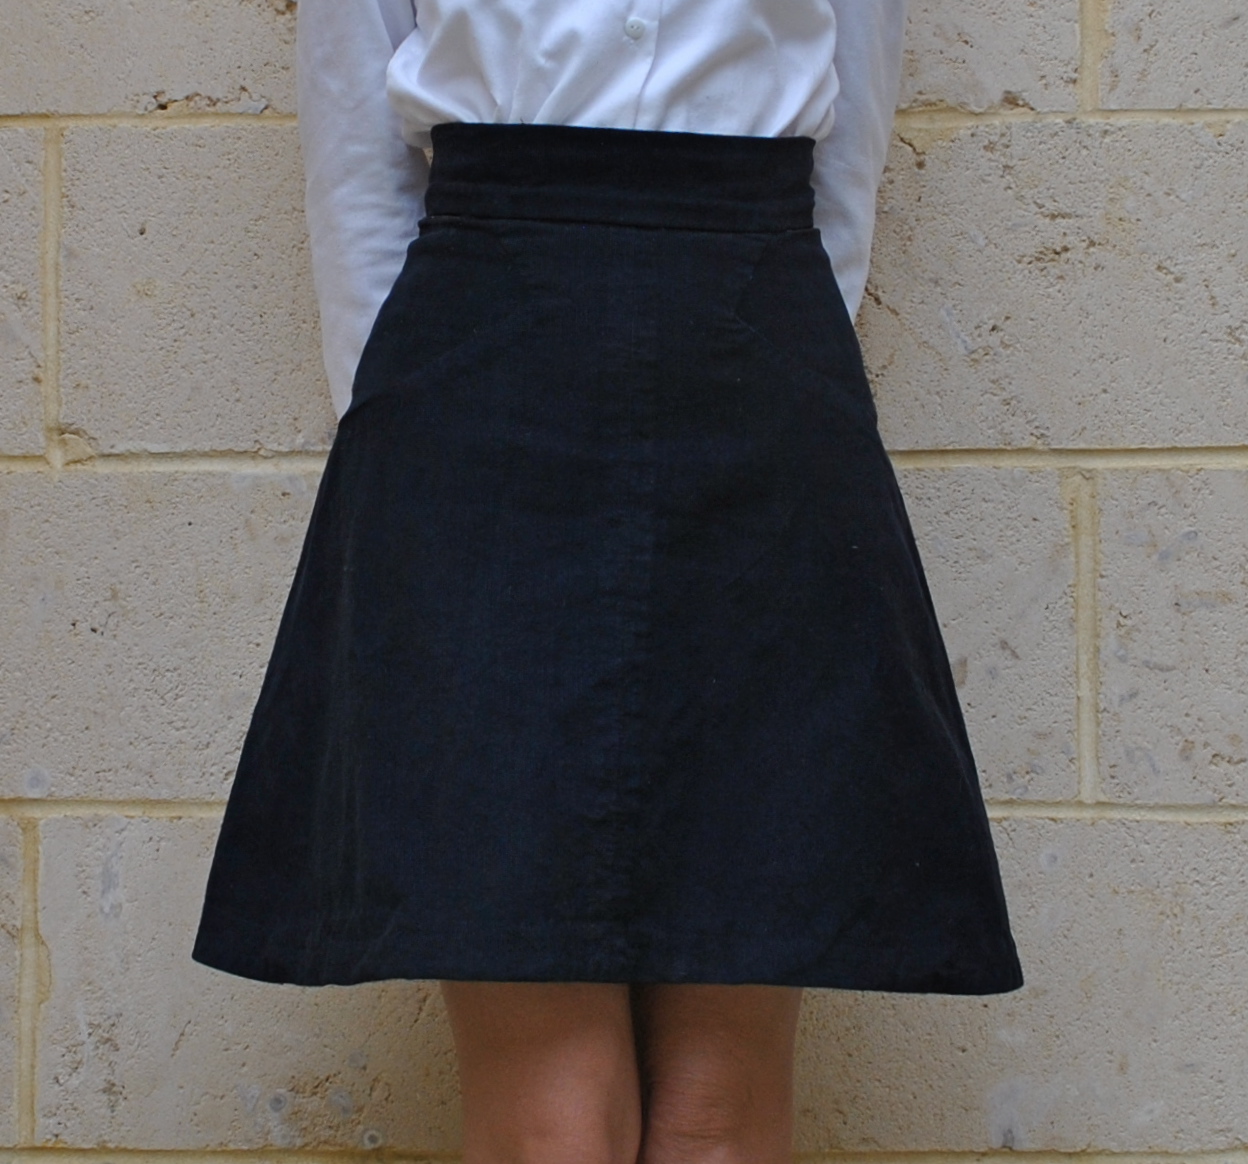
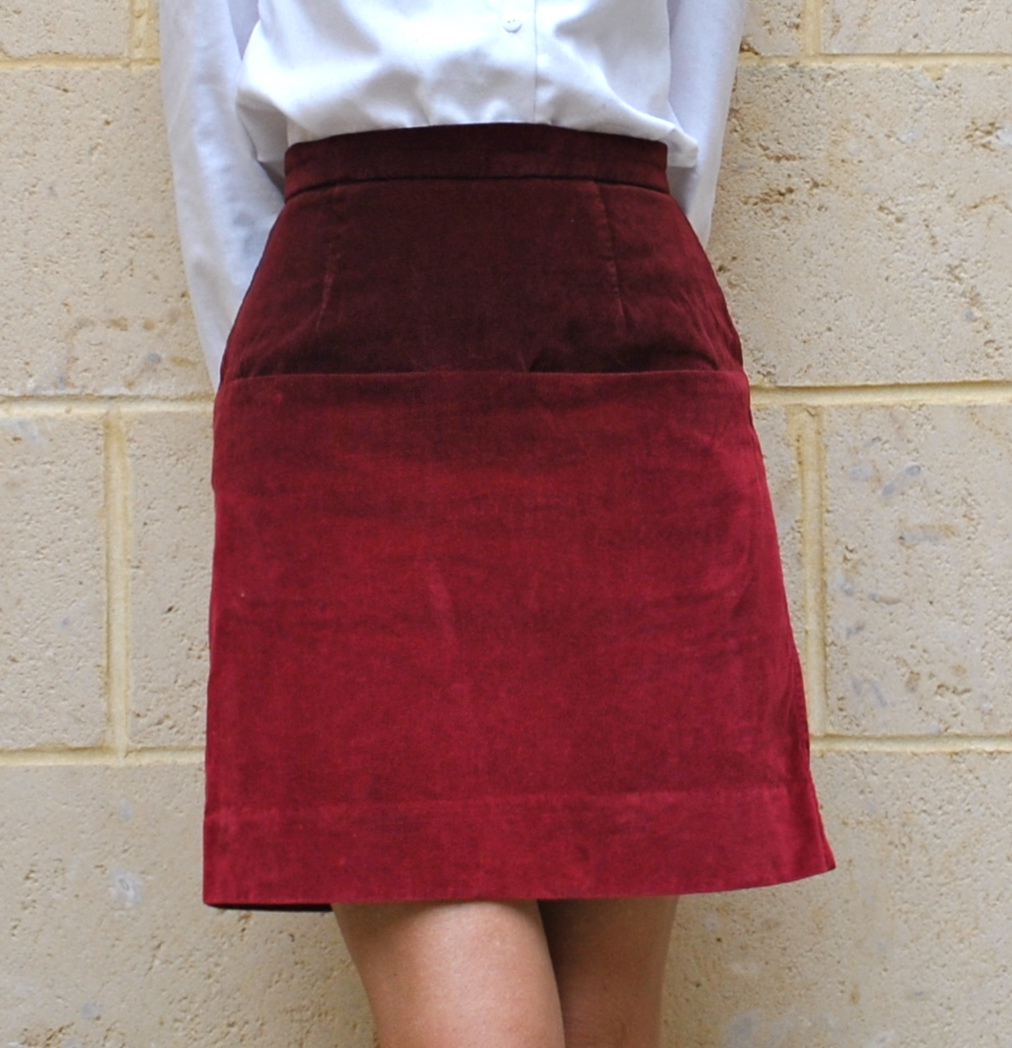
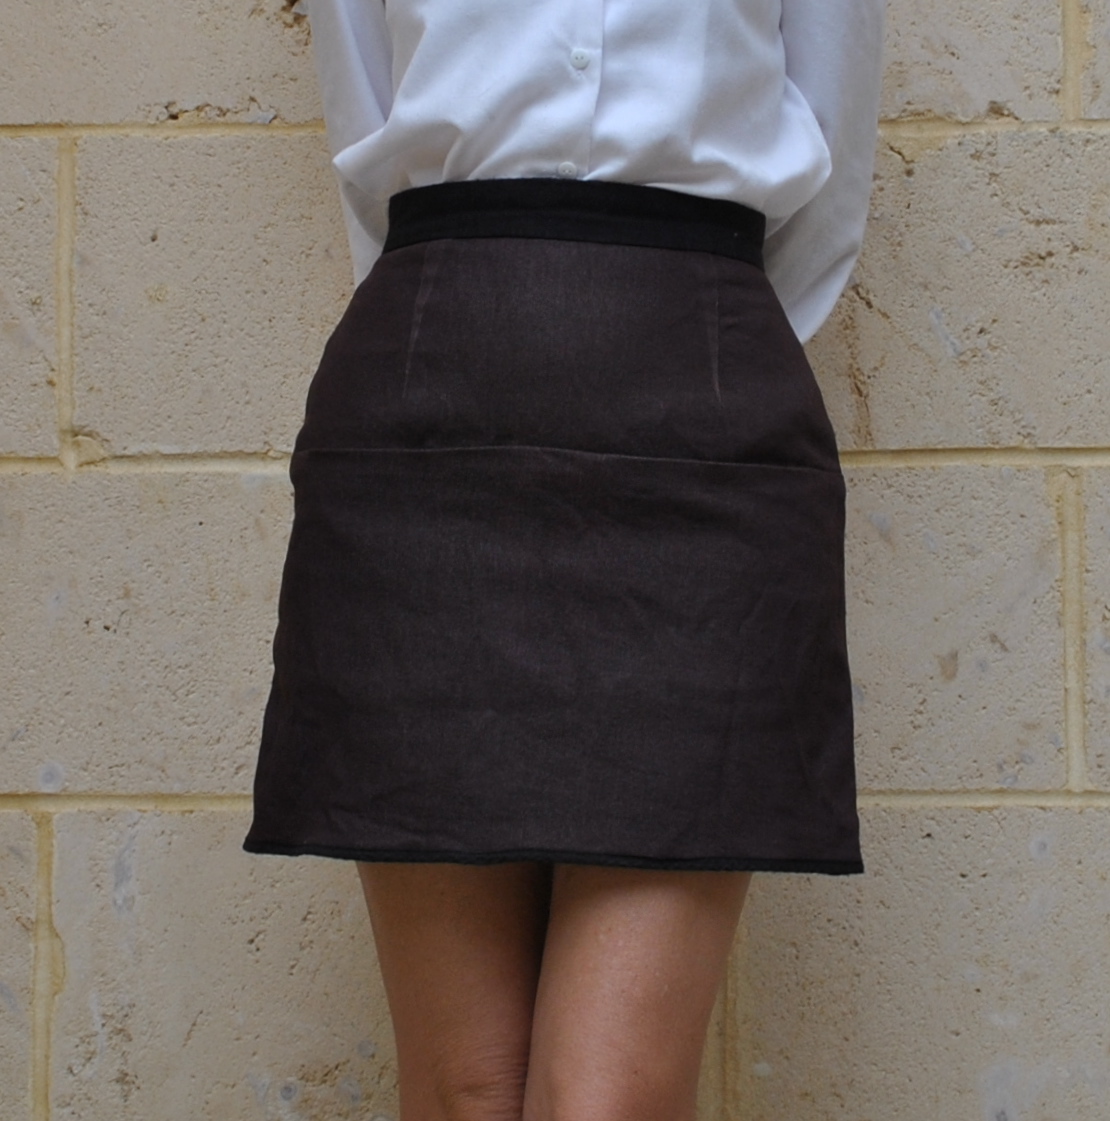
Exhibit A; my little yellow cotton corduroy skirt.  Absolutely nothing wrong with it, but I was just getting meh about it.  Plus the clear yellow colour was a bit sharp and not one of “mine”.  Since my khaki dress I have been thinking more about “my” colours and having more of them in my wardrobe.  Sorta de-wintering my wardrobe and autumn-ifying it some more, if you will.
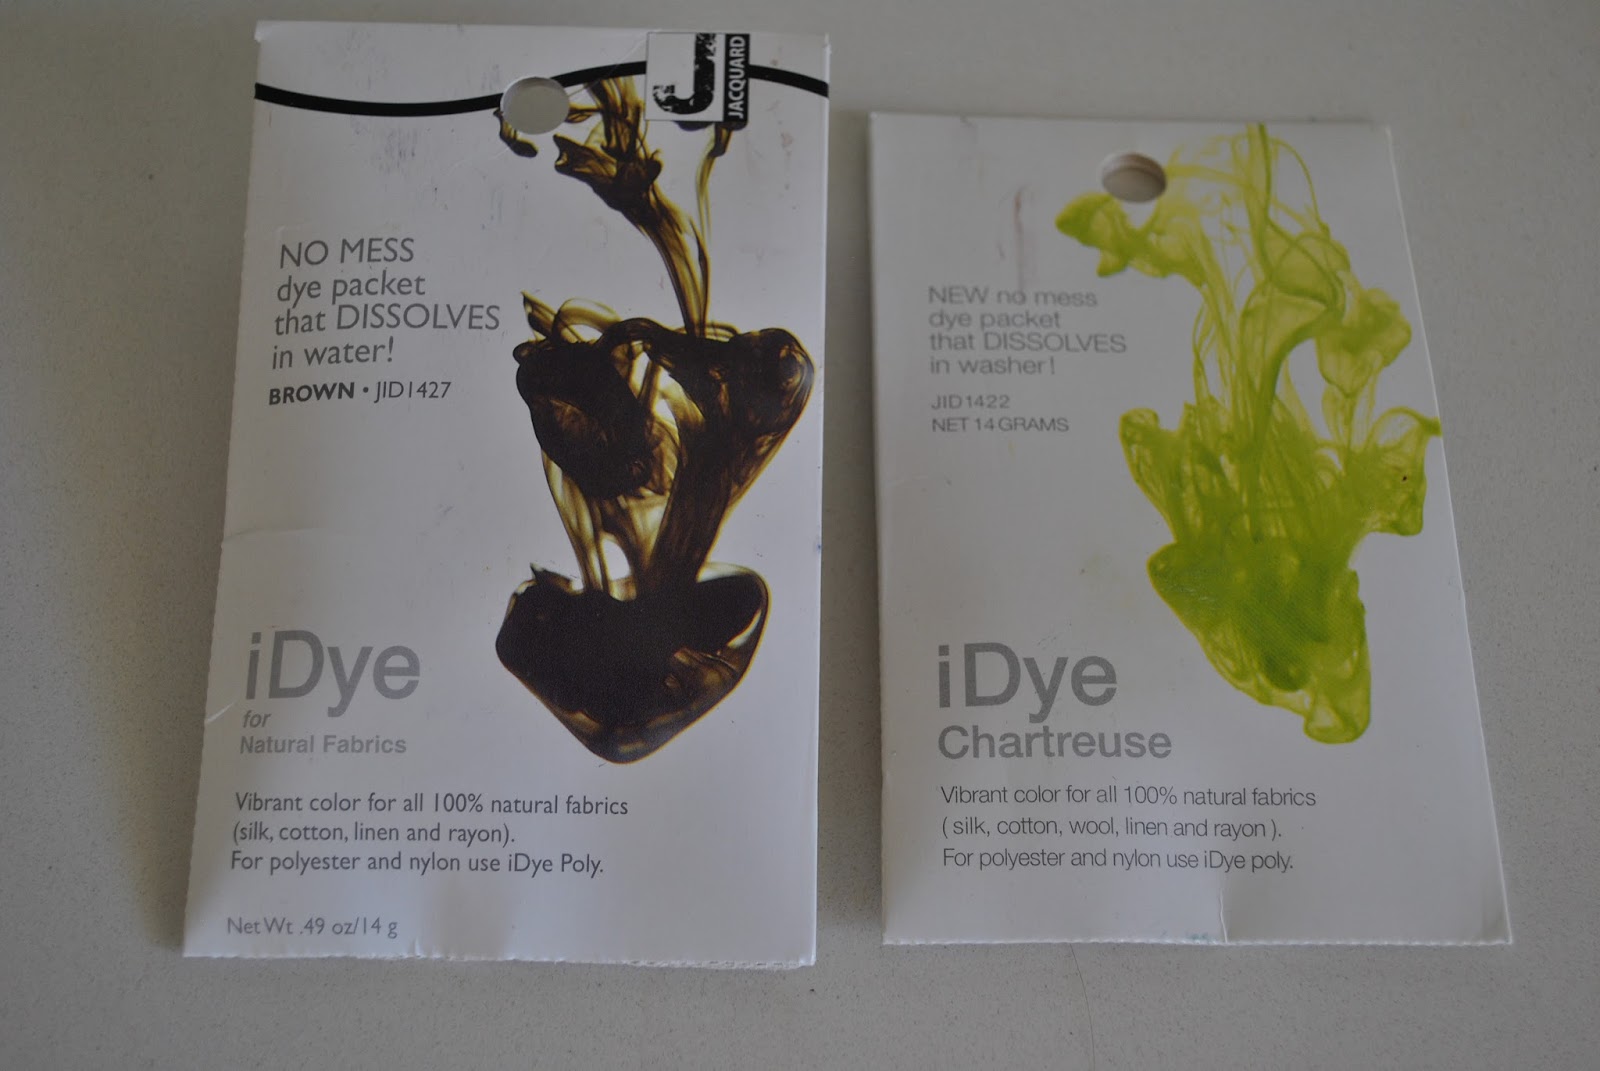
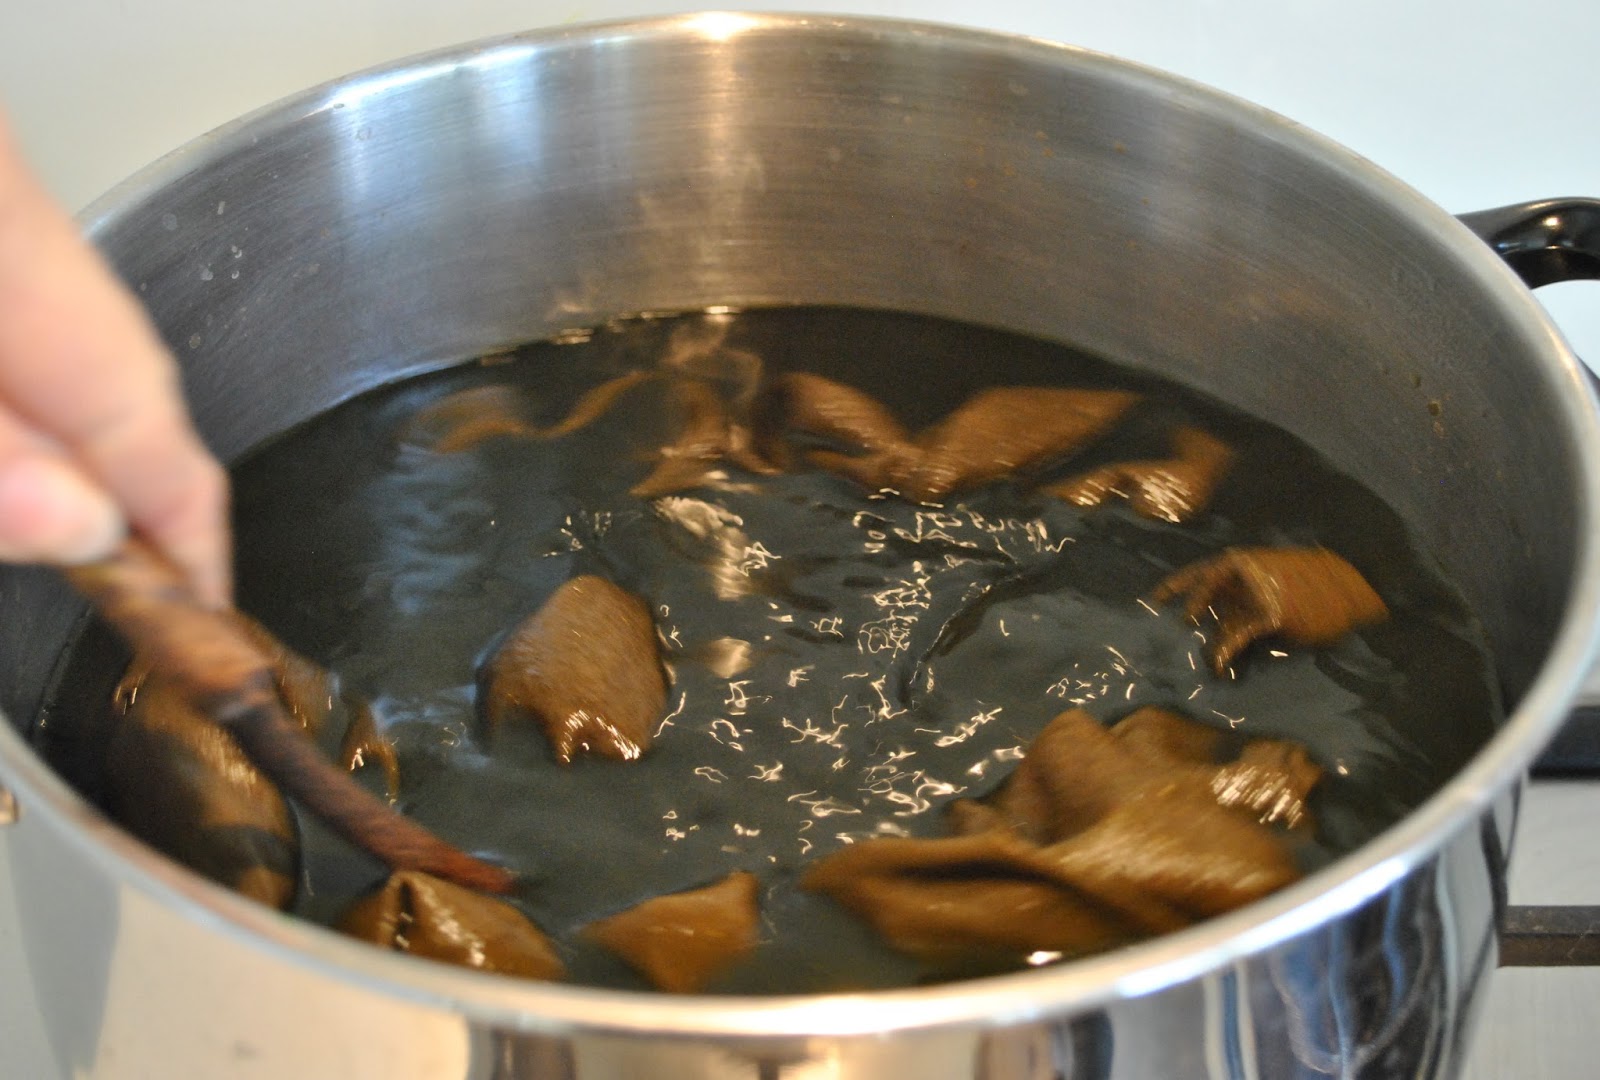
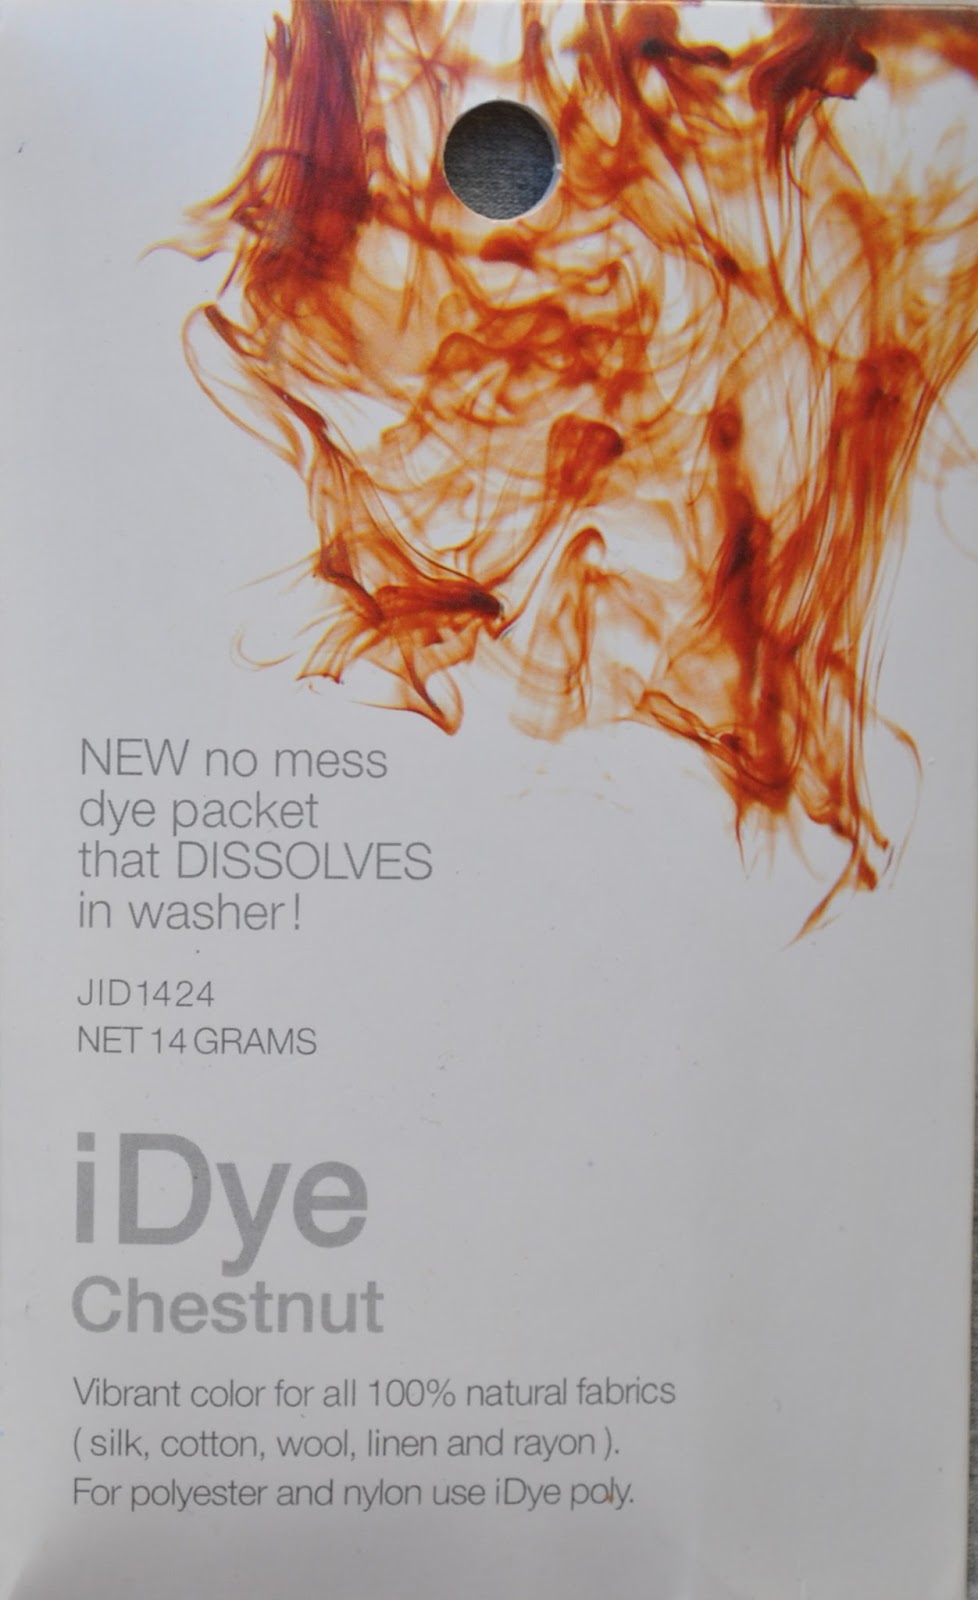
I used iDye in Brown and a tiny touch of the True Red, and got this rather wonderful deep caramel colour, in the top picture.  Hehe, it’s funny; because actually I was aiming for mustard! important moral of the story; you should never ever never dye something that you are so much in love with that you couldn’t bear an unexpected outcome.  Potential dyers, engrave that on your dye pots as it is one of the Commandments of Dyeing.
Anyway, I could not be happier with this super yummy, albeit unexpected, colour.  
Unsurprisingly, the poly satin I used for the lining and bias binding did not take up the dye one tiny little bit.

woa, crack out the sunnies!

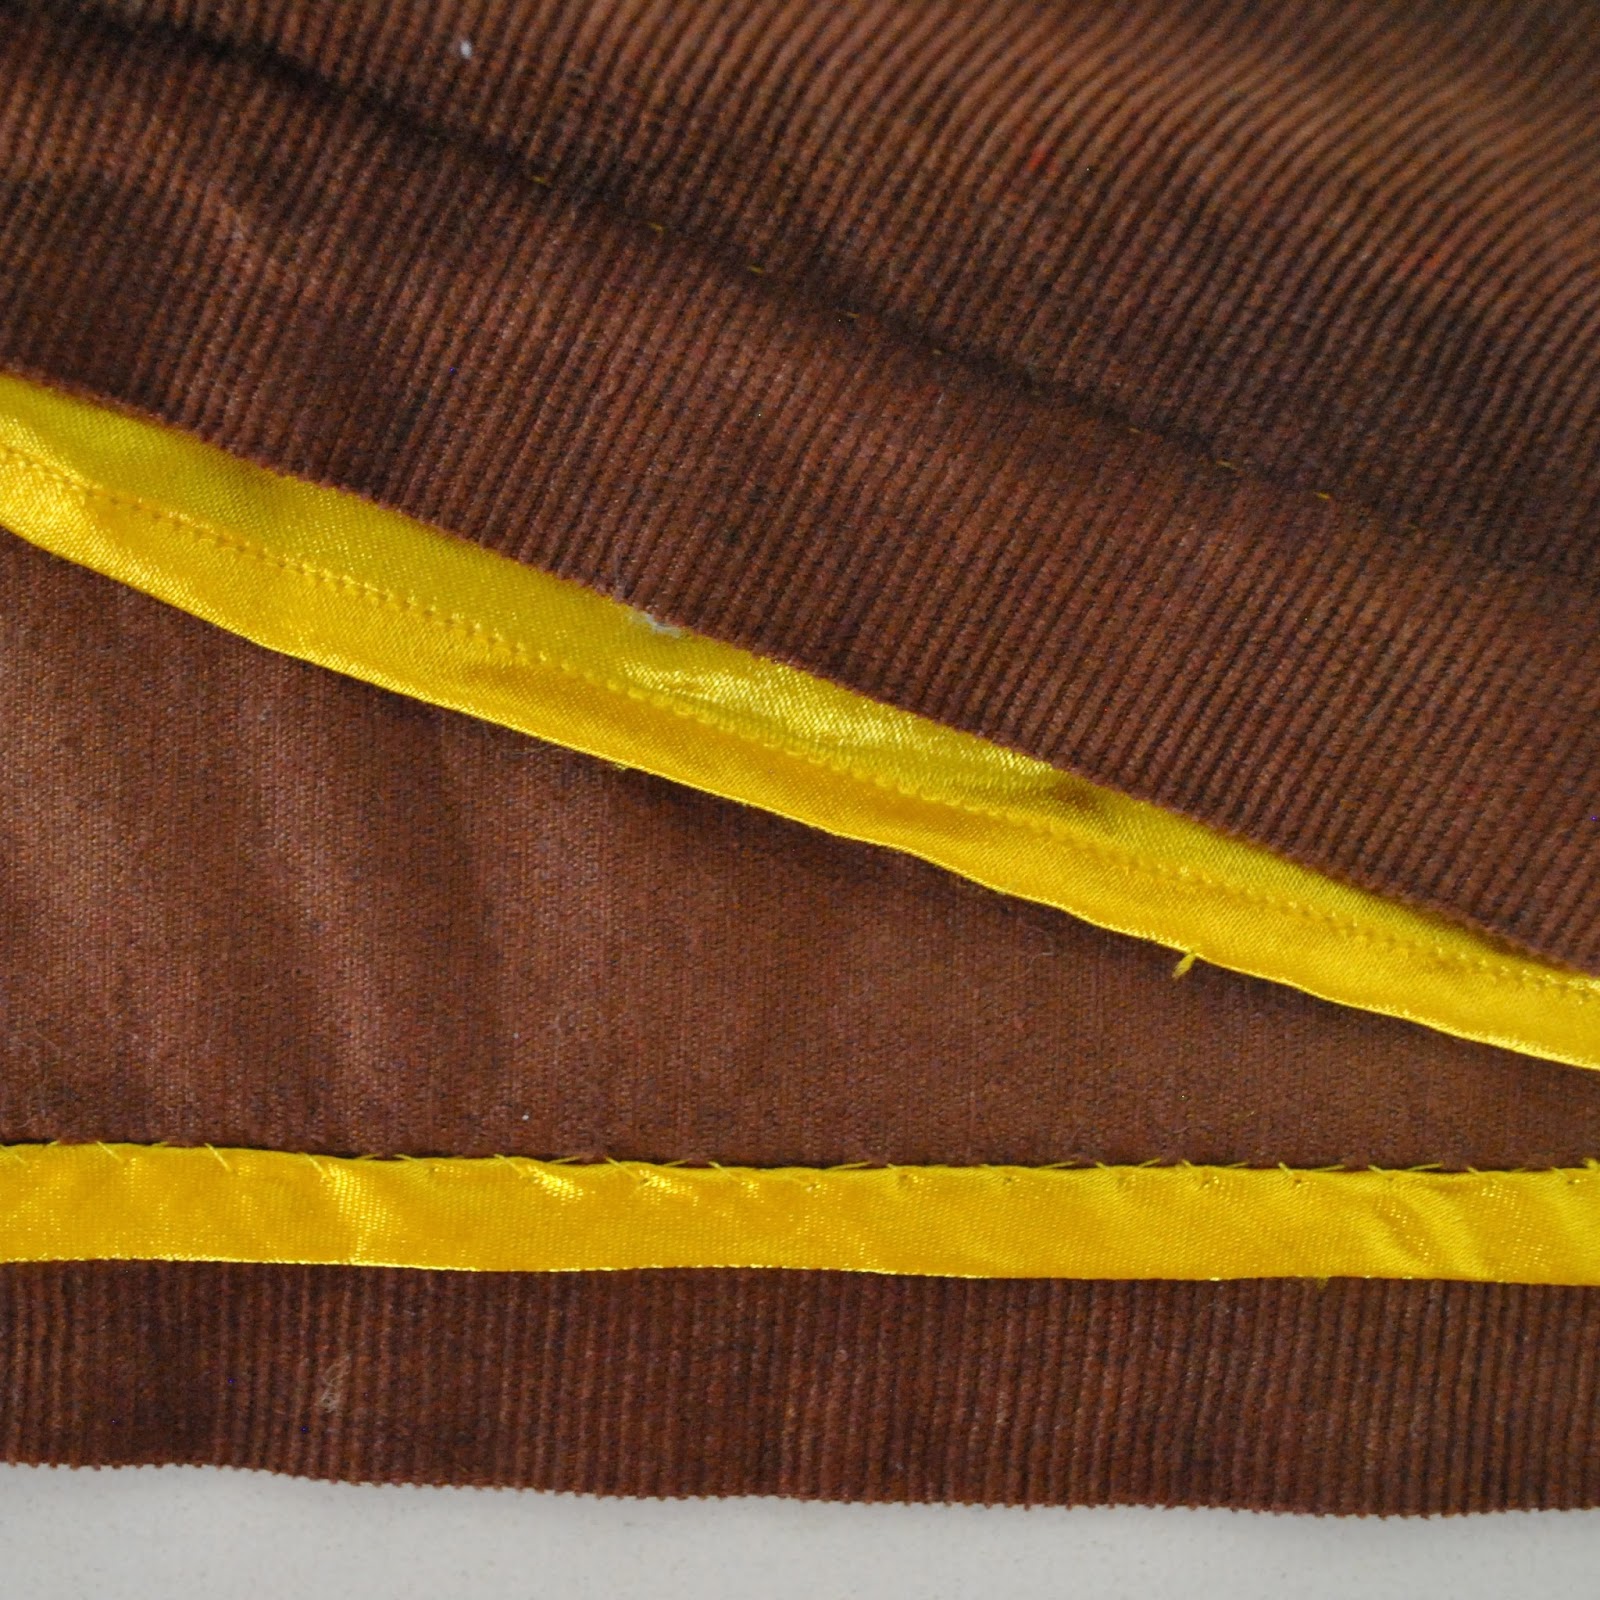
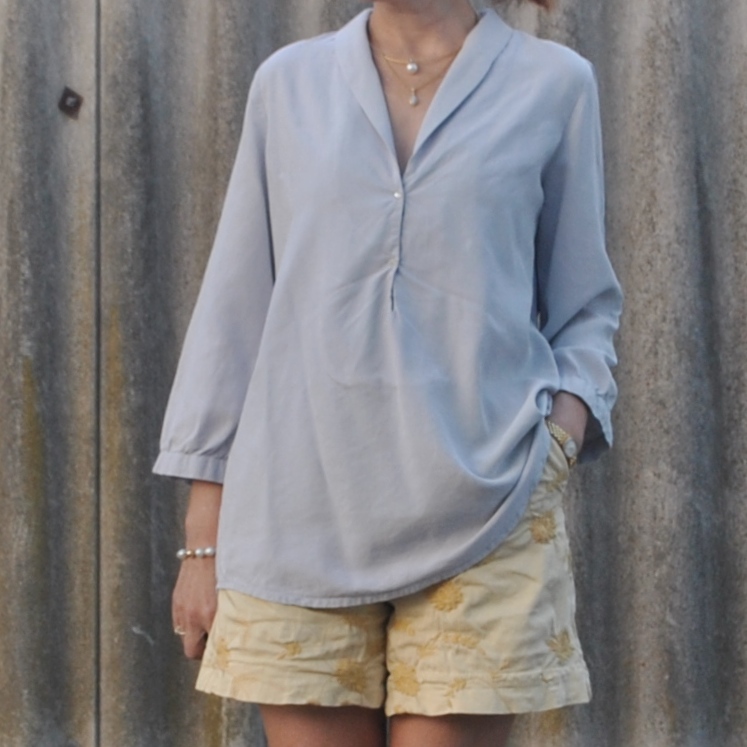
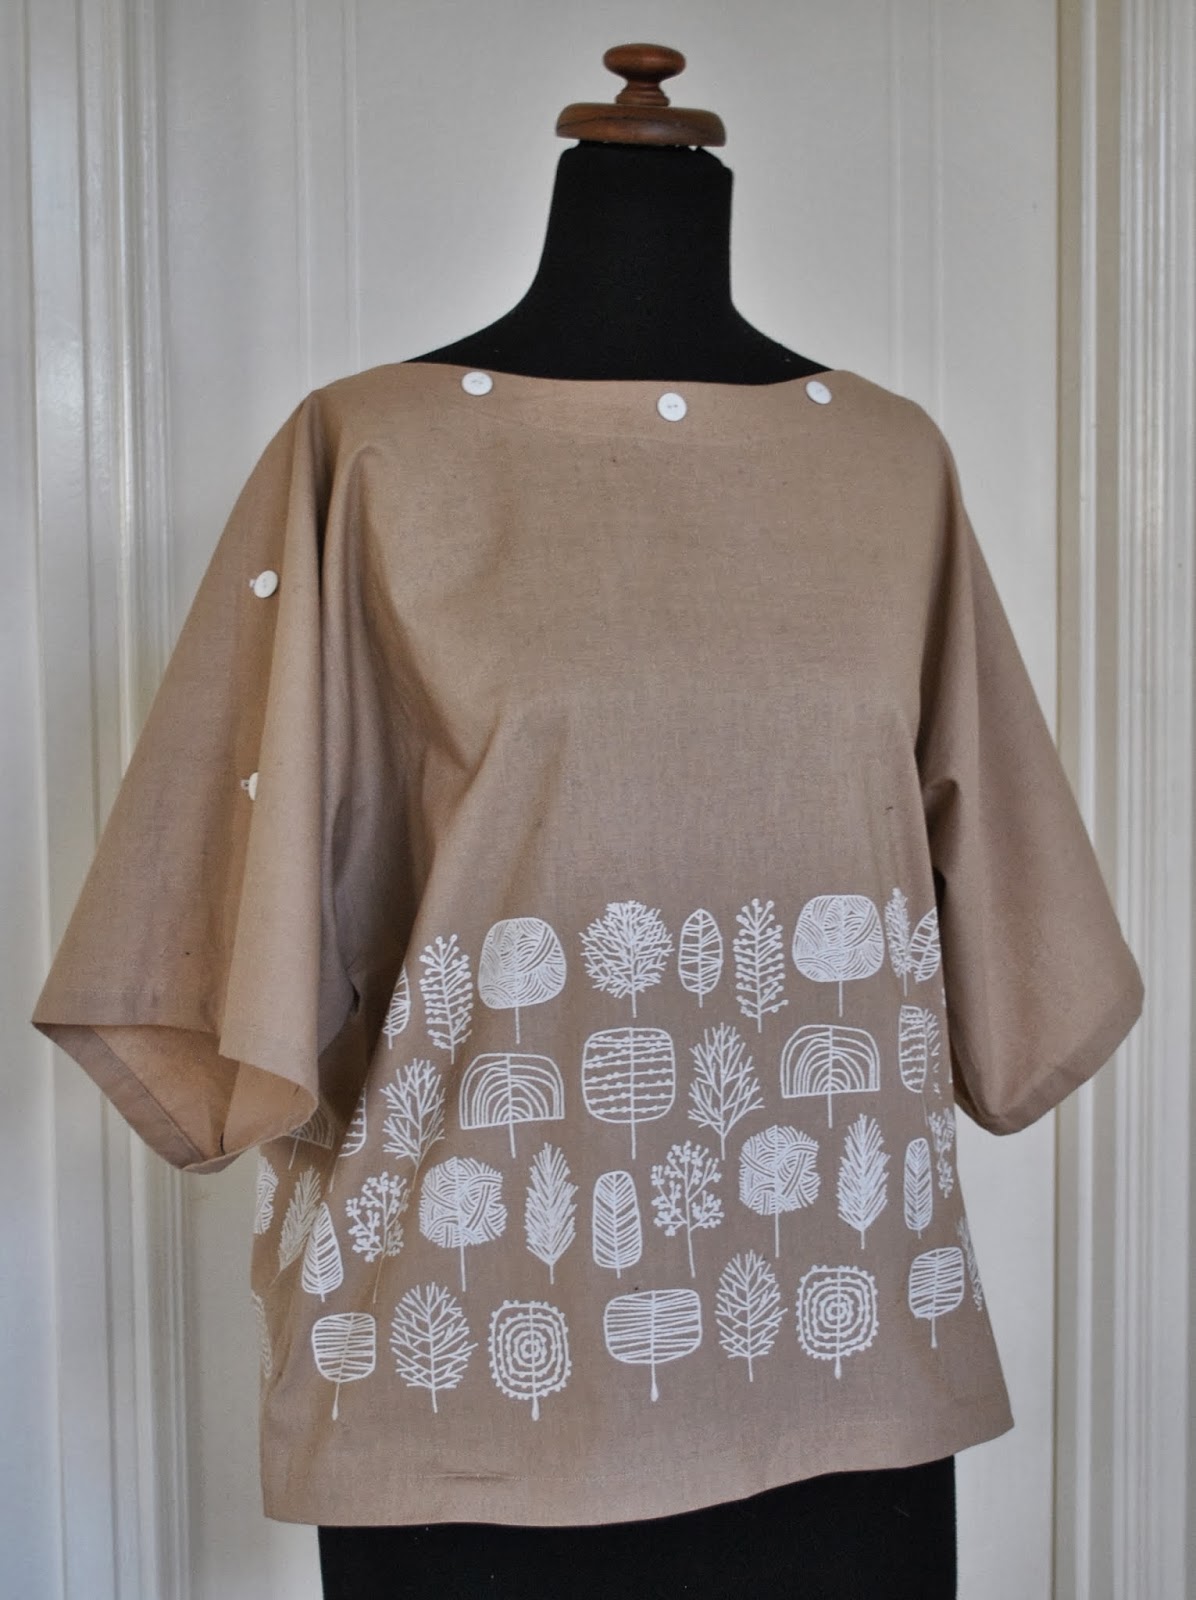
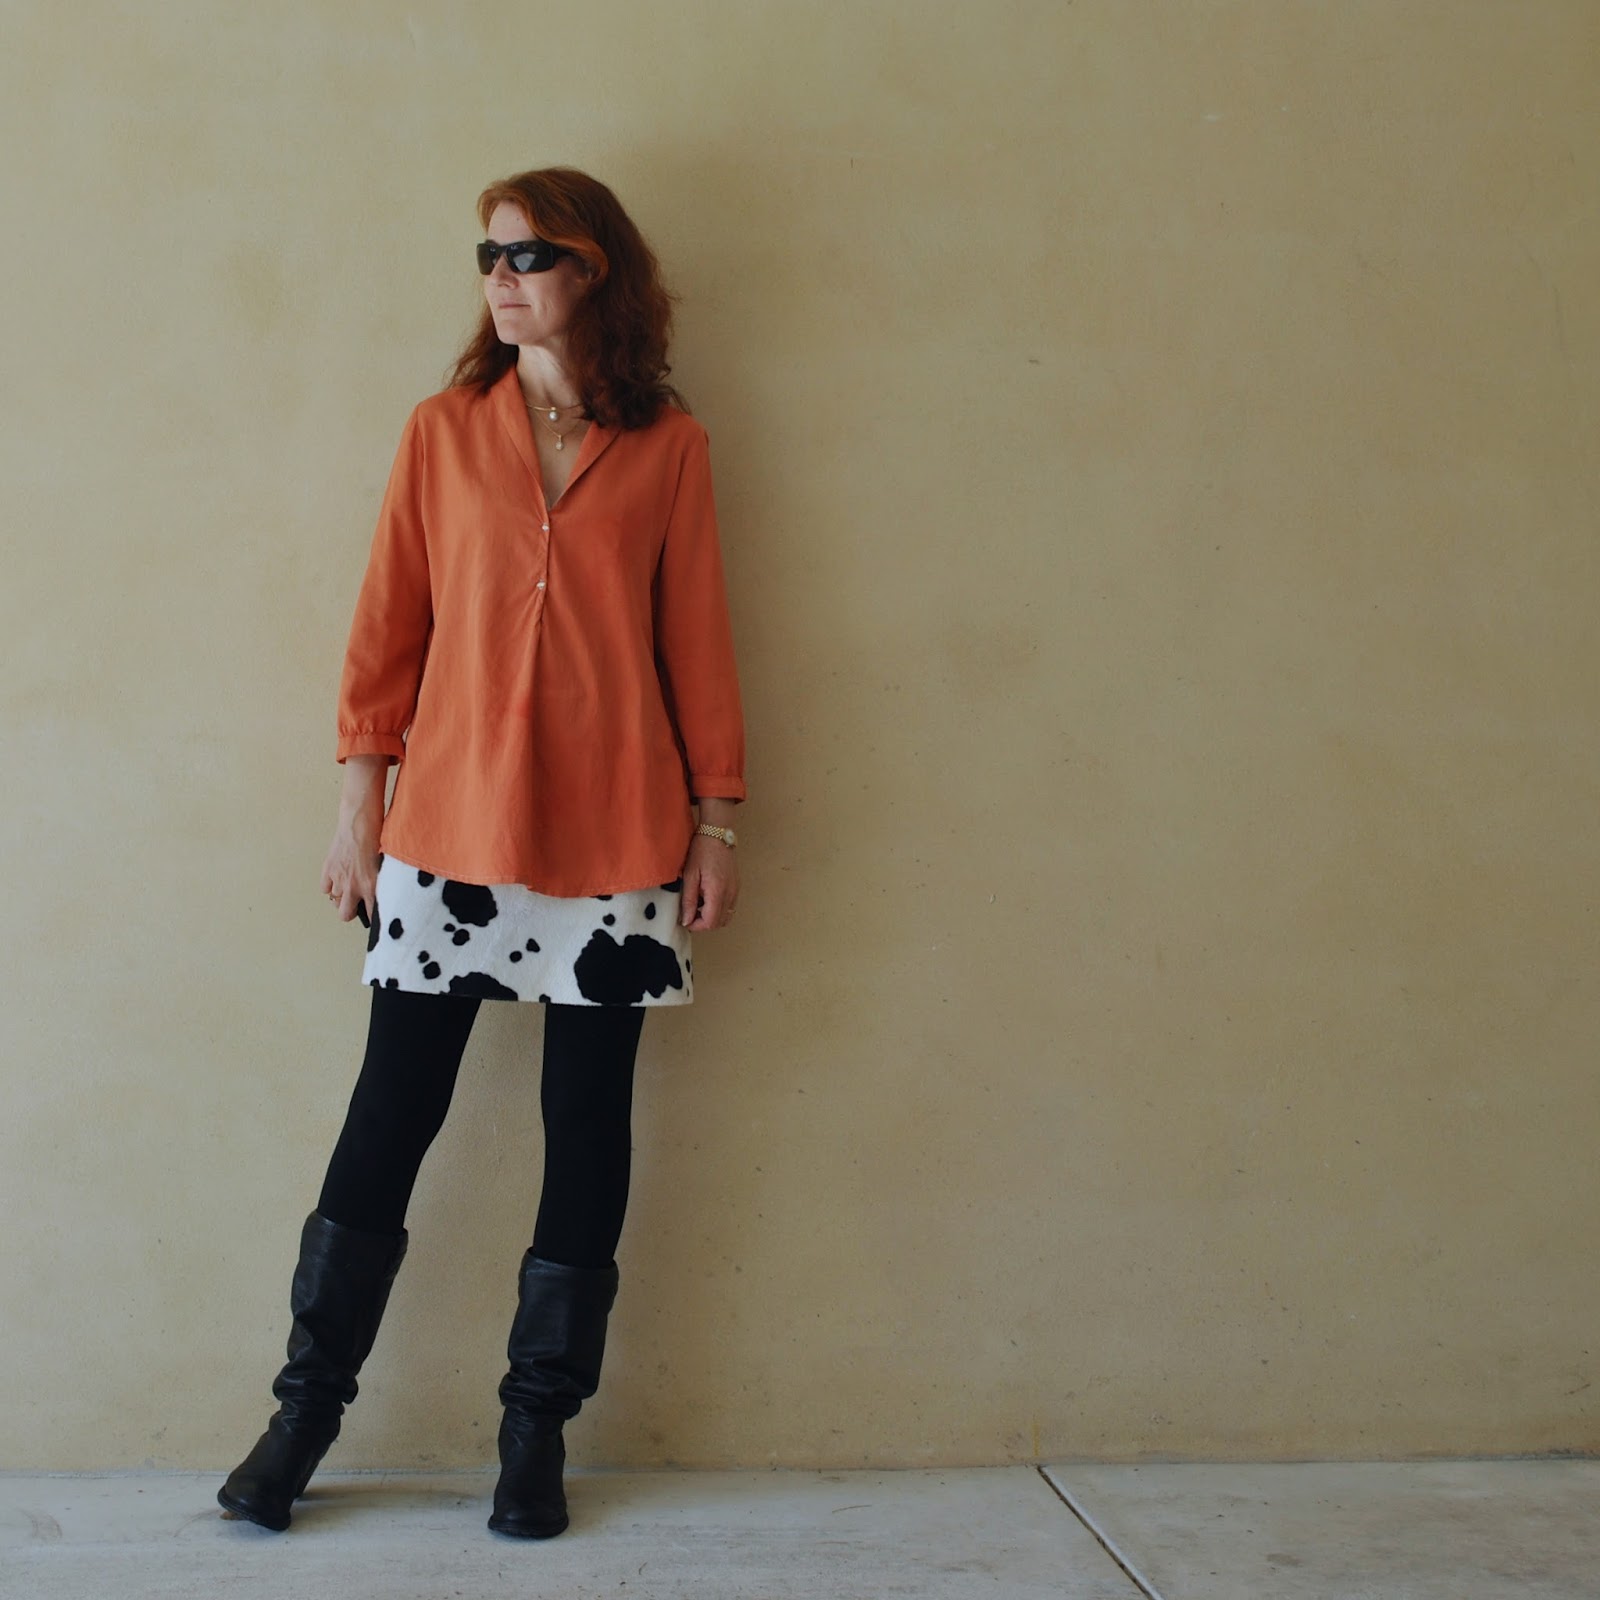
Exhibit B; while in the mood for dyeing, I also got out my pale blue, supposedly silk shirt (all original construction details here) and gave it a facelift.  Supposedly? well it was sold as silk, but its mild lack of enthusiasm for taking up the dye speaks to some synthetic content, ahem.  Not that I mind! it’s been a wonderful blouse and I love the shape unconditionally.  Just that it has faded drastically and its colour was now palling on me; or should that more accurately read, appalling on me?  Yeah, probably.
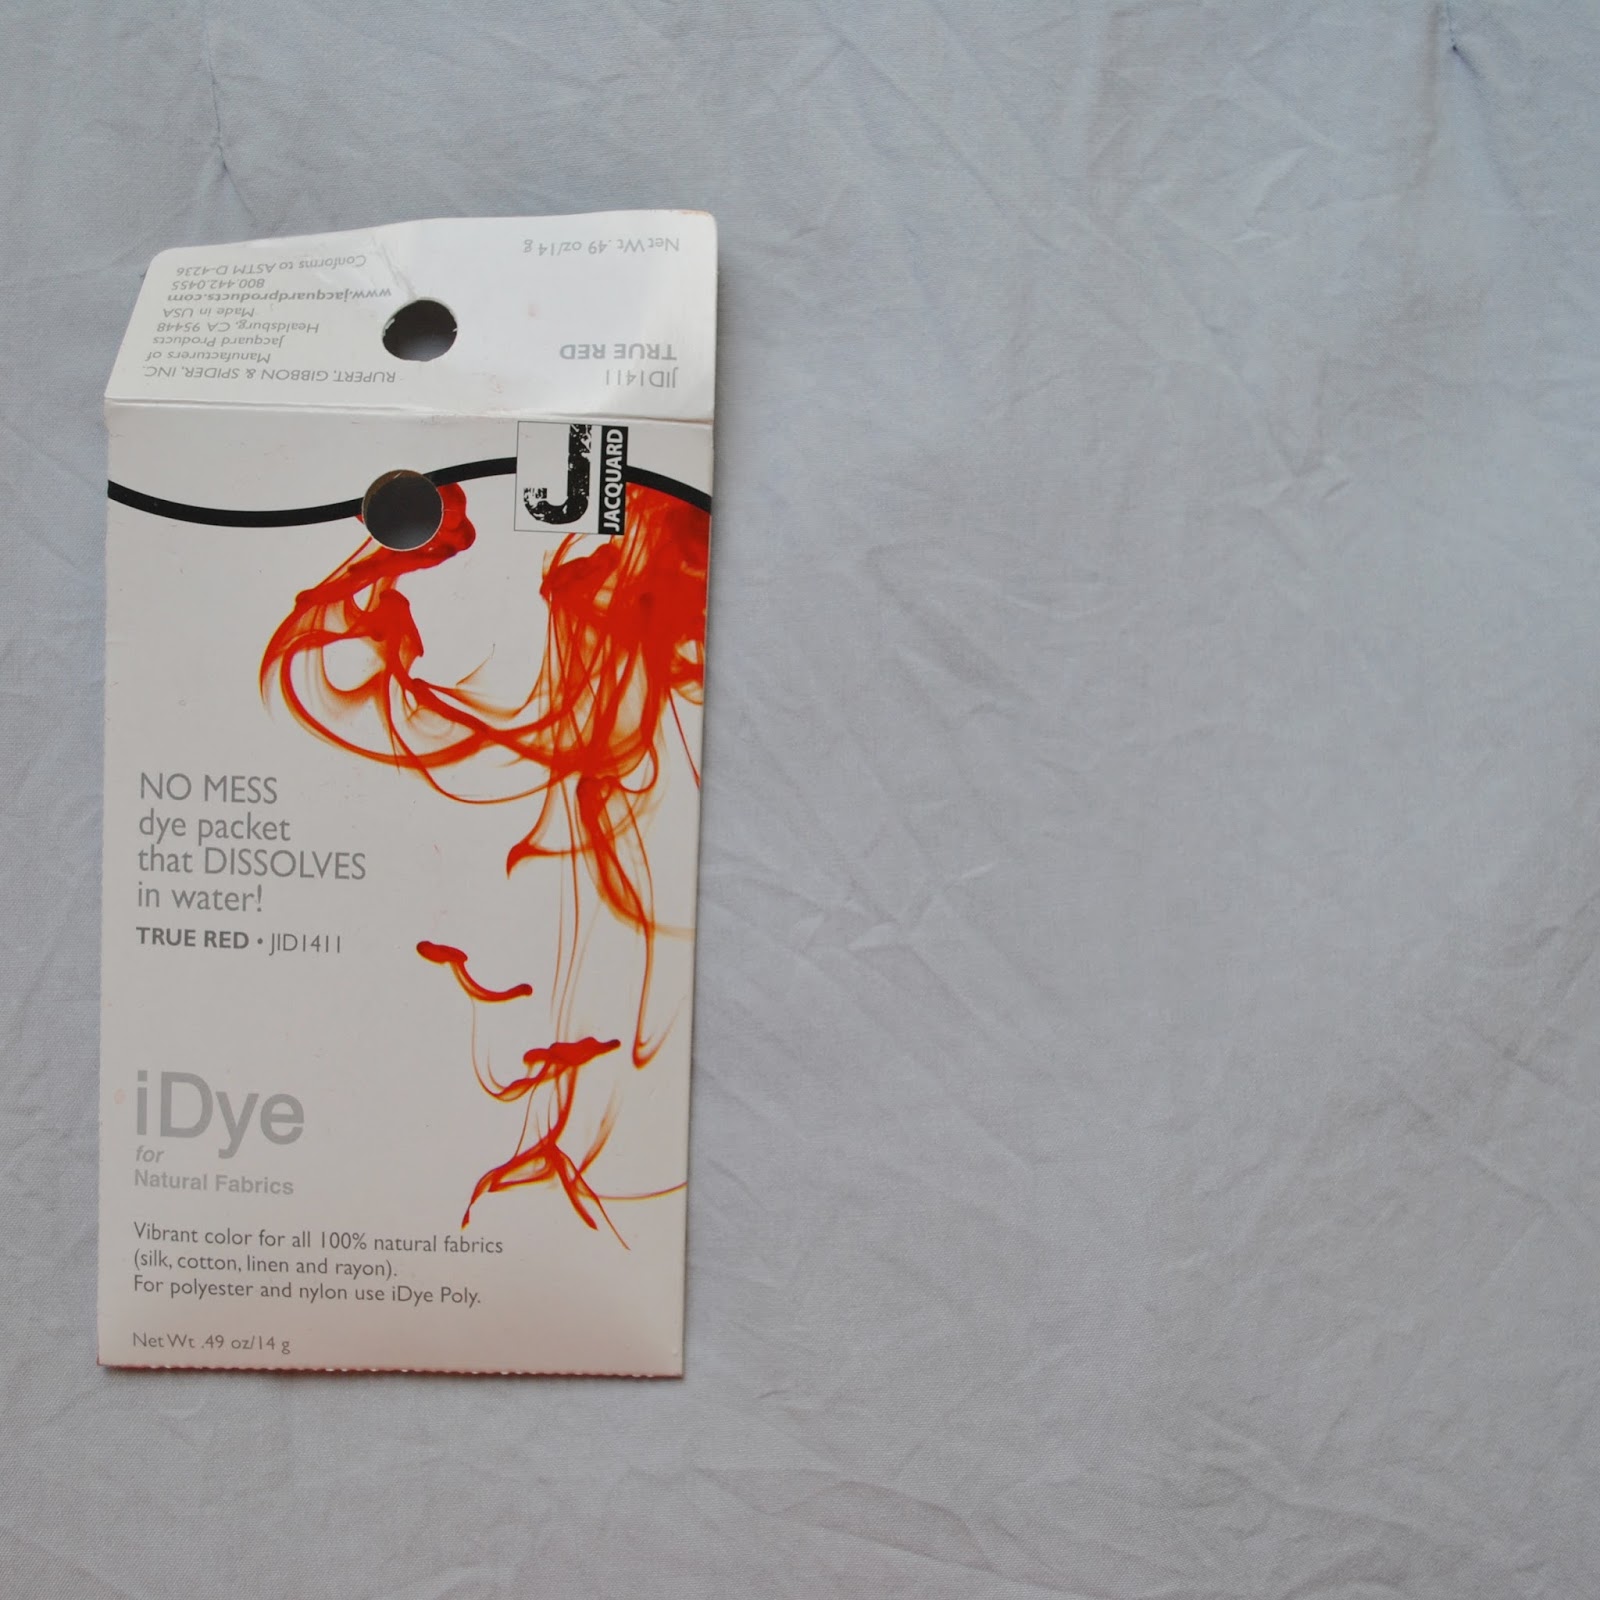
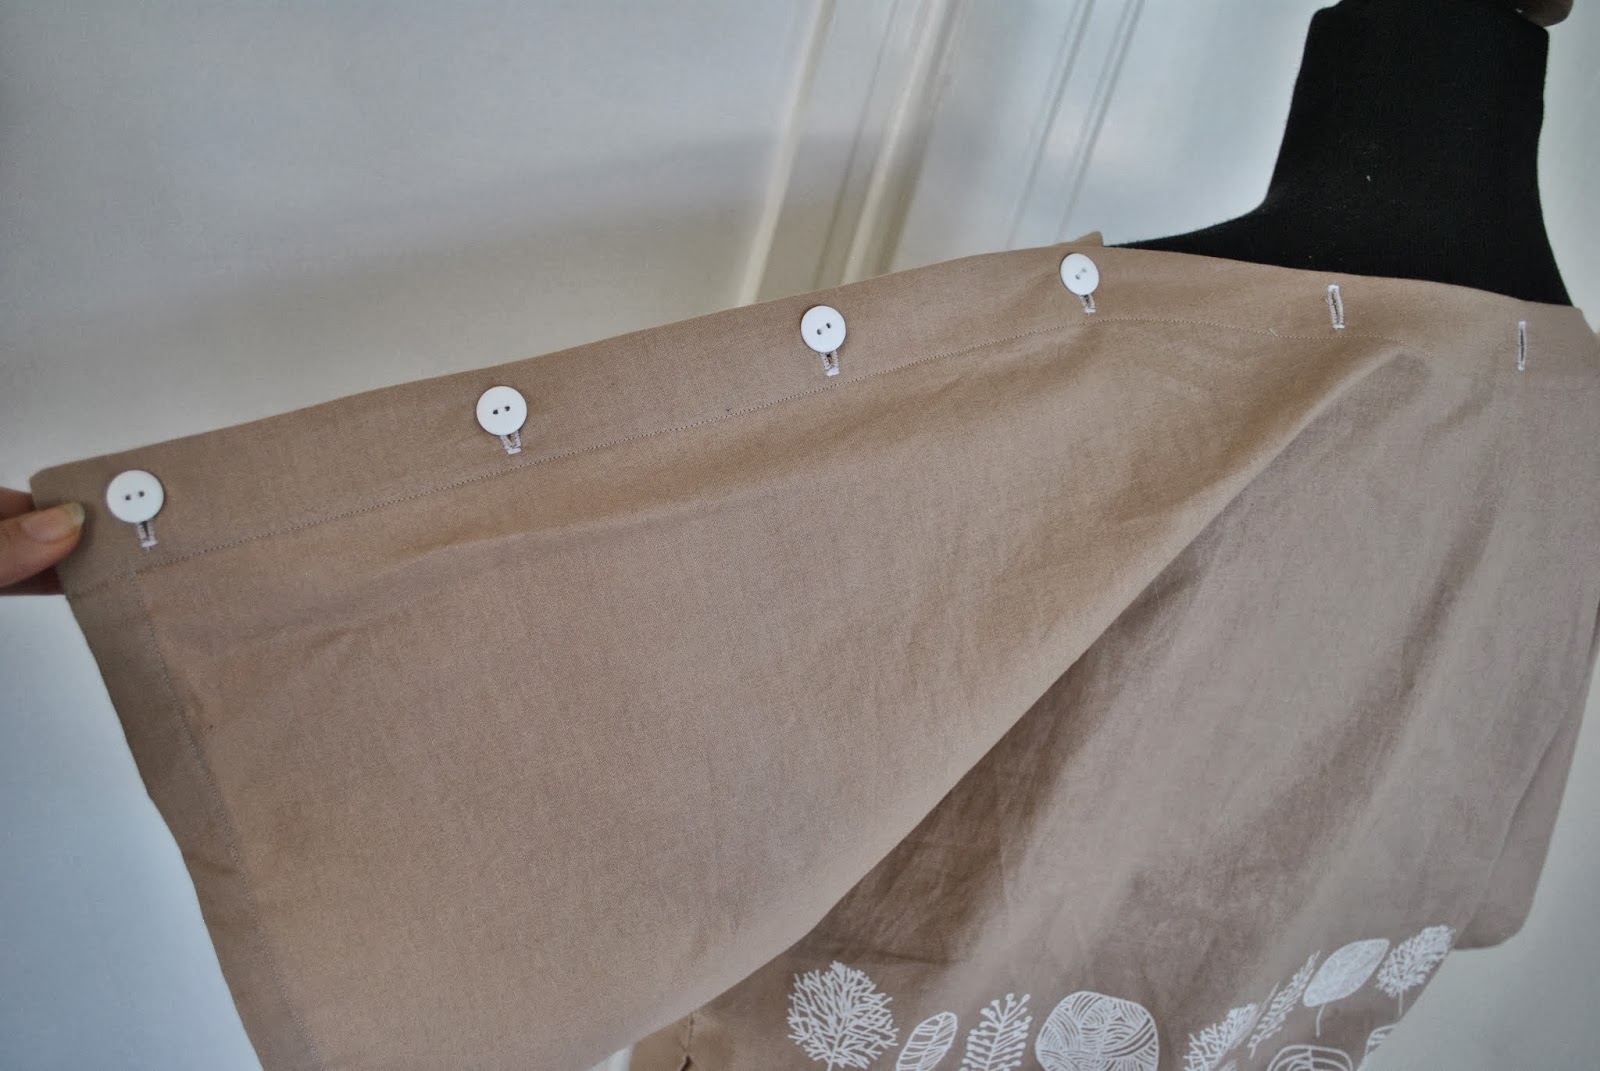
Anyway, it got treated to iDye in True Red.  

Much better!
Now; compare the new colour of the previously same coloured cotton bias binding … that strong red was what I was aiming for, although I like this warm tangerine colour just fine.  I’m just going to enjoy it as this colour for a while; and if I still want the deep true red colour I’ll pick up some red dye suitable for synthetics and give another whirl.  See how we go.

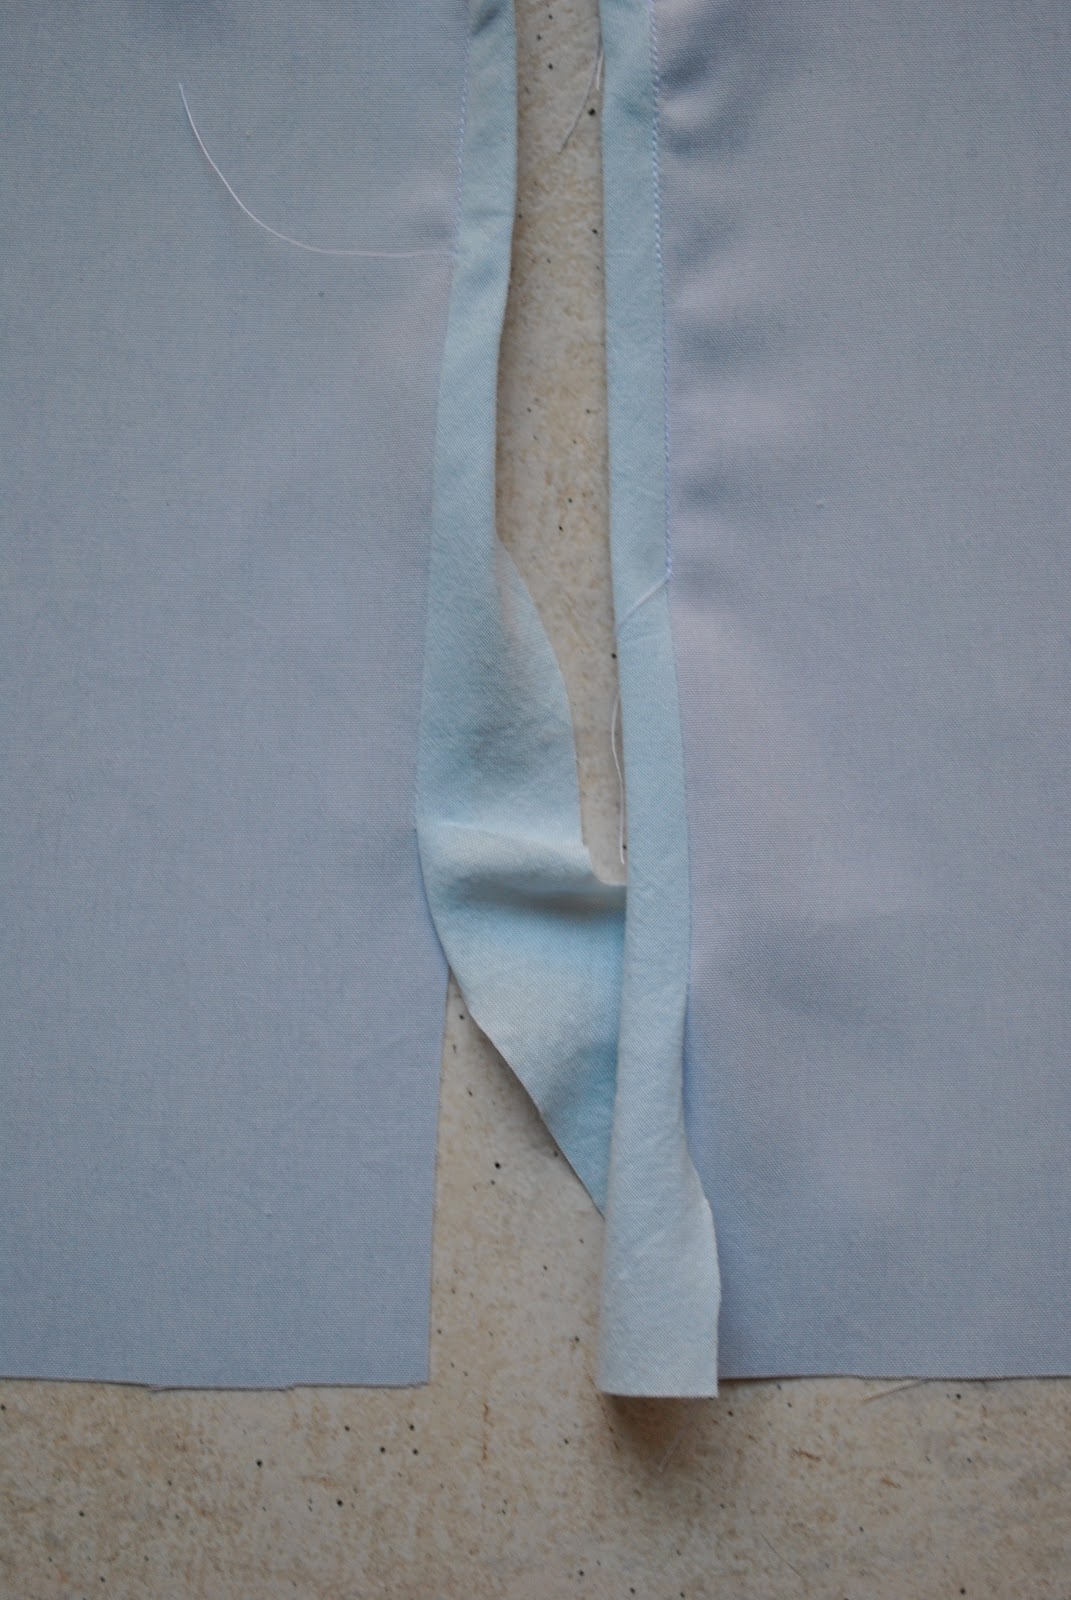
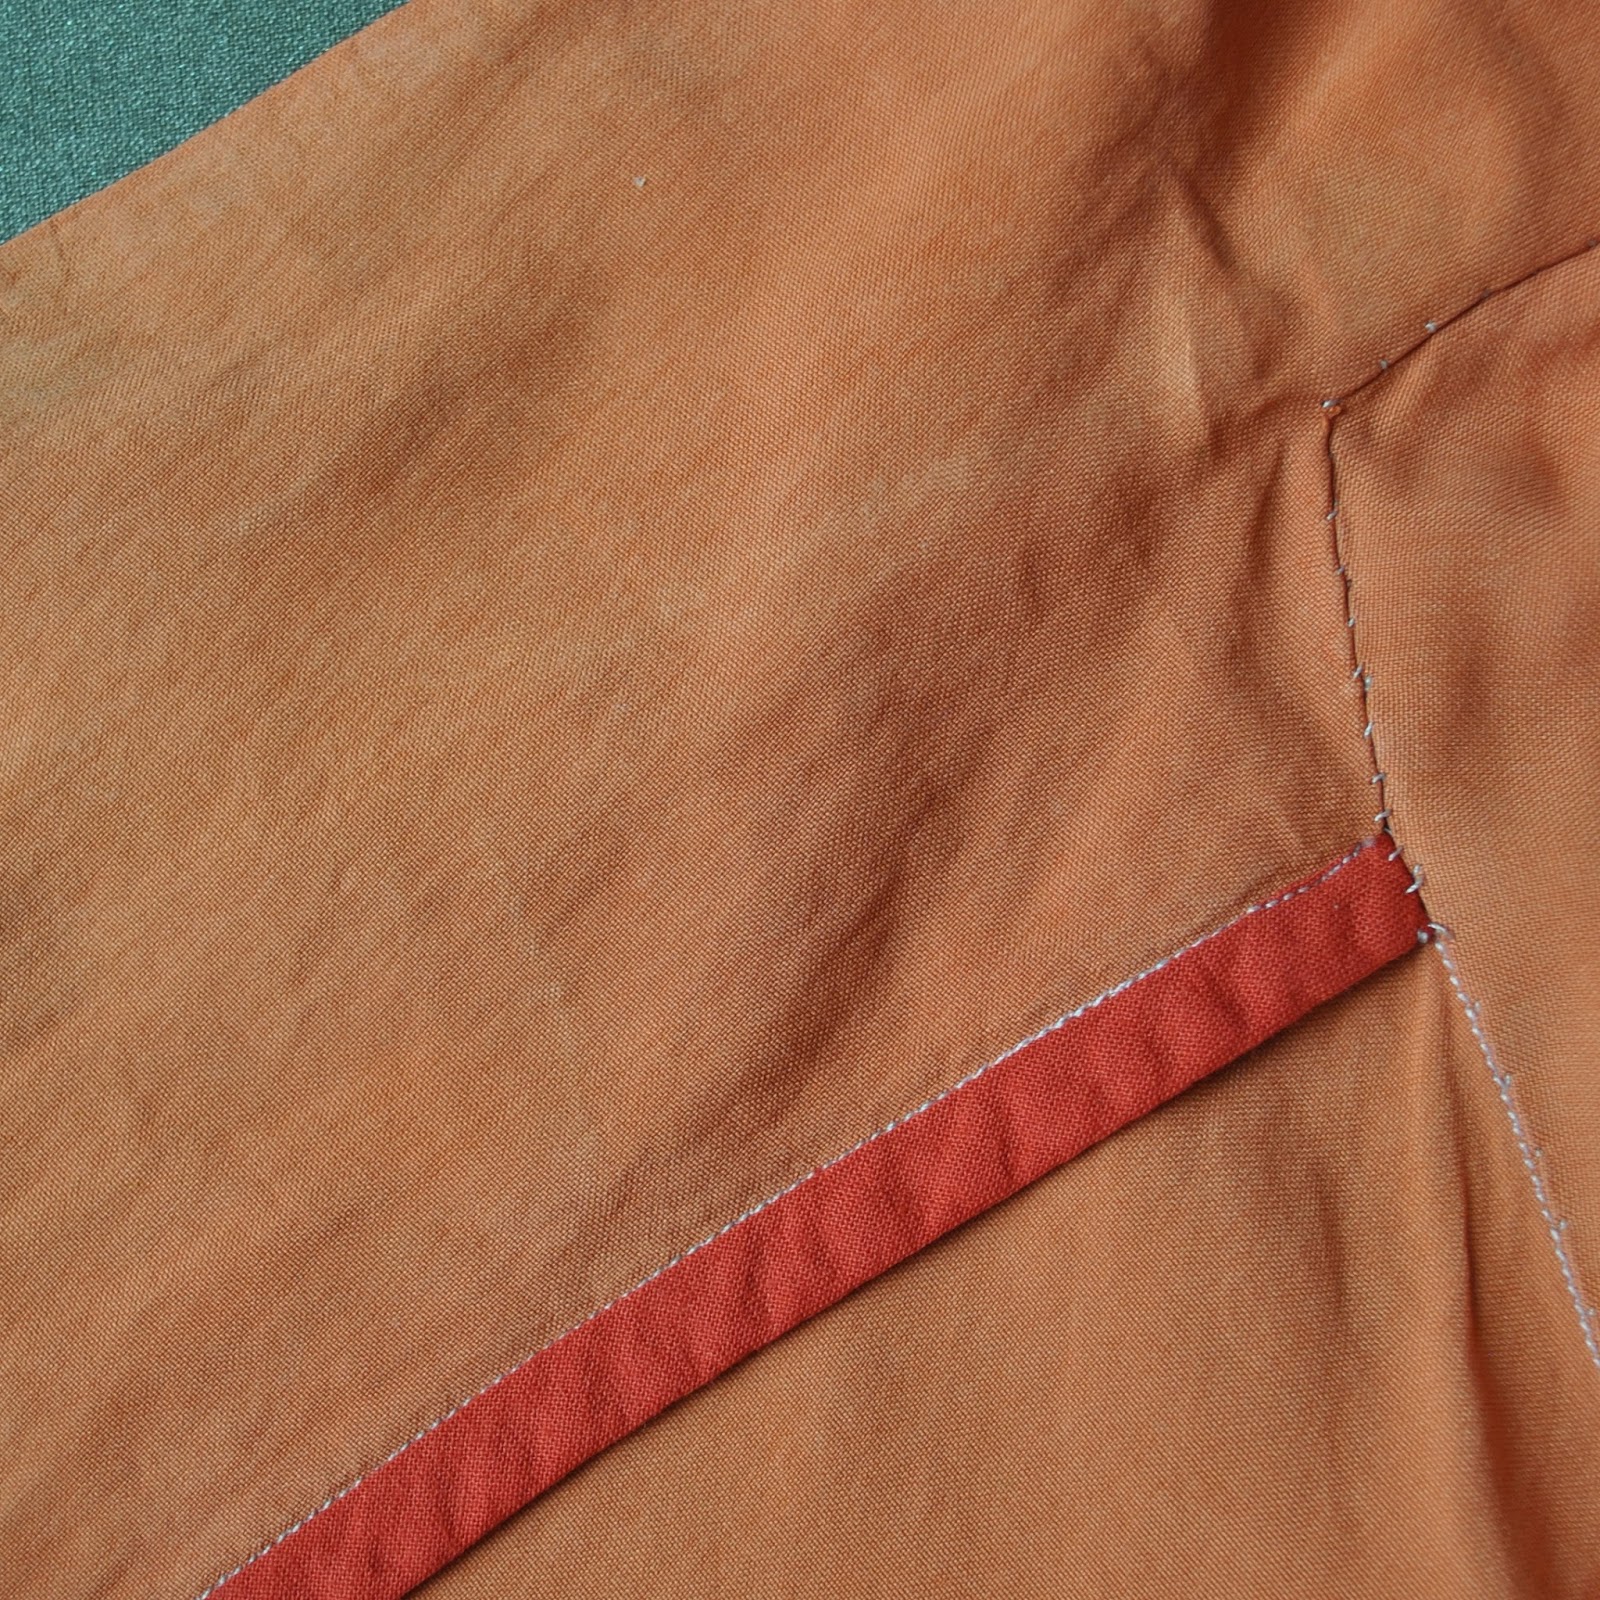
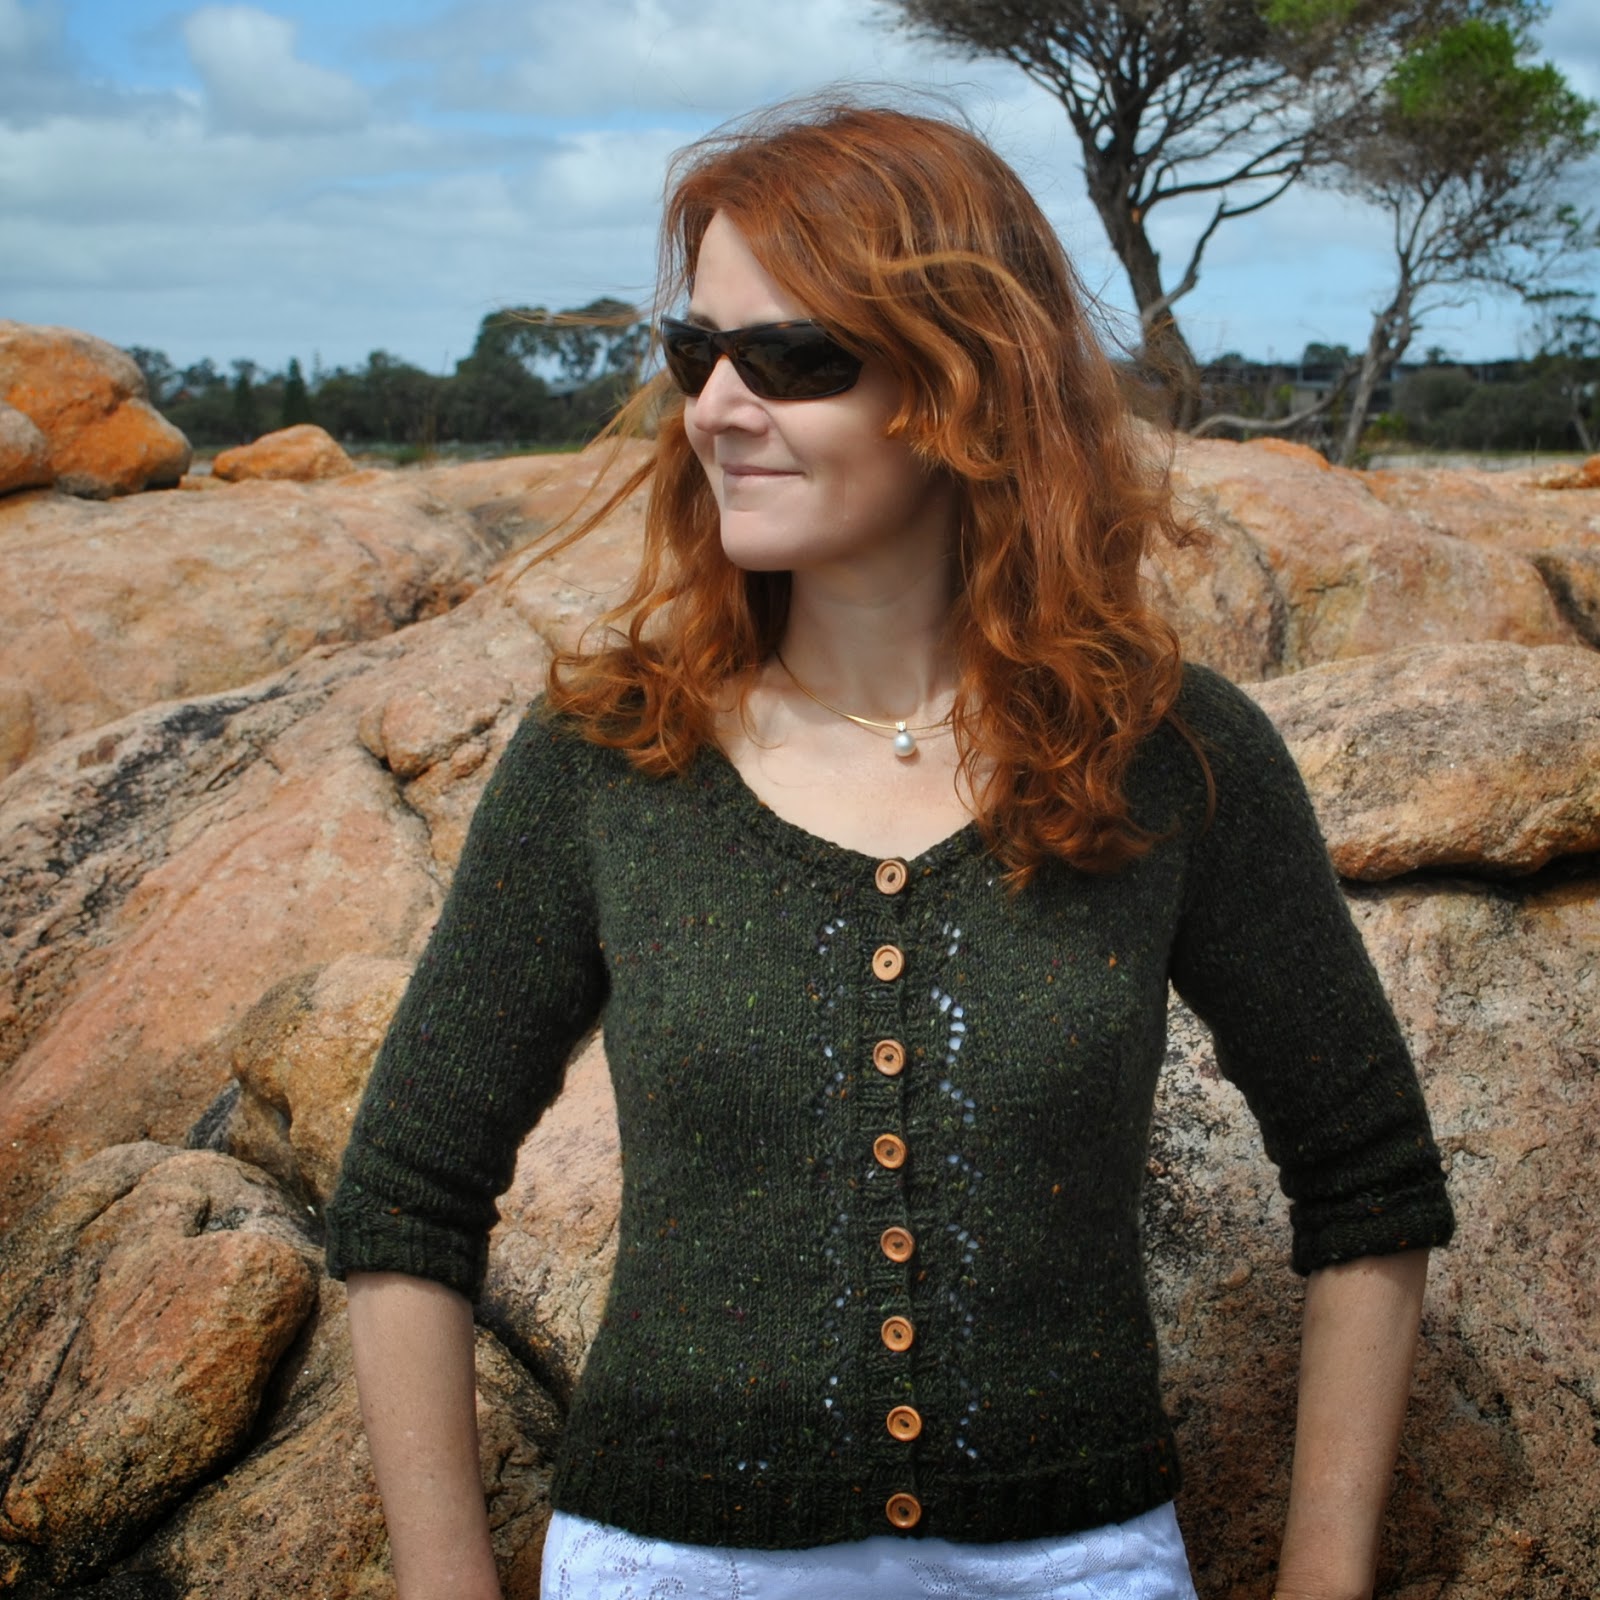
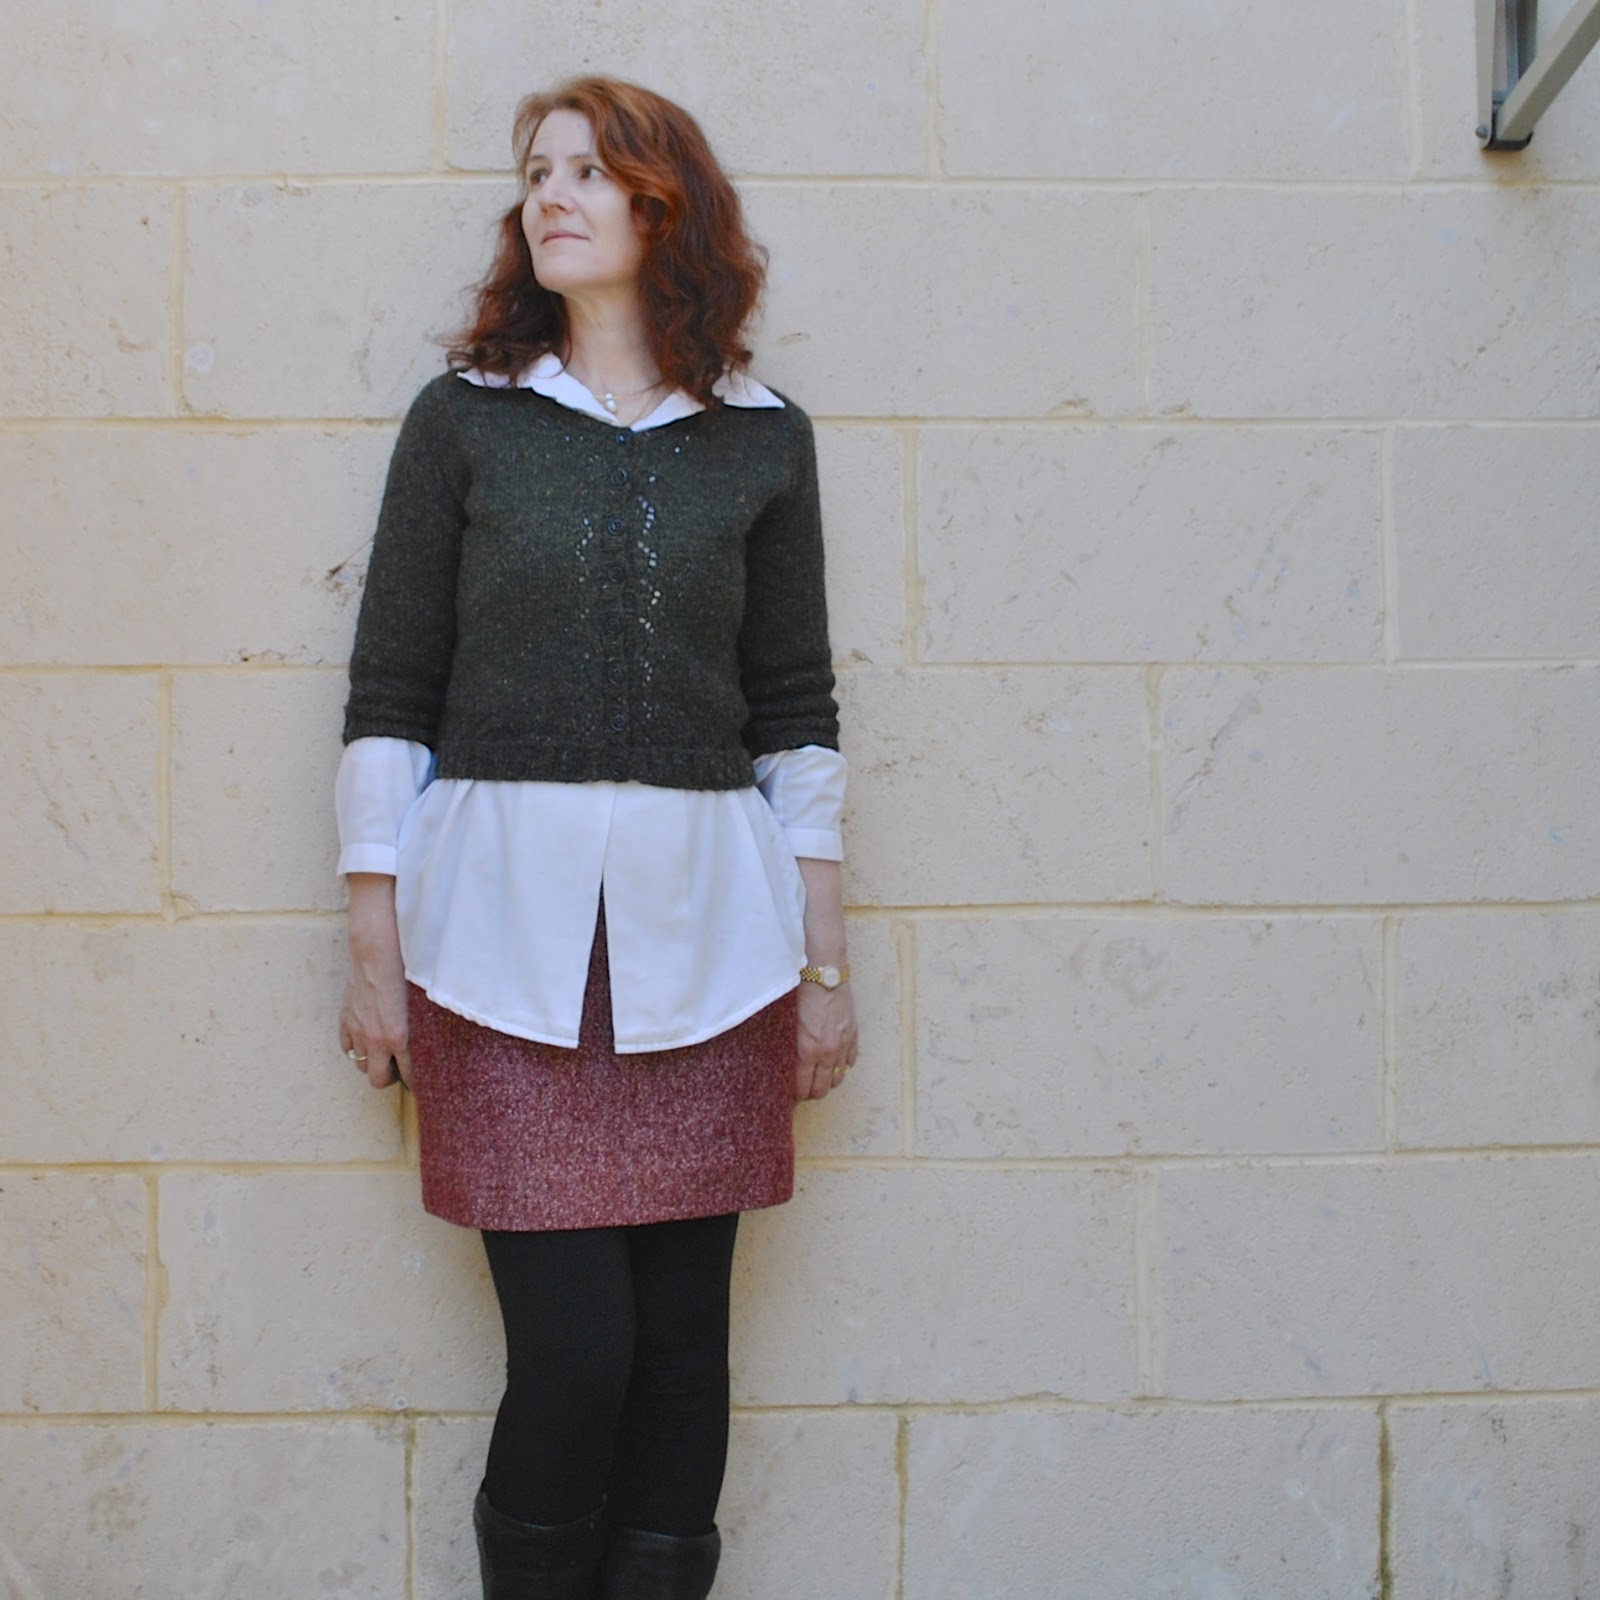
Exhibit C; not a biggie, but I switched the yellow buttons on my forest green Miette cardigan for new deep green ones.  

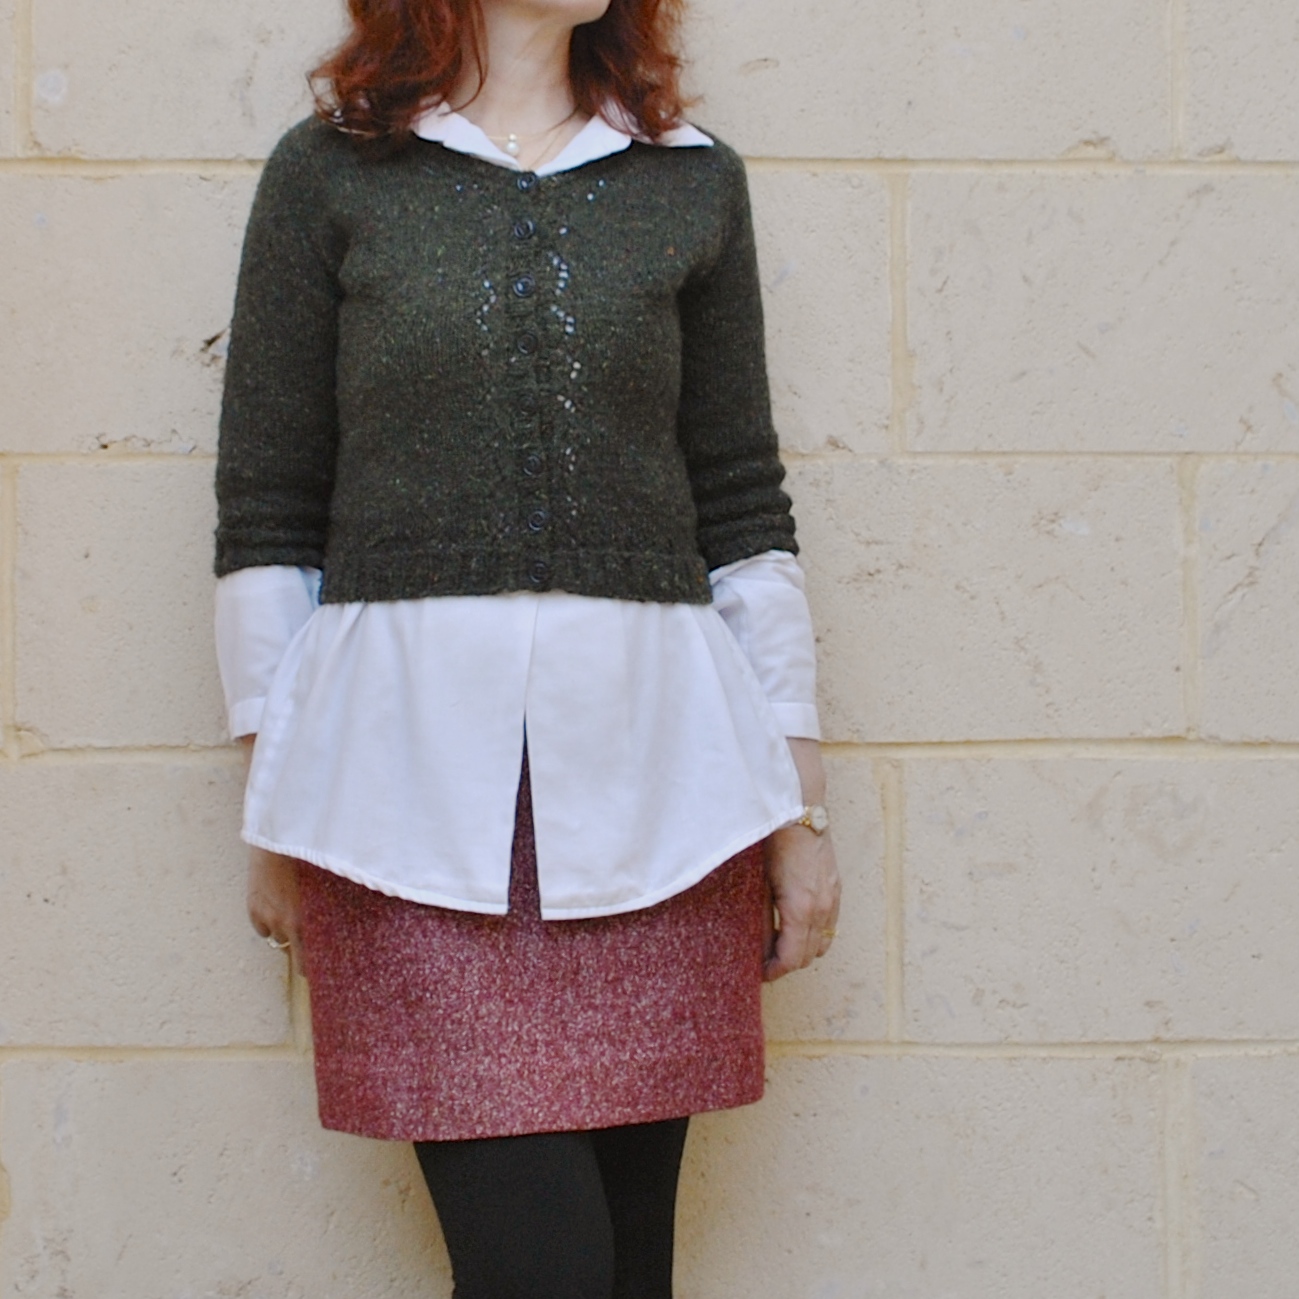
I think it’s going to be a tonne more mix ‘n’ matchable like this, since previously it pretty much went ONLY with my mustard dress below, or with all-white ensembles.  The yellow buttons were a distraction, I can see that now.  My mistake.  Also, I think the lacework shines a little more than it did before.

So, that’s it!  
In my current sewing news; I’m still struggling away with embroidering my felted wool, for my 1 year 1 outfit ensemble.  Every now and again I have to lay it aside and do something else.  It’s wearing me down a bit but I am certain I am going to love the finished piece and am quite excited to see it all come together.  Ever onward and upwards!

my tutorial on basic dyeing here

pinterestmail

raspberry/navy Alabama Chanin tank top

I’ve finally finished my latest Alabama Chanin project…  
Below is how it appeared on this blog previously…? (shudder) well, that dress has undergone extensive renovation over the past five months and now at last, I am quite satisfied.

I received loads of fantastic suggestions, thank you so very much to everyone who gave me so much helpful and wonderfully thoughtful advice  πŸ™‚  I am very grateful  πŸ™‚ *mwah*
The pattern is the fitted top from Alabama Studio Sewing + Style, by Natalie Chanin, and I had modified it slightly by giving it a higher rise at the neckline at CB, which will help keep the straps firmly on my shoulders and not slip off, like they occasionally do in my previous, first version of this pattern.  The print is Abbie’s Flower design from the same book, enlarged by hand and printed as described here, and I employed the reverse appliquΓ© method from the book, stitching running stitch around all motifs using crimson Gutermann upholstery thread, and then cutting the printed motifs away to reveal the base layer of fabric underneath.

I really liked Ann’s suggestion to bring some navy into the equation.  I bought some royal blue cotton jersey from KnitWit.  This was but a starting point; the original blue was a nice colour, but flat and not quite as edgy as I would have liked against the warmth and liveliness of the raspberry.  Some dyeing fun was called for.  I made haste for the lair and dragged out ye olde dye-pot, mwahahahaha
A short stint in a half-strength bath of iDye in Brown later and it was darkened and deepened up very nicely; transformed it into a very satisfactory shade of mottled dirty-navy.

Hehe, I just re-read that description and had to laugh at how the exact opposite of attractive that colour sounds!  well, I do love me some ugly colours, hehe.
The seams are all hand stitched in running stitch, with the occasional backstitch to “stop” the seam, something I learnt to do in hand- stitching quilts; and the seams then felled using running stitch, as per the Alabama Chanin way.  

I cut the binding strips for the armholes and neckline from the same dyed navy jersey and hand stitched them down in herringbone stitch using navy blue Gutermann upholstery thread.

A new tip; in my previous Alabama Chanin embroidery forays, I pinned the fabric layers together for the embroidery stage, this time I thought of a better solution.  I pinned and basted around all raw edges, then simply ran rough basting lines of long stitches, about 4-5cm apart, right across the pieces using my sewing machine.  Quick and dirty, nicely stable, and the long stitches are very easy to pull out as the embroidery progressed.  And far better than having to worry if my pins were going to fall out, only to get discovered on the sofa and produced as hard evidence in the Case against Sewing Taking Over the House.  Please, take a moment to consider the danger to one’s beloved husband whose bottom came to rest right beside that tiny little pearl-headed pin! not to mention one’s innocent offspring and cute fluffy pets!  
Hehe, no need to add further fuel to that particular flame  πŸ™‚

 My next Alabama Chanin project? already in the works!  Fortunately I made my original dress double layered and so I still have quite a good quantity of the raspberry fabric left after cutting this out; and I also dyed enough of the navy so that now a matching, though not identically patterned, skirt is awaiting in the wings to be made, as we speak.  Type?  Read?  One day, someone is going to come with a satisfactory verb for this kind of interaction  πŸ˜‰
Anyway, I am super pleased with my new Alabama Chanin top, and the good thing about that satisfaction is the renewed enthusiasm it brings for me to get on with that skirt quick sticks, to have something else to wear it with.  Ever onwards!

Details:
Top; the fitted top from the Alabama Studio Sewing + Style book, hand-dyed, -printed, -embroidered and -stitched in two different colour fabrics
Jeans; the Closet Case patterns Ginger jeans, navy stretch cotton denim, details here

pinterestmail

blue ray

Winter is officially over here, so right on target I’ve finished a wintery little dress.  πŸ™‚ 
I spent some quality time with my dyepot, dyeing bright blue corduroy in four different moody blues for the colour blocking.    This is my second version of Vogue 1316; I’ve dreamed up several different plans for this great pattern which I want to explore, including this one…  
One of the things about a colourblock design is that I think it’s more effective if the fabrics are all the same type and weight etc.  As well as the colours blending in and going together nicely somehow.  And it’s hard enough to find great fabric that you love, in great colours that you love too, let alone a single fabric in four great colours that you love, and that go together harmoniously.  Impossible!  So I made my own nicely co-ordinating set of coloured corduroys  πŸ™‚
My originally bright blue cotton corduroy is from Spotlight.
I divided the pattern pieces up into their colour batches and laid them out on my fabric, leaving a good margin around each piece to allow for a little error, just in case, then cut the colour batches apart for dyeing.  Before dyeing them I overlocked all raw edges to decrease the risk of distorting or stretching out the pieces during the dyeing process.  

I labelled each piece and was super careful to keep each label with its piece throughout the process and not get them mixed up!
my tutorial for basic dyeing here

I used iDye in various strengths of Black, Crimson and Chestnut; to get, from left:
-deep inky navy, from a biggish dose of Black, 
-royal purple; from a medium biggish dose of Crimson
-deep teal/aqua; from a medium dose of Chestnut, 
and finally the rightmost batch was soaked overnight in the leftover bath of Chestnut just to take the edge off that brightness, tone it down and dirty it up a bit.  The piece on the right is a small scrap of the original colour saved for comparison.

I took my own advice and put in pockets that sit underneath those long curved hip bands again, as described here.  Yes Vogue, I improved your pattern.

The dress is fully lined with navy blue polyacetate and I used a long, navy blue invisible zip.  As previously, I re-shaped the dress to be a little less boxy and bit more hourglass-y by re-fitting through those long back seams that run almost the full length of the dress.  A useful feature!

I’m so happy with this dress! it’s funny; I’m rarely 100% happy with things I’ve made but this project is pretty close to being completely satisfactory for me.   I’ve made another highly satisfying thing recently too, which I am yet to photograph and blog about.  The weather needs to warm up a touch first, but I’m so excited about that one too! I have to say, making two things in a row that I’m super happy with, in quick succession, has put me on SUCH a high. Honestly, I wish I could bottle this feeling.

Details:
Dress; Vogue 1316, blue corduroy dyed in 4 different shades using various iDye dyes, my review of this pattern here.
Tights; self-drafted, navy blue stretchy stuff, details here
Boots; Roberto del Carlo, from Zomp shoes

pinterestmail

Further Alabama Chanin-ing

Hello!  I am getting started on my next Alabama Chanin project.
Yes, an authentically executed Alabama Chanin creation is a big time commitment but I really enjoyed making my 3-piece set and it is nice to have a hand-held project to work on slowly, something easily transportable that doesn’t require much space or special equipment or a lot of thought but that you can just pick it up and get on with, a little bit at a time.
I’m using some hot pink jersey knit from my stash, bought in the Fabric Store in Melbourne during one of my trips over there with Mum and Cassie, I’ve forgotten which one now.  Probably the previous one, hmmm…  Actually, I had pulled this fabric out in the early planning stages of my recent SWAP and marked it as a definite; that was before eyeballing the rest of the long term stash residents that I was keen to sew up and realised that colour-wise, it didn’t fit in at all.
And it still didn’t.  Really, hot pink? I don’t know what I was thinking.  My current way of thinking wrt my wardrobe is to have it mostly subtly and/or autumnally shaded, and while in theory I like hot pink, in reality I was just like; ah, No.
So, step one; wash, soak and dye the fabric.  I used a small shake each of iDye in Brown, Yellow and Chestnut in the dye-pot.  Sounds hideous? well I did do a small sample first and thought it a huge improvement.  So that was a go.  My fabric was a slightly variegated hot pink and became a slightly variegated rusty-purply raspberry.

Cutting and Printing:  This is where things got tricky… I received an email recently from Carolyn in Florida, asking about the curl factor of jersey and how did it affect the Alabama Chanin technique.  Well, in the case of this particular fabric as can be seen in the photo above, the curl factor was extreme and the edges of my fabric curled up so badly And they just would not lie flat by themselves.  From a screen printing point of view this is disastrous.  I wanted to have my screen print go right up to the very edges of the fabric, and so the edges just had to lie as flat as possible.  So for a quick and easy fix-it I just used regular household sticky tape to tape just the very edge of the fabric down to my backing newspaper, just inside the seam allowance and immediately prior to printing.  Not a pretty or elegant solution, but it worked pretty well!

Printing the fabric seems to have tamed the curl quite a lot too!  The seam allowance for Alabama Chanin designs is small, like 5mm or so, so you do need to print right up close to the edge.  I’ve found from my first project that I prefer to have my embroidery right up to but preferably not within the seam allowances, though.

I will say; if your fabric does curl very badly I can see the case for printing then cutting out.  I do have my reasons for preferring to print after cutting out; reduces waste of expensive printing ink since you’re only printing what you are using: heckuvva lot easier when manipulating the smaller pieces to get a very good placement of print.  That last point is my primary reason for doing it this way, and I’m still glad I did cut out first.  I guess this is something that the individual will have to decide for themselves when embarking on a project like this  πŸ™‚

The Stencil:  This time I chose the Abbie’s Flower stencil from the book Alabama Chanin Studio + Design, by Natalie Chanin.  I enlarged it by approximately three times using the good ol’-fashioned method of drawing a grid on the design, then drawing a bigger grid on your paper in which you painstakingly copy each little square on the bigger scale.  Like we used to use in primary school; from back in the dark ages, before photocopiers.  Ha!

I thought the overall motif was still a bit small and my least favourite part of printing is placement of the screen for repeat printings.  I mean; if your motif is larger in area then you decrease the number of times you have to re-place the screen on your piece of fabric; and the less placement the better, imo.  So I ad-libbed putting more motifs from the Abby’s Flower stencil around about and added in a few random leaves and curlicues of my own too, until my stencil covered the maximum area I could get on my screen.

The embroidery technique I have chosen for this project requires keeping the printed motifs intact in the final garment, so I needed to print the motifs in proper fabric paint instead of the discardable house-paint that I used for my first project.  I used Permaset water based Textile Printing Ink from Jacksons, and mixed a deep oxblood red/brown colour using orange, crimson and a bit of green.
My green had a few chunky bits in it that didn’t mix in properly, and I really like the few areas of streaky green that showed up in the screen print.  It’s almost a pity that they will be mostly covered up by my embroidery!

My print placement was not perfect: note; it never is! and after I’d finished I noticed a few largish gaps that stood out visually in a not-good way.  So the next day I mixed up a teeny bit more paint, cut a new, very small paper stencil of two leaves and carefully printed in a few of these in the gap areas. The design looks quite irregular so I think it worked out very well.  They stand out like a sore thumb right now because they are a deeper colour but I’m thinking they’ll probably blend in OK once I get embroidering  πŸ™‚

pinterestmail

Green pleats, please!

Hello! Β πŸ™‚
So
what’s new here?Β  Just a colour,
really.Β  My Issey Miyake pleated topΒ (vogue 1142) used
to be a cheerful daffodil yellow, and now it isΒ a murky-lurky, swampy, toxic-waste shade of
green.Β  Definitely farΒ more meΒ  πŸ˜‰ Β Hoorah for dye!
Cassie was doing a wardrobe reno: an apricot cardi
plus some black dye equals a new chocolate cardigan! and asked if I wanted the
used black dye-bath for anything before she chucked it out. Β I barely gave it ten seconds of thought, just
grabbed this top.Β  It’s not that I can’t
bear to waste aΒ teeny bit of dye that might still have some oomph in it.. oh well,
yes, maybe there’s that too.Β  But I
really liked the top and wanted to get it into circulation more. Β Yellow is one of “my colours”,Β but the
brightness was just not working with many bottoms… and furthermore since
I’ve planned a very subdued autumn/winter wardrobe for myself then the bright yellow
top would just continue to not work.Β  And
on a psychological note, not that I’m overthinking this or anything! Β but I think maybe brights are just too daring
for my personality? Β I’m a bit of a mouse and perhaps bright yellow should just
be limited to infrequent miniscule doses in my life.
Ha! I reckon I’ve officially just overthought the
whole thing, which is hilarious considering that I didn’t think at all before
plunging the top into that dye-bath!Β  Lol!


Anyway, now the main thing is that now it’s going to
go quite well with the ivories, browns and greens of my swap.
Details:
Top; Vogue 1142, yellow silk over-dyed in a weak, already-used bath of iDye in Black,Β original details and my review of this pattern here
Skirt; my own design modifications to Vogue8363, cream curtaining fabric, details here and my review of this pattern here

below; before…
pinterestmail

White trees and buttons

I’ve sewn up my white trees fabric… into a top! I drafted it myself but it is a pretty simple silhouette; basically a big oversized T-shape, with something interesting in the form of the completely open top edge. Β The top edges of front and back have a full length button and buttonhole placket respectively, stretching from sleeve hem to sleeve hem along the whole neckline, and it’s partially buttoned up to close the top of the sleeves. Β Technically, you could button the top edge up all the way, except that the neckline is curved as an anti-strangulation measure. Β It’s funny though, when you’re wearing it you can’t really tell the neckline is curved, it reads as an almost straight edge.

It is based on several different sources of inspiration: years ago I had a Metalicus Tshirt that had an open top with snaps, that could open like this from sleeve right the way along the neckline; and also a few months ago Kirsty posted plans for her gorgeous topΒ from the Japanese pattern book She has a Mannish Style,Β a topΒ with a wide buttoned necklineΒ although with separate closed sleeves. Β I sorta combined those concepts in the design of my own top.

Most time consuming bit: I fiddled for aaaages with the spacing of the buttons/buttonhole, so it would both look “right” and also that I could have a button placed just at the point on my shoulders where I wanted it to go.

the back view is unexciting, but I know those of us who sew like to see this bit too…. Β 

Since the front neckline has a lower dip than the back, the buttons are spaced a little more wide apart along the front curve than the corresponding buttonholes at the back. Β I sewed up the rest of the top completely, before doing the button/buttonhole plackets along the top edge, this was the last step. Β The top edges were interfaced with similarly shaped strips of iron-on interfacing and then I sewed the plackets on.
What else. Β Oh, and it’s got pockets, too Β (blush)
I fear I have some sort of weird pocket obsession… Β is pocket-aholic a “thing”? Β  Guess I should sign myself up Β ;D

Details:
Top; my own design, coffee cotton broadcloth, screen-printed by me with little white trees here
Skirt; Vogue 1247, blue damask, details here and my review of this pattern here
Sandals; c/o Misano

LATER EDIT:
this tee has received a bit of a makeover! Basically I hadn’t worn it in over a year, so I gave it a rejuvenating dunk in a pink dye bath… voila!!! Β I love it all over again and it’s back in rotation…. yay!!!
wearing it with:
pinterestmail

New (not) khaki leggings

Hello  πŸ™‚
I’m still renovating my wardrobe… and can I just say, beige leggings, hmmm.  (shudder) I’d taken a hearty dislike to mine over recent weeks.  But they still had some wear in them.  Wasteth not, wanteth not.  It was really just the colour that had become offensive to my eyes.   Corrective action was called for.  
To the dye pot!!! 
(spoken in the same tone as one says “to the bat cave!” of course!)
Before…
the transformative materials…
I used only a shake (that’s an official unit of measurement there) each of iDye in Brown and Chartreuse.  Probably a pinch at the most, plus heaps of salt.  Pinch, heaps;  some other highly technical terms.  Trust me, I’m an analytical chemist!

And now they are no longer hideous to my eyes, they have a new lease on life  πŸ™‚
my tutorial on dyeing

Details:
Leggings; self-drafted of beige cotton knit, dyed khaki, originally posted here
Tshirt; self-drafted, grey knit stuff, details here
Dress; the gathered hole dress from Pattern Magic by Tomoko Nakamichi, charcoal suiting, details here

pinterestmail

I dye…

…  literally.  I’m dyeing heaps of stuff lately.
My ultramarine corduroy skirt.  I was bored with it, and didn’t wear it at all during me-made May even though it was season appropriate.  That is A Sign.  I dunno, I’d gone off the colour; the brightness of it felt a bit passe, a bit garish, not serious enough for winter.
So…. to the dye pot!   Plunging your clothes into a pot of dye feels so adventurous, and a little bit dangerous.  Like a thrilling, reckless and risky thing to do.  Yeah?  Man, I need to get out more.
This was dyed with iDye in Chestnut.
It did come out a lot less brown than I thought it would.  I thought, bright blue mixed with orange-y brown would maybe beget a chocolate-y offspring, or a deeper version of the corduroy in my hoodie jacket I am wearing above.  The new colour reads like deep dark petrol, a dirty midnight blue and I like it all over again now.  I’m super happy with the nuovo neutral-ness of it.  Feels like an actual new skirt, yay.

Then I turned to my ombre-d red velveteen skirt.  I did this only last week, but when I compared it to my original version, I realised that my re-ombre-ing efforts had been pretty darn pathetic.  So I re-ombred the re-ombred skirt in iDye in Brown.  So now it has been re-re-ombred.  Ha!
And my sludgy little skirt had lost some of its sludge, so it got a fresh dunking and a soaking in the leftovers.
Re-sludge-ing, accomplished.

Details:
Skirt; Vogue 1170, blue corduroy dyed chestnut, original details here and my review of this pattern here
Top (under); the loose drape top from drape drape, white cotton, details here
Hoodie; self-drafted, made from a pair of old corduroy jeans and long sleeved Tshirt, details here
Tights; self-drafted, black merino wool fabric, details here
Boots; nylon, from Zomp shoes

Red skirt; Vogue 1247, red cotton velveteen ombre dyed brown at the top, details here

Brown skirt; Vogue 1247, purple denim dyed brown, details and my review of this pattern here.

pinterestmail
Switch to mobile version
↓