Tag Archives: Own Design

Wave-y orange welts

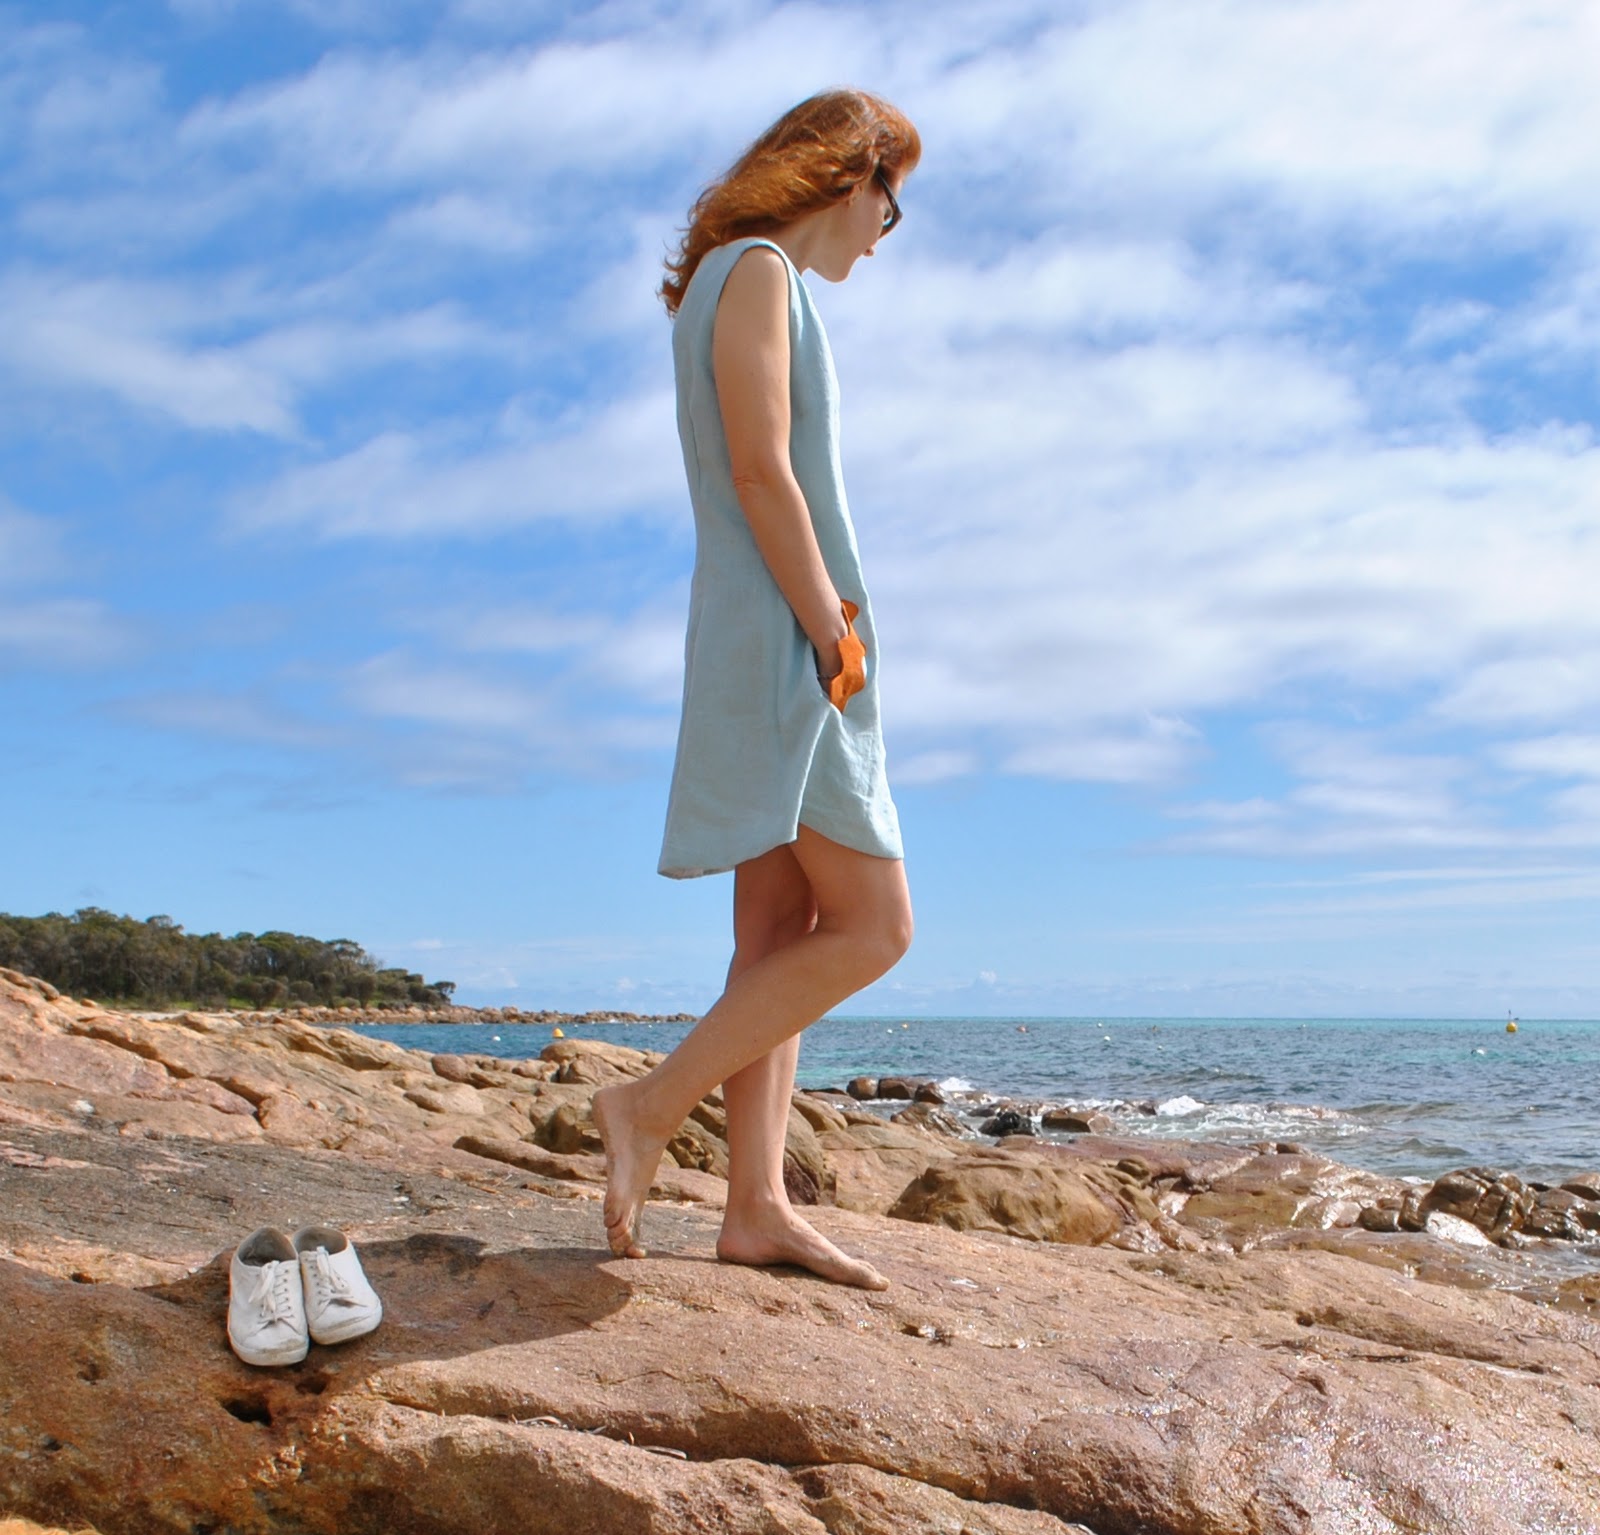
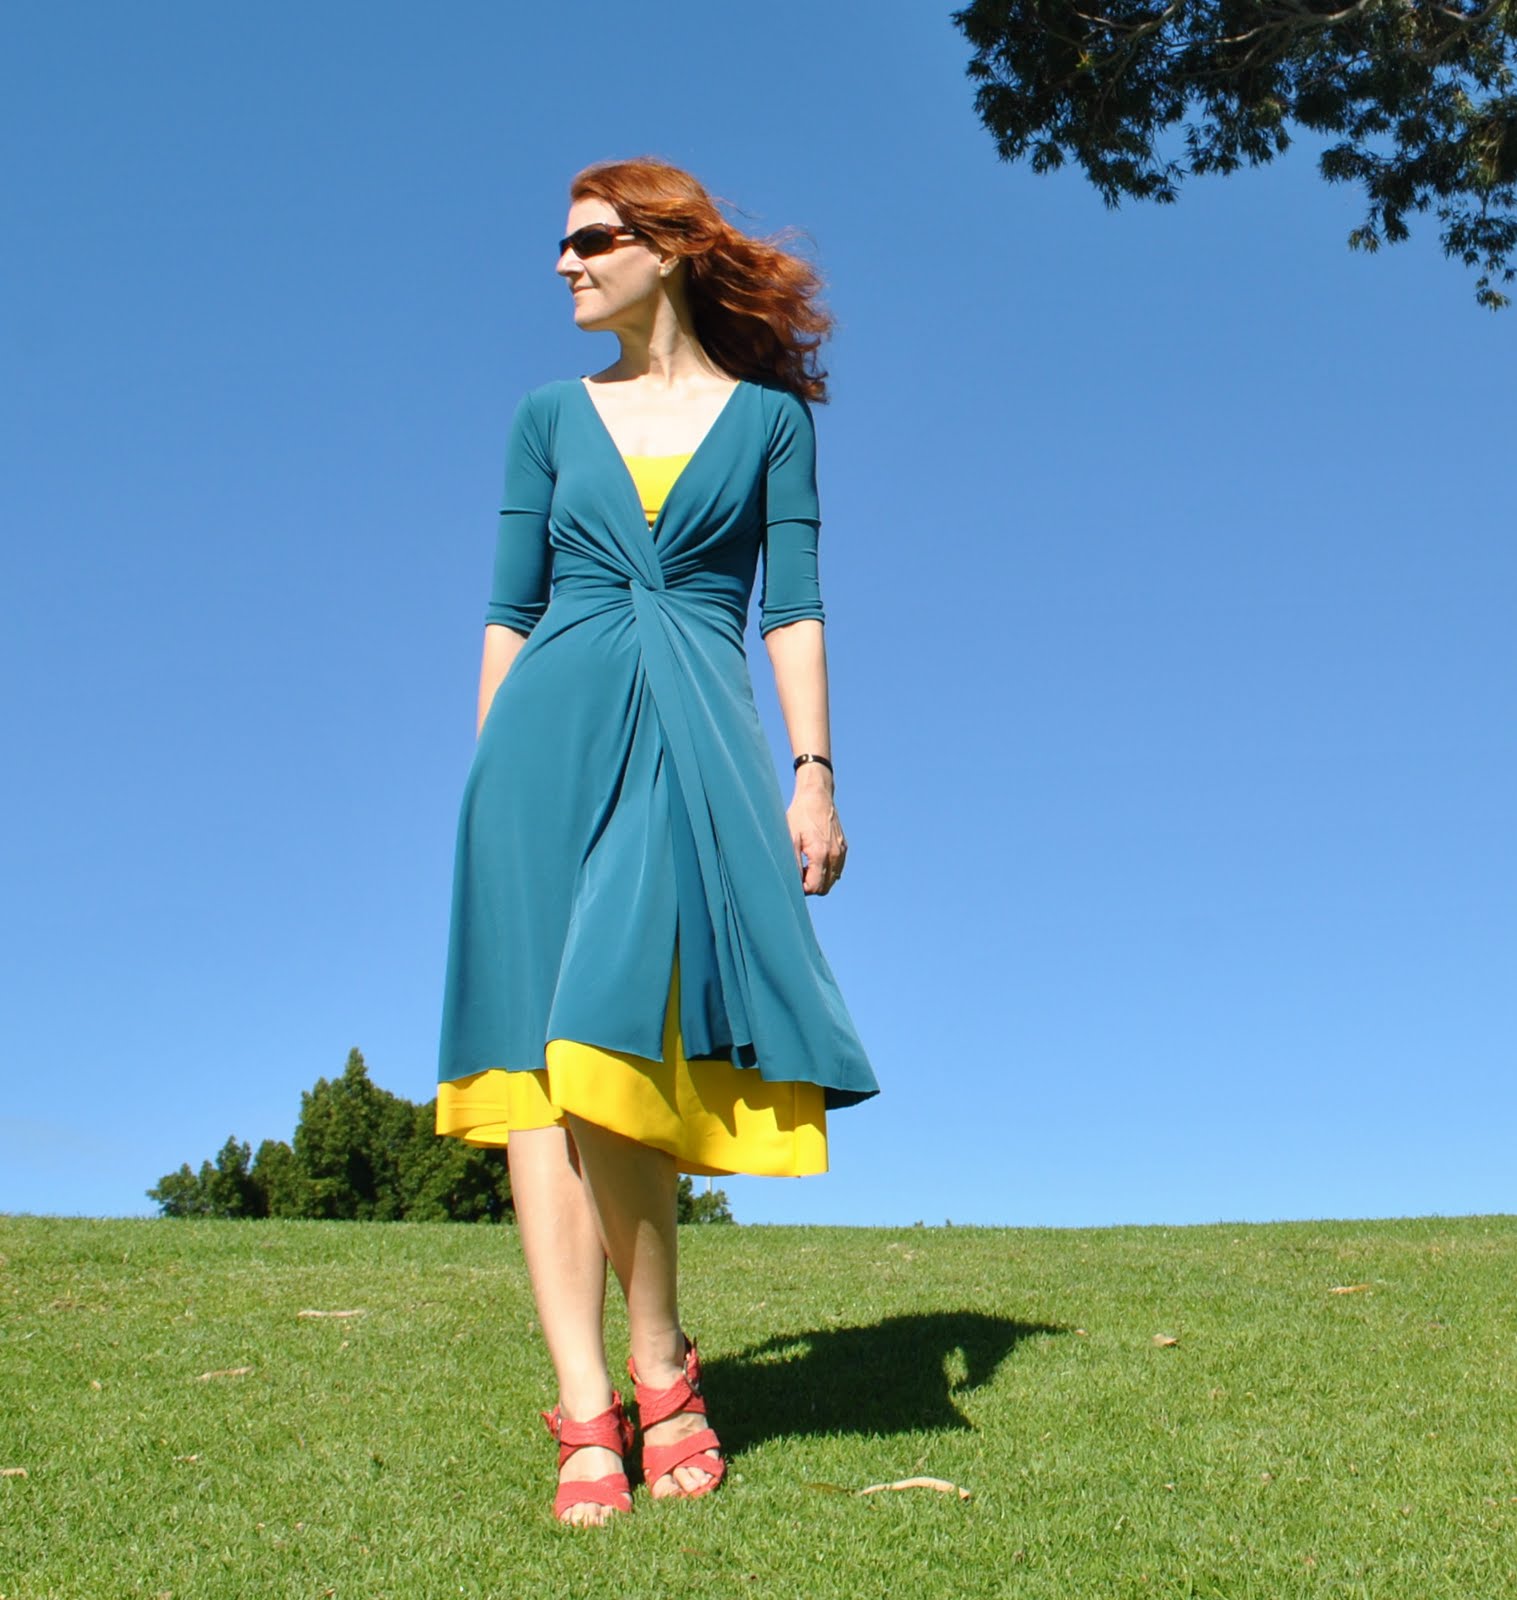
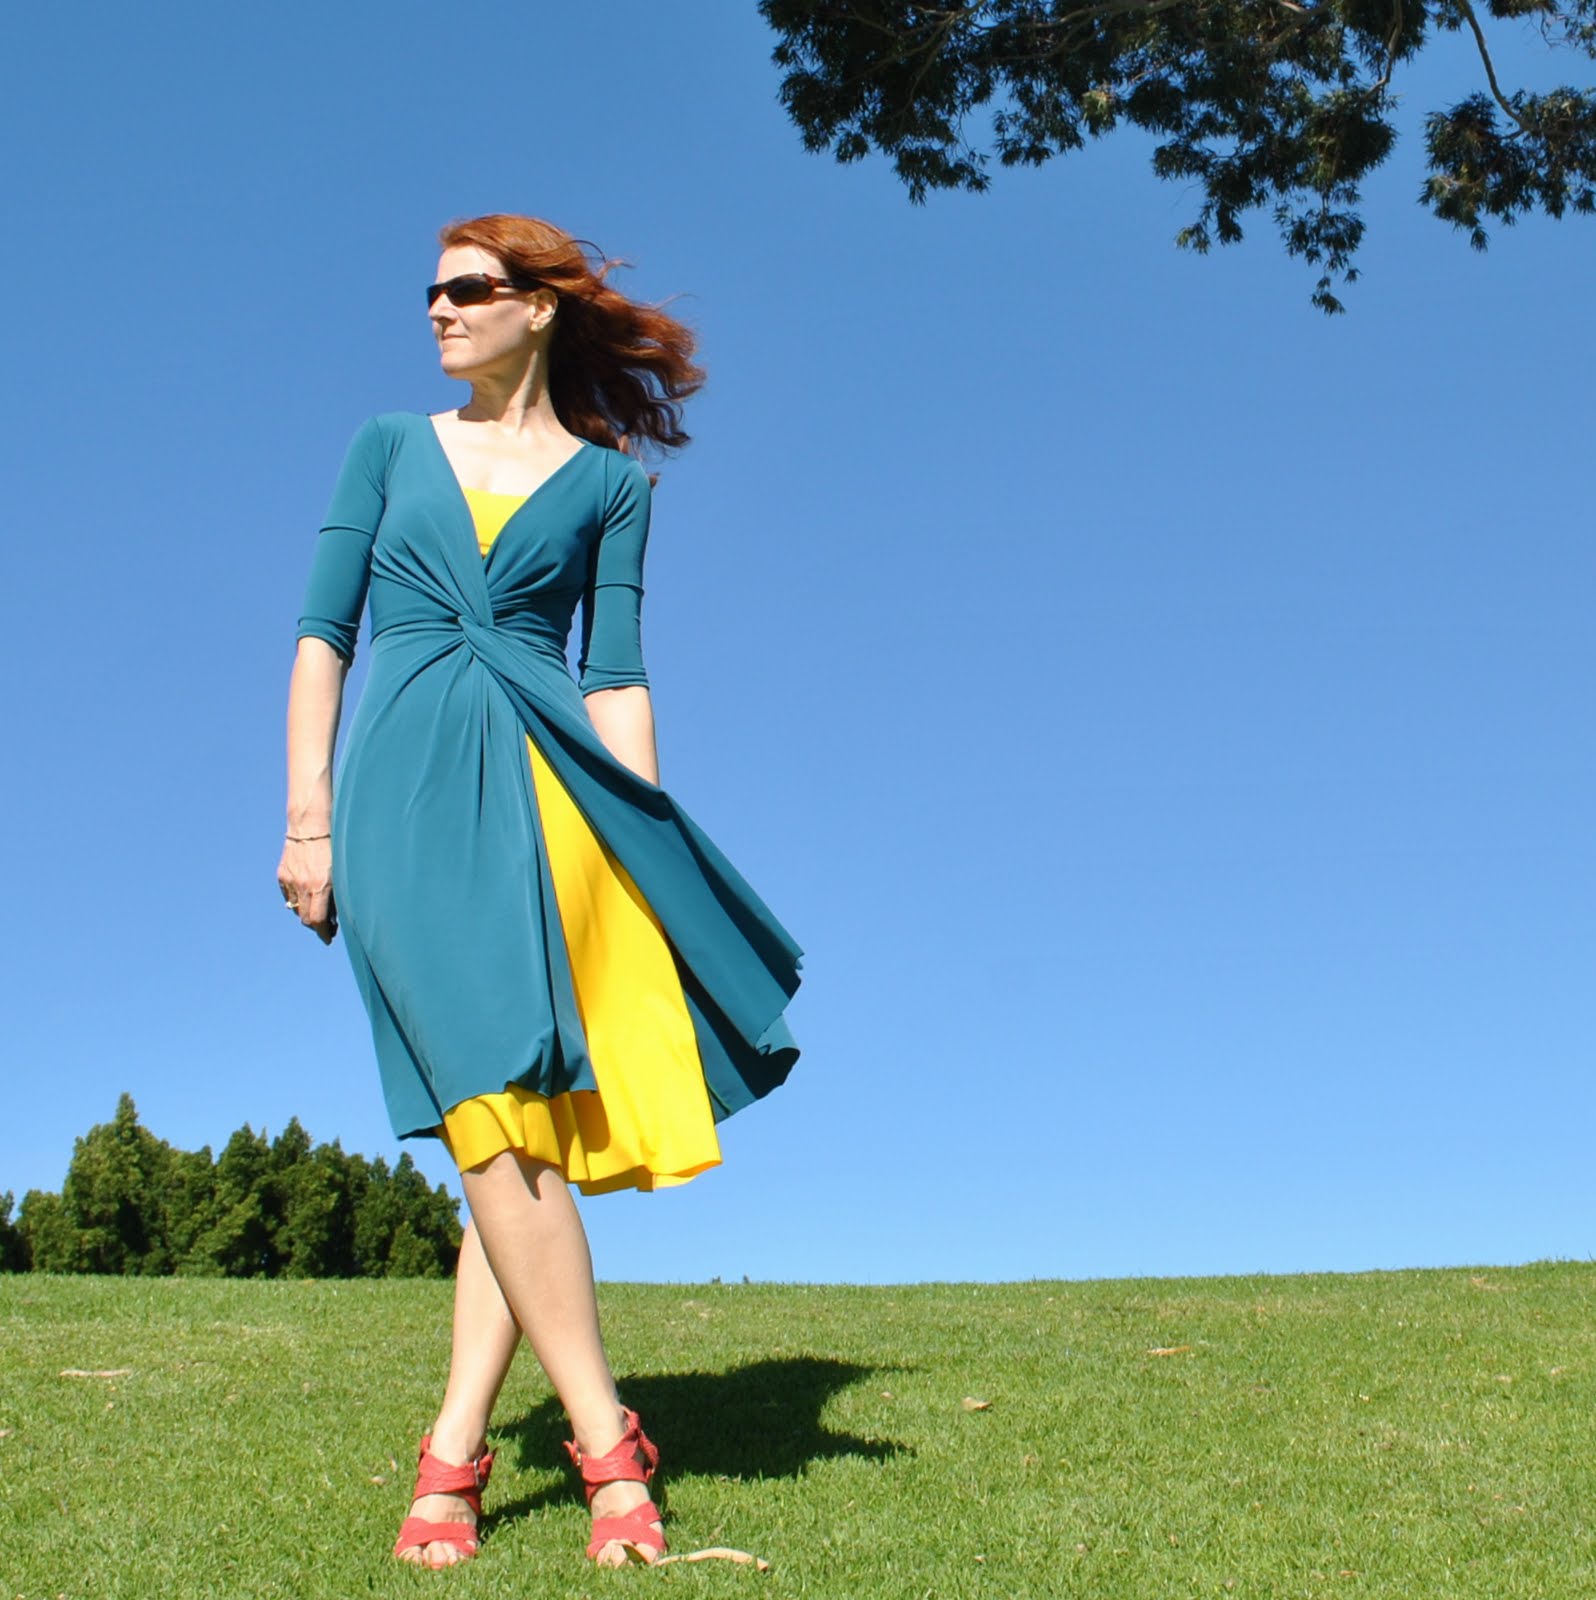
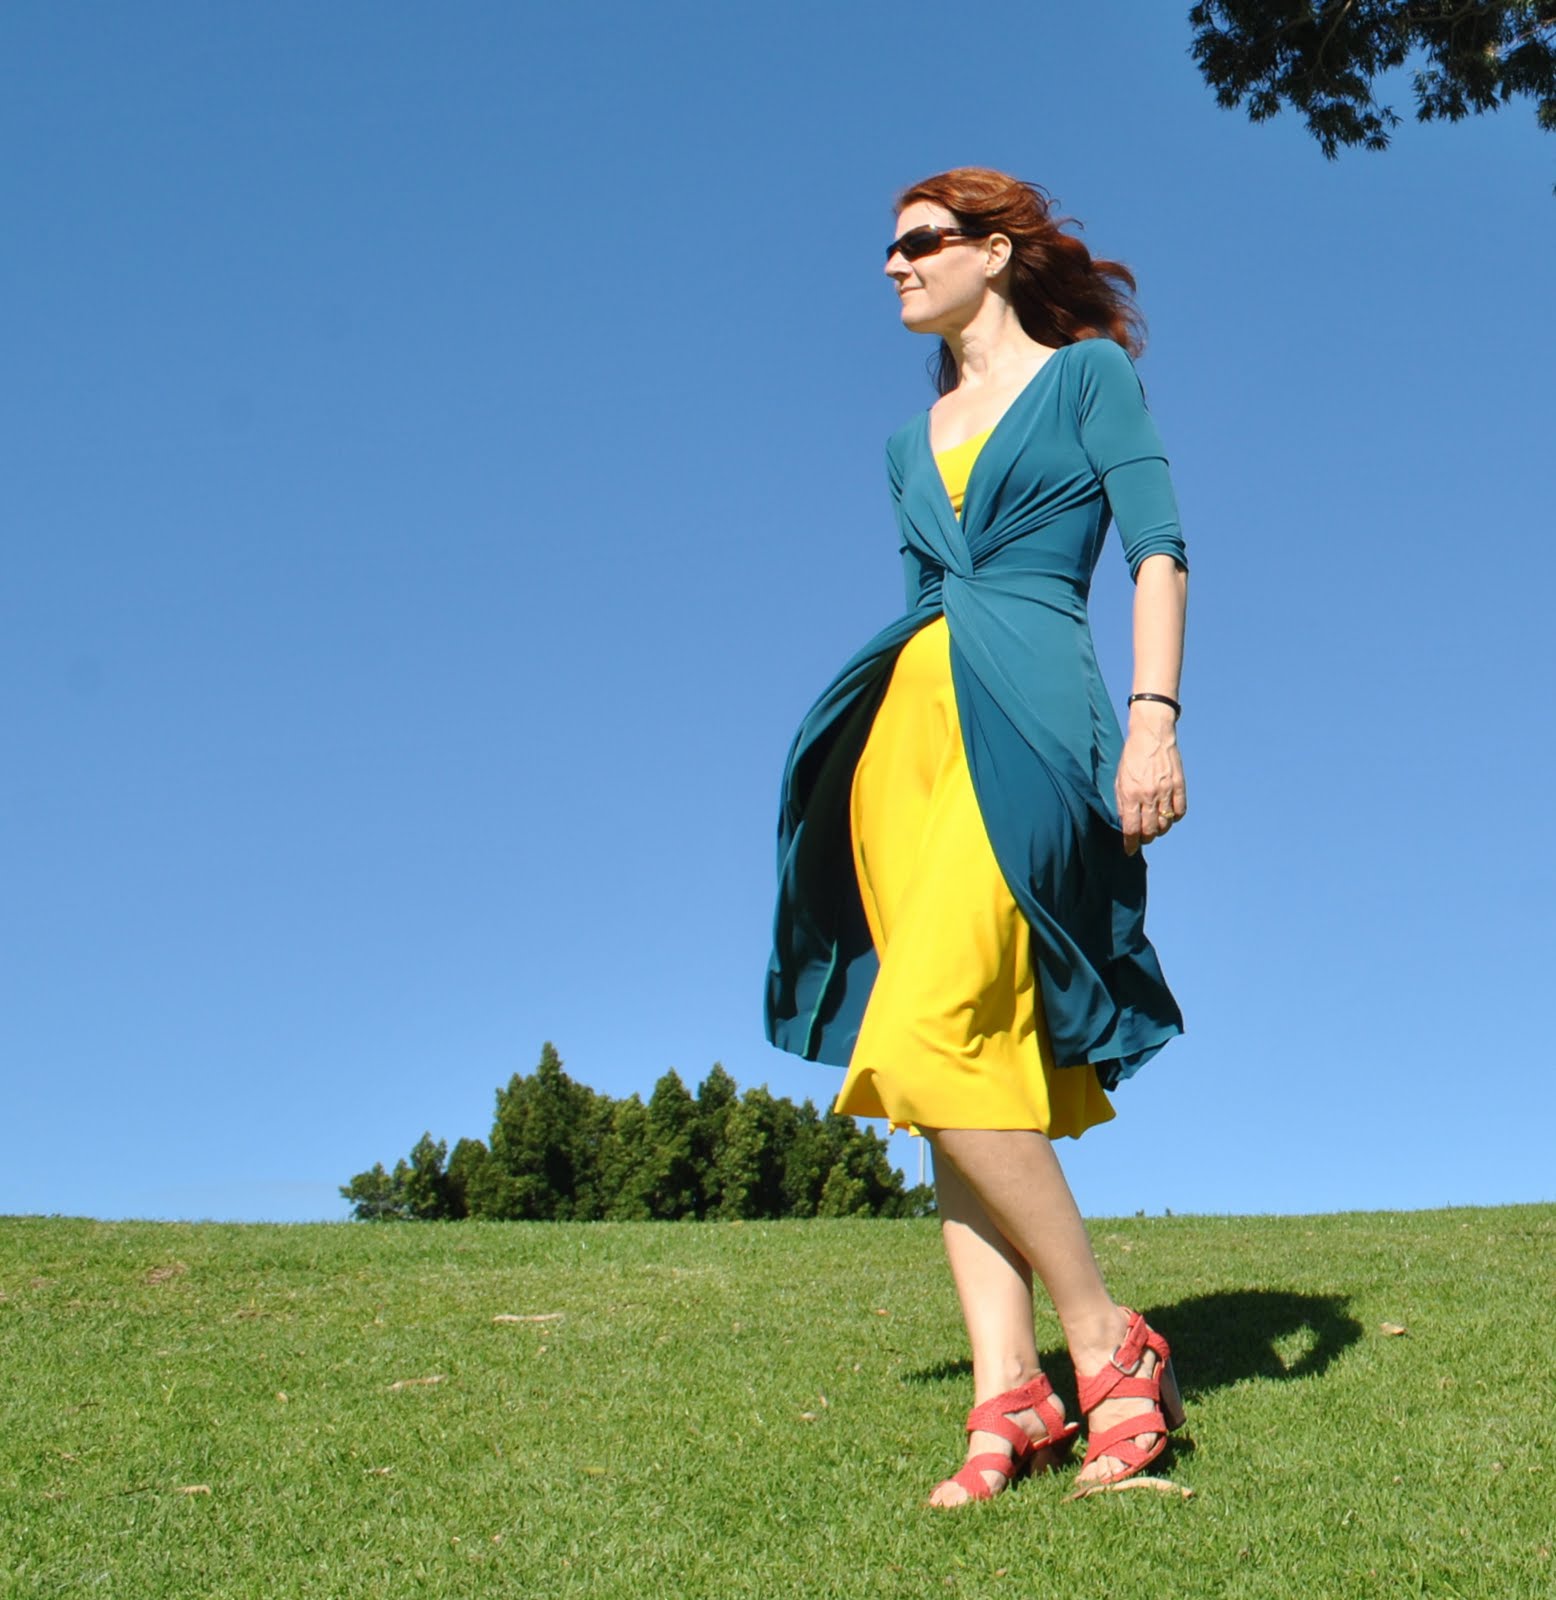
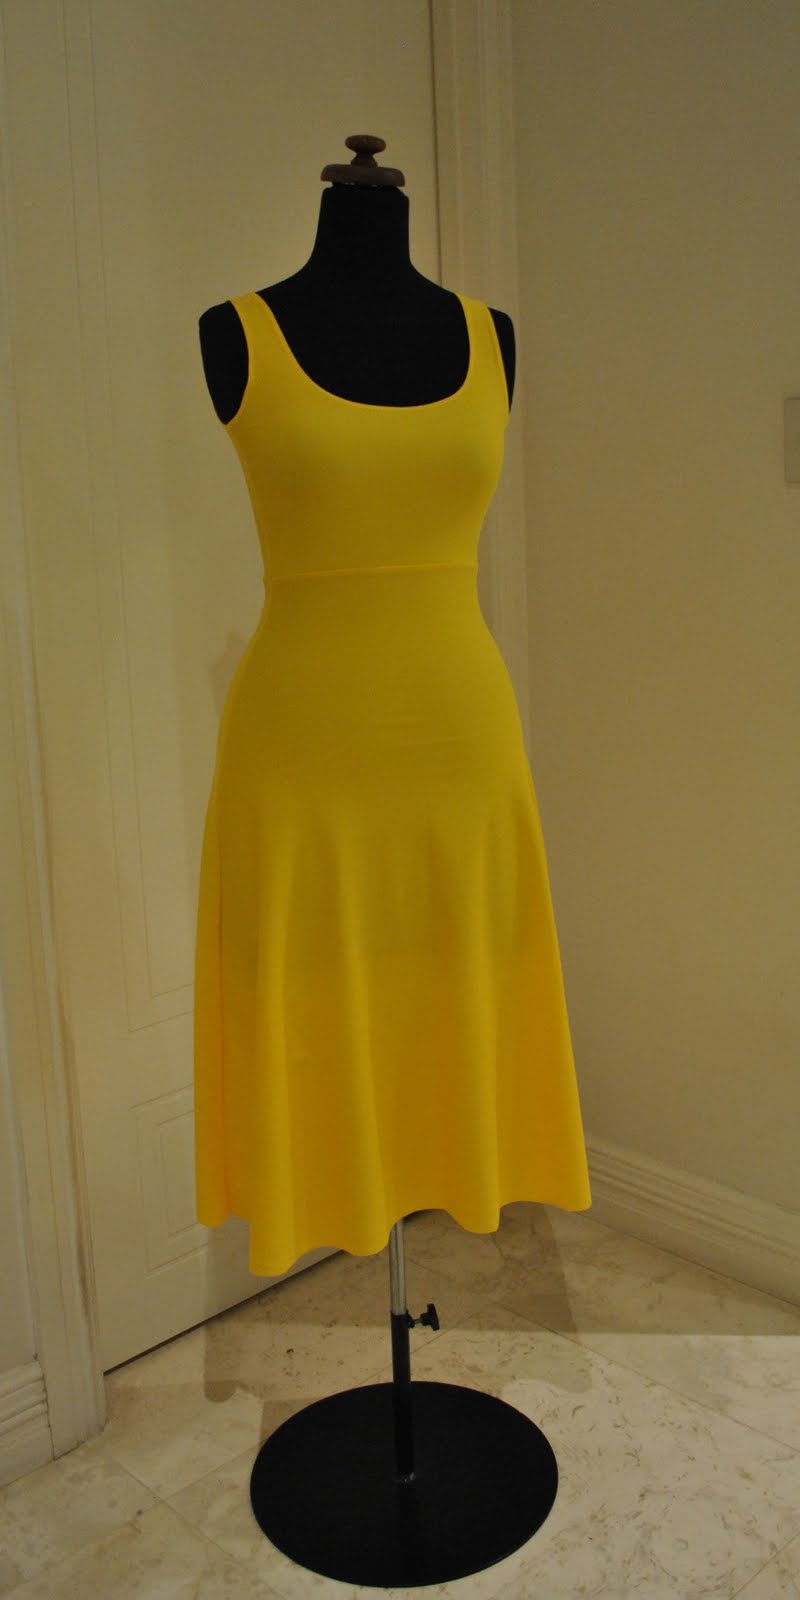
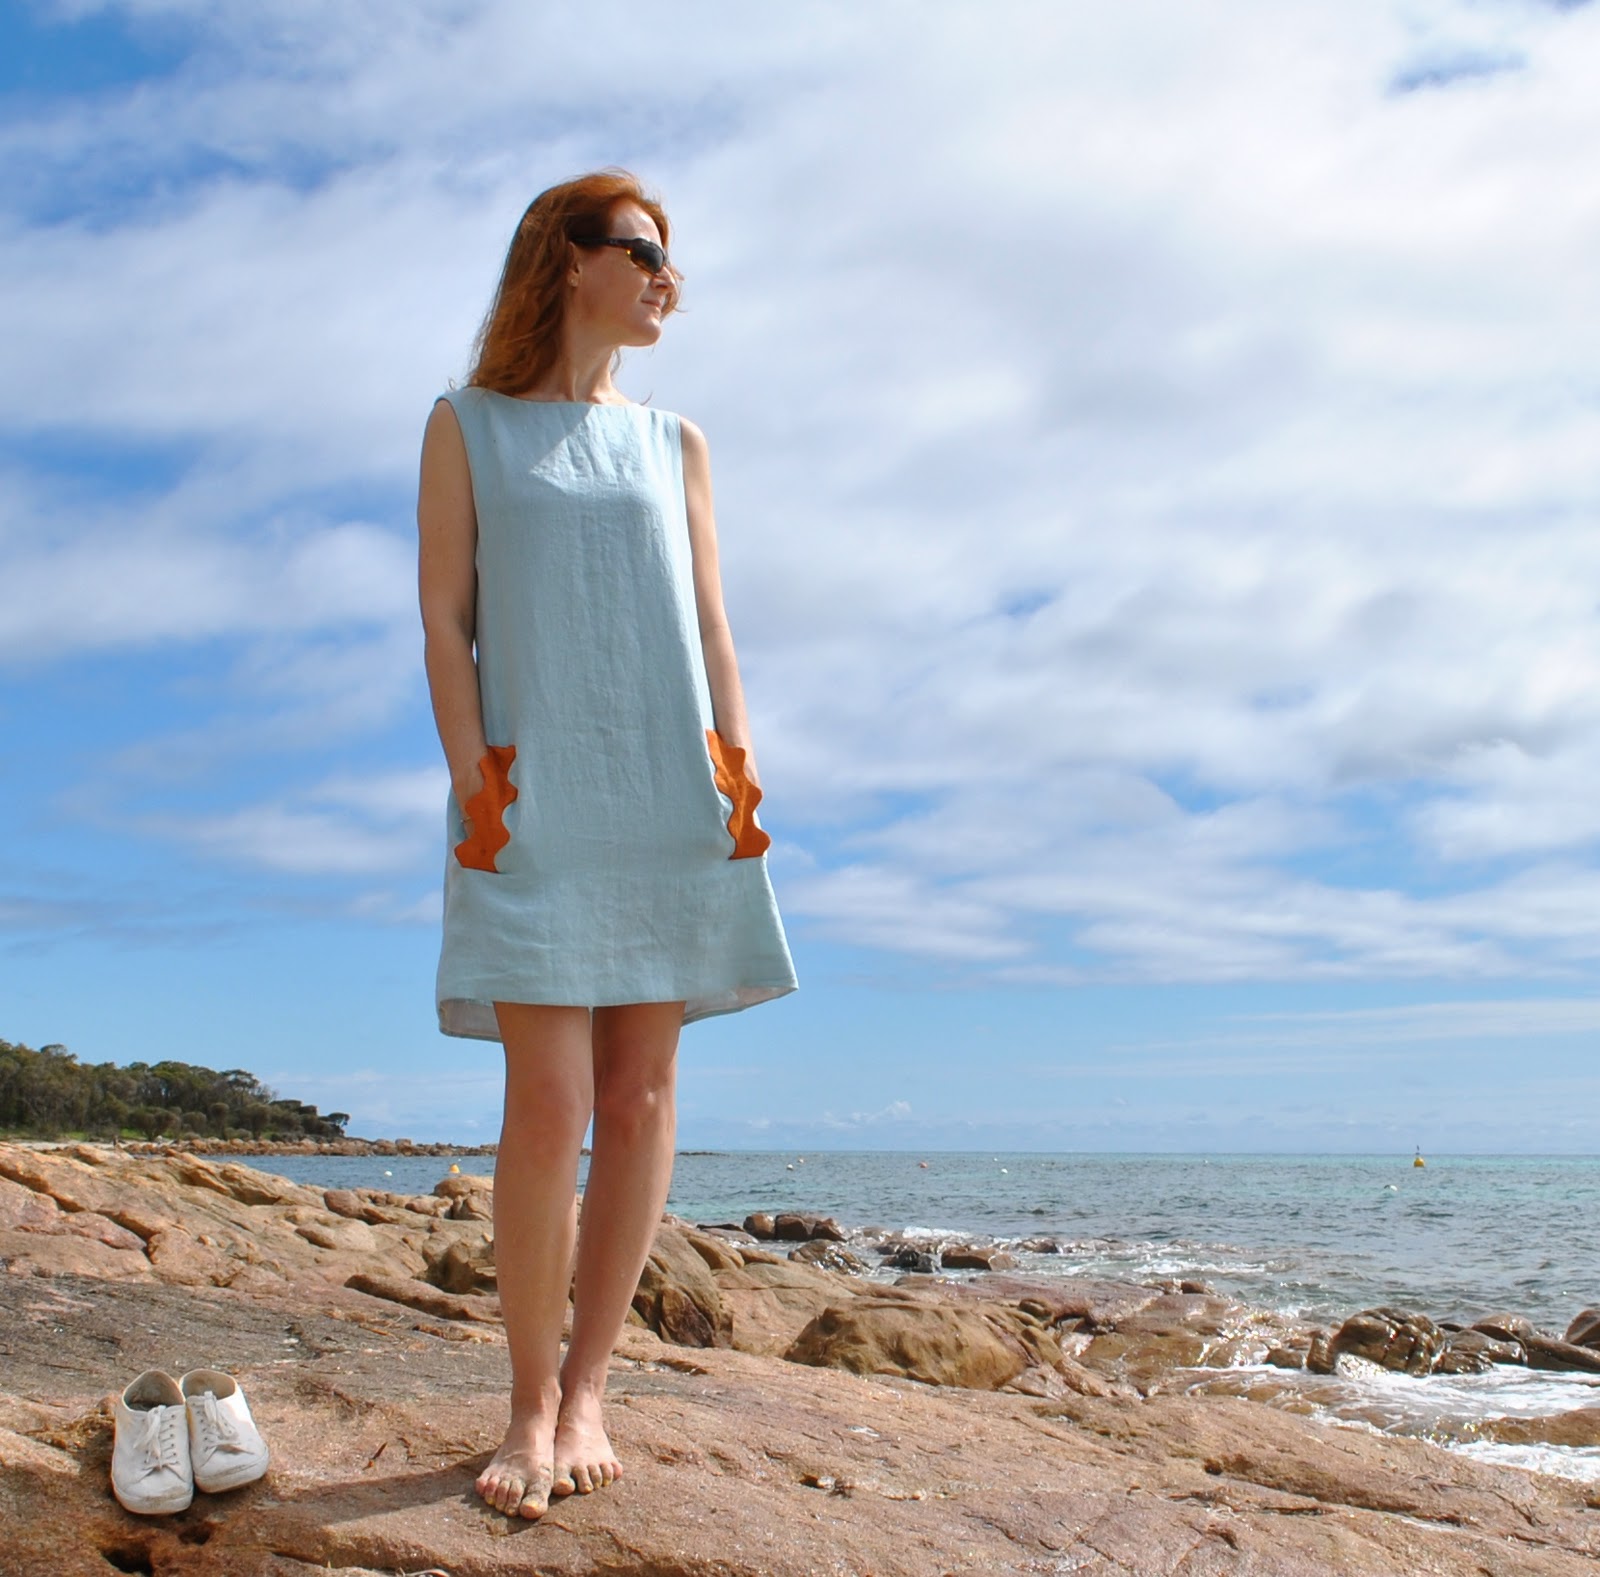
I made a little sundress.
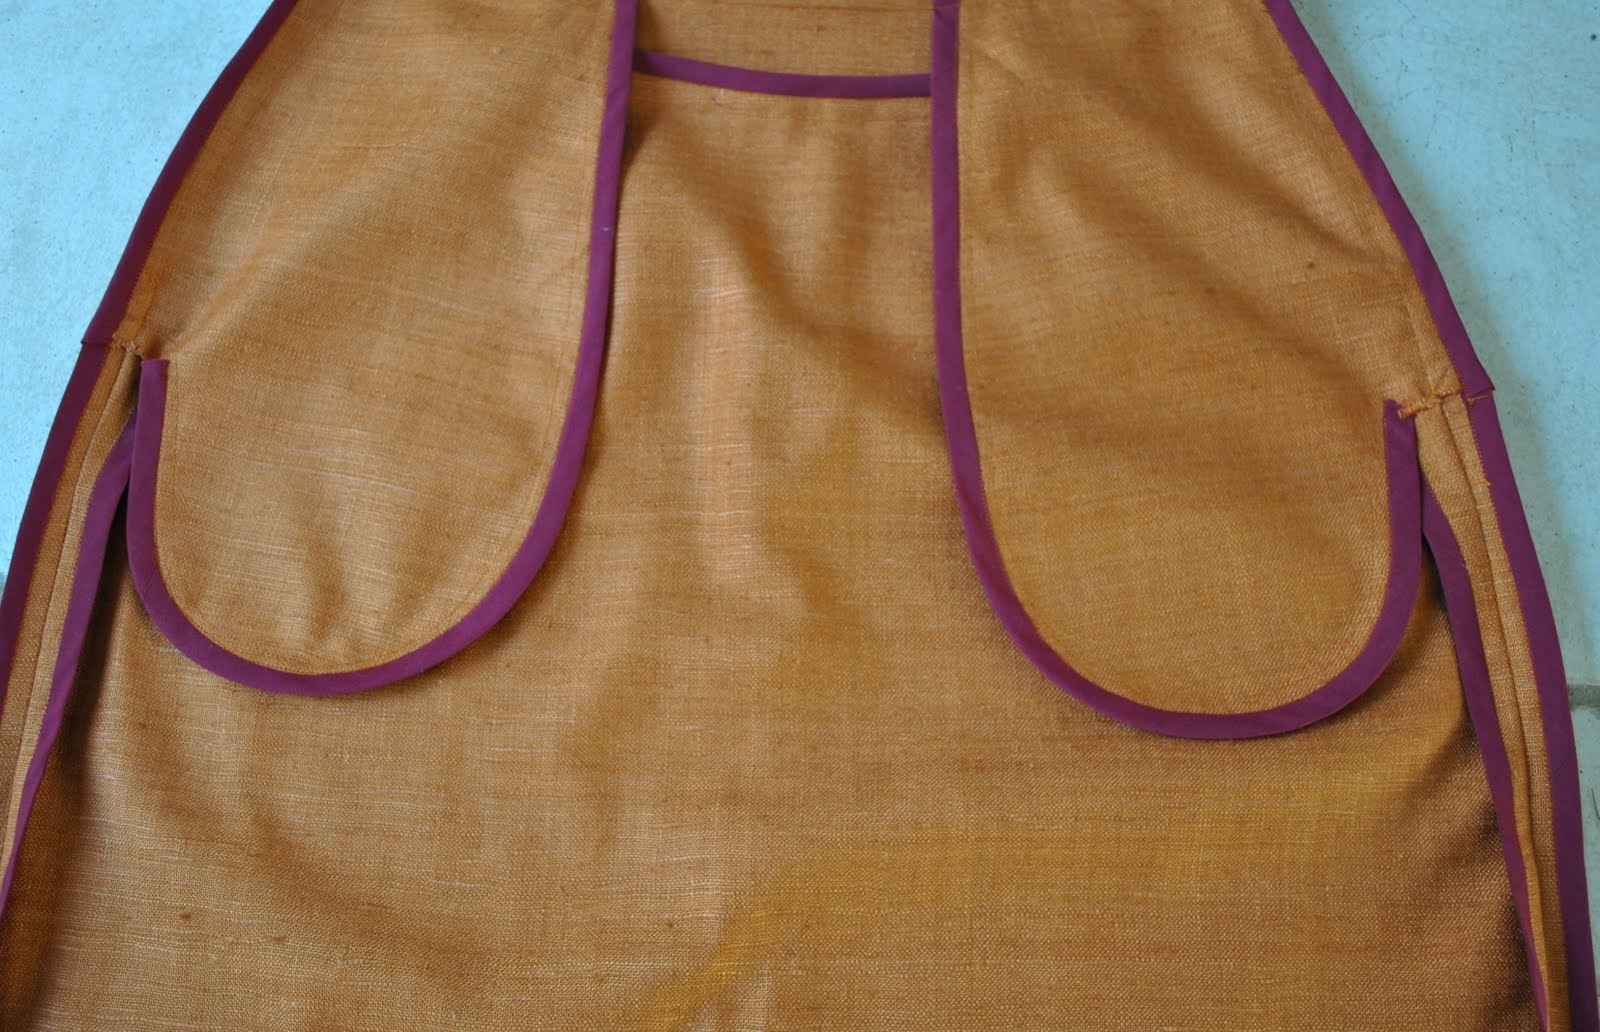
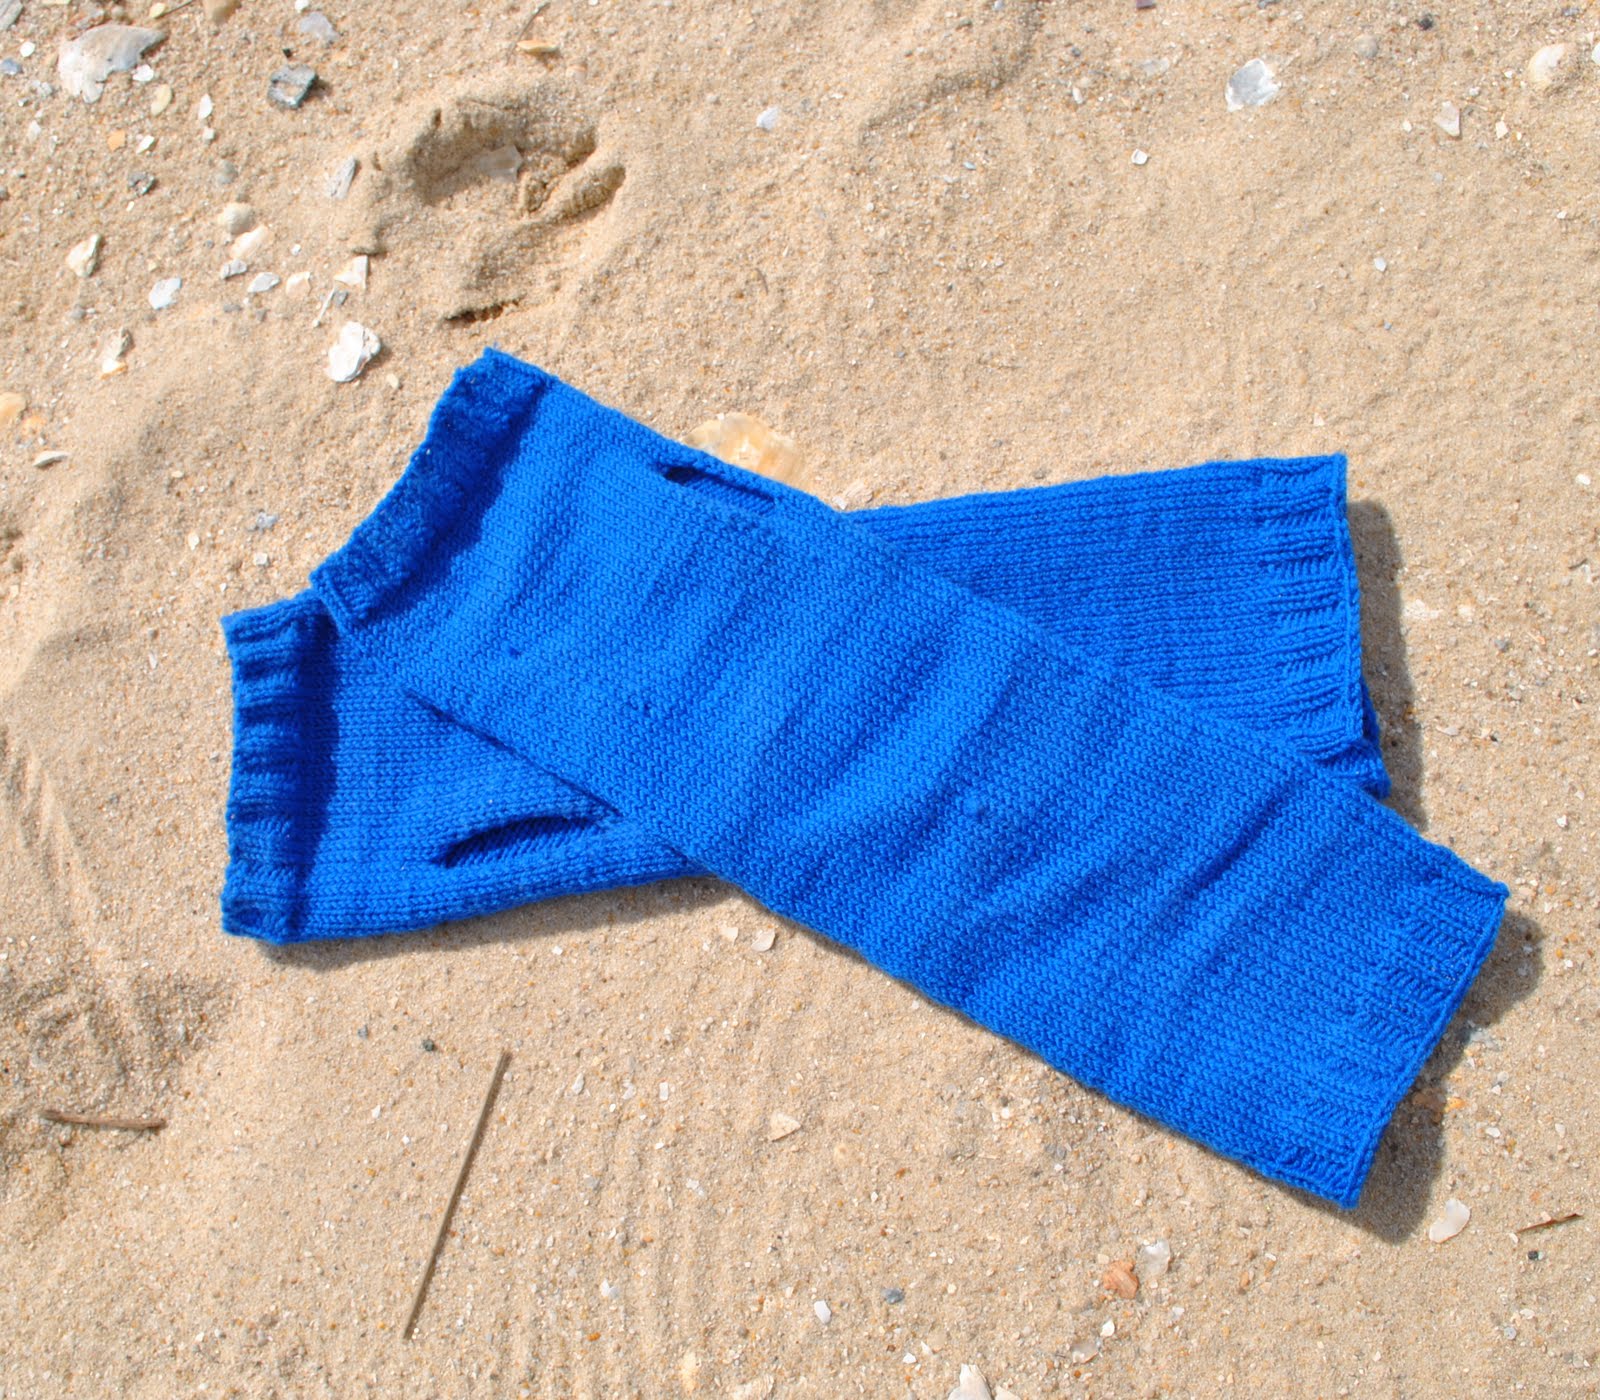
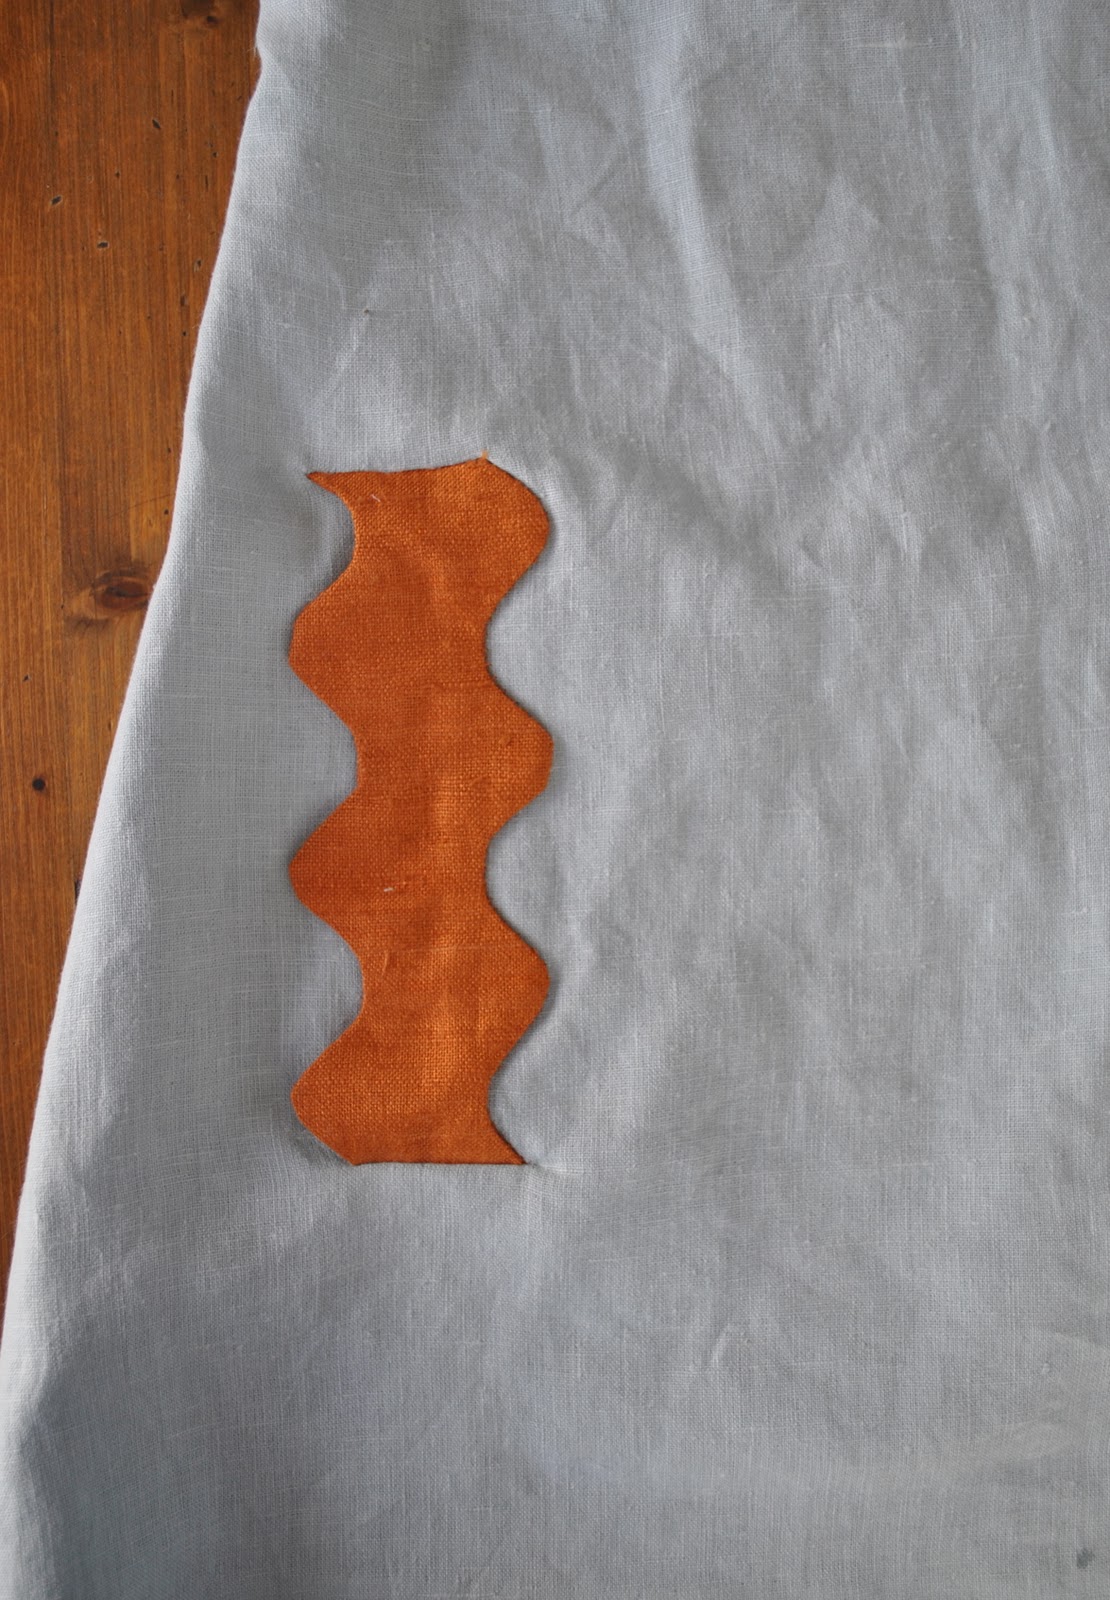
First impressions are that this is just a very plain little thing with minimal detailing.  Note … first impressions.   The apparent plain-ness is intentional because I wanted for the one and only detail to stand out big-time; those wave-y pocket welts (my own added feature), which took a little bit of working out and of which I am inordinately proud.  Why? well they are not just decorative, but functional; and happily situated over satisfyingly HUGE pockets. 
I have to say, one of the (many) reasons I like to sew for myself is so that I can add pockets to things… silly?  maybe, but a practical sort of silly, which is OK in my book.
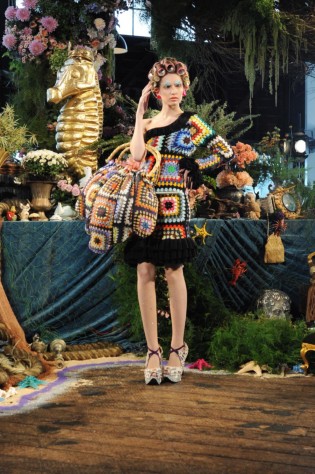
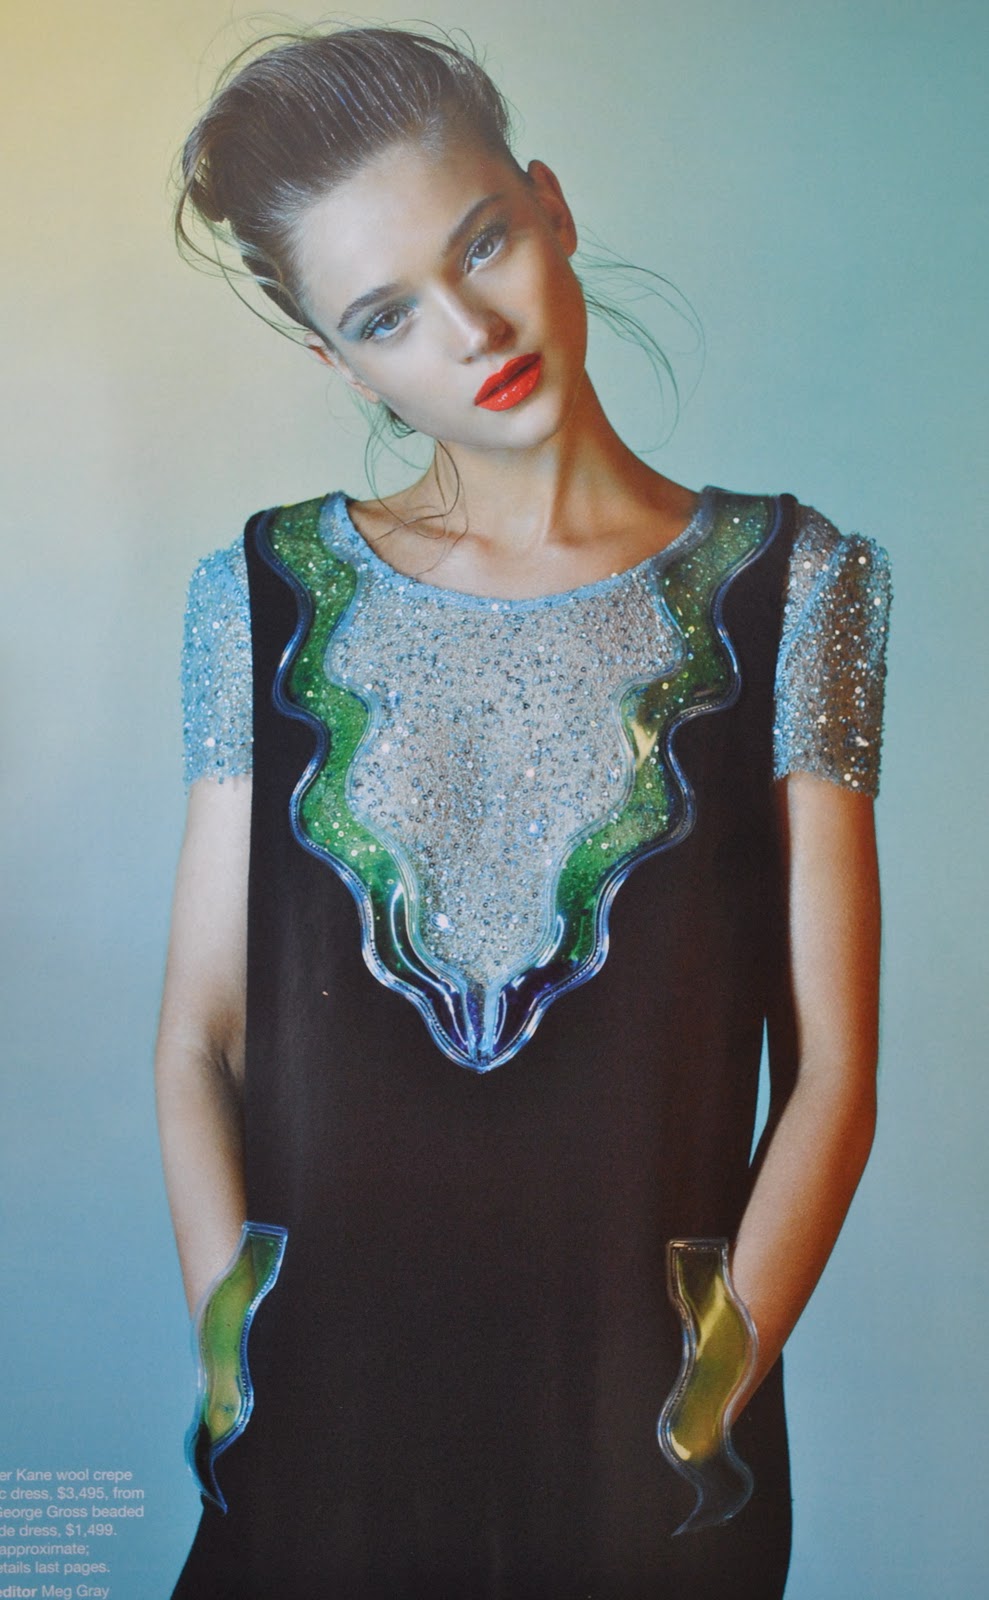
I’m very pleased with how those wave-y welts turned out.  I was directly inspired by this Christopher Kane dress (at right) with those wonderfully wave-y details.  The pocket welts and collar on this dress are heat-sealed plastic filled with gel of a satisfyingly toxic shade of nuclear-waste green.  Love it!  However since gel-filled plastic is currently beyond the capabilities of my little sewing room I just tried to reproduce the look in fabric.
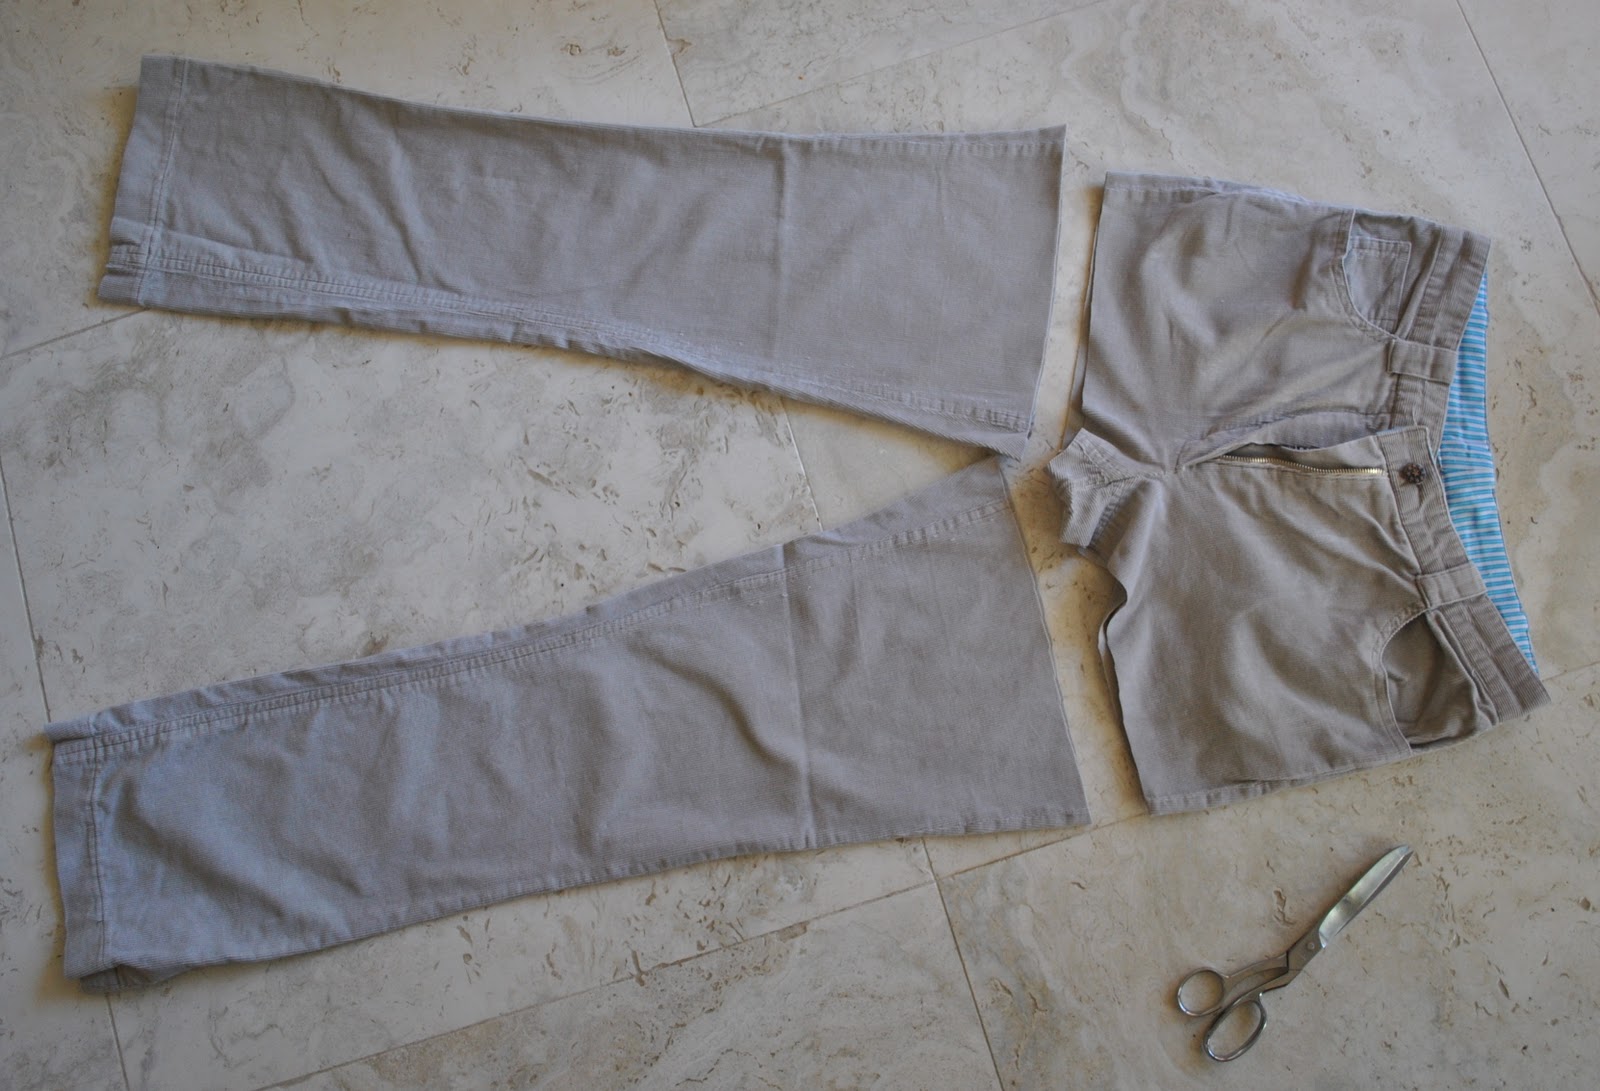
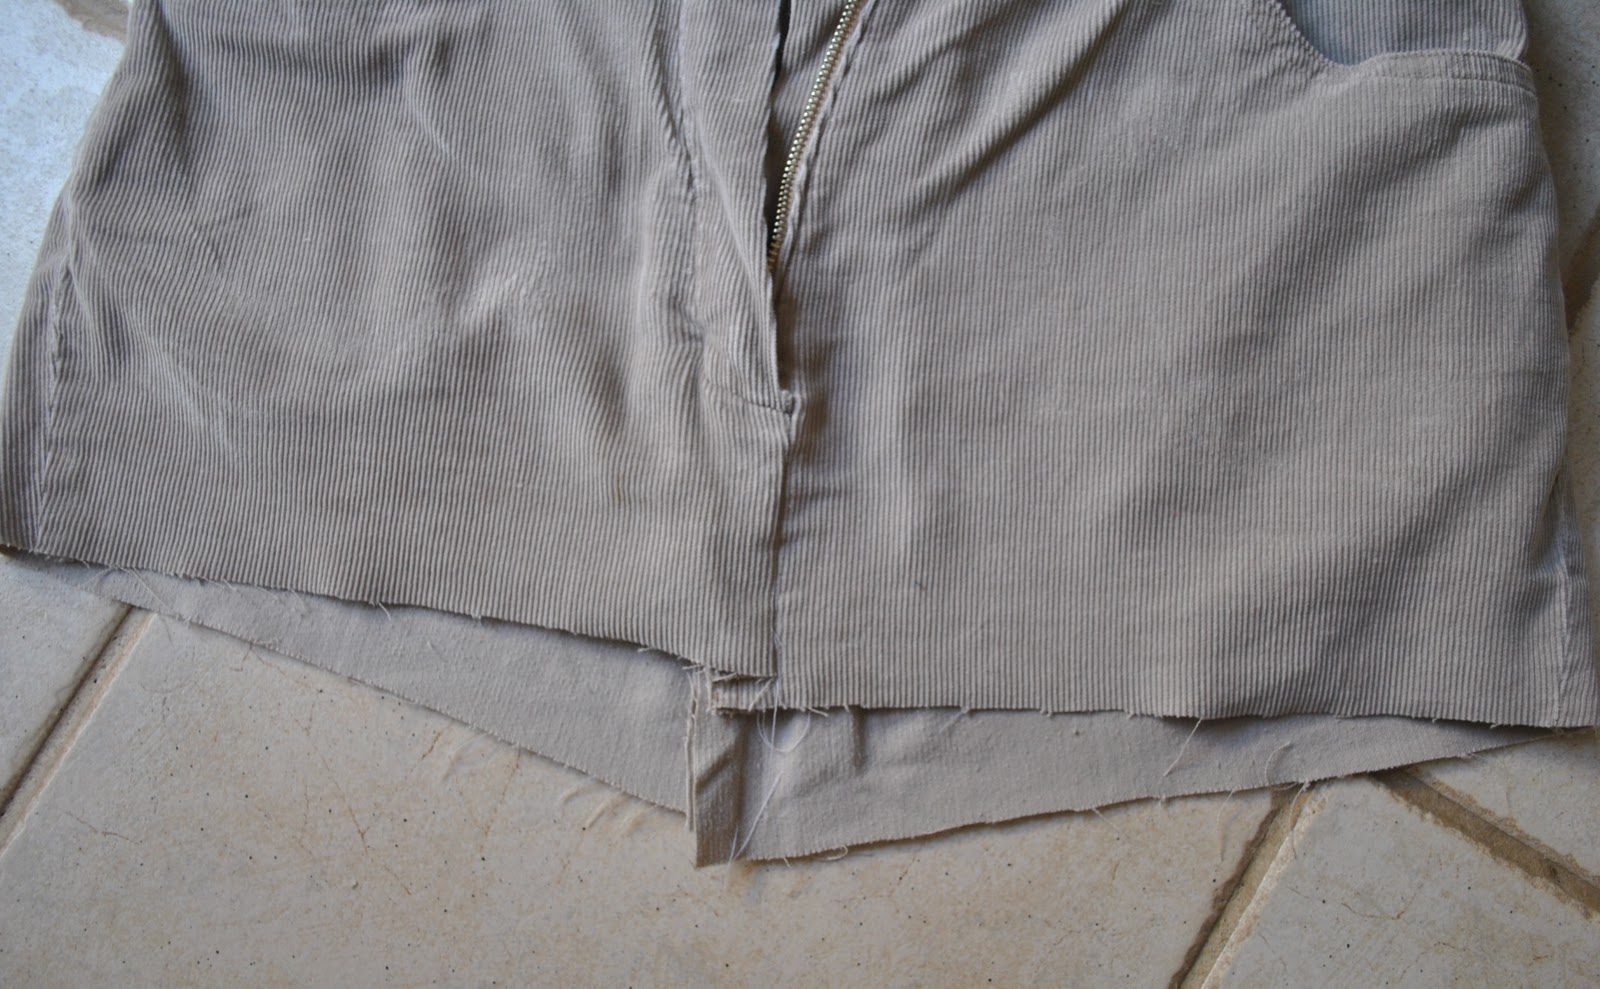
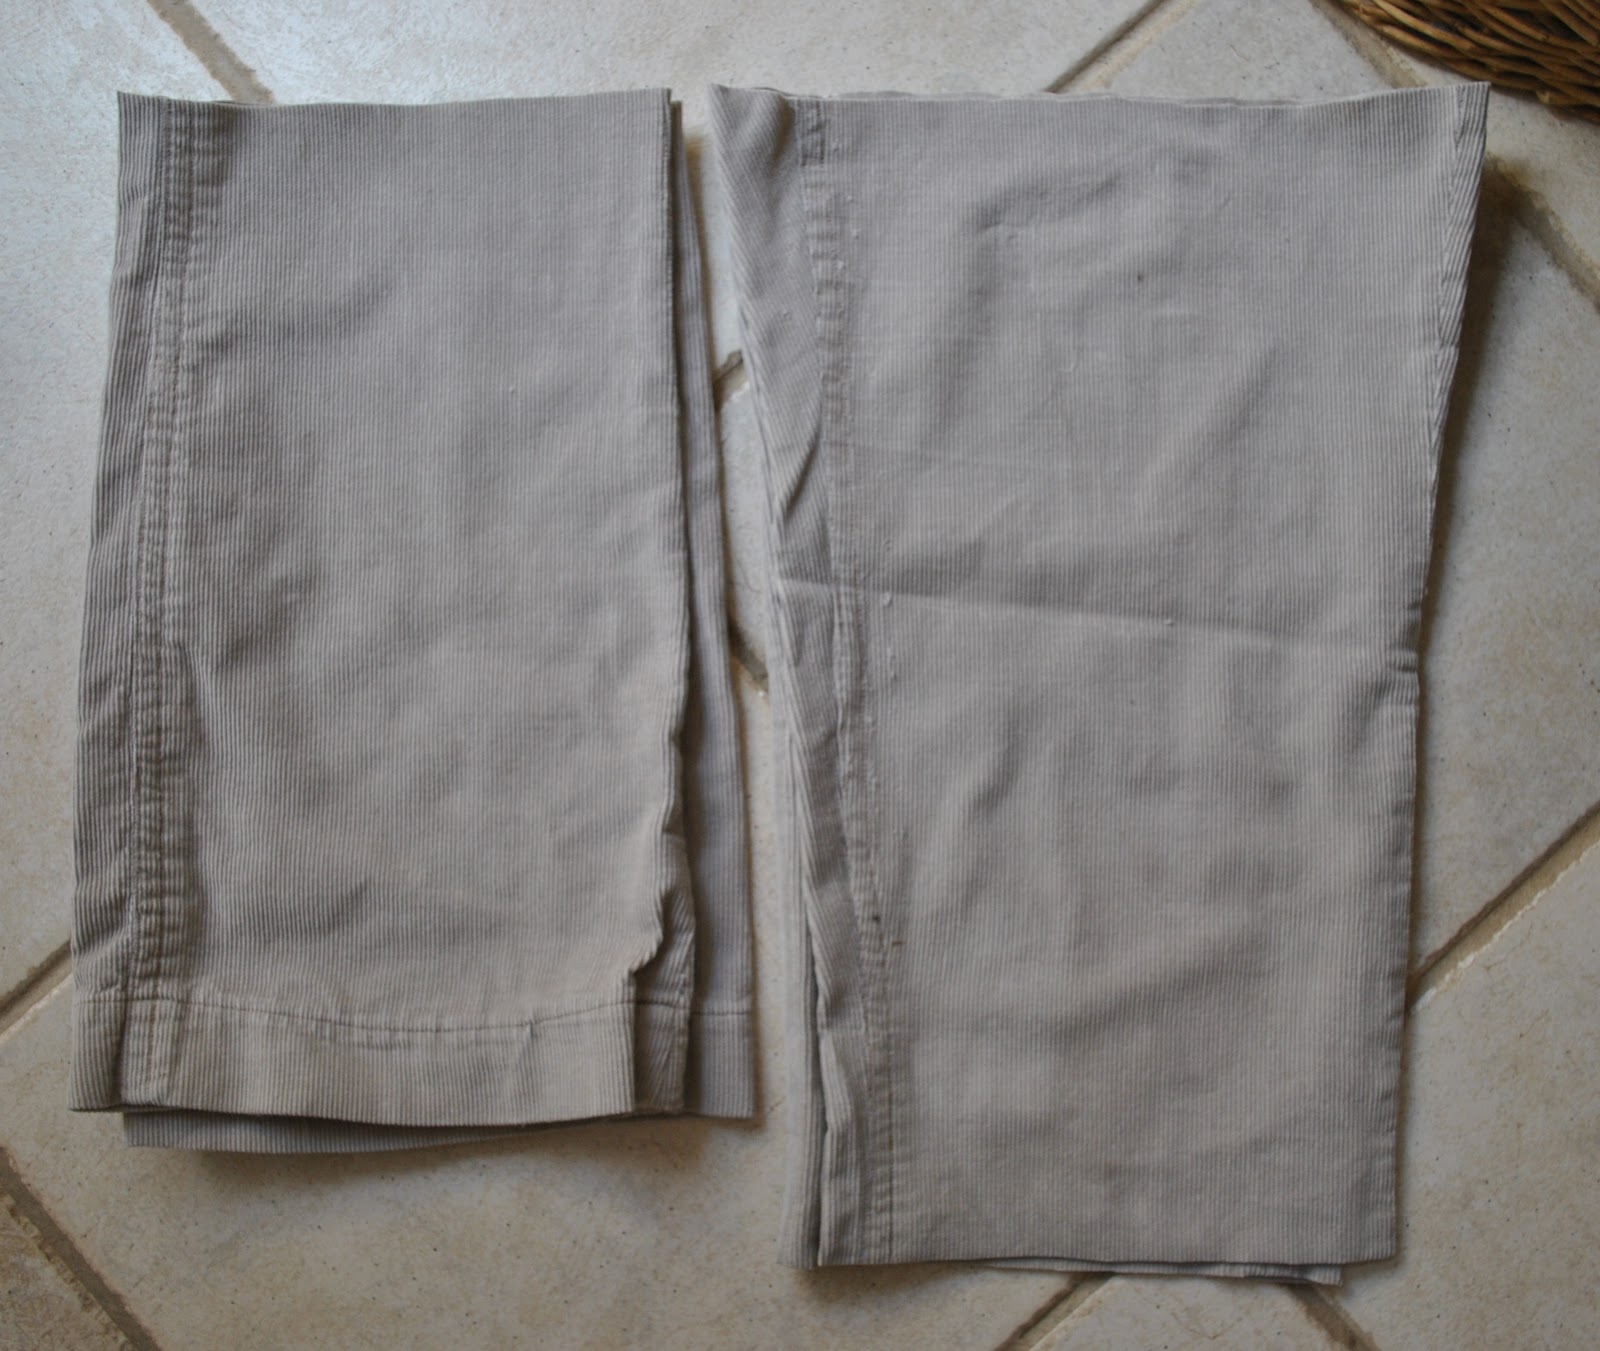
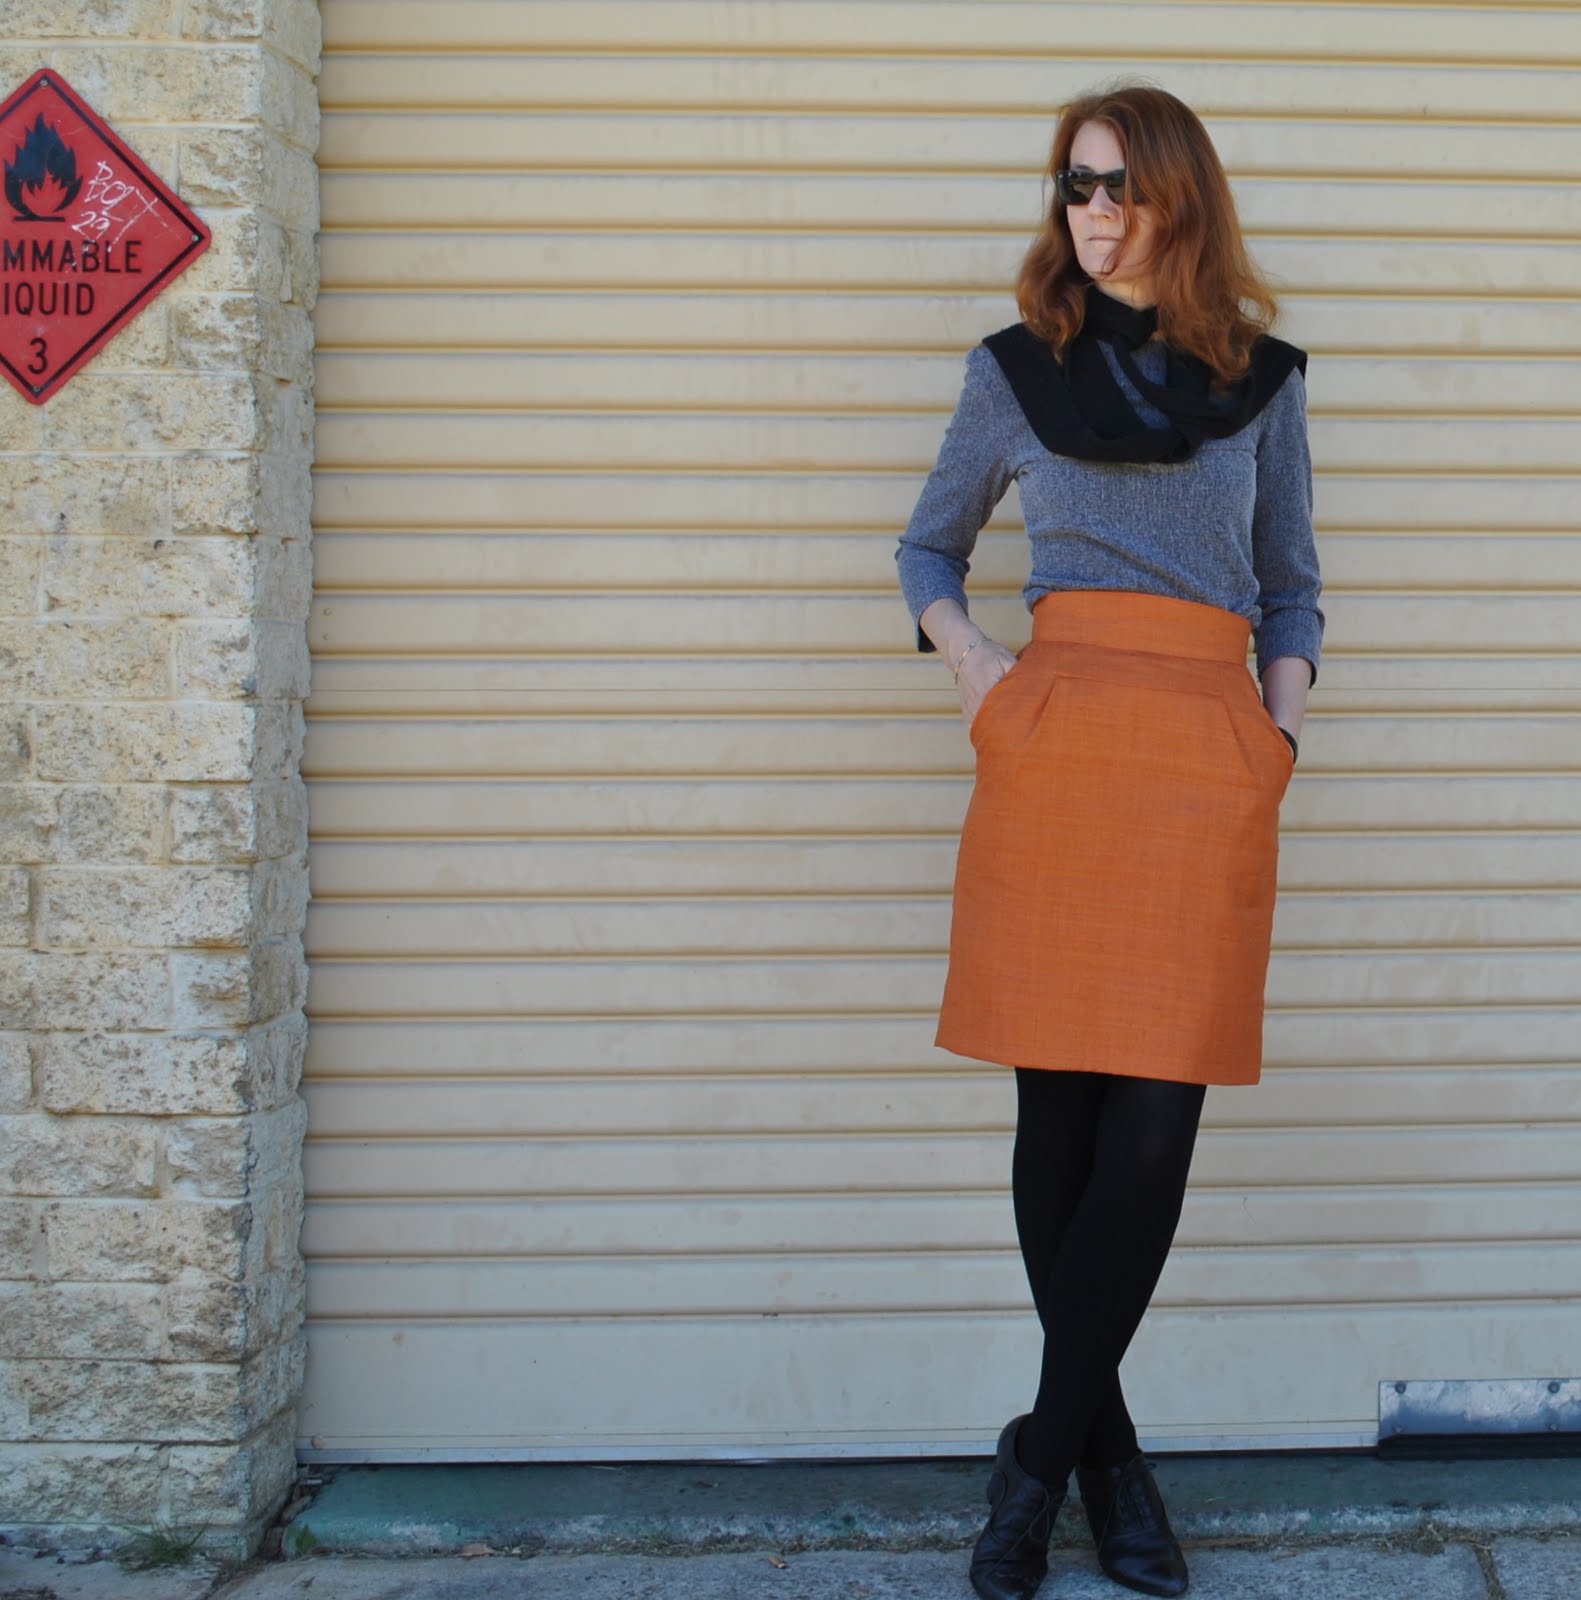
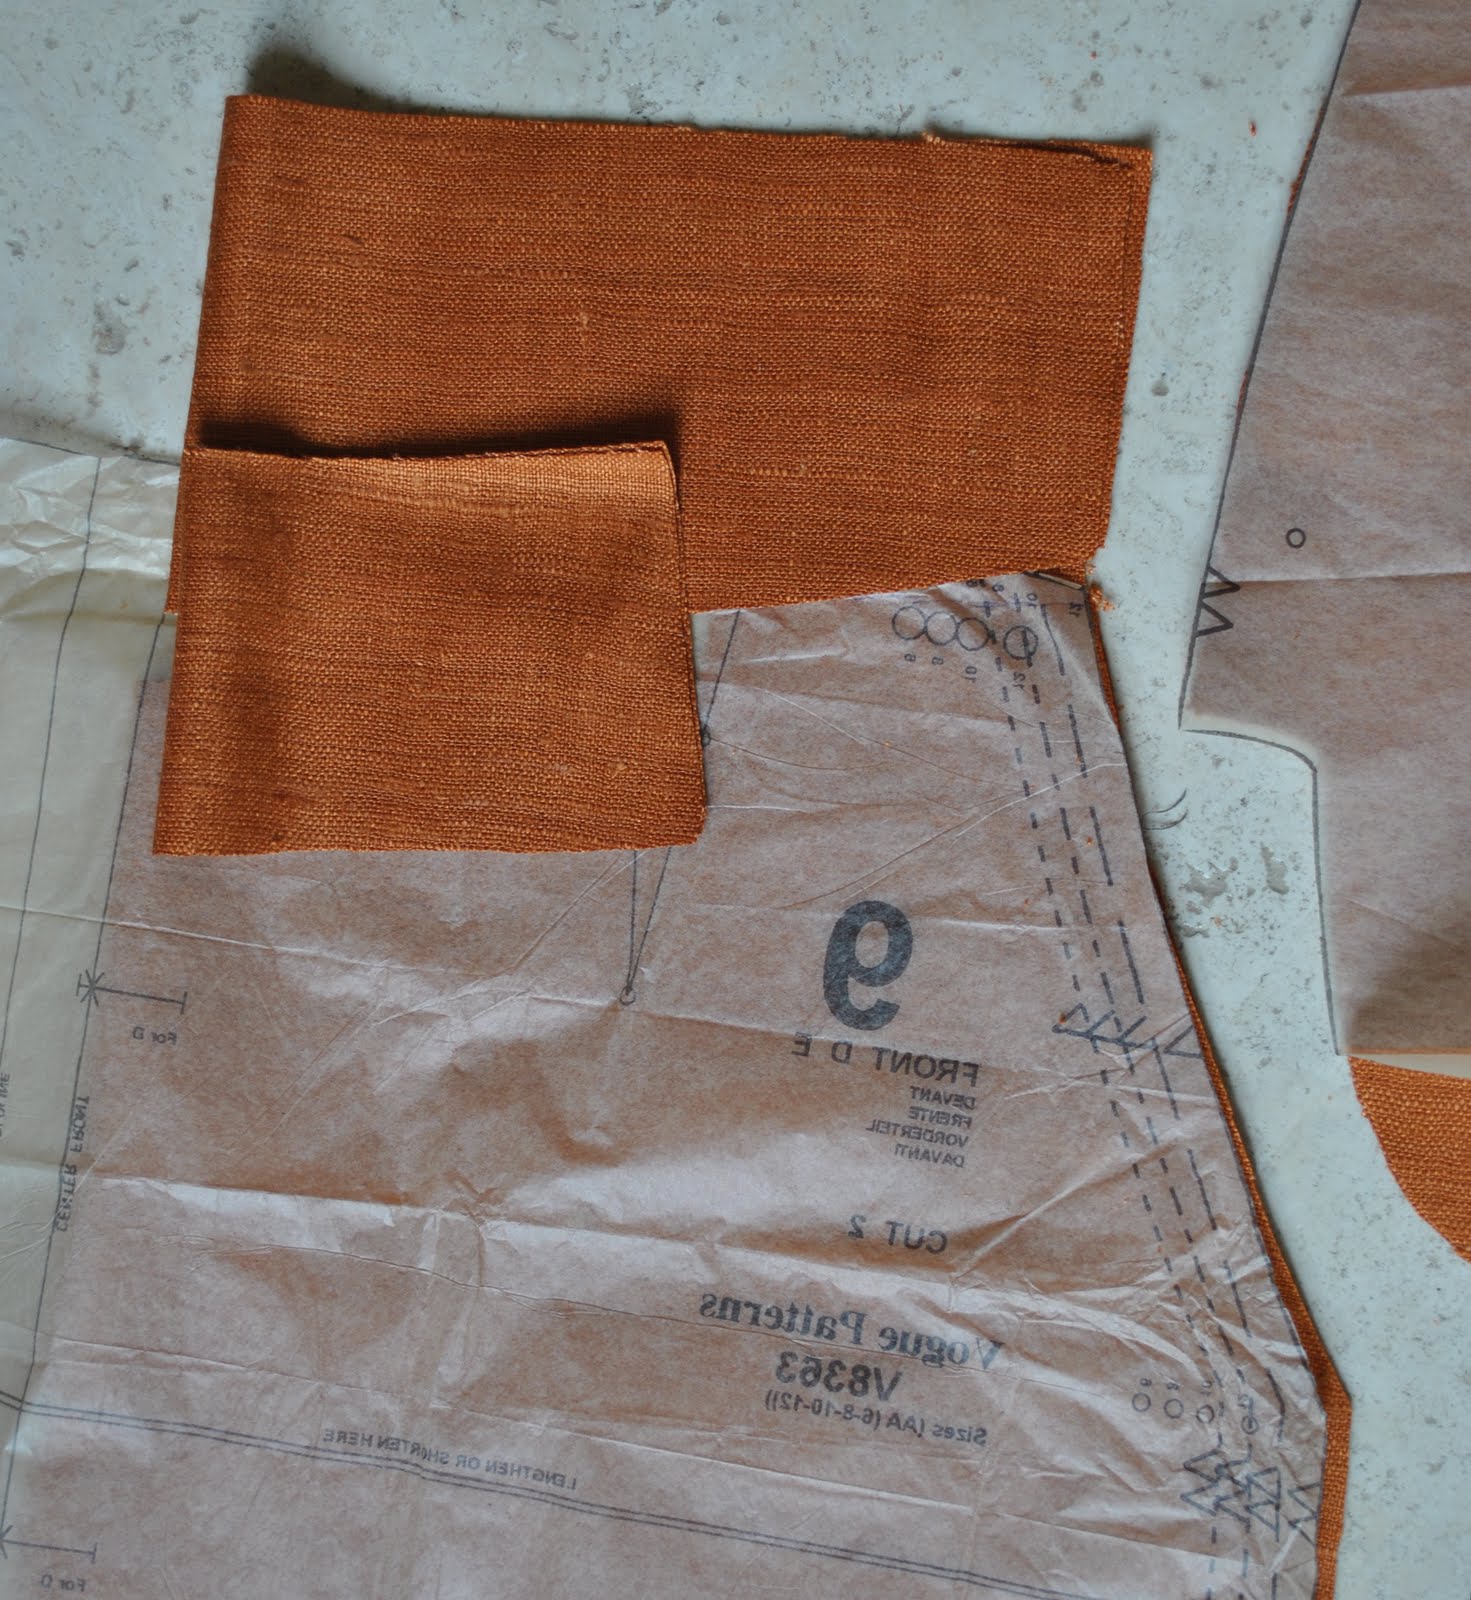
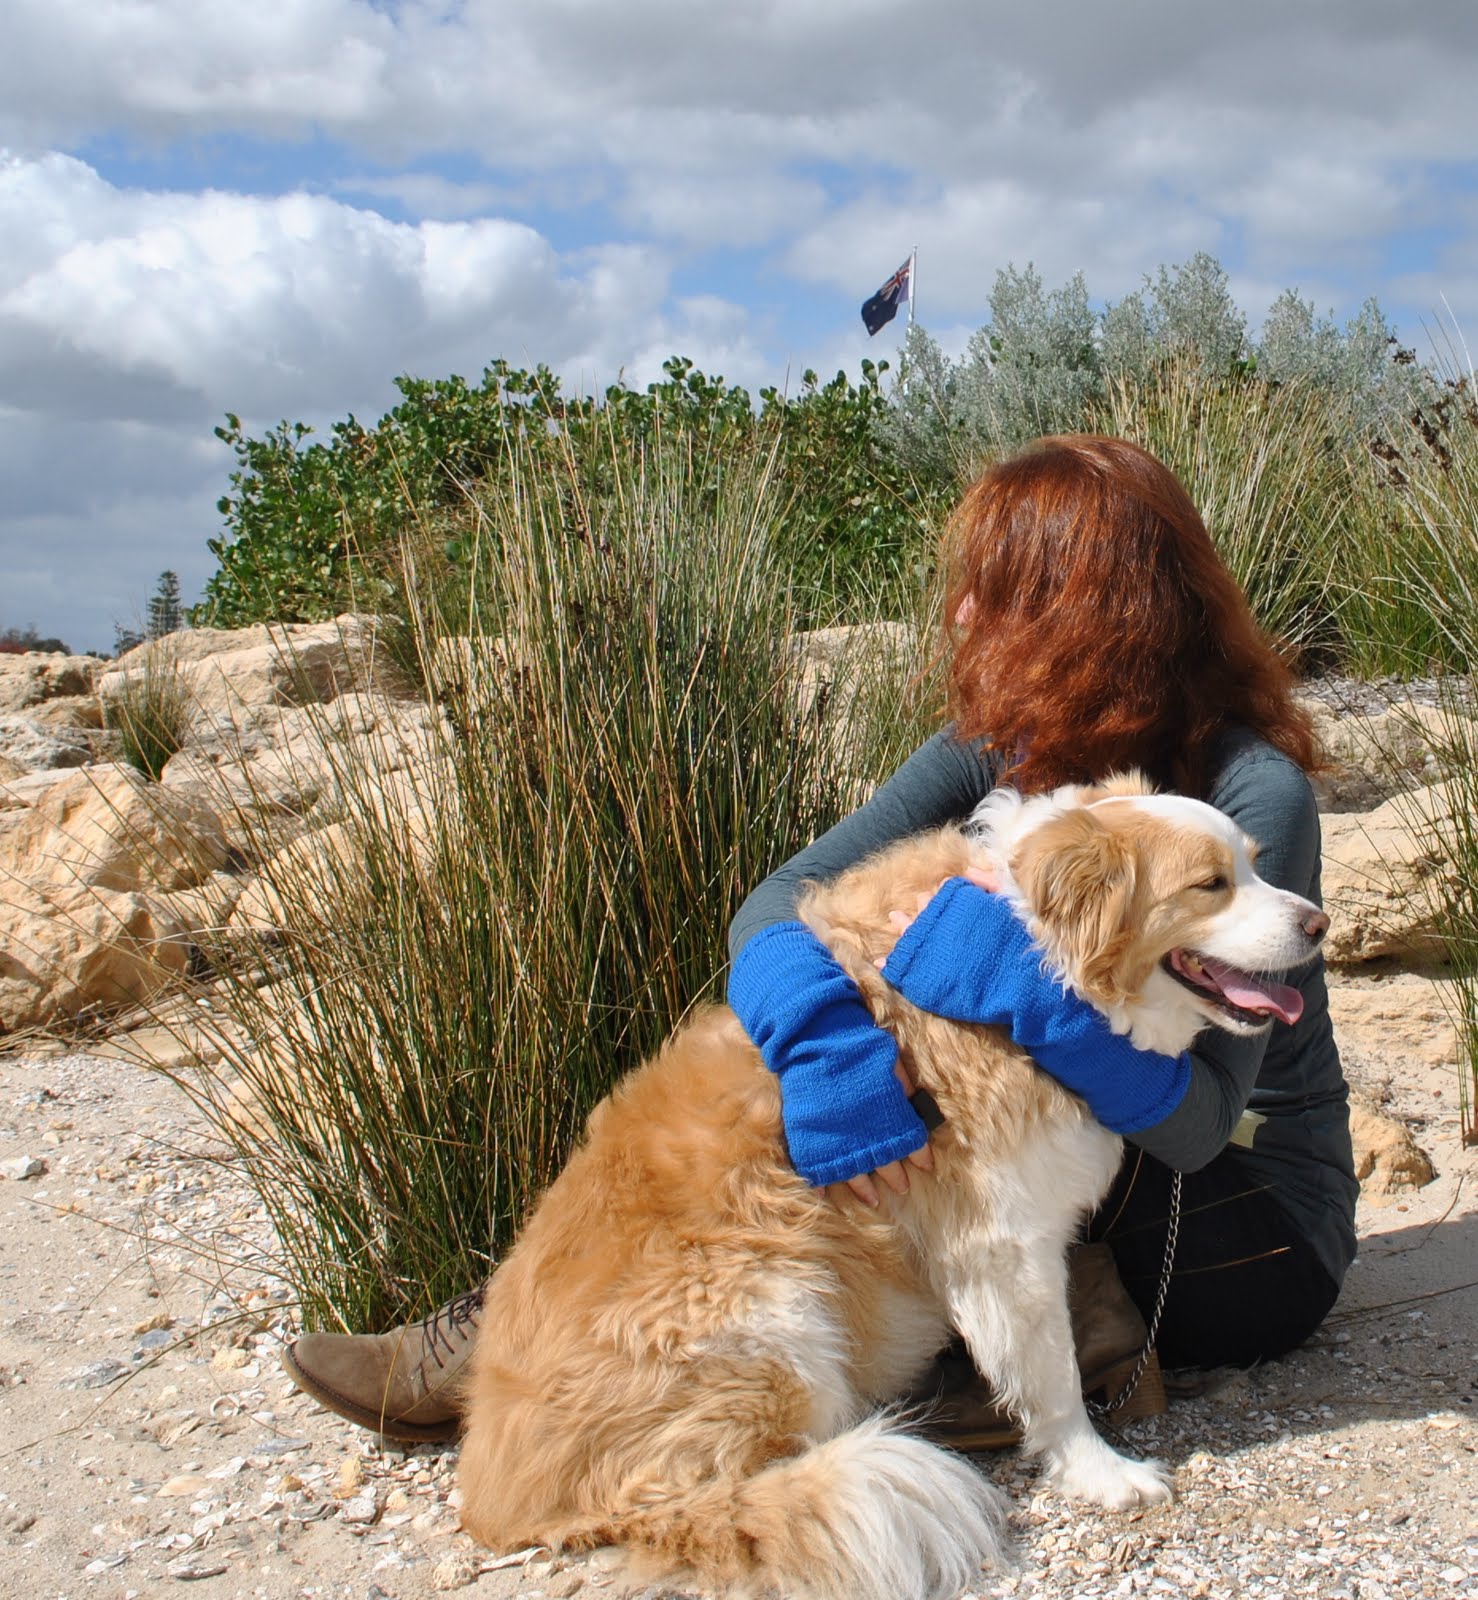
The dress is all made using leftover fabric scraps, and the wave-y welts were basically me experimenting and playing about which happily worked out just how I’d hoped.  The dress fabric is sea-foam green linen, the leftover bit from the shirt I made for my husband here.  I was sooo glad there was a little bit of leftover, since I had been such a good wife-y, making him a shirt and all.  I thought I deserved to keep this little bit for my own devious purposes, mwahaha.  And the pocket welts are of the leftover fabric from my burnt orange skirt, here.  The facings and pocket linings are of baby blue cotton, a biggish piece from my stash that is not a colour beloved by nor even suited to anyone in my family; but has still been incredibly useful.  It is getting eaten away slowly but surely for little things like this…

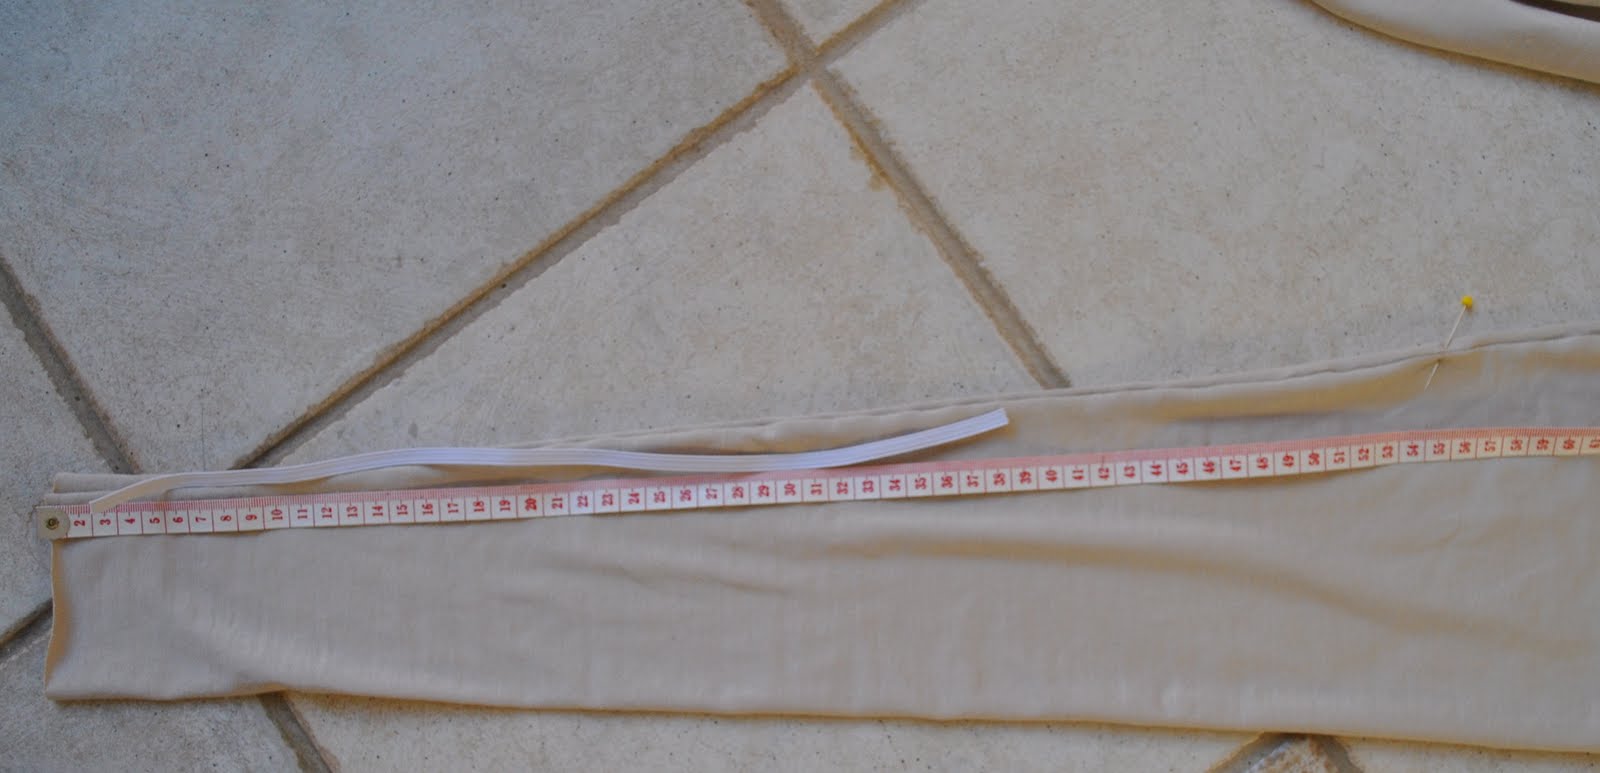
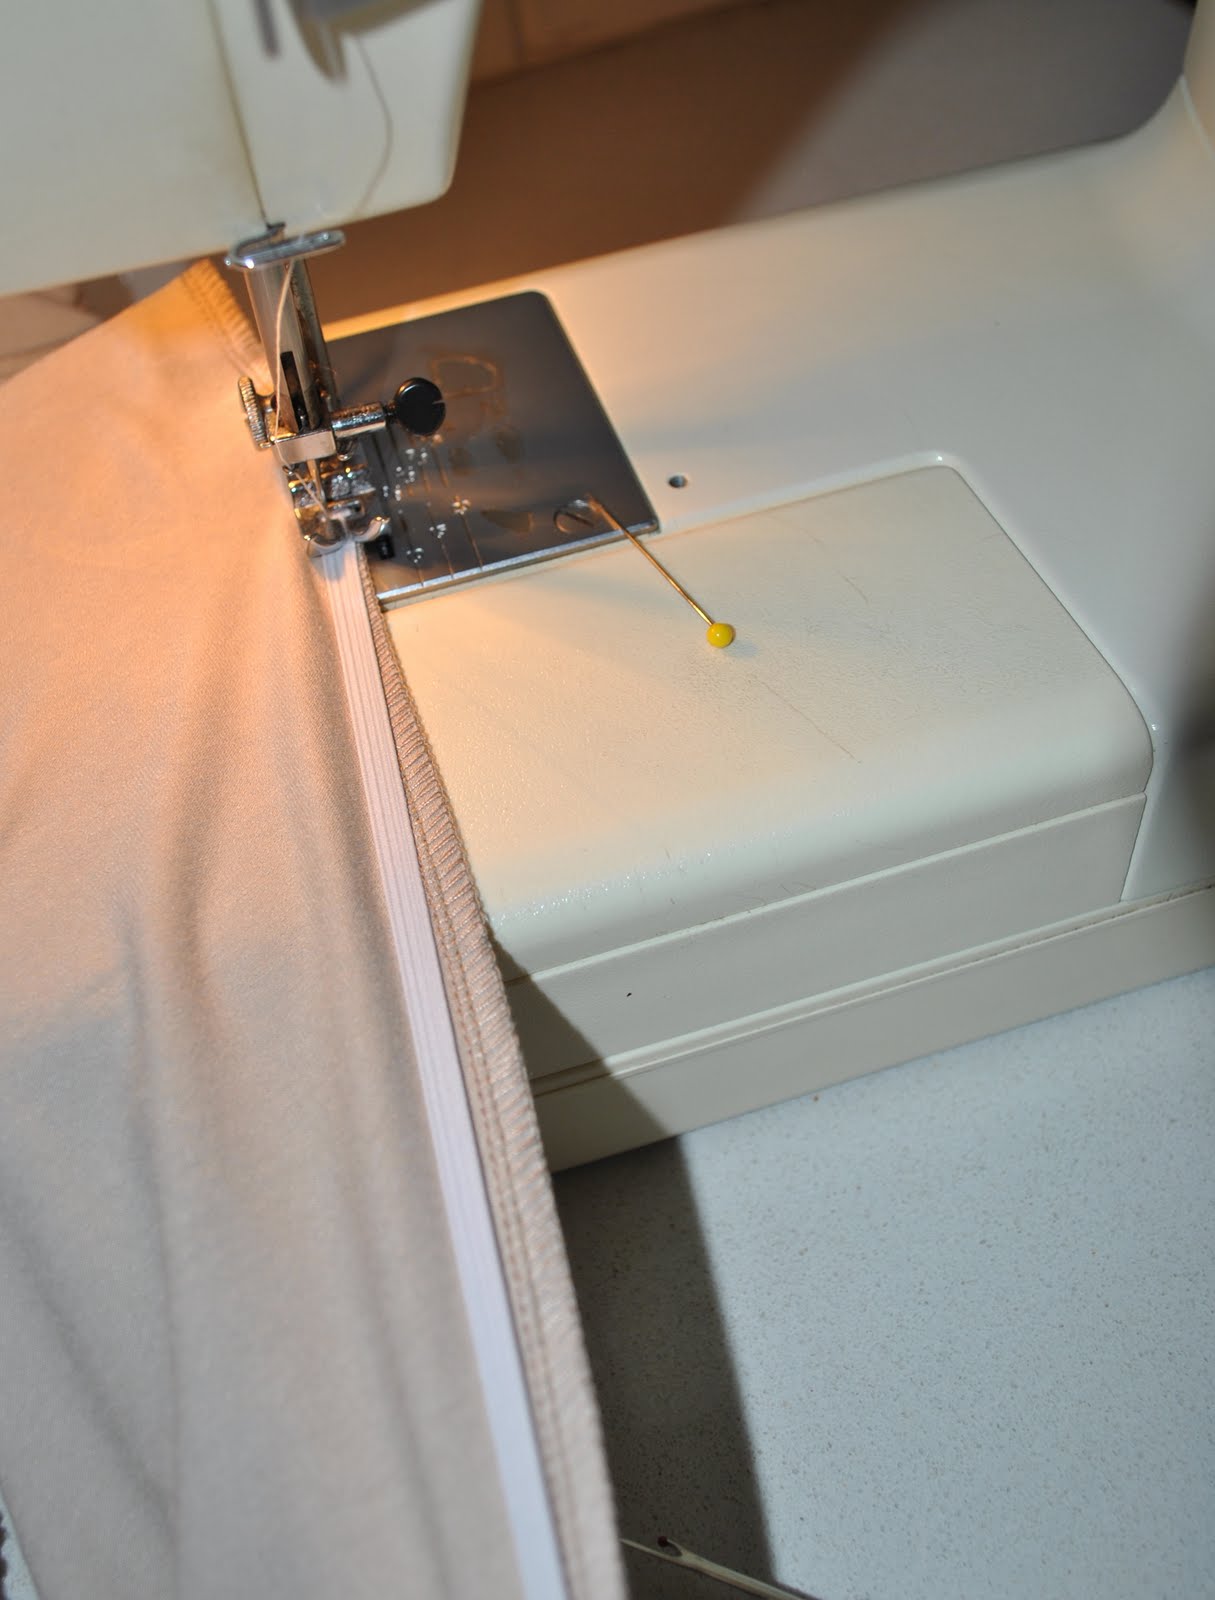
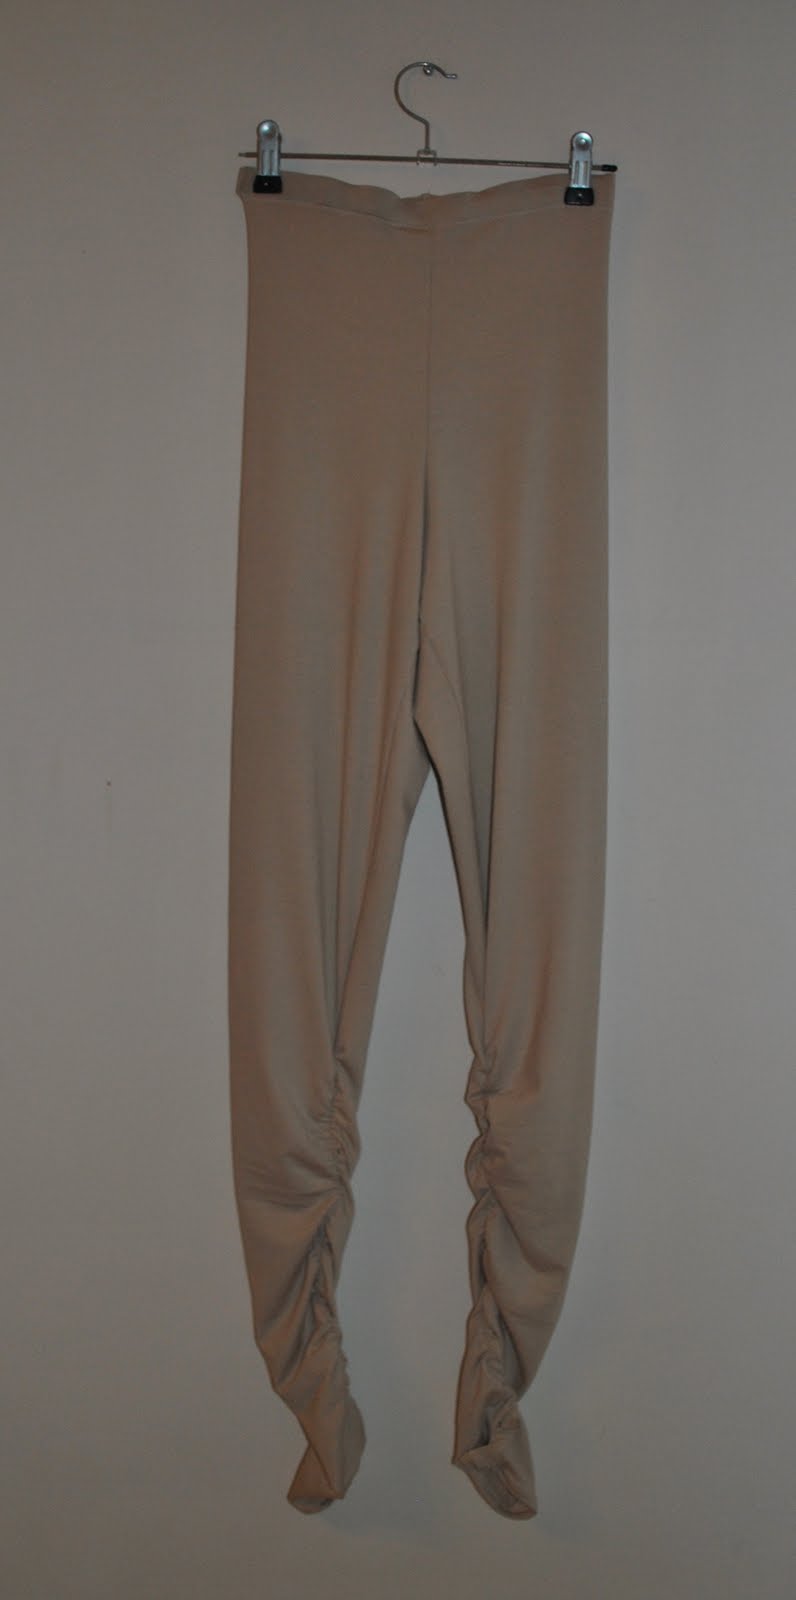
Later edit: I wrote a how-to on making those wave-y welt pockets here.  Thank you for showing an interest!

Details:
Dress; based on Burda 8511, sea-foam green linen with burnt orange raw silk pocket welts
Shoes; Country Road

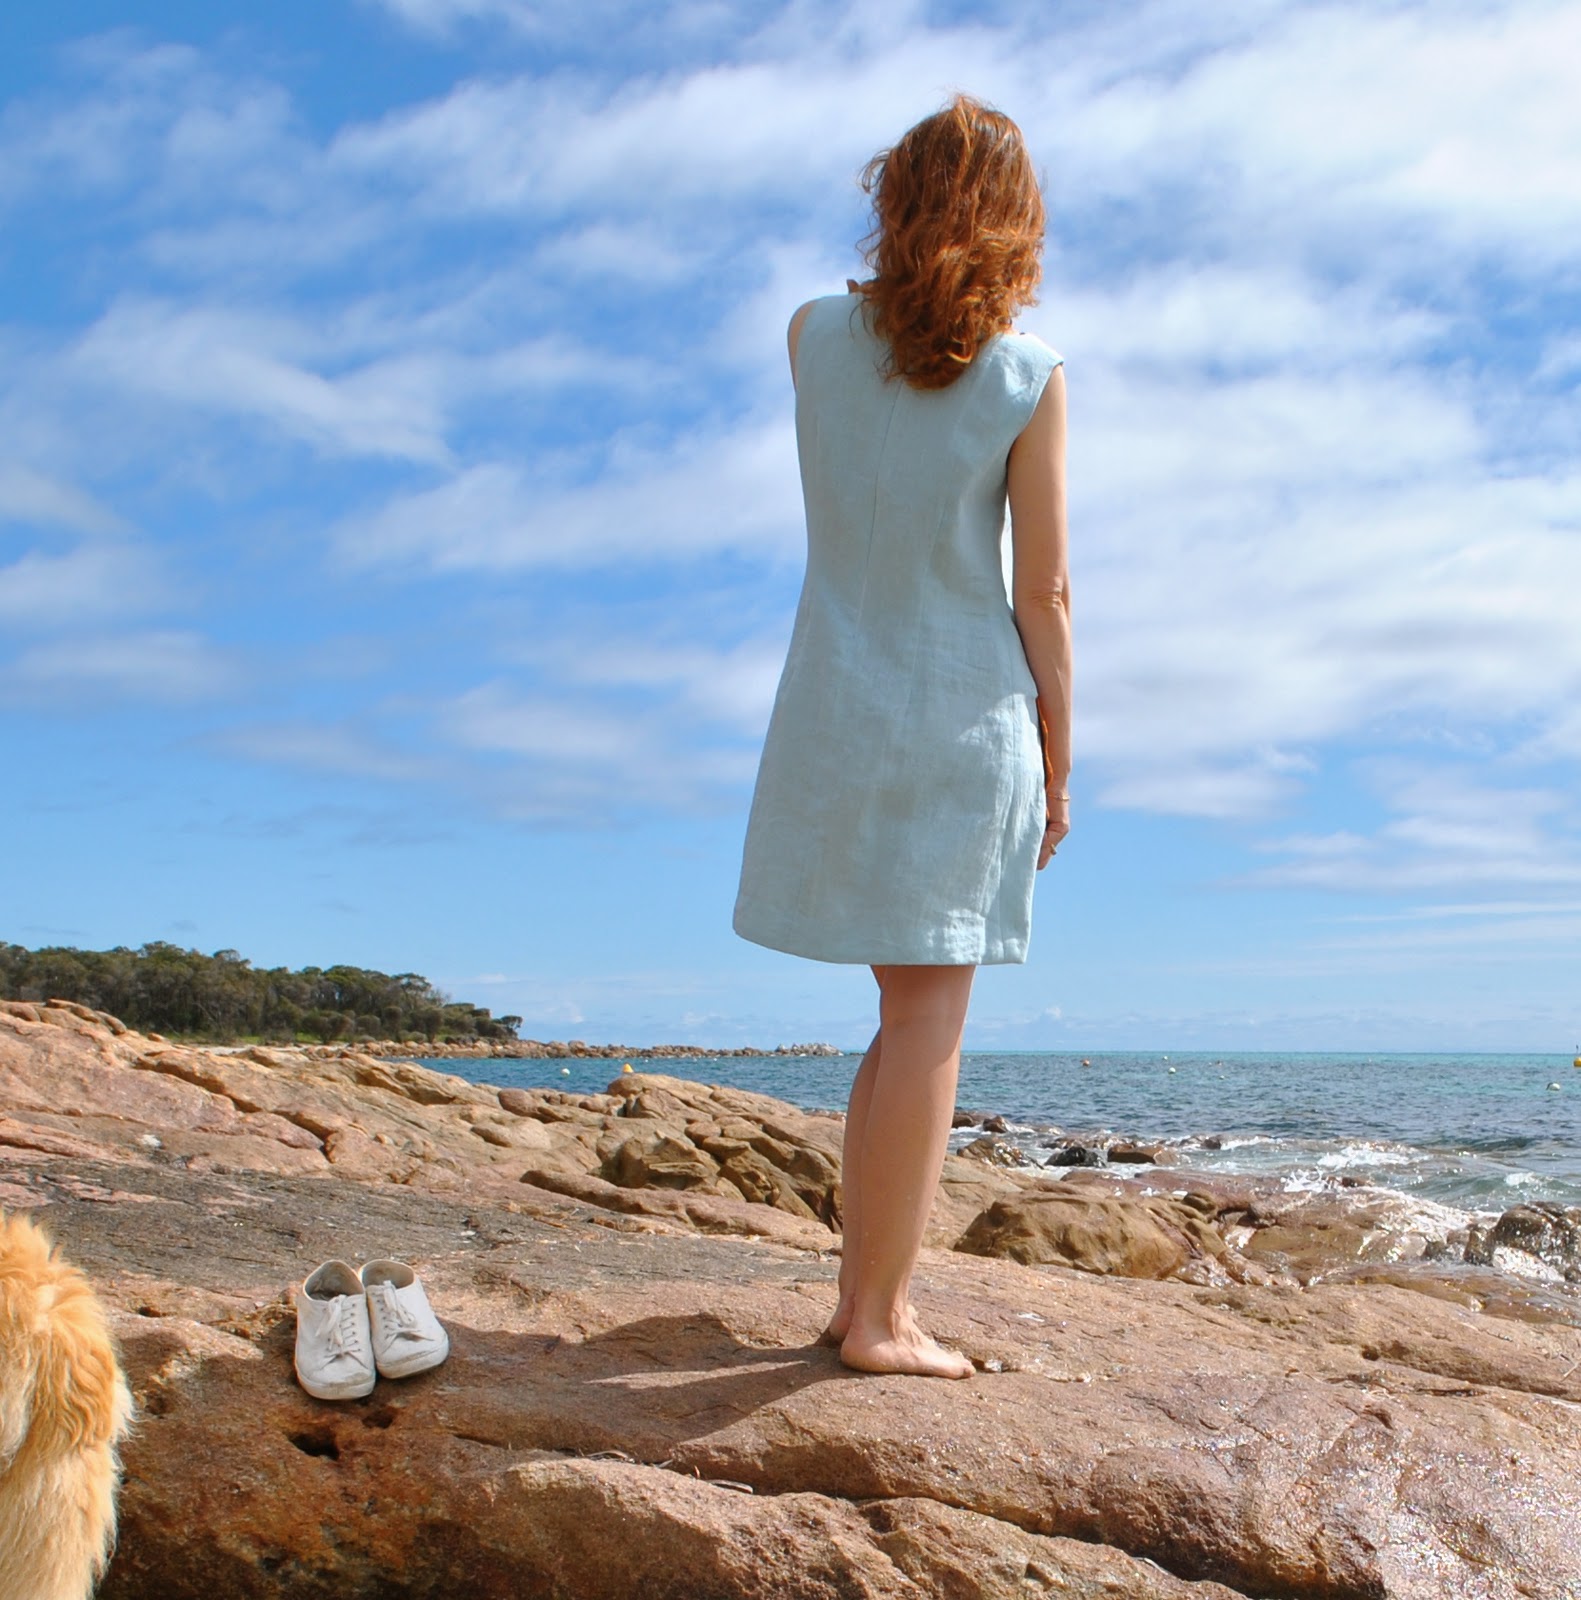
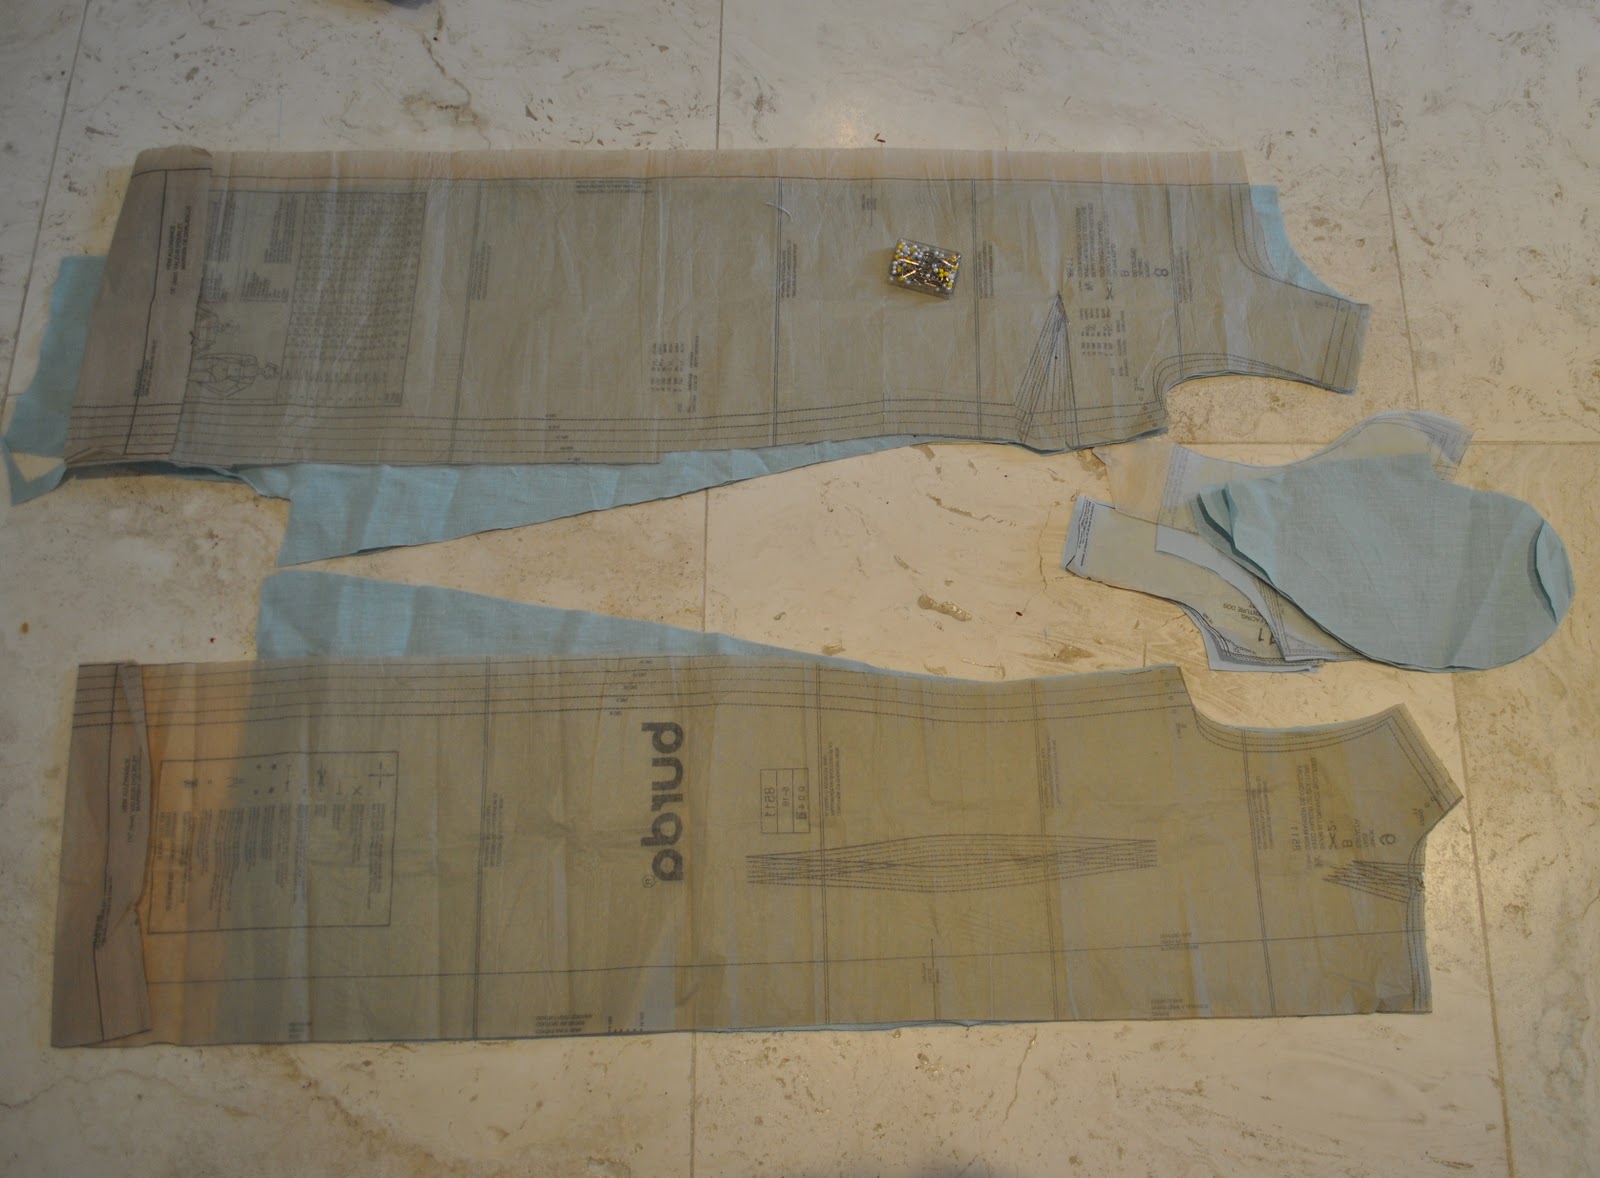
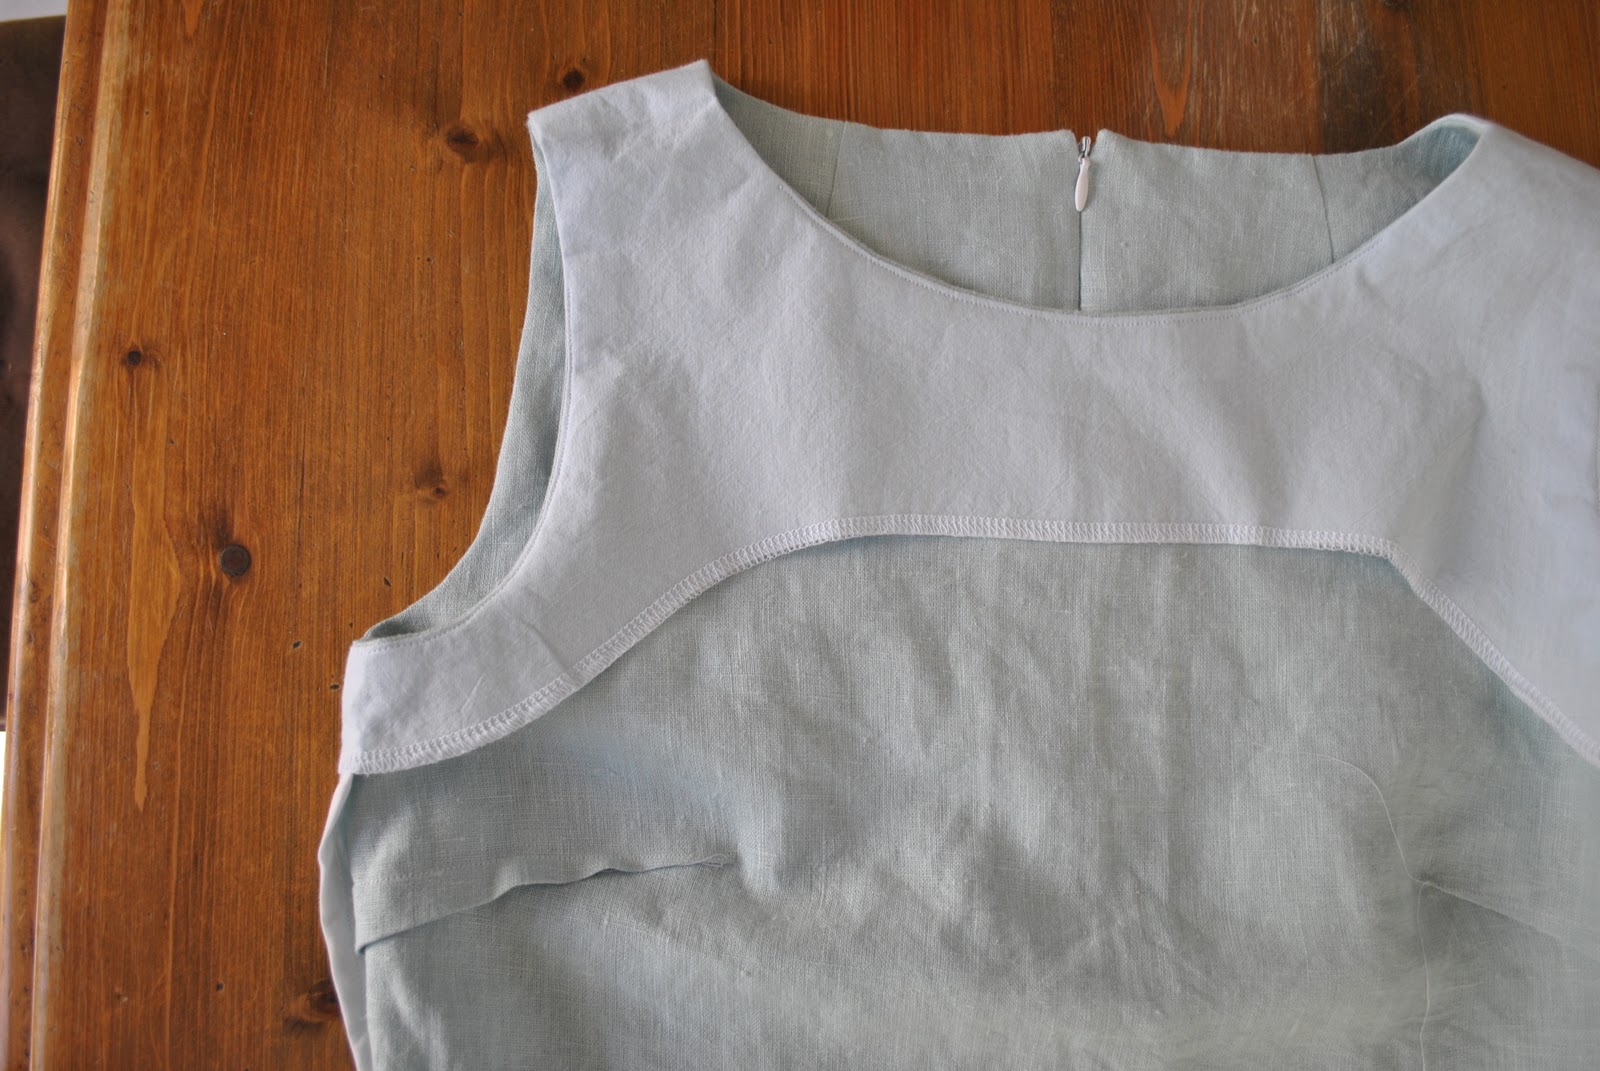
The dress is loosely based on an old favourite Burda 8511, and the pockets and welts are my own added feature.  This dress pattern is a very useful one, that I have used several times, but it has a fairly form-fitting silhouette that cannot accommodate pockets.  So I flared out the skirt part of the dress slightly, so that shoving my hands down deep into those pockets is both possible and comfortable.  Just this small detail alone is deeply satisfying…  I also altered the depth and length of the back darts to make the dress a more flattering fit to my shape.  Namely, because I have a slight sway-back, I generally make the back darts deeper and lower, and because I also have a narrow torso I take in the side seams in the upper torso region as well.  These are my standard fitting alterations for this pattern.
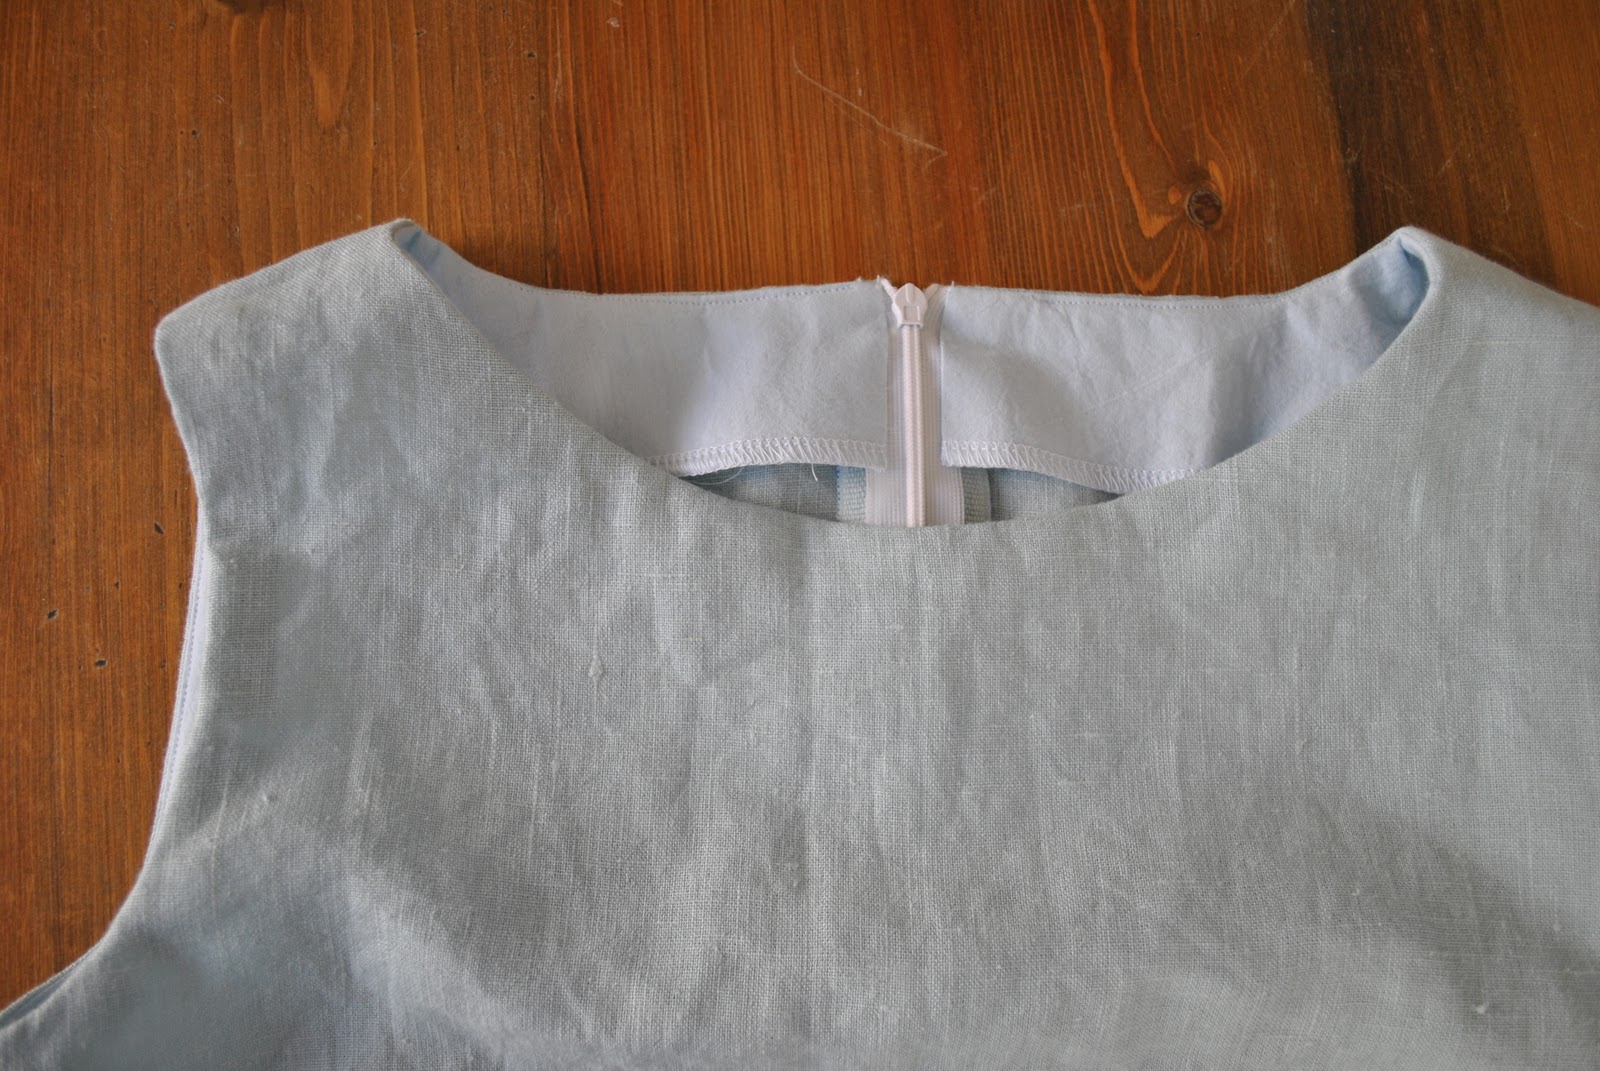
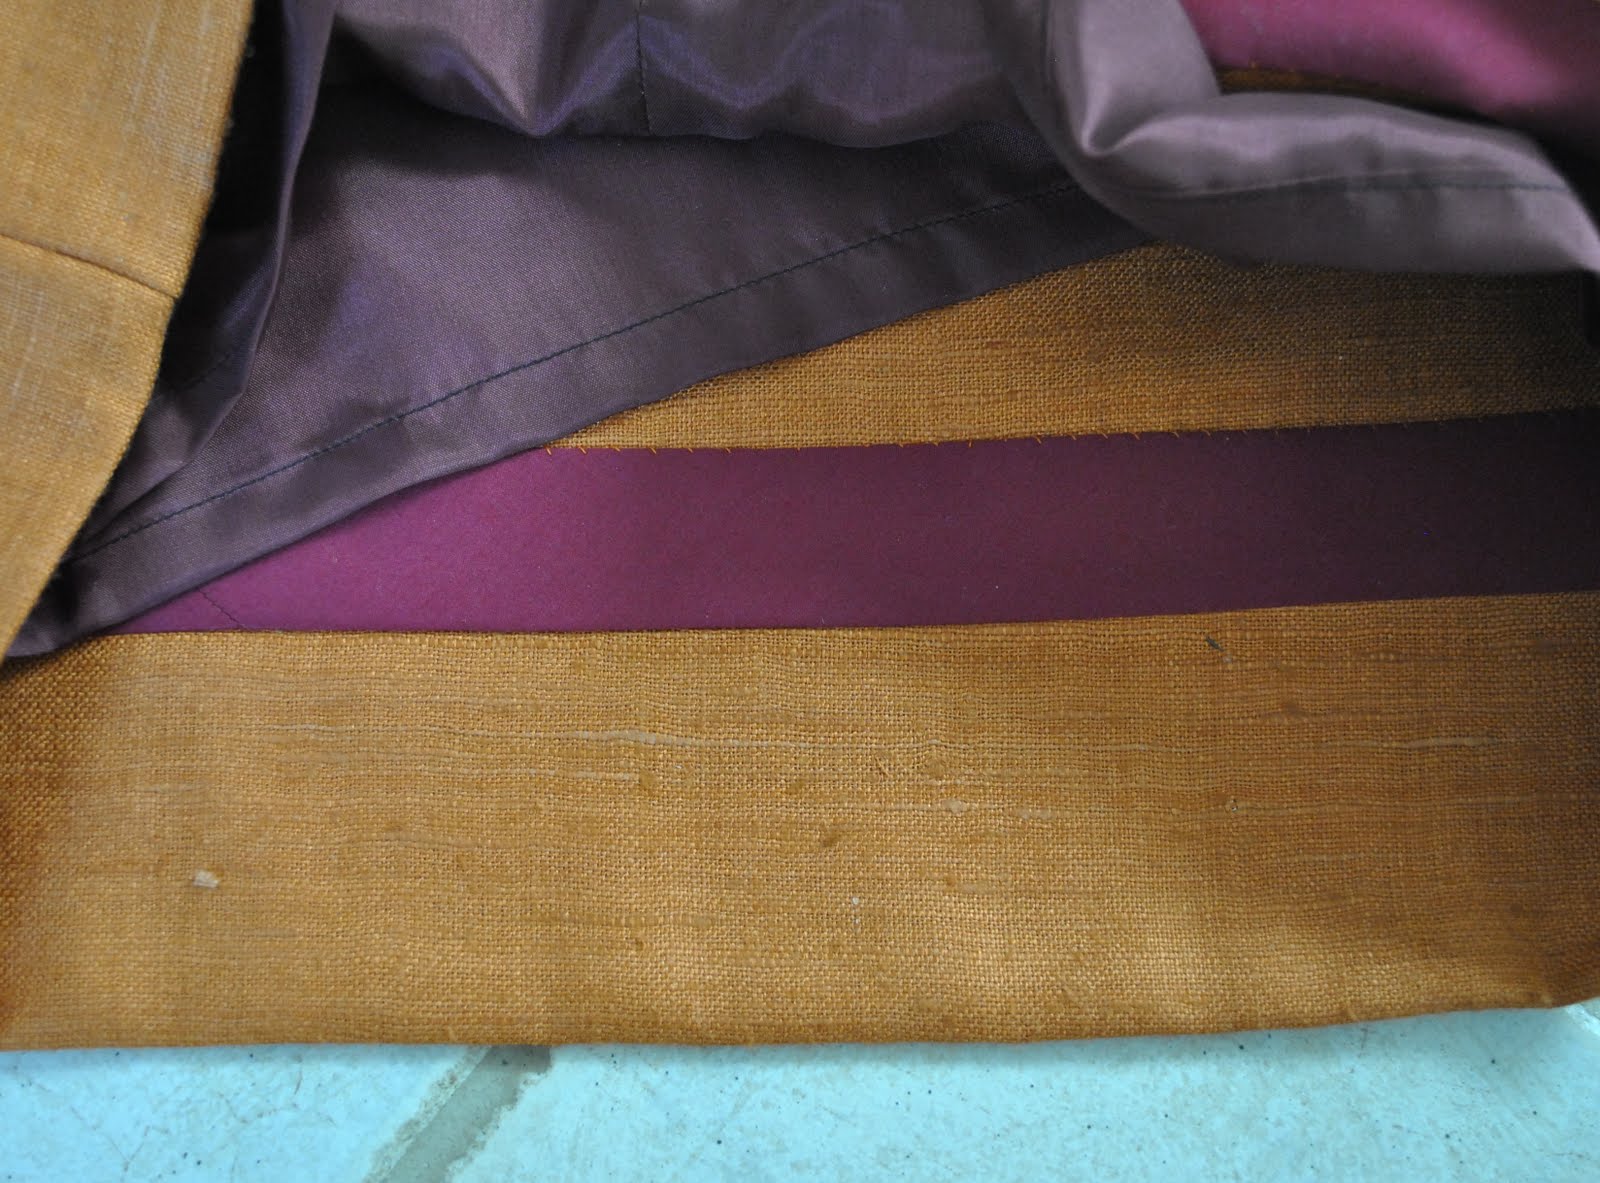
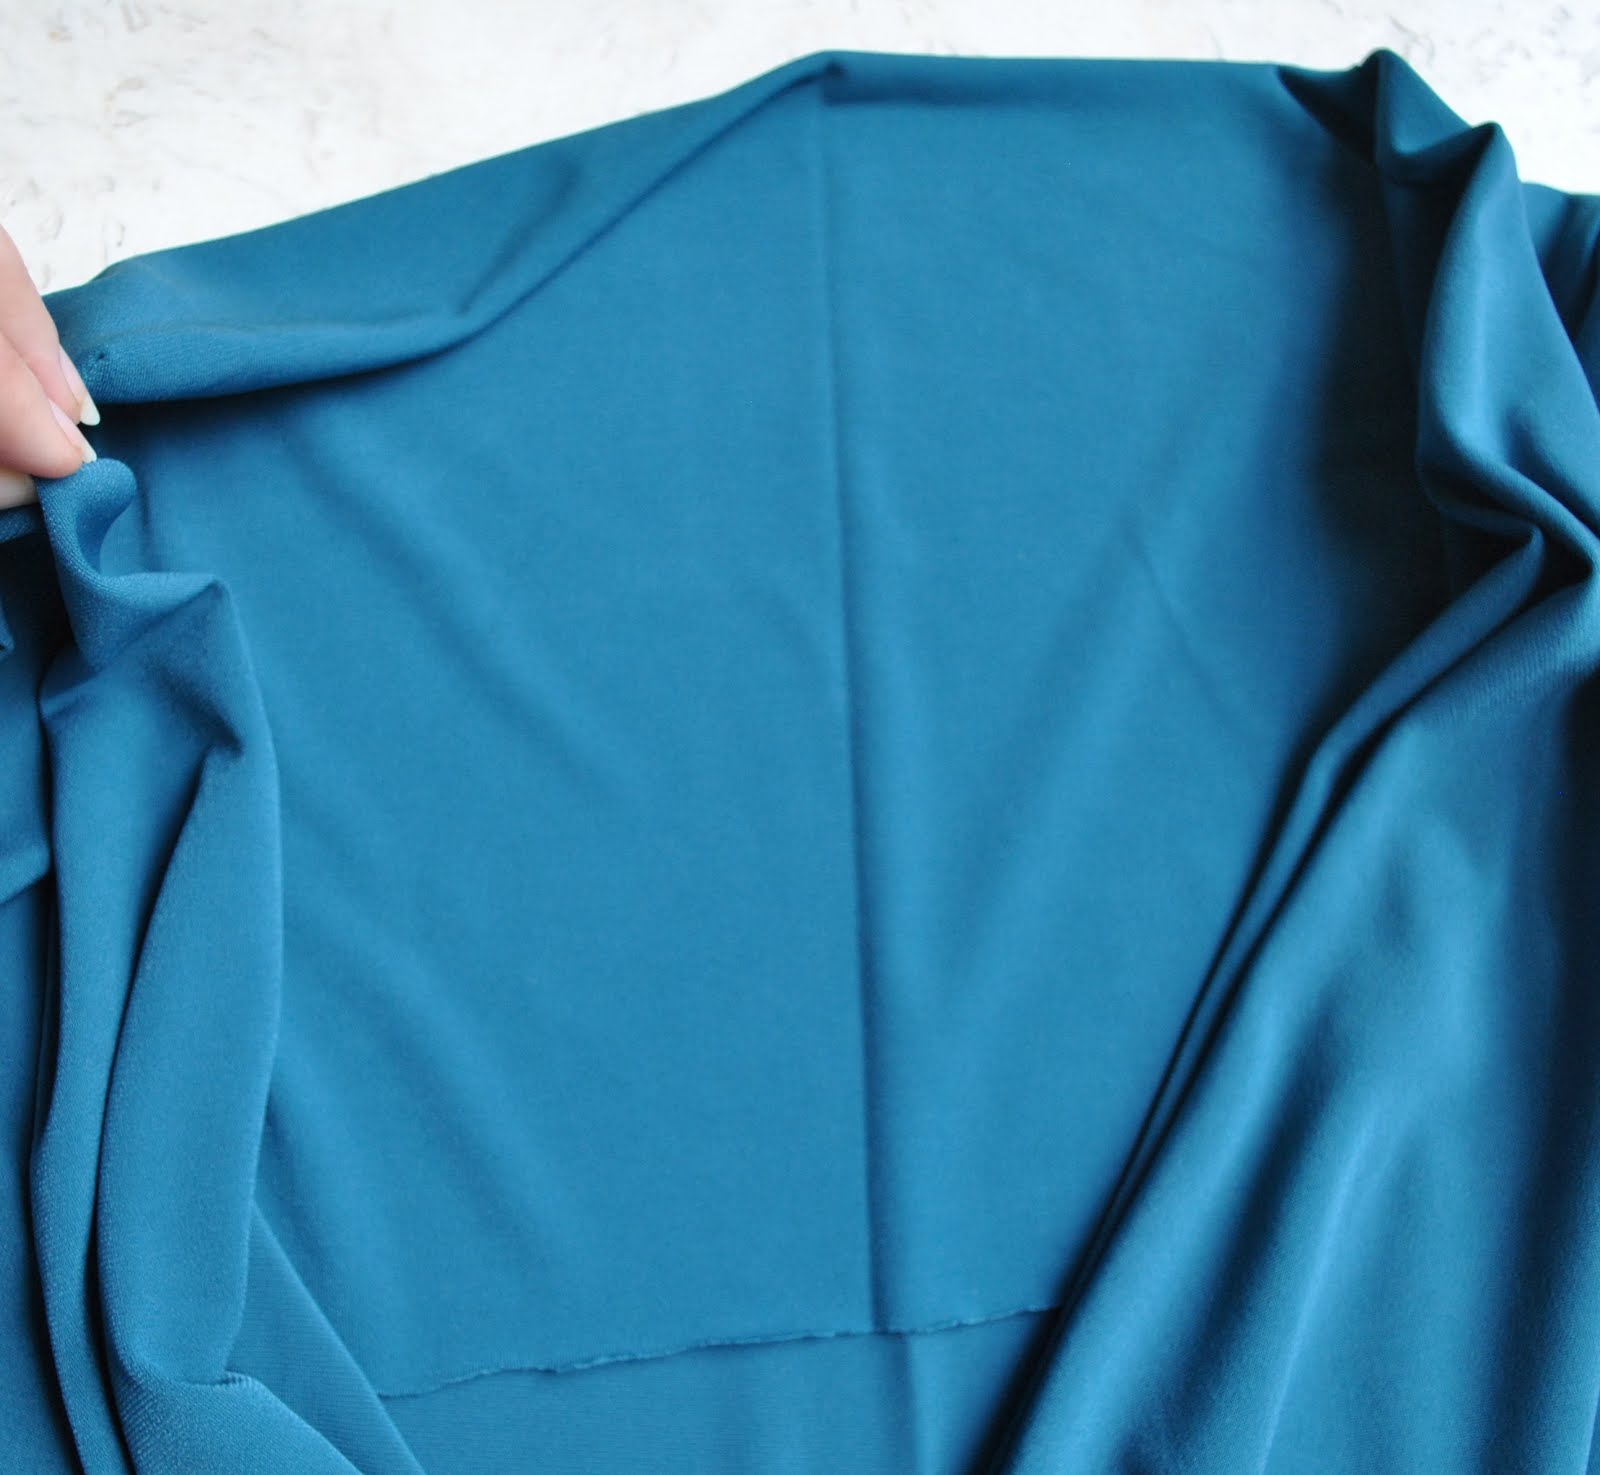
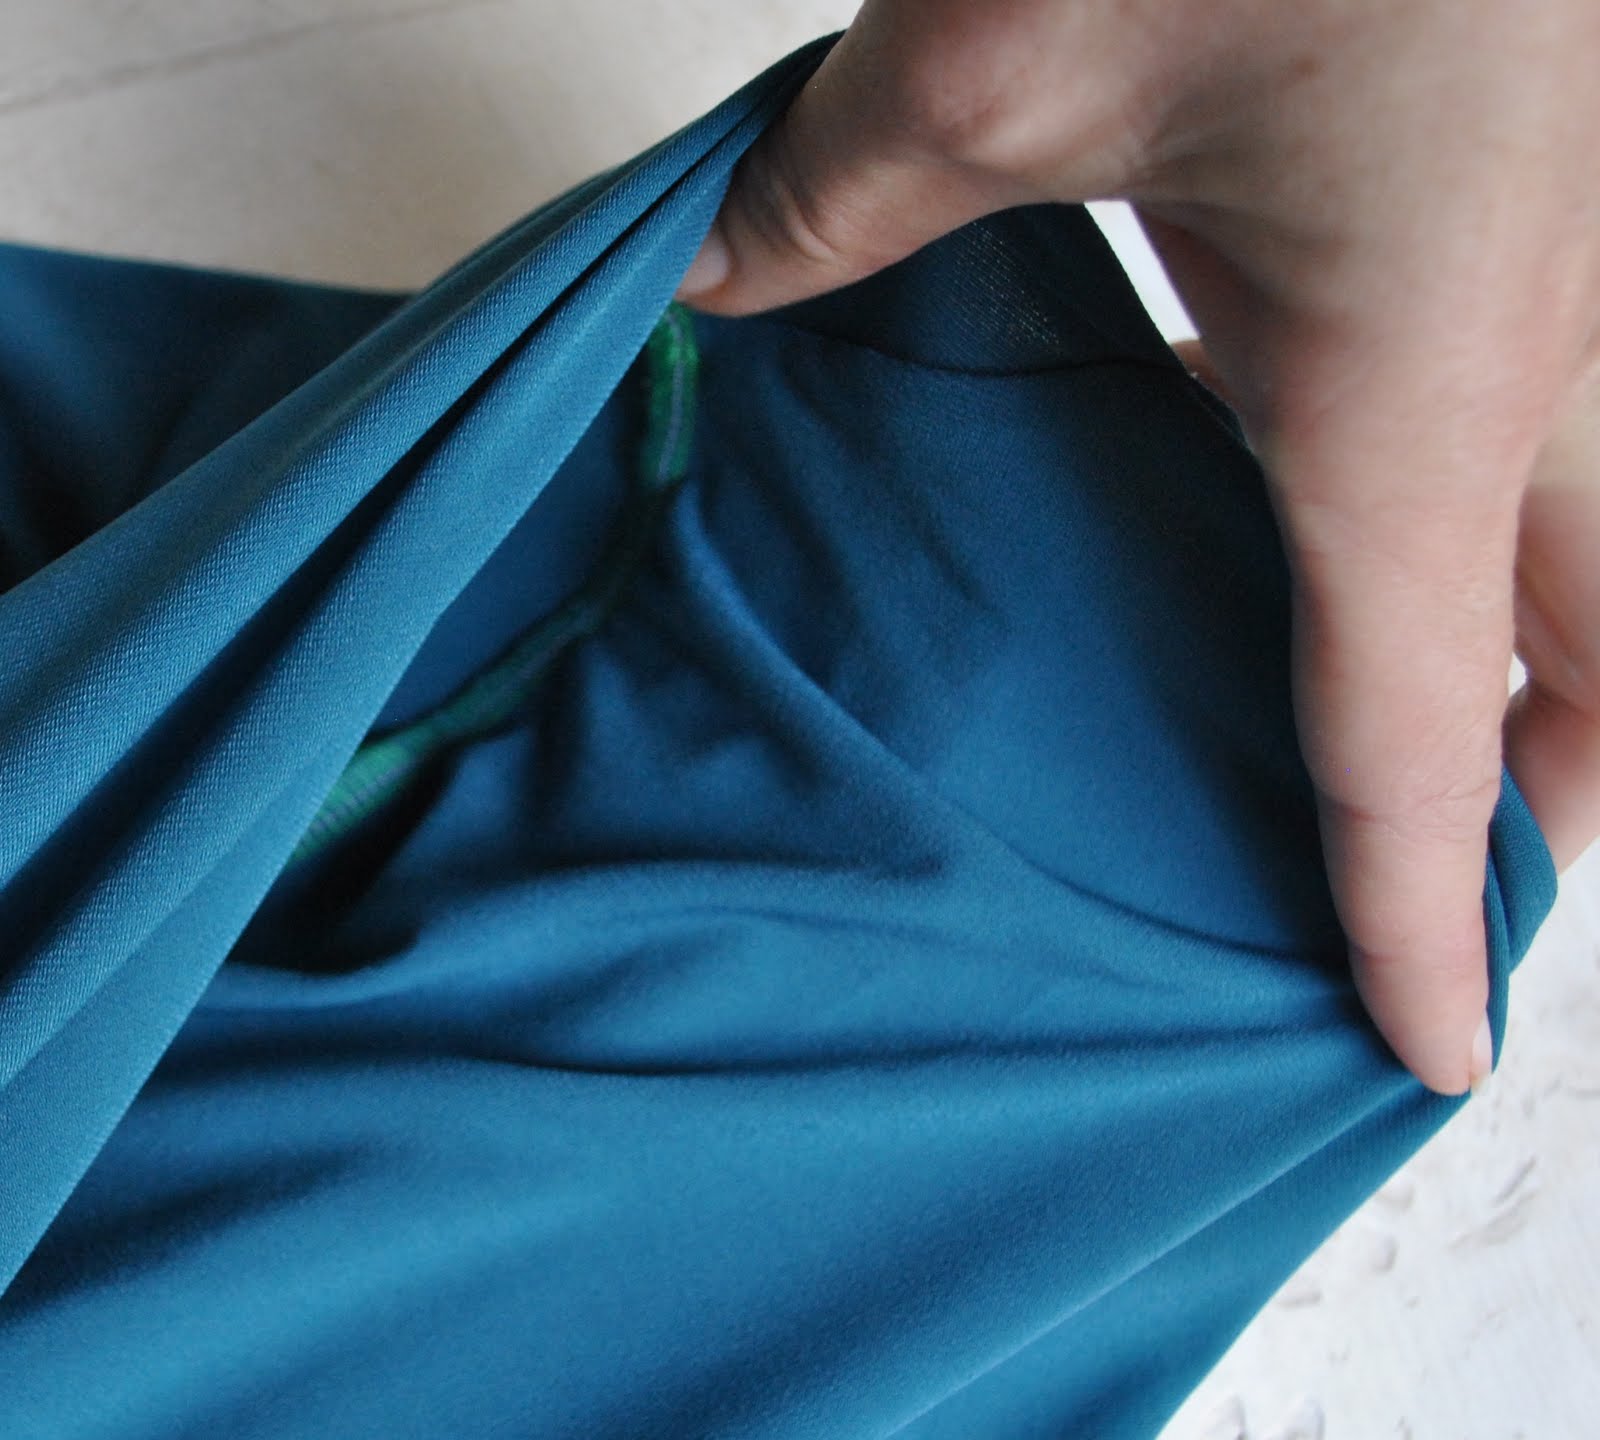
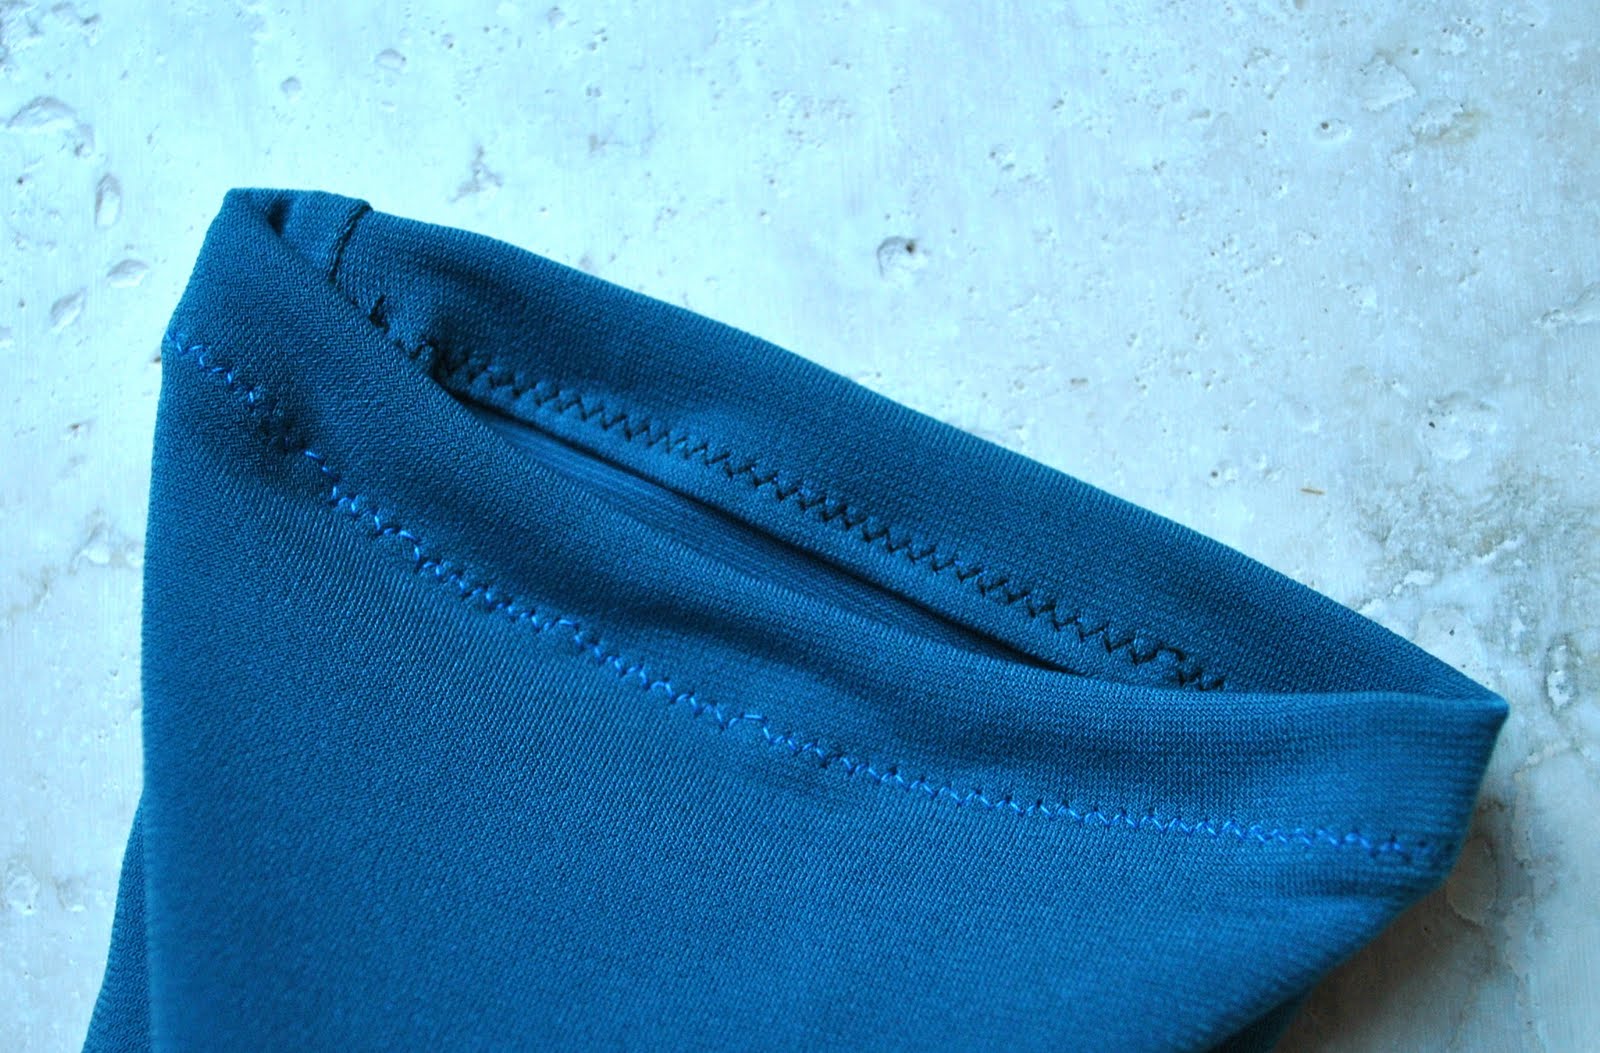
All the internal raw edges are finished with HongKong seaming and the lower hem is finished with a wider cut strip of bias.  Little secret; that bias hem strip is not just there as a quality dressmaking finish, but pretty well necessary in this case… This dress was cut from such a small scrap, the amount of actual dress fabric in that hem is about 5mm!

pinterestmail

Turning old jeans into a skirt…

…  I decided it was high time for another refashion since I still have a small mountain of perfectly good fabric in the form of old clothing sitting in my stash.  eep!  Do you remember these jeans?   They had got a bit saggy and baggy about the crotch and seat area, thanks to me using almost-stretchless fabric.  Thus I learnt jeans really are so much better with a bit of stretch in them… anyhoo so I could barely stand to see myself in them as jeans anymore but the corduroy was still in pretty good knick overall, and I still absolutely looooove the colour.  It’s the perfect “white” for me, a sort of warm shade of grey-white that I love.  Oyster white, to get all referentially descriptive, if you like that sort of thing.  Yeah, I do too  🙂
So.  I’ve seen dozens of jeans-to-skirt refashions on the net but none of them have ever ever appealed to me.  Why?  People can’t get past dealing with that big curved crotch seam, and will just leave it there, sew it down boom onto the front of their new skirt as is, and I just can’t bear that look.  When I do a refashion I want it to actually look like a skirt, thanks, and not for people to look at it and go, “oh, she obviously converted her old jeans into a skirt, yeah.  Hmmm.  Okaaaaay…  No attempt to do anything at all about that crotch seam….  And what about the rest of the fabric from the legs?  Why not make use of that somehow?”
So I gave it some thought and came up with this refashion (details below), that actually used up nearly all of the fabric from my old jeans.  The whole top bit, with the waistband, fly, side pockets, coin pocket and rear patch pockets is still there completely intact too.  I think it ended up looking quite fun and flippy, and almost sporty too, don’t you?

Details:
Skirt; my own design, a refashion of an old pair of off-white corduroy jeans (originally made by me too, using Burda 7863 here)
Blouse; Butterick 4985, ivory eyelet cheesecloth with lace trim
Cardigan; Country Road
Scarf; Missoni
Shoes; Bronx, from Zomp shoes

It was a pretty simple refashion…. firstly I cut off the top bit, and unpicked the curved part of that offending crotch seam.  

Pinned and resewed centre front and centre back respectively into a straight front and back seam… aaah; already, things are looking a lot more skirt-like here, right?   I also re-double-topstitched that centre back seam down again to match how it was originally…

Now for the legs bit…
Measuring and allowing for an equal depth hem cut each two leg pieces in almost-half horizontally.  

I wanted to keep the original hem down at the bottom of the legs intact, and so just unpicked a small area of hem near the outside leg seam… so I could unpick that long outside leg seam.  I chose the outside leg seam for unpicking like this since I had originally double-topstitched the inside leg seam down, and so the outer leg seam was a far easier option here…!!  And those double topstitched seams makes a nice random feature on the final skirt too.This gave me four largish pieces of leg, in pairs of two mirror images.  I used the lower leg pieces (with the hem mostly intact) for the skirt front and the upper leg pieces (which as yet have no hem) for the skirt back, and checking to make sure the nap of the corduroy is all the same way as each other and the top of the skirt, sewed up the side seams, and centre front and back seams.

The  next step was to arrange the excess fabric in the lower skirt piece into folds so that it fitted the upper skirt piece.  This was just a matter of measuring and arranging the folds to be as near as perfect mirror images of each other, front and back, and checking every now and again to see that it was fitting into the top section.  

Once the folds were all evenly in place I basted them all and then sewed the skirt top and skirt bottom together.  I top-stitched each fold down in place by about 5cm vertically, some single- and some of them double-topstitching.  Then hemmed the skirt back, to match the hem of the skirt front (which is already in place, and only required the centre front bit of the hem to be sewn into place…)

Voila!  A new skirt, and with very little waste!  The only waste fabric was from the crotch area, plus I ended up shaving a few inches off the top of the lower skirt section also to get a length that pleased me.  Note, I took length off the top of the skirt, not the bottom, since I was keeping that existing lower hem in place.  When re-fashioning a garment it is well worth incorporating those existing hems into your new garment somehow, since years of washing and wearing creates a permanent and very visible line of wear into the fabric, and a fold that will never ever iron out … thus removing length from that top area (that will just be disappearing into the joining seam anyway) is definitely the way to go here.

Better, yes?
pinterestmail

Burnt orange skirt

I’ve seen a couple of other little orange skirts just like this recently, namely Gail’s and Yoshimi’s, so you will have to take my word for it that I bought this fabric a couple of months ago and have had this skirt at the nearly finished stage for a few weeks!  So, I claim immunity from copy-itis, but instead invite you to marvel for a minute at the like-mindedness of great minds…
Now actually there is an element of copy-itis going on.  I saw a skirt in the window of Cue with an interesting waistband, pleat and pocket feature.  I am always on the lookout for interesting ways to incorporate pockets into straight skirts, a silhouette that I think suits me but is often difficult to put a pocket in successfully.  I thought the Cue team had done a marvellous job.  All Aussies will know how Cue along with its sister store Veronika Maine are veritable goldmines for interesting little features a seamstress can think about incorporating into her garments.  I just love browsing these stores, and if I wasn’t making my own clothes I would be wearing their designs.  Along with my all-time favourite Metalicus, of course…  Anyhoo, I digress; so, I went home inspired, then it was a week or so before the next visit to the fabric store, then it was another week or so before I got around to constructing my skirt.  So I was doing it from memory and it turns out mine is quite different from the Cue one, which on my next pass by the store window I noticed had two pleats, both situated between the front middle panel and the pocket.  Mine ended up having but one pleat, situated underneath the front middle panel.  Oh, OK OK, a fairly miniature difference that only a nit-picking detail-maniac like me would notice…  but, doesn’t matter the design still works for me…
I adapted one of the Vogue 8363 variations, modifying by redrafting the front waistband piece to have a lower curve (I wanted this shape as opposed to a flat straight waistband) and drafted a middle front panel and re-drafted the skirt front piece accordingly to accommodate these two changes.  The two front darts of the pattern were partly integrated into the middle front panel, and partly transformed into the small pleat.  The beauty of this pleat is that it enables some “hand-room” for when one is using the slanted front pockets.  Voila!  I’m extremely pleased with how it turned out.  I can shove my hands down deep into the pockets and the discreet little pleat enables one to do this comfortably, while still maintaining a nice little straight skirt silhouette.

The only thing about the design I’m not completely happy with is the middle front panel.  On the Cue skirt it looked really good, on mine I think it looks less so, and wish I had kept it as part of the front skirt piece.  I think it is do do with my fabric choice, the flatness of the fabric means the less seaming, the better it looks.  The Cue skirt was made of a quite textured fabric with a very busy multicoloured weave, which looked very good with the separate panel pieces… if I do this again I will try to remember this…
When I bought the burnt orange, there was no matching lining fabric nor zip to be found, so instead I went wild and bought a contrasting maroon lining and zip, and also for the cotton to make my HongKong seaming tape and hemming tape.  You can see I went happily all out on the HongKong seaming there…  this silk hessian is one of my favourite fabrics but frays like a madman…  so raw edges are a big no no.  I covered a button with some of the fabric, and also made a bound buttonhole, but took absolutely no close-ups of this.  For a reason…  After viewing Sherry’s superb bound buttonholes I’ve decided mine is nought but a travesty of a bound buttonhole.  I salvage my pride by saying humbly yet again that this fabric frays like a monster… I did my best but it is sadly far far from a perfect thing.

Details:
Skirt; my own adaptions of Vogue 8363, burnt orange silk hessian, my review of this pattern here
Top; the bodice part only of Burdastyle magazine 08/2009, dress 128, charcoal wool mix, details here
Scarf; my own design, details and my pattern here
Tights; Kolotex
Shoes; Django and Juliette, from Zomp shoes

pinterestmail

Pattern Magic linked-front dress

A new dress…!
This is drafted from the Japanese pattern book Pattern Magic, by Tomoko Nakamichi.  Since mine is the Japanese version I don’t know its translated name, but it is the design on p49.  There is a bit of a story behind this thing…
confession time:
This is the second version of this dress I have made; the first was an unmitigated disaster.  I was planning a three quarter length version using white chiffon (polyester-y stuff, so it was cheap, thank heavens) which I decided needed underlining as well as lining, because the seams would have shown through the fabric otherwise.  I won’t bore you with the whole saga, just cut straight to the climax which was me heaving the whole thing in the bin during a bad case of sewing-rage one night.  I don’t want to talk about it because it is still a painful memory… and if you’re wondering… (wails) yeees! I do regret chucking it out!  After only a short bit of mulling it over, I realised how I could have solved the problem I was having and now wish I had not been so hasty, but as fate would have it the bin was picked up by the rubbish truck the very next morning while I was still in the “never want to even look at it again” mood.  Oh well.  C’est la vie.  I suspect I would have had plenty more issues with it to be honest, so maybe all was for the best…
This version is completely different.  I’ve had this teal silk jersey in my stash from about eighteen months ago, and I envisioned a quick, stretchy, Metalicus-like, pull-over dress with a full-ish skirt; no zips, no underling, no lining required.  Far less fuss!
I made a petticoat to go underneath, why?  Partly because the design has an extremely low neckline.  And also; well the dress in indoor or calm weather circumstances looks like the above, but in a stiff breeze like today…

Lol!  And just so you know, stiff breezes are veeeerry common where I live, and especially during spring.  Yaas, just one of the reasons why hairstyles here are very much au naturel…  The design is completely open at the front, and whilst it would be a simple matter to sew up the front skirt seam I decided I like the idea of the contrasting colour to be a strong part of the final look.
Now, I’ve mentioned this before, but it is worth saying again; Pattern Magic is not for the fainthearted who need step-by-step instructions.  You need to have pretty solid sewing knowledge on how to construct and finish a garment before you have a go at these designs.  The designs as they are in the book give no clue about things like facings, closures, tips on construction, even details like sleeves (to sleeve or not to sleeve, that is the question) are often left up to the individual seamstress/seamster.  So for the sake of clarity I will give some details below as to how I finished off this garment… so you can skip this if you want.

Details:
Dress; drafted from Pattern Magic by Tomoko Nakamichi, teal silk jersey
Petticoat; my own design, of yellow swimwear fabric (polyester? spandex?)
Sandals; Pedro Miralles, from Soletta shoes

I drafted and cut the front neckline edge facings as part of the fronts, and folded them to the inside of the dress so the shoulder edges sat wrong sides together…
I also drafted and cut the back bodice partly on a horizontal fold, with the fold at the back neckline… so the facing of the back bodice is part of the back bodice also.  It finishes about halfway down the back bodice.  This saved having to finish off the back neckline, and also allowed me to enclose the front shoulder edges within the back shoulder edges in a nice clean close-in seam… see, the neckline has no seaming showing!  (self high five)

I felt pretty chuffed when this bit worked out OK.
I drafted a sleeve using a Tshirt I already had; that green internal stitching you see above is the sleeve set-in.  The only topstitching on this garment are the sleeve hems.  These were simply twice folding in 1cm and topstitching with a zig-zag stitch.  The bobbin thread is black while the topstitching thread is blue; and yah, I’m okay with that.

The petticoat is self-drafted, based partly on Tshirts I already had, as well as pinning and fitting to myself.  The bright yellow stretch fabric I used for the petticoat is actually swimwear fabric; so theoretically, on a hot day I can just flop in the pool in it!   It is a lot thicker than the turquoise silk jersey.  After experimenting with a few finishings for the neckline and armhole edges, I eventually settled for serging the edges to stabilise and then folding to the inside once and topstitching slowly with a wide zig-zag stitch, being careful not to stretch the fabric at all.  All the other seams are overlocked.
The lower hems on both dress and petticoat are not finished because these fabrics will not unravel or fray.  I just cut the fabric as straight and as smoothly as possible.

pinterestmail

Crocheted Granny-squares skirt

I crocheted a skirt!  Yup, a whole skirt…. almost can’t believe it myself, since crochet is not my forte.
Now I was initially inspired by Jo Sharp’s Hexagon skirt, but have discovered this new-wave trend was set by Australian designers Romance was Born in their whimsical Spring/Summer 2009 collection, itself inspired by the crocheted granny-square rugs of the 1960’s and 1970’s.
I really love it! it’s so warm and cosy, and I love the unexpected jolt of seeing so-unhip-it’s-actually-kinda-hip granny-squares in a wearable item.  I think it is fun and funky; when I first posted my plans for this skirt I did get a comment that “these are everywhere right now” but I haven’t seen a single one out and about around where I live, so I guess the trend hasn’t caught on in Perth yet.  I feel happily unique so far.
Viva les granny-square!


Details:
Skirt; crocheted to my own design using Jo Sharp yarns, my pattern below
Top; Sexy Woman, found second hand
Tights; Voodoo
Shoes; Misano from Labels boutique

(at left, Jo Sharp’s Hexagon skirt; at right from Romance was Born Spring/Summer 2009)

I wrote down the pattern I used to make my own skirt if anyone is interested in making one too.  There are multiple small variations on the crocheted granny-square.  I trialled several different variations before settling on this one, but a granny-square is a granny-square is a granny-square really…

Crocheted Granny-Squares Skirt:

6 balls of coloured 8ply yarn
I used Jo Sharp  Classic DK Wool; 3 “greenish” shades (Glade, Lichen and Orchard), and 3 “reddish” shades (Brocade, Scarlet and Nasturtium)
3 balls of Black 8ply yarn
3.5mm crochet hook  *
3.5mm round needle  *
(*warning, I am an extremely loose knitter and crocheter, and a “normal” person would probably use a needle/hook 3 sizes bigger…)

Abbreviations:
ch; chain
tr; treble stitch (US double)
sl st; slip stitch

Using colour 1, ch 6, join with a slip stitch in the 1st chain to make a ring.
ch3, tr x2 into ring, (ch 3, tr x3 into ring) 3 times; ch 3.  Sl st into top of 3 ch at beginning, end wool.
Join 2nd colour into corner:
ch3, tr x2, ch 2, tr x3; (ch 2, tr x3 into next corner, ch2 tr x3 into same corner) 3 times,  ch 2, sl st into top of first ch 3 in this colour, end wool.
Using black, join into corner:
ch 3, tr x2 into corner , ch 2, tr x3 into same corner, ch 2; ( tr x3 into side, ch2, tr x3, ch 2, tr x 3 into next corner, ch 2, tr x3 into same corner, ch2) 3 times; ch 2, tr x3 into next side, ch 2, join with a sl st into top of first black ch 3, end wool.

Voila! you have a little granny square!

How many you need to make depends on the size of your granny-squares, your own hip measurement and how long you want your skirt to be; this is an individual requirement.
I made 78, having one “green” and one “red” shade in each one, and alternating to have equal-ish numbers of each variation. Then overstitched them together to make a tube of 6 x 13 squares.
Then using a 3.5mm round needle, I picked up 92 stitches around the top (as a guide, 7 in each square and then 1 extra in the last),
K 15 rows in the round in black.
Row 16; (K4, K 2 tog) rep until you get to the last 2 st, K2  (78 st)
K 15 rows.
Cast off, veeeeery loosely (otherwise you won’t be able to fit the skirt over your hips!)
Take a piece of 2mm black elastic cut to fit your waist, and weave it in and out through the stitches in the second to top row, then machine zig-zag the ends together firmly.

The beauty of this is that it has no front or back, so there is less chance of developing a “seat” by sitting in the skirt the same way every time.  It can just be swivelled around any which way.  And since it is all wool and crocheted, it can be reshaped after laundering, if necessary.

SaveSave

SaveSave

pinterestmail

Scrumpled leggings

Ta da!  Scrumpled leggings!  You like?  I do!
And I think they fit in very nicely with my current seasonal aim of dressing to suit the natural colours and textures of my environment…
I know this is not a new look.  In fact I had a vague sense of deja vu when I first popped on my new scrumpled leggings… and went off to check, sure enough, here are some Comme des Garcons leggings from 2005 that I can remember being quite interested in when I first spied them in a Vogue magazine.  Yup six years ago… back then I wasn’t into making my own leggings, thinking they would be way too hard.  Little did I realise then how easy leggings are to make!  Also this kind of raaather avant garde stuff never ever ever appeared in a store here so I never bought some for myself.  Perth is kinda sleepy, you see.  Fashion-wise we are slowly waking up, but Harajuku we are not…
Speaking of, when Cassie and I had our fun day out with Yoshimi and Novita in Tokyo, as we parted ways Yoshimi pointed us in the direction of the Mitsukoshi department store, where we had a fabulous eye-opening hour or so oohing and aahing over fashion the likes of which are almost unknown around here. Unknown that is apart from some very expensive European clothing in certain boutiques…  Anyhoo Cassie found a pair of scrumpled leggings like these, and we thought they were so fun and different we bought some.  You’re wondering why I didn’t buy any for myself? well the leggings situation in Tokyo is the same as the shoes situation, if you are taller than 5’6 or have larger than a size 38 shoe, then forget about it
But scrumpled leggings had entered my radar once more…
And recently shams posted about a pair of leggings than she described as “pooled” because they ended up so long, and she liked them that way so left them long.  I liked them that way too.. and thus fully re-awakened my latent desire for a pair of scrumpled leggings…
Super easy.
I used my own pattern that I drafted to fit me, but cut the legs pieces to have about an extra 20cm length from the ankle down, and in a less tapered shape than I had drafted for a tight legging, probably by about 1-2cm wider at the ankle point.  Sorry, inexact measurements I know,the truth is I was kinda winging it…
After sewing up the inner leg seams (simply whizzed on the serger in a matter of seconds!) I cut two roughly 27cm lengths of 6mm elastic.  These were zig-zagged to the inside of the inner leg seam from just below my knee level down to 2cm from the bottom.  Then I just hemmed the lower edge as normal by folding up the lower leg edge by 1cm twice to sit over the elastic and zig-zagged the hem.

(Comme des Garcons leggings at right, image from Vogue Australia Sept 2005, photo by Willy Vanderperre)

Details:
Leggings; my own design, beige knit stuff, from my own tutorial of making your own custom fit leggings here
Top; Ezibuy
Dress; drafted from “Pattern Magic” by Tomoko Nakamichi, of charcoal wool mix, details here
Shoes; Francesco Morichetti, from Zomp shoes

pinterestmail

Easiest knitted handwarmers, ever

So, I mentioned that I had plenty of socks already, but still some sock yarn kicking around… so I turned to another extremity on my person that really feels the cold; my hands.  I am definitely a cold-hand person… and can be relied on to lay a soothingly cool hand on the brow of a feverish sick person, anywhere, anytime.  Nice for any sick people in my life, but nonetheless I am forever engaging in some futile attempt to lift the temperature of my hands above that of a corpse.  This takes form in various procedures; whether it be slowly rotating my hands over the toaster in the morning, making myself a gazillion cups of tea not necessarily because I am thirsty but so that I have a hot china mug to clutch for a short while (warning; this particular hand-warming method greatly increases the required number of visits to the ladies room), walking about with my hands stuck weirdly in my armpits, or sitting on my hands, which by the way is good for warmth but not for maintaining any actual feeling in the fingers.
And yes there are gloves, some pairs of which I do have and are wonderful for warming the ol’ handies, but not when one is doing delicate stuff such as knitting, or working on a computer keyboard and one’s gloved fingers keep typing in such gems such as: “hekoo there., anmd how arte yourd tofdsy?”
Anyhoo, I brilliantly detected this gap in my wardrobe, and set to filling it…

Here is my pattern for these super-easy handwarmers, suitable for knitters of all levels of ability.  It really doesn’t get any easier than these things…

Yarn; 4 ply, I used Morris Empire Superwash Merino 4 ply
Quantity; 1-2 balls…  exactly how much yarn depends on how far up your arm you want your handwarmers to extend.
Set of 2mm double ended needles
Tension; 28 stitches and 36 rows to a 10x10cm square of stocking stitch

Cast on 60 stitches, distribute so there are 20 stitches over three needles.
Bringing the last stitch on the third needle round to join onto the first stitch on the first needle to start knitting in the round, commence in K2, P2.  Leave the long tail from your first slip stitch hanging loose without weaving in, this marks the starting point of your knitting and enables you to count rows more easily.
Continue in K2 P2 for 8 rows.
From the 9th row, K in every stitch.
Continue for 20 rows.
Row 29; turn and P 60 stitches.  Note for this stocking stitch section, always slip the first stitch purlwise on a purl row, and knitwise on a knit row)
Row 30; turn and K 60 stitches
Repeat last two rows until there are 20 rows of stocking stitch.
Row 50; join the work so you are knitting in the round once more, and continue knitting in each stitch until the work measures the desired length (in this example, 31cm from the beginning)
K2, P2; for the next 8 rows.
Cast off in K stitch loosely, and weave in the loose ends.

Voila, one handwarmer!  Now just repeat for the second one… if you want to get fancy it is pretty easy to incorporate a cable design or something down the backs of each hand, but this is the basic unadorned model to start with.  This is a super easy project that doesn’t require much thought at all, so is perfect for while your family is watching TV or something and you want something mindless to do… and your toasty warm hands will thank you in the winter!

Details:
Handwarmers; my own design, knitted in Morris 4 ply merino, in Imperial Blue (col 424)
Top and tights; Metalicus
Skirt; Vogue 7303 in charcoal suiting, dyed blue by me here
Scarf; a gift
Boots; Francesco Morichetti, from Zomp shoes

pinterestmail

A leopard print daughter…

We bought enough of this gorgeous leopard print stretchy stuff in lovely caramels and warm golden brown shades to make this little Cat-girl set; Cassie made the Tshirt herself, drafting her own design based on a Tshirt she already has and that fits her well, and I made the leopard print leggings using my own pattern.
The side and armhole seams of the Tshirt are overlocked, and Cassie hand slip-stitched the lower and sleeve hems, and the neckline down in place.
Theoretically, the leggings were made to my pattern and so fit me too, but I’m doubtful I have the edge factor to pull these off! … they will be living permanently in Cassie’s collection.

Details:
Tshirt; made by Cassie to her own design, print stretch stuff
Leggings; made by me to my own design, leopard print stretch stuff, my tutorial on making your own custom fit leggings here
Denim skirt; Just Jeans
Boots; bought in Japan… tres cool, no?

pinterestmail
Switch to mobile version
↓