Tag Archives: Pattern Review

mocha set

…  for me!
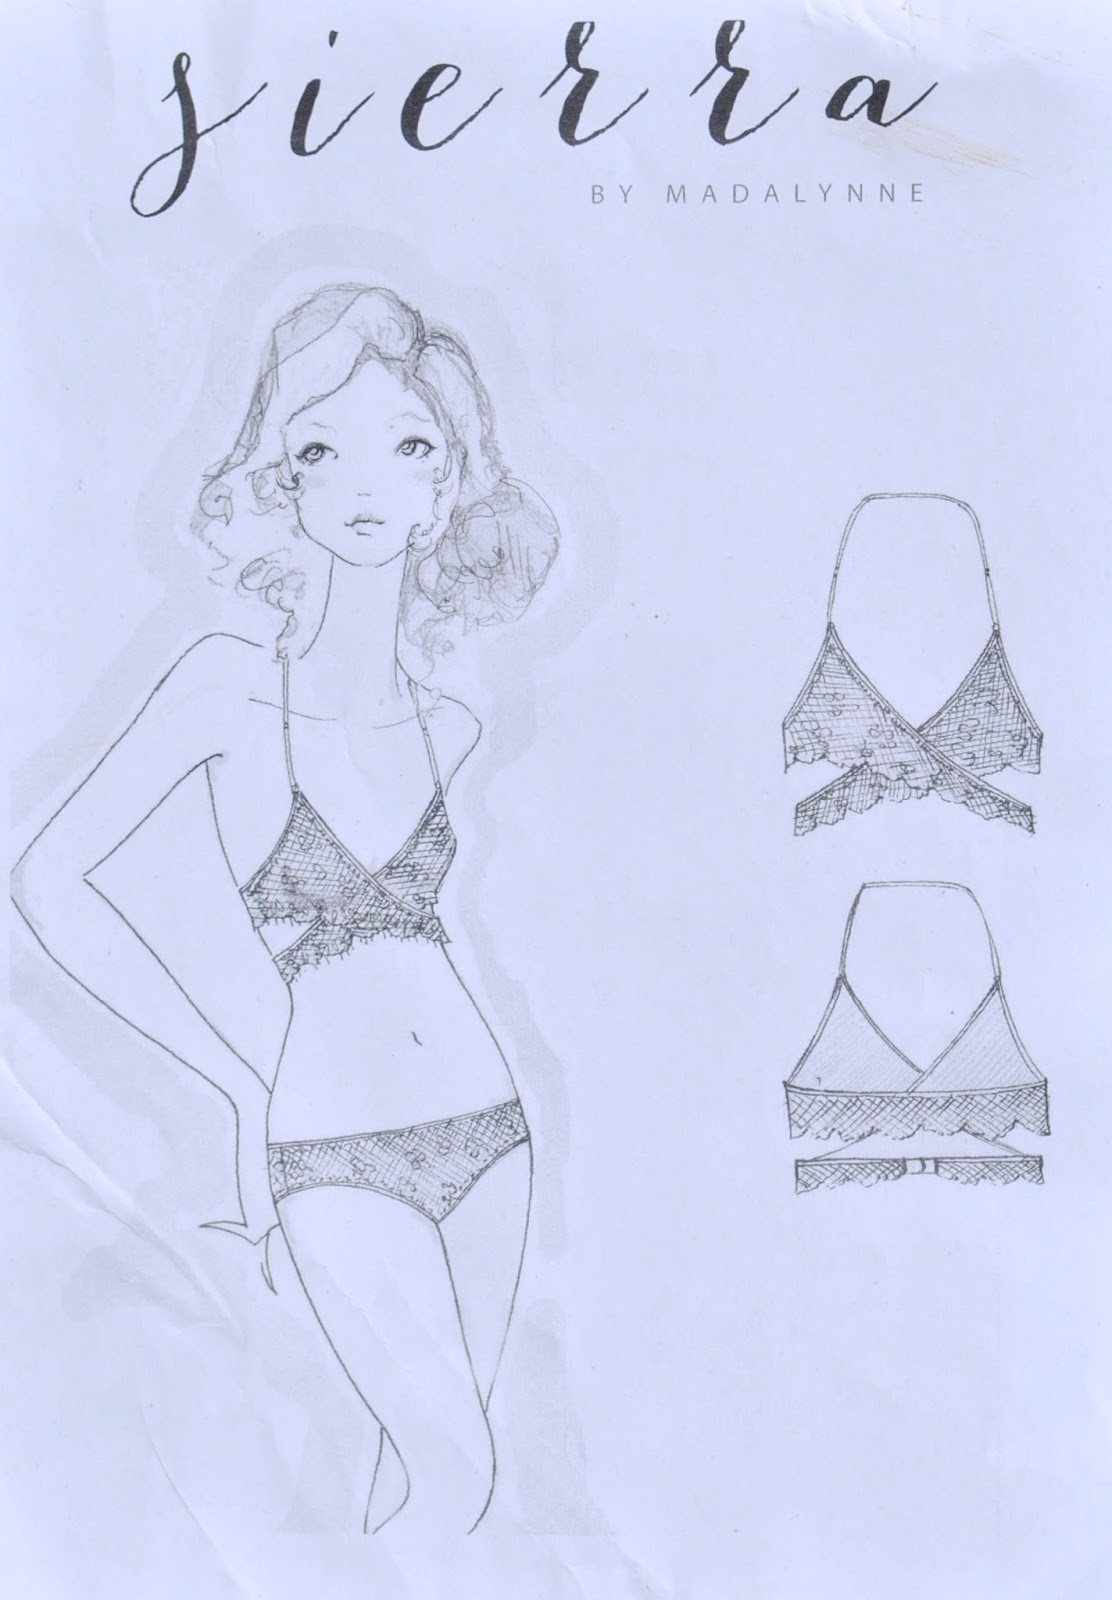
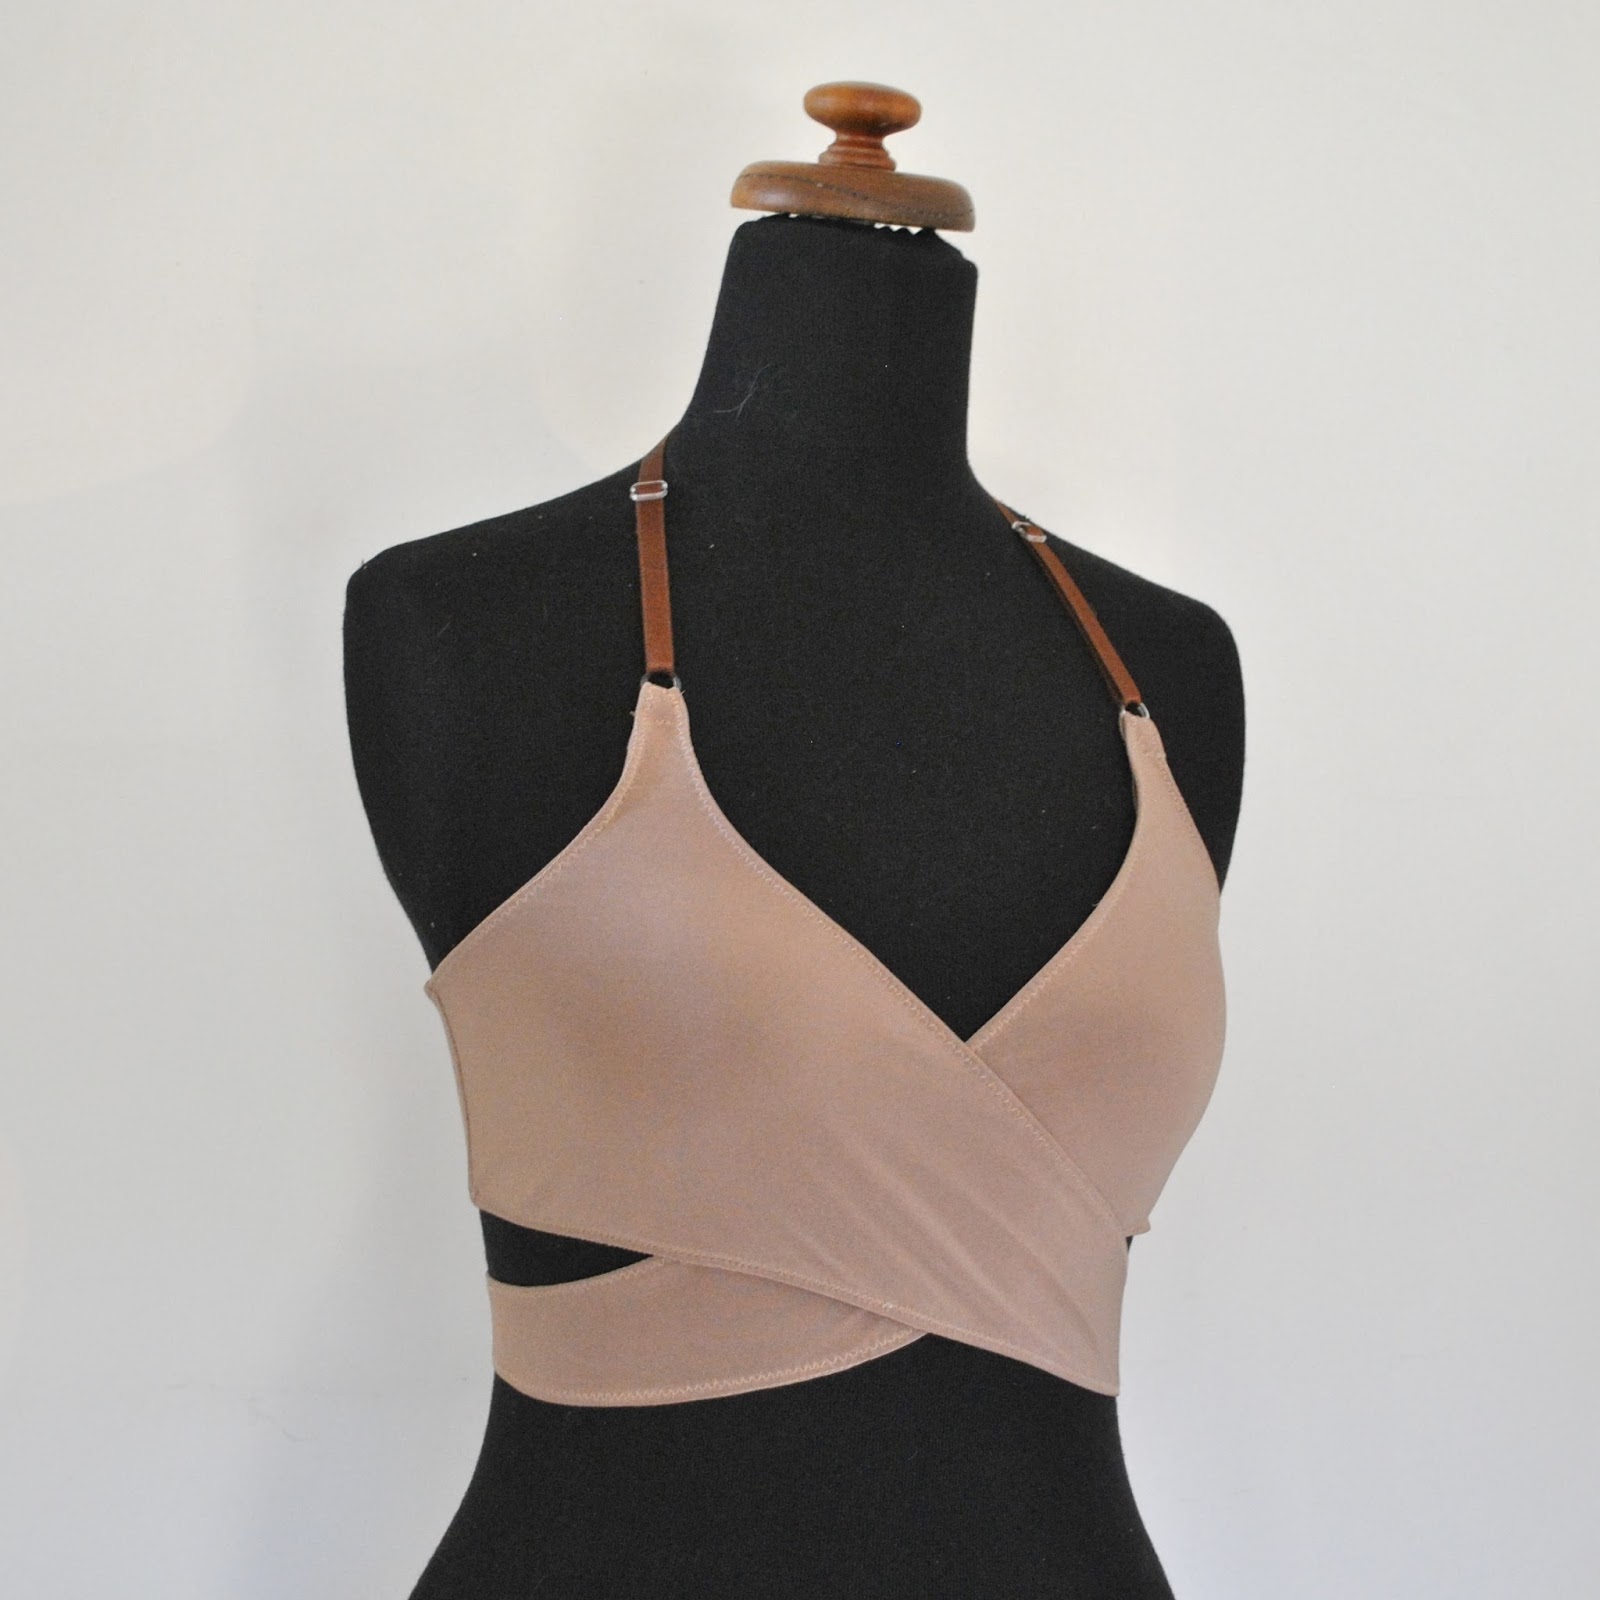
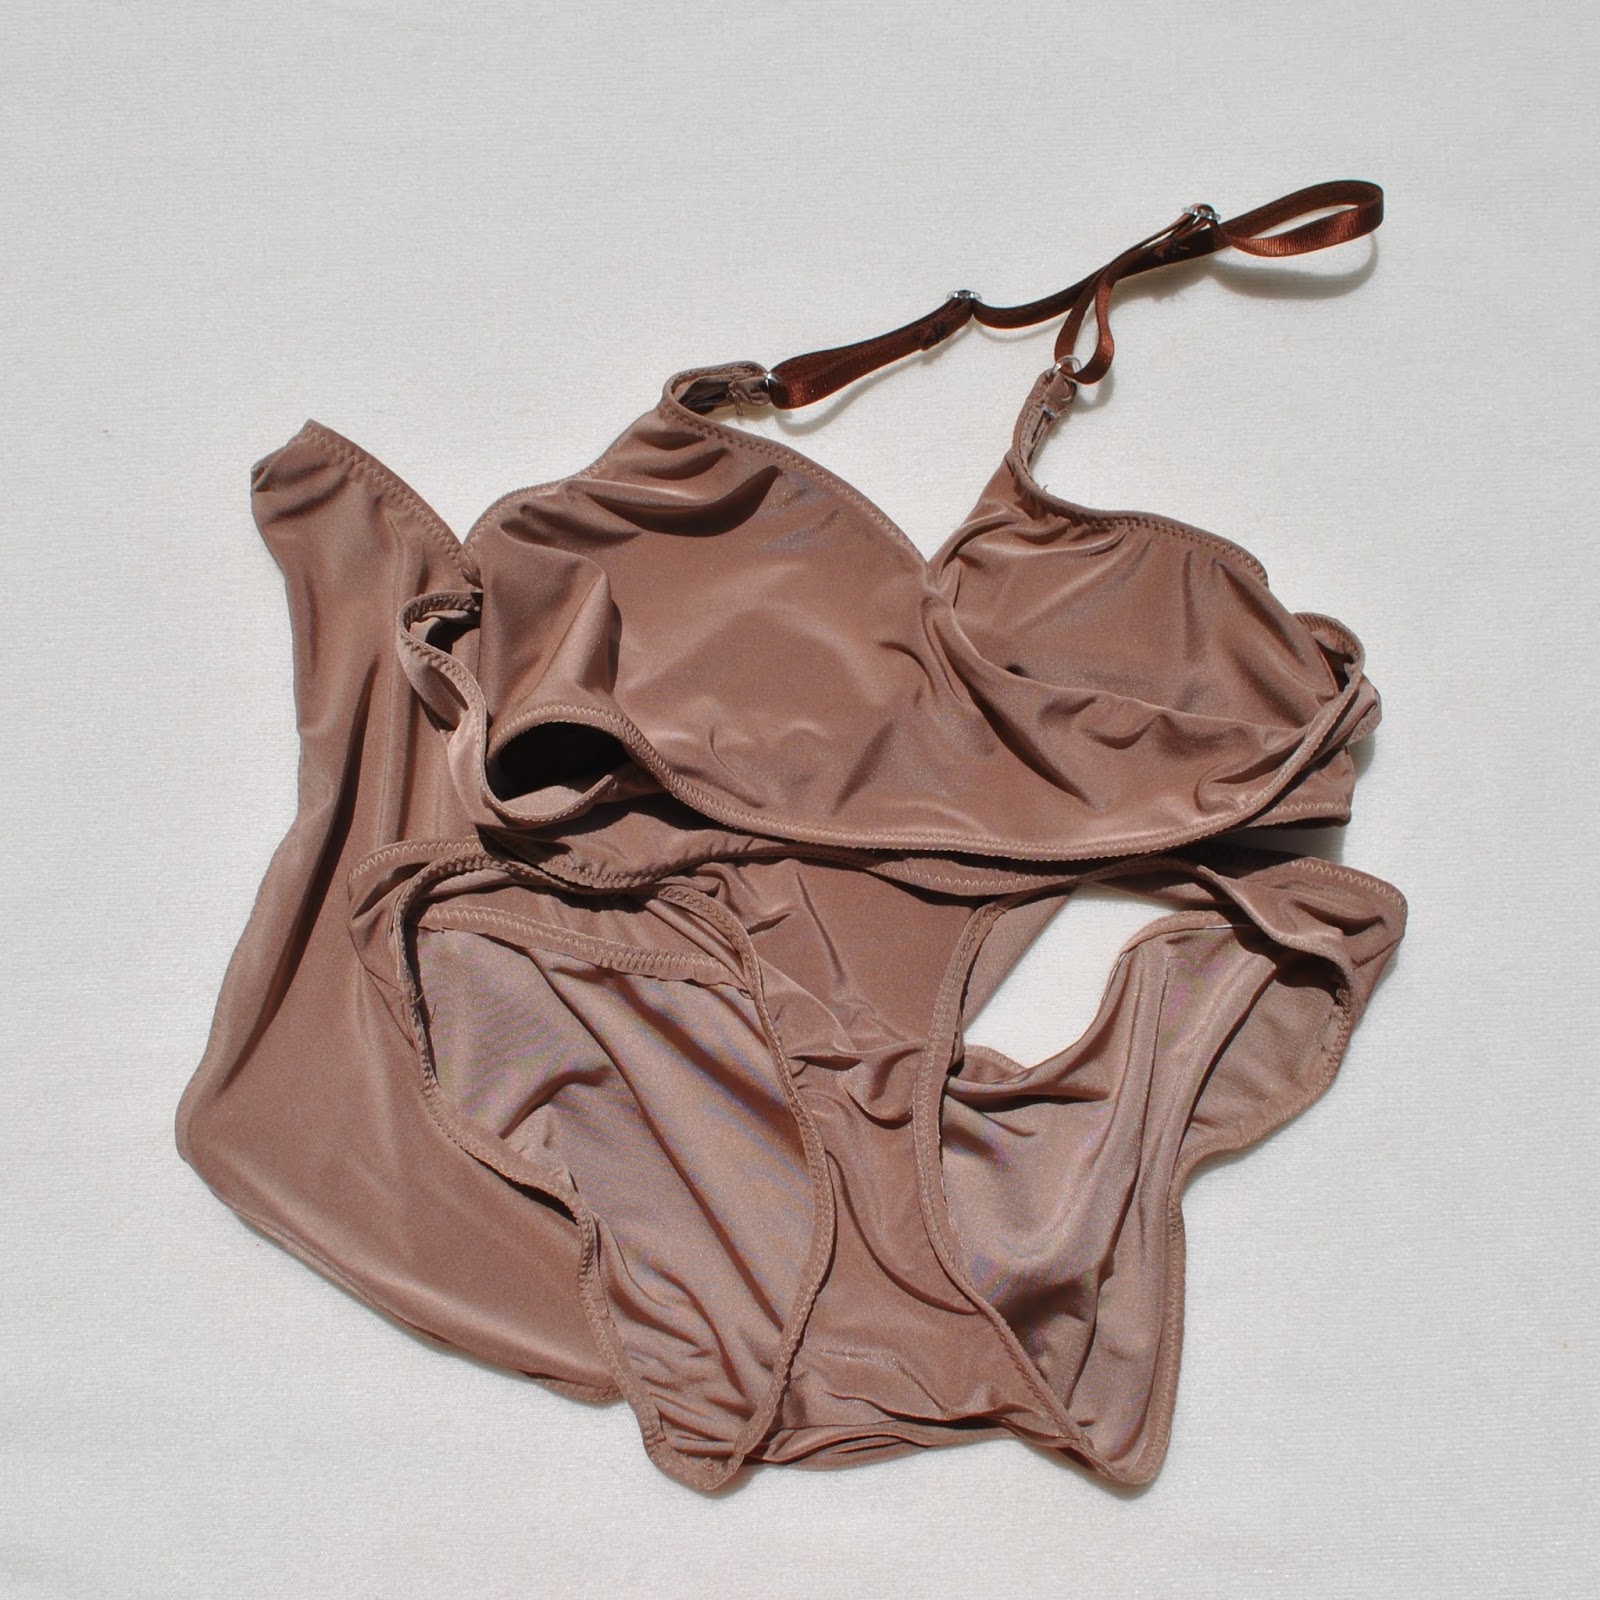
Fabric; slithery, slinky-malinki poly knit from Fabulous Fabrics in a divinely luxuriously glossy mocha shade; all elastic and other findings from Homecraft Textiles.  I wanted to make a Sierra bra for myself too; and while I love lace-y underthingies, this time I went for smooth, sleek and sophisticated, with a grownup vibe more befitting to an ancient old crone such as myself.
Haha, no really, I do have a nice selection of frillies already and just wanted a change of pace  🙂
Features; none.  Letting the fabric glow on its own with absolutely nil embellishment.
LOVE this unadorned look, I mean I adore pretty bits and bobs too but sometimes the simplest and plainest of styles in a sophisticated colour and liquid-y fabric like this feels just as gorgeous!

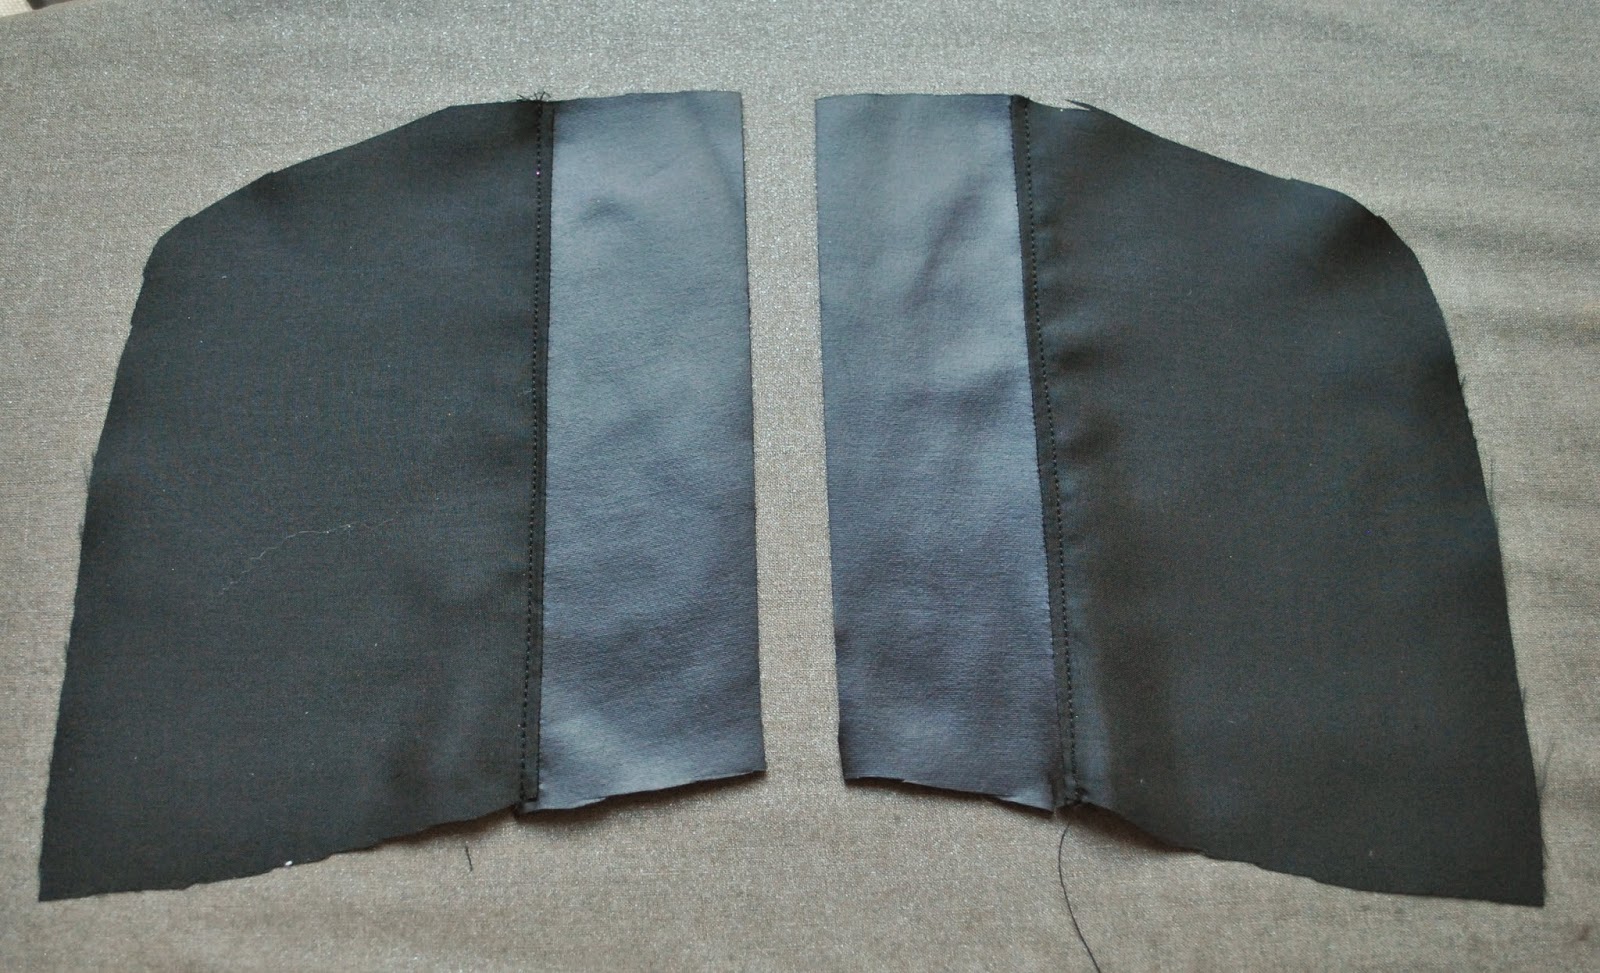
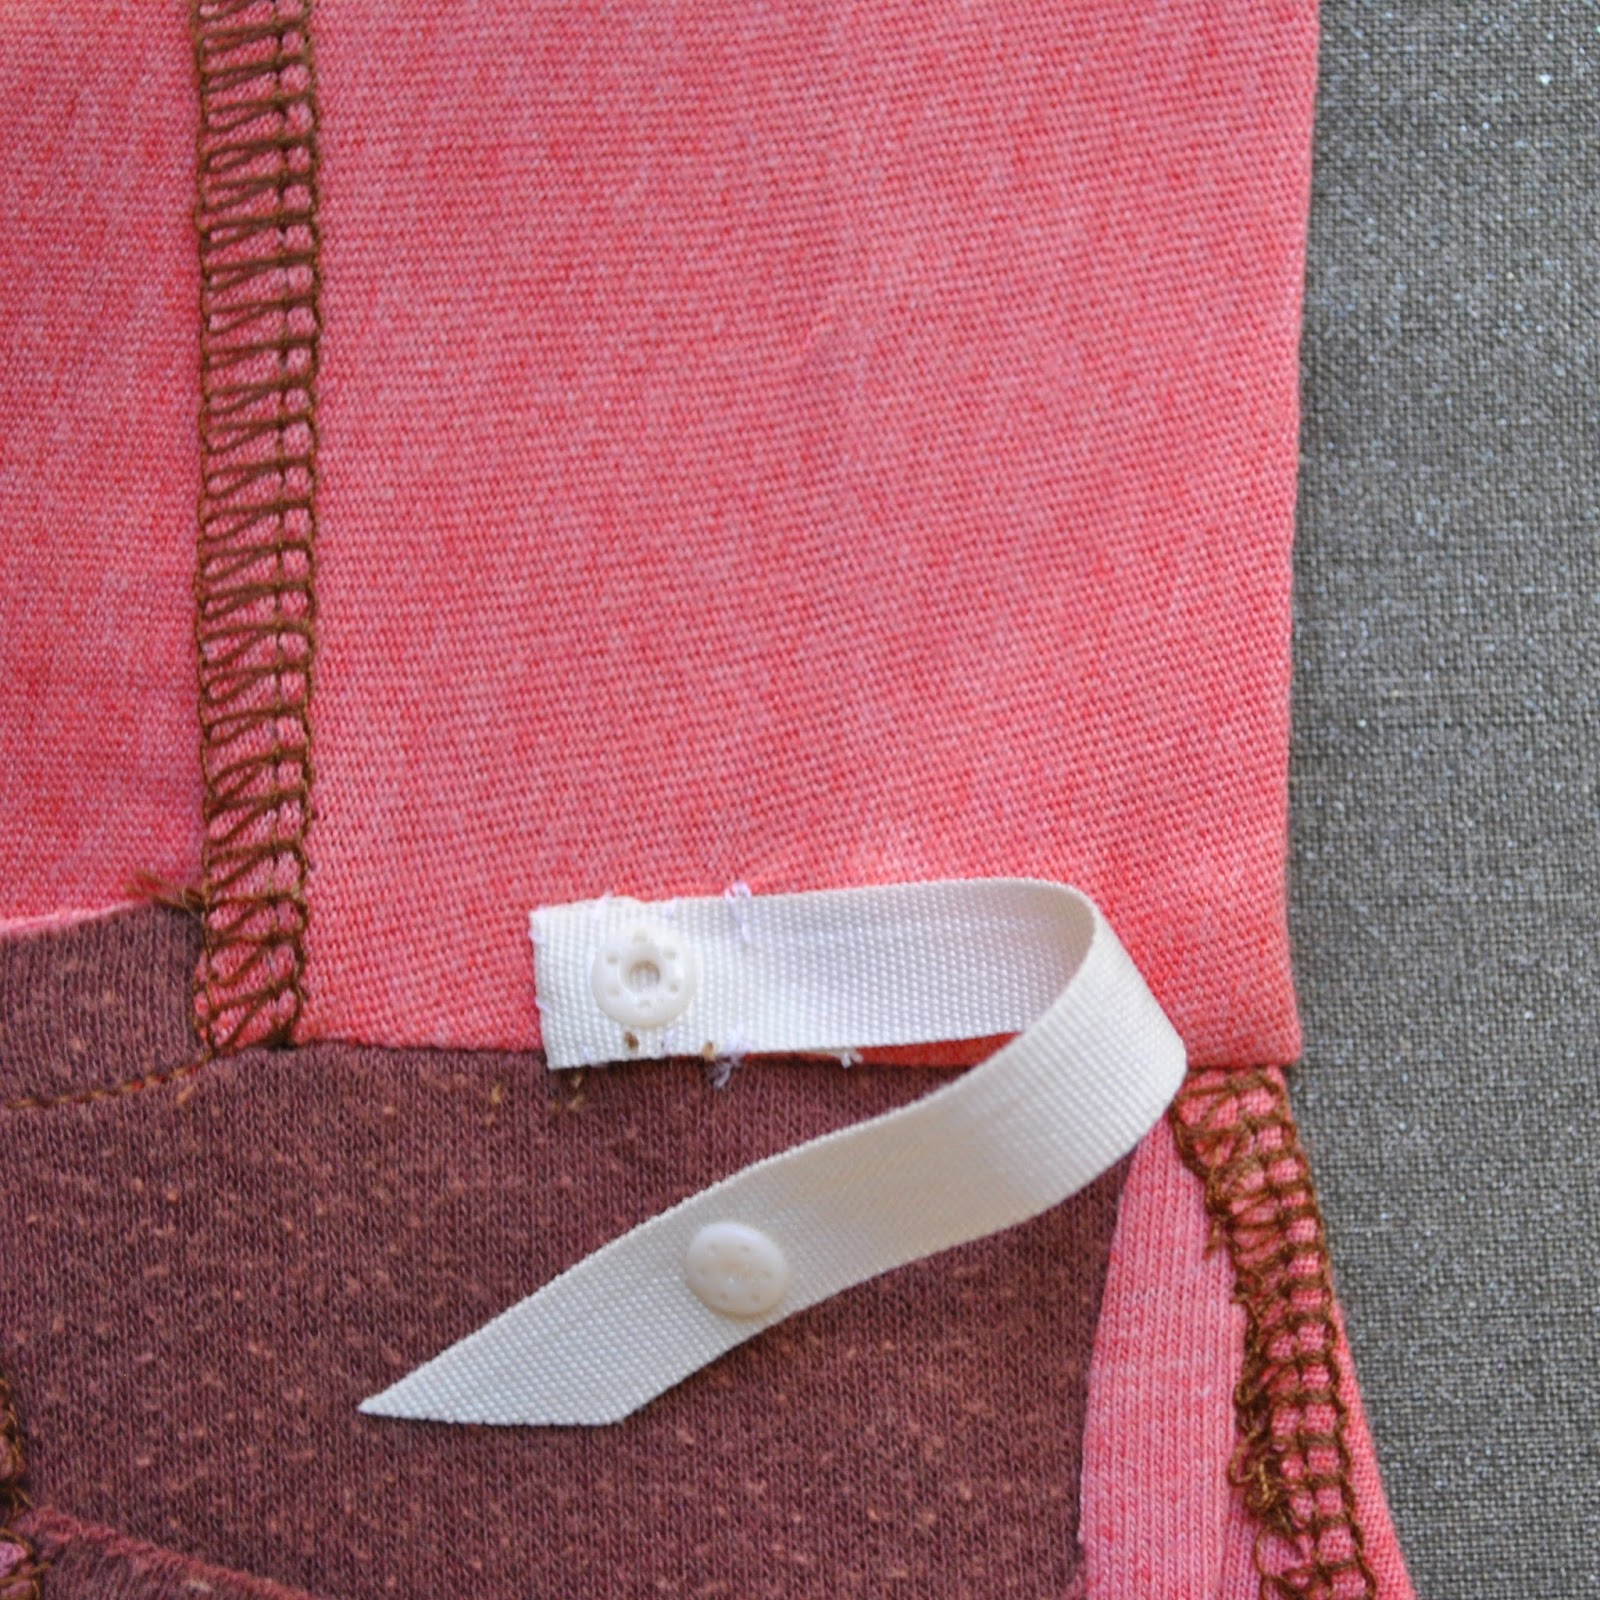
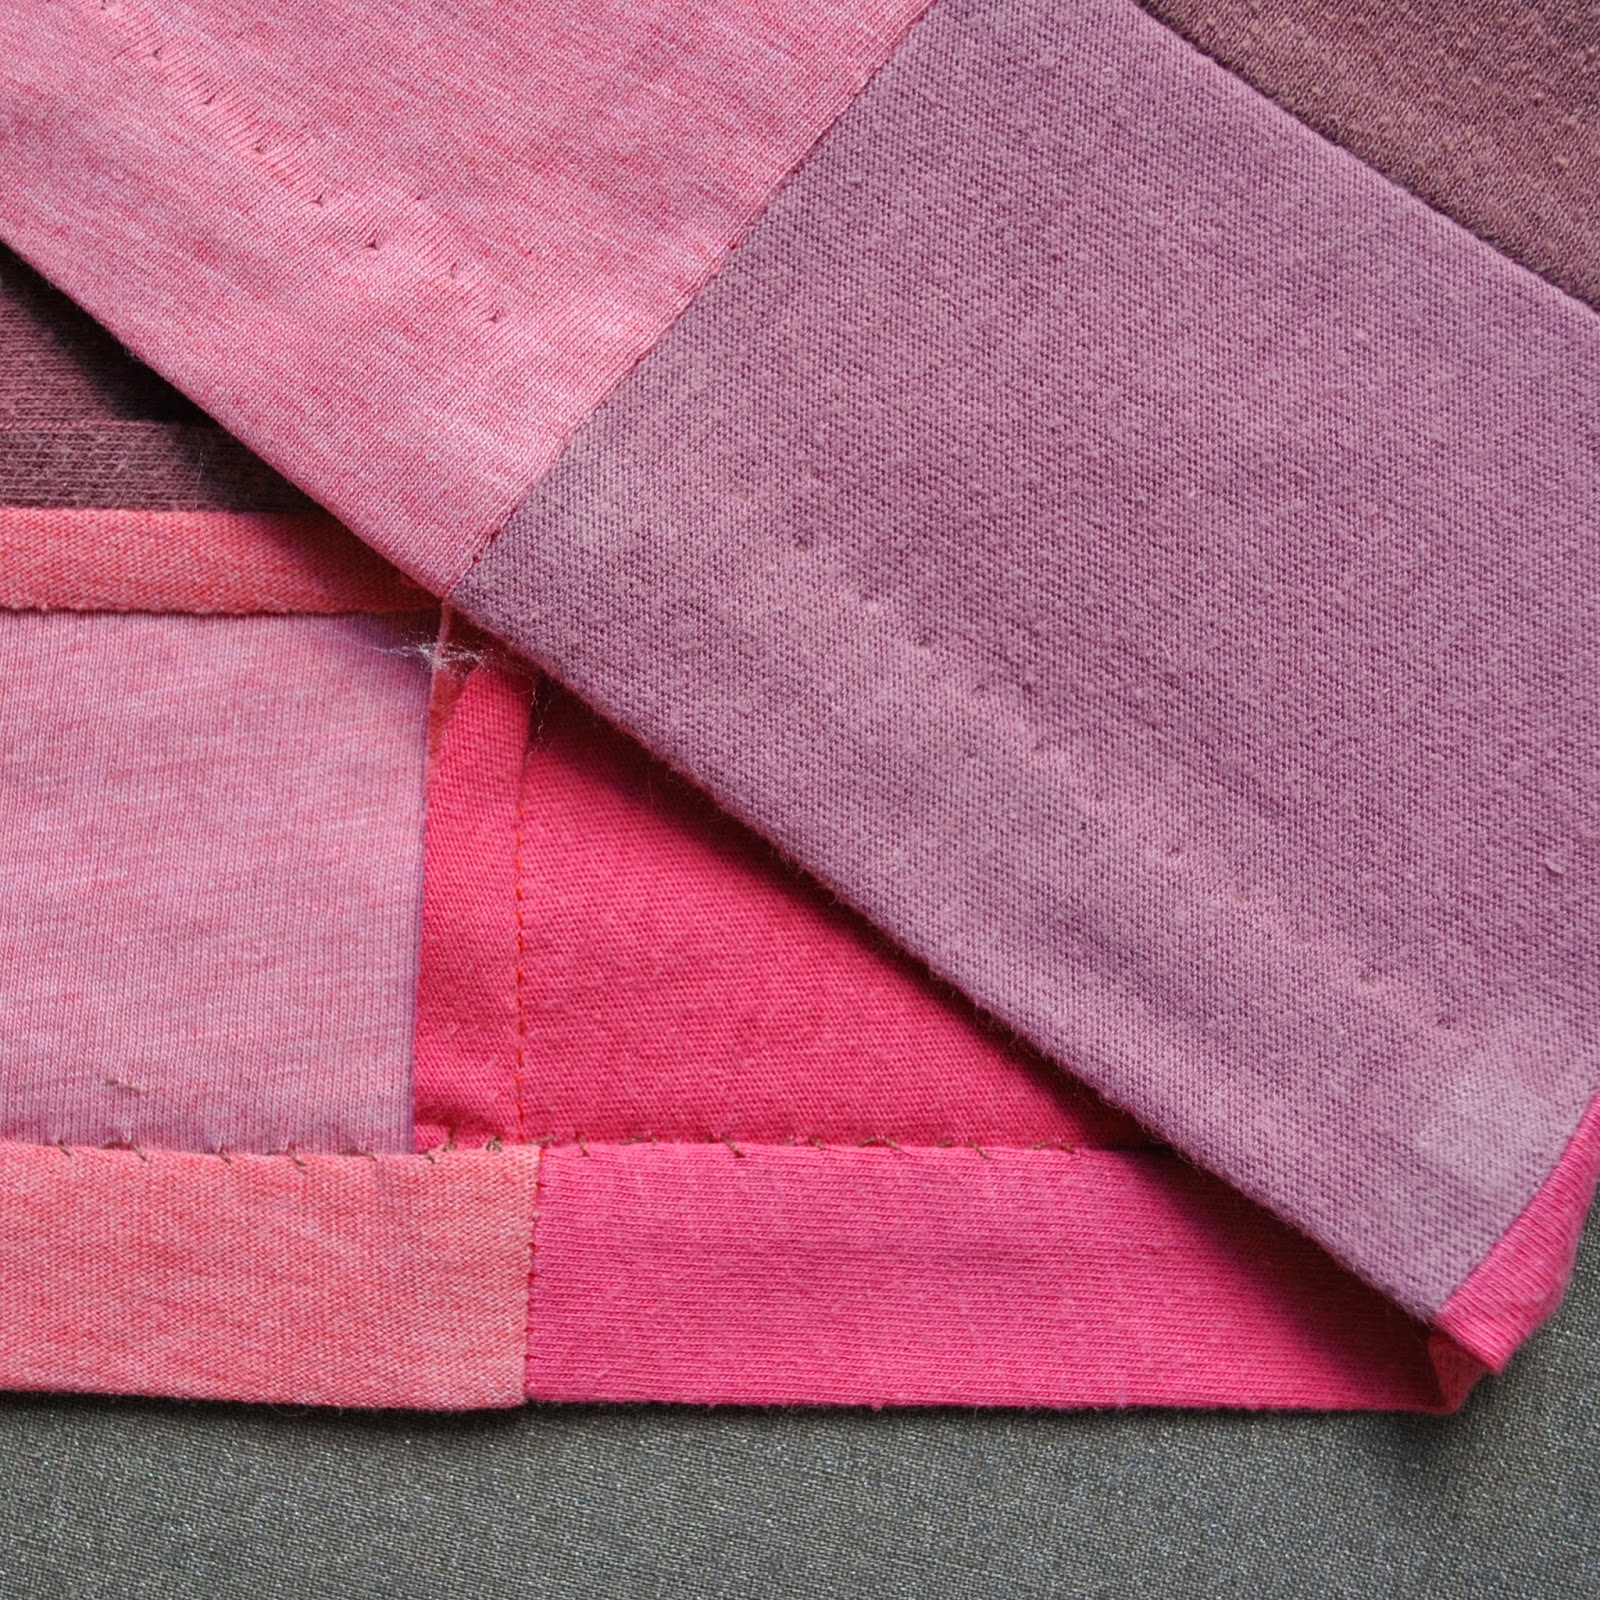
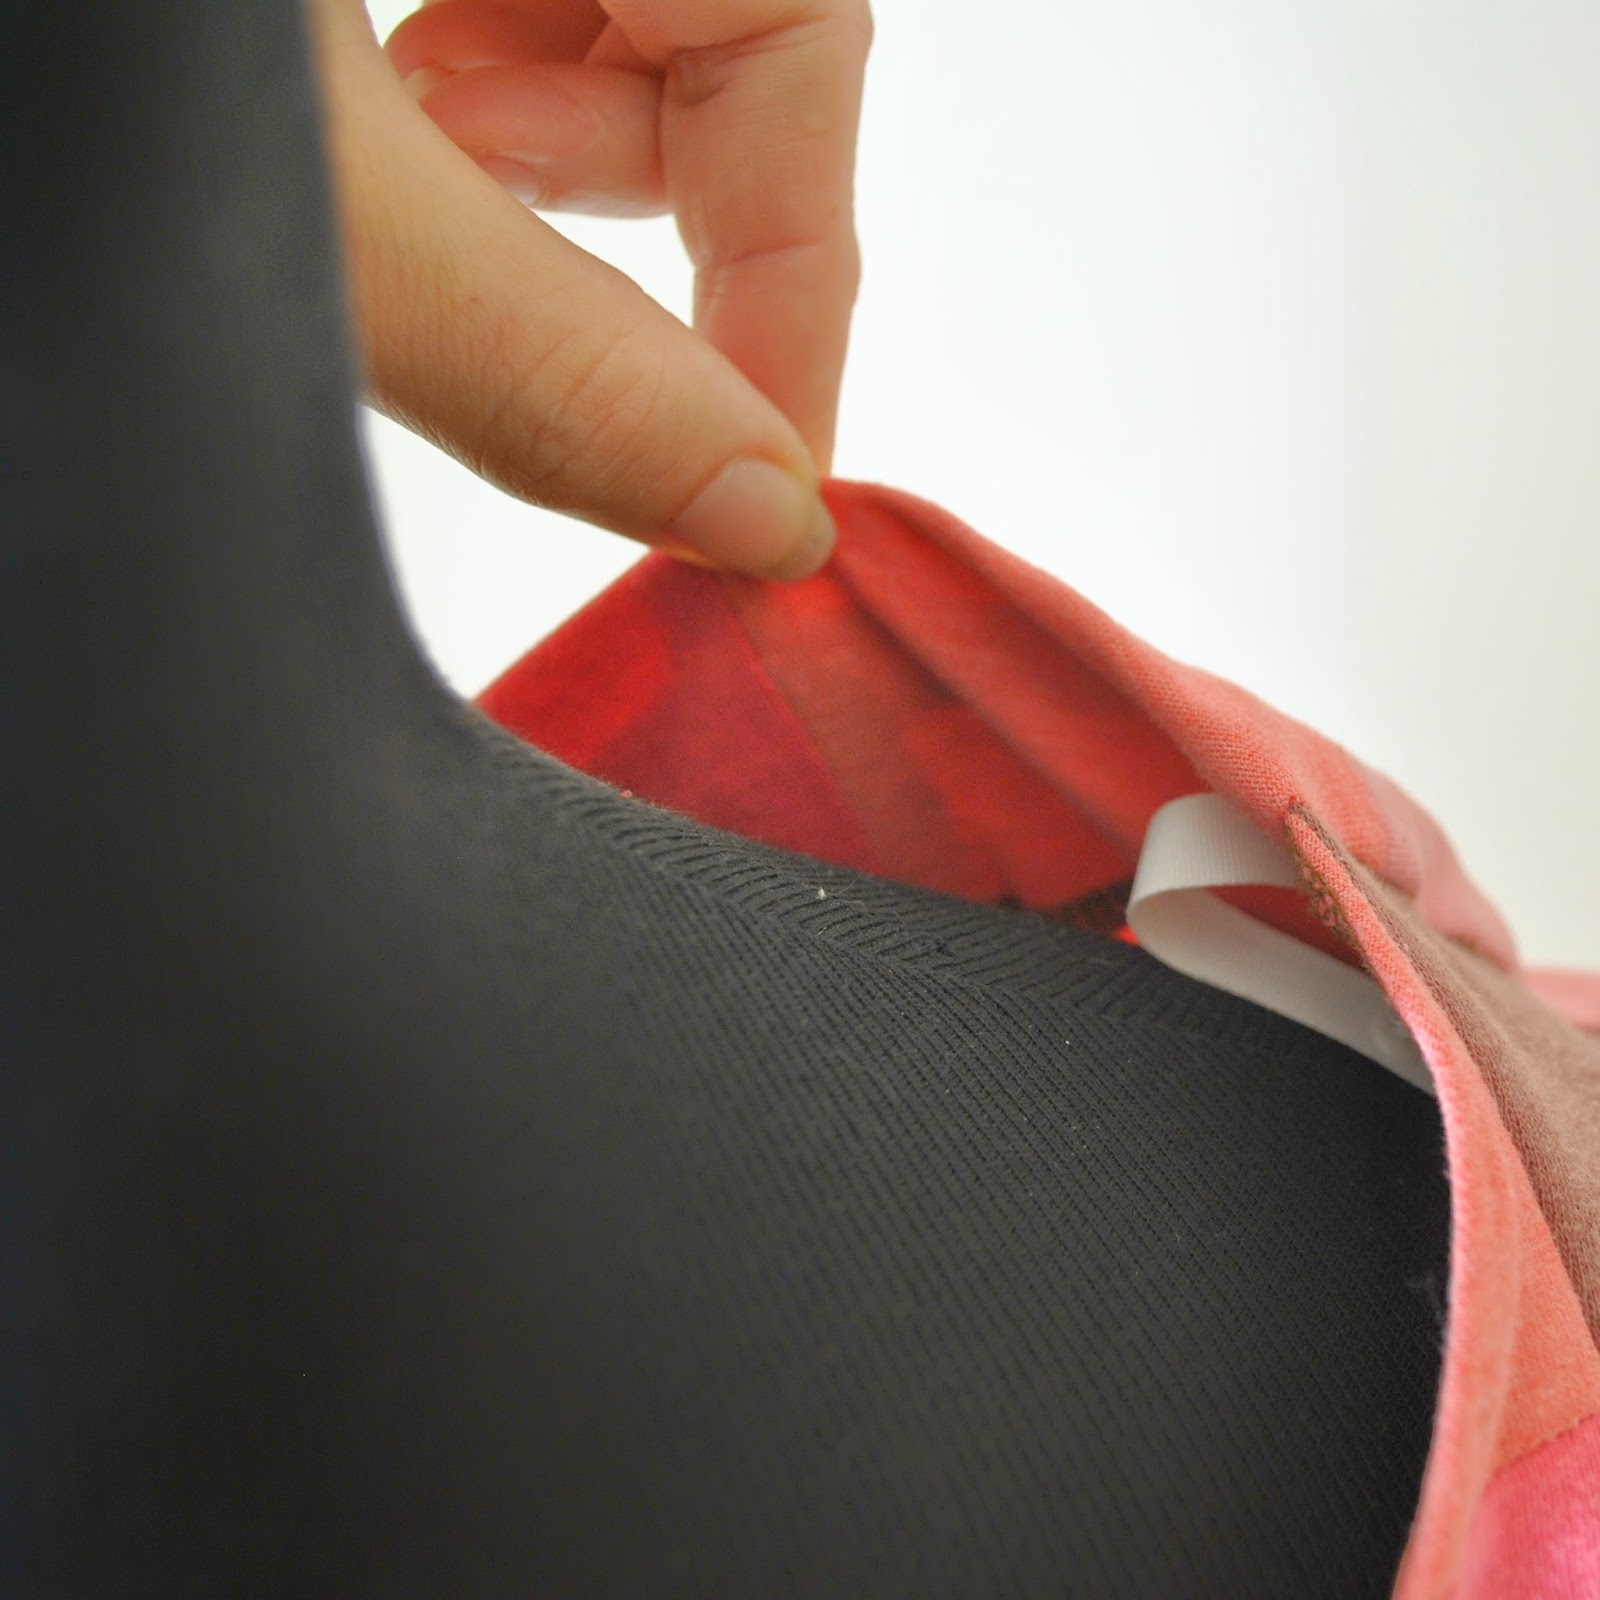
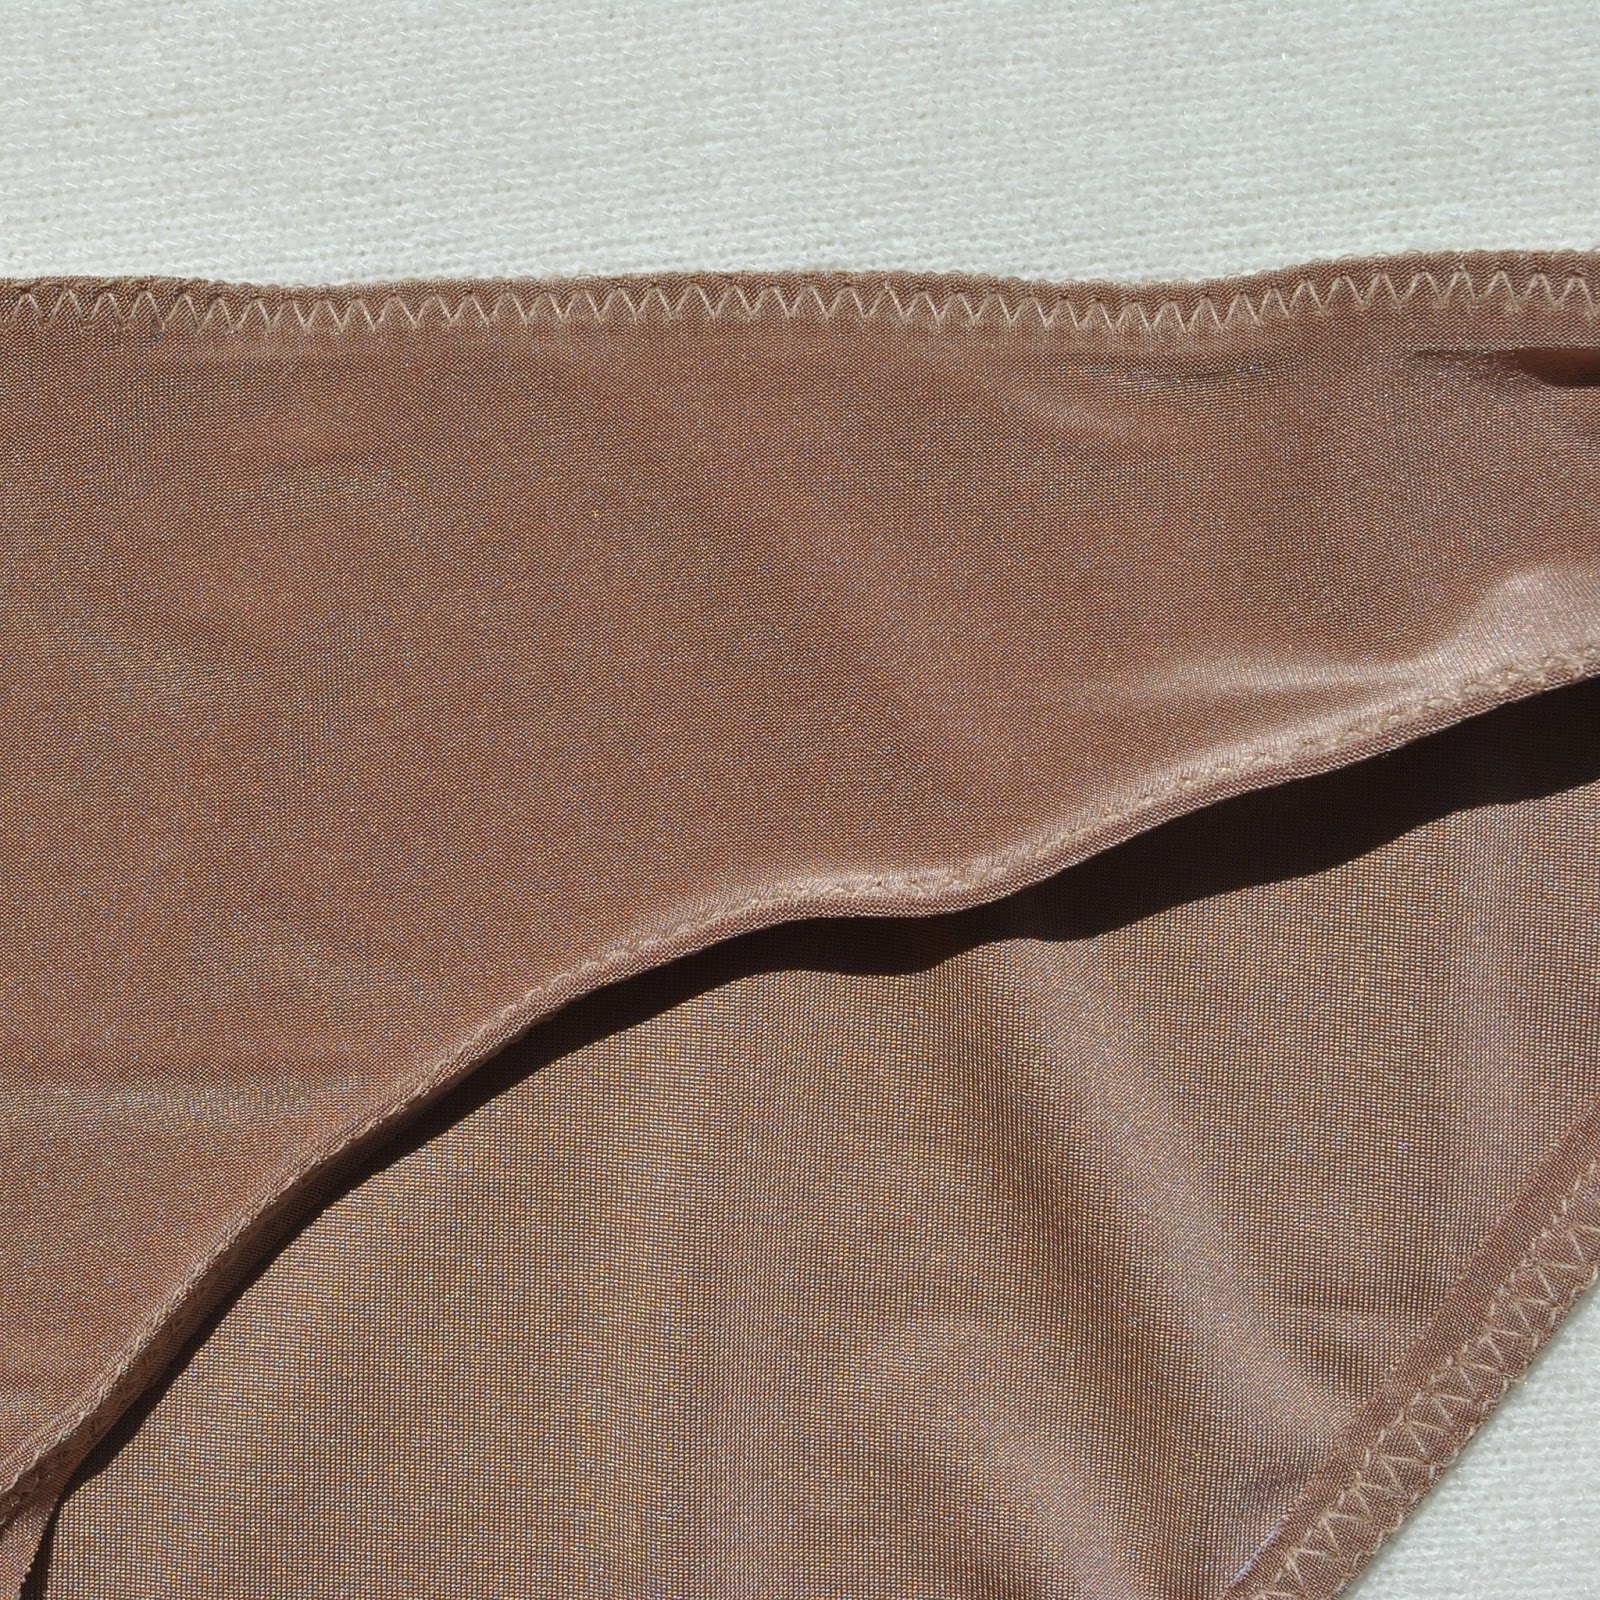
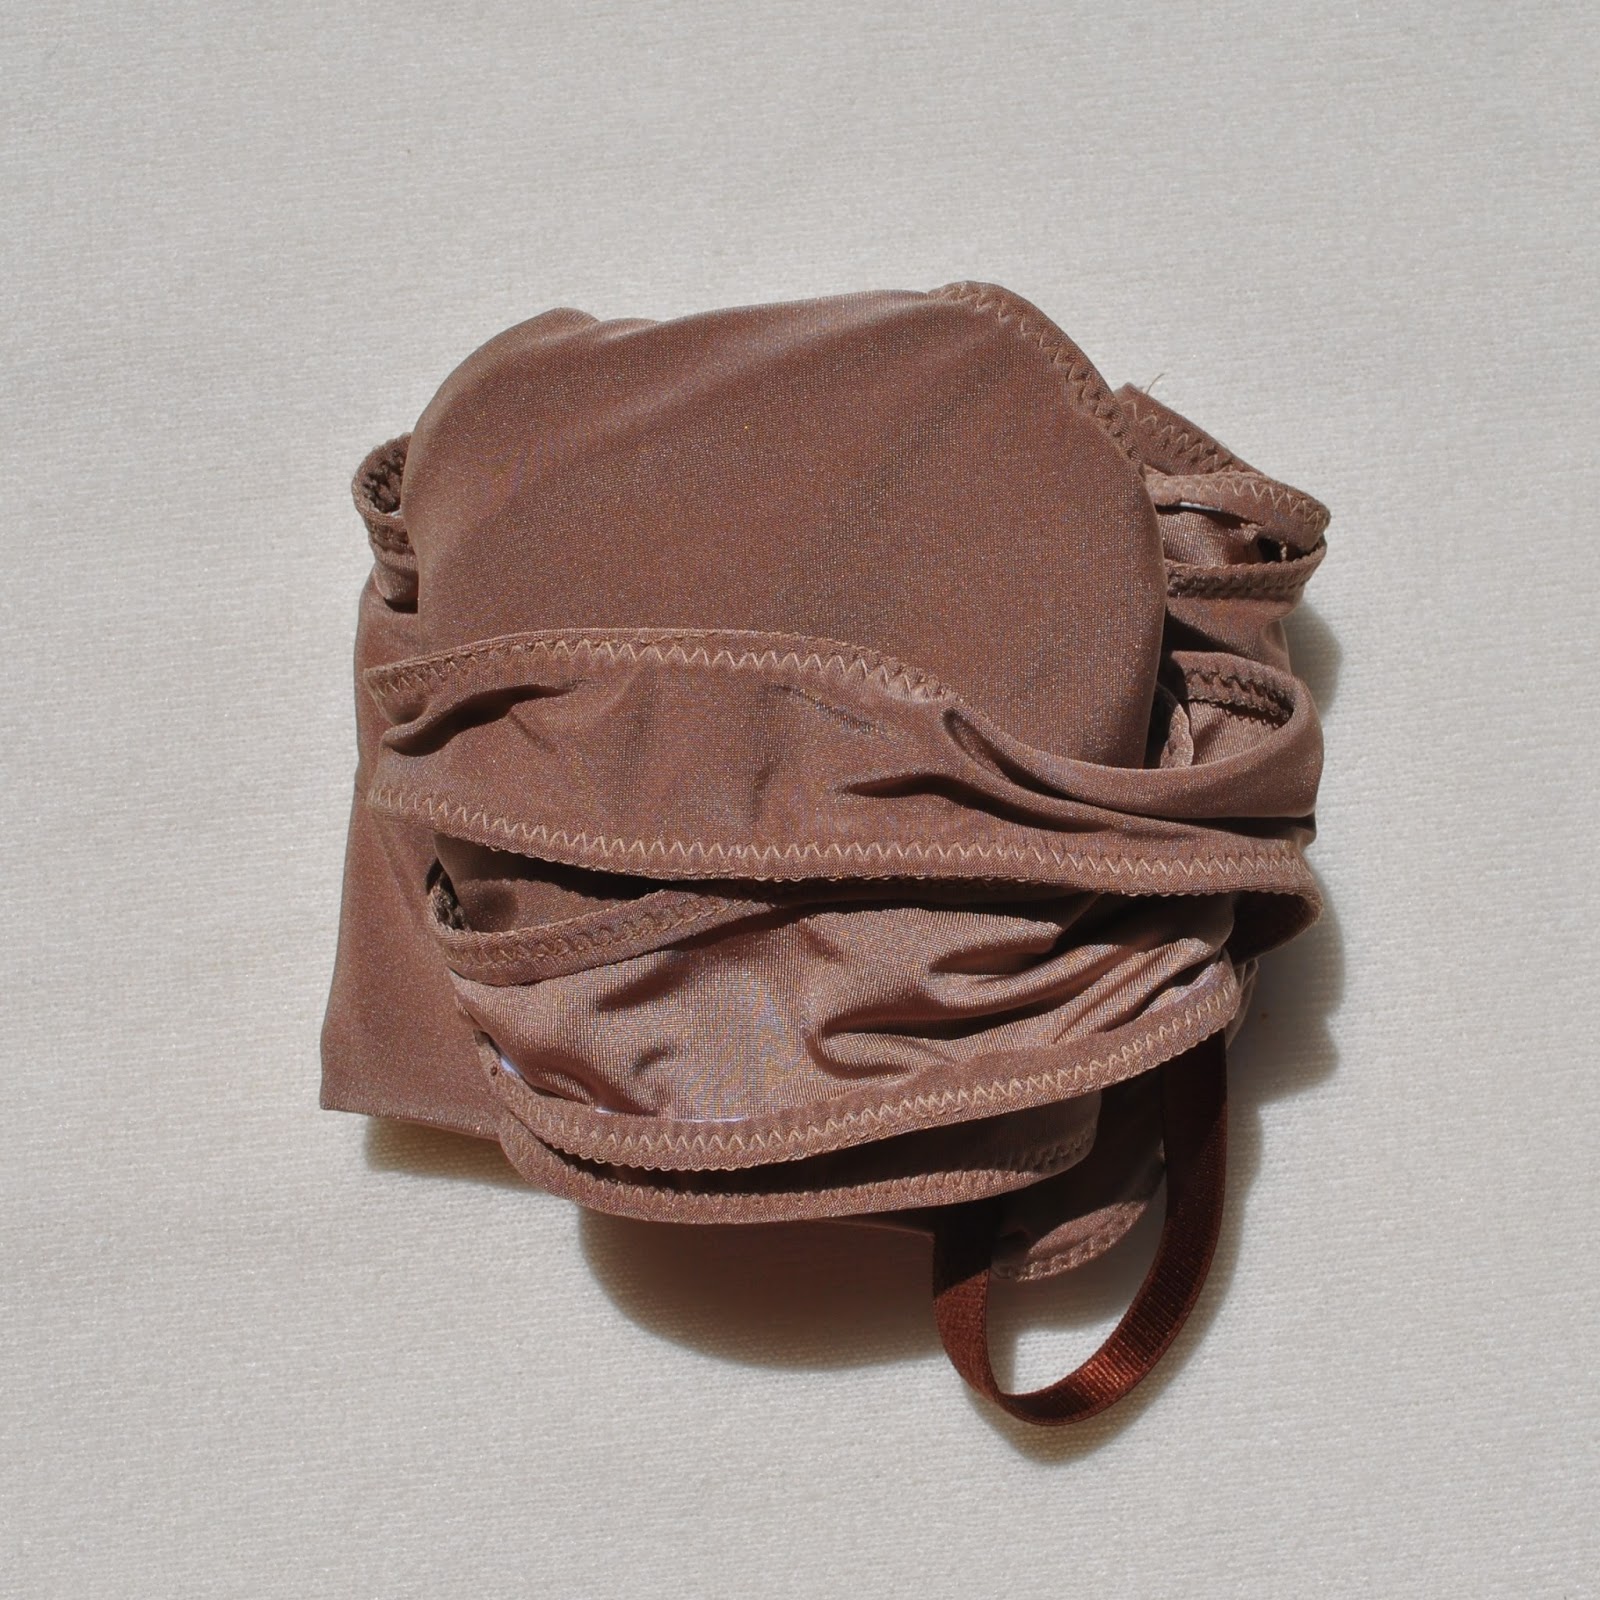
Technical blahdy-blah: I cut two backs, clean finished the seams within the layers, and also lined the front/cups with self fabric to about centre front.  I just left the lining CF straight edge floating unfinished on the inside; it’s not going to fray or anything and doesn’t show up at all.  The remainder of the fronts/straps are single layered.  The lower edge is finished with elastic, folded under and zig-zagged on the right side, just the same finish as the top edges and all edges of the knickers (as pictured below).  I cut the elastic 7% shorter than the edge it was to be attached to, measuring the paper pattern pieces.
That black hook and eye tape at the back is bothering me, but well, colour options here are pretty limited.  I’ve found Homecraft Textiles to have the absolute best array of lingerie elastics to be found in Perth.  Well worth hitting up.
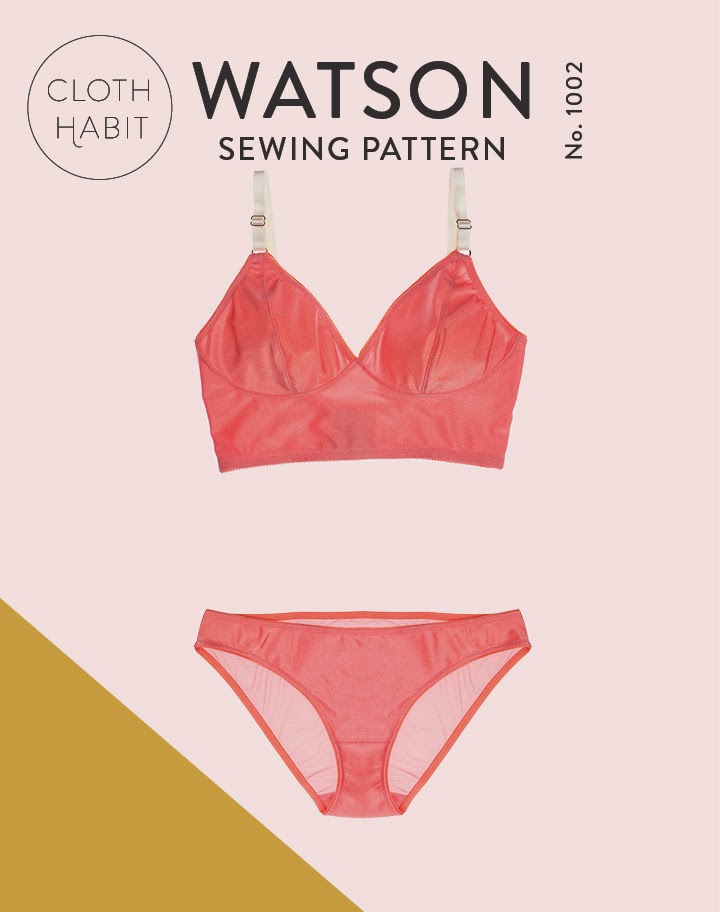
2x pairs of undies, both super plain Watson briefs.  Boring and barely worth a photo… close-up for elastic-attachment detail purposes only.

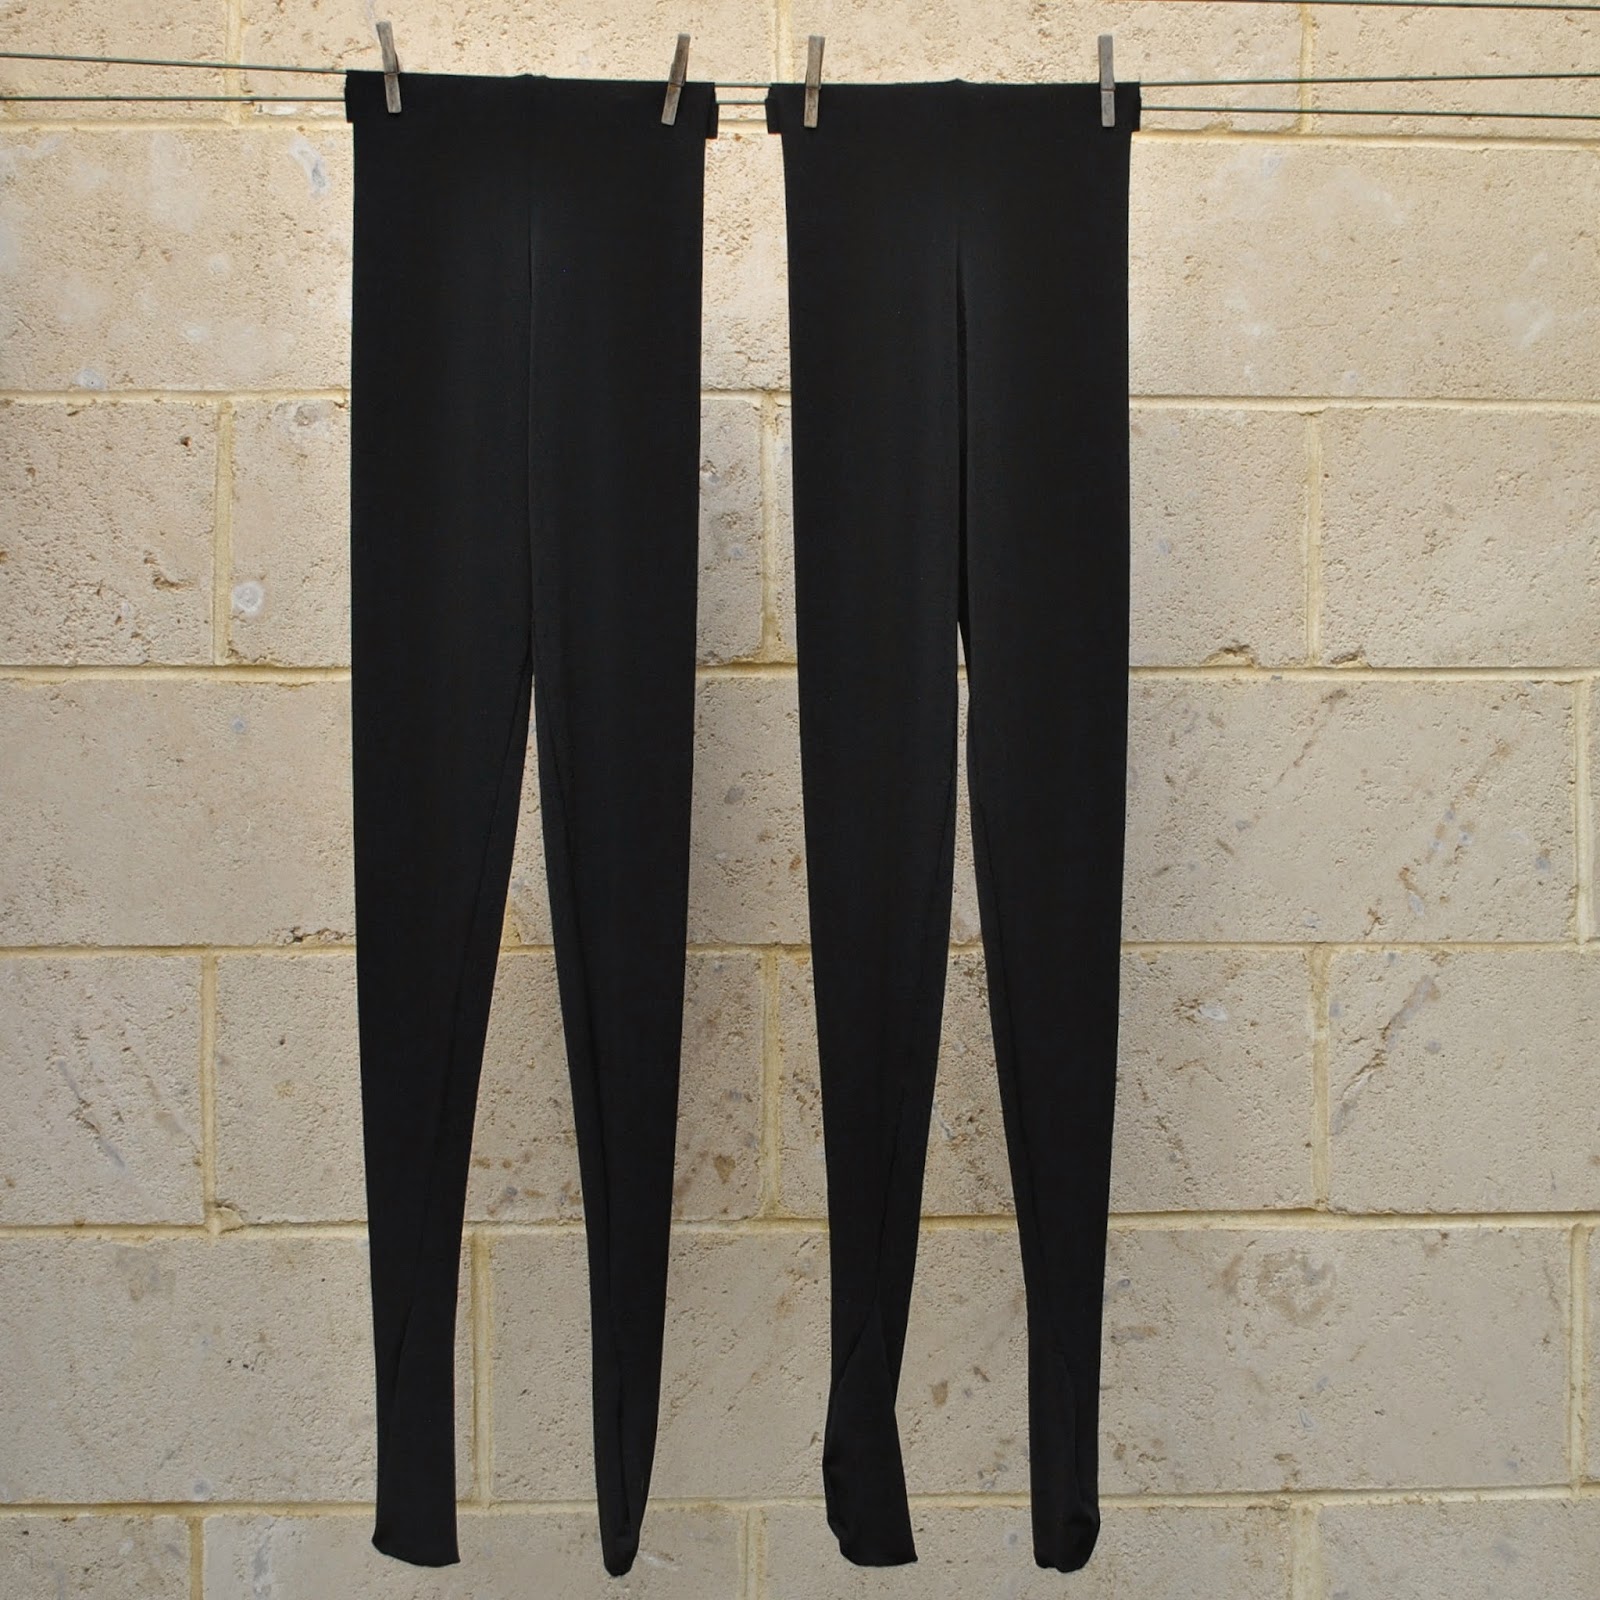
Full set: so normally I love my things to be photographed looking artfully arranged to best show them off but couldn’t resist going the full Merchant and Mills here.

artistic dishevelment and not a randomly chucked down pile of clothes at all 

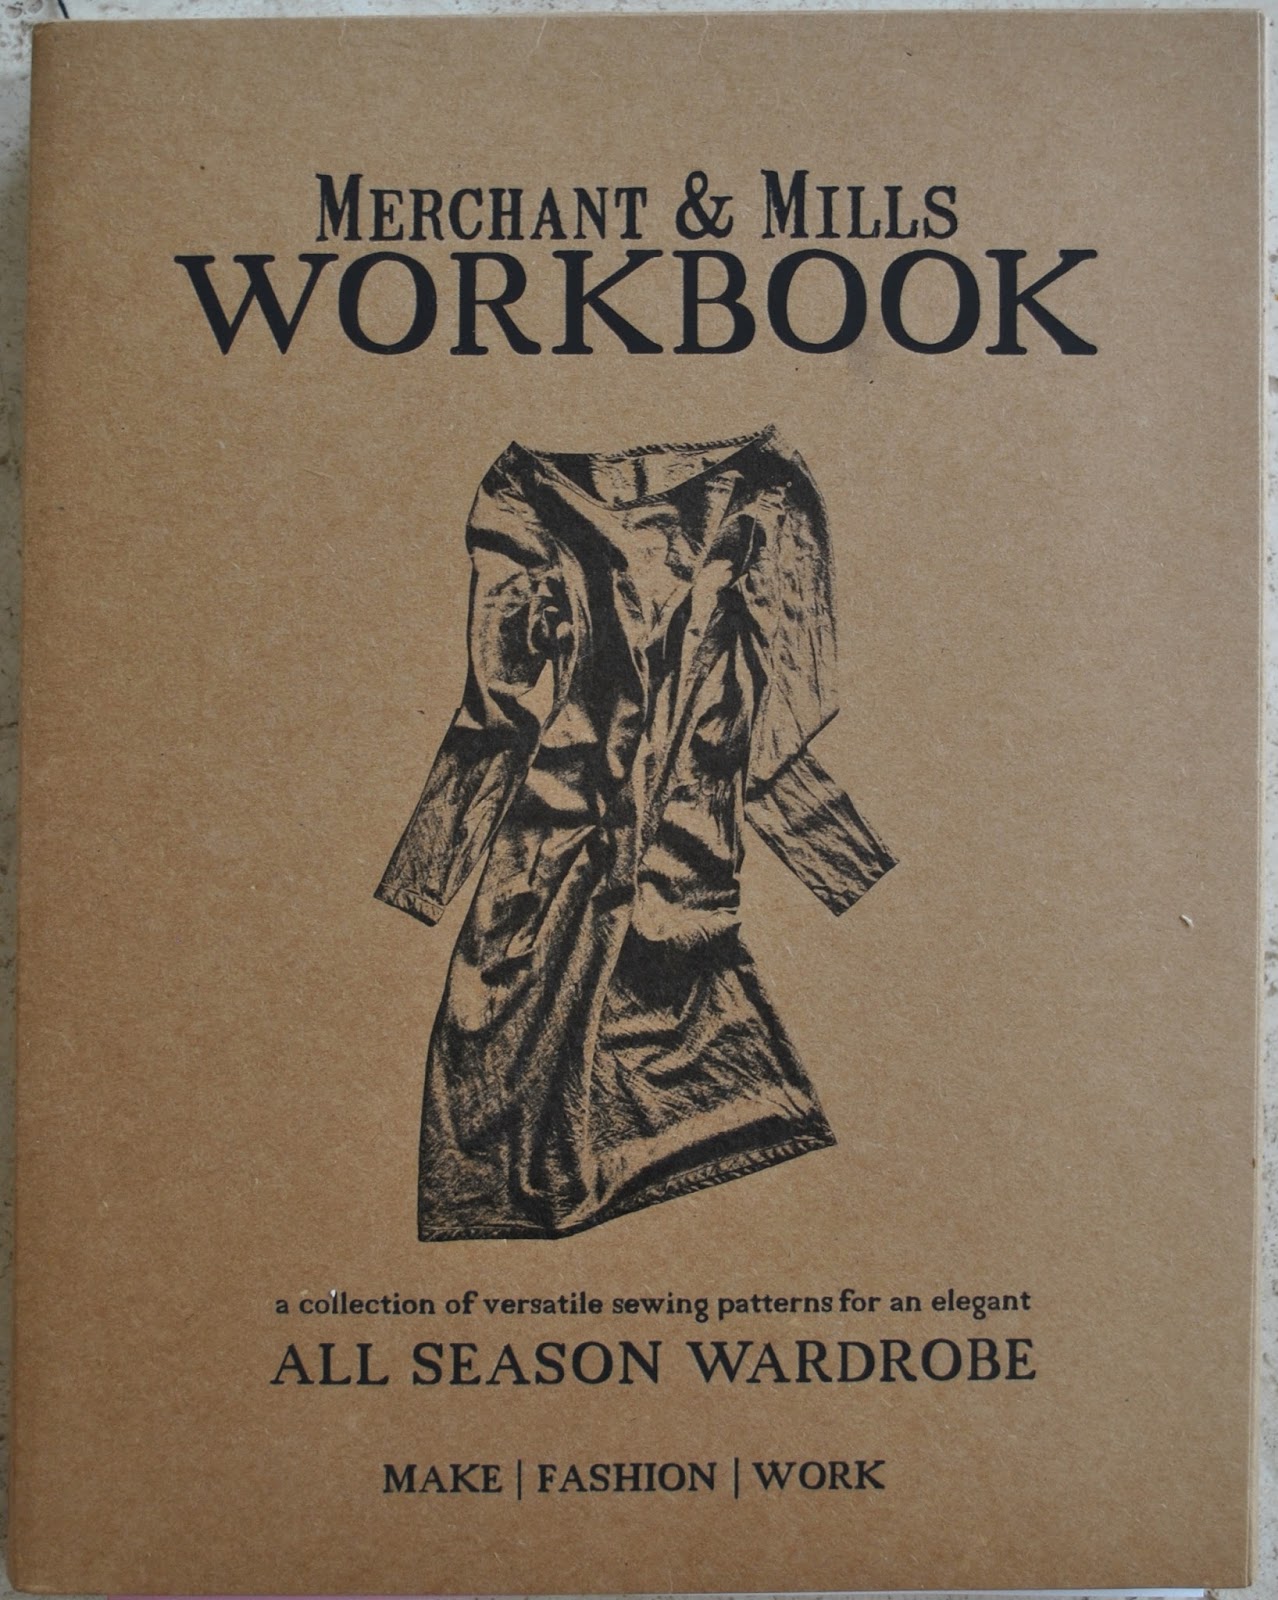
What is that aesthetic anyway? just kind of throw it down in a messed up crumpled heap on the floor, y’know? just like when your teenagers kick their grotty clothes aside as they step into the shower or something, and leave them there.  For days, if you don’t nag gently point it out.
*deep breath*
Embrace the crumple.  
Feel the crumple.  
BE.  The crumple.

Hehe, not to diss Merchant and Mills! I actually have the workbook myself… a recent birthday pressie, and heavy hints had nothing to do with it at all! *cough cough* and I love a lot of the stuff in it!  Just that the screwed-up-and abandoned-on-the-floor thing cracks me up.  The new cool… OK!
Actually, my clothing is more usually kept like below…  
Aaaah, that’s better!  *sigh of contended happiness*  ooo, did someone say neat freak?  Order and method, my friends.  Order and method:)

Happiness factor; plain, but supremely happy with that plainness, and I love the wraparound bra style; it’s nice to have something a bit different.  Construction, smooth sailing all the way.  For visual purposes I’m deducting one point for the black hook and eyes at the back.  9/10  🙂

Details:
Bra; the Sierra by Madalynne, free to download here
Knickers; the Watson briefs by Cloth Habit.

pinterestmail

origami blouse

Hello!  I’ve made a new blouse  🙂
Yes, it is currently winter here in Perth.  I am braving the freezing depths of winter to take these photos.  
Haha, not really!  Actually I am wearing my new blouse responsibly and weather-appropriately here, in warm and sunny Italy!  I made the blouse before we left on our recent hiking holiday and took it away with us so I could enjoy it in the warm weather  🙂
This is the Origami Blouse from the book Twinkle Sews, by Wenlan Chia.  My lovely sewing neighbour Megan kindly lent her book to me.  Thank you so much, Megan!

The fabric is a lovely creamy coloured silk/linen; bought as a remnant from Fabulous Fabrics.  I only had about 80cm and with some experimenting to find the most economical pattern arrangement just managed to squeak out the pieces with barely any scraps left at all.  And added 2cm in length to the blouse …  I cut it that little bit longer just because I had enough length and thought I would get a nice deep hem.  However when trying it on I detected a certain, um shall we say, lamb-ness? to the style, at odds with the general muttonness of my person…   Anyway, I decided any and all extra length that could be got definitely should be got at all costs; and stitched the skinniest of skinny hems that I could!
For that same reason I did not gather up the lower edge of the sleeves with elastic, but just left them straight and ungathered.  The resulting lack of sleeve puffiness raises the maturity level just a touch, I reckon  🙂
The origami thingies on the front are rather interesting, and although they look complex are simpler than they look.  Having said that, I still found them quite fiddly to make and mine are not particularly neat, although I tried!  Fabric is not like paper at all, it’s springy and thick, especially when seams come into the equation, and true origami perfection is a pretty tall order.  I ended up abandoning all aspirations to razor sharp points and perfectly angled edges and just tried to accept the imperfection.  I think I wrangled them to look passable.  I can almost imagine they are like a flutter of little creamy butterflies, alighting onto my shirt for a little butterfly gathering.

I’m not too terribly distressed at their imperfection, as when I’m wearing the top they are sneakily tucked away behind that black velvet tie anyway, mwahaha…

Verdict: I think it turned out, not too cutesy cute, but nice and just mildly cute, and rather fresh and romantic and just slightly poetic.

My thoughts on Twinkle Sews, the book…
This is a nice book; it contains patterns for 25 garments; 7 skirts, 13 tops and 5 dresses.  The designs include some that are easy and plain, others that are both interesting and unique, with some very innovative ideas in many of the pieces.  If you’re interested in something a bit different, basics with a twist, then this book contains some promising projects.
The fabrics chosen for the sample garments and the styling of them is sometimes a little questionable and I didn’t always find them visually appealing.  But disregarding fabrics and prints and just paying careful attention to the lines and shapes of the pieces, I reckon there are some real gems in there.  Check out Megan’s lovely shibori dress from the book.
The patterns come in sizes 0-16 (US) and are all on a CD included with the book.  The pattern pieces are all whole pieces, meaning, no half pieces to be placed on the fold.  This has advantages; it’s easier to lay the full-size pieces on a flat unfolded piece of fabric to obtain the most economical layout: also disadvantages; the most obvious being that you have to do a heckuvva lot more taping!
The early chapters are aimed at a beginner seamster, with some nice and encouraging chat about the joys of fabric and making clothes for yourself; and extensive, clear and helpful explanations of basic sewing terms as well as for all the techniques used in the projects.

Details:
Blouse; the origami blouse from Twinkle Sews, by Wenlan Chia, creamy linen-silk with black velvet ribbon
Shorts; Burda 7723, green cotton gingham, details here and my review of this pattern here
Thongs (above); Havaiana
Hat (Craig’s); Billabong
Socks (below); hand-knitted by me, details here
Hiking boots (below); Mountain Designs

pinterestmail

Black moto jacket

Finally! A wintery day!
It’s pretty unusual for me to get excited about a wintery day, haha.  Believe me, winter is my very least favourite season… but I have my reason, see; I’m happy for an excuse to wear and show off my newest thing.  My moto jacket!
*sings* the leader of the pack…  brrrrm brrrrm brrmrrrrrrm!
Silke, the designer behind schnittchen patterns contacted me asking if I would like to road test one of her patterns and I chose the Tina jacket; a blouson style with an asymmetric front closure by exposed zip, and a wrap-around collar.  
Danke, Silke!
I immediately envisioned making something in a combination of leather/wool… well; making this, wot I’m wearing here, essentially.  My jacket here is made up pretty much exactly to the pattern… except I made my sleeve cuffs a little wider, because I have quite long arms apparently, and I added leather sleeve tabs, sewn into the sleeve seams and wrapped around to close with two hammer-in press studs.  I also fully lined my jacket using black polyacetate lining fabric.

Also I top-stitched the body and armscye seams, stitching the seam allowances down inside. And a little bit of narrow zig-zagging along the top of the pocket openings, to strengthen that bit.
And I also made the pockets about 2cm deeper.  So, just a few teeny alterations here and there, after all  🙂

All of my materials are from Spotlight.  The “leather” is obviously vinyl, very thin, soft and pliable and a little stretchy.  I found I could use my regular sewing machine needle on it just fine.
The “wool” is a wool/acrylic mix tweed.  It felt quite stiff when I bought it, but a pre-wash in my machine on the gentle/wool cycle brought it up beautifully soft and fluffy, and the collar feels heavenly snuggly against my neck skin.

I chose to fully line my jacket.  The pattern doesn’t stipulate lining but that’s no biggie.  I used the pattern pieces, and to save myself the trouble of tonnes of piecing the multiple body pieces, I spliced the side front/side pieces together to cut them as one piece in the lining fabric, and also the centre back/side back pieces I spliced together in the same way.  When laying down the centre back piece; I laid it down with the centre fold line 2cm away from the fabric fold, giving myself an extra 4cm in width at the centre back. 

Note: re-enactment shots, when I realised I hadn’t taken any pictures, doh!

This extra width at the CB I folded into a box pleat and basted it in place for the first 5cm in from each edge.  Doing this gives me a nice bit of wearing ease in the lining, which is always a good idea in a jacket.  I learnt this little tip from my standby McCalls 5525 coat pattern.

When cutting the pocket pouches, I cut them of half lining fabric with a leather facing at the opening edge, so there’s no danger of any lining fabric peeking out unattractively.
Also, when cutting the sleeve linings; I tapered out by about 1cm down each long edge, again to give the lining a bit of elbow-bending ease inside the sleeves.

Thoughts?  Well, the pattern is a lovely classic style and the pattern works beautifully, all going together and fitting in place like a dream.  I really love the style, and how my jacket worked out.
However this might be a challenging project for the non-German speaking, beginner seamster.  This is a German pattern with German instructions and an English translation, with no illustrations or pictures.   Occasionally there were some innovative words and phrasing, reminding me of that time I typed a set of Patrones instructions into Google translate.  Memories.
The schnittchen website does however have an excellent step by step photo tutorial which clearly illustrates all steps and is very helpful.  I think if you had made a jacket before you would be absolutely fine with the English instructions.  They gave a good construction order and they worked perfectly well. 
Finally and most importantly, I’m super stoked and excited with my new jacket.  According to the fashion report on the news the other night, leather and leather details are IN this winter.  How fortunate!
Whatevs the fashion, I’m going to LOVE wearing it.  It’s very cosy, comfy and super warm.   Its edgy vibe is a nice bonus  🙂

Details:
Jacket; the Tina jacket by schnittchen patterns, faux leather and wool mix
Tshirt (under); white cotton, using my own custom fit pattern, details here
Skirt; Vogue 1247, overdyed purple cotton denim, details and my review of this pattern here
Tights; black polyester stretch, using my own custom-fit pattern, details here
Boots; Roberto del Carlo, from Zomp shoe boutique

In other making news, I ran up two new pairs of black tights for myself, in stretchy polyester knit.  I know I had this whole thing about how I wasn’t going to make my own tights any more, just buy them… but I’m taking part in me-made May again and going ALL me-made, as is my “thing”.  And I just decided that to cop out on the tights when it’s so laughably easy to make the darn things, well it was just that; a cop out.  I bit the bullet.  2m of fabric, half an hour of cutting/sewing, whack in an elastic waistband; BOOM yah.
Two pairs of new, super warm tights.

Also I *cough cough* um, “made” a scarf….  as in five minutes of zig-zagging the cut edges of a nice piece of fluffy brushed cotton plaid and fraying with a fine-toothed comb.  I found this plaid in Homecraft Textiles.
Like most of the world, probably, I fell in love with the Zara blanket scarf that was all the rage last Northern winter.  And though we do actually have a brand new Zara store here in Perth now, I don’t think we’re going to get the scarves here.  However I still kind of fancied one for myself.  So I have my diy version now.  Yay!  And if I get tired of it I can always cut it up and make a top or something with it still!  Double yay!
pinterestmail

baggy blue trousers

My new trousers are kinda weird.  They are seriously baggy and they have a seriously dropped crotch.  But they feel sooo luvverly on! I think I’m going to like them, in their weirdness, even though I know I look a bit kooky in them.   *shrug*
See, every now and again I’m seduced by an unusual but super-cool Japanese pattern, the kind of cool thing that looks awesomely cool on cool people.  And then am brought back to earth with a bit of a bump when I look at myself in the mirror and am reminded: I am not very cool.
Ah, well I can but try, haha.  The thing is, these are the comfiest trousers evah, as in incredibly awesomely comfortable, as in like wearing an old pair of trackydacks or pj bottoms, kind of comfortable.  Cool people know a thing or two about comfort, it seems.  Well, apart from the ones that wear skinny jeans, obviously.
My trousers are pattern No. 13, the Tapered Trousers from “she has a mannish style” a Japanese pattern book by Yuko Takada, and  I could see from the picture that they had a seriously dropped crotch,  which is just what you would expect in a “woman wearing a man’s pants” style.  So I did something very unusual for me and made a rough muslin.  My husband was a little bemused but Cassie gave them a big thumbs up, assuring me that lots of cool arty kids wear this kind of thing at uni.  This was both encouraging and, um, at my age; also a bit not, ahem!

Whatever, I ploughed ahead regardless; and ta da!
Technical blah-dy blah:
I made them in a deep navy-blue cotton corduroy from Spotlight, and cut the pocket linings and waistband facing from a pair of Sam’s old pj’s from the refashioning bag; nice soft and well-washed, navy-and-white plaid cotton flannelette.  I used a navy jeans zip, and a jeans-style, hammer-in stud for the button.  The pattern had patch pockets on the back, but since precisely zero of my husband’s trousers, not jeans, have patch pockets, I put in double welt pockets instead.  This gives a far more authentic “menswear” look, imo.

My measurements put me at size ML to L, however I found the waist/waistband in this size to be seriously oversized, by 10cm at the very least!! even taking into account that you make a tie with D-rings to cinch in the back of the waist, paper-bag style.  So I removed a tonne of extra width in the waist, while still trying to retain the boofy, oversized pants vibe of them.
I drastically enlarged the front pockets, by about double.  Seriously, the originals were so tiny you would not be able to fit barely anything in them, let alone hands.  I’m used to having to enlarge my pockets on patterns but these were teeny.  I very much liked the way they were constructed, with self-fabric facings and with a French seam to finish.  I think the finished pockets look really nice, both inside and out.

I’m not keen on the way the fly front was constructed, with the fly pieces cut separately only to be sewn back on immediately, leaving you with an unnecessary and bulky seam in the centre front.  I really cannot see any advantage in this, and prefer for the fly pieces to be cut-on.  And will do it in that way in the future.
btw, I have read reviews for this book saying that not all the instructions are given for a pattern; well they actually are but not always on the same page as your pattern.  The book only gives the instructions for doing a thing, like a fly front, once and once only in the book.  For example, the instructions for doing a fly front are given on p71, with the Semi-flare Culotte instructions.  It does mention this in the Tapered Trousers instructions, but since they are in rather small print in amongst the Japanese characters then it’s understandable why people might have missed that.  All the actual sewing instructions are illustrations, very clear and quite easy to follow.
So; in conclusion? I like my new trousers although, well to be honest I am a wee bit nervous of them, being so cool and all.   But I think my street cred will survive wearing them.  Actually, they remind me a bit of pants we used to wear in the early 80’s… omigod, did I just admit to that?!  Eeeeeek!  Street cred in tatters!

I think when you read a lot of sewing blogs and online forums and what-have-you, like I do, you can get swayed by the very popular notion that Fit and Figure-Flattery are the King and Queen of Sewing.  As in, everything has to skim your body just to the perfect degree, not too tight, not too loose, and be perfectly right for your figure type.  Hey, there’s absolutely nothing wrong with that at all; I buy into those rules all the time myself too.  Just that, sometimes it is fun and nice to stretch yourself beyond those rules, to make and wear something that is not particularly fitted, is not particularly figure flattering, and is just stylistically interesting and cool and fun and kinda weird.  And comfy.  Fashion should be fun, after all.  I think it’s ok to try out new and unusual stuff once in a while.

And they are so warm and comfy, I’m going to love every minute that I have them on.  Well, every minute that I’m not worried what people might be thinking.  
Did I mention they are comfortable?

Details:
Trousers; the tapered trousers 13 from “she has a mannish style” by Yuko Takada, navy blue cotton corduroy
Tshirt; Closet Case patterns Nettie, with short sleeves and a breast pocket, in thin white jersey, details here
Cardigan; Miette, hand-knitted by me in Debbie Bliss Donegal Luxury Tweed Aran, in Gold, details here
Shoes; Enrico Antinori, from Zomp shoes

pinterestmail

High-waisted apricot skirt

I’ve made a new skirt; a high-waisted, knee-length straight skirt, with a self-belt, long double belt loops and in-seam arrow welt pockets.  This is skirt 114 from the Solo in White collection from Burda style magazine 04/2014.  I’ve waxed lyrical about this collection previously just because of the dreamy colour palette, but a closer perusal of the design lines had me lost in admiration anew for the designs themselves.  This is now the third piece I’ve made from the collection; others here and here.  May not be the last either, because all pieces are quite lovely; classical but still with their own interesting little twist.  Honestly, it has to be said; Burda magazines are simply the hands down best value for money around.
The fabric is from the Fabric Store in Melbourne, bought during my last trip there with Mum and Cassie.  I think it’s a linen/something mix, woven of various thickness fibres, stiff-ish and almost like thin upholstery fabric.  I didn’t think it too thick for the slightly more complex sewing required of those arrow welt pockets, and think they turned out ok.  I got the skirt pieces cut out of my piece with the barest of scraps to spare.  Honestly, my wastage was less than a scrunched handful of fabric.  Win!!!  After cutting the pieces I overlocked all edges before doing a single other thing, because it frays like a madman.

Changes: I cut a size 40 at the hips grading into a size 38 at the waist.  In fitting to myself I ended up taking a little bit more off each edge at the waist.
I cut my pocket pieces to be substantially bigger than the pattern piece.  My one gripe with Burda patterns is that the pocket pieces are nearly always laughably small.  Or do I have giant flipper hands?  Ummm, probably the latter!
Another small gripe I have with this style of skirt is that the in-seam pockets are frequently situated too close to the CF for my liking, and so when you’ve got your hands in your pockets you end up feeling like you’ve got your hands sitting coyly and weirdly right over your crotch.  Hate that!  So I cut my skirt pieces so the front piece was 4cm wider at the CF, and folded 2cm down the centre of each side front piece.  This moved the seams 2cm further out to each side, which is just enough to make hands-in-pockets feel not so weird to me.

I fully lined the skirt with cream coloured polyacetate from Fabulous Fabrics, mostly because my fabric has some stiff and sharp fibres in it that I could imagine over time would become scratchy and super annoying against soft tummy skin.  Lining pieces are not provided with the pattern, but it’s easy enough to make a lining; by splicing the front pieces together along the seam lines, cutting from the facing allowance down; and folding the width difference in along the top as a pleat.  The back dart allowance can also be folded as a pleat in the lining.

I cut the facing and pocket pieces from pale yellow polycotton, and pieced the pocket with a strip of the self-fabric at the opening edge, so that is what shows if the insides are glimpsed during wear.

The instructions for the in-seam arrow welt pockets, contained in those for skirt 113, are quite difficult to follow; I was thinking vaguely of doing a little pictorial here to illustrate how they are done.  Maybe.
Anyway, that’s it!  It’s still too hot for this skirt yet, but I’m happy to tuck it away in the wardrobe, awaiting some lovely cool weather.  I bought some perfectly matching fabric to make a top to go with it too, so should get on to that thing next.  Ever onwards!

Details:
Skirt; Burda style 04/2014-114, apricot/cream linen/cotton woven
Top; adapted from the loose drape top from drape drape, by Hisako Sato, cream jersey knit, details here
Sandals; Zomp, from Zomp boutique

pinterestmail

Carolyn pyjamas

I was supremely flattered when Heather of Closet Case patterns contacted me to ask if it was ok to
name her latest pattern after me… wow, seriously?!
!!!!!  
*deeply flattered moment*
So the Carolyn pattern is for pyjamas, hehe. 
Yep, I inspired pyjamas!  Honestly
I’m not sure why I find that borderline hilarious, but there it is!
I have to say though; it’s amazing that Heather totally has her
finger on the pulse of what everyone is currently needing to wear and sew.  
Loungewear.
Very astute.  I mean, I love Vogue patterns for their smart
little fitted designer dresses, and have often thought that the working woman can do no wrong
by sewing up nothing but little Vogue dresses for her office/working wardrobe…
so smart and stylish and absolutely perfect for a businesswoman’s life.  but here’s the thing, the number of people
working from home has increased significantly over the last few years and
comfortable loungewear is definitely a thing that work-from-home peeps are
stocking up on for their working life, not just for their after hours life.  A few years ago, who’d have thought it? But
now totally this is a real trend.  I
mean, I work from home myself. And although I need and want to dress up smartly for many things in my life, my real wardrobe workhorses lean towards the easy-to-wear and casual.
Enter stage right; stylish and smart loungewear.
The things one would actually wear to bed are generally loose-fitting to enable
minimum chance of ripping or restraint while one is unconsciously flailing about, but Heather’s new
Carolyn (pinch me!) pyjamas have a slightly sleek and tailored air to them; a body
skimming rather than blouse-y line, that in the right fabrics one could happily
wear outside the house if one so wished. 
Without looking like one is wearing pyjamas!
With that in mind, I chose to make my test pair in luxe-ish, not-bedwear but daywear like fabrics; namely silk hessian for the body of the top, poly organza for the sleeves and
a silk/cotton for the collar and cuffs. 
The little shorts are in a soft, lightweight polycotton.  These were all from the remnant table at
Fabulous Fabrics.
I chose to make view C with long sleeves on the top and leaving off any piping.  I love piping as much as the next person… however I felt piping in this shirt/shorts style IS going totally “pyjama” and I’m serious about wanting to wear my outfit out and about.  In the streets even!
The shirt is a classic, sleek, unfitted style, with notched collar and a gently curved hemline.  I felled the seams in the body of the top and French seamed those sheer sleeve seams.  The armscye seams were overlocked before stitching down to the shirt body to finish; faux felling, if you like!
The shorts are super quick and easy things to whip up, with satisfying huge
pockets.  The pockets are the same fold-back design
that Heather used in her Ginger jeans, which was the
very first time I had come across pockets like this in my 40+ yrs of sewing .  Yes, really! 
I’m starting to think of them as her signature pockets.
I made my shorts with the cuff as per the pattern, but sans piping and with the cuff invisibly stitched in place from inside the fold, so it appears to be a folded-up cuff.  I like this cuffed look on the bottom of shorty shorts like these  🙂

So… do I love the Carolyn pattern, well heck yes!  The shirt especially is an easy classic shape and tres chic, in my opinion.  I will definitely be making both pieces again, maybe even as actual pyjamas!
As for my fabric choices for my test sample here… well, I was using all remnants and my favourite part is the sheer and floaty, leaf organza sleeves, and I also love the strength of the black accent collar and cuff details.  However while the roughly textured, stone silk hessian seemed like a good idea at the time, now I’m not so sure if it’s letting down the rest of the ensemble.  Hmmmmm.  I’m gonna wear it for a while and sleep on it – by that I mean figuratively not literally, of course!   but don’t be surprised if a dye job or small subsitutory type of refashion happens on this bit in the near future!

Details:
Set; the Carolyn (eek!) pyjamas by Closet Case patterns, shirt in silk hessian, poly organza, silk cotton; shorts in polycotton

pinterestmail

Watson lingerie set in sand cotton jersey

I just could not resist buying Watson, the new lingerie pattern designed by Amy of Cloth Habit.  Yes, I have a few lingerie patterns now, but a few points of difference with this one allowed me to talk myself into buying a new one.  Quite easily, as a matter of fact!  I’ve always admired Amy’s beautiful creations and so adding her new pattern to my collection was always going to happen  🙂
I used a sand-coloured cotton jersey, (the Morrison remnant sale), lining the bra cups and cradle with soft, sand-coloured rayon stretch (Fabulous Fabrics), pretty scalloped-edge lingerie elastic (Fabulous Fabrics) and plush elastic for the bra straps (Homecraft Textiles).
The pattern is for a simple, soft cup bra, in either longline or regular length, with no provision for underwires, and a bikini brief.  Obviously I had to make both! and made my usual two pairs of matching knickers to go with my bra.
So, I have several thoughts about the Watson pattern…
Firstly and most importantly, I really love my new bra! I very much like the clean and modern line, the simplicity of the cut.  It looks really cute on and for my size the fitting and drafting is spot on.  I chose to make the longer line option, and am very pleased with it.  Usually I go for a padded, underwire bra, but it’s nice to have different options in the undies drawer.
I chose to line both my bra band and cups for two reasons; firstly because I prefer the cups to be a slightly thick and padded anyway; and secondly; because the way the bra is constructed inevitably means all the seam allowances on the inside are exposed.  That’s unavoidable in having a pieced cup in a single layer of fabric.  However I usually like for my insides to be just as pretty as the outsides, and so I cut cup linings and worked out a way to construct it so that all the seam allowances are tucked neatly out of sight between the outer and lining layers.

1. Do not baste the lining to cradle as the first step; instead sew the side seam so that the back band is sandwiched between the cradle and its lining.
2. Sew all pairs of outer and upper cup pieces together, also for cup linings.  Baste the cups to their corresponding lining cups all around, wrong sides together.
3.  Turn the cradle inside out, so you can sew the cups to the cradle, sandwiching the cups, right sides together, between the cradle and its lining piece.  This means that all seam allowances will be inside the cradle.
4.  Sew the lingerie elastic to the top and lower edges as normal.
5. hey presto! all the seam allowances are nicely tucked away!

The white scalloped lingerie elastic from Fabulous Fabrics is very pretty and makes a really lovely edging; however, I thought it a little flimsy to use along the lower edge of the bra, which is a more “demanding” edge and requires a slightly thicker, heavier duty elastic.  So I used my regular Birch’s lingerie elastic just for the lower edge of the bra.

A small complaint about the pattern: I had to do a bit of detective work to determine the lengths of elastic required because unfortunately they do not seem to be included in the pattern.  I searched and searched and could find absolutely no clue in the instructions as to how long I was to cut my elastic pieces!  Nor the straps!  Strange.  So I dug out my KwikSew 3300 bra pattern to measure the strap piece, and also checked out the tables in it for a guide as to how long I should cut the lingerie elastic for the Watson bra edges.  Luckily, the KwikSew pattern has terrifically helpful tables outlining exactly how long you should cut your elastic, for each size.  Thank goodness for that!
Same story for the undies; I had to get out my McCalls 2772 bikini pattern and measured the waist and leg elastic guide pieces and used these same lengths for these knickers too.
I’ve now jotted down on my Watson instructions all these elastic lengths I need so I don’t have to go looking for them again.  Because I’m sure there will be more Watsons in my life.  🙂
Ok I only have one more complaint, and that is that metric measurements are missing from the instructions.  Yes, I can convert them myself, and I have, for future reference, and noted them down directly onto my copy.  But it would have been helpful to have them included in the pattern.  Along with those elastic lengths.

The bikini brief undies are plain and simple little things, definitely my style.  I only realised upon viewing the pattern pieces that there is a horizontal joining seam right across the front of the crotch, with open seam allowances on the inside.   I wanted mine without a seam, so I spliced my front and crotch pattern pieces together and cut the front as one piece, and then cut one separate crotch lining piece from white cotton jersey.  This is sandwiched between the back and front pieces when joining together, so that all seams allowances are nicely tucked away inside.  This is the same method I learnt from my regular McCalls 2772 bikini pattern, and so I know it gives a nice comfortable result.  And no unsightly seam!

I’m very happy with the new set!  It is so comfortable, also the colour alone means I’m guaranteed to wear these a tonne.  I was actually pretty desperate for this set… yes, sounds needlessly dramatic, but I have tonnes of white dresses and shirts.  Which I favour.  Meaning my white/colourless lingerie gets more wear and tear than the colourful stuff and as the lingerie drawer gets weeded out it’s looking a bit too colourful in there lately.  Clearly I have been extremely bad at planning and keeping up with lingerie requirements.
But now, I’m on it!  Stay tuned for another exciting episode of Watson, coming soon to this station.  Featuring some luvverly lace, mmmmm  🙂

pinterestmail

patchwork Sandpoint top

I’ve made a new top.  Well, kinda new from old actually, since it’s made from 4 old Tshirts cut up and patched together.  My refashioning bag yielded; a light purply-brown from Craig, two pinks from Tim, and a chocolate-y one which is one of my old self-made Tshirts.  They were all old and a tad tatty here and there but still had some good bits left in them.  And I liked these yummy Cherry Ripe colours together.   mm-mmmmm  🙂

The pattern is the Sandpoint top designed by Helena of GreyDay patterns.  Mel of the curious kiwi contacted me to ask me to make up the pattern and review it and well, I love trying out new patterns; so ta da!

The Sandpoint is described as “a loose fitting T-shirt
with a surprise cowl in the back”.  It is a nice little top pattern suitable for a beginner, having separate front pattern pieces for the two neckline options, V-neck and round neck.  I think it’s biggest point of difference from other similar designs is a “shoulder band”, essentially a strip which is supposed to be worn behind the neck.  I think its purpose is probably to keep the top actually up on your shoulders and not fall off, which is pretty much a given with these necklines.  However I wasn’t keen on the shoulder band and decided to leave it off, and sewed lingerie holders inside on the shoulder seams.  I have previously used lingerie holders to keep up the shoulders of my other oversized cowl, drape-y tops, here and here, and have found them to work just fine for the job.  Fortunately they do for this one too  🙂

Because I wanted my rather bold patchworked fabric to speak for itself I decided that arm and neckline bands would be a visually distraction, fighting for attention.  So I left these off also and finished these edges by simply overlocking, turning under once and hand slip-stitching a hem in place.  My lower hem is likewise, invisibly hand stitched, and actually my top is 6.5cm longer than the pattern… for no real reason other than my patched-together fabric had the extra length, and who was I to ruthlessly cut it off? after all that careful cutting and patching it together!?  Plus, I just happen to like tops to be a little bit long.

Because I was leaving off the shoulder band, I put my top together quite differently from the instructions… namely: the instructions say to fold the back cowl allowance inside and then stitch the front and back together at the shoulders.  However this would result in a visible end-of-seam at the neck, which in the design is to be covered up by that shoulder band.  So, instead I pinned the front and the back together at the shoulders right sides together, then folded the back cowl facing allowance out to wrap around the front; then stitched the shoulder seam.  This way, when the shoulder seam is turned right side out the shoulder seam is nicely encased and hidden away within the facing, which gives a neat, more polished finish.

Details:
Top; Sandpoint by GreyDay patterns, made using 4 old cotton jersey Tshirts
Skirt; an adaption of Vogue 1247 and Vogue 8561, blue, slightly stretch denim, details here
Shoes; c/o Misano

pinterestmail
Switch to mobile version
↓