
 Hello!
For ages I’ve wanted to replace my old beloved khaki ripstop army-style jacket… I LOVED that thing and even did a 6 different ways post on it once. At some point I decided I’d made the sleeves just a smidgeon too short so with some sadness passed it on to Cassie. Who loves it equally, and wears it often… and I found myself pining for it all over again whenever I saw her wearing it!
Finally I’ve got around to making another one for ME!
 I just adore jackets with tonnes of hardware and detailing, like zips and lots of different bits and bobs and interesting pockets. So set about planning for this one to be chockablock with loads of that sort of thing. I considered using the same Burda pattern I used for the previous one, but I had to make lots of additions/adjustments to that in order to make it the complex, feature-laden army-style jacket that I wanted, which is fine! but since making that one, lots of great patterns have popped up with all those features already incorporated into the pattern. Eventually I settled upon the Tosti utility coat pattern by Yuki of Waffle Patterns, it had the detachable hood, the belt, tabs, the front zip placket for a separating zip, multitudes of pockets, in fact: everything I wanted. I was really attracted to the variety of different pockets it had and was pretty determined to use each and every one of them in my jacket. There are six different types of pockets! an inner breast pocket, a sleeve pocket, two options for breast pockets and two options for hip pockets, and I used ’em all. Cassie thought I was loopy putting four different pockets on the front of the jacket, but I stubbornly ploughed ahead because I love that mishmash look… I know you’re not supposed to do ALL of them with the pattern, but I just wanted it!
Beware; pocket overload approaching…
Breast pockets:(L) inner welt pocket with flap; and (R) inner pocket with exposed zip closure


Hip pockets; (L) bellows pocket with patch flap; and (R) patch pocket with exposed zip closure


(left) patched sleeve pocket with exposed zip closure; and (right) inner breast pocket with double welt


The fabrics: the khaki cotton ripstop was from some online fabric store in the US; and I can’t remember its name, sorry! My neighbour Meggipeg and I went in together with a joint order. The fabric was priced reasonably, but postage was horrendously and shockingly expensive… the trap!!… but at least I got the ripstop so that’s ok. One of the saddest things ever is when Spotlight ceased stocking this stuff *sob*
The plaid cotton flannelette I used for lining and all zips were from Spotlight, and I had to visit two stores to find them all! and the copper press studs were from both KnitWit and Spotlight Yes, I had to visit a coupla stores to get enough of those too! The belt buckle was harvested from an old belt. Originally, I had decided I would put thin black fleece interlining in my jacket for some warmth, but once I had the lining made up I realised I wouldn’t need it. The jacket is pretty warm enough already, and truthfully, if it was any warmer it actually wouldn’t be all that useful in our climate.

 There is tonnes of topstitching all over, so satisfied that part of me that adores precision sewing. I’m that weirdo that LOVES topstitching! and am pretty much totally and blissfully happy when I’m hunched over the machine, chugging along; churning out lines upon lines of precise, neatly and evenly spaced, stitching. The wonderful thing about this ripstop is that the little squares in the weave of the fabric make precision stitching and lining up pieces to be perfectly square very very easy.
(L) belt loop; (R) shoulder tab. Press studs from kits bought in KnitWit and Spotlight


(L) collar with press studs for hood, (R) wrist tabs


No one will ever see or notice this but me, but the plaid lining matches up all the way around #patternmatchingfreak
The lining appears a bit “blowsy” in this picture, due extra ease in the lining… many of the lining/shell seams have you make folds/pleats in the lining when stitching the lining to the shell, to account for the extra length.

I’d cut a plaid lining for the hood too but decided upon a self-lined hood. Less jarring in appearance when the hood is worn down. Which, let’s face it, it most usually is!
Opening zip, and placket with press studs; (below) self-lined hood


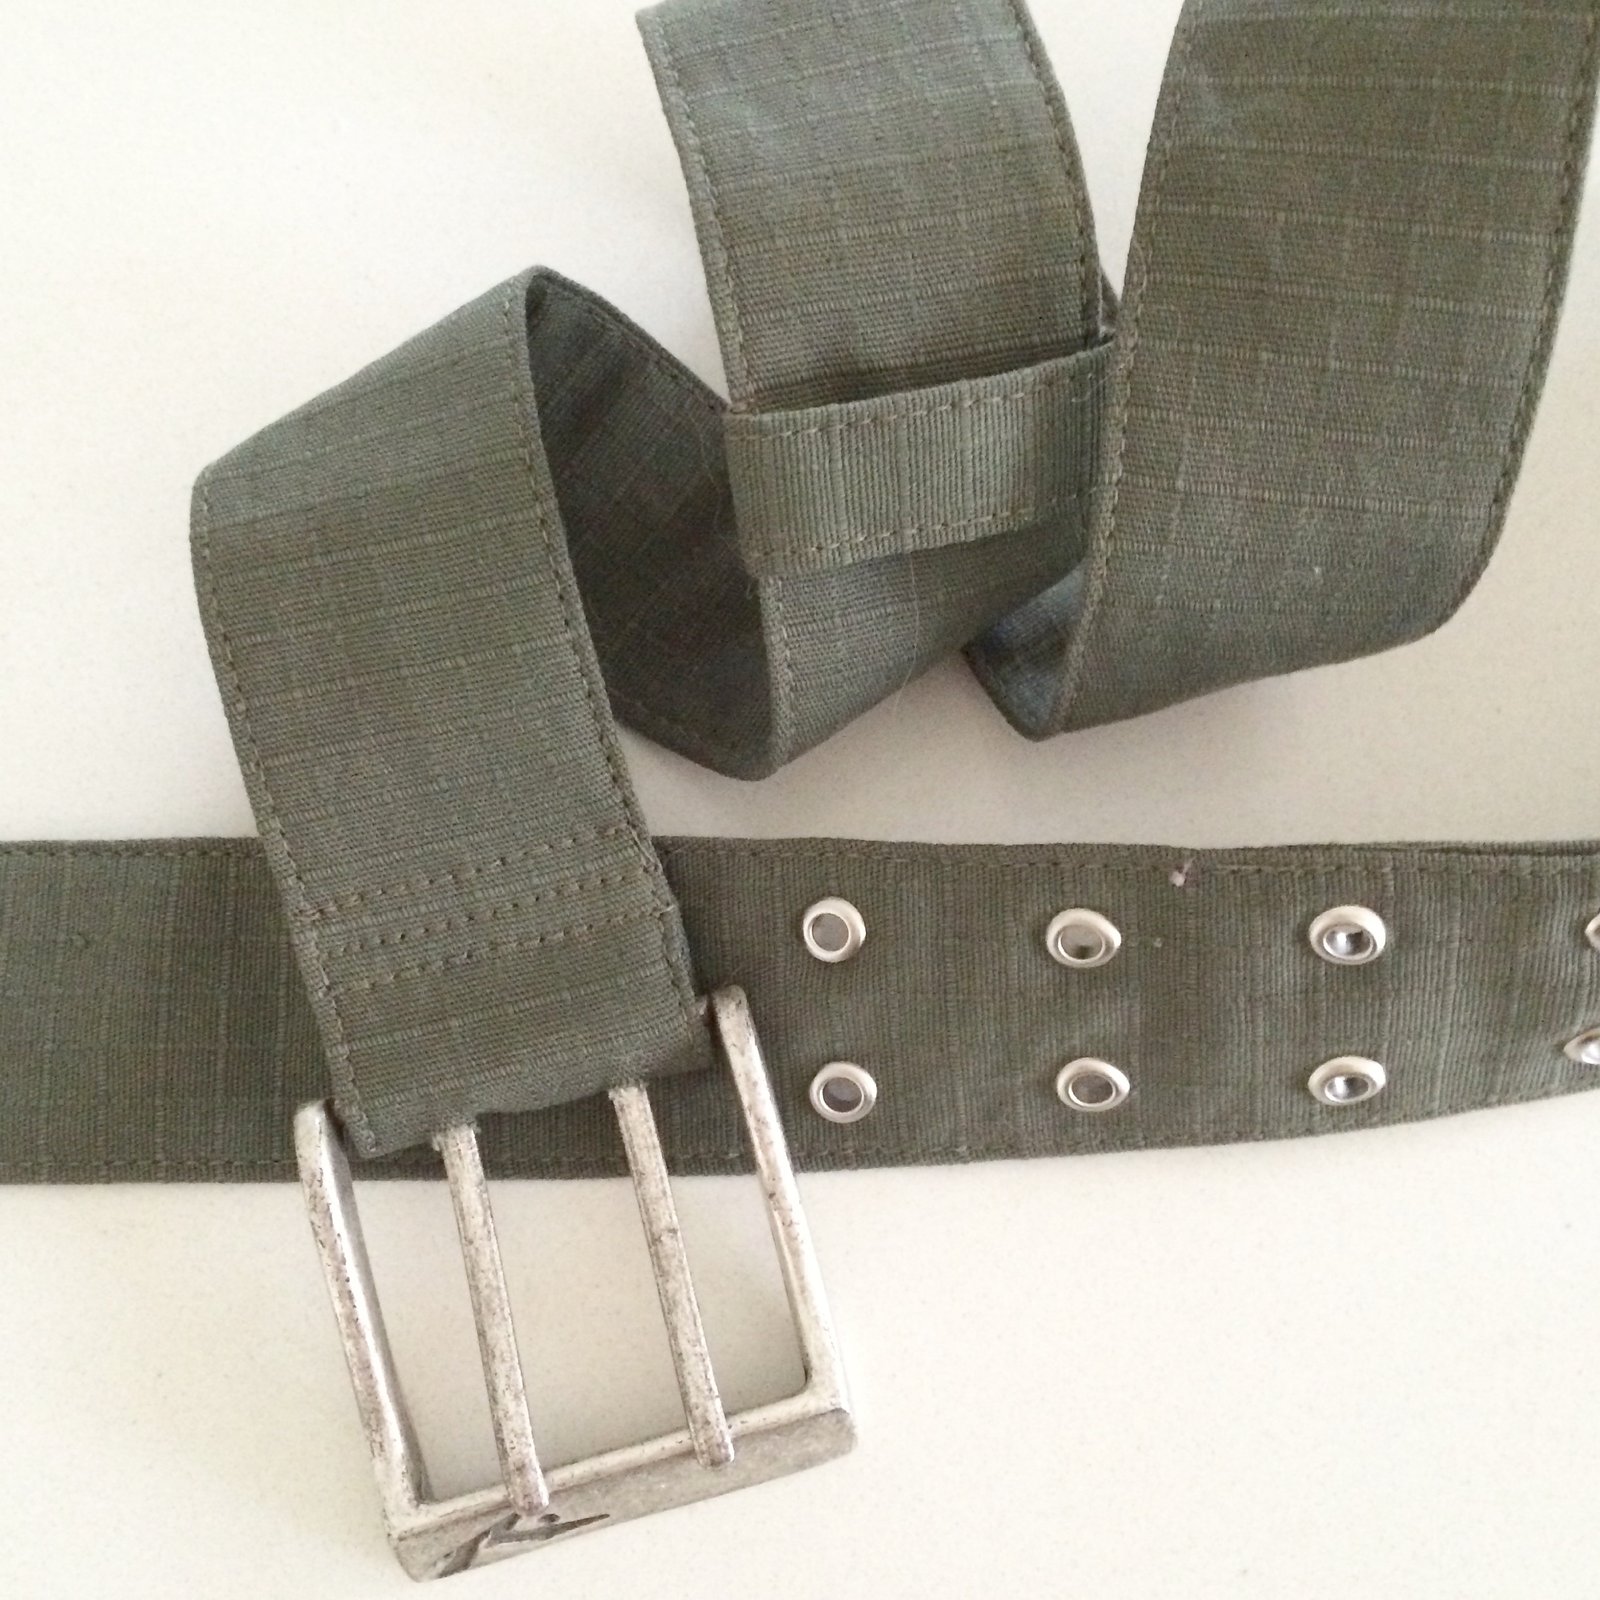
I also made the belt, using a buckle harvested from off an old belt of Tim’s, and eyelets from a kit from Spotlight
I posted lots of these progress pictures on instagram also, so I’m sorry for the doubling up. But; you know instagram; it’s fabulous and I love it, but stuff gets “lost” in no time there since it’s not that easy going back to see things you posted a year ago…so I’m reproducing all those pictures here. I know a lot of us seamsters have migrated pretty solidly to instagram now; in fact it seems fewer and fewer people are reading blogs and it could be that blogging like this is dead or at least heading towards comatose. I mean, let’s be honest, how many people actually click over when you see the words “on the blog now, link in profile”? Precious few… and that’s just the way of things, times change, people now are of the moment and often are only interested in one quick visual; and that’s all absolutely fine and ok and completely understandable. I think though that I will still keep on with writing this blog anyway, just for my own benefit. I want to keep going for the same reasons I started it; as a record of all my sewing projects, because I can search for and look up older things up here, and you can’t really do that over on instagram all that easily.
Hmmm, well that was a bit of a diversion there, sorry! I’m writing a review of this pattern, but no point in reading it really. It’s pretty glowing, because I absolutely LOVE this pattern; I thoroughly enjoyed making my jacket, and am totally enamoured of the final product. Fair dinkum; I’m going to wear this to rags.

Fun fact; after a week of FREEZING cold weather.. today, the day after I finished this jacket and wanted to wear it for the first time; of course today was then an unseasonably warm day. Naturally!! But you know what? I wore it anyway, mwahahaha. Unco-operative weather! pfffft! see what I care! I wore it, and I roasted. And I loved every minute of it!!
Details:
Jacket; the Tosti utility jacket by Waffle patterns, khaki cotton ripstop with plaid, brushed cotton lining
striped Tshirt; self drafted, details here
Skirt; Vogue 1247, cotton corduroy, originally yellow and dyed brown, details here
Tights, self-drafted, black stretch, details here
Shoes; made by me, details here


 I was thrilled when
  Did I dive right into that invitingly turquoise water for a frolicsome dip? NO!!!! Since I’m the wussiest wuss that ever wussed I just got my pictures super fast and then threw on my jeans and thick woollen cardi again pretty quick! You can see that turbulent water and my crazy hair, it was blowing a freaking gale and the waves were booming and thundering onto the sand like the proverbial white stallions. I do love the beach in any and all weather, including wintery and wild; I love the sparkle of sunlight on the water, the swirling foamy shallows, and the crashing of the surf. Well, perhaps more so when I’m warmly rugged up snug as a bug in a rug, of course. Sienna loves the beach too, but it’s alright for her, in her thick fur coat! hehe, the things we do…
 It’s funny; when I finished the pink/black one I almost immediately took a violent dislike to the colours I’d chosen… It seemed a bit… I dunno, young and sporty? or something. Then I made the charcoal version. Which I really adore. When I took out the pink/black one again, to take photos in it, of course, you know the story, it didn’t look quite so hideous after all. I actually took quite a shine to it again. The pink seemed a bit warmer and less Barbie than I’d remembered it. I decided I might even like it better than the charcoal one. I don’t know. Oooh, I’m torn! Either way, I expect both are going to get worn this summer 🙂
 Heather has introduced her own sizing chart for the pattern, which I think is a pretty good idea. You know, when you’re making something and you sometimes get too lazy or too cold to disrobe for proper measurements, and go with the same size you always take, or worse; what you think you are. I do find that when faced with an unfamiliar sizing chart, you’re more inclined to get out the tape measure and do a properly slow and careful remeasure, to determine your correct size. Which I did. So saying that, how do I feel the cups fit? well they both fit pretty good. Though I do feel like the cup on my charcoal one, while it fits me; is just a smidge on the scant side for my tastes, if that makes any sense. I believe Heather has upsized them on the final version, which I reckon is a good call. I am small up top but I still kinda like to have lots of coverage there, for personal preference. I might remake the charcoal bikini top, following the new sizing of the final version of the pattern. But maybe not ’til summer!
 Fabrics and bits and bobs: the fabrics are from Fabulous Fabrics; who do get some very nice swimwear fabrics in stock during the season. I bought all these fabrics in previous summers, stocking up during sales. Stashing strategically, as you do 😉 Other supplies from my fast dwindling MakeBra basic kits; the underwires, under wiring channeling and the foam for the cups. The swimwear elastic, plastic swimwear hooks for the straps and back closures are from Spotlight.

 I’ve made this new top! rather cute and feminine with a sweet little tie front at the waist. Yes, it’s linen, it’s plain, and it’s white. I just can’t help it, I’m a diehard white or off-white top kind of a girl… I’ve got stacks of them and keep on piling new ones in t the ol’ wardrobe because I never have quite the right one, and always feel like I could use just a few more, in different styles and fabrics. Also; white fabrics; honestly, sign me up for the Addicted t


 I’ve made some boyfriend jeans! Hehe, I actually made these aaaaaaaages ago! and have been dying for the pattern release, just so I can wear them more often. They’re so comfy and easy to wear, they’re my current favourites. I really really love them 🙂
 Fabric; these are designed for a non-stretch denim, so I found a nice, crisp, deep dark charcoal cotton denim, mid weight and with absolutely zero stretch to it in Spotlight. No stretch, and the jeans still feel fantastic! I also used coppery-brown Guttermann’s upholstery thread for the topstitching, and copper-y coloured jeans buttons, all from Spotlight. The grey cotton for the pockets and waistband lining is the same fabric as my


 I’ve made a new dress for Cassie! does’t she look swish and smart and ultra-glam? Well, I reckon so 🙂


 Hello there. I’m Sally 🙂
 So, my Mum took me to to Calico and Ivy for my belated birthday present; and we chose this book The Making of a Rag Doll, by Jess Brown, and a little stack of fat quarters. I know, right? I’m so lucky: FABULOUS birthday present! This was on Thursday and I finished this lot last night, so obviously I just could not wait to immediately get stuck into making my doll.


 Quickie review:
 It’s taken a while but I’ve finally taken pictures of Cassie wearing the dress I made for her for Christmas!
 btw, it’s faaaaaaar harder to hide Christmas sewing from Cassie than it is the boys! who pay precisely zero attention to whatever I’m mucking about with in the laundry… Cassie is a high probability to go snooping around the stash to periodically pet the fabrics and select stuff for herself. I had to be SUPER devious to get this made without her twigging as to what was going on… and she was completely surprised! Yay!!!


 Although it looks short on the model in the magazine, it didn’t look that short when made up so I removed about 9cm off the bottom to get the same look. Sleeves are about 2cm shorter.


