Tag Archives: Seams

Oblique mitred corners

I’m taking part in bimble and pimple‘s Sewvember instagram challenge, and on day two our mission, should we choose to accept it, *Dun Dun dundundun Dun*… was “technique”.  I happened to be doing a couple of oblique mitred corners that morning so that’s what got insta-ed.
A right-angled mitred corner is an easy and straightforward thing, simply folding the raw edges evenly together and sewing an easily gauged perpendicular line out to the edge from the corner.   
But I find an oblique mitred corner to be not at all intuitive… so anyway, I thought I would take a few more pictures and share my way of doing it here.  This is not necessarily the one and only way, of course.  Just mine  ðŸ™‚
This pattern has been cut with a 4cm hem allowance and a 1cm seam allowance.
Turn up the 4cm hem allowances on both edges and press the layers in place.  

Use a long pin to mark the underneath layer, exactly where the fold of the upper layer sits.  It’s also helpful to mark that outer corner fold point with a pin.

Unfold the hem allowances and turn them out right sides together, exactly aligning the upper layer fold at left to the line marked with the long pin.  The corner point pin is a helpful guide to alignment.  Pin.

the point of that corner fold pin can be seen peeping out at the bottom there

Stitch along the pressed fold; starting from 1cm in from the raw edge and ending at the corner point pin.  Trim the corner excess.

Turn out and press.  If all has gone to plan, it should be sitting all nice, smooth and flat!

Aaaand, hem  ðŸ™‚
pinterestmail

“framing” with an inset strip in a pieced garment

This method gives what could best be described as an inset strip.   It can be used to “frame” individual pieces and will highlight the piecing in a design as an interesting feature.
It is a flat strip set alongside a seam so it looks superficially similar to piping, and has the advantage of being flat, not 3D, as well as being a bit easier to sew than piping imo  ðŸ™‚

These measurements will give a narrow 1/8″ inset strip alongside a seam, however the measurements can be easily adjusted accordingly to make a narrow or wider inset as desired.  If desired, you can even make the strips slightly different widths within the one garment to emphasise some seams over others or to give a better balance visually.

Select the side of the seam you wish for the inset strip to sit.  For example, in this bodice I elected for the inset strip to be on the back side of the back/front side seam.  This will be the piece the bias-cut strip will be pinned and stitched to first.

Note: IF you are sewing strips into multiple seams on the garment as I did for my dress in this example, then it is very important to be rigidly consistent throughout here.  Because the inset strip is encroaching on the garment a little bit on one side of the seam the garment will look a little “off” if some strips are sewn to the front and some to the back.   Pick a side and stick to it.

Cut the bias strips to be 1″ width.

Pin the bias cut strips with the raw edge 4/8″ away from the raw edge of the fabric.

Stitch 6/8″ away from the raw edge.  Note: to make a wider inset strip, pin the strip and sew this seam further away from the raw edge.

Press the wide edge of the strip over the stitching, towards the raw edge of the fabric.

Stitch the pattern pieces together, right sides together, in a regular 5/8″ seam allowance.  The seam stitching is indicated in this picture, the stitching to the immediate right of that is the previous stitching to secure the bias-cut strip.

Open the pattern pieces out and press the seam allowance away from the inset strip side.
Voila!

pinterestmail

Jim jams

Mundane, but oh so welcome and necessary.  I’ve been absolutely freezing!!! at night lately and my old winter jammies were as thin as! so this was highest of high on my list of priorities.  But it had to still sit waiting patiently in the wings for the all important Magicka robe to get made first, ahem.
Both top and bottom are made from nice and warm fluffy cotton flannel from Spotlight; the top is a modified version of pattern 121/122 from Burdastyle magazine 10/2009 and the bottoms are kinda self-drafted.

The top: actually I’ve been eyeing off this Burda magazine pattern for yonks and dreaming of making it up in a suedette and this new jammie top is sort of my “muslin”, if you like.   I loathe wasting fabric on muslins and nearly always prefer to make something hopefully wearable, even when testing out a new pattern for the first time.  So; this PJ top.  It was a little bit hideous in its first, unmodified state; I ended up shortening it by about 12cm; slanted off the front neckline to be a V-neck and sewed the slit together at three spots which were covered up with three little buttons.
All the seams are sort of a faux version of flat felled seams.  By this I mean I sewed all the seams normally, overlocked the raw edges cutting close to the seam stitching and then laid the seam allowances to one side and top-stitched them down 5mm (1/4″) away from the seam stitching.

at left, “looks” like a properly flat felled seam, but on the inside, o noes! it’s plain to see now that this is the cheat’s version…

I also added an interesting breast pocket; this was also a rough try-out for this pocket that I pinned a while ago.

The bottoms; standard regular baggy trouser bottoms with an elasticated waist.  I made them the same way I’ve been making my PJ bottoms for yonks now: namely years ago I saved an OK-fitting RTW pair that had had it, and cut it up for a pattern.  I’m saying “self-drafted” because I’ve made multiple minor modifications, in this case an added a faux fly front, narrowed the waist and raised the waist rise, made them wider in the leg and longer in the leg and added in-seam side pockets.  My advice, PJ bottoms are like the easiest thing in the entire world, so when you are looking for a good pattern, just cut up an old pair for a pattern and make your own little modifications, do whatever you like, it’s almost impossible to stuff up PJ bottoms.  Easy peasy, and you can spend that money saved on the fabric for your new pair instead!

Details:
Top, modified version of Burdastyle magazine 10/2009, 121-122, cotton flannelette,
Bottoms; self cobbled together, cotton flannelette
Socks; hand-knitted by me to a 60’s pattern, details here

pinterestmail

More on sewing knit bands

eleynagomez asked how I made the thumbhole bands on my Nettie bodysuit, thank you so much for asking!
I didn’t take any pictures while I was making the real thing but I sat down this weekend and ran up a little mock-up band … basically it is the exact same procedure as if you are adding a neckline or armhole band to a Tshirt but just on a much smaller scale!

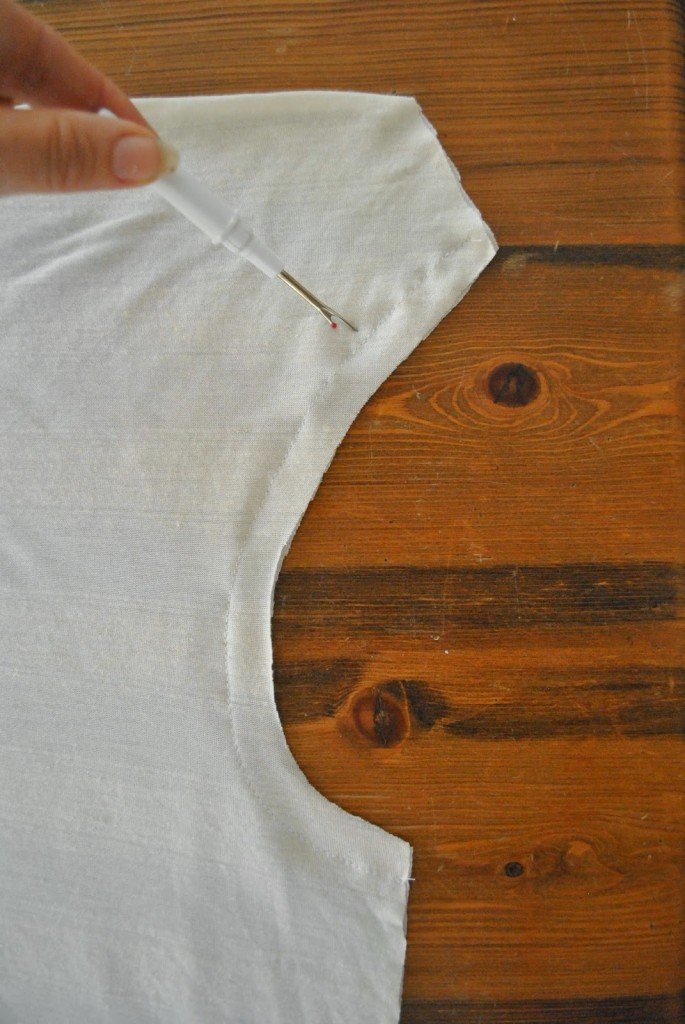
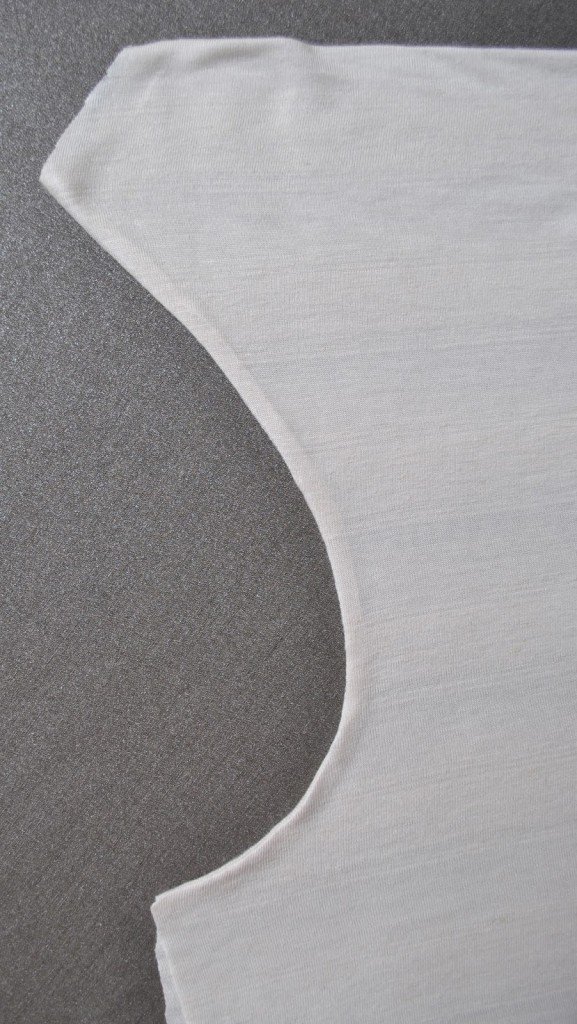
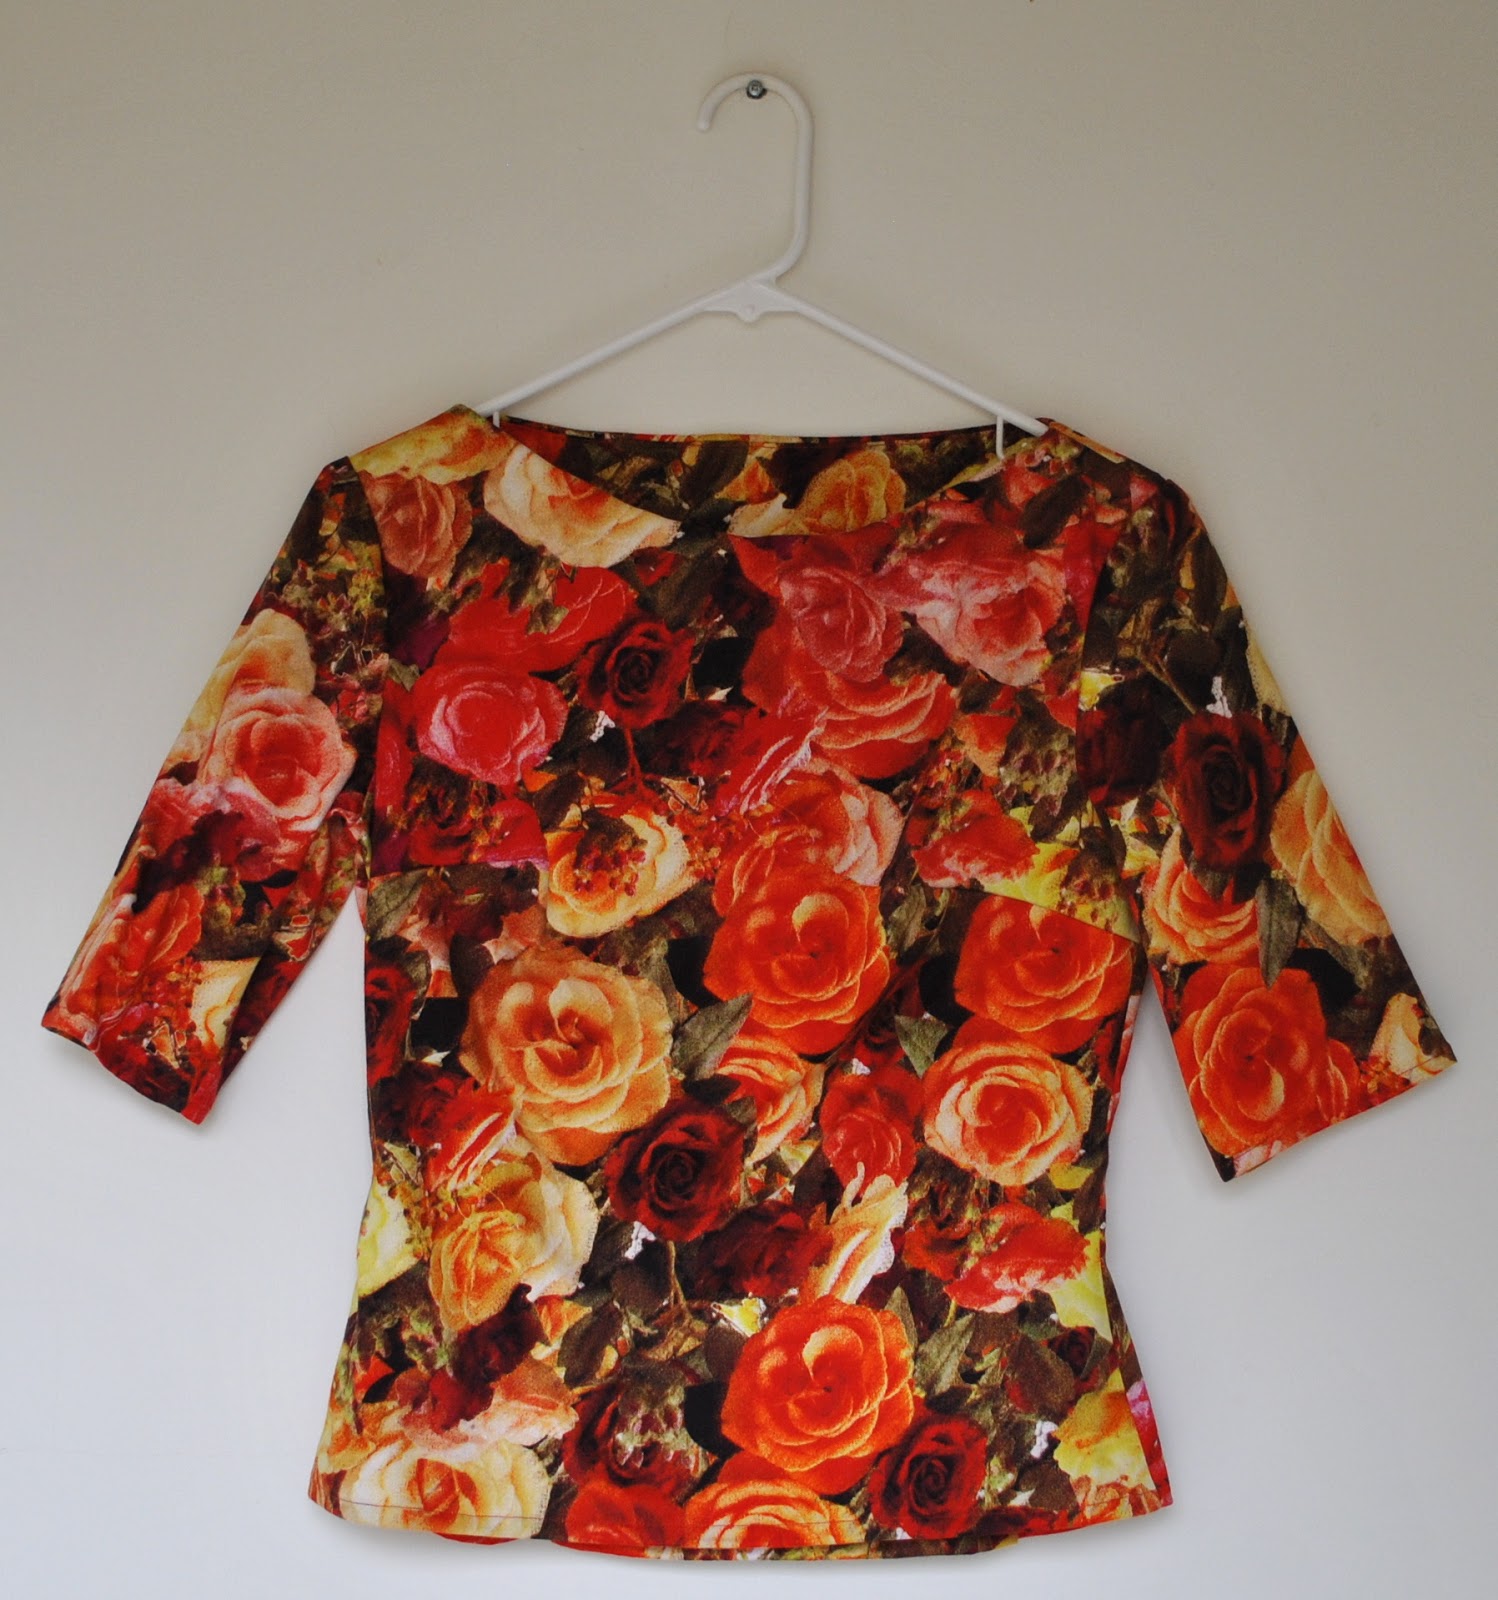
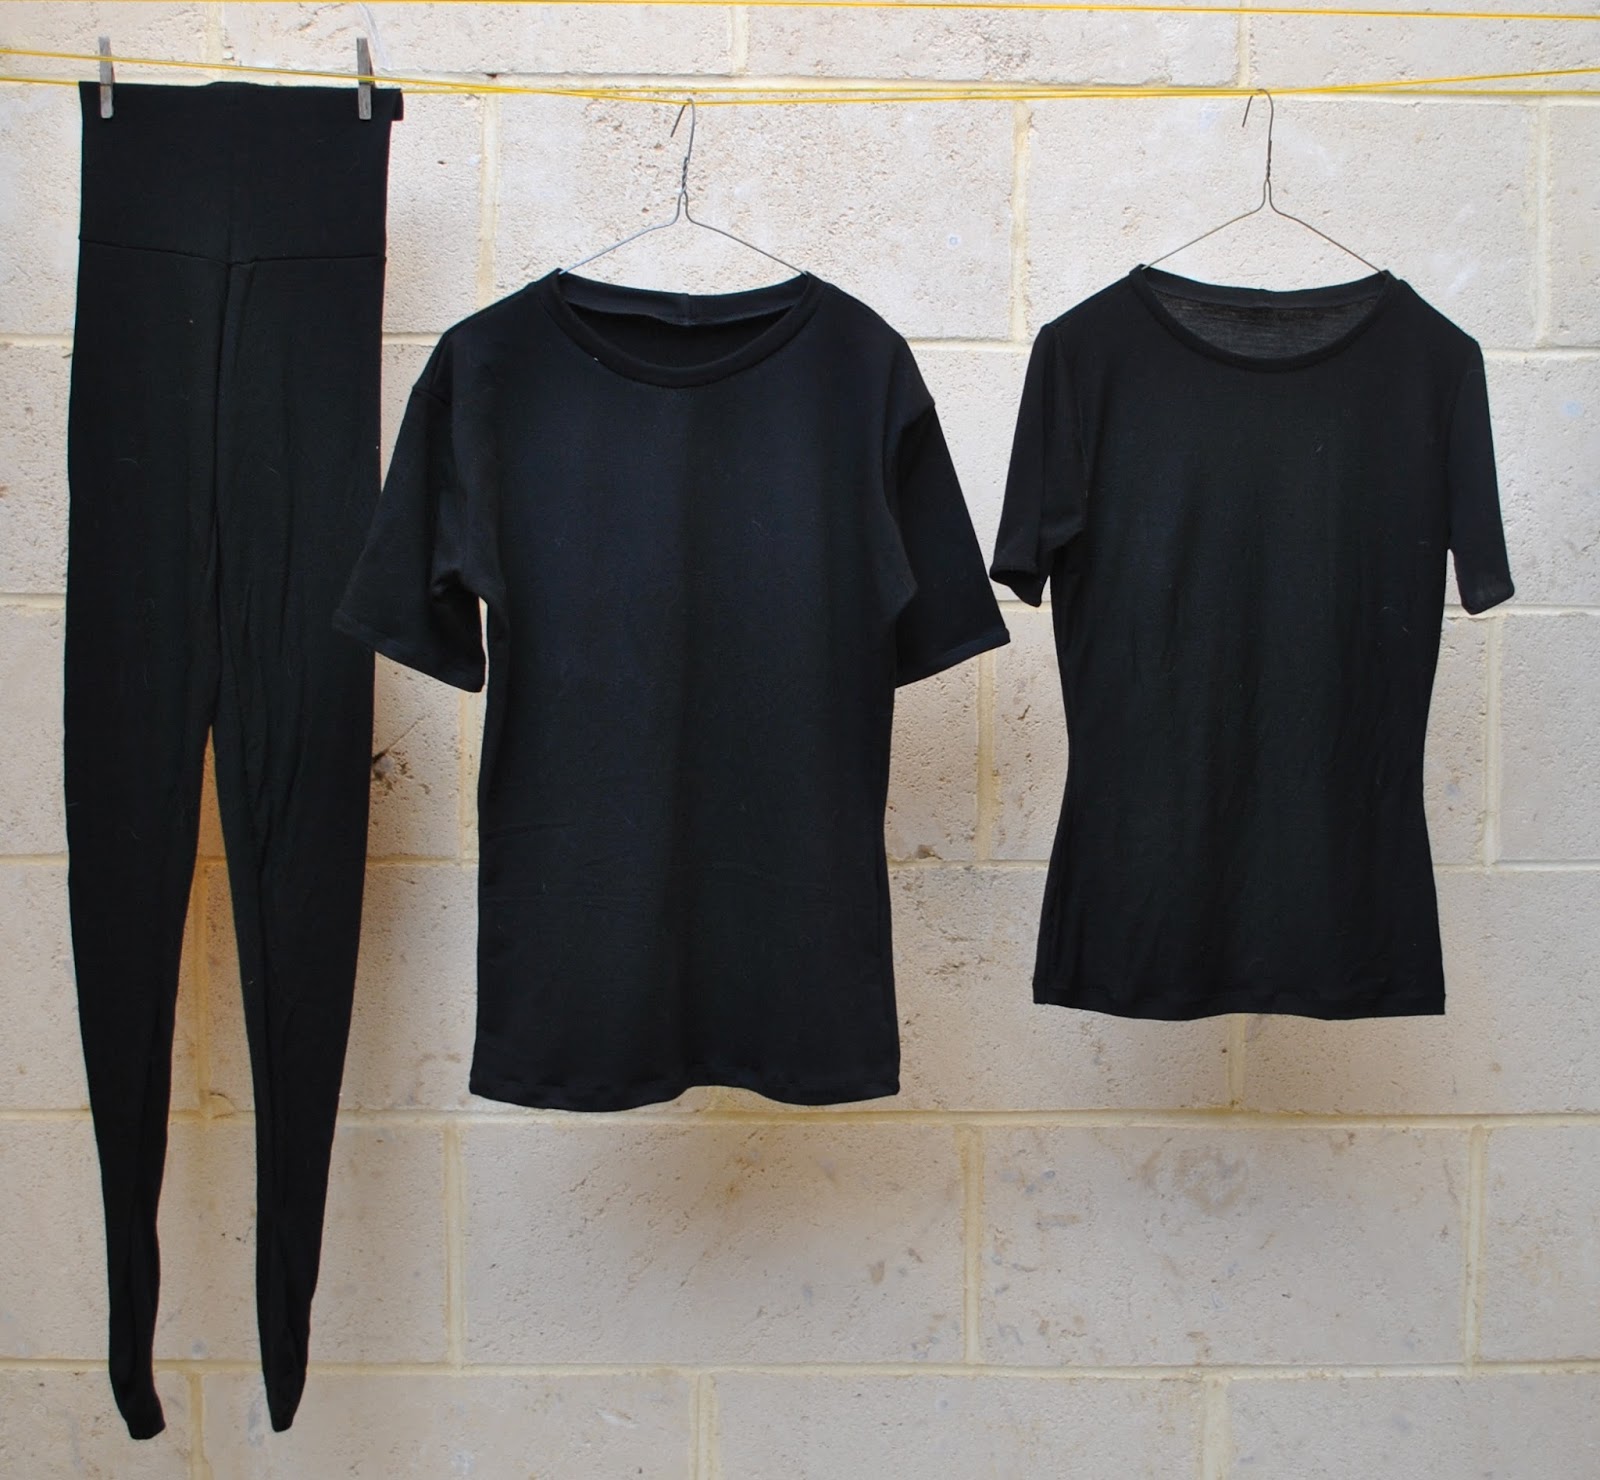
Firstly, when you cut your Tshirt or bodysuit pieces cut the sleeves long enough that they will cover over your hands, as above.  Make the Tshirt.
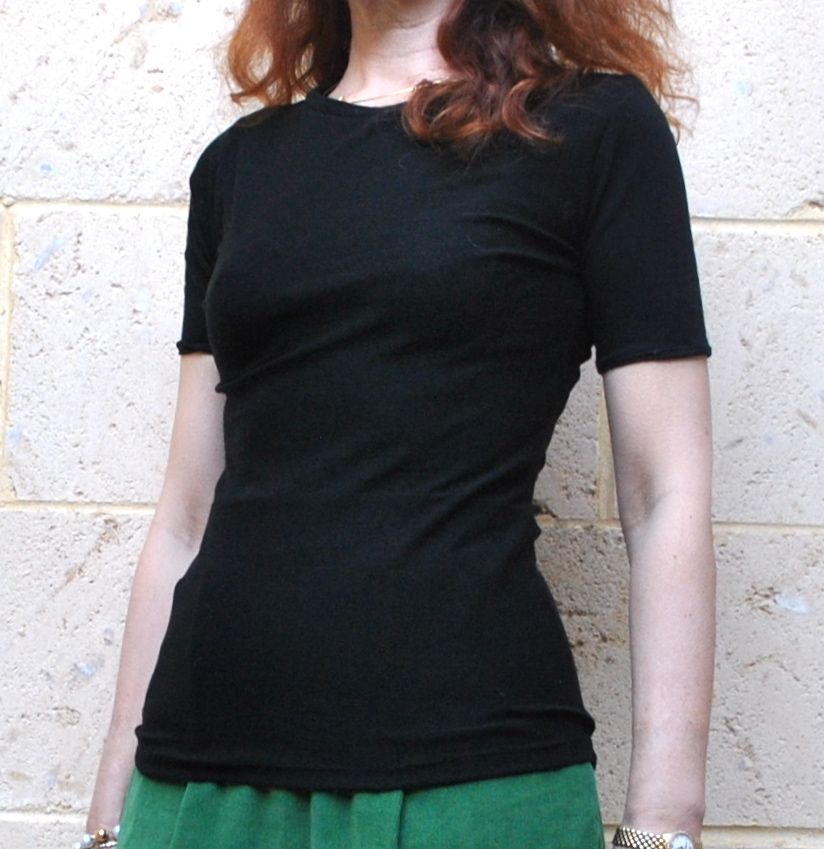
Try on and mark with a pin where you want the thumbholes to sit on the sleeves.
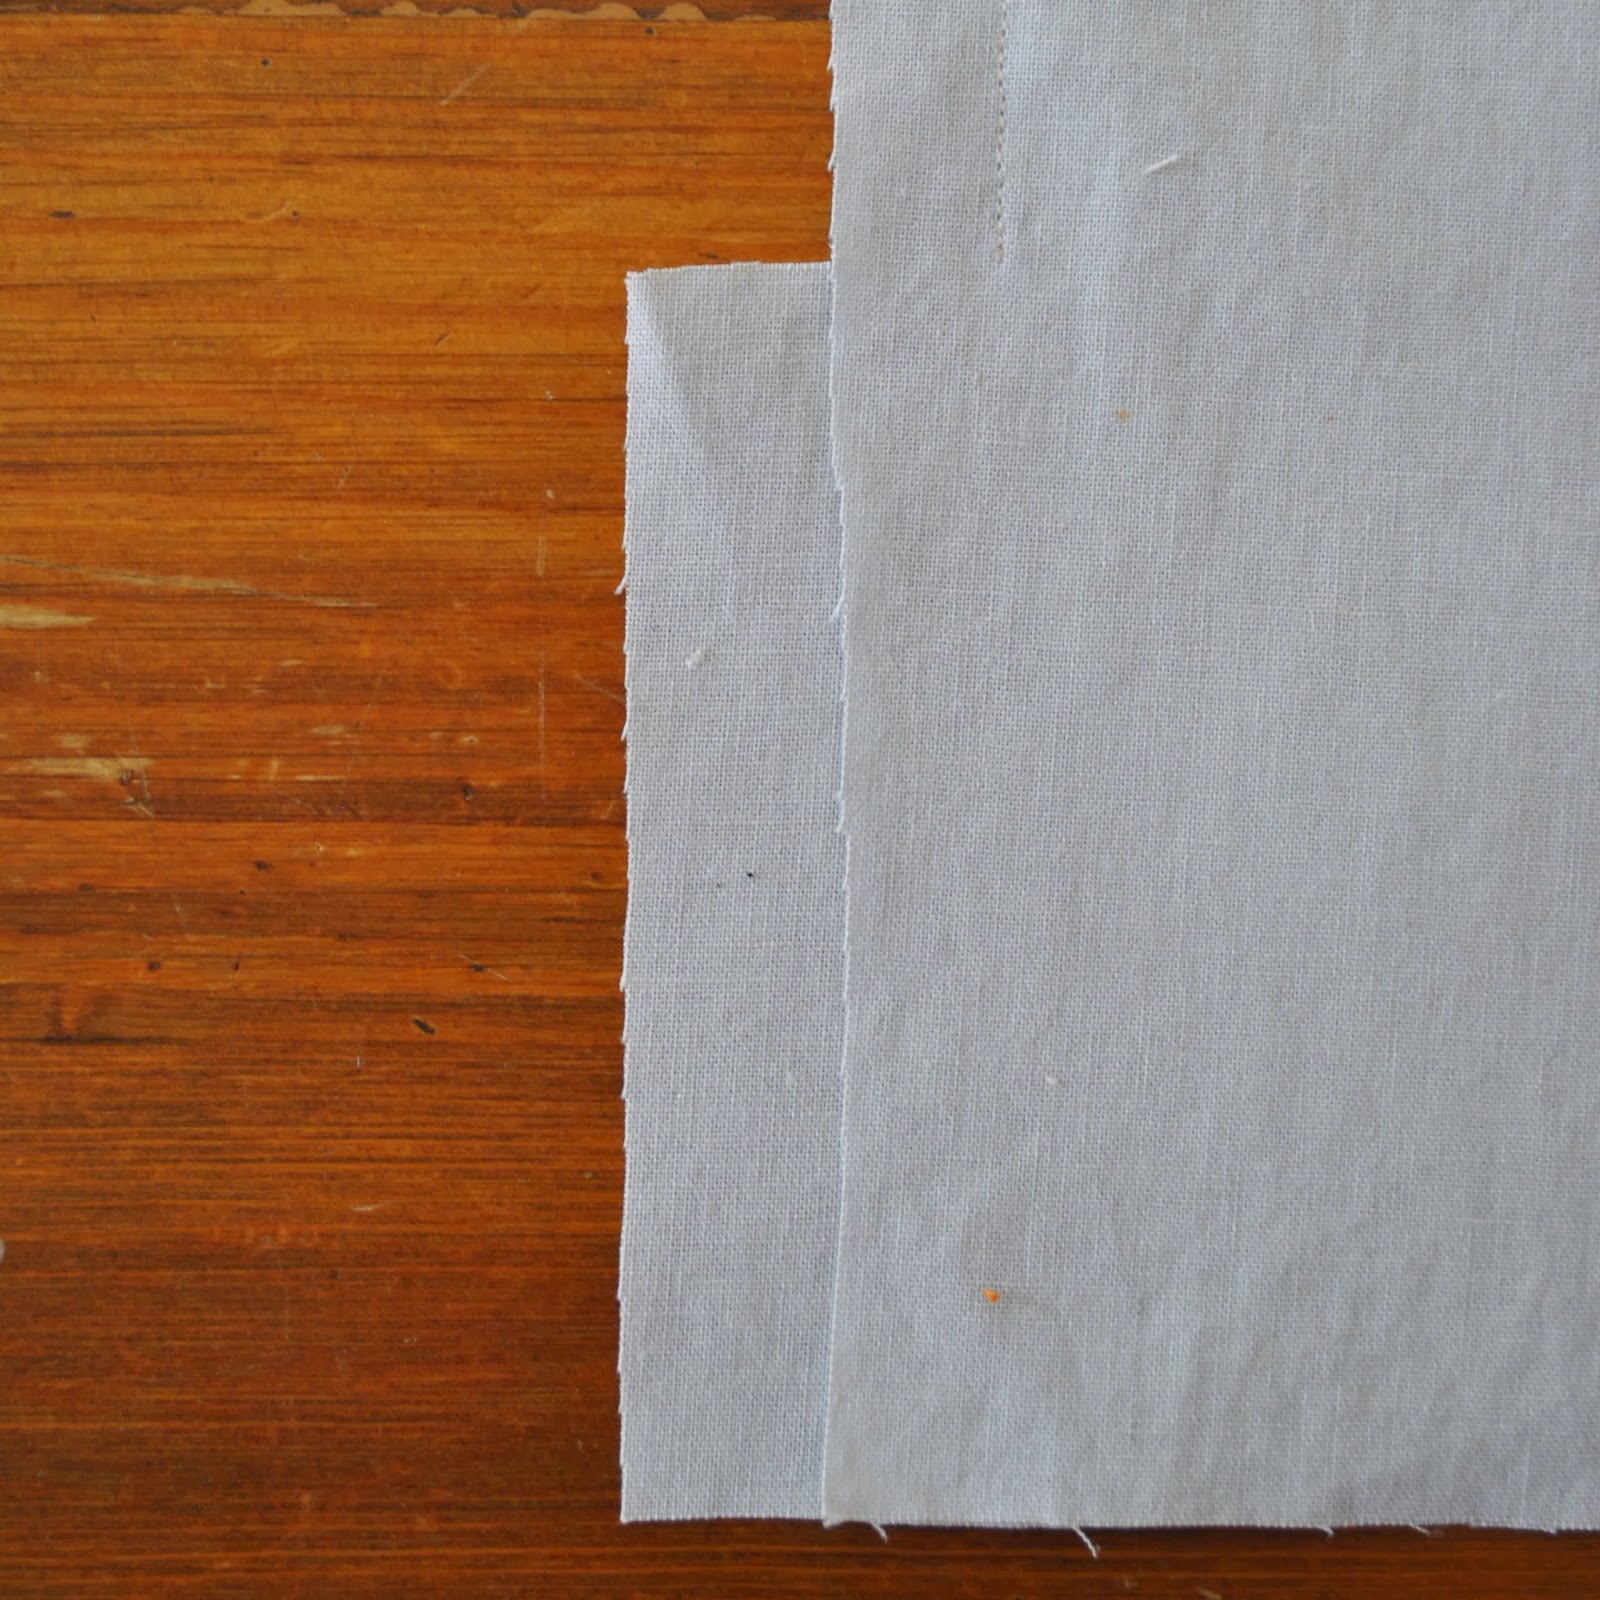
Now, measure around the base of your thumb and cut 4cm wide bands to fit, adding 0.5cm seam allowance onto each short end.

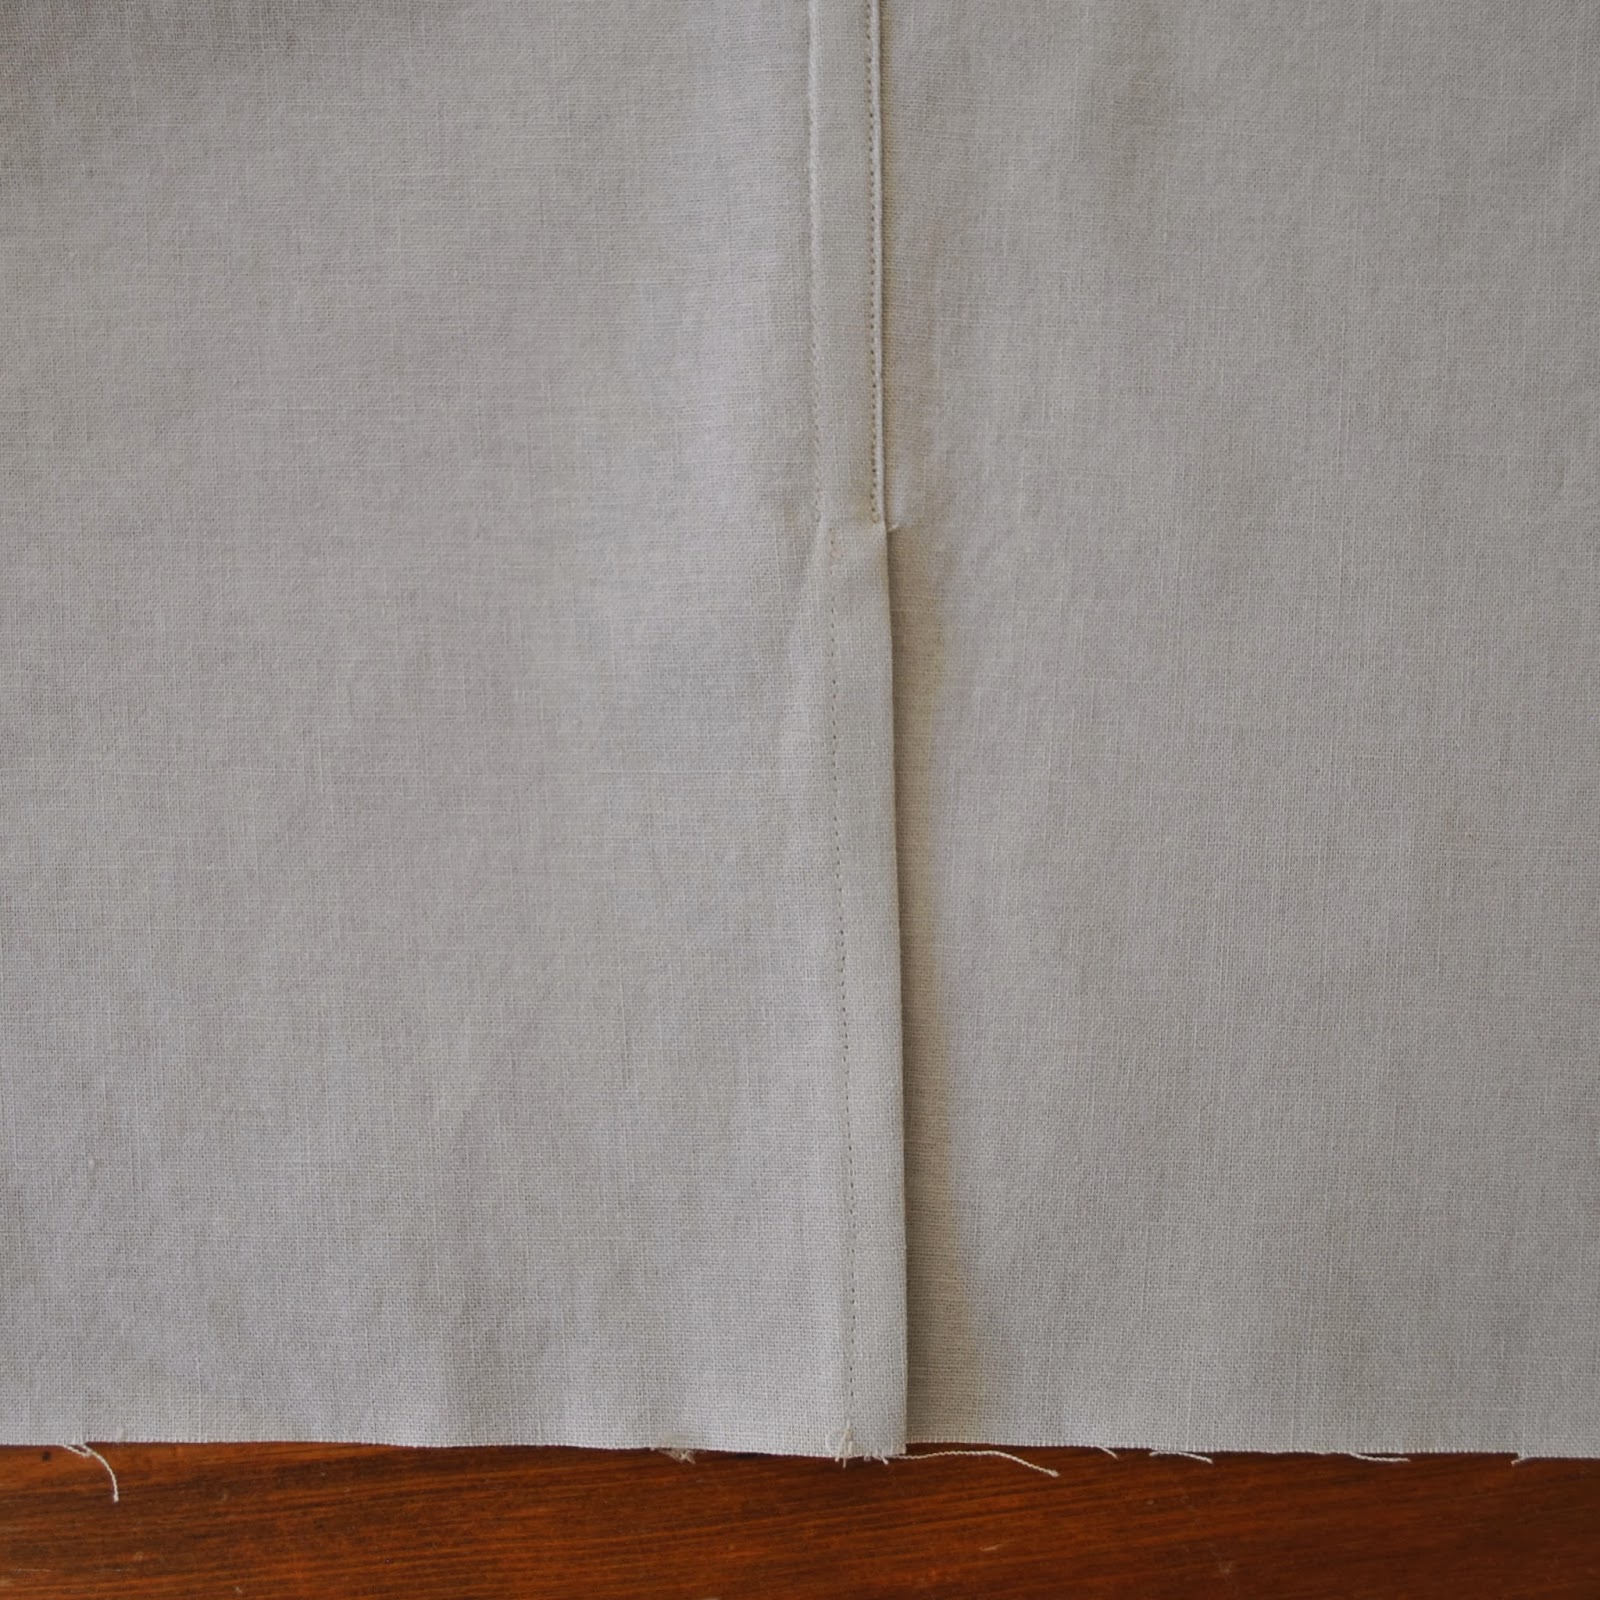
Sew the band in a ring, press the seam allowance open.

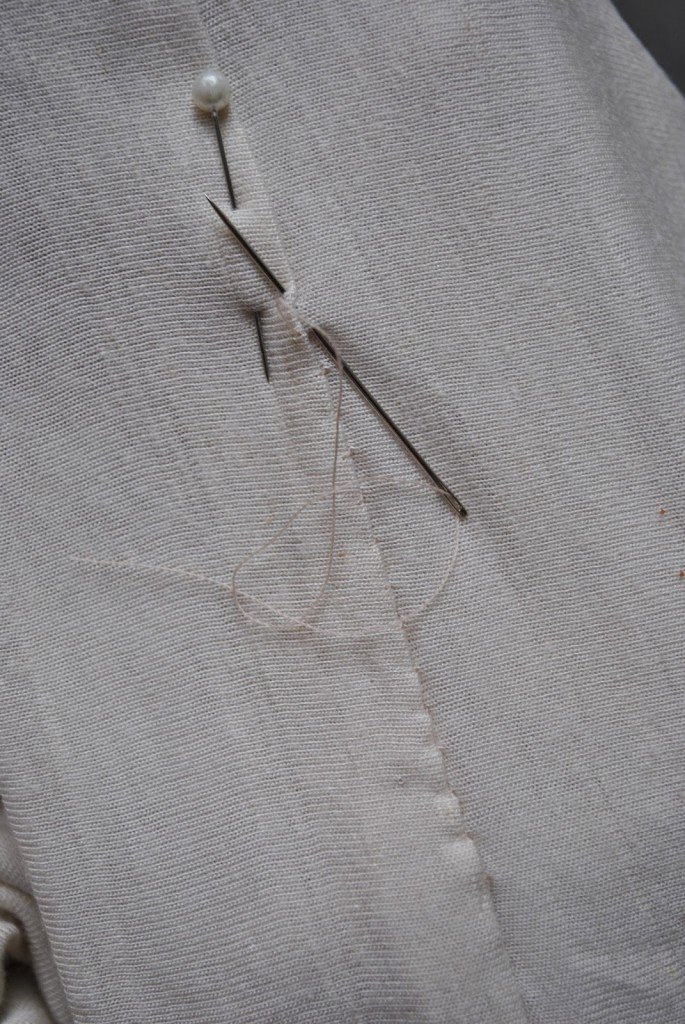
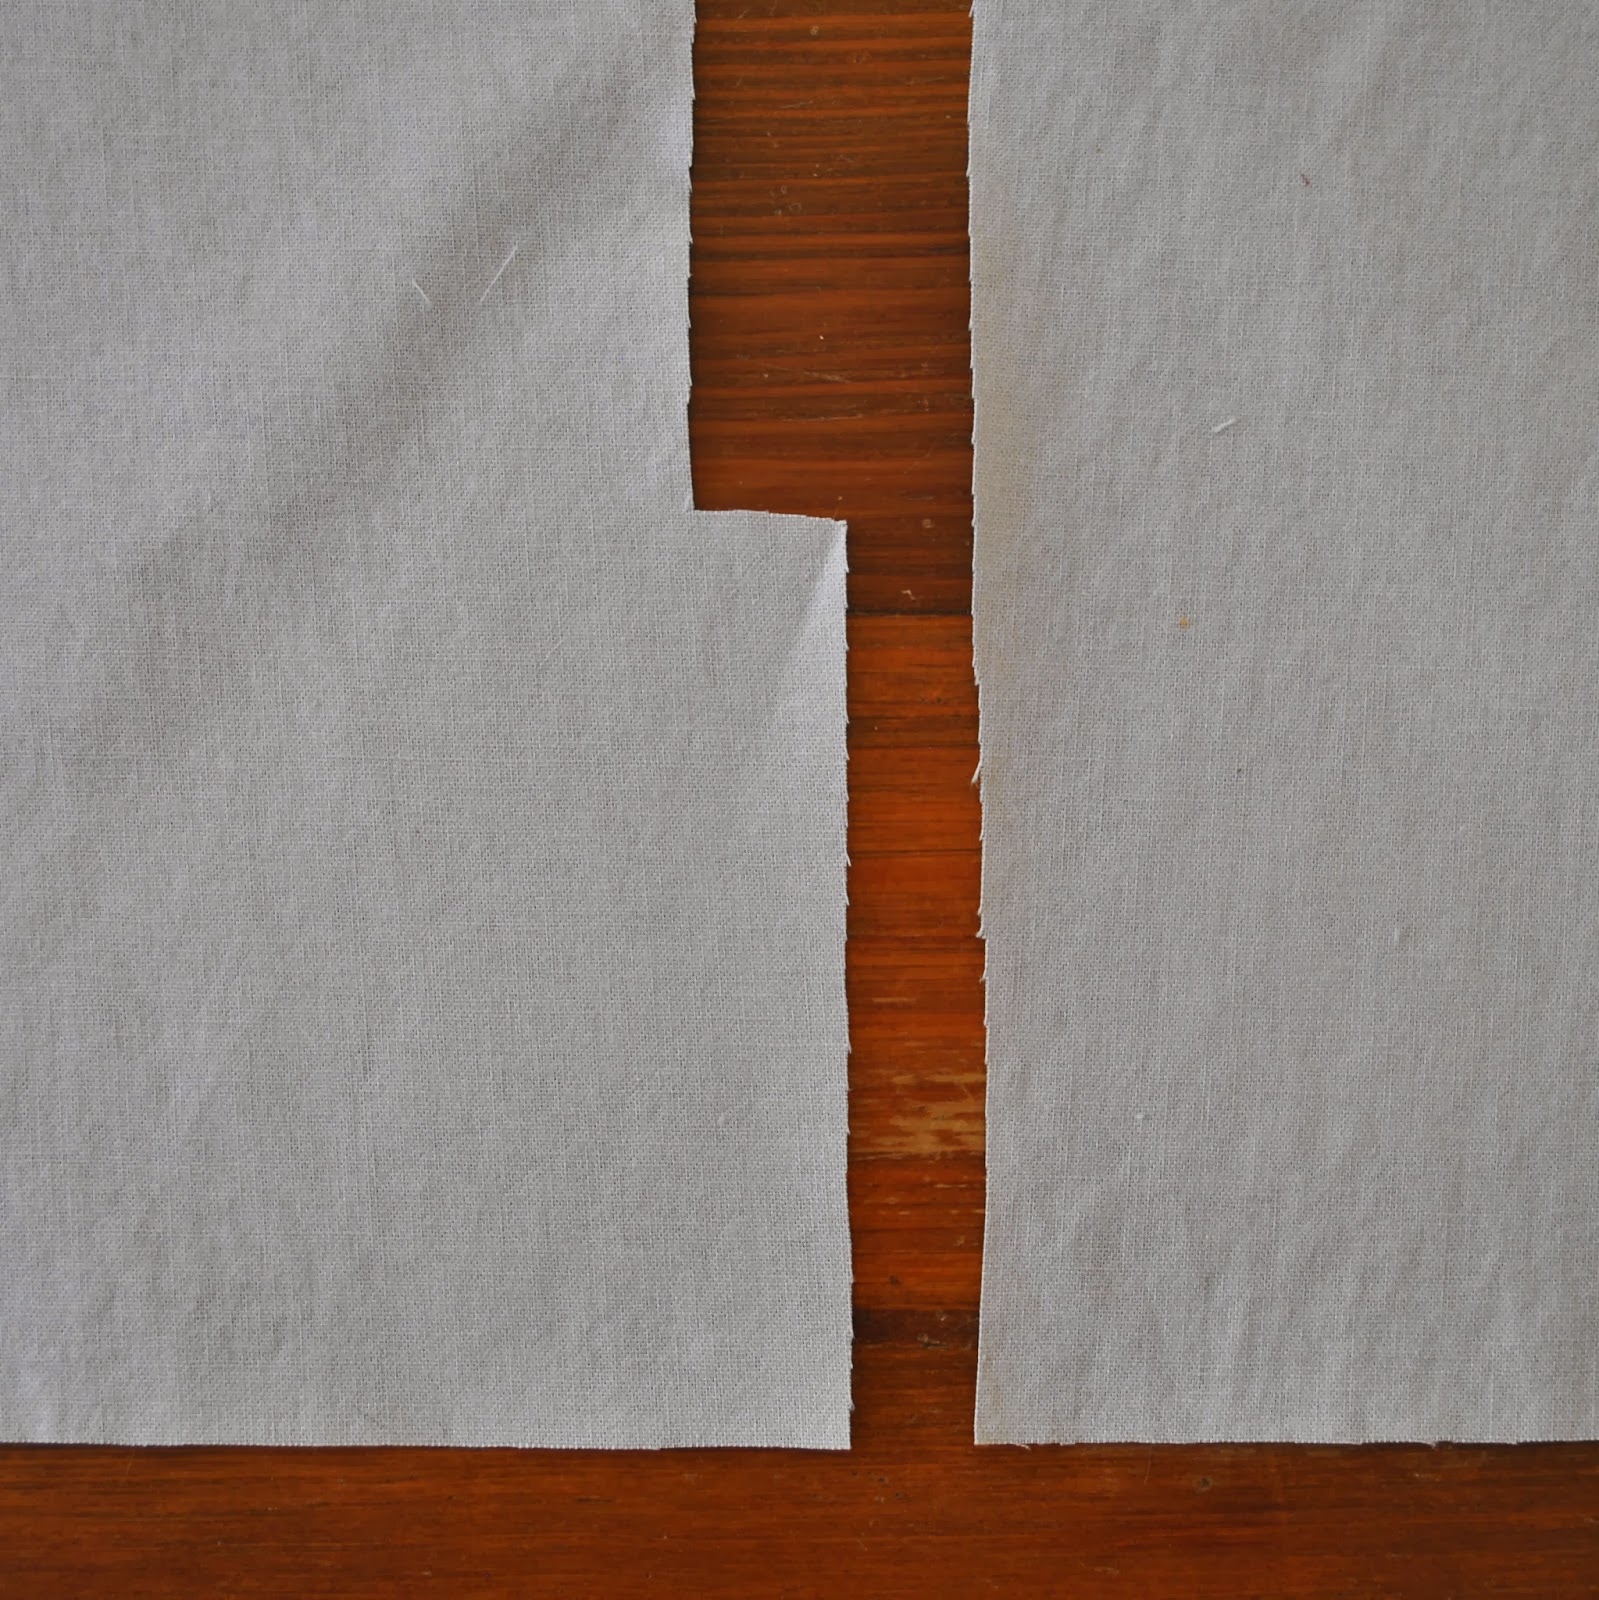
Fold in half, long edges together.  Cut an on-grain slit in the sleeve at where the thumbhole is marked; make it just a bit shorter than the length of the folded band.  It is best to make it a bit short, you will stretch the hole to fit the band as you are sewing.  If the hole turns out to be too small to stretch out sufficiently to fit the band; you can always nick the end of the slit a little bit longer while sewing.  But if you make it too long to start with then the thumb-band might stretch out and be too loose around your thumbs.  

And no one wants *horrified gasp* floppy thumb-holes!
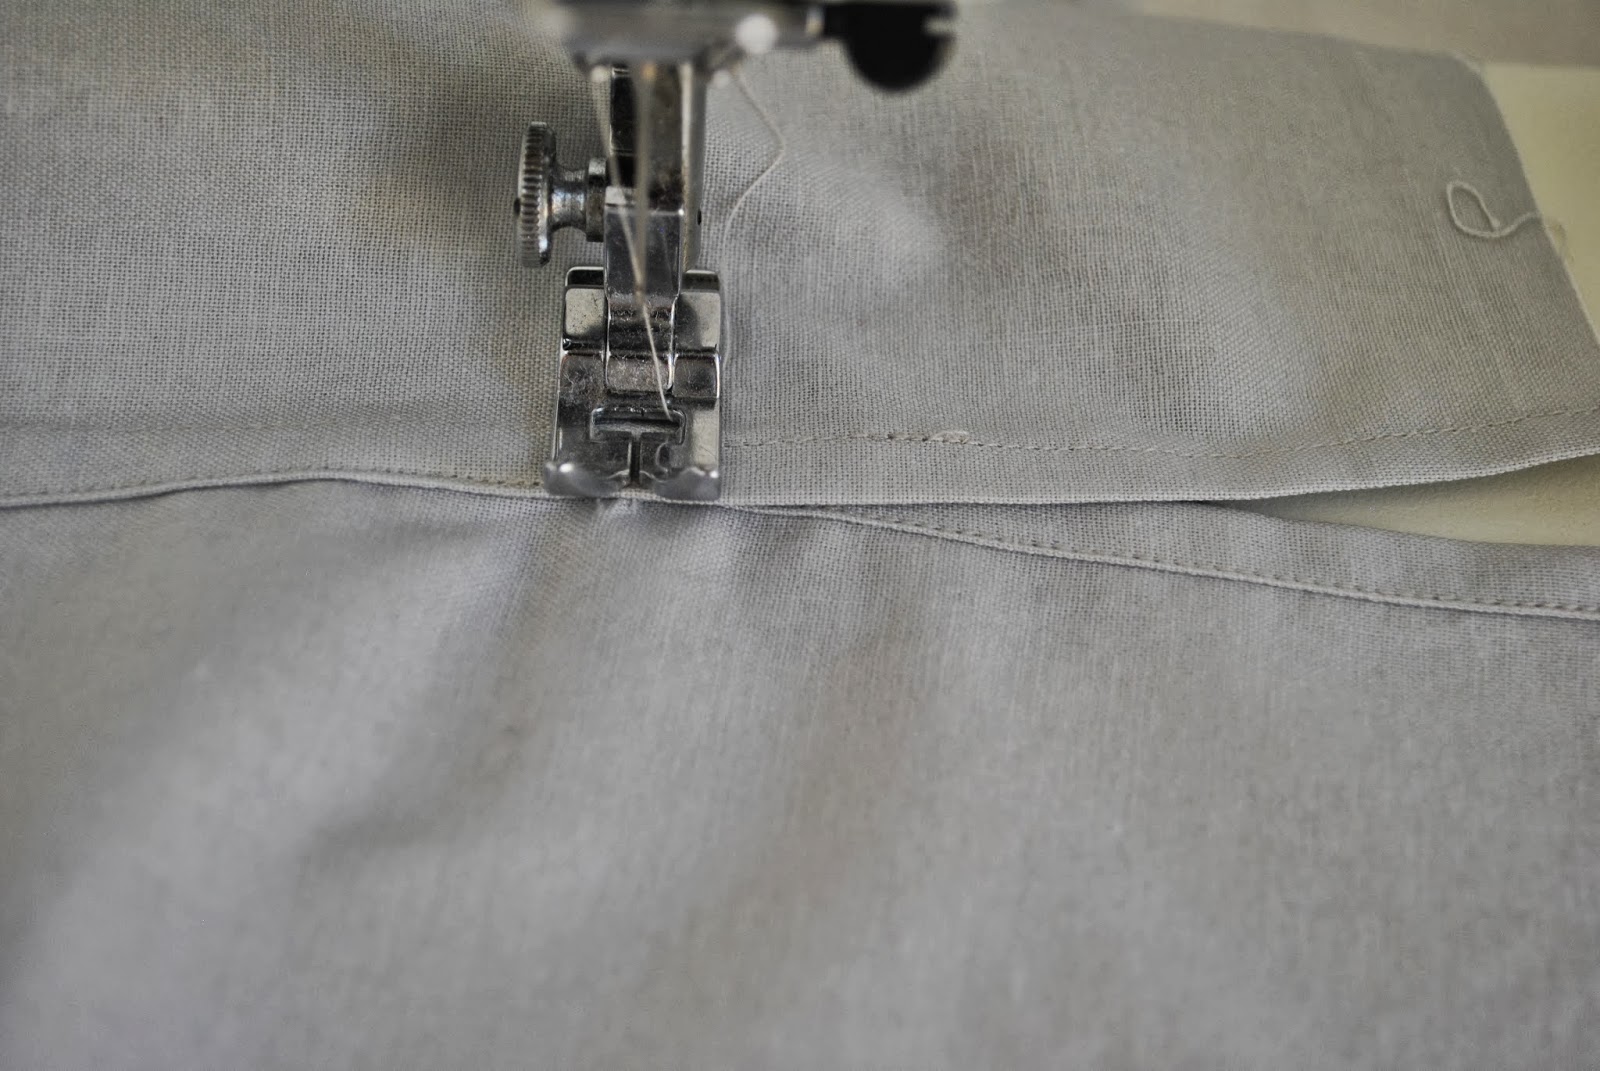
Pin from the band side, since stitching is to be done with the band side up.  

Also… important: whenever you do sew a ring or a tube of fabric like this, be sure to always sew from inside the tube rather than the outside; to avoid sewing down the opposite or underside by mistake!

Because it is such a tiny weeny little band; just go slow, keeping an even distance from the folded edge of the band at the left of the needle, and checking constantly to make sure the slit edge is being caught underneath into the seam.  Stretch out each end of the slit to fit the band as you go.

If desired, the seam allowance can be neatened by overlocker.

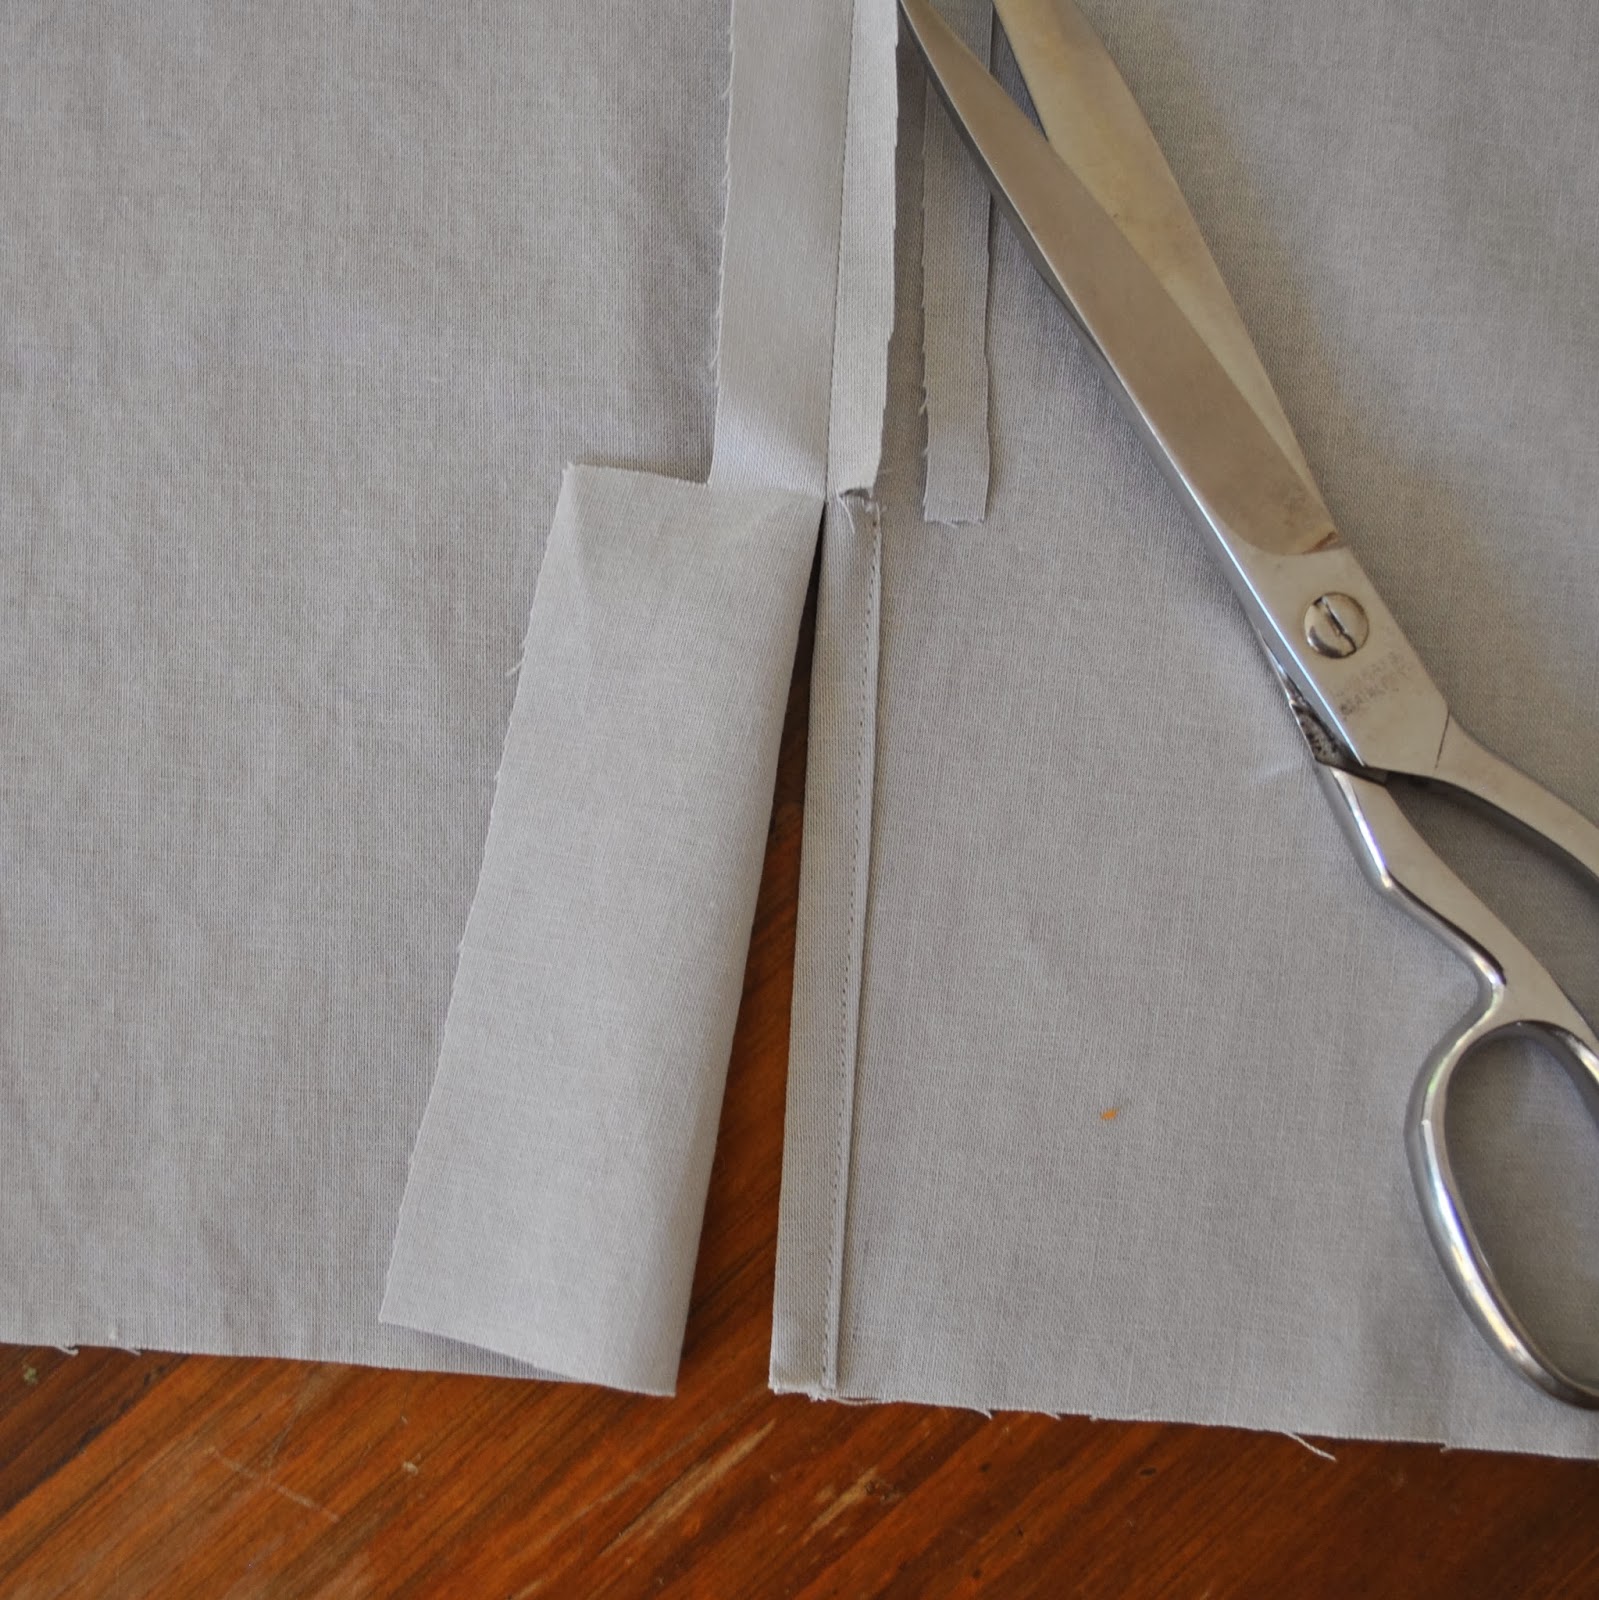
Also, I mentioned previously about sewing the joining seam in a band on the bias… I did say I would write a how-to, but this really only qualifies as a “tip”, I think!

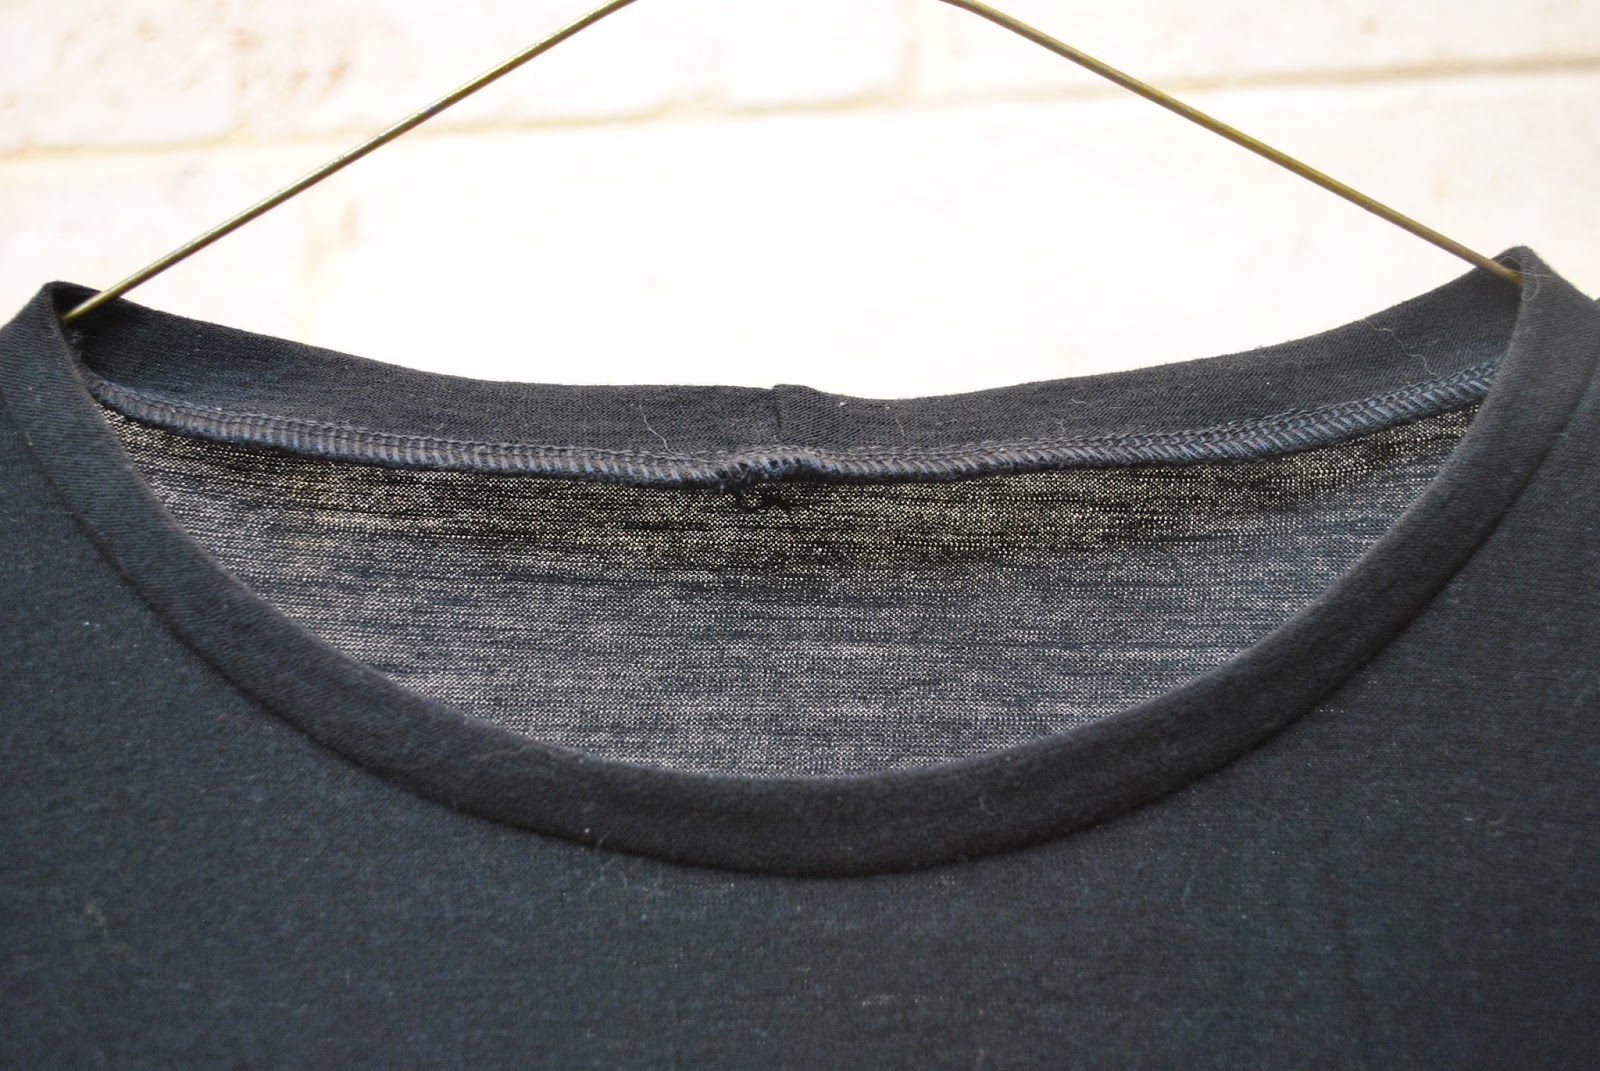
When sewing a jersey band onto the neckline or armhole or any aperture really! of a knit garment, I’ve generally gone for a straight seam just because it’s easy.
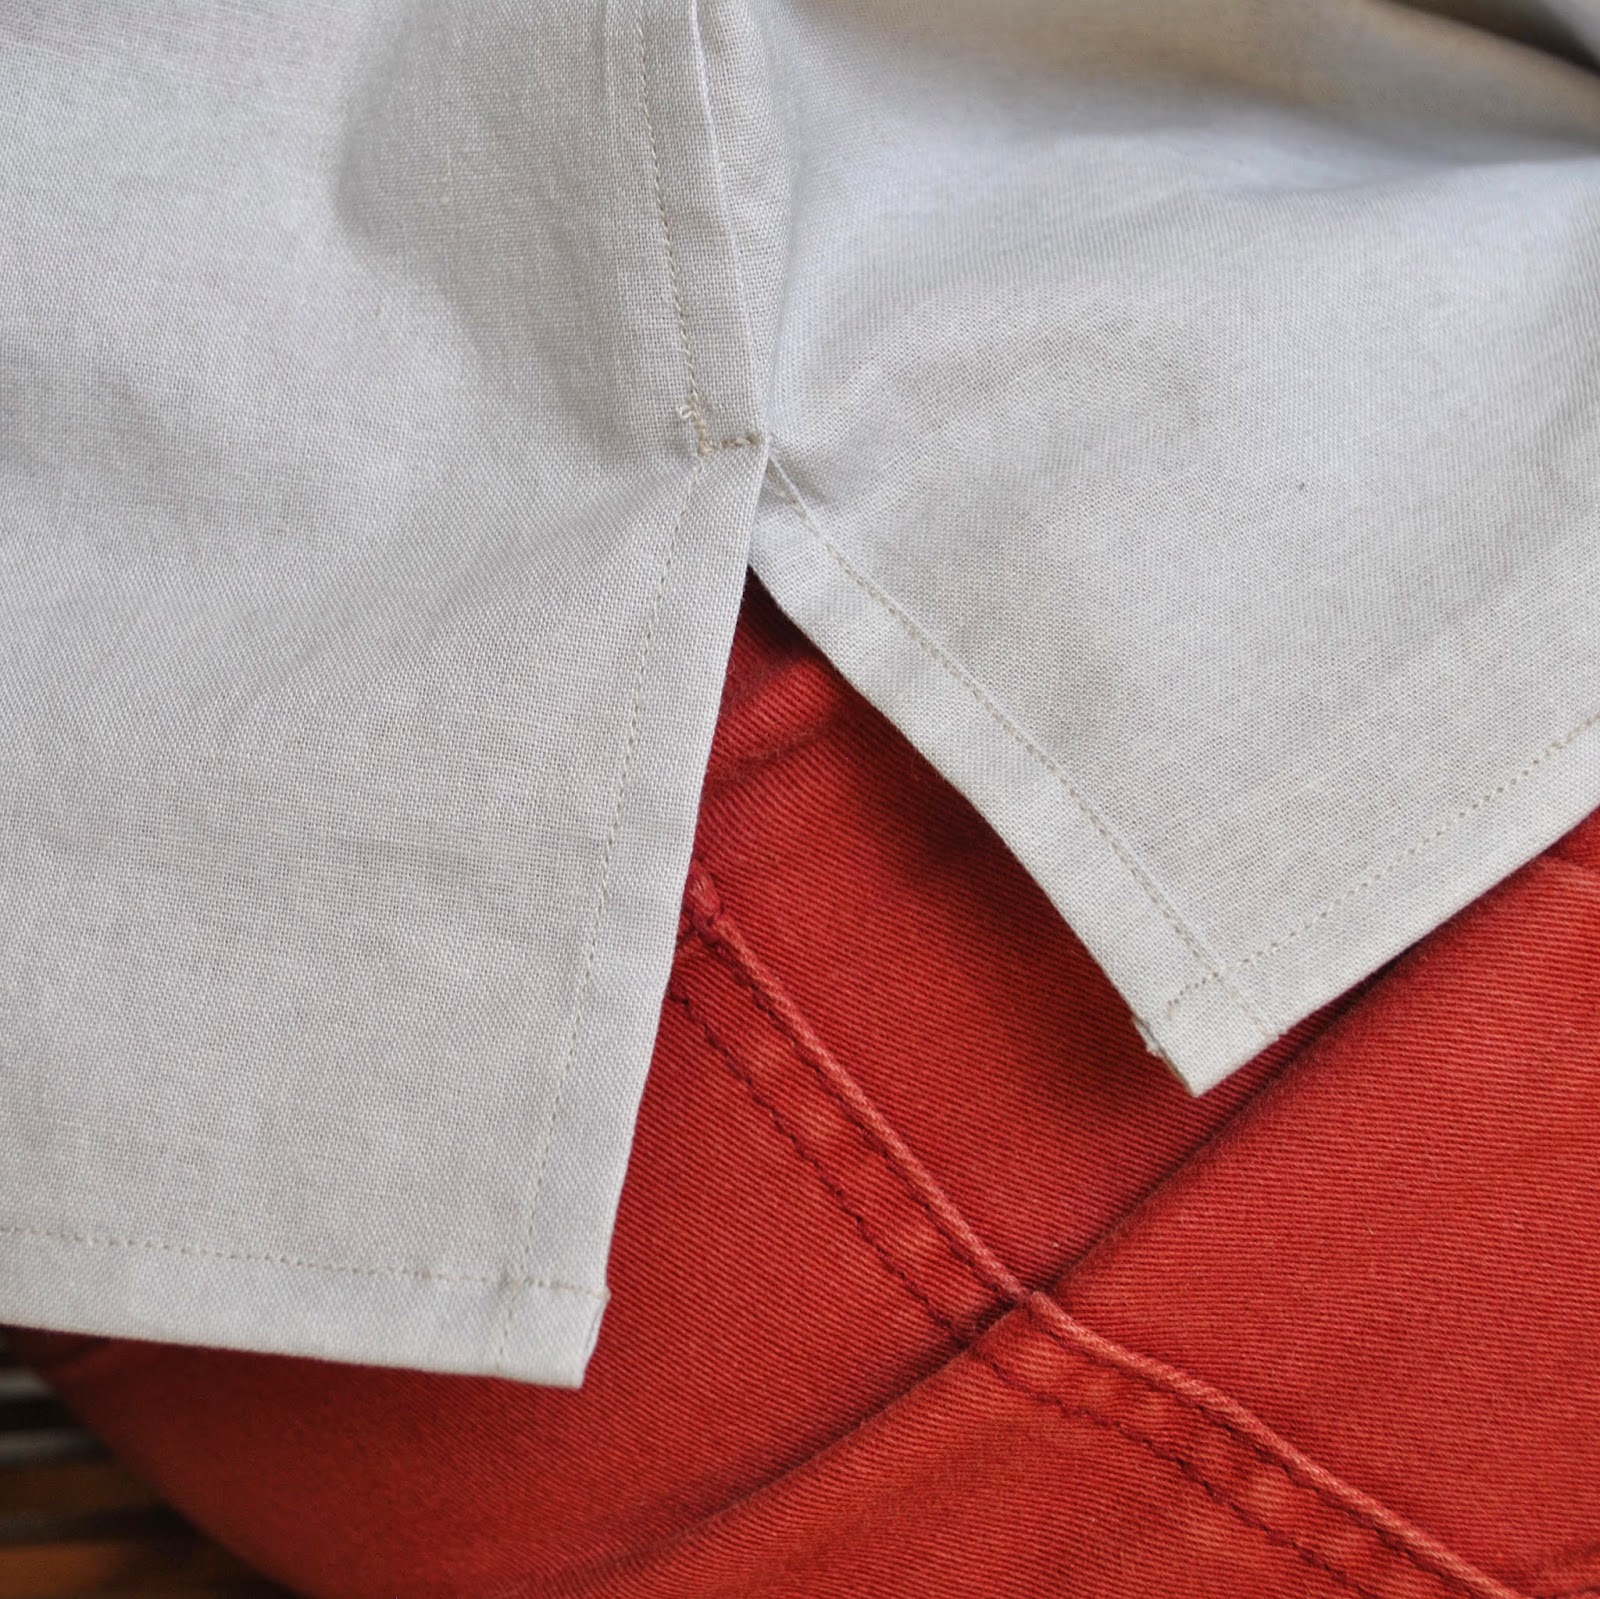
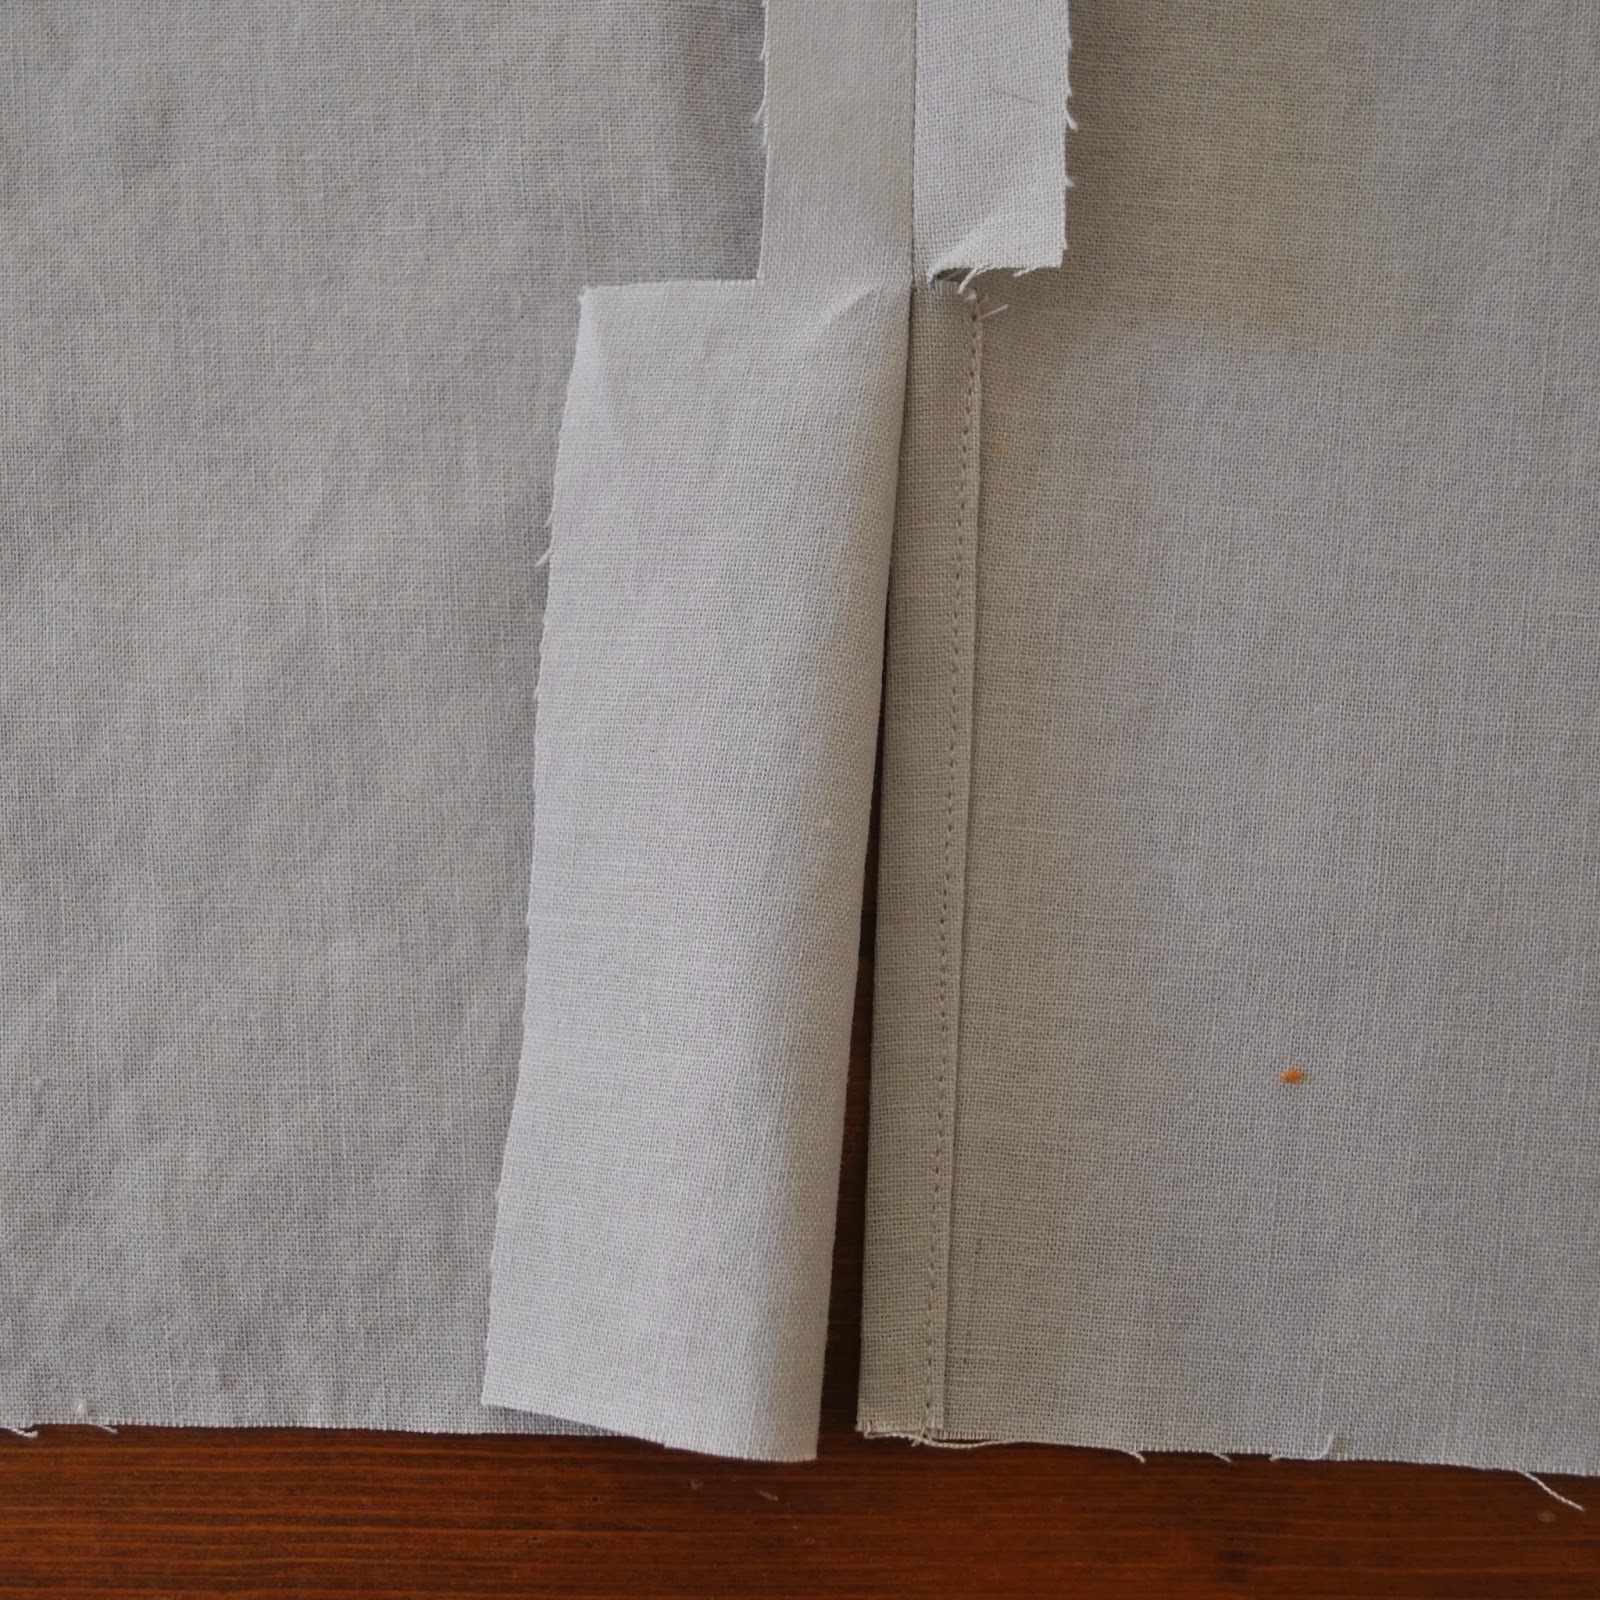
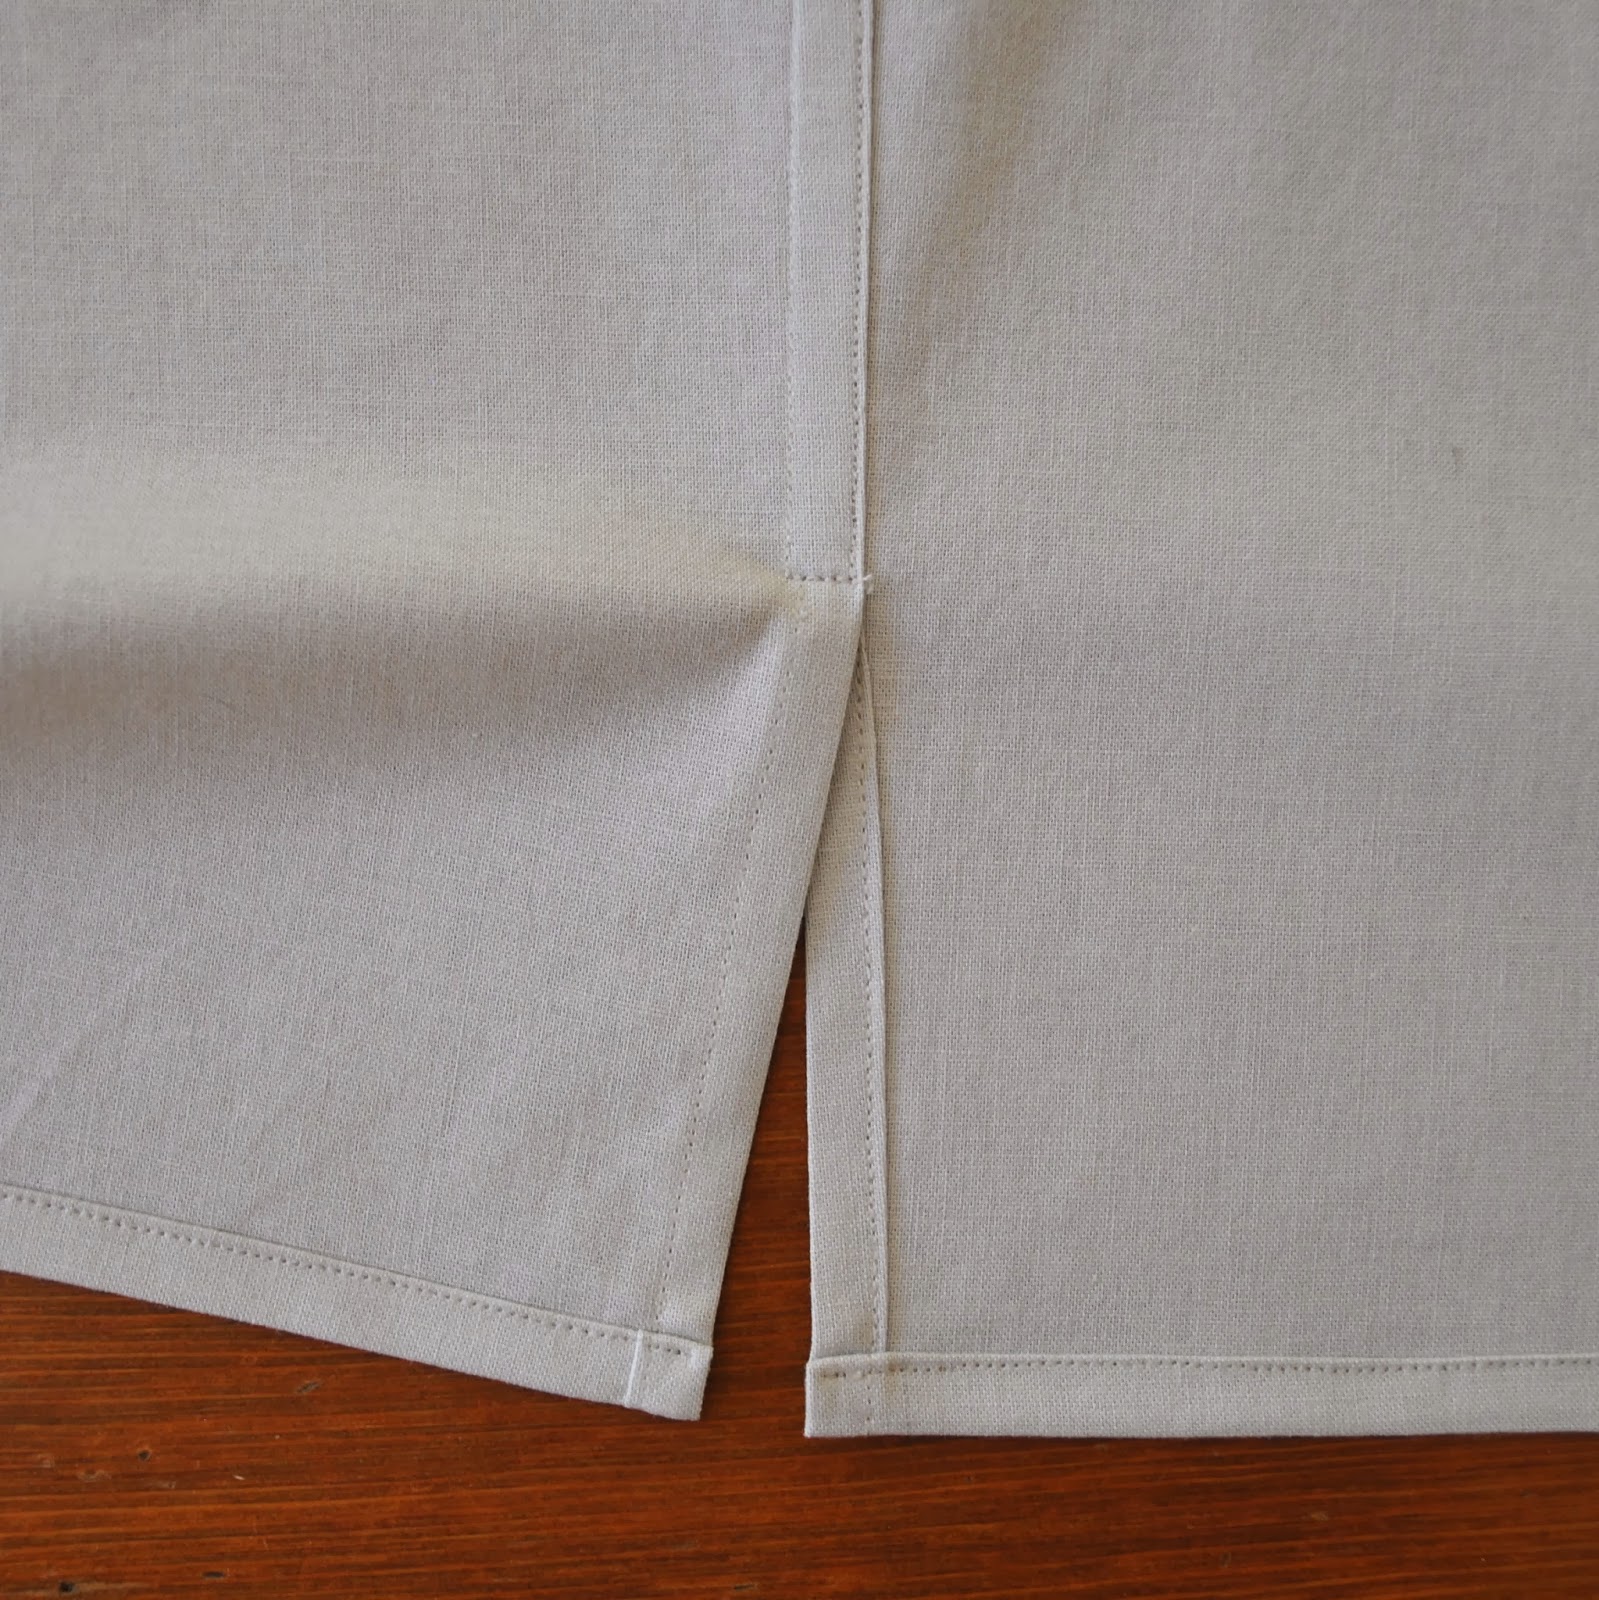
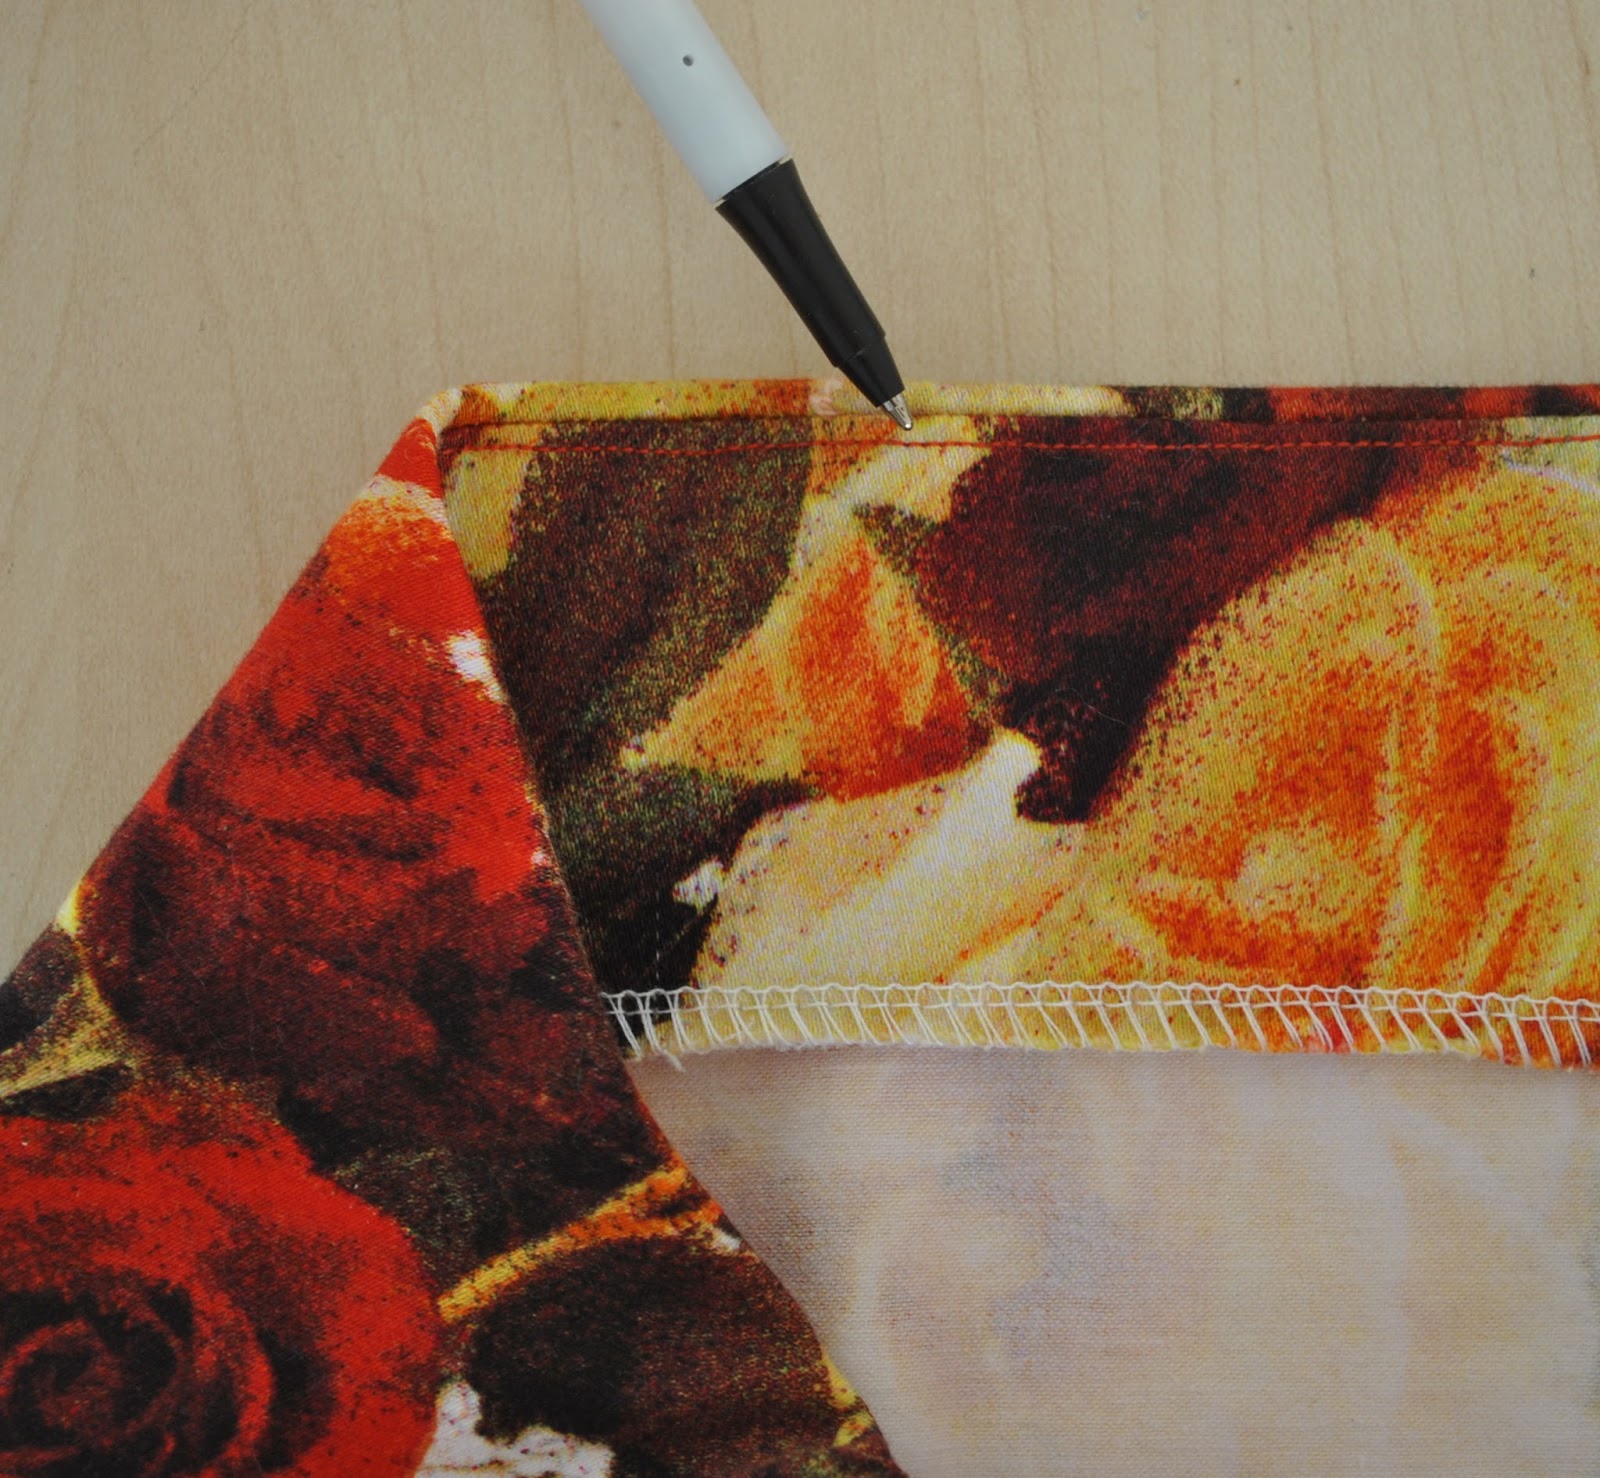
But because there are almost double the number layers of fabric sitting at that joining seam point compared to elsewhere along the band this area is can sometimes be a bit bulky and you sometimes end up with a slight bump no matter how carefully you guide that seam through the machine.  Seriously, getting a nice smooth and even-width band all the way around is often the hardest part about making a Tshirt!
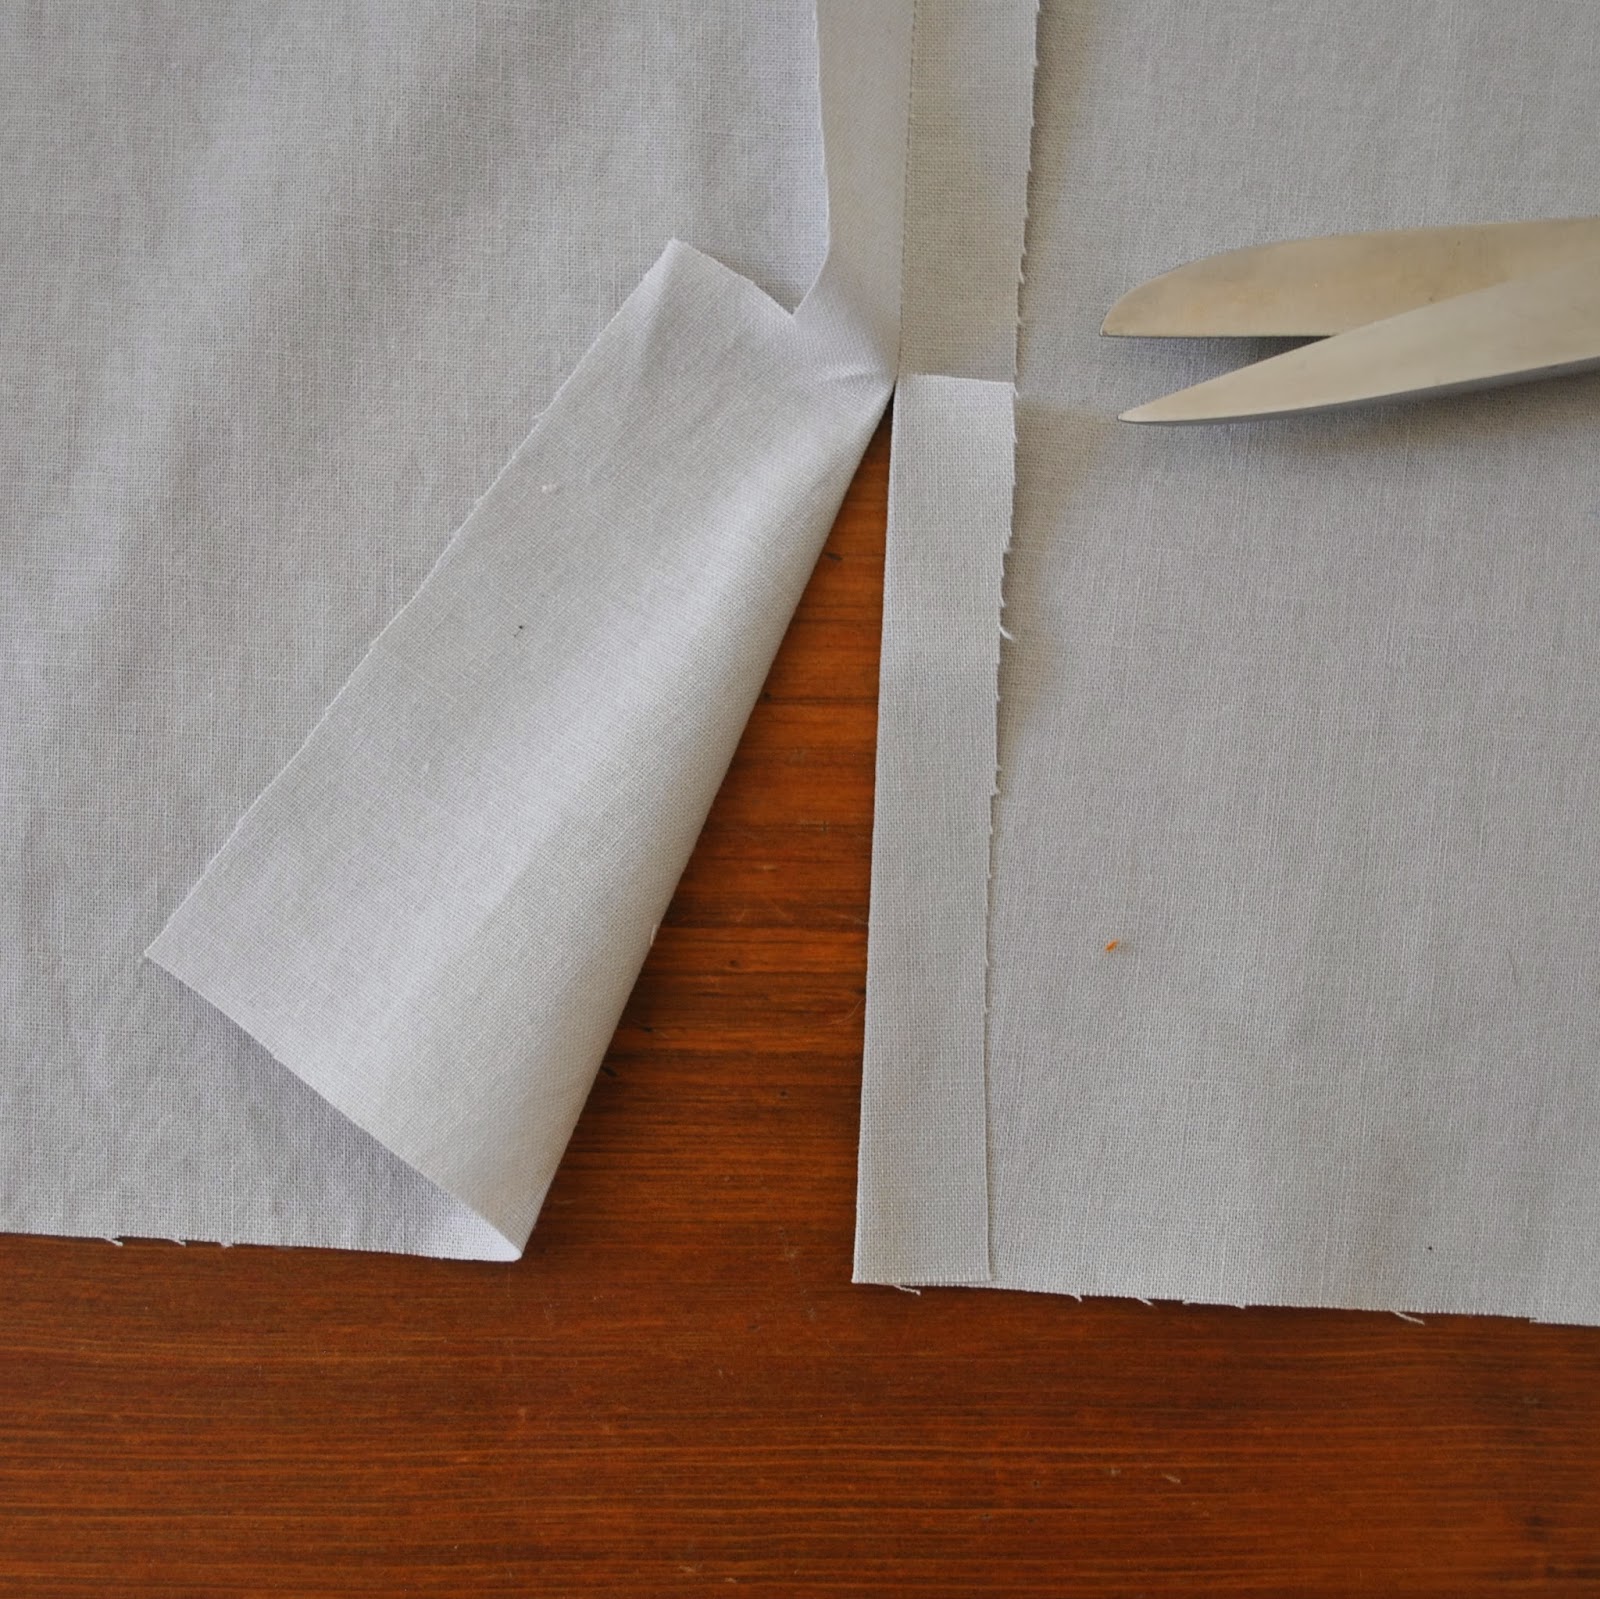
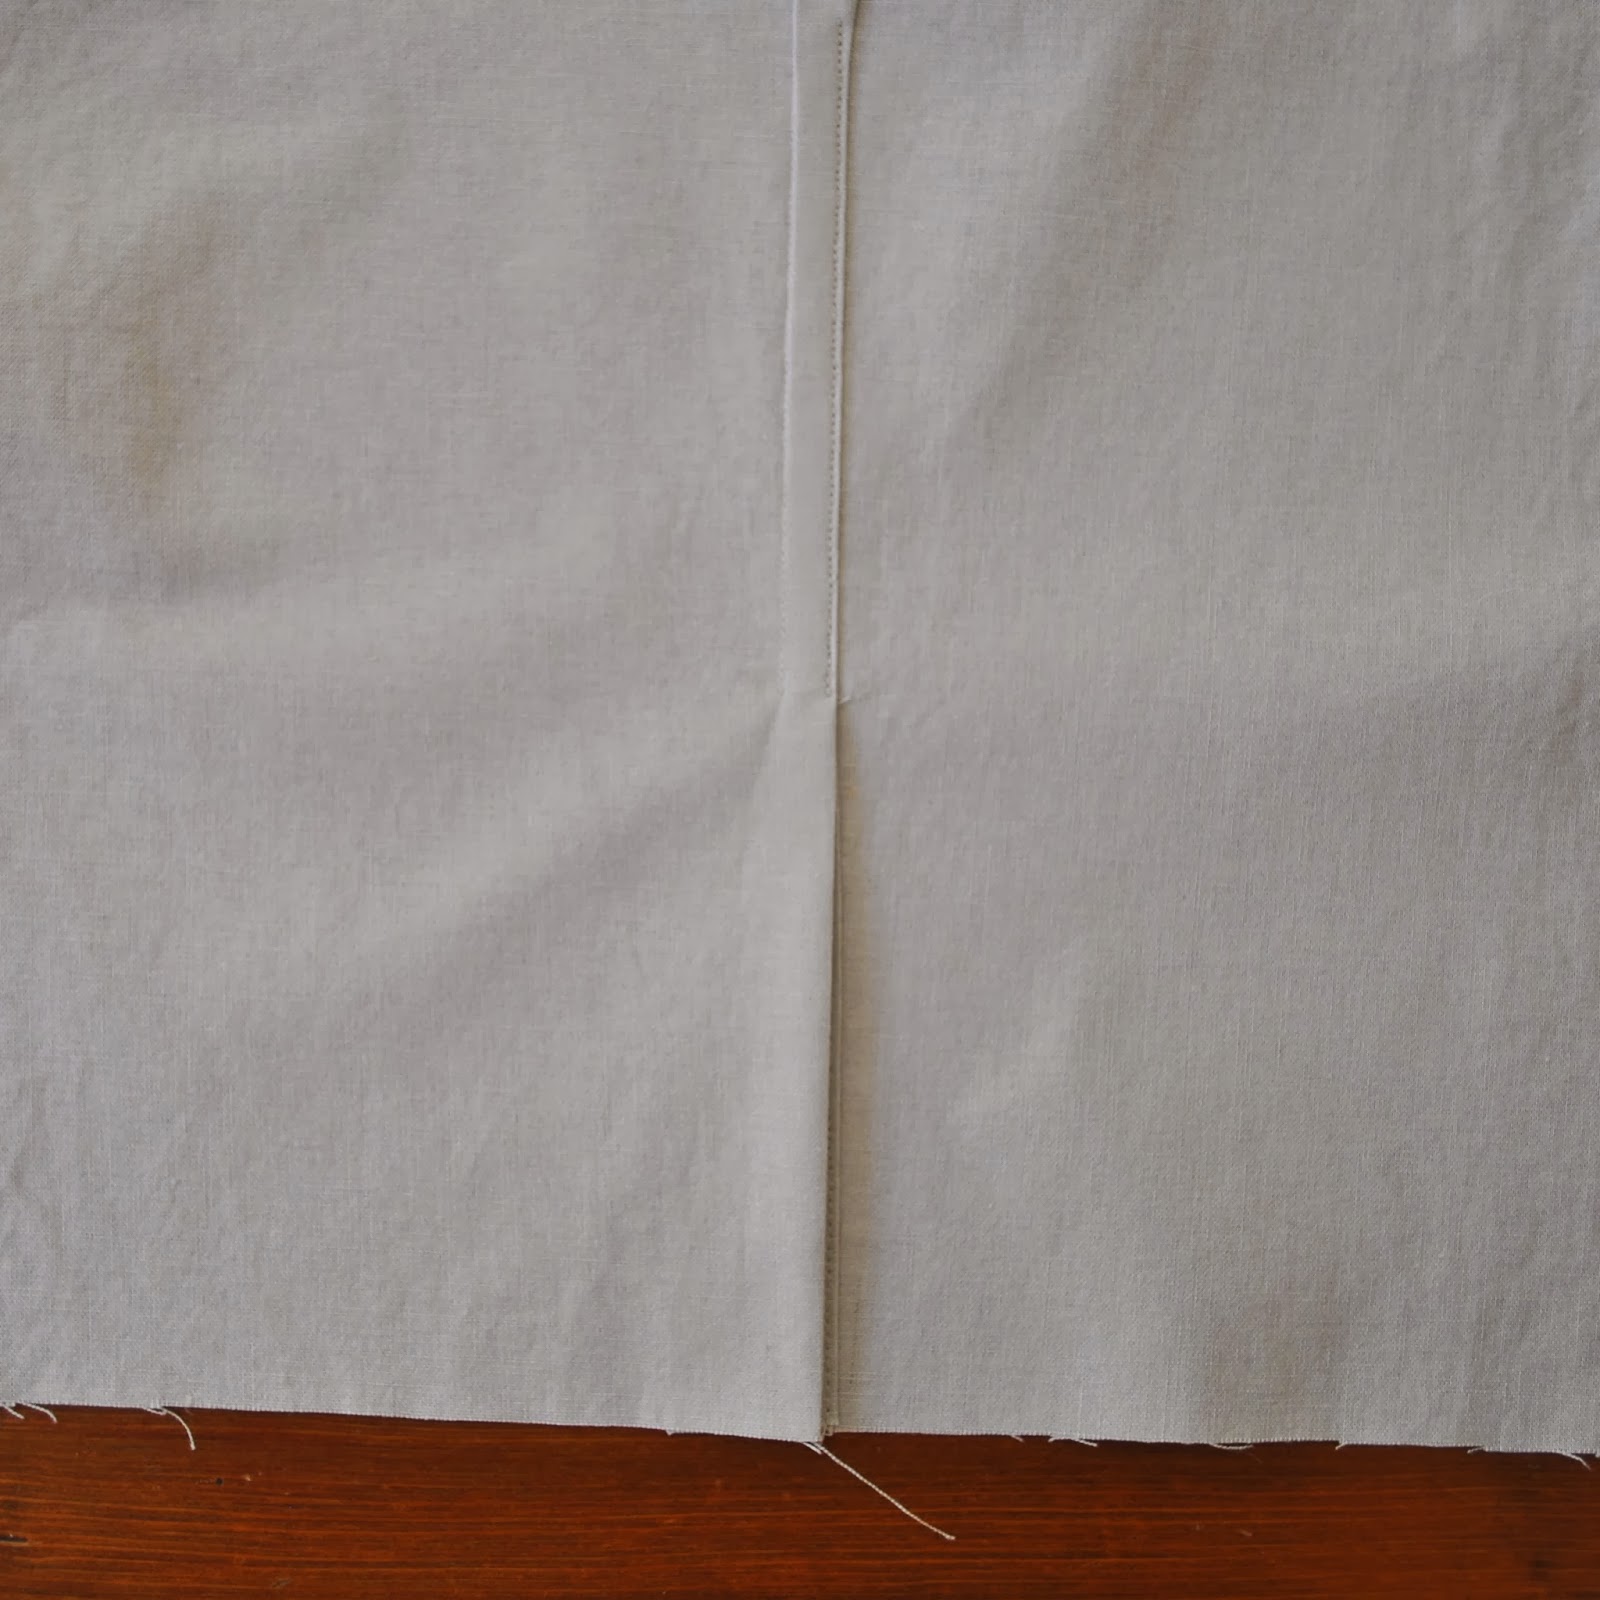
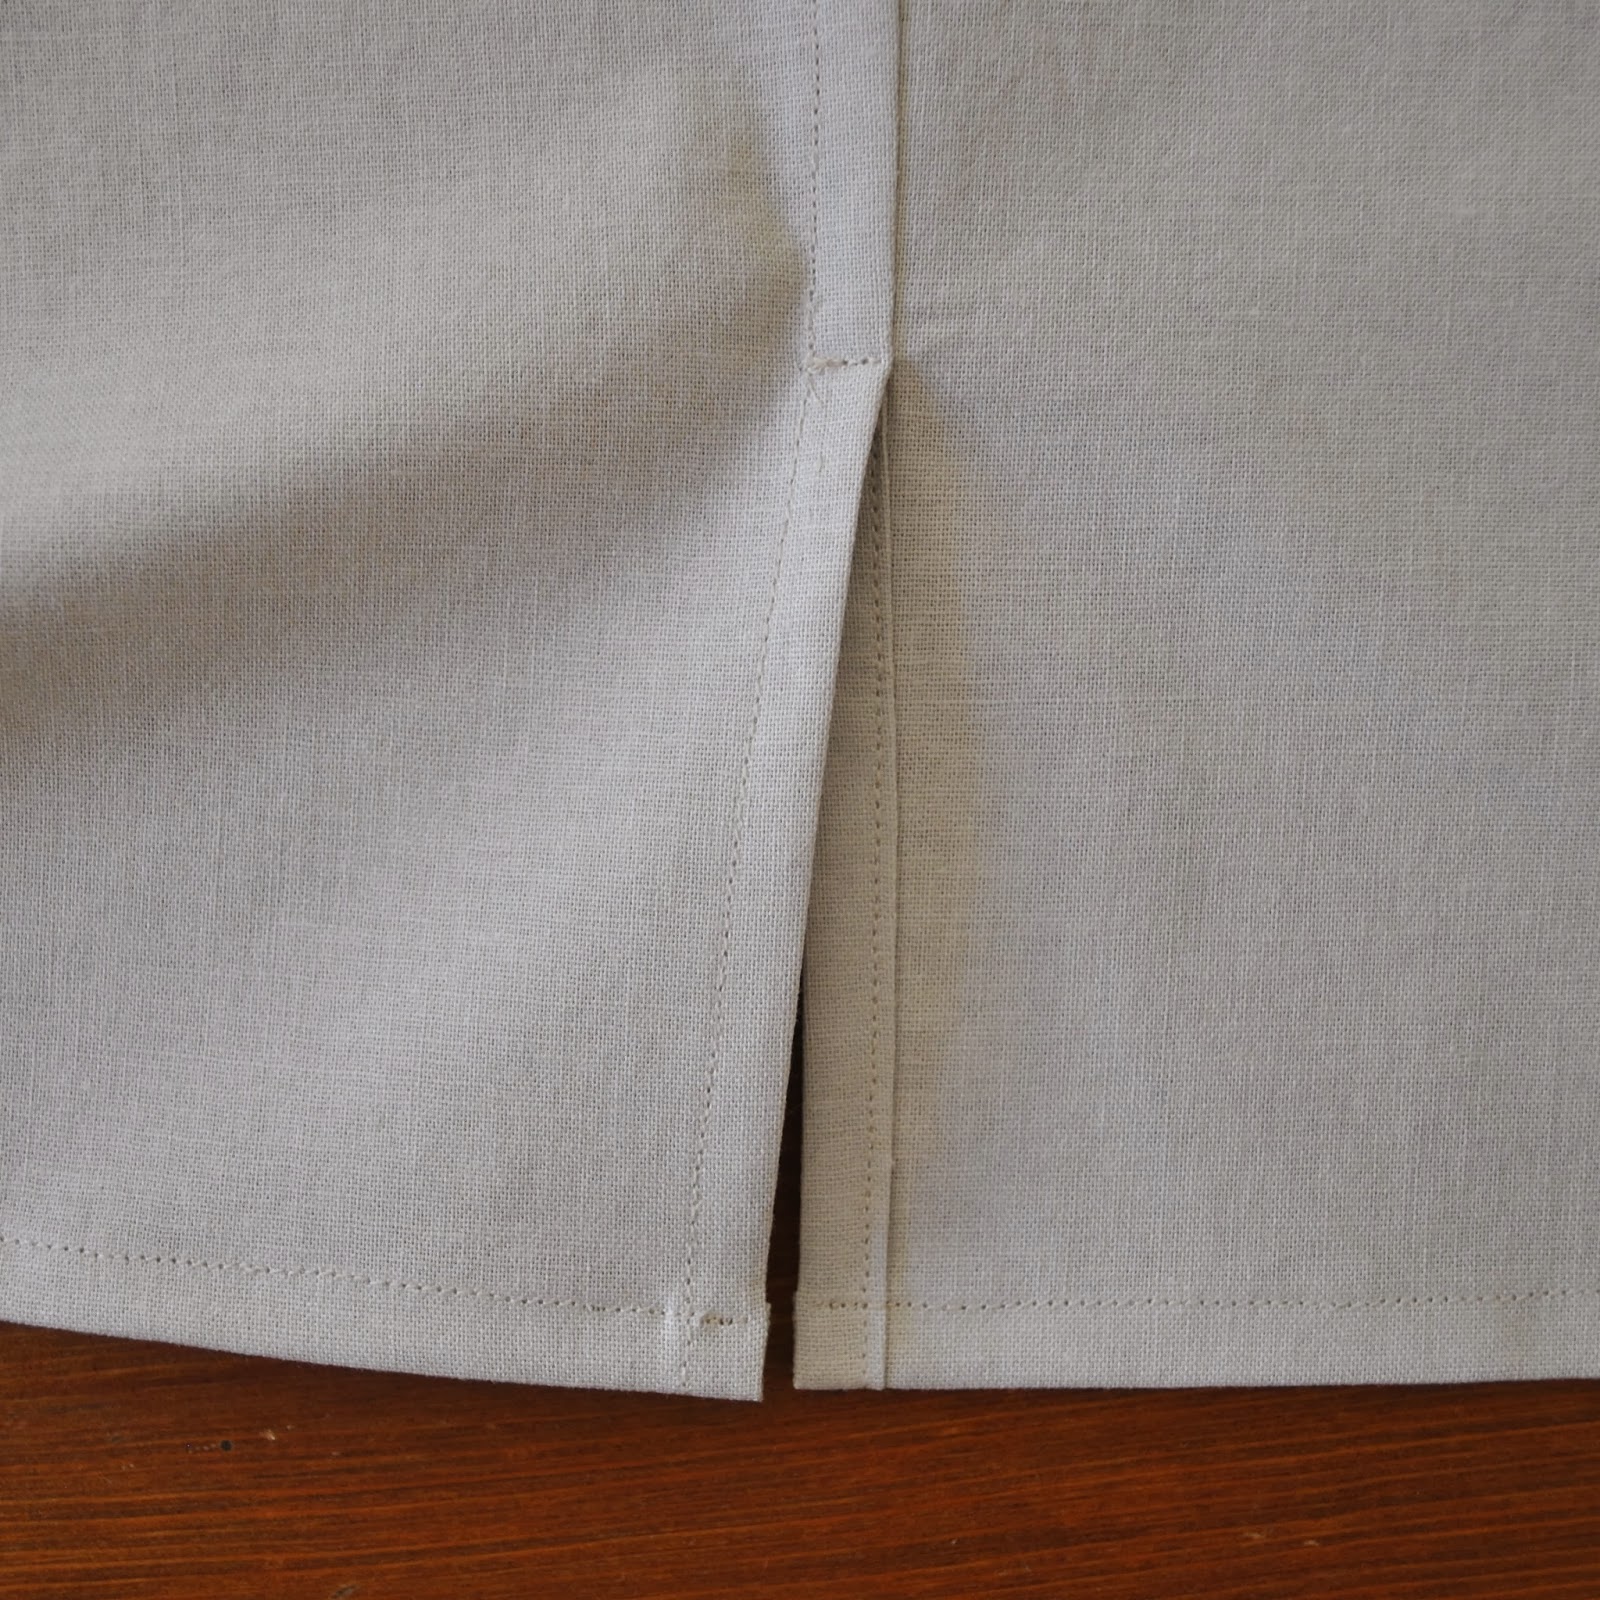
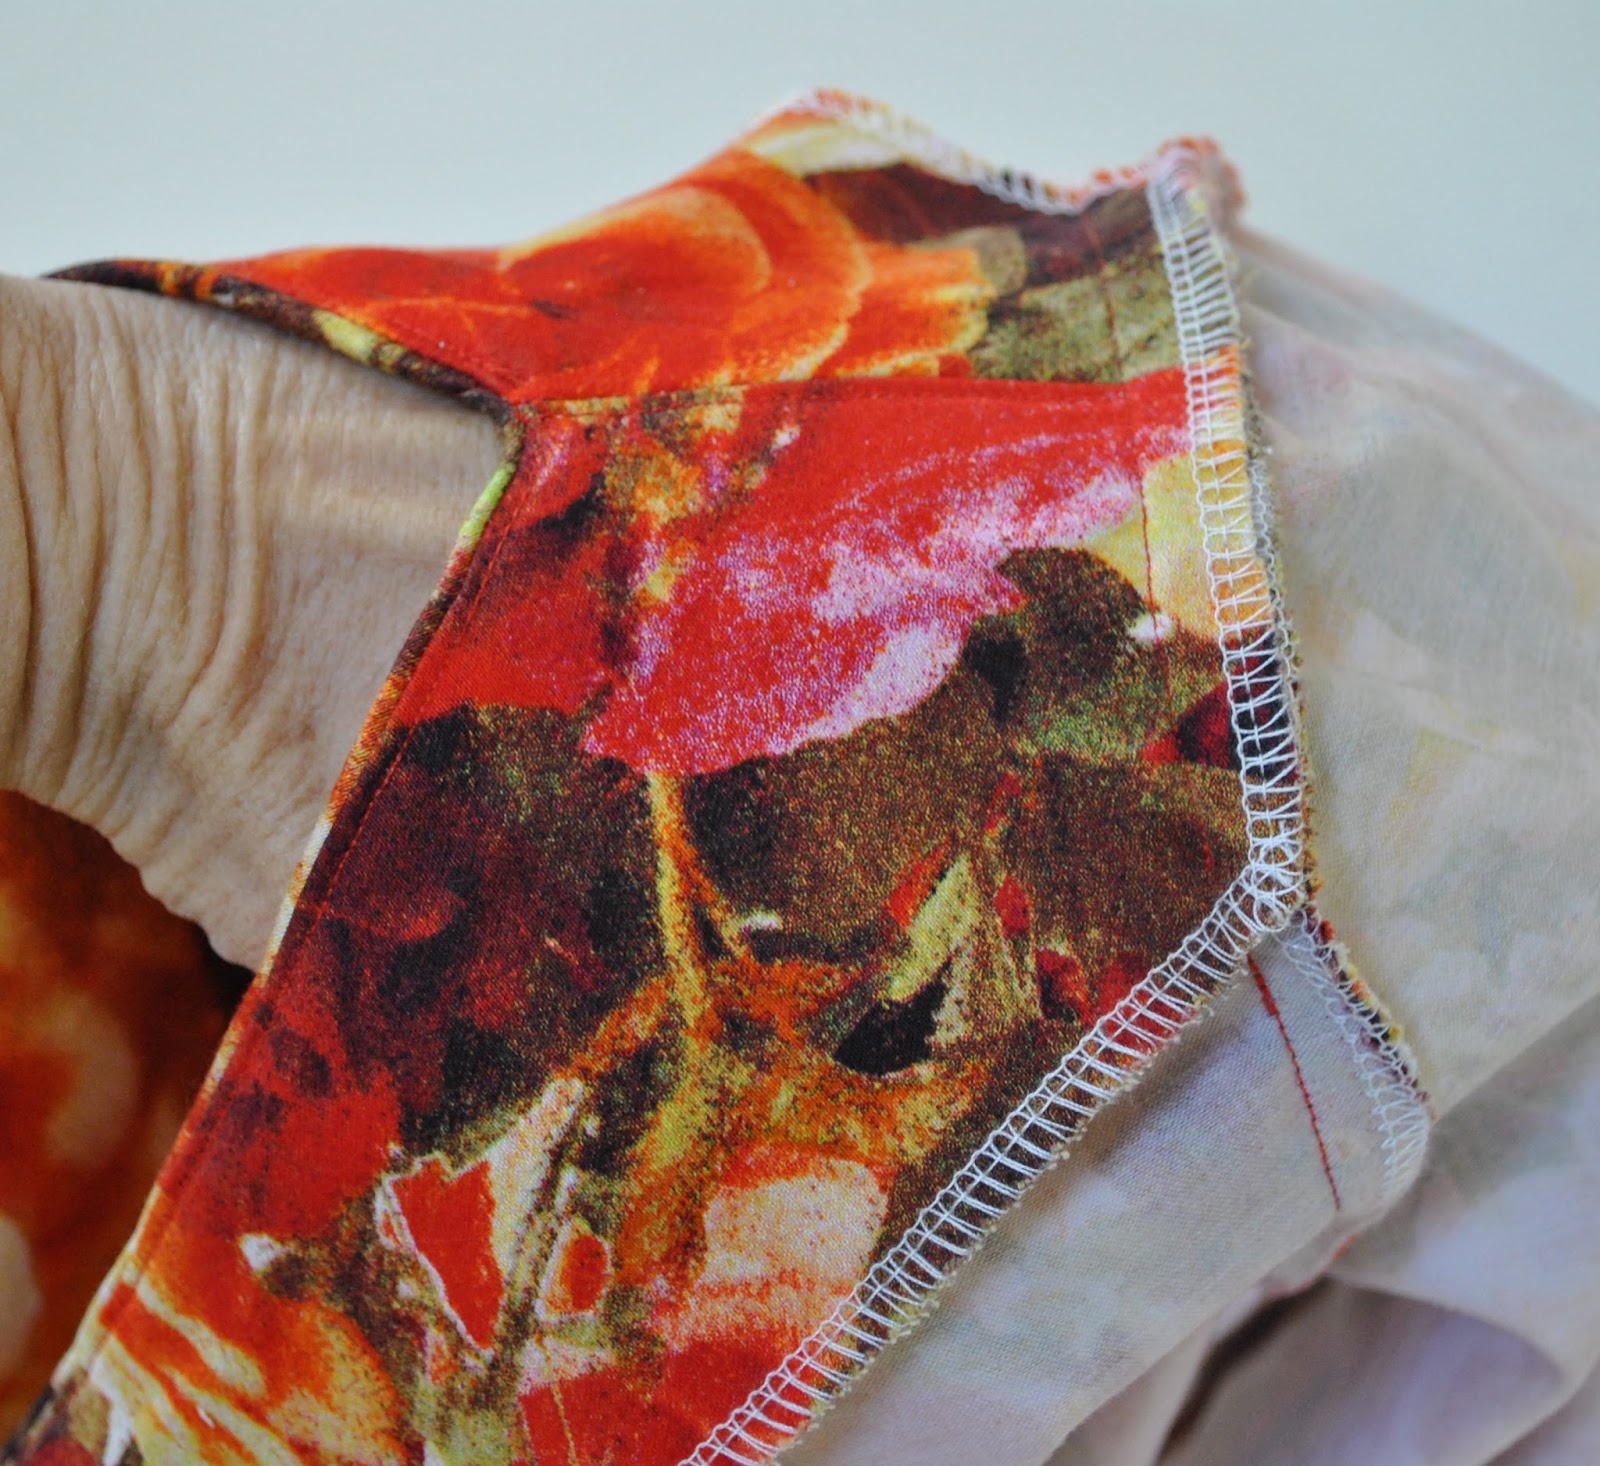
So lately I’ve been cutting and sewing the join on the diagonal, reducing the number of layers at the joining seam, and I think it’s been an improvement with almost no bumpy bit at all!!
It is a particularly good idea for bands like a cardigan button band, on which slight bumps and irregularities in thickness and width are particularly noticeable.

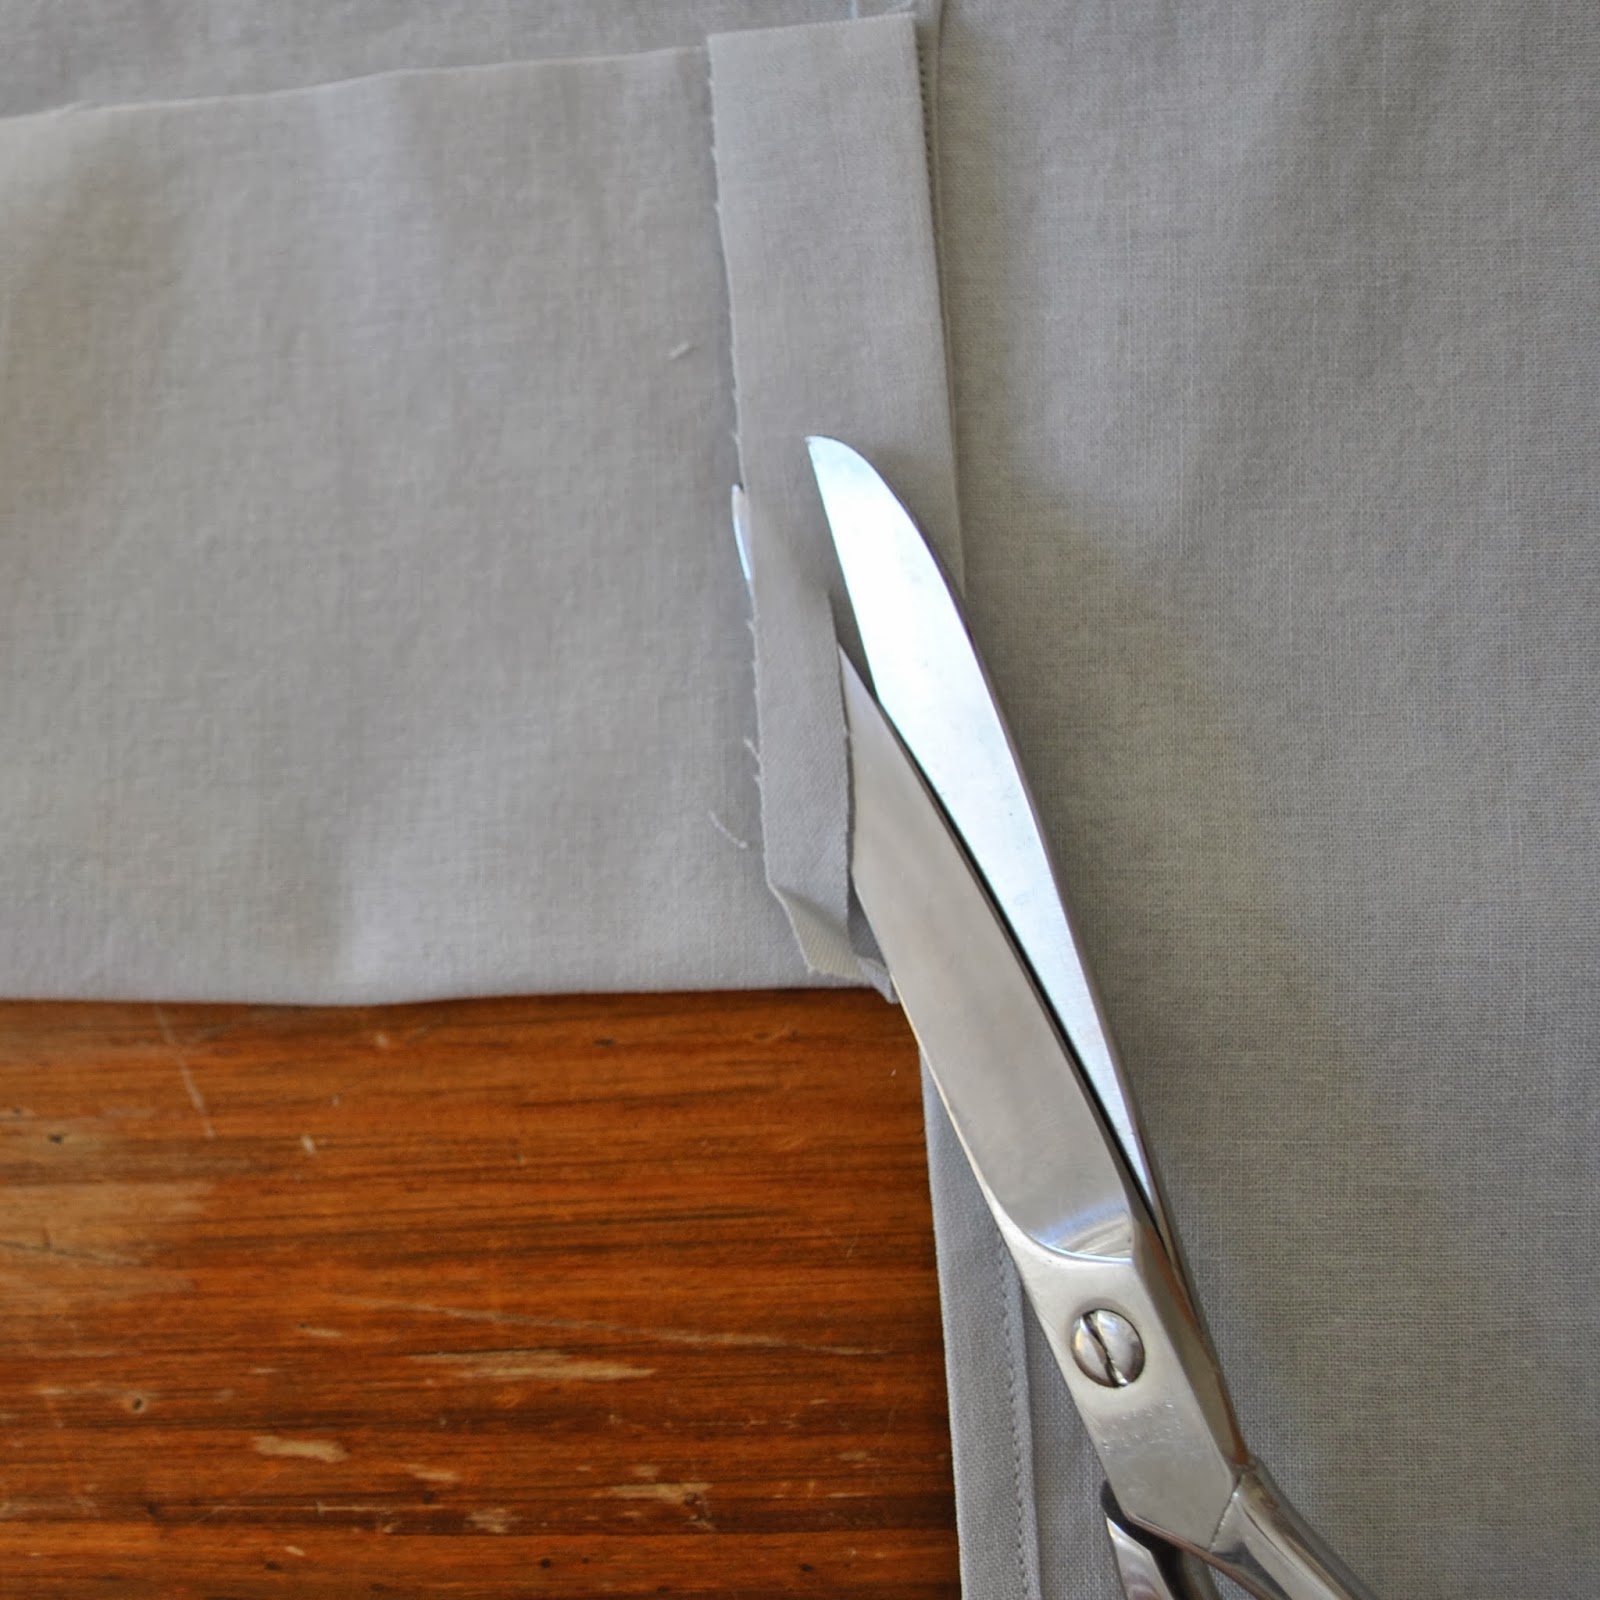
You do have to be careful while sewing that joining seam, since the fabric is on the bias along that edge you have to watch out that you’re not stretching the fabric at all while you’re sewing that short seam.  If you’re in any doubt as to whether the fabric will distort during stitching it would help to pin and sew to a backing piece of tissue paper, which can be ripped away after it is sewn.
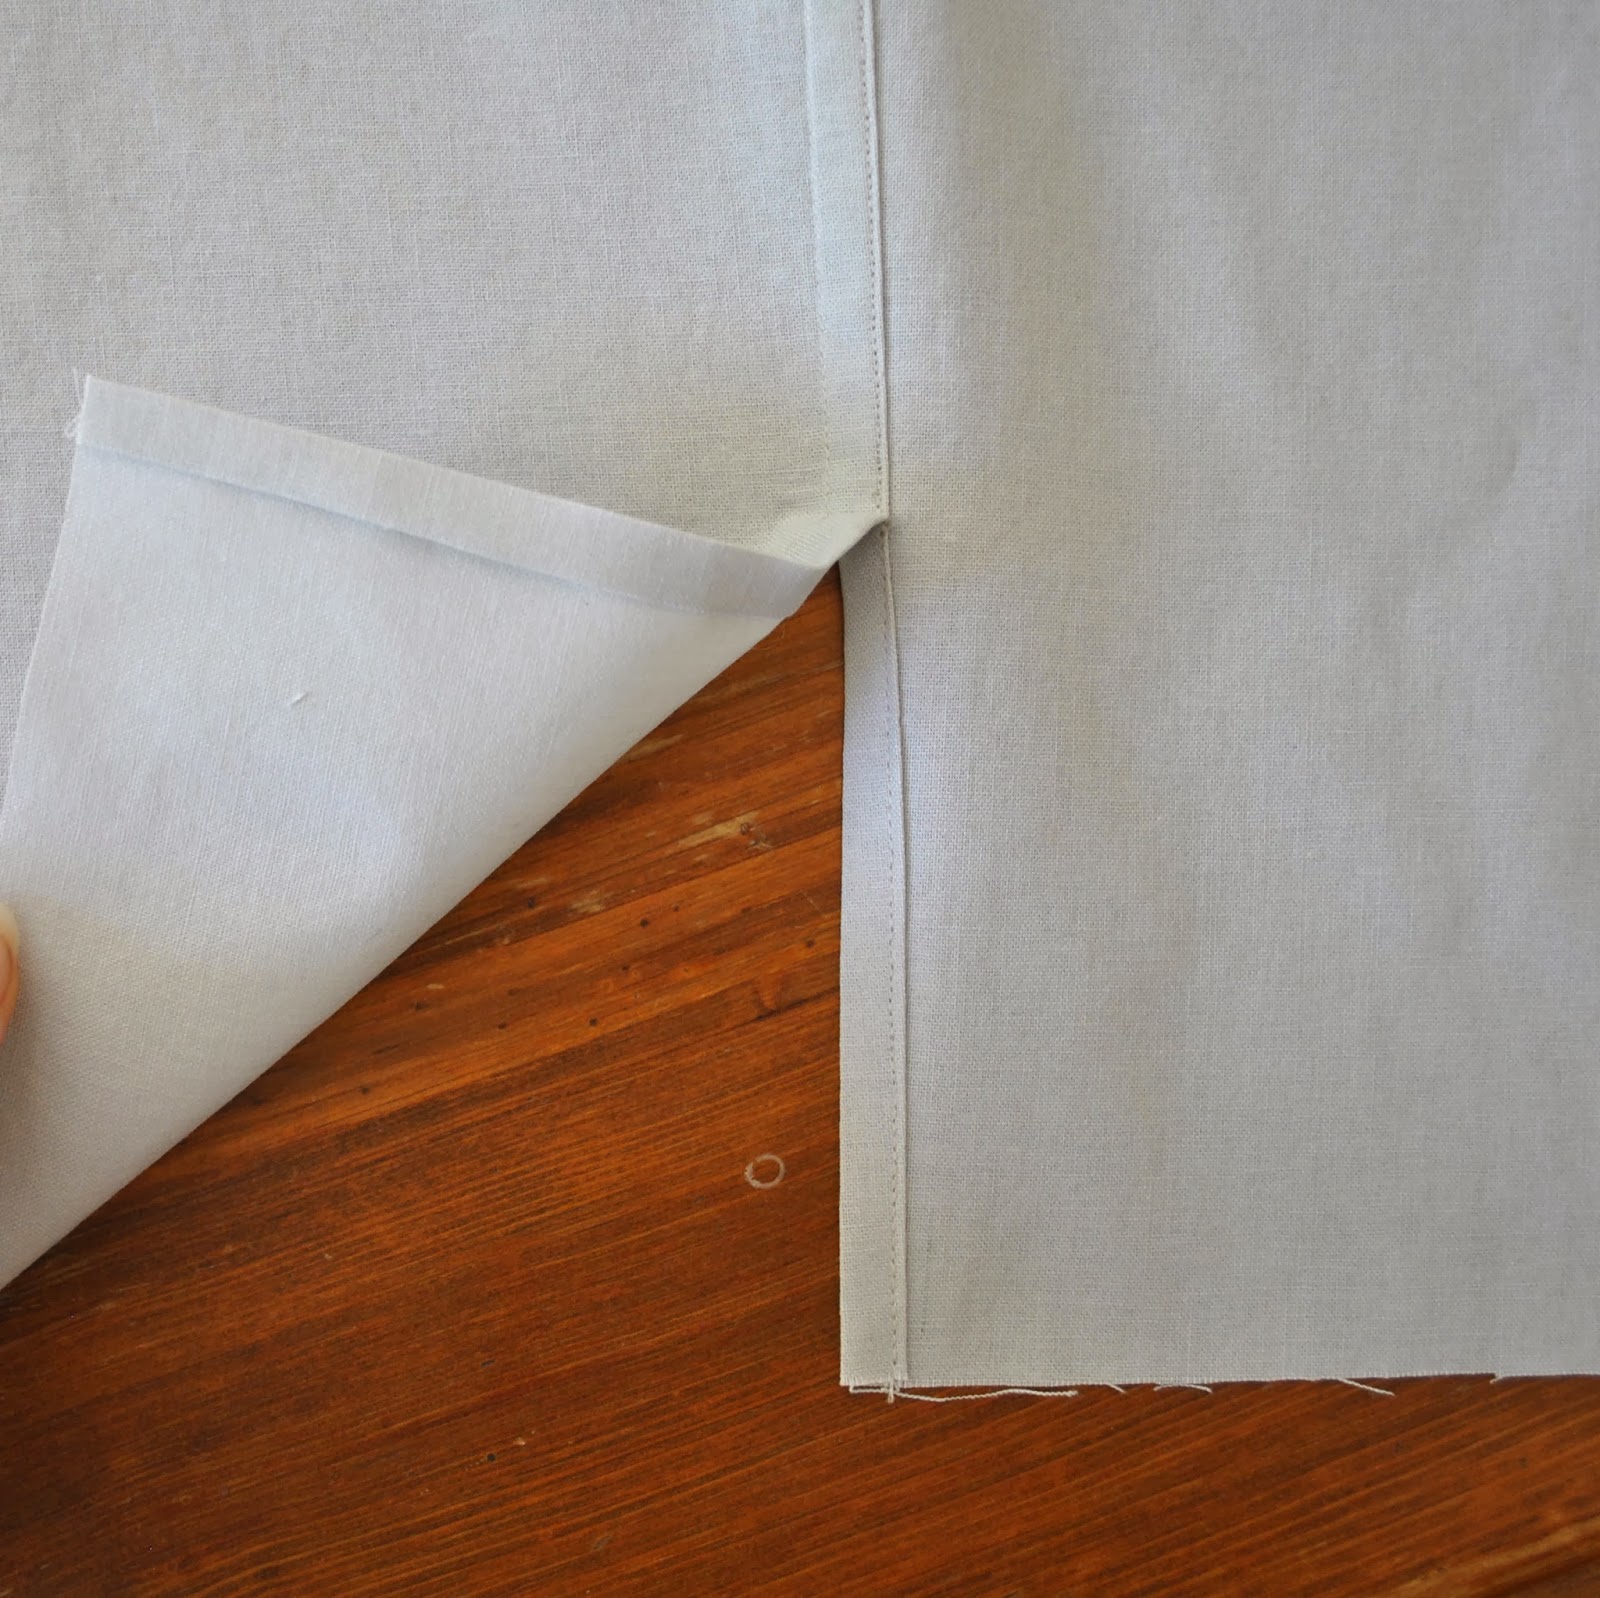
Later edit in response to an email question; just to be clear, the band is NOT a bias-cut band, it is still cut cross-grain just like you normally would and it is just the short joining ends that are being cut on the diagonal  ðŸ™‚

And yes, the thumbhole bands I described above are so tiny it was really too tricky to mess about with bias joining seams and I just cut those on the straight.  Choose your battles!

pinterestmail

“Baseball” skirt and tee

This is just a bit of silliness really; remember I said I had some idiotic plans for my leftover off-white leatherette? well I just hopped straight into it.  This is a new skirt, leatherette with red stitching to delineate the seam lines, baseball-like.  Yeah I know, kinda weird; and I’m still wondering if I ruined the skirt with that stitching! but it’s just a bit of fun really.  I figure if I absolutely hate it down the track I can always pull out the baseball stitching  ðŸ™‚

I used this picture to help me

The pattern is Vogue 1170; my fourth iteration of this pattern.  I chose it because it had lots of seam lines! and I lengthened it as much as I possibly could given my small piece of leatherette.  Actually, this is a good skirt for a smallish odds and ends of fabric; surprisingly good considering its flippiness.  It’s only the two large front-and-back pieces that take up the most fabric; the smaller pieces can be cut out of edges and corners and other off-cuts.  I left off the pockets and fully lined the skirt with cream polyacetate lining fabric; and I cut the waistband a lot narrower and on a curve to follow the curve of the skirt top.  This resulted in a much better fitting waistband than the original straight one, imo.  Also, I’ve learnt my lesson from my previous leatherette skirt where I found the leatherette waist facing kinda icky worn against the skin; and cut the waistband facing in white linen.  Much nicer!

The stitching is in red silk thread, which I’ve had for years… er, 21 *blush* but who’s counting!  ðŸ˜€ a leftover from knotting Tim’s quilt; and a small portion in matching red topstitching thread, which I ended up having to buy new (grrr!) when I didn’t have just quite enough of the silk.  Don’t you hate that!!
I did the stitching in two passes, first time you do alternate halves of the “wings”, and the second pass you finish off the other side of each one.

And because a baseball skirt needs a baseball tee, I made one; just because  ðŸ™‚   I used two old Tshirts from my refashioning bag.

OK, I thought that this is what a baseball tee looks like; but imagine my disappointment when I googled images of baseball players to see that they actually don’t wear this sort of two-coloured raglan-sleeved tee at all! but instead have a big baggy short-sleeved top, sometimes with a close-fitting long-sleeve top underneath.  NO raglans to be seen.  Confused!   So; why is a tee like this known as a baseball Tshirt, when actually it is not?!  I would love to be enlightened.  Anyhoo; I made it from from my own custom pattern, using an old raglan sleeve tee to help get me started and then fiddling and fine-tuning to fit me.  The embroidered motif on the front of the blue Tshirt, I positioned on the back of the new Tshirt.  It was either that or cut it in half, and even though my new tee is a cobble-together job, doesn’t mean it has to look like one!

With the neckline binding; I cut strips from the sleeves of the cream tee and joined them to get one long enough to do the neckline.  And this time I cut the strips with a bias joining edge: you can just barely make out the join in this picture.  This gave such a vastly superior finish to my usual method of joining on a straight seam!  and I can’t believe it has taken me sooooo long to work out this might be a better thing to do.  Up until now I’ve used a straight joining seam, and the bulkiness of all the layers in that bit make for a slightly bubbly and bumpy bit at that spot on the neckline.  So I hide this by positioning it at the back of the neck somewhere; but if the seam is on the diagonal, like here, then there is less bulk and very little bump issues.  Don’t know why it’s taken this long for the lightbulb to go off, but better late than never  ðŸ™‚

Details:
Skirt; Vogue 1170 with minor modifications, off-white leatherette with red decorative top-stitching; my review of this pattern here and my tips for working with leatherette here
Tshirt; self-drafted, made from two old Tshirts
Shoes; Bronx, from Zomp shoes

pinterestmail

enclosing all seams in a double layered top/dress

This is a method for sewing a double layered sleeveless dress or top in such a way that all seam allowances are enclosed within the two layers.  This could be used to create entirely reversible garments as well as simply giving a nice and neat inner appearance.  It is also useful when using sheer fabrics like mesh and very fine translucent knits to make a self-lined garment.

Cut the front and the back pieces with a 4cm hem allowance, and cut a front lining and a back lining, identical except with a 1cm hem allowance each.  This will give a garment with a folded lower edge and the lower hem seam hidden inside 3cm from the fold.  If a different hem allowance is desired then cut accordingly; or if the joining seam is desired to be right on the lower edge of the garment then cut the linings to be the same length as the front and back pieces.

(This particular top pictured has a straight folded edge at the upper neckline; but the method is just the same as if the linings were separate pieces that needed joining all round, since that neckline seam is the very first to be sewn… )

Pin the back to the back lining along the neckline edge right sides together, and stitch.  Trim stitched seam allowances, turn right sides out and press flat.
Pin the front to the front facing around the neckline right sides together in the same manner, and stitch.  Now for the front only! also pin the armhole edges of the front to the front lining and stitch.  Leave the shoulder seam open and unstitched.  Trim stitched seam allowances, turn right side out and press.

 Open the back/back lining piece at the shoulder and wrap it around the front/front lining at the shoulder edge, all right sides together, back piece to front piece, and back lining piece to front lining piece, aligning the neckline seams.   Pin all four layers together, ensuring the front neckline edge is abutted hard up against the neckline edge of the back/back lining.   At the outer shoulder edge continue pinning the back to the back lining down the armhole edge, keeping the front free.

Stitch the shoulder seam, pivot at the outer shoulder edge, and continue stitching the armhole edge of back to back lining.  Trim seam allowances, and pull the front piece out and through, turning the back/back lining piece right sides out and press flat.

 Now open out the pieces; and pin the front to the back and the front lining to the back lining along the side edges; aligning the underarm seam exactly.  Stitch side seams in one long seam; from lower hem to lower hem.  Press seam allowances open.  

Lay the outer layer over the inner layer wrong sides together aligning the side seams together and press again.

Separate the outer layer from the inner layer again and pin the lower edges of the outer to inner layers, right sides together and aligning the side seams.  Stitch, leaving a gap of around 12-15cm, or big enough to stuff your garment through without stretching out the fabric too much.  Use something long, skinny and padded to press the seam allowance down; I know there are proper thingies for the job but I generally use something like a rolled-up flannel.

Turn the garment back right side out through the gap left in the lower hem.

Inside the garment, press down the seam allowance of the outer layer to close the gap in the hem and pin in place.  Slip-stitch the gap closed invisibly by hand, being careful to keep the outer layer free.

Voila!  There are absolutely no seam allowances showing; anywhere!

pinterestmail

Lapped flat-felled split side seam

Florencia and Jana (by email) both asked about the lapped, flat-felled split side seam, thank you for asking!  Since I finished all my Christmas sewing today… and, can I just say; Whoopeeeeeeeeeee!!!!   I had time to get out some scraps and  show how I did them…
Bear in mind that a tiny bit of the wrong side of the fabric will show in this technique, so it is best confined to fabrics where this doesn’t matter.
To have this feature, you have to plan ahead and cut an extra little extension, or tab, on the outer edge of either front or back; about 11.5cm in height for a 10cm split.  I randomly chose for the front edge to have the tab so as to flat-fell the seams towards the back as my own convention; but it looks equally fine either way.

Stitch the side seams to level with the top edge of the tab.

Press the side seam open above the split, at the same time press down the seam allowance on the un-tabbed side and leave the tab un-pressed.  Snip the untabbed seam allowance to the endpoint of the previous stitching.

Fold under and press the untabbed seam allowance below the snip, and stitch.

Trim the remainder of the untabbed seam allowance to half its width, along the entire length of the seam.

Press the tabbed seam allowance over the trimmed seam allowance, and wrap the raw edge around the trimmed edge of the other side to enclose it, the entire length of the seam.  At the same time, press the tab under along the same line to the lower edge.  Pin in place.

Stitch the flat-felled seam, stopping at the top edge of the split.

If necessary, trim the tab; then turn under the raw edge and press.  Stitch.

To strengthen, stitch a short row of horizontal back and forth over the top of the split.  Alternatively bar-tacking, or narrow, closely spaced zig-zagging can be used at this point.

Hem the lower edges.  Remember:  the underside split is hemmed facing out, so mind you don’t accidentally stitch the hem on the outside on this side!  I almost got caught here the first time!
Finished views: below left, the inside; and at right, the outside view

pinterestmail

Bright roses, tops n tights

Y’ello  ðŸ™‚
I’ve been making stoof.  Please bear with me while my photo-taking catches up…
Firstly, my new top of stretchy cotton sateen.  I must be dreaming of spring already, I think!
This is a stash-busting success story.  I fell deeply in love with this autumnal gold/orange/scarlet/khaki rose-print fabric from Tessuti’s in Melbourne last year, and threw down my credit card with blithe abandon.  So my colours!  Close-up, the print has that slightly scratchy spotty appearance of an old polaroid.  Love it.
Difficulties arose when I got home and had to come to terms with the fact that for some dumb reason I had bought only 70cm.  I have no excuse for this insanity. Yes, I was an idiot.  I’m blaming that state of mad fabric drunkenness brought on by places like Tessuti’s.  Note to self:  get at least a metre from now on.
So I made a simple little pull-on Tshirt top because fortunately you don’t need much metrage for this style.  This is the bodice from a dress pattern, Burda style magazine 08/2009, 128; elongated a bit.  I have made this pattern up twice before, firstly as a dress and then as a top just like this one, so I already know how much I love this flattering boat-neck style.  It has bust darts in the front and two long vertical darts in the back for shaping.  No zip or closure is needed because the neck opening is wide enough so that you can just pull it on over your head.

I could not make the sleeves as long as the pattern intended, as in my previous two versions.  This is the very longest I could get from out of my meagre piece.  I would really prefer them to be about 12cm longer, but meh.  I can cope.

Details:

Top; Burdastyle magazine 08/2009; 128 modified to be a top, stretchy cotton sateen, my review of this pattern here
Skirt; Burdastyle 10/2010, 136 (the Karl Lagerfeld skirt) lengthened, black suiting gabardine, details and my review of this pattern here
Shoes; Django and Juliette, from Zomp shoes
Some notes on the finishing details for this top:

The neckband is finished with facings.  I always always under-stitch facings on a garment that I wish to look sorta dressy, or just not-so casual.  Top-stitching always makes things look a bit more “casual” imo, and often you want an edge that smoothly and cleanly rolls under to the inside, with no top-stitching or anything visible on the edge.  Under-stitching (the red stitching in both photos below) always provides a nice clean and minimal look on the outside; and safeguards against facings popping up and out.

After under-stitching, the facings are stitched to the sleeve cap seam allowances just inside the previous sleeve cap stitching, and stitched-in-the-ditch down to the shoulder from the right side of the garment, to hold them firmly in place.  

But wait, there’s more…

While I am really enjoying wearing my crazier leggings and tights, I guess we all agree that plain black tights are kinda the most useful type to have, and a must for winter, right?  So I made a second pair identical in every way to my previous pair.  I am wearing these in the photo above too.
And I have made two little Tshirts too, one for me, and one for my husband, both self-drafted and custom-fit, using the very last of my 100% merino wool stash, bought from the Fabric Store in Melbourne last year.  Now we have matching his-and-hers thermal tops, haha.  Quelle romantic, non?

Random picture of the neckband, constructed using this method.  Appearing here for no better reason than for me to feel good about the increasingly better finish I am achieving nowadays.  The centre back is still a wee bit bobbly thanks to the extra thickness of fabric in the joining seam there, but it’s getting there.  Practise is benefiting the quest for perfection!
pinterestmail
Switch to mobile version
↓