Category Archives: Uncategorized

a travel wardrobe; Scandinavia

Travelling!  We’re home from a perfectly delightful sojourn in Scandinavia, back to a house full of the noise and busy-ness of offspring and animals, of cooking and cleaning.  Not to mention a mountain of washing.  I’ve done 3-4 loads a day since we got home and it’s still like, full floor coverage in the laundry there.  Joy!
We spent time in Denmark, Sweden, Norway and Iceland; unfortunately with limited time we could not fit in Finland, home of Marimekko.  And the Moomins.  I know, right?  A little bit of sad face.  But not too much since everywhere we went was pretty much ALL amazing.  I’m in love with Scandinavia!  I would seriously love to live on a fjord in Norway or anywhere in Iceland: except that I’m a wuss who just cannot cope with true cold.
Anyhoo, now to get into something I nerdily like to do; the retrospective travel wardrobe analysis, looking back the the success (or not) of the clothes I took, ponder on what I wish I’d taken, and generally how did it all go.

Time away: 
21 days
Where to: 
Copenhagen, Stockholm, Norway, Iceland
Season: 
Early summer.  However I was keeping a close eye on the weather over there and soon realised that an early summer in Scandinavia is like early winter in Western Australia.  So I packed accordingly.  The daily temperatures were from lows as low as 7C up to about highs of 19C, and one delightful afternoon in Oslo when I met with the lovely Sølvi was warm enough to leave off the tights! 
Expected activities: 
Lots of city as well as country walking, one formal dinner, one hot spring and plenty of cold weather outdoorsy stuff, including hiking, horseback riding and zooming about in an open dinghy on a wind-whipped, iceberg laden, glacial lake.  Fortunately, for that last activity everyone was provided with an ultra-thickly padded flotation suit, Michelin man like.  Without which we would have fair dinkum all been icicles.  Incidentally; no picture, sadly, but I can assure you a dinghy load of tourists all dressed identically as huge, puffy, red marshmallow men is a pretty darn hilarious sight.
Colour scheme: 
Mostly strong, bright colours, tempered with ivory and only a little black
What I packed: 

(each garment is linked to its original construction post)

2 jackets: faux leather jacket (smart) and lightweight blue raincoat
2 jeans: black corduroy and ivory denim
2 scarves: ivory wool (smart) and raspberry jersey
6 tops: ivory Pattern Magic twist top (smart)
striped Tshirtpurple Tshirt
dark orange bodysuit, olive green bodysuit
royal blue short-sleeved hoodie
3 skirts: navy corduroy A-linegreen corduroysludge-coloured denim
1 jumper: pink/green/ivory striped
1 dress; floral jersey, with beige satin petticoat to wear under
5 pairs tights/leggings: 2 prs black woollennavy blue tights, paprika tightsolive cotton leggings,
neon green knitted hand-warmers
white bathers
6 pairs wool socks
3 shoes: black suede pumps, black leather booties, hiking shoes, plus red thongs, 
chocolate leather handbag
not pictured; underwear, nightie, toiletries bag, umbrella
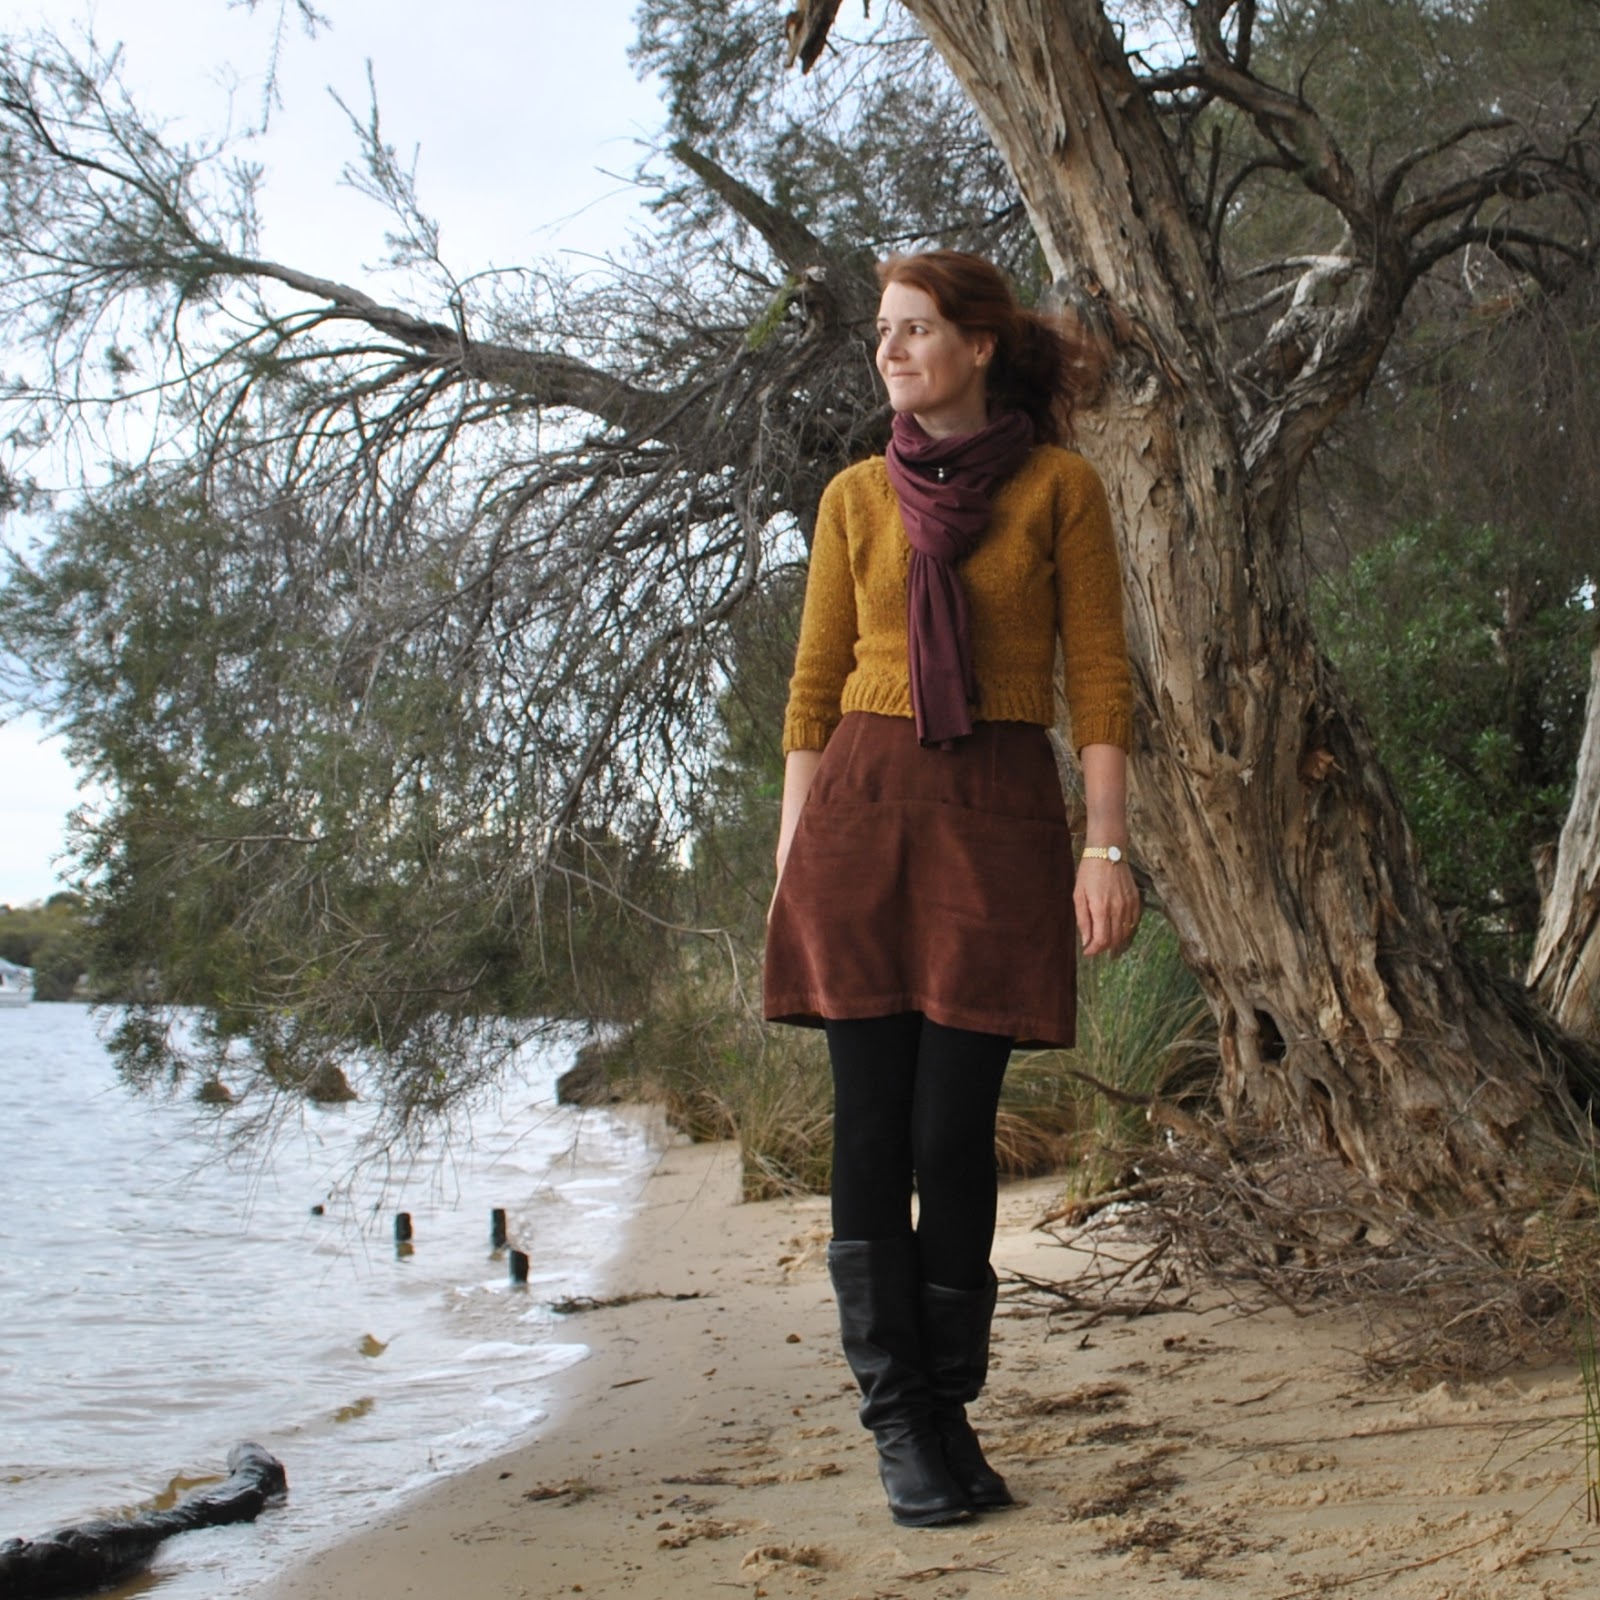
My daily outfits:

Apologies that some of these pictures have already appeared here as part of the me-made May collage.  There was some overlap in time  🙂


Thoughts:
Well I was adequately warm and comfortable, and had suitable outfits always so in that respect it was a very successful little selection!  I got pretty bored with everything I’d chosen by the end of the trip but that’s par for the course  🙂
I know it looks like rather a lot of clothes pictured up there but for three weeks it kinda wasn’t. The weather was cold so lots of items were worn layered together, frequently.  The variety of tops: long-sleeved, short and elbow length; fitted and loose, worked out to be absolutely terrific for layering.  
The surprise “fabulous” item was the royal blue Pattern Magic hoodie; which seemed like the perfect thing to go with almost everything else!  I wanted to wear it twice as often and several times had to restrain myself from throwing it on over yet another day’s ensemble.  No joke, I need to make myself another one of those things!
I also really LOVE my floral dress.  It just makes me feel really good when it’s on, I think it’s instantly flattering, it’s smart enough to wear out to dinner as well as during the day and yet is still that traveller’s godsend, non-crushable.
I tried to mix and match things up every day, and aimed to wear everything at least three times each.   Because of the timing of our itinerary there was scant opportunity for washing clothes apart from the obligatory undies-in-the-shower-every-morning that I stick to religiously while travelling, no matter what.  It’s always best to keep on top of that at the very least, I reckon!  Also I washed my ivory Pattern Magic twist top and “saved” my white denim jeans for the trip home.  Might sound funny, but for us it’s always such a long long trip to come home, from everywhere! so I always aim to keep something nice and clean for the trip home.
Shoes.  Hmmm. In my opinion the trickiest thing in packing.  Aaaaargh!  So hard to narrow it down  and always the most annoying and bulkiest things to pack!  I had forgotten about the cobble-stone situation that is endemic to Europe so I kicked myself a bit for not bringing my desert boots.  In retrospect they would have been fantastic in the city streets.  But since my suitcase was bulging with new purchases by the end of the trip perhaps it was a good thing to have restricted myself there, spacewise.  I took my black suede pumps because they can be worn both with or without tights.  The tights-less occasions numbered exactly two!  I guess I was overly optimistic about the prospect of warm weather, there  🙂   My ankle boots were brilliant.  Hiking shoes are just a given.  I wore my thongs just once! but I never feel like they are a waste of space since they really don’t take up any room in the suitcase.  And you just never know if they might come in handy.  That could just be the Aussie in me talking though  🙂  

And yes, I met Sølvi! or define elise as she is known in me-made May.
I enjoyed a totally delightful few hours chatting with Sølvi;  sipping champagne in the sunshine sitting alongside Oslo’s beautiful new Operahuset (opera house) and discussing important world issues such as sewing, fabric shopping, blogging and me-made May-ing.  Just a thoroughly gorgeous afternoon.  And we were so caught up in happy sewing chatter that we forgot about the obligatory commemorative selfie!
Thank you so much for coming out to meet with me Sølvi!  🙂

pinterestmail

Me-Made May 2014

So once more I have LOVED taking part in me-made May again this year!  I participated in the Flickr group every day but decided to just write one summary post here on my blog about my experience; which is this one!
So what to say, what to say…
My pledge….  I went 100% me-made, including all underwear, hosiery, sock and knitwear, all of my clothes.  The only exceptions were, as usual, my shoes.
Did I enjoy it…? YES! always  🙂  I love looking at everyone’s outfits and feeling like part of a community.  I think that for those of us who sew our own clothes, this is the best way for us to have our own annual, if virtual, seamsters’ convention.
Did I learn anything…? well that I have plenty of clothes (blush) with no gaps that need filling really, and nearly all my current wardrobe is made by me, which is a pretty excellent stat, if I say so myself.  I kinda half-tried, not-very-strictly to go without repeating an item during May, which seems a very silly and shallow goal but a goal that has the well-intentioned side effect of forcing me to rootle out things in the wardrobe that I am not wearing very much and attempt to integrate them more fully amongst the very well-worn items.  I think it’s good for me to force this every now and again, because let’s face it; I sew a lot, because it’s my hobby and I love it.  But actually wearing everything that I sew doesn’t always happen fairly and equitably.  I do wear my own creations all the time, but like everyone I have favourites.  Me-made May is always a good opportunity to play at styling more of my own closet. 
And did I repeat any items…? my two pairs of black tights, my navy and paprika tights, my burnt orange Nettie bodysuit and my ivory Pattern Magic twist top each got worn twice.  Everything else got worn just once, and I managed to really mix it up with some new outfits that I really enjoyed.  It was fun playing about and trying to make the most of my wardrobe.
Favourite outfit…? can’t decide, I like lots of ’em
Least favourite….? well yes, there were a few less than stellar days and I have singled out some items that should and most likely will, exit gracefully from my wardrobe.  Some things that I have acknowledged are undeniably shabby.  Photos do not lie.  A few things have been moved to the “potentially for the Salvoes” bag, and I am going to try very very hard to actually deposit them in the bin sometime.  It’s going to be tough but I think I can manage to do it.
How did taking the photos go….?  well this time I found it to be pretty easy and no biggie actually!  I’ve traditionally complained about taking photos of myself during me-made May, but that is probably because I’ve traditionally set a certain standard for myself and burned myself out.  This year, I had more of a no frills approach and set myself a time limit of ONE minute, and NO MORE in which to take my photo.  And that was that.  Also, I am already taking a quick photo every day for my daily outfit photo blog too so it has become just “a thing” that I do once a day anyway, a part of my daily routine.  Occasionally while on holidays I get Craig to take my picture; and he has a pretty low tolerance for this activity so the process is still quite speedy with minimal fussing allowed!
So that is that for another year.

The entire Flickr group’s photos are here, and all of my May outfits can be viewed separately in my own MMM14 Flickr album here.

And also; today marks the last day of Yoshimi’s and my joint photo blog; the year-long photo maisonette experiment.  I’ve really looked forward to and enjoyed looking at Yoshimi’s photos every day.  It’s been a fun, enjoyable and very interesting exercise for me; and Yoshimi, thank you so much for saying you would join in taking part with me. I know you are very busy with your work and family so I am so appreciative that you agreed to make the commitment.
Also I hope that everyone who did view the blog enjoyed the differing, and sometimes very similar views of our daily lives in Japan and Australia respectively.  Thank you to all those who did stop by!  Your kind words were always very much appreciated  🙂

pinterestmail

More on sewing knit bands

eleynagomez asked how I made the thumbhole bands on my Nettie bodysuit, thank you so much for asking!
I didn’t take any pictures while I was making the real thing but I sat down this weekend and ran up a little mock-up band … basically it is the exact same procedure as if you are adding a neckline or armhole band to a Tshirt but just on a much smaller scale!

Firstly, when you cut your Tshirt or bodysuit pieces cut the sleeves long enough that they will cover over your hands, as above.  Make the Tshirt.
Try on and mark with a pin where you want the thumbholes to sit on the sleeves.
Now, measure around the base of your thumb and cut 4cm wide bands to fit, adding 0.5cm seam allowance onto each short end.

Sew the band in a ring, press the seam allowance open.

Fold in half, long edges together.  Cut an on-grain slit in the sleeve at where the thumbhole is marked; make it just a bit shorter than the length of the folded band.  It is best to make it a bit short, you will stretch the hole to fit the band as you are sewing.  If the hole turns out to be too small to stretch out sufficiently to fit the band; you can always nick the end of the slit a little bit longer while sewing.  But if you make it too long to start with then the thumb-band might stretch out and be too loose around your thumbs.  

And no one wants *horrified gasp* floppy thumb-holes!
Pin from the band side, since stitching is to be done with the band side up.  

Also… important: whenever you do sew a ring or a tube of fabric like this, be sure to always sew from inside the tube rather than the outside; to avoid sewing down the opposite or underside by mistake!

Because it is such a tiny weeny little band; just go slow, keeping an even distance from the folded edge of the band at the left of the needle, and checking constantly to make sure the slit edge is being caught underneath into the seam.  Stretch out each end of the slit to fit the band as you go.

If desired, the seam allowance can be neatened by overlocker.

Also, I mentioned previously about sewing the joining seam in a band on the bias… I did say I would write a how-to, but this really only qualifies as a “tip”, I think!

When sewing a jersey band onto the neckline or armhole or any aperture really! of a knit garment, I’ve generally gone for a straight seam just because it’s easy.
But because there are almost double the number layers of fabric sitting at that joining seam point compared to elsewhere along the band this area is can sometimes be a bit bulky and you sometimes end up with a slight bump no matter how carefully you guide that seam through the machine.  Seriously, getting a nice smooth and even-width band all the way around is often the hardest part about making a Tshirt!
So lately I’ve been cutting and sewing the join on the diagonal, reducing the number of layers at the joining seam, and I think it’s been an improvement with almost no bumpy bit at all!!
It is a particularly good idea for bands like a cardigan button band, on which slight bumps and irregularities in thickness and width are particularly noticeable.

You do have to be careful while sewing that joining seam, since the fabric is on the bias along that edge you have to watch out that you’re not stretching the fabric at all while you’re sewing that short seam.  If you’re in any doubt as to whether the fabric will distort during stitching it would help to pin and sew to a backing piece of tissue paper, which can be ripped away after it is sewn.
Later edit in response to an email question; just to be clear, the band is NOT a bias-cut band, it is still cut cross-grain just like you normally would and it is just the short joining ends that are being cut on the diagonal  🙂

And yes, the thumbhole bands I described above are so tiny it was really too tricky to mess about with bias joining seams and I just cut those on the straight.  Choose your battles!

pinterestmail

Little black polka-dots

I’ve made a dotty little cardigan  🙂  Yes, it seems like I’m turning out new stuff everyday, but the truth is that some of my recent items have been finished for up to a few weeks or more and it is just my photo-taking that has been lagging.  Not the pink lingerie, which I  really did only finish yesterday.  But certainly this cardigan and my yellow skirt.  I have me-made May to thank for kicking me into action, photo-wise  🙂
I bought this coffee and black polka-dot knit fabric in Tokyo while shopping there in January with Yoshimi and Cassie.  I can’t remember the name of the store but think it was Yoshimi’s favourite knit store?  The fabric came in several colour ways, each of which I loved!  at first sight!  with a passion!  and it was soooo hard to pick just one.  I spent ages and ages, dithering over the gold, the teal, the purple, the coffee.  Obviously coffee won in the end, but there was inner angst at leaving the others behind.  The store owner gave us each a pen and a lolly, just for shopping, or maybe to thank me for leaving at last  😉

I bought another absolutely divine burnt-chocolate knit at the same store, another hard-thought out decision.  Seriously, the fabric shopping in Tokyo is too fabulous for words.  I would so love to go every year!
So, I like polka dots, but I particularly like them if they are either :
A. a bit randomly placed 
B. irregularly sized and 
C. a bit splodgy and undefined in their outline
Yes, yes and yes.  This one ticked all the boxes!

The design is based roughly upon the shape of a favourite RTW cardigan with a few minor shaping modifications.  I sewed all seams on my machine then finished the raw edges on my overlocker, and stabilised the shoulder seams inside with Seams Great, a gift from velosewer, thank you Maria!

The neckline band is cut on grain because there is almost no stretch in that direction and I joined the pieces on the bias; a joining seam can just be seen in the top right section in the picture below.   I started joining band strips on the bias like this on my raglan-sleeved baseball tee, did it for all my Netties; and it’s become my new little “thing” to do because it greatly reduces seam allowance bulk in the band at that joining point and so makes for a much smoother and neater band.  I can write a little how-to if anyone is interested?  

I finished the hems and bands by hand because I wanted the finishes to be as invisible on the outside as possible.   I applied a strip of iron-on interfacing to the quarter of the front band strip that was going to be the outside bit to stabilise it; sewed the band onto the front edge by machine, turned under the outer seam allowance and hand-stitched it down inside.

The buttonholes are by machine though.  I practised a few buttonholes on scrap to make sure my machine wasn’t going to chew through the fabric before going at it for real.  I was pretty pleased that they actually worked out pretty good  🙂
The black buttons are from Fabulous Fabrics.

Details:
Cardigan; my own design, coffee with black dot knit with only a little widthwise stretch.
Tshirt; never blogged, it’s just a plain self-drafted thing in beige jersey
Skirt; Burda style magazine 10/2010-136, (the Karl Lagerfeld skirt) lengthened, black wool suiting, details and my review of this pattern here
Tights; self-drafted, black merino, details here and my tutorial for drafting your own custom fit tights here
Shoes; Django and Juliette, from Zomp shoes
Sunnies; RayBan

pinterestmail

Lolly-pink lingerie set

Fulfilling a need rather than a want, I made another lingerie set for myself.  It’s not speccie* but just a bread-and-butter everyday set, with a Tshirt bra and two pairs of matching plain undies.  The fabric is a strawberry pink cotton/lycra blend from the Fabric Store in Melbourne, bought for the specific purpose of a new lingerie set but I was a little shocked when I dug it out of my stash.   The colour was a bit more er, pink! than I remember.  I’m sure it used to be a lot closer to my skin colour.  Honestly, I swear it got pinker while it was sitting marinating in my stash.  Seriously!
Anyway.
The bra is made using KwikSew 3300, modified by adding in foam cup inserts within the layers of the cup and hand-pickstitching the cup to the inside layer.  The two pairs of identical matching undies are both the bikini bottoms of McCalls 2772, another old favourite that I’ve used for all my undies.  It has a nice high-cut leg that I think I prefer to the boy leg cut.  I have a small handful of boy-leg style undies and I find I’m always itching to hoist them up at the sides all day.  Maybe I should wear a boy-leg more to get used to them.  Get out of that rut.  OK, next time.  Maybe  😉
This is my favourite sort of style; a plain and simple little set, easy and comfy to wear with the perfect amount of padding and structure to keep me happy.  Basics.  Comfort food for the smalls drawer.  🙂 
However;
I’m boring.  I know I’m boring.  I’m boring myself too!  My new set is not exciting.  Well, are basics ever exciting?  This was definitely a cake exercise, not icing.  I want to make icing now.  I think I need to break away from the tried and true and make a more wow set next.  I’m actually investigating a few different bra patterns *gasps*

*”speccie”; spectacular

pinterestmail

Incredi-Yellow!

I think every year I seem compelled to make for myself one skirt in some extremely garish shade.  This year isn’t get away scot free either.
I bought this brilliant daffodil yellow pin-wale corduroy from Spotlight a few years ago.  And I apologise for my painfully predictable choice of another Vogue 1247 skirt.
So, I put some thought into thinking of something new to write about the pattern here.  I’ve used it a lot so clearly its got a lot going for it and so it shouldn’t be hard to write some fresh and original new praise for the pattern.  Truly I wish I could expound long and freely and with poetic abandon upon the multitude merits of the humble Vogue 1247 skirt. But the well of words has run dry.  So my love just has to be expressed wordlessly and in the mute evidence of the sheer number of them that have rolled off the sewing machine.

OK, lining.  I can say something about that.  I wanted to line it, so I could wear it with tights during winter.  So, when in Spotlight recently I checked out the lining situ-bar.  It was poor.  But they had something called Dancetime Satin which was both cheap and a not-terrible colour.  See, here’s the thing; my most favourite-ist skirt lining of all time has been the ivory satin I used in my curtaining skirt; another Vogue 1247.  It’s been a sheer joy to wear this skirt, every time, and part of it is in the quiet hidden luxury of the rich lining with its sheen and its cool slipperiness.   But there’s satin and then there’s satin.

Like a fool, I fell for a low price.
I have some hard-won advice for everyone; do not ever, under any circumstances, EVER, buy Dancetime Satin.  Unless you are planning to set fire to something quickly.
Dancetime Satin is like demon’s spawn, put on this earth in order to torment the unsuspecting home seamster.  Truthfully.

Really I should have given up on it, sought out some regular polyacetate lining from Fabulous Fabrics.  But I struggled on with the Dancetime Satin lining, and because there was some leftover I made some bias to finish the lower hem.
I’m hoping it proves itself nice to wear, at least.

Details:
Skirt; Vogue 1247, lengthened and lined and more A-line, yellow corduroy, my review of this pattern here
Top; the twist top from Pattern Magic by Tomoko Nakamichi, charcoal ponte, details here
Tights, self-drafted, black merino knit, details here, and my tutorial on how to make your own custom fit tights here
Shoes; Django and Juliette, from Zomp shoes

Not that the back view of this skirt is particularly noteworthy, but I’ve realised I’ve pretty much never provided on my blog a back view of this Pattern Magic twist top.  I love this top.  I want it to last forever.

LATER EDIT;
this skirt has received a dye bath and now looks like this:
pinterestmail

Navy blue tights

I really really wanted some navy blue tights.  Basically I have two, yes, two! navy blue corduroy skirts for winter, and a coupla hand-knit cardigans including this one which are mainly midnight blue and which I want to dig out and wear more, quite a lot of other navy blue stuff too, ahem *blush* and so matching tights seems like a Plan.  Man, I’m getting so sensible lately.
Anyway…  *ten minutes of sewing later*   DONE!
Well, apart from the fact I had to go back to the fabric store twice, but I’m not counting that.  No, I’m not.  I had a small disaster wrt the fact that you really should check twice before laying the pattern piece down to really make sure as in beyond reasonable doubt that the degree of most stretch is going to be horizontally; or around your legs.  More importantly, around your hips.  Because if you get it wrong you might not be able to get your brand new freakin tights up over your freakin hips.  But let’s not dwell on that now.  The past is in the past and I’m moving on.
I have tights.
Fabric is a rayon/viscose from Fabulous Fabrics.  It’s fabulous, warm and with terrific recovery, and my second attempt is perfect.
Actually I do have several other new things to show here, but my photo-taking and documentation is dawdling.  I’m taking part in me-made May, which has become kind of like the unofficial Annual Seamsters’ Convention, albeit a virtual one.  I’m in the Flickr group, and I’m trying to spend a sensible amount of time on it all so blogging-wise I’m pacing myself.  New things to appear here very soon.
Later dudes!

Tights; my own custom fit pattern, details and my tutorial on how to make your own custom fit tights here
Skirt; Vogue 1247, navy blue corduroy (made from old jeans) details here
Top; loose draped top from drape drape by Hisako Sato, white crinkly jersey knit, details here
Cardigan; hand-knit by me using Patons 8ply wool, to a Patons pattern, details here
Shoes; Francesco Morichetti, from Zomp shoes

pinterestmail

Further Alabama Chanin-ing

Hello!  I am getting started on my next Alabama Chanin project.
Yes, an authentically executed Alabama Chanin creation is a big time commitment but I really enjoyed making my 3-piece set and it is nice to have a hand-held project to work on slowly, something easily transportable that doesn’t require much space or special equipment or a lot of thought but that you can just pick it up and get on with, a little bit at a time.
I’m using some hot pink jersey knit from my stash, bought in the Fabric Store in Melbourne during one of my trips over there with Mum and Cassie, I’ve forgotten which one now.  Probably the previous one, hmmm…  Actually, I had pulled this fabric out in the early planning stages of my recent SWAP and marked it as a definite; that was before eyeballing the rest of the long term stash residents that I was keen to sew up and realised that colour-wise, it didn’t fit in at all.
And it still didn’t.  Really, hot pink? I don’t know what I was thinking.  My current way of thinking wrt my wardrobe is to have it mostly subtly and/or autumnally shaded, and while in theory I like hot pink, in reality I was just like; ah, No.
So, step one; wash, soak and dye the fabric.  I used a small shake each of iDye in Brown, Yellow and Chestnut in the dye-pot.  Sounds hideous? well I did do a small sample first and thought it a huge improvement.  So that was a go.  My fabric was a slightly variegated hot pink and became a slightly variegated rusty-purply raspberry.

Cutting and Printing:  This is where things got tricky… I received an email recently from Carolyn in Florida, asking about the curl factor of jersey and how did it affect the Alabama Chanin technique.  Well, in the case of this particular fabric as can be seen in the photo above, the curl factor was extreme and the edges of my fabric curled up so badly And they just would not lie flat by themselves.  From a screen printing point of view this is disastrous.  I wanted to have my screen print go right up to the very edges of the fabric, and so the edges just had to lie as flat as possible.  So for a quick and easy fix-it I just used regular household sticky tape to tape just the very edge of the fabric down to my backing newspaper, just inside the seam allowance and immediately prior to printing.  Not a pretty or elegant solution, but it worked pretty well!

Printing the fabric seems to have tamed the curl quite a lot too!  The seam allowance for Alabama Chanin designs is small, like 5mm or so, so you do need to print right up close to the edge.  I’ve found from my first project that I prefer to have my embroidery right up to but preferably not within the seam allowances, though.

I will say; if your fabric does curl very badly I can see the case for printing then cutting out.  I do have my reasons for preferring to print after cutting out; reduces waste of expensive printing ink since you’re only printing what you are using: heckuvva lot easier when manipulating the smaller pieces to get a very good placement of print.  That last point is my primary reason for doing it this way, and I’m still glad I did cut out first.  I guess this is something that the individual will have to decide for themselves when embarking on a project like this  🙂

The Stencil:  This time I chose the Abbie’s Flower stencil from the book Alabama Chanin Studio + Design, by Natalie Chanin.  I enlarged it by approximately three times using the good ol’-fashioned method of drawing a grid on the design, then drawing a bigger grid on your paper in which you painstakingly copy each little square on the bigger scale.  Like we used to use in primary school; from back in the dark ages, before photocopiers.  Ha!

I thought the overall motif was still a bit small and my least favourite part of printing is placement of the screen for repeat printings.  I mean; if your motif is larger in area then you decrease the number of times you have to re-place the screen on your piece of fabric; and the less placement the better, imo.  So I ad-libbed putting more motifs from the Abby’s Flower stencil around about and added in a few random leaves and curlicues of my own too, until my stencil covered the maximum area I could get on my screen.

The embroidery technique I have chosen for this project requires keeping the printed motifs intact in the final garment, so I needed to print the motifs in proper fabric paint instead of the discardable house-paint that I used for my first project.  I used Permaset water based Textile Printing Ink from Jacksons, and mixed a deep oxblood red/brown colour using orange, crimson and a bit of green.
My green had a few chunky bits in it that didn’t mix in properly, and I really like the few areas of streaky green that showed up in the screen print.  It’s almost a pity that they will be mostly covered up by my embroidery!

My print placement was not perfect: note; it never is! and after I’d finished I noticed a few largish gaps that stood out visually in a not-good way.  So the next day I mixed up a teeny bit more paint, cut a new, very small paper stencil of two leaves and carefully printed in a few of these in the gap areas. The design looks quite irregular so I think it worked out very well.  They stand out like a sore thumb right now because they are a deeper colour but I’m thinking they’ll probably blend in OK once I get embroidering  🙂

pinterestmail
Switch to mobile version
↓