Yearly Archives: 2018

You are browsing the site archives by year.

2018; a retrospective

Ah, it’s the 31st December, when I look back over of my year of making and wearing and do a little analysis… to kick off, some of my favourite pictures/outfits, one for each month.  Several of these pictures are not even “blog pictures”; by that I mean have never appeared on my blog, but may just be an outfit or picture that I particularly liked, or may be because of a particularly lovely memory of that day or something…

January

just a particularly gorgeous day and in my happy place…

February

… because I love this outfit so much

March

…the prototype of my first sewing pattern!

April

the day of Tim and Kelly’s engagement party which is pretty special I think; so I made a special skirt just for the occasion

May

… in Bali for our friends L + L’s wedding; so much fun!

June

… just because of this gorgeous cockatoo fabric! unfortunately also the day my trusty old camera nosedived into the sand and died, and the beginning of several months of annoying “photo improv”

July

… made a raincoat to commemorate the wettest year we’ve had for like 50 years, or thereabouts…

August

… just had a really nice hike, that’s all….

September

… love first “bare leg” day of the season…

October

… luscious lace, and cheers to a lush, rain-engorged garden…

November

…  our daily constitutional…

December

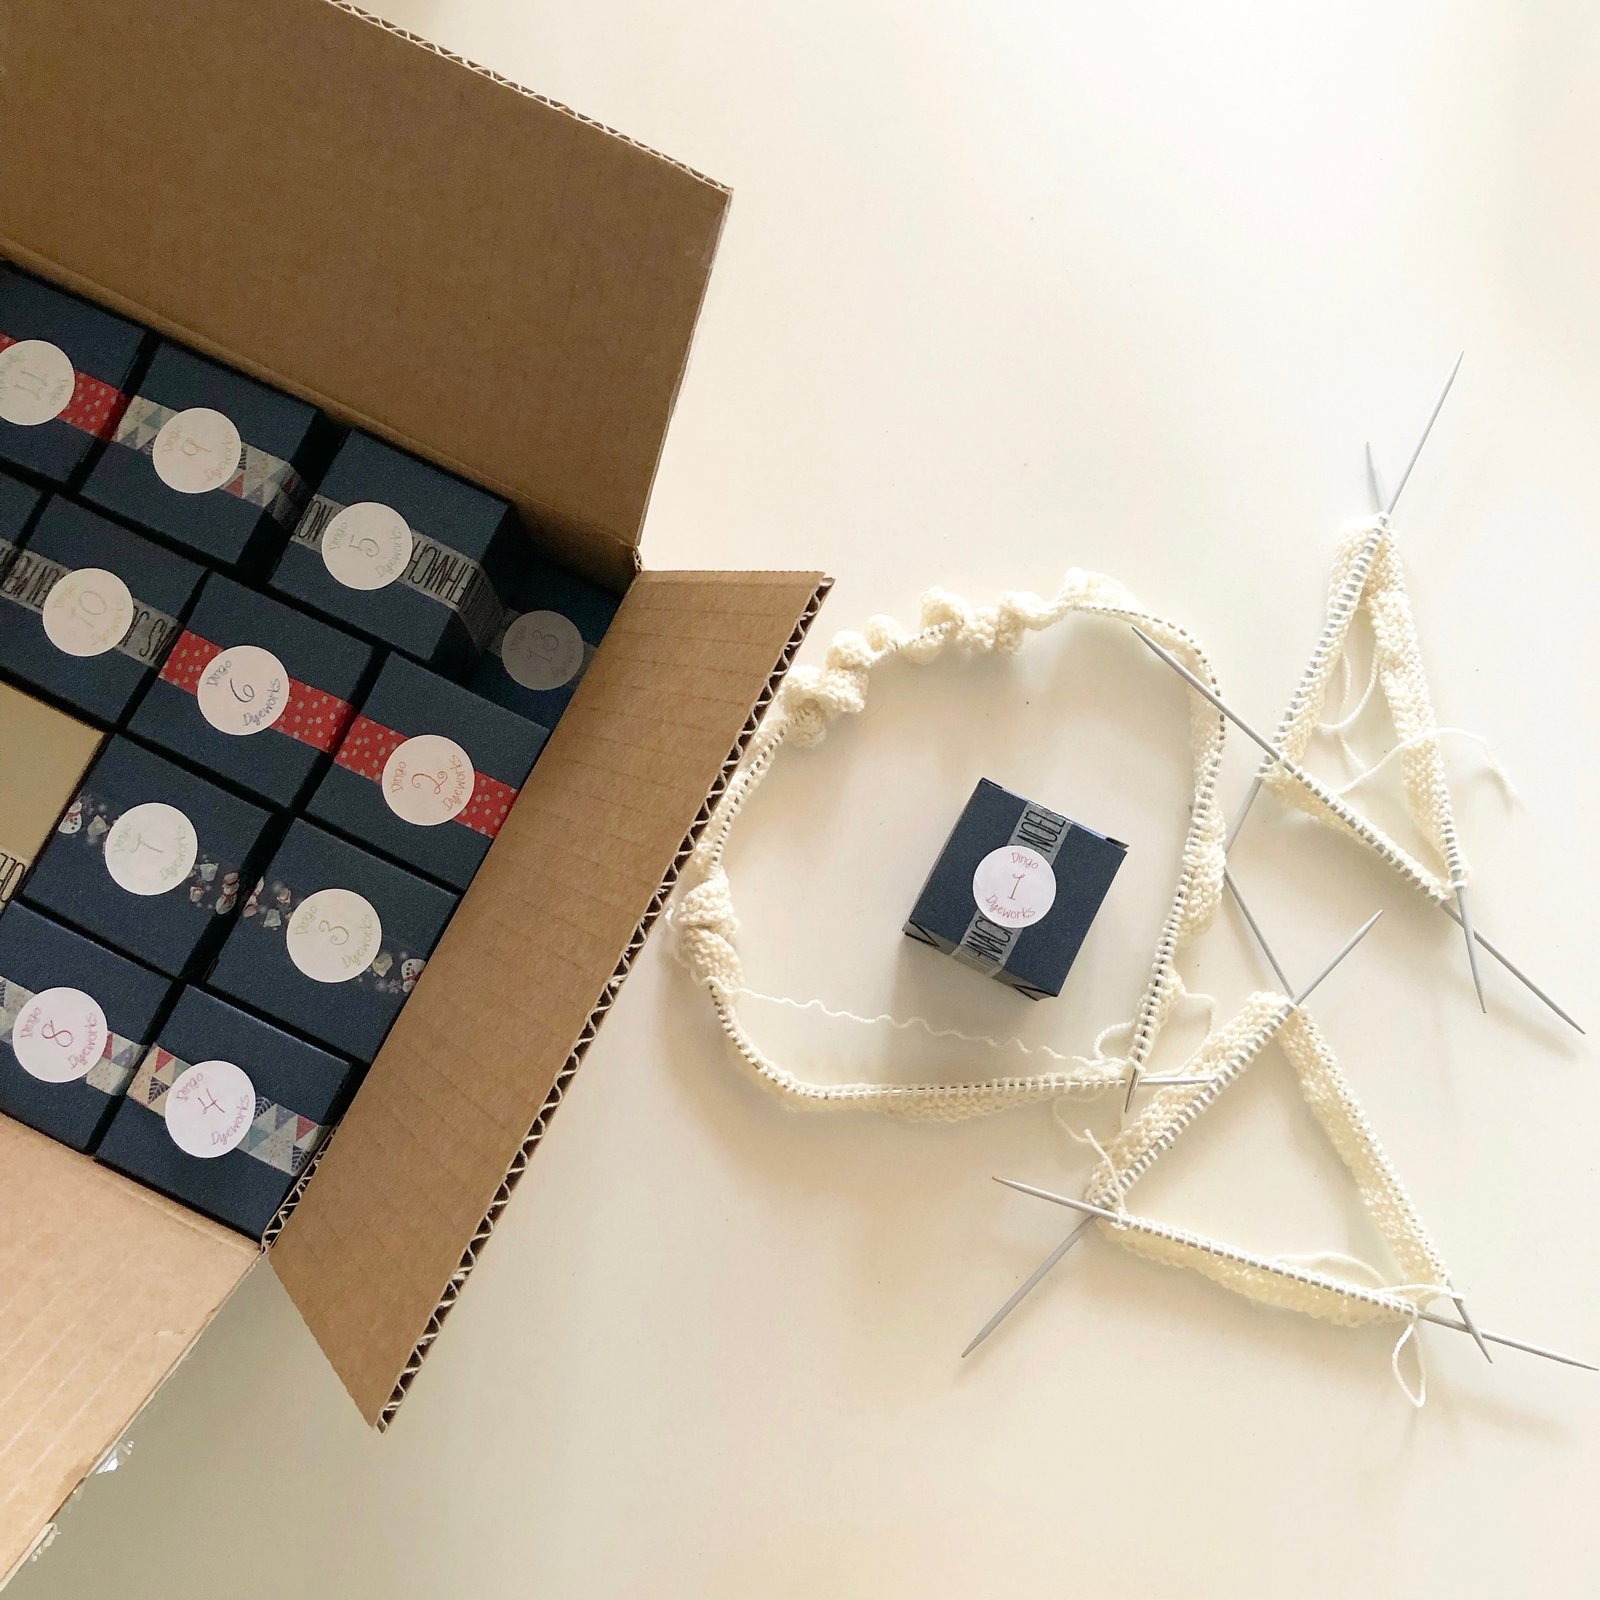
… my most recent creation!  Thoroughly enjoyed this, and the whole fun experience has sewn some fertile seeds for a new project I’m dreaming of for next year  🙂

What did I make?

So, it’s funny; this year I didn’t feel so productive and could have sworn I didn’t make as much as previous years, and yet when I added it up I made 77 things, including 22 items for others, 2 prs of shoes, and our 2 sewing patterns.  Surprised! and even a little embarrassed?  This is on a par with last years’ production levels, though to be sure some items this year were definitely on the quick and easy side.  Breaking it down: 13 tops/shirts/blouses, 6 skirts, 4 prs jeans/trousers, 9 prs sockettes, 2 prs tights, 2 prs shoes, 6 hats, 1 baby romper, 12 dresses + 2 wedding dress muslins, 3 coats, 1 jumpsuit, 3 sets of lingerie, 2 knitted cardigans/jumpers, 5 bags, and 4 dolls complete with wardrobes.  I know, right?!     In fact, now I think about it, I actually made 3 further items over and above than this, but those things have not yet been blogged since they are all patterns still in the testing phase and I’ve been sworn to secrecy until their release. One of them is a Pretty BIG Thing, though.

This year I also started making our soap, and think I’ve made enough for several years’ supply already, lol.  Luckily, we really like using it, and I also gave several bars away during the year, as little gifts for friends and family too.

What did I wear?

I still keep my OOTD blog up to date and tally up the things I wore and frequency thereof.  Documenting one’s outfits is a pretty obsessive thing to do, I realise that, but I still really like doing it.  The clothes I wore the most frequently this year can be summed up in the following:

This collage comprises more outfits than I’ve posted in previous years for this category, but I have an explanation: keeping an outfit tally has opened my eyes to the fact that I tend to favour certain wardrobe items and ignore others… and I’ve been making an effort to “spread the love” around my wardrobe more.  This might seem like an artificial thing to do, like why force yourself to wear something you don’t love as much as another thing? Why not just wear the things you love the most?  But I’ve found that wearing something breeds a love for it, so pulling out not-quite-so-loved things, experimenting with them and finding outfits in which they can shine; is a means to the end of loving them more, thus loving ALL your self-made clothes, MORE; and so getting more wear out of everything.  I loathe waste, and particularly waste in clothing, so I don’t want for things I’ve spent care and energy making to be unworn and tossed out before their time.  So, I wear them.  Make sense?  Well, I know what I mean, anyway.

Apart from various shoes/boots and my self-made black tights, all of which are always worn the absolute MOST in my wardrobe; the most frequently worn item this year was my new mustard raincoat with a total of 31 wears, closely followed by my grey Sasha trousers at 30 wears, my trusty little paprika cardigan at 22 wears, and my pink Kelly raincoat and scarlet Miette cardigan both at 19 wears each…

Favourite creations?

Oooh, this one is always so tough… I mean, how does one choose one’s favourite child?? of course it is impossible.  Having said that though, I think my favourite creation(s) for the year are something a little bit different; our sewing patterns!  Because, yes; of course, during the year Cassie and I released two sewing patterns; our Perth dress/blouse, and our Kimberley rag doll.  The response has been fantastic, for which I am so SO grateful.  We’re fully immersed in plans for TWO more patterns too!  It’s a LOT of work producing a pattern, and I’m eternally thankful to everyone who did support us in this new endeavour this year.  MWAH! to all of you.  Thank you xxx


As far as favourite made clothes;  well, if I really did have to pick… it’s nothing special, far from it! but I really enjoyed making, and I really love wearing my “piñata” outfit!  A little bit weird, all very spontaneous, the fabric was such an impulse buy, and I ran it up on my dinky, clunky, plastic-ky little holiday sewing machine, in our holiday house with the bare minimum of sewing supplies.   Maybe all that “wrongness” is what combined to give it a paradoxical rightness … and I have a soft spot for those orange pompoms too!

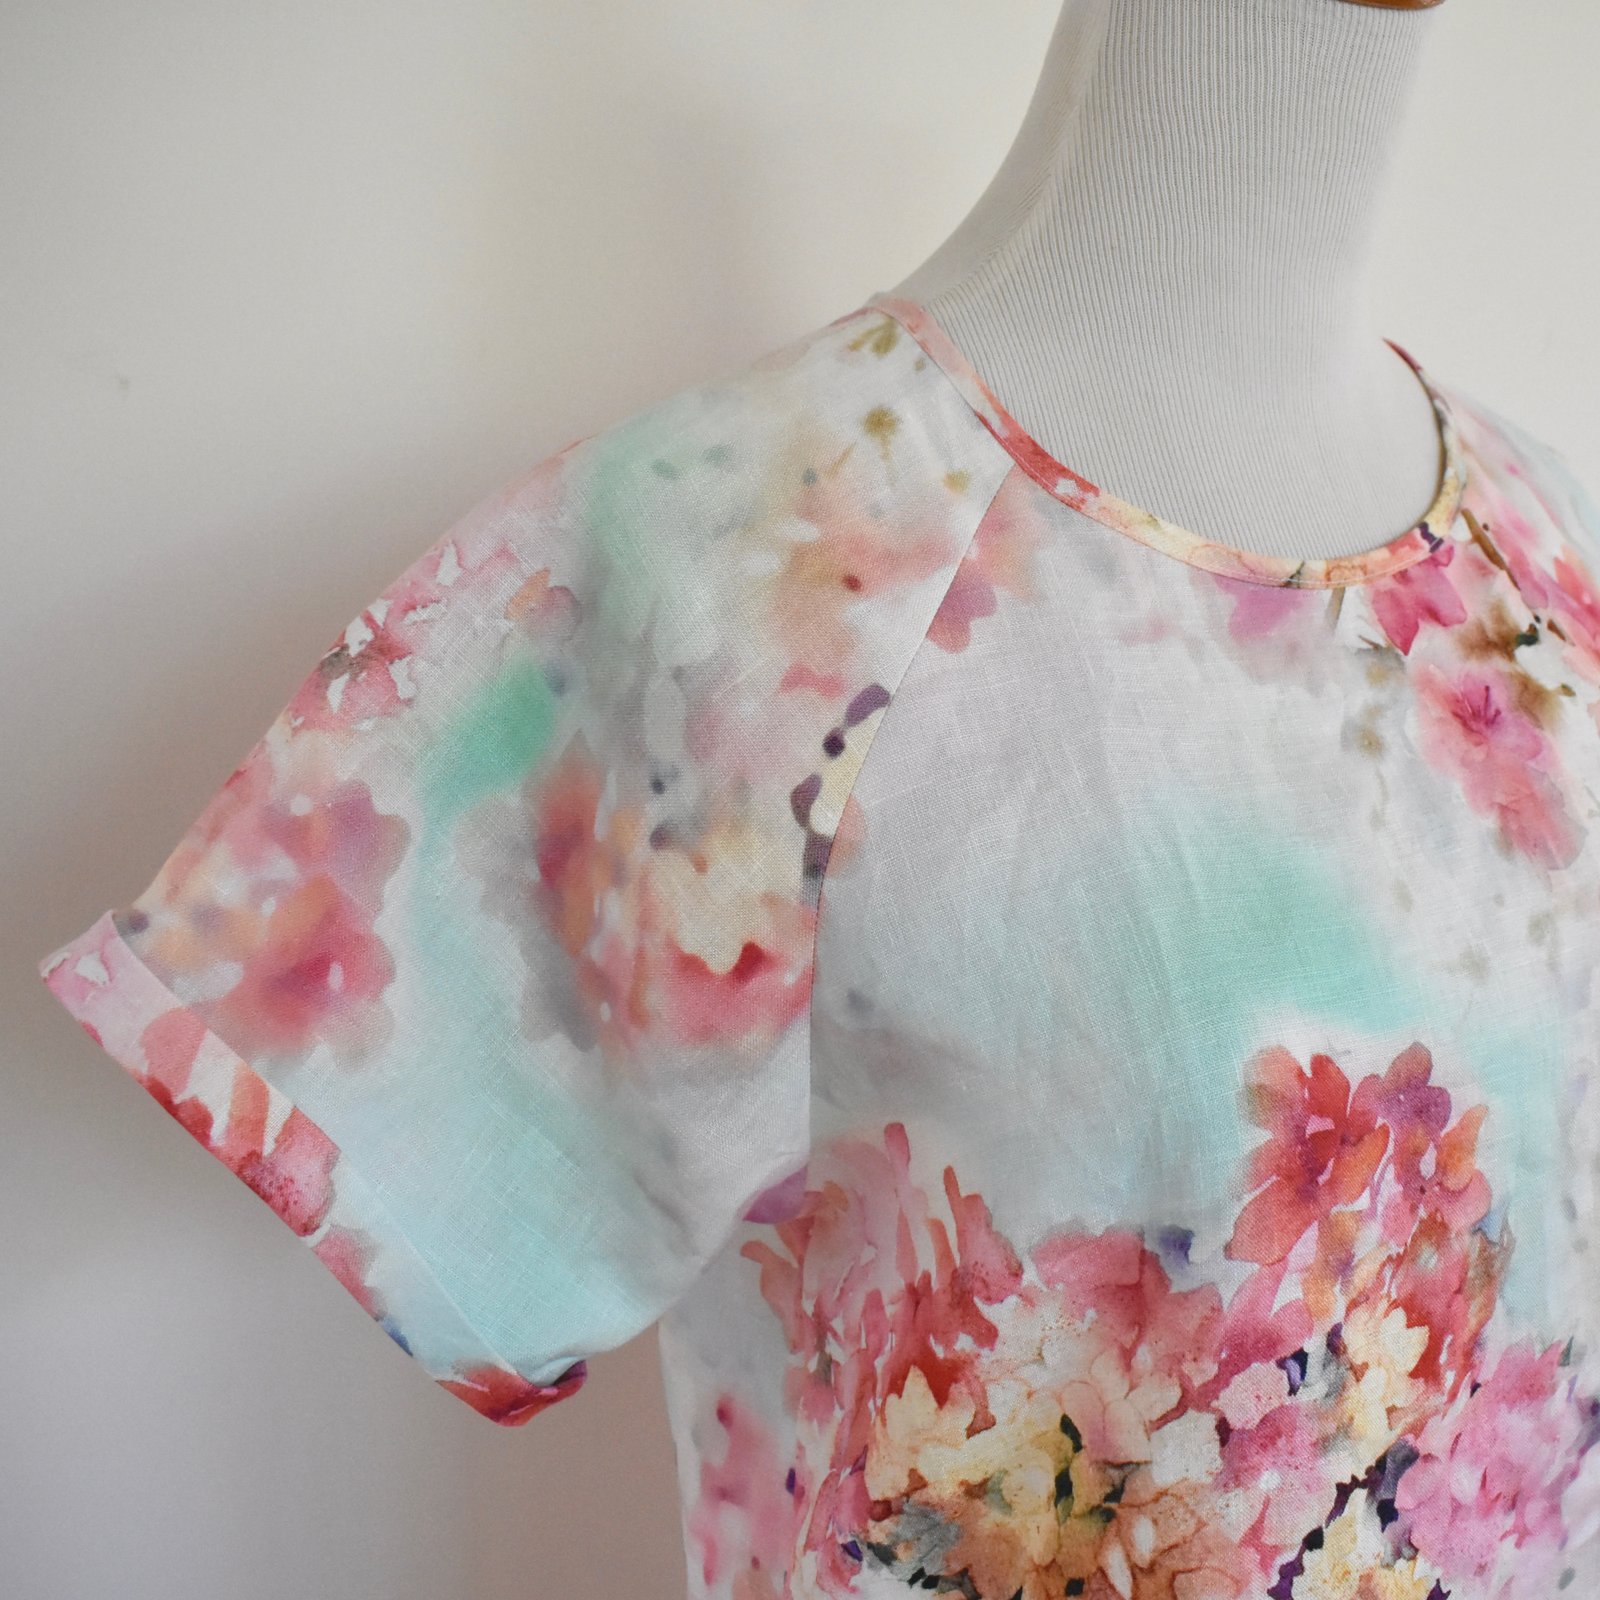
I also really really love my cockatoo outfit and also my floral trench coat…  I must be having a colourful moment?!

What are my plans for 2019?

So, BIG THING….  the first part of this year I will be making Kelly’s wedding dress! yes that’s pretty huge.  I’ve made two muslins so far… the second one is nearly perfect so with only one tiny adjustment and one further fitting, I hope to actually cut into the real fabric early in the New Year.  Scary!!

muslin number 1

muslin number 2

I am also beholden to make two bridesmaids’ dresses; one for Cassie, and one for her’s and Kelly’s mutual friend G.  I’m going to tackle those after I’ve got the bare bones of the wedding dress all done and dusted though.

For myself, well of course I want to make a mother of the groom outfit for myself!  Yup, pretty excited for that too!!  I know exactly what I want, I have my pattern all ready and lined up, and I just need to find the perfect fabric.

In other, more ordinary, sewing plans; the smalls drawer! I did not make much this year and now find myself in need, so there will be more lingerie this year.  I am also in a very sad sock situation at the moment, my old socks are all darned and darned and even then darned some more.  So my plan is to knit 1 new pair of socks per month.  A dozen pairs of socks!

And, yes, I have plans for two new patterns this year.  The groundwork has been laid, and I just need to get in and on it; and tidy a few things up.  Well, there’s a LOT to be done, to be honest, I only hope I can get enough time together to do all this… obviously the wedding dress is my number one priority.  🙂

Anything else?

Well, finally and of course most importantly of all, I just want to say THANK YOU! to everyone who reads my blog and who takes the time to leave a comment, I am so grateful for each and every kind thought.  Thank you all so very much, and I’d like to wish all the best to everyone for a safe, happy, peaceful and wildly creative 2019!  Mwah!  xxx

pinterestmail

a knitting advent-ure

I’ve knitted a magical, rainbow, unicorn of a jumper/sweater!

But, what is this, Carolyn??  I didn’t know you were into magical rainbow unicorns?!  Well, of course there is indeed a story behind this…

my little “troll” progress keeper was my constant companion and cheerleader… 😉

So, in the past few months, idly hanging around on youtube I randomly got into the world of knitting youtubers, and watched a few videos… I think it was Katie of Inside Number 23 who introduced me to these wonderful things called knitting advent calendars …  I thought they sounded like such a fun idea! at roughly the same time I’d been to Calico and Ivy checking out all the wool and other yummy eye candy they always have in there and seen and admired some gorgeous wool hand-dyed by a local lady going by the name of Dingo Dyeworks, and I mentally tucked the name away.  Later on, in search of an advent calendar, I found that the same Dingo Dyeworks had produced one for this year.  SO naturally… I bought one!

day 1; and I’m ready to party!!!

The advent calendar came in the form of 24 cute little boxes, each with a mini skein of wool inside; the colours of which were a complete mystery.  There is also a 25th box, which is much larger and contains a full-sized skein of the same sock yarn, but I decided to base my “advent”-ure project on the 24 mini-skeins.  The only thing you knew about them was that they were all on the Dingo Dyeworks “ridgey-didge” base; a fingering-weight 85% fine merino 15% nylon superwash, which I’d checked out in Calico and Ivy and liked.  SO I laid my plans… to make a jumper, or sweater.  I bought from C + I a skein of similar gauge yarn in an undyed cream colour and did a few swatching experiments, made a few calculations and a plan, decided I could indeed make a whole jumper from sock yarn.   I knew knitting just a little bit every day would be perfectly manageable, and fairly painless.  In fact, I always find the lead up to Christmas so full of stress and madness that I welcomed the thought of carving out a little bit of time in each day, to just devote myself to a quiet, happy and mindless project just for me.

If you follow me on instagram, you might have seen my daily “unboxing”, a single example of which is above… I had so much fun just opening the yarns and seeing that day’s colour!  Honestly, even without the daily calming and meditative knitting session, and notwithstanding that I now am the proud owner of a divine new jumper – the texture of which is so baby-soft and so squishy, and basically too too heavenly to even describe…  just opening the days’ little box each morning was also such an enormous joy for me.  I also posted a picture in my stories each day of the day’s progress.  If you want to see them all, I’ve saved the whole process in my permanent stories, called “advent”-ure, at the top of my page  🙂

day 3… 🙂

I started from the bottom, and knitted the same number of rows on each sleeve and the body section each day, and then when I got to the appropriate place to start the yoke, joined them all together and continued in the same way, decreasing raglan style up to the neckline.

day 14…

Before opening the first skein I wasn’t 100% sure there would be enough yarn in each little skein to do the width of stripe I wanted, in this case my plan was to “fill in” between the stripes with a few rows of the undyed yarn I’d bought for the cast-on… but after day one I’d happily determined there was plenty! in fact I estimate I only used roughly a half of each skein, even for the widest sections.

day 17…

I’d decided to just knit each colour as it appeared and not second guess anything at all! so the delicious Unknown of it all was exciting and fun; but I have to admit there were one or two days I was like “whaaa??”   However I’d checked out the Dingo Dyeworks advent calendar from 2017, which was so so beautiful, and I just had to put my trust in this years’ being beautiful too.

day 20…

It is a little different, to be sure! and while not all the colours were what I might have chosen and there was even a coupla days where I truly wondered where this was all going!  Would this advent-ure be irredeemably unicorn-ly?!  However I’m very happy to admit that my fears were unfounded and I feel like my finished sweater is now one of my loveliest and, dare I say, the prettiest that I have?! and the colour-story worked out quite beautifully in the end.  I’m still about 99% convinced days 16 and 17 were mixed up! but that’s neither here not there really, since you can’t really tell that in the end result.

aaaaand, day 24!

Knitting on this every day was, as I’d hoped, a calming and peaceful, meditative and fun! interlude in the lead-up to Christmas for me, so I am so glad I decided to do this … yes, it resulted in a smaller pile of me-made things I could give my loved ones; I bought a few presents for my family this year and I refuse to feel guilty about that! and I still did manage to make a few things.  And I have a beautiful and unique new jumper!

back, indistinguishable from the front actually, but you know…

Details:

Jumper; my own design, made from the Dingo Dyeworks 2018 advent calendar
Skirt; Vogue 1247, made from curtaining fabric, details here
Thongs; fipper, bought on our holiday in Bali

pinterestmail

rope market bag

< So this is embarrassing… I made this bag in October… last year!  It has sat up in my laundry, only awaiting the handles; and the following draft post has been sitting forlornly in my drafts folder ALL THAT TIME.  But no more!  I finished the handles last month, polished up the draft post and just bunged in some pictures and bammo…  DONE!  Finally! >

hehe, anyone who knows me knows that I don’t make bags very often… it’s the one luxury I BUY! but I saw this tutorial by Amy over at Heather’s blog Closet Case patterns and just thought it was super chic and cute!! Coincidentally, when I pinned it I found that a few years previously I had also pinned a similar tutorial written by Erica over at honestlywtf.com! Guess it was a sign… for me to get on and DO it!


I’ve been carrying my shopping in generic carry bags rather than plastic shopping bags even before the placky-bag bag came in, because I’m such a bag snob, hehe, and while I do have a quite a lot of perfectly serviceable plain ones stashed in the boot of my car I decided I wanted a nicer one for when I wanted to look more classy-like in the supermarket.  Probably just because I wanted to give this awesome tutorial a go more than anything else, to be honest…

I bought 3 bundles of this cotton rope/cord from Bunnings and just had at it… my first fold is 20cm, and I started sloping the sides after just 10 rounds, because I wanted my bag to be wide, but flattish.  The longer your first fold, the wider the bag, widthwise, and the more rounds you stitch before sloping the sides up, the “fatter” your bag will be.  My bag itself is two whole bundles of 25m, and then I decided I wanted leather handles rather than rope ones…. I had a small scrap of deep chocolate brown leather from when my friend V was cleaning out her stash.  I punched the holes for the stitching using the leather tool I bought from Skinhuset in Copenhagen during our visit there a few years ago, and handstitched using a leather needle and deep chocolate brown Gutermann’s upholstery thread.


I also wanted some little internal pockets inside the bag; one side has a zipped one for keys and the other has an open,  more accessible one for my phone… these are made from a stiff, cream-coloured cotton broadcloth, actually the same stuff I used to make my rag-doll Sally… and I just zig-zagged them down inside the bag.  Because there’s all the mad crazy zig-zagging going on on the outside of the bag already, you don’t really notice a little bit of extra zig-zagging for the pocket attachments.  The perfectly matching “rustic” chocolate-brown zip came from an old pair of jeans that I previously cut up for another project…

so that’s it!  I really really love it, and think it will come in handy not just for shopping, but just for anything and everything, really.  So far I’ve used it precisely once, when I took it to my local Australian Sewing Guild meeting, to hold my sewing stuff.  It worked!

pinterestmail

the bumper Christmas edition

So, every Christmas I like to make a small mountain of stuff for my loved ones; this year was a smaller mountain than previously, mostly because I embarked upon a sorta epic making-adventure of a more selfish variety, ahem … but more about that particular project in a future post!  But I did still manage to make some bits and pieces for others!  btw, I was too busy to take any photos on the day, woops!  but I’m hoping to get some modelled shots here sometime soon  🙂

Items 1-5; it’s always difficult to think of something for the boys, something “useful”, because boys are never just about the pretty things like girls are. Also, because I actually prefer practical and useful myself too, always.  I recently discovered elbe sewing patterns through instagram, and noticed that she had very kindly made a free pattern available; the Sorrento bucket hat.  Freeeee!  So generous! and I thought it would be fabulous for my guys who do wear hats all the time. Craig, for one, who has been wearing the same sad shabby hat for about a decade now, ahem. Yes, since I make stuff it has indeed been a point of embarrassment, hehe  ;D  A hat also seemed like the perfect gift for Cassie’s man D, notoriously difficult to buy/make for.  He loves fishing with a passion and was apparently in need of a new fishing hat, according to Cassie.  Great timing!

Tim’s hat

I had to measure everyone’s heads… awkward! but well, I guess everyone’s used to my strange stealth-measuring attacks by now!  Cassie helped me out by stealth-measuring D’s head… she said she did it while he was sleeping which made me laugh to imagine that!  Fortunately he says it fits him perfectly!

D’s hat…

The boys’ hats are all made from Spotlight’s cotton drill, it’s hard to find fabrics that are both masculine and interesting, but luckily Spotlight currently has these camouflage prints in a wide range of colours. SO AMAZINGLY LUCKY!!!

Craig’s hat…

I opted to interface the brims with medium weight fusible interfacing, and they are all fully lined; Cassie’s with a stiff white cotton, the drills I used for Craig’s and Tim’s both have an olive-ish cast to them so I used an olive poplin from my stash for them, and Sam’s and D’s are both more blue-ish so for them I cut up the trouser legs off an old pair of Sam’s navy blue work trousers.  It was exactly the right shade of navy blue, and also a really nice weight for lining a hat.

Sam’s hat…

And I found this old label in my notions basket! the very last one! leftover from when I used to sew their names in their school uniforms! I had a little giggle putting this in, and Sam too when he saw it in there on Christmas morning.

Cassie’s hat…

I also made one for Cassie using some of the leftover fabric from her Christmas dress for this year…  more on that later!  Cassie’s floral linen is very lightweight compared to the cotton drill that I used for the boys’ hats, so I fully interfaced all the pieces in this one, including the lining, with medium weight fusible interfacing.

This is a free pattern so obviously you can’t complain, and I’m not! because this is a fantastic little pattern! However one thing I want to note for if I ever use this the future… the pattern specifies 30cm for fabric and 30cm for lining. Yes, this is technically correct; but personally I prefer for the brim lining of a hat to be of the same fabric as the shell, because you can see it while you’re wearing it. So if you’re cutting out all 4 brim pieces from the outer fabric, 30cm is enough, but just barely! and only if you throw all grainline specs out the window and are super vigilant about miserly pattern placement! I did make sure to cut the band pieces on grain though, I think you have to for the hat to look nice.  If you want to cut the brim plus brim lining pieces all on grain then you’d need at least 40cm, or 50cm to be safe

I made all my paper pattern pieces full size, which I HIGHLY recommend; because when you are cutting out fiddly little pieces like these on the fold, and in multiples; then they rarely come out identical to each other.

Best thing; everyone seemed to love their hats! I might even get around to making one for myself one day 🙂

Items; 6-7; I was going to make hats for Tim’s fiance Kelly and for Sam’s lady L too, but when it came time for choosing prints for them, well I chickened out!  There were loads of gorgeous prints in Spotlight, pretty, feminine and cute and probably lots that they’d love, but well, you know, choosing a print for another girl is quite a personal thing, and I was nervous they wouldn’t like my choice. Eventually I hit on the idea of making a reusable shopping bag for them.  Yes, these are in a print too, that I chose, but a bag is definitely “safer”!

During the last year, it became illegal for supermarkets here to give out single-use shopping bags, and now everyone has to remember to take their own shopping bags for their groceries… of course there are lots of branded reusable shopping bags you can get but everyone likes a cute one to hang up in their kitchen, yes? Kelly and Tim have recently done up their kitchen and btw, it looks AMAZING!!! it’s all dramatically jarrah, black/white, stainless steel, and grey blue; and they also have a lot of indoor plants there. So I chose the above fabric for Kelly’s.

For L; well she loves baking, and she loves cute stuff, so when I saw this bright and fun doughnut print I knew instantly it was perfect for her!  

I made my own pattern, based upon the measurements of the little bag holders in Coles checkout stations. My own experience is that the stitched-on-strap style of handle is a weak point in shopping bags, the first thing to go; so I designed the bags to have cut on handles, and to be reinforced with a facing.  It is a bit of a fabric hog to cut it out like this, but I’m thinking it will prove to be a much stronger and robust design than separately cut and stitched on straps. 

  I found some pieces of stiff plastic film to line the bottoms of the bags, and for the groceries to sit on.

Item 8; Cassie specifically requested that I make a dress for her this year, and we went to Fabulous Fabrics together to look at fabrics. They had this divine pink hydrangea print in a cotton sateen, and Cassie wistfully fingered it and mentioned she would love this if it was in linen. We looked at a few other prints and she pointed out a few others, which I tucked away in my head for the future, mwahaha. But just imagine my joy when I went back in to actually buy something for her, and saw they had actually JUST got the hydrangea print in, IN LINEN! PERFECTO!

For the patten, I cut up an old favourite little tunic dress, that she had discarded a long time ago; it is a simple but very pretty little T-shirt style, with a high rounded neckline finished with bias binding, raglan sleeves folded up at the hem, and a centre back zip, and I always thought she looked gorgeous in it. The new dress did seem a tad short when I’d finished it, but otherwise I was very pleased with it. Then she tried it on on Christmas morning, and it was Super Short!  Turns out 26yr old Cassie likes to wear her dresses a little longer than 18 yr old Cassie did, haha. who knew?!  😉  Anyway, fortunately I had extra fabric, even after making her matching bucket hat, so I extended it with an extra piece attached underneath the hemline. This is a technique I’ve used on several of my own dresses in the past, I do think it makes for an interesting hemline detail, even if you don’t need to add length.  To make it look more like “intentional design detail” rather than “whoops, need to add length because it’s scandalously SHORT” I folded and stitched a series of tucks, and love how this looks!  A hidden bonus is that this adds some weight to the hemline… and I think linen dresses can often benefit from a little extra weightiness at the bottom.

Items 9-2000, might be overshooting the mark but just roughly guess-timating there; so I also like to make something both useful and fun for my extended family members, and this usually ends up being an edible something … this year it was gingerbread pussycats! So of course we have our own three darling little fluffykins, and I hit on the bright idea of icing the gingerbread puddycats to symbolise The Girls.

I’d made huge batches so this took quite a long time, but turned out pretty cute I think! The kids were tickled pink!

My recipe is adapted from a free recipe from Taste.com, and my own lemon icing is a sort of hybrid royal icing/ regular icing. Sophie has green eyes, so I painstakingly picked out the green cachous from a multicoloured jar. I couldn’t get black food colouring! so settled for dark purple-y/blue for Sophie, and sky blue for Zoe, who is a greyish blue point with blue eyes. Zoe was by far the fiddliest pussy cat to recreate!

Mischka is a mischievous fuzzy wuzzy ginger striped pussy with amber eyes, so I tried to capture her cute and perky nature with a riotous striped icing.

It’s funny; everyone immediately said, “but what about Clara?” and there were lots of jokes as to why she was excluded from the fun but of course the real answer is perfectly simple… I don’t have a dog-shaped cookie cutter! Maybe next time, haha.

I buy these airtight thingies to give them away in,  see, practical and useful are my middle names!  Each one perfectly fitted 16 gingerpussies.

So, I blog very very rarely about the meals I make; but this year Craig and I decided to cater for the entire extended family lunch, which is a BIG undertaking. We ambitiously planned for a rather (for us) long and involved menu and I’m so proud of us for pulling it off that I thought I’d share … we made all the various dressings and everything!

the makings of maple carrots…

pumpkin and couscous salad…

German-style potato salad…

BBQ asparagus, zucchini and snow pea salad…

veggie rosti with smoked trout; we doubled this recipe and made one with the smoked trout and the second one with smoked salmon

peach and raspberry trifle…

and cherry and nougat semifreddo

the recipes are all from the free Coles cooking magazine that they put out every month. Fair dinkum, this is hands down my favourite source of recipes at the moment… I love it!  We also had a ham that I forgot to take a picture of, and Vintage Cellars had high-end champagne going for half price so I bought a dozen of these… honesty, it all felt very special and went so well, we had such fun, and we were so chuffed everybody at our party had such a gorgeously happy day too!

So that was Christmas this year!! it felt rather epic and stressful all month leading up to it, but now it’s the morning after, and I’m feeling peaceful and relaxed with a happy post-party glow, the house is clean and back to normal; and most of all I am SO GLAD that I did go to the effort of making as lovely a day as I could for all my amazing family. It’s always SO worth it 🙂  Until next time!

pinterestmail

grey 3/4 length trousers; 6 different ways

So, I made these cropped trousers last year, using the Closet Case Patterns Sasha trousers pattern, and a khaki/grey stretch gabardine from Fabulous Fabrics; and they have been heavily worn over the past year, so heavily in fact that they have reached the ecologically recommended magic number of thirty wears in less than one year’s residence in my wardrobe!  That’s pretty amazing, I think!  It’s funny to me, because I actually wasn’t 100% keen on them when I first made them; thinking the fabric was a tad on the thin and plasticky side.  I liked my blue version more, in a more satisfyingly heftier-weight fabric.  However! I just wore them and wore them and WORE THEM!  The fabric was very comfortable, but I think never destined for a long life; by the end of it they were getting quite stretched out but I forced them into just a coupla extra wears more than they should have had, just so I could say they got up to that magic number 30.  I don’t know if it’s just me, but that 30 wears thing? has totally guilt-tripped me into being unable to even think of tossing a thing out, unless I can be quite sure it’s had that number of wears.  I know, seems like such a good idea, ecologically sound and all that, but feels little silly in execution?!  Mmm-hmm!

So I know they got 30 wears, thanks to my handy dandy stylebook app which counts it up for you, and also my ootd blog, which I update like the awkwardly passe blogger that I am.  Does anyone even keep ootd blogs any more…?  that’s a rhetorical question btw, since I’m pretty sure the answer is no!  Another awkwardly passe thing to do of course, is to talk about “how to style” an item of clothing, which I shall now proceed to go ahead and do, ahem…

So.  My 6 favourite outfits with the trousers, and btw, all items I’ve made are linked to their original construction post:

Below, at left; they were light, warm, and stretchy, making them comfortable and practical enough for hiking during the winter, a thing we do on the regular believe it or not.  Here, I’m wearing them with one of my warmer jumpers and scarves, hand knit socks, and my trusty old hiking boots which have very sadly also bitten the dust during the year, sob!  It’s funny that the grey in the trousers didn’t match up with any of the colours in this crazy jumper, and yet I still think it all worked quite well!

At right, I think out of all these, this outfit was my absolute favourite; worn with my Carolyn white cotton shirt and my apricot split top, sockettes and white sandshoes.  This exact outfit had multiple repeat days.

Below, at left; I think this outfit got a few repeats too.  My khaki suede, baggy oversized tunic top felt like a perfect match for the sleek grey trousers.  Worn also with my raspberry tee which I thought a nice zing! of colour, and the same sockettes and sneaks.

At right; I chose this outfit after one night going through, and getting inspired by, the archives of a favourite ex-blogger of mine, who had a style I LOVED.   I think she’s let her archives go, or made them private or something since then though, so I can’t link.  Blue check shirt that I originally made for Tim and he grew out of it and gave it back to me – score!, and my little blue/grey cardi that has surprisingly been one of the most useful things I’ve EVER made.  And sockettes and sneaks.

Below left; this funny mish-mash of grey/navy blue/mushroomy pink seems like it should be a) a disaster, and b) shouldn’t suit me at all; but I inexplicably loved it!  worn with my navy blue merino tee, my tie-dye cardigan and a scarf that Tim gave to me for Christmas a few years ago…  Oh, and the sockettes and sneaks like before.  I have to admit, these sneakers were like the perfect shoe for the trousers, and I wore them together most of the time.  I apologise for the lack of shoe variety!

At right; I love red and grey paired with each other! otherwise simple and basic, but then simple and basic is a nice safe no-brainer isn’t it?!  My scarlett Miette hand knit cardi, my cream drape-y tee, and my old blue thongs that also went kaput during the year after a few years’ excellent service.  I know! it’s been a year of several old favourites going kaput on me, which is pretty sad.  A moment’s silence, please…

So farewell, ye old grey trousers!  Your life was short, but practical, and I thank you for going the prescribed thirty-wears distance!pinterestmail

ochre challenge

So I loooooooove the colour ochre, and I adoooooooore linen too, not to mention that I’m a complete and utter sucker for a clothing/dressmaking challenge of practically any description…. so when the Fabric Store announced their ochre challenge I was just like, well point me to the sign-up page!!!

The idea; you buy some of their ochre linen, or ochre merino – yes, yes, I know, you always have to buy something! but I love the Fabric Store anyway, and for the previously mentioned reasons I’m A-ok with buying a bit of ochre linen.  Then you have to make something with it.  Obviously  😉

I’ve had this idea floating around in my head for a dress with overlays and all random odd angles and “bits” so I drew a few sketches and got playing with some of the very large pieces of paper I seem to always have lying around nowadays since I started designing patterns.  And made a pattern.  And here it is, in fabric form!

It has a gently A-line shape, pockets , overlays both front and back, seams all hidden inside, and asymmetry EVERYWHERE.  There was a bit of technical head scratching about laying the pieces down on my 2m of fabric, and then getting the seams inside and hidden, especially because of the overlays; and getting the “bits” to sit how I wanted them to, but I think it all came together in the end just exactly how I wanted it to.  I’m actually pretty thrilled to be honest! because it’s quite fun and flirty, the colour is YUUUUM! and I think it’ll be really nice for a casual day dress in summer.  I might even make this into a pattern, if there’s interest?  Please do let me know!!

So, I’m pretty sure I NEVER pull this pose in real life and yet I’ve noticed that somehow I’m compelled to do it for blog poses on a frequent and regular basis?? #weird

Details:

Dress; my own design, made from 2m of ochre linen from the Fabric Store
Shoes; made by me, at the Shoe Camaraderie workshop, details here

pinterestmail

poppy dress

I’ve made this new dress   #surprise!  This beautiful poppy printed silk chiffon was a birthday present from my lovely thoughtful Mum… we were browsing together in Fabulous Fabrics and oohing and aahing over it, and she suddenly announced “I’d like to get that for you for your birthday!”  And she even chose the pattern I was to use, which is of course Vogue 1351, anyone who has read this blog for even a short amount of time will know how much I LOVE this Donna Karan pattern since I’ve used it a few times.  Actually four times before, to be exact; here, here, here and here.  To my mind its silhouette has a perfect simplicity, or should that be that it is simply perfect?  Either or!

The poppy chiffon is very delicate and sheer.  The background is actually pure white, however I chose to line my dress with a off-white polyacetate lining fabric.  I chose the off-white over pure white, because it was noticeable softer, the overall effect of the pure white was surprisingly harsh.  I’m not really at my best in pure, pure white, even though I love it; a softer ivory-white is a lot better for me.

invisible zip in left side seam; this is always my preferred zip placement!

I’ve worn it several times already, the first time on Remembrance Day, when Mum, Dad, Craig and I went to visit the RSL poppy tribute at Kings Park.  I chose to wear it a) because of Remembrance Day, of course! and b) because Mum and Dad were staying with us and I wanted to show them the lovely birthday present they had given to me!

Wait, the poppy tribute?  Well, this year, 61,513 hand-knitted and crocheted poppies were made and “planted” by RSL volunteers, one poppy for each Australian lost at WW1.  Seeing them and walking through the exhibit; the sheer number of them, was such a very sobering, very humbling and very moving experience.  Speaking, um “craft-ily”, as it were; so much care and love and thought had obviously gone in to each and every poppy too, some had buttons, that we read were often included for their significance to the family in some way, like from a uniform or something.  The exhibit was only on for four days, so we felt very fortunate we thought about it and went, and I was also very pleased to hear that the exhibit will be returning again in future years.

I did think about getting a picture of my dress at the exhibit, but once we got there I felt that would be disrespectful.  I mean, while the poppies themselves were beautiful and spectacular and a visual treat to behold, of course I realised how very wrong it would be to treat them like a photo backdrop to my dress.  Though a few ladies passing by did comment that my dress was “perfect for the day” which was very nice.

I did take a picture of Mum and Dad though…

I next wore the dress just recently, we had a gorgeously warm, but windy! weekend and we went for a lovely long afternoon walk at the beach, and I grabbed the opportunity to take some pictures… does Clara look incredibly wet and sandy in this picture?  Well, that’s because she is!!  I was wondering if she was going to jump up on me, or shake sopping sand all over me with one of those doggy full-body shakes.

Actually caught her partway through one said full-body shake below… and thank goodness she’s waaaaaaaay way over there!  Normally she’ll come right up to you before letting loose, and I’m telling you, this is one ultra-fluffy hairy doggy, and she can carry a heckuvva lot of water and sand in that there gorgeous coat of hers!

plus bonus random bird! hey birdie!

Aaaaand there’s my husband, being very polite and keeping well out of the way while I take my pictures, ahem. Well, that’s what he’s supposed to be doing!!  Man!

Fun fact; in this picture he’s wearing this blue jumper, that I made for him last Christmas.  You have to scroll riiiiiiiiiight to the end of the post to find it though, I just checked and it’s a MONSTER post with about a million items in it.  Well, that’s what it felt like, when I was making them I mean.  Ha!

Details:

Dress; Vogue 1351, poppy print silk hiffon
Red cardi, in beach pics; my own design variation on the Nettie bodysuit, but Closet Case patterns, details here
Sandals; Zomp, from Zomp boutique

pinterestmail

the Kimberley doll pattern

For anyone who liked my dolls and maybe wished to make one for themselves…Cassie and I have made a pattern!

The Kimberley doll pattern is available to buy in our shop right now, just in time for Christmas making!  You can get it as an instantly downloadable pdf and there are also a limited number of paper patterns.  This is the same pattern I developed to make my recent seasonal set of four; the Mses Winter, Spring, Summer and Autumn … I enjoyed making them all so much! and am so happy they’ve been liked so much too  🙂

Included is the rag doll pattern, naturally; and her full wardrobe…  I know when I was a kiddy the most enjoyable thing about playing with my dolls was dressing them in a variety of clothes; the more the better! and my favourite dolls all had lots and lots of clothes which I delighted in changing out regularly.  This is why I strived to give the Kimberley doll plenty of outfit options!  All pieces included in the seasonal girls’ sets are here; the “winter” turtleneck tunic dress and a pair of jersey leggings, and the knitting pattern for her chevron-patterned beanie with pompom; a twirly summer wrap dress, lace knickers, and raglan sleeved mini dress, which so far I have chosen to make in stretch sequinned fabric as a cocktail dress for “my” girls.  Additional patterns included are for her zippered duffle bag, and also for the dust bag that is designed to hold her and all her belongings when she is not being played with.

I also include instructions for giving the doll a full head of yarn hair and an embroidered face.  The example I used for the pattern is basically the same face that I have given all my dolls, but I would like to point out that how you do the face for your own doll is a very personal decision and you can, and should! use your own artistic license and go with whatever takes your fancy!   Something  interesting I’ve found is that the smallest, tiniest variations; a slant to a mouth, wider-set eyes, offset or asymmetrical eyebrows, can affect a facial expression quite a lot.  And hair! that’s a whole other story too…  🙂

Some of the technical deets:

The Kimberley doll stands 43cm (17″) high.  Most of her clothes can actually be made from scraps and small bits and pieces of fabric, but following is a complete list of requirements should you buying new:

The Kimberley doll is named for the Kimberley region of Western Australia, following our theme of naming our patterns after places in Western Australia.  Well, we already had “Perth” and so decided this would be a nice theme to keep up and we have so many beautiful places here in Western Australia that are obviously very dear to our hearts.  Though we were partly influenced by the thought it would be nice to have a girl’s name for a doll pattern too, so very fortunately we do have one girl’s name in the state!  The colours of the Kimberley rocks are what I was going for in the background colour of the pattern cover.  I was pretty thrilled when Cassie recognised this straight away without my having to explain it, hehe…

It’s so weird; for many years I never suspected I would have become interested in making dolls, it’s not “serious” like making clothing for yourself or anyone else for that matter, and for a long time I’ve been quite serious about my sewing and devoting myself to making a full and proper wardrobe.  But well, doll-making has been such a nice diversion, just something purely whimsical, you know?  I hope it gives a little bit of frivolous enjoyment to others too!

By the way; selling of completed handmade dolls made using this pattern is permitted provided design credit is given to Carolyn & Cassie Pattern Co.pinterestmail

Switch to mobile version
↓