

hello! I’ve made this new blouse… I was having trouble thinking of a way to describe the colour, since the only thing coming to my mind was those white puffball fungi that upon “puffing” send forth a little cloud of smelly spores that are just about exactly this colour. Then Craig came to the rescue, suggesting “golden brown” Oh, yes, that is SO much nicer! Why is my brain sooo….? um, weird and mundane and lacking in poetic nuance?!
Fabric; a silk crepe from Tessuti fabrics in Melbourne, bought during a previous years’ trip over there with Mum and Cassie. I’ve had it marinating in the stash all this time, awaiting the perfect blouse pattern. I think this was happily, and accidentally, IT!
obligatory back view…

Pattern; the Sudley by Megan Nielsen patterns. Tim and Sam gave it to me for Christmas, after I had requested the Dove blouse pattern. Did I mention already that the Dove is perpetually sold out?? yes I believe I did. Clearly my boys encountered the same issue that I have had …. timing, it seems, is everything!! However, the Sudle is a nice little pattern, very simple, and I think I will use it a lot too.
 This is actually the second Sudley I have made. I also made a dress that has now been assigned to Cassie when I realised it was just going to be a little too, er, young for me. I expect it’ll show up on ye olde blog here sometime…

Alterations: The Sudley is a very young-at-heart style whereas I am more of a hoary-old-beast-at-heart; so I made a few minor design alterations to “old” it up a bit. I opted for the plain neckline, and jazzed up the plain sleeves by running a loop of skinny elastic through the sleeve hems to gather them softly up, and made a separate bias rouleau loop “bow” which is purely decorative and just sewn on to the hem with a few firm stitches through all layers.
 I also cut the lower hemline to have a curved “shirttail” line to it. The hems and the neckline are all finished by hand, because I really wanted to have a smooth clean stitch-free expanse of fabric with absolutely no visible topstitching anywhere. This is about as invisible as I could get.


Oh; one thing I did, which I would recommend for this type of neckline; you stay-stitch all around the neckline and the keyhole opening, obviously to stabilise it, however! to further help keep the neckline straight and true I kept a little bridge of fabric intact at the top front edges of the keyhole where the ties were to be attached, and maintained it throughout most of the blouse’s construction, and only cut through it at the very last minute, when turning and hand-stitching the bias binding down on the inside. I think this simple precaution really helped to keep everything true.

All seams throughout are French seams, except for the armscye seams which I just ran through the overlocker to finish. Picking my battles here! This silk, while absolutely divine and a dream to wear, was actually not much fun to sew! However! The puffball spore, I mean, lovely golden-brown is a perfect colour for autumnal me, also I think this style of blouse suits me and I’m going to enjoy wearing it a lot. It’s going to go with TONNES of my other clothes.


Details:
Top; MN2004 the Sudley blouse by Megan Nielsen patterns with minor modifications, silk crepe
Skirt; Vogue 1247, ivory curtaining fabric, details here and my review of this pattern here
Shoes; made by me, my own design, details here
Skirt below; Vogue 8363, canvas, details here
Location: Eagle Bay, Western Australia
Wearing it out to dinner recently, with my “bookshelf” skirt. I think they go together quite nicely!

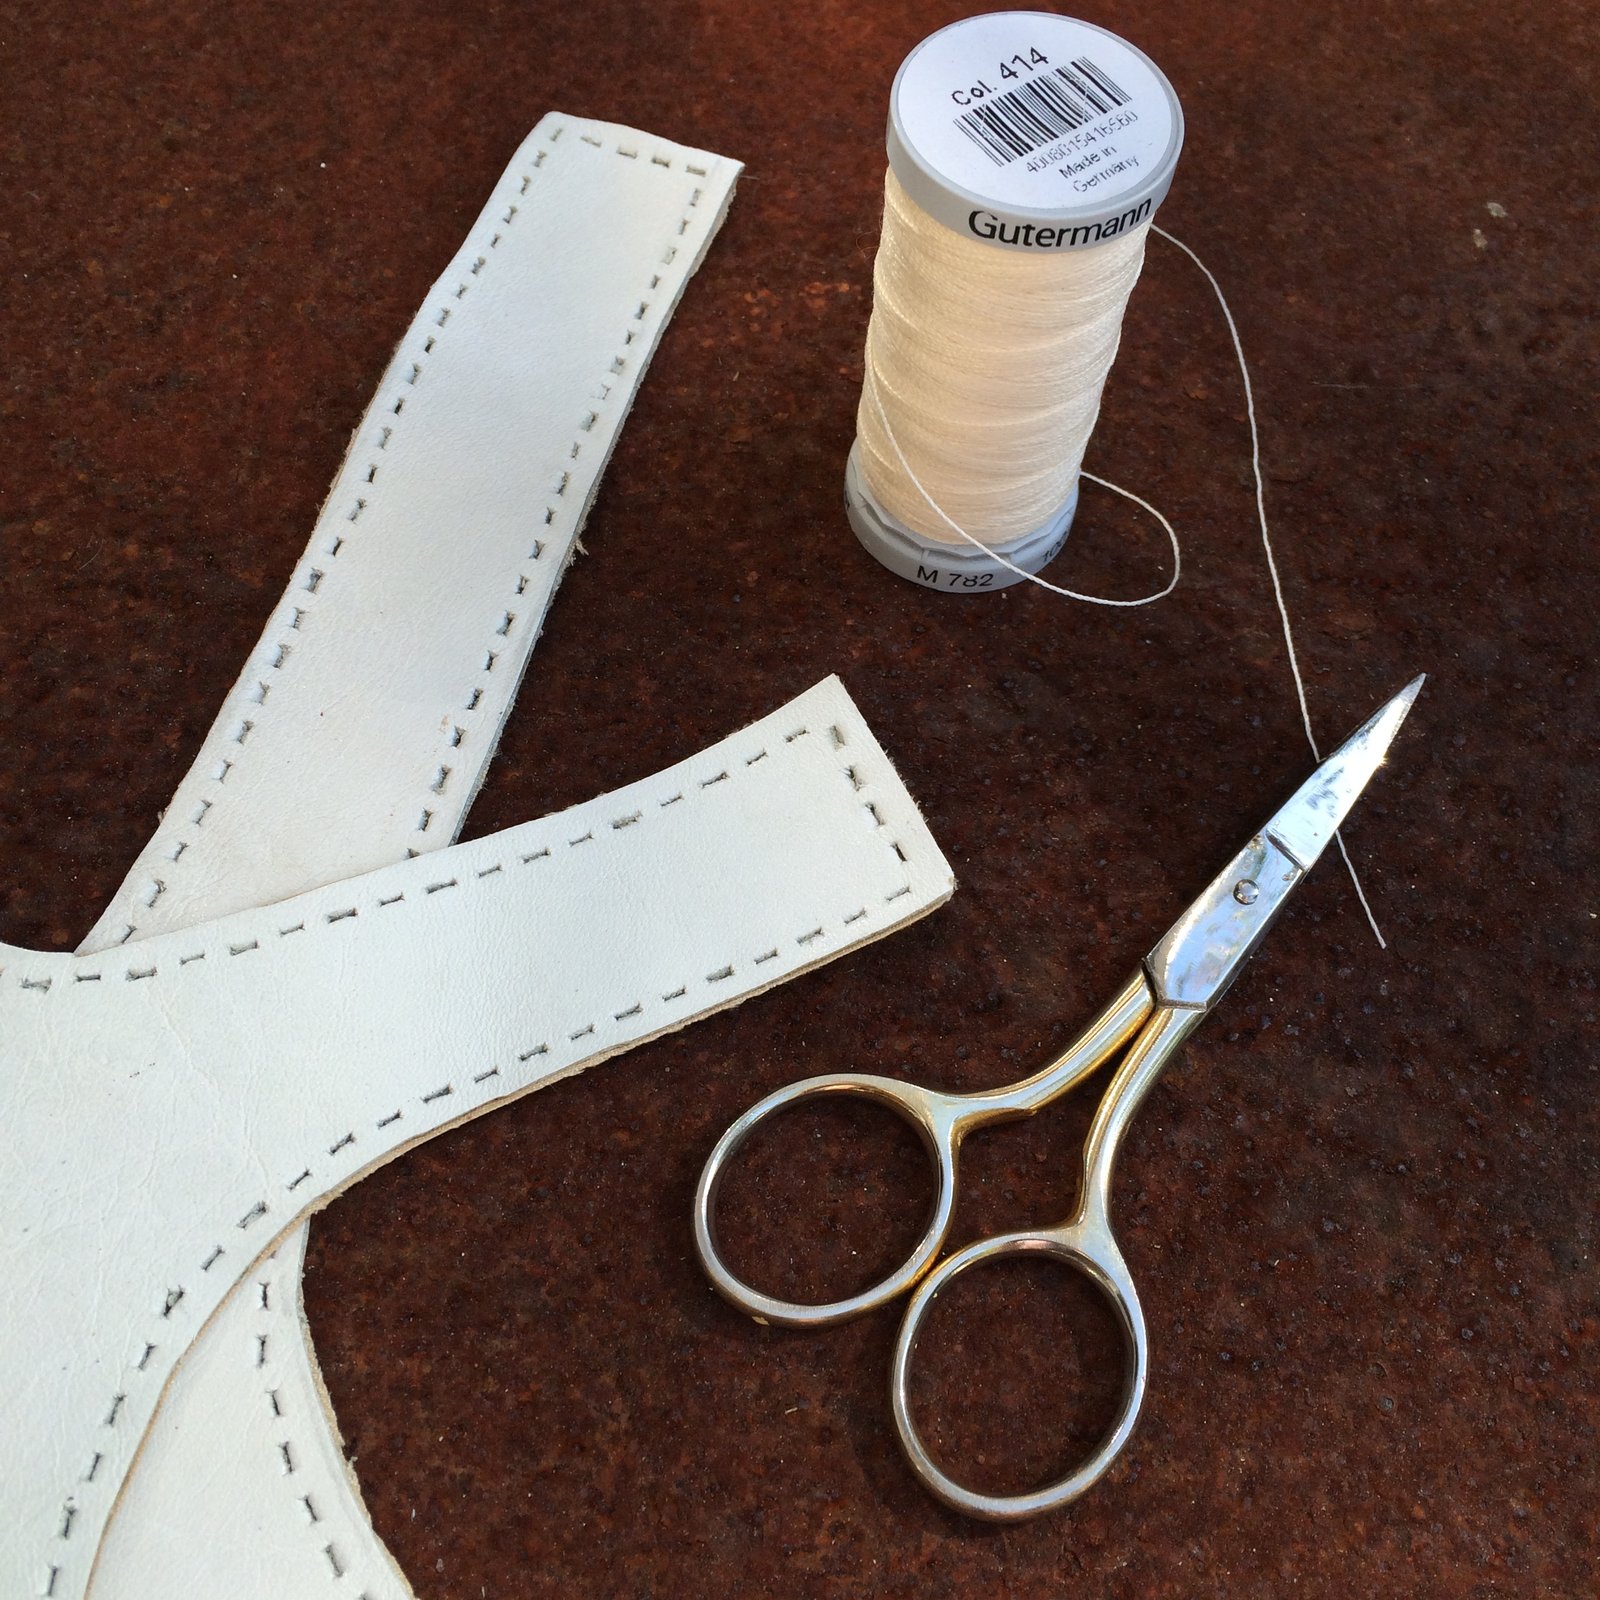
And my clogs have received a much-needed makeover! The ivory pleather part of the upper has got so worn and was starting to pull badly around where it was nailed to the soles…. I’d already fixed it once but finally acknowledged that if I wanted them to last a lifetime, and I think they can! then it was time for action. One thing I’ve learnt about making my own shoes is that if something needs a little mending or attention then it REALLY pays to get onto it very quickly. Mum had given me an ivory leather clutch years ago “for shoes” and it was juuuuuust big enough so I could cut out new pieces. I used my punch that I bought in Copenhagen, and upholstery thread in ivory to sew up and down all around, and hammered on the new uppers.

Now they’re as good as new!! in fact; I reckon BETTER!

 Self-explanatory, really. #endblogpost 😉
 Pattern; Vogue 1384. It’s a vintage pattern, hailing from 1984, sorry. Yeah, it’s annoying when people make things in vintage patterns that you can’t get a hold of anymore. But I’m sure this is not particularly aspirational actually, it’s a little weird in that 80’s way. That high, slightly floppy collar combined with a billowing pirate-y blousiness is giving me serious


 I’ve made a softly floaty blouse 🙂 of course just as summer is on the way out… o no, wait, actually summer is over! However we’re still getting days of 40C. Not that I’m complaining, mind you. I love the warmth! Only thing is that I’m getting tired of all my summer things thus the decision to make a new summer thing, ha. #seasonallyinappropriatesewingforthewin It’s light and pretty and easily breezy; and delightfully cool. I fully expect the weather to turn cold now.


