
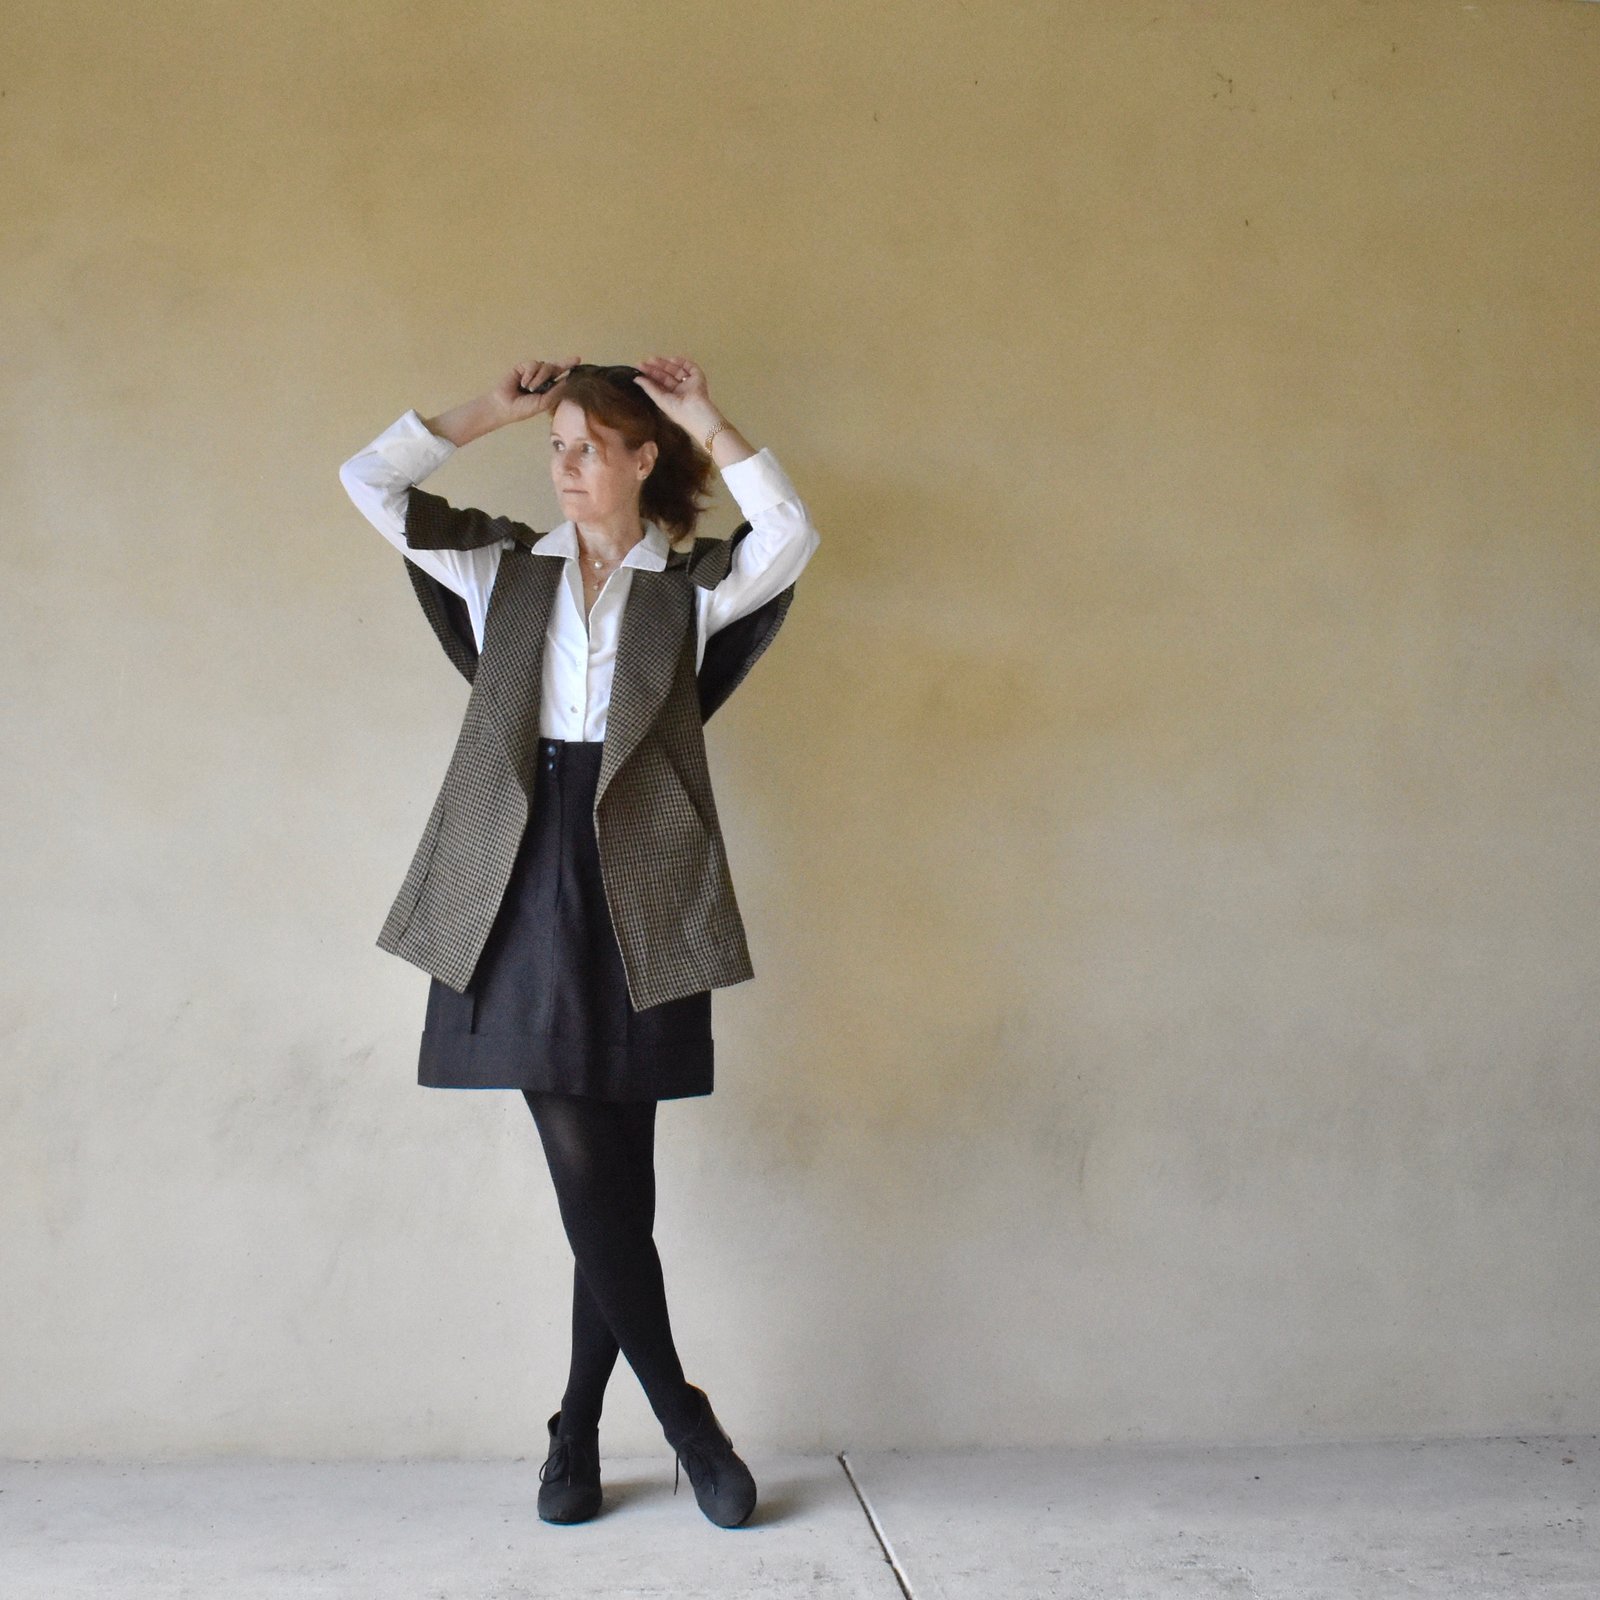
 Remember in my 2018 end of year round-up I mentioned briefly I had made a Big Thing? Well this is it! A tailored blazer… this is the Jasika blazer, the newest design by Heather of Closet Case patterns.

Well, what a project! I really really enjoyed making this; sinking my teeth into my most involved and meaty project in ages! since I’d pretty much fallen into the lackadaisical habit of quick and easy “ordinary” things for quite a long time prior. I was very ready to take on something a bit more contemplative, careful and slow-fashion-y, and this was a really nice thing to ease back into that… I’m so glad Heather asked me to test for her again!

The Jasika blazer is described as a classic tailored jacket, made utilising modern speed tailoring techniques, with fusible interfacing and minimal hand-stitching, but rest assured, purists! there is still hand-stitching where it counts! And I do really appreciate that the process for making this blazer is nicely catering to the modern-day maker that still wants to sew timeless classics for themselves but might be time poor, and so might prefer to do as much by machine as possible.

Materials: I used a length of lovely raspberry-rusty silk/wool tweed given to me by my friend L when she cleaned out her garage, and it was perfect for the job! I love the luscious colour; I think it’s a good one for my colouring, and of course the texture is totally divine… I lined with black polyacetate lining fabric, another longterm resident from my stash; and mostly used the tailor-made (ha!) interfacing/notions package that Heather is stocking specifically for this project. This kit contains fusible woven and knit interfacing, horsehair canvas, padded sleeve heads and shoulder pads and cotton stay tape. Boy, but this is a really fab little kit too and I SO appreciated this! It’s not always that easy to get quality tailoring bits and pieces like this in Perth so it was just brilliant to have them at hand, to help me get a really nice finish to my blazer. Because you really want this to turn out as good as you can get it; a tailored blazer is quite the time-consuming project and it would be nice for the materials to be worthy of your time!


I dithered on whether to use my own label, or the Me-Made from Closet Case patterns. Cassie said why not use both, why not indeed…

I honestly can’t remember now whether I bought the perfectly matching button from Fabulous Fabrics or from Spotlight now. I scouted through both shops, and bought candidates from both shops too! so much agonising!… and now its provenance is lost in the hazy mists of time… I did really take my time with the buttonhole though, and made a mini double welt one, so as to match those pockets.

Oh! Pockets… I LOVE all the pockets in this blazer! I jammed every single one of them into my blazer, in order to test all the pocket options for the pattern of course! Not that I’m a complete pocket-whore or anything, o no! There are three; a single welt breast pocket, a double welt hip pocket, and a double welt with flap hip pocket. I’m actually toying with the idea of opening out the lining and adding an extra, internal welt pocket to the inside of the jacket too… but that will have to wait until I get a few more, ahem VIP’s; and by that I mean Very Important Projects, out of the way! #drowninginweddingsewing


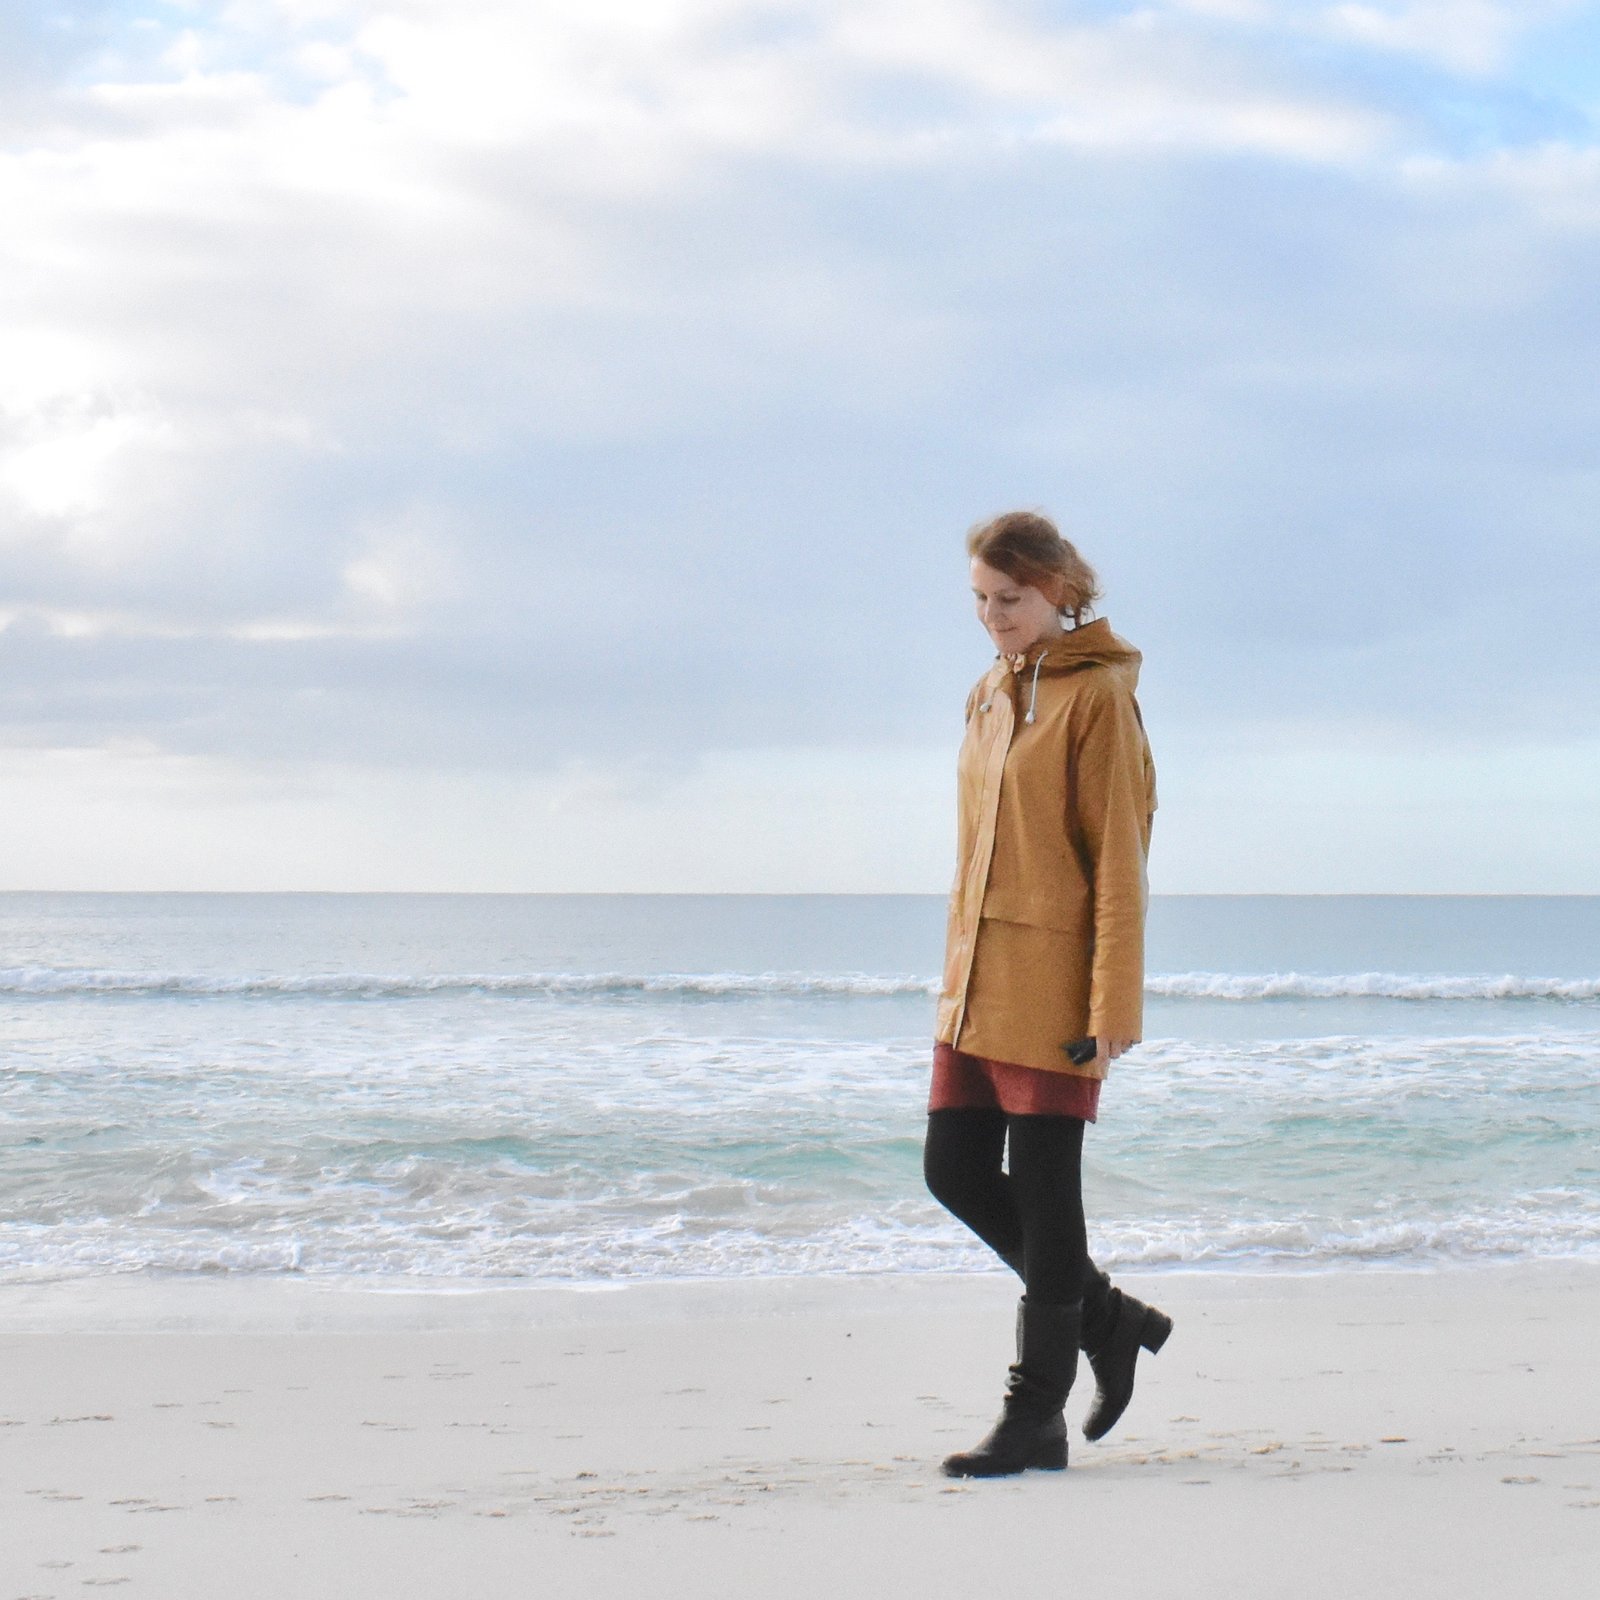
We’re not supposed to reveal a project before the pattern’s been released, which is sometimes so hard to do… I did however sneakily wear the blazer out for real, once, one coolish day (below). Fortunately for me, it’s been quite summer-y and not conducive to blazer wearing, and I felt sorry for all the northern hemisphere testers who have no doubt been dying to wear their splendid new blazers! The pattern has been released just at the right time for us in the southern hemisphere, yay… how often does that happen? not very often! Though, it was 35C when I was taking all these photos… my husband thought I was bonkers putting on tights, boots, woolly top and blazer in this heat. I was like, but it’s a winter thing, I have to look the part, even if I’m legit dying! Aah, the things we do…
 Not only did I thoroughly enjoy making my new blazer, I’m really quite proud of how it turned out, and am very much going to enjoy wearing it too. I might even be… dare I say it? looking forward to winter?? Going too far?? maybe!!


Details:
Blazer; the Jasika blazer, Closet Case patterns, raspberry/rust will/wool tweed
Skirt; Vogue 1247, purple denim dyed brown, details here
Top; modified Nettie, Closet Case patterns, ivory wool/mix, details here
Boots; Roberto del Carlo, from Zomp boutique
White dress; the Inari by Named patterns, in white ultra-bobbly stuff, details here
Caramel leather sandals, from an op shop years ago


 I’ve made a new trench coat; a riotously floral-tastic, blowsy English rose of a trench coat. As soon as I spotted this print I was smitten! delightfully old-fashioned, vaguely reminiscent of Granny’s china cabinet and a wholly unabashed celebration of spring-time. Because that’s what it finally is now… SPRING!!!
 Pattern; McCalls 5525 view E, the view with all the bells and whistles. The only things I left off were the flap thingies over the pockets, because I didn’t have enough buttons for them!


 So that’s all super good and satisfactory. However?! I have to admit to a little frisson of disappointment at the halfway point of making this coat, at about the point when the body was together, and I slung it over Bessie and took a step back to have a first look… and, oh dear. See, I had barely enough fabric to cut out my trench, and in fact several pieces are pieced together! Which ones? oooh, I’ll never tell!!! See if you can see the seams! But that’s not the problem here, after all, piecing is something I’ve done in a lot of garments because of lack of fabric and I’m perfectly ok with doing that when I have to…. The thing is, I really had to be clever about laying out the pattern pieces to have any hope at all of getting the coat cut out, and I did some very premature self back-patting when I managed to lay out the pieces. Because the way the print has turned out on the finished coat is just not good. Specifically; the front is quite a lot “busier” than the back, and I wish I could have been switched-on enough to see that while I was juggling those pattern pieces but sadly, I did not. The front and the back are to my eye almost like two completely different coats, which is very sad-making (please excuse my little Evelyn Waugh-ism there…)


 Having said that… it’s not the most wonderful raincoat fabric in the world and I had struggles APLENTY but more on that later.


 Yes, I know; a complete mis-quote of an already mis-quote… *braces oneself for outraged Holmes enthusiasts*


 That’s not a criticism btw, just an observation. I really love my new Sherlock Holmes jacket, and I really loved making it too; but I’ve admit; it was not a particularly easy project. Even given the fact that I complicated things for myself a. dyeing and b. deciding I absolute HAD to have in-seam pockets – which were a big success in the end if I say so myself. I’m so glad I put them in. Actually I can’t imagine a jacket without pockets of some kind.
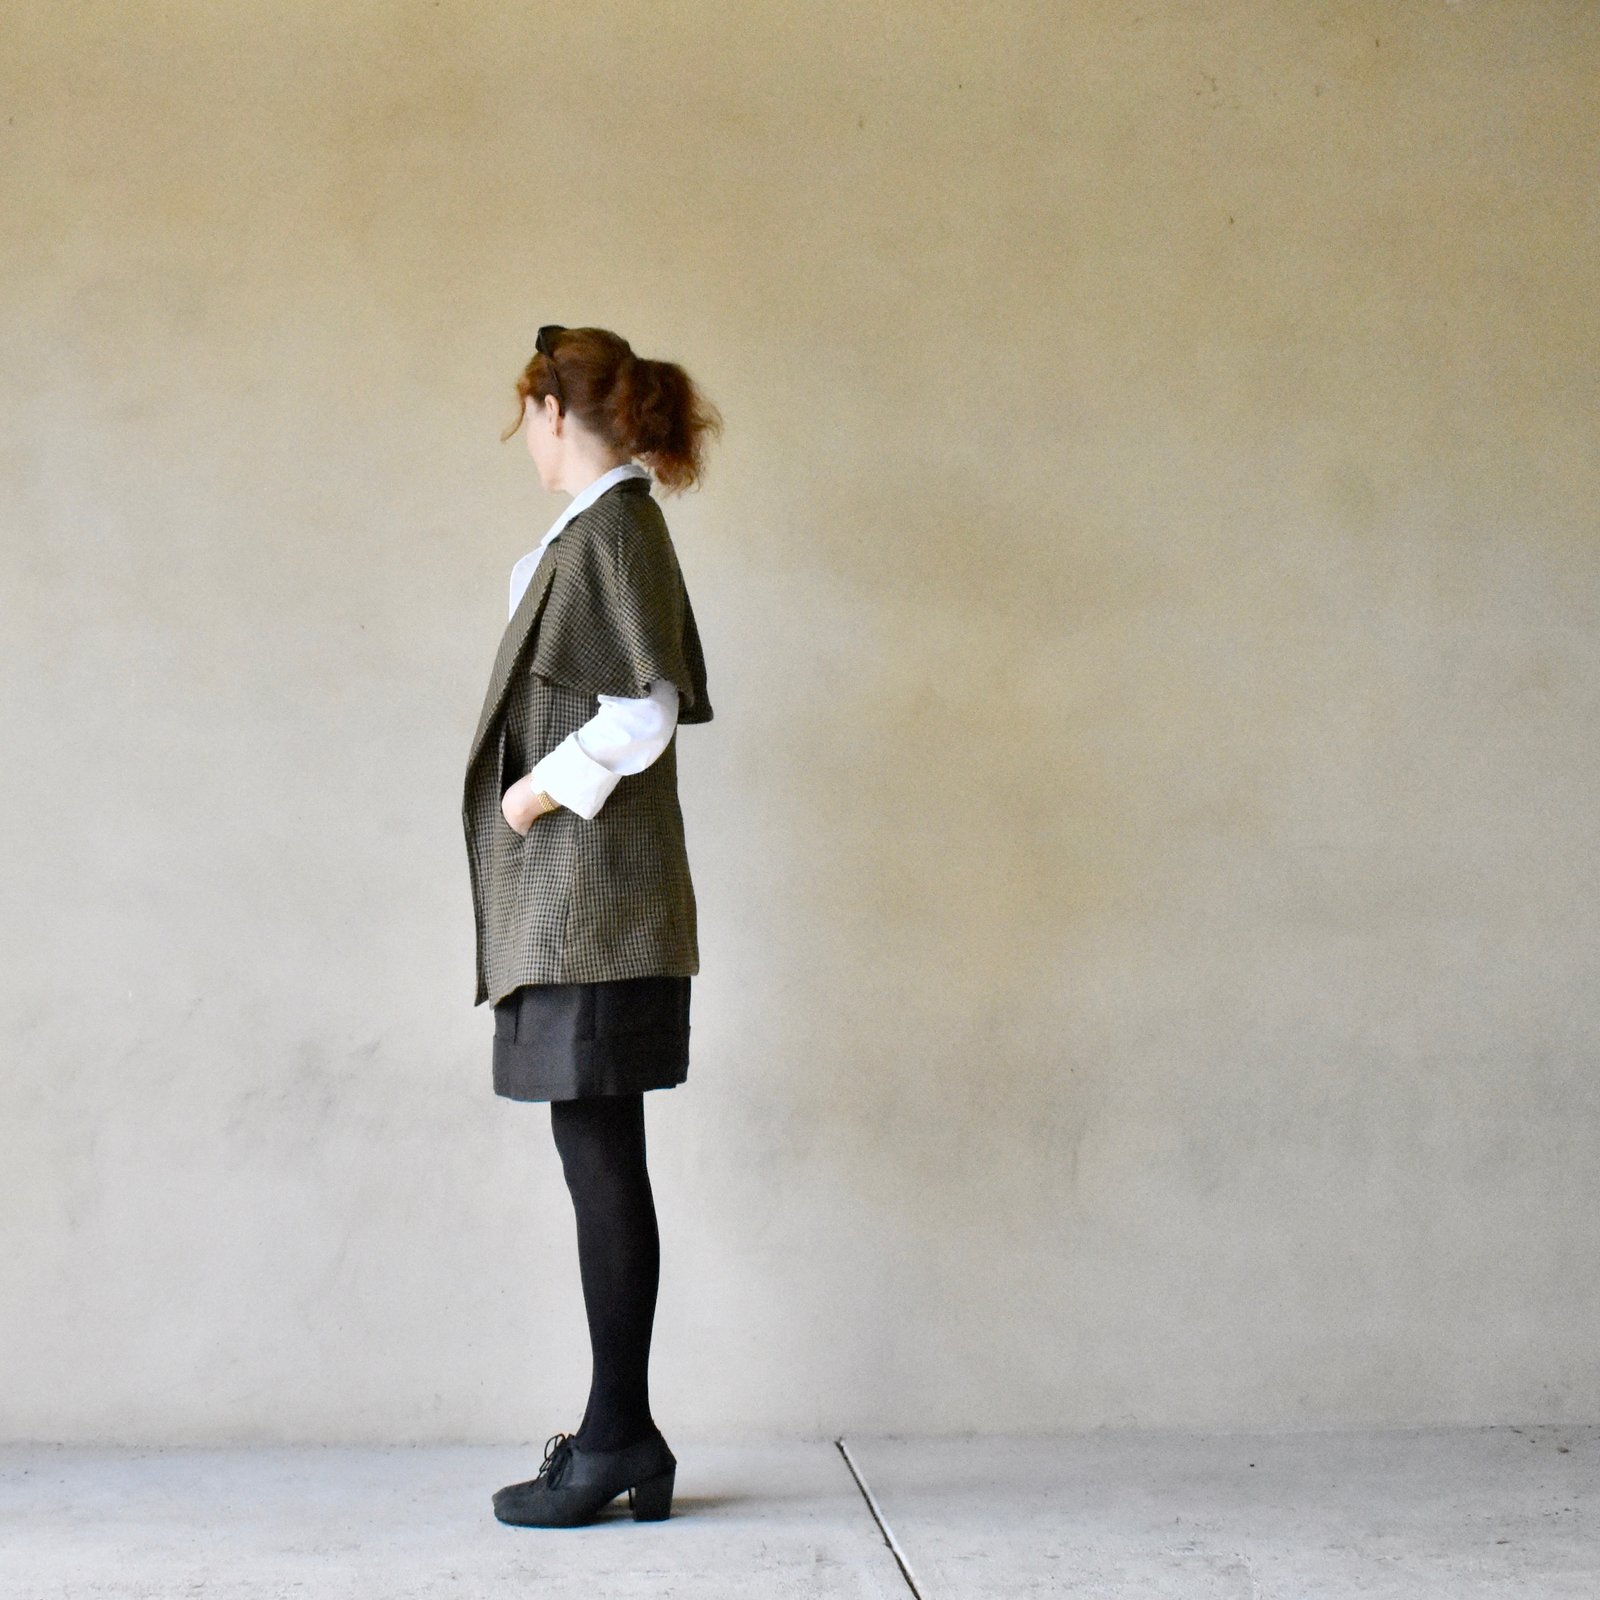


 So, a new year, a new


 That’s the jacket!!


 Bet you can’t guess where I am here… Yeah, I know, it’s a tough one. Some locations are just so obscure and far off the beaten track, but I do like to seek out these especially quiet and sleepy, tucked-away little spots to highlight here on ye olde blog… GO me.


 Voila! Jacket made the same way you’re supposed to, and using the forbidden fabric to boot! Ha!


 O hey!
 A jeans-to-jean-jacket project has been a long-term “thing” in my little bucket list of refashions that I have in my head. and one of the reasons I’ve been collecting my children’s old jeans for only like, forever… recently I was asked to speak at the 20th anniversary celebrations of Australian Sewing Guild, a huge honour! and in the general chit-chat heard mention of their

 While I lurve a patchy aesthetic to my clothing, and of course the beauty of a thing like a jean jacket is that it’s supposed to look a bit beat up and NOT a work of beautifully tailored perfection… I still wanted it to look at least a little bit intentional and not too bunged together. There was plenty of colour variation even within each single pair of jeans as well as fashionable distressing effects everywhere too, so I carefully cut so as to make sure the colour variations were matched symmetrically all over the jacket, for example; the upper arms are cut from the same area of one pair, the side fronts also both from the same area of another pair, ditto the two side backs, etc etc, so as much as I possibly could the lighter blue areas are balanced out nicely and symmetrically with the darker blue areas on the jacket.


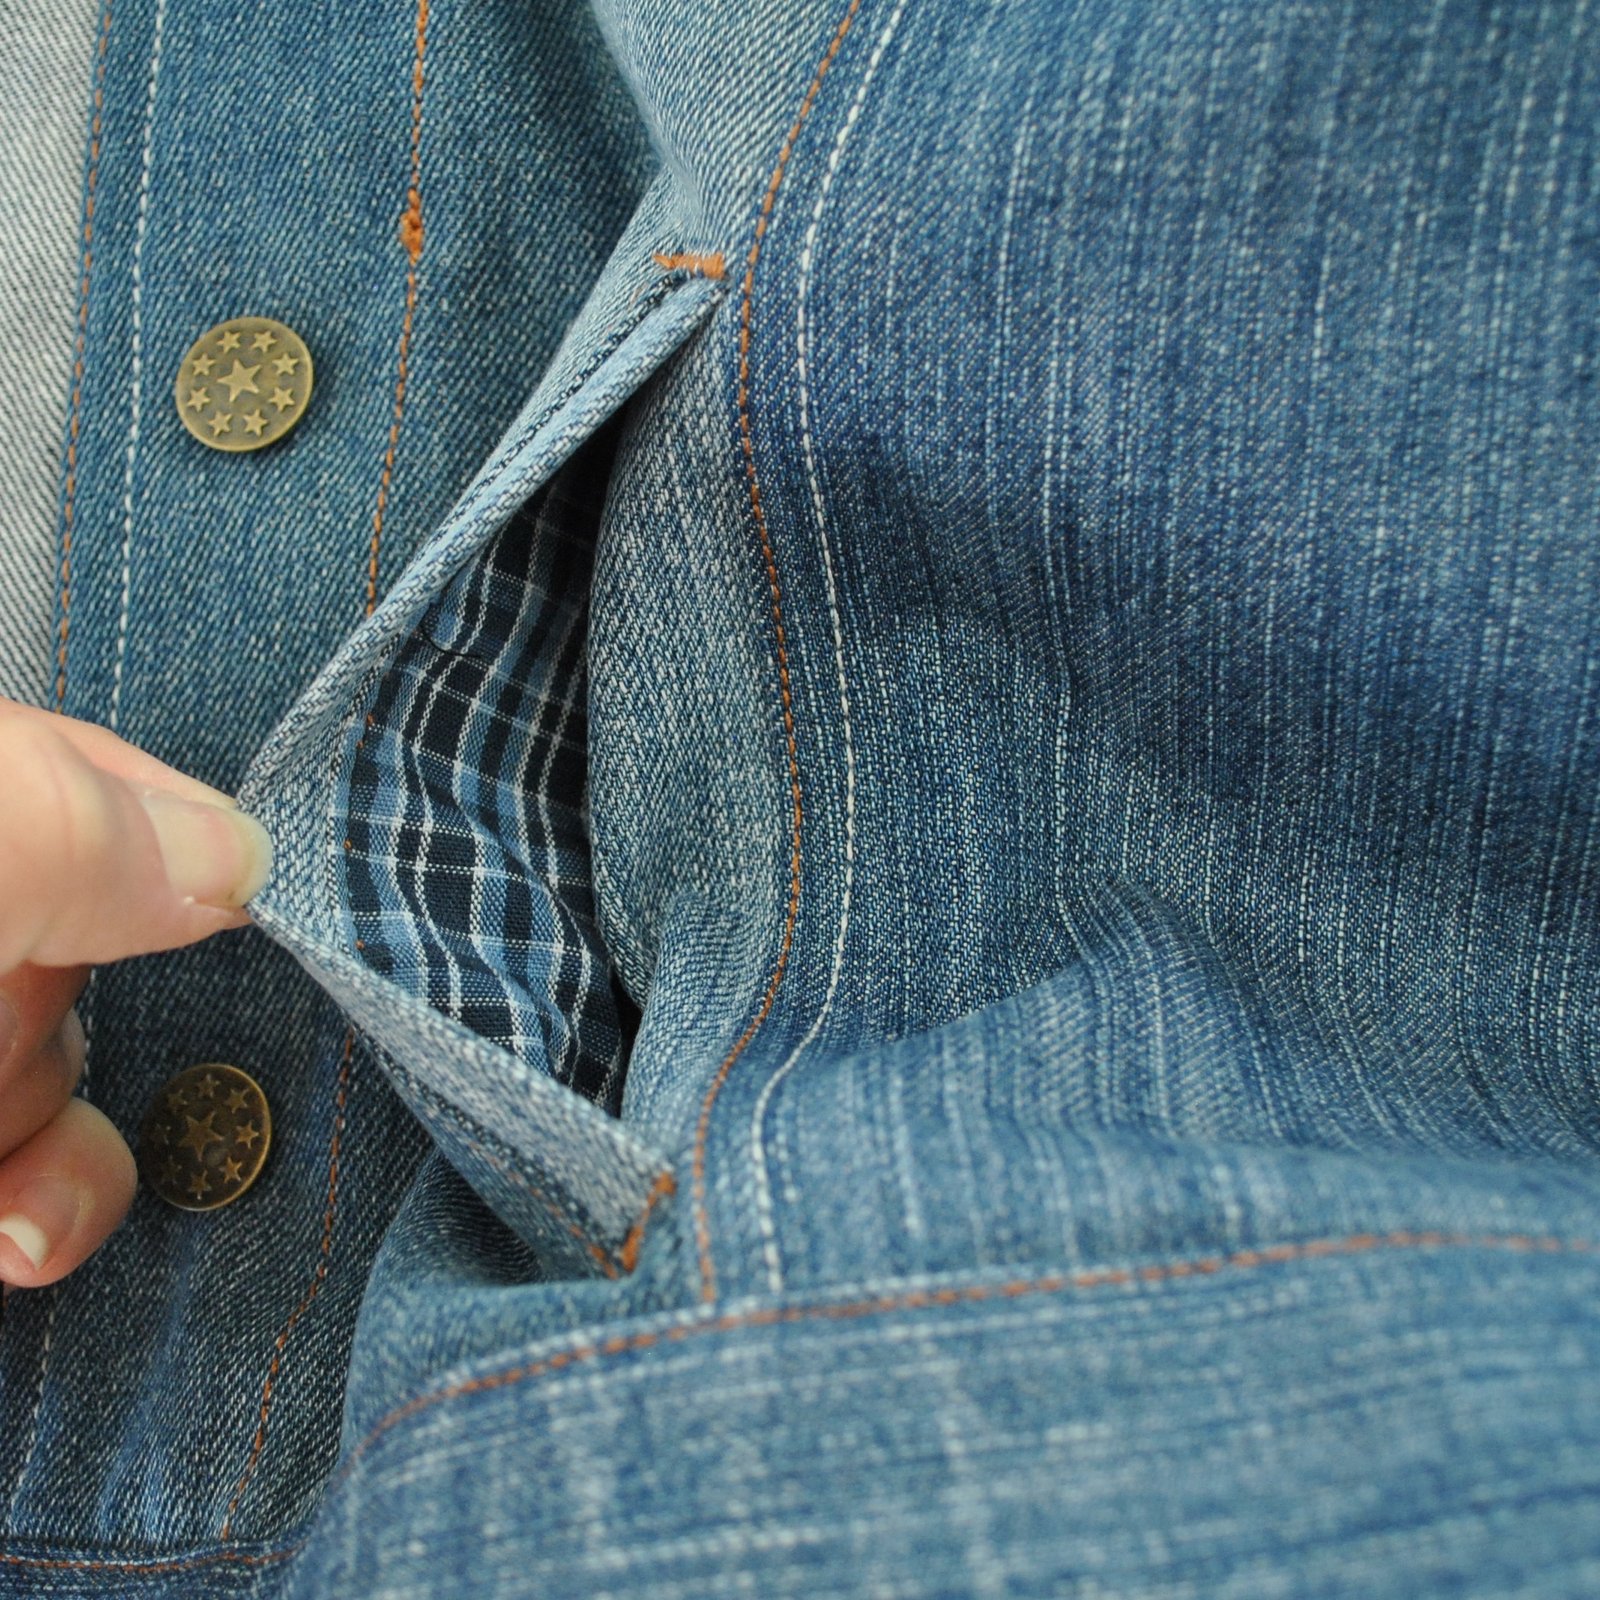

 Thoughts on the pattern: description says a classic, unlined, button-down denim jacket with collar; short and loose-fitting design with flap pockets at the front; sleeve vents and wide button cuffs, wide band at the hem. Well, hmmm, I’m not going to start ranting about my pet hate; the incorrect use of the term “button-down”. Noooo, I’m not. Apart from that! everything else about the pattern is pretty awesome. A slight negative; it is a bit more loose-fitting than I anticipated. Not 80’s loose, but still pretty loose. I’m ok with it really… I will certainly wear it anyway! it’s so comfy and feels absolutely fantastic on! plus I’m only wearing it over a thin little Tshirt here and of course a bit of oversizedness is a good thing when I’ll want to wear it over cardigans or long-sleeved woolly tops in the winter. I think when I get a little time I might have a go at re-jigging the pattern to be a little more form-fitting, for the future. I still have plenty of pairs of jeans that need refashioning, so a second, differently styled jean jacket might even happen. One which even has bigger and better functioning hip pockets!


 O hey-a! After finishing my own Kelly anorak and having it admired to the nth degree by family members, I made a few more! a pale grey one for Cassie, and I also made a deep cobalt blue one for Tim’s girlfriend Kelly. Well, it seemed only right that she should have a “Kelly” too!
 I quickly snapped that top picture of an unsuspecting Cassie waiting to meet up with me in town before she noticed me heading towards her… I know it’s a bit blurry and not very posed to show off the anorak to modelly perfection, but I just really like it nonetheless… to me it attests that she’s been wearing it a tonne, in fact every single occasion that I’ve seen her in the past three weeks since I finished it and gave it to her she has been wearing it. There’s no greater compliment to a seamster than that! as well as a testament to the pattern being an absolute style winner. Kelly’s worn hers each time I’ve seen her since I gave it to her too, but I’ve not taken any pictures of her in it.. will update if she sends me one 🙂
 Both the anoraks are in a nice weight cotton drill from Spotlight, in fact, all the other bits and pieces are from Spotlight too. In both anoraks, I added a few inches to the length of the body and modified the pockets to have separate pocket flaps so as to close the pockets; otherwise these are both made up exactly to the pattern.
 This picture below of Kelly’s anorak has been my most “liked” picture on instagram ever! far more than anything I have ever made for myself! Interesting, no? Well, I think it is, anyway 😉 I don’t know what that “says”, if anything at all, but maybe something. Social media is such a funny phenomenon. Something else also interesting to me is how a person, any person, can have a certain number of followers and the number of “likes” never ever reaches anywhere close to that number. Honestly, I have no idea about how or why this is so, but it’s just a curious thing.
 I’d got enough of the same white cord for Kelly’s anorak , but since I’d found a nice, perfectly colour-matched blue zip for hers’, and used blue thread for all topstitching and there was no other white anywhere in the jacket; the white cord looked all wrong. And naturally there’s no such thing as blue cord in the whole of Perth! so I just had to dye it. And, when your regular dye-pot is HUGE and there’s just one little length of cord what’s a mad maker to do? but of course, improvise.


