I love working out convoluted construction puzzles in the process of sewing something and this new dress ticked that box very nicely.
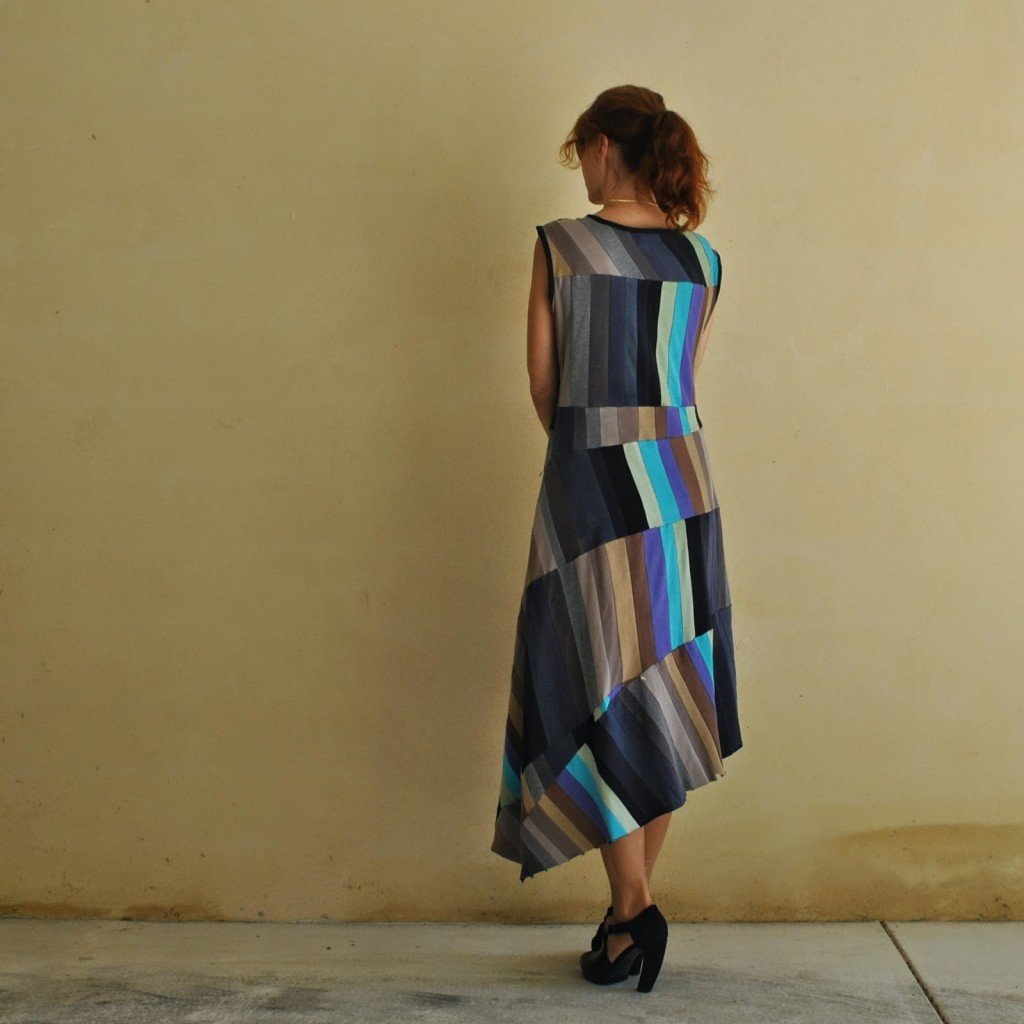
It looks kinda plain upon first glance, but it’s actually based upon a very unusual twisted design by Anita, of Studio Faro.
And now I have to apologise right here because I’ve just searched forever for the design on Anita’s blog to link to it, and I find I did not even pin it… so I cannot. I’m sorry! but I’m pretty sure I saw the sketch for the pattern piece on either Anita’s blog, studio faro well-suited, or her Facebook page.
Later edit; thanks to Emily I found it, Anita’s original design is here.
Anyway. In making it, I realised it was just like an infinity scarf, but in dress form. Unique!
And, my dress is fully reversible! with all the seam allowances enclosed and tucked away neatly between the two layers of the dress. The construction technique to make it reversible is one that I worked out myself and not something I’ve ever seen in any pattern or design before. This was the part of it that kept me on my toes, brainstorming a way to make it happen. I’m super chuffed that it did work out. 🙂
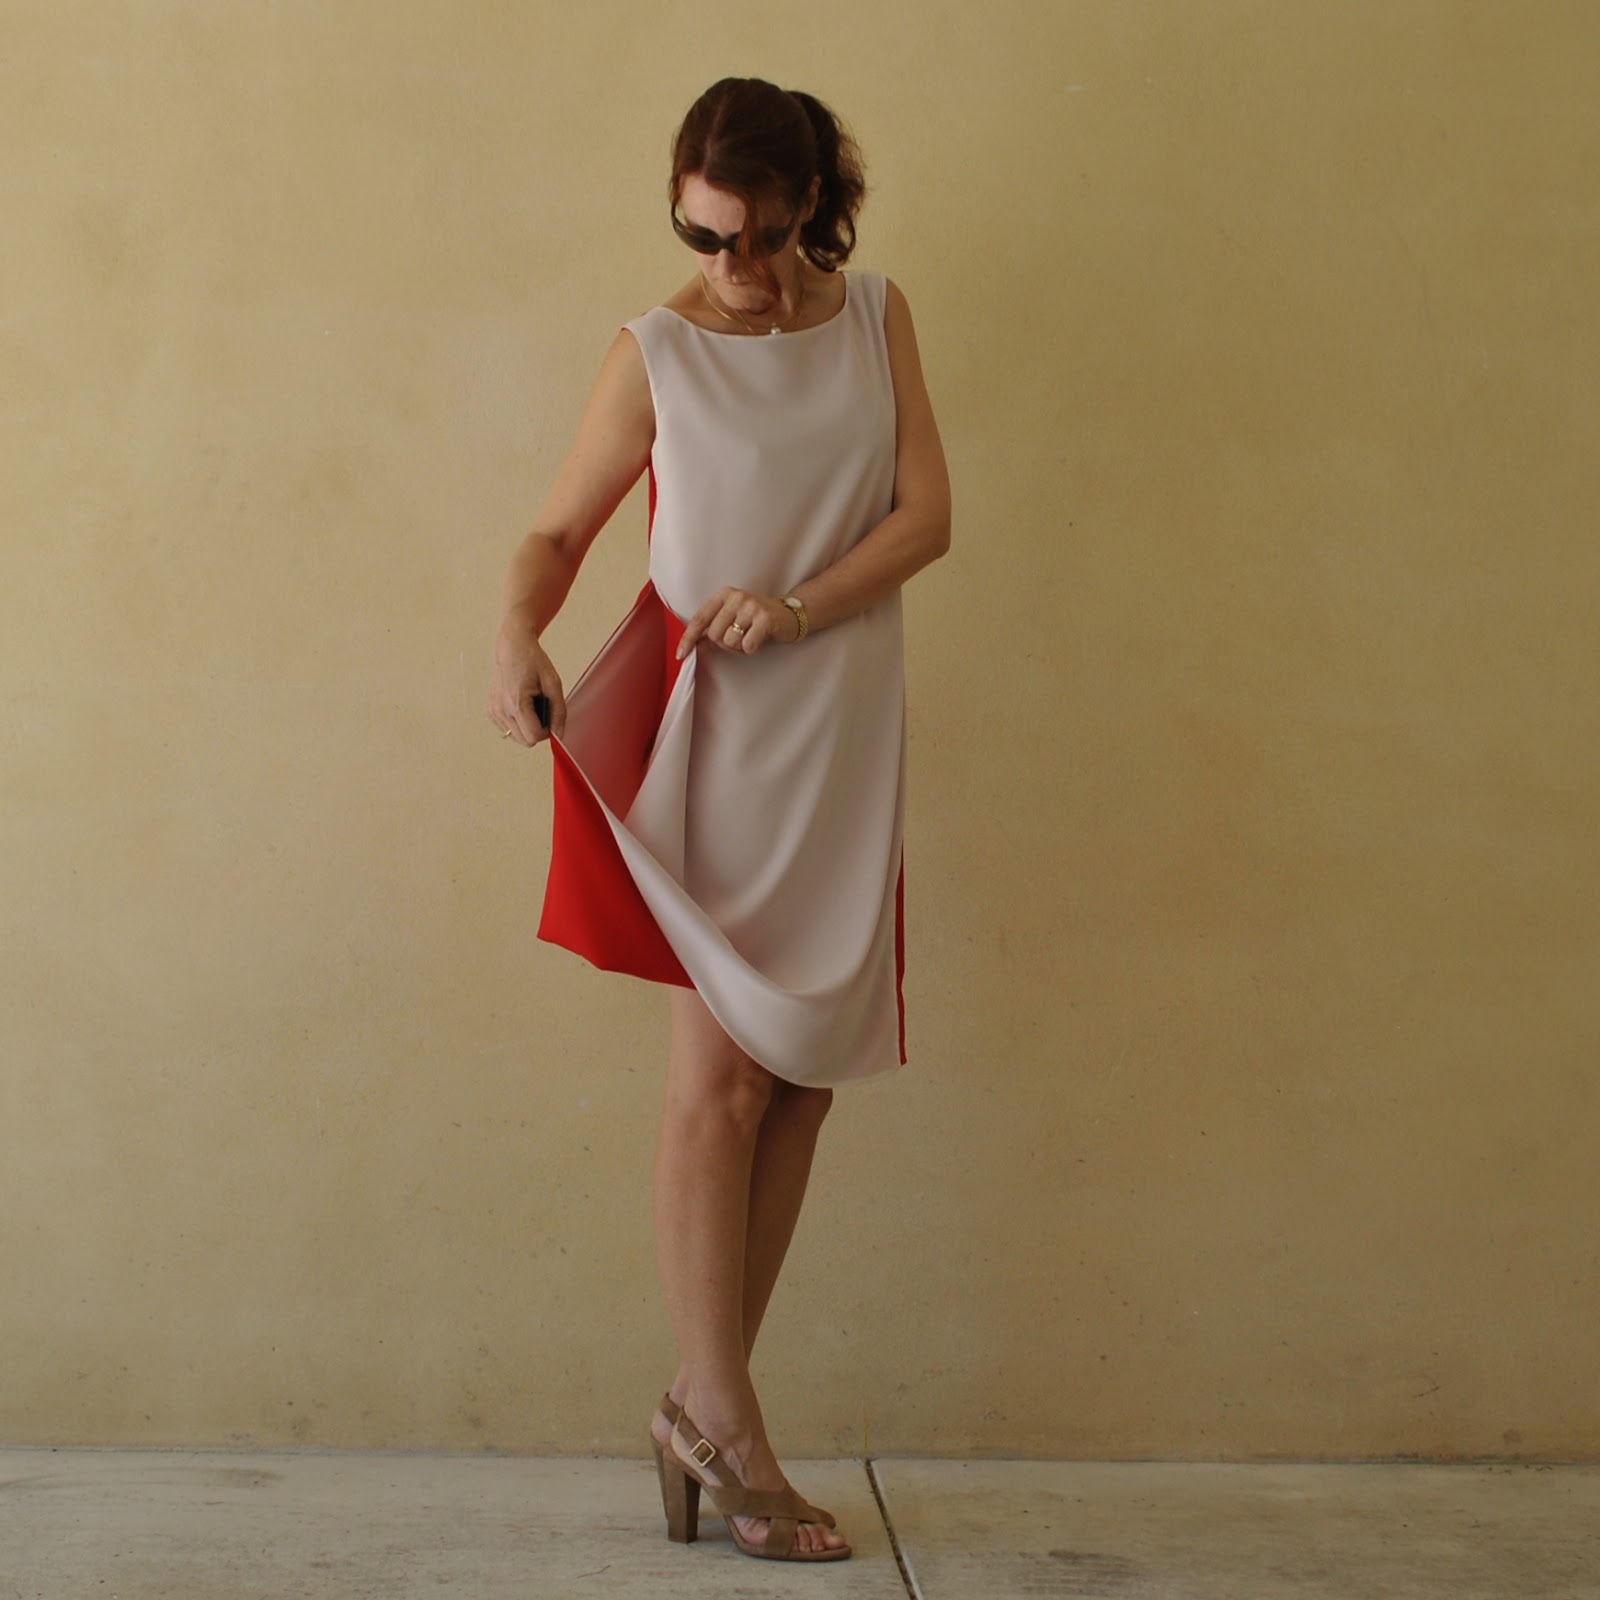
In my initial plans; it was not going to be a reversible design and I wanted to use double-sided fabric for my dress, but the only ones I could find were kinda expensive, and much as I craved the actualisation of that idea I just couldn’t justify the cost… economy can often be the mother of invention, non? Eventually I settled with a double layered dress using two lightweight fabrics, and then while I was fiddling about with the two layers I realised I could actually make it a completely reversible dress, meaning I could wear it inside out just as easily … and ta da! this is the result!
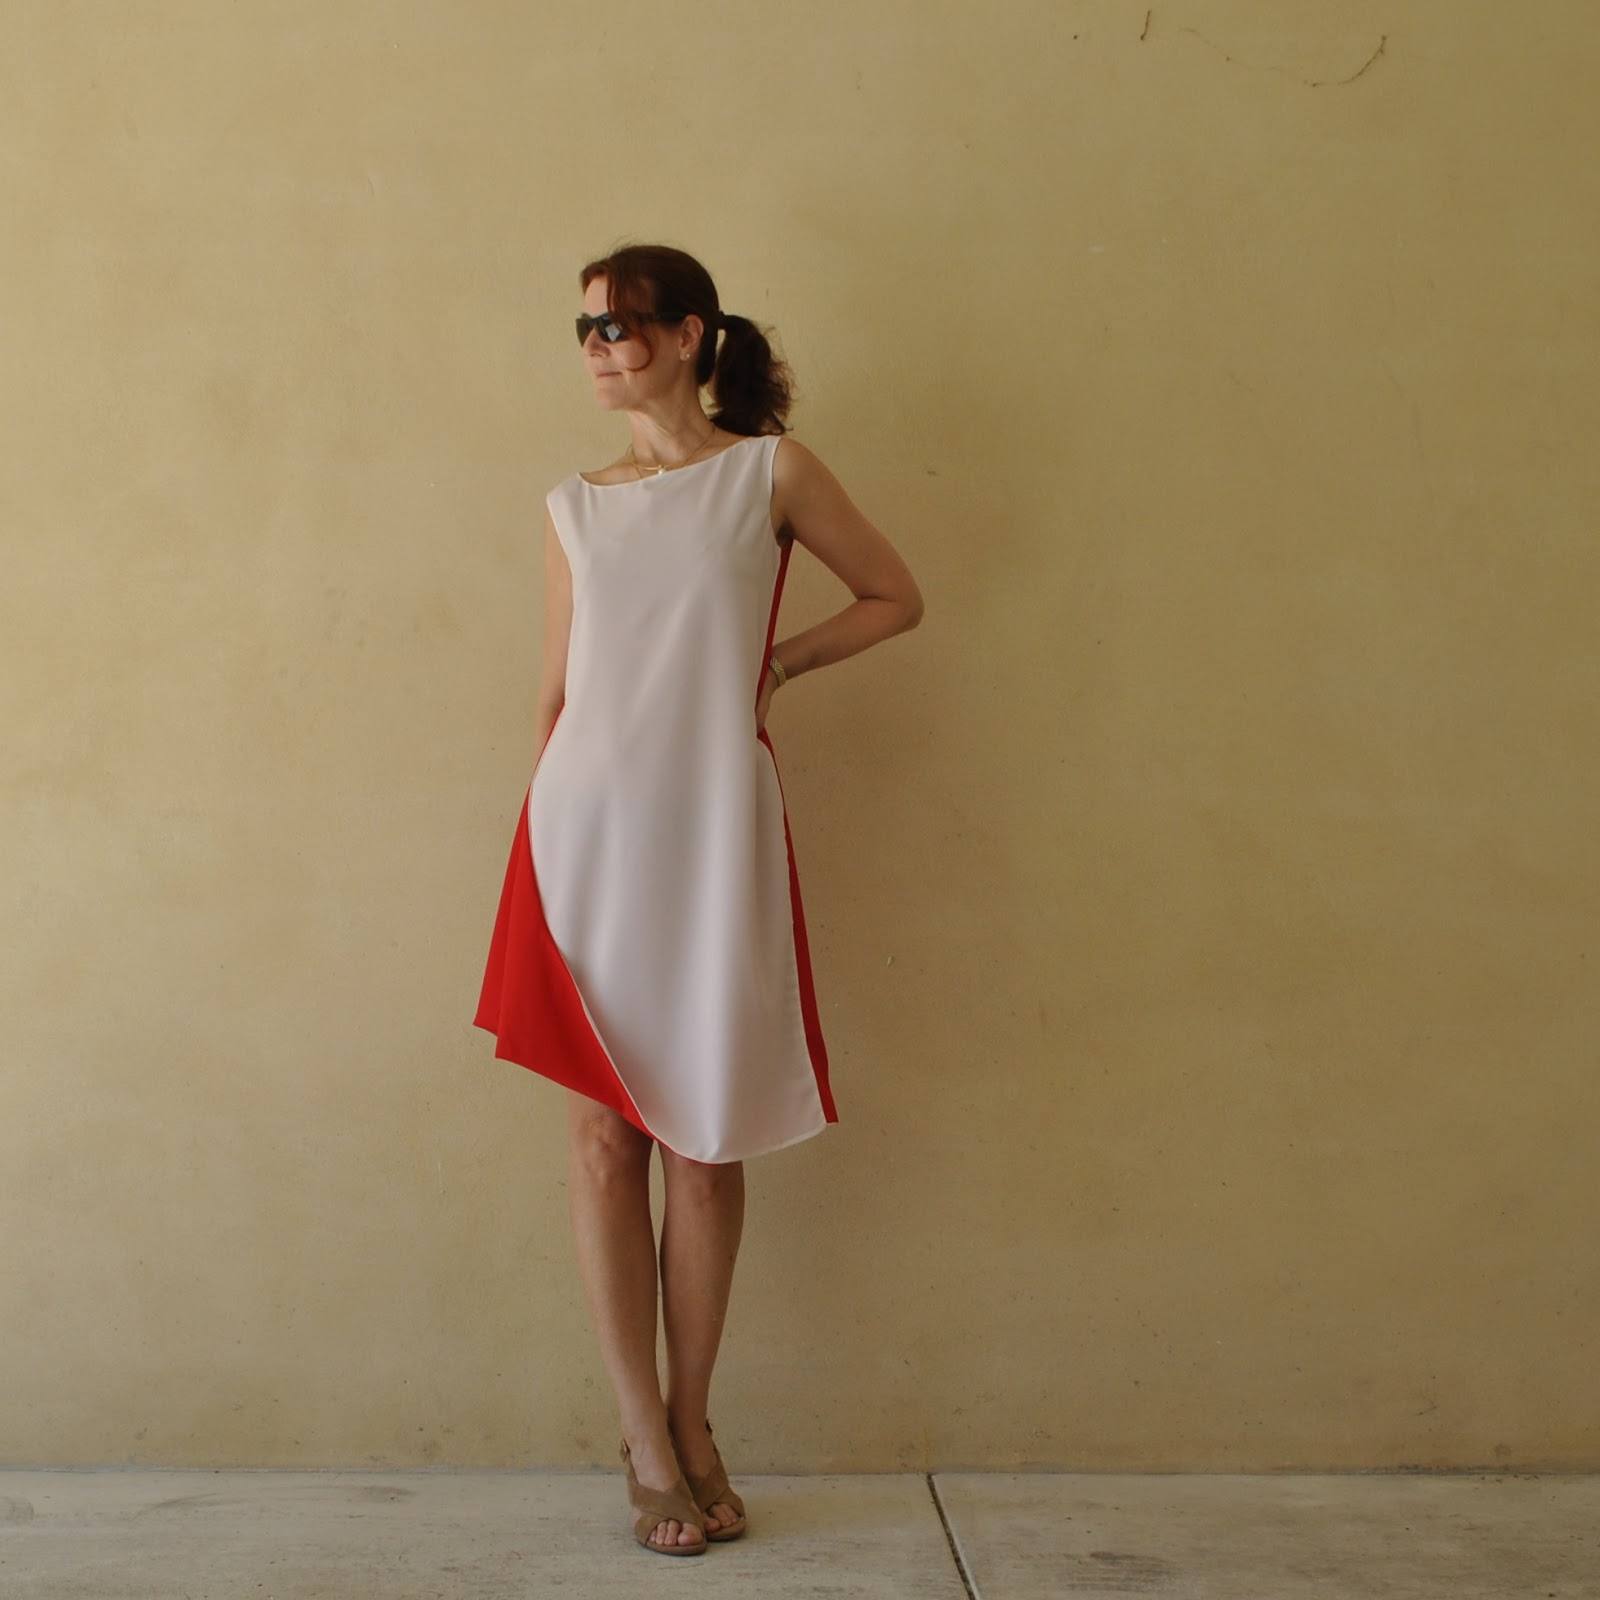
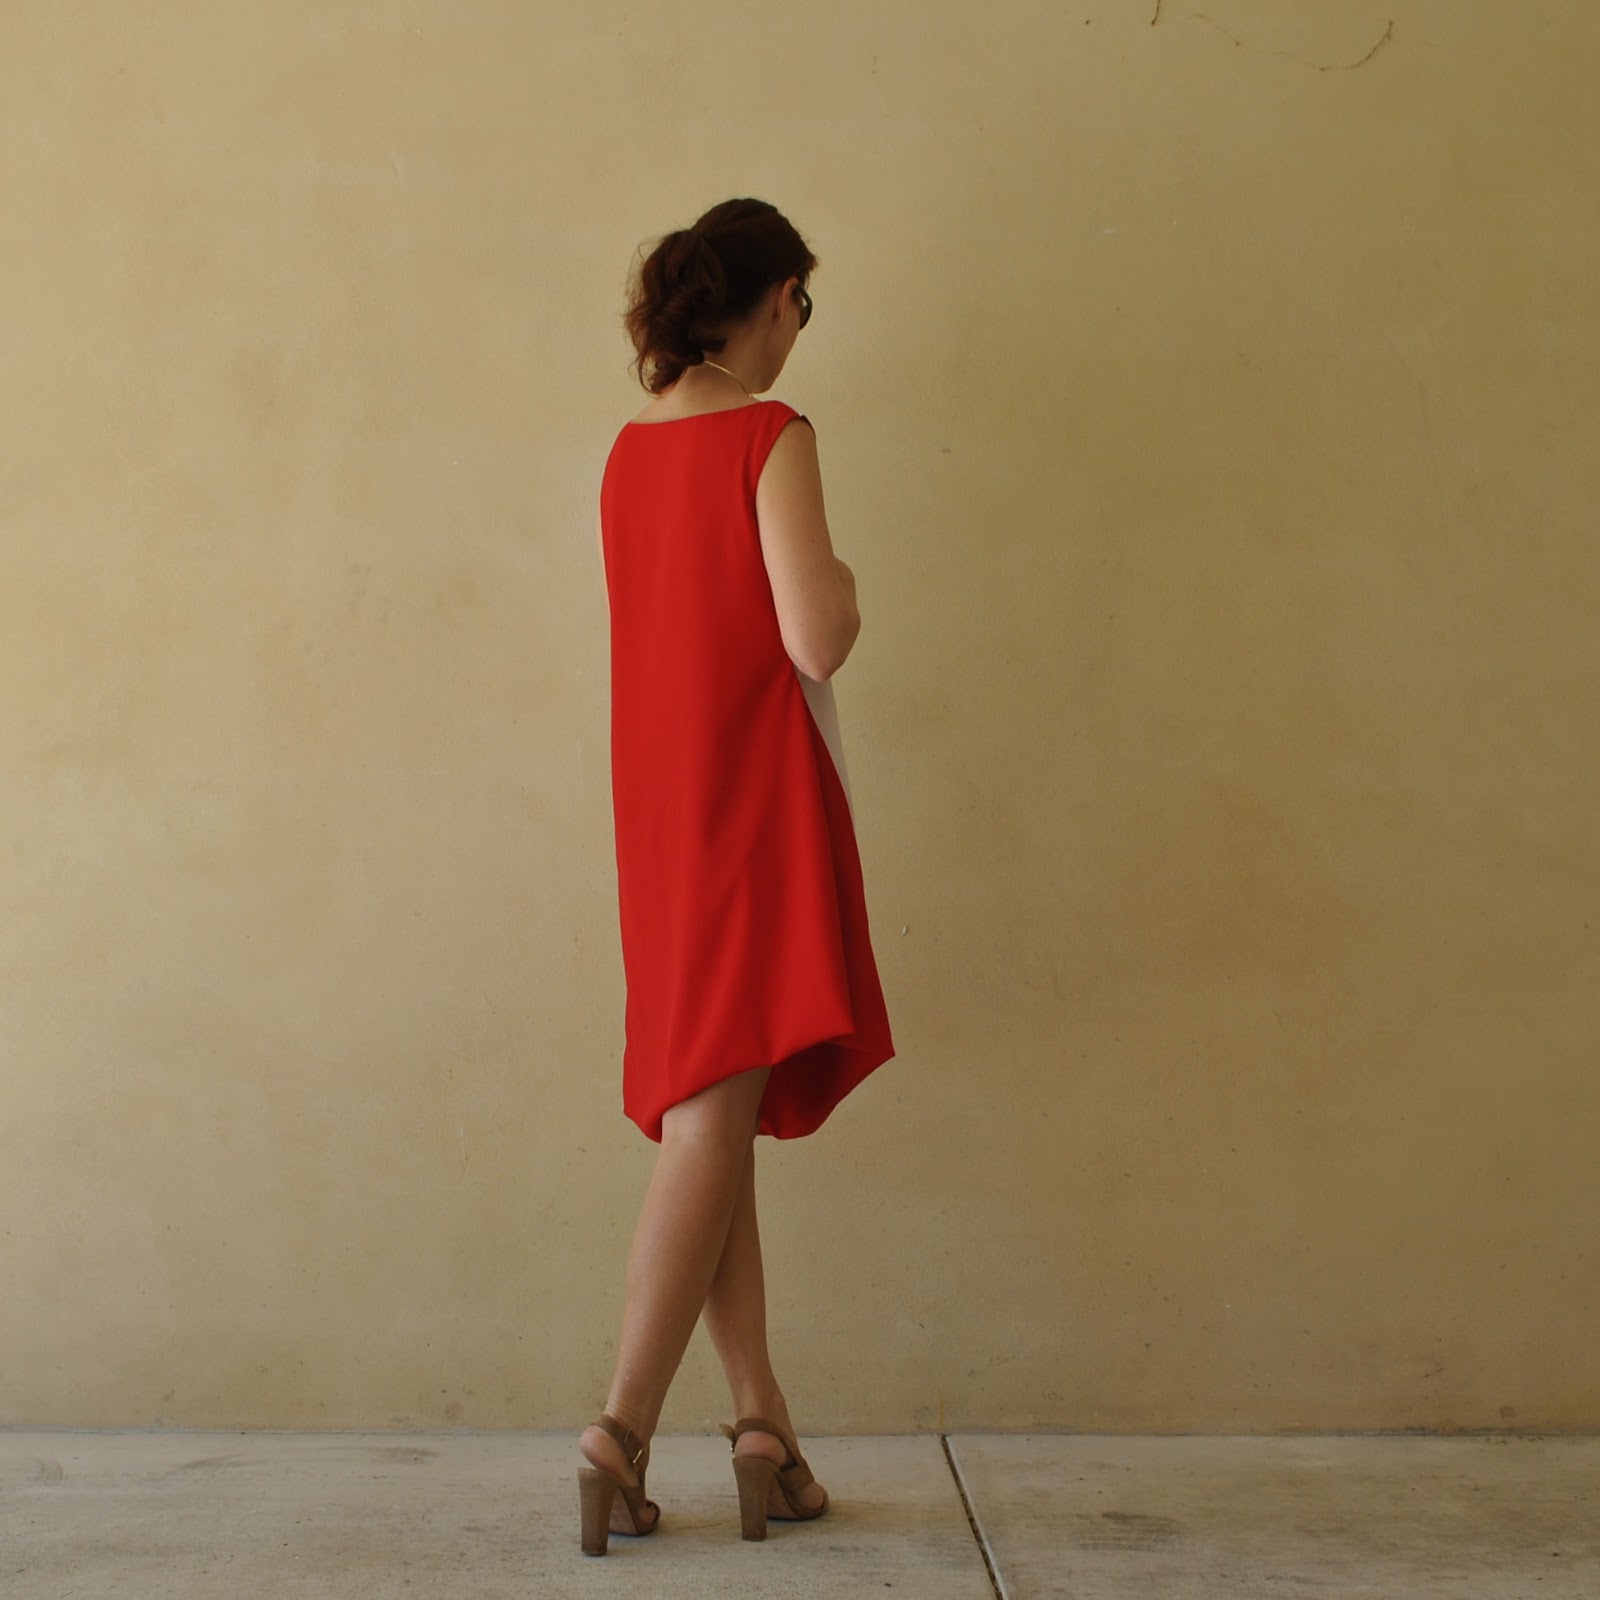
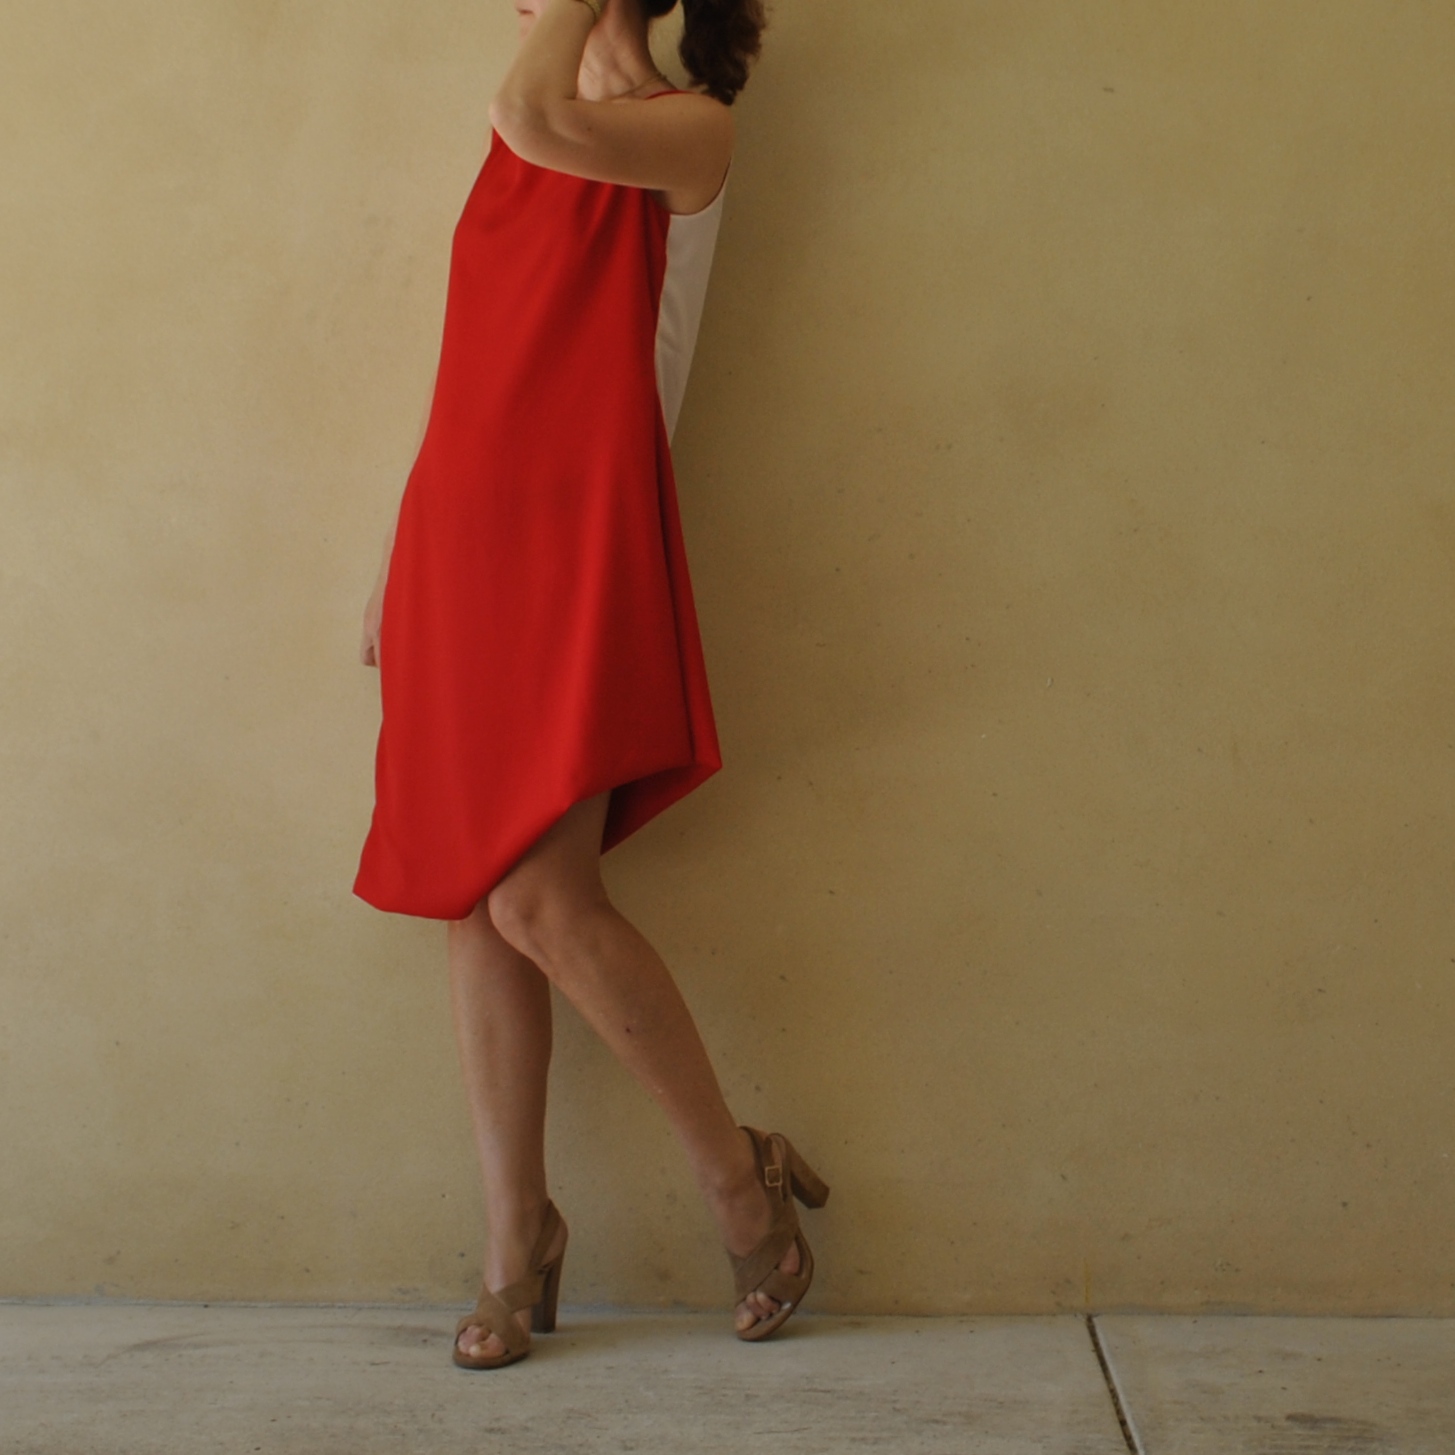
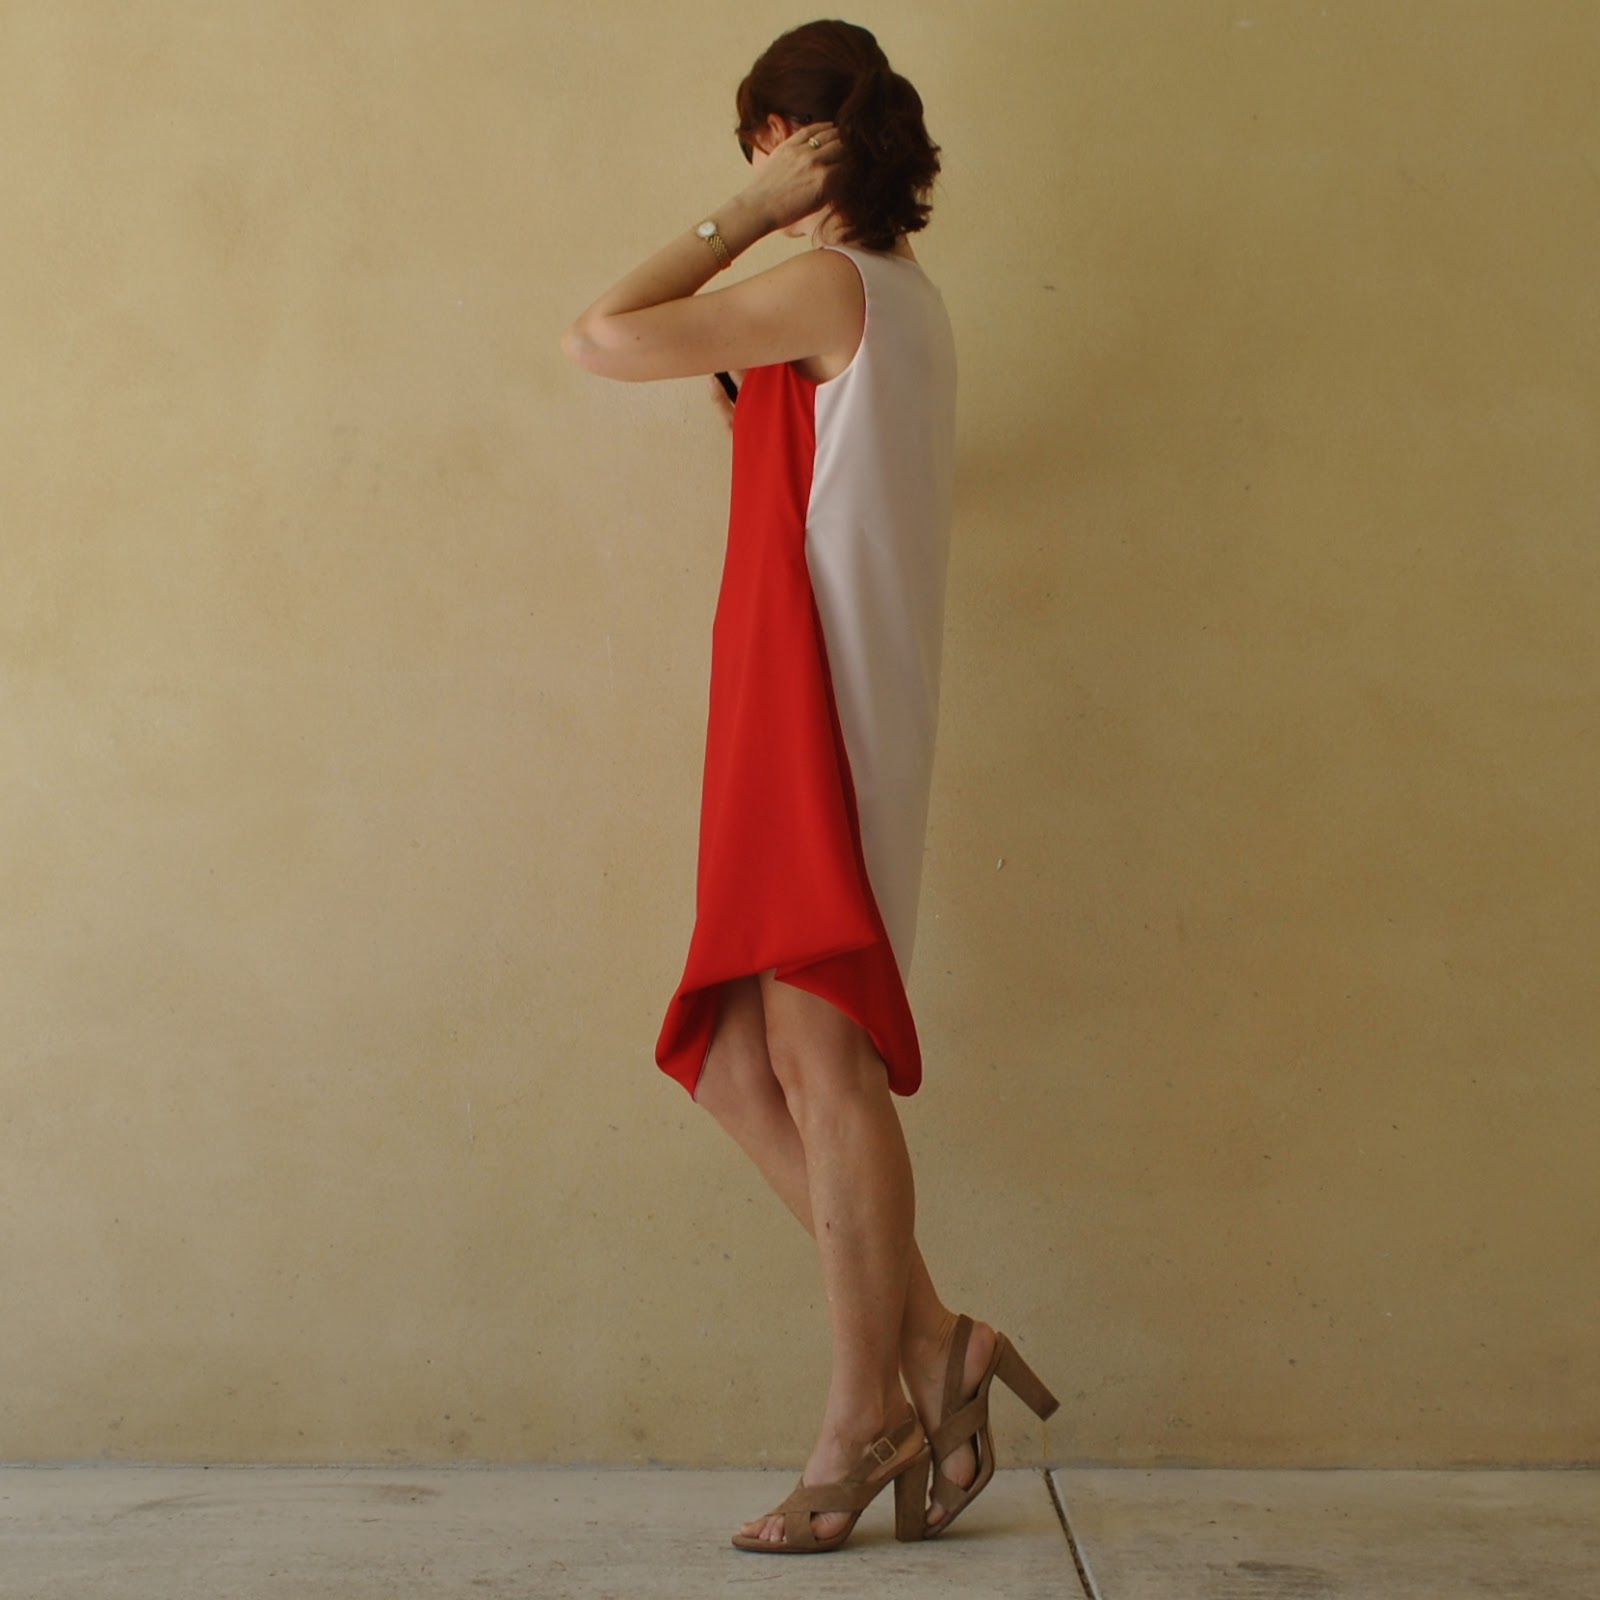
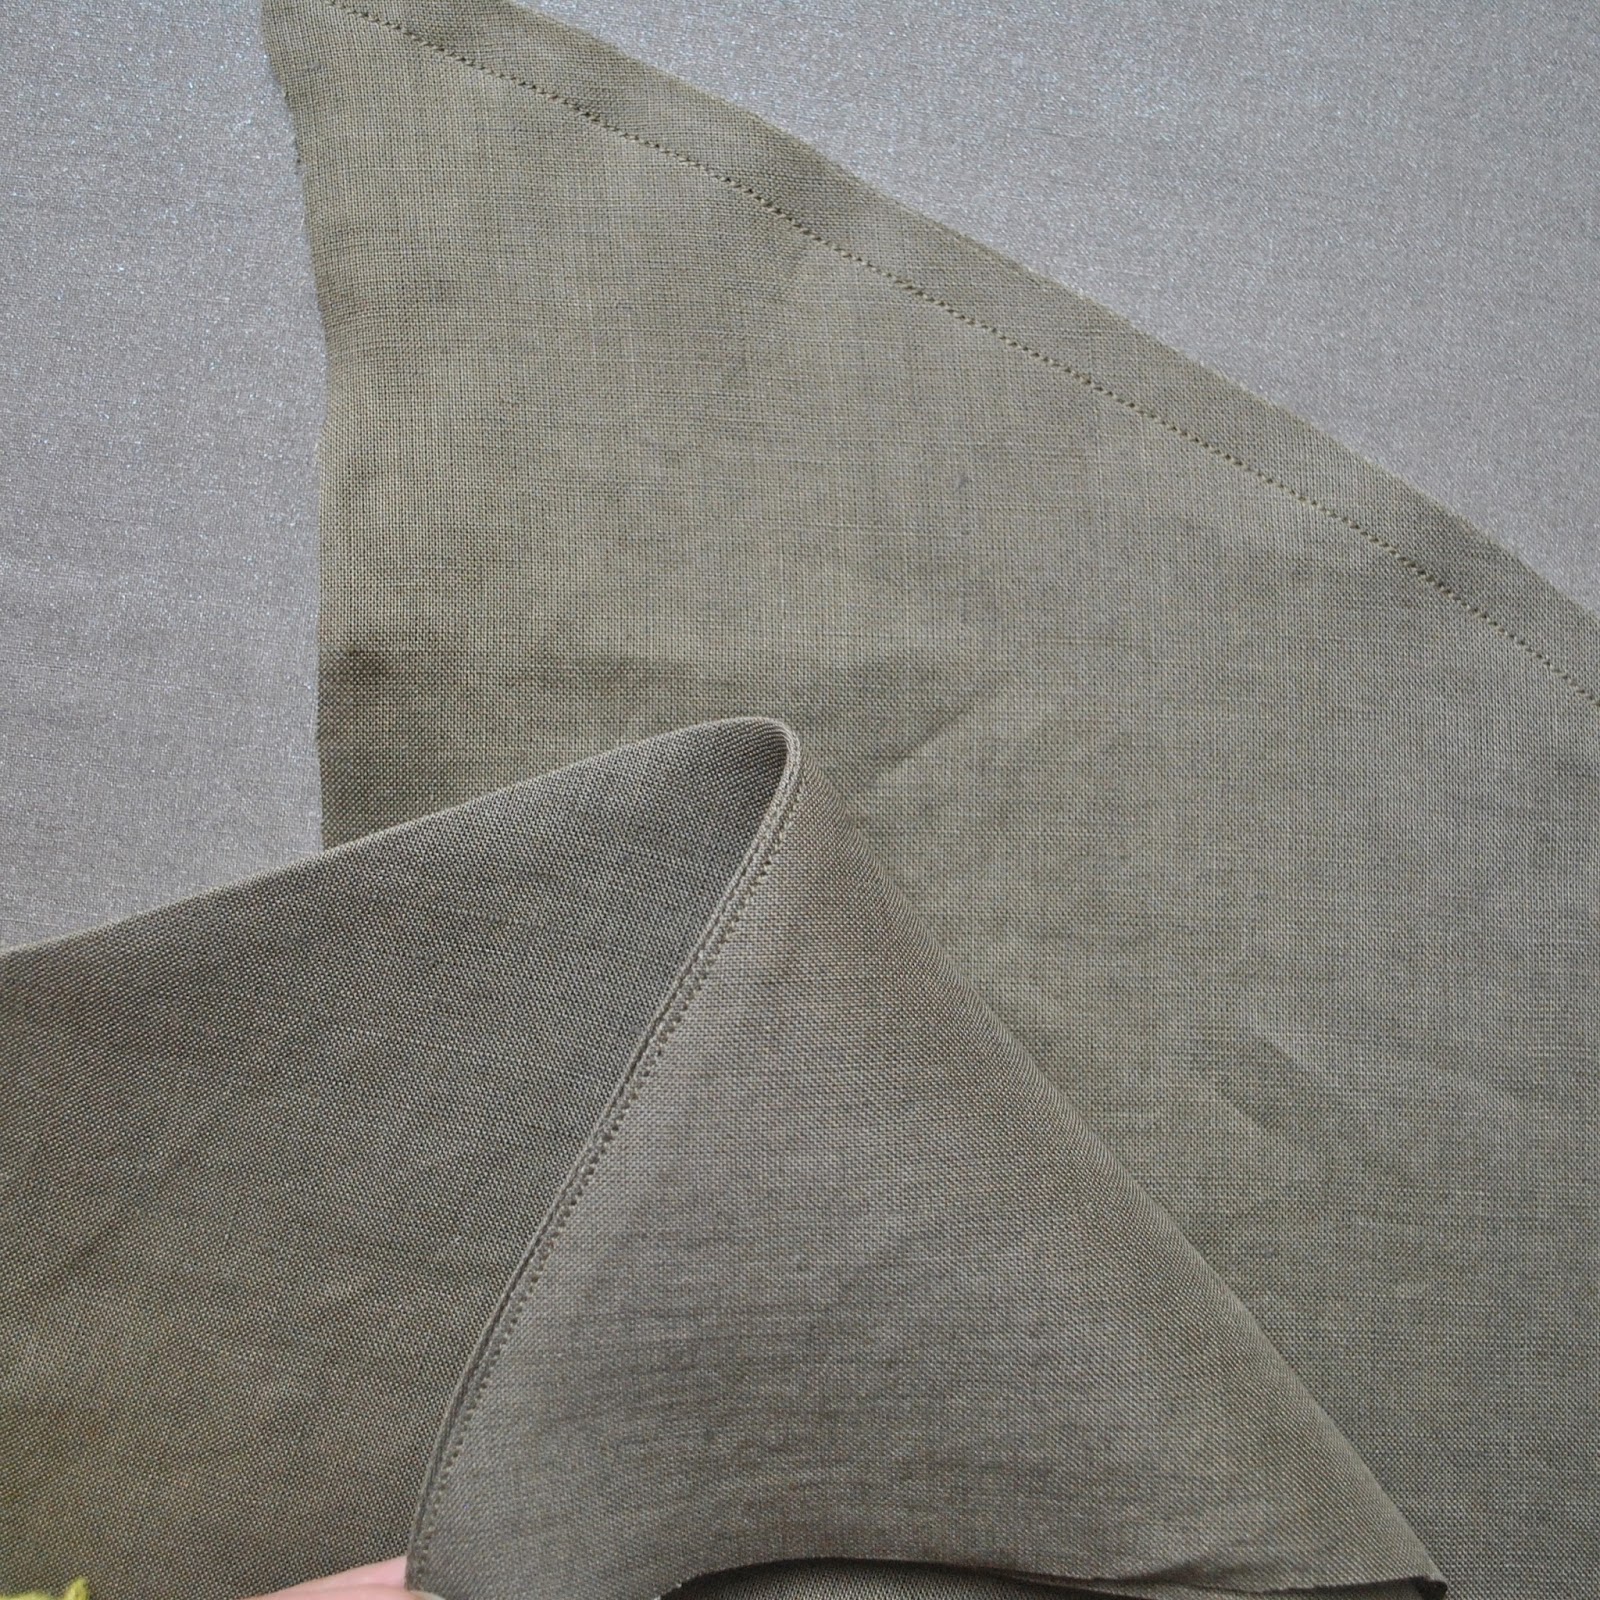
Right way out; I wanted the white at the front and red at the back. The way the infinity twist goes; the dress is actually mostly open at the right side seam, but the way it crosses over there is a restriction in the drape of the hemline so that it sits with the opening closed quite securely; and there is absolutely no danger of the drape falling open and exposing your knickers at all. I tried to move and sit in it a few times to see if I could possibly get humiliated from any hint of exposure in the dress and am happy to say I could not make it happen.
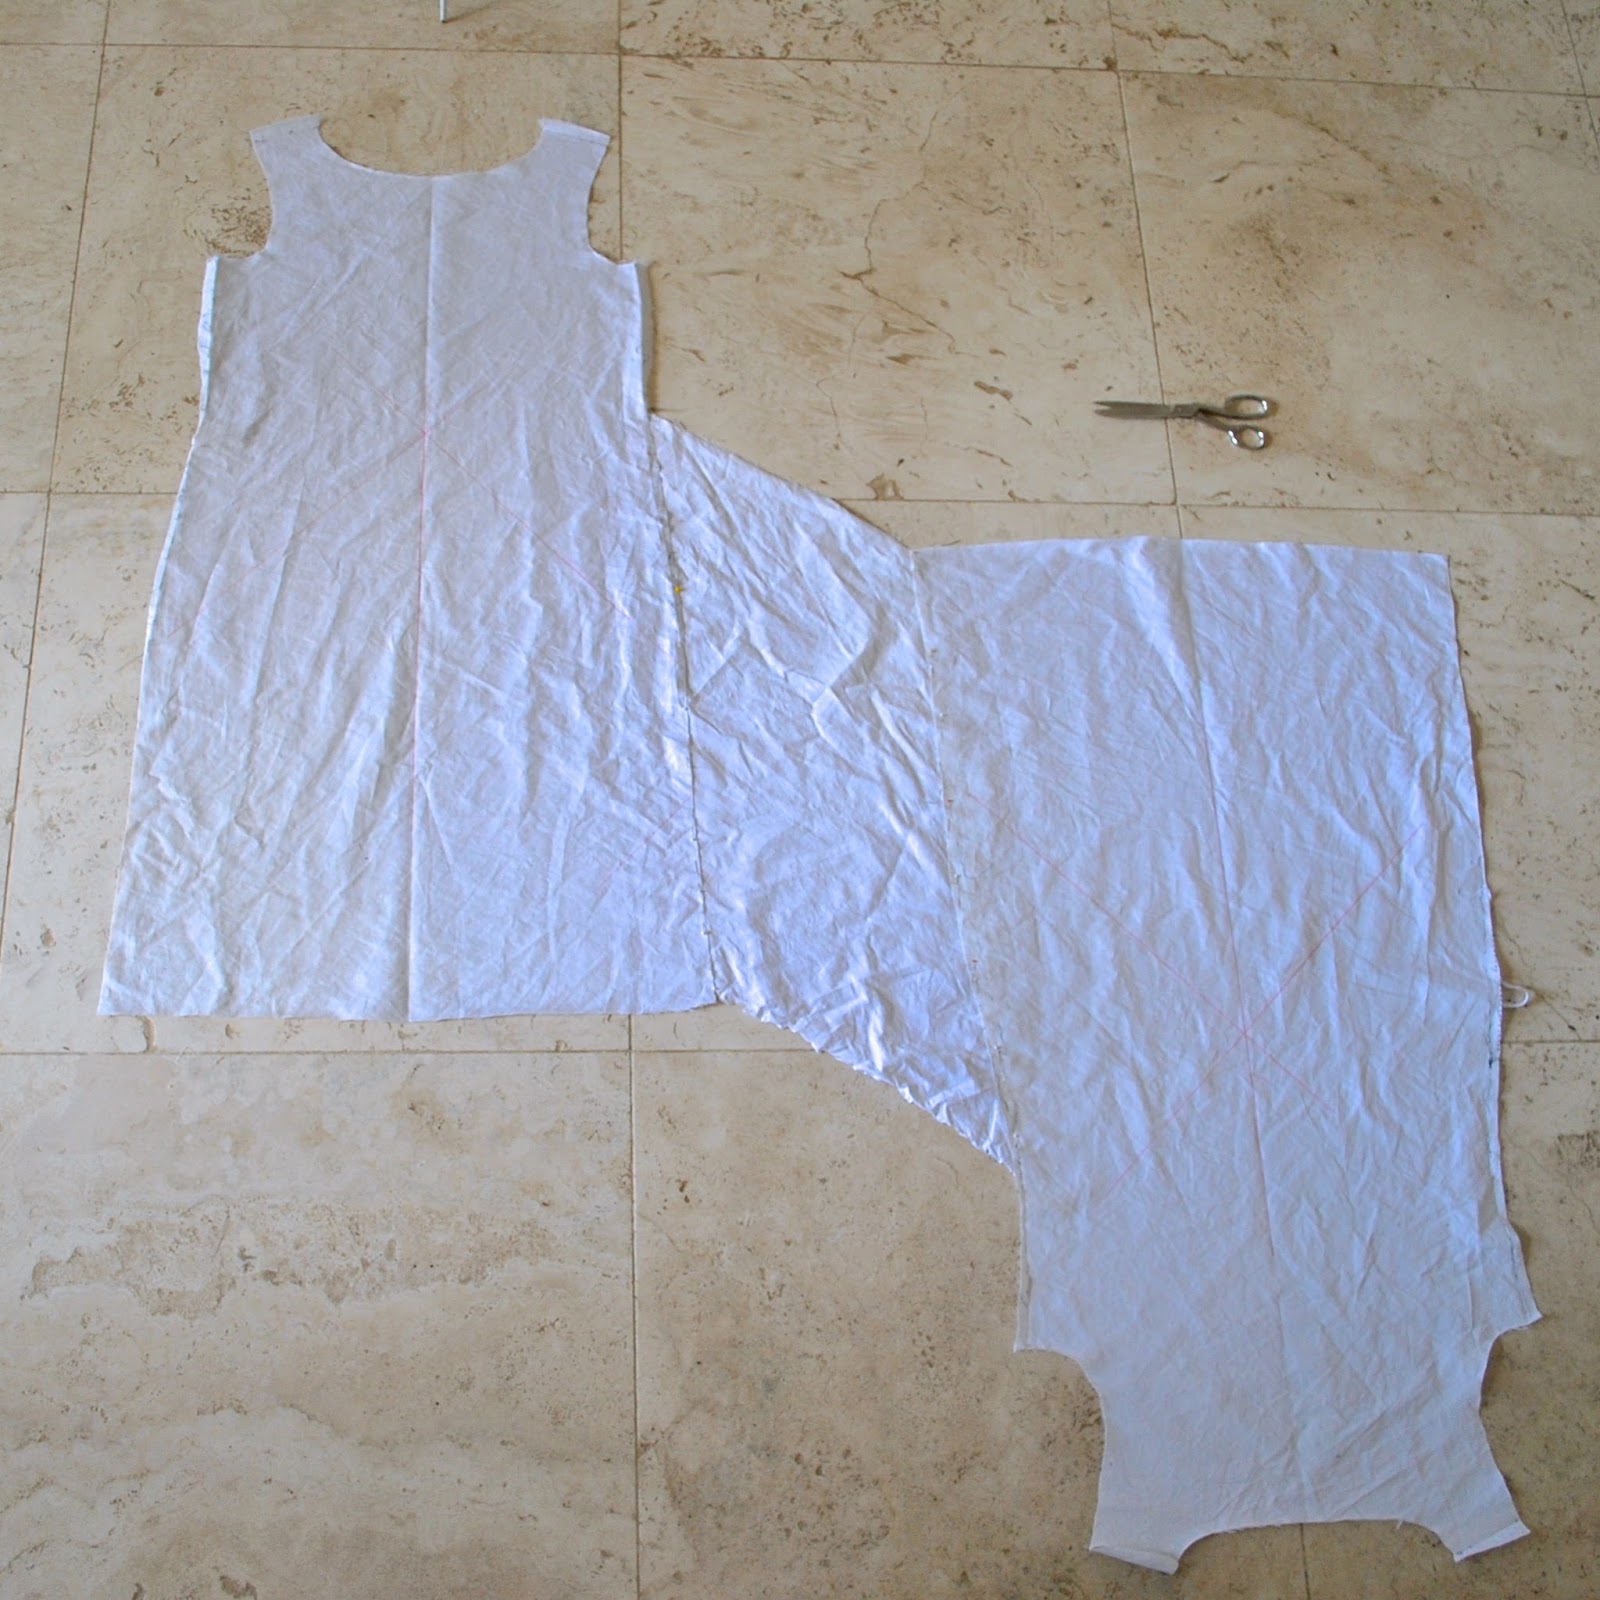
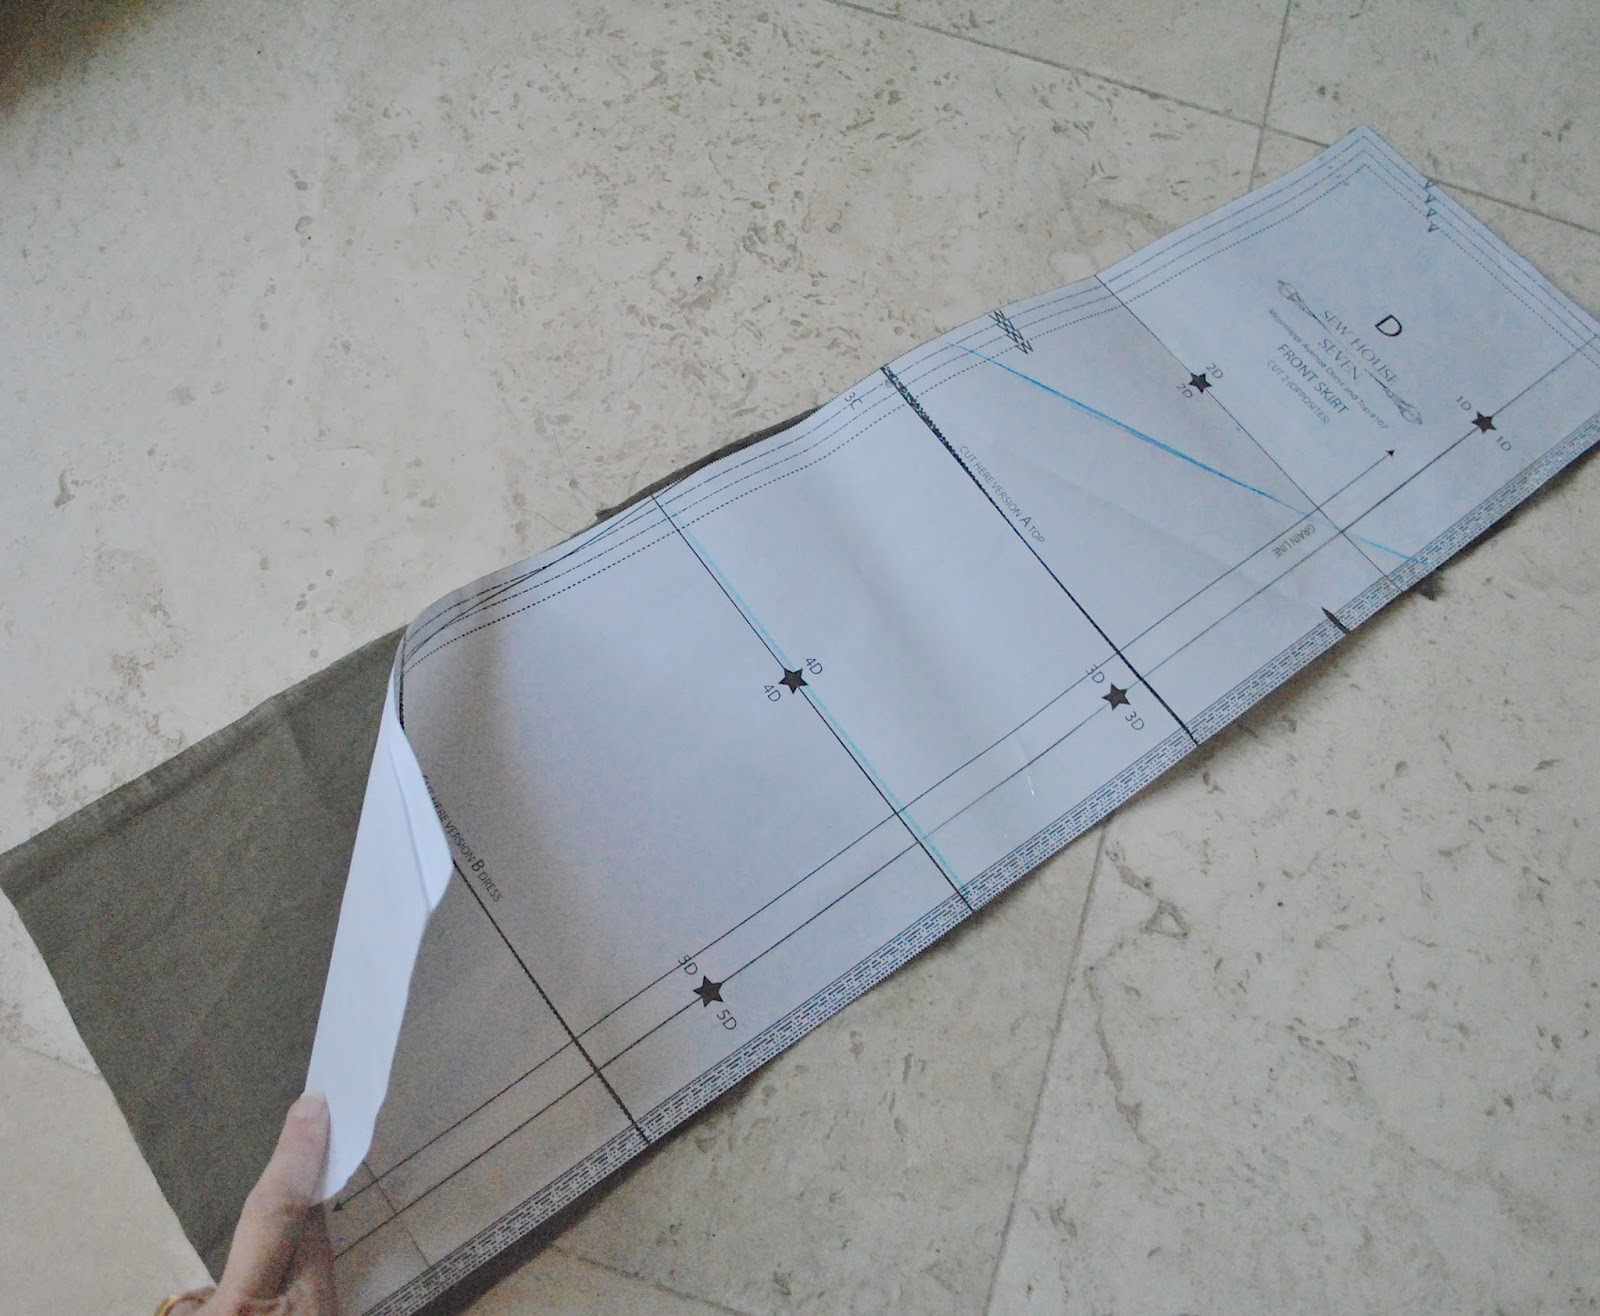
The one single pattern piece looks like this, and you rotate the “upside-down” part around clockwise and up, to lie over on the “right-side up” part. This naturally forms an infinity-twisted drape at the side, and the wrong side of the fabric against the right side, front and back.
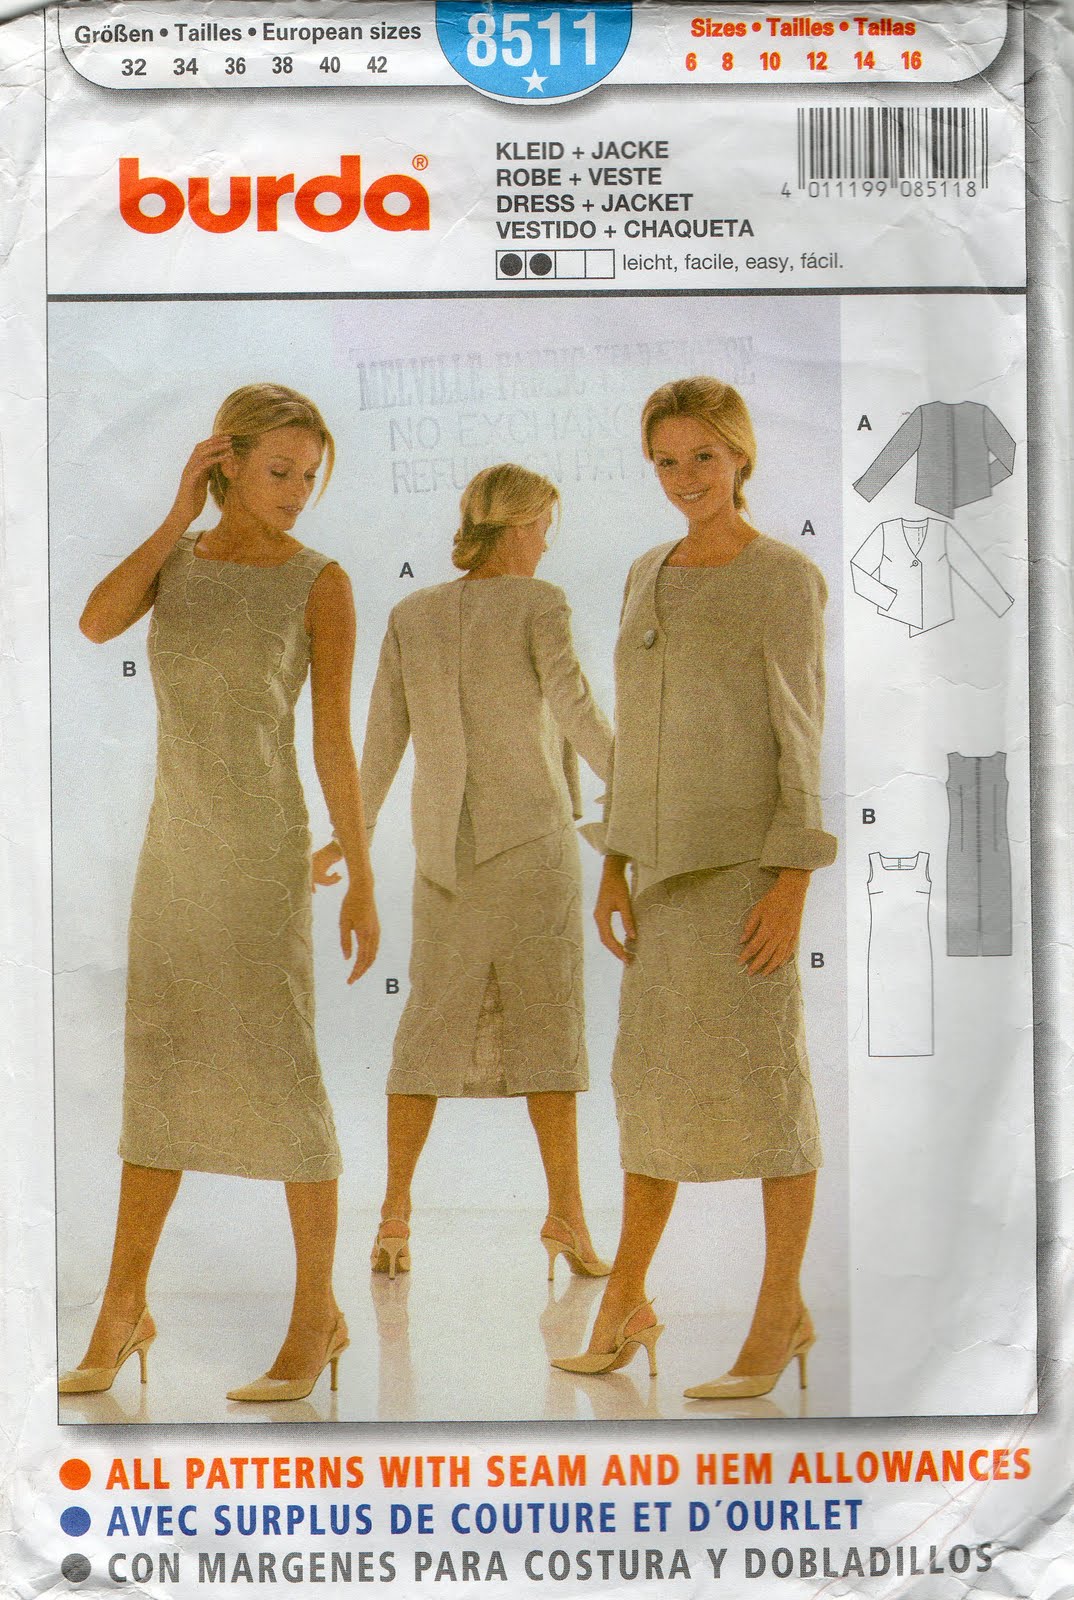 Any straight or sheath dress design could be used to get this pattern piece; I used my old standby Burda 8511 as my sheath dress sloper. It’s one I’ve made enough times over the years to have tweaked and fiddled with it enough to have fine-tuned the fit to my pear-shaped self just about perfectly.
By the way; if you’re at all interested in creating your own pattern manipulations like this one, and this goes for just about all the Pattern Magic designs too; my recommendation is make a sturdy, fabric sloper. It’s a good idea to have one for a sheath dress, a bodice and possibly a skirt too. You could use a well-fitting, tried and true pattern like this one, if you have one; in any case get a basic pattern and make up a few samples to fine-tune your fit. Once you’ve fiddled and diddled enough to discover the perfect adjustments for you; get some strong fabric that’s not going to rip or fray easily, like an old sheet… these often have the most fabulously high thread count making them super-tough! Then cut out your perfectly-fitting pattern pieces. Using a clear, easy-to-see marking pen of some sort, mark on the sloper pieces the waist line, hipline, bust points, back dart points, the straight grainline and the bias grainlines going both ways. I used bright red marking pen. This sloper can be kept rolled up with your patterns for whenever you have new ideas and want to play about with making new designs for yourself 🙂
Why fabric, not paper? well obviously so you can baste it together and put it on! wearing a paper version of a thing is absolutely nothing like the real fabric thing, we all know that! Paper has zero drape, plus it rips all too easily 😀
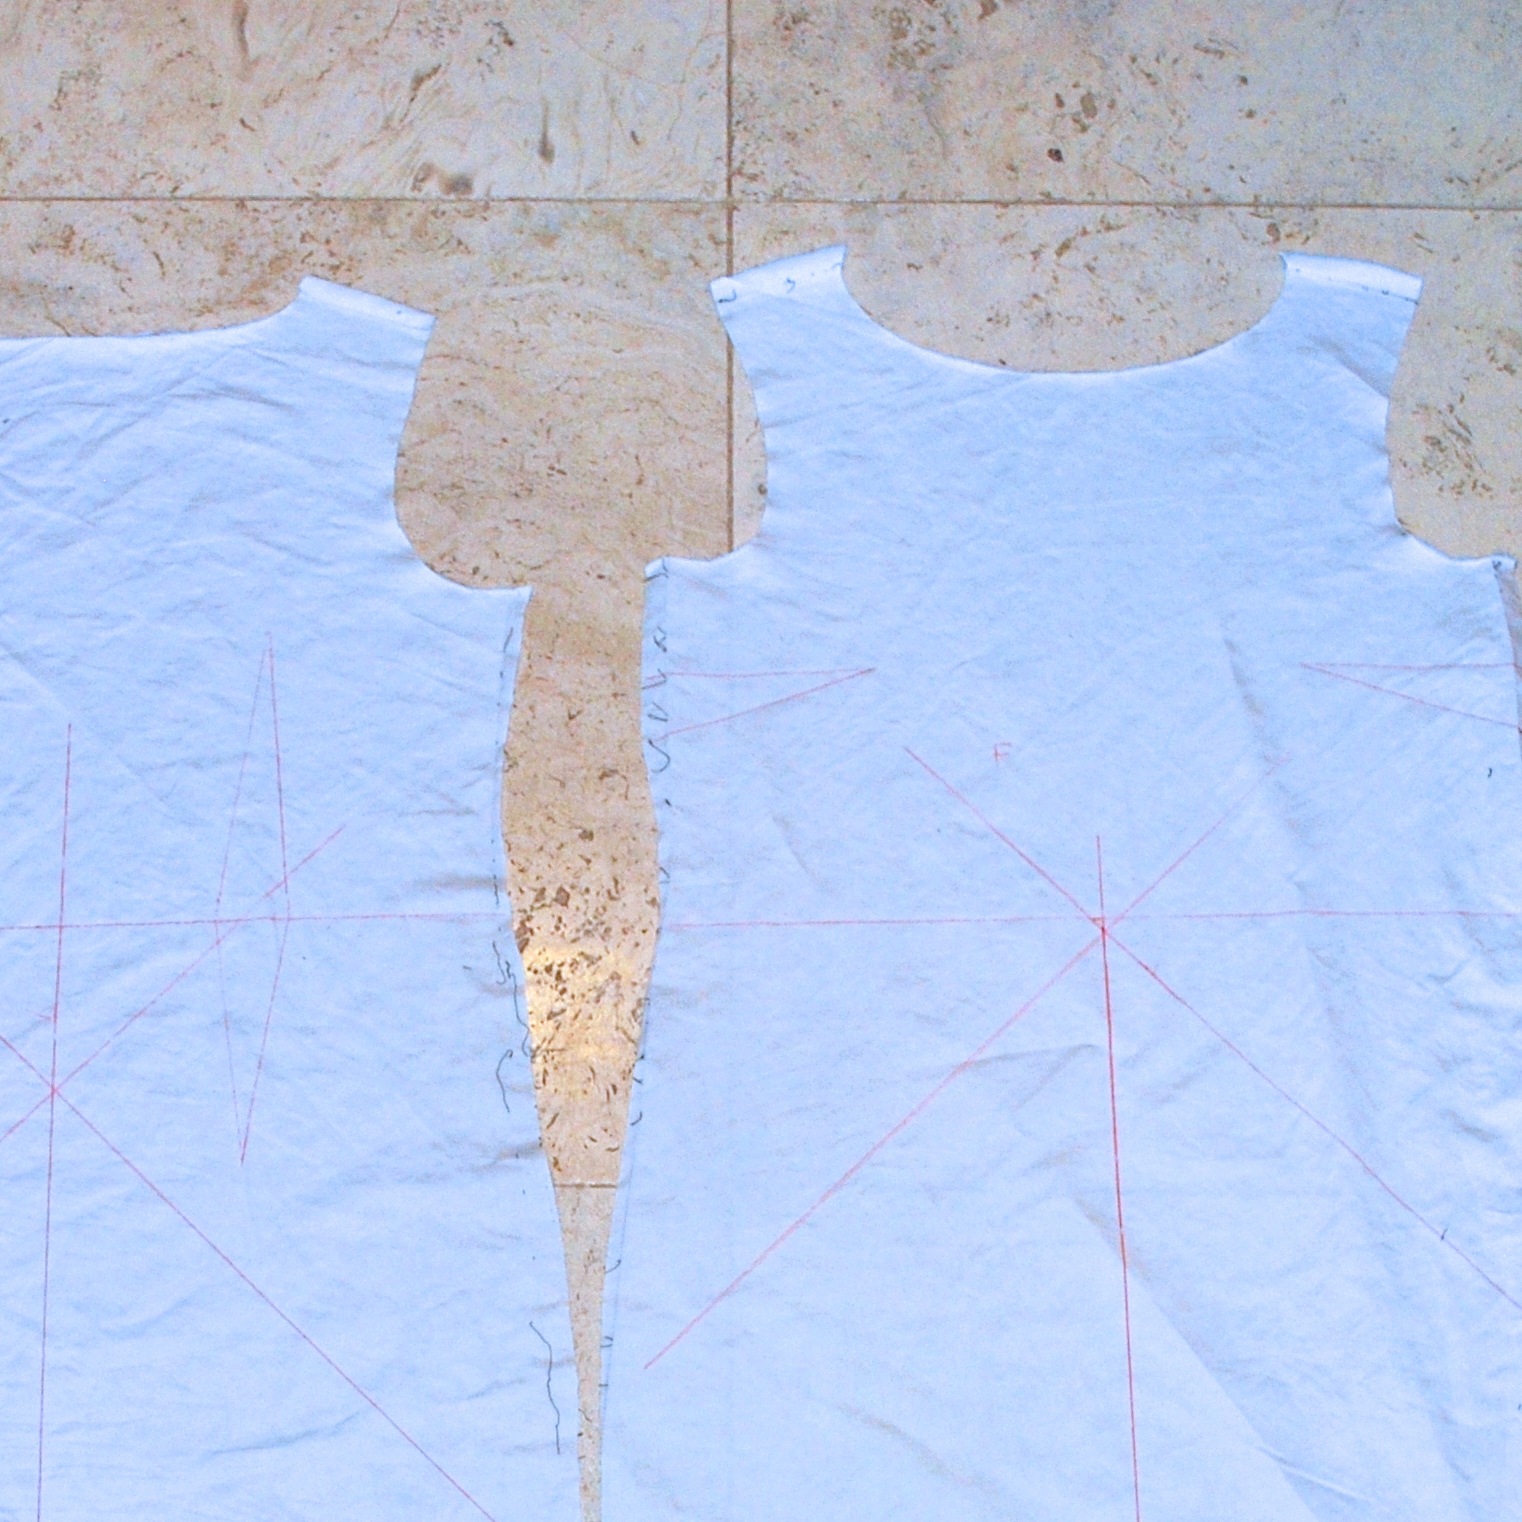
The middle, joining piece goes from the waist to the hemline. I left off all shaping darts, so the “dress” portion is a kinda shapeless sack, a base-point which I think is a good criteria for a double layered reversible design. I also cut it so that I can just slip the dress over my head, eliminating the need for a zip. Obviously that feature is essential in a reversible dress too!
I used a lovely rayon crepe from Fabulous Fabrics, in red and white, and needed 1.8m of 150cm wide fabric in each colour. Having the nice wide fabric meant I could cut my pieces on-grain and with no joining seams in the pieces.
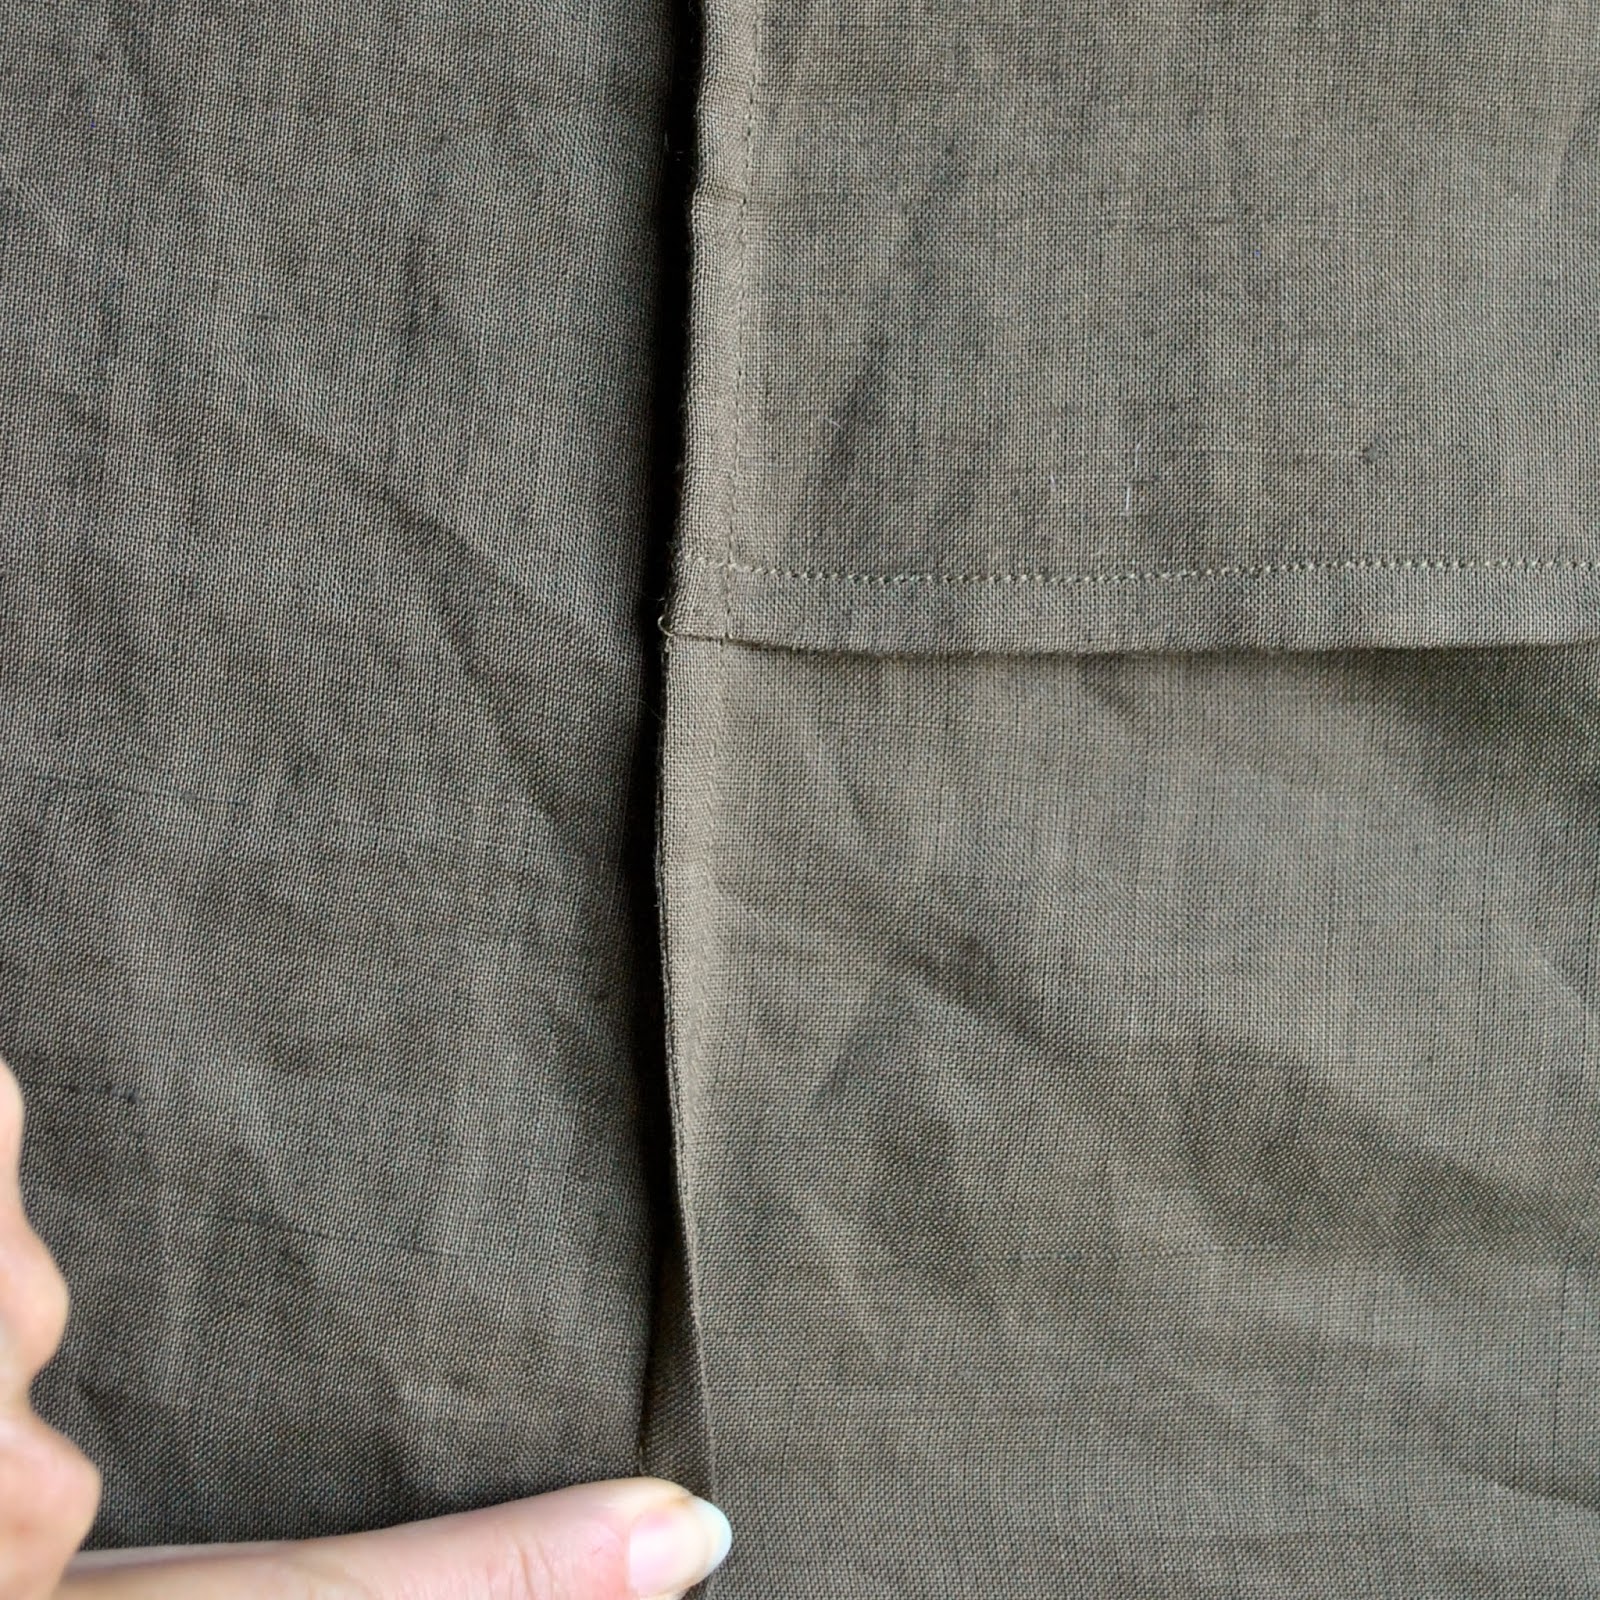
The white is quite sheer, and just about all seam finishes except for French looked absolutely dreadful underneath it; so after a bit of experimenting I went with seam allowances done like this:

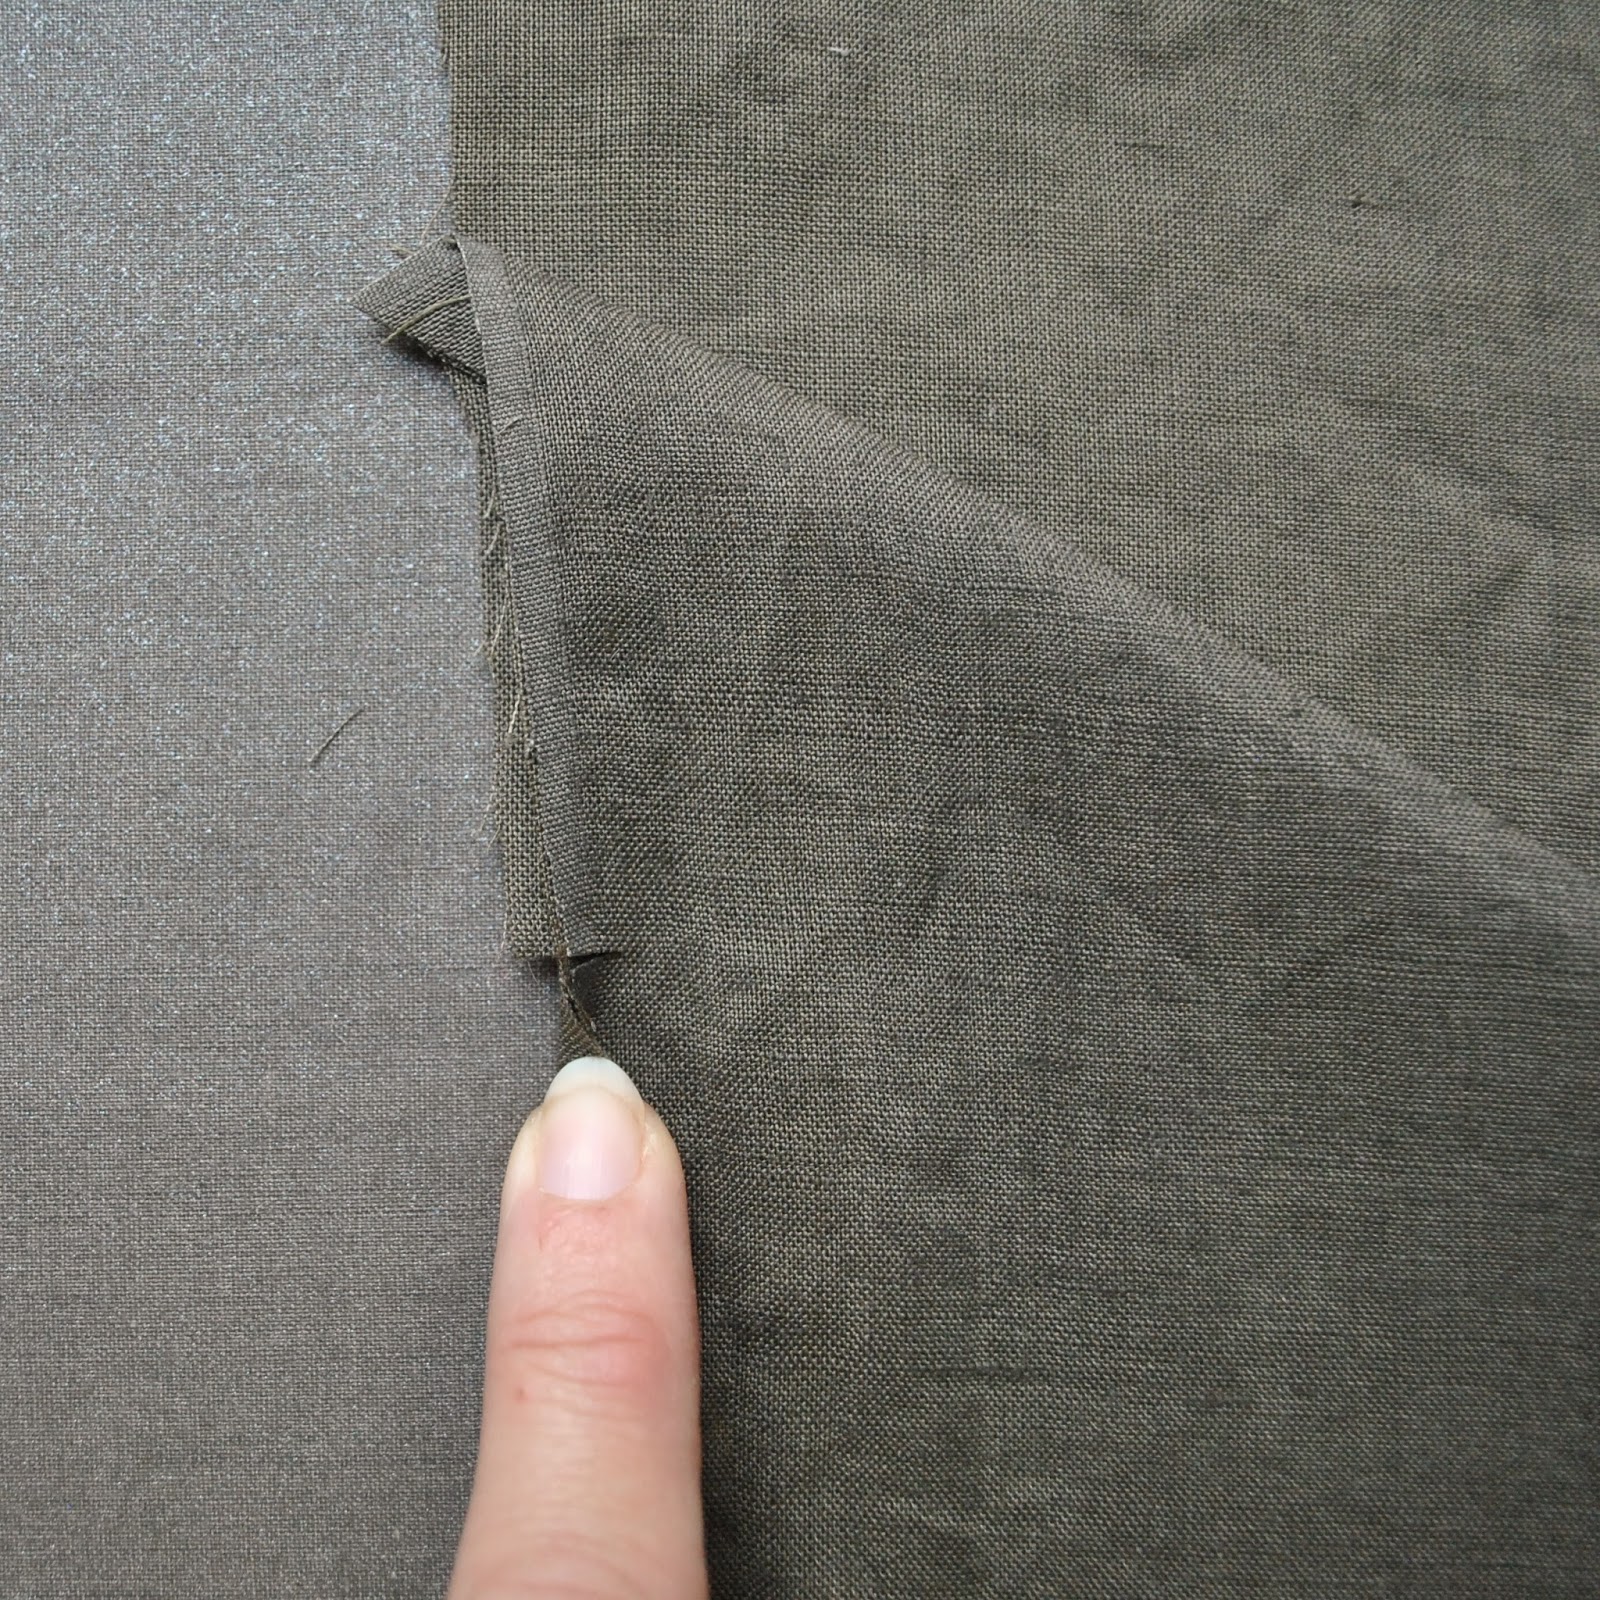
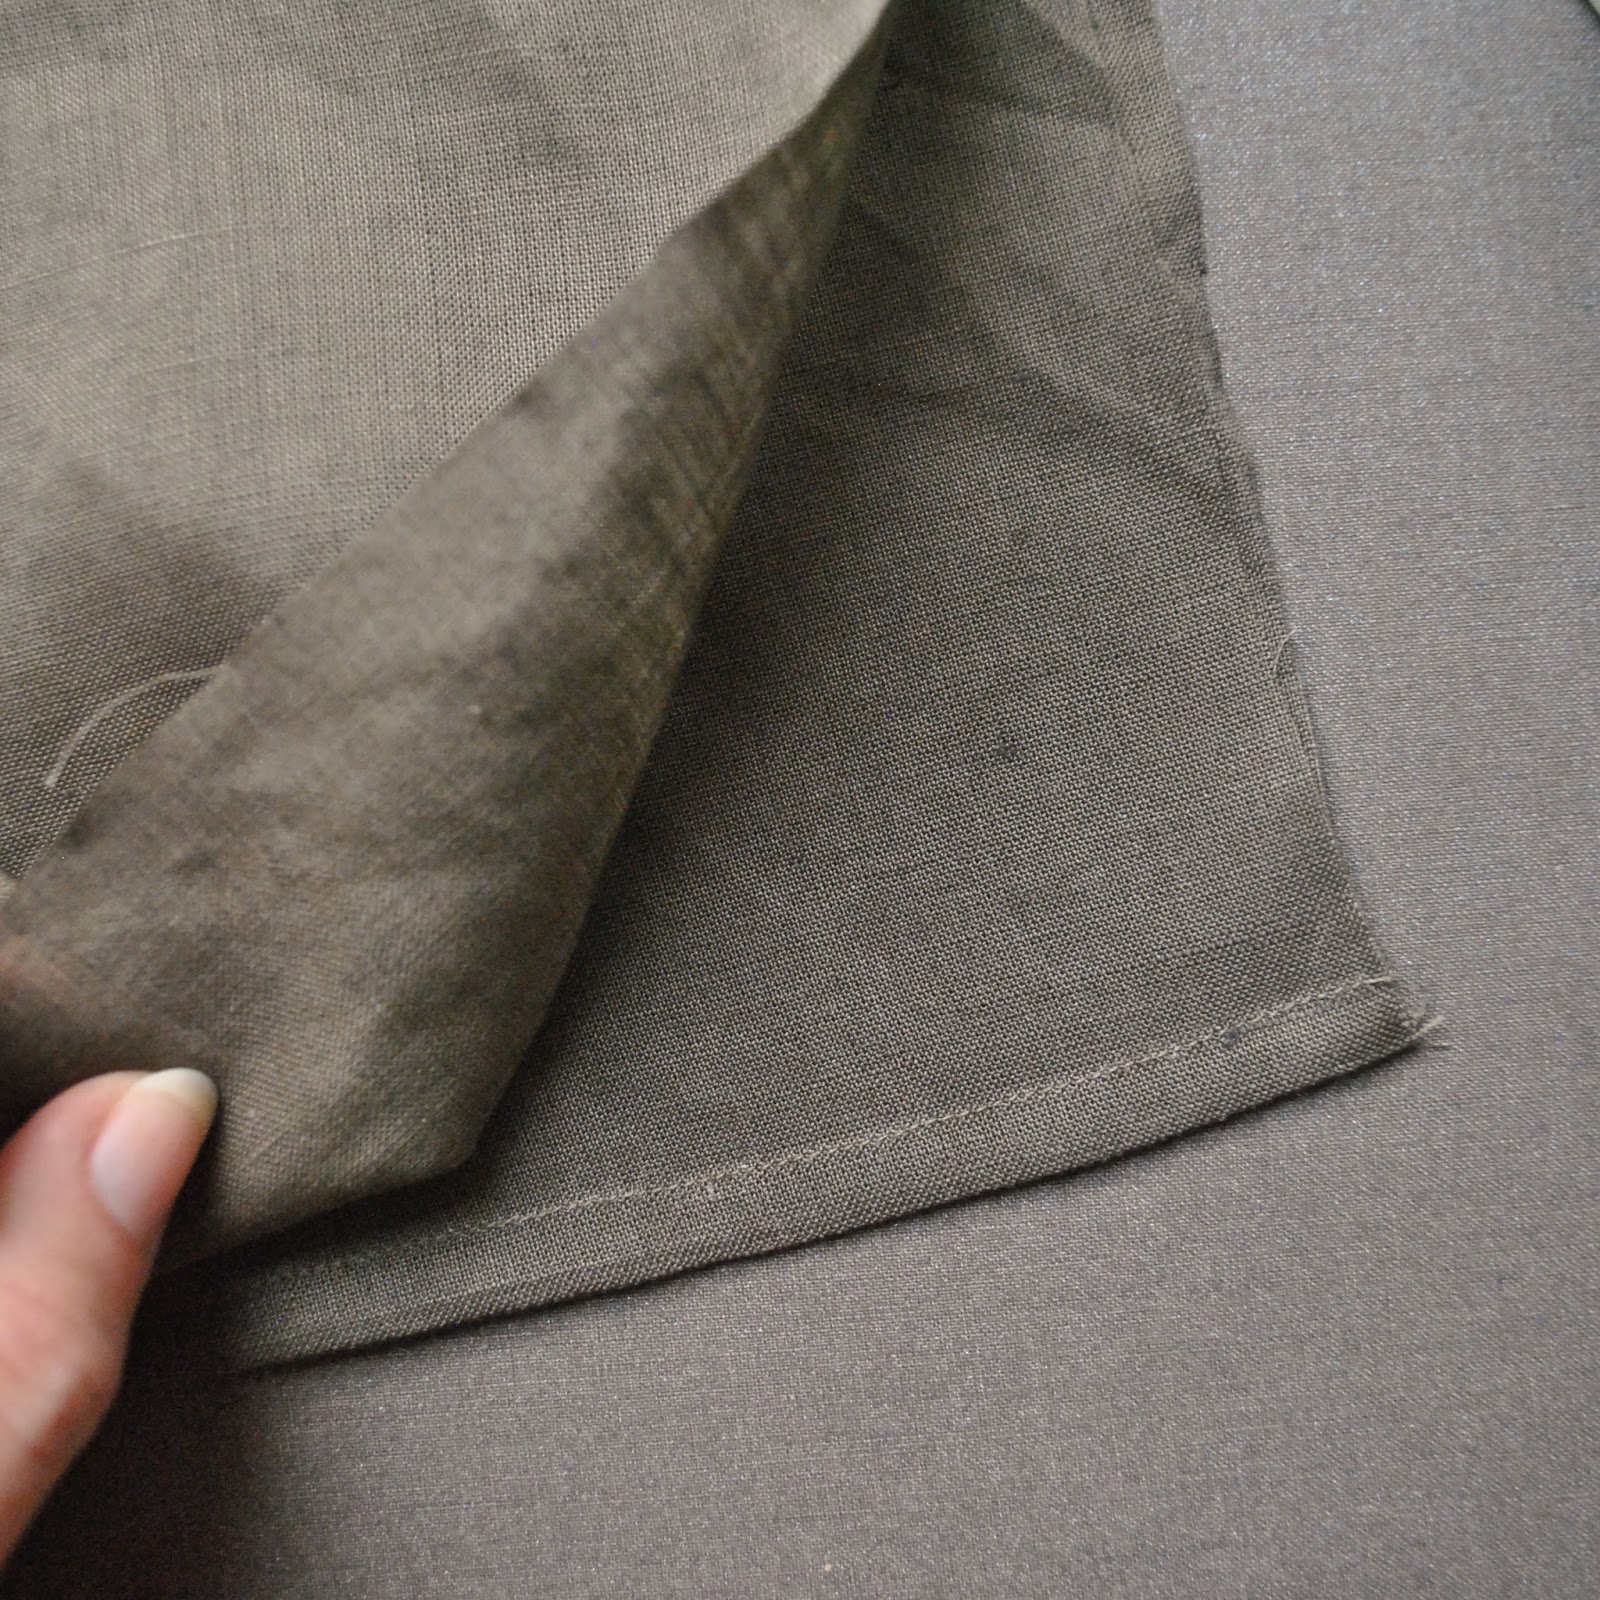
Firstly I stitched the seam allowances with a regular 1.5cm(5/8″) seam allowance. Pressed to set it, pressed open to get the crease set, then pressed back closed again. Secondly stitched a second pass of stitching just inside the seam allowance. Lastly, trimmed the seam allowance to an even narrow width. This should be pretty secure and stable with the double stitching. And the “ghost” of this seam allowance as it appears showing on the white outside looks quite nice, almost like a French seam.
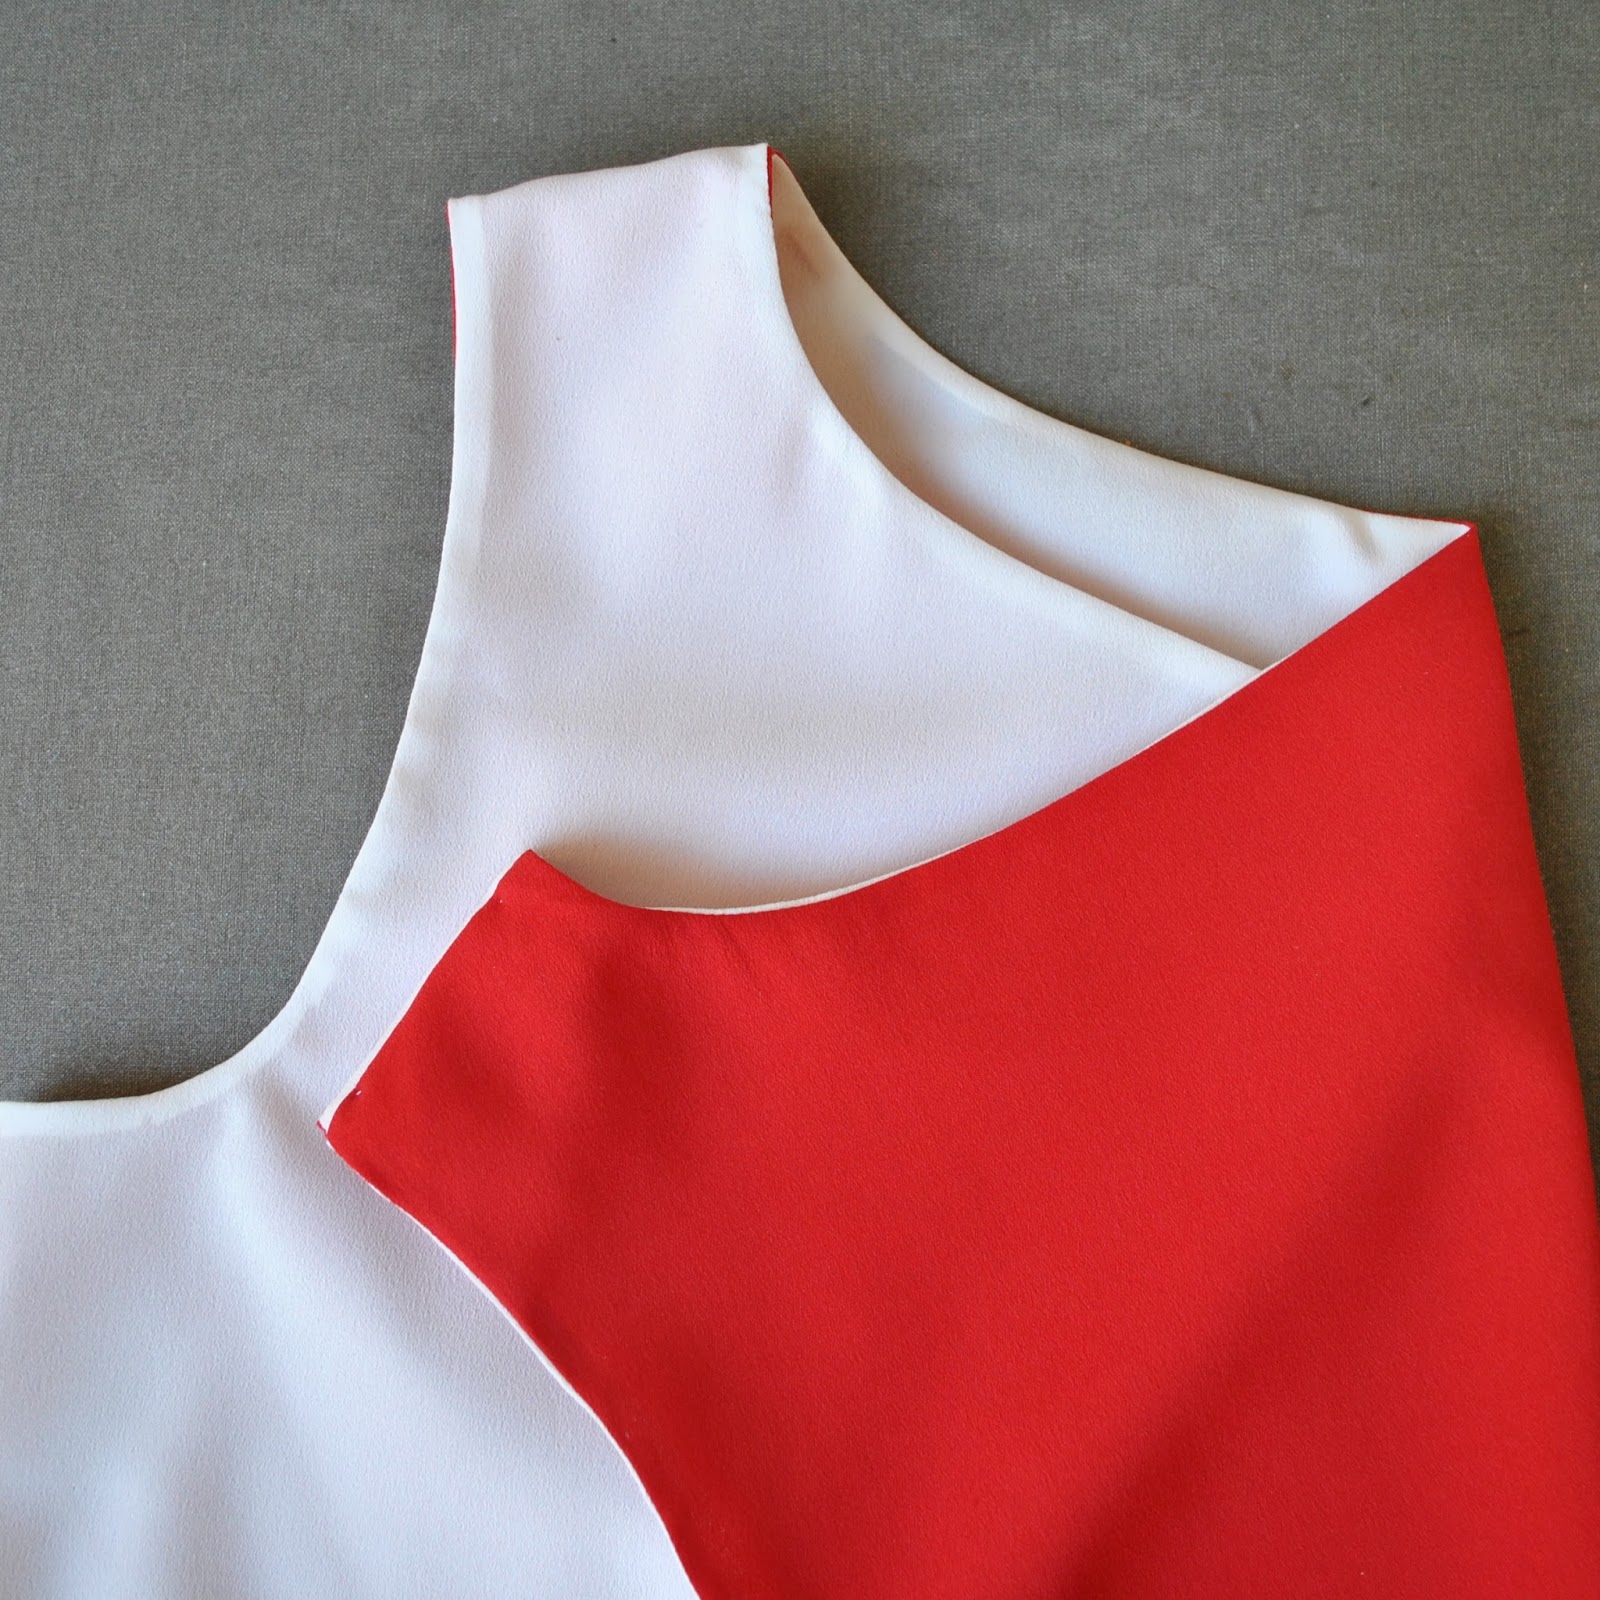
By the way, I did consider trying to do actual French seams in this dress for about a hot minute, before I got sensible and realised in that way insanity lies and I would be tearing my hair out and frothing at the mouth in no time at all…. in any case, the reversibility of my construction technique means that all my seam allowances are enclosed with the two layers of the dress, so there’s no danger of any seam allowance coming out on view anyway. The ultimate in neat-looking insides, yay!
There are only three bits of almost invisible hand-stitching closing the layers: the two inside shoulder seams, and a short length on the inside hanging drape; through which I pulled the entire dress in the very last step before closing it up.


The drape can be adjusted to sit in different ways; like pulled completely through to the front as in the top picture. I also like it pull it back through on itself a little bit, and have it sitting more balanced. It does look nice like this, but it does eventually tend to slip naturally back into its default position, probably because my fabric is quite slithery and slippery. If it were made up in linen, which is more “grabby”, it would probably hold a different position better.
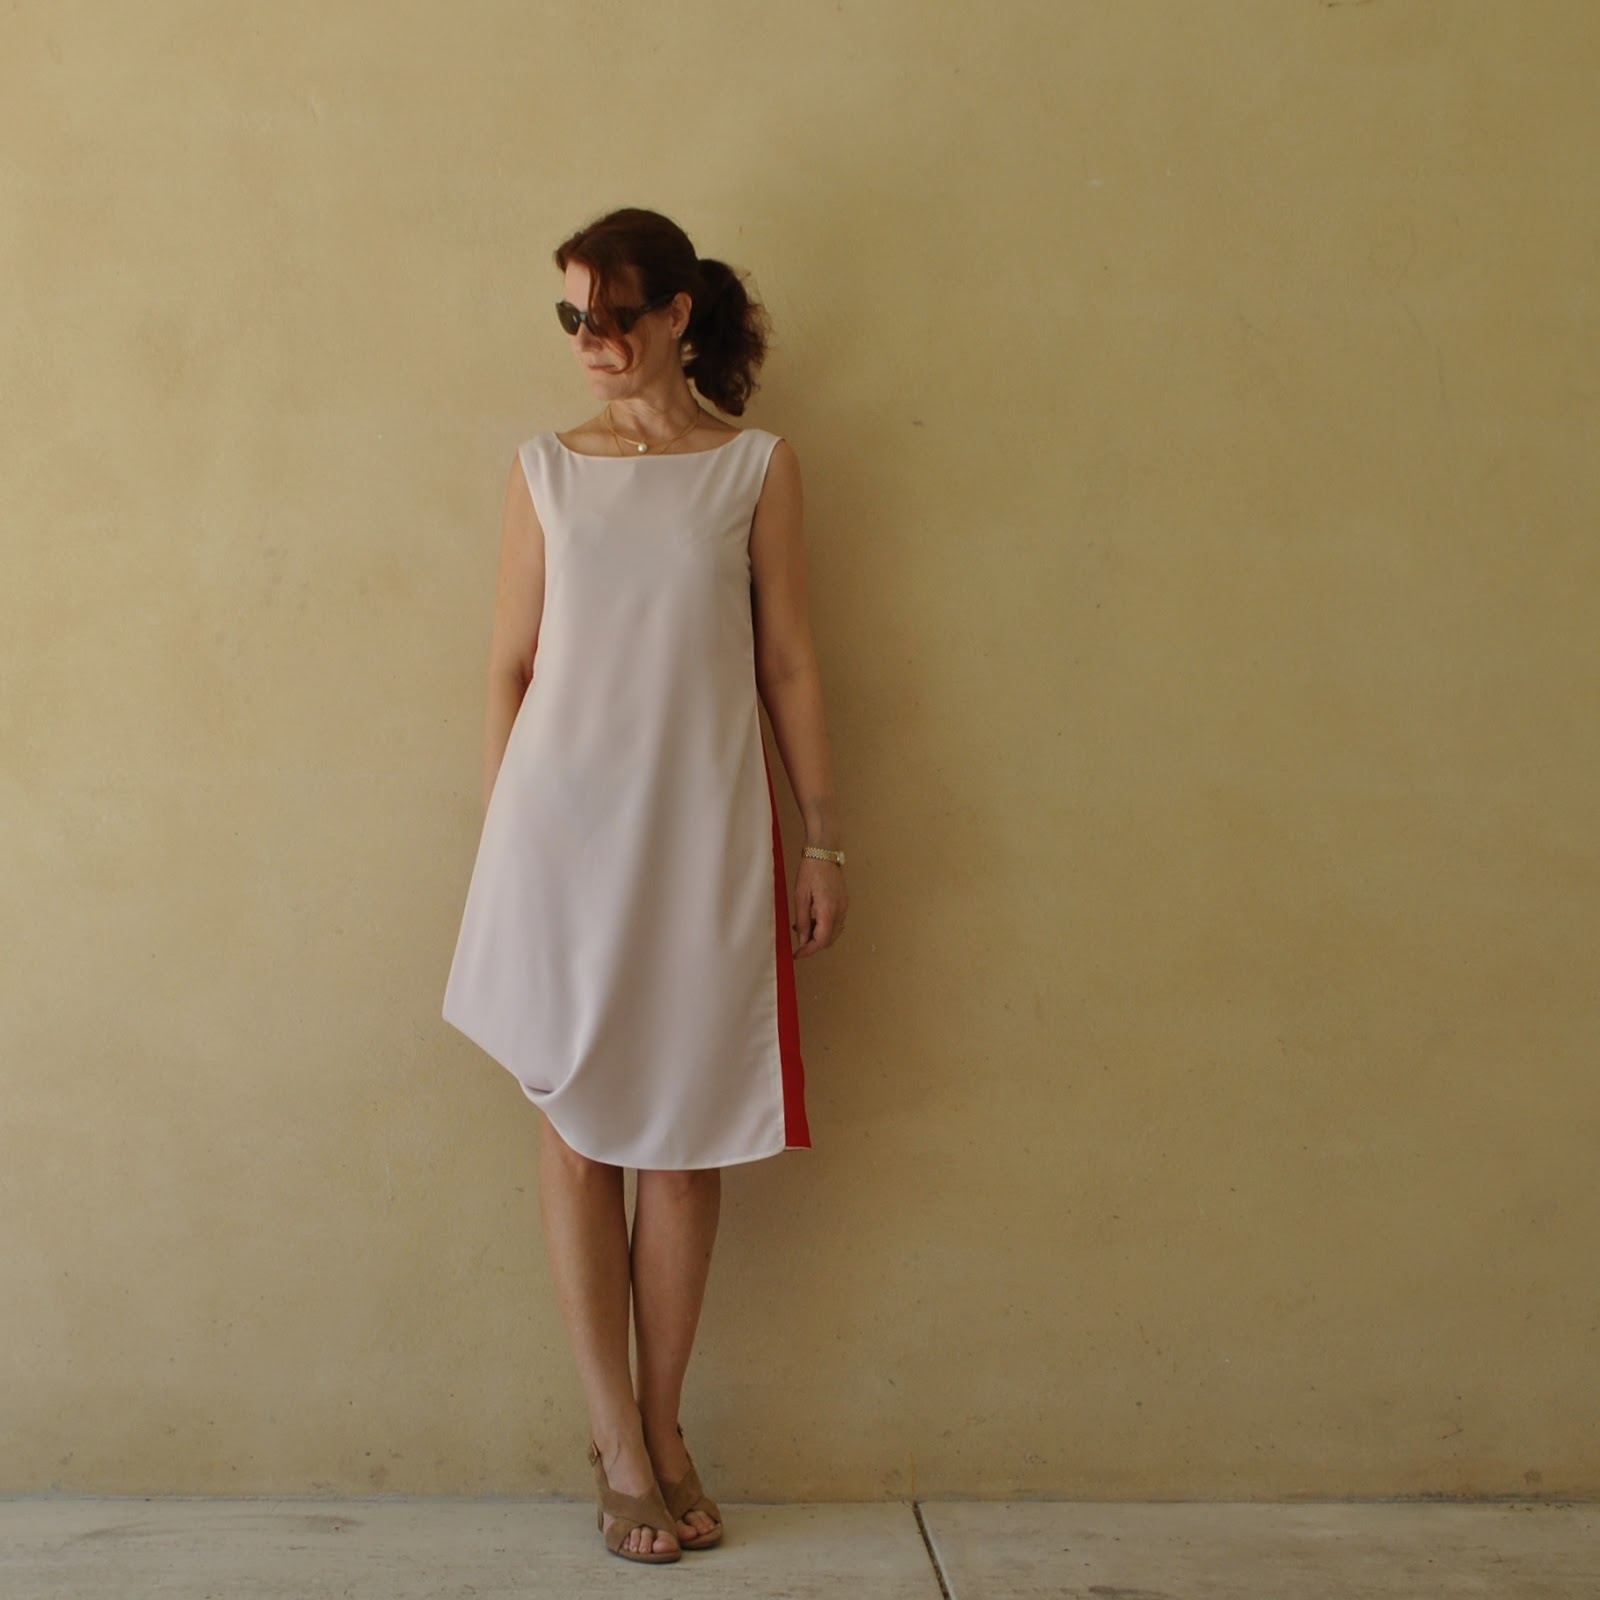
The dress does have a front and a back, the only way to tell them apart is by holding it up at the shoulders so you can see the lower scoop of the front neckline. However I can wear it with a red front and a white back if I like by pulling it inside out and wearing it with the lining side out… hello, reversibility for the win! Below is the dress worn in reverse; i.e., with the “lining” on the outside. It doesn’t look that different to if the dress was worn back to front, just in small details. Unless you looked closely at the shoulders and saw that they were hand-stitched closed, you probably couldn’t tell this was the inside of the dress!
Although I really like how the dress looks, I’m not completely happy with some of my construction in this one… I found to my cost that one majorly important aspect is to make sure that the two outer, left side-seam edges are exactly, and I mean exactly the same length!! This is the boo boo I made; mine were out by a mere 1cm, which was enough to put my side seam out by a touch, so it hangs a weeny bit too wibbly-wobbly for my taste. So I’m thinking of this one as a kind of prototype or wearable muslin, and want to make another “proper” one for myself, although I will wear this one a lot too.
Maybe if I make it again I’ll do a proper tute on how it all goes together, reversibly.
Maybe.
Details:
Dress; a variation on Burda 8511 and based upon a design idea of Anita from studio faro; in red and white rayon crepe
Sandals; Zomp, from Zomp shoes


