
This is the hardest post that I never wanted to write, but I feel I owe this to all my lovely long term readers who have over the years come to know our darling, dear old lovely girl, Sienna…

She’s been here on my blog with me since the very beginning, from my very first post, and has been my beautiful partner in crime, so to speak, on so many of my weird and funny blog-photo taking outings. Oh how I’ve giggled on many an occasion as we scrambled about on rocks and on beaches and in the bush as I’ve set up my camera and tripod and Sienna has stuck faithfully to my side, sat patiently beside me, or foraged about sniffing and waiting loyally for me to finish whatever the heck I was doing. I often took her into many an isolated, deserted spot, mostly because I was so terrified of someone coming along and seeing this insane woman posing in some outlandish home-sewn outfit, posing ridiculously in front of a tripod… oh man… and having Sienna with me always made feel safe and of course, accompanied. She was my little assistant. My bloggy-doggy friend. She kept me company, that was the thing. Keeping me company. She listened silently and unjudgingly and lovingly as I talked endlessly to her about life, the funny things we saw. Oftentimes about the craziness of blog photos, how was I going to set up my camera in whatever position this time, to get the picture I wanted? and how ridiculous I was being. Just politely wagging her tail every now and again. Just “being there”. And I would hug her and tell her over and over what a good good lovely girl she was.
as a puppy

Oh, I’m crying my eyes out even writing this, even though I thought I had no more tears to cry… saying goodbye to her and hugging her for the last time, crying into her ruff; was so hard, so so awful…
Poor Sienna had been unwell for many months; she was diagnosed with inoperable liver cancer back in May. She had been a bit poorly, and I had taken her in for a scan just after taking this picture for me-made May, and was told the terrible news that same day. I thought about saying something here or on social media, but decided I wanted to give her her dignity for as long as possible … we’ve known her time was limited for quite a while now. The last month she has been quite frail, had all but given up on eating and she deteriorated very rapidly over the last few days of her life. I wanted desperately to wait longer than we did, but even I had to admit in the end that to wait longer was possibly cruel and selfish.
she absolutely LOVED this fluffy cushion… would toss it around the room, then lie and contentedly suck on it for ages….

Sienna loved the beach. Well, she loved walks and walking anywhere really, but the beach was her very favouritest walk of all. It perked her up and she would frolic in the shallows like a puppy. We took her to Dunsborough last month, like we always do; and as always, I took her out for our early morning walkies while Craig slept. She had a tiny, brief little dip but came out straight away and sat down, refusing to walk. She just wanted to lay on the beach quietly. For Sienna to not want to walk on the beach, well, it was jut a big thing, that’s all. A big, huge thing; something that she loved most of all, and she didn’t want to do it… earlier that day I posted this picture of “my view” for bpsewvember and it seemed particularly poignant…. that was a heart wrenching moment. That moment was like a turning point for me, in letting go of my denial.

So there it is. I thought about editing a lot of this, but no. Sienna was the best-est of friends to me for so many years, and she deserves all my words and all my thoughts. Even all these silly tears, although she wouldn’t have understood them. She would have just sat quietly with me, looking lovingly at me, as always and just privately wondered what the heck I was doing probably.
actual shot from a blog photoshoot

Thank you for reading, and for all the lovely comments about Sienna over the years. It’s meant the world to me that other people have loved her too xx


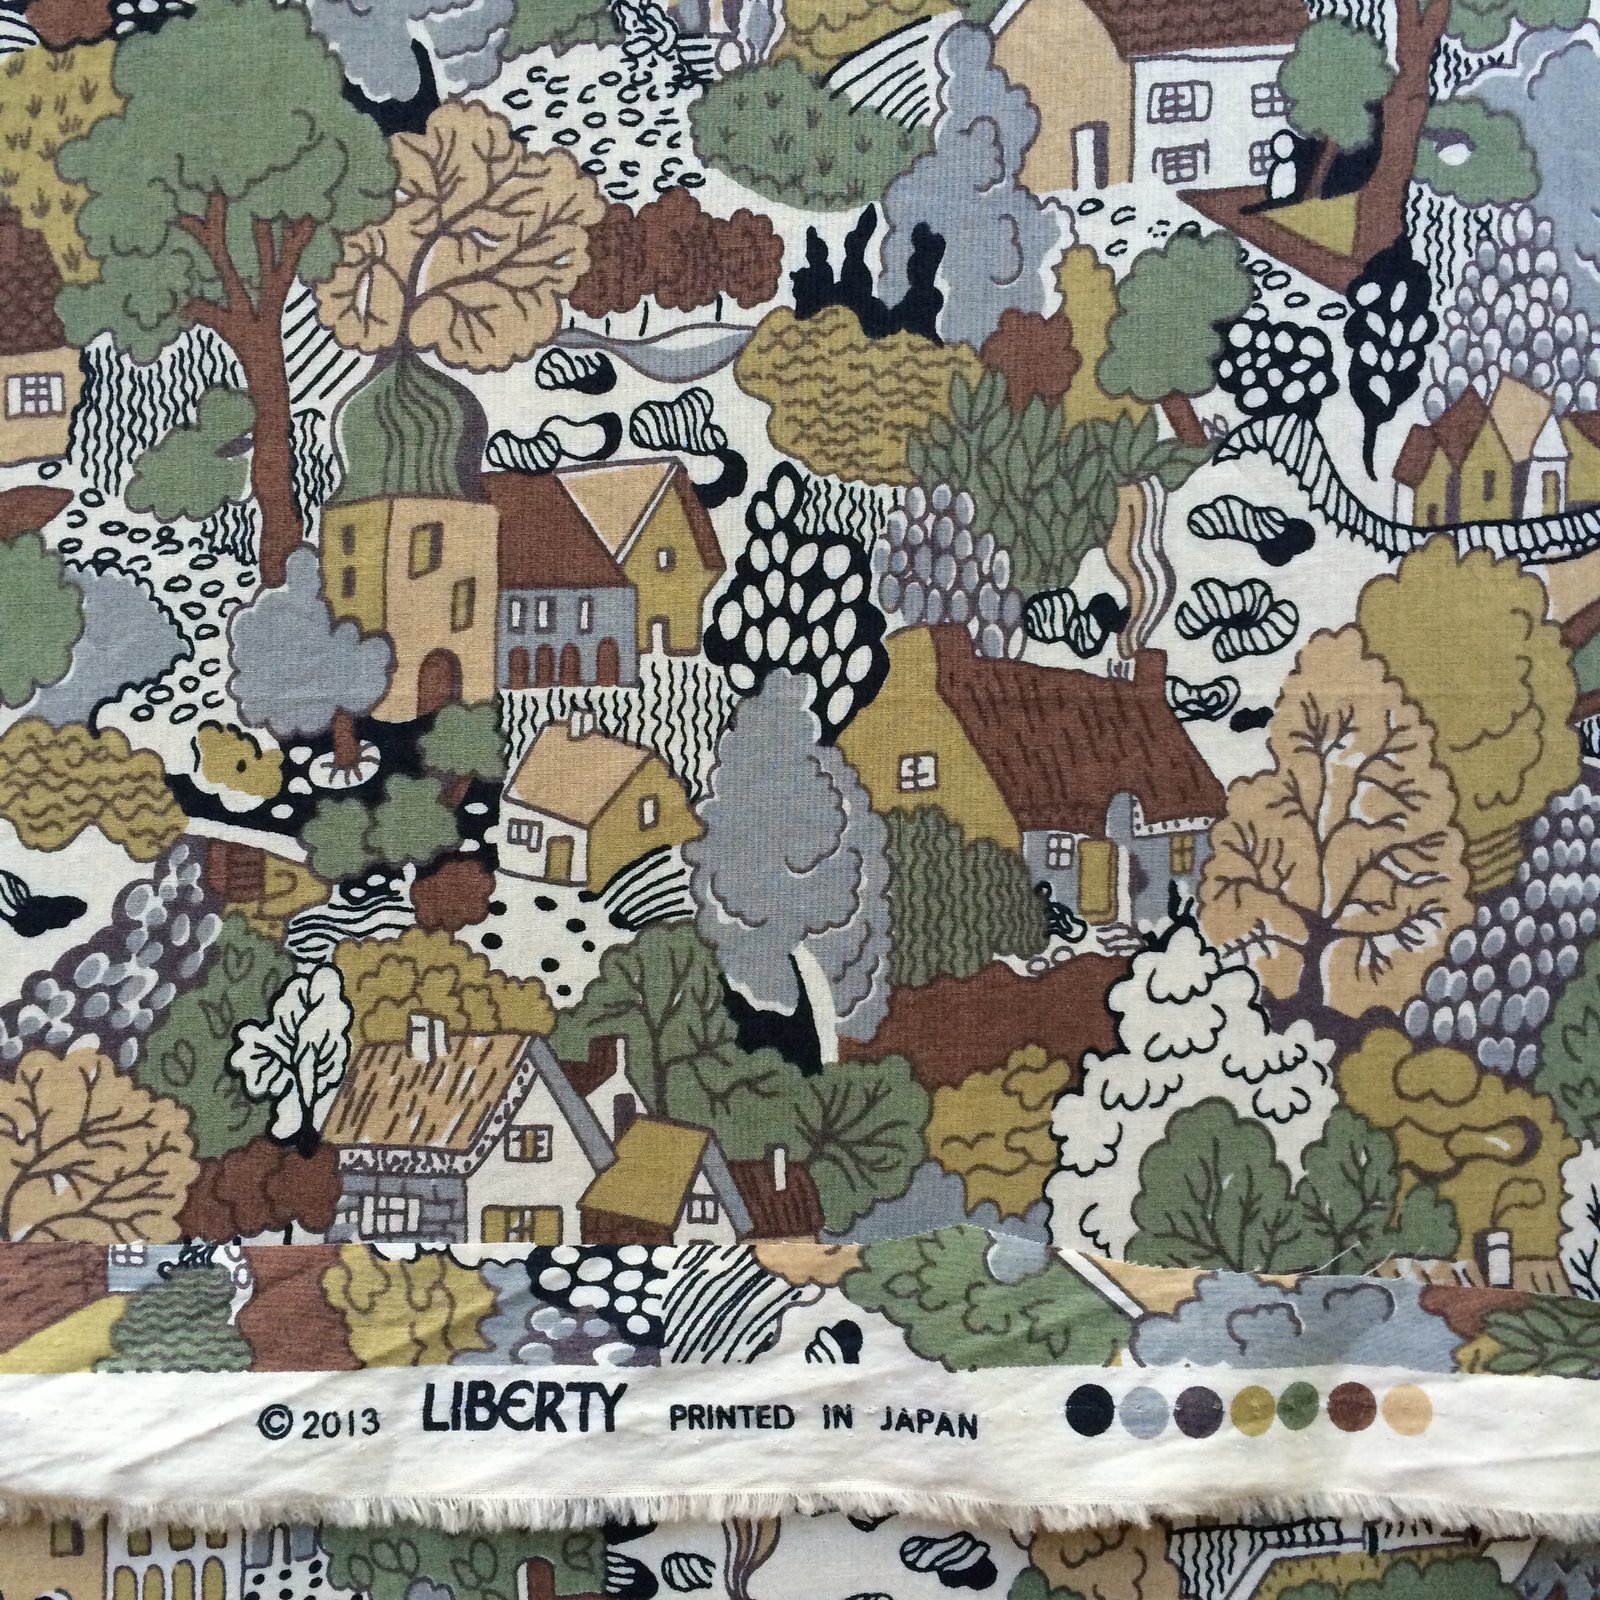
 Hello! I’ve been sewing a new shirt for Craig… and feel quite bad actually because we
 bought this fabric for him during our visit to Japan last January… nearly a whole year ago! Yes, I feel terrible.
 Also above; I decided upon welt pockets rather than patch pockets. No, they can hardly be seen in amongst that busy print. I’ve made my peace with that, at last, though that was the motivating factor behind my decision to topstitch throughout with black thread, to make all the details of the shirt stand out a little more.




 Pattern: the Sophie swimsuit by Closet Case patterns; and yes,
 With the bottoms; my black fabric is quite thick, almost a little scuba-like and isn’t hugely stretchy, so to be on the safe side I made size 6 bottoms grading out to an 8 at the hips. I didn’t think it needed a full lining but I did incorporate a “panty liner” of white stretch fabric, sandwiched between the front and back in the joining seam and basted it along each leg edge before attaching my swimwear elastic. I topstitched on each side of all vertical seams 1/8″ out from each side (above). You can barely even see this with the naked eye actually because of the black-on-black! but I just wanted it to be all finished off nicely and to stylistically fit in with that same topstitching on the bikini top 🙂


 Mum and I went shopping together on my birthday; her for my birthday present, and me for her birthday present! yes, our birthdays are just a few days apart so this is a bit of a tradition. We went to Fabulous Fabrics. Haha… well how unexpected! *wink*

 from L to R, top to bottom:


 Uppers: this particular vinyl has that very rubbery texture which sticks to the presser foot, leading to horribly uneven stitches. I usually use a strip of tissue paper to facilitate the vinyl going evenly through the machine; but these strips are really really skinny, wonky stitching would stand out a mile and I wanted to get the topstitching perfectly even in appearance, and you can’t see through tissue paper so it just wasn’t going to cut it this time. I found though, that by turning the vinyl upside down it all worked out quite smooth and fairly easy to sew.
 A bit of faffing about with strips and I finally settled upon a nice simple, multi-strapped design, cut a denim “inner sole” piece and zigzagged all the strips to this underneath the echo-panel layer, to anchor them securely into position inside the sandal. This denim inner sole is sandwiched between, and securely glued to the echo-panel above and the cork sole below. So it’s not visible in the final sandal, also, none of those strips is in danger of pulling out!
 I toyed with the idea of leaving the echo-panel showing on the edge, but its woolliness actually picks up every stray hair and twig, and the white shows like every smudge, and I decided a smooth, dark edge would be less of a headache. More sensible, hides the dirt, you know. I cut and glued on a nice evenly cut strip of dark denim to the outside edge, pinning in a few strategic places where the denim didn’t instantly stick to the inner curves of the sole. Those pins can just be seen in the picture below; I sort of thought they would be a temporary measure until the glue dried, however they got pretty firmly glued in themselves and proved impossible to get out! so I’ve left them in there. After this picture was taken I went back and touched them all up with a dob of black paint so now they’re invisible. And, then they were further sealed in with several coats of varnish over the denim, so they’re pretty secure. I don’t think I have to worry that they’ll ever come out 🙂


 O hey-a! After finishing my own Kelly anorak and having it admired to the nth degree by family members, I made a few more! a pale grey one for Cassie, and I also made a deep cobalt blue one for Tim’s girlfriend Kelly. Well, it seemed only right that she should have a “Kelly” too!
 I quickly snapped that top picture of an unsuspecting Cassie waiting to meet up with me in town before she noticed me heading towards her… I know it’s a bit blurry and not very posed to show off the anorak to modelly perfection, but I just really like it nonetheless… to me it attests that she’s been wearing it a tonne, in fact every single occasion that I’ve seen her in the past three weeks since I finished it and gave it to her she has been wearing it. There’s no greater compliment to a seamster than that! as well as a testament to the pattern being an absolute style winner. Kelly’s worn hers each time I’ve seen her since I gave it to her too, but I’ve not taken any pictures of her in it.. will update if she sends me one 🙂
 Both the anoraks are in a nice weight cotton drill from Spotlight, in fact, all the other bits and pieces are from Spotlight too. In both anoraks, I added a few inches to the length of the body and modified the pockets to have separate pocket flaps so as to close the pockets; otherwise these are both made up exactly to the pattern.
 This picture below of Kelly’s anorak has been my most “liked” picture on instagram ever! far more than anything I have ever made for myself! Interesting, no? Well, I think it is, anyway 😉 I don’t know what that “says”, if anything at all, but maybe something. Social media is such a funny phenomenon. Something else also interesting to me is how a person, any person, can have a certain number of followers and the number of “likes” never ever reaches anywhere close to that number. Honestly, I have no idea about how or why this is so, but it’s just a curious thing.
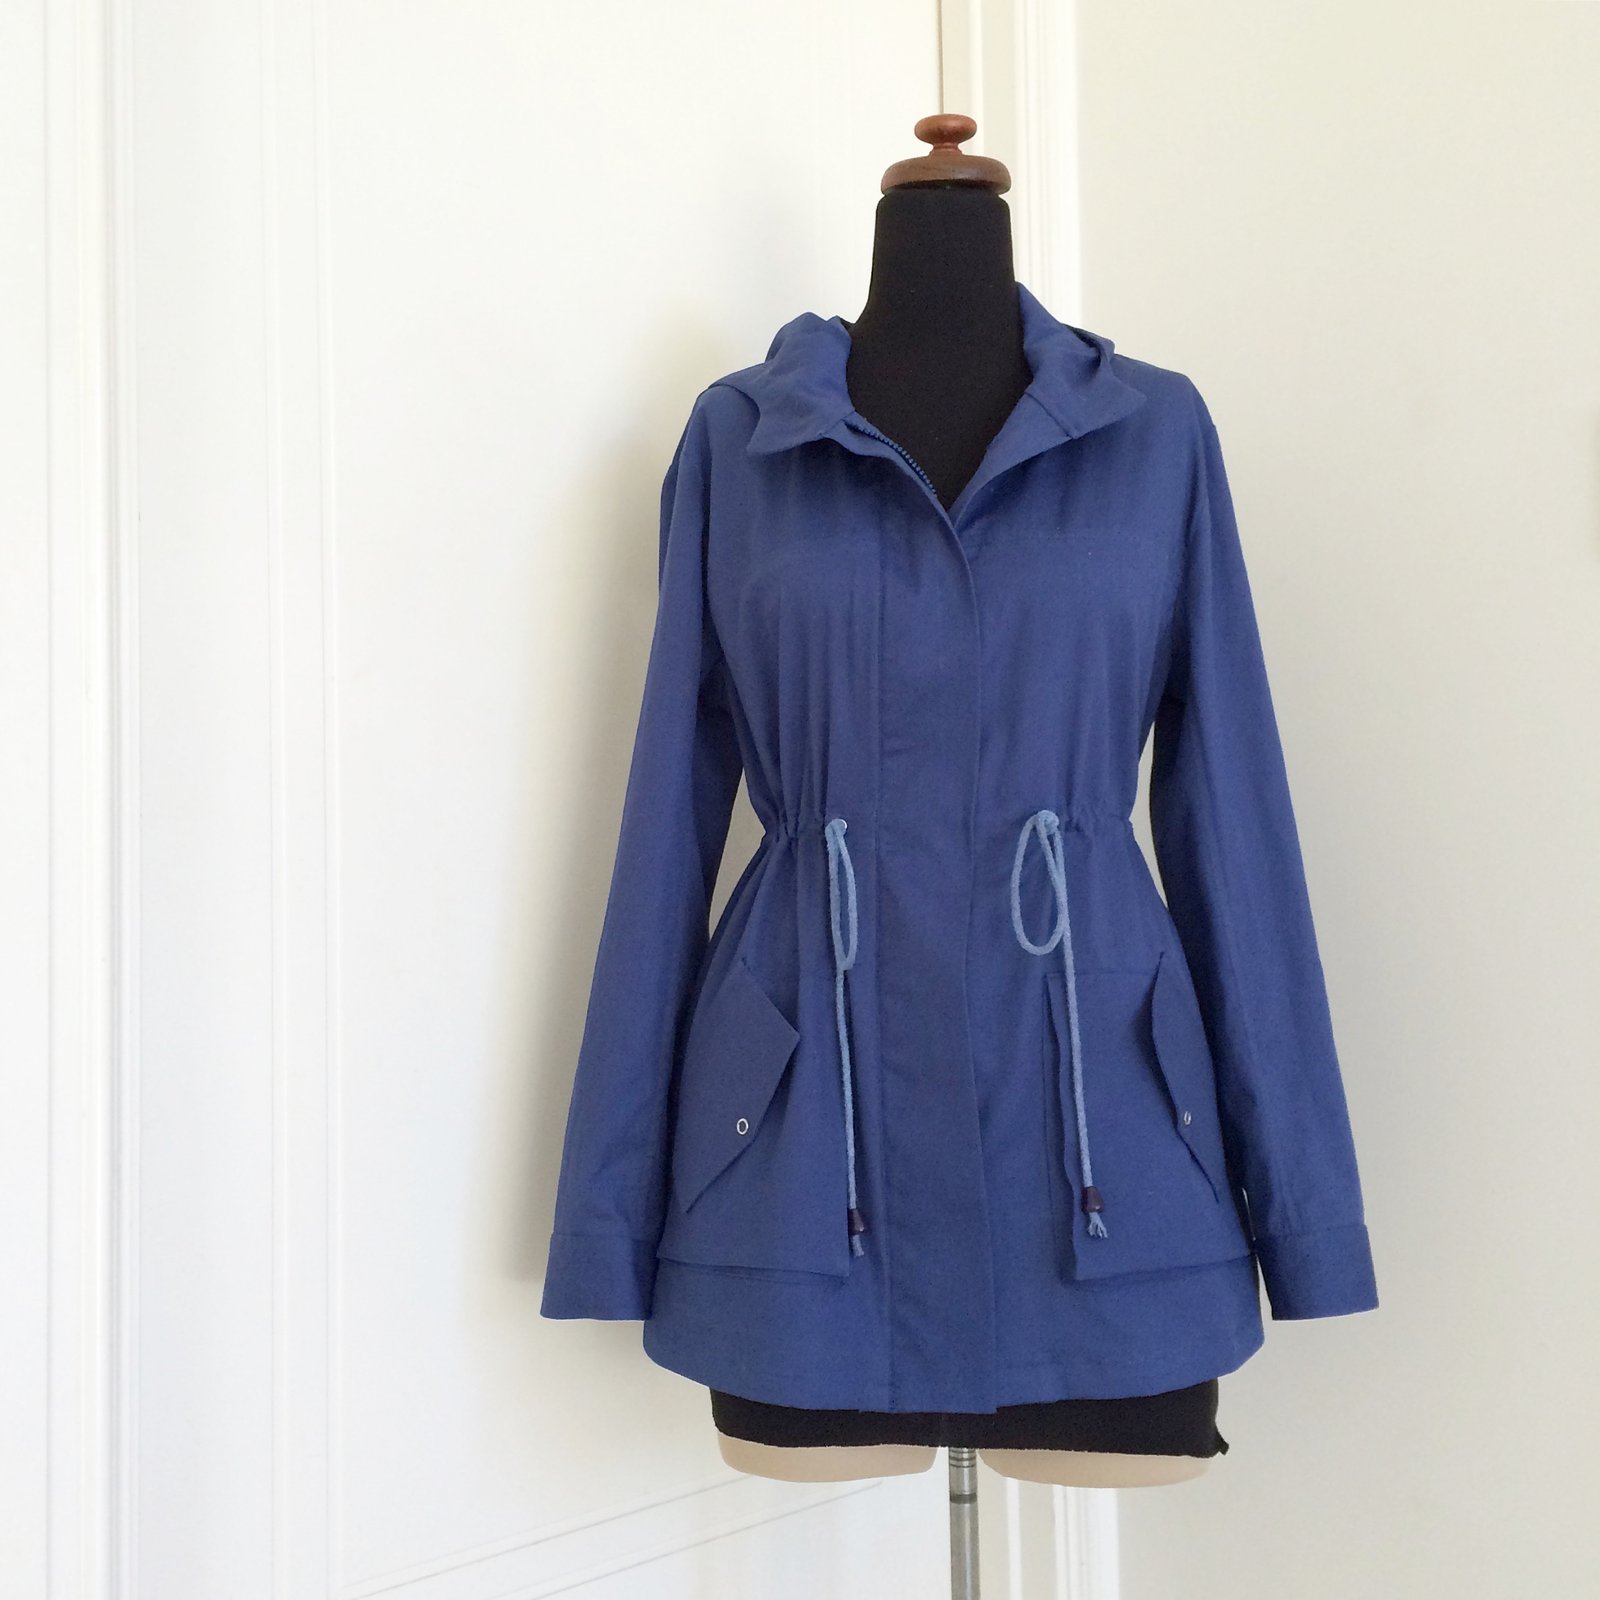 I’d got enough of the same white cord for Kelly’s anorak , but since I’d found a nice, perfectly colour-matched blue zip for hers’, and used blue thread for all topstitching and there was no other white anywhere in the jacket; the white cord looked all wrong. And naturally there’s no such thing as blue cord in the whole of Perth! so I just had to dye it. And, when your regular dye-pot is HUGE and there’s just one little length of cord what’s a mad maker to do? but of course, improvise.






































