Category Archives: Uncategorized

“bookshelf” skirt

Hello!  I’ve finished the second part of my little autumn wardrobe-lette… a new skirt! using a printed, upholstery-weight cotton canvas from the Fabric Store in Melbourne, the fifth fabric from the top in this pic of my Melbourne acquisitions…

I absolutely fell in love with this print at first sight, in fact the very minute I spotted it I GRABBED IT!  Not even counting the rather yummy autumnal colours… it reminds me of bookshelves, stacked not quite full, with the colourful spines of the books tipping over a bit into the gaps between them.  I love libraries, in fact it’s been a lifelong daydream of mine to have a room that is completely lined with shelves of books, from floor to ceiling, and a big squishy armchair right in the middle of the room, either faded rusty-red or bottle-green velvet, can’t decide but either would be nice, big enough for me plus at least one cat, and with one little curly-legged side table just big enough for a stained glass lamp and a cup of tea perched on top.  *sigh*

Wait, where was I? oh yes ahem…SKIRT.


Pattern; Vogue 8363, one I’ve used many times before, actually I’ve just counted and have made it TWELVE times previously!  You can look at ALL of them by clicking here….

Some of the many reasons I love this pattern so are; a) gorgeously deep slanted side pockets, in fact I can’t help noticing I have my hands shoved deep deep down into those pockets in, only like, every single picture.  They’re just that wonderful, I simply can’t resist!  Also b) straight side seams, making it a nice one for pattern matching, c) double darts in the back which lend themselves very nicely to the wide hips/narrow waist/slight sway back adjustment that I usually make.  I tend to use view D for the pockets, which has a button front placket at the centre front; I obviously eliminate this though and instead have an invisible zip closure at the centre back.  I also like to cut the skirt part roughly two sizes up from the waist part, because I like that boxy with nipped in waist silhouette on me.

Also, this time I added belt loops because I decided all that psychedelic tipping-stripe-y action could probably benefit by being visually reined in with a solid, sombre, no-nonsense belt.  Now it’s finished and I’ve worn it thus, I think yep, this was a good idea

Partly because I stingily didn’t buy much of the print, and also partly for the same visual grounding reason as having a belt: I cut the pocket bags in a thick chocolate brushed twill, a small bit of leftover fabric harvested from Craig’s old pair of chocolate moleskins and which I used to make this skirt, also  Vogue 8363.

Inner workings; I had to piece the chocolate moleskin to get pieces big enough for the pocket bags, but the seams are tucked down deep in the pockets… I used plain black cotton for the waistband facing and pocket facings.  Because I’m a bit of a stickler for matching threads, I switched threads on BOTH my sewing machine and overlocker several times during the making of this skirt!

Above, I spaced it to turn up the hem exactly between two horizontal stripes in the print.  The lower edge of the skirt is finished in bias cut black cotton, the same as for the inner waistband and pocket facings.  See that little tiny row of mustard stitches along the top? I initially started hemming with black thread to match the bias; but quickly realised that even though I made my stitches as tiny as tiny could be, that row of minuscule black dots did show up on the right side of the skirt if you looked closely enough, and I didn’t like it!!  So I switched to the same mustard thread that I’d used in other seams, which disappears nicely into the print.. so they’re pretty much invisible on the right side, which is the main thing!

Above; I chose a mustard invisible zip.  When it came to placing the belt loops, I put two on the front, spaced just outside the waist-shaping dart; and three on the back, the outer two just outside the outer waist shaping dart, and one in the centre back.  It abuts the waist closure, which I wondered would make it difficult to put in the belt; but it doesn’t, it slips through just fine and isn’t a bother at all.  Oh, and waistband closure? there’s a wide hook/eye stitched in under there.

Also, darts?!  One of the most serendipitous things I discovered about this print is that you can barely make out any darts at all! can you even see them in the above picture?? they’re just buried there in amongst those higgledy-piggledy books.  WIN!

I’m wearing today paired with my basic black Tshirt because I wanted the skirt to take centre stage in this, its own dedicated post… but I also think it looks quite nice worn with the, as yet one other piece in my autumn mini-wardrobe, the apricot top.  Actually, I only picked up the apricot crepe because of this fabric!

sorry for the blurriness.  Clearly I’m busily dashing off on a very important mission… like, to get the leaf blower


Details:

Skirt; Vogue 8363, printed cotton canvas, my review of this pattern here
Black Tshirt; self drafted, details here
Belt; had this for about 30 years
Black shoes; designed and made by me! details here

Above picture:
Apricot top; the epaulette cut and sewn, pattern no.4 from “she has a mannish style” by Tuko Takada, details here
Brown and ivory clogs; also designed and made by me, details here


Also; on Eagle Bay beach, Western Australia… Every time we come down here I have to walk along the beach and clamber over the rocks each day.  This is one of my favourite places on Earth.

pinterestmail

couture pour bébés

Hello!

Lately I’ve been making some cute little baby suits!

We have two friends who have recently welcomed babies into their lives, both boys, and I decided to make some little hoodie suits for them.  Aren’t these the cutest?? It was soooo haaaaard to choose which cute little jersey print to use! there were so many super sweet and adorable little prints available.

I agonised a bit, would the Mums prefer funny/cute? or would they prefer chic/cute?  You can’t always predict what people are going to want for their babes, in the end I stuck with the safe option and went with the neutral coloured chic/cute… but just couldn’t resist the bear ears on the hoodies!  So there is a little bit of funny/cute going on.   I hope the new mothers don’t mind this… because I think the bear ears are adorable!


Pattern; Butterick 6372.  For both sets I chose to make a bear eared hoodie, zip fronted with long sleeves, and separate trousers.  There isn’t a pattern for the hoodie with long sleeves, but it’s pretty easy to juxtapose the onesie pattern piece with the armscye that allows for long sleeves, with the vest pattern piece that has the little pockets and a shorter, swingy silhouette.  Yes, I put in the side pockets!!! Completely useless obviously, nearly every single family member who has seen them has asked “but what are they going to put in there???” but they’re so cute that just like the bear ears, I just couldn’t resist adding them.
Fabrics; cotton jersey from Spotlight.  Both are bear prints, which fits in with the bear ears thing going on with the hoodie… am I putting too much thought into this, or what?!  Anyway, I love both of them equally.  Baby T is a bigger baby so the beige “bears camping” one is a bit bigger for him, and the smaller, ivory “bears in the woods” set is for baby J.  To be honest, I’m seriously thinking of getting some of this fabric to make a Tshirt for myself… would that be weird??  I would just have to be vigilant to never wear it while visiting!

It was such fun making these, took me right back to when I used to make cute little baby clothes for my own bubs!  I love fiddling about with the smaller and easy to manage pieces and everything goes together so fast and easy!  the only difficulties I had was with the zips for the front opening.  I don’t really like these ones all that much, they’re called “invisible separating zips” but they were the only ones I could get that were even halfway suitable, as in a) separating, b) the right colour and c) lightweight and “petite” enough to be ok for babywear.  Also it is NOT FUN putting zips into flimsy, lightweight jersey fabric.  I just went as slowly and as carefully as I could, being super careful not to stretch the fabric out very much, and I think they turned out ok.  The zip for the smaller, ivory hoodie had to be trimmed a little in length, and you can’t cut any off the bottom, because you’d lose the separating part!  So I trimmed it from the top and was careful to firmly secure the top edge into the seam so there’s no risk of the zip-pull flying off the top.  I’m speaking from bitter experience there… it’s an old old old war wound, and don’t ask!!  Just that my number one rule with invisible zips is usually; NEVER cut the top off!!

OH!  I forgot to blog about this before, in fact I just checked and I made this back in February!  bad blogger!  but I also made another little work dress for Cassie, another Named patterns Inari tee dress.  This is my fifth Inari made, my third for Cassie, she loves the style just as much as I do! Also it’s like a perfect little design for work, plus being easy and comfortable to wear, and quick to run one up.  I incorporated the same sleeve-widening alteration I devised previously, to counteract the “raise your arms above your head and oh look! now everyone can see your knickers!” effect of this design.

Fabric: a piece of mid-blue suiting fabric from the small stash given to me by my friend L, when she cleaned out her garage.  It’s got that distinctive vintage feel to it; cuts like a dream, a lovely weight, a bit heavy and with a texture almost like brushed wool.  I overlocked the raw edges inside, with the exception of the hem edge which I finished with a Hong Kong seam in mid-blue linen, from my stash.  Since the inside hem edge of this design is often glimpsed while you’re wearing the dress, I think it’s therefore much better to finish it with some beautiful, “meant to be seen” finish, than just roaring it through the overlocker.  I stitched this down over the edge, before slip-stitching the hem invisibly in place.

Other alteration, the addition of inseam side pockets.  Well, duh.  🙂

SaveSave

pinterestmail

apricot split

SO!  On my recent trip to Melbourne with Mum, Cassie and Tiffany; I picked up my autumn/winter wardrobe! Obviously, it was all in 2D form, oh except for a pair of Italian leather boots, whoops!  well I am allowing myself to buy shoes every once in a while now… 🙂

I absolutely freakin’ LOVE fabric shopping in Melbourne! so much choice!  so many beautiful fabrics, everything of gorgeous quality; and it’s SOOOO difficult to narrow it down to what you can actually fit in your suitcase.  I joyfully made a zillion plans, followed by a realistic estimate of my time and what I want vs what I actually need, and ended up buying the small pile pictured below.  Plus a coupla pieces of Liberty jersey for pretty colourful underthings… not pictured because their colours didn’t “go” with this autumnally photogenic colour palette here, hehe.

the spoils from Melbourne; aka, my autumn 2017 collection…

First up; this top! the third fabric from the top…

Split high-low hems are everywhere this season, and the more I saw the more I WANTED!  Fortunately, this is an ultra easy thing to rustle up yourself using whatever basic pattern you already have lying around, it’s only a matter of working out your proportions…

Fabric; a heavy apricot crepe, from the Fabric Store in Melbourne.  It’s thick, quite heavy and sponge-y in texture, slightly stretchy, and actually quite warm.

Pattern; modified version of the Epaulette cut and sewn top, pattern No.4 in the Japanese pattern book “she has a mannish style”, also known as “she wears the pants” by Yuko Takada,   This is fairly unexciting, but a terrifically useful basic, go-to, loose, boxy top pattern; I’ve made it twice before, for myself here and once here for Cassie.

I cut the neckline and all pieces as is, and diddled about with the lengths to get the look I wanted… as follows:

side seams; 16.5cm, the remainder left open as a split
sleeve length; 37cm from apex of sleeve cap to lower edge, and with an extra 5cm for a deep hem
Front length @ side seam; 28.5cm
Back length @ side seams; 37.5cm
both front and back I allowed an extra 6cm for a nice deep hem.

For the split hem, I laid the hem allowance outside, right sides together and sewed up the side edge, then turned the corner out and invisibly slip-stitched along the overlocked edge inside, for a clean neat finished appearance on the outside.

Neckline; I cut the facings from a thin, woven raw silk for minimal bulk, the self fabric would have been way too thick for this!  Interestingly, this fabric was also originally from the Fabric Store in Melbourne, bought a few years ago.

And, done!  I really really REALLY love this, and can see myself wearing it a lot, and with a lot of different outfits.  Actually, I originally envisioned it as a kind of cropped oversized tunic to wear layered with a long-line, slim-fitting, buttoned up white shirt with the shirttails hanging out the bottom, over tapered capri pants.  However: two things; a) it’s too hot for an ensemble like that just yet, which is actually a very good thing because b) I am currently bereft of a long-line, slim-fitting buttoned up white shirt! so maybe I’d better get cracking and make one of those too?!

For now, I really like how it looks nice with this equally boxy, tailored skirt and my new clogs, or alternatively with my boyfriend jeans as below.

Details:

Top, adapted from the epaulette cut and sewn top No. 4, from “she has a mannish style” by Yuko Takada, heavy apricot crepe
Skirt; Burda 10/2010; 136 the Karl Lagerfeld skirt, black suiting fabric, details and my review of this pattern here
Shoes; made by me, and my own design, details here


and below: worn with my Morgan boyfriend jeans, charcoal denim, details here

location: Eagle Bay, Western Australia

pinterestmail

black leather clogs (shoes)

Hello!  I’ve finally finished these black leather clogs; that have been on the go for nearly a whole year now…. eeeeek!!

these soles are the ones on the left; the ones on the right went on to become my teal suede wedges

The last time I went down to visit Mum and Dad: Dad had some pinewood he’d cut himself from a “weed” pine on their block… and he very kindly helped me to shape the blocks on his bandsaw, and have the use of his sander to do some further shaping while I was down there… I’m so lucky that Dad has all the perfect equipment for this!

me making the soles in Dad’s amazing, treasure-chest of a shed; and yes, I made my entire outfit… those red shoes that don’t “go” at all were some of my very earliest oxford shoe-making efforts.  They held together ok for a few weeks, then I made the mistake of walking through very wet grass in them one day, they got completely sodden and, sadly, never recovered from that dreadful, fatal experience  🙁  The silver lining is that that little disaster galvanised me into doing more research and getting more serious about making sturdy, tough shoes that could take the hard knocks.

Once I got home, I sanded down the soles even further, stuck some cork to the bottom and the heels, and applied five coats of satin varnish.  Ohhh, wait, getting ahead of myself…  before that, I’d fancied the idea of a nice deep, chocolate brown wood, I thought it would play off nicely against my chosen black leather.  So I bought some walnut stain and gave them a coat.  They looked um, not good, but I persisted (“maybe they just need MORE of it” famous last words) and did a few more coats.  Then they looked DREADFUL.  A day or so of deep depression later, and I’d regained the energy to set up the sander again and sand it all off.  THEN I did the soling/ varnishing thing to my clean, new soles.  *sigh*  Lesson learned; wood looks better in its natural colour.

Now for the design of the uppers!  I absolutely LOVE my other clogs, and basically wanted something very similar, just in the very useful colour, black.  So, they’re pretty much identical except that these are engineered to the hilt and will certainly last a lifetime.  They are like bullet-proof tanks, the Sherman Tanks of shoes, if you like!  My other clogs have been pretty sturdy too, but I did have to repair/reinforce bits of them during my Year of Handmade which taught me more lessons about what counts when it comes to shoes.  Firstly, that all the strain on a pair of shoes like this is right on the inner nail closest to your ankle.  I lost two nails from that area on my previous clogs that had worked loose without my noticing, and also the fabric even started to rip a tiny bit in that spot   (horrified gasp… NOOOOOOOO!)  so I reinforced the area on both shoes by glueing on a piece of thick canvas underneath the overfoot strap, and then hammering it back down firmly in place with the nail in question dipped briefly in glue first.

But; anyway, back to these shoes!  The uppers are made of thick, strong, upholstery leather.  This was a small piece given to me by my kind neighbour, Megan.  The front bit is lined with chocolate brown synthetic suede, from the Fabric Store, the same stuff I’ve used to line most of my shoes, including my winter boots.  It’s great stuff!  The skinnier, over-foot strap, that really takes the brunt of strain, I’ve lined with black, real suede, cut from the precious small piece that I bought from Bilby Yarns, also used to make these oxford shoes… this suede was tanned in the Fremantle Tannery before it closed down, forever (sob!)  The strap that goes around the back of my ankles is simply wide black elastic.  I found with my other clogs that I rarely can be bothered to undo the snaps to put them on, I tend to just slip the clogs over my feet.  So, I dispensed with all closure and just went the elastic route.  I glued another, further piece of the real black suede under the vulnerable overstrap area, covering and enclosing the edge of the elastic.  Then I punched holes all round each piece, using my Danish hole punches that I bought in Skindhuset, Copenhagen, for the very first time!

and double sewed all round by hand, using chocolate brown upholstery thread.

The final step was to drill holes and nail the uppers down to the soles.

give a girl a power drill…   *

*riff on an equality slogan from the 80’s… “give a girl a spanner”

And they’re done!

I’m so completely over-the-moon happy with these!  I know they’ll be very sturdy and tough enough for anything.

Also, did you notice my “tattoo” in the first pic? that was my lame little April Fool’s Day thing today…. but it’s funny, I did it just for fun but you know what?!? I actually quite like it!  I think if I was to even consider getting a tattoo, which I probably wouldn’t, I’m not really the sort, but thinking in a fantasy sort of a way here; THIS would be my choice.  It’s my cure-all advice to myself for any time I’m feeling a bit down, and written in my own handwriting obviously.  It’s really very very me!

Zoe approves…

pinterestmail

burnt brown jeans; 6 different ways

I’ve been planning my upcoming autumnal/winter wardrobe, doing a seasonal clean out, or in today-speak; konmari-ing the heck outta it… and decided to bid adieu to these jeans.  The last few times I’ve tried to wear them I’veburda7863-1-728x1024 just felt vaguely frumpy in them and peeled them off straight away.   I’m just not feeling this style any more, feel like it’s becoming a little bit dated.  Is it just me, or are skinny jeans appearing decidedly passé right now?  Anyway; OUT THEY GO!!! Well… maybe just to the time-out box for a while.  I have this box you see, that I chuck doubtful clothes into, and in a few months or a year or so I’ll check them out to see if it’s easier to make a decision then.  Honestly, sometimes I wonder why I even have that box since it’s a kind of hoarder-ish thing to have and really nine times out of ten the items within get the flick! but for the one item that gets a reprieve I’ve always been glad I kept it after all.  Sometimes, you and your clothing just need a bit of a break from each other.  A trial separation.  A conscious uncoupling, with the door open to re-coupling.  Yeah.  *madly justifying hoarding tendencies to oneself*

Anyway, here are six of my favourite outfits with these hardworking jeans…

I first made them about two years ago, one of my many Burda 7863’s and they have been absolutely fantastic in their day, I have to admit it.   Very stretchy, therefore super comfortable, and a terrific colour that seems to go with everything I’ve got.  Having said that; a heckuvva lot of the time, I wore them either with this big loose ivory shirt as in the first picture… OR like at right, with one of my Pattern Magic twist tops.  Here, with the forest green one.  In fact, it would be pretty accurate to say these two outfits were both very reliable fallback “uniforms” for me for quite a long time…

brown-jeans-2

At left; another frequently-worn ensemble, worn with my white drape drape t shirt, and my leather jacket.  At right; I do still like them rolled up to three quarter length like this.  Hmmm, actually I really like this outfit too, maybe I should keep them after all…. (worn with self-drafted Tshirt, cardigan, self-made shoes)

At left; they’ve frequently done service in casual, dog-washing, beach walking, gardening, house packing-and-moving mode too… worn with my over-dyed blouse, black thongs…  At right; another winter-y ensemble… worn with my Pattern Magic twist tops, my shearling jacket, hand knitted gloves and my self-made desert boots.

brown-jeans-3

Okaaay! I’ve just done an excellent job of talking myself out of getting rid of them! 😀 So maybe I’ll see how they go this autumn/winter before giving them the big heave-ho…

Anyway, on a slightly related note: I’ve read a few good strategies about helping to clean out unwanted stuff from your house, the one I like the most and have adopted a few times in the past coupla years is to just walk into your closet/open a cupboard and immediately throw out five things without spending more than ten seconds thinking about each thing.  If you give yourself permission to do this once in a while; and I use that phrase because I have terrible hoarding tendencies and really DO need to give myself a stern talking to, mentally giving myself permission to throw things out seems to work for me…  anyway, it can be an excellent and stress-free way to de-hoard.  The trick is to first say sternly to yourself “OK, I’m doing this NOW” and then to march in and NOT think too much about it.  Five things, just like that. *snaps fingers*   It can be surprising how quick and easily you then immediately identify those things that are just not working anymore.

pinterestmail

making your outfits “pop”

Like most bloggers, when taking my pictures I usually try to pick some nice location as a backdrop to my creations, something that has the colours and the “feel” and/or just some general overall appropriateness in subject matter or whatever, that I think enhances whatever it is I’m showcasing.
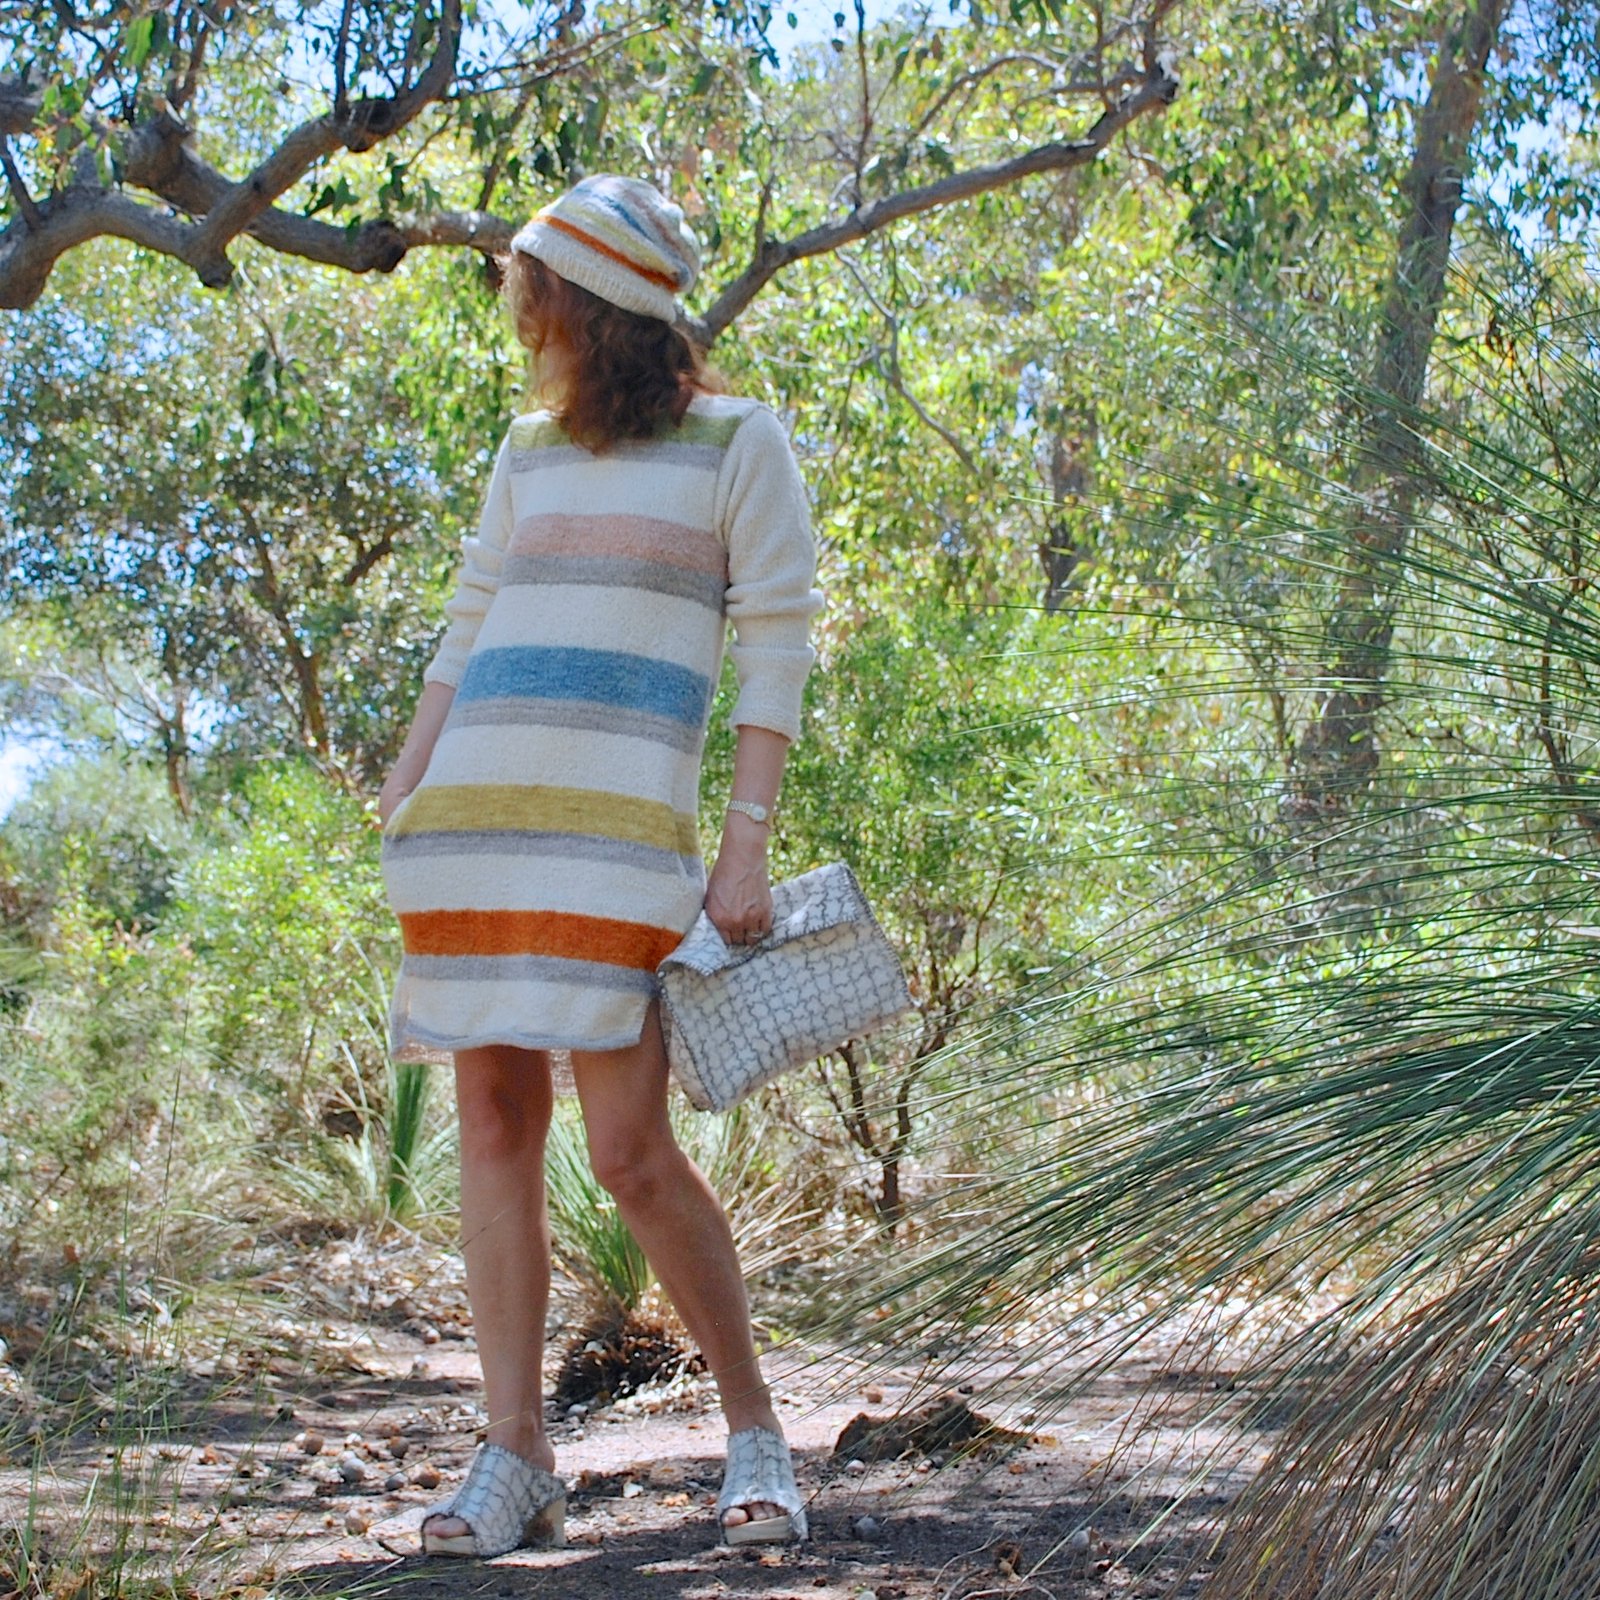
my West Aussie outfit in its place of absolute origin, the West Aussie bush

However, even if you LOVE your background, it can sometimes swallow up your colours into its gorgeousness and your outfit kinda disappears and doesn’t show up very well… And also, sometimes I just like the idea of being able to eliminate the background.  I really like that look where you have a black and white background, and the thing you’re showing is in full and glorious colour… and after a bit of fiddling about I’ve worked out an easy way to do it and am sharing it here just in case it helps anyone else who likes this look too!  🙂

SO.  You need Adobe Photoshop;

Firstly open your picture in photoshop.  Go to Image, Adjustments, and select Desaturate.  This makes your picture black and white

Now go to the icons on the left and select the History Brush Tool

On the right in Brush selects, have the brush as the big, round-edged solid one at the top.  You can change the width/size of the brush using that size scale just above.  For the edges, make it a very small size and zoom right in on your picture so you can get it into the edges and corners as close as possible, getting it all nice and neat and no going over the edges.

For the “colouring-in”, size up the brush width a lot wider, for speed.

Once it’s all done, save it as a new jpeg.

Oh yeah!!  Doesn’t it all really POP now?!!!

“POP”:  hehe, I never use actually that phrase; I’ve always been like, pop? I heard no pop, am I going deaf? well ahem, ummm ok yes, I am actually… the perils of ageing, you know,  but um, oh alrighty then!  Guess that explains everything!

pinterestmail

red thongs (shoes)


Hello!  I’ve made a new pair of um, “shoes”…??  although I’m embarrassed to even consider giving them that lofty title; they’re so basic.  Also; yes I know my year of handmade is all but over and I don’t have to make any more footwear, but I just can’t help myself!  I’ve even got some OTHER new shoes in the works too!  😀

I’d bought a sheet of this foam from Clark Rubber; it’s matting designed to slot together to make a kiddies’ playmat or shock absorbent flooring for gyms.  My straps are red corduroy, the same fabric I used for a previous pair of long-gone sneakers.  I made the hole in the foam with a sharp pencil, which I also used to push the straps through said hold.  The straps ends are sewn securely to a piece of linen that will be glued between the top and bottom layers.  Liquid nails was deployed.

The bottom layer is thin cork-covered, contact paper, cut to size, stuck on – more liquid nails, yo!!  and then three layers of clear, enamel varnish to seal and strengthen.

aaaaand, done!

Details

Dress; Vogue 2900, indigo dyed linen, details here
Hat; Vogue 8844, ivory corduroy, details here
Red thongs; made by me

random outfit shot intended to feature the thongs and they’re barely visible, ha!

location; Eagle Bay, Western Australia

pinterestmail

Japanese linen-gauze shirt dress

My dear friend Yoshimi sent to me a beautiful birthday present last year; some really beautiful, deep indigo blue linen gauze…   The colour is quite glorious, not a solid colour but mottled and variegated with plenty of depth and character; and the texture is ultra light and sheer, quite breezy and with a slight stiffness very similar to organza.  It’s utterly lovely.


It’s taken me quite a while to decide what to make with this precious stuff…  I would take it out and pet it, thinking of a million options.  I layed out several different patterns onto it, only to pack them all up again… obviously it had to be perfect, also I really wanted to make the absolute MOST of every little bit using a pattern resulting in as little waste as possible!  I finally settled upon this Burda pattern, Shirt Dress 03/2016; 112B, The pattern pieces fitted on my piece of precious fabric PERFECTLY!!

However.. modifications happened along the way.  Of course they did.   My dress has the same bones, but the original is actually a very boxy design, with quite a pronounced dropped shoulder.  I’m sure it’s a lovely design for the right fabric; as in, something with plenty of natural “flop” that allows those shoulder seams to drop gracefully down over your upper arm.

My fabric doesn’t want to flop in the slightest; while super-breezy it stil has quite a bit of oomph and structure.  It works beautifully in the tailored details of a shirtdress, but really the shoulders did not drape in the desired manner at all…  So I ended up taking quite a bit of width off from each shoulder and side, and slimming down the sides of the dress bodice too, so my final dress is more like a gentle A-line shape.  I couldn’t say I “self-drafted” the armholes, that just sounds terribly pompous when it was basically just tonnes of super careful pinning and multiple tryings-on.  I’m so so happy with the final result though.  I think the more fitted, yet still loosely relaxed shoulders, the slimmer bodice and A-line shape is perfect for the fabric.

Other alterations: I inverted the pleat the other way in the centre back, also left off the placket to hide the buttonhole band.  Fun fact; my pattern is the German version, and while I plugged the instructions into Google translate I actually couldn’t make head nor tail of them, haha!!  I think I’ve made enough shirts that I managed to put it together ok though  🙂

I LOVE the sleeves which are unchanged from the pattern, they’re only very slightly gathered at the top, and blouse-y at the elbow, with deep pleats taming that blousiness into the bands.  I also love the petite little collar.  The collar stand is the tiniest I’ve ever made, so skinny and narrow, only about 1.5cm deep.  I was slightly terrified how this would go, fortunately, the linen gauze was an absolute delight to sew and eased beautifully everywhere I asked it to.  Like sheer heaven.

I found these awesomely cool yet delicate brass buttons at Fabulous Fabrics.  I’ve previously used these very same buttons before, on my khaki linen “army” shirt; five and a half years ago!!  I’m so glad they still are stocking these; they’re quite old-fashioned-y, a bit dinged-up and antique-y looking, so very much to my taste!

I also made a little matching belt, which is basically an interfaced waistband with just one button and two buttonholes.

With the fabric being the divine will o’ the wisp that it is, my new dress needed a slip; so I hemmed it so as to work well with my ivory crepe Ruby slip.  You can see the slip when I’m wearing it, but hey; you were going to see any slip I wear with this ultra-sheer dress! so it may as well be a nice one!  I really love the way the ivory underneath lightens and brightens and highlights the variegated blues and really brings them to life.

I absolutely adore my new dress; thank you so much, Yoshimi!!


Details:

Dress; Burda Shirt Dress 03-2016;112B slimmed down a bit, Japanese indigo linen gauze
Slip; pattern scissors cloth Ruby Slip, a free pattern available here; ivory crepe, details of mine here
Shoes; made by me and my own design, details here

Location, the Crawley boatshed, Crawley, Western Australia

yes; it was blowing a freaking gale, not really ideal but I had the photo opportunity so *shrug*…

Funny story; this is a very popular spot for wedding parties and also for tourists to stop and take pictures.  I rocked up and there was a Chinese man taking pictures, so I waited at a little distance for him to finish… once he had I went over and put my camera on the steps.  However he hung around for a bit, then came back and started gesturing to his camera and at me; at first I thought he was asking if I wanted assistance with my pictures and I assured him that I was fine, gesturing that I had my remote, etc.  However, no! what he wanted was for me to be in his pictures!!  eeeek! he demonstrated where he wanted me to stand and how he wanted me to pose, gazing up into the sun and beaming like a stereotypical sun-worshipping Aussie.  He took quite a lot of pictures, so if you ever see me popping up in some Chinese guy’s holiday photos, that’s why!!!

pinterestmail
Switch to mobile version
↓


























