my blue corduroy skirt

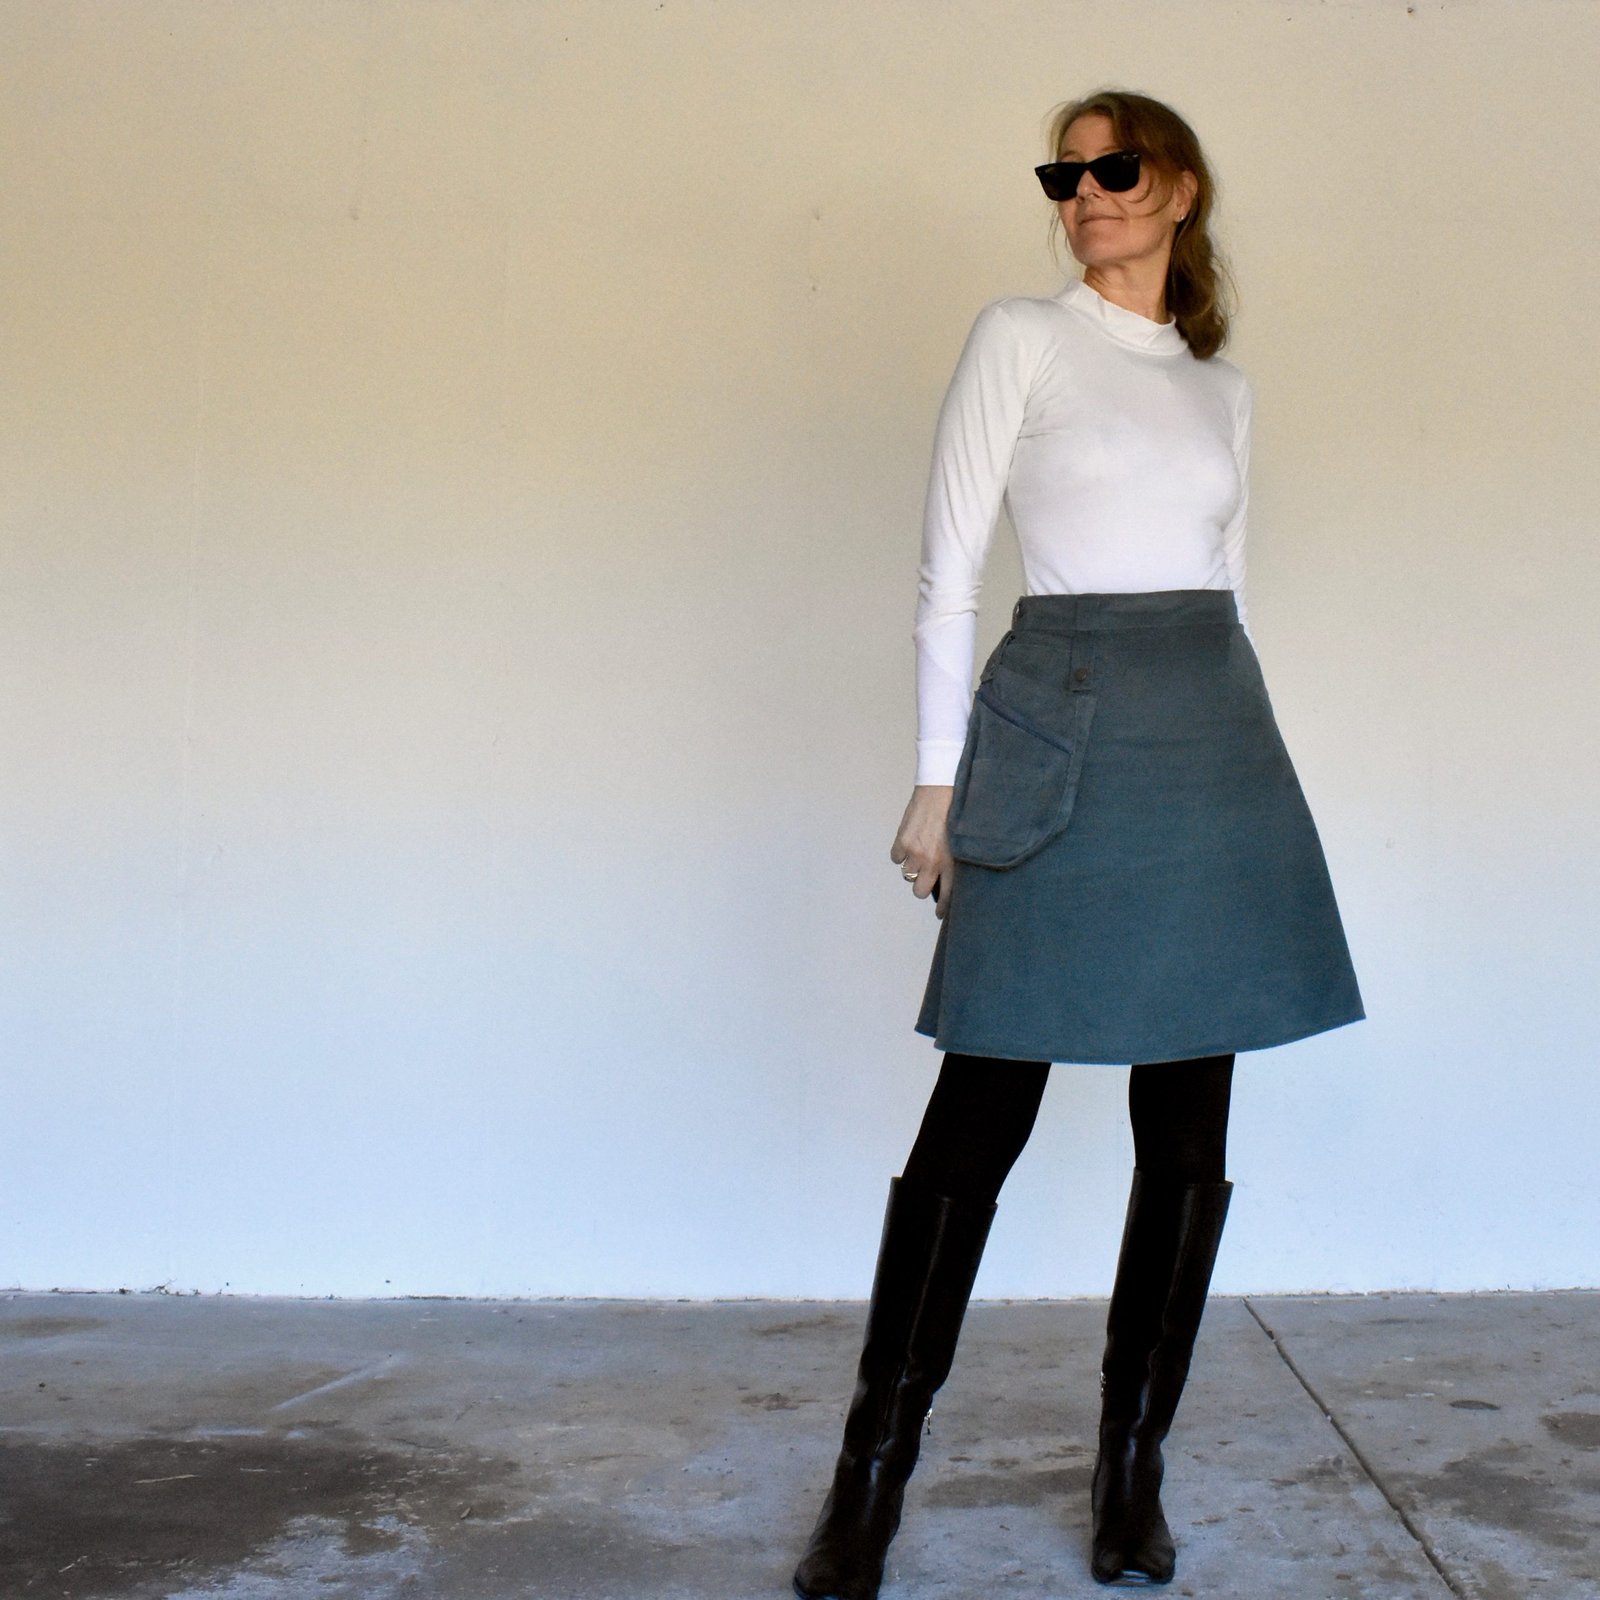
ok sure, I’ve made a few blue skirts before, and I’ve made a few corduroy skirts before, and I’ve even made a few blue corduroy skirts before too… And now I’m welcoming a new one to my wardrobe!  The best thing about this one?  a totally awesome new pocket!!  It’s almost more like a little bag than a pocket, and I could not love that idea more!

Cassie bought this very thin, lightweight, blue cotton corduroy from Tessuti fabrics for me, on my behalf, when she went over to Melbourne on a holiday with her now husband D… it’s quite lovely and it’s languished in my stash for way too long!  I made it one of my “use 12” for this year as a way of forcing myself to finally make something with it.  It’s crazy, but I often struggle with using my favourite fabrics, preferring somehow to make things with fabric I don’t like very much.  It’s like I’m afraid of ruining my favourites… yes I’m trying to get over this…

The pattern is Vogue 1170 a pattern I’ve used several times before, and the ultra cool hip holster pocket is from the Anzu cargo skirt pattern by Waffle Patterns.  I really love this pattern and basically bought it as soon as it was released!  I would really like to make cargo skirt as per the pattern sometime, when I have the appropriate fabric.  Mmm hmmm; as silly as this sounds, because I still feel like I have masses of fabric, I don’t actually have any appropriate fabric in my stash.  AMAZING!!  I’m really trying to use only stash fabric for the time being, as much as possible.  Hey, if I change my mind about this restriction, then I change my mind.

I added a lining, using my own personal skirt block… and some pretty aquamarine teal polyacetate fabric that was already in my stash too.  The only thing I had to buy was the zip!

This is the latest thing in my proposed “use 12” for this year…

If you’d like to check out a quick and fun video of the making of this skirt, then please consider having a squizz at my video on my youtube channel… I even worked out how to add music this time, yay!

I’m wearing it here with two of my recently made merino Nettie tees, my self-drafted tights, and boots bought with a birthday voucher given to me by my friends.

https://youtu.be/YzN8_s3kbC4

pinterestmail

pretty green ebony, bibs, masks

I’ve made lots of Closet Core patterns’ Ebony tees and dresses for others and this is the first one for me!  I finally used this absolutely beautiful, delicate grey/green wool knit that I bought in Tokyo, one of of our trips over there.  It’s beautiful stuff, with an almost lace-like texture to it, but unfortunately it had developed a few little moth holes over the years since I bought it.

So I fixed these up with some carefully invisible mending.  Yes, I know visible mending is all the rage nowadays but personally I like my mending to be of the other sort if possible.

See my ghost-like hand up there?! The knit is very sheer, so I fully lined my Ebony tee using the leftovers from my recent Forest Nettie, from two posts ago… I had just enough to squeeze the Ebony pieces on for a lining!

 I stitched the outer and lining together around the neckline, and under stitched using a wide, shallow zigzag stitch.  I also handstitched them together at the underarm points, just to anchor the lining inside secretly.

This is the latest thing in my use-12 challenge for the year, where I’m making a little capsule wardrobe from 12 pieces selected from my stash.

I’m also wearing this skirt from Vogue 8363, drastically modified, and self drafted tights

In the last week we had another mini lockdown, and I kept myself busy by making some much needed things for Theo…. bibs!

These are made using the piece from Butterick 5583, and the fabrics are all scraps and leftovers from other projects.  One of them is from one of Cassie’s old skirts, another two are from Craig’s old shirts, and one of the boys’.  The other cute prints are all from the leftovers from Craig’s surgical caps, fabric originally from Spotlight.  The backing is thin cotton towelling, that I already had in my stash too.

Some of them have completely useless, but also completely adorable little pockets.  What can I say, I couldn’t resist!

I made 10 in the end, and I also made a few masks for Cassie, just in case she wants to match her baby.  Masks are newly compulsory here again, after a few months without them, so it’s becoming more necessary to have a little supply on hand…

I’d made a few more for myself as well during me-made May, which fell on the tail end of our last period of compulsory masks; here are some of my favourites.  These are also from out of those cute surgical cap leftovers.  I have successfully and completely used up all these fabrics now, yay!  The pattern is from Trend Patterns…

pinterestmail

nighty night!

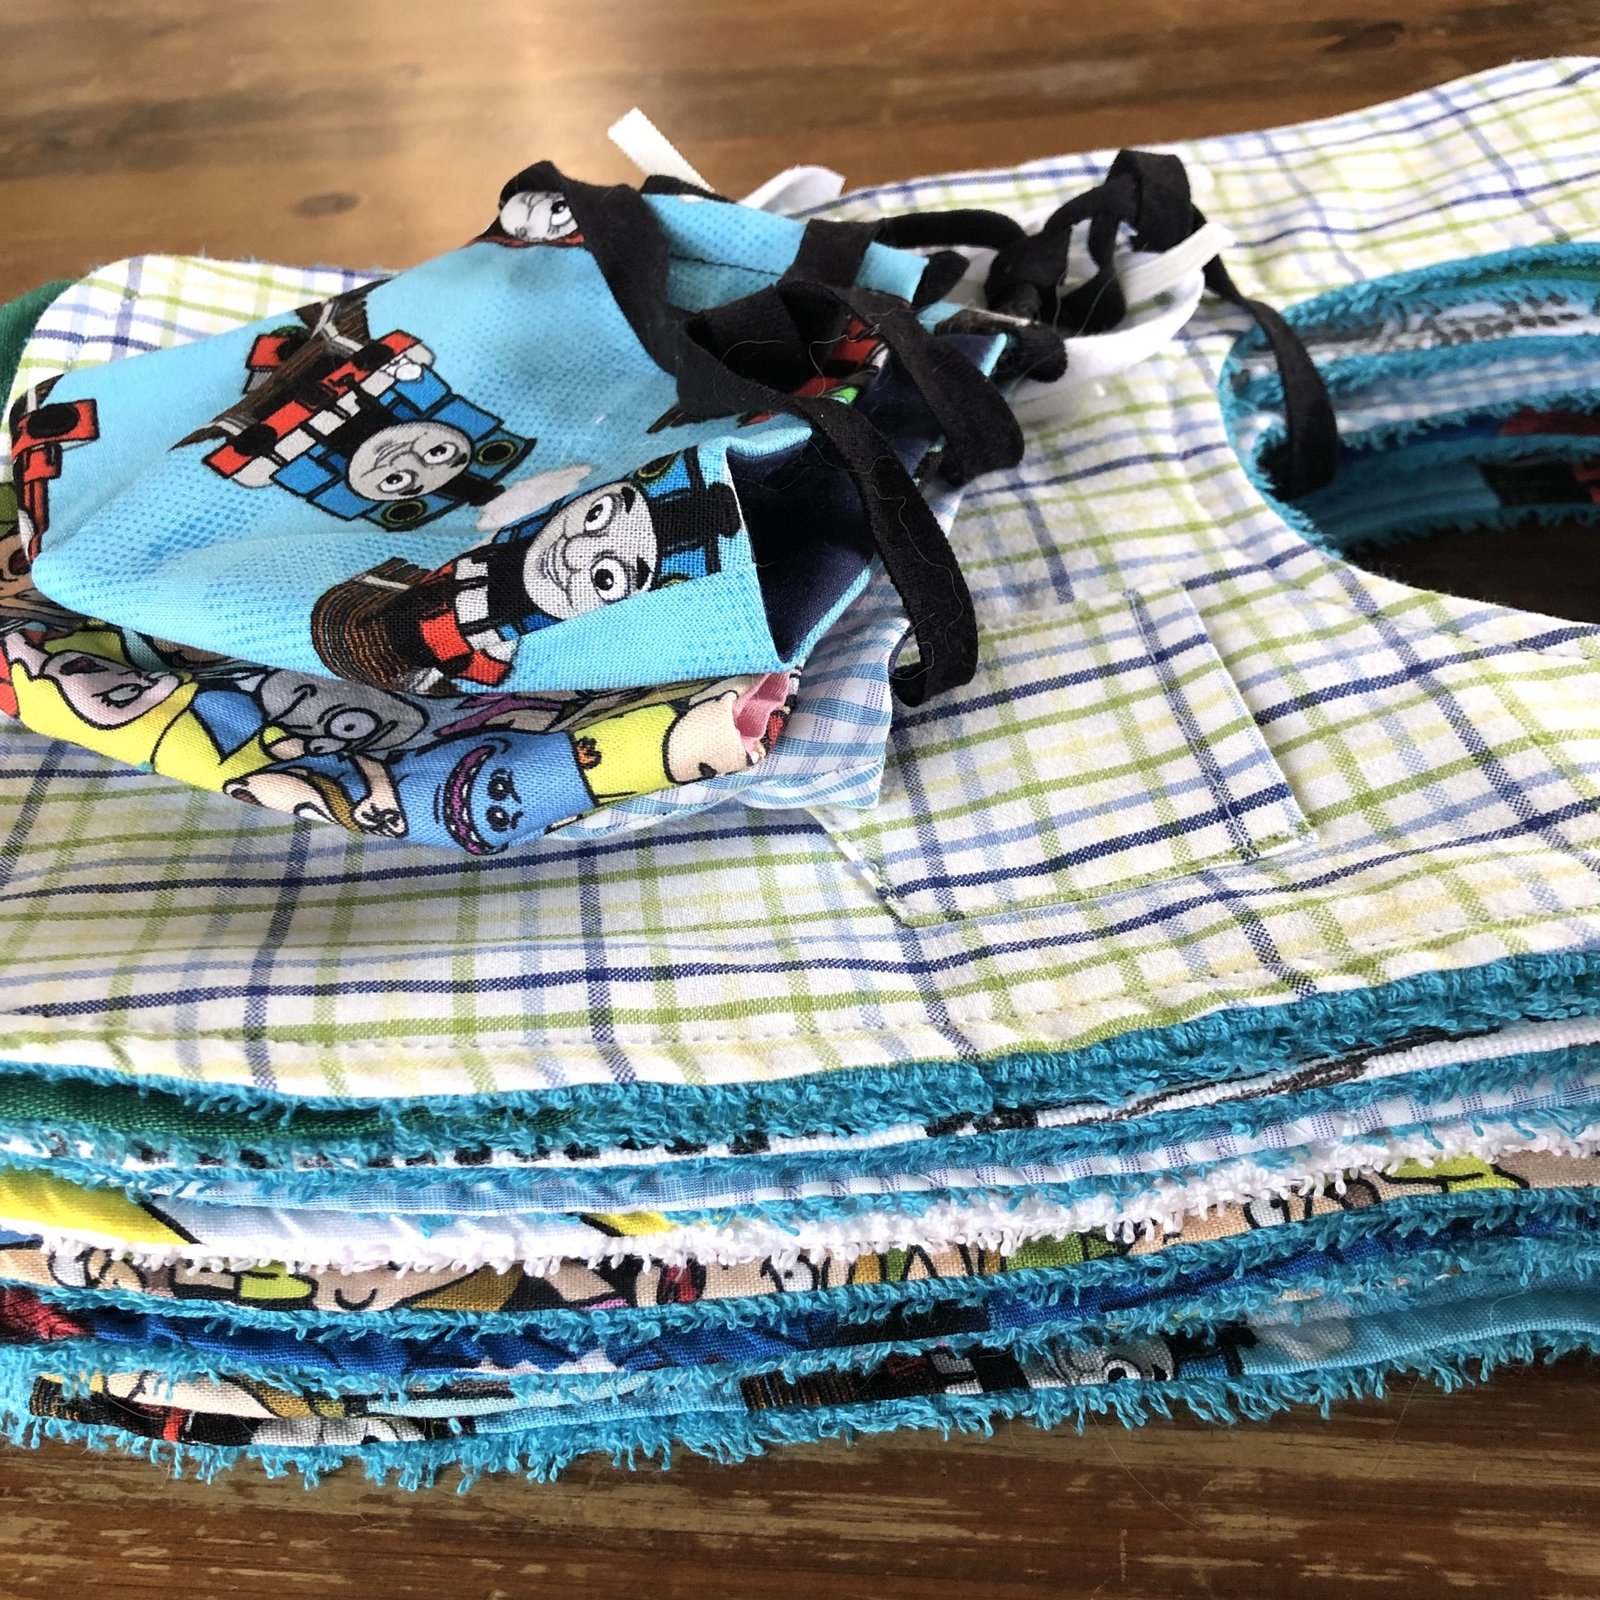
Last month I also devoted some time to updating the pj situation in my life, and in little Theo’s life too!  It suddenly got really really cold overnight, and my fave old bunny pj’s, that I still LOVE btw are sadly too thin to really cut it any more…

I actually bought both the white and mustard, fluffy cotton flannelette at Spotlight very early out of our first lockdown last year… I panicked that we might have another lockdown and I would need new pj’s and that I didn’t have the fabric for a new pair, so rushed out and quickly bought some.  Then decided my bunny pj’s would be fine for another year after all.  Anyway, they’ve been made now and ooooo, they’re so fluffy and awesomely warm I’m in heaven as soon as I put them on..  😀

I used my namesake pattern, the Closet Core patterns Carolyn pj’s for the bottoms, and for the tops I used my now standby pj top pattern Burda 10-2009, 121; which is just so quick and easy and comfortable.  I jazzed up both pieces by incorporating a bit of faux piping in some horizontally placed seams.  I used the selvedge of both white and mustard flannelette in their opposite pieces’ nd found a piece of gorgeous raspberry cotton jersey in my stash in both to tie them both together.  The selvedges are just single thickness with the selvedge edge facing out, and the raspberry jersey is folded once with the folded edge facing out.  On the inside, all the raw edges are overlocked together to finish, and the seam allowances are stitched UP in all cases.

One of the best things is that I think they look great with my fluffy pink robe, that I made two years ago and that is still going strong.  It’s VERY IMPORTANT that one should look exceptionally well put together even in one’s pj’s, ahem…

Also, little Theo needed a sleeping bag… we had some very cold nights during June and Cassie had put in a request.  I already had both these pieces of fabric in my stash too… the red fleece, well I’d previously used most of it to make kangaroo pouches last year, when we had the bushfire wildlife care callouts.  I still had a few pieces big enough to cut out the sleeping bag, fortunately! I cut the collar and cuffs from striped cotton jersey, just to make it look more interesting and fun.  The only thing I needed to buy in all of this was the red zip… I feel like my stash busting efforts are going really well!

Oh of course, the pattern… this is Butterick 5583 and I added 18cm in length because he is apparently a very tall baby!

pinterestmail

3 merino netties

To be perfectly honest I don’t know why I keep calling this a Nettie because I’ve rejigged it so much it literally has zero of the original seam lines left…

… anyway!  above is my new sweater/ tee in the Fabric Store merino knit, colour Vanilla; I made it using (sort of) the Closet Core Nettie pattern and added a short wide turtle-neck collar… I love this tee so much! even though honestly I don’t really need to make another white or even white-is top as long as I live.  I don’t care I still love it!

Worn with my Closet Core patterns Pietra shorts in BamBam cotton drill from Spotlight, and ye olde self-drafted tights

二 … another new sweater/tee; same pattern, same fabric in colour Marsala.  Worn with my outback wife V 1247 skirt, self-drafted tights

三 … below; same pattern, this time with a bound neckline, and the same fabric in colour Forest.  Worn with this little wool tartan skirt, fabric bought in Tokyo during a holiday there… boy that feels like decades ago now!  I wish I could go back some day!

below, closer to actual colour

So; I had bought all of these beautiful thin merino stretch knits from the Fabric Store online during one of their sales… I had this idea once upon a time of making a tee in every colour in their range but just to do it bit by bit, buy maybe two new colours per year.  I don’t know now if I’d still do a tee in every colour…   since we moved and I had to finally own up to the fact that my stash is GINORMUOUSLY HUGE,  so I’m kind of on a mission to use up my stash before buying anything else at all.  And now with the completion of these three new tees, I’ve successfully used up nearly all the merino in my stash, which is kind of amazing! Yes, I said “nearly’ I still have about another sweater’s worth of the ivory leftover, and small leftover amounts of marsala and mustard left too, oh and also the forest, but the forest is thankfully already cut out and well on its way to be completely, and gainfully, used up which is totally awesome news.

oops, almost forgot! the last, forest, (sort of) nettie is the next in my use-12 fabrics challenge that I set up for myself at the beginning of the year… yes, I got a bit behind with this for a few months but I hadn’t forgotten it!

pinterestmail

Tali Tali Sandhills

I thought about holding off on posting anything about this ensemble until later on, like after the exhibition and I had some pictures of it actually IN the exhibition but … well obviously decided no!

I was thrilled to be invited to participate in FrockOn this year, a collaborative exhibition between Flying Fox fabrics and Ikuntji artists group; an event that aims to highlight and celebrate the work of indigenous artists in Australia … Essentially indigenous designed and printed fabrics were supplied to sewing peeps like myself and we were expected to turn it into an ensemble for the exhibition.

I received 2m of this print; “Tali Tali- Sandhills” by Alice Nampitjinpa.  The design depicts the artist’s Tjukurrpa the Tali Tali Dreaming in reference to her country in Western Australia… you can read more here, and even purchase some of the fabric if you so choose…

The print is in khaki and cream on black linen and I really threw my all into making something truly worthy of this really beautiful print!  I just wish I got to keep it! a few peeps on instagram suggested I buy more of the same fabric and make another set for myself, but honestly, I don’t know if I have the creative stamina to do that.  But anyway!  Here it is, in the spirit of continuing to document everything I make, sewing wise on this ol’ bloggeroo  … 🙂

I made the top using V1486, a Nicola Finetti for Vogue design … (this pattern previously made here) I love the boxiness of this design and thought it went so well with the clean, very straight and fitted lines of the skirt… the back closes with an open ended zip and I was pretty determined to use a gold zip, the nickel colour did not look good at all… however the gold one came only in a 75cm length so it had to be shortened. This is always a far fiddly-er process than you imagine and I’m always terrified the zip pull is going to be on the wrong side or fly off the top! A solid wedge of hand stitched upholstery thread at the top provides a good thick stop though.

.
I cut all internal facings from plain black linen and made bias binding for edging throughout from khaki cotton batiste … I think this looks quite smart on the inside…

I made the skirt using V1693, an Issey Miyake for Vogue pattern that is sadly long out of print… (this pattern previously made here)

I really love how the asymmetric details of this design play up the jaggedly stripes against each other in such an interesting way, adding a bit of a visual twist to a print that is already quite dramatic!

I made bias binding of khaki batiste to bind inside edges and flat felled the side seams of the skirt inside… I found the perfect blotchy khaki buttons in my stash, and handstitched some “made by me” labels inside both pieces, these are cut from the same khaki cotton batiste and handwritten using a laundry marker…

I am SO EXCITED to see the exhibition virtually in July and to view all the art and textiles work by all the artists involved… it was an honour to be invited to contribute in just this small way …  It was very scary to make that first cut but once I’d committed to my chosen designs it was a hugely enjoyable process to work with such special fabric.  I posted it off back towards the beginning of the month and just hope it gets there ok!  Still slightly terrified!


Details:

Top; Vogue 1486
Skirt: Vogue 1693
Sandals; my old faves from Zomp boutique

boy I really kinda wish I still had it looking at these pictures now.  I actually REALLY love it!

pinterestmail

sewing tragedies

I’ve made this crazy new dress… isn’t this fabric hilarious?!  The very second I clapped eyes on I simply could not resist… it’s like a comic book – first point in its favour – except all sewing stuff – second point in its favour.  Almost an afterthought, but I was really drawn to its cool sharp black and white graphic artistry too- I don’t frequently gravitate to a lot of black-and-white prints but if it’s quirky I suddenly do – point three; and SOLD!

I think comic book art is a highly unappreciated art form and its taken way too long for the style to finally come out from the cold… I’ve always loved it but it’s always teetered on being Not Taken Seriously, which is such a shame.

I wanted a style of dress that kept the boxes fairly intact and not cut across like you would for a regular A-line skirt, so I drafted my own idea.  It’s kinda wacky, but I actually love how comfy and nice it is to wear so I’m thinking of making this into our next pattern… I mean, it needs some work because this is a sort of prototype but I think it has promise!

Because the print tickled me pink I went with a pink linen for the bias bound neckline and armholes…! hmmm, a tenuous little link?!   In reality it just happened to be sitting on the sidelines, so I grabbed it…. this was leftover bias binding from the Yallingup top I made for Cassie, in the previous post.

just because, cute pattern weight… #notstagedatall

I put on some patch pockets, and employed weapons-grade pattern matching skills here… hehe.  Ok, definitely tongue in cheek there since only one pocket could be pattern matched!  I only had enough fabric to do one… but you know.  The other pocket is not even vaguely pattern matched sadly.  I probably should have matched neither, to be consistent, but…  I didn’t.  Pattern-matching… missed chance for another sewing themed tragedy comic there, haha?

Details:

Dress; designed by me, cool comic book fabric from Minerva, available here
Sandals;  Zomp, old favourites

pinterestmail

the Yallingup dress/blouse

I can finally reveal the main thing I’ve been working on for the past few months… our new pattern!

Please allow me to introduce the Yallingup dress/blouse!
This is a loose summery piece that can be made as either a regular item or alternatively as a nursing friendly version for nursing mothers… both versions appear superficially the same at a glance but of course are constructed quite differently on the inside!

The design features a scoop neckline, single breast pocket, and an overlaying wrap top that can be worn either loose or tied at the back… for the nursing version the wrap can also function as a modesty cloth for when you are feeding your baby… the dress version also has deep inseam side pockets, of course!

Cassie conceived the design after the delivery of her baby and then I converted the idea into a regular one for “not nursing” people too😁

So technically, the pattern has four views:

A, the regular blouse; B, the nursing friendly blouse; C, the regular dress and D, the nursing friendly dress…  and because the construction method for the regular version and the nursing friendly version are quite different I ended up deciding to write two different instruction booklets, for the two different methods.  I know, that sounds complicated but honestly it was nowhere near as complicated as when I had them combined in one single instruction booklet!  Separating the two methods completely has simplified things considerably so I hope you’ll forgive the extra file that comes with it.

I’ve been making tonnes of these lately, for basically everyone in our family, including the new Mums … it’s super comfy and easy to wear and we hope you like it too!

The Yallingup pattern is available right now in our Etsy shop, here, or you can click the Yallingup illustration in my right hand side-bar over there ->

Pictured here are just a small sample of the Yallingup’s I have made:

btw; I opted to not go the call-out for tester route this time.. this is because there has been a bit of negativity around the “doing testing work for free” in the sewing community lately and I even ran into this a little bit during the testing for my last pattern, the Mundaring raincoat.

It’s funny because I personally love testing patterns and I’ve been doing it for many years for other pattern companies, happily, and with no expectation or even thought of getting paid.  Nowadays a lot of sewing peeps feel like they should be paid.  This is not necessarily a criticism by the way, just an observation into how attitudes are a-changing.

This time we did all the testing in-house and through personal contacts.  I mean, I’ve always personally tested each and every size in all our patterns anyway, so I know they work as they should; and this time we did the same thing.  I think maybe part of the pattern-testing negativity I mentioned earlier is because pattern testers feeling like they’re doing work for free and then being treated like free publicity for the pattern company; and so I decided I did not want to be associated with that perception of exploitation.

pinterestmail

cool new top

oh hey! I made a new top.

This is the Harmony pattern by FibreMood; and I really loved it upon first sight; the interesting, sailor-inspired bib collar and slightly old-fashioned sleeves with a wide, buttoned cuff.  I think it has a vaguely Edwardian air about it and I am totally on board with this idea!

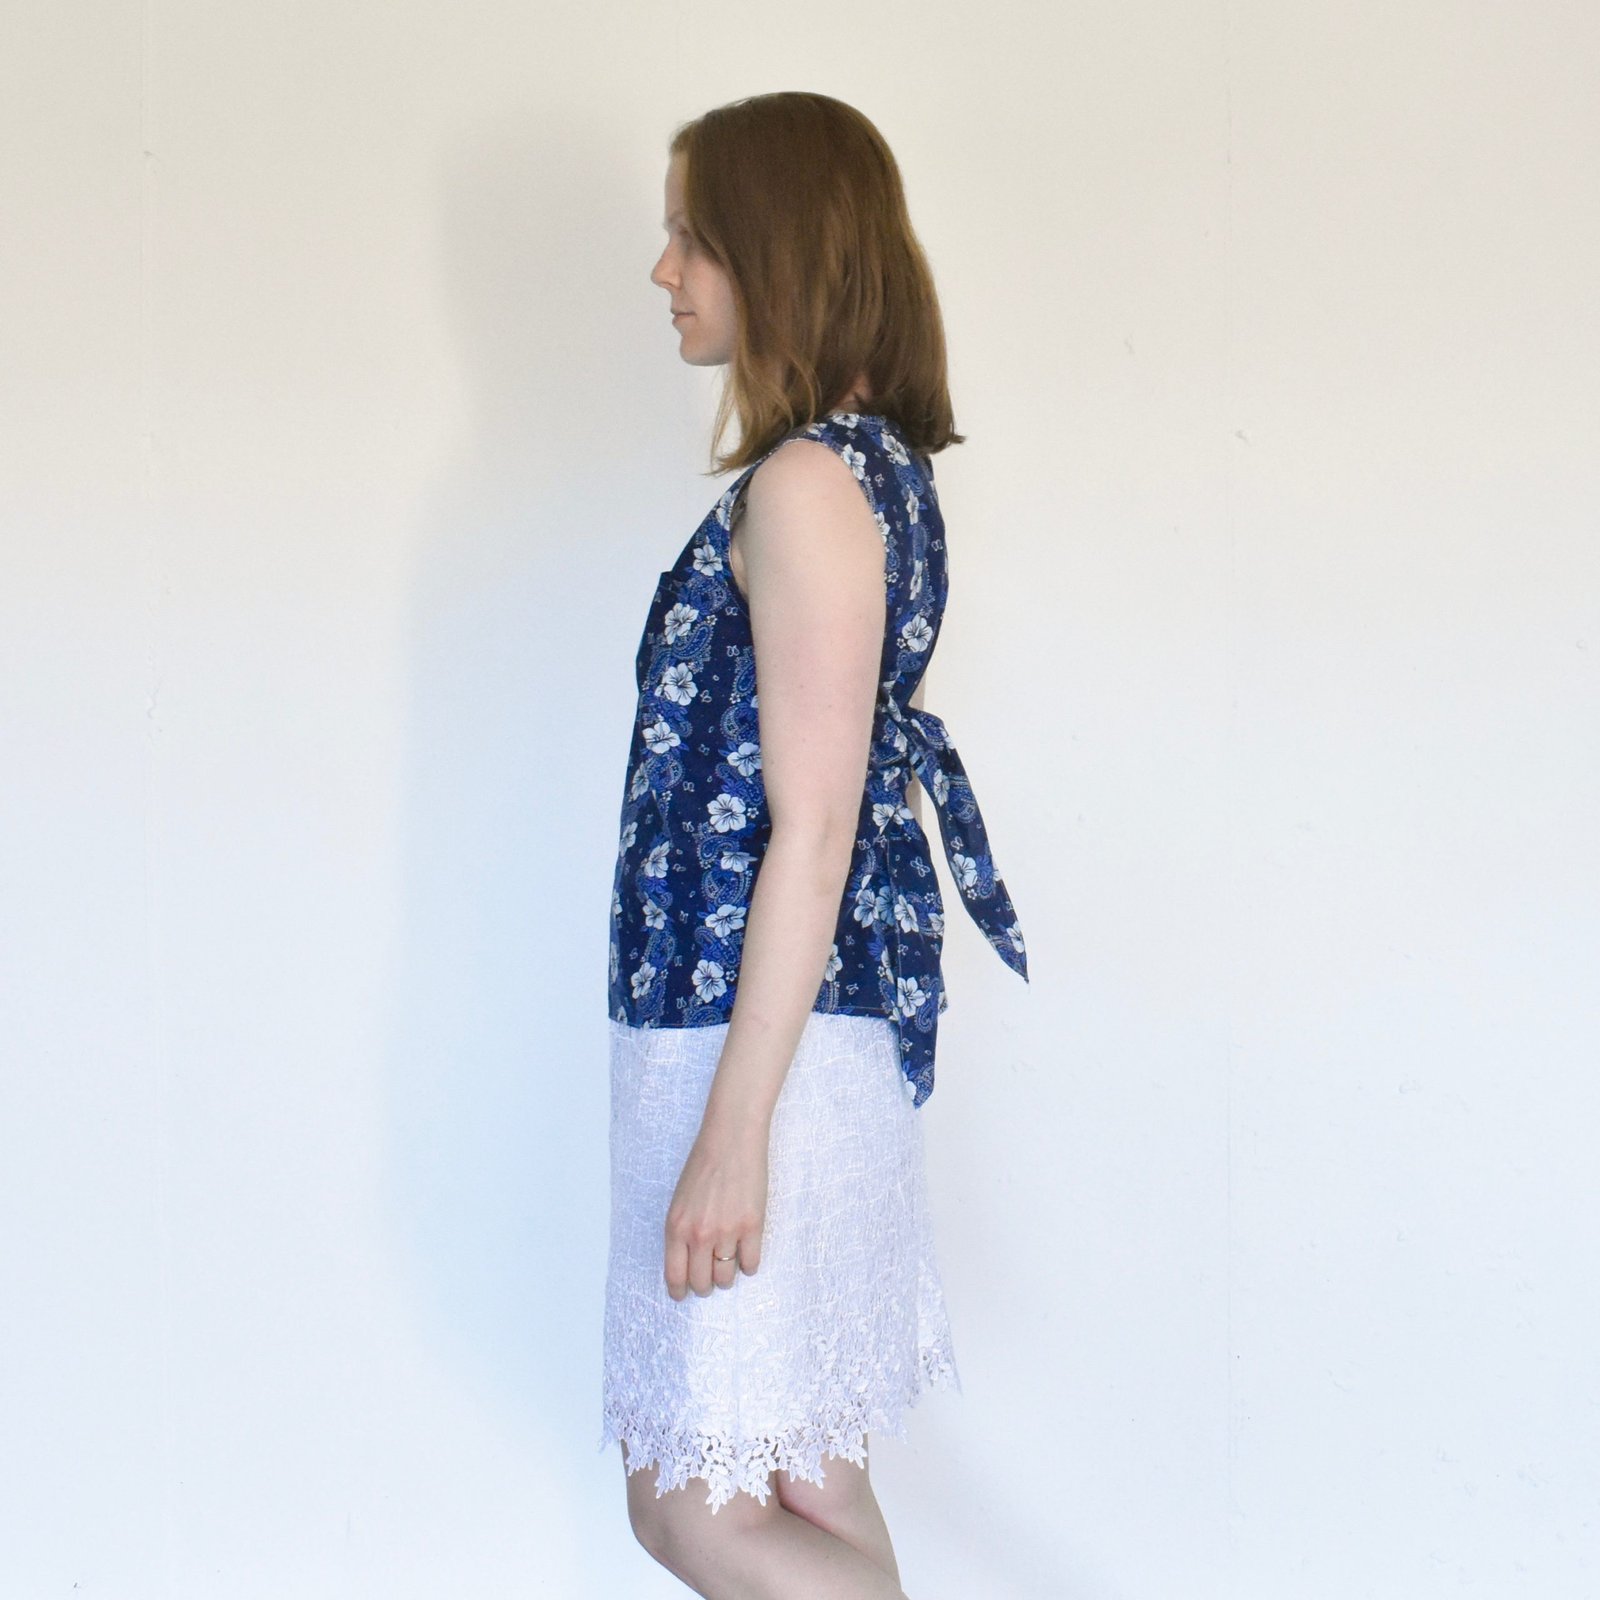
I used a beautiful silk/linen mix that I bought from Fabulous Fabrics ages ago… btw, I’m on a use-my-stash-only kick, since out move when I realised just how much fabric I have.  Spoiler alert; it’s a LOT and I seriously want to get my supplies down to a much more manageable level.   Like, to about a quarter of what I have now!  Yes, very embarrassing, I know! but there it is and I’m making good headway, believe it or not!  Yes, I know I haven’t posted much here lately, but I’m making a lot of toiles for Cassie’s and my new pattern and I’ve managed to harvest/cull quite a bit in the process.  But, I’m getting sidetracked here… back to my top!

You’re supposed to gather the bodice into the bib, and also gather the sleeves into the cuffs; instead I carefully measured and folded mini pleats in these areas which I think suits my quite crisp fabric a lot better.  I really love doing pleats in lieu of gathers, actually and have done it in quite a few garments in my time.  I won’t call it “age-appropriate”, because I’ve become wary of that divisive term in recent years so I will just describe it instead as “personal-style appropriate”.  That’s better!

The design actually uses an unexpected lot of fabric, and I didn’t actually have enough… I solved this problem by cutting the bib facings on the selvedge, and joined them in the middle.  This enabled a much more efficient layout of the pattern pieces and of course you can’t even see the facings anyway!

The pattern advises you to put buttonholes on the shoulder closure; I did stitch them on during the making but I unpicked them when I realised buttoning and unbuttoning up on my shoulder like that was going to be pretty darned awkward; and I installed pretty pearl-headed press studs there instead.  The sleeves have self-fabric looped button closure too, but they are wide enough I can easily slip my hands through without having to fiddle with those, and the cuffs can stay firmly and securely buttoned the whole time.  I used pearl look-alike buttons here.  Yes; all of of this from my stash!  I’m so glad I could finally “marry” all of these items together into one pretty garment!


Details:

Top, the harmony blouse pattern by FibreMood, ivory silk/linen
Trousers; the Sasha trousers pattern by ClosetCore patterns, stretchy cotton denim, more details here
Shoes; made by me using a Shoe Camaraderie kit, details here

pinterestmail
Switch to mobile version
↓