
 hello! I’ve made some new things recently… firstly, some new winter pyjamas. 🙂
I used my usual Closet Core patterns Carolyn pattern for the bottoms, and for the top I used a pattern adapted from a Burda pattern, just a basic loose top with cut-on sleeves. I went to Spotlight and bought 1.5m coral pink, 0.5m navy blue and 1.0m white cotton flannelette… and right now I have to make a stern warning to future me; THIS IS NOT ENOUGH FABRIC TO MAKE A PAIR OF WINTER PYJAMAS. Well, to be more specific, it CAN BE enough fabric, but only if one is prepared do lots of careful measuring, careful cutting and careful piecing to use as much of the fabric as is humanly possible. And there will be practically zero fabric by the end of it.

I mean, this is a good thing, right? Reducing waste? To answer myself, yes it is, and I enjoyed the technicalities of the process and pretty proud I managed to use practically all of it, however this normally very simple project turned into a bit of an epic journey. I think it’s ok to admit that it’s not necessary to virtuously use “all your fabric” when you make something.

I realised I had not bought enough fabric once I laid down my pattern pieces, and so had no choice but to cut and piece every single offcut in order to make the pyjama legs as long as I needed, as well as the pyjama top sleeves and body as long as I needed. It was kind of fun to have the different colours appear as stripes like this too.

All the seams are overlocked on the inside, and all the seams are faux fell-stitched down using white thread on the outside. I like that all those little bitsy-bits are highlighted like this!

This is the tiny pile of my total leftovers. Honestly, in the end, “using all the fabric” became such a quest that I slapped on a few superfluous pockets, which is kinda silly really. It was a fun experiment, but of course it’s a truth that superfluous pockets are not morally superior to throwing away small scraps. Just saying.

I also made some new clogs!

I used a kit that I bought from Leather Needle Thread, hmm, perhaps a few years ago. It’s taken me a while to get around to it, yes. 🙂

The colour is black, which of course will be extremely handy . As much as I love colourful things in my wardrobe, black shoes really are the most useful ones. As previously, I applied several layers of clear varnish to the clog bases with light sanding in between each coat before making the clogs. I know the supplier of the clog kits doesn’t recommend this, but I personally have found it an excellent idea with regards to keeping the clogs clean. Even if you scrupulously wash your feet each time prior to putting on your shoes, you still can’t help but get them a bit dirty, and varnishing the bases really makes the cleaning process a lot more effective.


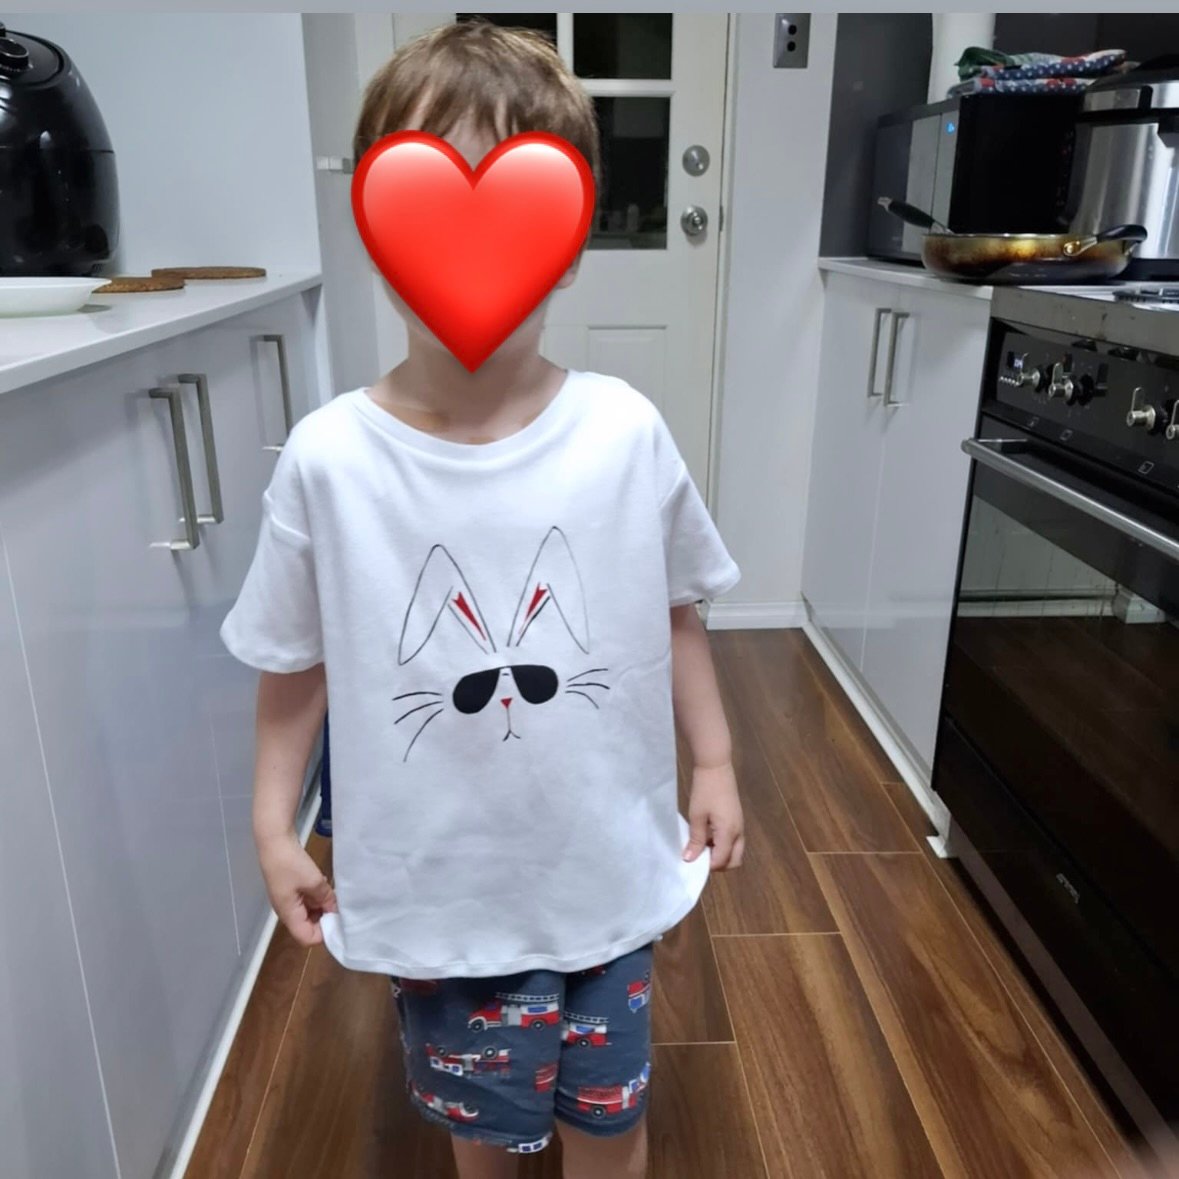
 Hello! For the Easter just gone by I wanted to give something to my three little grandsons… chocolate has been ruled out by the parents and so I had to think of something else. I decided upon this! As a teen, my eldest Tim used to have a pink T-shirt with a “cool bunny” printed on it which he absolutely loved. It was actually a very different print from this one, but with this in mind I googled “cool bunny” and something like this was one of the millions that came up. I thought it was really cute!
 I hand-drew the design on tracing paper in lead pencil, then transferred the designs to equally sized pieces of wrapping paper.


 First print done!
 Second print!


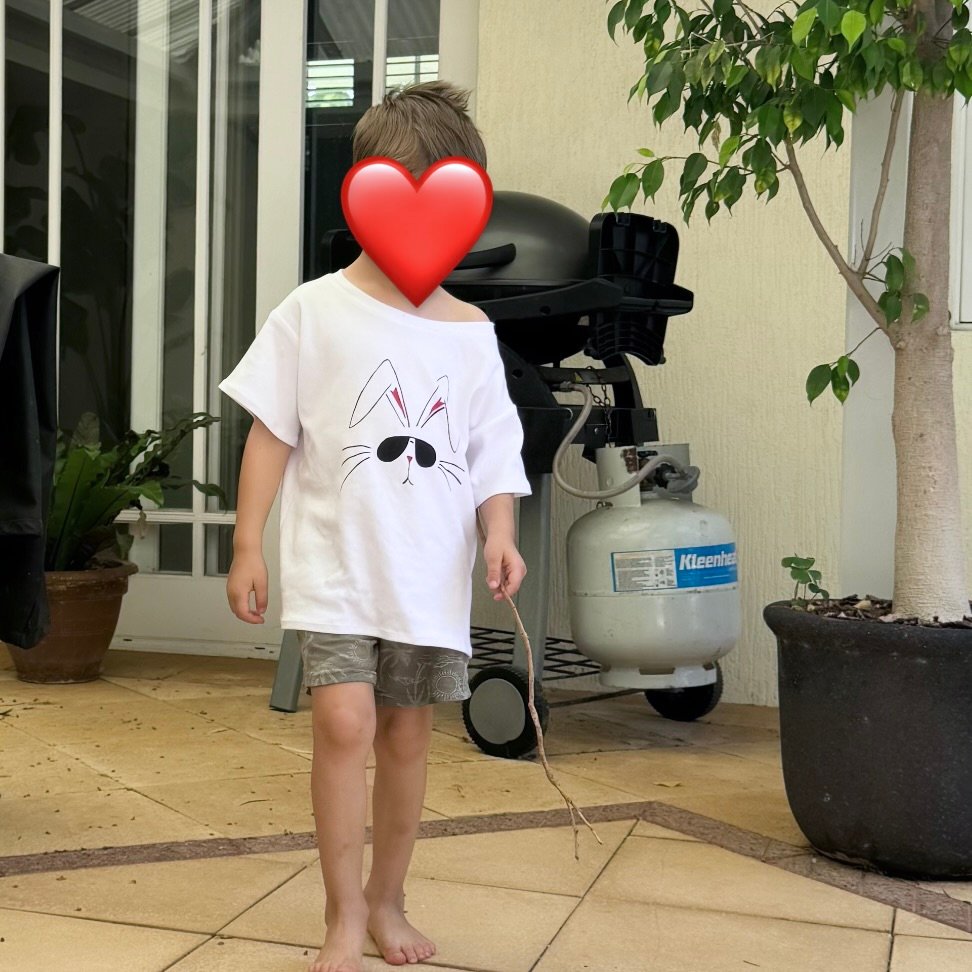
 and this one did not. If you can’t see it straight away, just look at the red, inside-the-ears bit, and you can see how skewiff it is compared the the others. I’ve still got this fabric, and may use it for something else in the future.
 Heat set the prints, and then I sewed up the T-shirts.

 hello! I made a fun new little dress…
 I cut the collar and cuffs from a neutral linen that I’ve had in my stash even longer. I think this is from Calico and Ivy originally; it’s been very useful over the years for just cutting pockets, facings, and other bits and bobs that require a sturdy and neutral coloured fabric.


 in the Nagano region


 I added a cotton pocket inside the skirt, this cut from an old worn out shirt of Sam’s. I’ve found some sort of pocket a useful addition to the skirt pattern previously although I haven’t used this one yet, in spite of wearing the skirt quite a lot already. As it turns out I always wore it with other garments with it that had more convenient pockets so didn’t need it. The Jade pattern is not ideal for pocket addition at all, but I’ve still tried to force one upon it a few times now. I’m confident that it will prove useful in future wears, though.
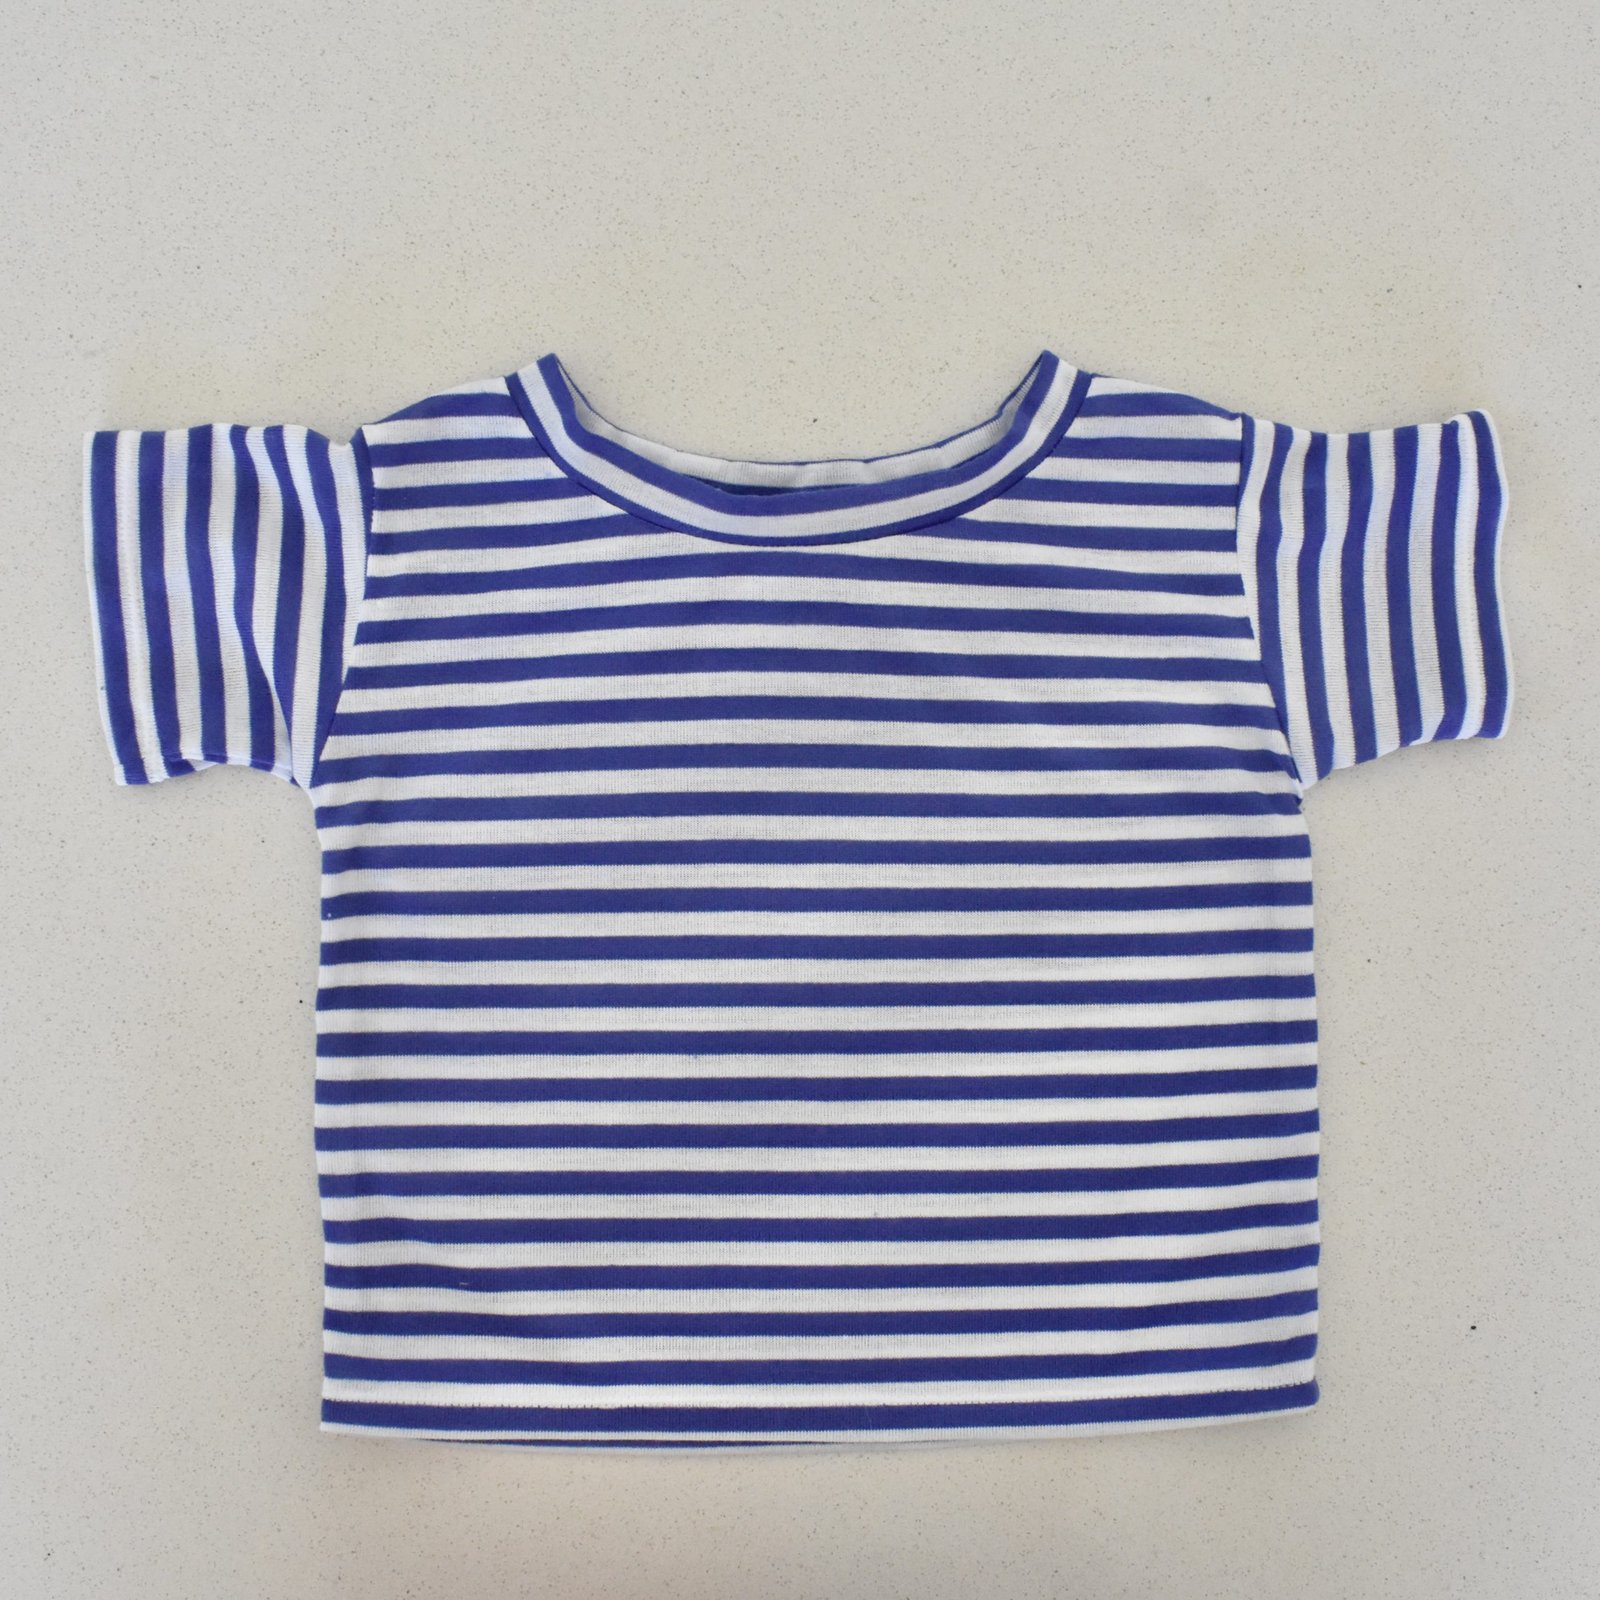
 The other new garment is a T-shirt, made from a blue and white striped jersey also from N. You may recognise it from G’s T-shirt in my previous post. For mine, I used our own Carolyn & Cassie Pinjarra pattern, sizing up because the fabric doesn’t have much stretch. I actually didn’t have much opportunity to take a photo of the T-shirt on our trip because it was rarely warm enough to wear it by itself! plus for some reason taking pictures of my outfits didn’t take a lot of priority in my mind. Is this a good sign? Am I maybe getting more mature?! All pictures featuring the Tshirt are pretty ordinary quality, haha…
 Anyway, both these pieces are obviously comfortable and nice to wear, and feel like really good new basics for my wardrobe.


 hello!
 Unfortunately there wasn’t enough to do every single seam and edge like I have done in previous examples of this method but I just did as many of the more prominent bodice seams before I ran out of it.
 I know I’ve used this pattern quite frequently but it really is such a beautiful dress design that I don’t see myself every tiring of it any time soon. Of course I really should branch out more and I’m resolving to try more new patterns this year and not fall back so often on the old favourites. In the meantime though, some of my recent as yet unblogged projects have failed this resolution already whoops.
 I wore this along with my


 rhetorical question, don’t mind me. I actually love stripes, even though when I do sew with them I feel inextricably compelled to pin each and every stripe. It’s ok. A small amount of suffering is acceptable when it leads to nice things.


 hello! I’ve made a new outfit by refashioning some other previously worn old things… from a skirt and old jeans, I’ve made a new/old tunic top and some new/old shorts. I realise I probably I should be using some of the new fabric already in my stash instead of “already used” fabric – truthfully I am not very sensible a lot of the time – however if I really like a fabric but not the garment so much then I do feel like it just makes sense to reuse the latter if I can. Actually, I have been making a number of things lately, and from my stash! but just haven’t got around to taking photos or blogging them yet. For some reason, I’m finding taking photos to be the biggest challenge now.


 I bought this pretty raspberry/cream tie dye cotton? jersey from Stone Mountain fabrics in San Francisco during my trip over there with Yoshimi in late 2019… always with the intention of making a new lingerie set. Five year later and finally, ta da! I actually had it all cut out several years ago, and then it languished, and languished… The fabric is a tad on the thin side, not too thin but just a little. I think it might have some bamboo in, it has a slight hint of that tell-tale slipperiness. Maybe that’s why I left it for a while. Jerseys are so variable, it’s honestly quite amazing.


 I had a small amount of leftovers so ran up a quick pair of sockettes using the Sytt och Prytt Florens ballerina sockette pattern.


