Tag Archives: Jacket

a shearling jacket

P1130071

As sneaky-peeked previously; my shearling jacket, and mamccalls5276n, I’m so happy with it!!  It turned out just exactly how I hoped, and was the most wonderfully cuddliest, comfiest thing to have with me in our recent visit to Japan; I loved bundling up in it each day in Tokyo and used it as a snuggly rug while on the plane…  without a doubt the warmest coat I’ve ever made formyself, evah.  Like wrapping myself in a fluffy blanket, and I was perfectly snug enough even in the subzero temperatures of Hokkaido.
P1130050

Obviously, and with my usual attention to weather appropriate sewing ahem, I chose to get started on this super fluffy thing during the most heinously hot heat wave… 42C anyone? phew, try-ons were hideous.  Seriously I question my sanity sometimes.  Well, lots of times actually 😉   Anyway it was all worth it in the end, since I’m quite chuffed with how it turned out.

IMG_9612 - Version 2

What is it about making jackets that is so enormously satisfying and fulfilling? I don’t know exactly why, but I always find jackets, and dresses too, to a slightly lesser extent; to be the projects that give me the biggest of happy warm fuzzy buzzes… 🙂

P1130064wrt this one; well I’ve wanted to make a shearling jacket for oh, about ten years now.  Ever since the first time I clapped eyes upon one belonging to our friend S; a colleague of my husband’s who is always super suave and cool and has a slightly alternative, very hip and happening taste in clothing.  He owns a beautifully thick, oversized shearling jacket that he’s had for years and years and trots it out every winter once or twice.  Every single time I see it I’m struck all over again by how awesome it is and have harboured a secret desire for one of my own…

IMG_9986

I bought the faux shearling from Spotlight and the burnished, dull metal buttons from Fabulous Fabrics.  The pattern is loosely based upon McCalls 5276, a pattern I’ve had for years but only muslined once and not got any further… oops!  I pretty much chose the pattern  just for the collar alone, since I wanted that big oversized 70’s lapel collar on my jacket, but not much else.

My alterations included;
Body and sleeves slimmed down and lengthened somewhat.
Welt pockets added as described here,
Belt and belt loops added.
I also fine-tuned the front edge and collar to have it so I could happily wear it in a variety of ways… a) open, cardigan style b) buttoned up halfway with the lapels flared, c) buttoned up to the neck with the collar laid down in a peter pan style, and finally d) with the collar turned up and buttoned up right to the very top in a funnel-neck style.  Also, having the belt tightened or hanging loose adds to the wearing options too.

P1130068
Because I was using a shearling obviously I left off all facings and all edges are left raw.  When working out how to seam the pieces together, I checked out a pattern for a shearling jacket from one of my Burda magazines… which mentioned overlapping some edges to be joined and top-stitching the overlaps to minimise bulk.  So; I overlapped the shoulder seams in this way, and also the collar-to-neckline seam.  The other seams; namely the sleeve, side and armscye seams are sewn right sides together in the conventional way.

P1130105

Even though I used the McCalls collar, I still cut it a bit bigger on the edges – just in case!!- never forget the golden rule of sewing… you can always cut away but you can’t add it back… EVER!!!  And then trimmed it here and there to allow it to sit how I wanted it to look, to fit how I was imagining my collar.  I’m particularly pleased with how the collar looks when buttoned up to the neck like this..

IMG_9976I made the sleeves extra long, so I could turn them up and have a woolly “cuff” on the sleeve ends, and also made wrist strips.  These are sewn to the sleeve, then wrapped around and buttoned to themselves.  The seam allowance of the cuffs are topstitched down for a neat look when they are turned back, and then I stitched-in-the-ditch of the sleeve seam down to the sleeve so the cuffs stay folded up permanently.

P1130096

P1130073Welt pockets: my tutorial for how to do the welt pockets is here

Buttonholes: I’ve written a separate post detailing how I did the buttonholes here, so as not to clog up this post more than it is already!  aaaaaagh! picture overload!!

P1120887

In summary; I thoroughly enjoyed having and wearing my cosy new jacket in the subzero temperatures of Japan, and now we’re back home…. and it’s 35C… lol! so it’s off to the back of the wardrobe with this fluffy hulk of a thing.  See you again next winter, you snuggly bundle of cosiness!

mccalls5276burda7863DSC_0001-2

Details:

Jacket; my own design based loosely upon McCalls 5276, faux shearling
Top; the twist top from Pattern Magic by Tomoko Nakamichi, in ivory ponte, and in charcoal ponte
Jeans; Burda 7863 modified to be flares, in ivory cotton denim, and made as regular bootcut in black cotton corduroy
Gloves; hand knit by me in 4ply charcoal merino, details here
Socks; hand knit by me in Noro 4ply, details here
Shoes; Francesco Morichetti, from Zomp shoes

P1130083

pinterestmail

alpaca cardigan; a 100% local product

So, at the beginning of the year I mentioned that I was taking part in one year one outfit, the brain child of Nicki of this is moonlight; the challenge being that we participants have one year in which to make an outfit for ourselves that is 100% locally grown or sourced.
And this cardigan is my first thing! the first component of my outfit finally finished.  Phew!

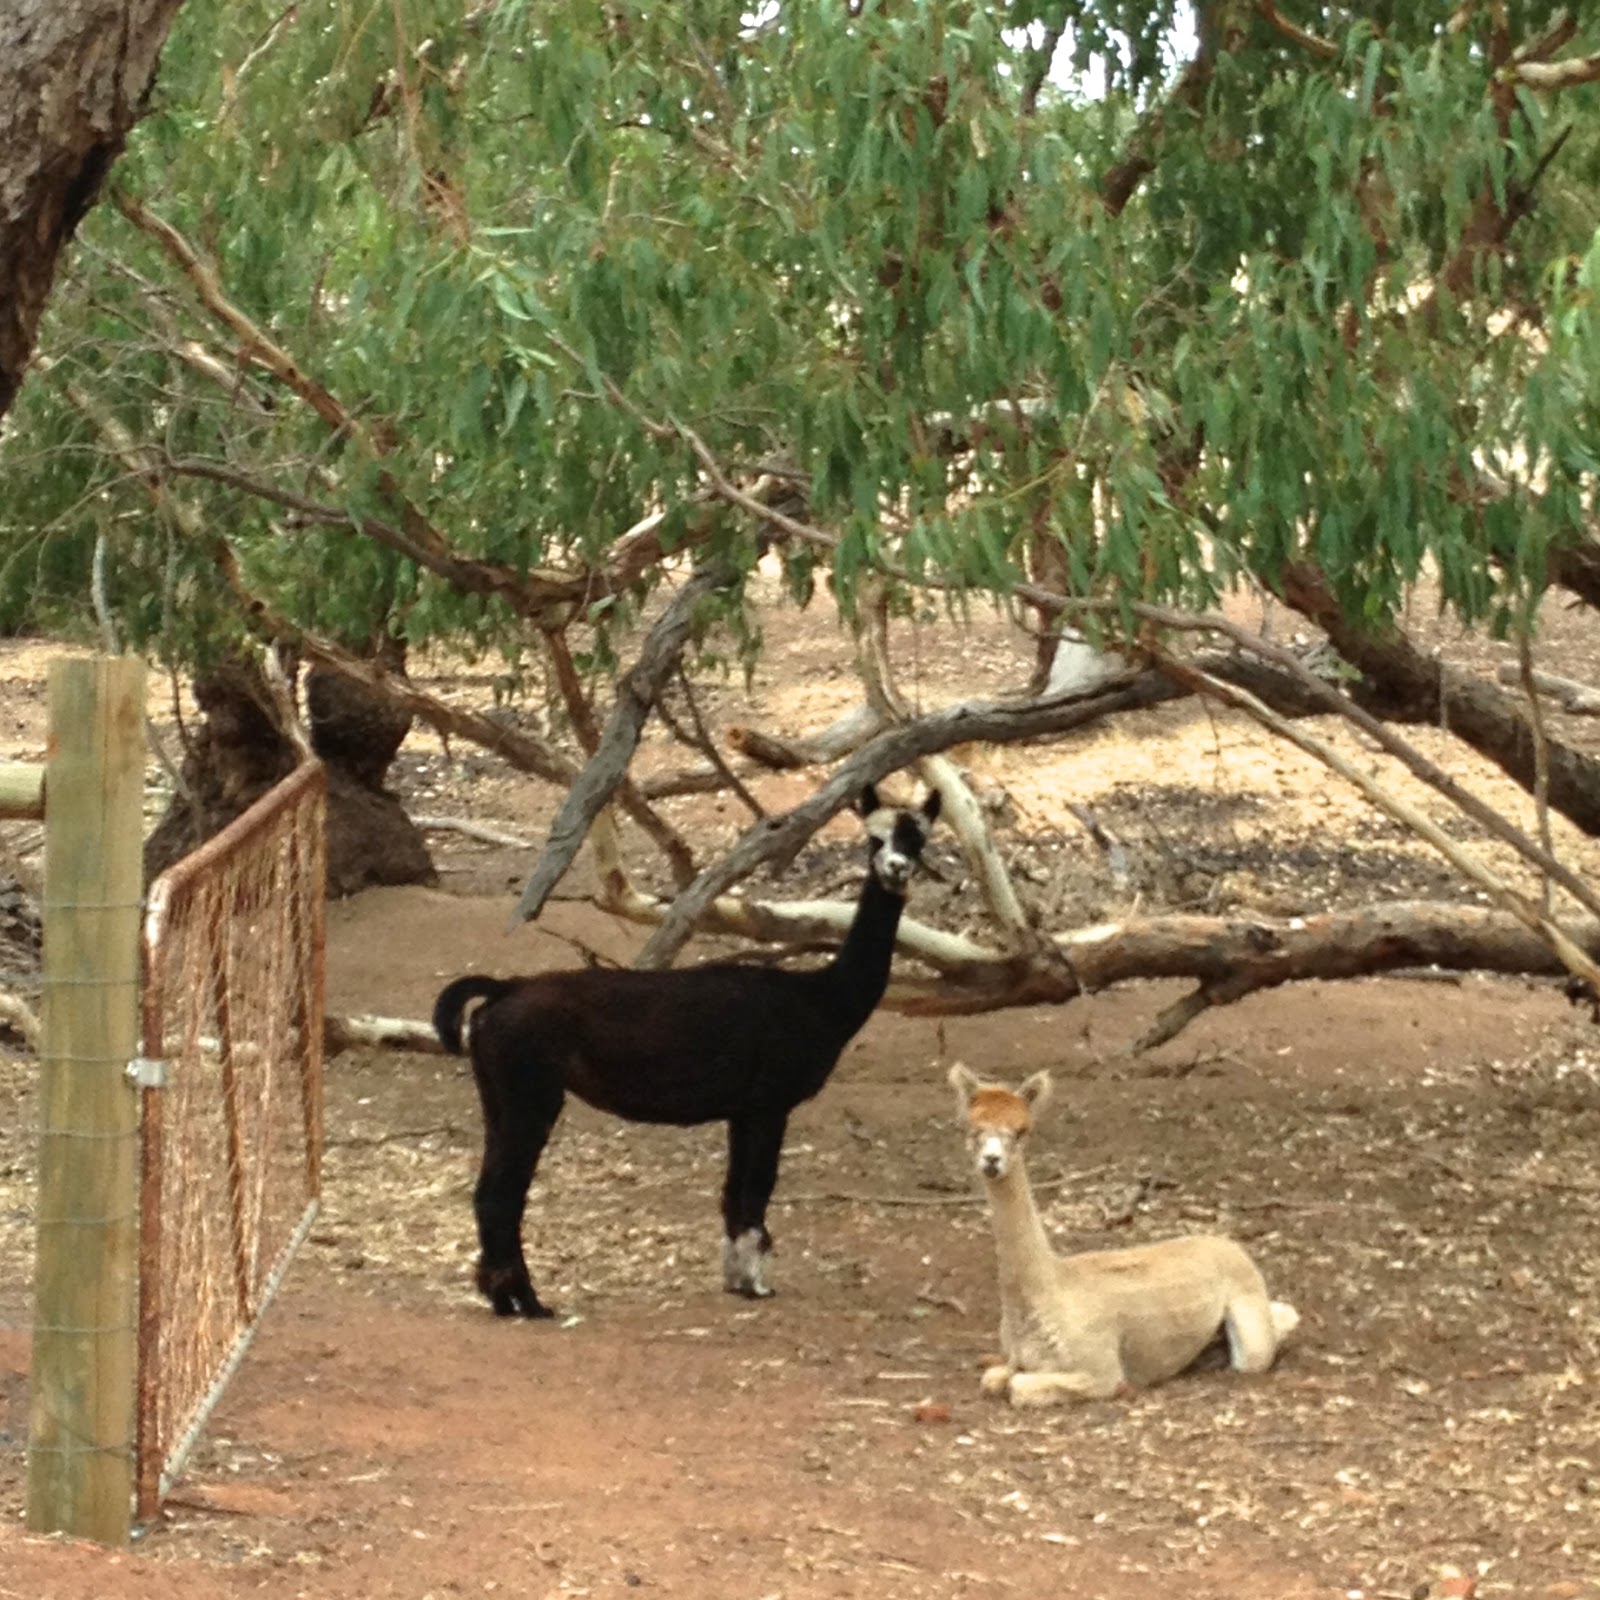
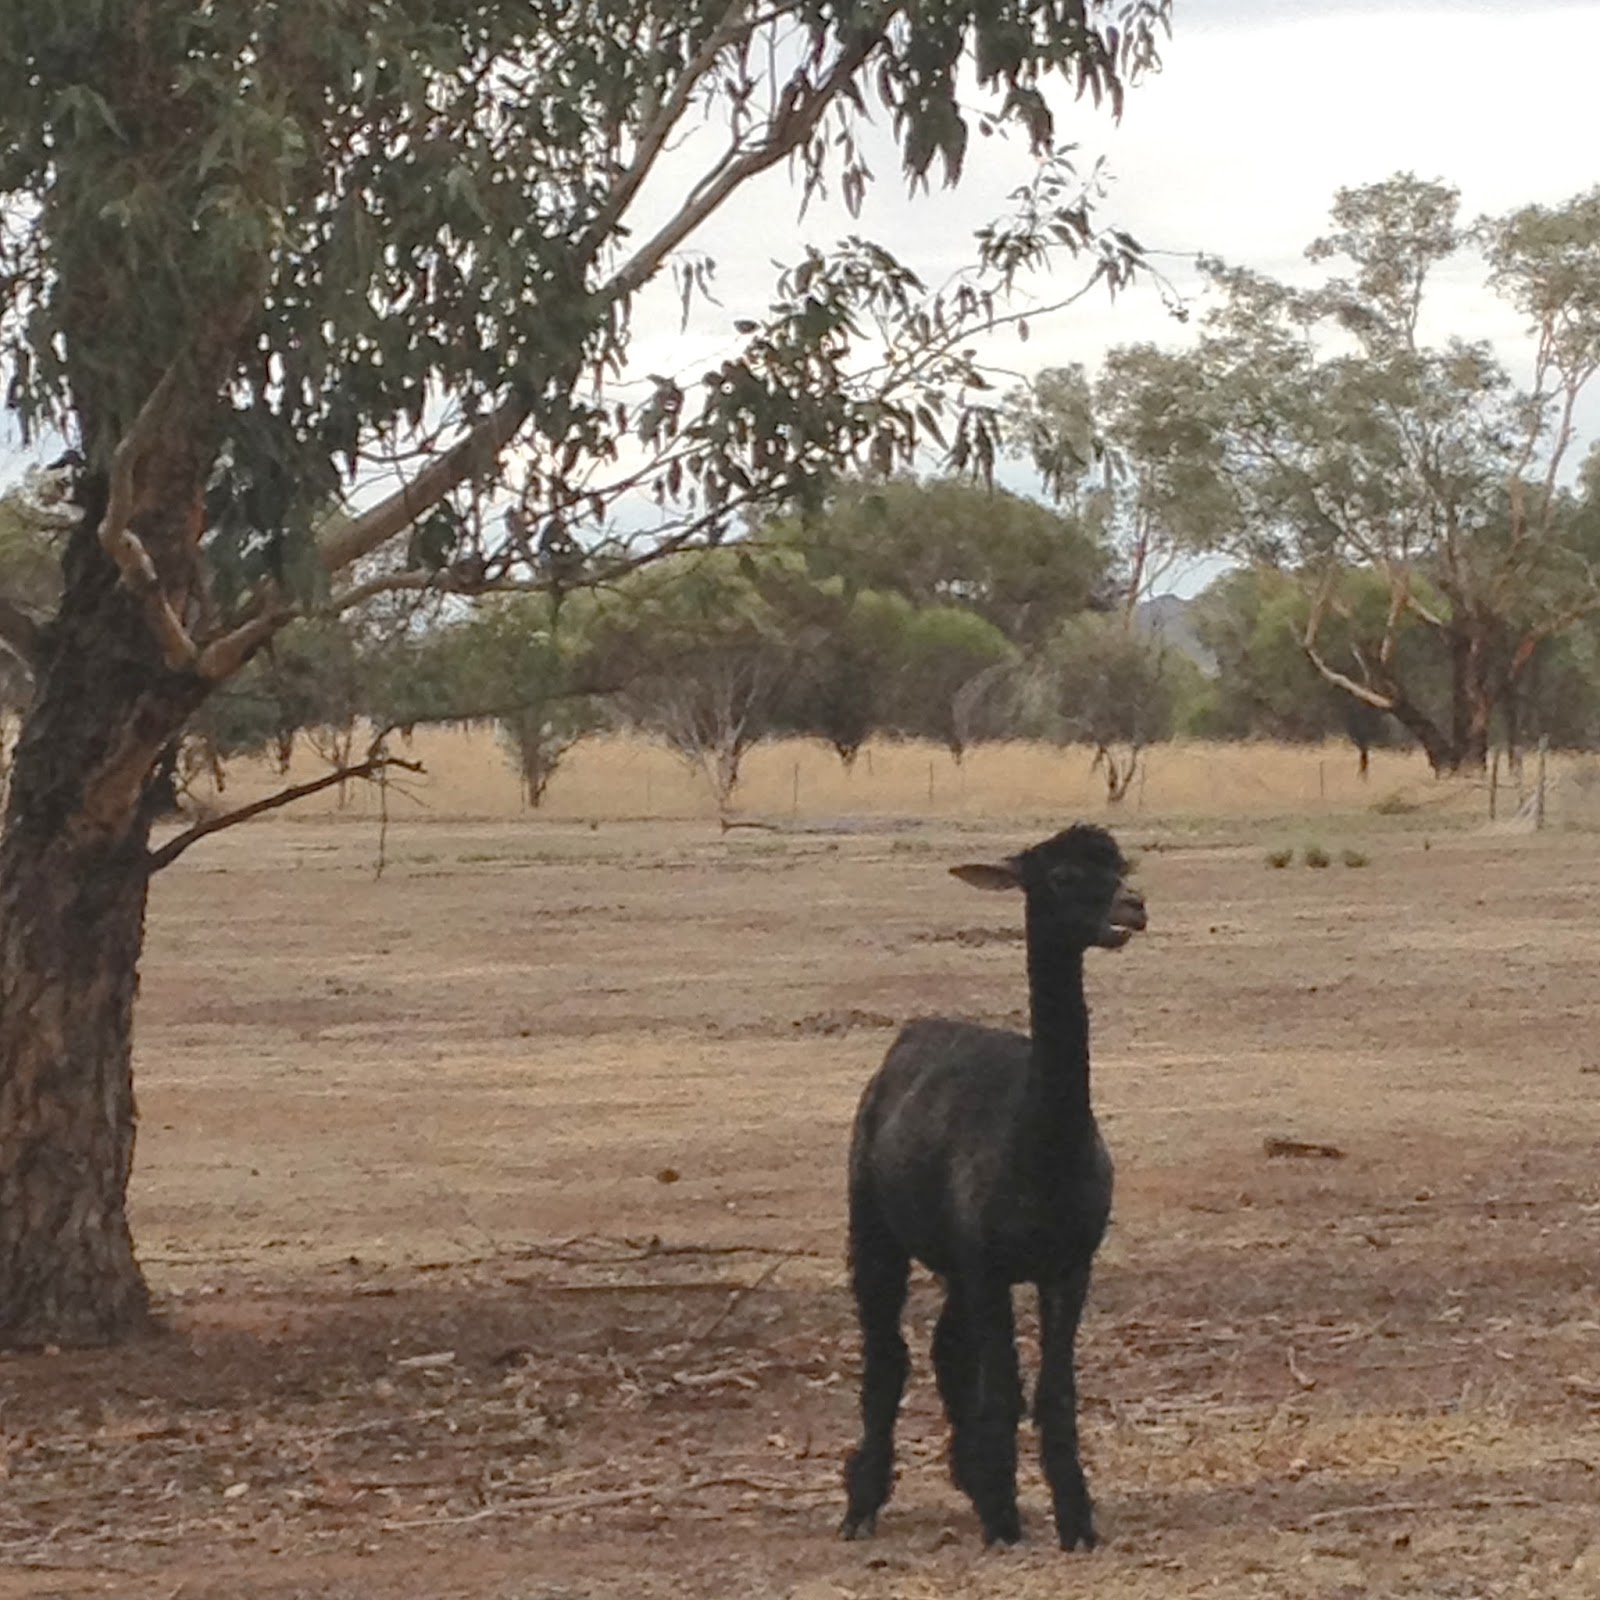
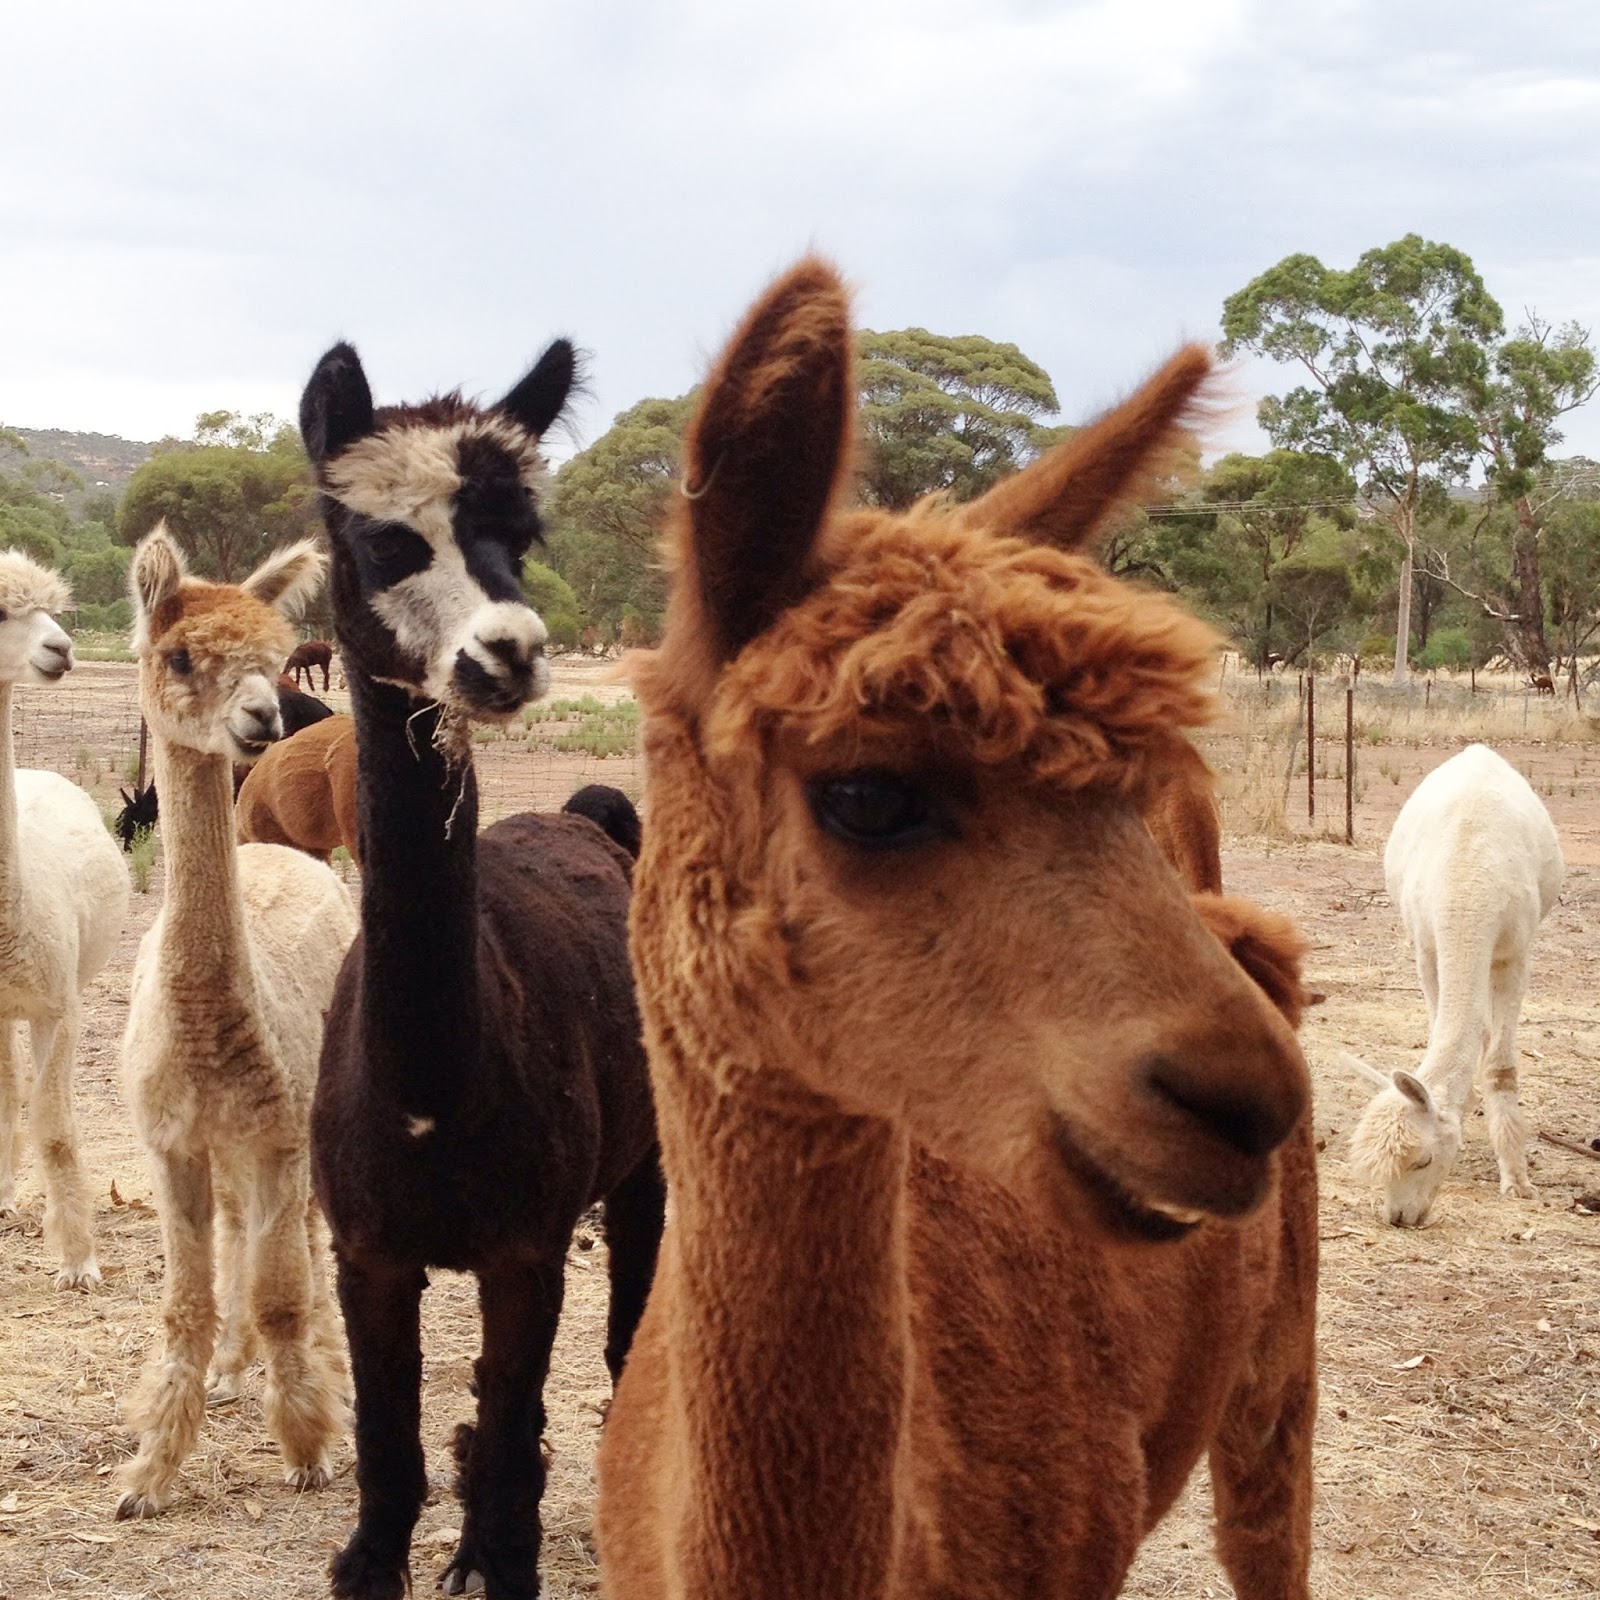
Earlier in the year, Nicki drove Sue of fadanista and me to Toodyay, where the three of us visited the Fibre of the Gods, the alpaca farm owned and run by Hazel and Michael McKone.  The farm is also home to a tiny and thriving wool mill; processing fleece into yarn for anyone who has some and wants it done; AND very importantly for the purpose of our project, also processes and spins its own alpaca yarn, shorn from their very own animals!   The lovely Hazel took us into the girls’ paddock and introduced us … below are some of the hembras.  That’s the term for a female alpaca, fyi.  Also did you know that a male alpaca is known as a macho?!  We saw one macho, out on his lonely lonesome in a separate paddock, all manly-like and aloof, looking down on us girls.

No, they’re not checking out the macho…  they’re giving the evil eye to the farm’s cat!  Alpacas are very wary of cats; and dogs too, according to my friend J, who has a small herd of her own. They will protect your sheep from vermin like foxes, and are likely to turn on a dog and kick him out of a paddock if they don’t know him well.

Hazel kindly showed us the mill equipment and explained how the entire operation is run entirely on their farm; from the animal right through to the finished yarn.  And then we obviously shopped in their tiny store, cleaning out a, erm, sizeably large chunk of their eponymous stock, eep! They do stock some lovely coloured yarns and a few knitted and felted products for sale, however we were all of us after their own natural, un-dyed yarns for the purposes of our 100% homegrown project  🙂

Sue and Nicki also have written about our day out on their individual blogs too.

Anyway; my cardigan!

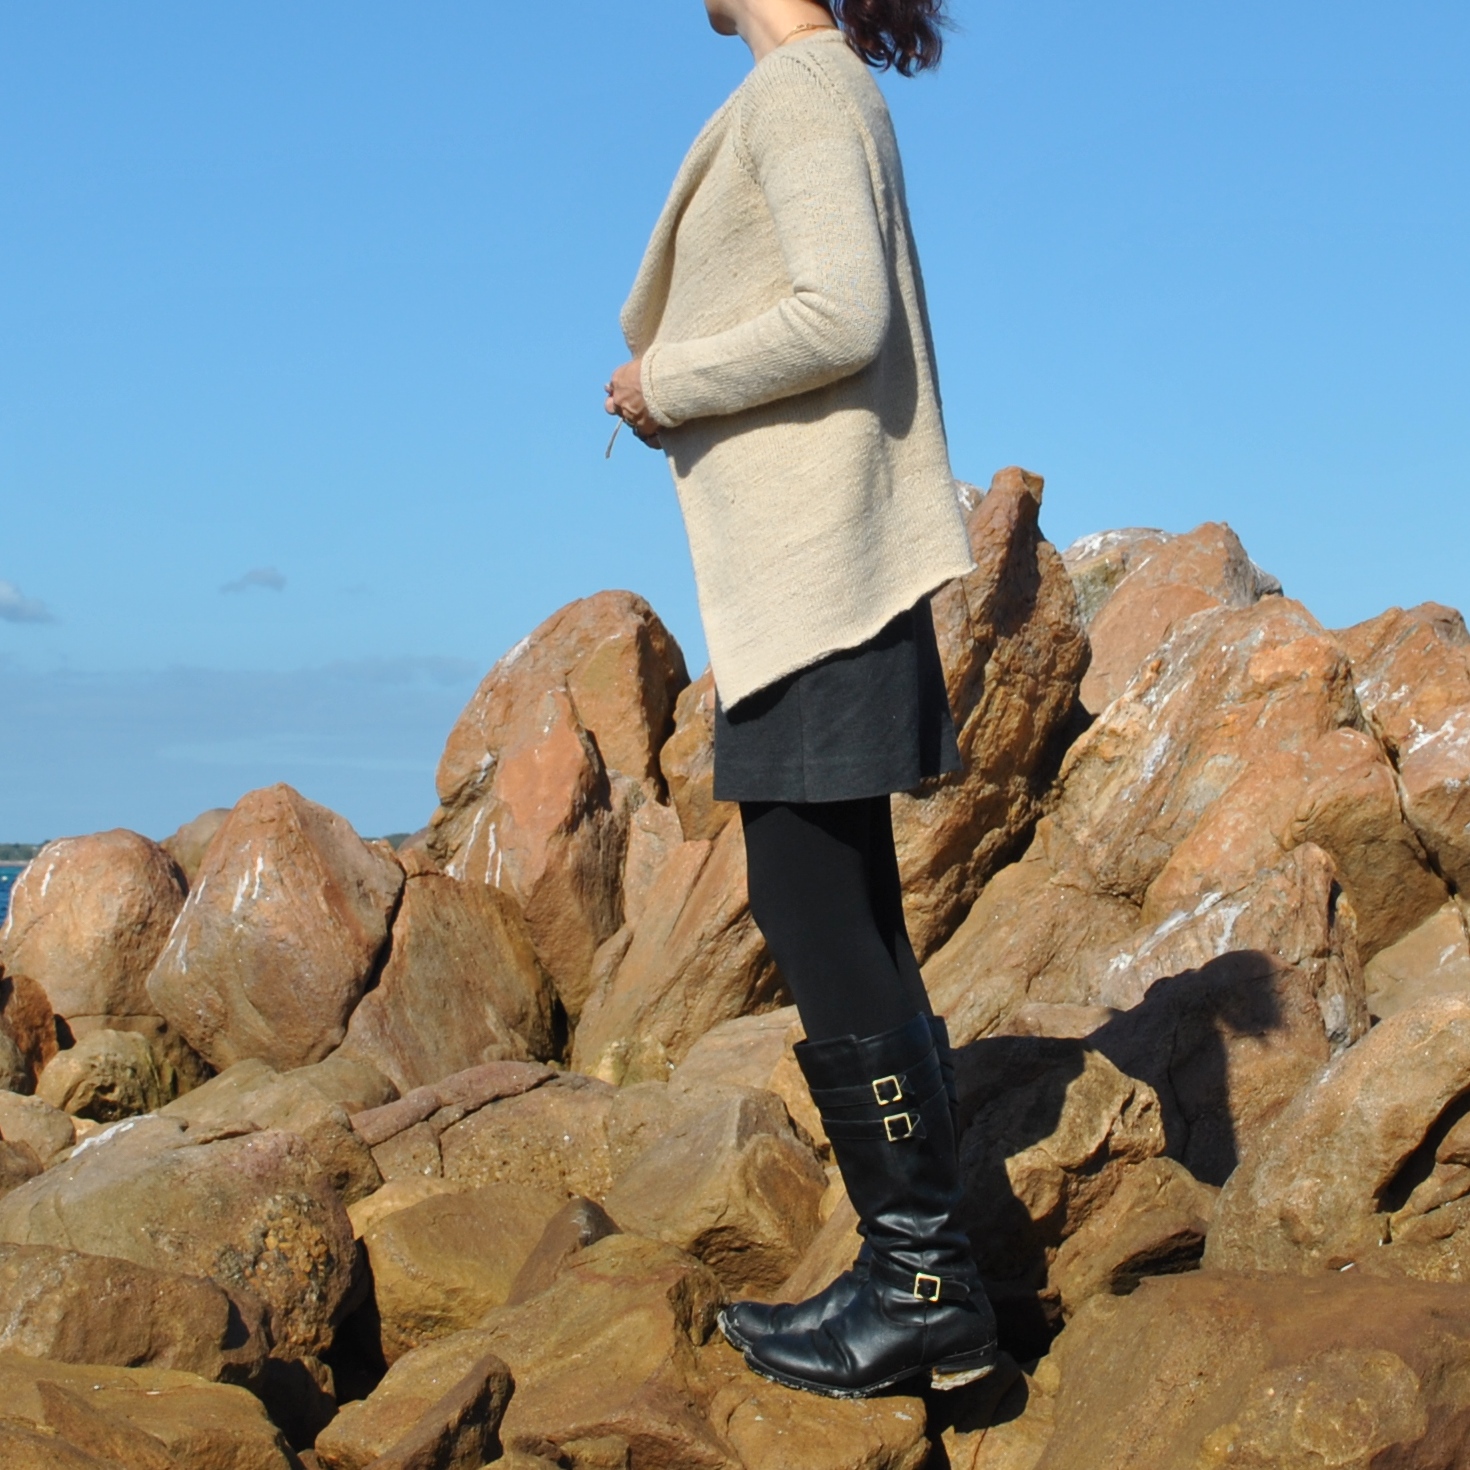
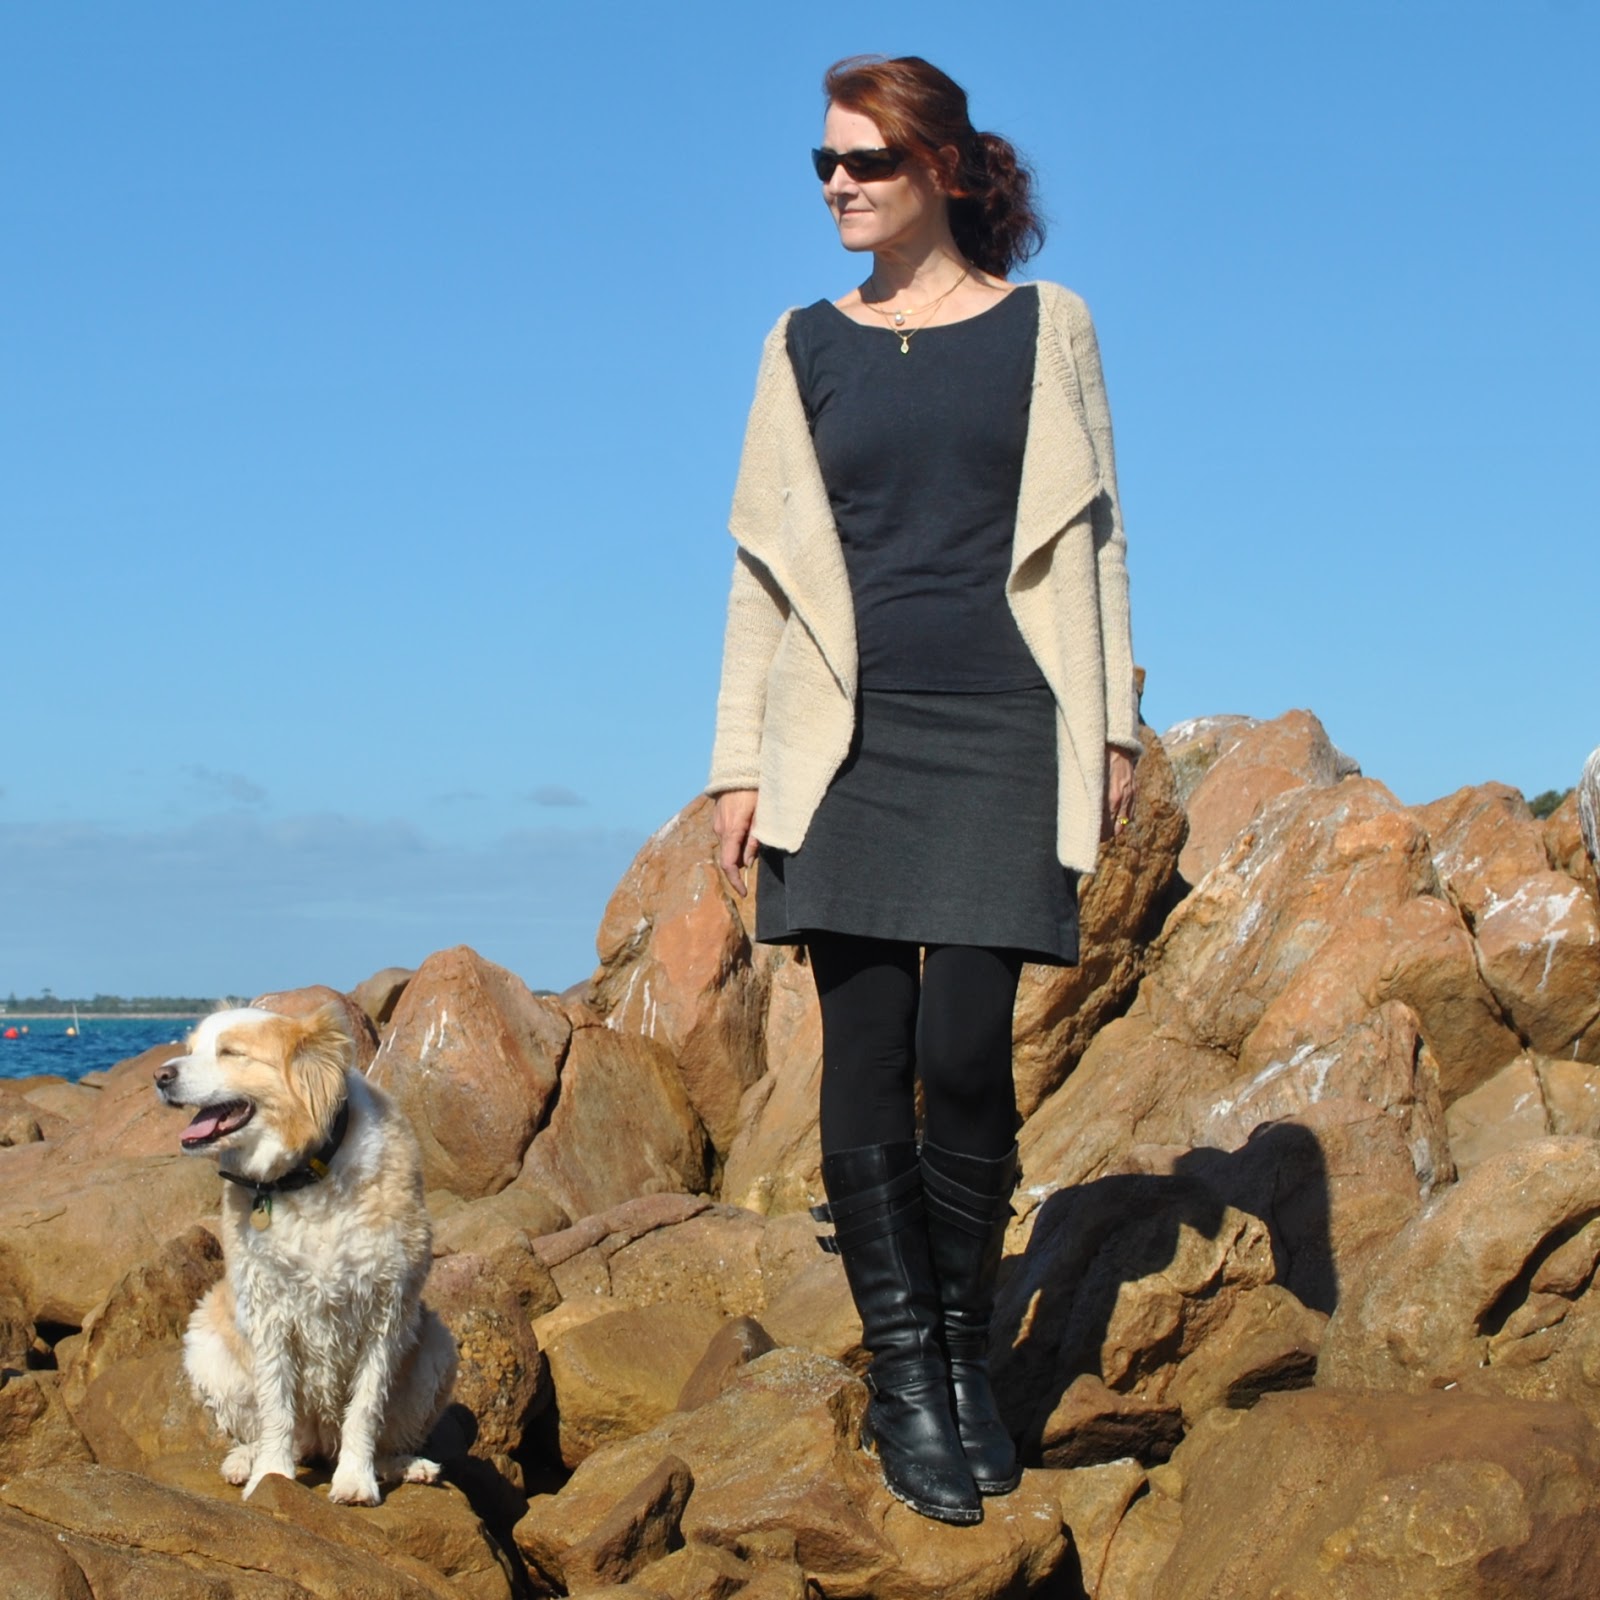
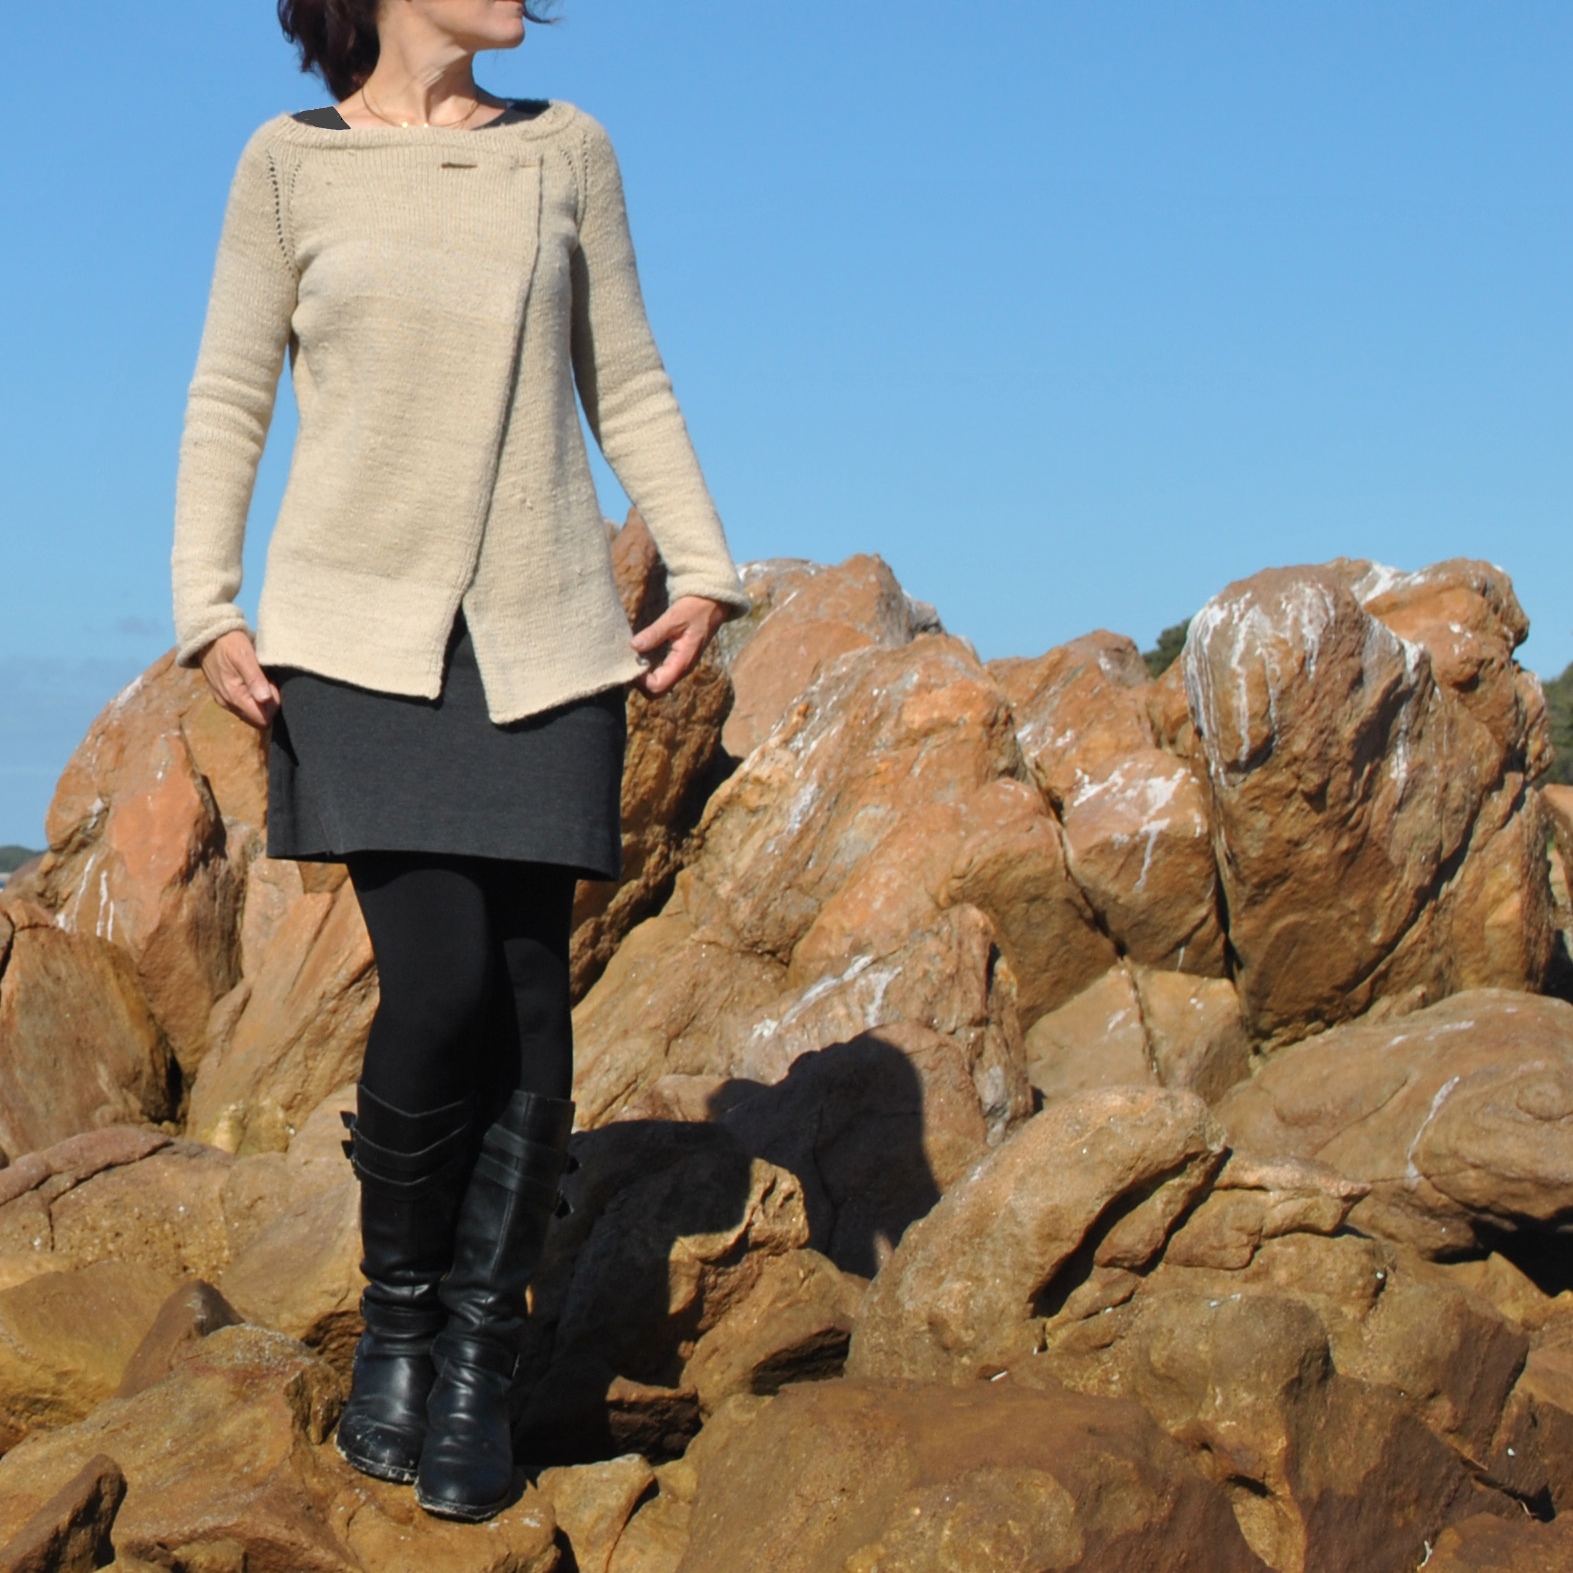
I used natural or undyed alpaca yarn from “white” alpacas, which when viewed objectively and ex situ is actually not even vaguely white at all really! but this lovely, very pale caramel colour.  So how apt that I should choose a pattern called “Caramel”!  
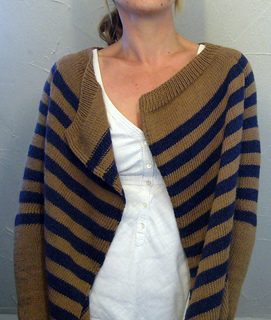
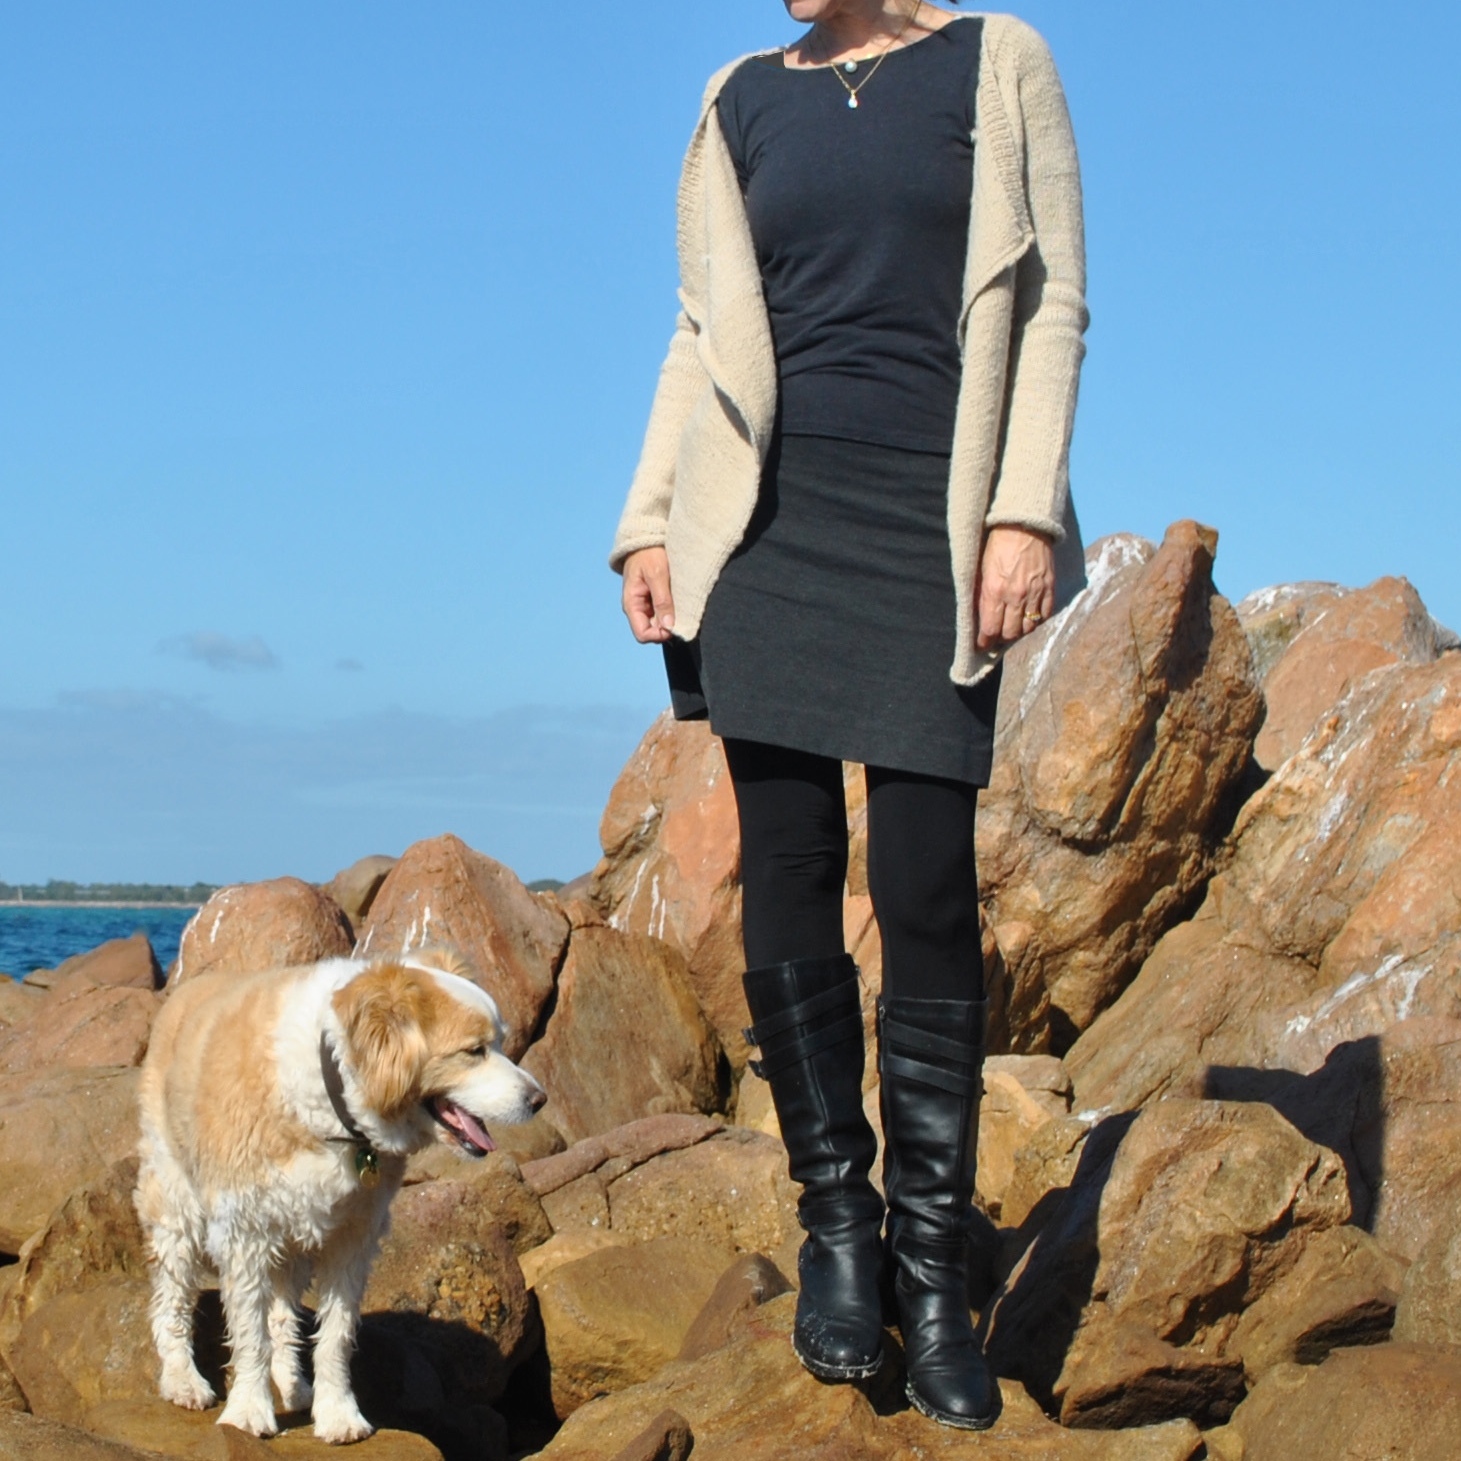
The Caramel blanket-style cardigan or jacket is designed by Isabell Kraemer, and is freeeee! available to download here on Ravelry.  Basically; I put the search words “free” “cardigan” “8ply” into the Ravelry search engine and this came up… I thought it a rather nice and elegant shape.    Well, “shape”; of course “blanket style” is basically another way of saying “giant rectangle with sleeves”… anyway I love how it looks loose with the fronts gently draping upon themselves, the points hanging down longer than the back.
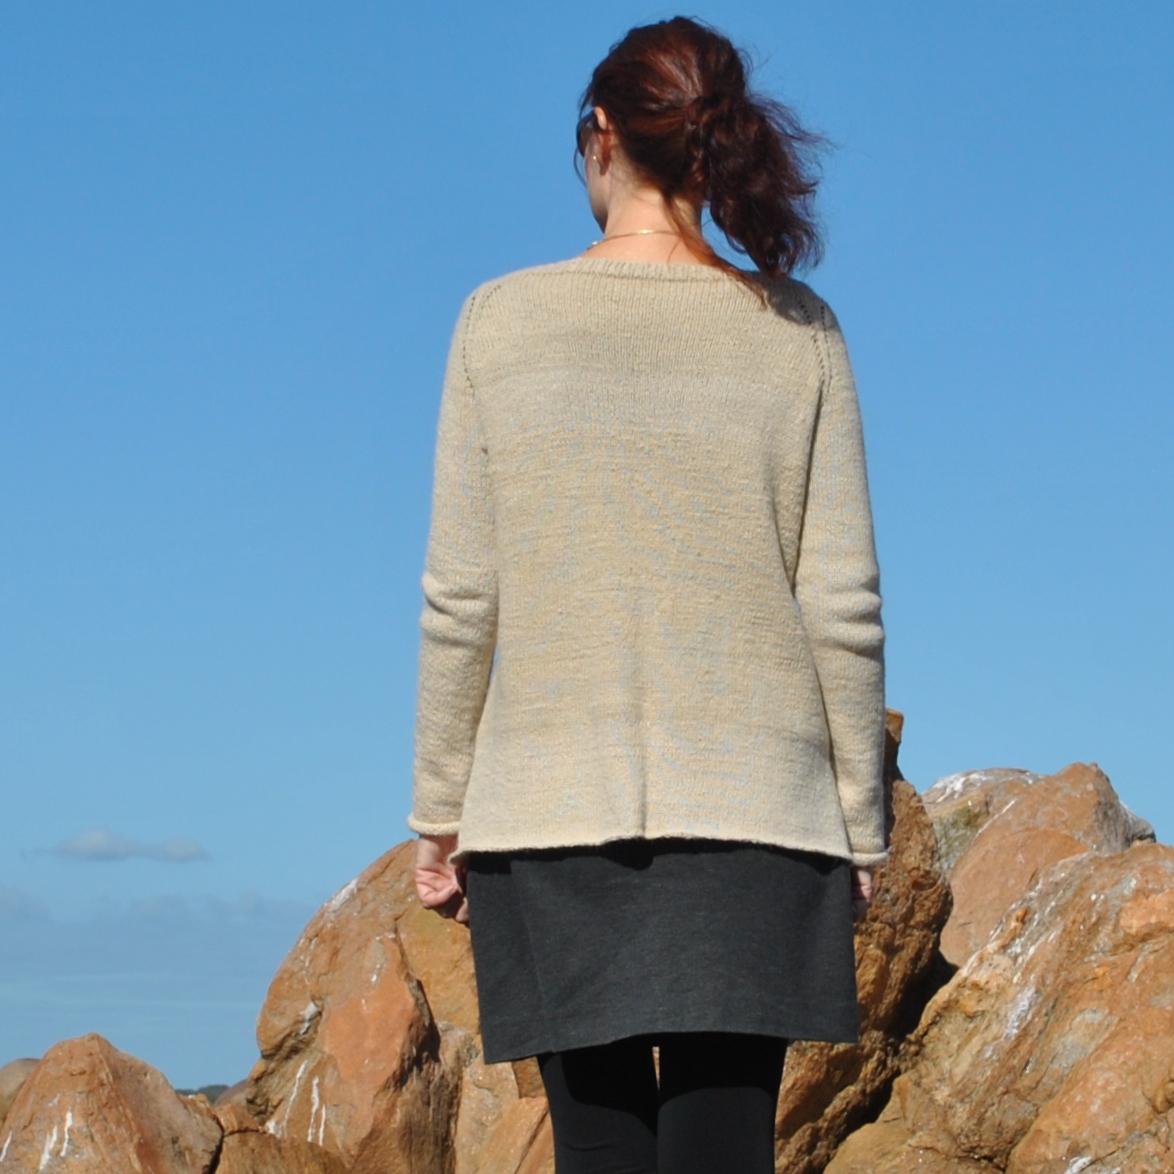
My Caramel is knitted pretty much to the pattern; with just a few minor variations. Obviously mine has no real stripes.  My sleeves and body are much longer.  Also, I left off the the decorative? purl side seam stitching and the ribbing off the sleeves and lower edge.  In the process of knitting I decided I really preferred the streamlined look with slight curl-up of the ends that you get with no ribbing.  I had initially finished a sleeve lower edge with ribbing, to trial it; but then I unravelled that bit and redid the edges sans ribbing. 
Plus; and herein is a huge advantage of a top-down knitted design, I just kept on knitting knitting knitting until I had used up all my wool, then cast off that lower edge.  It’s a lot easier to do that if you know you don’t have to allow for ribbing.
Result; barely no leftovers!  Win!

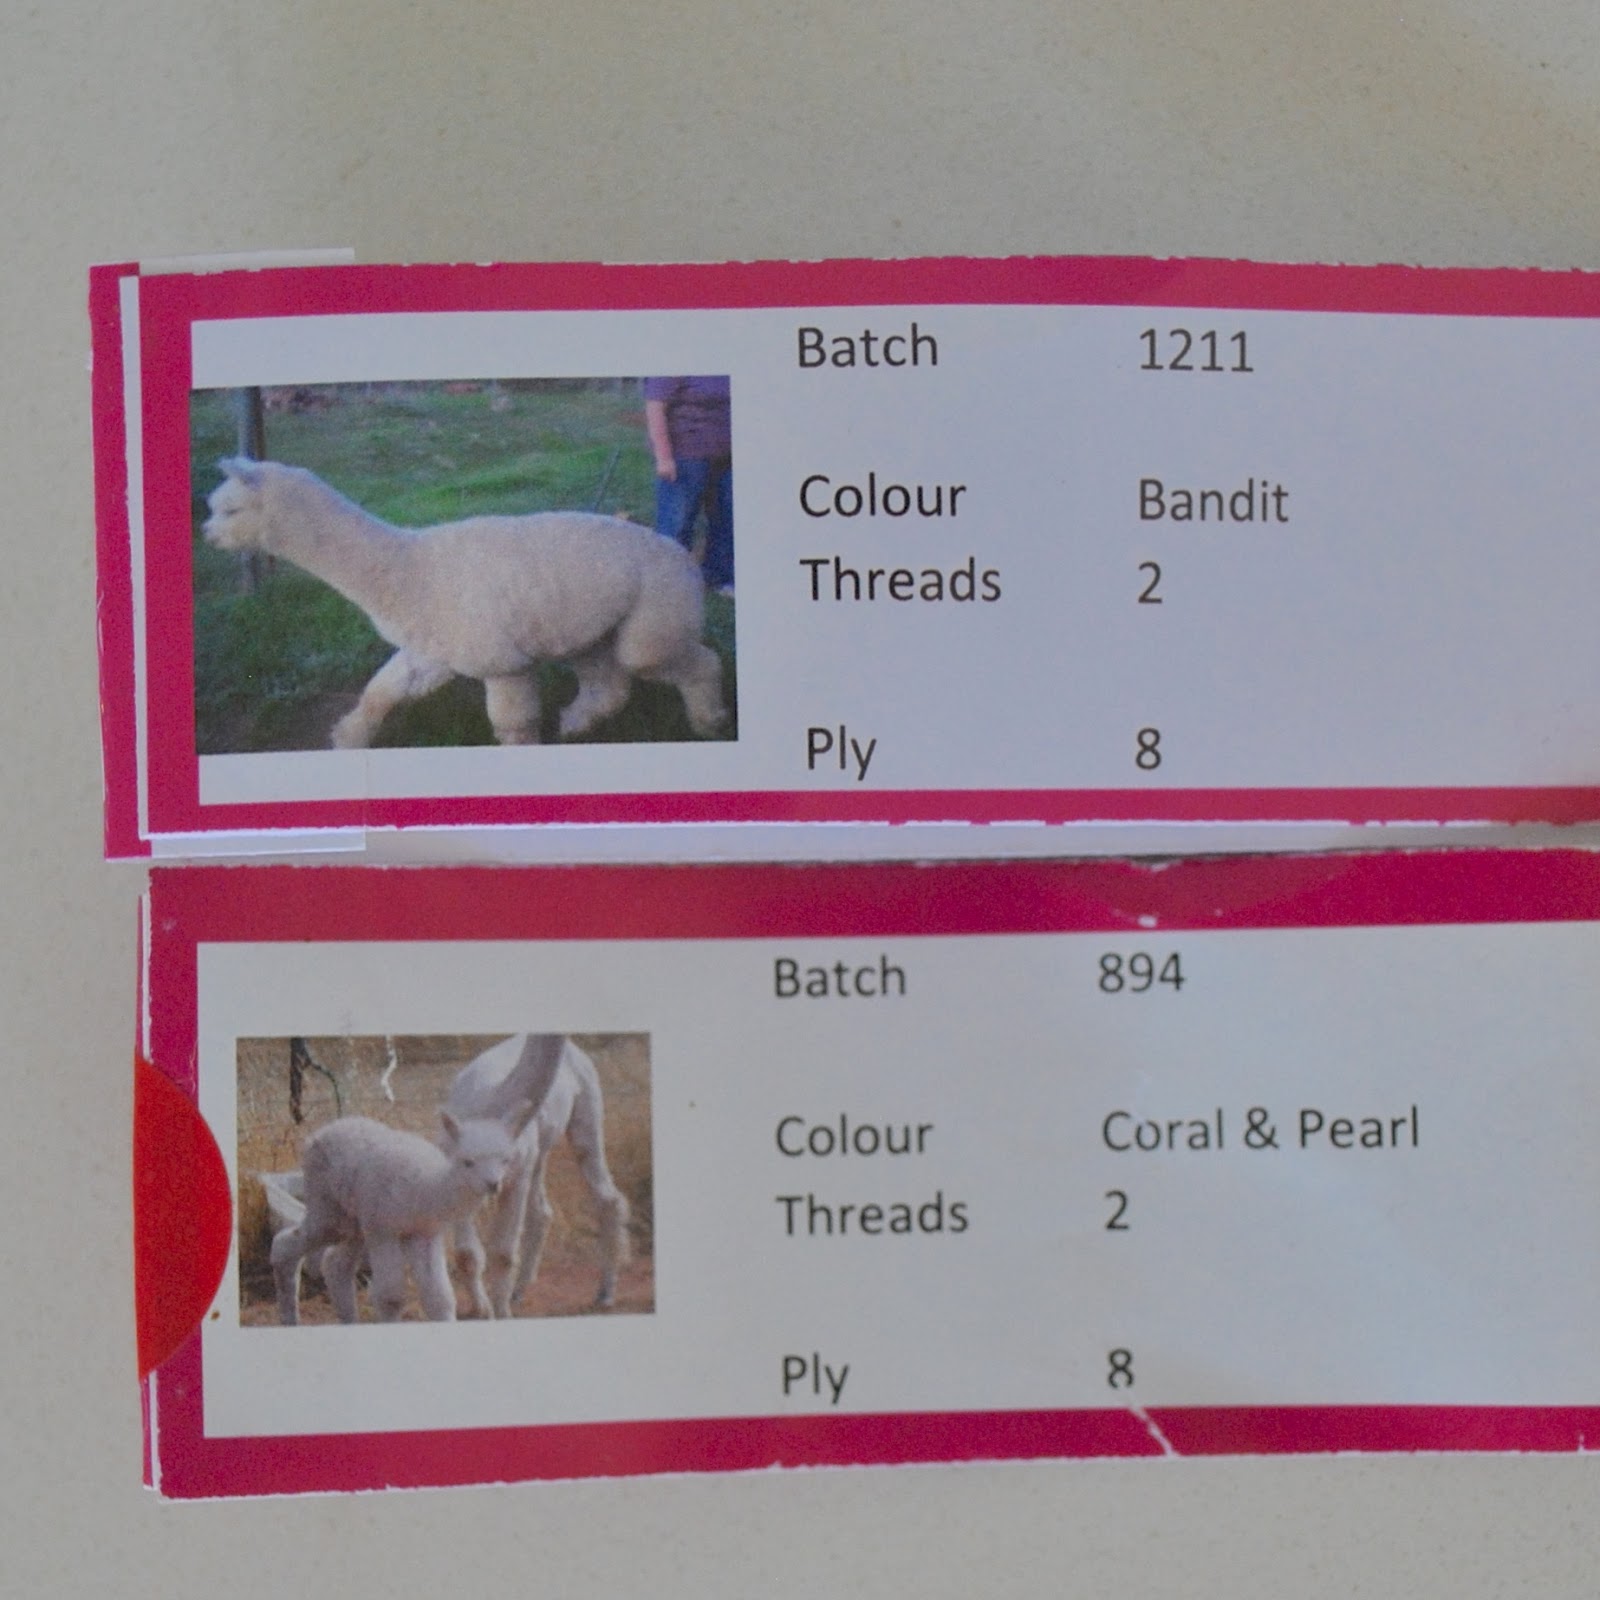
One thing about the Fibre of the Gods yarn that I really really LOVE! is how Hazel and Michael have labelled the balls with the name of the animal along with a little picture of them.  So I know that my alpaca yarn came from Bandit, Coral and Pearl. 
Hey, guys! Thanks so much for the shirts off your backs… figuratively speaking.  😉

I did notice some slight variation in the shade of the yarn, due to the slight variations in the three alpacas’ different natural colourings.  I find these subtle “stripes” quite charming.
 subtle stripes are very subtle

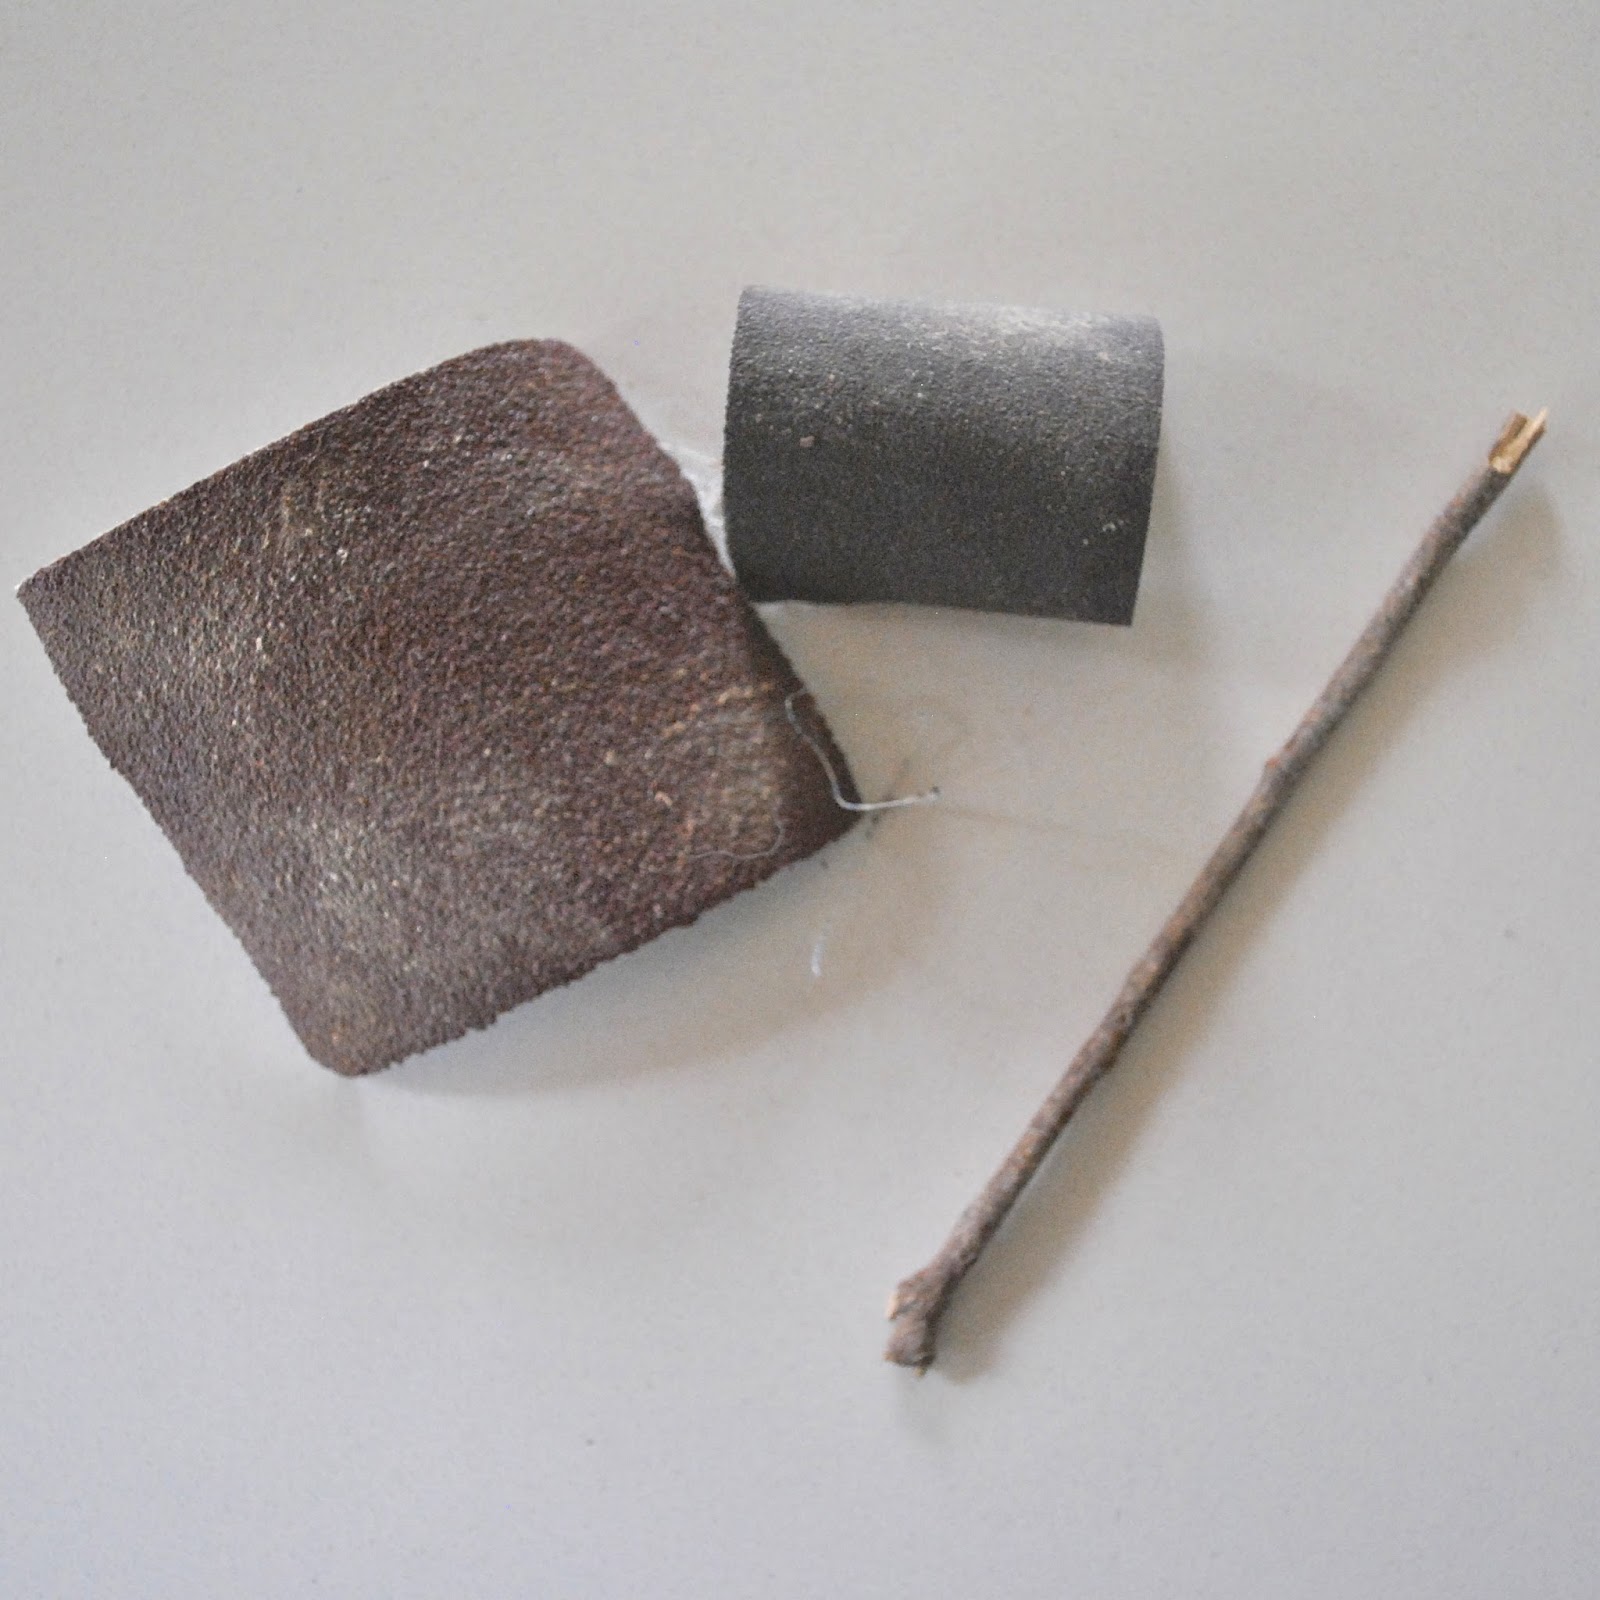
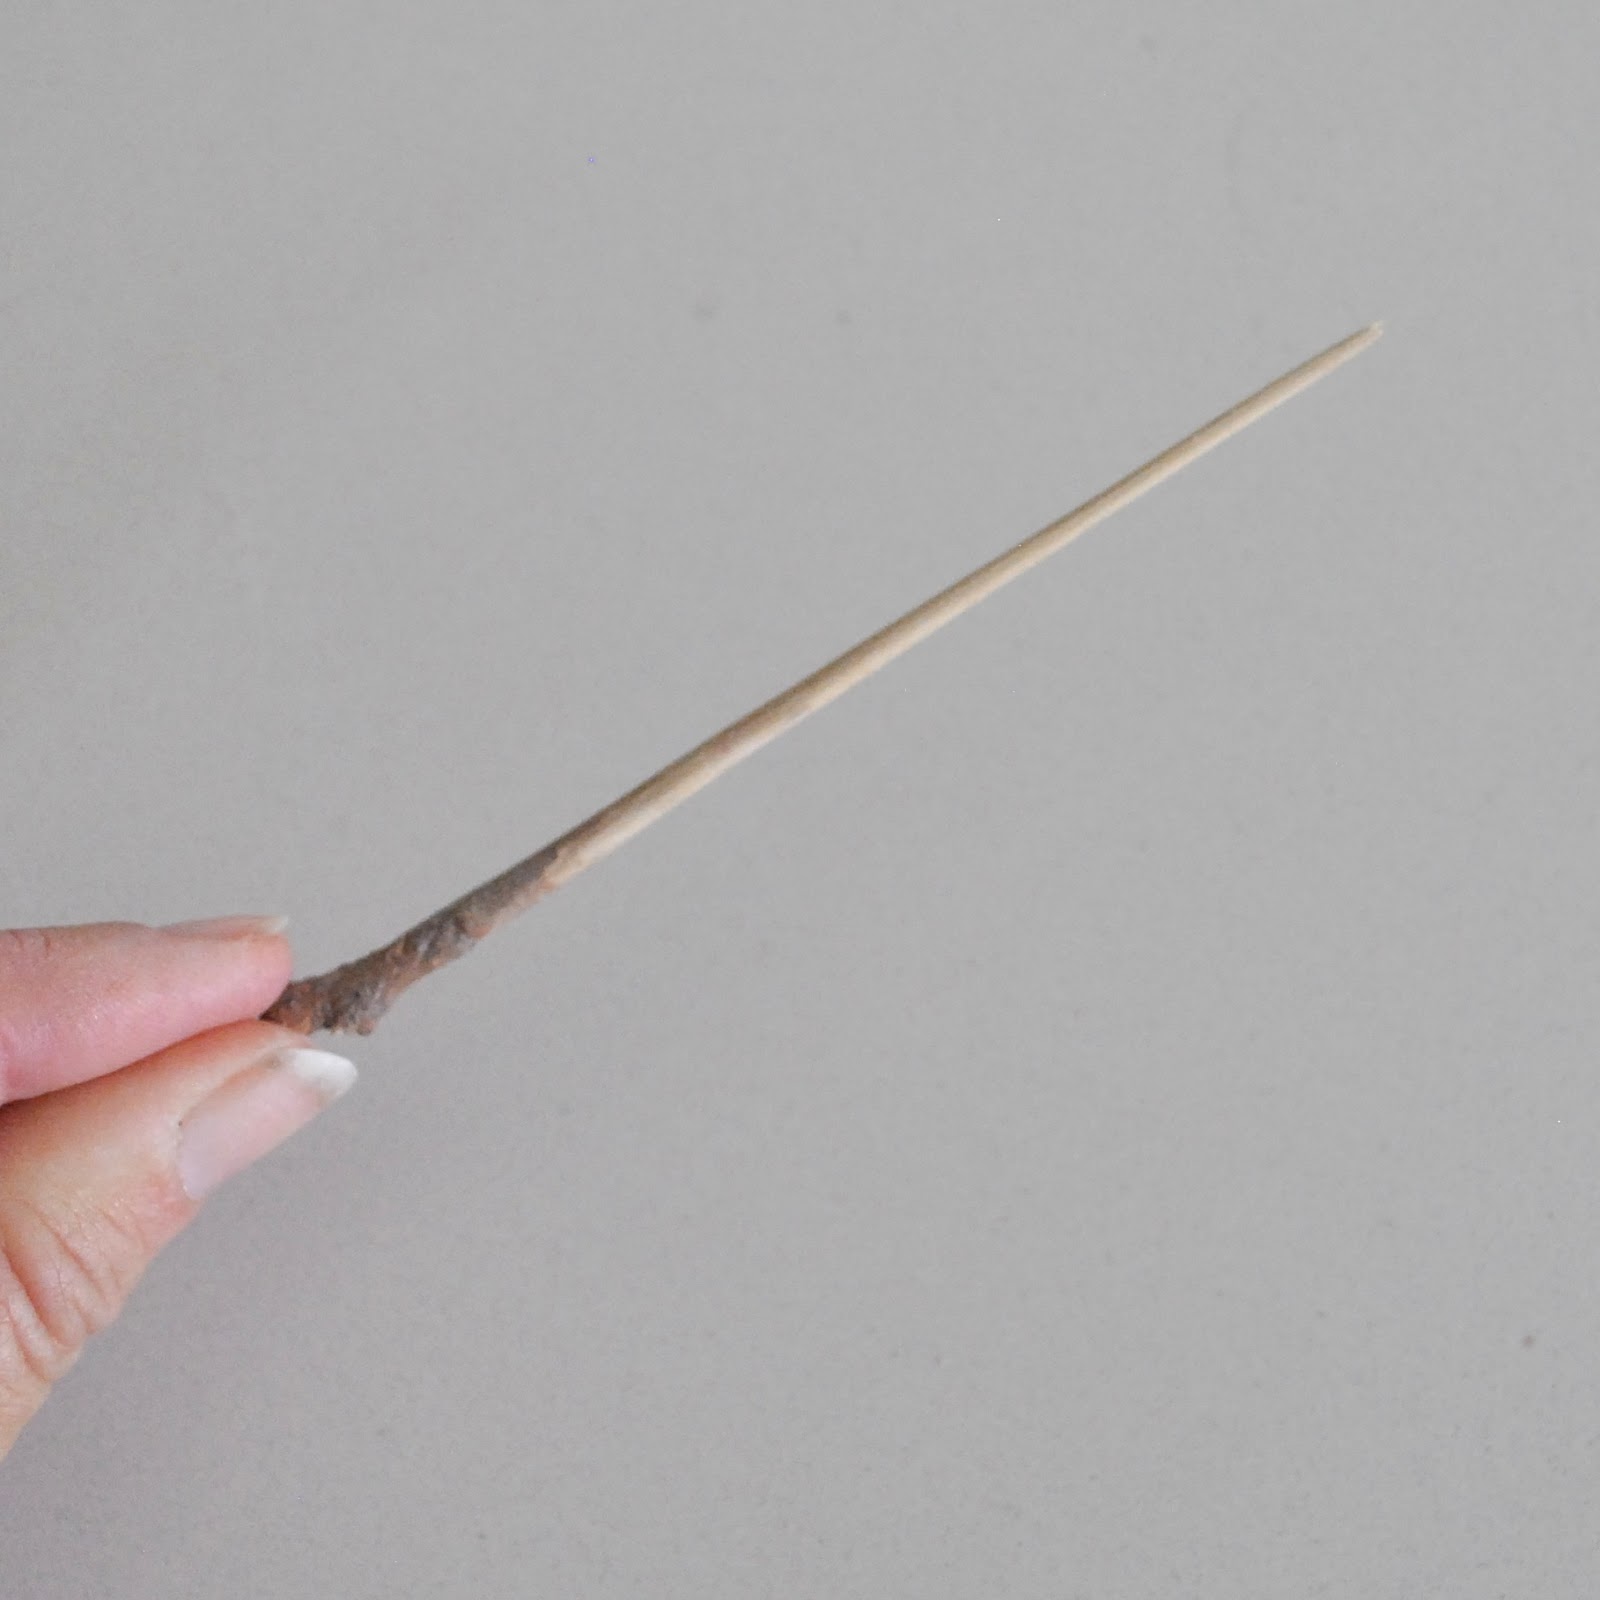
I also made a little wooden “pin” to hold the cardigan closed if it’s cold; by sanding down a nice and straight, little stick, found on my morning walk.  It’s local obviously, so it too fits in with my one year one outfit challenge!

I can’t decide if I prefer my cardigan open or closed; I think I like it both ways equally!

Details:
Cardigan; hand-knitted by me, the Caramel pattern by Isabell Kraemer, natural alpaca yarn from Fibre of the Gods mill in Toodyay.
Tshirt; own pattern, blue jersey over dyed black, details here
Skirt; own pattern, charcoal ponte, details here
Tights; own pattern, black stretch poly, details here
Socks; not seen, hand-knit by me from Noro wool yarn, details here

pinterestmail

Black moto jacket

Finally! A wintery day!
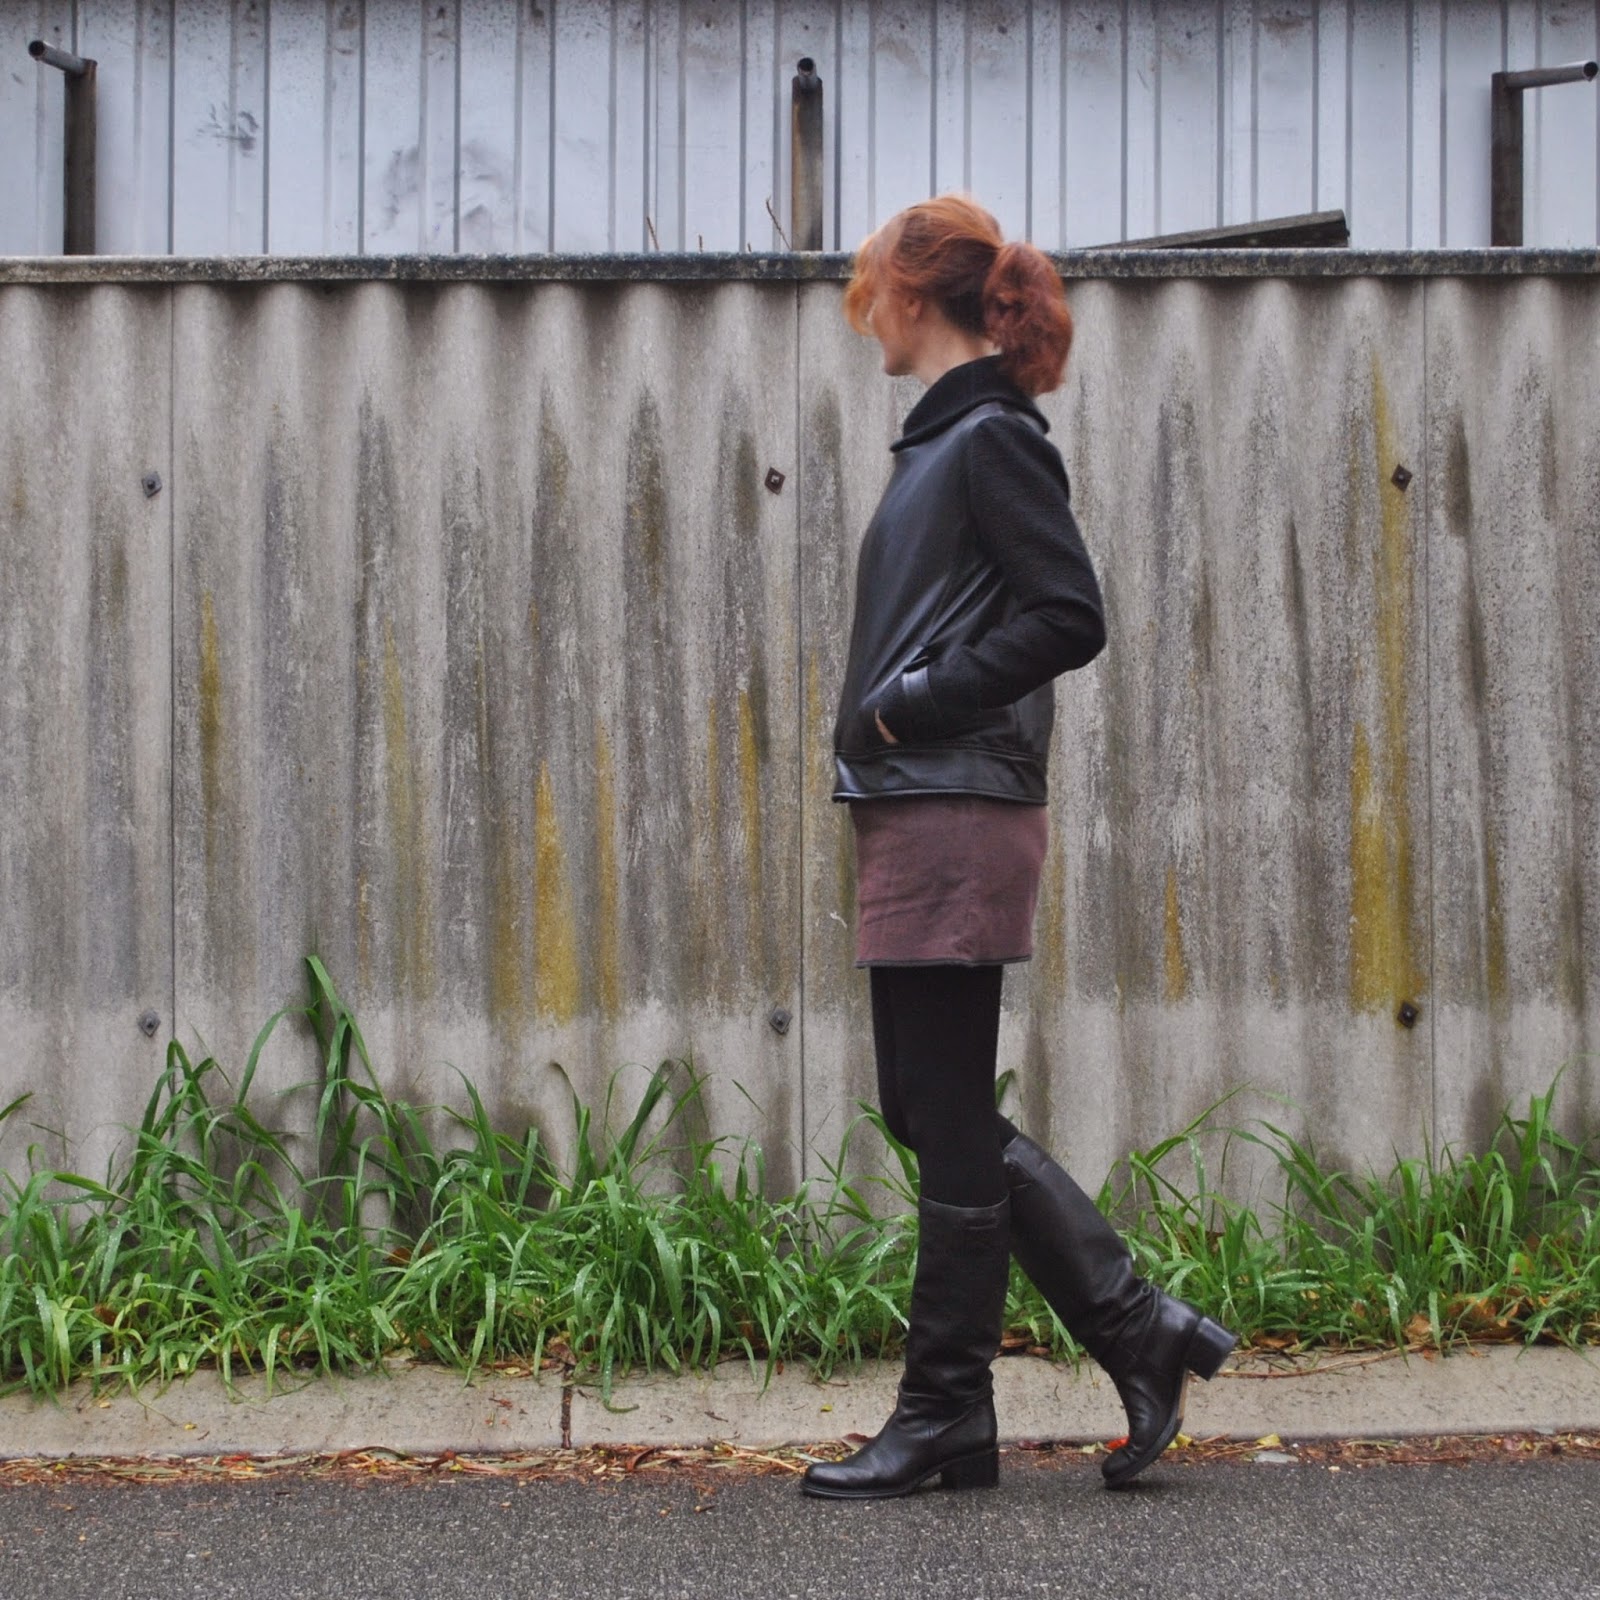
It’s pretty unusual for me to get excited about a wintery day, haha.  Believe me, winter is my very least favourite season… but I have my reason, see; I’m happy for an excuse to wear and show off my newest thing.  My moto jacket!
*sings* the leader of the pack…  brrrrm brrrrm brrmrrrrrrm!
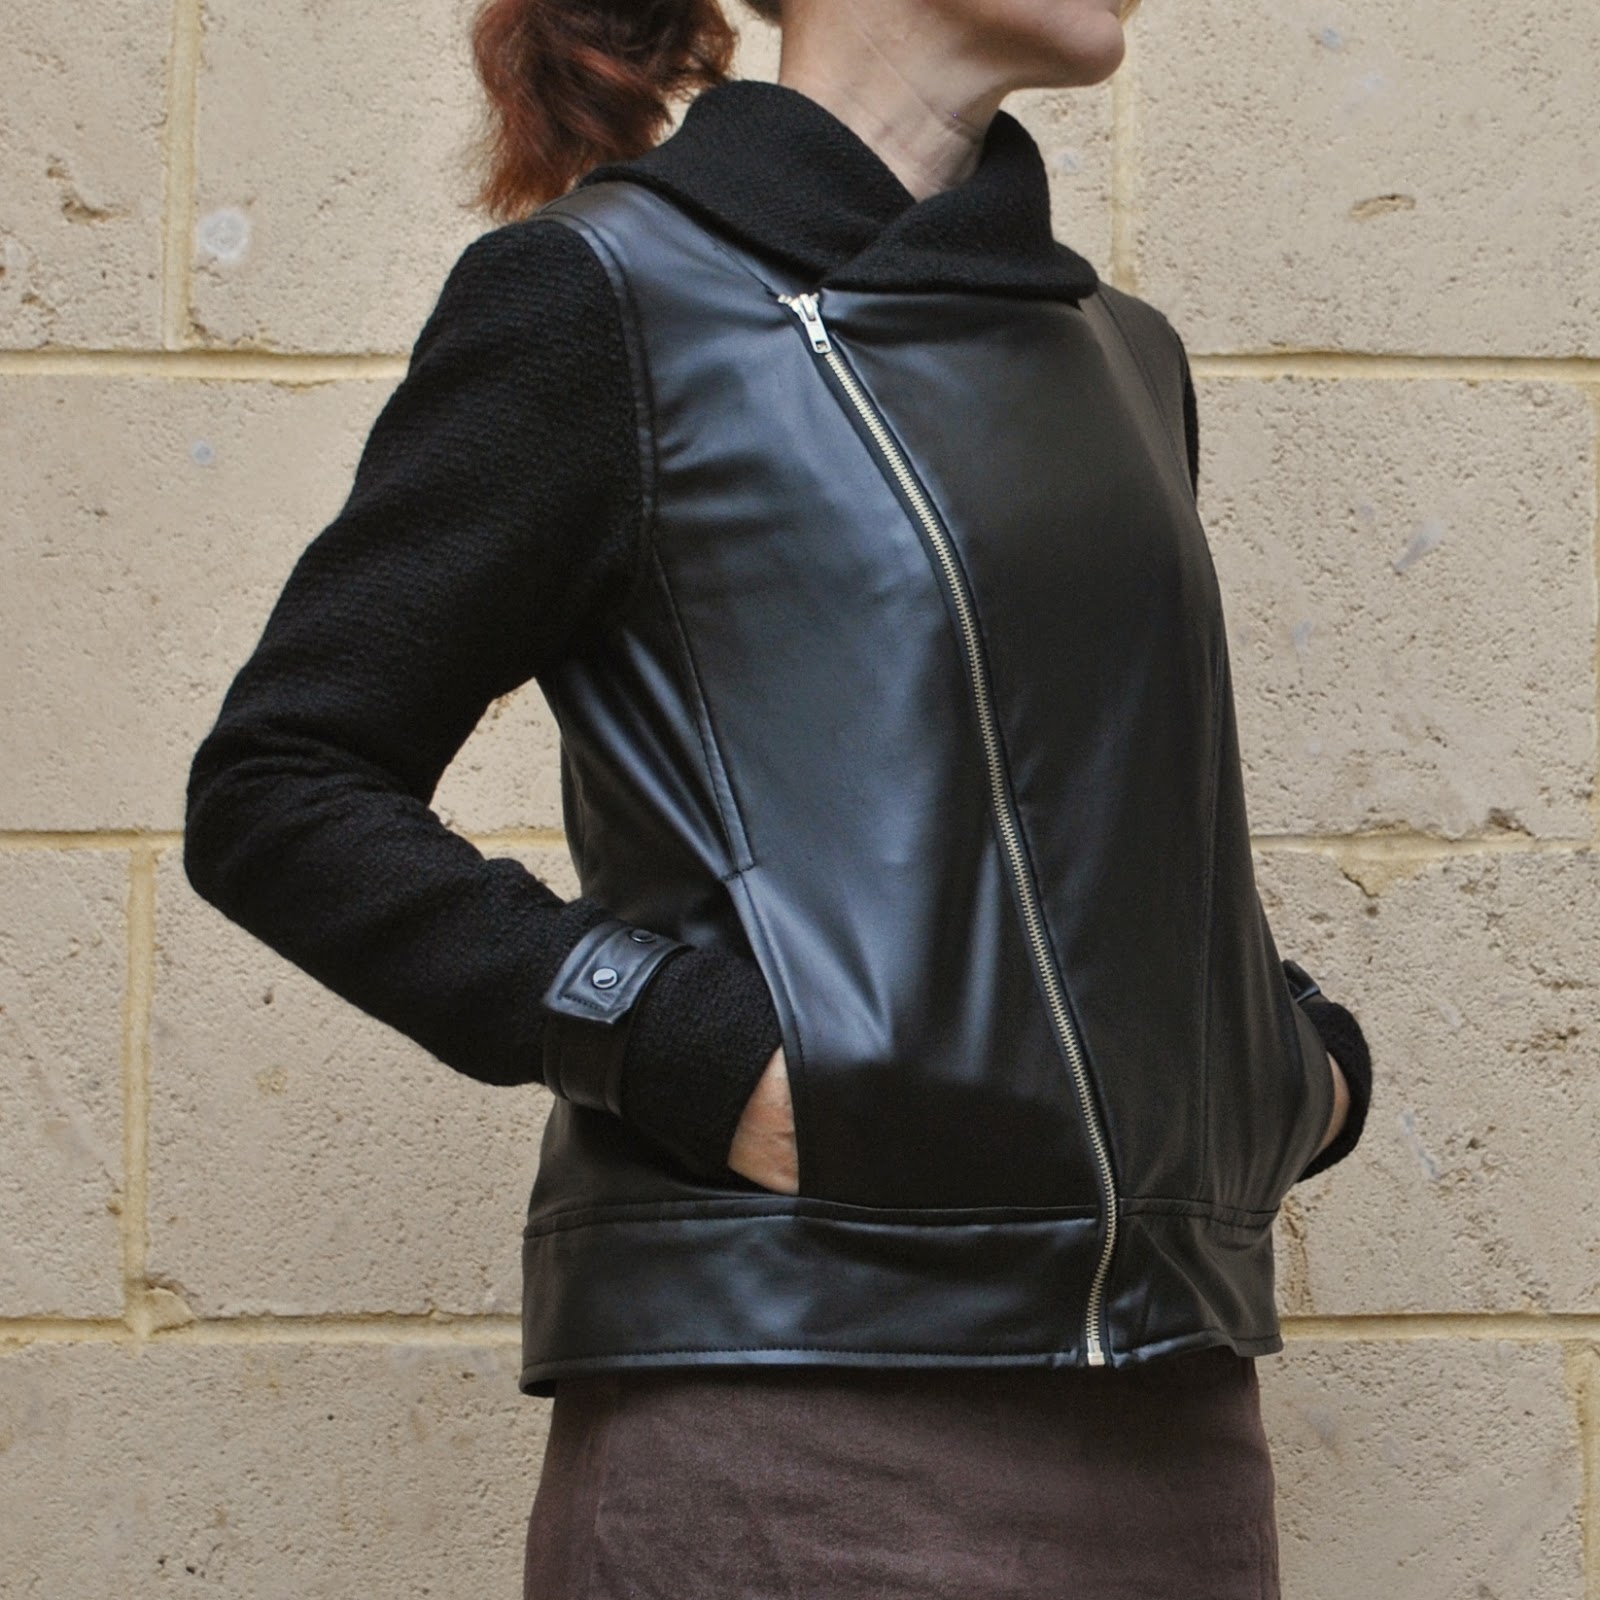
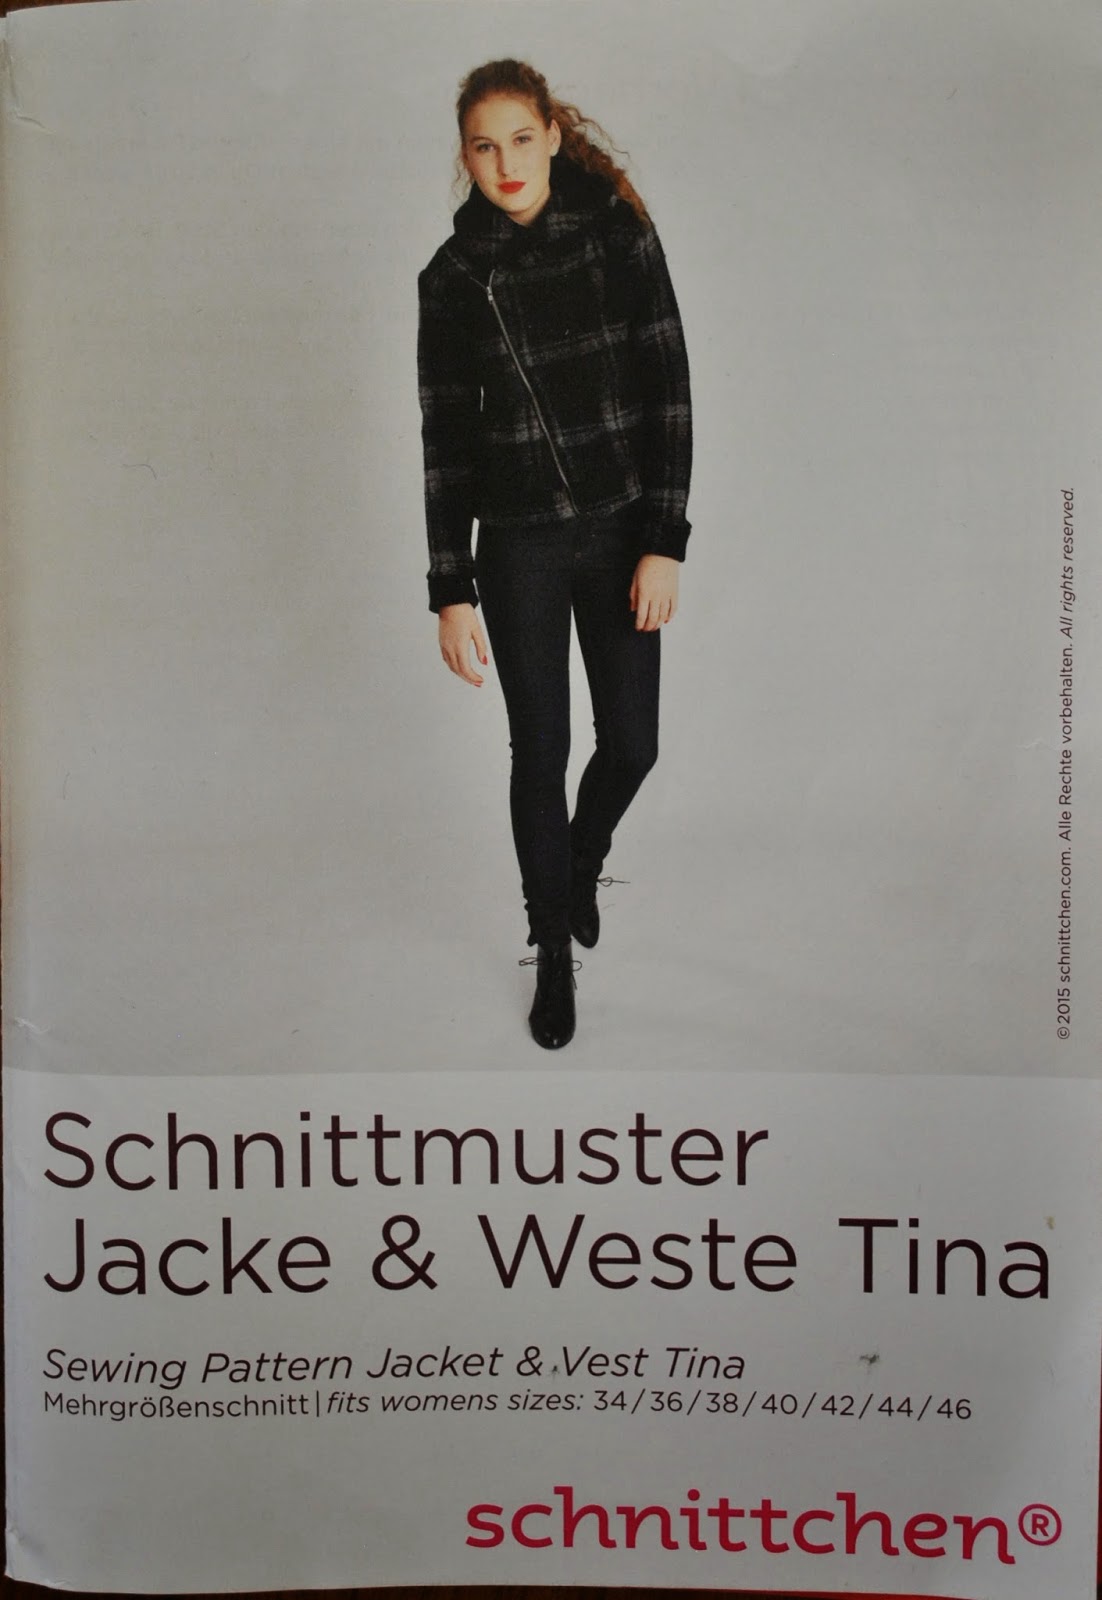
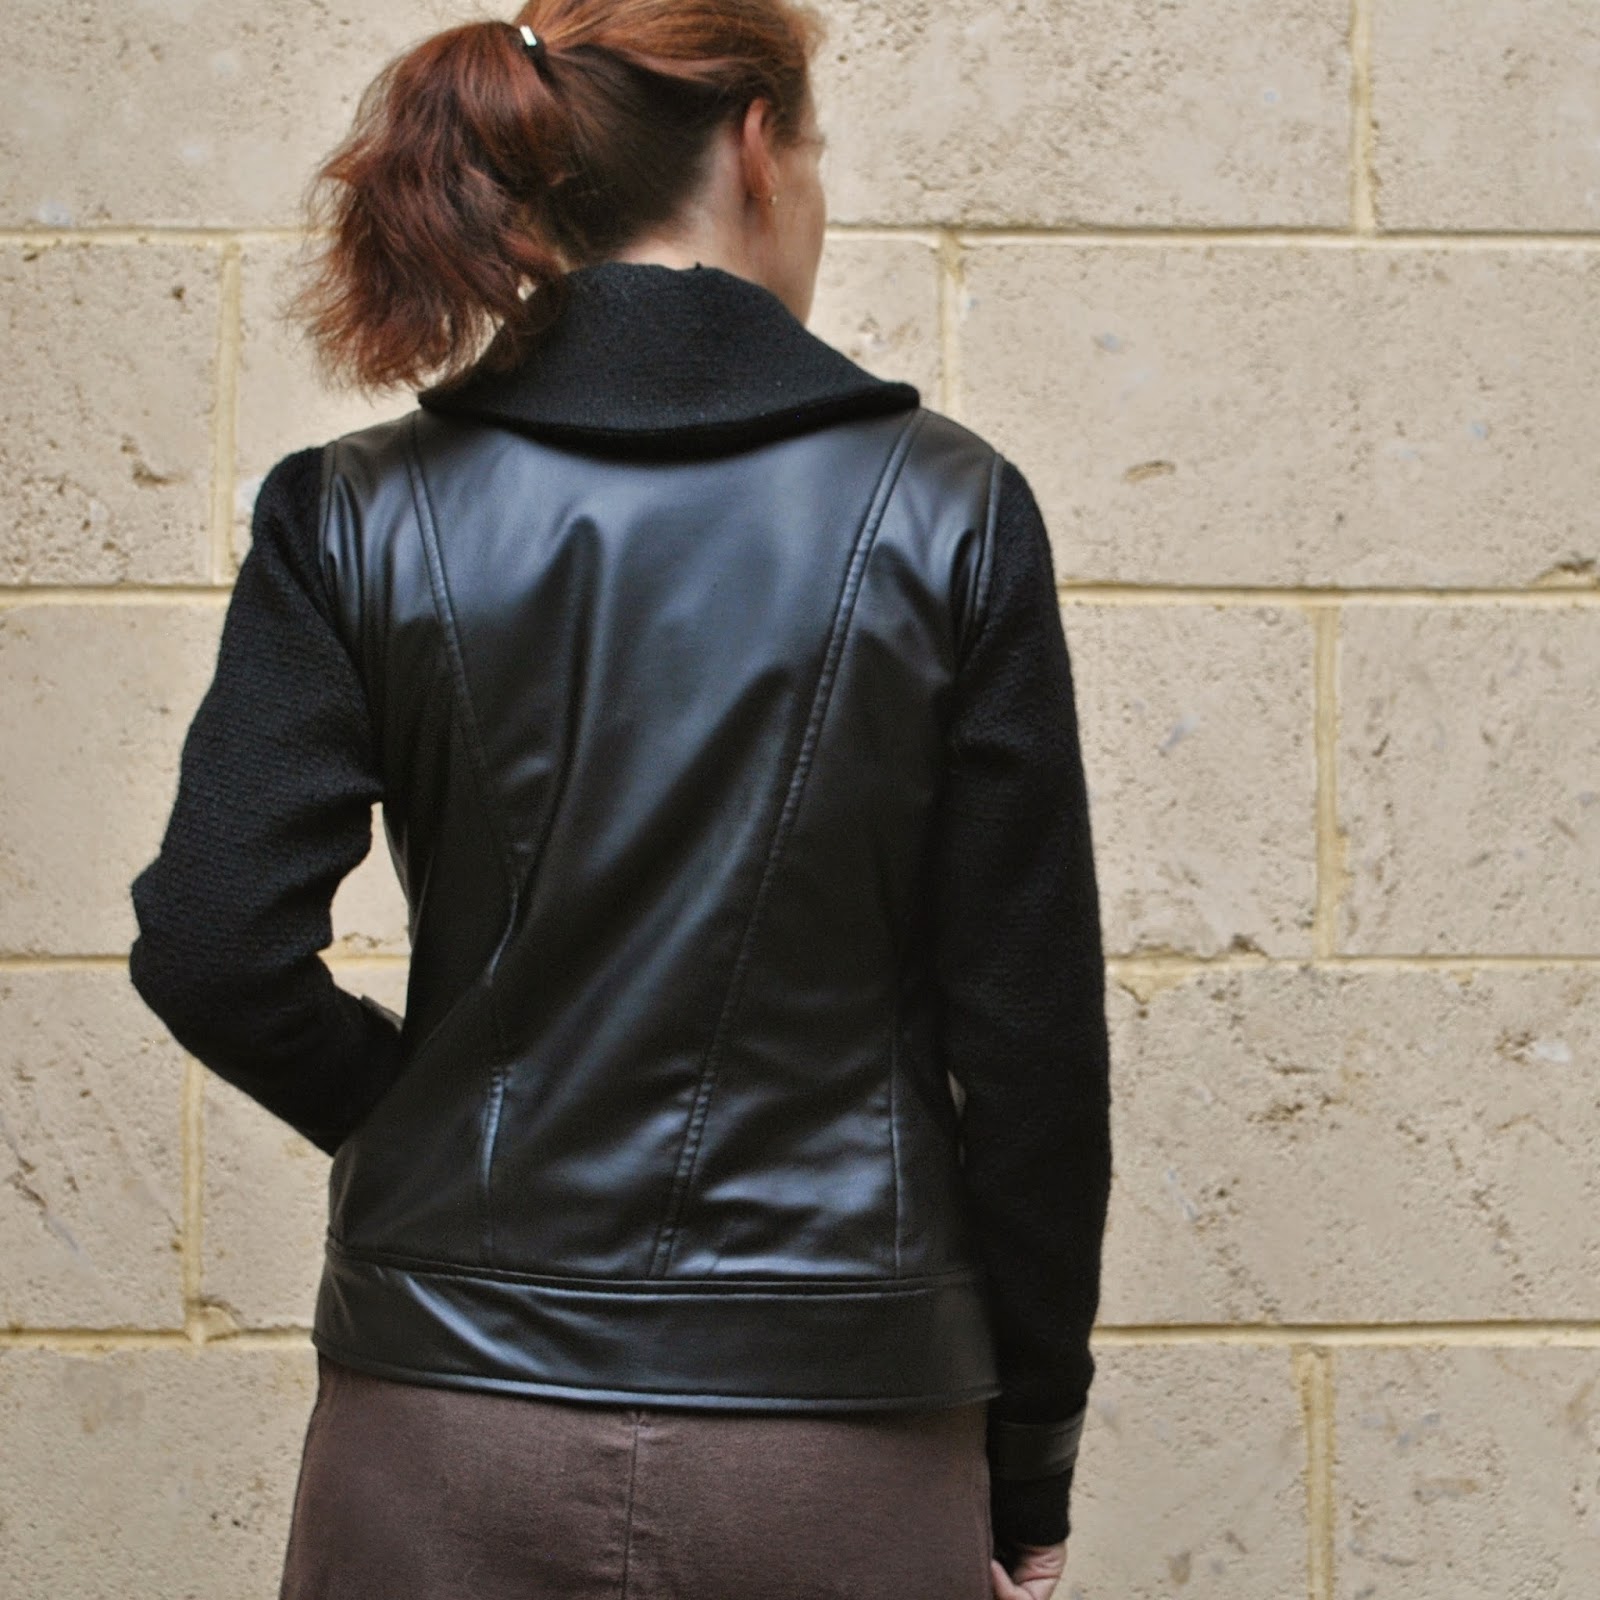
Silke, the designer behind schnittchen patterns contacted me asking if I would like to road test one of her patterns and I chose the Tina jacket; a blouson style with an asymmetric front closure by exposed zip, and a wrap-around collar.  
Danke, Silke!
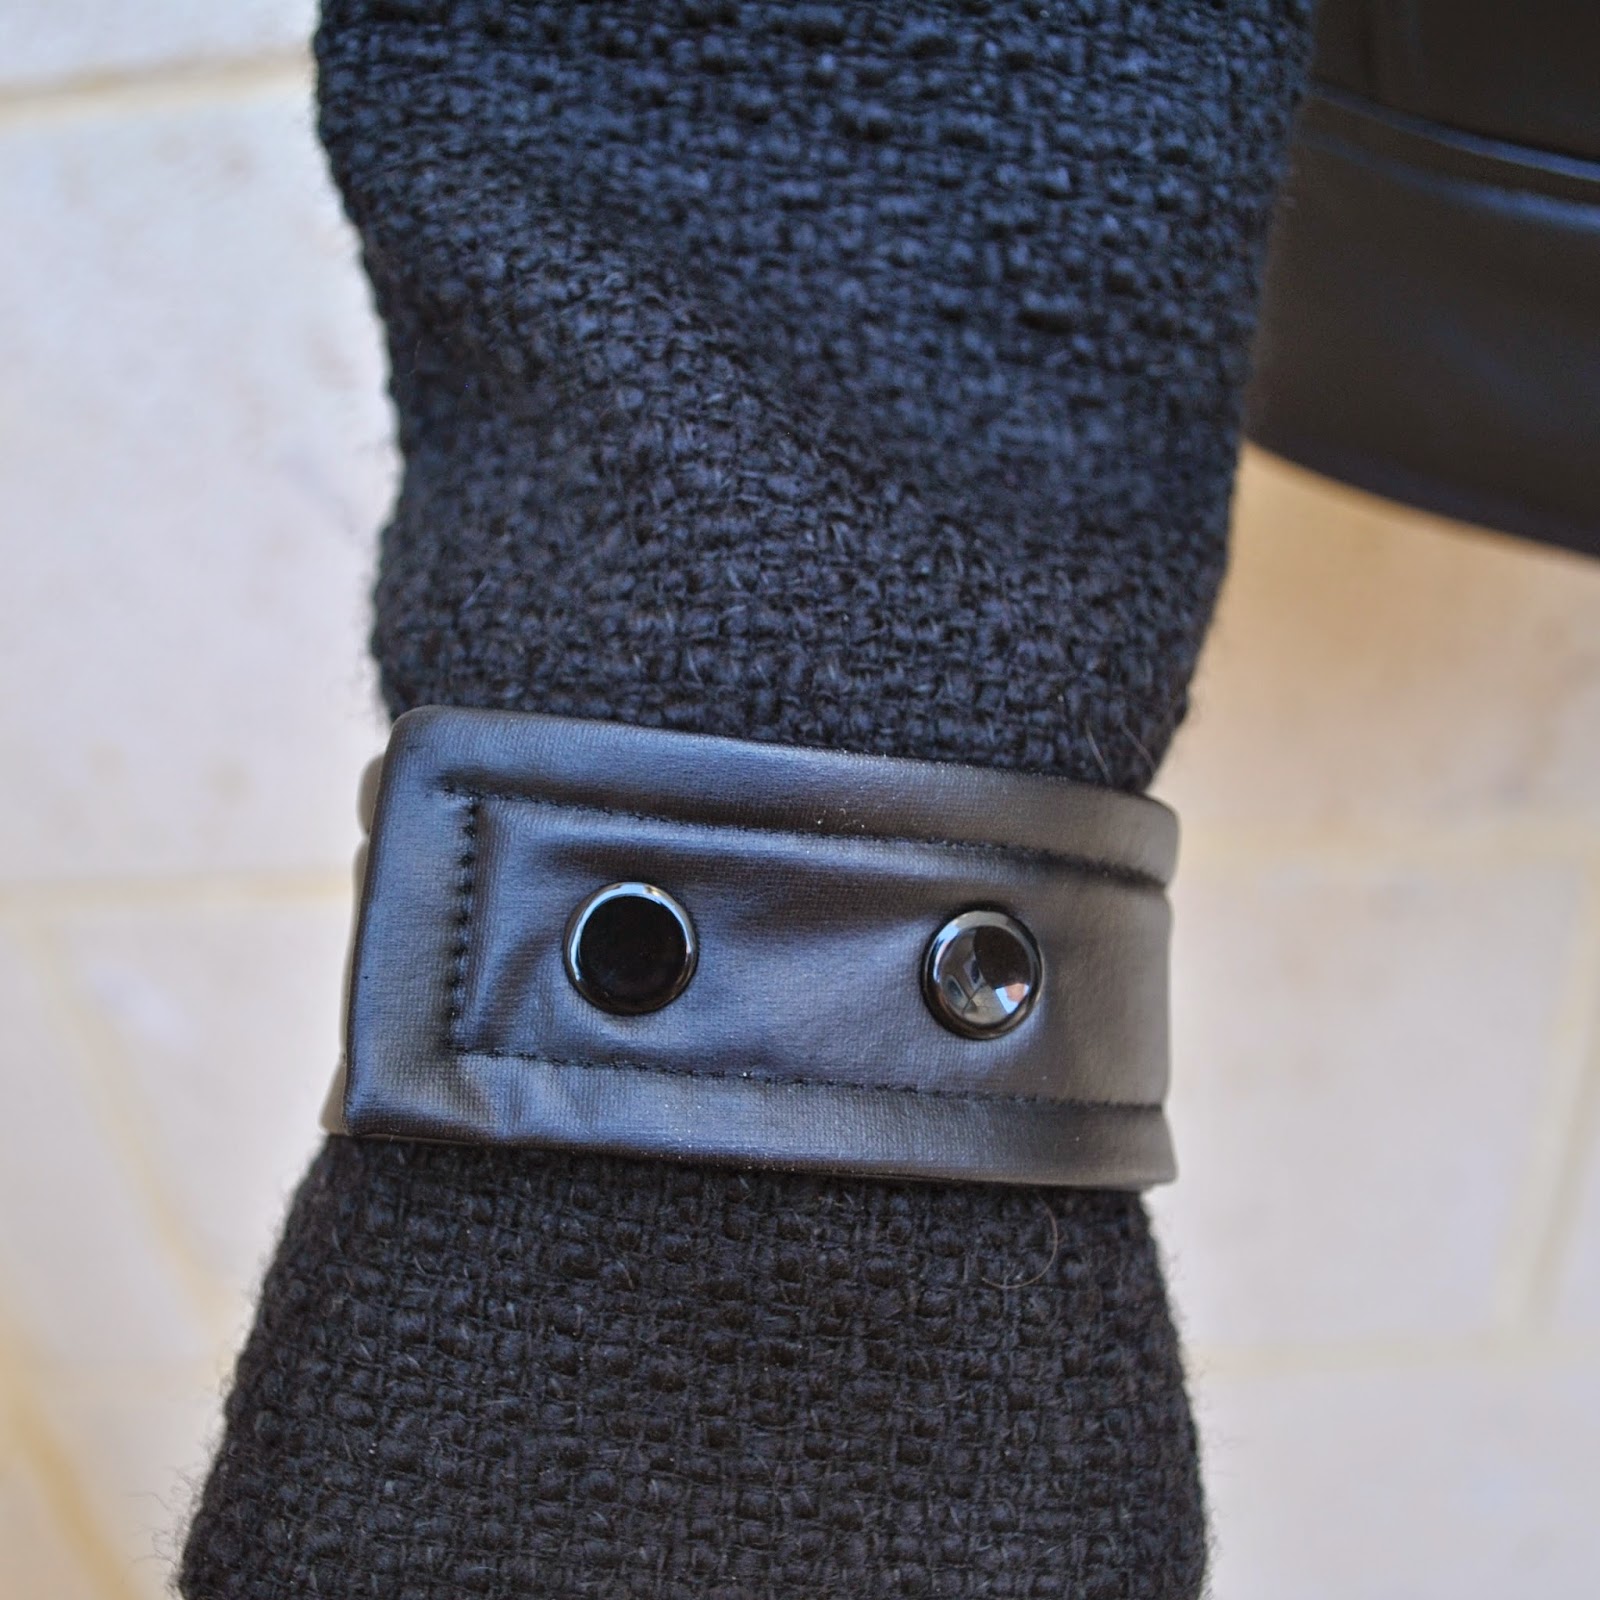
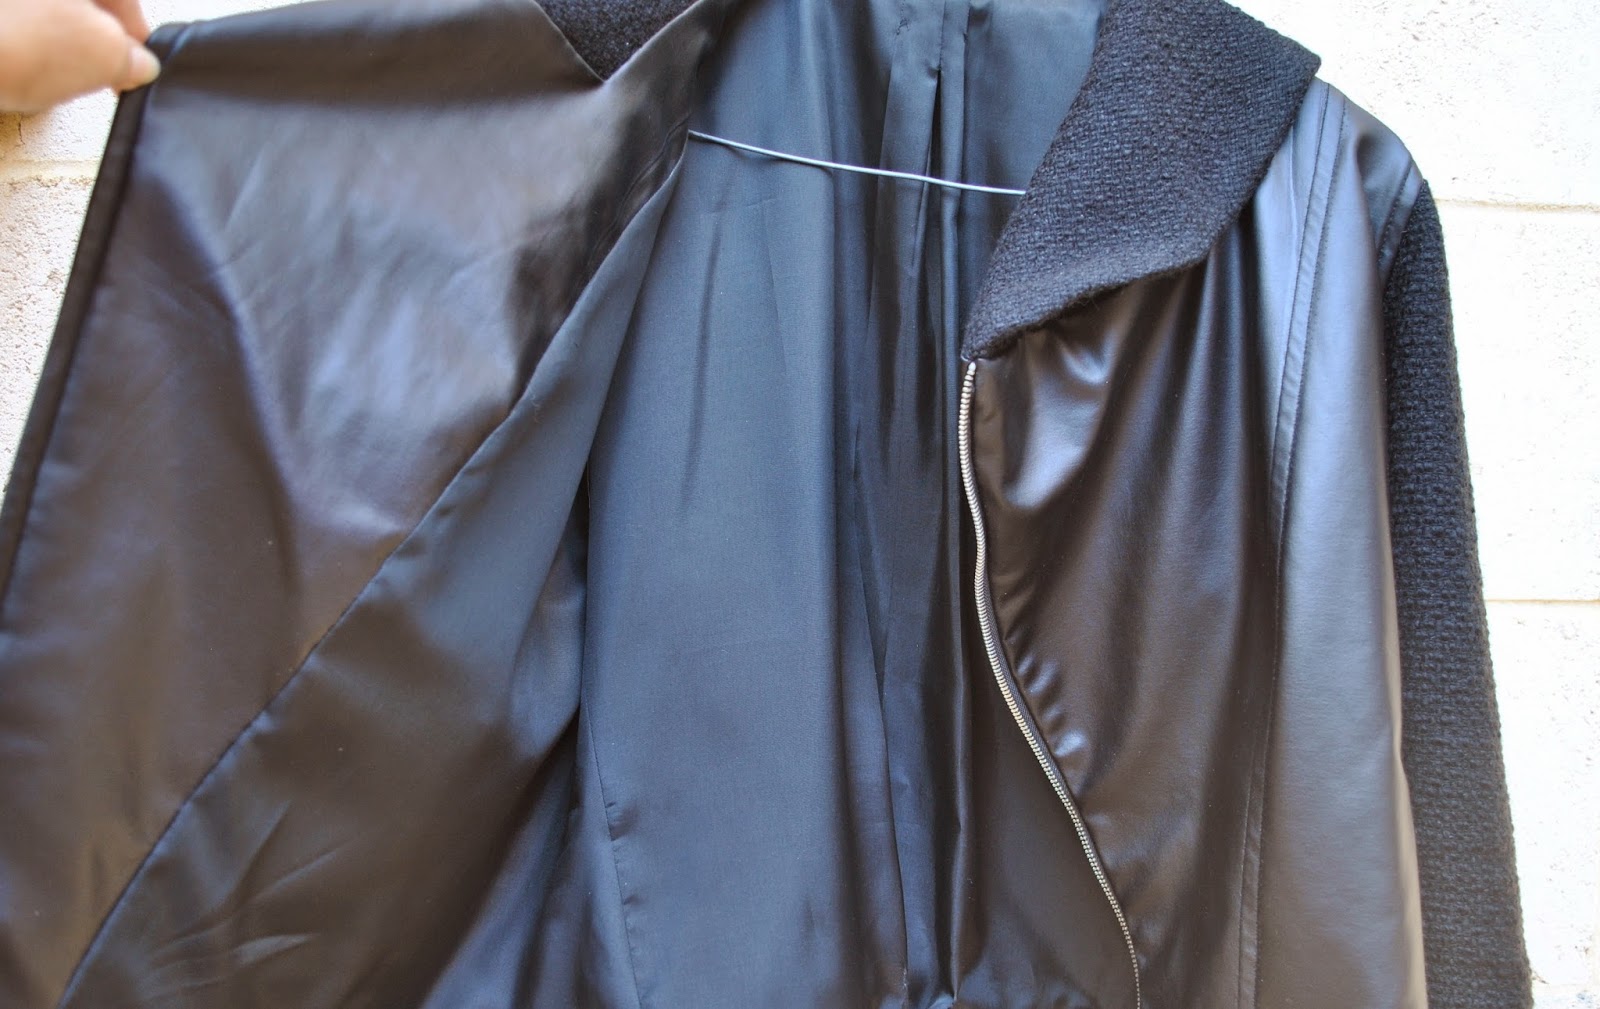
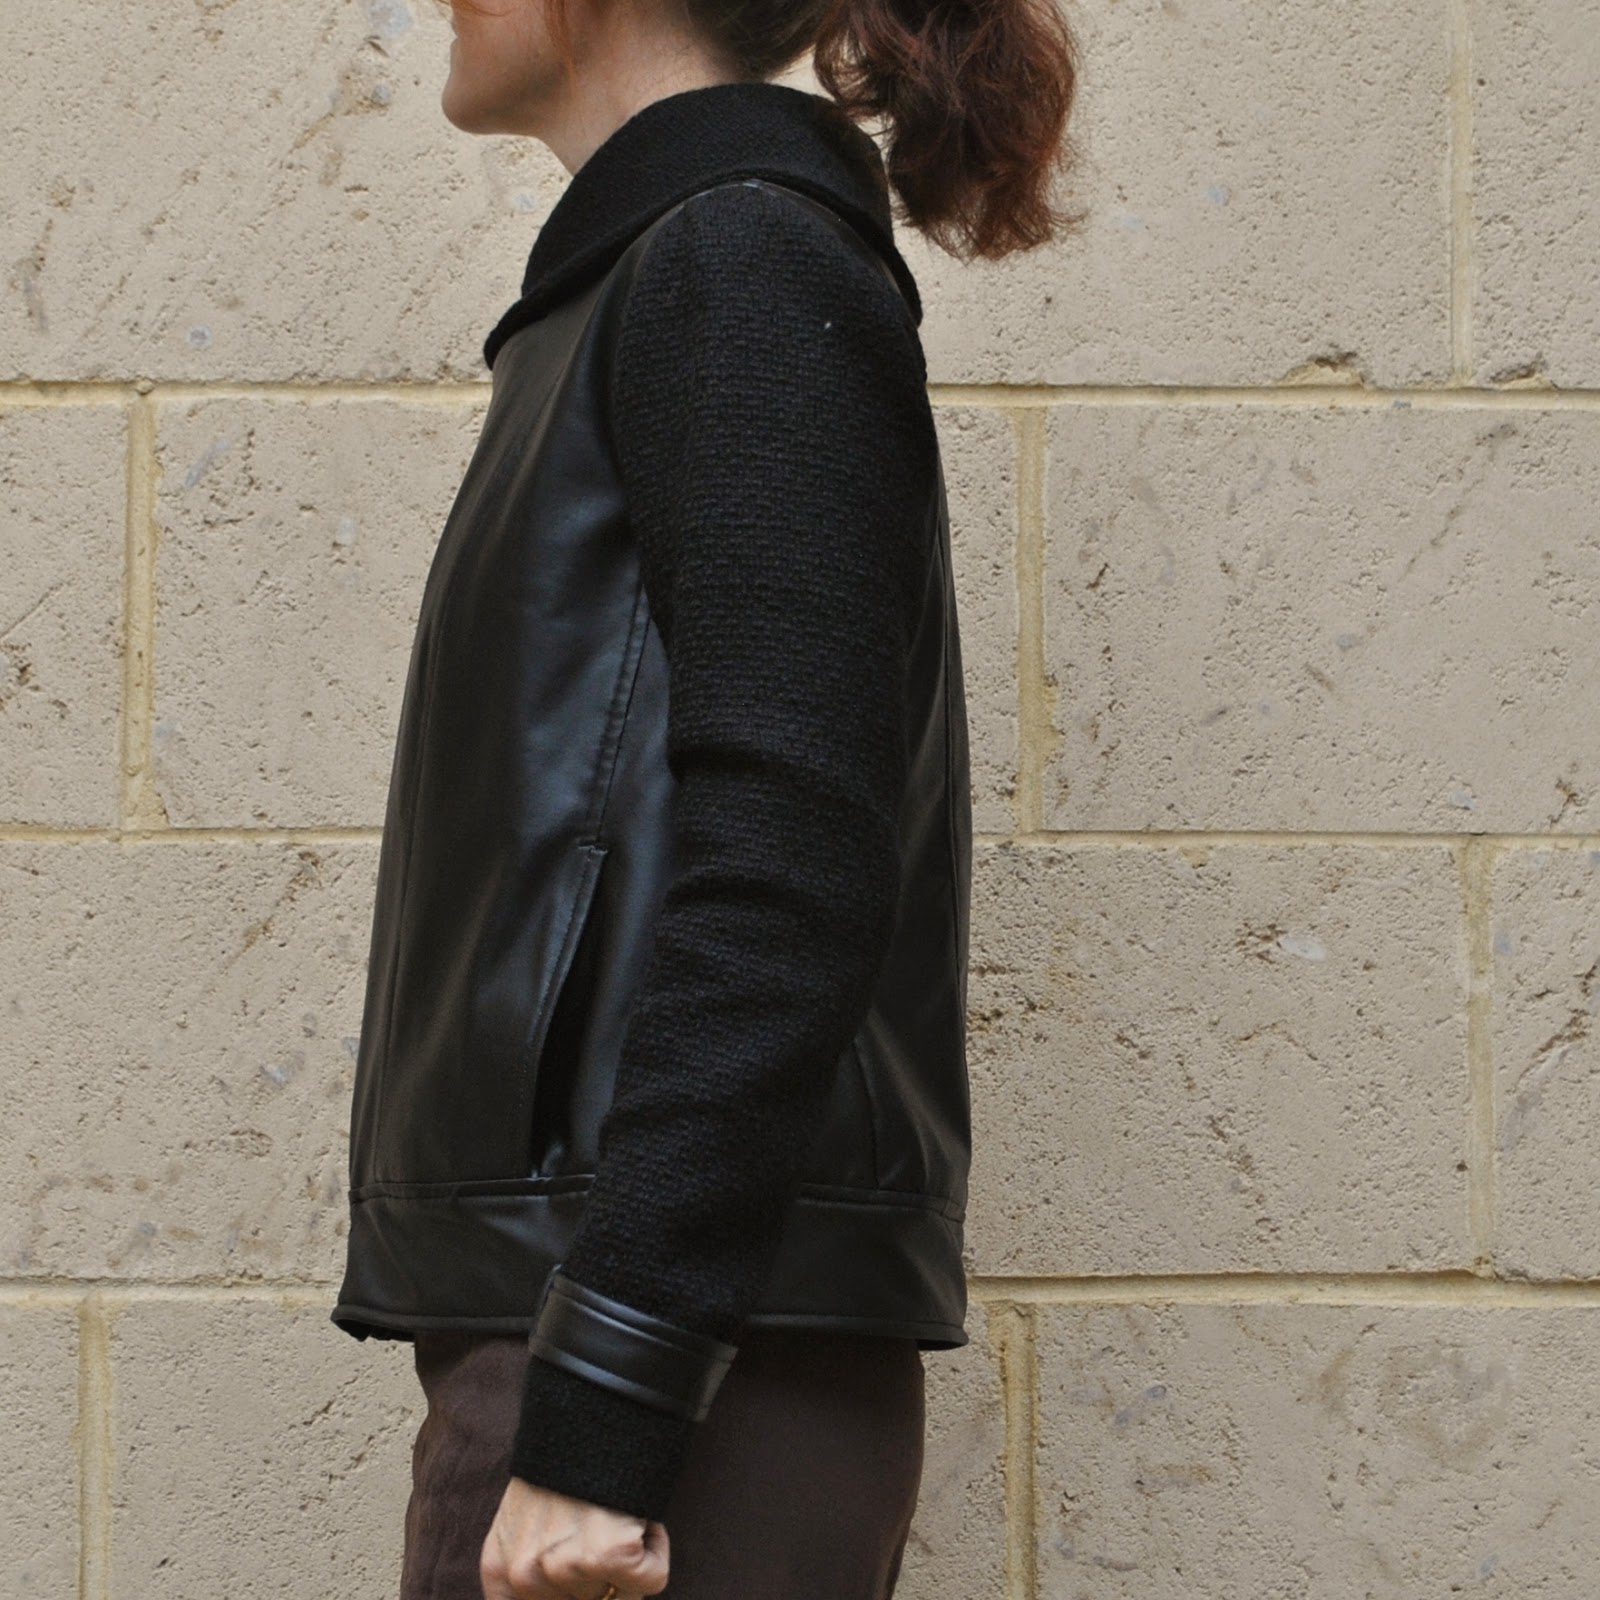
I immediately envisioned making something in a combination of leather/wool… well; making this, wot I’m wearing here, essentially.  My jacket here is made up pretty much exactly to the pattern… except I made my sleeve cuffs a little wider, because I have quite long arms apparently, and I added leather sleeve tabs, sewn into the sleeve seams and wrapped around to close with two hammer-in press studs.  I also fully lined my jacket using black polyacetate lining fabric.

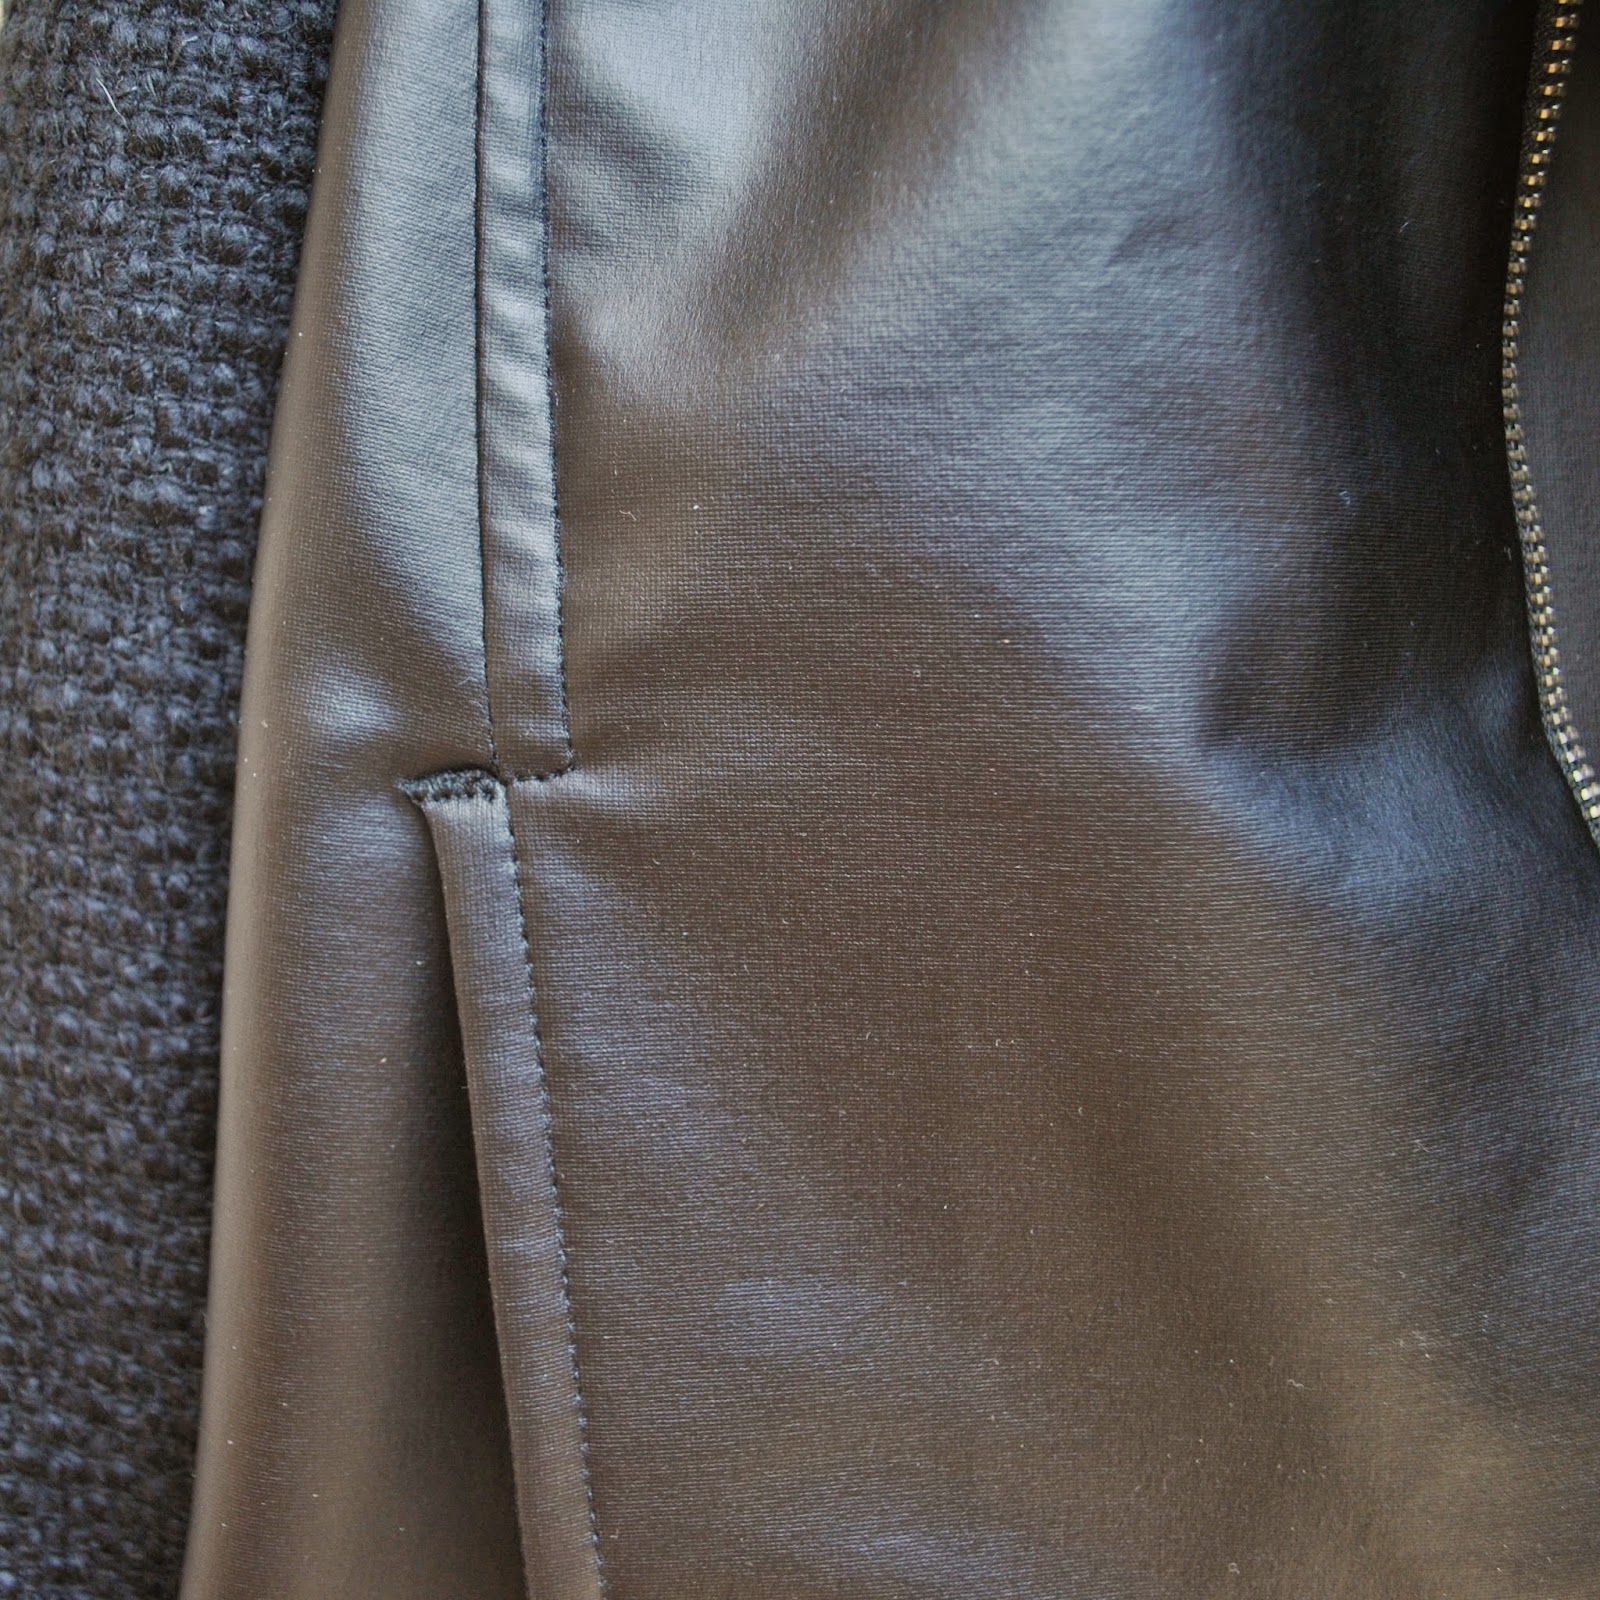
Also I top-stitched the body and armscye seams, stitching the seam allowances down inside. And a little bit of narrow zig-zagging along the top of the pocket openings, to strengthen that bit.
And I also made the pockets about 2cm deeper.  So, just a few teeny alterations here and there, after all  🙂

All of my materials are from Spotlight.  The “leather” is obviously vinyl, very thin, soft and pliable and a little stretchy.  I found I could use my regular sewing machine needle on it just fine.
The “wool” is a wool/acrylic mix tweed.  It felt quite stiff when I bought it, but a pre-wash in my machine on the gentle/wool cycle brought it up beautifully soft and fluffy, and the collar feels heavenly snuggly against my neck skin.

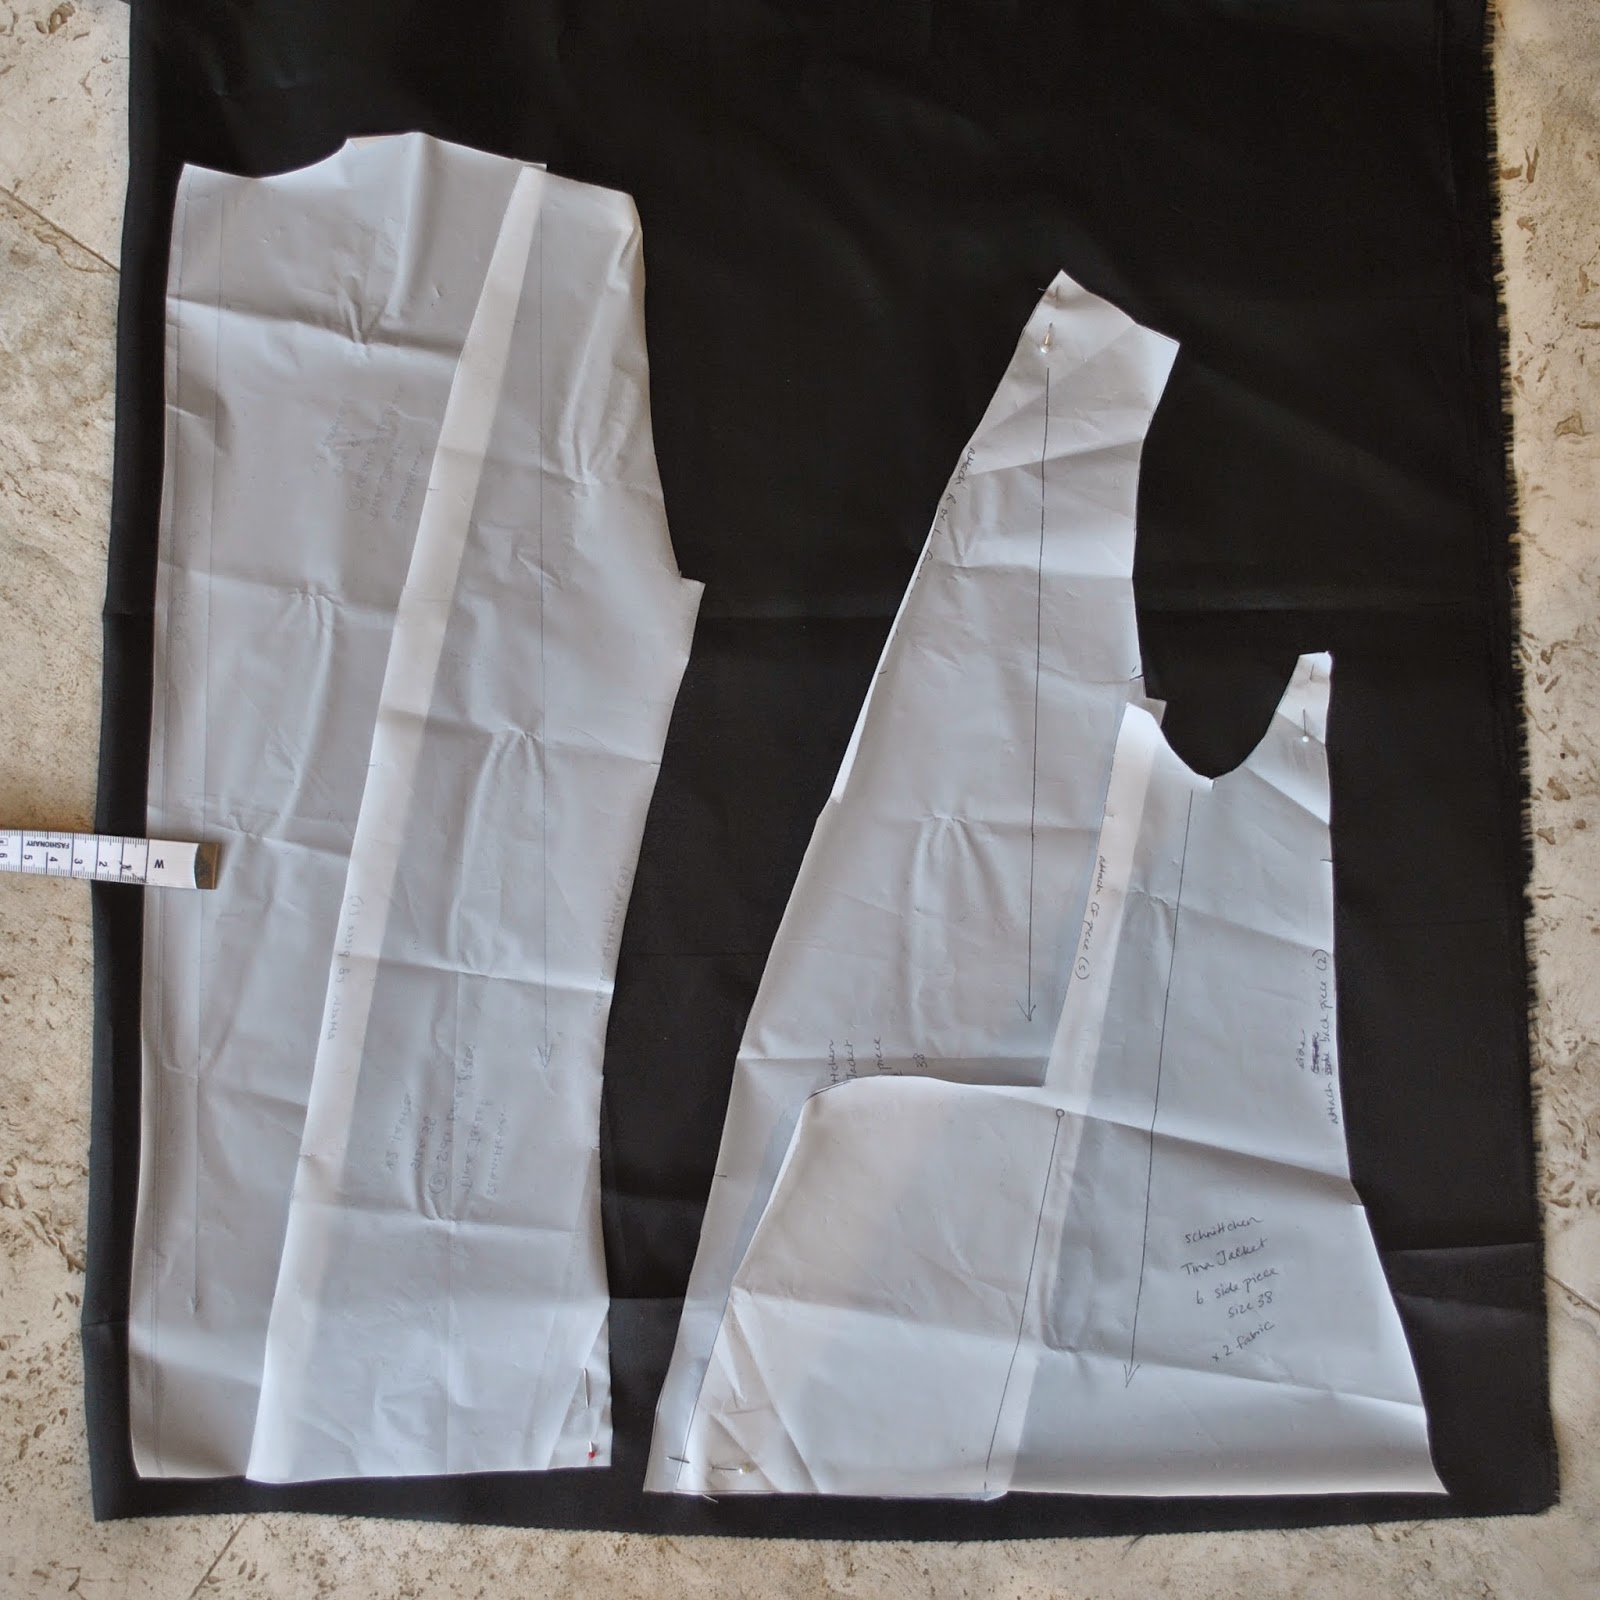
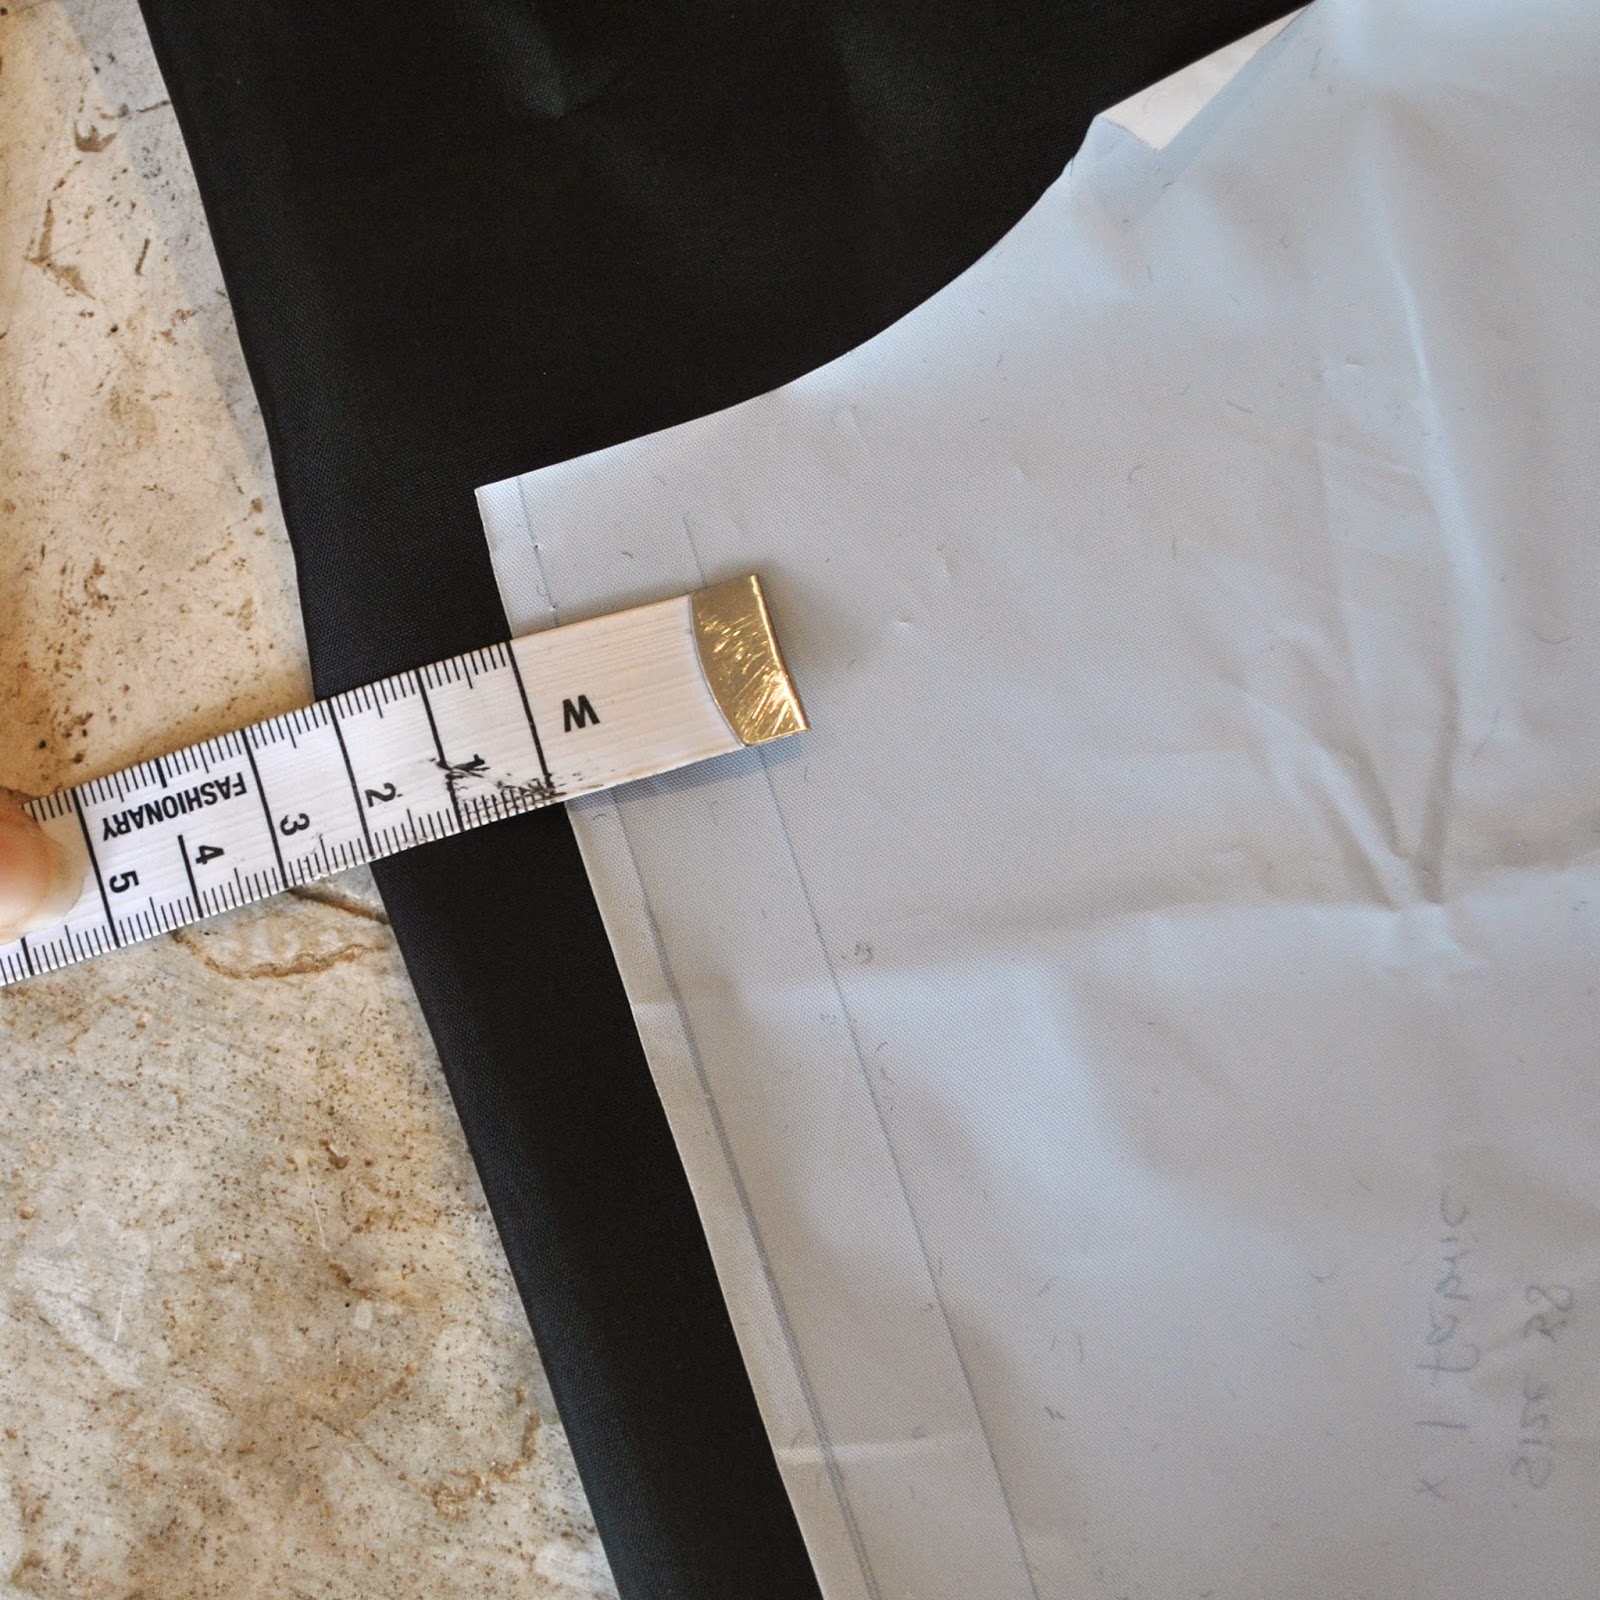
I chose to fully line my jacket.  The pattern doesn’t stipulate lining but that’s no biggie.  I used the pattern pieces, and to save myself the trouble of tonnes of piecing the multiple body pieces, I spliced the side front/side pieces together to cut them as one piece in the lining fabric, and also the centre back/side back pieces I spliced together in the same way.  When laying down the centre back piece; I laid it down with the centre fold line 2cm away from the fabric fold, giving myself an extra 4cm in width at the centre back. 

Note: re-enactment shots, when I realised I hadn’t taken any pictures, doh!

This extra width at the CB I folded into a box pleat and basted it in place for the first 5cm in from each edge.  Doing this gives me a nice bit of wearing ease in the lining, which is always a good idea in a jacket.  I learnt this little tip from my standby McCalls 5525 coat pattern.

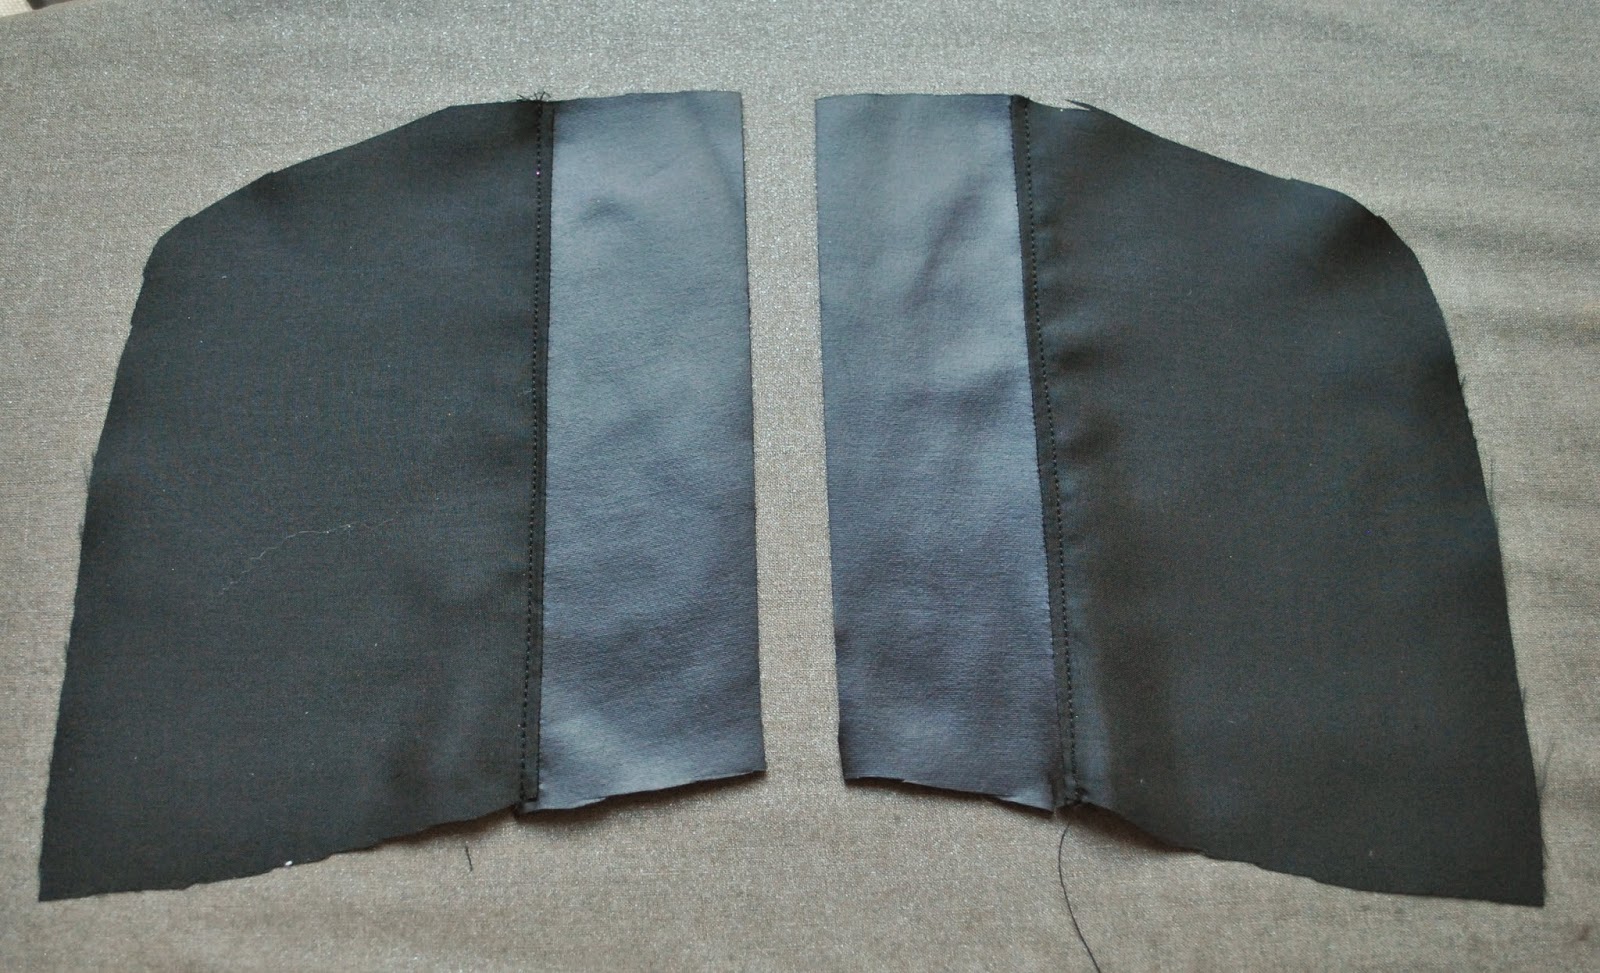
When cutting the pocket pouches, I cut them of half lining fabric with a leather facing at the opening edge, so there’s no danger of any lining fabric peeking out unattractively.
Also, when cutting the sleeve linings; I tapered out by about 1cm down each long edge, again to give the lining a bit of elbow-bending ease inside the sleeves.

Thoughts?  Well, the pattern is a lovely classic style and the pattern works beautifully, all going together and fitting in place like a dream.  I really love the style, and how my jacket worked out.
However this might be a challenging project for the non-German speaking, beginner seamster.  This is a German pattern with German instructions and an English translation, with no illustrations or pictures.   Occasionally there were some innovative words and phrasing, reminding me of that time I typed a set of Patrones instructions into Google translate.  Memories.
The schnittchen website does however have an excellent step by step photo tutorial which clearly illustrates all steps and is very helpful.  I think if you had made a jacket before you would be absolutely fine with the English instructions.  They gave a good construction order and they worked perfectly well. 
Finally and most importantly, I’m super stoked and excited with my new jacket.  According to the fashion report on the news the other night, leather and leather details are IN this winter.  How fortunate!
Whatevs the fashion, I’m going to LOVE wearing it.  It’s very cosy, comfy and super warm.   Its edgy vibe is a nice bonus  🙂

Details:
Jacket; the Tina jacket by schnittchen patterns, faux leather and wool mix
Tshirt (under); white cotton, using my own custom fit pattern, details here
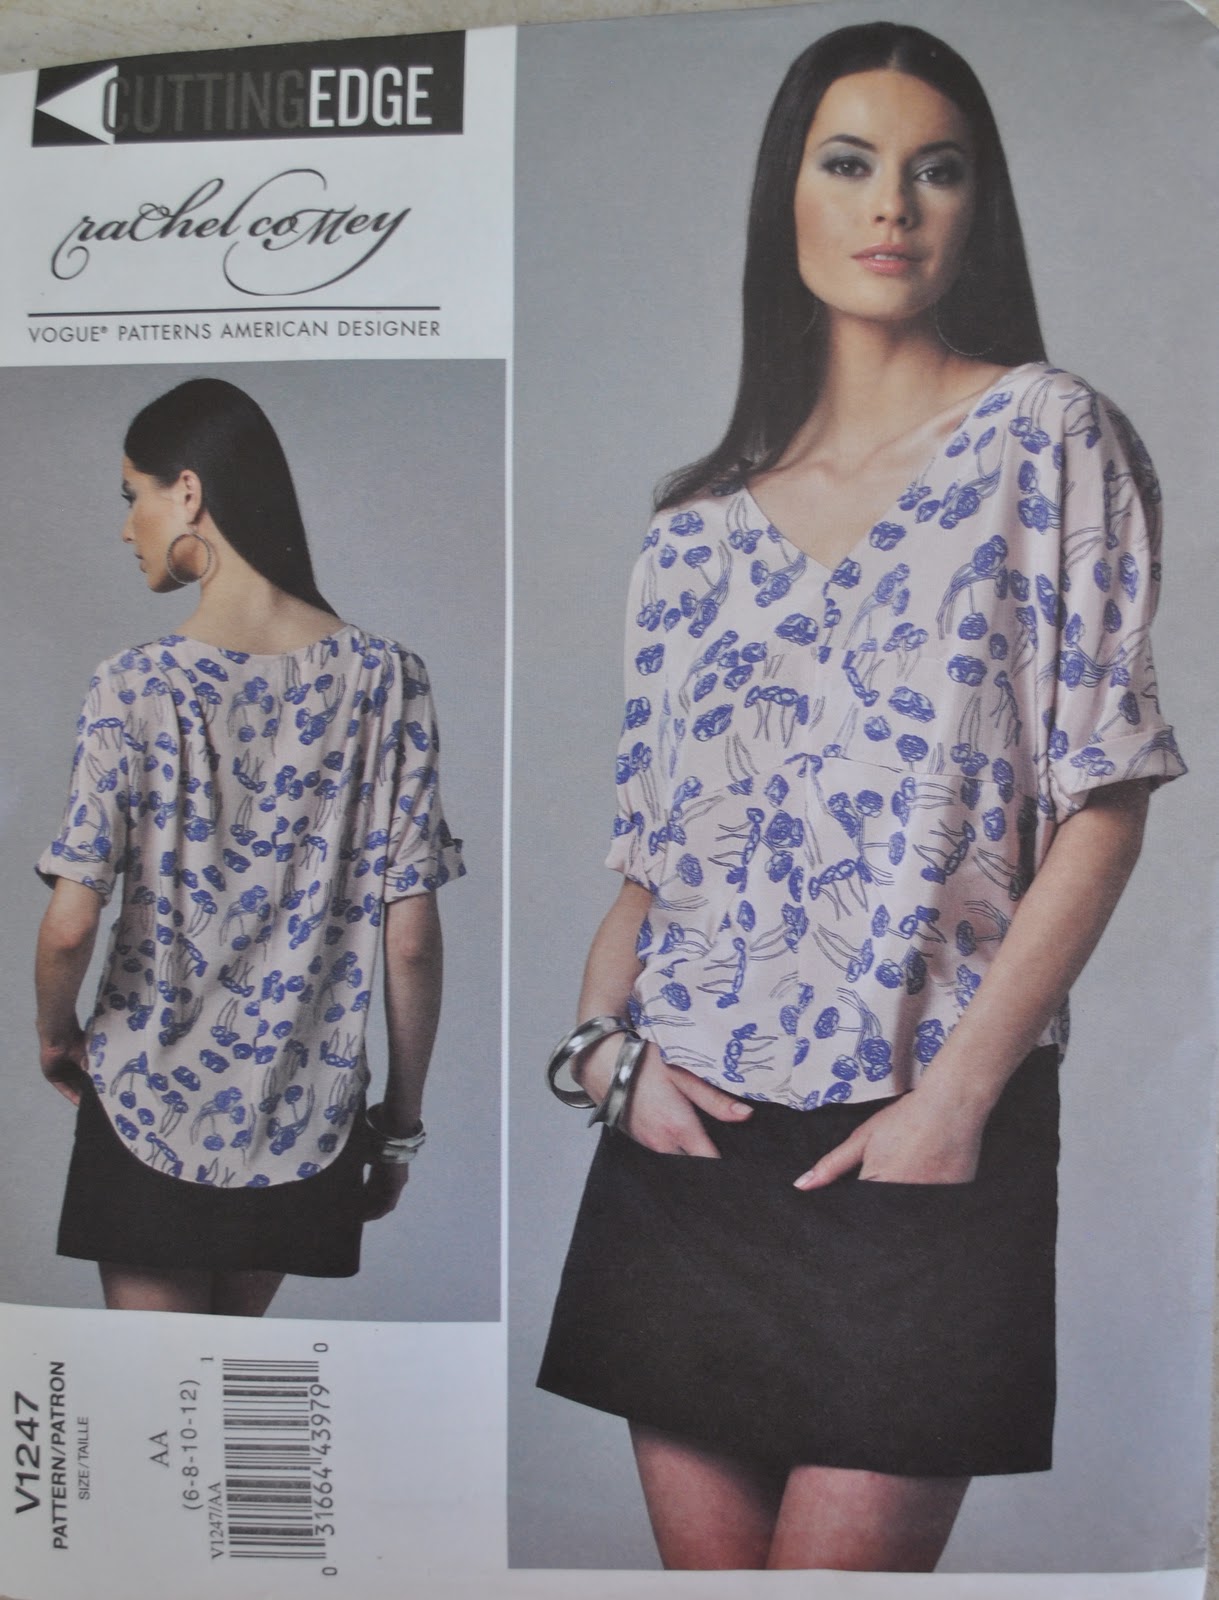
Skirt; Vogue 1247, overdyed purple cotton denim, details and my review of this pattern here
Tights; black polyester stretch, using my own custom-fit pattern, details here
Boots; Roberto del Carlo, from Zomp shoe boutique

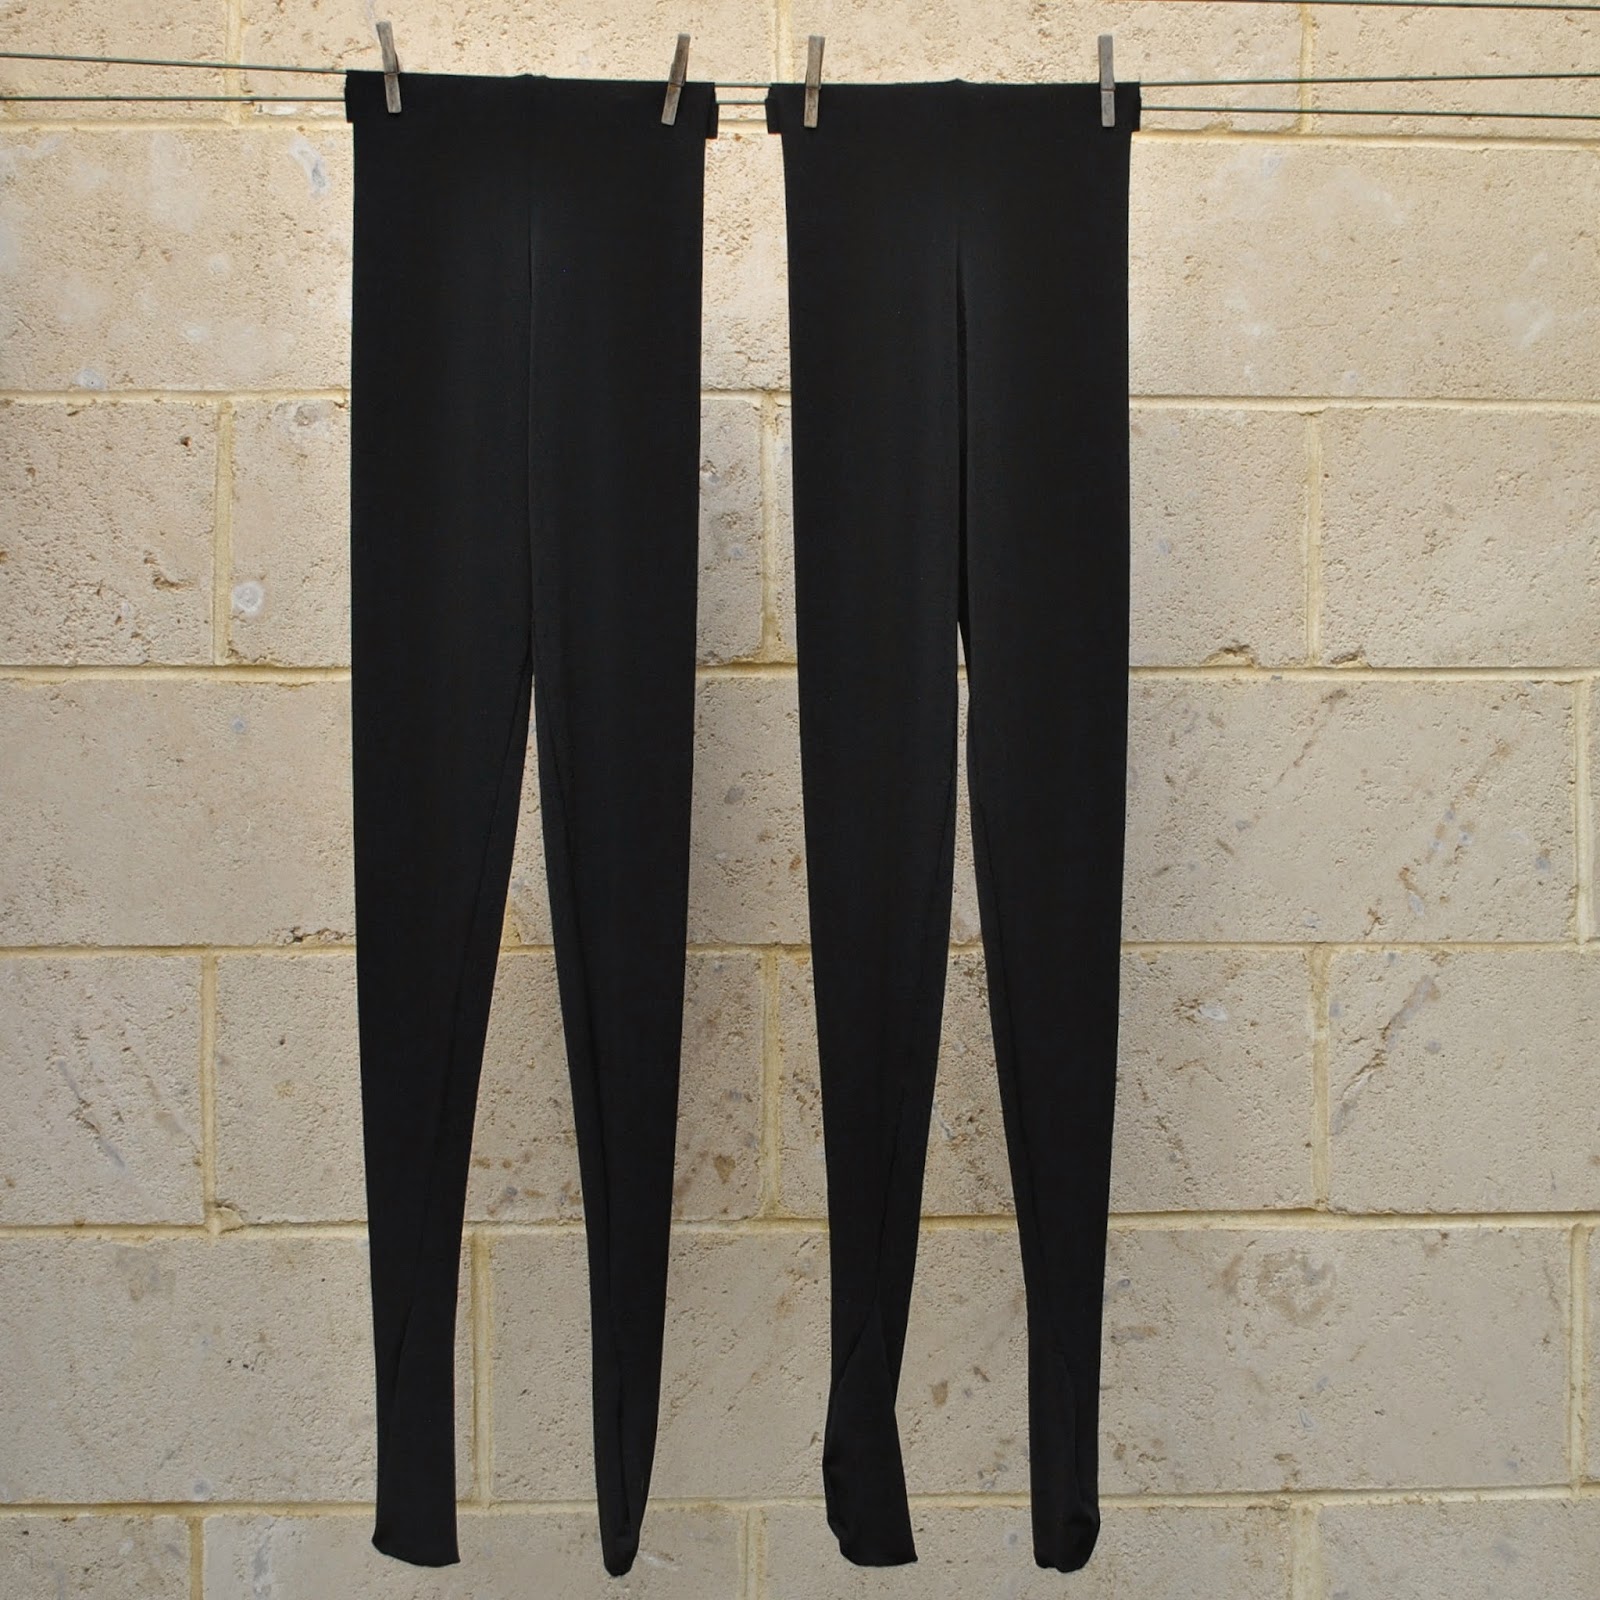
In other making news, I ran up two new pairs of black tights for myself, in stretchy polyester knit.  I know I had this whole thing about how I wasn’t going to make my own tights any more, just buy them… but I’m taking part in me-made May again and going ALL me-made, as is my “thing”.  And I just decided that to cop out on the tights when it’s so laughably easy to make the darn things, well it was just that; a cop out.  I bit the bullet.  2m of fabric, half an hour of cutting/sewing, whack in an elastic waistband; BOOM yah.
Two pairs of new, super warm tights.

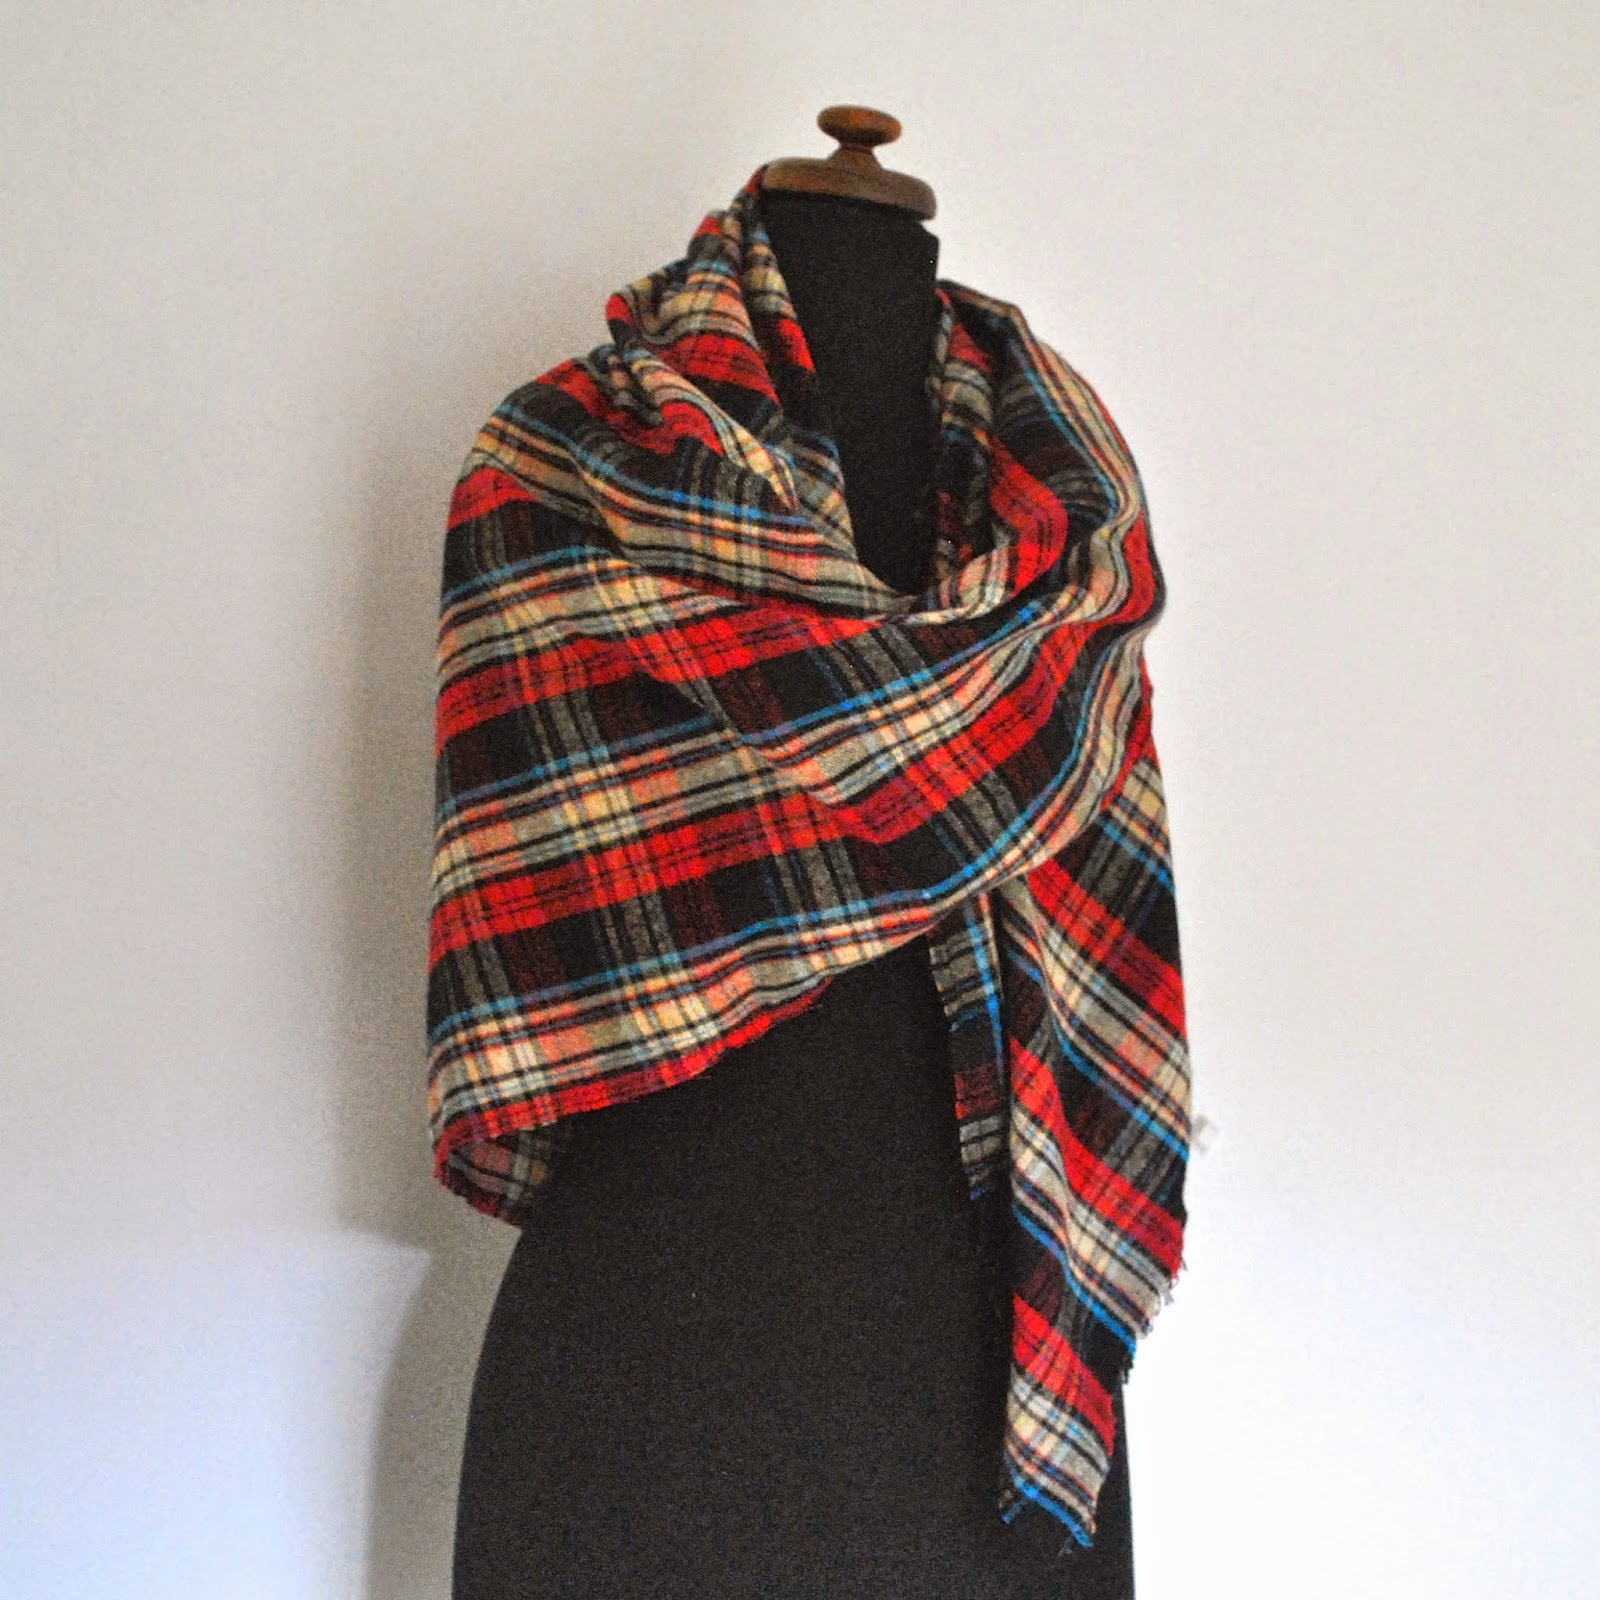
Also I *cough cough* um, “made” a scarf….  as in five minutes of zig-zagging the cut edges of a nice piece of fluffy brushed cotton plaid and fraying with a fine-toothed comb.  I found this plaid in Homecraft Textiles.
Like most of the world, probably, I fell in love with the Zara blanket scarf that was all the rage last Northern winter.  And though we do actually have a brand new Zara store here in Perth now, I don’t think we’re going to get the scarves here.  However I still kind of fancied one for myself.  So I have my diy version now.  Yay!  And if I get tired of it I can always cut it up and make a top or something with it still!  Double yay!
pinterestmail

a “Norwegian” jacket

I’ve made up my Norwegian
souvenir fabric.

Pining for the fjords? me? well, maybe just a little  😉
I
bought this divinely thick, strong, and sturdy cotton drill in Oslo during our
Scandinavian holiday, with dreams of  making a boxy, nautically flavoured little
hoodie.
And done, and dusted.   🙂
I
used pattern 108 from Burdastyle magazine 10/2009.  In the magazine it’s
made in felted wool, is lined, and has a fur-edged hood.  I fancied it made up as
a lighter, warm weather thing, and knew it would work out perfectly ok in that role too.
 Mine is unlined and I finished all the raw edges off using my
overlocker so it all looks nice and neat inside.  The fabric is beautiful quality, actually quite
thick and wind-resistant; so even sans lining it’s turned out to be a rather cosy little jacket.  Brisk spring breezes? ha!  I laugh in your general direction!
The
pocket, pocket flap edges and the interesting shape of the yoke pieces are all highlighted with navy blue piping, for which I used readymade bias binding.
 I’ve had this in my stash for decades, no kidding, and thought,
yay! I’m finally going to use this up!  Obviously, I then did not have
quite enough, which meant I had to buy a bit more.  Which meant now I still
have some in my stash.  Doh!  It’s a conspiracy!!!
I
ummed and aahed about the front and pocket closure… first thinking I would
put in big white chunky zip, rejected that; then thinking metal dog-bite clips,
but the ones I found weighed quite a lot and would’ve dragged the jacket down.  I wanted something a bit different, but it still had to be lightweight.  The magazine version called for toggles, since it was supposed to be a wintery thing, and finally I thought a summery version of a toggle would be a fun thing to
have.  
I made mine using cotton twill tape and cotton rope.   My Dad
made the lovely wooden buttons, aren’t they beautiful?  Many years ago I
asked if he could make me one for my little brown cardigan, and he generously
made several so I would have a selection from which to choose.  And I’m
thrilled I had enough to finish this little jacket.  Thanks Dad!
I
had bought enough of the cotton rope to put in the hood as a drawstring, so I
sewed miniature teeny buttonholes in the hood front and inserted the rope in the
self-facing casing.  The hood seams are flat-felled.

Doesn’t scream Norway?  Well, I can hear it quietly whispering Norway, in my shell-like ear at least  🙂 
I
put a lot of time into getting that piping and those toggles positioned just exactly right and I’m very pleased with how it turned out.  I particularly love having Dad’s wooden buttons on it!
Details:
Jacket; Burda style magazine 10/2009, 108, cotton drill from Norway
Dress; Burda 8071, made from an old polo Tshirt, details here
also white/navy blue Tshirt underneath, details here
pinterestmail

Caramel suede cardigan/jacket

o hello  🙂
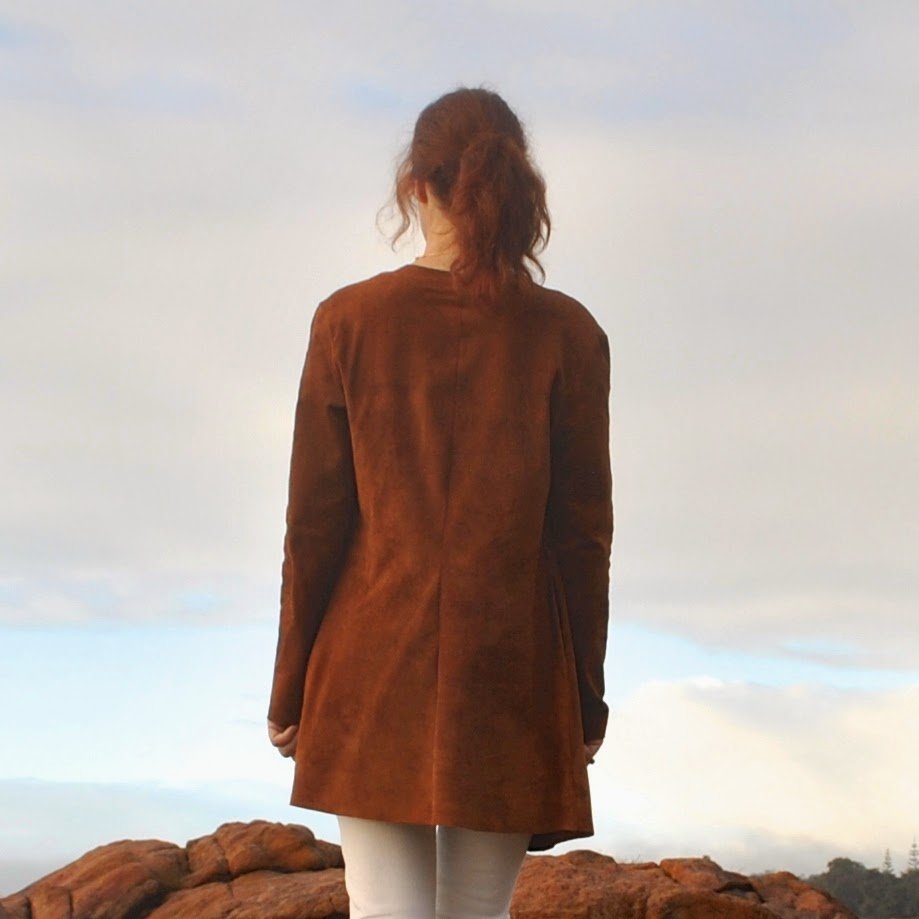
I’ve made a suede cardigan for myself, or is it a jacket?  The pattern says “jacket” but I tend to think of jackets as being kinda involved, time-consuming things to make, with lining and so forth.  While cardigans are unstructured, unlined things one can whizz up in a blink of an eye.  Which actually describes this thing pretty well.
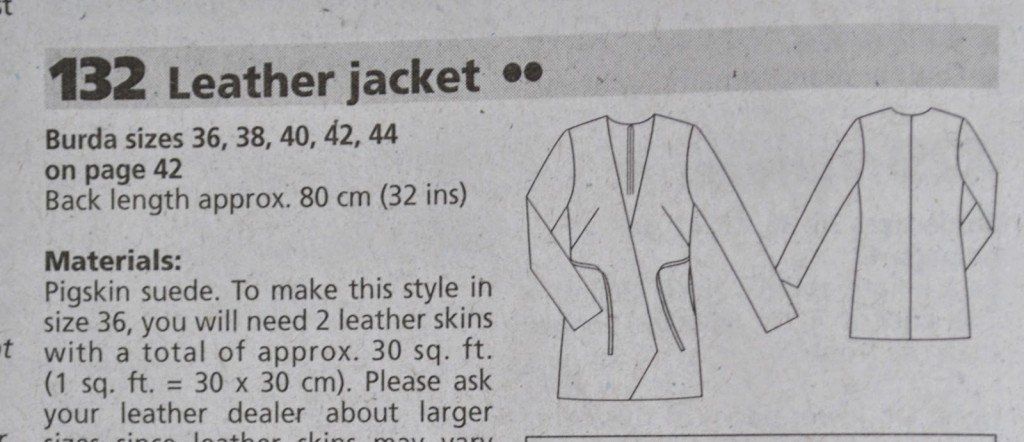
The pattern is jacket 132 from Burda style magazine 11/2012, which Philippa sent to me in a giveaway, thank you so much Philippa!  I lurve Burda magazines, the designs are usually both interesting and stylish, the cost per pattern is very very low, and still not bad even if you do only make a few things in an issue.  I reckon they deserve to be a heckuvva lot more popular than they are.  You don’t need every issue but I generally get maybe one magazine in a year and manage to make several things in each one.  This design caught my eye straight away, and was firmly in my mind when I bought my leather.  I actually made a muslin for it, which is only worth mentioning because it’s such a rare thing for me to do.  Well my leather was kinda precious and I did not want to stuff it up!  I did a minor sway back adjustment and shortened the bust darts by a few inches.
I used my two pieces of caramel brown pigskin, bought in Copenhagen on our trip.  I liked both sides; the smoother, leather-y side has some interesting brand marks, but the suede side has the most glorious, rich caramel colour.  Colour trumped brand marks.

The cardigan is quite long in the body with wide-ish front flaps so it took some layout wizardry to get the pattern pieces out!  I re-laid the pieces down over and over and over again, trying to fit them all in and cut it with the skinniest little 5mm seam allowances.  I did have to do just one little fill-in piecing on the left back back, but I managed to position this at the very top, centre back, so it’s as un-noticeable as I think it could possibly be!

The pattern has pockets; which I cut to be nice and huge, to accommodate my nice huge hands, hehe.  Burda magazine patterns have the teeniest tiniest child-sized pockets of all, I swear.  Very cute, but seriously?!  Maybe it’s just me; I like to plunge my hands right down deep into my pockets  🙂  I used chocolate brown silk charmeuse, which I fortuitously just happened to have in my stash already,  hanging around, in the perfect colour, you know, as you do  😉  Hopefully cutting those pockets out of it won’t mean I now don’t have enough for it to fulfil its original destiny.

below left; I have no idea why the colour is so off in this picture here, but… pocket! 

The pattern called for a waist tie, to be sewn in the side seams.  I preferred the idea of a separate belt that I could wear or not wear, whichever I wanted, however whim and whimsy struck, and not to have the ties dangling uselessly and annoyingly at my sides whenever I was wearing the cardigan loose.  So I put little belt loops in the side seams, seen at top left in the picture above, and made a very long skinny belt as a separate thing.  This has tonnes of mad bias-cut piecing  all along it, as I was dealing with mere scraps of leather by the time I had cut out the main pieces of the jacket.  But I don’t think that matters much, you can barely see all the joins when it’s on. This is simply folded in two lengthwise and topstitched.

I think worn loose, as at top, it looks quite modern, and with the waist tied up it looks a little bit boho 70’s, yes?

I am very happy with, and am very much going to enjoy wearing my Copenhagen souvenir!

Later edit: some technical details on sewing with leather, and thank you so much to Erica for asking  🙂
 This is the first leather thing I have made so I learned a few things… I used a denim needle and regular polyester all-purpose thread, and used paper clips to hold edges together in lieu of pins. Lots of experimenting to get the tension right, I ended up with a medium-loose tension and a long stitch. The leather didn’t move through my machine very easily, so I used strips of tissue paper while stitching the seams, which helped a lot. Fortunately, this jacket had few seams! I used tissue paper both top and bottom, and did this by folding a wide, single strip and wrapping it closely around the edges before clipping it all together with paper clips, then sewed the seam; which was easier to hold in place than I imagine two separate strips would be, and also made it easier to follow an even seam allowance while stitching too.  
For short seams, like piecing the belt pieces together; I started stitching from halfway along and ended at the edge, then turned the piece over and stitched the other half of the seam from the same halfway point to the other edge, because my machine didn’t like “starting” on an edge, and behaved badly on these. If I was to do more sewing with leather I think it would probably be very well worth getting a teflon foot for my machine, which will enable the leather to glide through more smoothly.

 Details:
Cardigan; Burdastyle magazine 11/2012-132, caramel pigskin suede
Jeans, Burda 7863, white denim, details here and my review of this pattern here
Tshirt; self-drafted, white cotton jersey, details here
Socks; hand-knitted by me, details here
Shoes; Francesco Morichetti, from Zomp shoes

pinterestmail

Army jacket; 6 different ways

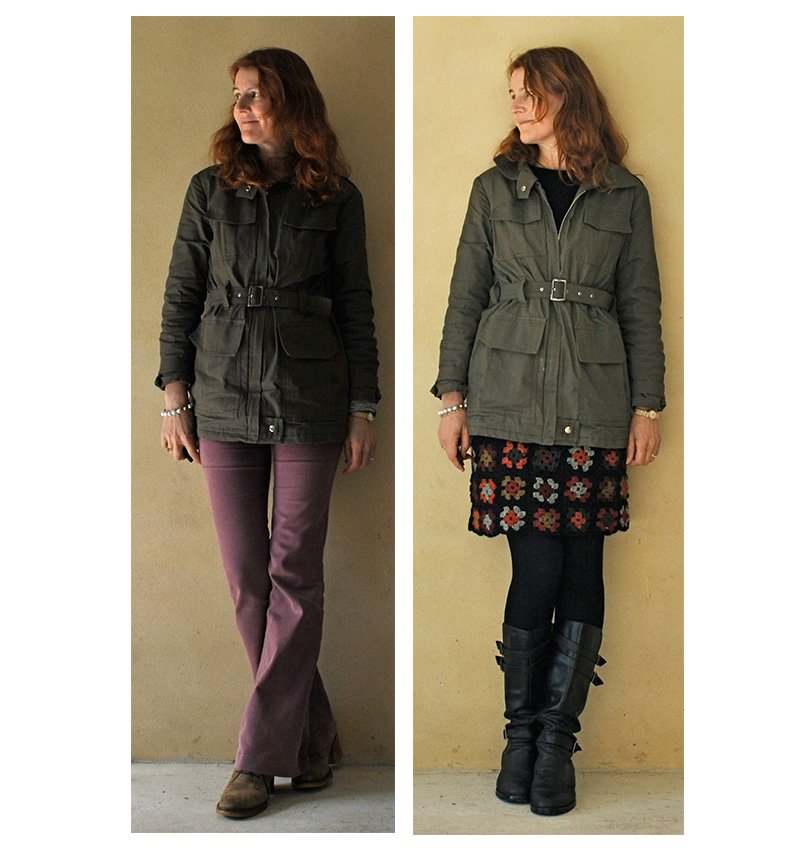
My khaki army-style jacket has been my go-to coat/jacket this winter.  I made it two years ago, completely inspired by all the fabulously cool examples I had seen out and about in Tokyo.  I got home and pretty much immediately set about gathering all the bits and pieces to make one for myself, adapting a jacket pattern from Burdastyle magazine so the features matched the ones I had seen in Tokyo.
Australia often marches to the beat of its own drum, fashion-wise; and looks that are IN! overseas may or may not take off over here.  You can never tell…. but anyhow, this winter army jackets were IN! here and I remembered that I had made one (o serendipitous moment!) pulled it out and have been wearing it pretty solidly since.  It is sooo warm!
Now, you might think it could only been worn as a casual thing, but being such an on-trend item I’ve found it incredibly useful and the deep olive colour goes with everything I have in the wardrobe.  I also made an attachable fur-lined hood to go with it but obviously such a thing is pretty irrelevent to our climate and so I’ve never attached it.  Maybe one day I will visit a snowy climate soon and can happily button on the hood without looking ridiculous?  A girl can but dream…. but in the meantime these are some of my favourite combos with it from this winter.

Below: at left; casual to the max, worn with my purple flared jeans.  Funny thing, I’ve kind of gone off jeans completely lately and don’t want to wear them at all.  I’ve semi-tossed these ones out now… they’re on probation….  At right; the jacket kept me toastily, snug-as-a-bug warm on our coldest day (15C) along with my crocheted Granny squares skirt, a black Tshirt, black woollen tights and biker boots.  I had my knitted gloves on for part of that day too, but not for the picture… brrrr!

army1a

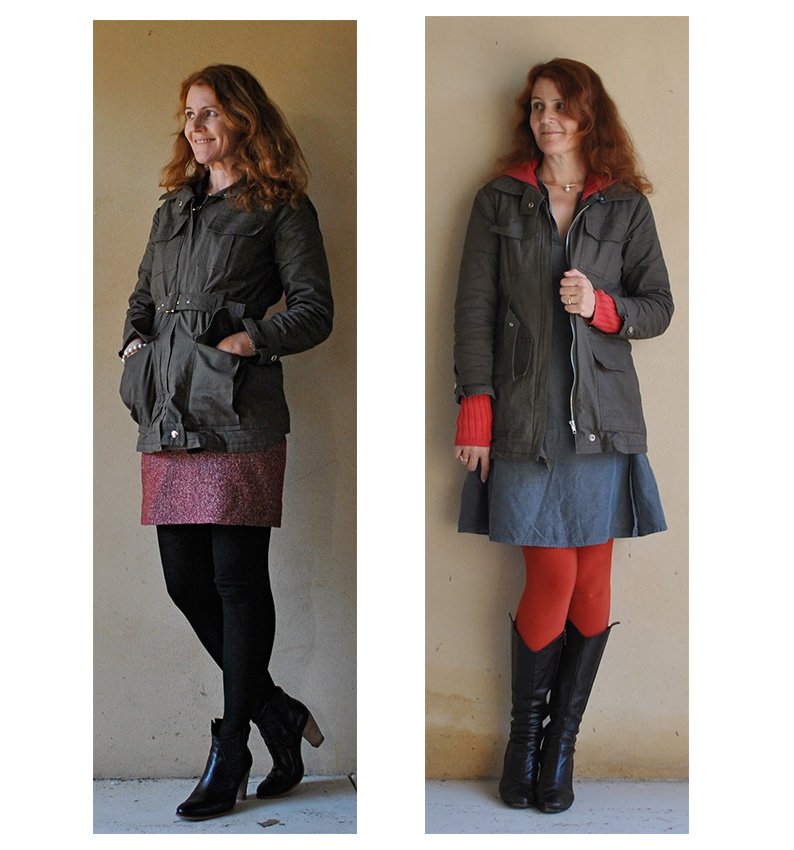
At left; I’ve seen sequins combined with utilitarian khaki in a gazillion gorgeous street-style photos, and loved the craziness of the look, so I wore the jacket over my own silver sequinned skirt, a drapey white top, and with black suede pumps to a dinner with friends, and felt like an ultra trend-ite, for once!  At right; sporting a symphony of satisfyingly subtle sludgy goodness, worn with my khaki linen shirt, my sludgy little skirt (incidentally, the same fabric as my purple jeans in the photo above, dyed brown), my olive leggings, and olive knitted socks (not really showing here)   A bit drab maybe? but then again drab is my middle name.  Seriously, you should see the looks I get when I fill in forms.
(10pts to anyone who can pinpoint that quote….)

army2a
At left; worn into the city, with my rusty-red wool/silk skirt, black woollen tights and high-heeled booties, and at right, worn with my gunmetal blue silk dress, red hoodie and paprika tights.  Incidentally, this is today’s outfit, and I had a lovely lunch out with Dad.  He was wearing this shirt, actually nearly every time I see him he seems to be wearing it!  Which is super nice of him  🙂
army3a

So, the weather is warming up gradually, in fits and starts, and soon I’ll stop reaching for this jacket but I’ve sure appreciated and enjoyed its cosy comforting warmth and its easy-going style.  Hopefully the trend will stick around for a few more winters to come!

pinterestmail

Leo

… the lion., and the latest in my horoscope series.  
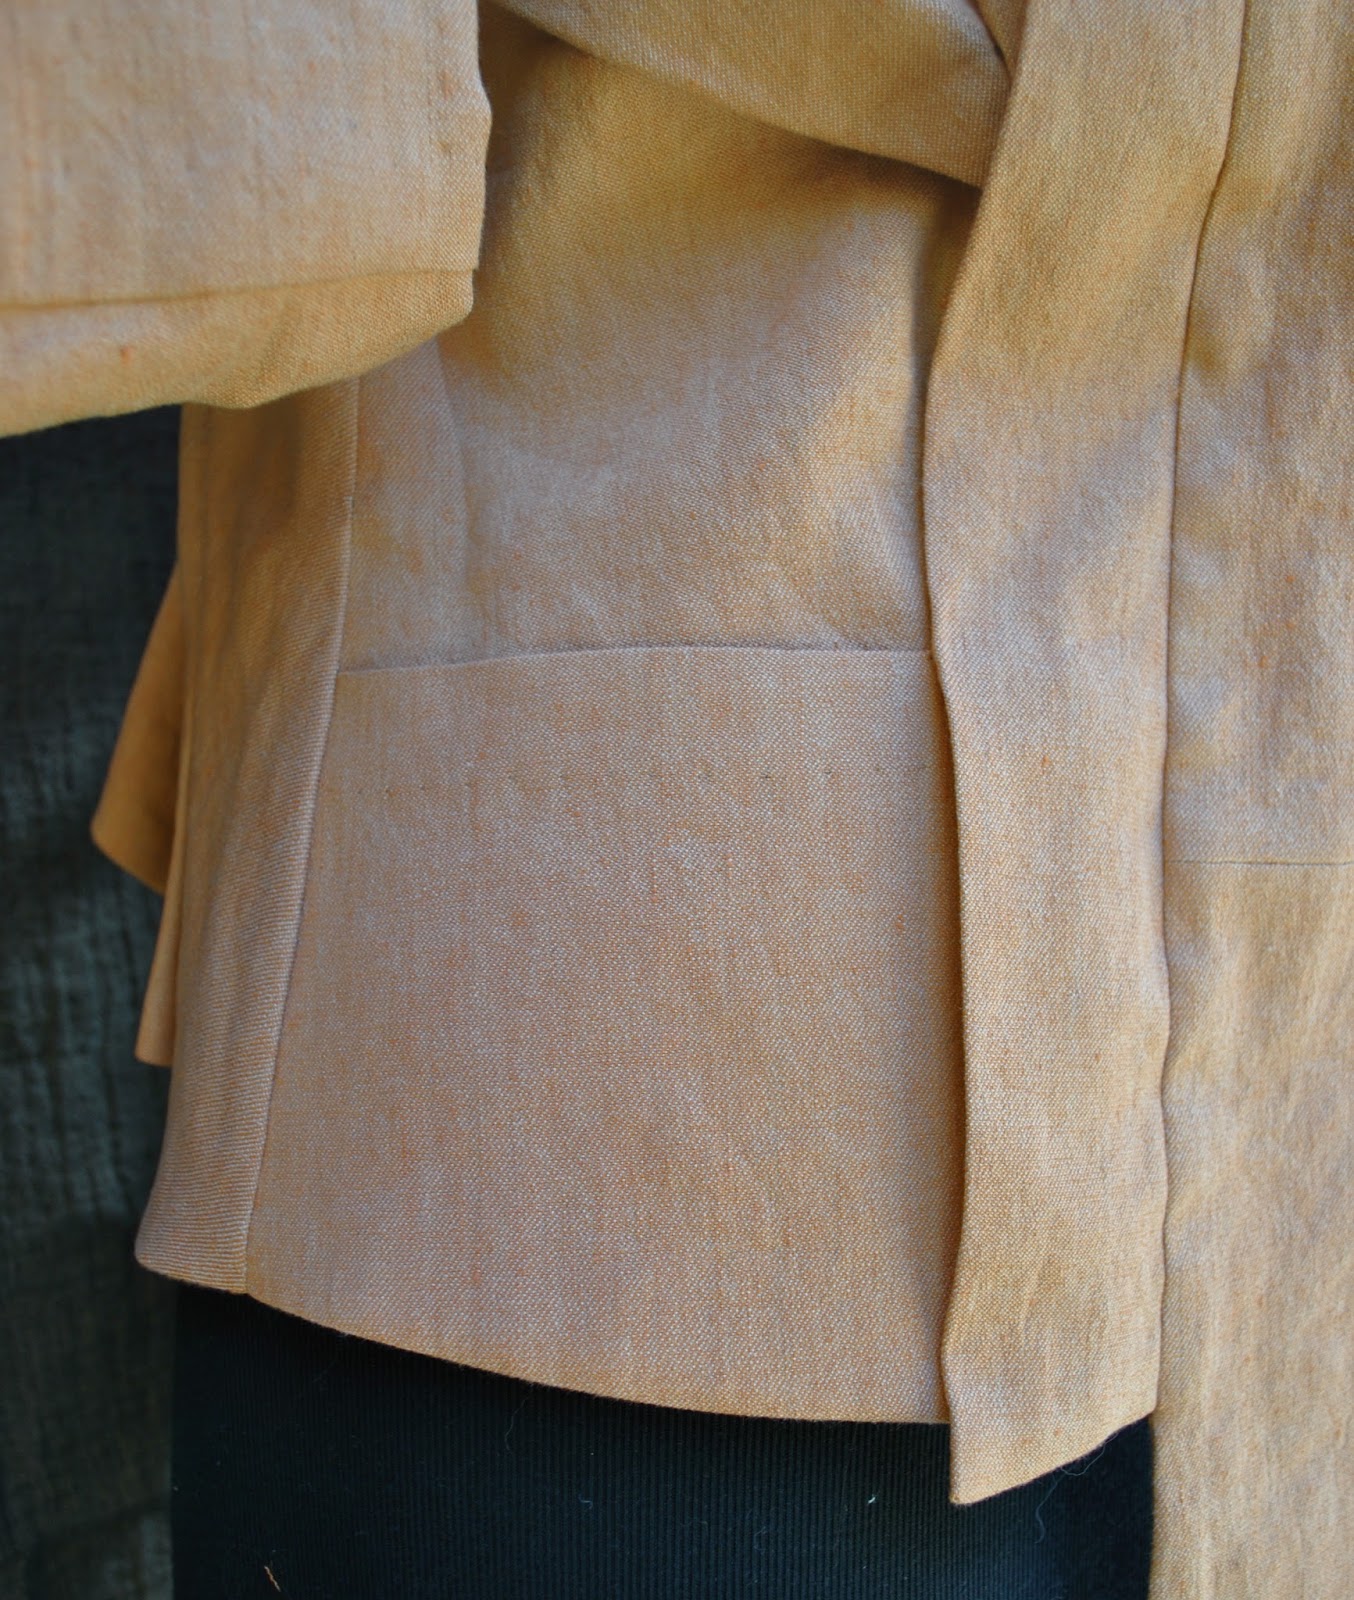
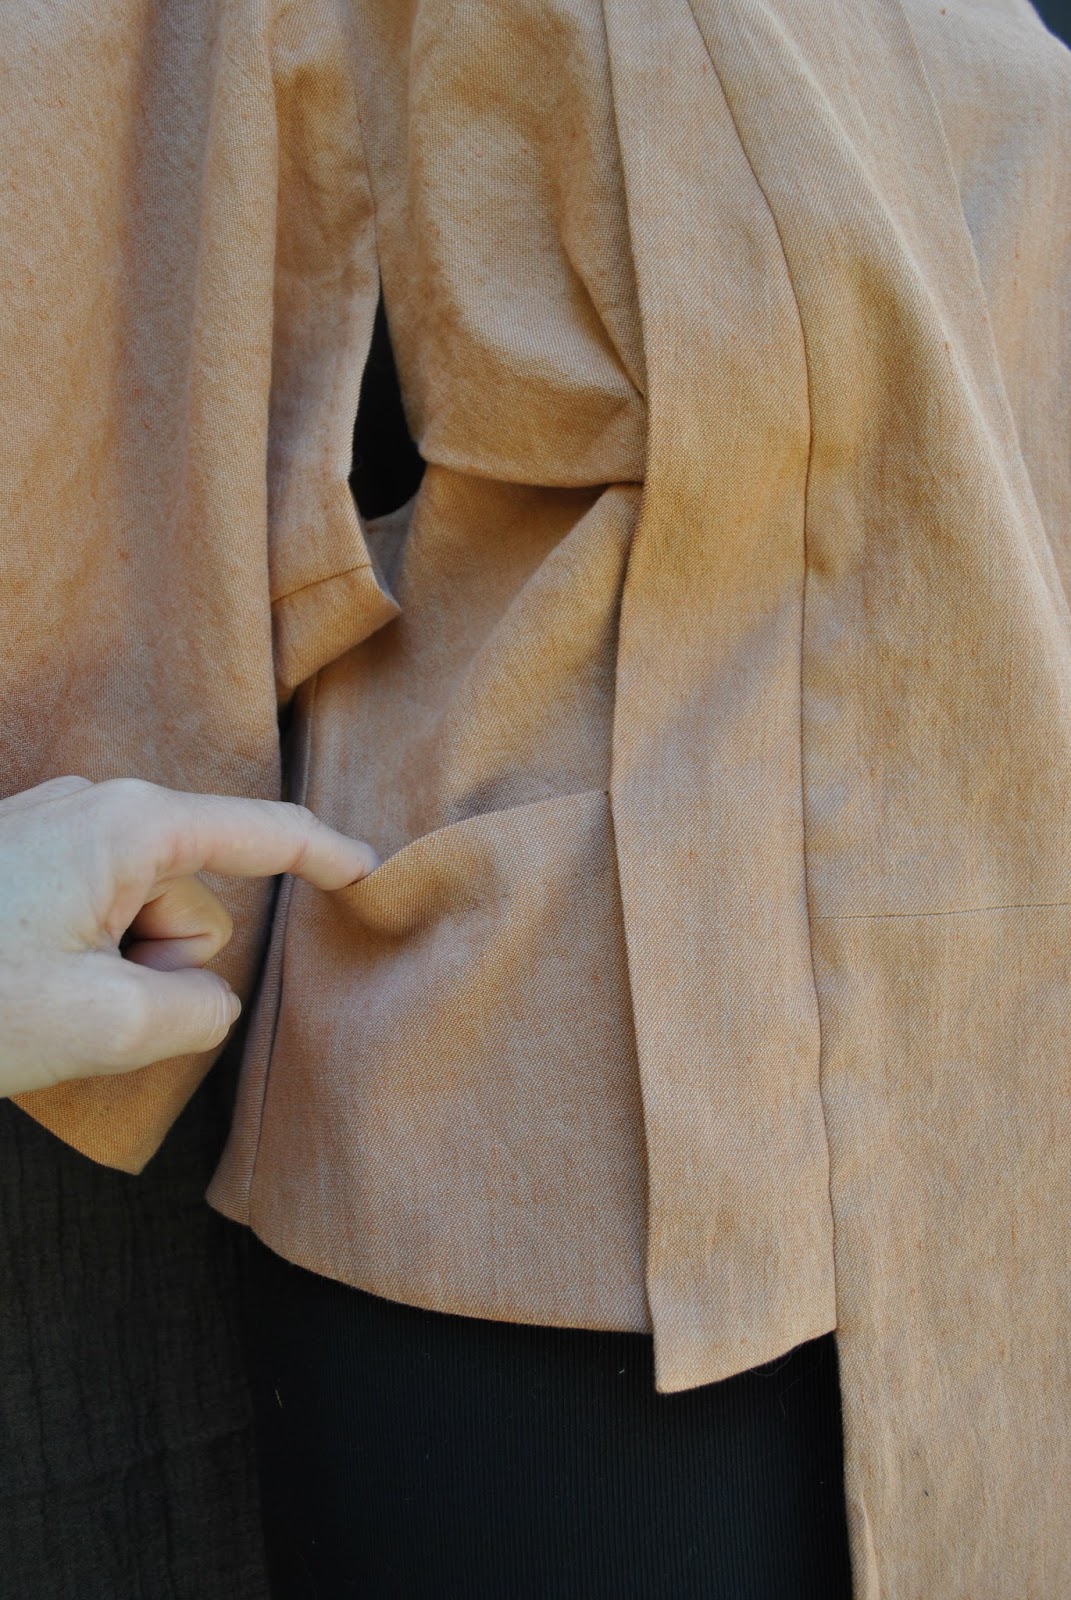
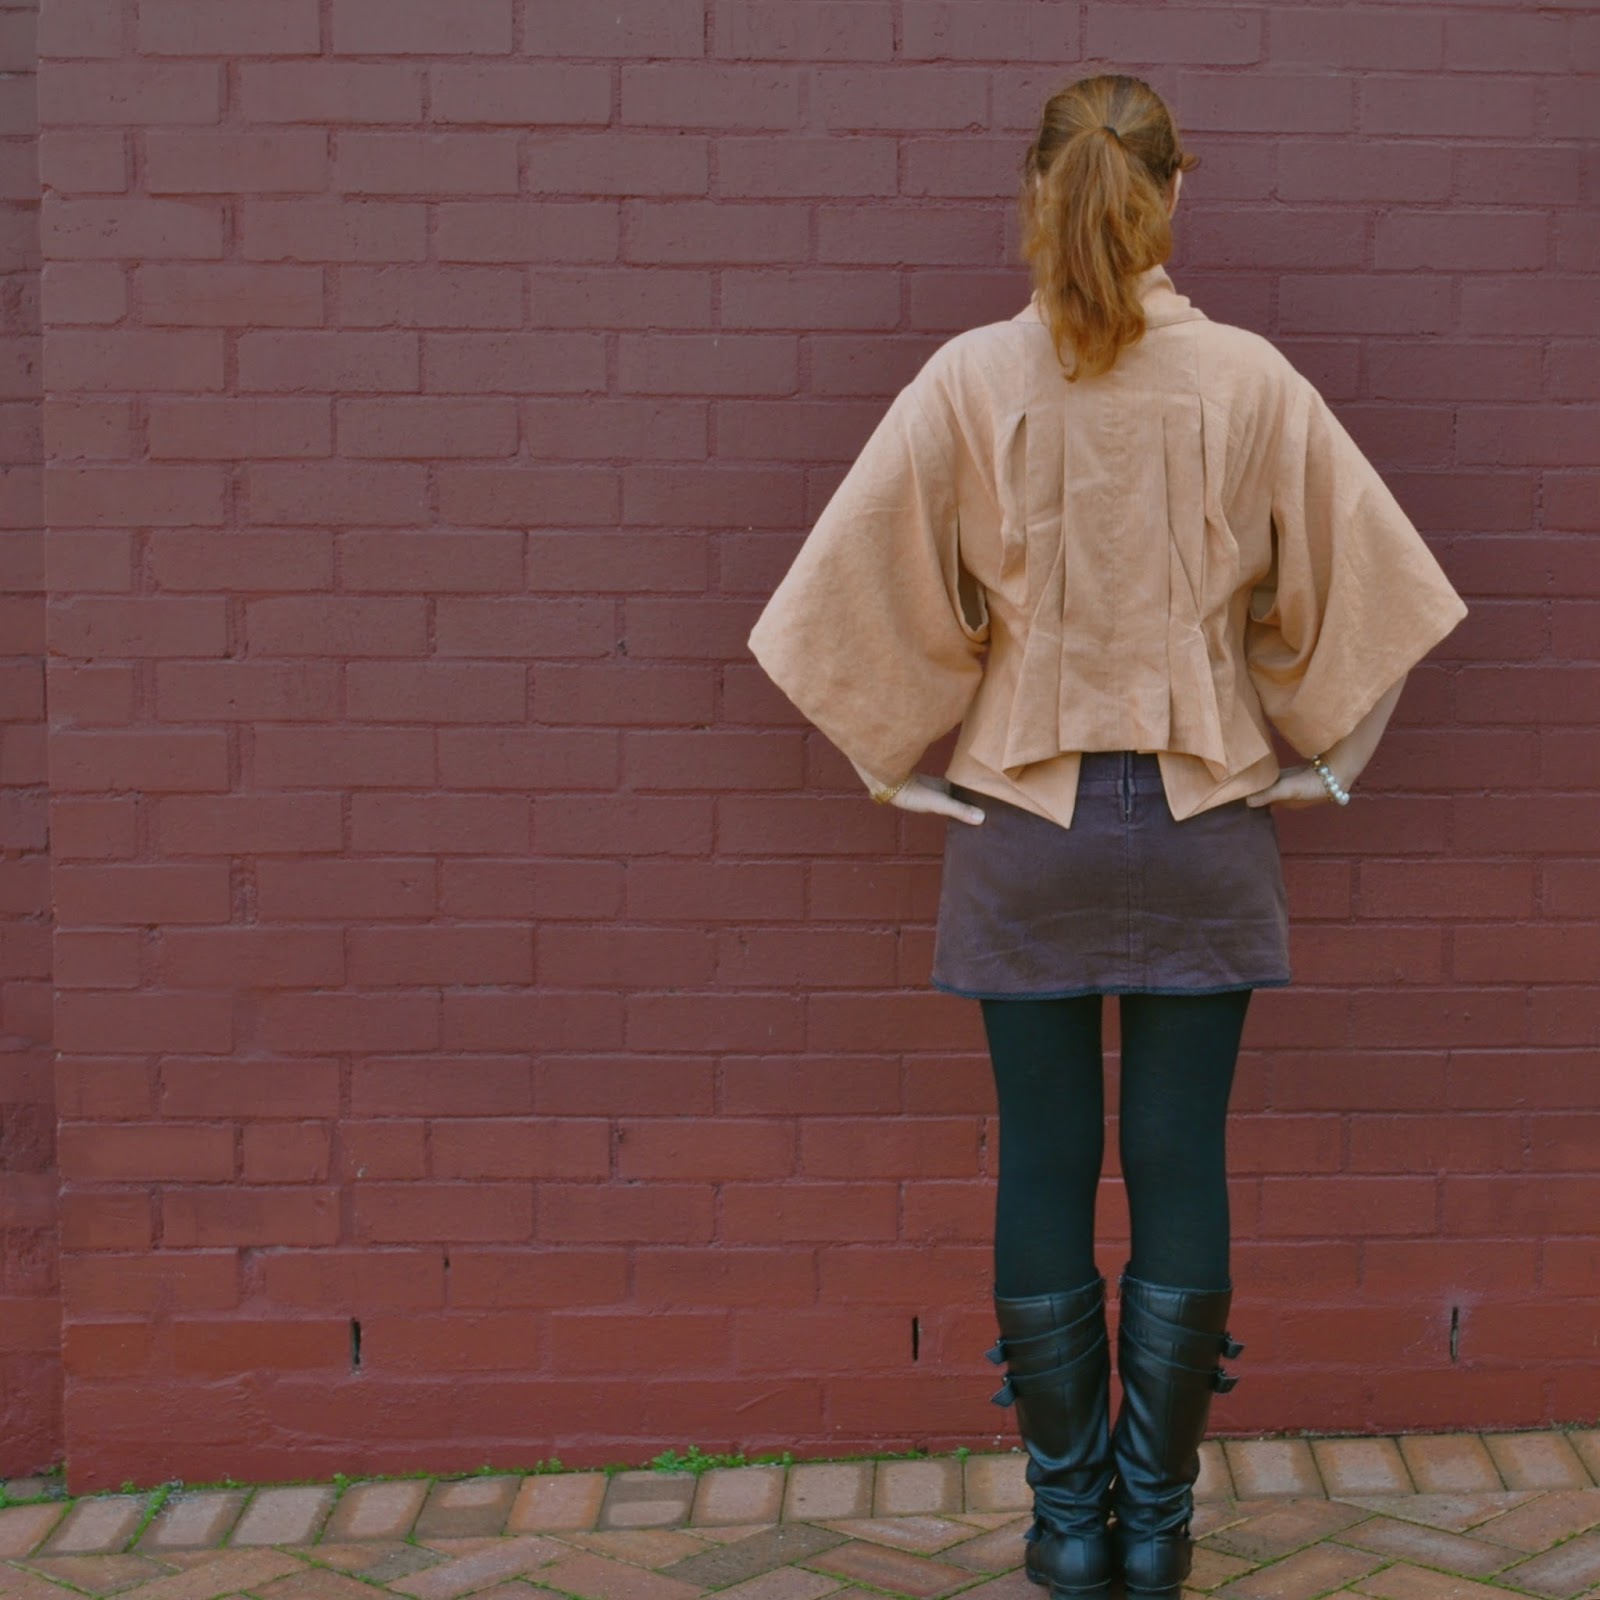
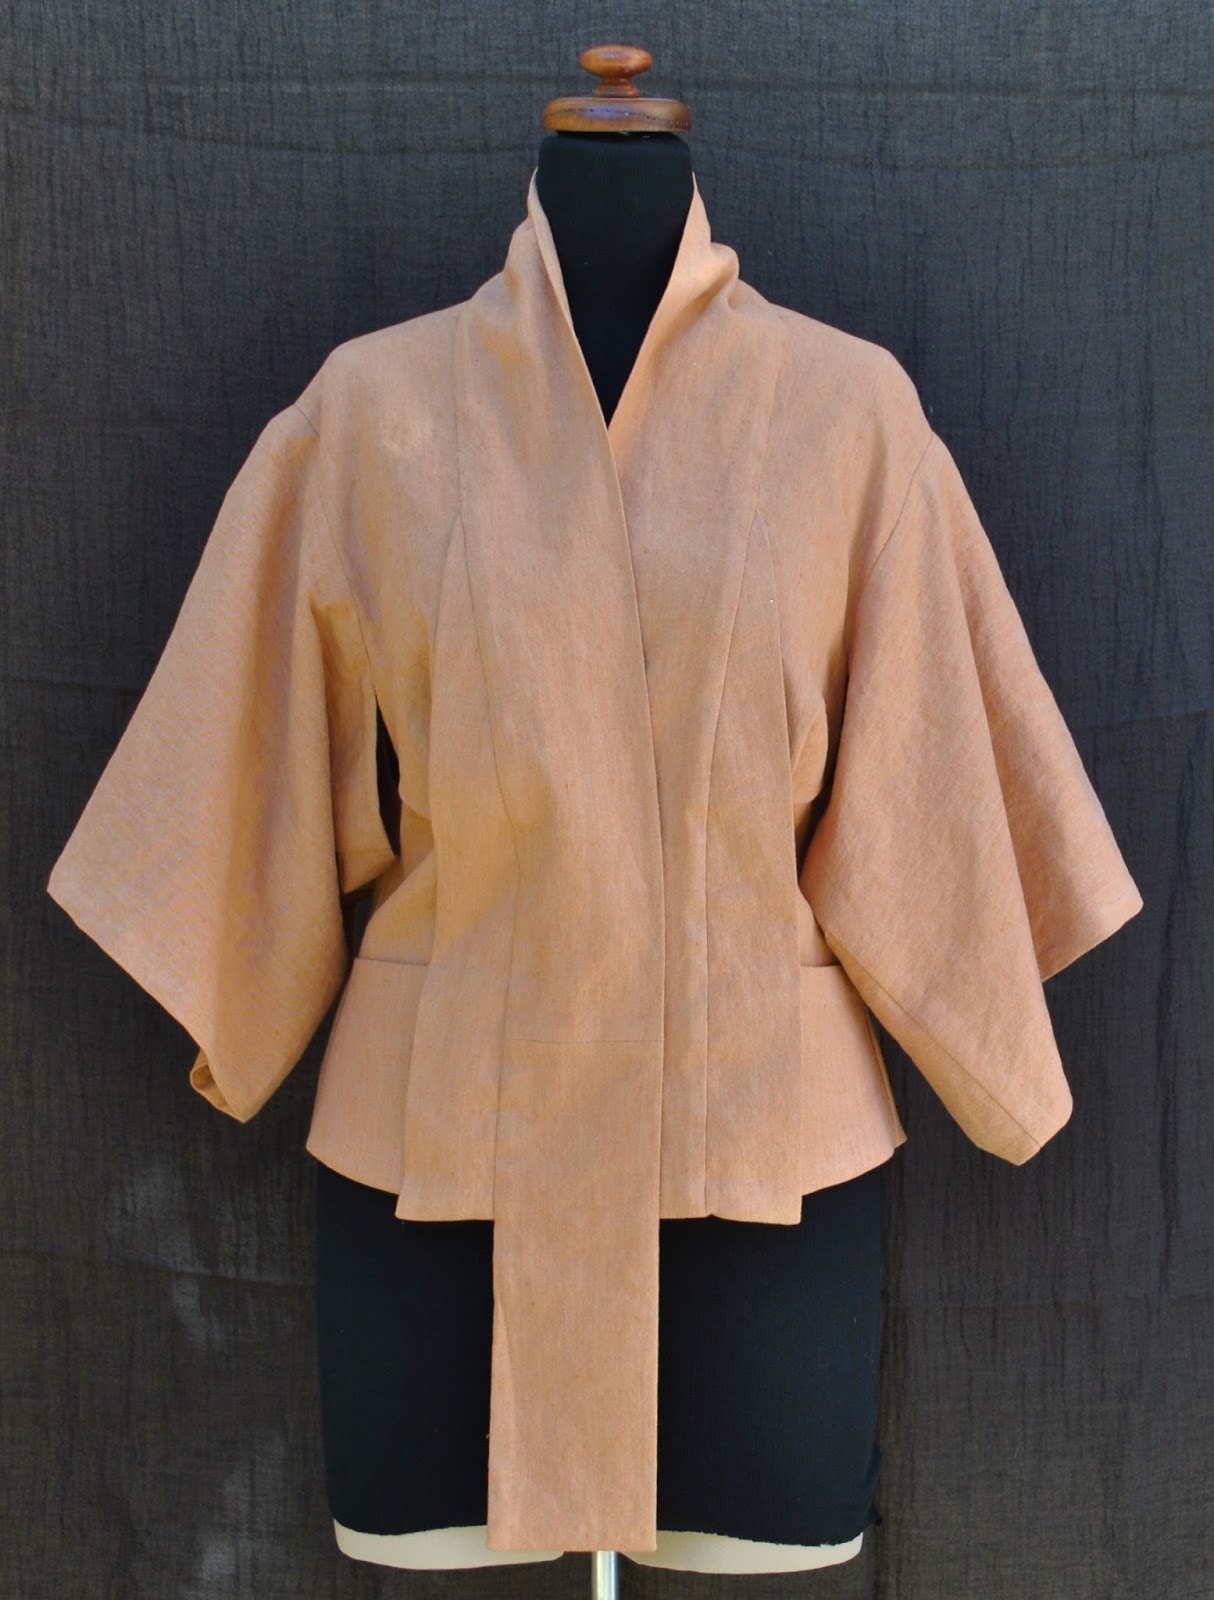
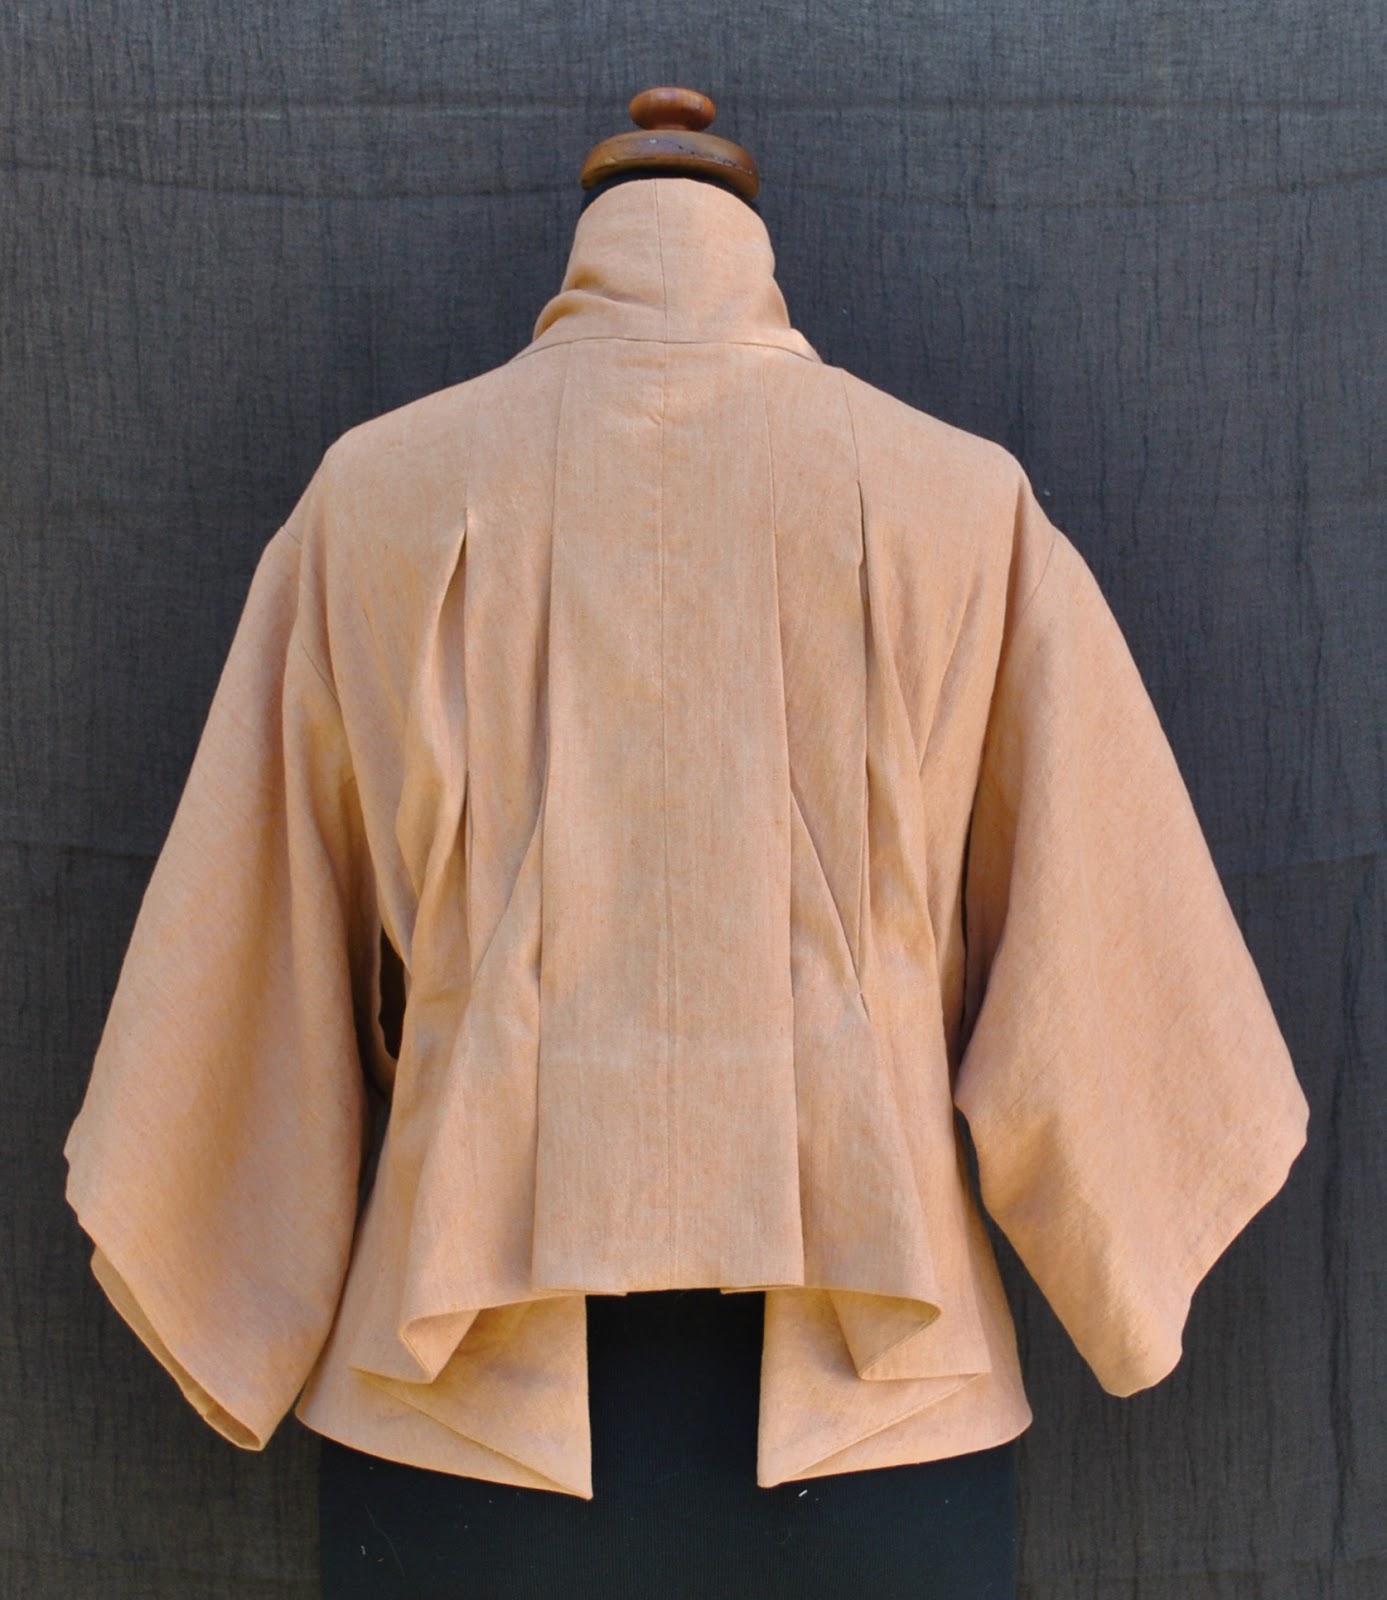
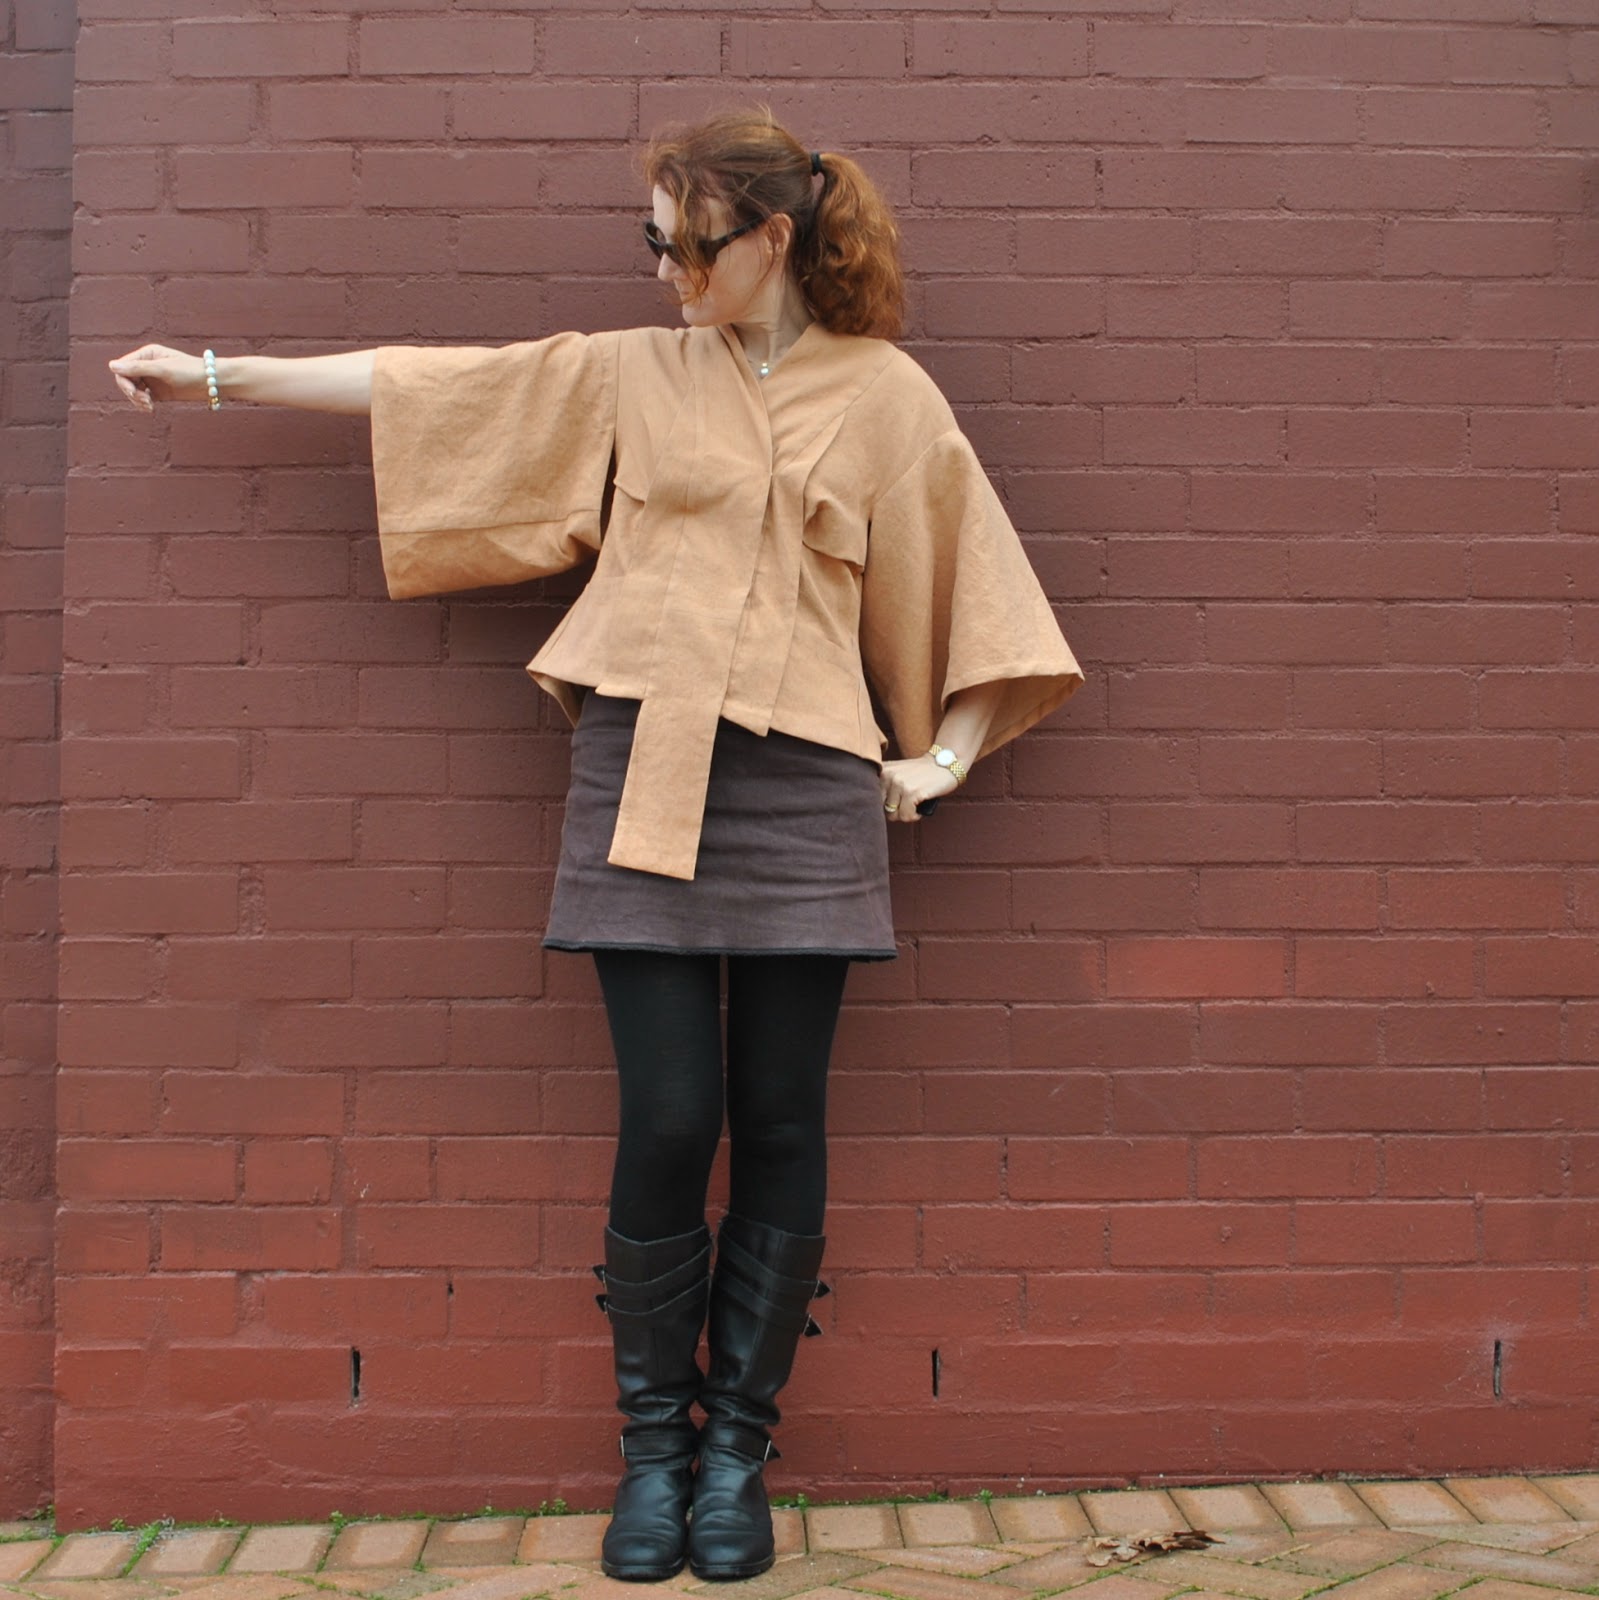
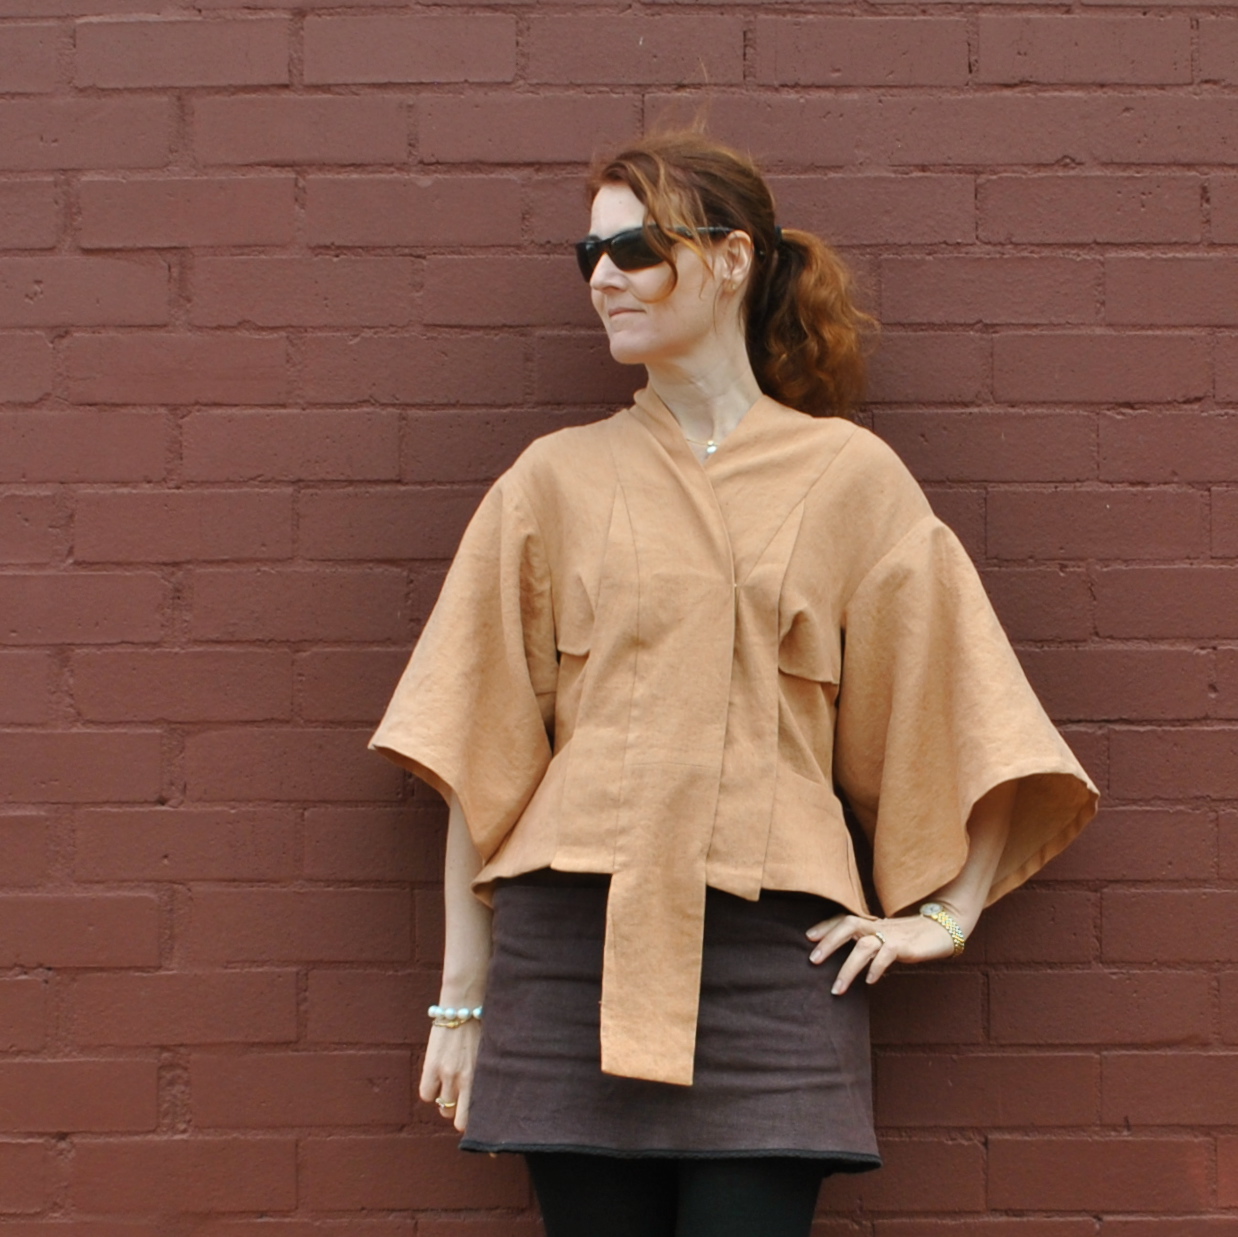
I am wearing my new Alexander McQueen designed jacket.  And did you know that Alexander McQueen’s first name was actually… oh ok then, his name was Lee not Leo.  But… pretty close.  And this jacket has been taking up the, um, lion’s share of my time lately… ?!

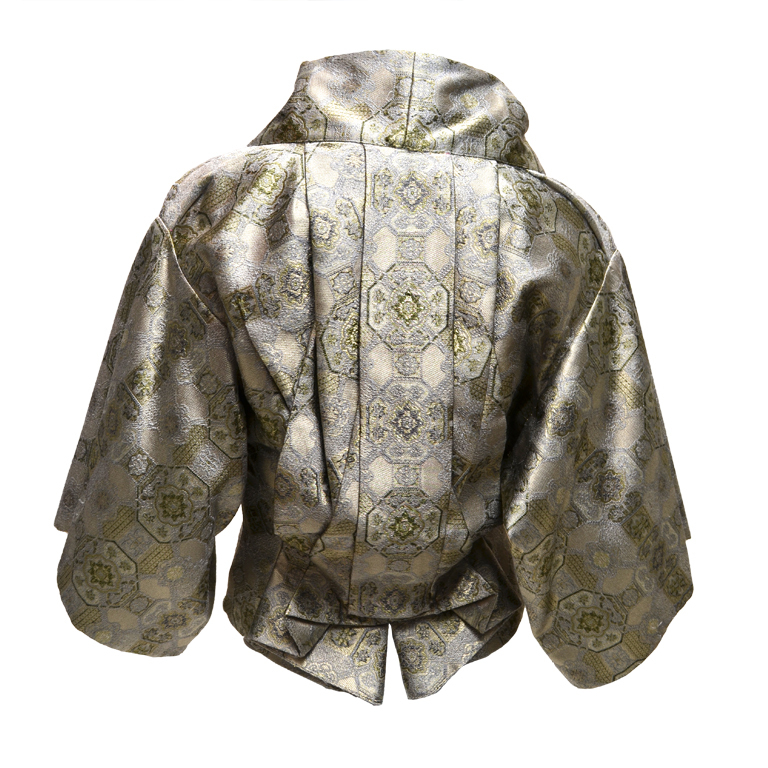
above; Alexander McQueen brocade kimono jacket, 2003

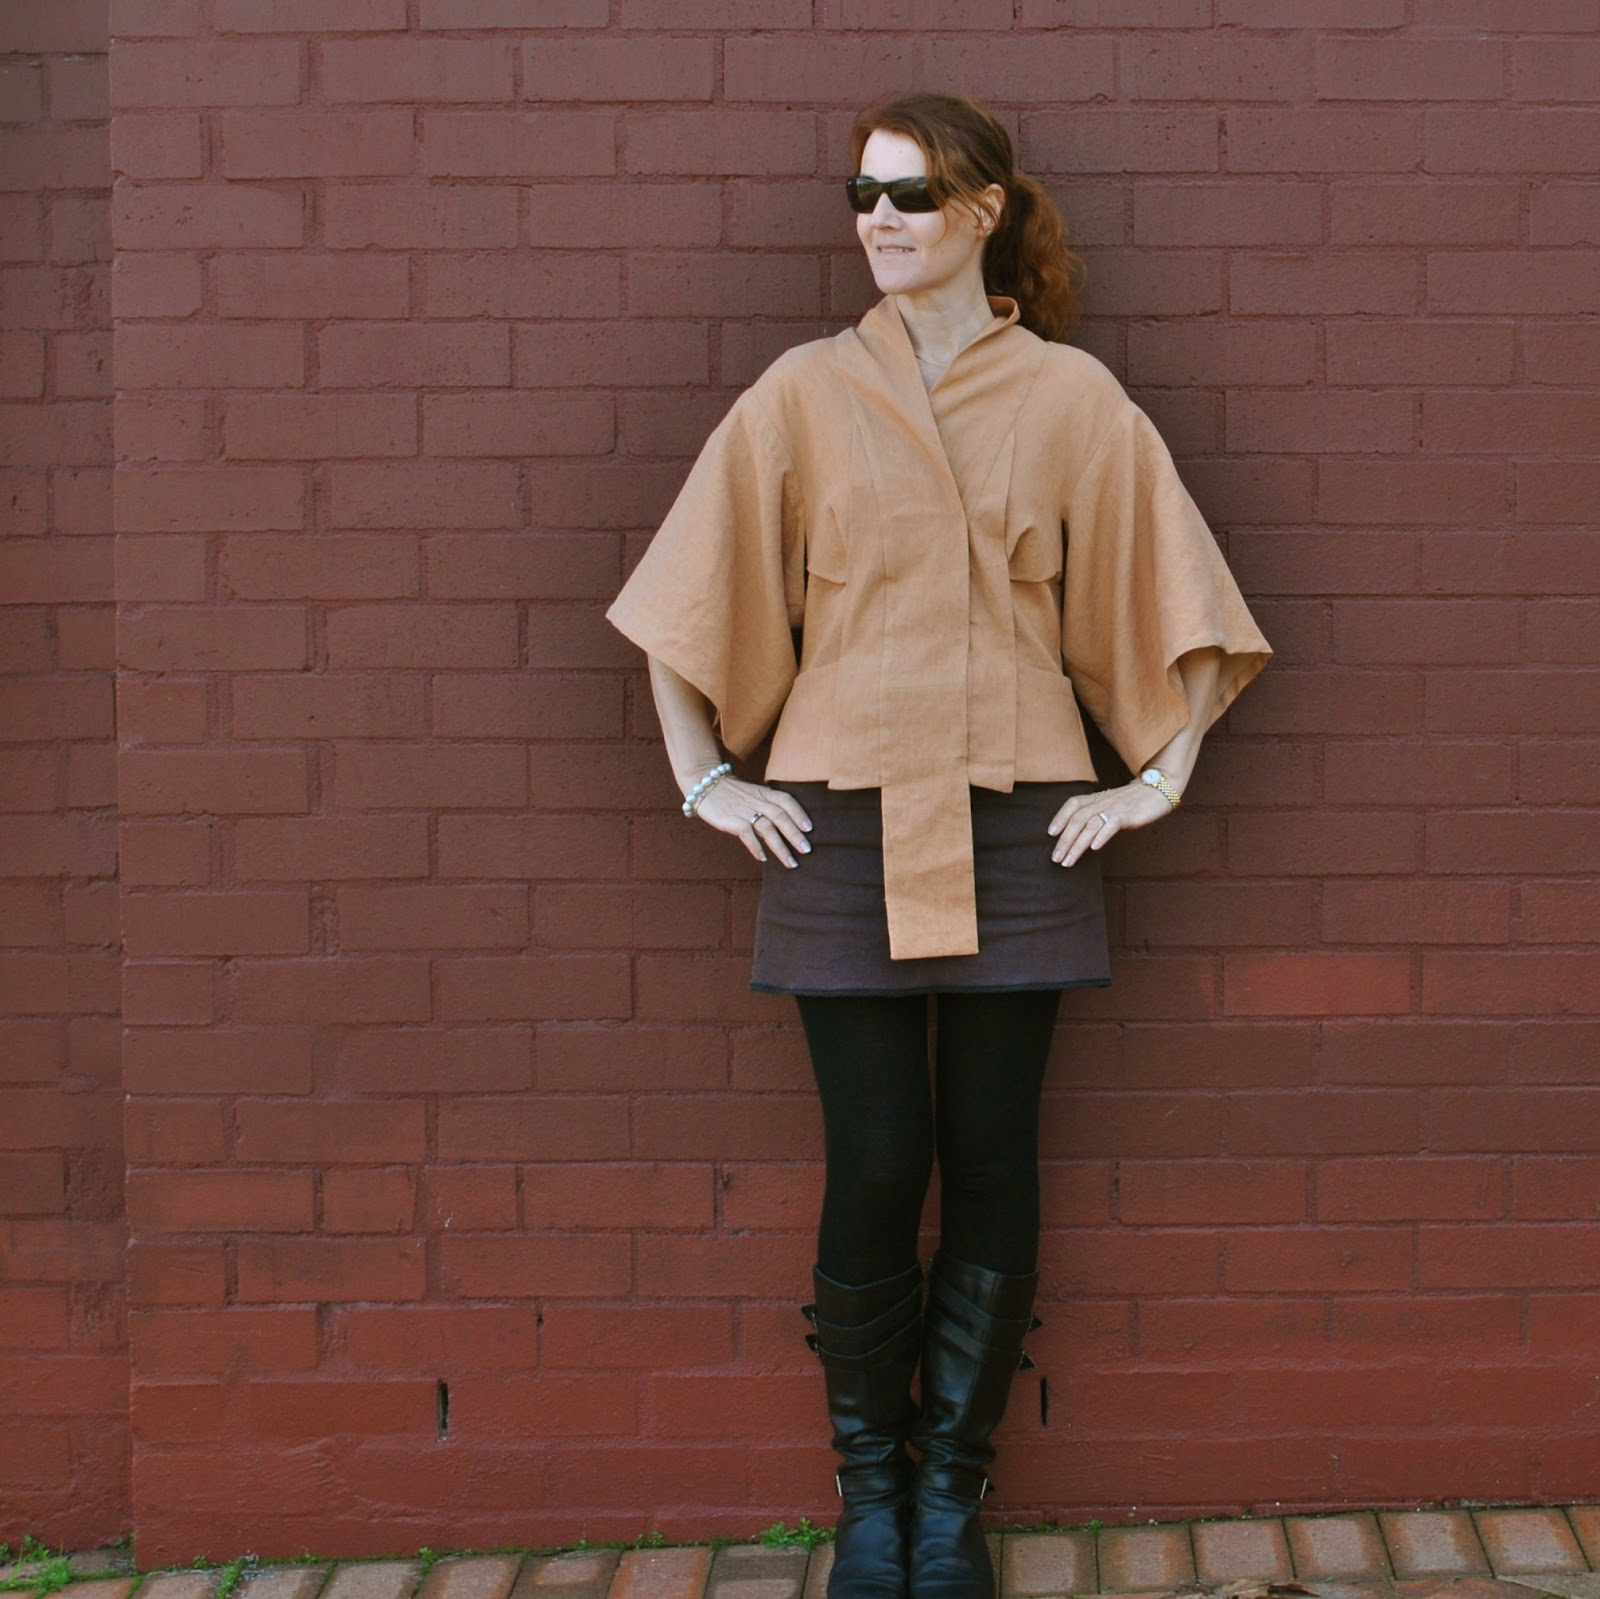
The pattern is a free download from showStudio and when I saw Catherine’s fantastic version of this edgy design I just had to give it another go.  Confession, this is my second time making this up; my first attempt back in 2010 was pretty disastrous and I gave up halfway through. 

Attempt number two… and at least I finished it this time!  Thank you Catherine for sending me the instructions  🙂
This is a very difficult make but I’m fairly happy with the end result and there was not as much angst involved as in my maiden voyage.  Though once again there were times I wondered whether the late Mr McQueen had been having a bit of a lend of us…. !  but it does actually make sense and comes together successfully in the end.


The fabric I used for this new version is a very soft cotton denim in a shade of dusky apricot, and was part of my precious Japanese-bought stash, posted here.  I just barely got the pattern pieces cut out of my 2.5m… barely! so I recommend that if you decide to make this yourself get at least 3m unless you really fancy an extra little challenge to go with this already challenging design.

I added discreet and fairly useless little pockets, just because why not.  There is no pocket pattern piece and none are mentioned in the rather sparse reader-contributed instructions, however there are markings on the pattern not relating to anything else but that appear to indicate where a pocket could go  (dot B)  I wanted for my pockets to be as invisible as possible, so the sides disappear into the side seams and underneath the front flaps, and the lower edge is sewn flush against the lower edge of the jacket.  Meaning the only visible edge is the top edge.
Actually there is no visible stitching on the outside of my jacket at all.  I really like the apparent minimalism of the finishes, a contrast to, and a showcase for the complexity of those pleats and darts at the back.
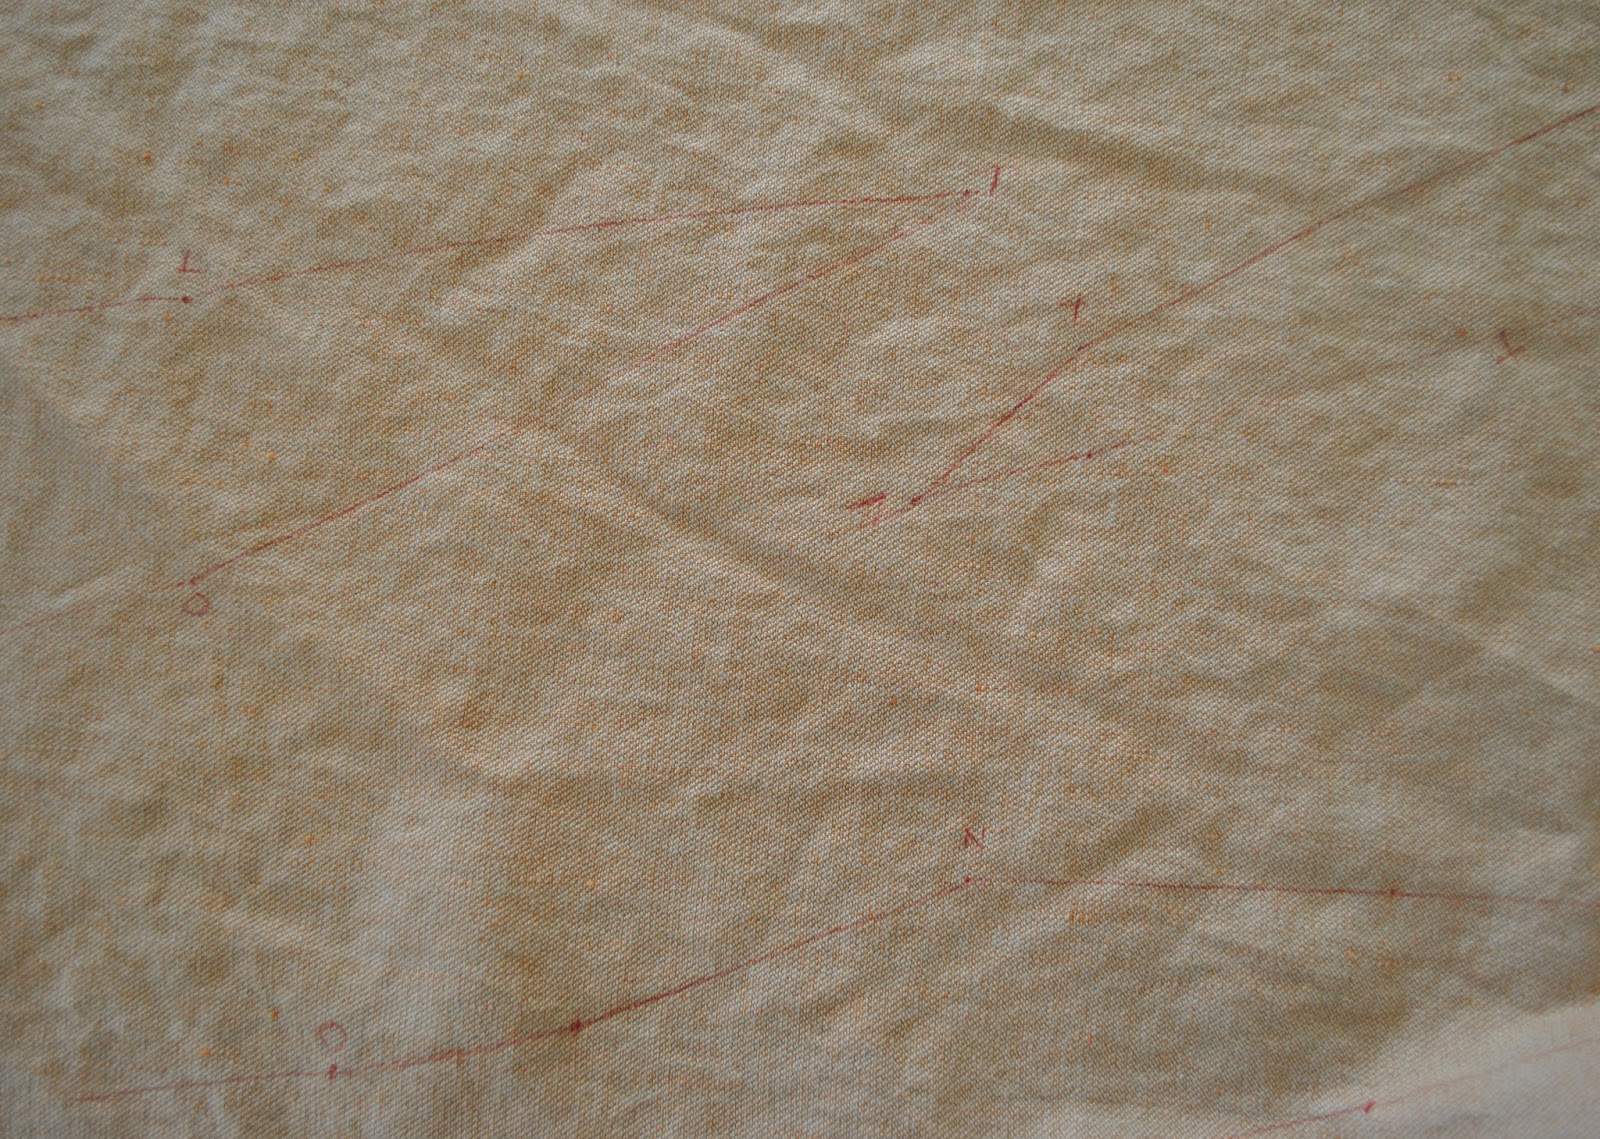
 The instructions did help but they are not fabulous.  I transferred all markings onto the wrong side of my fabric with red pen which washes out with the first wash, and this helped enormously.  As well as dot B, dots X and L are also not mentioned anywhere in the instructions and dot L  is all by its lonesome with no other dot L anywhere.  I joined up points X a little way along their joining lines, and freehanded the last pleats to guarantee symmetry.

(Later edit: in a lightbulb moment I’ve suddenly realised you are supposed to join dot L from one back to dot L on the other back!  Doing this would “look” about the same as what I did so I might leave mine the way it is!)

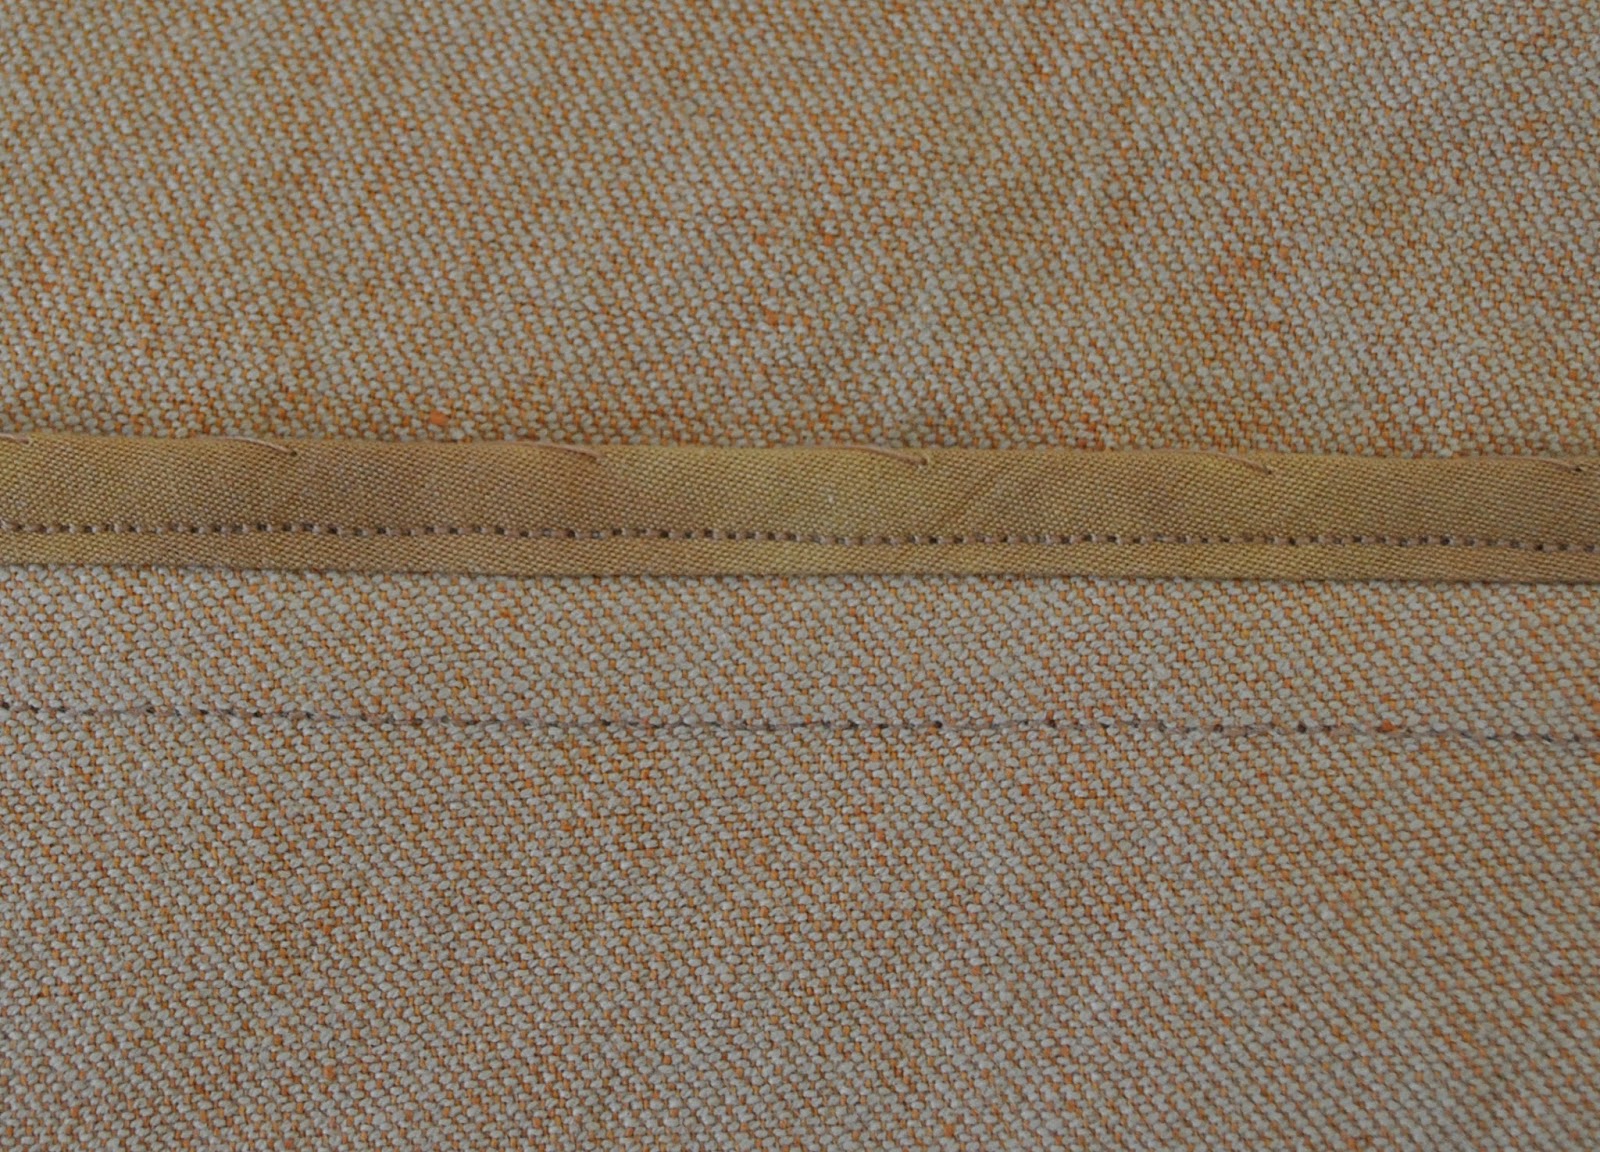
Visible hidden inside edges I finished with HongKong seaming which was then invisibly slip-stitched down to the garment.  A few invisible inside edges were finished on the overlocker.  The centre back piece was cut on the side edge and I left those raw selvedges unfinished on the inside too.  I interfaced the lower facing then later decided this made the lower edge far too stiff for my taste, so ripped it off.  There is no interfacing in the jacket now, and I like this softness.
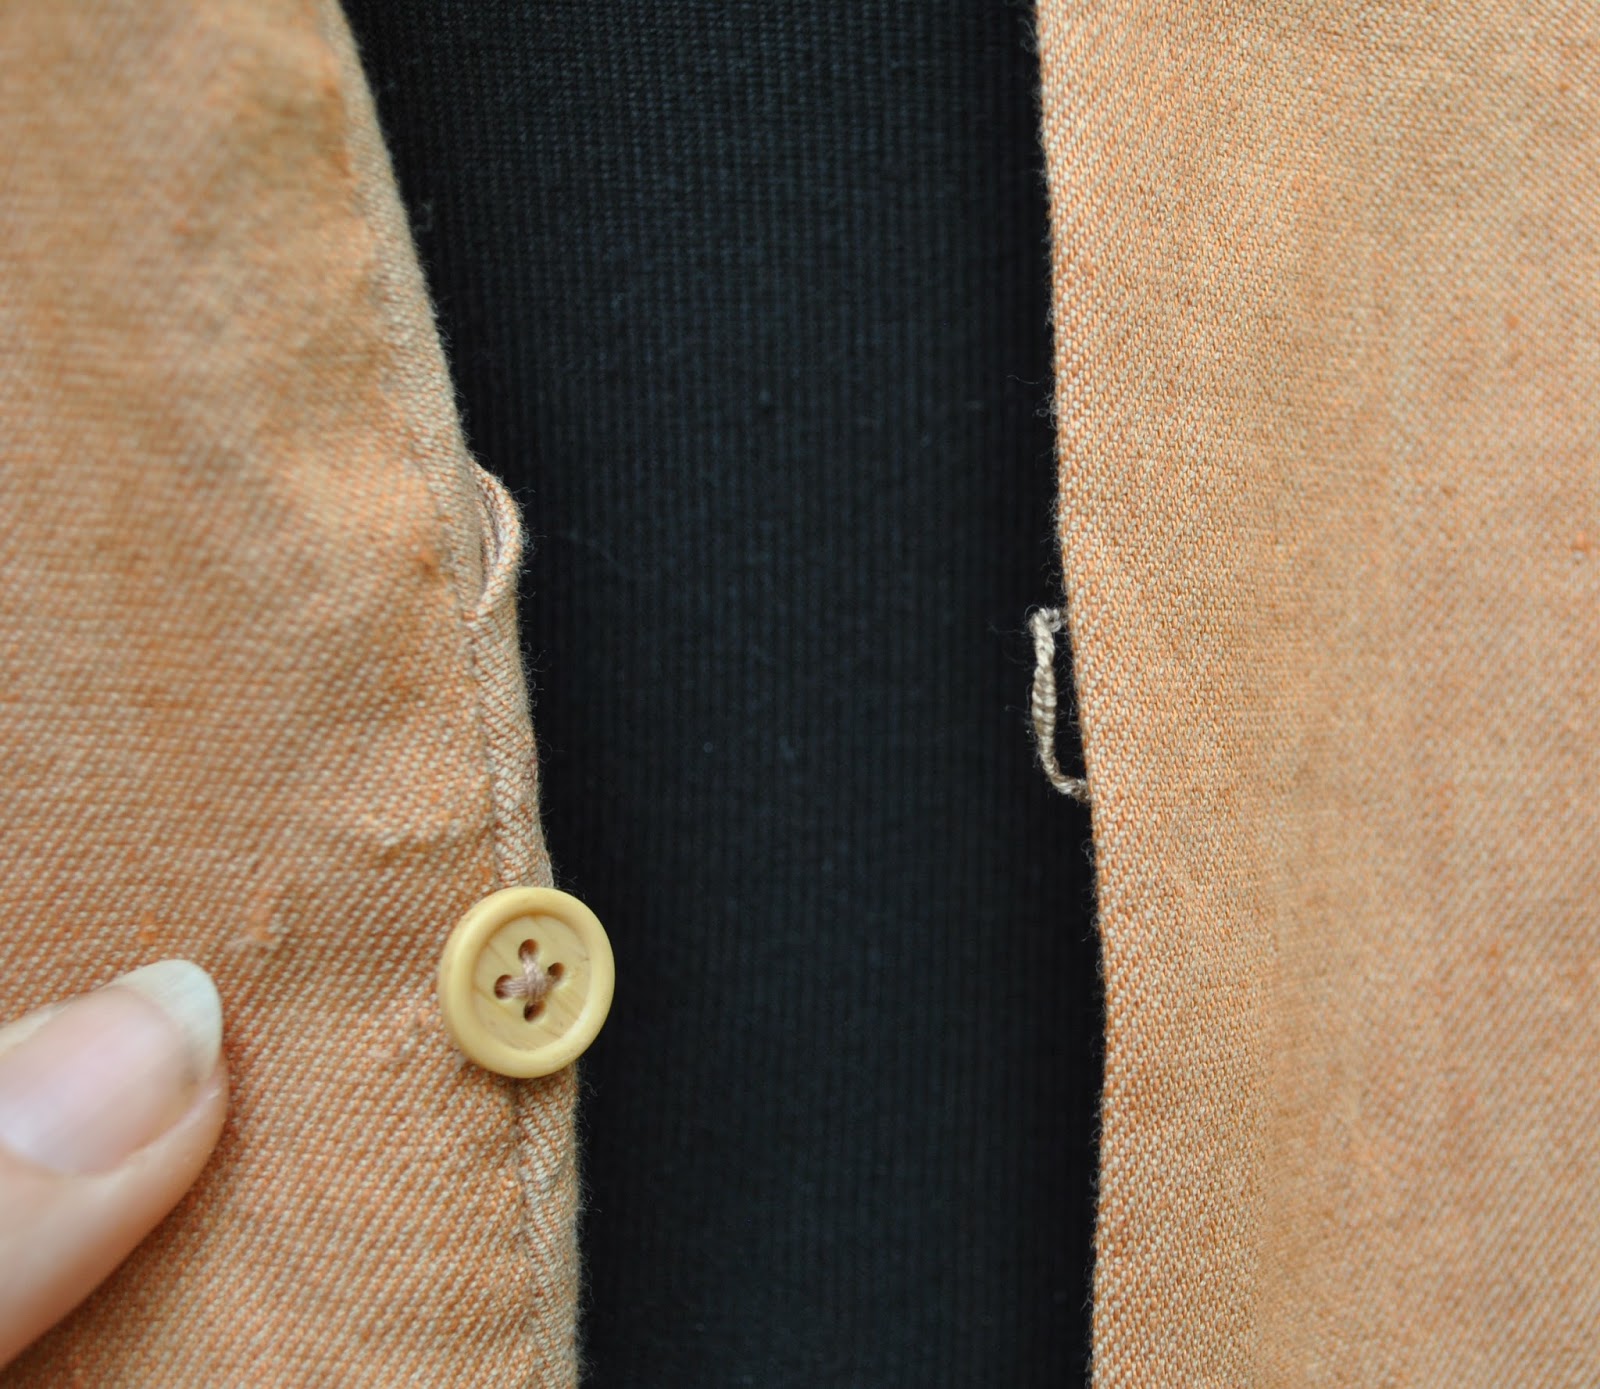
Closure is by a single button and a loop covered with tightly spaced blanket stitching, made from embroidery thread, plus three small brass press-studs.

Details:
Jacket; Alexander McQueen via showStudio, lightweight apricot cotton denim
Tshirt (not seen); self-drafted, white cotton, details here
Skirt; Vogue 1247, purple denim dyed brown, details and my review of this pattern here, and see this skirt styled in 6 different ways here
Tights; self-drafted, wool merino, details here
Boots; Andrea and Joen, from the now re-branded Uggies in Dunsborough

pinterestmail

Future Grrrrl!

Whoa!  who is that babe?
It’s FUTURE GRRL!
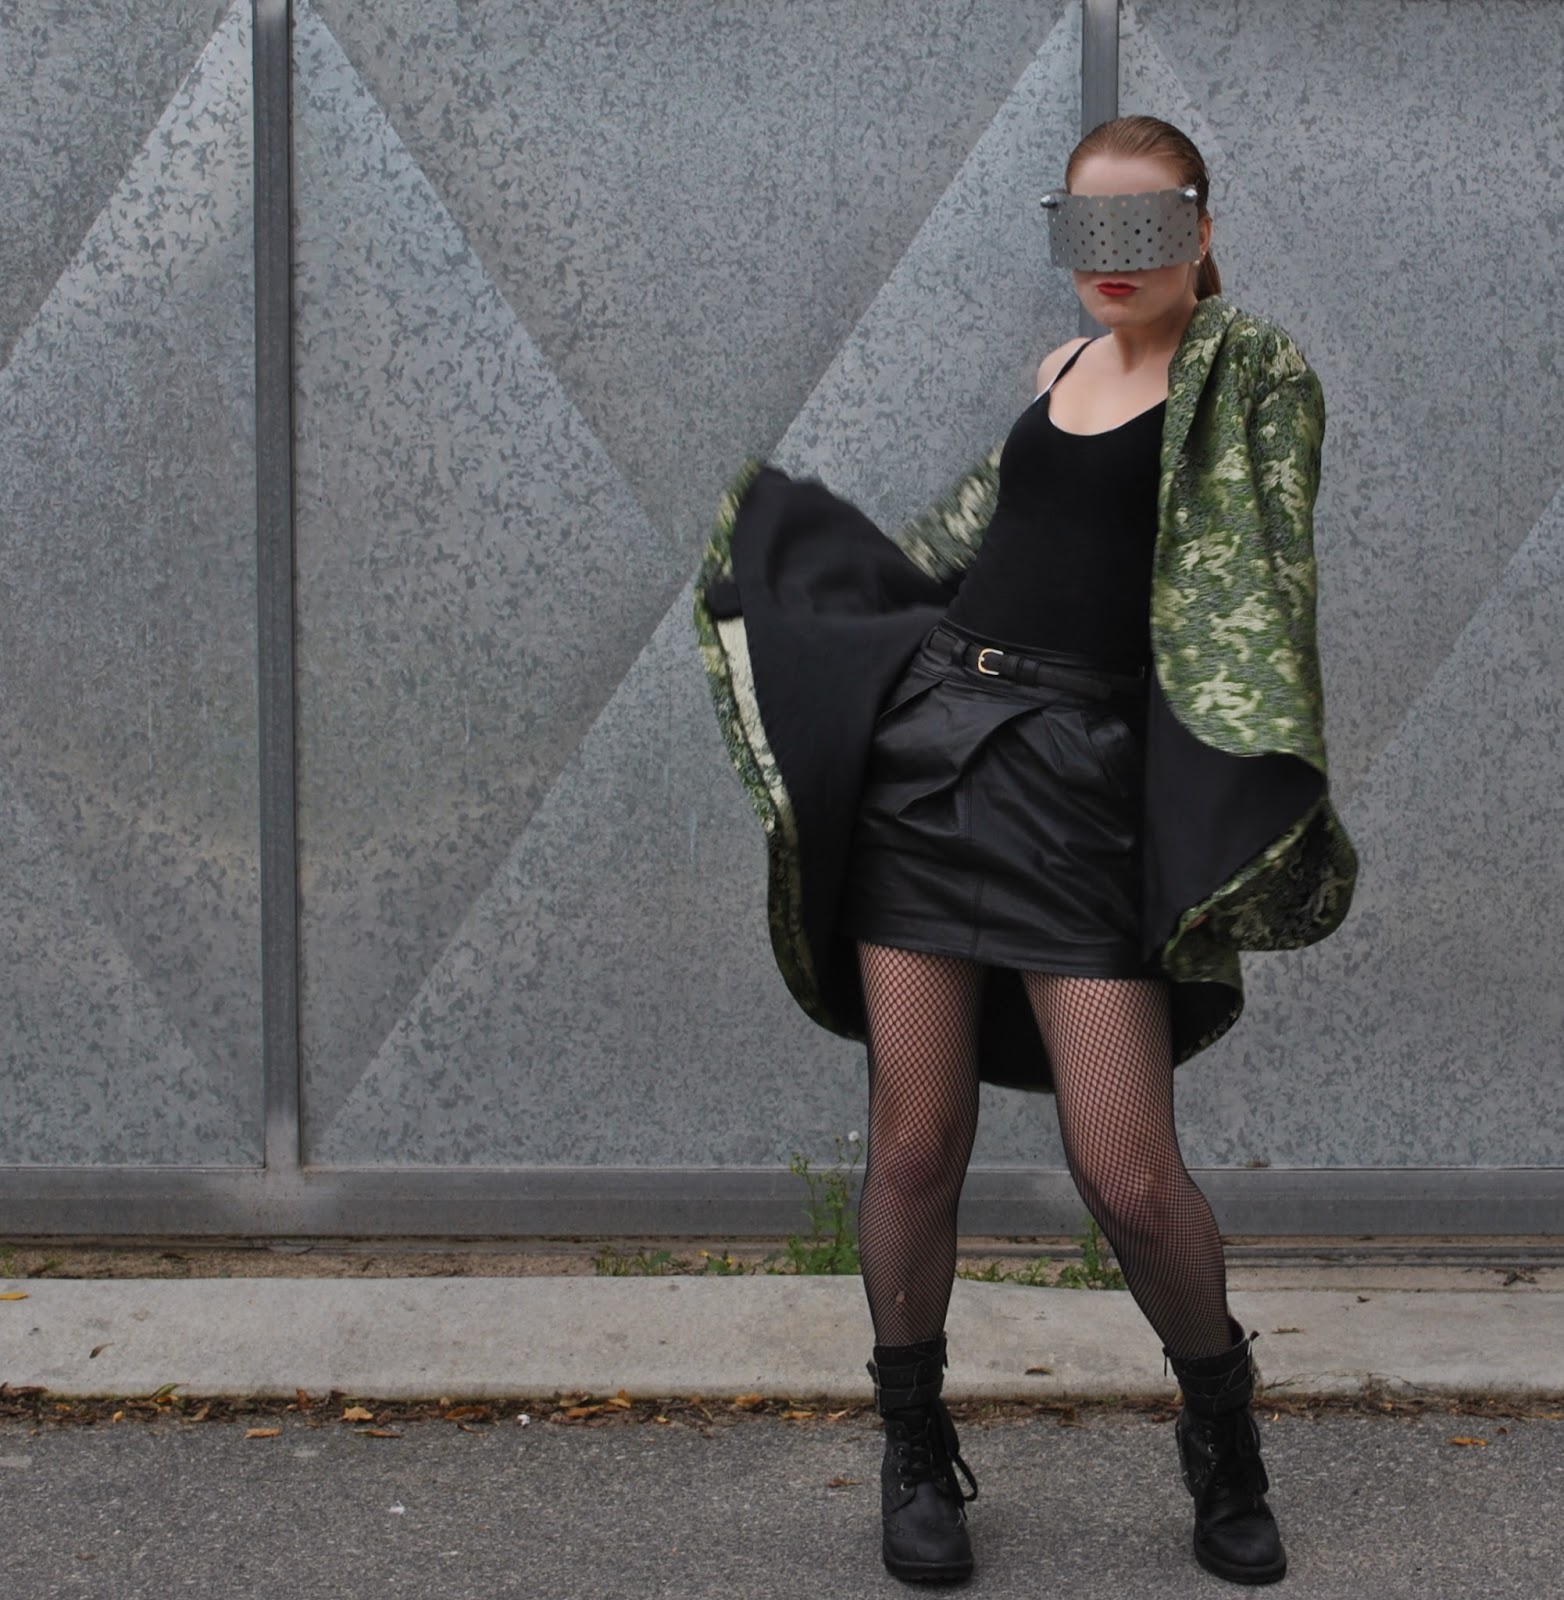
So; Cassie was going to a Futuristic party… and had a firm idea of how she wanted to look.  To make this sartorial vision a reality she wanted a flamboyant and luxuriously textured coat.   
Mission accomplished!
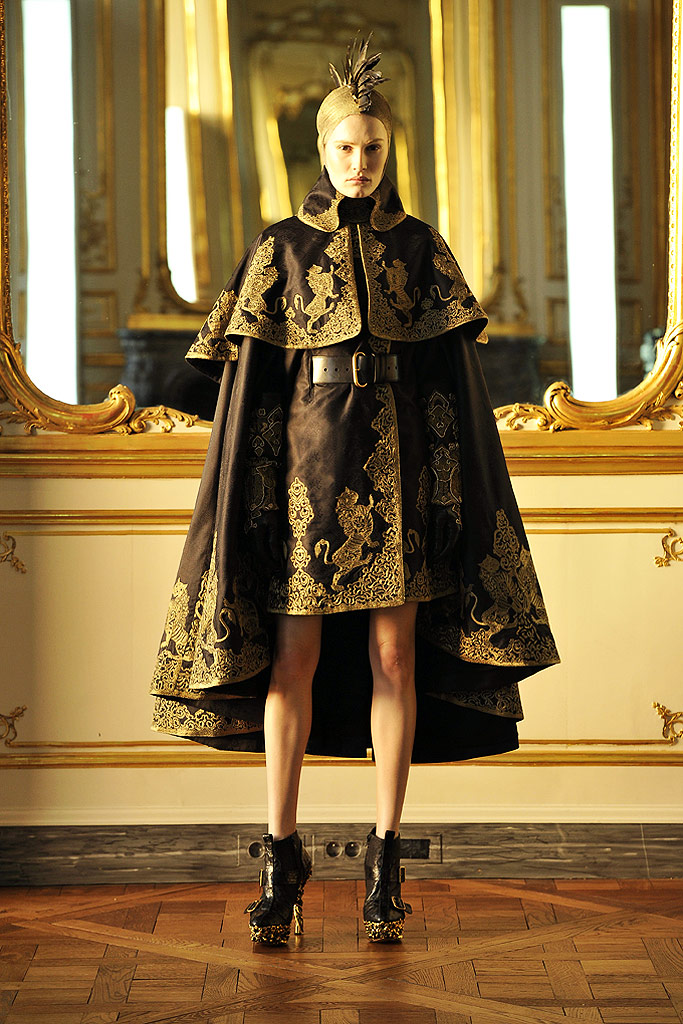
She took her inspiration from an Alexander McQueen outfit, and looks kinda Blade Runner I reckon.  We bought the fabric and pattern together. Wait, wait what am I saying? I bought the fabric and pattern.  She buys her own clothes now, but I do pay for her fabric when we’re out together… I’m hoping to encourage that creativity and DIY spirit.  Well, that’s the theory, anyway!

below: Alexander McQueen Fall 2010 RTW

Fast forward a coupla weeks and Cassie having spent hours and hours and hours of her free time on meticulously hand-sewing another friend’s costume for him to wear to the same party (he looked very cool too, btw) suddenly realises the night before the party that she has to work the next day, and so there is absolutely NO WAY she can get her own costume finished on time.  Daughterly pleading with promises of chocolate followed.  *sigh*  Mum to the rescue.  I did not want that fabric and pattern to just sit there and not even get to the party!

Hehe, I’m joking of course, I was very happy to step in and take over the making of this ultra glamorous jacket.  Isn’t it rather gorgeous??  And, she did construct most of the shell herself.  Probably we each did about half the work involved.
btw, this is NOT the fab, self-indulgent, frivolous thing for myself I mentioned in my previous post… I had to abandon that for a while to make this!  That is yet to come!
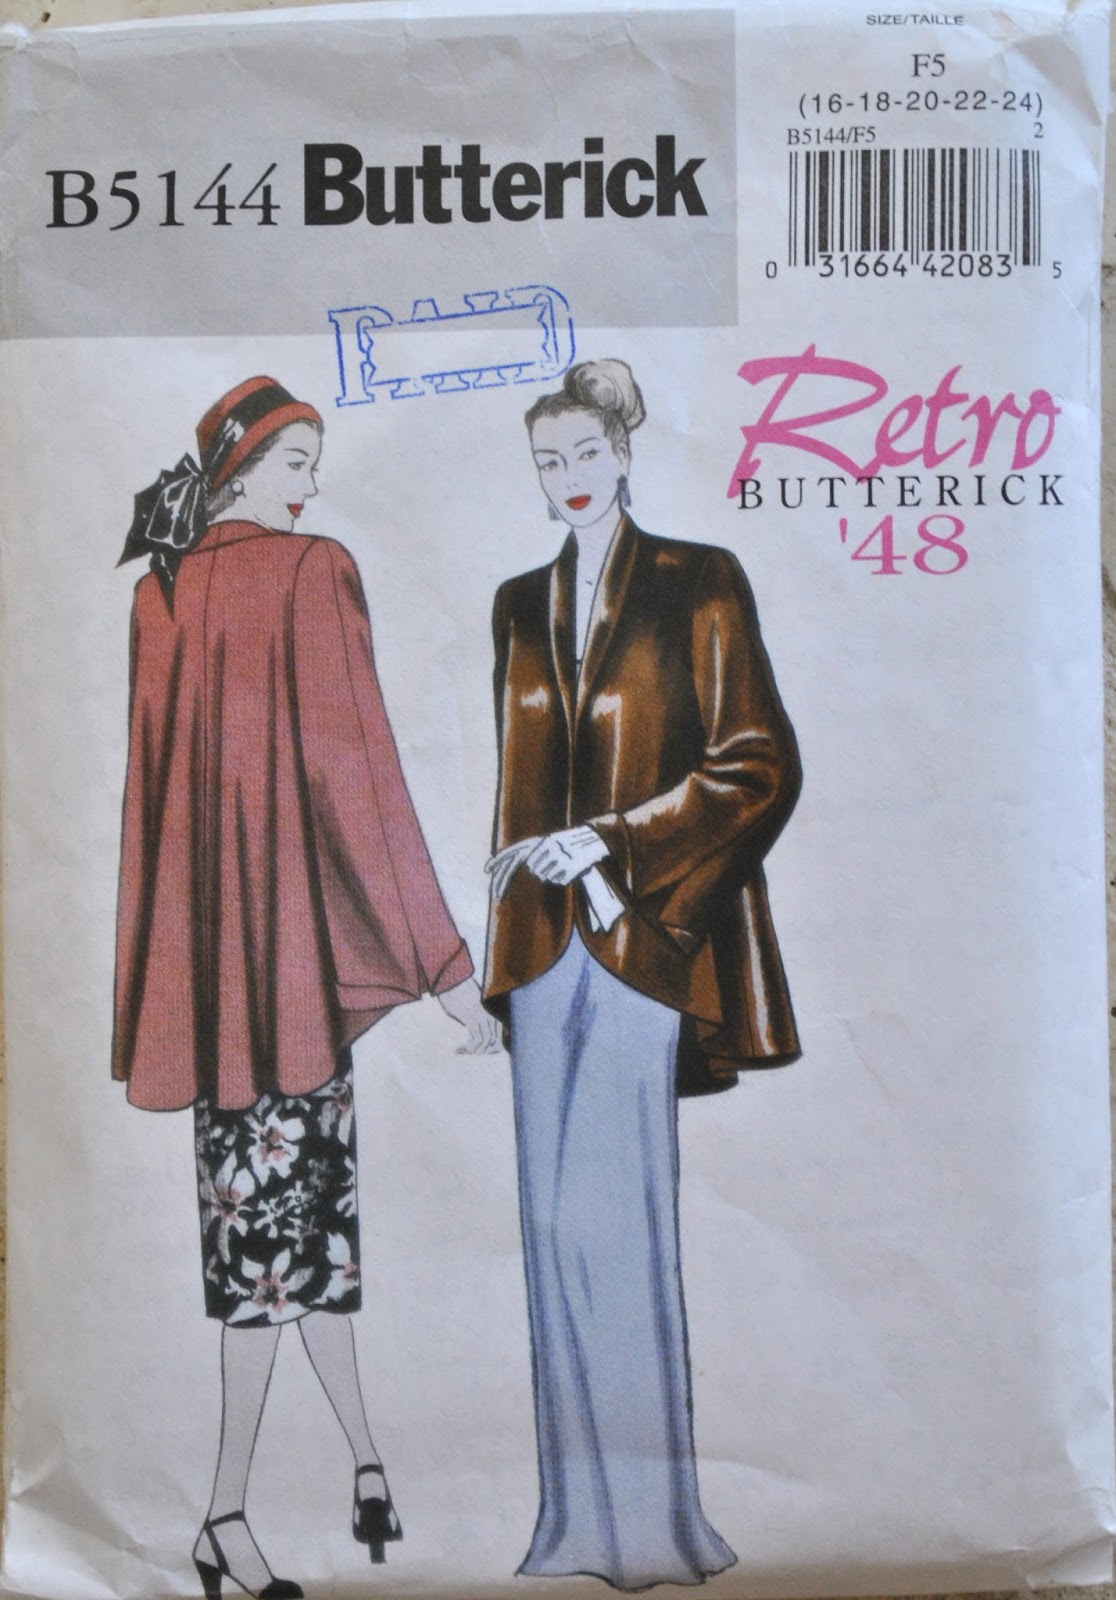
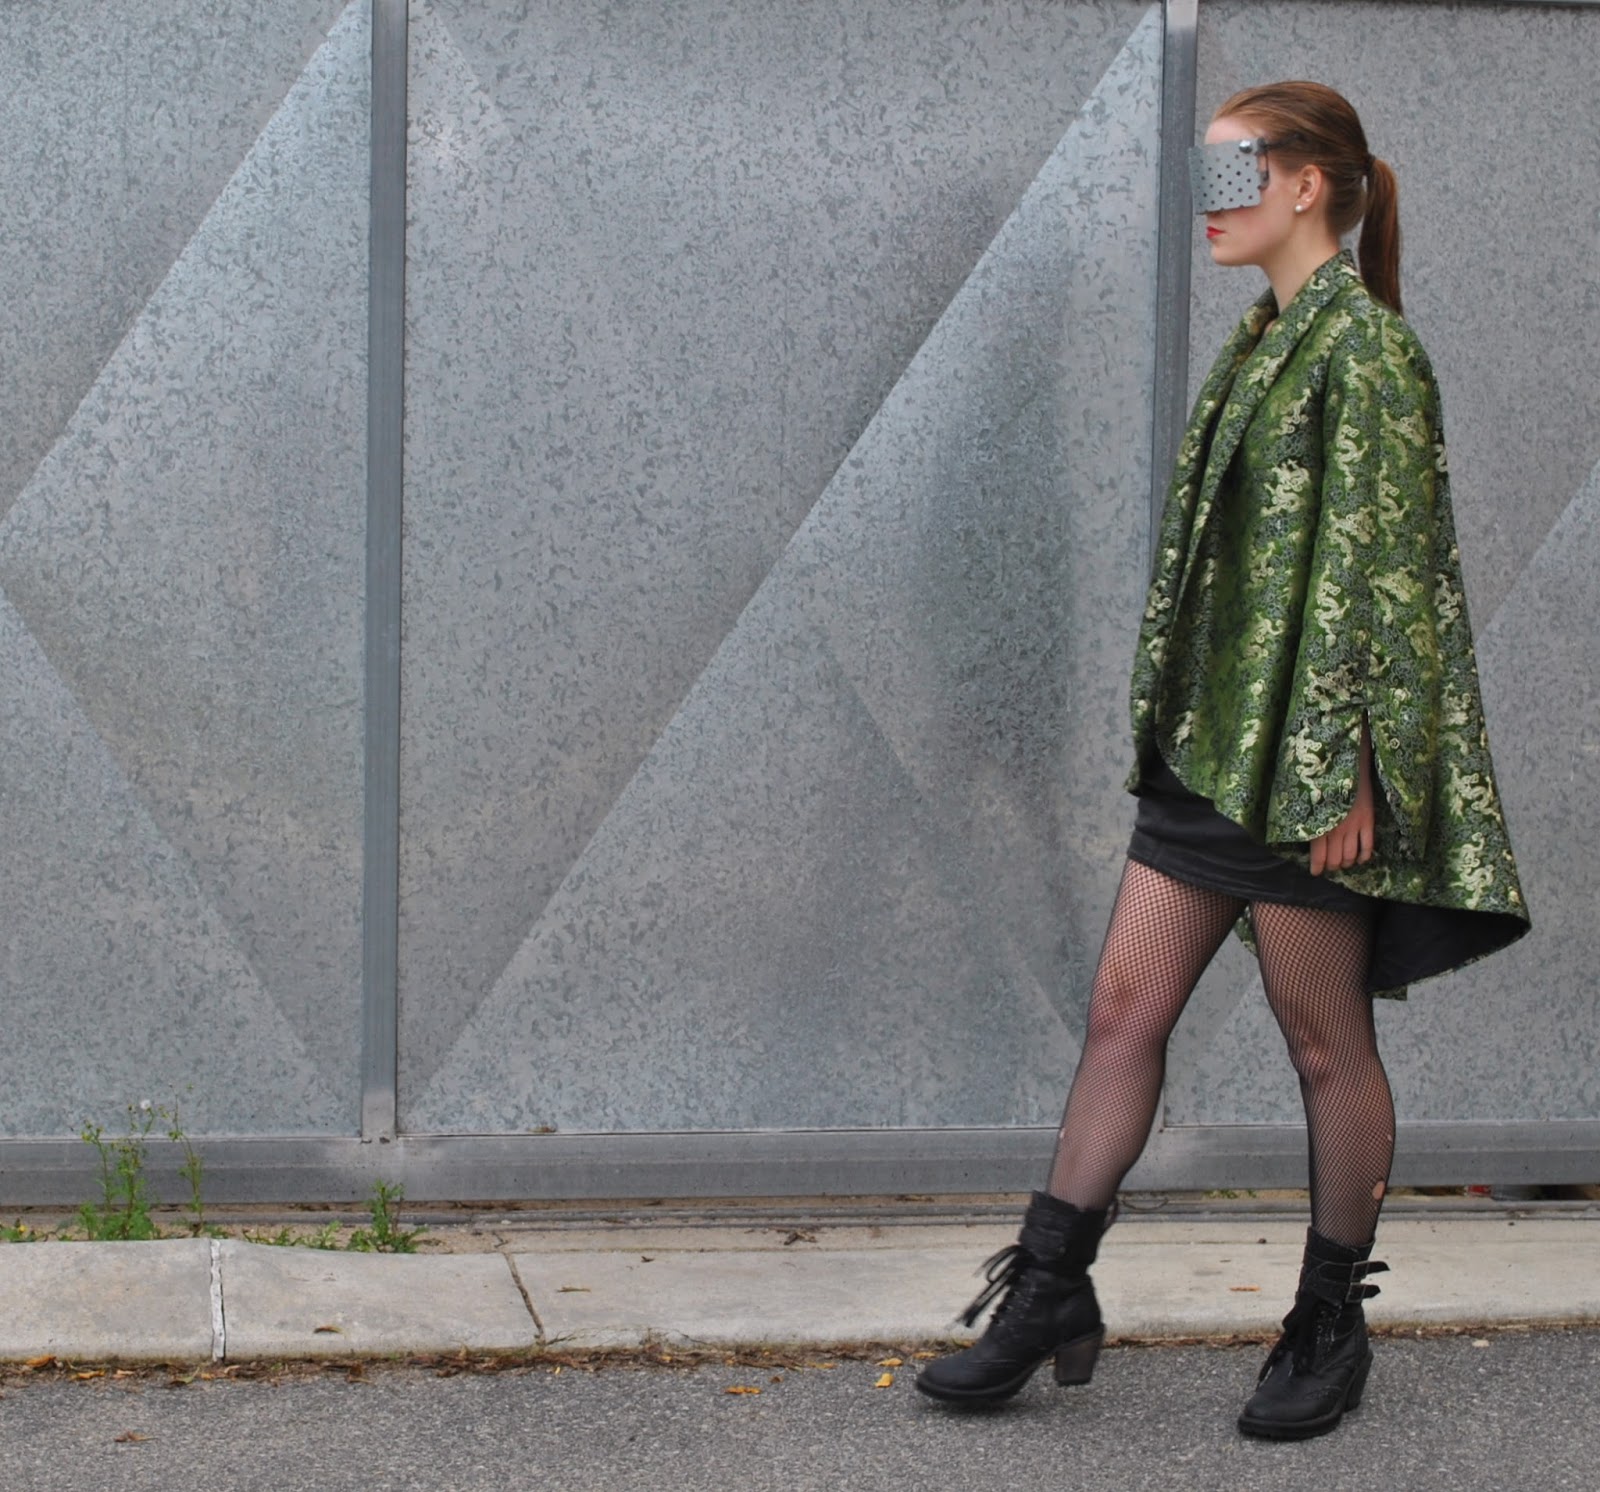
The pattern is Butterick 5144, a reproduction 1948 pattern.  My, but this is a wonderful silhouette, isn’t it?  Fortunately I’m allowed to wear it too if I want  😉
The fabric is a heavy Chinese brocade from Spotlight; emerald green and gold and black, with dragons writhing all over, and lined with black polyacetate lining fabric.

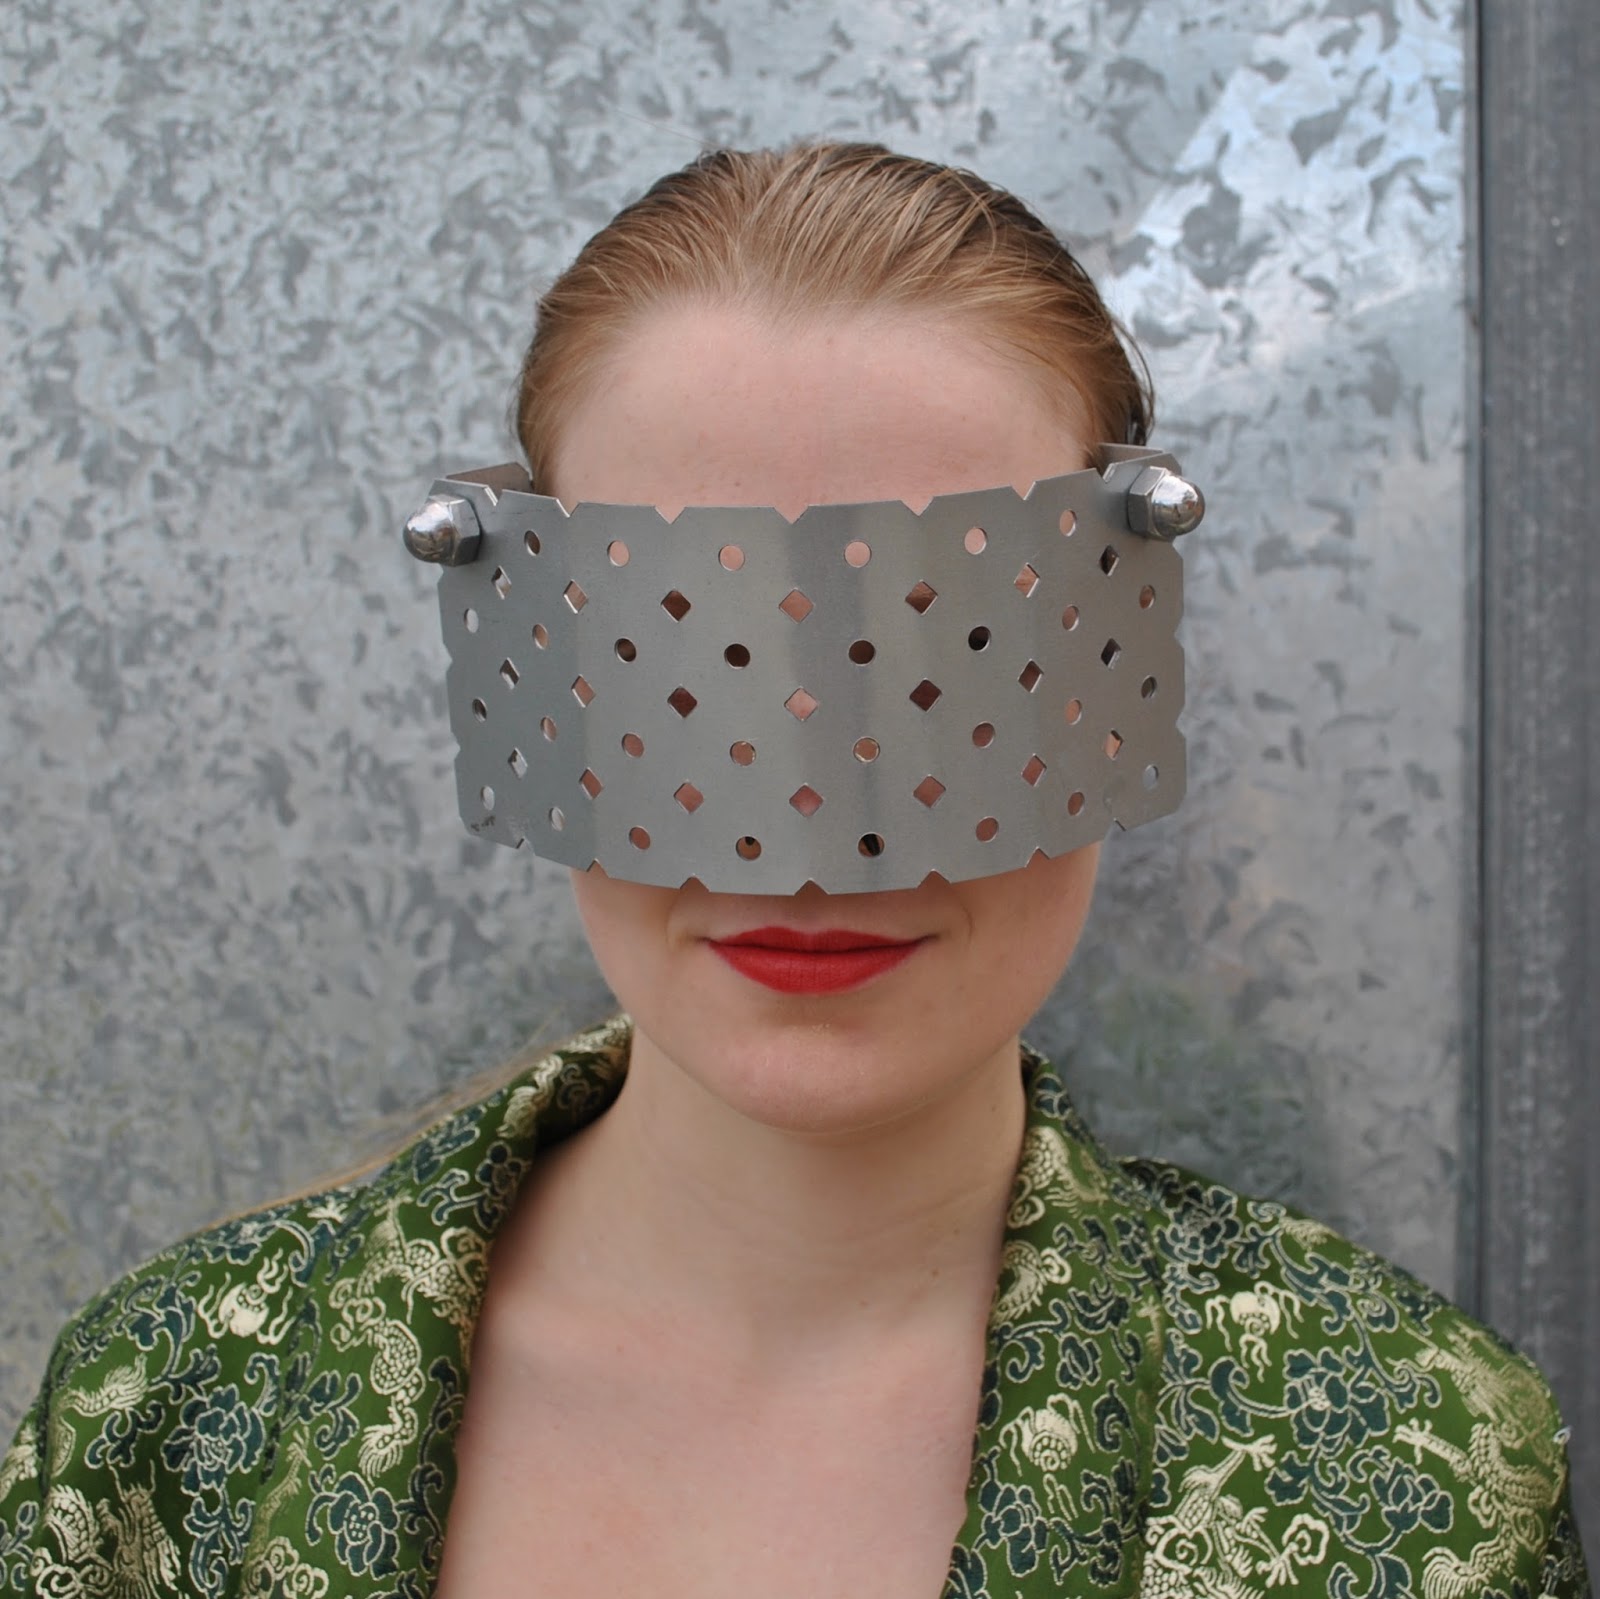
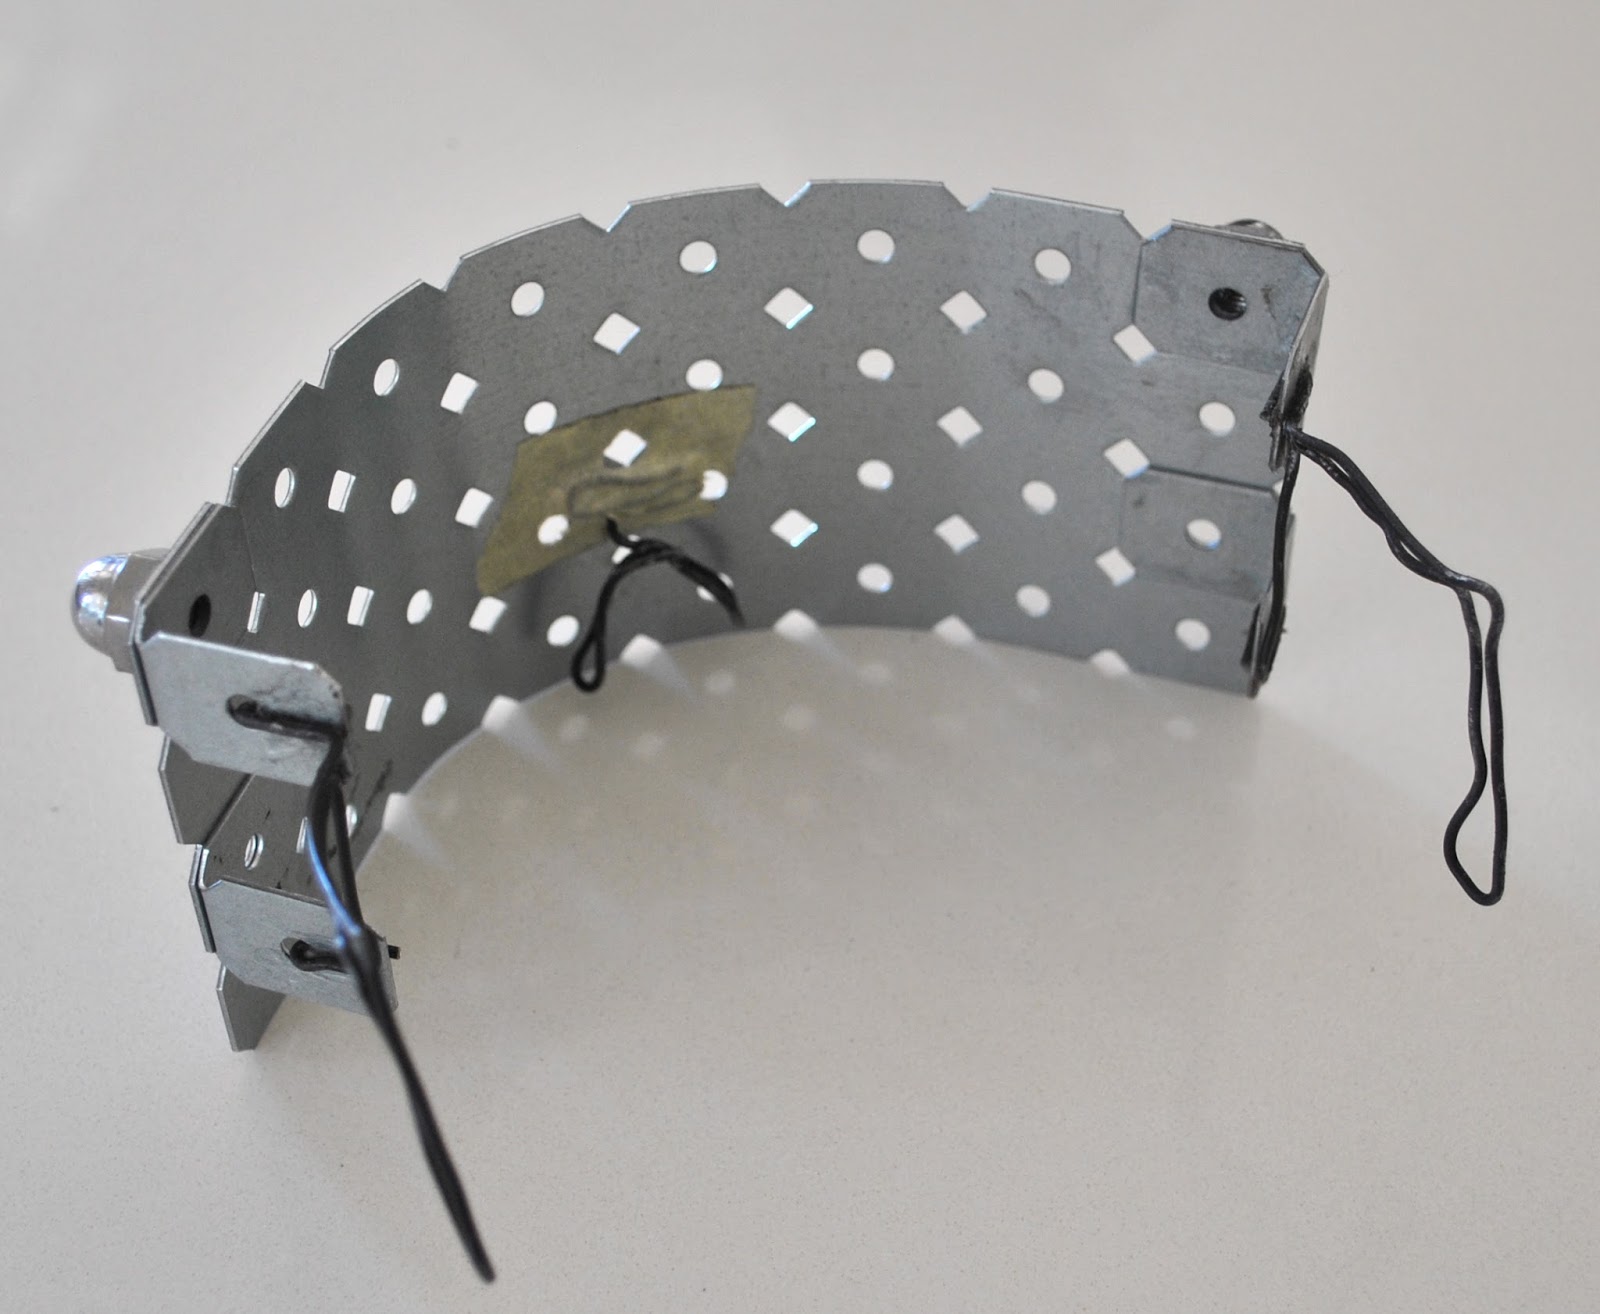
Cassie made her own “sunnies” too.  Aren’t they amazing?  She tells me there was another girl at the party with homemade mesh sunnies on.  They met up and were like: 
Hey cool sunnies!  
Hey, yours too!  
Can you see anything?  
Nup!  Can you? 
No!
cue massive rofl…. in that way that girls at a party have…

Details:
Jacket; Butterick 5144, Chinese … silk? (can’t remember for sure) brocade
Sunnies; made by Cassie
Cami; Country Road
Skirt; Manning Cartell
Stompin’ boots; bought in Japan  

Pattern
Description:
Very loose-fitting lined jacket has shaped front and flared back, shawl collar, side seam pockets, two piece sleeves with turn-back cuffs and shoulder pads
Pattern
Sizing:
16-24, unfortunately the only size the shop had.  I graded it down to a 10.
Did
it look like the photo/drawing on the pattern envelope once you had finished
sewing it?
Yes.
Were
the instructions easy to follow?
Very!  This is rated easy, and it is!
What
did you particularly like or dislike about the pattern?

Oh My Gosh, you guys. I was doubtful at first when my daughter chose it, but now I could not possibly love it more. It could be the most glamorous thing in the house! The shaped hemline is chic and looks quite high-end, the draped back is elegant, the long and very wide sleeves look lovely. It has pockets! and is overall a surprisingly simple make. 
I have no dislikes.
Fabric Used:
Chinese brocade (I think silk? but am not 100% sure of that)
Pattern alterations or any design changes you made:
Unfortunately the only size in the store was a 16-24, and my daughter had her heart set on it. However I did not find it difficult to grade it down to a 10; there are 11 pattern pieces which are quite basic and the instructions are simplistic and straightforward. No fiddly or difficult bits at all.
Would you sew it again? Would you recommend it to others?
My daughter and I made this one together for her, and I think I would like to make one for me now! And, yes!
Conclusion: 
Very very cool. This is a 1948 reproduction pattern, so at first glance it might appear a bit costume-y but in this unexpected fabric it manages to fit beautifully into a funky modern wardrobe. I absolutely LOVE how it turned out. This one is for my daughter, and me? I’m dreaming of one in lightweight camel wool… or maybe in black or chocolate coloured velvet… (sigh)
pinterestmail
Switch to mobile version
↓